new build

new build

Home Forums Scratch build new build

  • This topic is empty.
Viewing 25 posts - 26 through 50 (of 105 total)
  • Author
    Posts
  • #59994
    Ralph Pinch
    Participant
      @ralphpinch41762

      Thats going to be one hell of a model, you could use it as a ferry on the billabong, errrr are they called that in New Zealand? lol.

      Looking forward to the next instalment.

      Ralph.

      #60010
      Amy jane September
      Participant
        @amyjaneseptember49770

        Good morning all

        Hi Andy, thanks for dropping in. The boat will be transported on a household trailer, with an extension draw bar bolted on. She will be light enough for my little car to tow happily. Ian is quite right, the crew will be life sized and mostly human! (although I've had quite a lot of fun figuring out how to RC her, I think it could be done quite simply)

        As to whether she is a model or not, depends on how one looks at it. As stated earlier, she is a 2/3 size of a 30 footer, so in that sense she is a scale model. On the other hand she is 20 feet long……(incidentally, the boat poking its nose out from behind the shed is a stand off scale 'model' (?) of a 12metre yacht, she is 12 feet long….)

        Hi Ralph. Thanks for the encouragement. Actually billabong is an Australian term. We're not that imaginative, we just have bogs and swamps!

        Any way on with the build

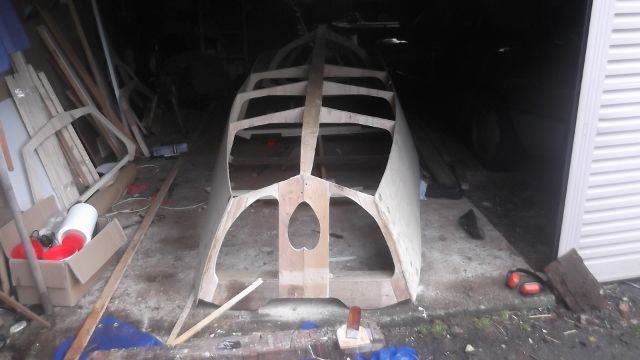
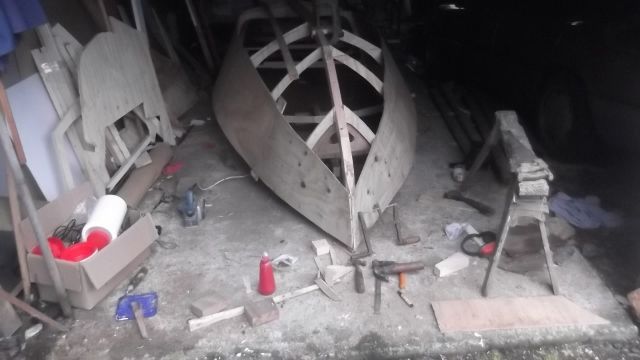
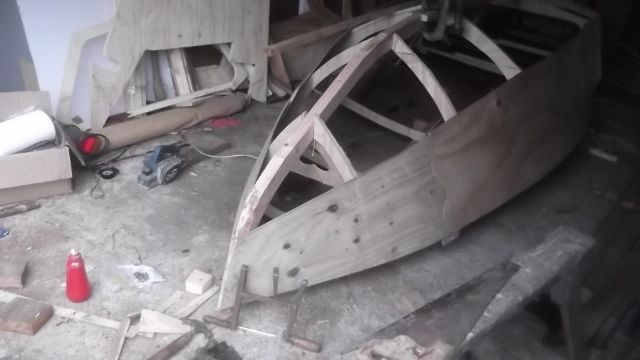
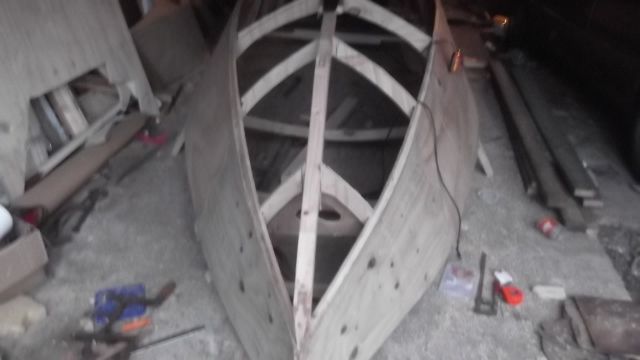
        Managed to get a bit done today, and now have something quite boat like.

        dscf6591 (640x360).jpg

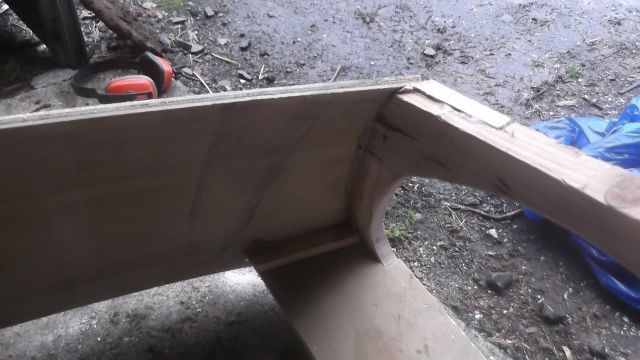
        Went together not too badly, The transom tacked on, the midships and one bow frame were tacked in. The slots for the plank keel cut in the frames with a coping saw, and the plank keel laid in. This ensures that the boat is straight! The other frames are then fitted. Most went in fine, one was miles out, got something awfully wrong there! The bevels were bang on, didn't need to alter one.

        dscf6585 (640x360).jpg

        dscf6587 (640x360).jpg

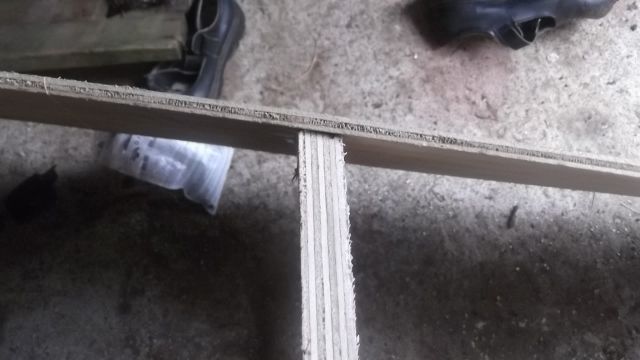
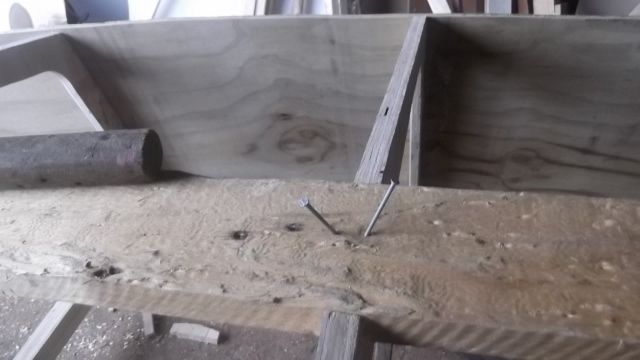
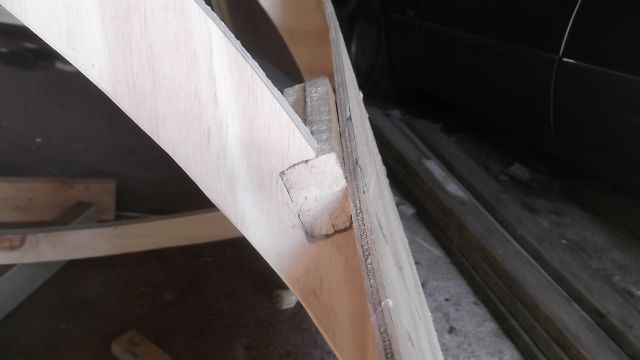
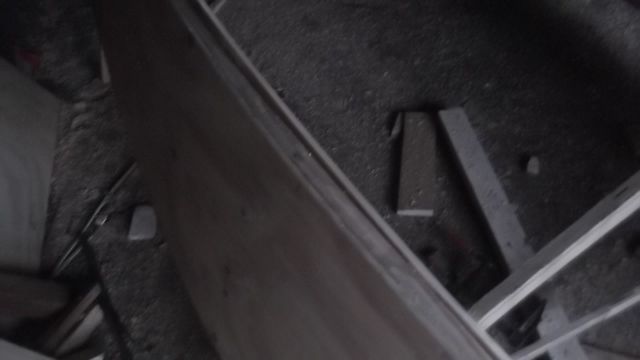
        Once happy, the frames were removed one at a time, and glued and nailed in. The trick with nailing into the edge of sheet ply is to put the nails in at alternating angles.

        dscf6583 (640x360).jpg

        This improves there holding power and prevents the plies splitting apart.

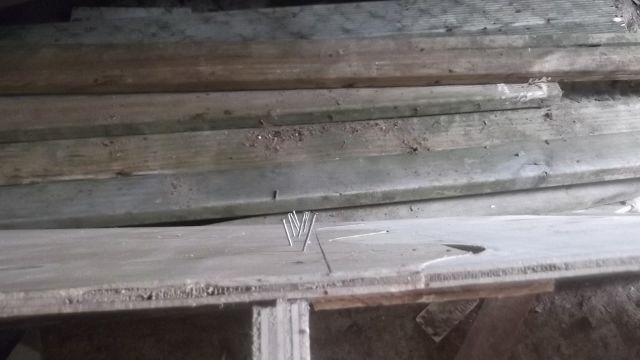
        The same trick applies to nailing the keel to the frames

        dscf6584 (640x360).jpg

        Again this gives the nails good holding power, and keeps the heads on the centre line of the keel, out of the planes way.

        more soon….

        Aj

        #60016
        ashley needham
        Participant
          @ashleyneedham69188

          Nails not screws ???

          Ashley

          #60026
          Bob Abell 2
          Participant
            @bobabell2

            Amy J……..Such a fascinating rough and ready construction!……..But well made, I hasten to add

            Will you be smartening up the craft somehow?

            What does the Cabin Cruiser look like, that this build is a part payment for?

            Just curious…..lol

            Bob

            #60050
            ashley needham
            Participant
              @ashleyneedham69188

              Bob. AmyJ will be painting the vessel (presumably) and it will look fantastic.

              A teacher at my primary school once told me a lick of paint would not hide the bad workmanship (I was attempting to make a balsa plane, not a kit, but from the supplied small bits of wood). I thought on this and believed it until I re-started making model boats and I know it is just not true. It is of course the right thing to say to small boys.. Filler and paint will hide any amount of bad workmanship, not that I use much filler and paint of course….

              Ashley

              ps I am not alluding that Amyj`s boat is bad workmanship obviously, but once sanded and painted the rough and ready construction will be but a memory.

              AmyJ…glue?? own recipie??

              #60062
              Diede van Abs
              Participant
                @diedevanabs87670

                Paint? That would be a bloody shame of the boat.

                I call for a tender caring sanding treatment and numerous coats of high gloss clear…

                #60123
                Amy jane September
                Participant
                  @amyjaneseptember49770

                  Hello all, thanks for the interest.

                  Hi Diede. The ply is not up to varnishing standard, so will be painted. There will be plenty of varnised trim though. My intention is to finish her to the same standard as my "Birthday Boat"

                  dscf5922 (640x480).jpg

                  Hi Ashley. No real need for screws, nails are ample. You are right about paint and filler. I've had the dubious pleasure of working on a couple of these so called "super yachts" the amount of filler is staggering…..

                  #60125
                  Amy jane September
                  Participant
                    @amyjaneseptember49770

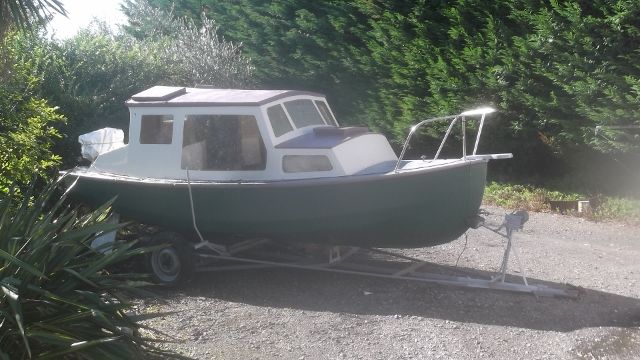
                    There you go Bob, one cabin cruiser.

                    dscf6443 (640x360).jpg

                    p1040367 (640x480).jpg

                    Right back to the new girl…

                    dscf6602 (640x360).jpg

                    Turned around, and the stem in.

                    dscf6601 (640x360).jpg

                    The slope of the stem is important in a flared bow hard chine boat, as it takes the twist out of the bottom panels, where they land on the stem. Even more so on this boat, as the bottom will be 1/2" ply.

                    The construction is rough and ready, Bob, but as you say, she will be well built and will look respectable enough when done.

                    Ashely, the glue is my own recipe, all though no doubt it has been done before. 90% acetone,10% petrol with enough expanded polystyrene dissolved in to make a syrup. Waterproof, and stronger than the wood, in a smooth and well fitting, well clamped joint. Thickened with slaked lime, or better still. finely ground bone, it makes a filler every bit as good as the commercial polyester stuff. (though slower drying).

                    Amy jane

                    #60163
                    Amy jane September
                    Participant
                      @amyjaneseptember49770

                      Hello again.

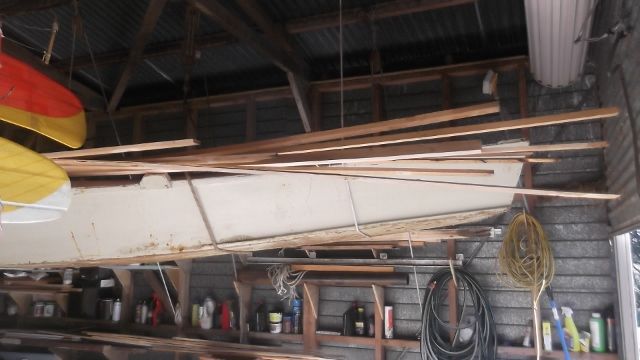
                      The next step was to rip up the chine logs. As I have plenty of long 1/2" thick pine planks, they were put through the precision saw bench.

                      dscf6605 (640x360).jpg

                      and stored in the over head storage bin…

                      dscf6606 (640x360).jpg

                      (which I can just reach by standing on the boot of the Mercedes…)

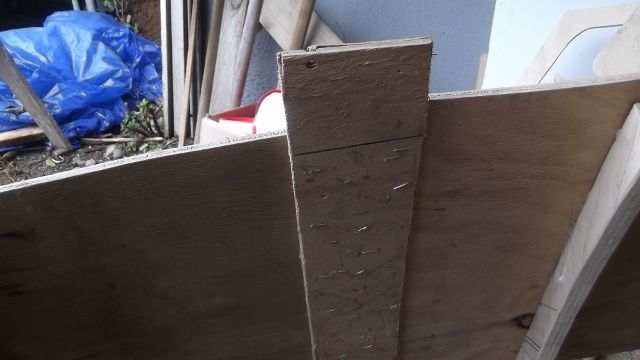
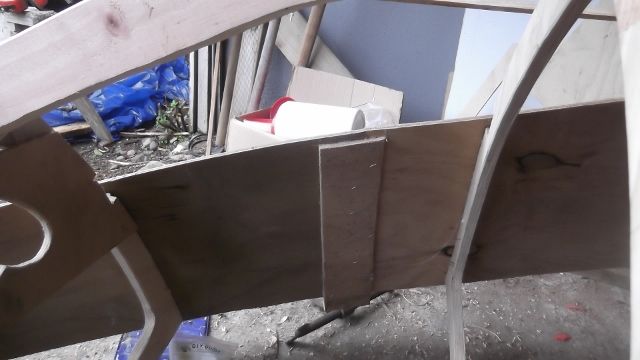
                      The chine log will be two layers of the 1/2", will bring the chine up to 1 1/2" once beveled, which will make a good gluing area. Two sort bits were glued together for to use as a pattern for cutting the slots in the frames.

                      dscf6607 (640x360).jpg

                      The butt straps were then marked,

                      dscf6609 (640x360).jpg

                      and cut to length. Because the side / bottom joint has to change from a lap to a but joint at the bow, the side was planed down fair.

                      dscf6610 (640x360).jpg

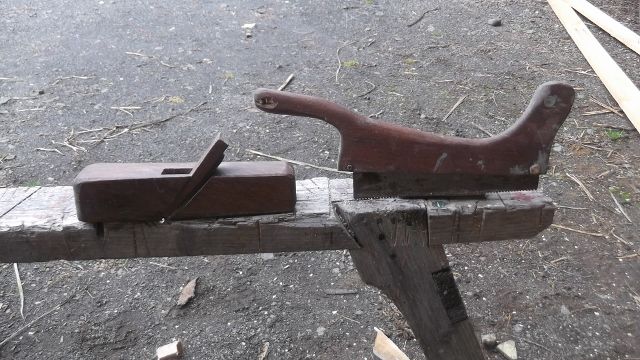
                      These are the tools that I made years ago for the job.

                      dscf6611 (640x360).jpg

                      The plane allows me to plane hard up against the frames. The blade is made from an old file, sawn and ground to shape.

                      First chine log in.

                      dscf6613 (640x360).jpg

                      I tack the logs in first, then roughly fair them up, then go back and nail them in properly. (It's easier to clean glue off the plane, than pull out nails put in the wrong place!)

                      dscf6614 (640x360).jpg

                      second layer in.

                      Aj

                      #60166
                      Bob Abell 2
                      Participant
                        @bobabell2

                        An excellent post, Amy

                        You are a true boat builder, without a doubt!

                        Credits due, where credits due…..So they say

                        I like the sound of your home made glue too

                        Bob

                        #60172
                        Amy jane September
                        Participant
                          @amyjaneseptember49770

                          Why thank you Bob. You are a true gentleman, for sure.

                          #60178
                          ashley needham
                          Participant
                            @ashleyneedham69188

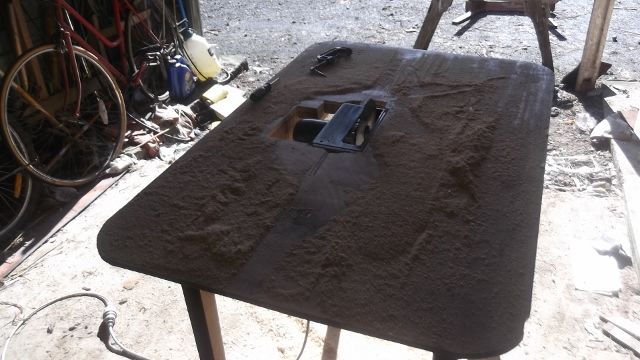
                            AmyJ. Struggling to see the precision saw bench in the photo. Does it sit on the rough old table centre shot? wink

                            Ashley

                            #60179
                            IAN_I
                            Participant
                              @ian_i

                              Hi AJ…

                              What a good looking build, it looks similar to the re builds they are up to in the Windermere lake district.

                              Also making your own brew of Glue, never ending skills.

                              Great work and good to see, thanks..

                              By the way… the radio control….?

                              Is that you behind the tiller….lol

                              Ian

                              #60180
                              Amy jane September
                              Participant
                                @amyjaneseptember49770

                                Hi Ashley, Upside down skill saw, string tied around trigger.devil

                                #60181
                                Amy jane September
                                Participant
                                  @amyjaneseptember49770

                                  Good evening Ian.

                                  Thanks for the praise!

                                  Yes. (I shall have a good play with this one before I hand her over to her new owner, builders prerogative and all…)

                                  Aj

                                  #60182
                                  Mike Prentice
                                  Participant
                                    @mikeprentice83334

                                    Hi Amy.

                                    Making your own woodworking tools. Now that is something.

                                    I think we all secretly wish we could build a boat like you do.

                                    AS others have said , Great work.

                                    Mike.

                                    #60206
                                    ashley needham
                                    Participant
                                      @ashleyneedham69188

                                      AmyJ. Talking of precision equipment (and you know I was only joking) My dad made a circular saw bench using bearing posts to support the blade, and an industrial 240V motor, drive via a rubber belt. Fearsome thing. I used it quite a bit, the table (and basement) were quite big and so I could cut up sheets of 4X8 easily.

                                      The saw fence was simply clamped at either side of the table having measured up both sides of the blade to get the fence parallel with the blade and the correct distance away.

                                      Oddly enough i bought a Machine mart bench saw (and a stand for it ) some years ago but the fence and its markings are rubbish, so resort to the tape measure all the time. I miss the size of table as well, but I just dont have the room.

                                      Sheets of 4×8 I usually lay on the lawn supported by bits of 2×2 or whathaveyou and again clamp a long runner to the appropriate marks and use a hand held jobbie.

                                      You build big boats like I build my models, a quick sketch and then on with the saw-work. I think it comes of having the finished product in your minds-eye and just knowing what to do to get there. I could never build to a plan.

                                      None of my creations have a plan. I would not dare to show anyone the "plans" I work to, they would larf. Glimpses can be seen in the article photos now and then, I obviously do not bribe the editor sufficiently to keep them hidden.

                                      Ashley

                                      #60212
                                      Amy jane September
                                      Participant
                                        @amyjaneseptember49770
                                        Posted by Mike Prentice on 06/09/2015 22:31:51:

                                        Hi Amy.

                                        Making your own woodworking tools. Now that is something.

                                        I think we all secretly wish we could build a boat like you do.

                                        AS others have said , Great work.

                                        Mike.

                                        Hi Mike

                                        Thanks for dropping in.

                                        To tell you the truth, model boats are far harder to build than the big ones! If one can build a little'n, one can build a big'n!

                                        I find the whole black smithing thing fascinating, It's like a kind on magic, to take a hard file and make it soft enough to hack saw, then make it hard enough again to use as a plane blade….

                                        #60216
                                        Amy jane September
                                        Participant
                                          @amyjaneseptember49770

                                          Hi Ashley.

                                          Aint improvisation a great thing? A few bits of wood, a piece of string…..

                                          Yes, I build very much as you describe, just enough on paper to get things under way.

                                          #60283
                                          Amy jane September
                                          Participant
                                            @amyjaneseptember49770

                                            Hi all

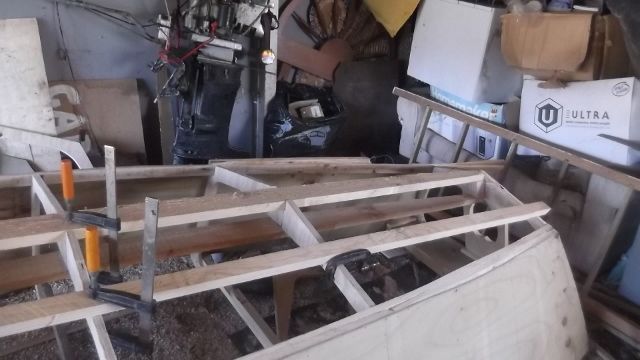
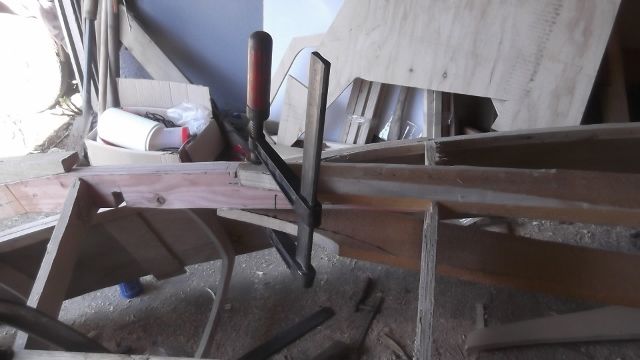
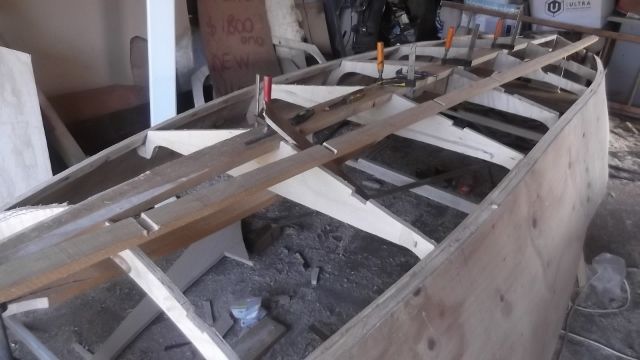
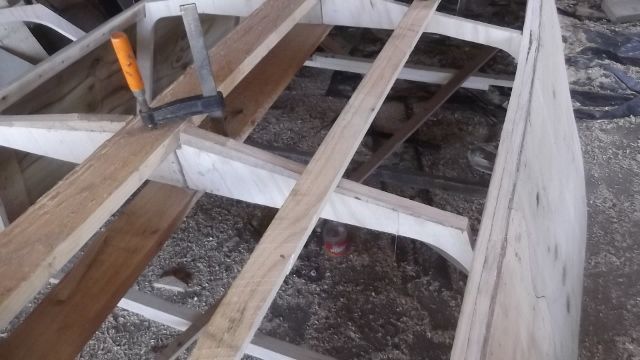
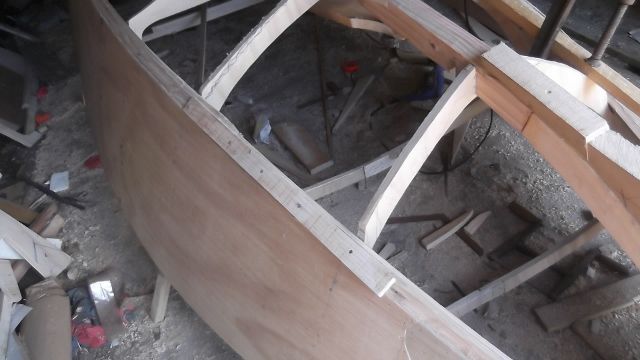
                                            Managed to get a few hours in today. Because a boat with little rocker and a shallow v bottom is an inherently weak shape, I need to reinforce the keel. The normal method is to put small vertical posts between the underside of the thwarts and the top of the keel, so one supports 'tuther. This boat isn't having thwarts, so a different approach is needed. I've put a keelson in, which sandwiches the frames between it's self and the keel.

                                            dscf6617 (640x360).jpg

                                            I will then (when I bring some ply back from work) put vertical shear webs between the keelson and keel, on one side only, but alternating sides between the frame bays. This will make a strong, light and stiff keel.

                                            dscf6616 (640x360).jpg

                                            keelson attachment at stem

                                            The bottom stringers, of 2"x1" pine are marked and notched to the frames. I will install them permanently once the keel shear webs are on.

                                            dscf6620 (640x360).jpg

                                            Here are a couple of my mistakescrook

                                            dscf6618 (640x360).jpg

                                            This frame wasn't quite right, so I had to glue on a couple of strips and plane them down.

                                            dscf6619 (640x360).jpg

                                            I got a bit trigger happy with the electric planer, and cut off 1/8" too much, so had to glue a bit in….

                                            Amy j

                                            #60289
                                            ashley needham
                                            Participant
                                              @ashleyneedham69188

                                              Electric planer….ELECTRIC PLANER. Ye gods woman…whatever next. I suppose you will using electric drills! soon..

                                              The "cut to fit" method is my fave, works every time thumbs up

                                              Ashley

                                              #60292
                                              Colin Bishop
                                              Moderator
                                                @colinbishop34627

                                                Oh dear Ashley, and there was me thinking that your technique was to stick it on and trim round the edges….wink

                                                Colin

                                                #60293
                                                ashley needham
                                                Participant
                                                  @ashleyneedham69188

                                                  Wellll I do sometimes….

                                                  Ashley

                                                  #60299
                                                  ashley needham
                                                  Participant
                                                    @ashleyneedham69188

                                                    In fact, this is what I did for the veneering on proj no3, as its all angles. The veneer was cut oversize, glued, trimmed and sanded to the angles and then the next bit stuck on. Perfect joints, overlaps so there is no ply showing. The way to go.

                                                    Ashley

                                                    #60313
                                                    Amy jane September
                                                    Participant
                                                      @amyjaneseptember49770
                                                      Posted by ashley needham on 12/09/2015 14:16:56:

                                                      Electric planer….ELECTRIC PLANER. Ye gods woman…whatever next. I suppose you will using electric drills! soon..

                                                      The "cut to fit" method is my fave, works every time thumbs up

                                                      Ashley

                                                      My work shop technology is exceeded only by the quality of my building materials……surprise

                                                    Viewing 25 posts - 26 through 50 (of 105 total)
                                                    • Please log in to reply to this topic. Registering is free and easy using the links on the menu at the top of this page.

                                                    Code of conduct | Forum Help/FAQs

                                                    Latest Replies

                                                    Home Forums Scratch build Topics

                                                    Viewing 25 topics - 1 through 25 (of 25 total)
                                                    Viewing 25 topics - 1 through 25 (of 25 total)

                                                    View full reply list.