This is Spooky

This is Spooky

Home Forums Sailing Models This is Spooky

Viewing 25 posts - 26 through 50 (of 89 total)
  • Author
    Posts
  • #127195
    Tim Rowe
    Participant
      @timrowe83142

      Thank you Richard.

      The bare balsa hull was 93 grams and increased to 105 grams with the external and internal epoxy work.  The lead bulb from SailsEtc is 720 grams so we will achieve a decent ballast ratio but I am not sure I am going to limit the all up weight to the 1 kg mentioned in the magazine build article.

      Fin, rig, servo, winch, battery and some fitting out has to come to 175 grams.  I will see where the waterline arrives with the full weight of the bulb and if we are below the marks I will have to drill out some of the lead (reluctantly!).

      The rigs and sails are currently stuck in the Spanish customs. I am dreading how much duty they will claim.

      Tim R

      #127197
      Tim Rowe
      Participant
        @timrowe83142

        Now for some fitting out.

        The plan calls for a winch (now my preferred option), a servo for the rudder, a switch and a battery.

        Interestingly the winch is mounted on its side which is a first for me and I am not sure that I want to fit a switch because that means a hole somewhere and if there is a hole, water will find a way to get in.  I can leave the switch decision to later.

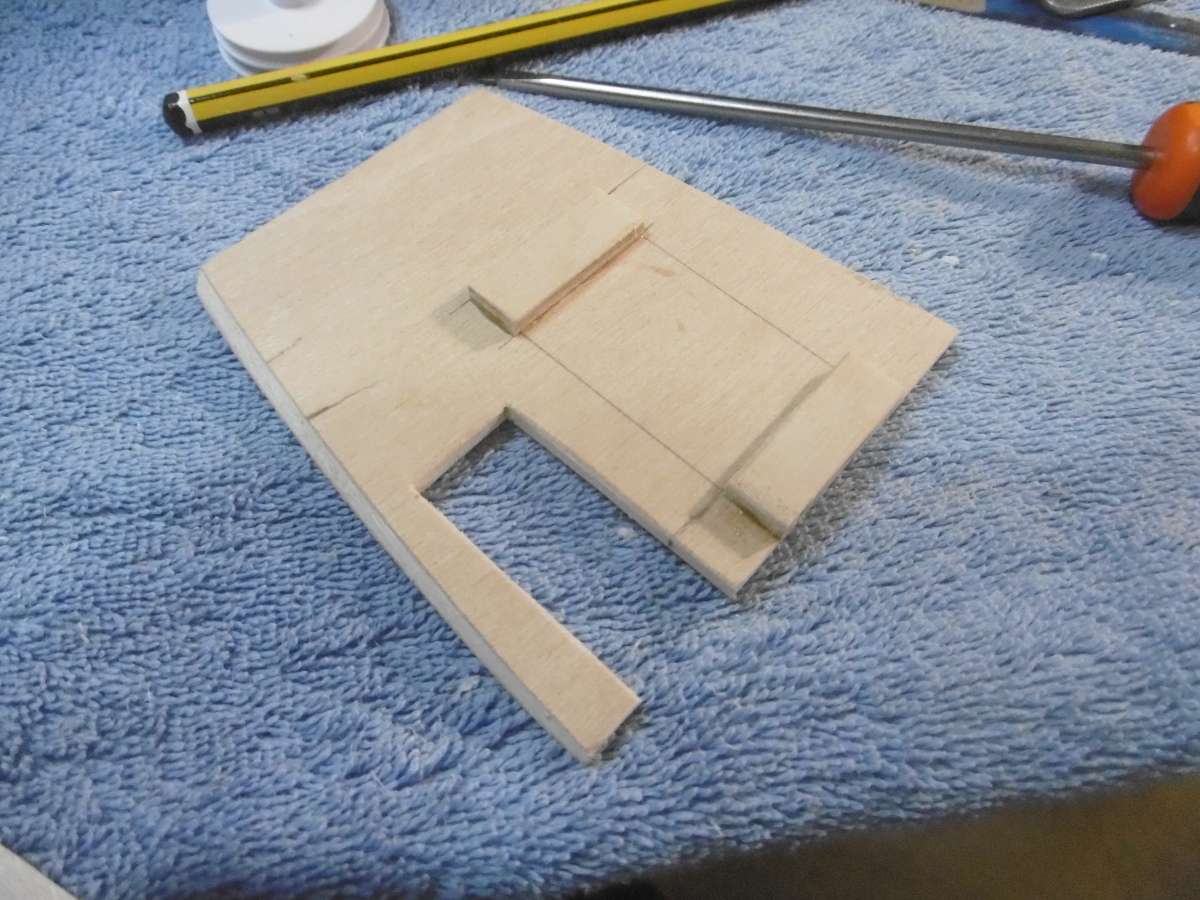
        P1020751

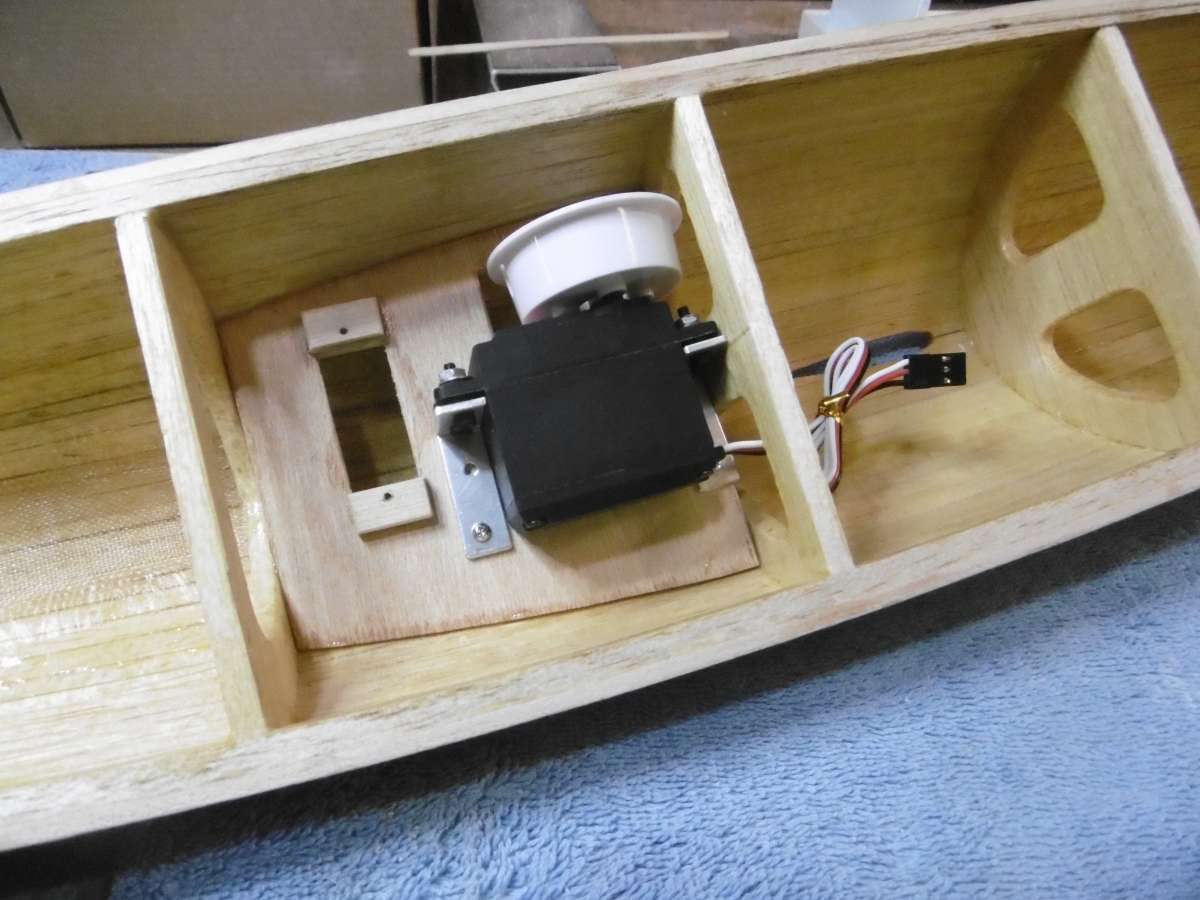
        The winch and the servo need a support and this is made from lite ply, shaped and bevelled as necessary to get a good glue line.  It is well supported by the hull and by two bulkhead so I didn’t think I needed the strength of birch ply and I certainly didn’t want the weight. The little blocks are to give a bit more meat for the winch servo screws to hold securely as in string winds there will be quite a load.

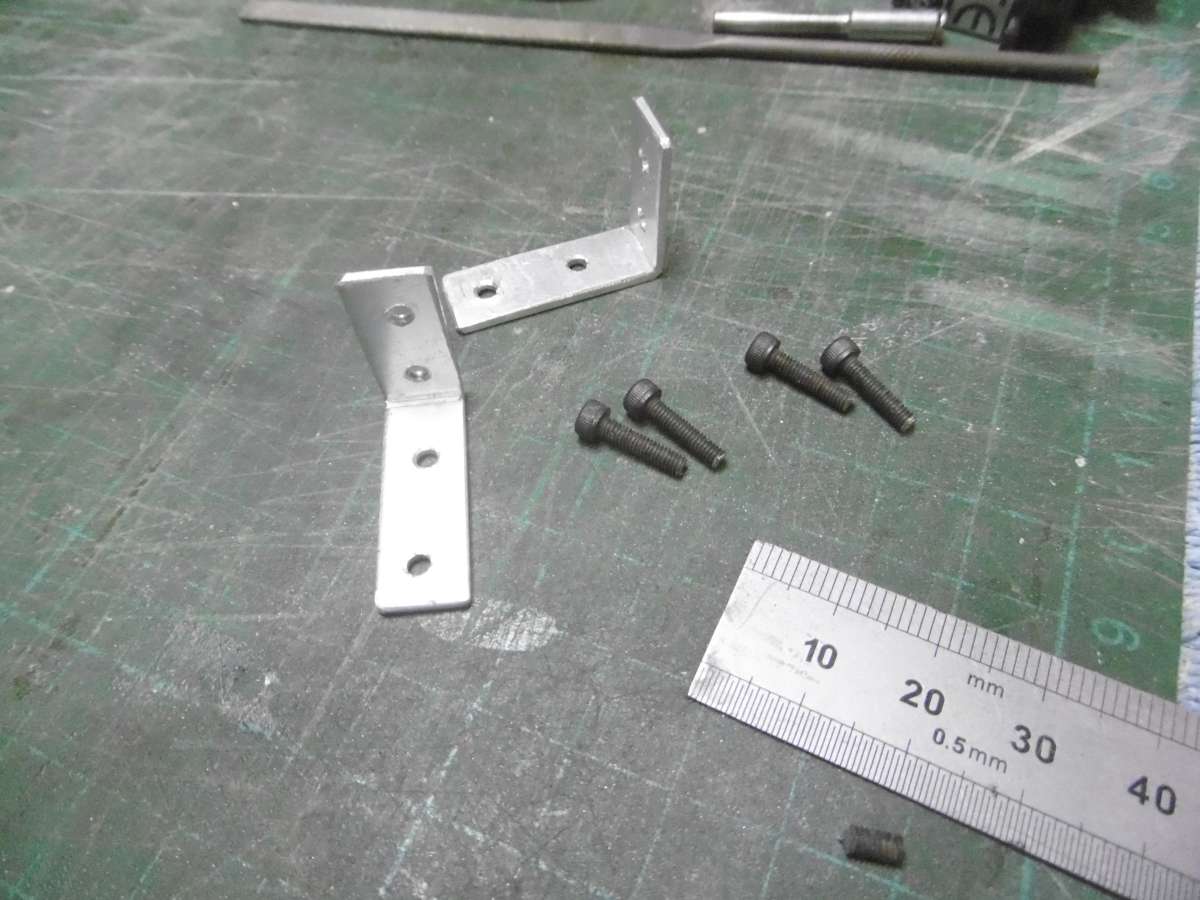
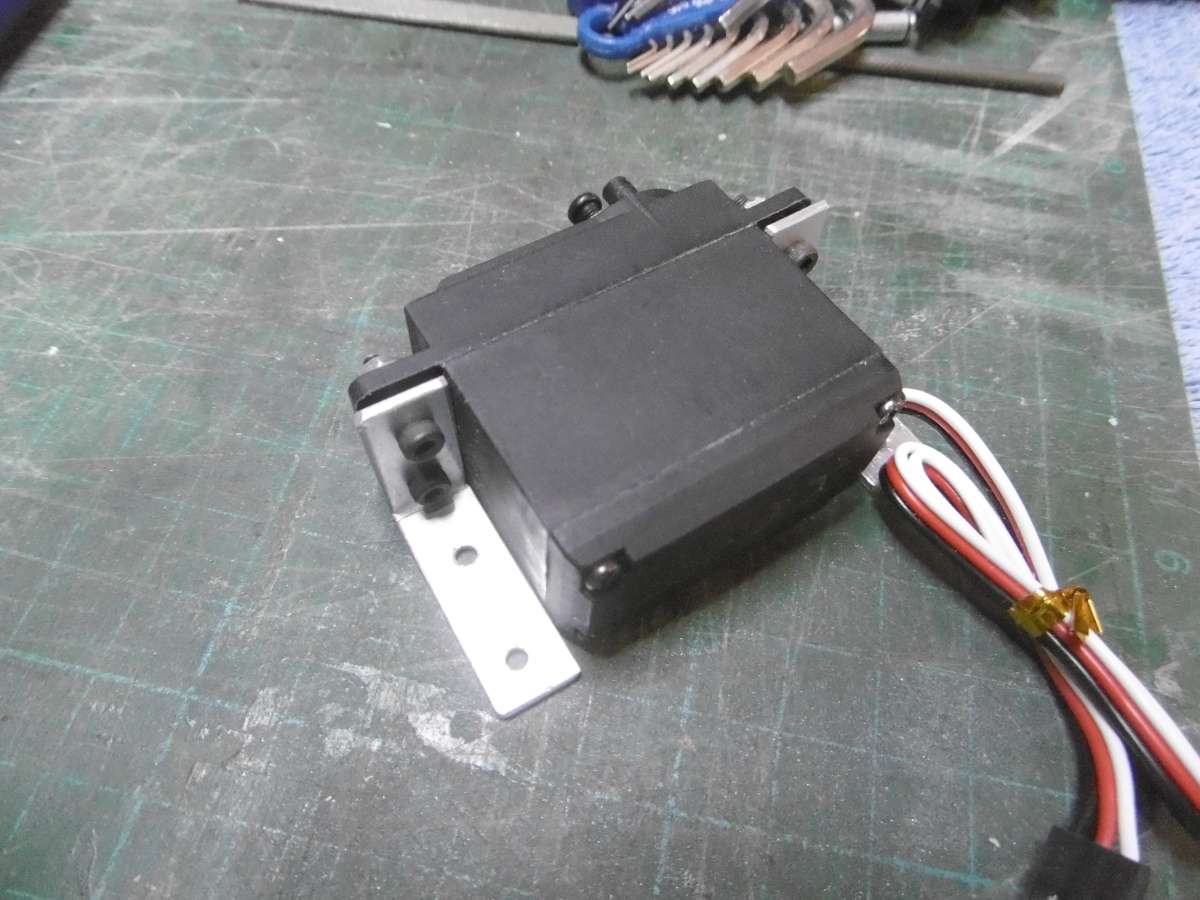
        Being on its side the winch needed some brackets.

        P1020756

        Here they are, cut from a length of aluminium angle salvaged from an old television.

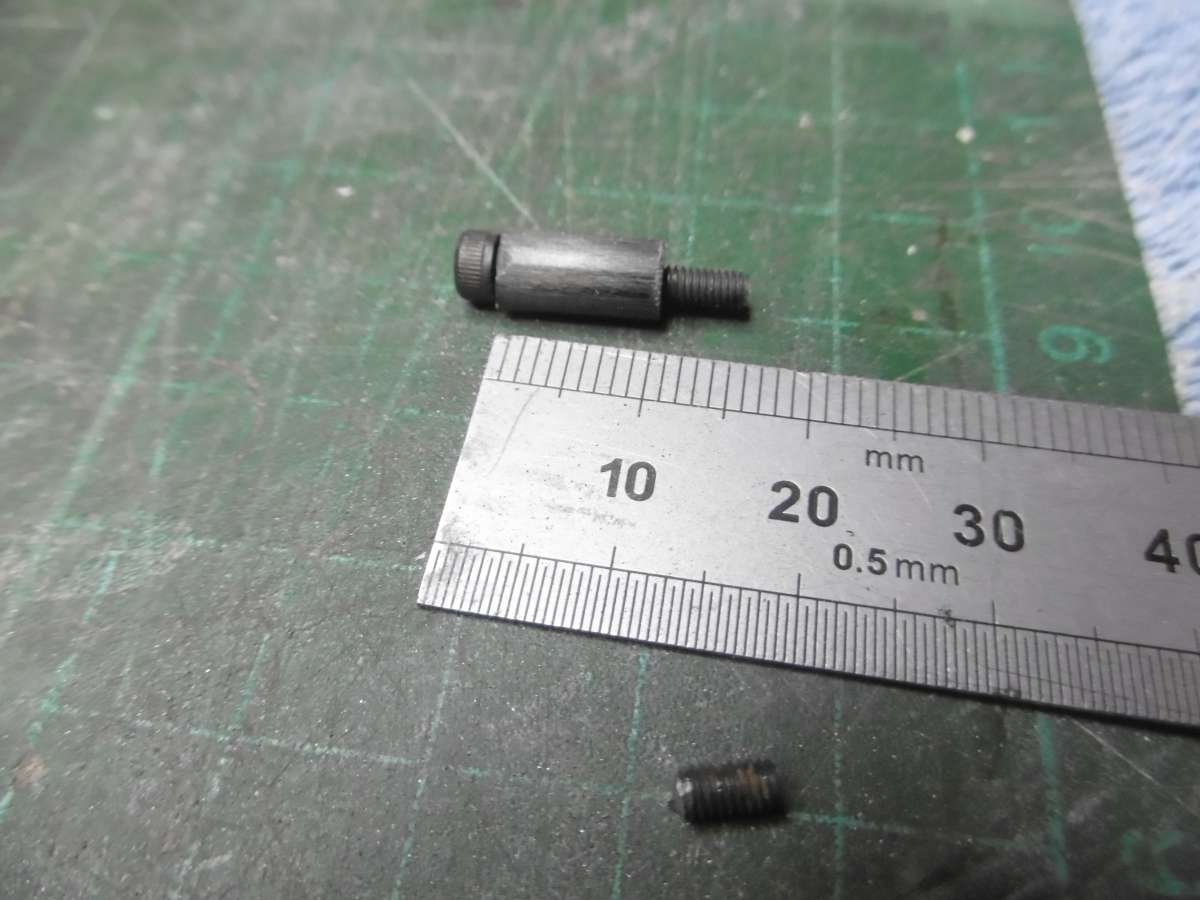
        The 3mm cap screw bolts were too long and had to be cut down to 10mm.  To make sure I get them the same length and I slip a bit of tube over the bolts that is 10mm long and that gives me a guide for the Dremel cutter.  For more precise work or where the appearance is important I split the tube turning it into a collet.  I can then part off in the lathe and machine a nice lead-in chamfer.

        P1020754

        P1020757

        Here is the winch now fitted with its brackets.

        P1020763

        And here it is on a trial fit in the support.  The blocks for the rudder servo at to get it high enough to be clear of the hull.  I couldn’t put the support any high then it is otherwise the winch drum would foul the underside of the deck. P1020785

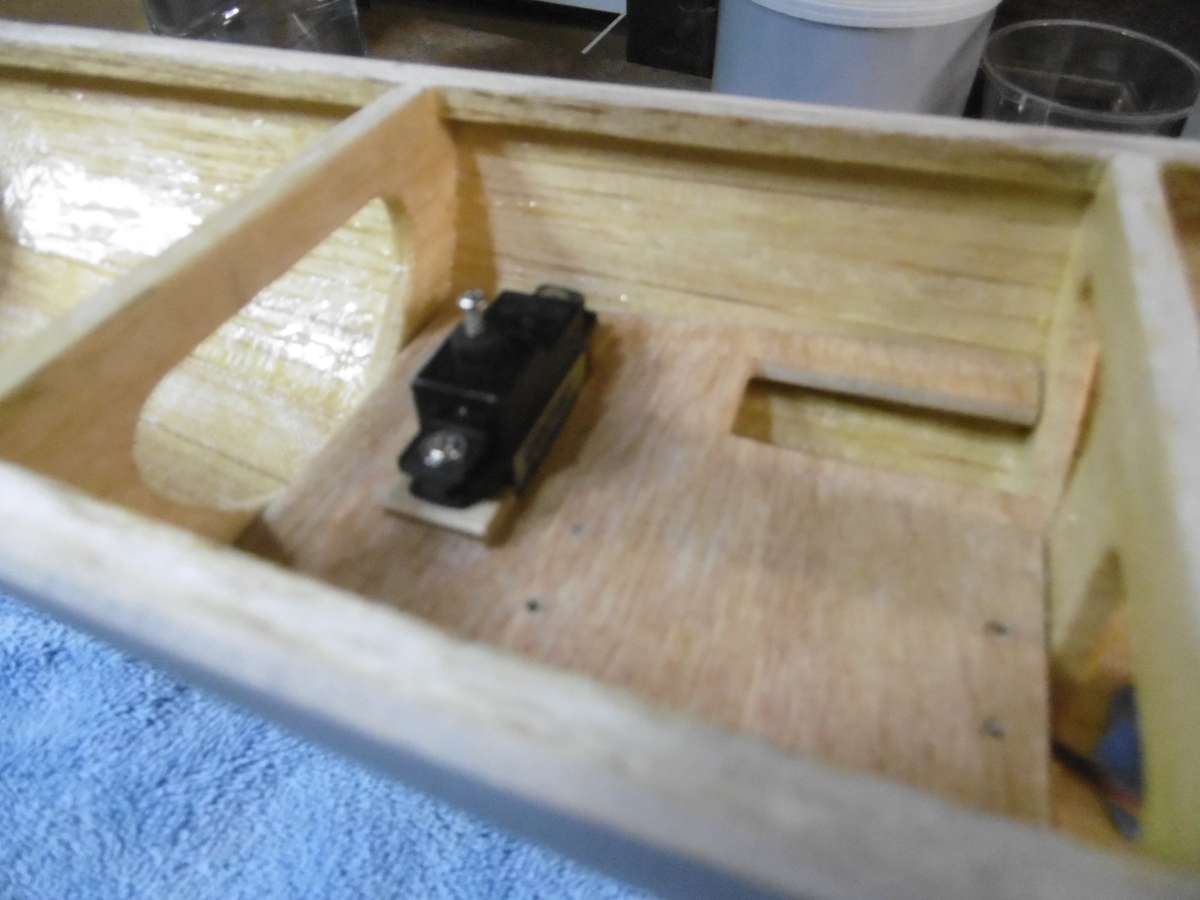
        Her is the trial fit for the rudder servo.  It is position so that the axis of the output shaft is on the centreline to match the rudder stock.  This is the easiest way of ensuring the rudder throw is equal from side to side.

        Tim R


        #127198
        Ray Wood 3
        Participant
          @raywood3

          Hi Tim,

          I hope your rig isn’t held up too long !! you should have asked me to popped over with it in my hand luggage 🙂

          Anything to get away from the cold weather here !!  having said that my daughter and granddaughter and I had a good day at Duxford catching up with the latest restorations, the Battle of Britain Lancaster is in bits getting a full make over.

          Spooky looks good, are you having a single line to the main and jib with elastic to keep the tension ? If you need any DF65 photos let me know ?

          Regards  Ray

          #127200
          Tim Rowe
          Participant
            @timrowe83142

            Hi Ray

            Let me know if you are coming over this year and I am sure I can find something to pad out your hand luggage!

            Eventide and Wild Duck both have enclosed drum winches and don’t have elastic to keep tension.  I will see if that works on Spooky first and I can always add elastic if necessary.  A have order DF65 A and B Rigs with Soch sails so some photos would be really useful thanks.

            Any chance of seeing some Lancaster restoration photos?

            Tim R

            #127201
            Richard Simpson
            Moderator
              @richardsimpson88330

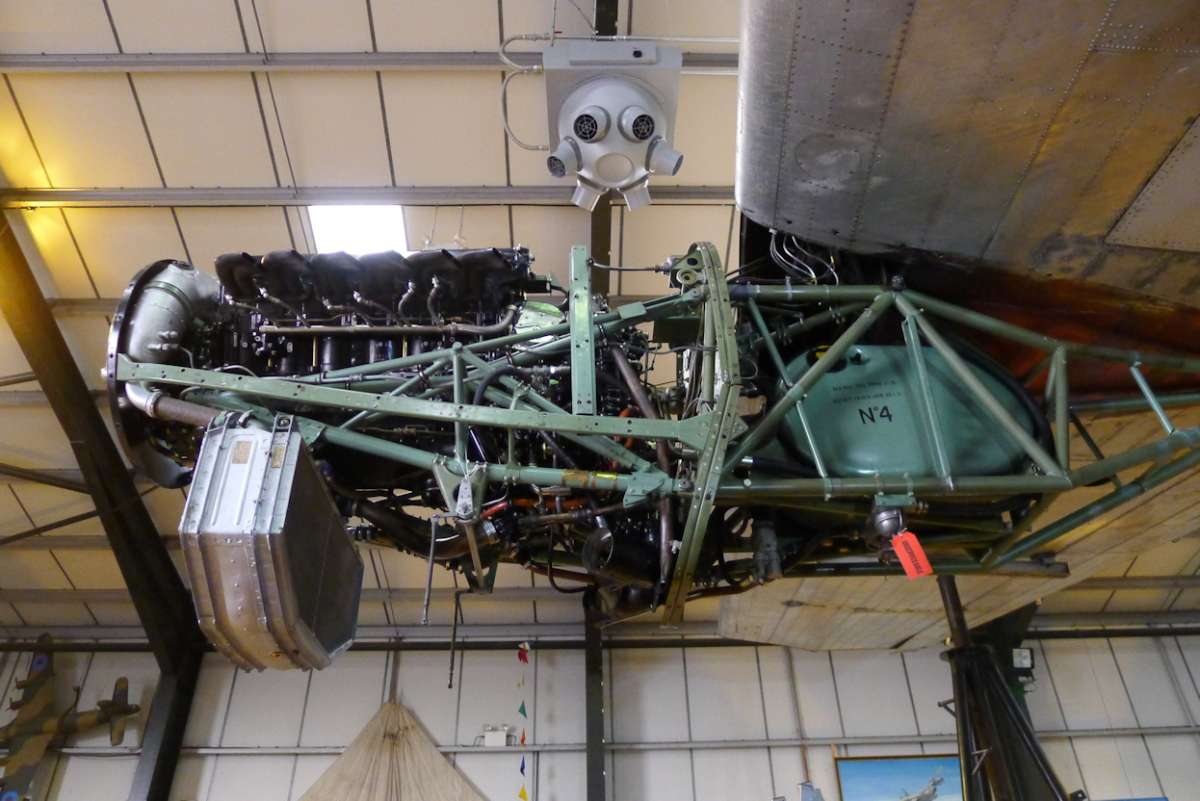
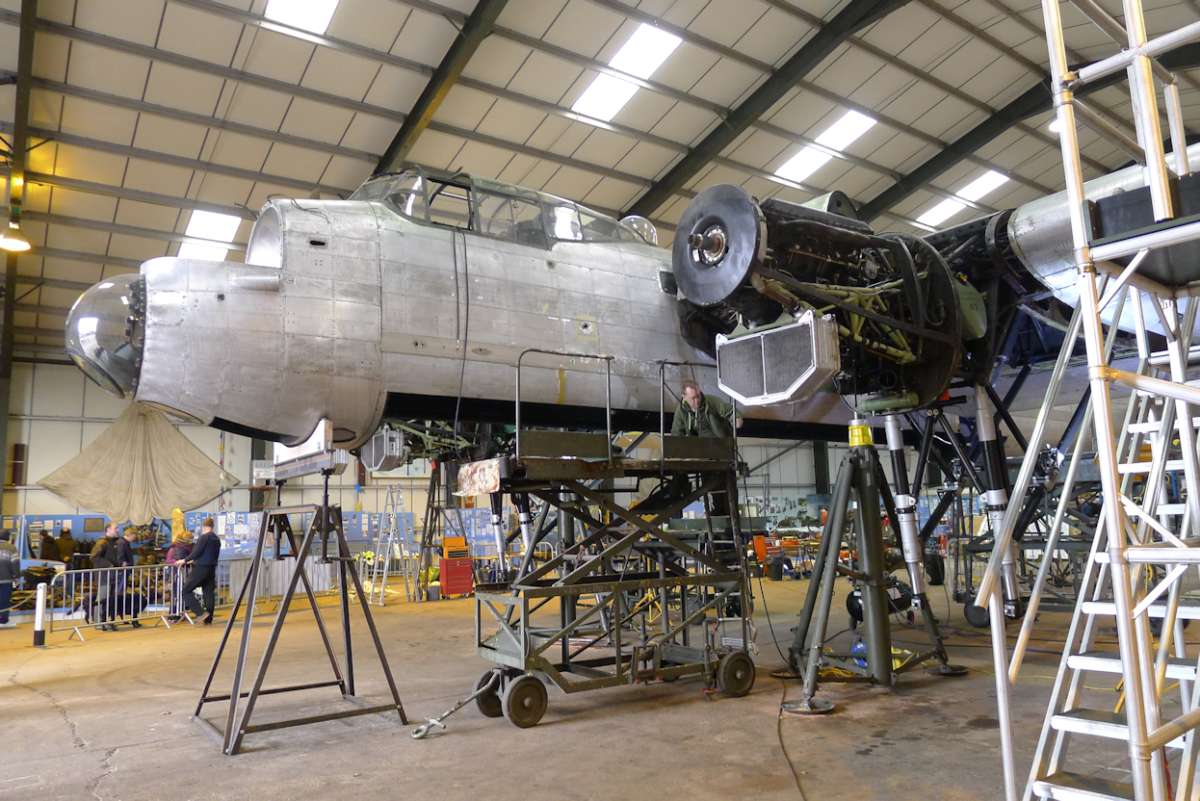
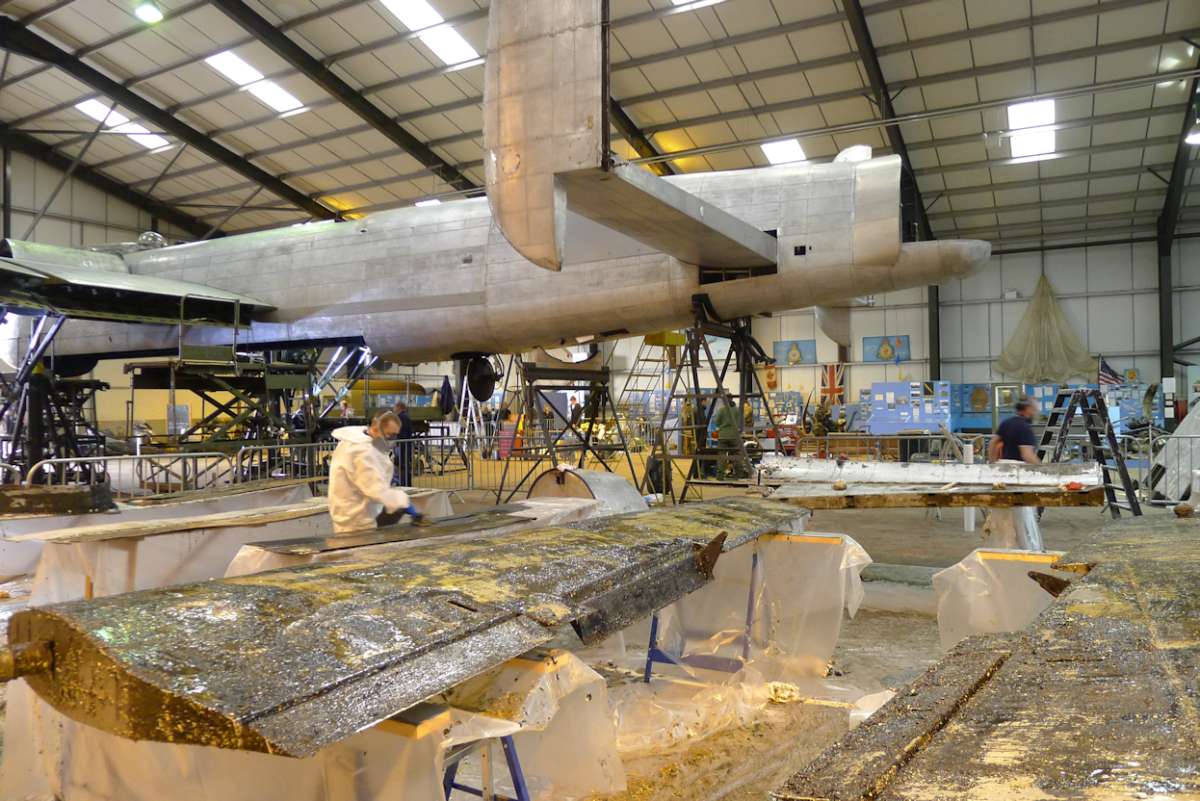
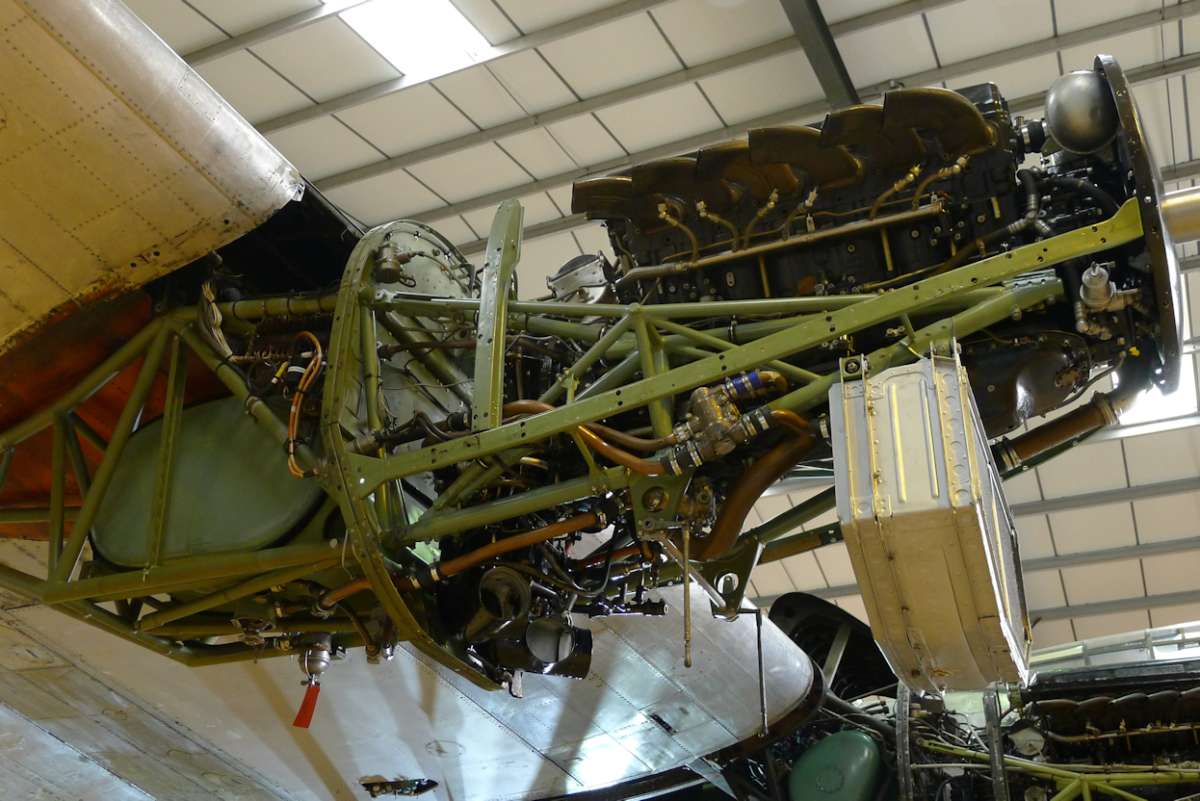
              These are a couple of shots of “Just Jayne” undergoing her annual winter refit in 2017.  Every year they strip her down and progress the refurbishment during the winter months before putting it all back together ready for the next summer season of taxi runs.  The money she makes out of a summers taxi runs pays for the next winters refurbishment progress.  For a private company to take this work on and progress it entirely as a result of their own funding is an unbelievable task and I’m so much in awe of what they achieve with this aircraft.  They still hope to eventually be able to get her airworthy.


              17-02-17-32JustJayneWinterRestoration32


              17-02-17-04JustJayneWinterRestoration4


              17-02-17-28JustJayneWinterRestoration28


              17-02-17-21JustJayneWinterRestoration21


              17-02-17-06JustJayneWinterRestoration6

              #127203
              Tim Rowe
              Participant
                @timrowe83142

                Hi Richard

                That’s fascinating.  Two thigs stand out for me:

                That huge mass of the engine hanging from a spindly tubular frame (how we over engineer our models!)

                That enormous frontal area of the radiator even though it get covered in a cowl.

                Tim R

                #127207
                Richard Simpson
                Moderator
                  @richardsimpson88330

                  Hi Tim,  I always thought the engine looks quite insignificant when seen in the context of the entire nacelle.  When you look at the radiator it makes you wonder how a Spitfire or even a Mosquito copes with such a hugely smaller radiator.  I can only assume they must pump the coolant around at a far greater flow rate.

                  #127208
                  Tim Rowe
                  Participant
                    @timrowe83142

                    Hi Richard

                    I imagen the Spitfire and the Mosquito were quite a lot faster so got more ram air than the Lanc?

                    Back to Spooky. I have done most of the fairing on the hull.  The final fairing will happen when I put the deck on so I can blend in the deck edge.

                    The fairing process started with the bare balsa hull and you have to be brave and start off with really coarse grit.  I generally start with 60 grit which has characteristics not far from a gravel path.  You have to be very gentle on balsa but the reason is that you must knock off the high spots.  If you start with too fine a grade you will end up maintaining the same profile and just reducing the thickness.  60 grit does leave scratch marks but as the hull is sheathed, the resin and the fabric will bridge these scratches no trouble at all.  It is worth spending some time on this first stage by sighting from different angles.  You can also use a thin batten which should wrap around curved surfaces with constant contact.  The balsa is not totally uniform in colour or hardness so perfection at this stage is not possible. That comes when there is a uniform colour when painting.

                    After sheathing it is necessary to very lightly rub down to remove any whiskers.  Hopefully there are no blobs of resin.

                    I use a high-build spray primer and apply two coats before doing anything.  This gives a bit of thickness to play with and should more or less fill the weave texture.  Allow plenty of time between the coats; my product requires 48 hours to prevent blistering and the harder paint is less clogging on the sandpaper.

                    To follow

                    Tim R

                    #127209
                    Chris Fellows
                    Participant
                      @chrisfellows72943

                      Coming on well Tim. Interesting in what you say about may or maybe not using elastic to maintain pressure in the sheets. I’d assumed using elastic was essential with a drum (unless using a closed system) due to the risk of entanglement?

                      Did you and Ray use elastic on your Eventide and Duck builds, I can’t remember now? Won’t be long now before I have to decide what to do on my Fisherman build. Not been able to do much lately though due to having to replace the washing machine and paint the room whilst I had access and the ongoing problem with my wrists – just waiting on a call from the doctor as regards this.

                      Chris

                      #127211
                      Tim Rowe
                      Participant
                        @timrowe83142

                        Hi Chris

                        I didn’t use elastic in Wild Duck or Eventide and I used a shrouded drum.  Ray used an extended arm on a standard servo which is OK for small sails but doesn’t have the grunt for anything very big, or for use when it is windy.  Both these designs are fair weather boats.

                        I haven’t had any problems but I do take precautions. If I am setting up indoors I  always help the winch to keep some tension by lightly holding the sheets.  Outdoors in the wind, it looks after itself because even if the sails are flapping, they are still pulling.  Both Wild Duck and Eventide have winches with about 2 1/2 turns so there is very little cord actually on the drum.  If you use a winch you will have to decide how many turns you need and order appropriately.

                        I have elastic on my IOM and even though it is underdeck it doesn’t last that long. If it fails, and you are relying on it, the turns will fall off an open drum and you are in trouble.

                        I like winches because you get constant torque over the sheeting range.  They are usually fitting with twin grooves so if you need a differential between sheet the main and the jib you can load a few turns of narrow tape into  one of the grooves to increase its effective diameter.

                        I don’t suppose you have much sail area but even if you do opt for a lever arm winch, the geometry is quite important. You need to arrange the geometry so  that when the sails are sheeted in, the arm is at top dead centre.  This is because the travel is not linear unless you have an arm that is a segment of a circle which effectively turns it into a winch.  A downside of a lever is that to get the travel, you normally need a 2:1 purchase.  This halves the torque and depending on how it is arranged you can loose a lot more to friction.  Galileo has a proprietary Hitec lever arm winch and it struggles in a blow. Galileo is 900mm long but does have quite a powerful A rig.  One day I might swap it out for a winch, and use the Hitec in my Thames Barge.

                        Are you ging for a self-tacking jib or one that overlaps the mast as in a genoa?

                        Tim R

                        #127212
                        Chris Fellows
                        Participant
                          @chrisfellows72943

                          Hi Tim, thanks for the info. Fisherman is also going to be a fair weather boat, especially as it has a motor as well and as you say has a relatively small sail area. I’d pretty much discounted an extended arm as I don’t really have the room. Still considering a linear servo but I need to work out the sheet travel and they are long and expensive – will most likely go with a shrouded drum in the end.

                          The Fisherman does have a jib that overlaps the mast but I’m thinking of modifying to one that doesn’t so that it can be self-tacking.

                          Chris


                          #127214
                          Tim Rowe
                          Participant
                            @timrowe83142

                            Hi Chris

                            I don’t know what sort of travel you can get with a linear servo but I guess you will need maybe between 150 and 200mm.  That could mean that you need more than a 2:1 purchase and that would be very inefficient.

                            I use Kingmax servos and I think you can buy them in a range from 2 turns up to 6 turns. They are reasonably proced.

                            Tim R

                            #127215
                            Chris Fellows
                            Participant
                              @chrisfellows72943

                              They do one with a 100mm throw and 8kg pull so could easily cope with a 2:1 reduction but the length will be over 200mm so not really practical in the Fisherman.

                              Just fancied doing something different, maybe use one in a future build for the rudder for the hell of it! Total overkill I know!

                              So it will be the tried and tested method! I usually use Hitec but will have a look at Kingmax.

                              Thanks again for your very useful information.

                              Chris

                              #127216
                              Ray Wood 3
                              Participant
                                @raywood3

                                Hello Chaps,

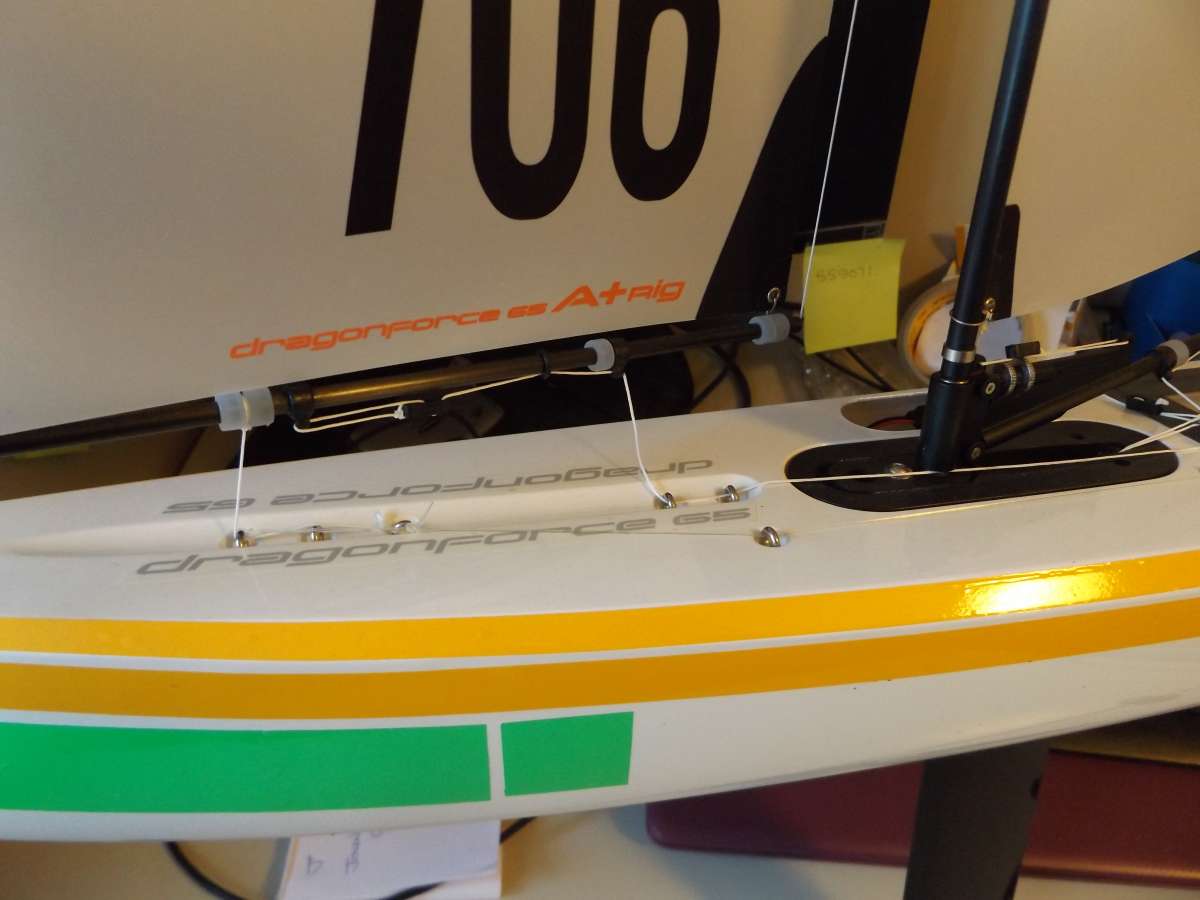
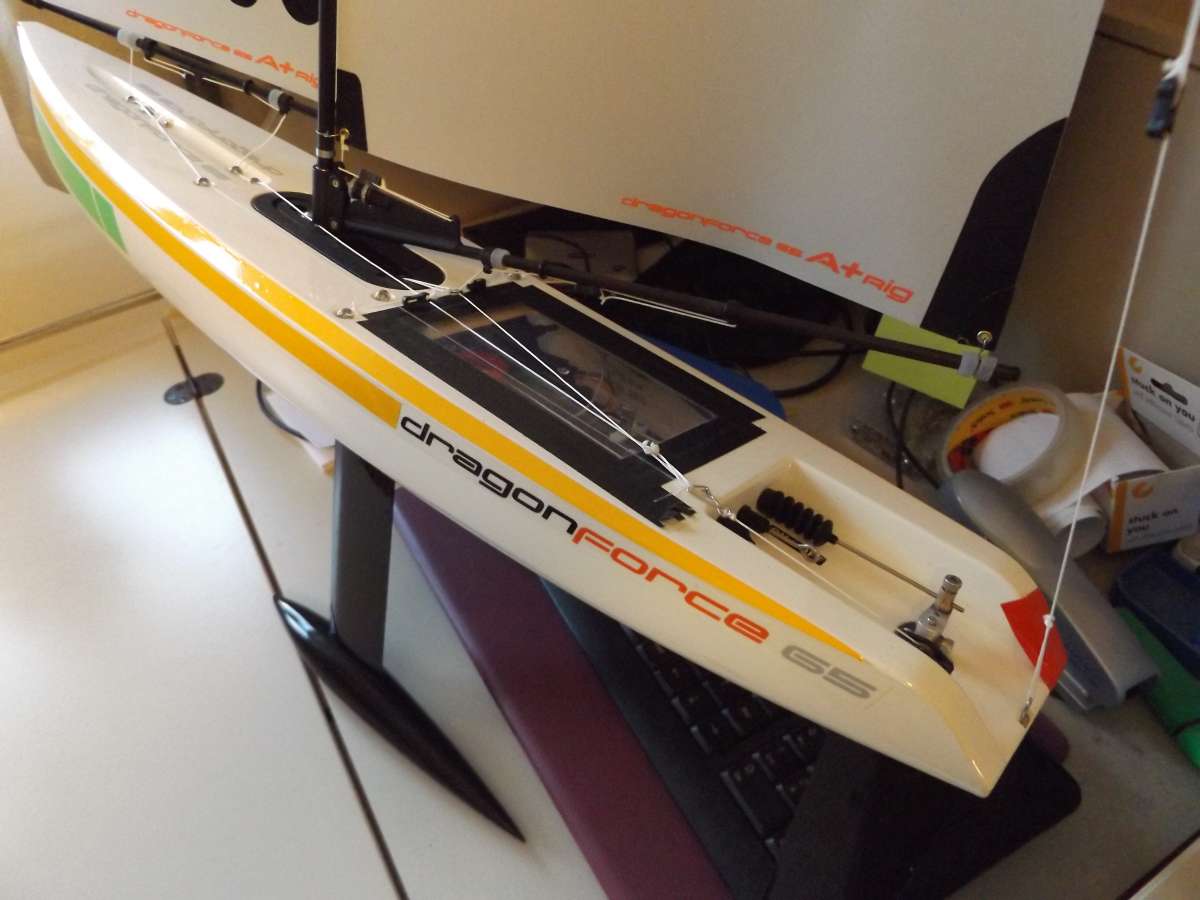
                                My little boats are kept simple with the lever arm servos 🙂 The winch line under elastic tension on my DF65 a couple of general shot’s, loads online I expect , we are getting 12 – 14 on the water for racing even through the winter, ice permitting 🙂

                                The best feature imho is the silicone tubes on the carbon spars for adjustment !!

                                This boat has the A+ Rig goes really well I’m 4th in the winter series atm

                                Regards  RayDSCF3069DSCF3068

                                #127240
                                Tim Rowe
                                Participant
                                  @timrowe83142

                                  Hi Ray

                                  Thanks for the photos.  I can see that the gooseneck goes right down to the deck.

                                  I was surprised to see how far forward the mainsheet is attached to the boom. In an IOM that would be where the vang would be!  I think I am going to sheet mine a bit further aft even if that means the transit time will be a bit longer.

                                  My DF A and B rigs have arrived from RC yachts together with the Soch Sails.  I am very pleased with them but not so much with the customs duty.  I ow have all the parts I need to finish Spooky although I will probably swap out the winch for one with fewer turns.

                                  Great to see Lady Luck has been published.

                                  Tim R

                                  #127246
                                  Tim Rowe
                                  Participant
                                    @timrowe83142

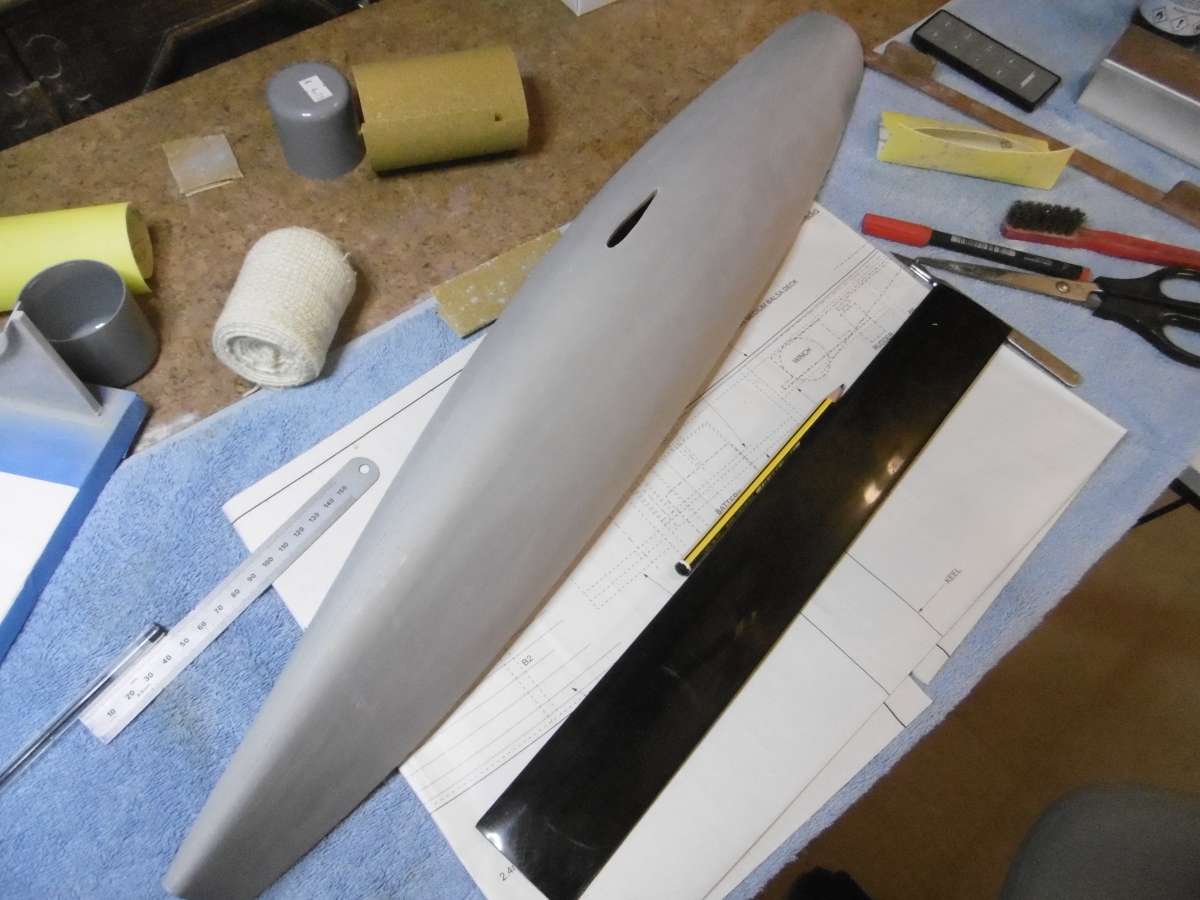
                                    The fairing of the hull continues and after a couple of coats of primer, the solid colour showed up the highs and lows very clearly.  There is limited opportunity to reduce the highs because I can only sand back a far as the sheathing. I definitely do not want to get back to the balsa.  The low spots I am hoping are sufficiently shallow that they will disappear with paint application rather than filler.

                                    There are a few tips to get good results:

                                    After each coat, sand back the high spots until you can just see through the paint to the sheathing.  This will stop the high spots from getting any higher.

                                    Avoid sanding low spots otherwise this defeats the object.

                                    Don’t use too fine a sandpaper to start with.  I used 150 grit used wet to start with and this removes material very quickly.  The sandpaper is wrapped on a hard foam block that allows good control and tends to bridge the low spots.

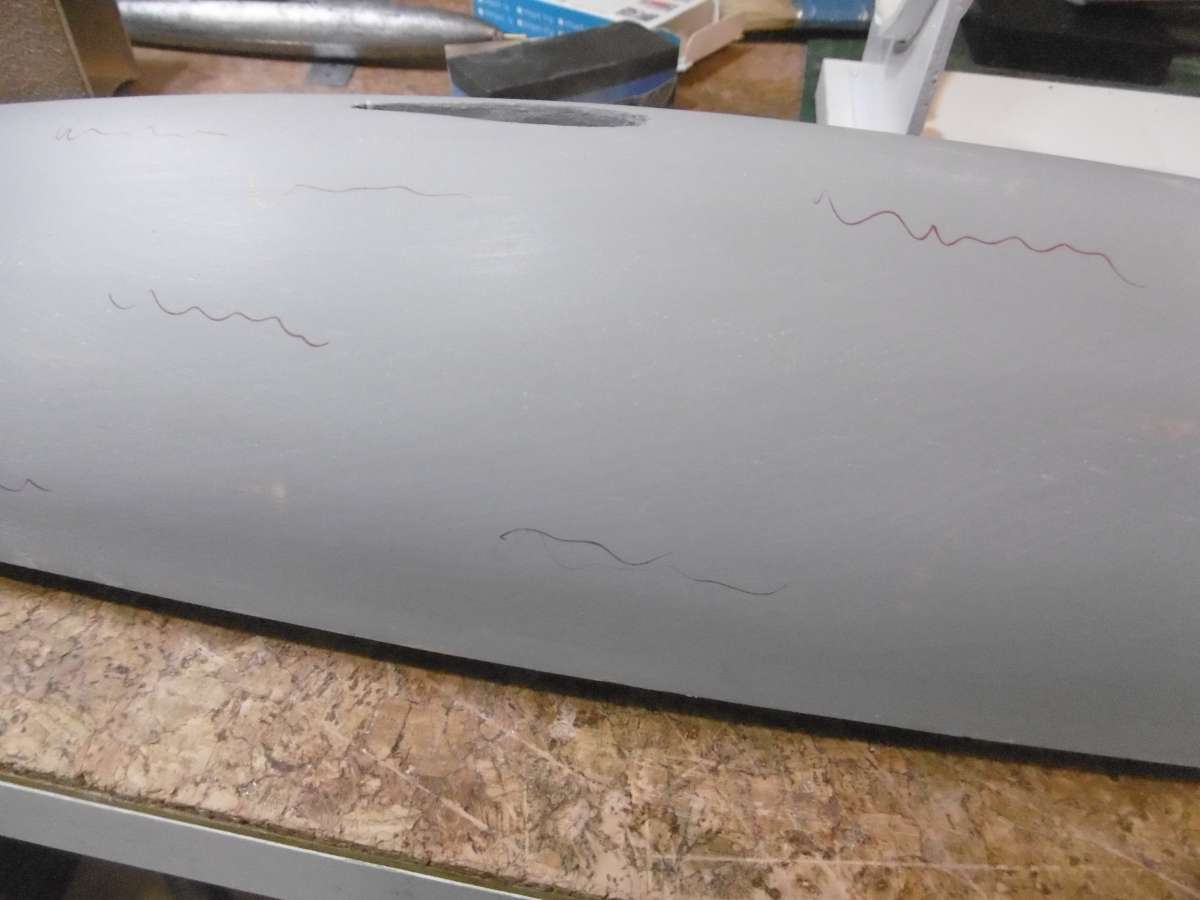
                                    When the hull is getting very close to being fully fair you don’t need to sand back until you see a witness of the sheathing because you want to start building a reasonable thickness of paint. Holding the hull at angles to a light will reveal any remaining slightly high areas and I mark these with a fine red felt tip pen.

                                    P1020783

                                    I can now see where there is still a bit more sanding to do.

                                    Once I am happy that we are almost there I will give the hull a “dust” coat of a contrasting colour.  This is spraying from a distance to give a light peppering of paint for the final light sanding.  This will be the final test of any remaining low areas.

                                    Gradually applying the finishes I will probably go to around 600 grit in stages to remove any visible scratches.

                                    White or very light colours are more forgiving than dark colours to surface imperfections.

                                    Tim R

                                    #127280
                                    Tim Rowe
                                    Participant
                                      @timrowe83142

                                      We are now onto the fitting out which is one of my favourite stages.

                                      P1020749

                                      The fin is a carbon helicopter blade.  It only required a small amount cutting off to be the right length.  What I didn’t know until I measured it was that it is very slightly tapered.  I have to remind myself to make the keel box to suit the bigger end that obviously has to go at the top.  When I cut the inboard end (helicopter mode) off it seemed to take longer than expected and it had a steel rod inserted for some of its length so the top (boat mode) is easy to identify.

                                      After flip flopping I decided to make the keel removable.  The rationale being that it wouldn’t be that mush more difficult to build and I would always have the option. Actually setting up on a table is much easier without the keel as it has quite a deep draught.

                                      Curiously there is no waterline drawn on the plan.  This threw me a bit because the waterline is one of the principal references on any boat plan.  The boat seems to be referenced off the deck.   Going back to the build notes in the magazine at says to trim the boat so that the transom an the stem just touch the water, so here is a cautionary note if anyone else is thinking about building Spooky.

                                      Going back to the plan, the transom is around 15mm higher than the bottom of the stem.  This means to get the boat floating correctly the boat has to be trimmed by the stern by about 3 degrees.  This means that all the bulkheads will eventually slope back by the same amount.  Not really a big deal but odd!
                                      It also means the axis of the rudder stock will slope forward by 3 degrees and although that is not ideal I an live with that and anyway it is already installed according to the plan.
                                      The unacceptable feature is that the fin will slope forward altering the centre of lateral resistance and the bulb will point up by three degrees which will induce unnecessary drag.  As it happens there are slight advantages in having a long slim bulb point upwards slightly but not by this much.

                                      The fin will now have to slope back when referenced against the plan and so will the socket for the mast otherwise it will have excessive aft rake.

                                      All this would have been unnecessary had the boat been drawn on its waterline.

                                      Tim R

                                      #127281
                                      Ray Wood 3
                                      Participant
                                        @raywood3

                                        Hi Tim,

                                        That’s a basic given when drawing the plan 🙁 the DF65 has a shorter keel available which we use in light airs 🙂 It’s 7″ from the bottom of the boat to the centre of the bulb, comes in handy but we can’t change keels mid races to suit the conditions it’s a bit of a lottery fitting the right one 🙂

                                        I hope you have plenty of helicopter blades.

                                        Is it beginning to warm up where you are ? still bloomin cold here with a northerly breeze !!

                                        Regards  Ray

                                        #127287
                                        Chris Fellows
                                        Participant
                                          @chrisfellows72943

                                          That’s a bit of a b@gger Tim. You would have thought he would have realised that when building the prototype?

                                          I’ve used the shorter DF 65 keel in my Fisherman.

                                          Chris

                                          #127306
                                          Tim Rowe
                                          Participant
                                            @timrowe83142

                                            Well we have moved past the waterline problem and onto the keel.  I only have two suitable helicopter blades and the other one is earmarked for an experimental project.  Spooky’s keel is 300mm from the underside of the hull to the top of the bulb.

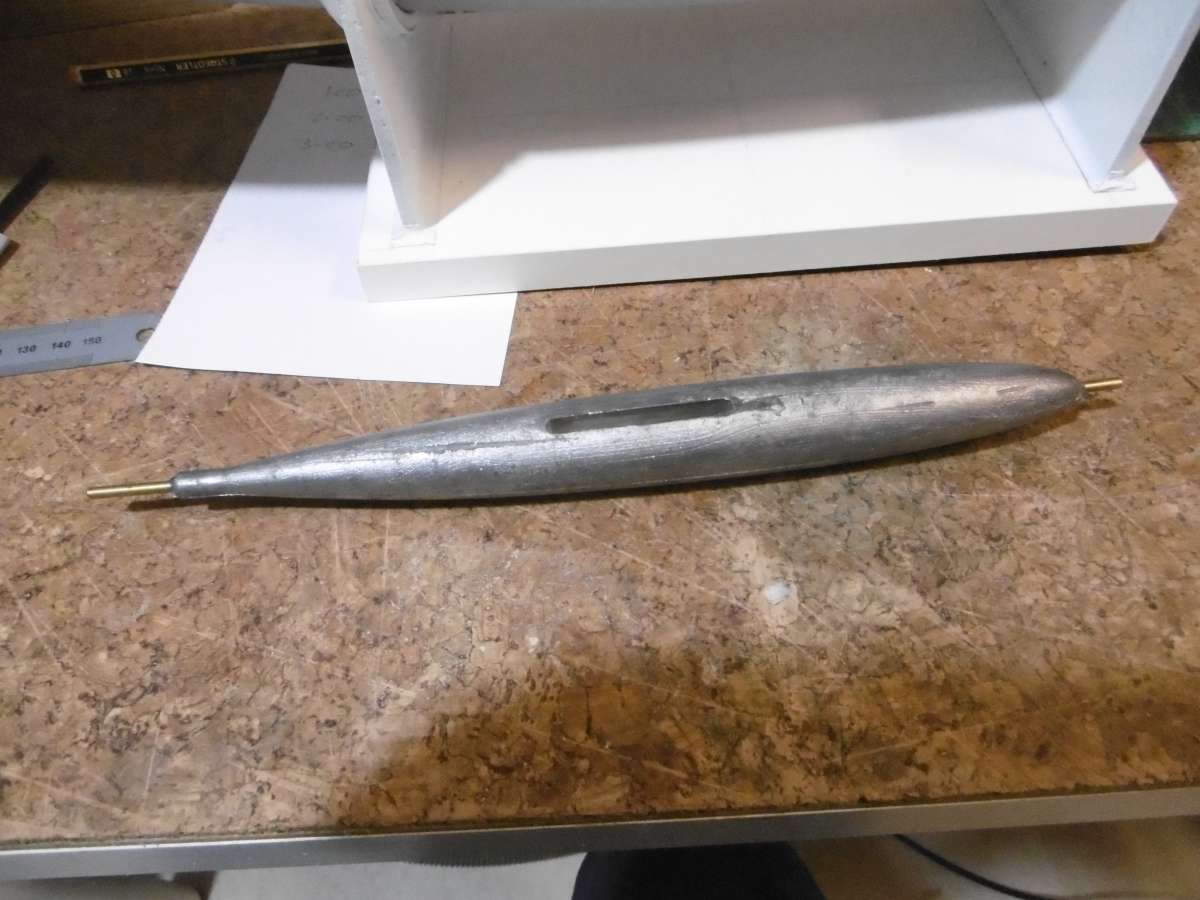
                                            I cheated with the bulb and bought one from SailsEtc.  They are very nicely cast in aluminium mould and have a really good surface finish.

                                            P1020776

                                            There is a bit of fettling to do cutting of the ends of the brass reinforcing rod and filing the ends to a point.  The cast-in slot is a help but it will need widening a bit so the fin will enter.

                                            P1020782

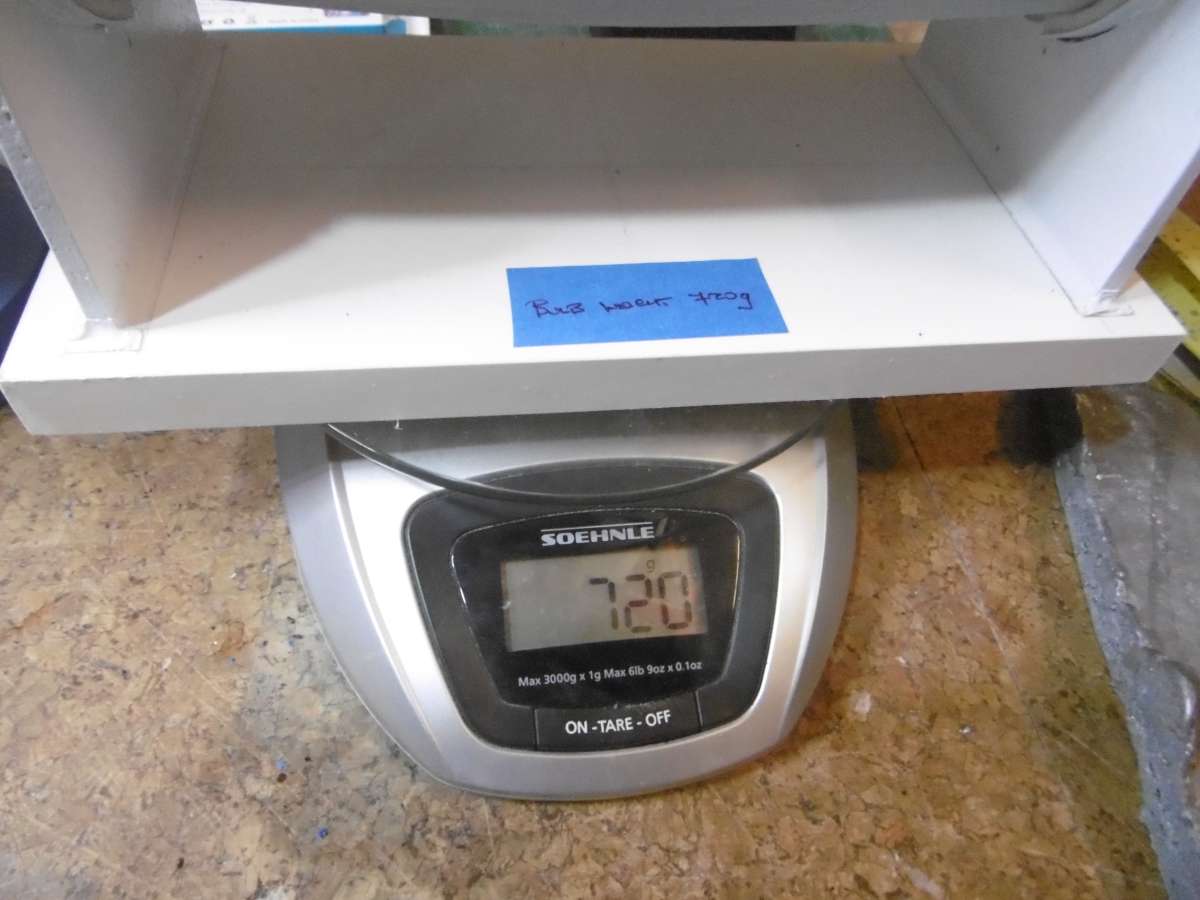
                                            This is what it weighs and it came down to 714 grams after the fettling.  I am pretty sure it will be too heavy as the plan build keel ended up at 550 grams.  I have been building as light as I can so preserve as mush weight in the bulb as I can.  We will see!

                                            Tim R

                                            #127307
                                            Ray Wood 3
                                            Participant
                                              @raywood3

                                              Hi Tim,

                                              You could drill out under the weight to reduce it, I tape over the DF65 cap head bolt which holds the bulb to the fin, only the fish will see 🙂

                                              Regards  Ray

                                              #127311
                                              Tim Rowe
                                              Participant
                                                @timrowe83142

                                                I have seen that the DF65 comes out at 1.2kg and I think that is quite close to where I will finish up.

                                                First however, having decided to make the keel removable I need to make a keel box.

                                                P1020828

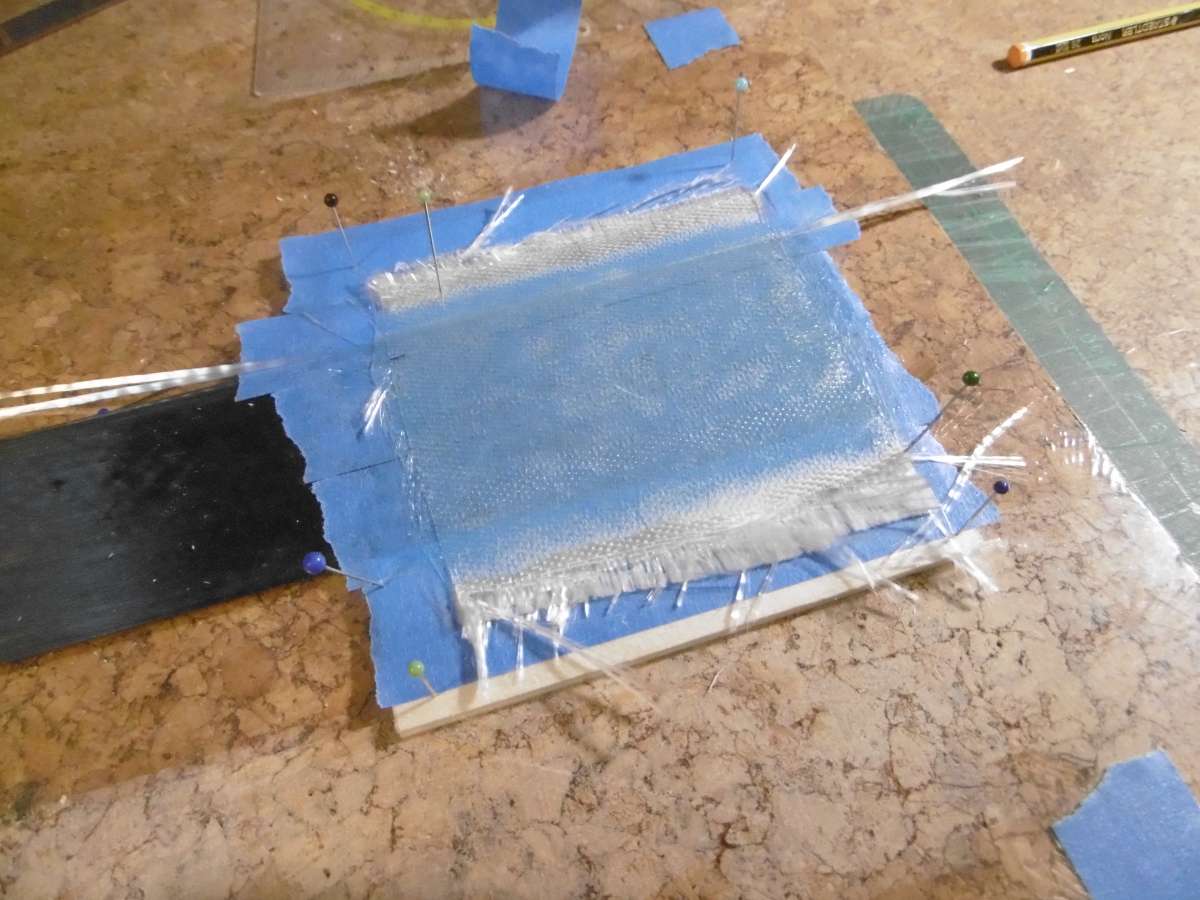
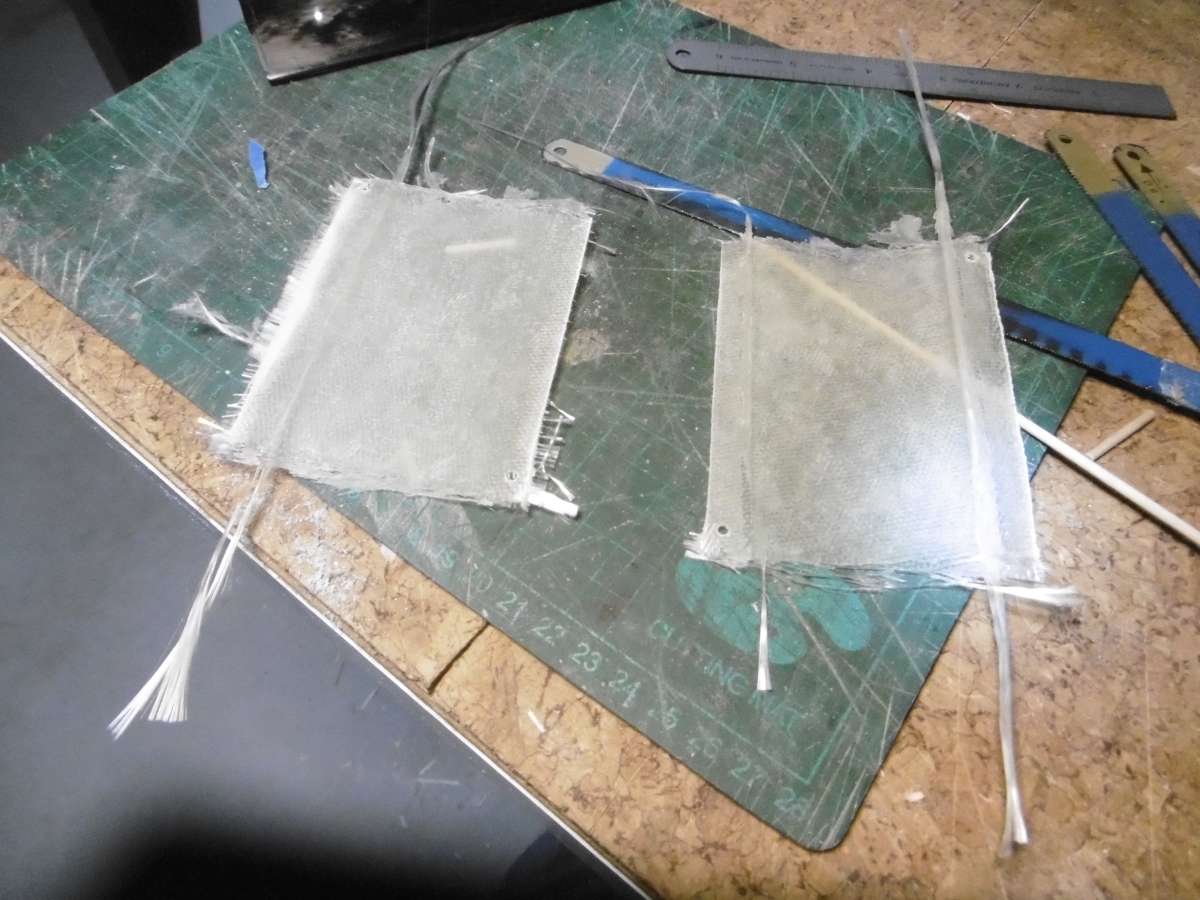
                                                The keel box will mould in two halves using the carbon fin as a pattern.  Here are the stages:

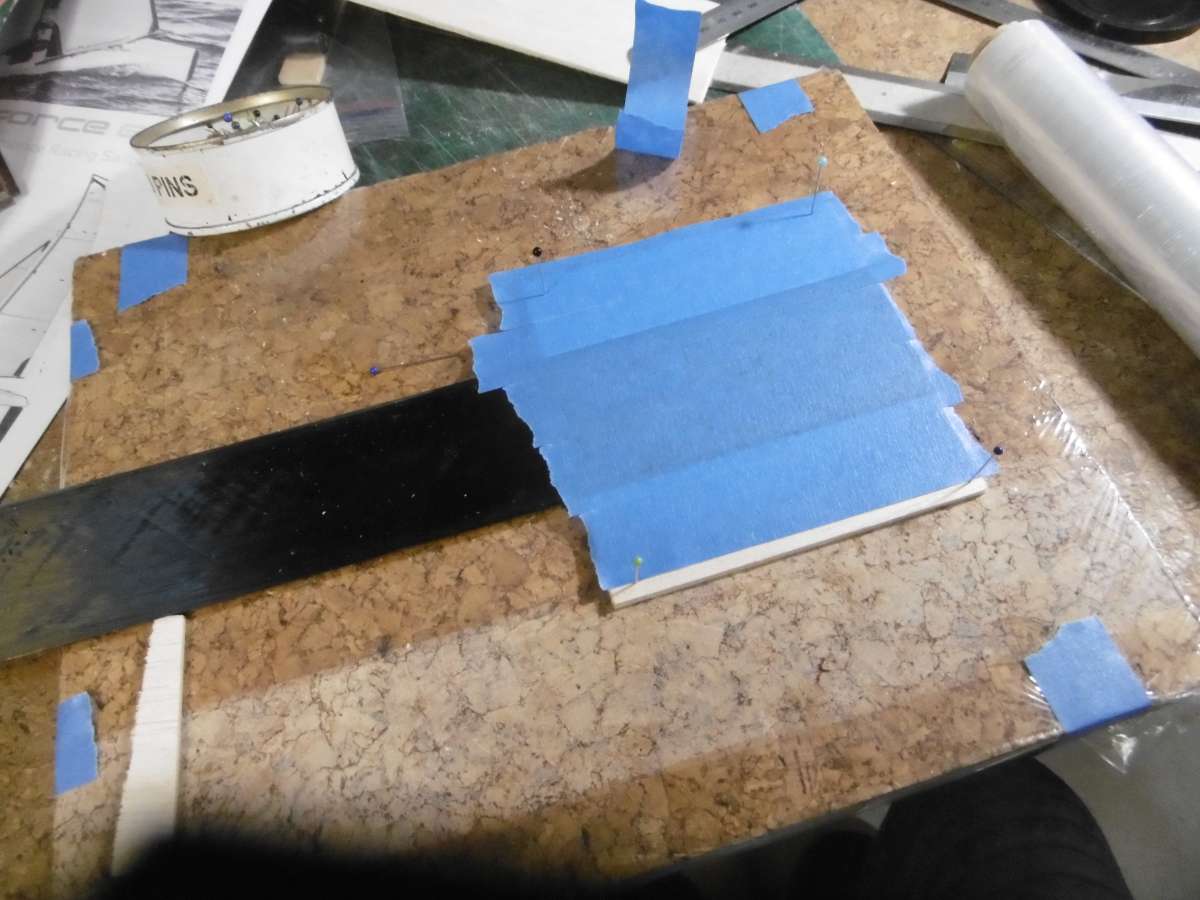
                                                Tape over the fin area with low-tack masking tape.  The is the expensive 3m stuff from chandlers and not the cheap stuff that if you leave on for too long or it gets wet will stick for ever.   The tape give a little bit of clearance by virtue of its thickness.

                                                The fin is an aerofoil with a maximum thickness at this point of 7.5mm.  The case has to split and join on the centreline so the tape is placed over slips of balsa sanded down to 3.7mm which will give me some joining flanges on the centreline.

                                                P1020829

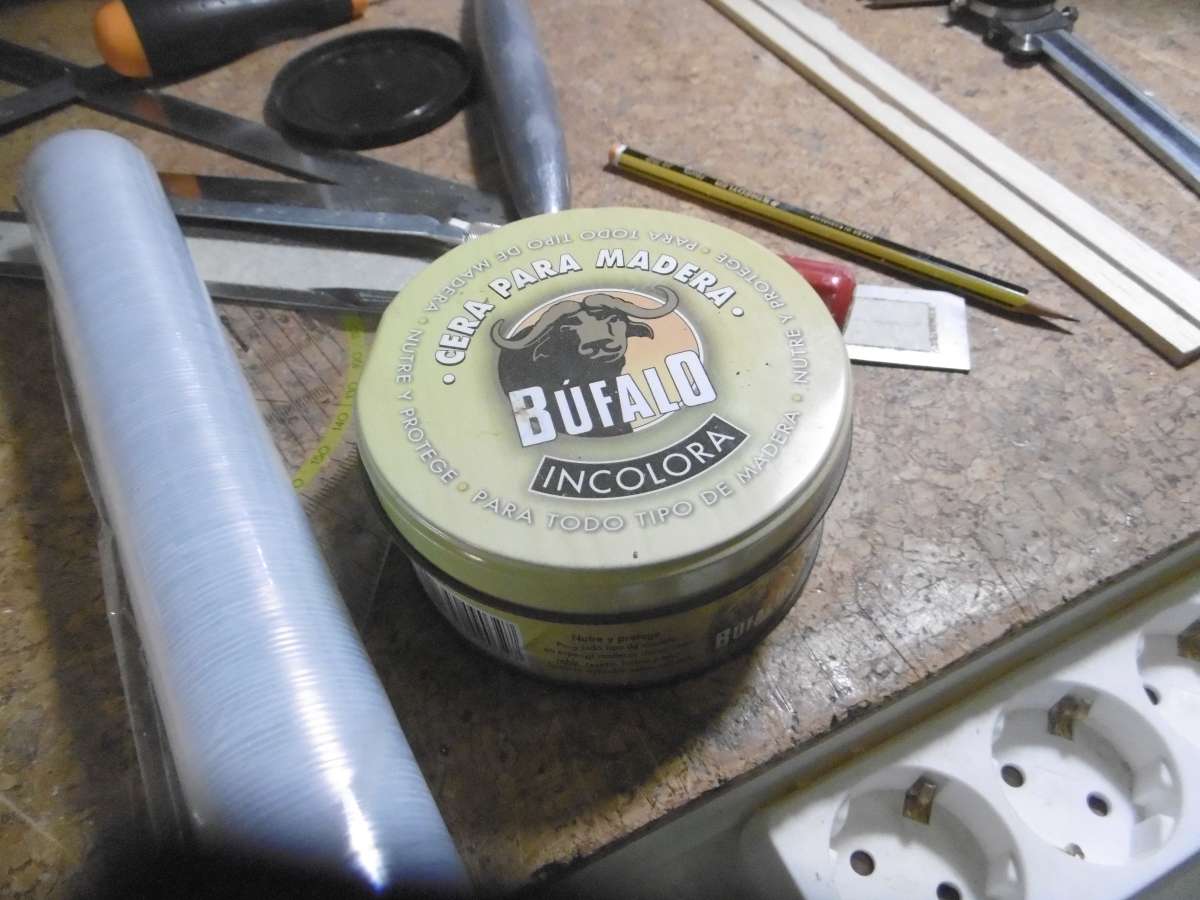
                                                Next the tape is liberally coated with wax so the epoxy will not stick.  This is ordinary furniture wax. For pukka jobs it should be a carnauba wax and the best is called Mirror Glaze.

                                                P1020831

                                                One half of the keel box is laid up with two layers of bi-axial glass cloth at about 400 grams per square metre.  This gives me a finished wall thickness of around 0.8mm. This doesn’t sound much but it is surprisingly strong and later will be well supported in the hull. Don’t use chopped strand mat with epoxy.  Chopped strand mat has a powder or emulsion binder that dissolves in polyester or vinylester resins.  Epoxy will not dissolve the binders and it will be very hard to wet out.  Fabrics are woven and stitched and have no binders.  The long glass filaments are also much better suited to the superior strength of epoxy.

                                                P1020841

                                                We now have the two side of the casing.  The holes were drilled before the moulding were taken off the fin and these will take dowels to make sure the two halves are perfectly lined up when it comes to gluing then together.

                                                P1020844

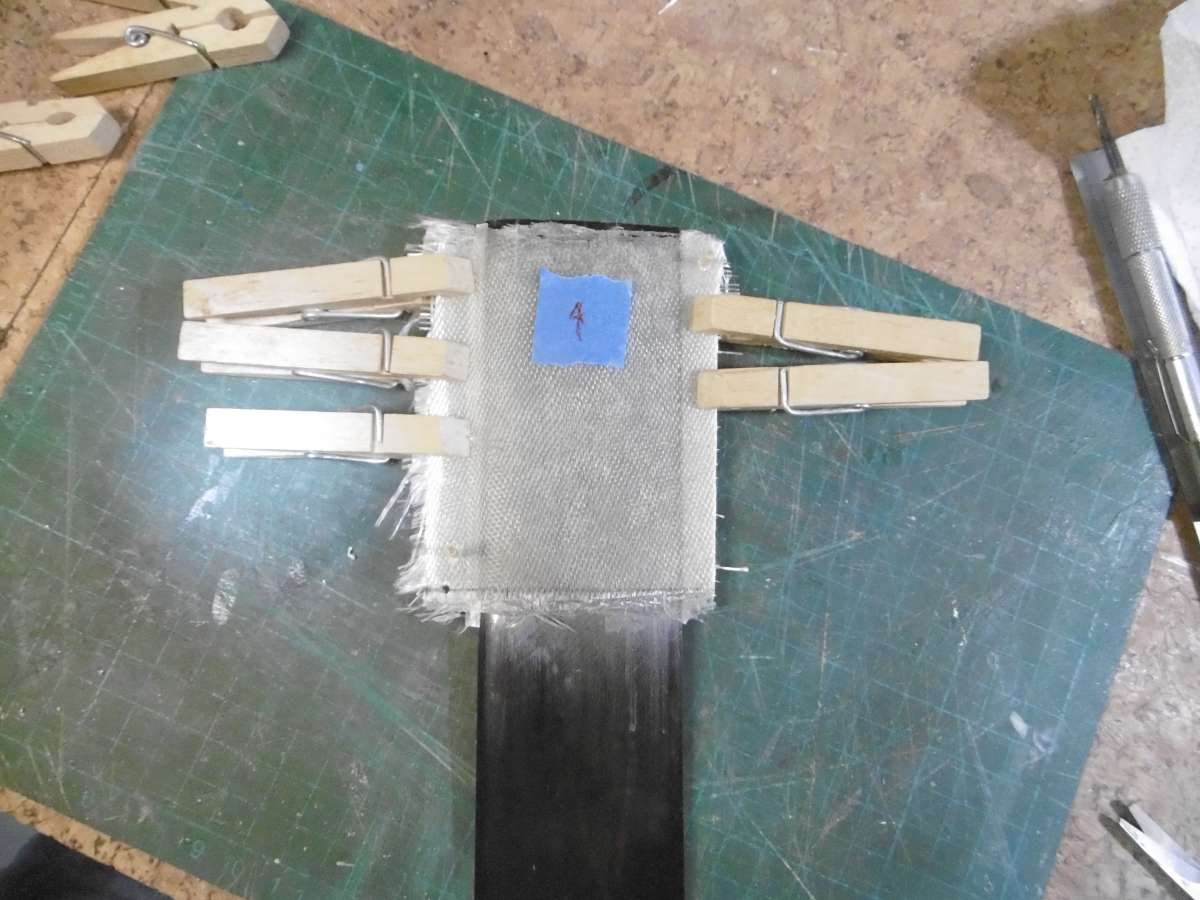
                                                Here is a trial fit on the fin and it was a bit tight.  This would be a risk because if it got squashed even a fraction when putting it into the hull the fin won’t go in at all.

                                                P1020845

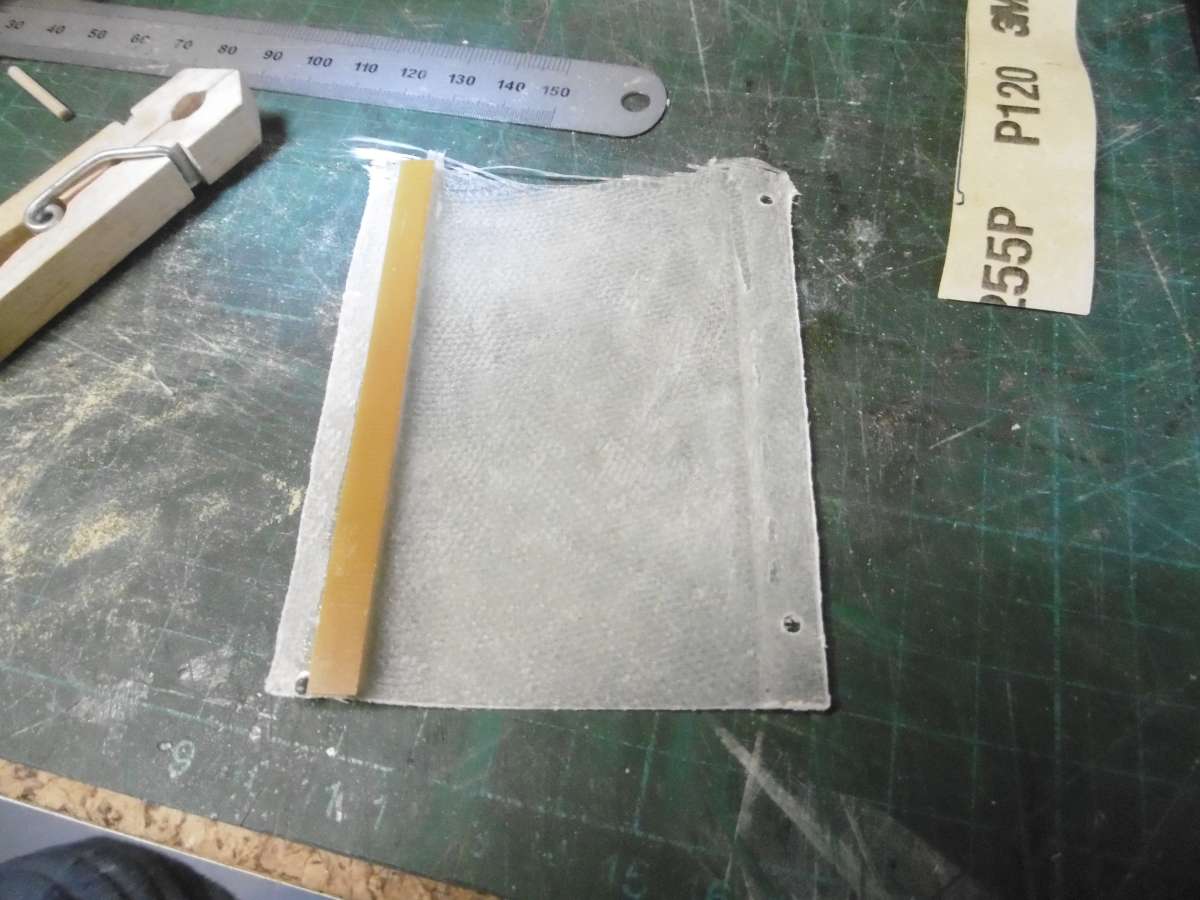
                                                This was cured by putting a strip of 0.8mm epoxy sheet in the forward flange.

                                                P1020848

                                                Here the box is finally joined up using 60 minute epoxy.  There is no rush for it to cure and the 60 version is stronger and harder than the 20 minute stuff.
                                                The case is about 15mm longer than it needs to be to give me a trimming allowance at the deck and the underside of the hull. The case will go up to the underside of the deck where it will be sealed and the bottom will pass through the hull and then later trimmed flush.
                                                Thee is also a trimming allowance at the from because eventually it will have to confirm to the inclined bulkhead the size of the aft flange will be left wide enough to preserve a strong.  The whole assembly is epoxy so there is no need to paint anywhere.

                                                Tim R

                                                #127321
                                                Richard Simpson
                                                Moderator
                                                  @richardsimpson88330

                                                  Very neat Tim, lovely job.

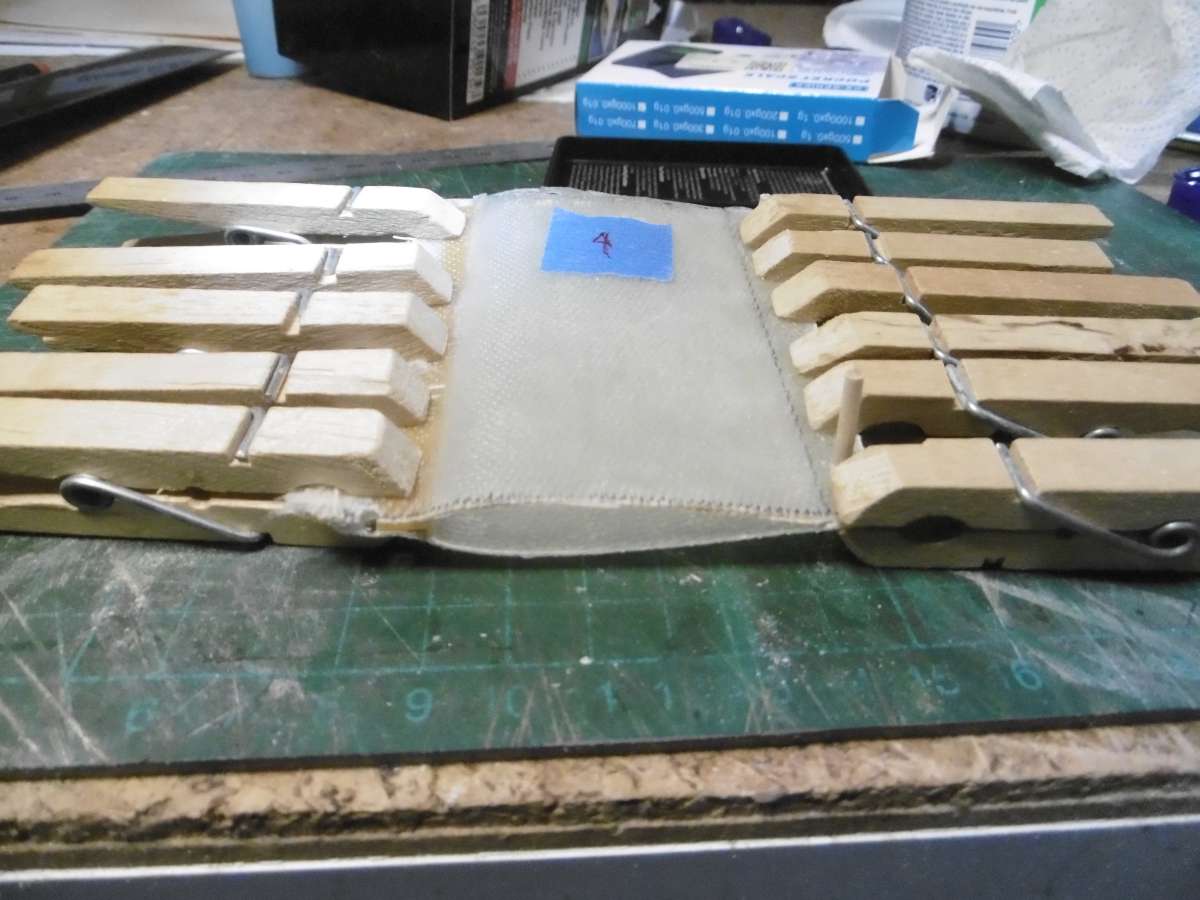
                                                  Funnily enough I also use wooden clothes pegs a lot as handy clamps, especially in conjunction with a pair of tweezers for holding fine parts while glue or paint dries, but never thought of bevelling the ends to give better accessibility.  Nice idea!

                                                  #127378
                                                  Tim Rowe
                                                  Participant
                                                    @timrowe83142

                                                    Hello Richard.  I am a real anorak with the clothes pegs.  I even keep them in two boxes.  One box with strong springs and another  with very strong springs.  I did have a third with weak springs but hardly ever used them so they got re-purposed in the domestic department as clothes pegs!

                                                    P1020808

                                                    I didn’t realise at first that the DF65 and most of the RG65s only have a forestay and backstay.  The swing rig option doesn’t have anything so the mast support must take all the rig load.  I am using the DF65 A and B rigs and Soch sails all bought from Soch Sails as recommended by Ray Wood.  Thank you Ray for the rig set-up photos.
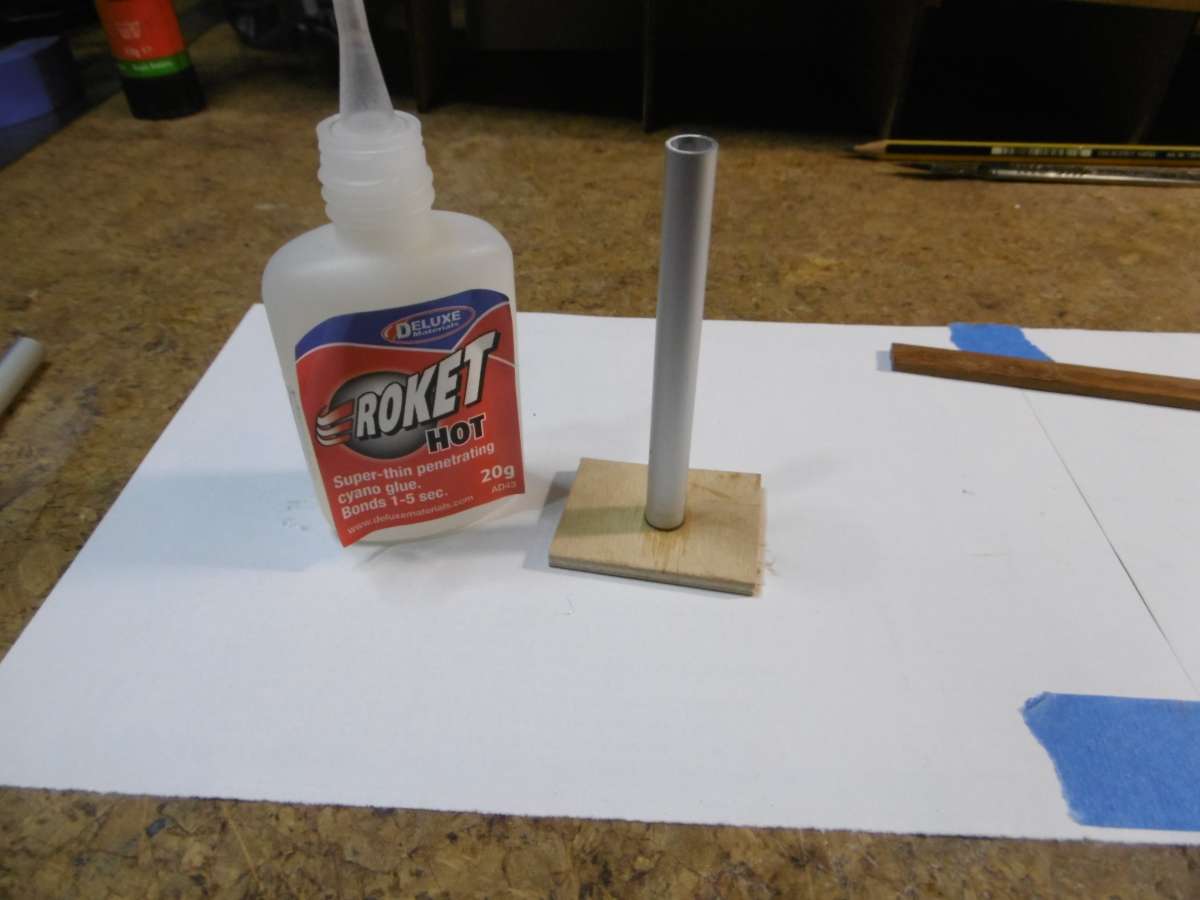
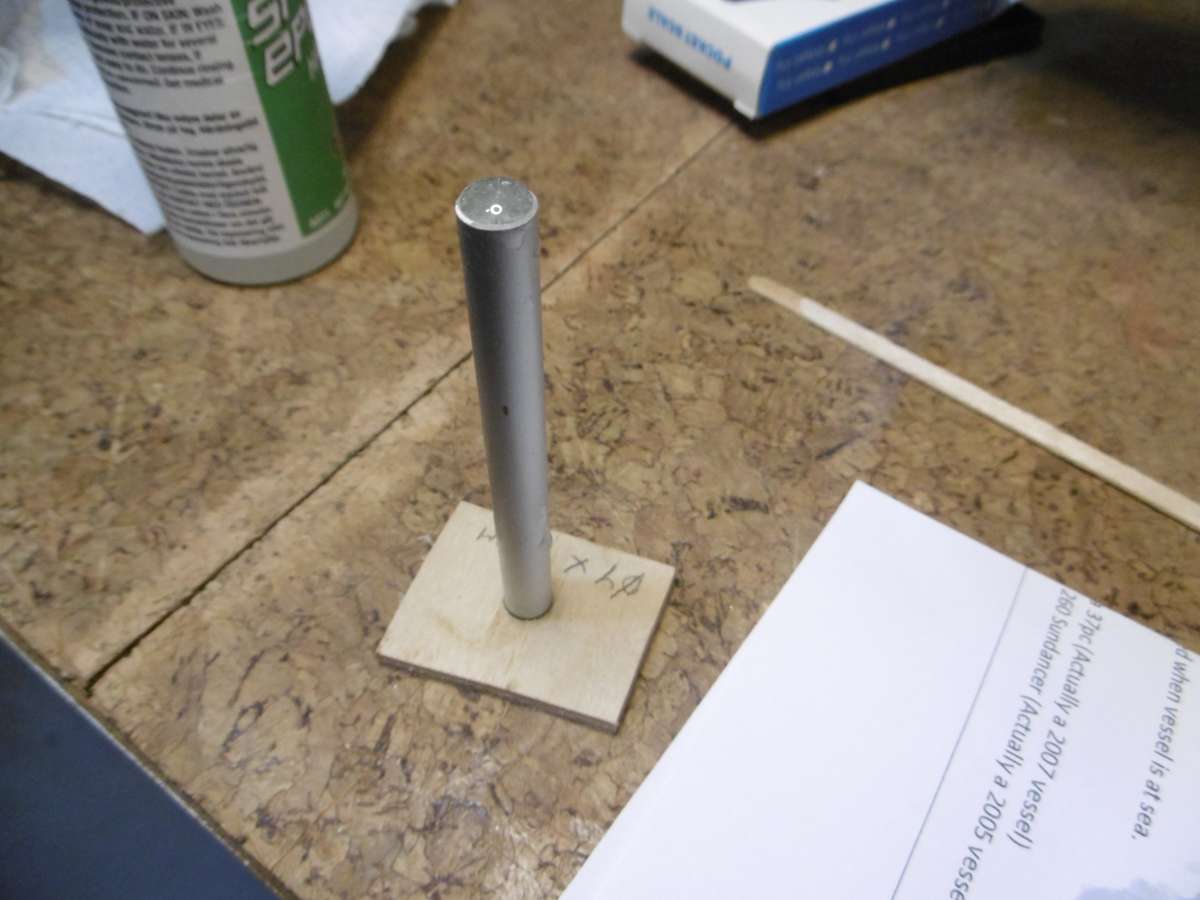
                                                    Searching around my boxes of bits the best I could do for the mast socket was some aluminium tube.  This is tempered and anodised but the the bore was a bit oversize making the mast a sloppy fit.  I glued a piece of scrap plywood to the bottom to seal the tube and then filled it with 60 minute epoxy. After filling I warmed it slightly with a heat gun which initially makes the epoxy quite runny.  This helps to let any air bubbles come to the top.  A surprising amount of air came out which meant that I had to top up the tube twice.

                                                    P1020814

                                                    Here is the tube filled with epoxy with a slight meniscus because this will be the bottom when fitted and the slightly rounded end kinder on the hull bottom than a hard aluminium edge.  The plywood base snaps off easily.

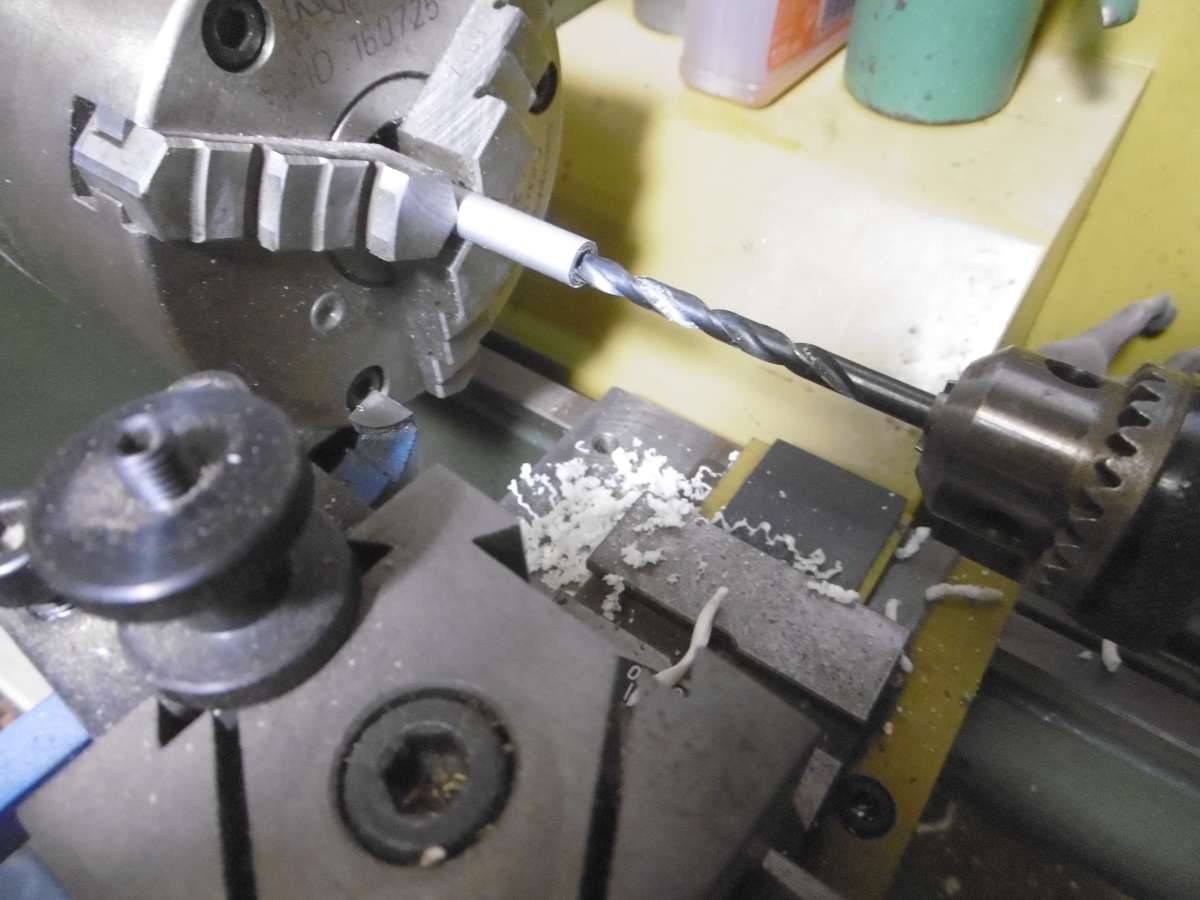
                                                    P1020817

                                                    Into the lathe for drilling out to the right size and the right depth for the mast spigot.

                                                    P1020818

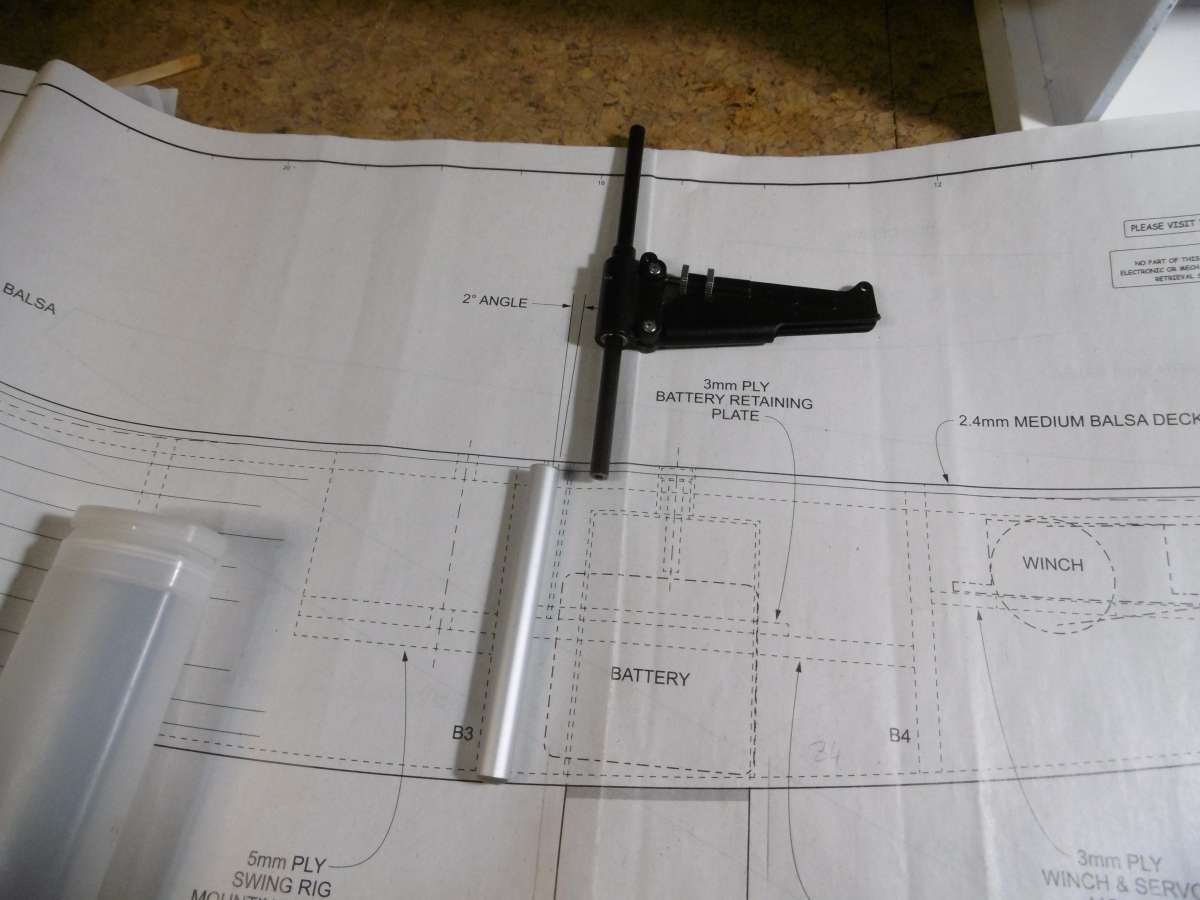
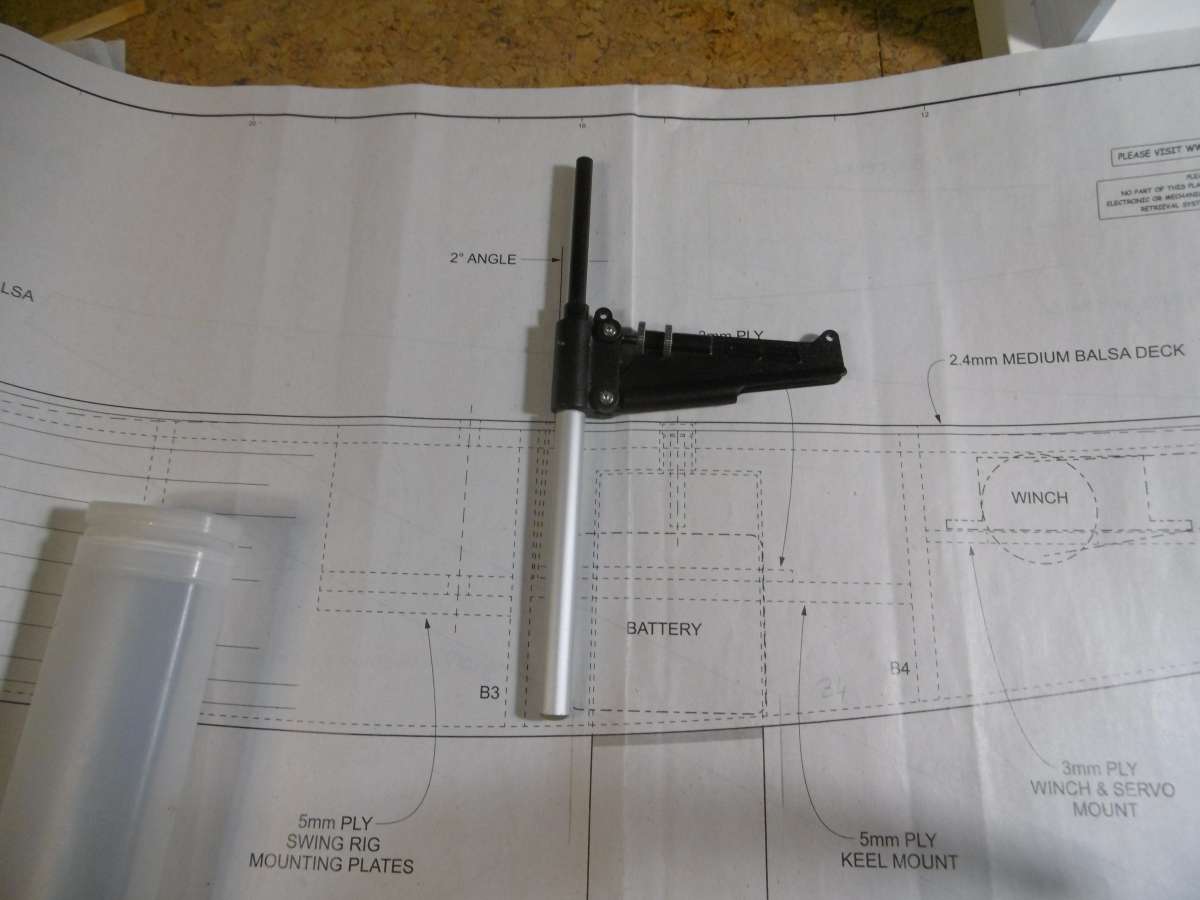
                                                    Up against the plan to show where it goes and ready for the DF65 gooseneck / mast stub assembly.

                                                    P1020819

                                                    The depth of the support tube is just sufficient to keep the gooseneck clear of the deck. As close as possible is good.

                                                    You can see 2 degrees marked on the plan but we already know that to put the boat on the correct waterline we have around 3 degrees already.  If I was to superimpose the 2 degrees that would be a mast rake of 5 degrees which would be way over the top.  In practice I Had to lean the mast support forward (in reference to the plan) by 1 degree to get the required 2 degrees mast rake.
                                                    I will come on to that.

                                                    Tim R


                                                    #127379
                                                    Richard Simpson
                                                    Moderator
                                                      @richardsimpson88330

                                                      Always interesting to see how someone comes up with an answer to a problem.  I would have been digging around for brass sleeves or such like but the epoxy is a far more elegant engineering solution.

                                                    Viewing 25 posts - 26 through 50 (of 89 total)
                                                    • Please log in to reply to this topic. Registering is free and easy using the links on the menu at the top of this page.

                                                    Code of conduct | Forum Help/FAQs

                                                    Latest Replies

                                                    Home Forums Sailing Models Topics

                                                    Viewing 25 topics - 1 through 25 (of 25 total)
                                                    Viewing 25 topics - 1 through 25 (of 25 total)

                                                    View full reply list.