new build

new build

Home Forums Scratch build new build

  • This topic is empty.
Viewing 25 posts - 76 through 100 (of 105 total)
  • Author
    Posts
  • #61522
    Amy jane September
    Participant
      @amyjaneseptember49770

      Sssshhhh. Anchor well sounds so much more nautical….(I'm not nautical, just naughty…). Probably just leave it open, what ever water that sloshes in there will wash the mud out.

      No polystyrene or jerry cans, she cant sink, she's wood! He he

      #61523
      ashley needham
      Participant
        @ashleyneedham69188

        But surely the waters are stuffed full of sharks and killer jellyfish (I`ve seen all those films) and the weight of the outboard would drag the boat down and thus leaving occupants open to dismemberment (or whatever) ????

        And another thing…the "anchor(s)" will get all horrible and warm with no sun protection. An open "anchor" well of course means that this are will dry off better then having a lid in place.

        Is the bow area sealed (or at least has a bulkhead at the rear) and the only means of forward access will be the hatch?

        Ashley

        #61977
        Amy jane September
        Participant
          @amyjaneseptember49770

          Fear not, good sir. The killer jelly fish are scared of me!

          The anchor well is shallow, and drains directly over board. No bulkhead under the fore deck, the fore peak is open.

          There is enough timber in her structure to float her level, with the outboard head clear of the water, and with enough free board to bail her if swamped.

          There will be an ice box to house the vital marine supplies…..

          Some more progress.

          The deck is on, the cut water and fashion pieces at the bow done.

          dscf6810 (640x360).jpg

          The buffalo rails were made up from three layers of 1/4" ply screwed to the rail.

          dscf6802 (640x360).jpg

          Then cut to fit on the deck. Then will be planed to there final shape once installed.

          Plenty of filling and sanding.

          dscf6812 (640x360).jpg

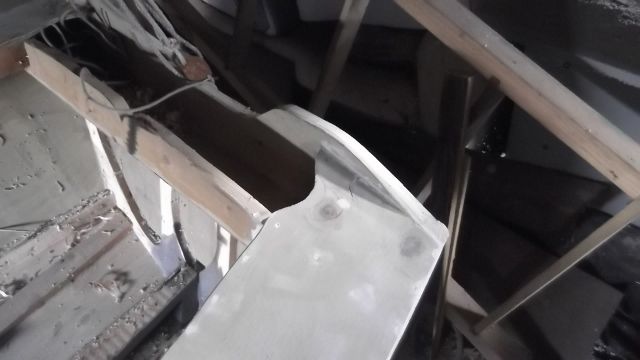
          The side decks were lapped over the outboard well splash back and taken right to the transom.

          dscf6808 (640x360).jpg

          A start has been made on the windscreen.

          dscf6813 (640x360).jpg

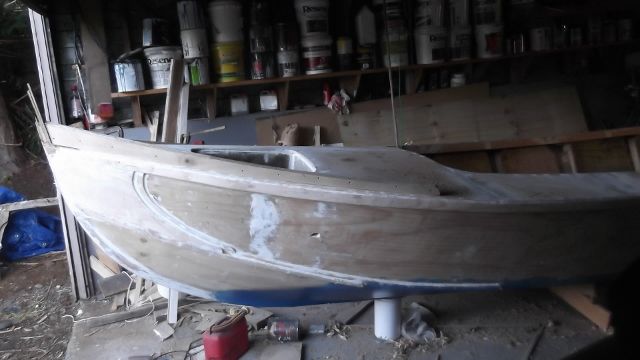
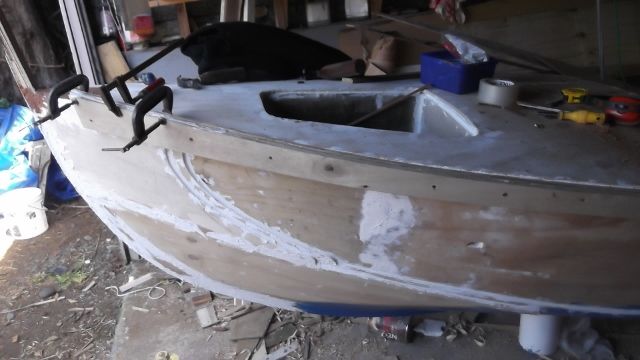
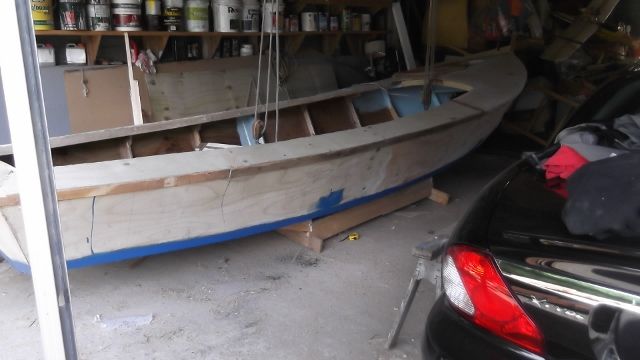
          One side of the hull has been sanded and is ready for painting. I will pull the boat out next weekend and turn her around for to work on the other side and the transom.

          Amy j

          #61994
          Andy C
          Participant
            @andyc56856

            Hi AJ

            Been a while, nice to see you back again. good progress, very much liking the shape of the windscreen. Very Funky. Looking forward to more.

            Andy

            #62007
            Amy jane September
            Participant
              @amyjaneseptember49770

              Hi Andy

              Thanks for dropping in, good to hear from you.

              A few too many distractions of late, but I'm going to start pushing it along a little more now.

              Glad you like the windscreen. Hopefully it'll be worth the work!

              Amy j

              #62014
              ashley needham
              Participant
                @ashleyneedham69188

                AmyJ. Fashion pieces, Buffalo rails.. There`s more to building boats than meets the eye !
                Awning to protect from all that antipodean sun ?? and the Hydrofoil mounting points…later??

                Ashley

                #62075
                Kimosubby Shipyards
                Participant
                  @kimosubbyshipyards

                  Amy, nice work there, but how come you get weather, I thought that was here with us now they've started naming "storms".

                  Good to see you are teaching Ashley some nautical terms, so what anchor type will you go for Bruce, CQR, Danforth, Kedge or just a Reef?

                  Ash, I think the outboard is laid horizontal on this one with a long prop shaft out back….

                  Kimmo

                  #62080
                  ashley needham
                  Participant
                    @ashleyneedham69188

                    Kimmo, you are probably right. BUT, would the propshaft be set at less than 5 degrees though??

                    I think the traditional Maori "rock-on-a-rope" would be appropriate for the anchor…

                    Ashley

                    #62202
                    Amy jane September
                    Participant
                      @amyjaneseptember49770

                      Hi There Kimmo. Good to hear from you

                      Sounds like thing have been a bit rough weather wise up your way! (we are looking set for drought on the east coast again here, been dry and windy of late.)

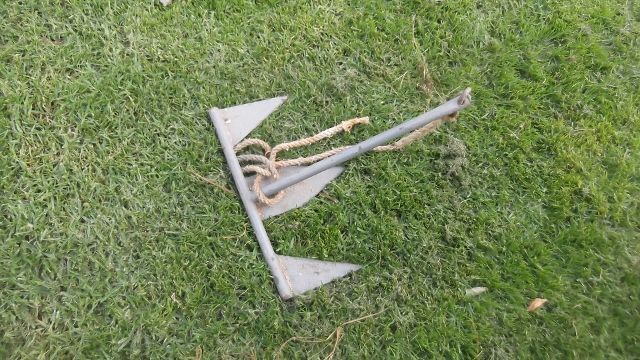
                      Anchor? You'll not be surprised that I make my own…

                      dscf6823 (640x360) (640x360).jpg

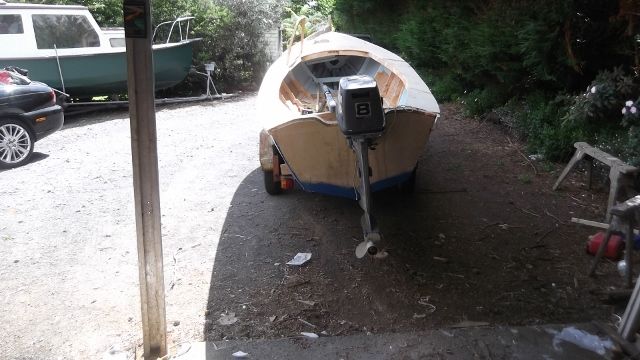
                      Sorry guys, No outlandish drive system….

                      dscf6831 (640x360) (640x360).jpg

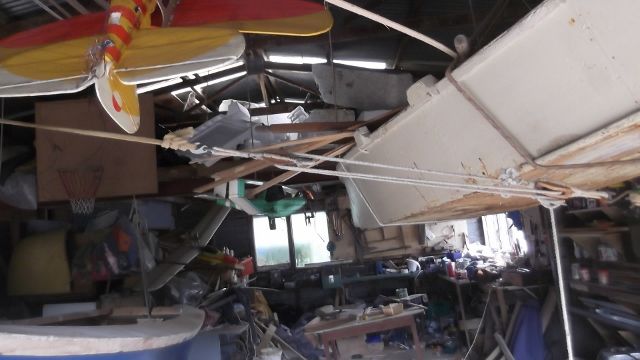
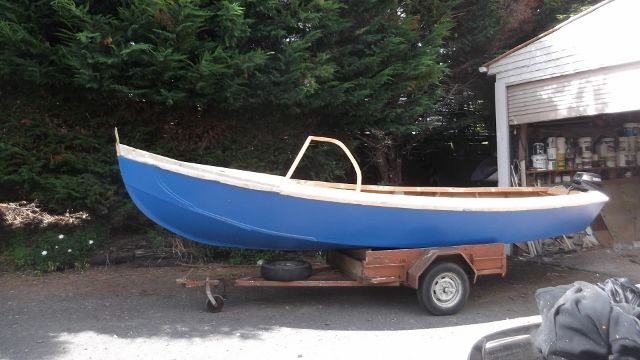
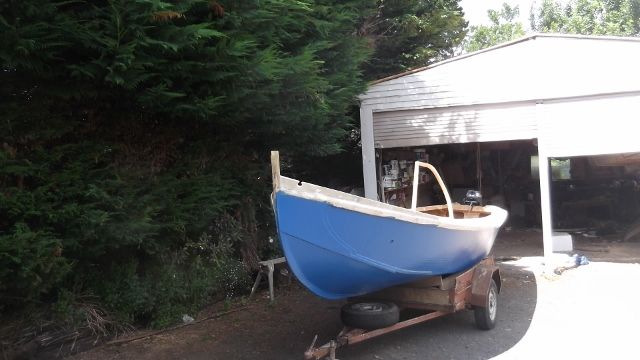
                      Weelll…. Had a bit more fun getting on the trailer this time. She's quite a bit heavier….. My luff tackle wouldn't lift her, so I had to improvise a gun tackle and haul that with the luff tackle…..That got her.

                      dscf6824 (640x360) (640x360).jpg

                      I'm taking an educated guess I admit, but I'm thinking about 200lb at this point.

                      Still got her on the trailer!

                      dscf6829 (640x360) (2).jpg

                      Kinda cute I'm thinking!

                      dscf6830 (640x360) (2).jpg

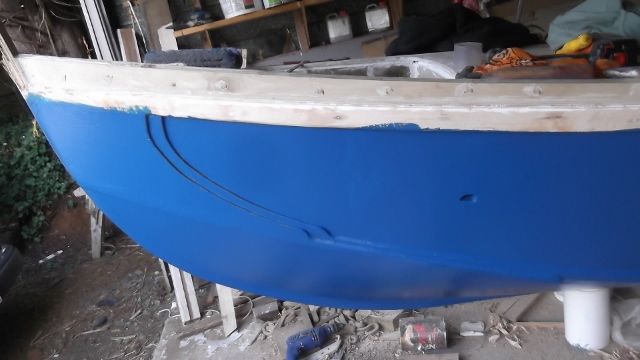
                      Bit of an art deco feel, with the the fashion piece.

                      dscf6822 (640x360) (2).jpg

                      more soon…

                      #62206
                      ashley needham
                      Participant
                        @ashleyneedham69188

                        AmyJ. Very smart indeed. The little hole on the LEFT hand side…is this the anchor locker drain ?? or what.

                        Anchor. Of course you make your own, easiest bit on the boat.​ Kim will tell me what sort it is…..

                        Ashley

                        #62216
                        Amy jane September
                        Participant
                          @amyjaneseptember49770

                          Hi Ash

                          Yes the little hole on the port side is the drain hole!

                          The boat is back in the garage. Time to start all over again with all that filling, sanding and painting. sigh…

                          dscf6834 (640x360) (640x360).jpg

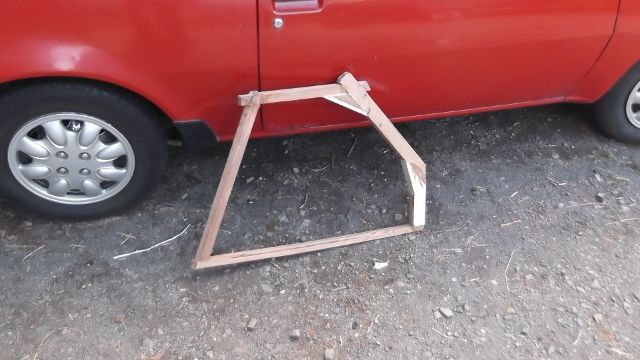
                          The other side of the windscreen is pieced up.

                          dscf6821 (640x360) (2).jpg

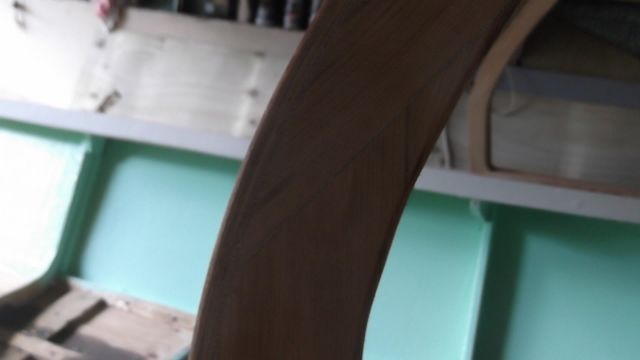
                          Lots of fiddly marking and cutting, but windscreens end up being grab rails, so need to be strong! The Timber is recycled Rimu, and will be very pretty varnished up.

                          #62231
                          Banjoman
                          Participant
                            @banjoman

                            In equal measure impressive and attractive!

                            /Mattias

                            #62303
                            Amy jane September
                            Participant
                              @amyjaneseptember49770

                              Hi Mattias

                              Thank you sir, you are very kind.

                              and…

                              Merry Christmas to you all!

                              Amy jane

                              #62446
                              Amy jane September
                              Participant
                                @amyjaneseptember49770

                                Happy new year!

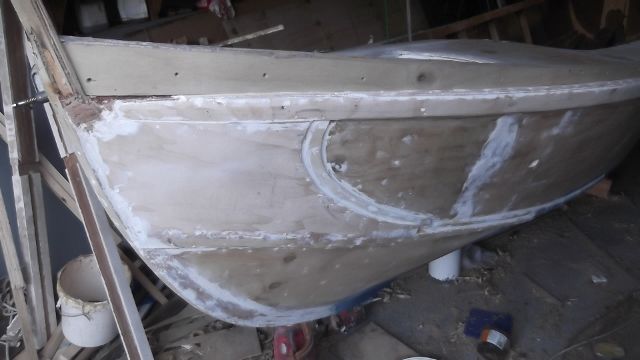
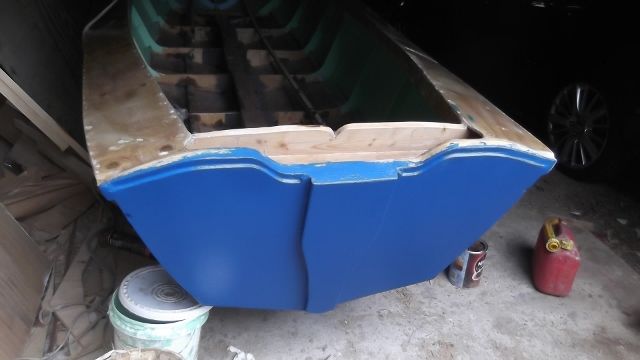
                                I have finished the work around the transom and the entire hull is painted

                                dscf6849 (640x360).jpg

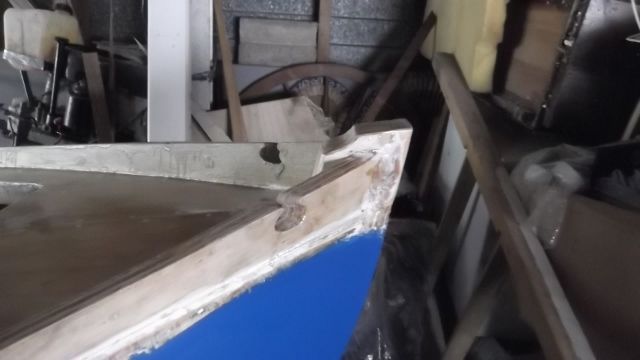
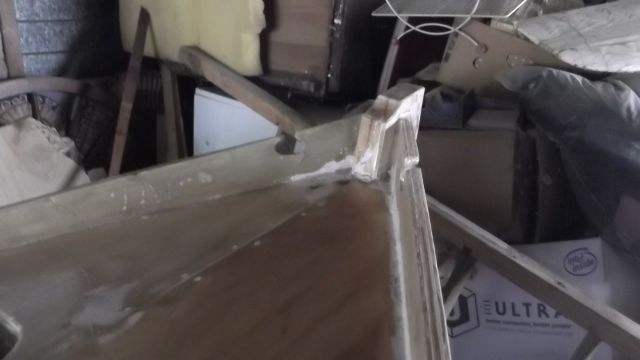
                                The stem head is complete, and anchor fairleads cut into the buffalo rails.

                                dscf6851 (640x360).jpg

                                The deck is sealed and ready for paint

                                dscf6852 (640x360).jpg

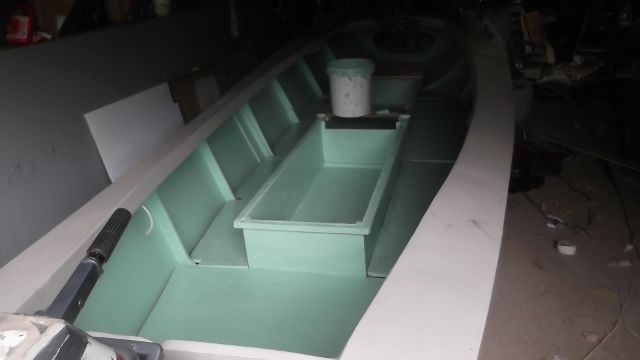
                                The interior has been painted. (Well the parts you can see anyway. Clear sealer on the rest). Back onto the wind screen next week.

                                Amy

                                #62974
                                Amy jane September
                                Participant
                                  @amyjaneseptember49770

                                  Hi all

                                  About time for an update.

                                  dscf6878 (640x360).jpg

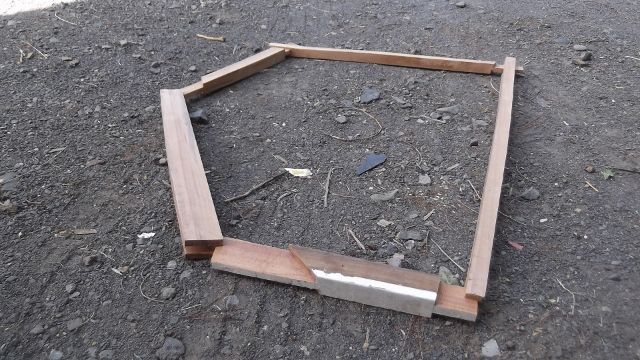
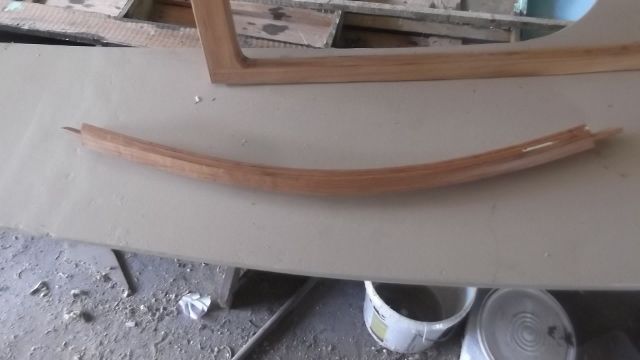
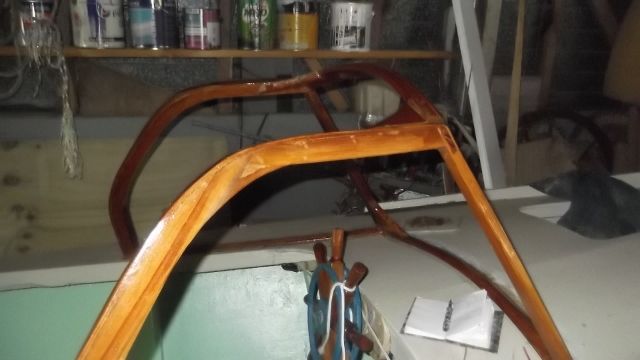
                                  The deck is painted, and I'm back onto the windscreen. Two strips of 1/8" laminated around the back edge of the side frame for strength and neatness. My home made glue through out. (Thanks to careful shopping around, I can now make it for a mere $4 a litre!)

                                  dscf6870 (640x360).jpg

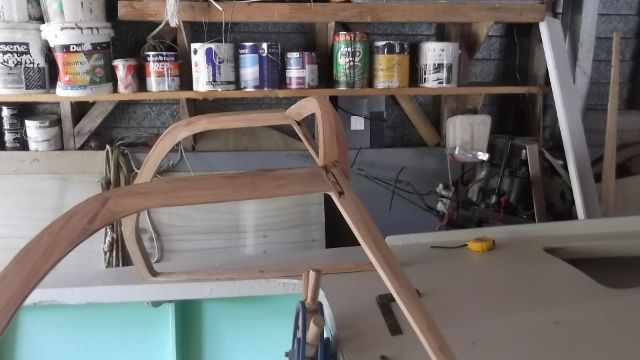
                                  The bow for the top was laminated on the flat….

                                  dscf6871 (640x360).jpg

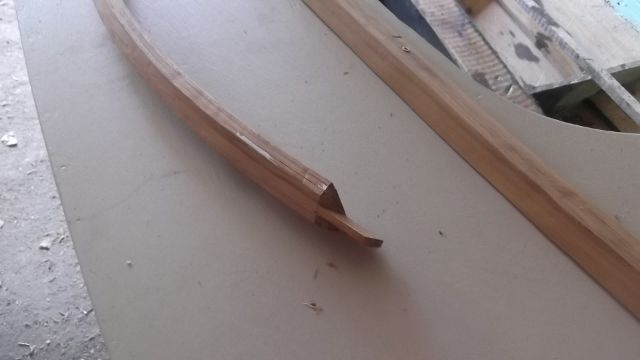
                                  The tenons cut on an angle…..

                                  dscf6872 (640x360).jpg

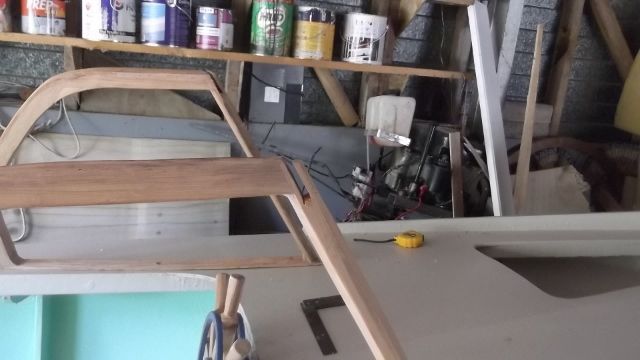
                                  To be slotted into the top of the side frames. This gives the required two way bow.

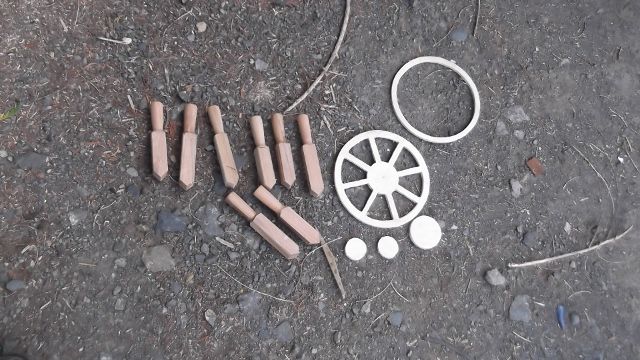
                                  dscf6874 (640x360).jpg

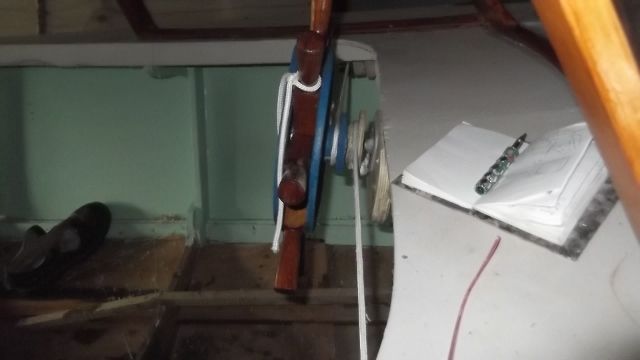
                                  The bits and bobs for the wheel…

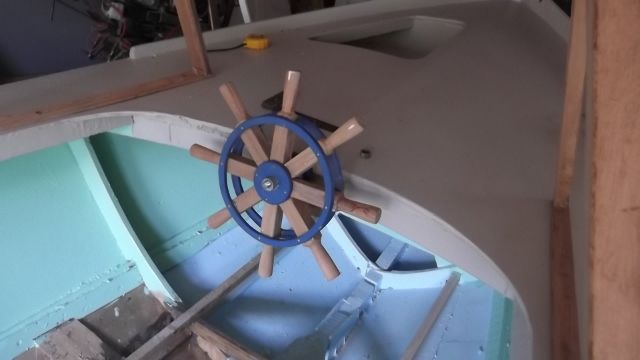
                                  dscf6869 (640x360).jpg

                                  completed

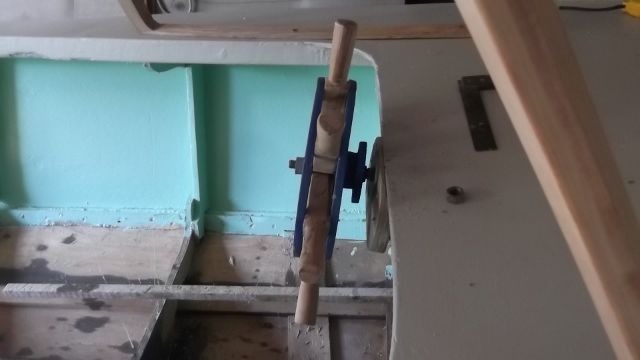
                                  dscf6877 (640x360).jpg

                                  The drum for the steering cables built straight onto the wheel for simplicity.

                                  dscf6876 (640x360).jpg

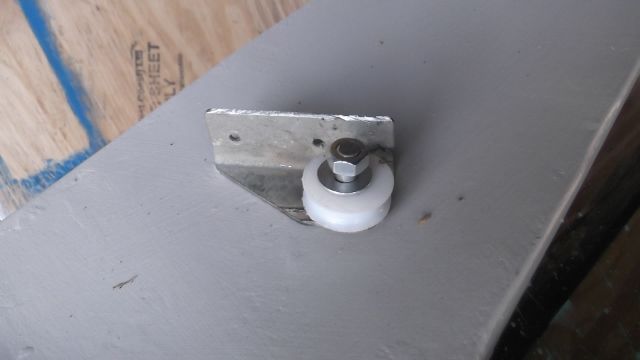
                                  A start on the fairlead pulleys for the steering cables….

                                  dscf6881 (640x360).jpg

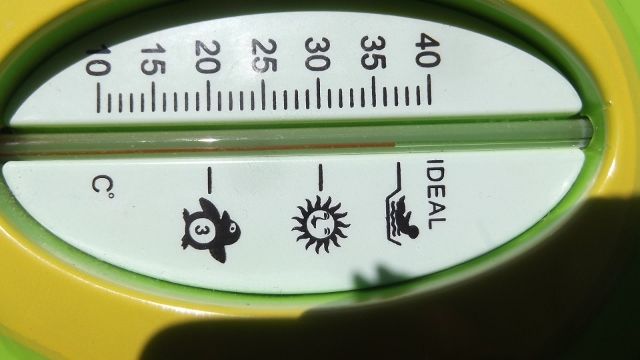
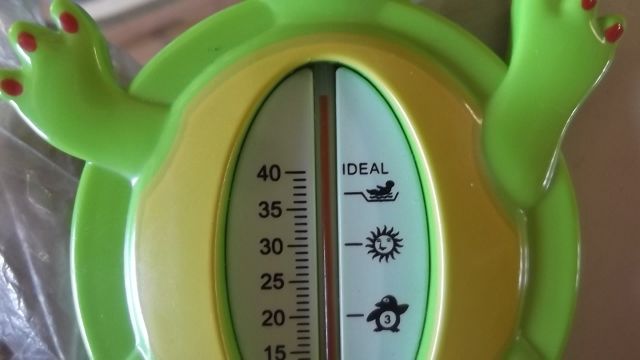
                                  Oh did I mention it was hot here….. Thermometer just outside the garage door…..

                                  dscf6880 (640x360).jpg

                                  Hard to get motivated!

                                  Aj

                                  #62975
                                  ashley needham
                                  Participant
                                    @ashleyneedham69188

                                    AmyJ. Good work as ever. Hard to get motivated here as well, hovering between 0 and 4 degrees !

                                    What is the white material for the wheel ?? Little dome cover or even a dome nut in wheel centre?

                                    Ashley

                                    #62987
                                    Amy jane September
                                    Participant
                                      @amyjaneseptember49770

                                      Hi Ash

                                      Wanna swap? I guess we are both over our weather……

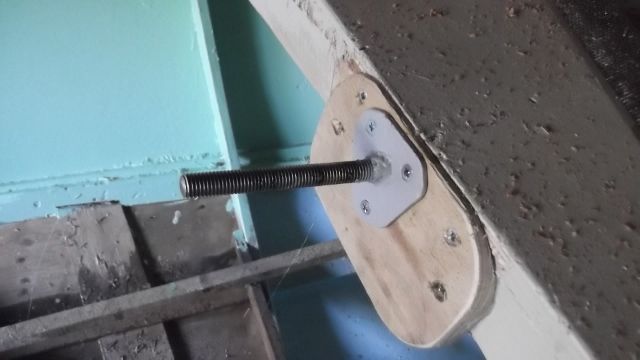
                                      Yes, A nut. The wheel has a steel pipe for a bush, slid over a threaded rod attached to the deck beam. I will attach a lever to the nut to lock the wheel. Need to be able to get to those vital marine supplies whilst under way…..

                                      Oh did I complain it was hot yesterday? What was I thinking?…….Same place and time today

                                      dscf6885 (640x360).jpg

                                      I'm melting……

                                      #63000
                                      ashley needham
                                      Participant
                                        @ashleyneedham69188

                                        AmyJ. OMG !!!

                                        Lever on the nut. True genius, verily.

                                        Ashley

                                        #63017
                                        IAN_I
                                        Participant
                                          @ian_i

                                          Hi AJ…

                                          Happy new year….lol

                                          You are managing to keep cool as the temperature rises…?

                                          Just catching up with the build and you are doing a great job…

                                          Best regards,

                                          Ian

                                          #63124
                                          Amy jane September
                                          Participant
                                            @amyjaneseptember49770

                                            Happy new years Ian. Thanks for your kind words.

                                            The weather here is cooled just a little, but now it is just pelting down instead! oh well…..

                                            The wind screen frame is all done, ready for the perspex.

                                            dscf6889 (640x360).jpg

                                            and the steering cable set up. Took me a little while to cotton on that I needed two drums on the wheel,one for each side to stop riding terns forming…

                                            dscf6892 (640x360).jpg

                                            This is the steering wheel shaft and bracket.

                                            dscf6887 (640x360).jpg

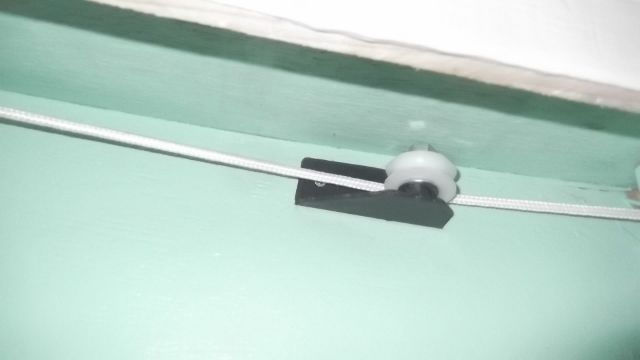
                                            and the assembled pulleys.

                                            dscf6886 (640x360).jpg

                                            …The plastic sheaves used to be my kitchen chopping board…

                                            dscf6896 (640x360).jpg

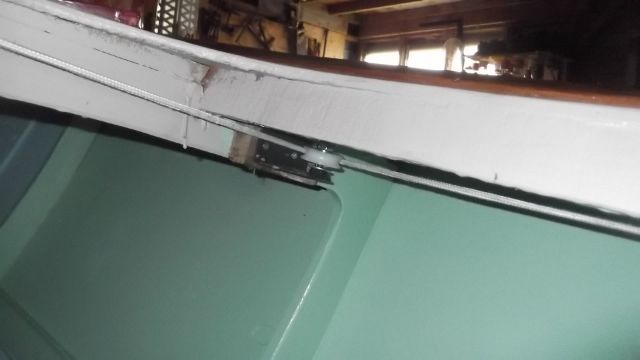
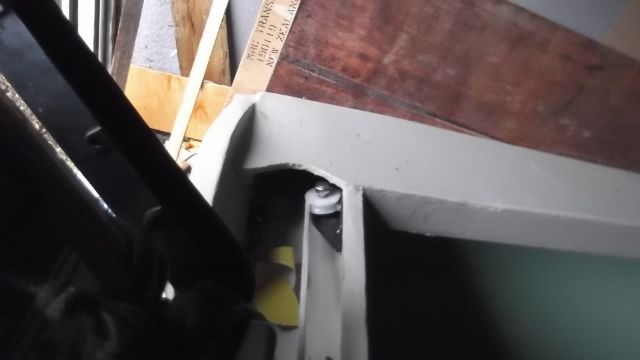
                                            Installed fore..

                                            dscf6895 (640x360).jpg

                                            …amidships…

                                            dscf6893 (640x360).jpg

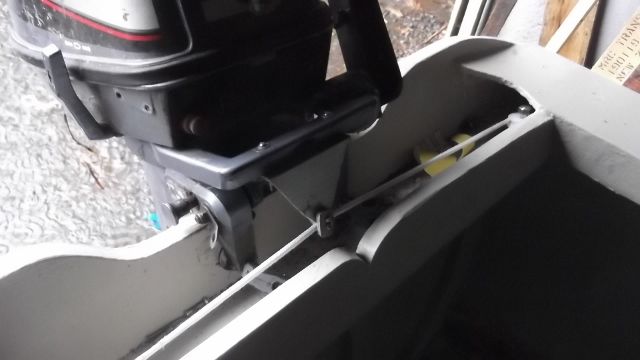
                                            And aft.

                                            I had to lower the attachment point on the motor to get a better lead.

                                            dscf6894 (640x360).jpg

                                            I need to free up the bracket on the motor some, but otherwise works good.

                                            aj

                                            #63125
                                            ashley needham
                                            Participant
                                              @ashleyneedham69188

                                              AmyJ. There`s no pleasing you is there…too hot..too rainy….

                                              ​Windscreen looks very nice, all those little artistic touches add up….the bent rear screen stay, nice rear end, styling bits on the FRONT.

                                              Great use for a plastic chopping board, after all, you can make a nice matai or Kahikatia wood board if required, but surely Barbie preparation simply involves shoving things on sticks?

                                              Wheel…could use one wider drum and have a continuous bit of string as a loop? no problem with riding turns then, possibly a strong spring mid-span to provide continuous tension, or it may be this would wear down the chopping board bits too much??

                                              Like the duck-egg/ budgie blue interior.

                                              Ashley

                                              #63556
                                              Amy jane September
                                              Participant
                                                @amyjaneseptember49770

                                                Gee it's been awhile…

                                                Hi Ashley. Of course there is no pleasing me, I'm a woman….. Thanks for your complement about my rear end, my bits up the front aint bad either… Oops.. don't mind me, it's still hot here and I'm having my afternoon tea…

                                                dscf6932.jpg

                                                Lets see. hmm… sticks burn, tent pegs are better…Tried the continuous line but couldn't get enough grip…(Didn't work on the steering either BTW)….

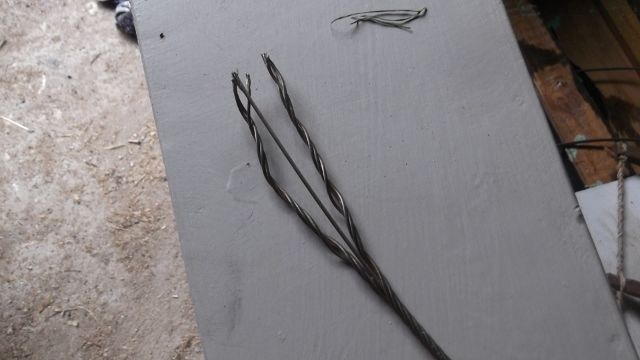
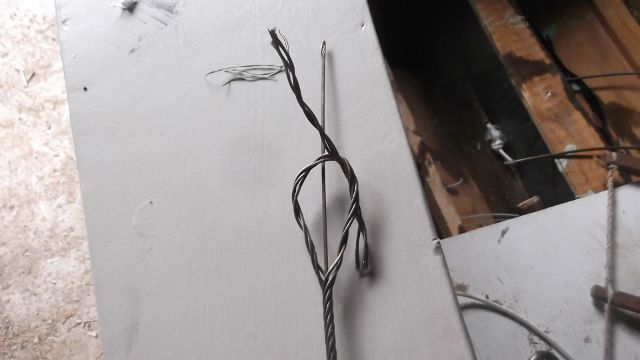
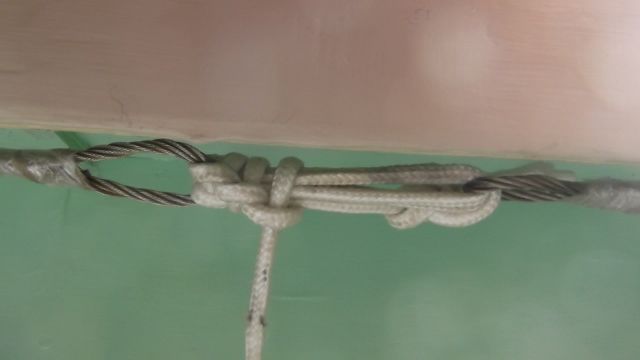
                                                Wasn't totally happy with the steering, I freed up the lower motor bearing but couldn't get to the top one with out pulling half the motor apart! A bout then I remembered the S/S yacht haliard I had kicking around, so replaced the steering lines with that. Much better. The lines in three parts. a short one attached to the outboard and around the quarter pulleys, with loops in the ends. One each side, from the wheel doen the side of the boat, also with loops in the end. The ends were lashed to gether with cord to tension the whole thing up. The loops were done with molloy hogans, (much quicker and aesy than eye splices, and plenty strong enough)

                                                dscf6900 (640x360).jpg

                                                Step one

                                                dscf6901 (640x360).jpg

                                                Step two, centre strand cut out, then wound down to the base of the eye and taped.

                                                dscf6902 (640x360).jpg

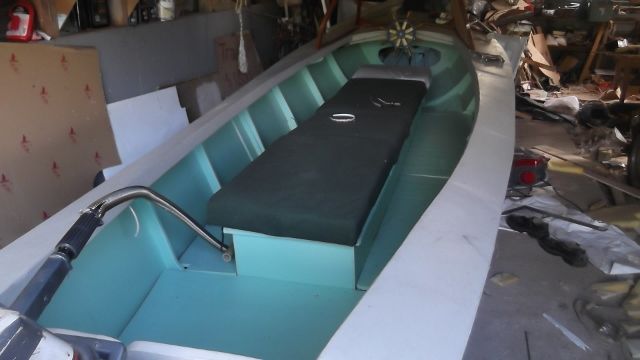
                                                The seating is in. Doing it this way wasn't my idea, But I think it has alot going for it. The crews weight stay amid ships where it belongs, plent of stoarge space, provides a good bit of floatation if the boat is swamped….

                                                dscf6916 (640x360) (640x360).jpg

                                                dscf6927 (640x360).jpg

                                                Two sections of the squabs will fold up to form back rests for two to sit tandem. Floor boards dun.

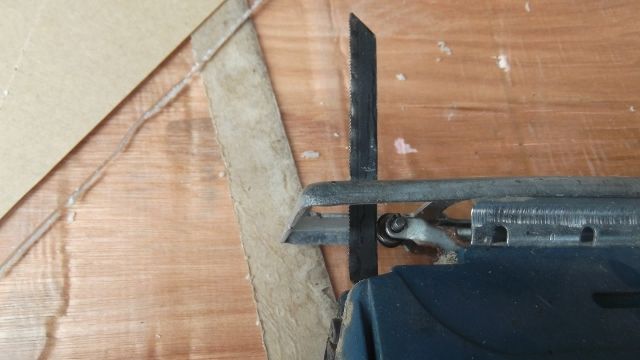
                                                I've made a stert on the winsrceam perspex. 2mm thick, finner than i would like but got plentys of its. This is my method of putting it in.. I cut it wif a hak saw blade ground down fit the jig sw.dscf6914 (640x360) (640x360).jpg

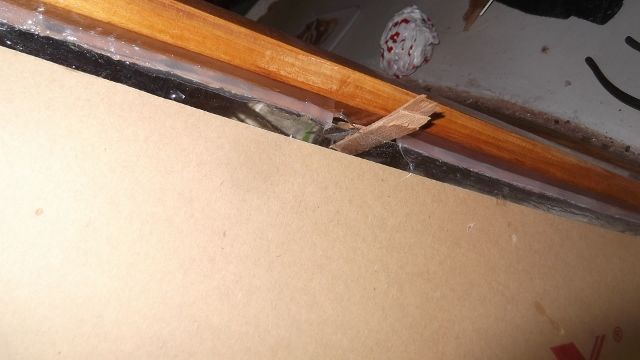
                                                bout a1/8" smaller alls round.

                                                i then wedge it in the frame with small sticks and squirt sillycon ruba al round.

                                                dscf6926 (640x360) (640x360).jpg

                                                this holds it firmly, but flexibly. {ive had it crackbyscrewingitinrebatesss{ oh I give uplookatv thepics….

                                                dscf6928.jpgdscf6930.jpg

                                                aj

                                                *&%#&hick000@%&&**%%hick….

                                                #63557
                                                ashley needham
                                                Participant
                                                  @ashleyneedham69188

                                                  Ah AmyJ. Things are looking really together now, whilst other things are falling apart…

                                                  Not keen on seating arrangement, looks like a RIB setup and lacks flexibility of space use, but THE CUSTOMER IS ALWAYS RIGHT. ​

                                                  Not sure I am understanding the glazing method….and presumably the sheathed bits are the steering wires?? or not perhaps..

                                                  Ashley (go easy on the chocolate)

                                                  #63583
                                                  Amy jane September
                                                  Participant
                                                    @amyjaneseptember49770

                                                    Hi Ashley

                                                    Compis mentis again…..

                                                    The glazing is the perspex cut 1/8" smaller all round than the frame. The sticks are just a temporary means of holding the perspex in, whilst maintaining the gap all round so the plastic dosn't touch the frame any where. The silicon fills the gap and the sticks are removed when dry. This allows the frame to flex slightly with out stressing the perspex.

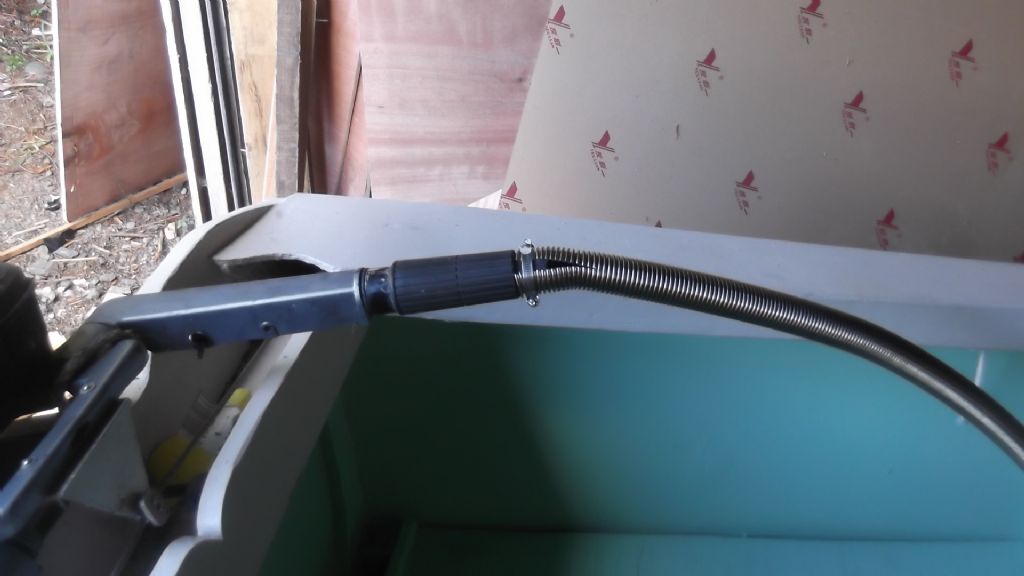
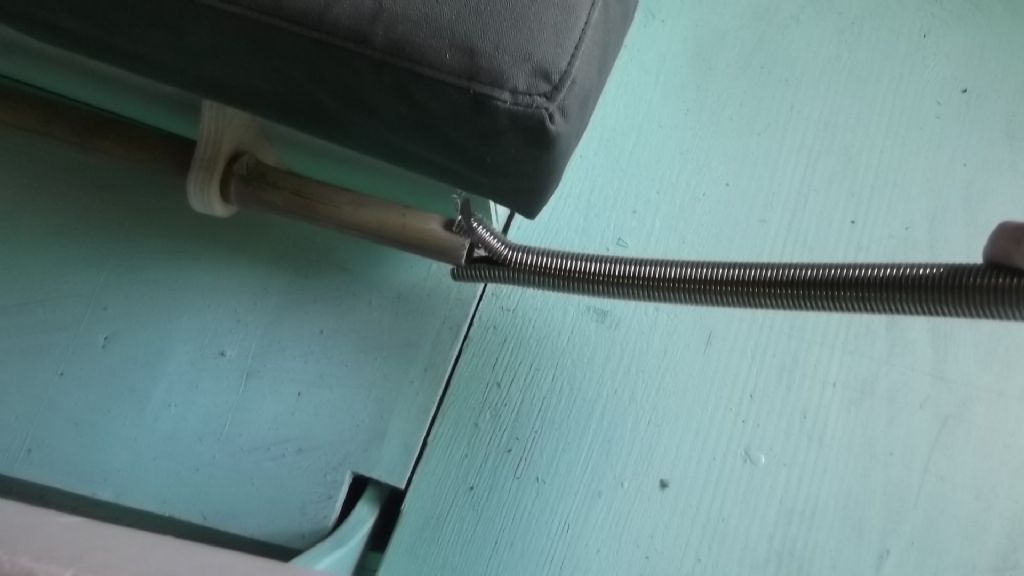
                                                    Not sure what the 'sheathed bits" are. If you mean the convuluted s/s pipe, that is the throttle control, attaches to the

                                                    long bamboo pole running down the side of the seat, ending by the helm. Twisting it works the throttle…

                                                    The chocolate is no longer an issue…..

                                                    disgust

                                                    #63592
                                                    ashley needham
                                                    Participant
                                                      @ashleyneedham69188

                                                      Yes…cos you have EATEN it all !!

                                                      .Sorry was not paying attention to the sheathed obvious throttle cable diving under the seating area.

                                                      It was the wording of the glazing method rather than the actuality of the photo I was questioning, but now the lack of chocolate has solved it.

                                                      Done lots of splicing in my time, not tried wire splicing. Always looked too tricky. Like your method, quite adequate for the strains it will be taking. Could the cord be replaced by a strong spring, say from a sunbed lounger (not yours of course) for instance. This would provide constant tension, assuming you don't need such a monster grip to actuate all the wheels and so on.

                                                      Ashley

                                                    Viewing 25 posts - 76 through 100 (of 105 total)
                                                    • Please log in to reply to this topic. Registering is free and easy using the links on the menu at the top of this page.

                                                    Code of conduct | Forum Help/FAQs

                                                    Latest Replies

                                                    Home Forums Scratch build Topics

                                                    Viewing 25 topics - 1 through 25 (of 25 total)
                                                    Viewing 25 topics - 1 through 25 (of 25 total)

                                                    View full reply list.