Fairey Huntsman 31

Advert

Fairey Huntsman 31

Home Forums Build Blogs Fairey Huntsman 31

  • This topic is empty.
Viewing 25 posts - 26 through 50 (of 126 total)
  • Author
    Posts
  • #86287
    Chris Fellows
    Participant
      @chrisfellows72943

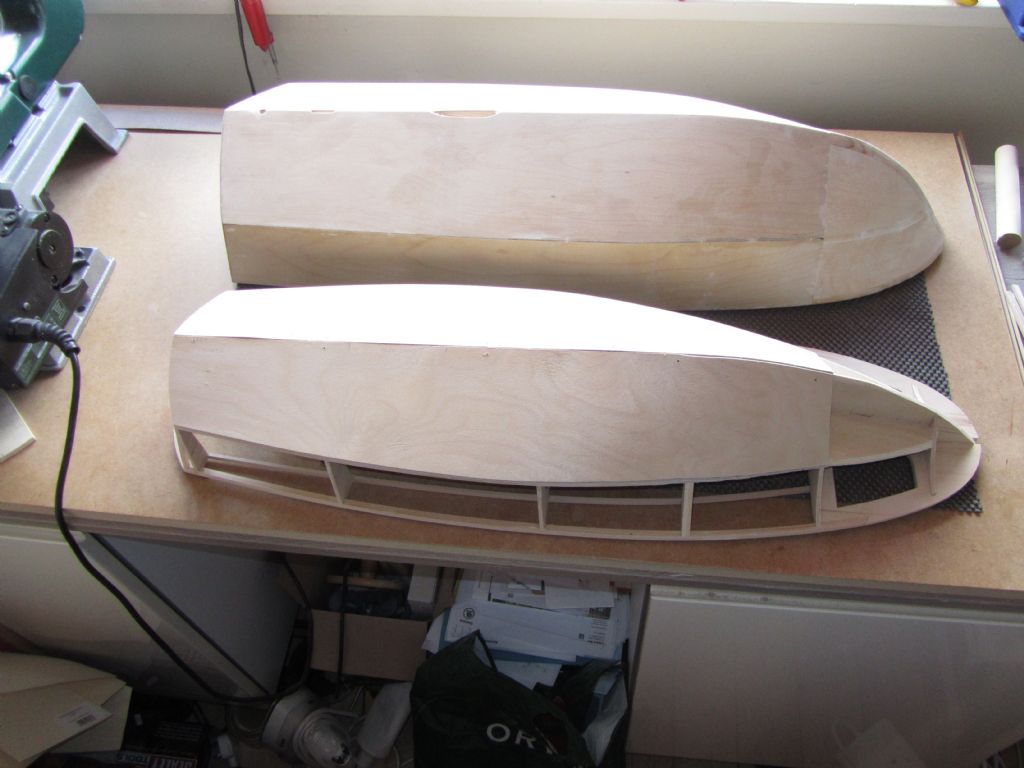
      Talking of the attractiveness of the hull here is a comparison of it alongside the Swordsman at the same scale. The Swordsman is only 2" longer but much beamier and dwarfs the svelte Huntsman.

      As Dave once related, the Swordsman is like a floating cottage!

      Chris

      swordsman & huntsman 31.jpg

      Edited By Chris Fellows on 29/03/2020 11:42:52

      Advert
      #86288
      Ray Wood 3
      Participant
        @raywood3

        Hi Chris,

        I was flagging slightly with my modelling, as I'm building a couple aeroplanes as well as the boats but once i like the look of a suitable subject I'm off again 😀

        The 1.5mmm ply is ott in my view a hangover from the Aerokits days when you need the hull strength to start an ic engine, imho 1/32" or liteply is perfectly adequate. As I guess your going to glass cloth over the ply.

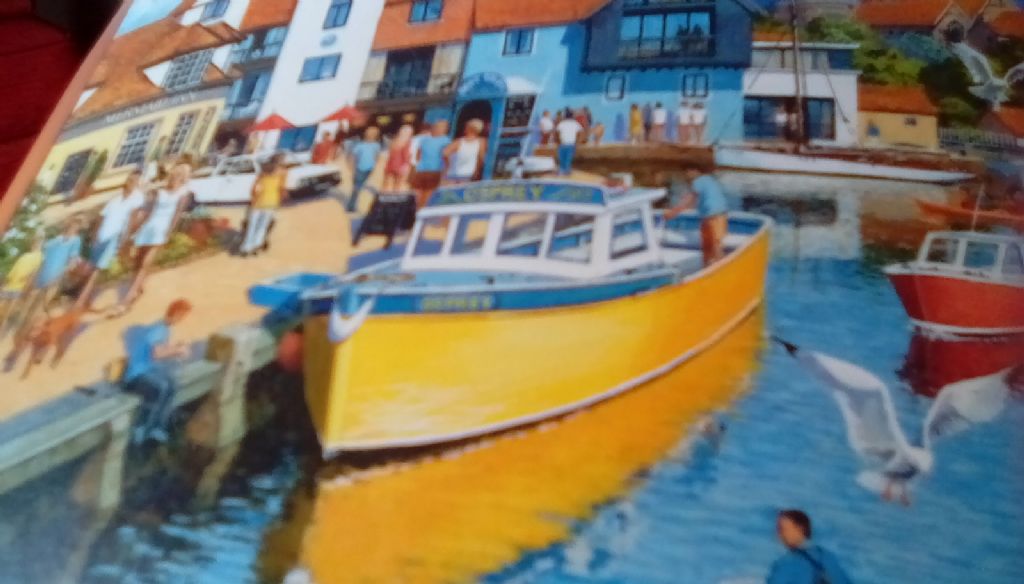
        This the trip boat from my wife's jigsaw nice and summer is scene and colours.

        Regards Rayimg_20200328_152024.jpg

        #86290
        Chris Fellows
        Participant
          @chrisfellows72943

          Hi Ray

          Yes, 1.5mm, never mind the 1.8mm I've used is a bit OTT but I do like to build my models a bit on the substantial side. At this scale weight isn't really an issue and with brushless motors power isn't a problem.

          The trip boat will make a good little model and nice bright colours. Looking forward to seeing it being built.

          Chris

          Edited By Chris Fellows on 29/03/2020 11:53:49

          #86446
          Chris Fellows
          Participant
            @chrisfellows72943

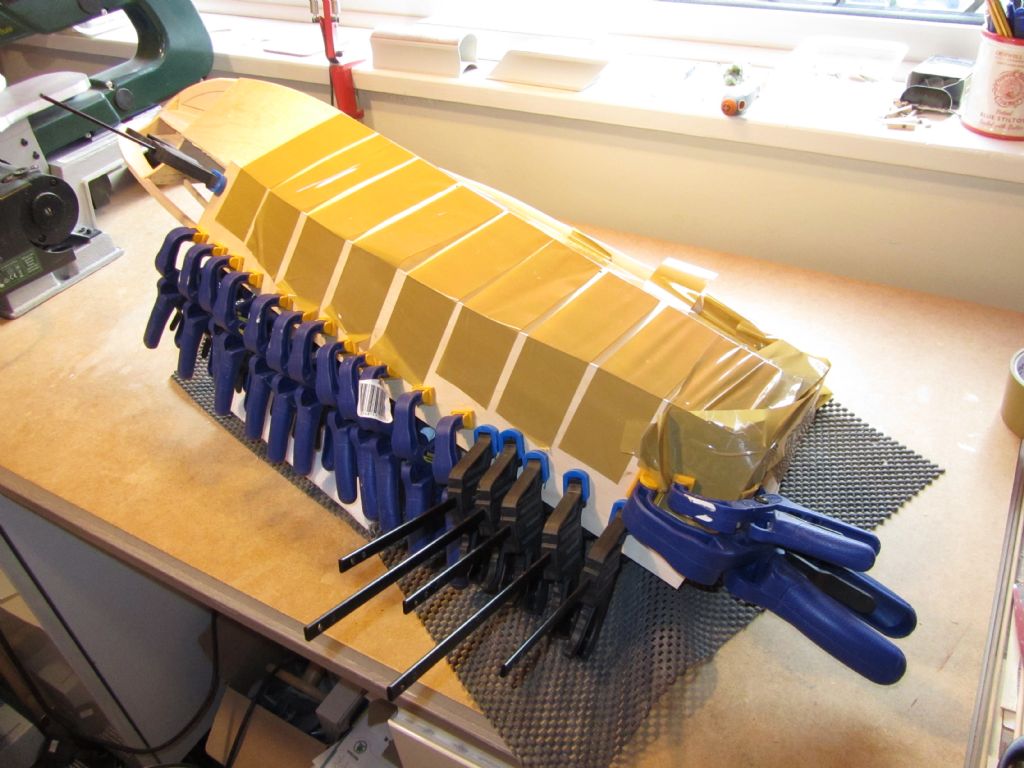
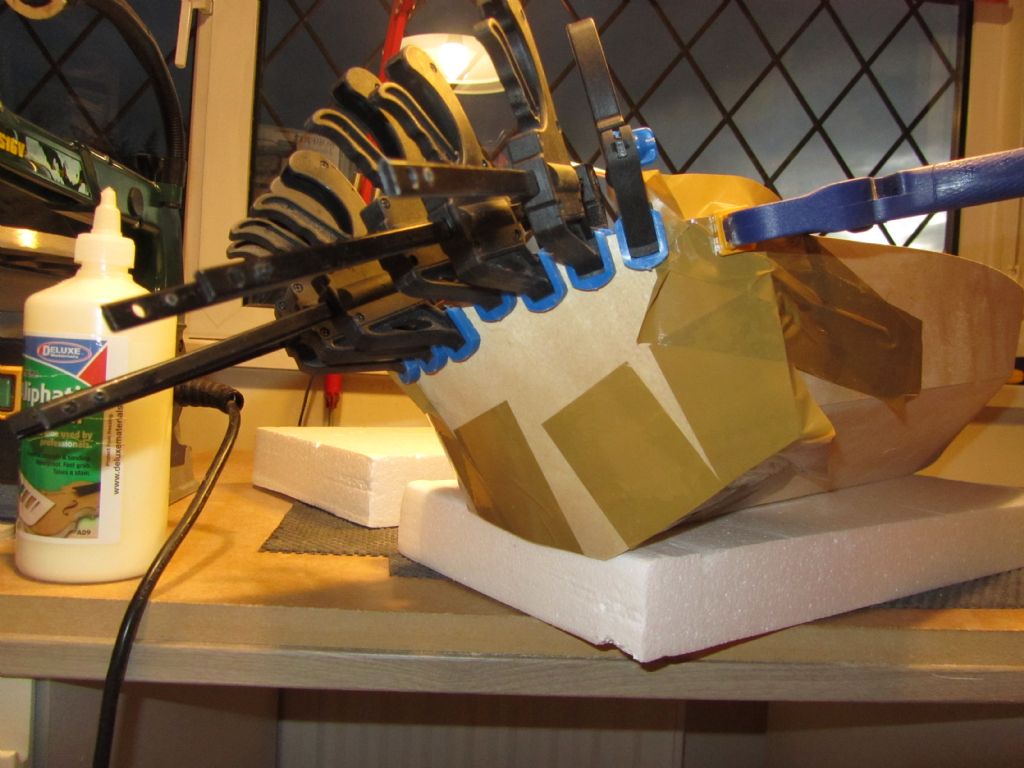
            Both side skins now fitted and held in place with copious clamps and parcel tape. It's a good job I do resin and cloth the hull as the tape does tend to pull the surface of the ply off slightly.

            2nd side fitted

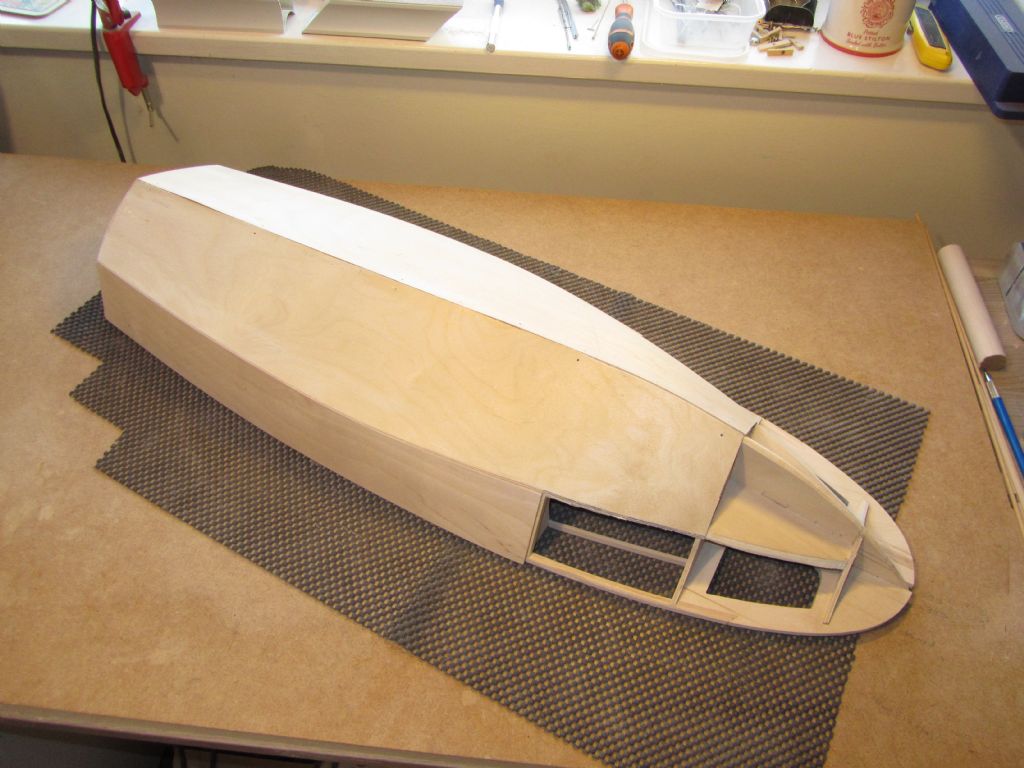
            Four skins in place now. smiley And sanded at deck, transom and abutment of side and bottom skins.

            four skins in place.jpg

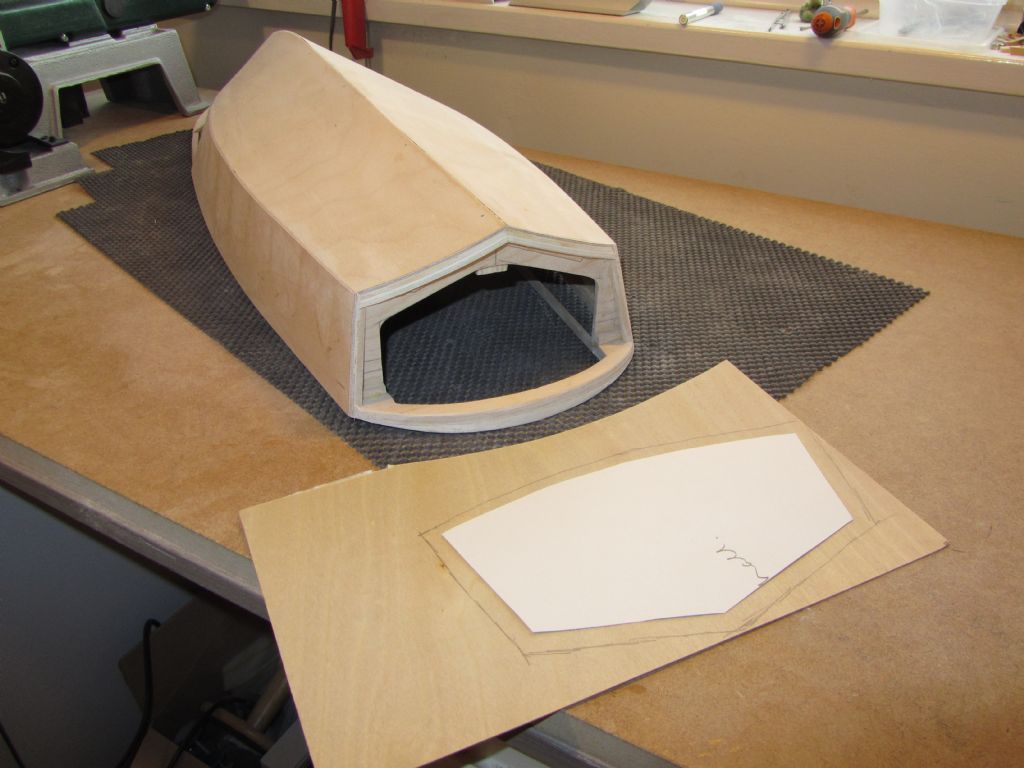
            Cardboard template drawn out and ply cut to size a little larger all round. Due to the quite tight curvature of the transom I've used thinner 1mm ply. The curve will give it strength anyway, added to by the cloth and resin.

            transom template.jpg

            And glued into place.

            transom glued1.jpg

            Chris

            #86447
            ashley needham
            Participant
              @ashleyneedham69188

              Chris. Looks very nice. I always like the”wood” stage..sometimes it seems a shame to splash the paint on.

              Yes, the Bushy crew are churning out the boats! (And not-boats). It seems like we bounce ideas around one another and everybody gets inspired. The other thing is that these things are not usually 10-year projects, but fun, relatively simple things. The audience loves the boats and I must say that more than a few builds have been built with this in mind…viz..the current Toy Story collection!

              All good fun. Take it you are a bit far away? (Not that it matters at the moment).

              Ashley

              #86448
              Ray Wood 3
              Participant
                @raywood3

                Hey Chris,

                Way to go !! Your going to end up with a boat soon 😀

                Are we on to meet up with the boys @ Bushey Park when This bad business is over ??

                Regards Ray

                #86451
                Chris Fellows
                Participant
                  @chrisfellows72943

                  Ashley – you're right about the wood stage. I've had the River Cruiser and the Huntsman 28 sitting on the dining room table in that state for a while waiting for painting weather having left it too late last year. They look nice in birch ply and mahogany.

                  You and the lads do have fun with your diverse builds.

                  Ray – it will be good to get one of my own boats finished and on the water given that I've got 4 on the go!

                  Never say never, but I'm a fair way away being in Warwick.

                  Cheers, Chris

                  #86472
                  Chris Fellows
                  Participant
                    @chrisfellows72943

                    Clamps and tape have produced nice tight joints and once removed the edges of the transom have been sanded to shape. I didn't include any central supports due to the pretty tight curve which results in a nice clear transom inside. Before starting the skins I did manage to knock the top of the transom off due to clumsiness! Soon glued back on though.

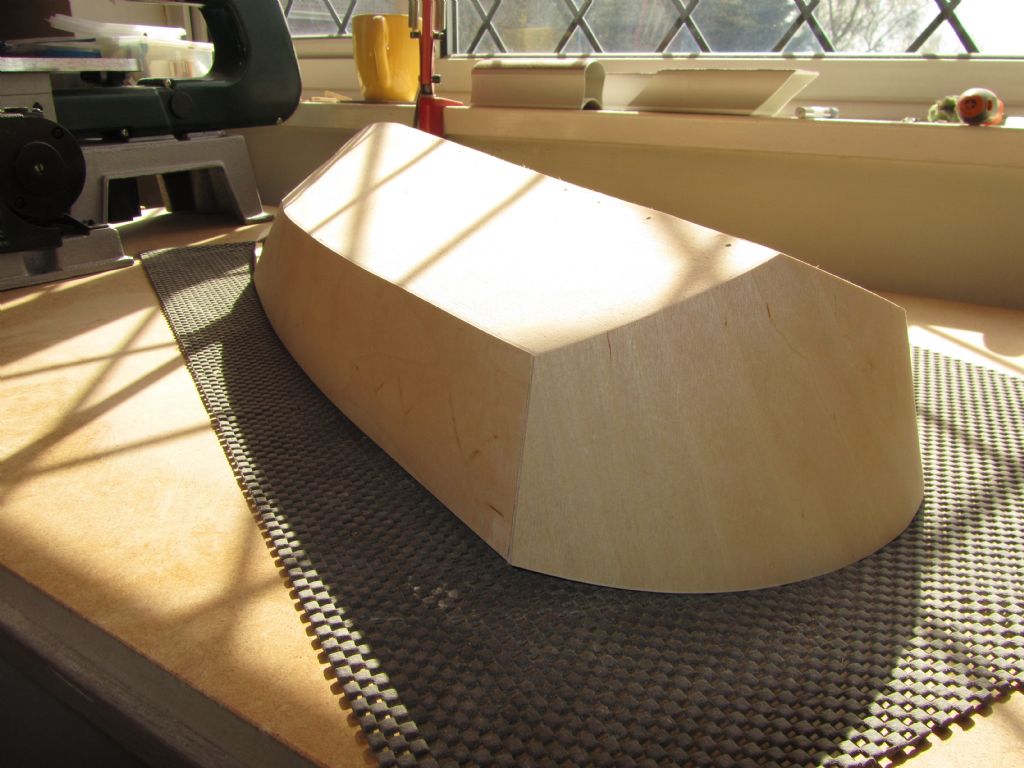
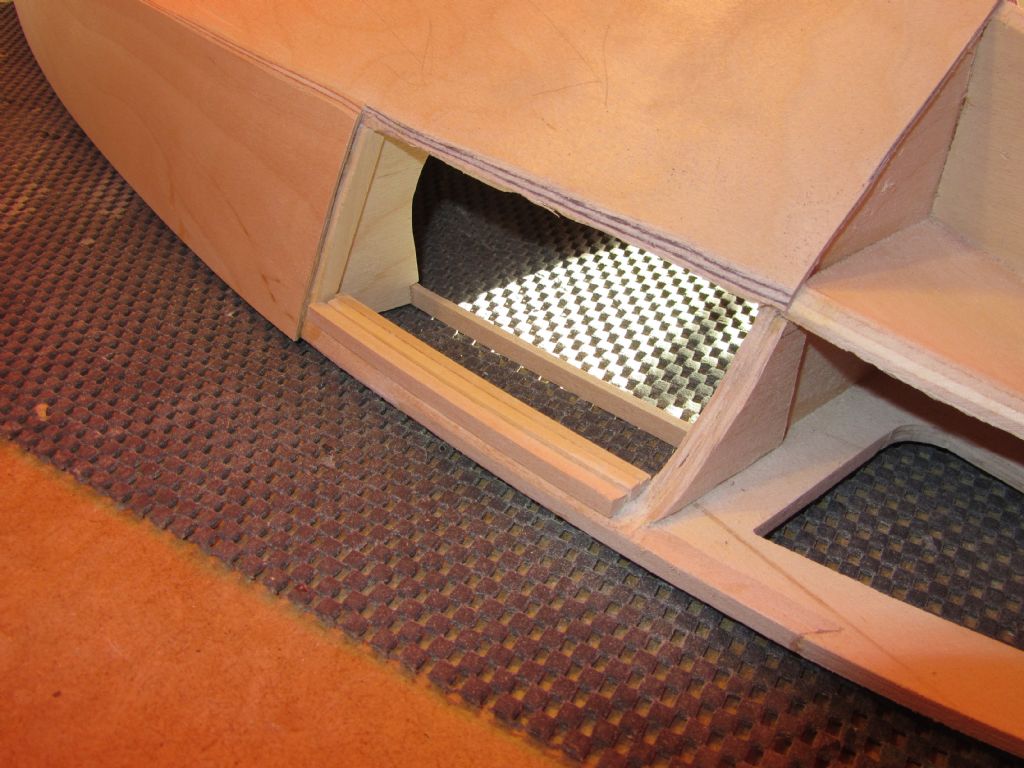
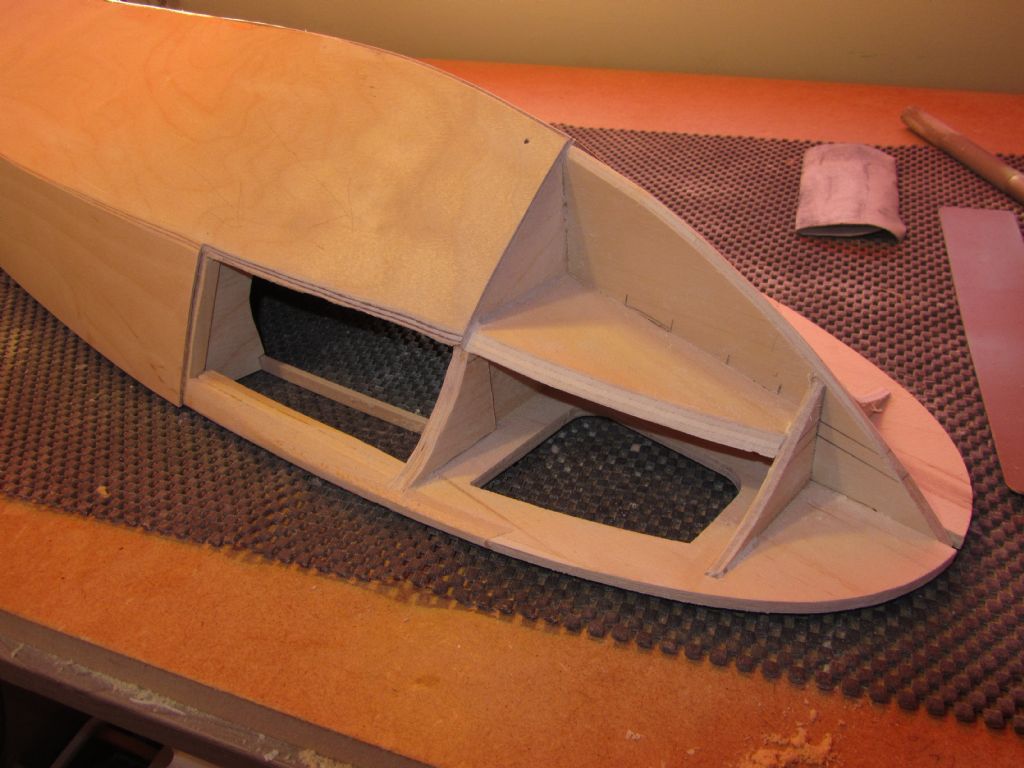
                    Next job the bow area. I usually do the hull skins as far forward as I can in one piece but with the Huntsman 31 having such a pronounced flare I've decided to do the side skins in two pieces. As well as bending the ply to the required shape the angle it makes with the deck is pretty sharp and so I think dealing with that and gluing the rest of the skin in place successfully will be pretty nigh impossible. Doing it in two pieces, if I cock it up, I will be able to remedy it more easily.

                    On smaller models the flare is sanded out of the balsa blocks but with larger models i.e. the Precedent kits at 1:11 and 1:8 some of the flare is taken care of by the ply skins with balsa blocks at the bow and it's that route I'm going to follow. Looking at the curve for the flare in Frame 2 I think I've overdone it, the radius is too small, and so I need to glue in some timber and reprofile them. The joy of scratch building!

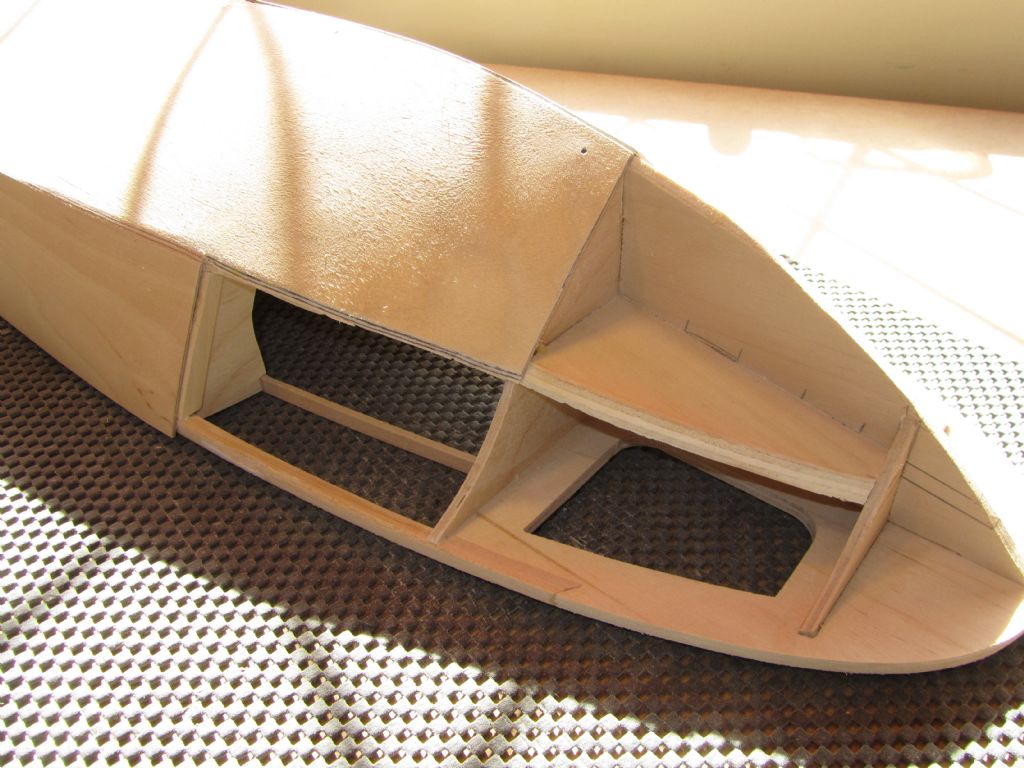
                    Whilst the deck is cambered I've made the sheer straight. Reason being is that I'm going to get the deck planking laser etched on one sheet of ply and if there is a compound curve the ply won't sit down properly. Today I bought and downloaded TurboCAD Deluxe so that I can produce the file for etching and in the future get some 3D printing done. Just got to learn how to use it now!

                    Chris

                    transom sanded.jpg

                    transom inside.jpg

                    bow flare 1.jpg

                    bow1.jpg

                    #86621
                    Chris Fellows
                    Participant
                      @chrisfellows72943

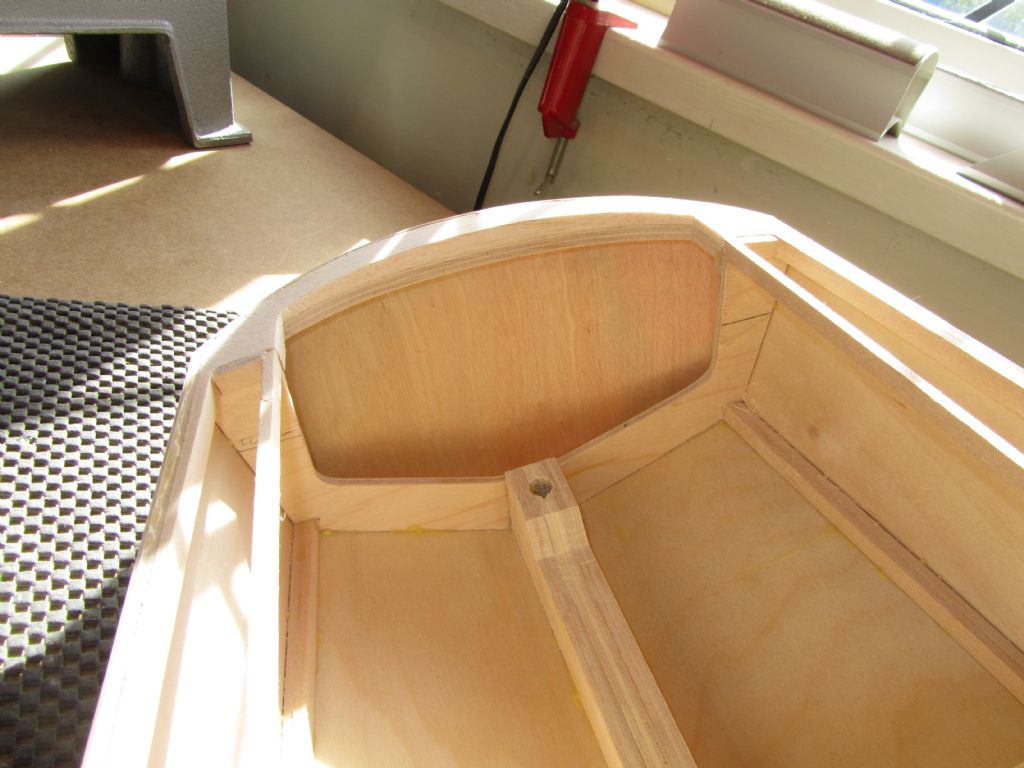
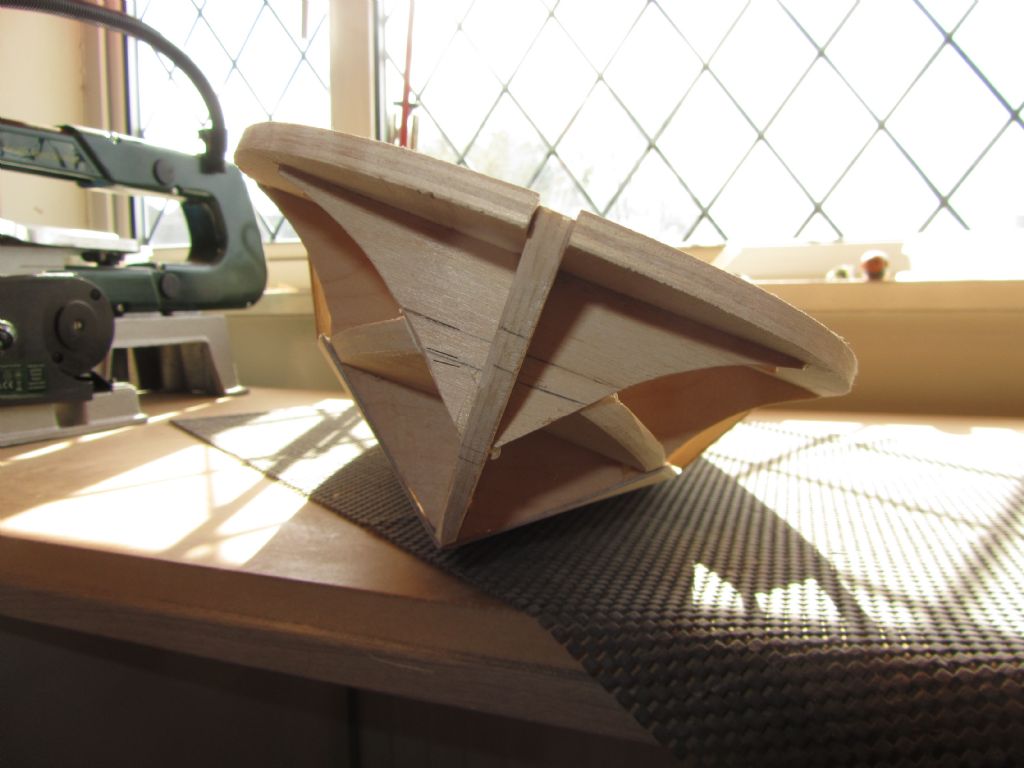
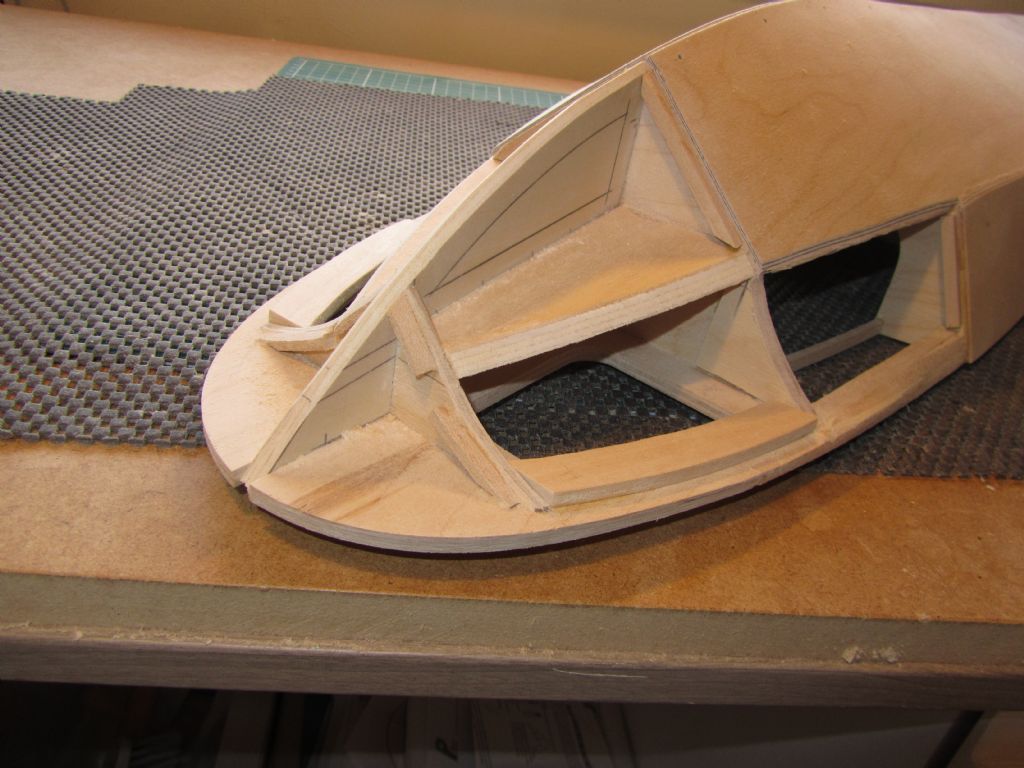
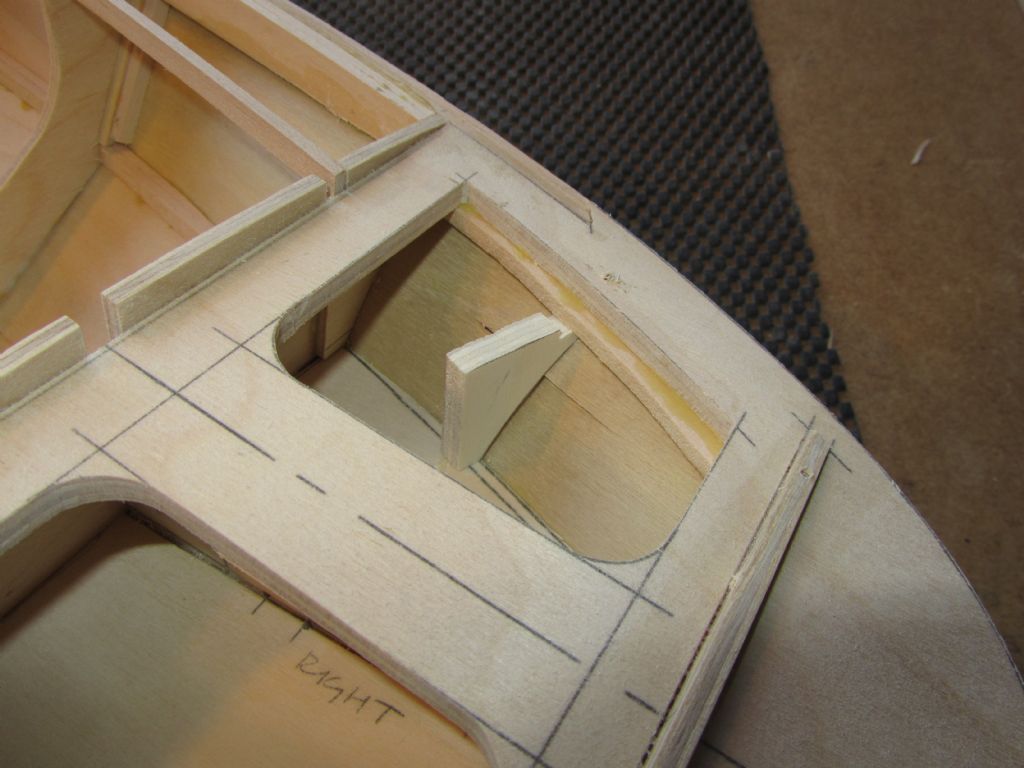
                      At Frame 2 the ply skin will meet the deck almost horizontally (I've filed the frame some more since the last photo) and given that the skin has to go from a flat plane at Frame 3 to concave at frame 2 and from the rubbing strip area to the underside of the deck in the process I've introduced some additional timbers glued to the deck stringer so that I can sand them away to the shape required and provide support for the ply skin.

                      extra timbers to stringer.jpg

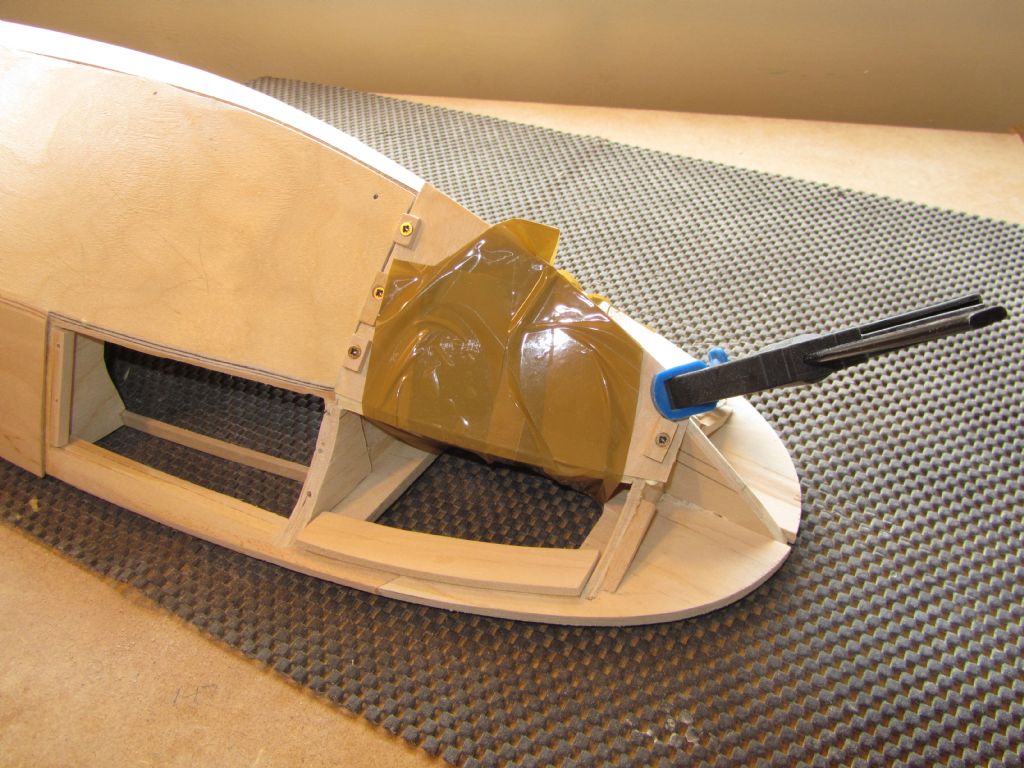
                      I've also added a ply doubler at Frame 2 so that I can temporarily screw into it whilst gluing the skin in place. The following photo shows the additional timbers shaped with my Dremel and Perma-Grit file. After tea I shall see if this is going to work, fingers crossed!

                      shaped to suit skin.jpg

                      #86715
                      Chris Fellows
                      Participant
                        @chrisfellows72943

                        For the side skins trial fits between frames 2 and 3 have been successful and I think I might be able to do between 1 and 2 as well as that will mean just a small piece of balsa at the bow which will be good.

                        However I've switched attention to finishing off the bottom skins first and have added some additional pieces of timber for that and for the side skins to provide bigger gluing areas and for temporarily screwing into. The timbers to the underside of the breast hook are yet to be shaped and are to facilitate the change of angle between the flare and where the rubbing strip will sit.

                        This hull build has been a good learning project, especially as regards the bow area. I shall be building this hull again for the aft cabin version and the additional timbers etc. will be incorporated more neatly into the design drawings rather than just introduced on the fly.

                        Chris

                        additional timbers at bow.jpg

                        first bow skin.jpg

                        #86718
                        Ray Wood 3
                        Participant
                          @raywood3

                          Hi Chris,

                          It maybe less of a struggle if you used 2 lamination of 1/32" ply for the concave sections ? Bending 1 /16" ply on that radius won't be easy 😀

                          or balsa planking ? As your going glass cloth & resin anyway, just a thought, as I have the T shirt.

                          Regards Ray

                          #86730
                          Chris Fellows
                          Participant
                            @chrisfellows72943

                            Hi Ray

                            Yes, I had a couple of attempts with 2mm ply which I scored on the back but couldn't get a nice smooth curve, ended up with a polygon!

                            Tried it with 1mm and no problem. I might just use that as the curve gives it strength and as you say I'm going to cloth and resin it anyway. Will either fill the difference in thickness at the joint or shim it out level or as you say use 2 laminations.

                            I did find some 2mm birch ply which is more flexible so I'll give that a go but as well as the difficulty with the curve it's more of a handful so will probably go with the thinner stuff.

                            Despite me not building light the hull is surprisingly light. The 6mm with doublers I used for the keel felt light when I was working it and of course there's not much to the bulkheads being a full open cockpit. Should go well!

                            Chris

                            #86774
                            Chris Fellows
                            Participant
                              @chrisfellows72943

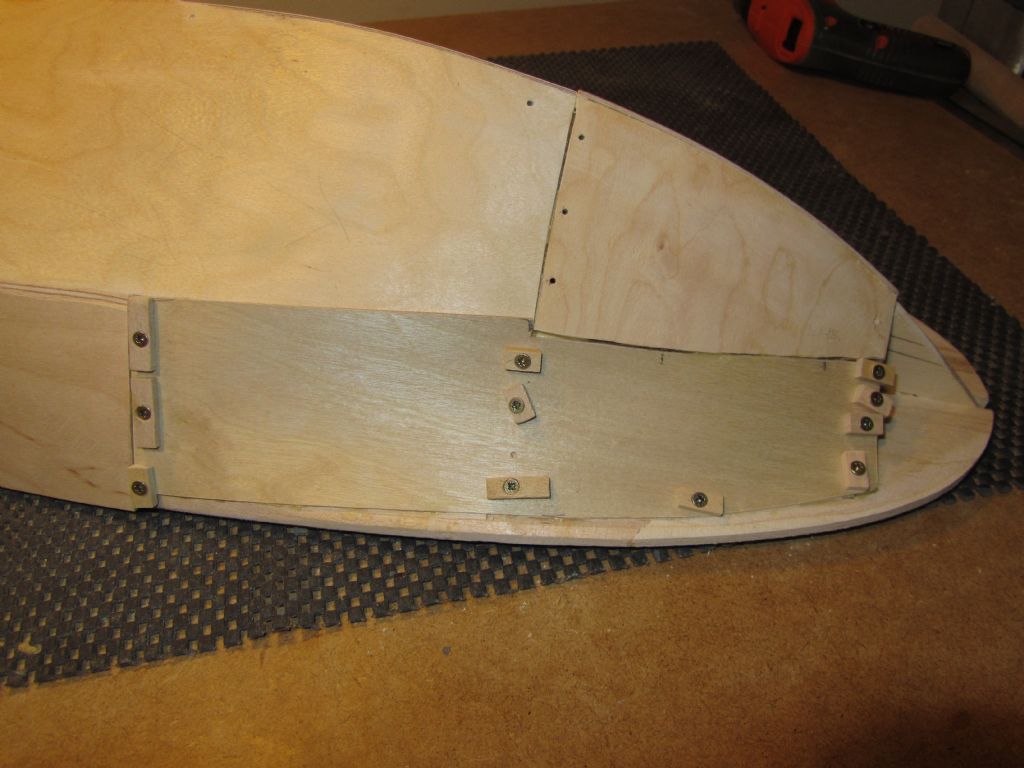
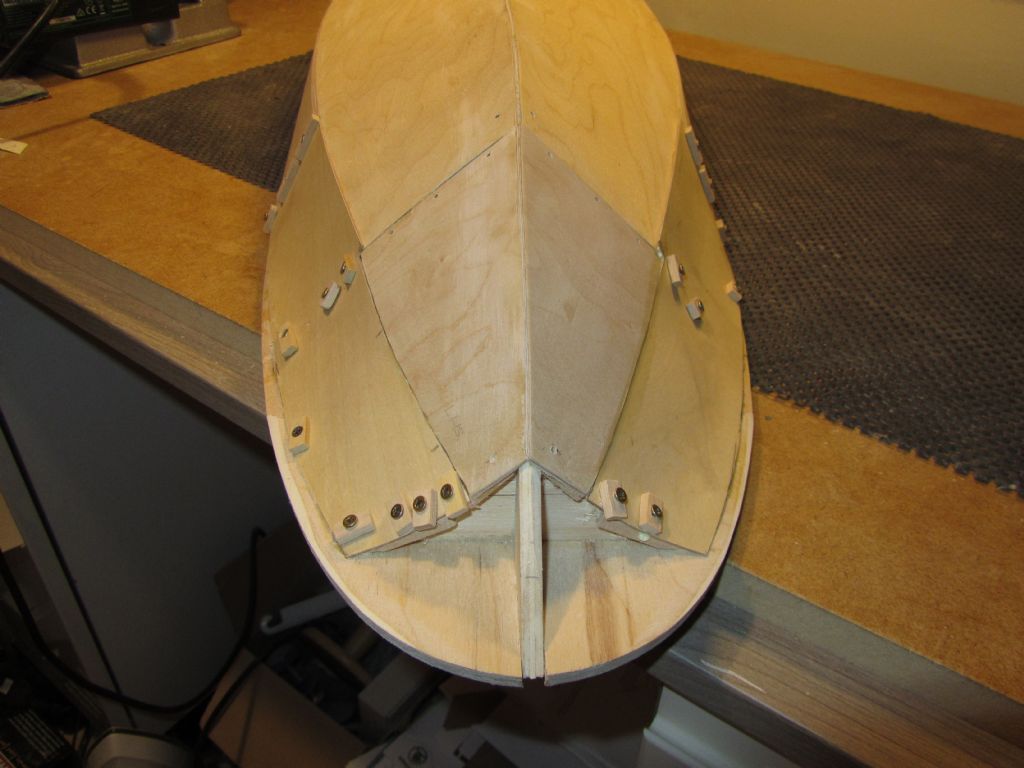
                              Fitted the other panel to finish off the bottom skin. Doing these panels I realised I could have done each bottom skin in one piece. Hey, ho. Also sanded the additional timbers fitted between Frames 1 and 2 to take the ply edges.

                              I decided to stick with the 1mm ply for finishing off the side skins. Have managed to do both sections in one piece which is great. Couldn't have done it with anything thicker as it's a compound curve and was tricky enough as it was making the template and getting it to fit.

                              It's not perfect but with some filler to fair in where the ply meets the breast hook and at the joints it shouldn't look too bad. Got a decent amount of flare anyway. That just leaves a small amount of balsa to fit at the bow.

                              I nearly chickened out and went for balsa blocks between Frames 1 and 2. I might do that next time and see how it comes out.

                              Chris

                              shaped btween frames 1 & 2.jpg

                              side skin completed.jpg

                              got some flare.jpg

                              #86783
                              Chris Fellows
                              Participant
                                @chrisfellows72943

                                Took the screws out this morning and sanded off the ply overlap. There's a slight bulge each side due to the compound curvature but not too bad. I could fix some balsa on the back and sand it out, we'll see.

                                Unfortunately back to decorating today so the filling will have to wait.

                                Chris

                                screws removed.jpg

                                Edited By Chris Fellows on 13/04/2020 10:30:53

                                #86786
                                Tim Rowe
                                Participant
                                  @timrowe83142

                                  Hi Chris

                                  Great to see the hull coming together.

                                  Ray asked you whether you were going to clad with glass and epoxy and I couldn't find an answer. I don't think there is any way you need it from a strength point of view but I would suggest you do so at least over the joins in the ply panel. You have very concentrated stresses at these joins especially if you have been working some twist and curves in the panels. I worry these will cause cracks in your filler if you don't glass them.

                                  In general and stressing this as a personal view, I hate plywood in all areas except were it is strictly necessary such as hard points, engine bearers and very few others. I much prefer Ray's methods of planking with balsa and sheathing with glass epoxy. This is quite likely due to our background in model aircraft where lightness is critical. You can only approximate compound shapes by using conic sections and in general the material is very unforgiving. Thin ply is difficult to join on its edges requiring a backing or a stringer. Besides which it rapidly blunts my tools and sandpaper blocks. Here it is horrendously expensive especially decent quality thin stuff. Nuff said!

                                  If I require stiffness in two planes I often make my own plywood with two balsa layers with a 45 degree or 90 degree orientation.

                                  Great builds, great subjects and great postings.

                                  Tim r

                                  #86807
                                  Chris Fellows
                                  Participant
                                    @chrisfellows72943

                                    Hi Tim

                                    Birch faced ply is quite a nice material but otherwise I agree with you about ply. Last time I mentioned cloth and resin was in my post on the 11th. I use it on all my builds even where birch faced ply has been used and certainly over balsa. It ties the different timbers together and provides a sound and uniform base for painting even if the strength it provides isn't necessary.

                                    I must admit I wouldn't have done what I have done with ply around the bow area if it wasn't for aliphatic resin. I had to buy some more, this time from Deluxe Materials, and it is even better than my previous bottle and grabs really quickly. Too quickly sometimes, as I found out during a DIY project. I wanted to reposition a piece of timber and after only a few minutes I had to get a chisel to It! Fantastic stuff. 

                                    One of the reasons I'm looking forward to the Fisherman 27 build is that I will be using a different build method and timber etc. Looks like I will be doing a build blog now!

                                    Thanks for your kind comments, much appreciated.

                                    Really looking forward to your Huntsman build, can't wait.

                                    Cheers, Chris

                                    Edited By Chris Fellows on 13/04/2020 19:09:56

                                    #87026
                                    Chris Fellows
                                    Participant
                                      @chrisfellows72943

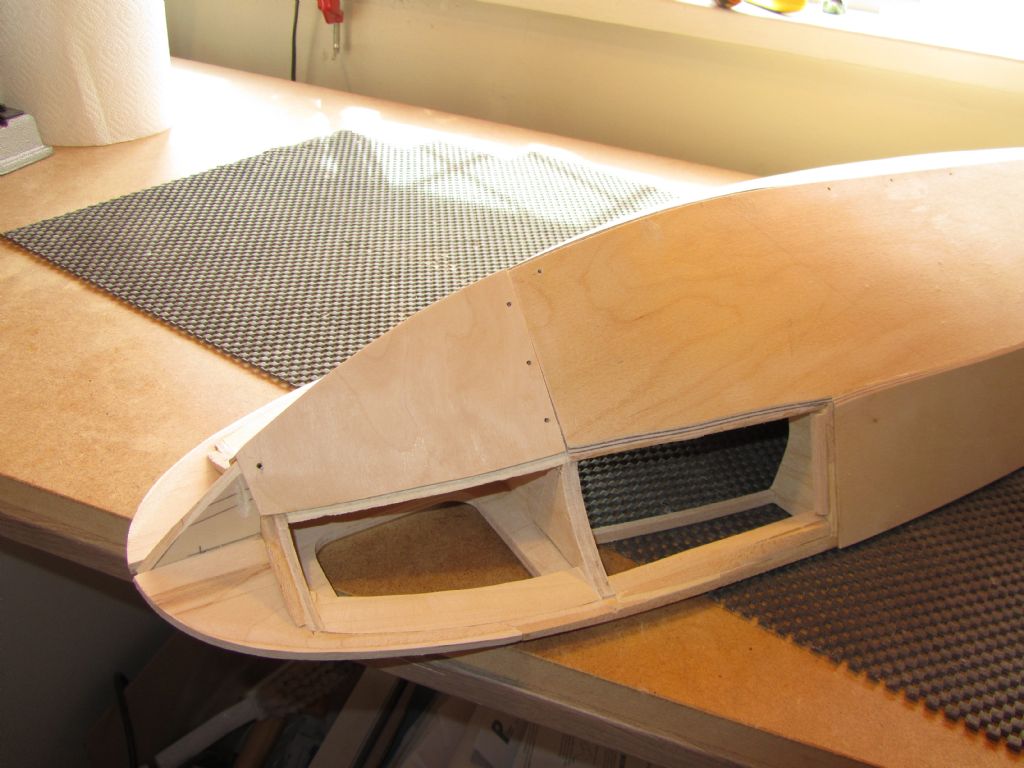
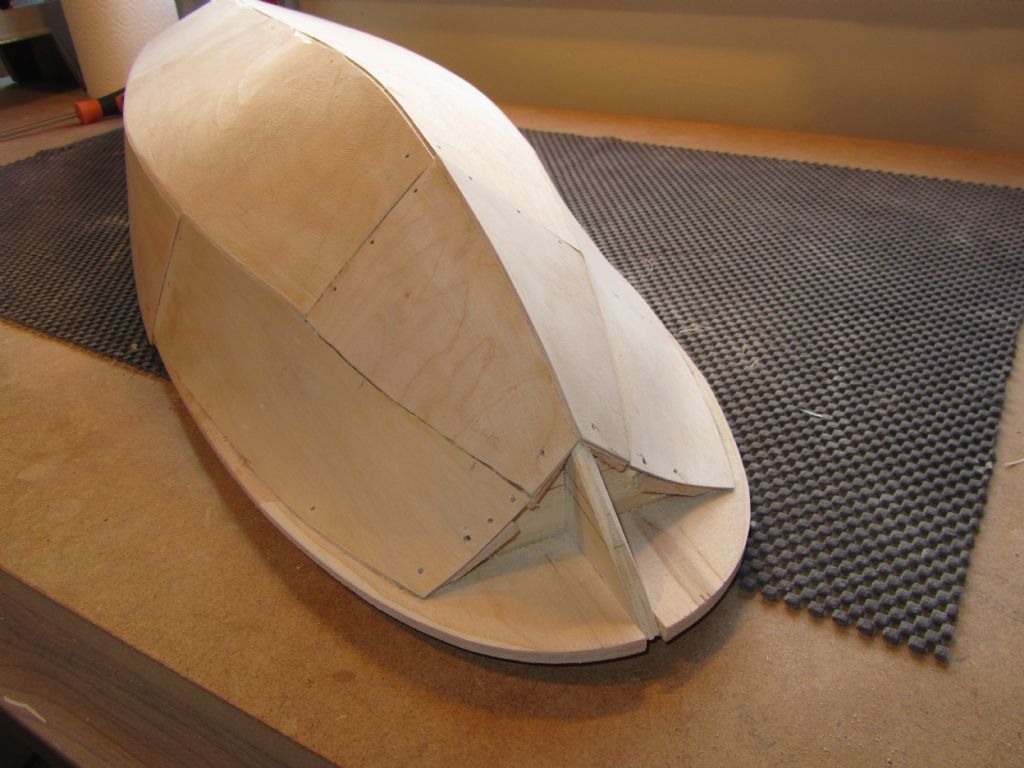
                                      As mentioned earlier there is a slight bulge in the concave curve/flare due to the compound curve and whilst it's not too bad I couldn't be having that! So out came the Stanley knife to see if a couple of slits would remedy the situation, which it did.

                                      I then made and glued in a small ply former to each side to which I could glue and pull in with screws – photo is before gluing. This worked pretty well and additional formers will be part of the design for the next build.

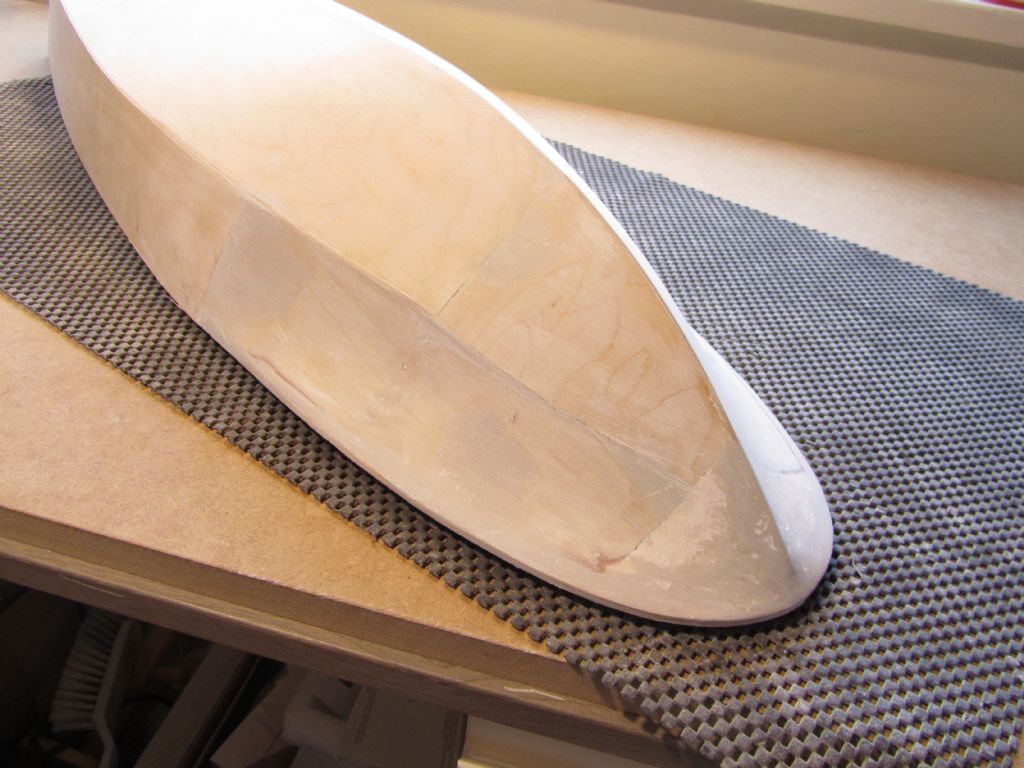
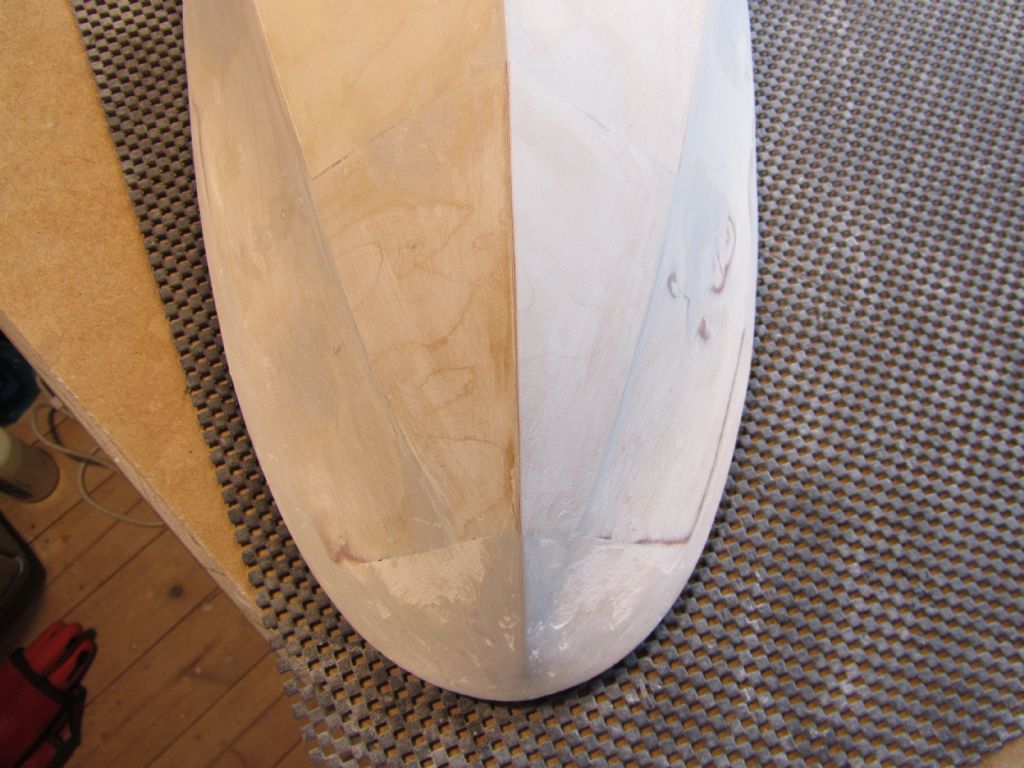
                                      Then fitted the balsa blocks to the bow and once the glue had set cut and sanded them to shape. Now ready for some P38.

                                      Chris

                                      additional former.jpg

                                      ready for filler.jpg


                                      Edited By Chris Fellows on 20/04/2020 19:01:26

                                      #87027
                                      Ray Wood 3
                                      Participant
                                        @raywood3

                                        Hi Chris,

                                        I think solving the awkward shapes are all part of the fun of model building, so boring if it all goes well 😃

                                        But P38 will solve all your bow issues !!

                                        Regards Ray

                                        Edited By Ray Wood 2 on 20/04/2020 21:31:32

                                        #87308
                                        Chris Fellows
                                        Participant
                                          @chrisfellows72943

                                          Hi Ray

                                          Yes, part of the fun even if it doesn't feel like it sometimes! I've learnt not to tackle things like this in the evening when you're starting to feel tired and want a quick fix – not that kind of fix! Best to leave it to the morning and have all day to think about it and have the time to make the necessary parts and remake if required.

                                          At last I've finished the flippin' bedroom! Not going to do the landing for a couple of weeks so that I can do other things with No. 1 being model boat building!

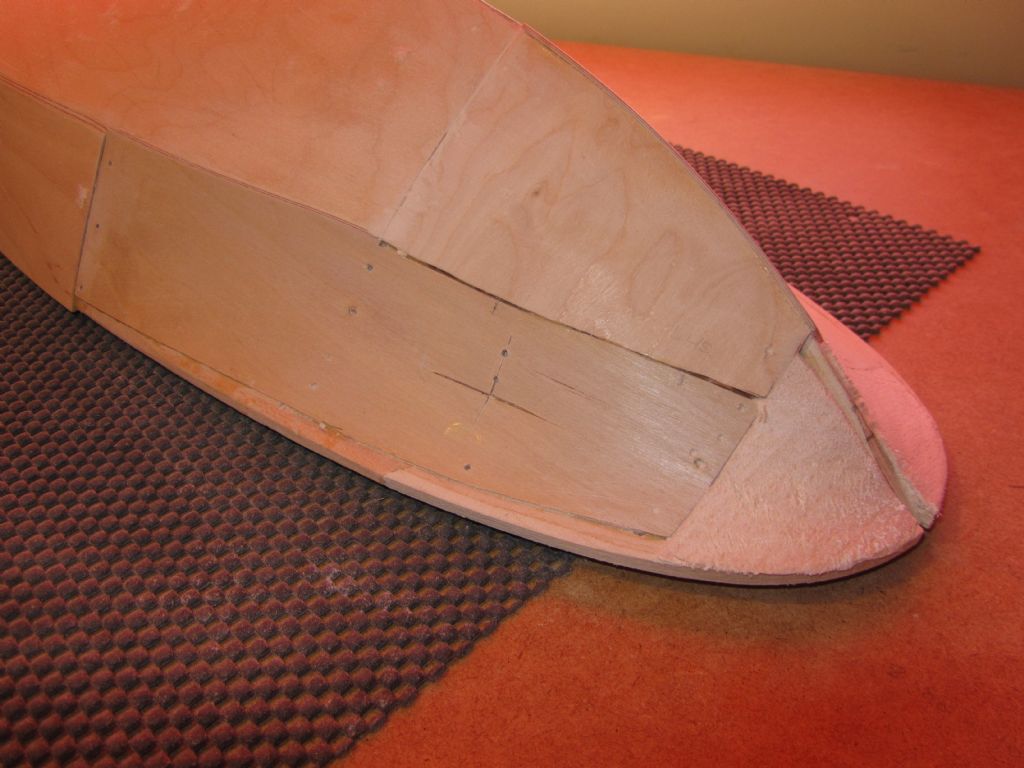
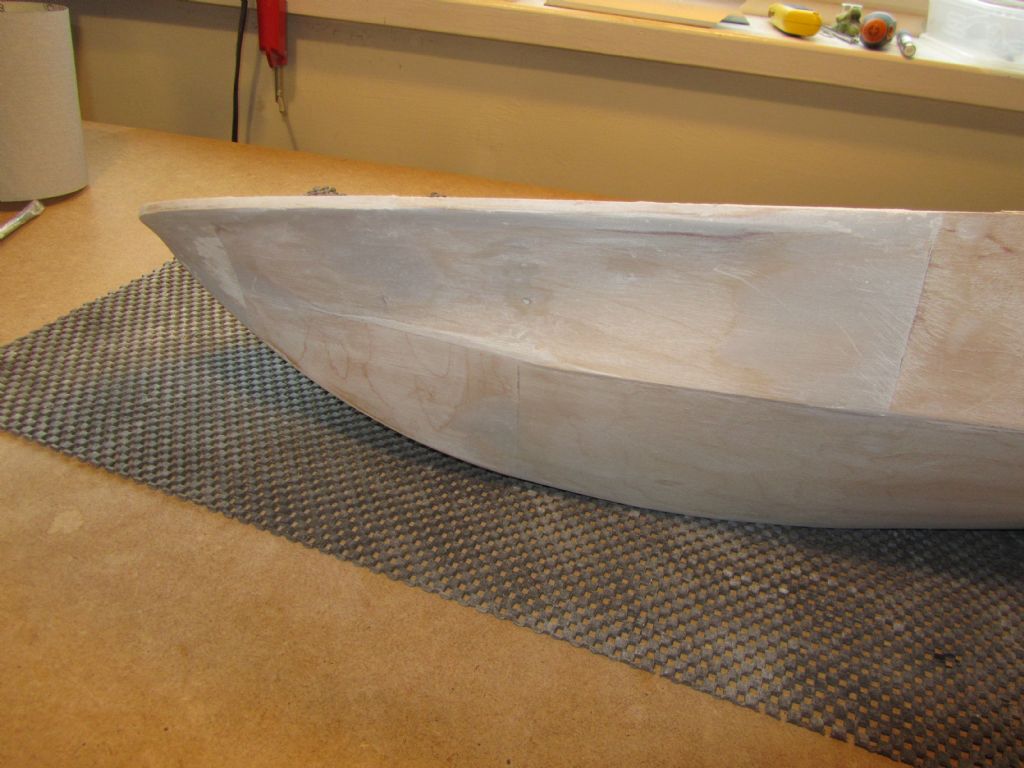
                                          So yesterday it was out with the P38, which I didn't need too much of, and with the weather still being nice did the preliminary sanding outside. Today I finished off that sanding and applied a bit more P38 where required and after leaving for the requisite time sanded it again and it's pretty much there now. Just needs some minor surface filling where the balsa is showing and looks like it's got chicken pox and after a final fine sanding all over the hull it will be ready for cloth and Eze-Kote. It looks better in the "flesh"!

                                          Well not quite on two counts. Firstly, for some reason I didn't cut the slot for the P bracket when I was doing that for the prop shaft when assembling the keel (no problem doing now of course) and secondly, as Old Mother Hubbard found out, the cupboard is bare, well as far as lightweight cloth goes anyway! So today I had to order a couple of packs from Deluxe Materials.

                                          A couple of weeks ago I was pondering on whether to make both superstructures for use on the one hull, i.e. the large cockpit of the Sport version and the aft cabin version. Still pondering but it will be nice to have both complete boats. And a couple of days ago when woken early by the dawn chorus and trying to get back to sleep I was musing over whether I should be even building the Sport and not the aft cabin version. Reason being that I've got the Spearfish kit to build and as the hull is based on the Huntsman 31 hull and it has the full cockpit I will end up with two very similar boats. Added to which I've already got other full cockpit boats with the Huntress and Huntsman 28. Decisions, decisions!

                                          Chris
                                          bow2.jpg

                                          bow4.jpg

                                          bow5.jpg

                                          #87311
                                          Ray Wood 3
                                          Participant
                                            @raywood3

                                            Hi Chris,

                                            It sounds like your going with the rear cabin version of the 31 😀

                                            Looking good , spray rails next, I use obeche it's great stuff & planes triangular easily on a shooting block, which saves your finger tips 😯

                                            Regards Ray

                                            #87312
                                            Eddie Lancaster
                                            Participant
                                              @eddielancaster

                                              Hi. Chris, that’s a mean looking bow section it’s looking good as Ray says.

                                              Regards.

                                              Eddie.

                                              #87313
                                              Chris Fellows
                                              Participant
                                                @chrisfellows72943

                                                Thanks chaps.

                                                As for spray rails I chickened out on the Huntsman 28 and used square section rounded off as per DM's suggestion which looks good. You'll have to post some pictures up showing how you do it Ray. Might be easy for you! I've had thoughts again on styrene but would prefer to do it all in timber.

                                                I could always start another hull which was going to be the original plan anyway!

                                                When are you going to start on yours Eddie?

                                                Chris

                                                #87315
                                                Chris Fellows
                                                Participant
                                                  @chrisfellows72943

                                                  I thought I'd get the Spearfish out which has made the decision easy. The model is semi-scale, which isn't the problem, as I was going to build the deck and superstructure in timber as per the early Spearfish's anyway but it's bigger than I remember and at 36 inches for a 30 foot boat it's too far away from the 1:12 that I'm building my other models at. It's even bigger than my Swordsman 33.

                                                  So that's going to the back of the build queue, if ever!

                                                  So it's back to Plan B now which is the Sport with Plan A, which was the aft cabin version originally, at a later date!

                                                  Chris

                                                  #87320
                                                  harry smith 1
                                                  Participant
                                                    @harrysmith1

                                                    Hi Chris

                                                    Is the Spearfish the fibreglass hull one ???

                                                    If you are not going to build it keep me in mind , if you sell it.

                                                    Old mate, old buddy

                                                    Harry Smith

                                                    #87329
                                                    Eddie Lancaster
                                                    Participant
                                                      @eddielancaster

                                                      Hi.Chris, I need to get done all that I can on Zulu before I start on the Huntsman, There are hatches, duck board’s lights and painting to do yet, maybe another weeks work. You will be the first to know when I start the build.

                                                      Regards.

                                                      Eddie.

                                                    Viewing 25 posts - 26 through 50 (of 126 total)
                                                    • Please log in to reply to this topic. Registering is free and easy using the links on the menu at the top of this page.

                                                    Code of conduct | Forum Help/FAQs

                                                    Advert

                                                    Latest Replies

                                                    Home Forums Build Blogs Topics

                                                    Viewing 25 topics - 1 through 25 (of 25 total)
                                                    Viewing 25 topics - 1 through 25 (of 25 total)

                                                    View full reply list.

                                                    Advert