Fairey Huntsman 28

Advert

Fairey Huntsman 28

Home Forums Build Blogs Fairey Huntsman 28

  • This topic is empty.
Viewing 25 posts - 26 through 50 (of 193 total)
  • Author
    Posts
  • #79797
    Chris Fellows
    Participant
      @chrisfellows72943

      Blimey, you're really cracking on there Brian, I'm feeling really bad! It's looking good – is that planking the etched stuff or have you drawn the lines on? The jury's out on whether I do "planking" or not on my first builds.

      As per my previous post I wasn't expecting to have done much, which has been the case, and not helped by being without heating and hot water for a week.

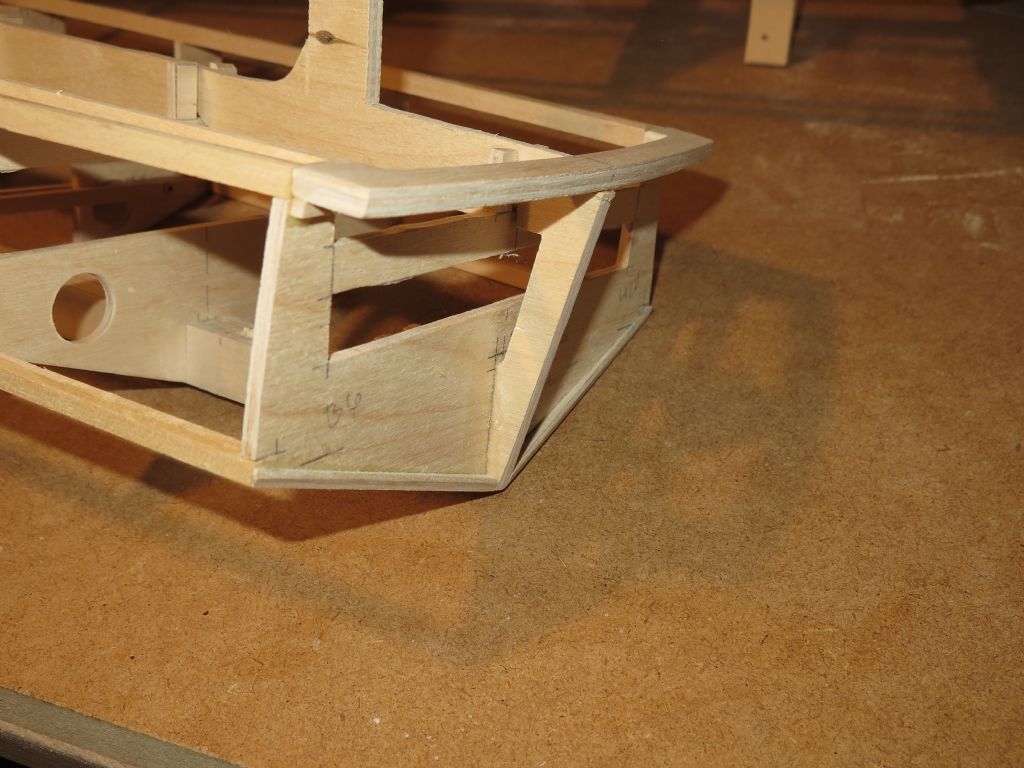
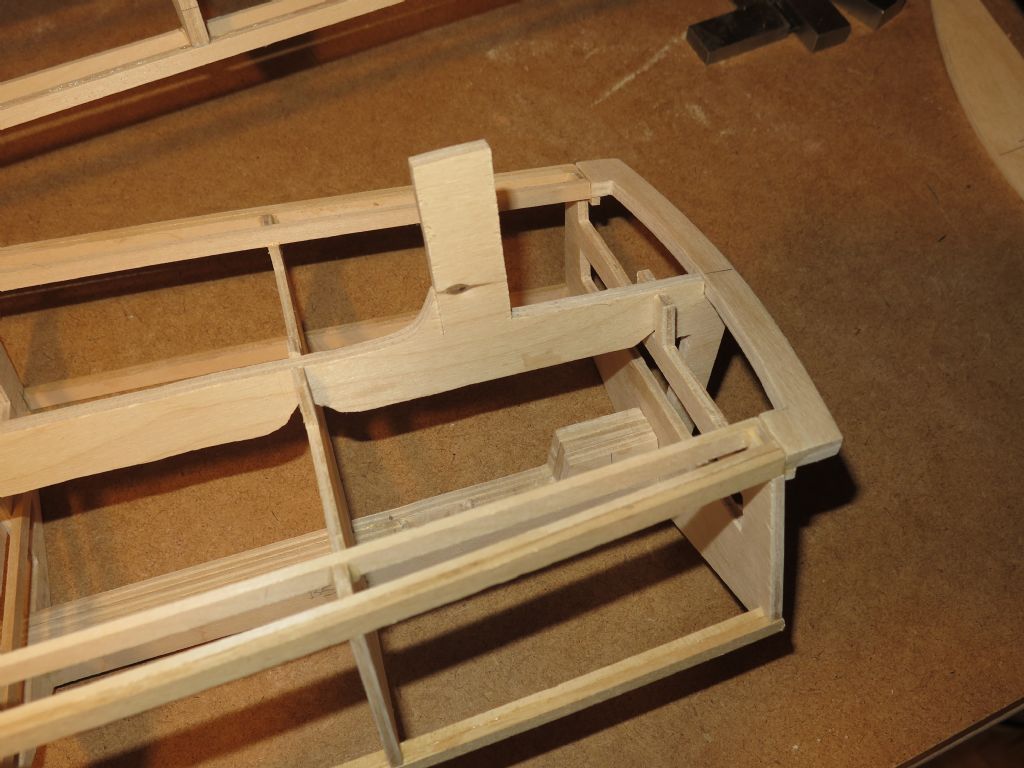
      I have been doing a bit of fettling on the Swordsman of work I'd done and wasn't happy with but as regards the Huntsman all I've done is add some extension pieces to the last frame to form the shape of the transom. All I need to do then is add the engine mounting base and it will be ready for skinning.

      Now that the new shed, boiler and holidays etc. are done and dusted and we're going into winter I shall be able to step the pace back up again (not that it's ever been that high!) and start making some real progress again.

      Chris

      Advert
      #79798
      Chris Fellows
      Participant
        @chrisfellows72943

        I hadn't realised, until just looking back through your photos, just how far back you have your motors! As you say it helps with CoG and it's a big model so hopefully your prop shaft angles aren't too great. Also with twin props and being close to the side of the boat I hope that you don't have problems with cavitation especially when the boat banks into a turn.

        My Swordsman is 33" and the Huntsman 28", so somewhat smaller so have gone with single motor installations which sit within the cabin areas so no height problems.

        Chris

        #79817
        Brian White 3
        Participant
          @brianwhite3

          Hi Chris,

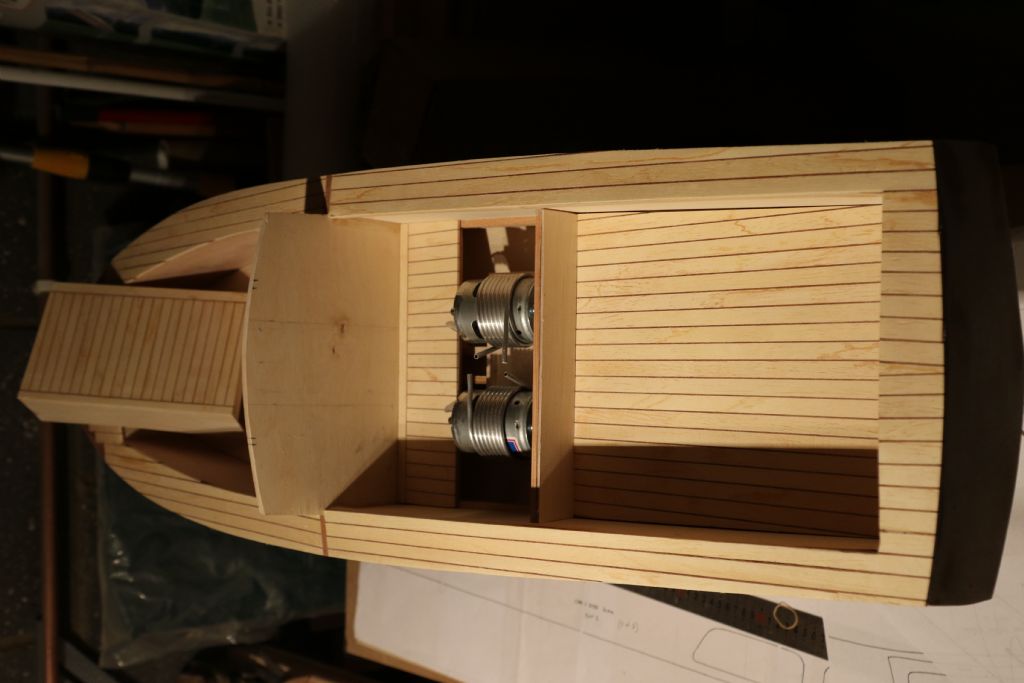
          The decks are planked with 10mm Obechi strip with 1mm Sapele strip spacers. This scales up to 3inch wide planking. If you remember, I was going to try to bend the strips in a steamer to contour the hull, but this was a total failure and resorted to keeping the planks straight.

          Good points raised in your last post Chris. I must admit I was unsure where to locate the motors athwart ships, so plumped for midway between the keel and side skin after seeing pictures of other twin motor installations. I must admit, with the narrowing of the hull this will place the props a little further out. I've kept the prop shaft angle the same as the original design, approximately 15 degrees, just moved them along the same shaft angle. As I've not penetrated the hull and fitted the shafts yet, I could bring the motors further inboard. The screws I purchased are three blade 45mm diameter. Any suggestions as to how close these could be? Advice would be very appreciated. I will need to install the cooling scoops just outside and along side the props, so moving the screws in a bit will give me more room to play with.

          Work on the H28 has slowed down recently as it's been a bit cold in the garage come mancave!

          Regards, Brian

          #79819
          Chris Fellows
          Participant
            @chrisfellows72943

            Hi Brian

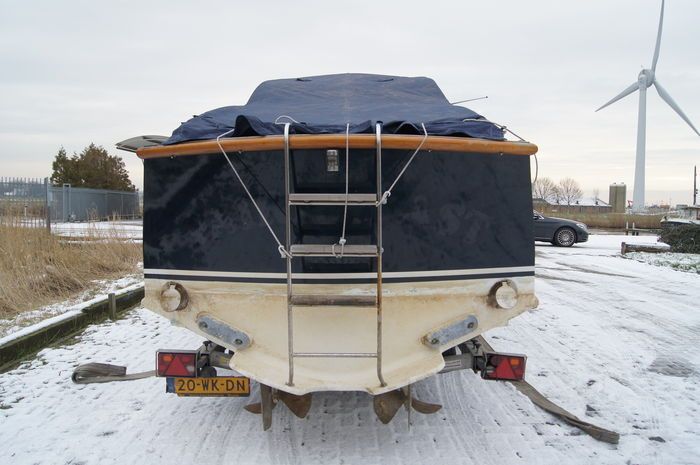
            Photo attached of the real thing which shows that they are very close to the keel, closer than the mid-point between the sides and keel.

            The Huntsman 28 is the narrowest of the twin screw Faireys and the installation was tight in the full sized craft!

            45mm are fine but have to say that I would have gone down the brushless route as the motors would be smaller, lighter and much more powerful.

            Chris

            huntsman 28 1.jpg

            #79861
            Brian White 3
            Participant
              @brianwhite3

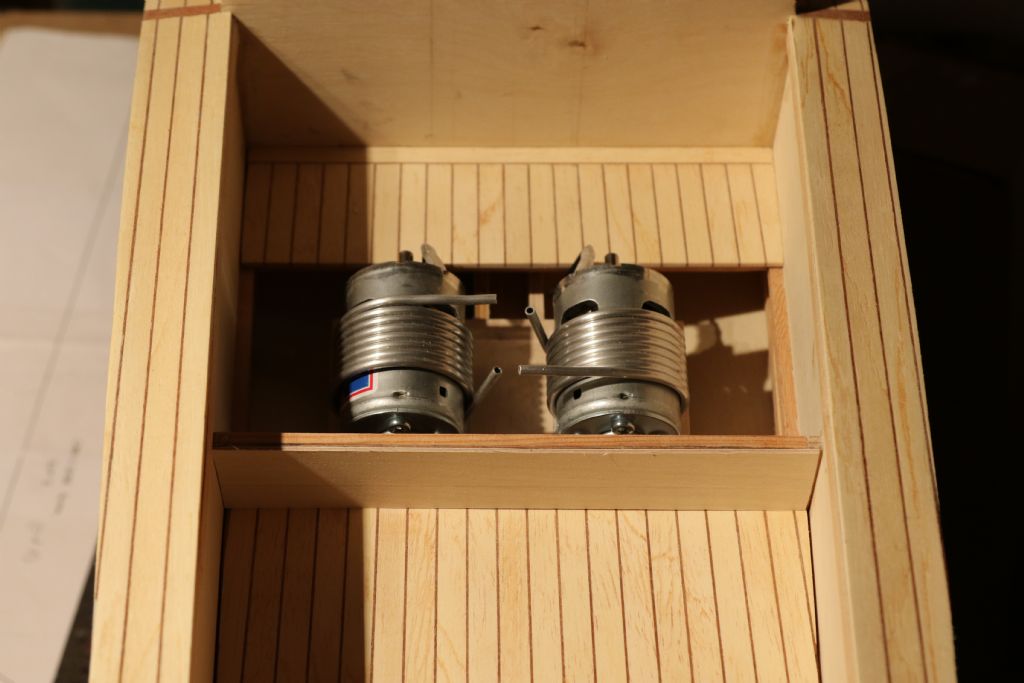
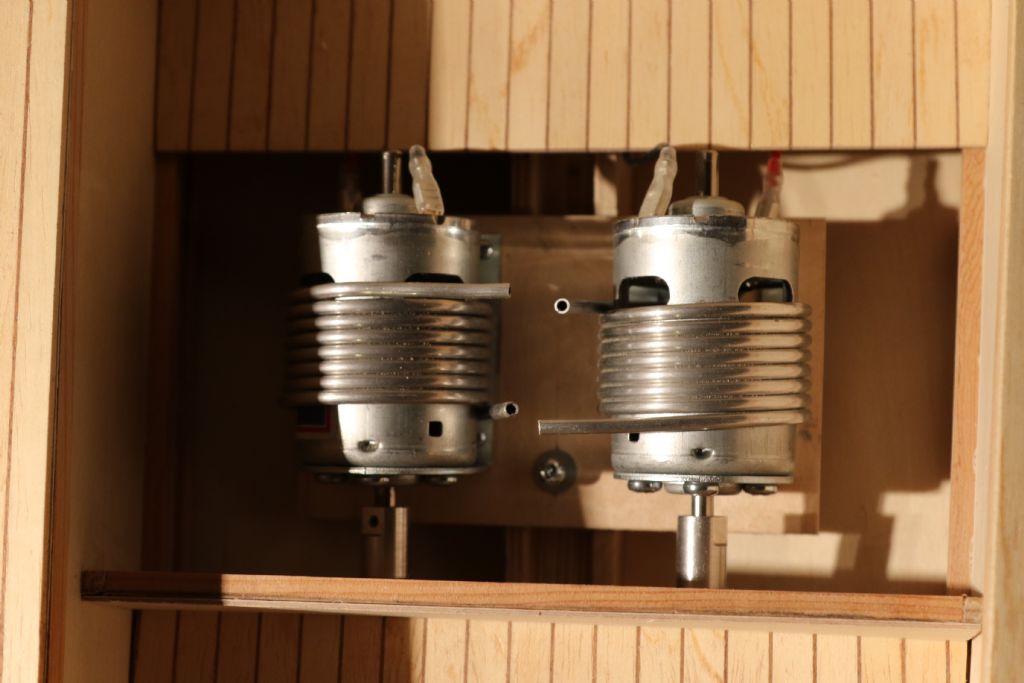
              Chris, Spent this afternoon repositioning the motors to obtain the correct shaft spacing as per the Actual H28 General Arrangement drawing kindly donated by Dave Milbourn. Each screw is 14" from the C/L. Attached are pictures of the reconfiguration.c29b4656.jpgc29b4657.jpgc29b4658.jpg

              #79871
              Chris Fellows
              Participant
                @chrisfellows72943

                That's better Brian. I said the installation in the full size boat was a bit tight!

                #79876
                Brian White 3
                Participant
                  @brianwhite3

                  Chris, Again, thanks for the advice. It certainly will look better.

                  Also the 10" prop shafts will bring the screws to approximately the same position as in the H28 GA and the photo you posted above.

                  Things are coming together nicely…

                  #79880
                  Chris Fellows
                  Participant
                    @chrisfellows72943

                    Your progress is certainly motivating me to get my finger out!

                    At work today but when I get home I'll have a look at what I need to do for the motor mount. I think that's all I need to do before putting the skins on. Once they are done real progress will have been made and I can crack on with the superstructure which I'm looking forward to doing.

                    Unlike yours I'm doing the superstructure all in one piece.

                    Cheers, Chris

                    #79882
                    Dave Milbourn
                    Participant
                      @davemilbourn48782

                      Unlike yours I'm doing the superstructure all in one piece.

                      I shall be watching this bit with interest…especially how you get around that tricky transom!

                      Dave M

                      #79885
                      Paul T
                      Participant
                        @pault84577

                        I am confused now ……..is the transom part of the superstructure?

                        I always thought the the superstructure was everything above the deck level i.e. the cabin, but how can you construct the cabin/wheelhouse/roofs in one piece.

                        Confusing isn't it indecision

                        #79886
                        Dave Milbourn
                        Participant
                          @davemilbourn48782

                          Paul

                          In the context of a model of the Huntsman 28 the answer is "yes…and no". You need to know nothing further. Wait and see.

                          DM

                          #79890
                          Paul T
                          Participant
                            @pault84577

                            Image result for huntsman 28

                            Very big transom and a very small bit of superstructure

                            #79891
                            Dave Milbourn
                            Participant
                              @davemilbourn48782

                              Hence the problem, Paul. How to blend one into 't other.

                              DM

                              #79894
                              Chris Fellows
                              Participant
                                @chrisfellows72943
                                img_0033.jpgPosted by Dave Milbourn on 14/11/2018 14:29:39:

                                Unlike yours I'm doing the superstructure all in one piece.

                                I shall be watching this bit with interest…especially how you get around that tricky transom!

                                Dave M

                                You know that phrase, "ignorance is bliss", well that applies to me , that does!

                                Yes, it's going to be tricky and fiddly but I will come up with a solution! smiley

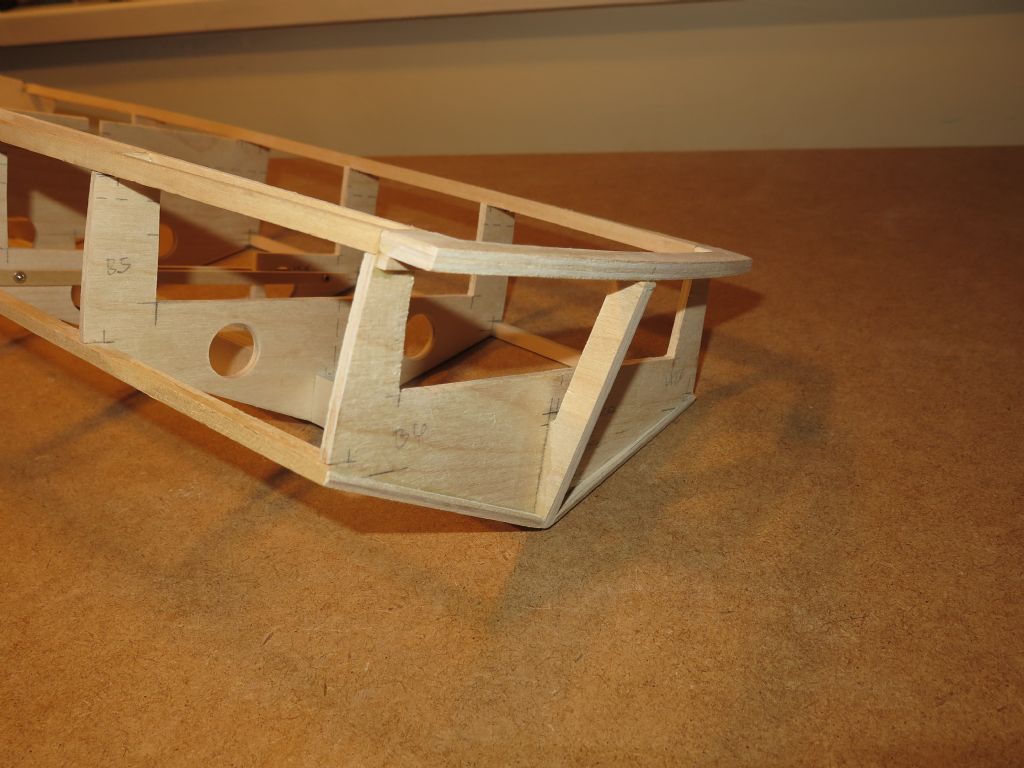
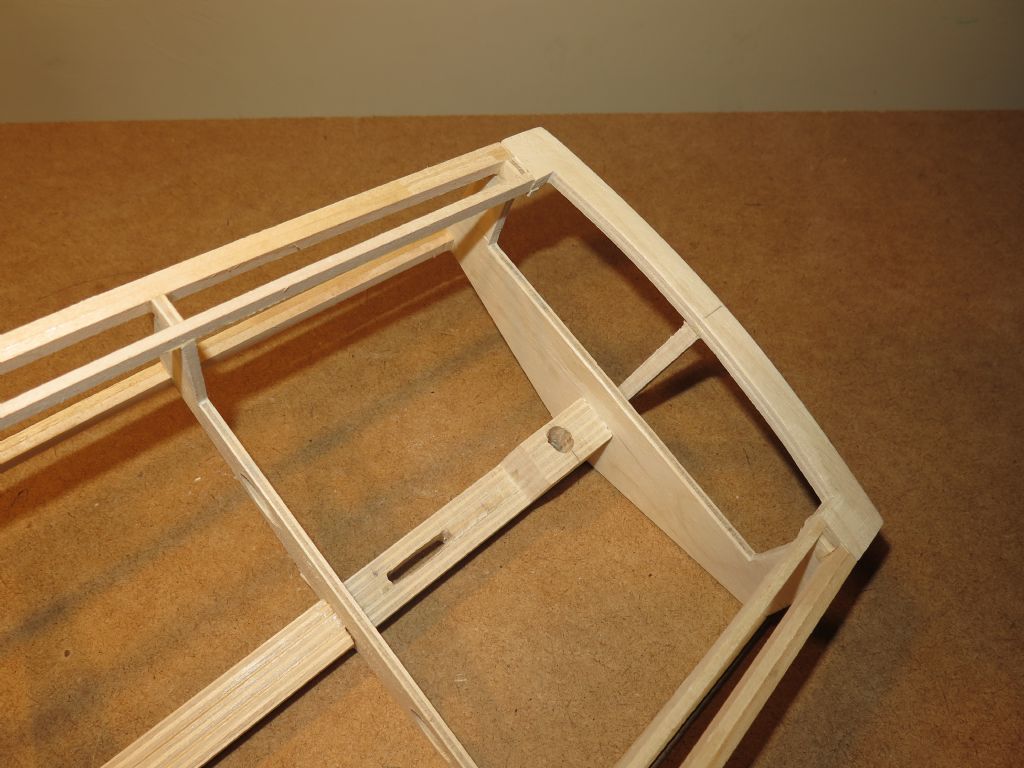
                                Couple of photographs showing the transom so far. Quite a bit of that timber is temporary to aid construction and will be cut out. The bit of decking around the transom is a little wider than shown on the Fairey GA drawing and I may sand this a little more to reduce the width or use a bit of artistic licence.

                                img_0032.jpg

                                #79896
                                Chris Fellows
                                Participant
                                  @chrisfellows72943

                                  Interestingly, having looked at few more photos, the "deck" part of the transom can vary quite a bit from boat to boat. Some are very slim and some have an upstand. Others are wider than mine and look to be square rather than curved.

                                  Some of these differences may of course be due to later work/refurbs, who knows?

                                  So I'm going to stick with what I've done so far which gives me some meat to work with.

                                  #79957
                                  Chris Fellows
                                  Participant
                                    @chrisfellows72943

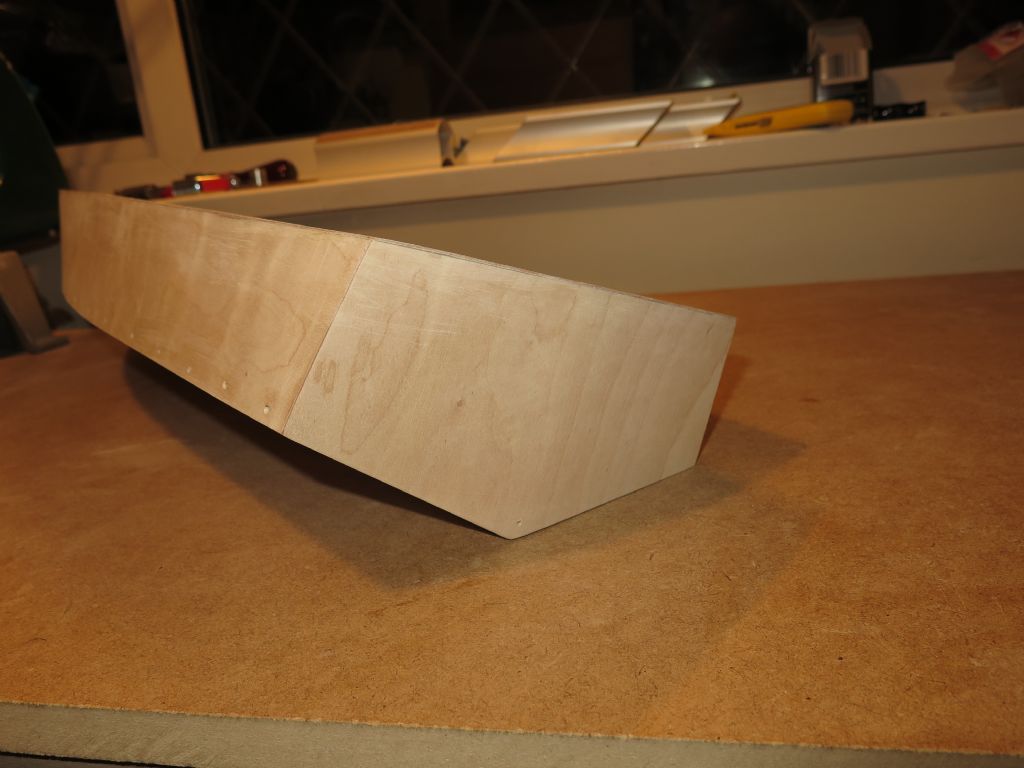
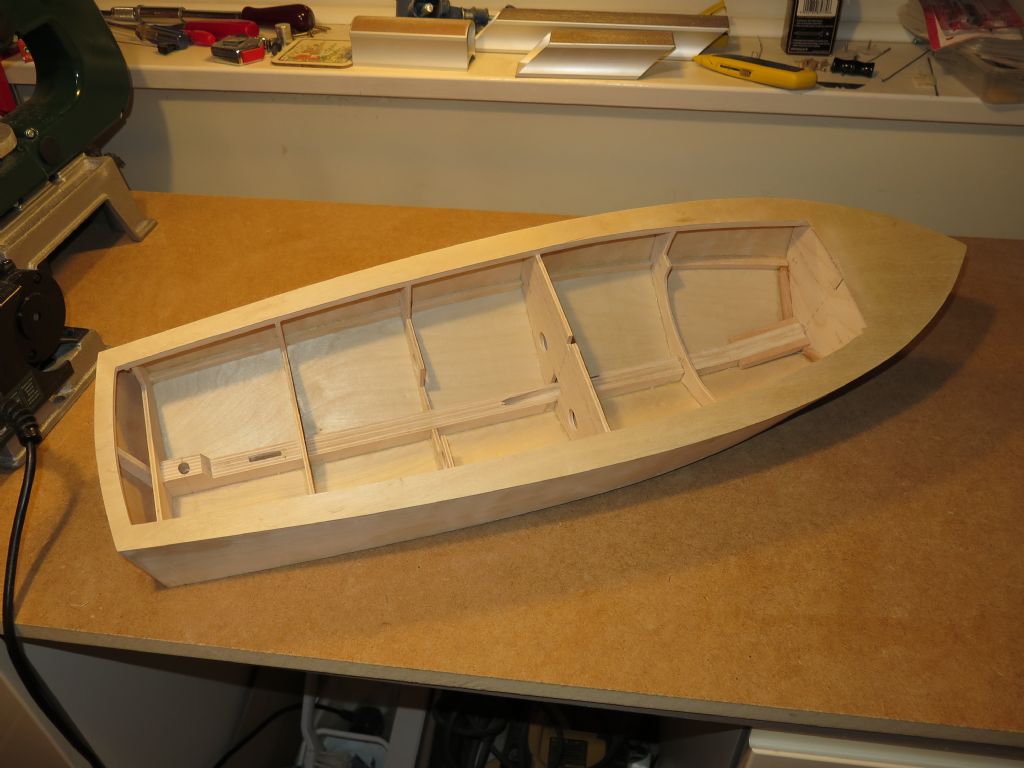
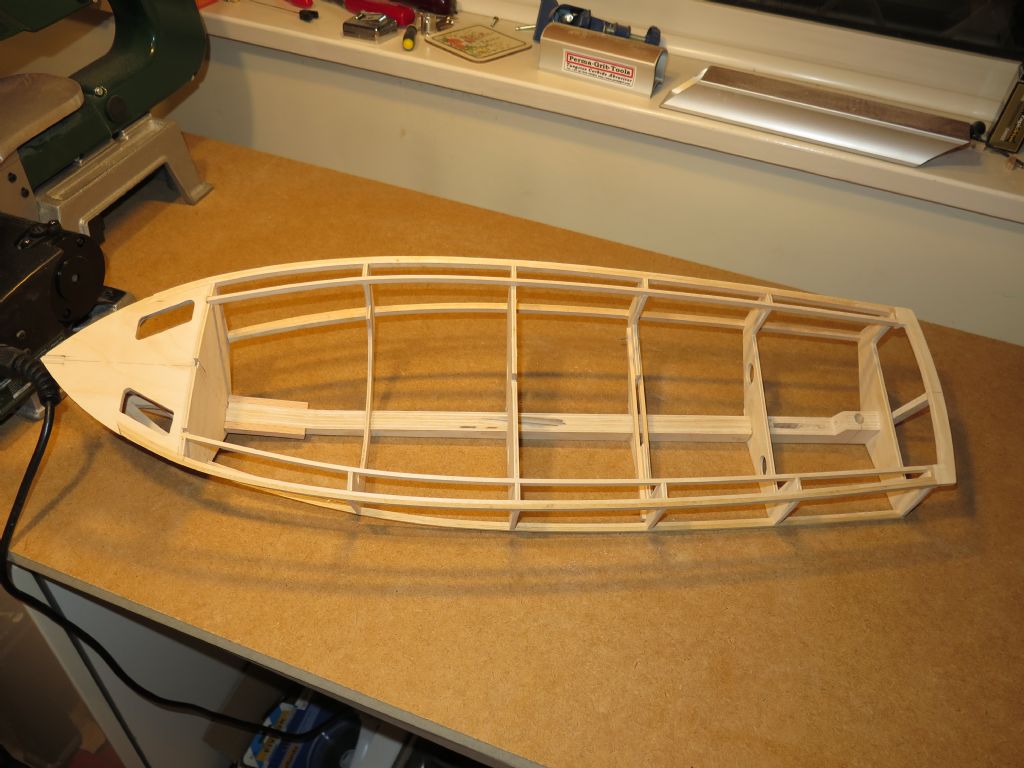
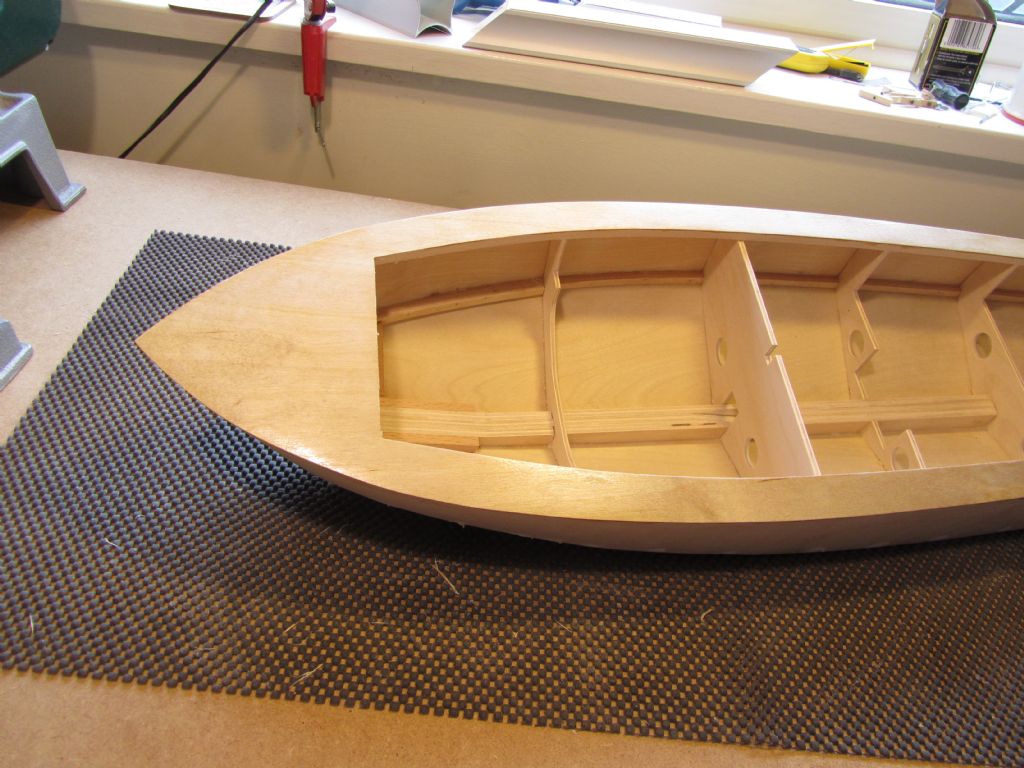
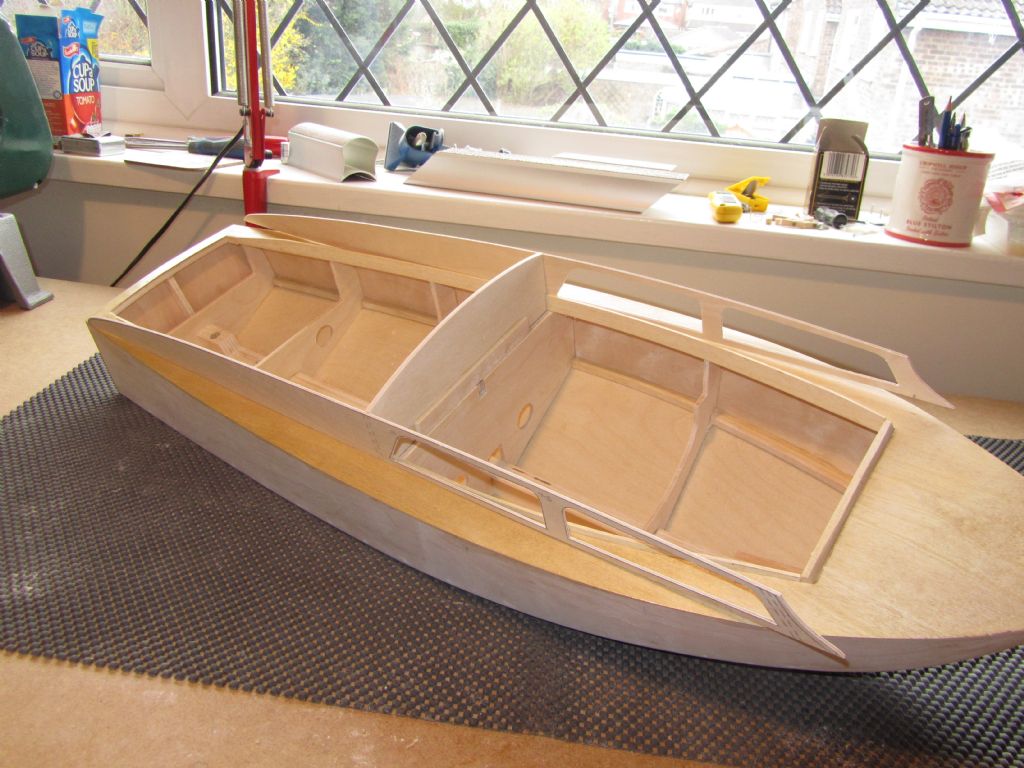
                                    Bit more progress. Temporary timbers to the transom, to a number of the frames and the spine have been cut out leaving a nice open hull.

                                    With those out of the way for the transom the holes could be drilled/cut out for the rudder and prop support. Unlike for the River Cruiser, which was spot on, the hole for the rudder decided to be awkward, and despite drilling a pilot hole first the hole ended up off centre as you can see. Might not look too pretty but the use of a round file remedied the situation and the rudder will be nice and upright.

                                    Finished off sanding the stringers to profile and it's now ready for skinning along with the River Cruiser.

                                    img_0036.jpg

                                    img_0034.jpgimg_0035.jpg

                                    #80267
                                    Chris Fellows
                                    Participant
                                      @chrisfellows72943

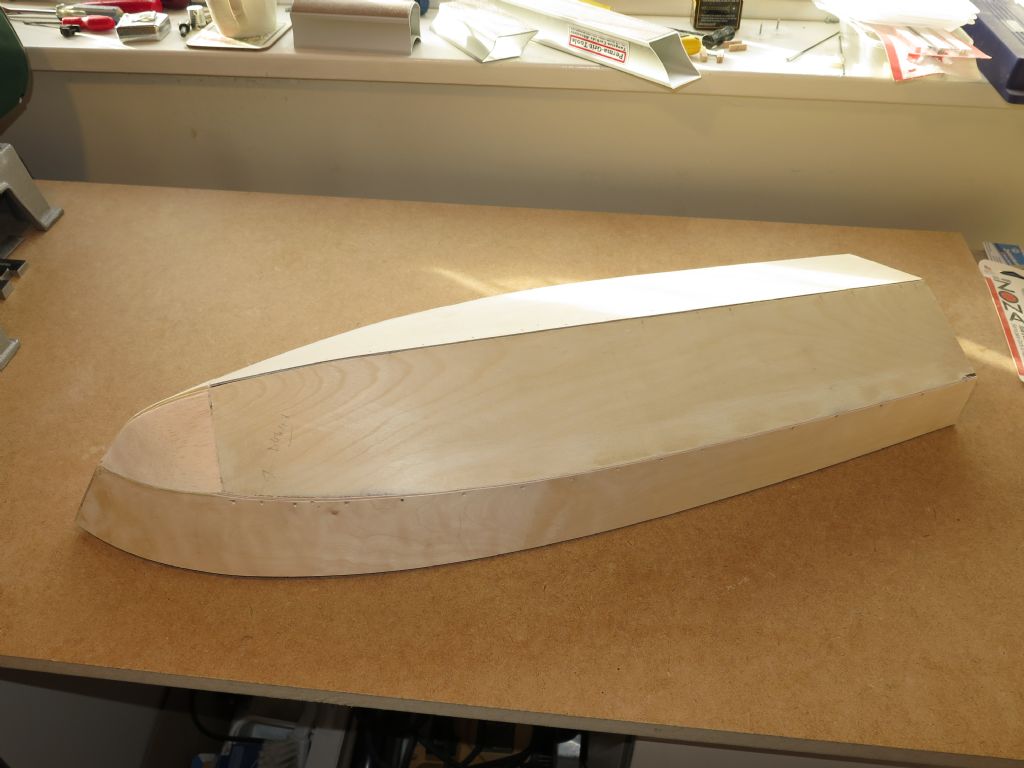
                                      Coming on. I've fitted the side and bottom skins and fitted the balsa blocks to the bow and sanded to shape ready for filling.

                                      I need to order yet more timber as I want some thinner ply for the deck, rather than the 1.5mm I've got, as it will be easier to fit and sand to the opening for the cabin and cockpit. I shall probably veneer the deck rather than plank it. I shall see once I've fitted the ply.

                                      I've come up with a way of tackling the transom which I'm pretty confident about. We shall see when I get to it!

                                      balsa to bow.jpg

                                      Edited By Chris Fellows on 10/12/2018 12:37:26

                                      Edited By Chris Fellows on 10/12/2018 12:39:53

                                      #80636
                                      Chris Fellows
                                      Participant
                                        @chrisfellows72943

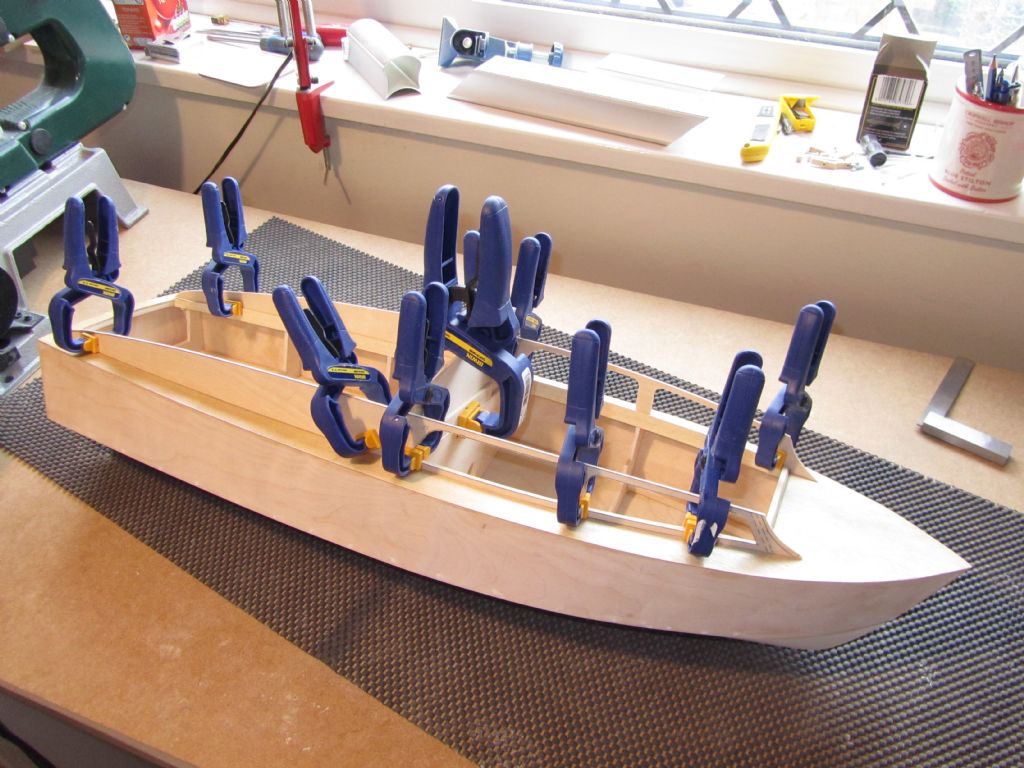
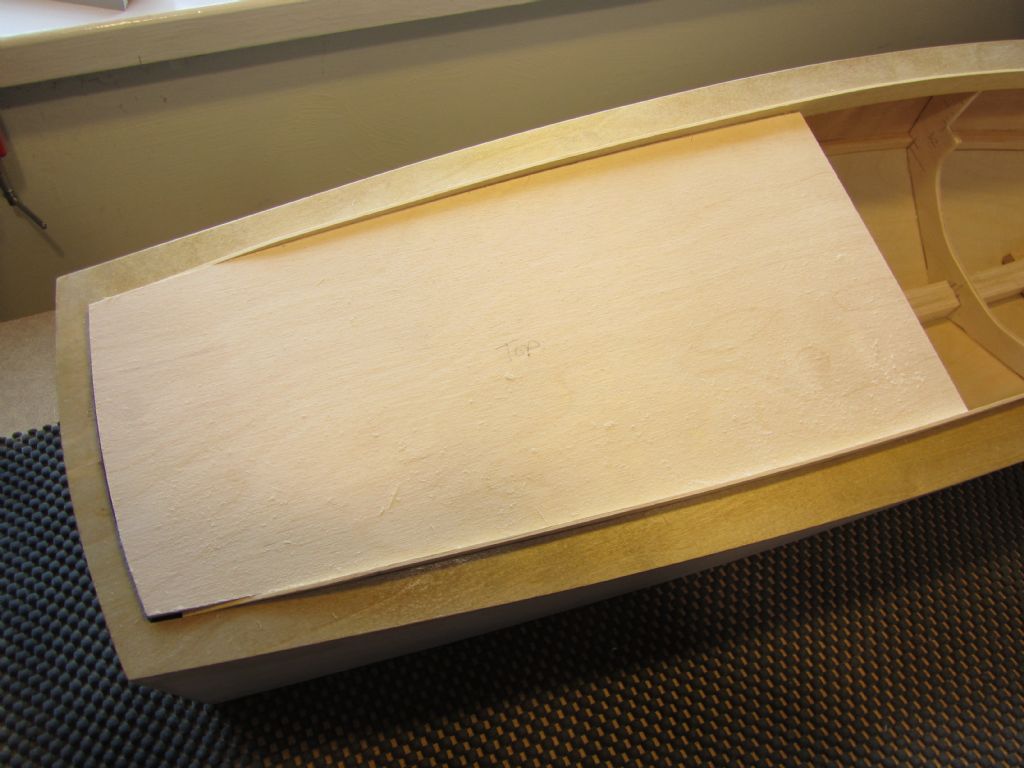
                                        Back on he Huntsman now. Don't know why I said I'd be veneering the deck in my last post as what I intended to do and have now done is added the deck in birch ply so that I can varnish it. I'm not going to plank or draw lines on this model as the deck areas are fairly small and I'd never get it finished!

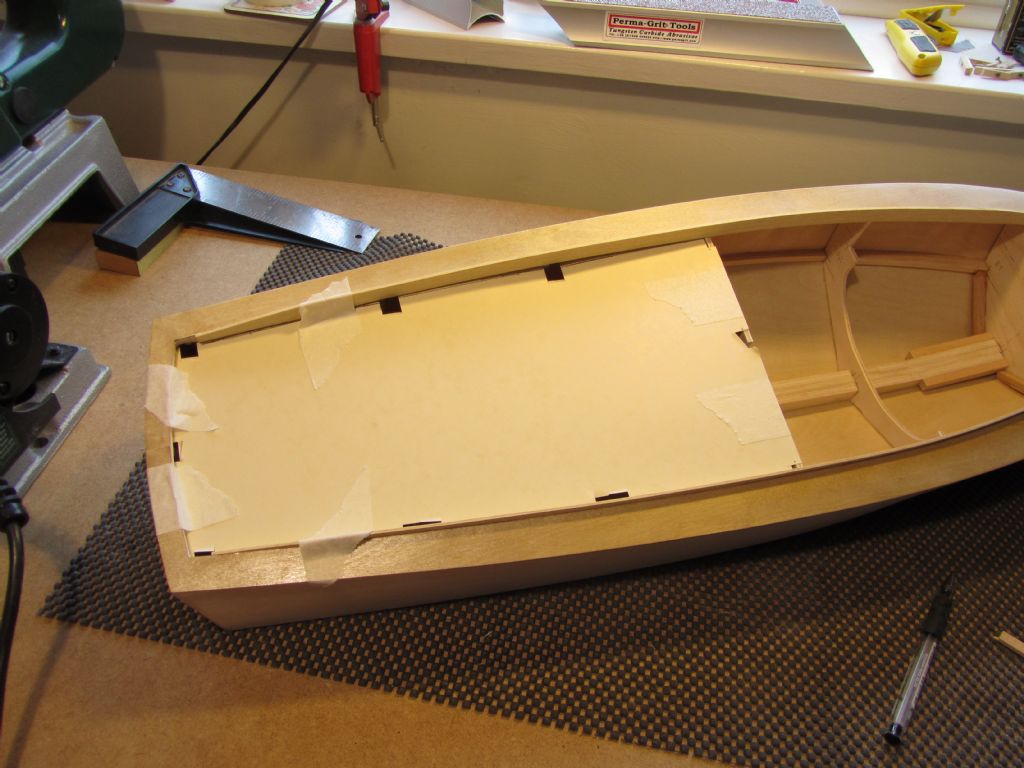
                                        Another delivery of timber from SLEC duly arrived containing the 0.8mm birch ply I wanted so that I could fit it to the curved deck more easily that the 1.5mm that I used for the hull skins, or so I thought!

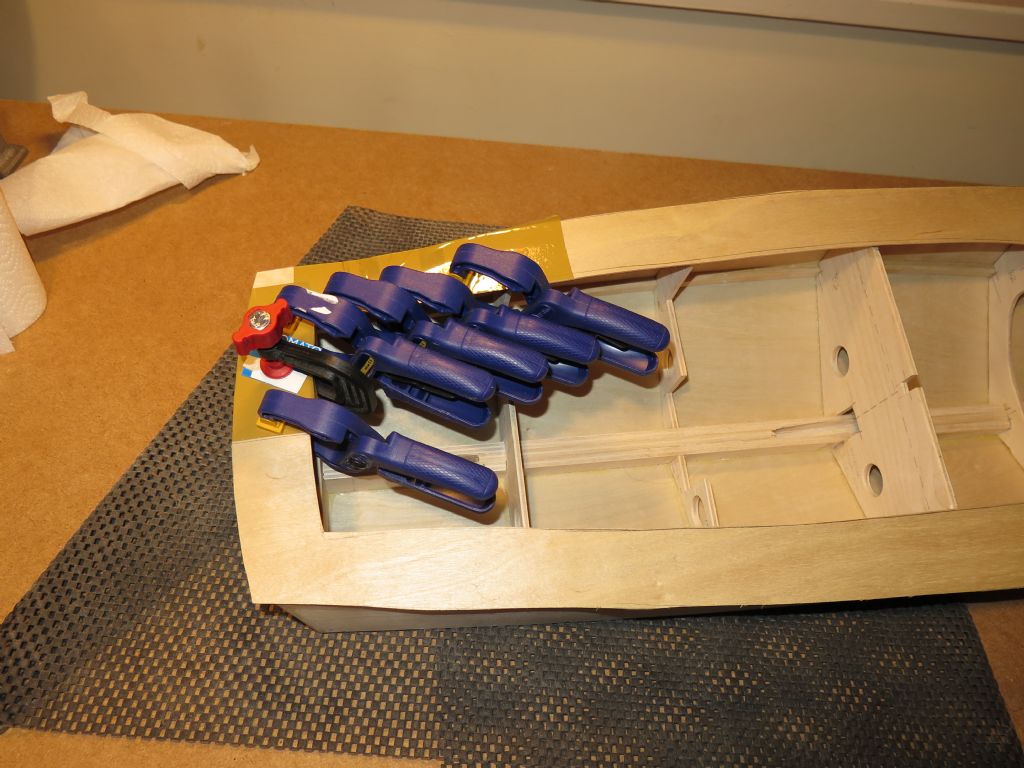
                                        I cut out a card template for the whole of the deck and then cut out the 0.8mm ply. Laying it in place it certainly bent to the profile easily enough and so set to adding aliphatic resin to all the required areas. I positioned the ply, starting at the bow and it was like herding cats when I began adding the tape and clamps. By the time I'd got the bow area taped down good and tight the side and rear parts of the deck were curling up and the glue was drying. I wanted to finish it in one go really but I took stock and decided to just do the bow and part way down each side and finish it the next day. This worked well, but I did have to put a saw cut in above the transom as I couldn't get the ply to sit flat – this will hardly be noticeable though.

                                        I have to say this has probably been the most tricky and fiddly (more than fitting the first hull skin on the first build) part of the builds so far, particularly as I had to be careful of not damaging the surface. There is the odd small mark and scratch but nothing of consequence.

                                        I'm pleased with the outcome though as I've got the fit pretty neat and tight. I shall apply a couple of coats of varnish to provide protection before I start on the superstructure – I need to do some more on the drawings though before I do that and in the meantime am back on the Swordsman.

                                        Oh, almost forgot, before fitting the deck, I fitted the transom to finish off the hull skinning.

                                        As ever the photos are out of sequence!

                                        Chris
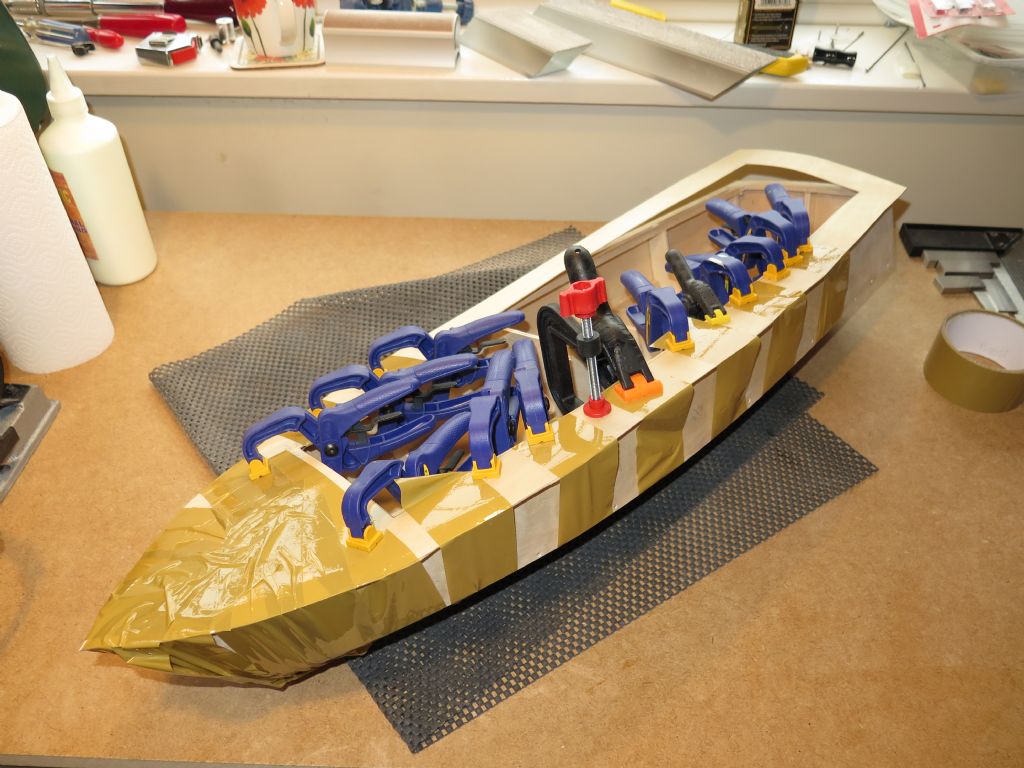
                                        Deck Started 1 Transom fittedDeck FittedDeck Started 2

                                        #80637
                                        Tim Rowe
                                        Participant
                                          @timrowe83142

                                          Nice neat work there Chris.

                                          For protecting surfaces you can use some good quality low tack masking tape. This can be drawn on and can stay in place during cutting. It is very unlikely to "pull" the grain on this kind of plywood when you remove it. I keep some expensive 3M tapes for lining and this kind of purpose and cheap stuff for other uses. There is a big difference.

                                          That deck is going to look lovely just varnished and I think you are right about leaving out the planking seams.

                                          Tim R

                                          #80638
                                          Chris Fellows
                                          Participant
                                            @chrisfellows72943

                                            Thanks Tim

                                            I have got masking tape and thought about using it but thought it would get in the way of trimming and sanding. Cutting wasn't a problem with a nice sharp Stanley knife and a cutting mat. If I'd slipped masking tape wouldn't have saved it as I was cutting with the face I wanted uppermost!

                                            It was the little plastic G-clamps that caused the problem, even though in the main they were screwing onto the parcel tape – not very thick of course, so I used some card on the last section. And also a slight slip of the saw when doing initial trimming! But things like that are going to happen despite being as careful as you can be.

                                            Chris

                                            #80640
                                            Ray Wood 3
                                            Participant
                                              @raywood3

                                              Hi Chris,

                                              Regarding your deck finishing, I would urge you to try a sample of varnish on a scrap piece of birch faced ply before you decide whether you need to draw some plank lines and stain the deck before varnishing. Plain nearly white deck I don't think will be very realistic? Your choice obviously 😁

                                              Regards Rayhuntsman 180117 001.jpg

                                              #80641
                                              Chris Fellows
                                              Participant
                                                @chrisfellows72943

                                                Hi Ray

                                                Yes, a colour along the lines of what you have used would look good. I'll consider the lining again but the long narrow side decks of the H28 don't make it easy and the large patchy grain of birch lessons the illusion of planking.

                                                I'm going to plank the deck on the Swordsman though as it's a much bigger model and I can do the sub-base of ply in pieces if I want.

                                                Chris

                                                #81462
                                                Chris Fellows
                                                Participant
                                                  @chrisfellows72943

                                                  Blimey, doesn't time fly! I thought it had been a few weeks since I'd done anything on the Huntsman, not two months!

                                                  I have been doing something along the lines of model making though, involving timber – refurbishing the nesting box for the blue tits and building a food box for the squirrel. Once he'd got past being nervous he's got the hang of it and is backwards and forwards eating some peanuts and burying others in various parts of the garden, including the raised bed, plant pots and an old hanging basket. Keeps me amused for ages, particularly when he chases the pigeons off.

                                                  Haven't done much on the Huntsman, just put a couple of coats on the deck to protect the birch ply. Bit expensive but I've used International Schooner tung oil varnish. It's a lovely honey colour which is similar to some of the lighter planking on the full sized boats.

                                                  I've started fitting the coaming around the inside of the deck, well just the front piece, as I've had to put in yet another order to SLEC! I wanted some thinner timber, 1.6mm in this case, to keep the cockpit sides as thin as possible. And again, to make the postage worthwhile I had to order more glue and timber etc!

                                                  Once that arrives I can get into the swing again and start on the superstructure.

                                                  Apologies for more talk than action but there will be more of the latter!

                                                  Chris

                                                  varnish applied.jpg

                                                  #81689
                                                  Chris Fellows
                                                  Participant
                                                    @chrisfellows72943

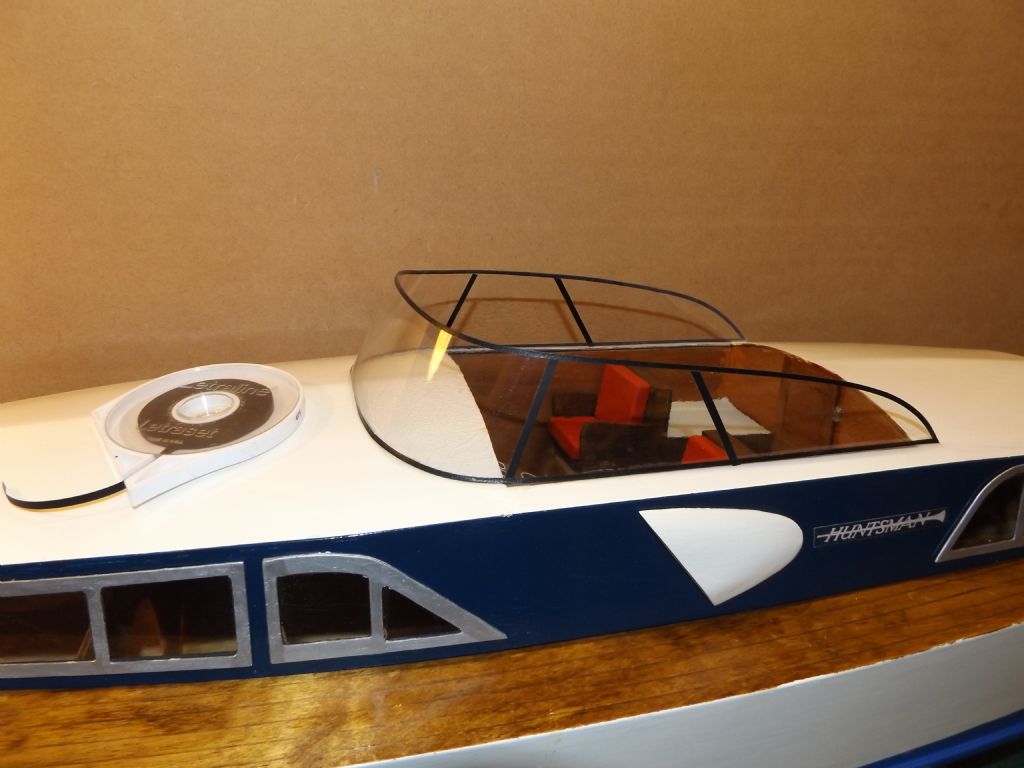
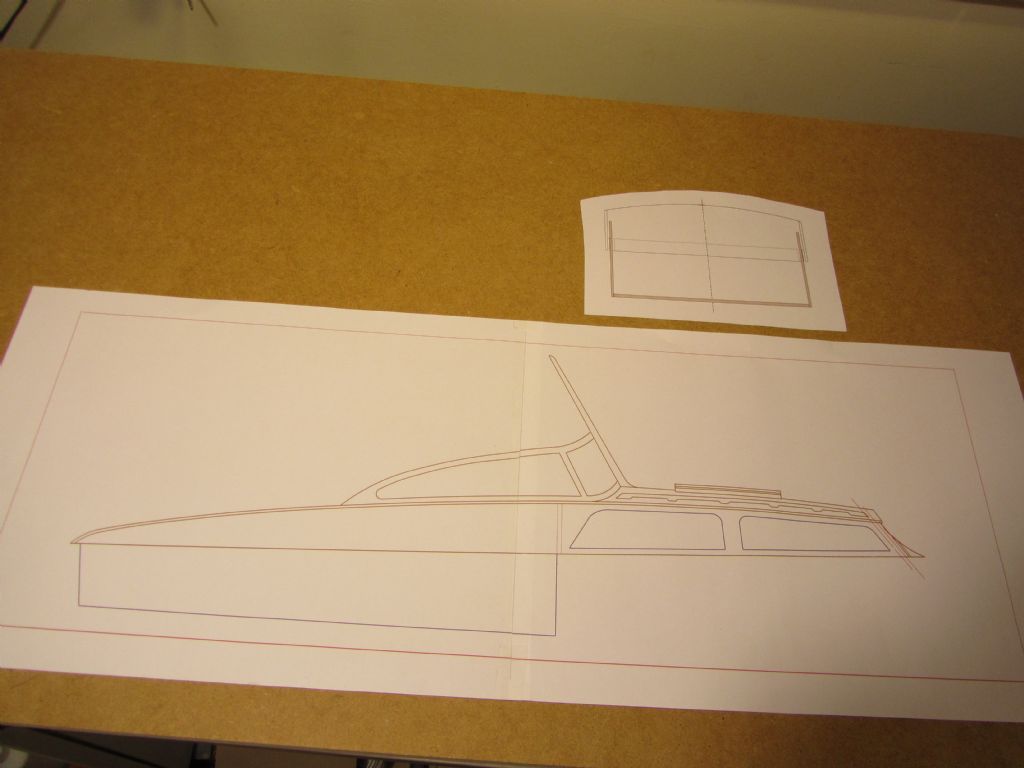
                                                    Time spent on the Huntsman has been sporadic due to other things as usual but work on the superstructure is now progressing. Drawings were produced for the cabin/cockpit sides and the rear of the cabin, transferred to ply using my favoured method of carbon paper and then cut out on the scroll saw – 2mm birch ply for the sides and 3mm ply for the cabin rear. A piece of timber was glued to the inside face of the cabin rear to locate it at the right height when sitting on the frame. The pieces were then held in place by clamps and glued with a/resin.

                                                    A card template was then made for the cockpit floor to ensure a snug fit and cut from 3mm ply. The fit was snug but 2mm will be taken off the sides for the inner cockpit sides to be glued to it.

                                                    Then onto the front window which was a bit of a pig. The River Cruiser has front and rear windows and they were pretty straightforward, apart from making the front one twice. Drew out the front window using the cabin drawing as a guide and took the width from the model across the coamings and transferred to ply. Learning from the RC I left the window opening until I had sanded the frame to fit but when offering up the frame realised I'd forgotten the deck was curved and not flat like the RC, doh! So second window frame duly made with a curved bottom. I then had difficulty in clamping/holding it in place whilst gluing with a/resin as due to the curve and angled bottom (the window leans back) it keep moving all over the place. Gave up on that so used cyano which wouldn't hold (due to using the a/resin first I guess) initially, but after holding the frame in place with a screw I managed to get it to hold and then ran some additional cyano down the joints. But the fit of the cabin sides was a bit tight and one side sprang loose. Glued again and it is holding but I shall fit some 3x3mm timber strips along the joints for added strength – once the roof is on it will be fine.

                                                    Keen to get on now but nothing will get done this weekend. But only one more week at week so should have more time, though other interests and DIY/decorating will be vying for my time.

                                                    Photos will probably be out of order as usual!

                                                    Chris

                                                    cabin & cockpit sides drawn.jpg

                                                    clamped and glued.jpg

                                                    #81690
                                                    Chris Fellows
                                                    Participant
                                                      @chrisfellows72943

                                                      cut out and glued.jpgcockpit floor good fit.jpgcard template.jpg

                                                    Viewing 25 posts - 26 through 50 (of 193 total)
                                                    • Please log in to reply to this topic. Registering is free and easy using the links on the menu at the top of this page.

                                                    Code of conduct | Forum Help/FAQs

                                                    Advert

                                                    Latest Replies

                                                    Home Forums Build Blogs Topics

                                                    Viewing 25 topics - 1 through 25 (of 25 total)
                                                    Viewing 25 topics - 1 through 25 (of 25 total)

                                                    View full reply list.

                                                    Advert