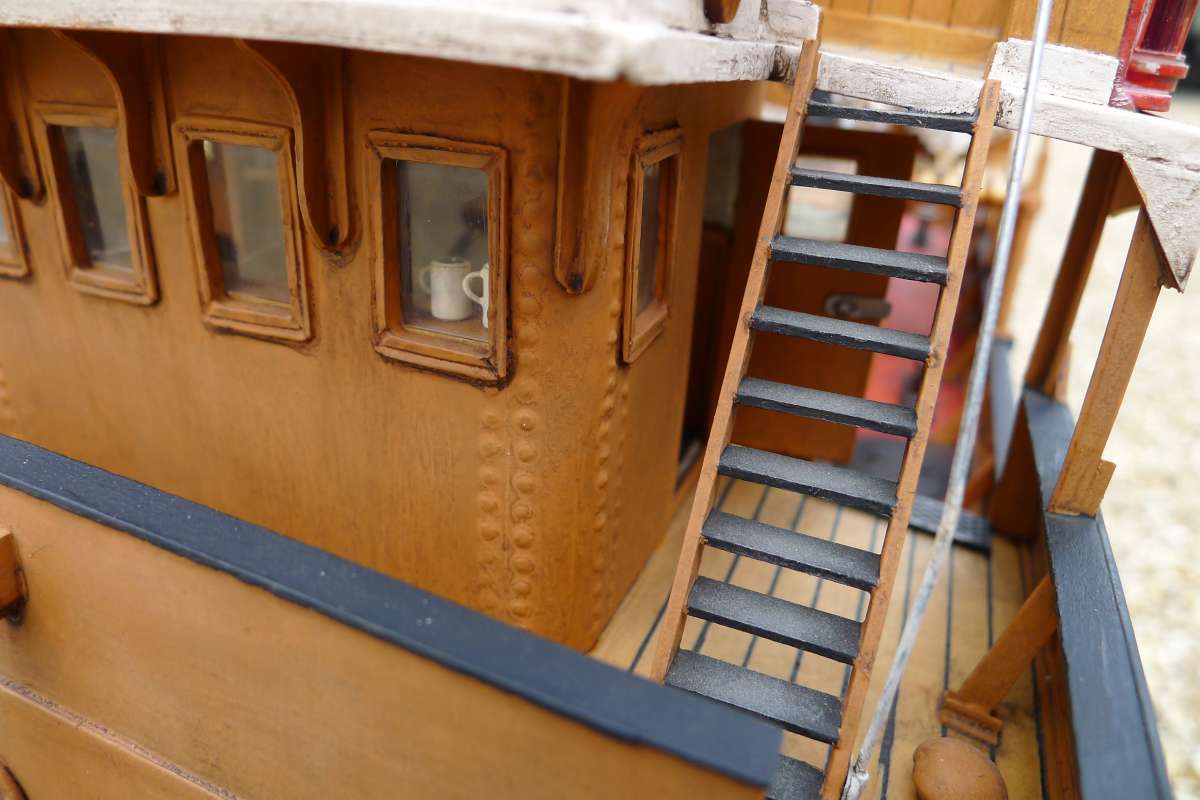
Ben Ain

Advert

Ben Ain

Home Forums Steam powered models Ben Ain

Viewing 24 posts - 76 through 99 (of 99 total)
  • Author
    Posts
  • #118693
    Richard Simpson
    Participant
      @richardsimpson88330

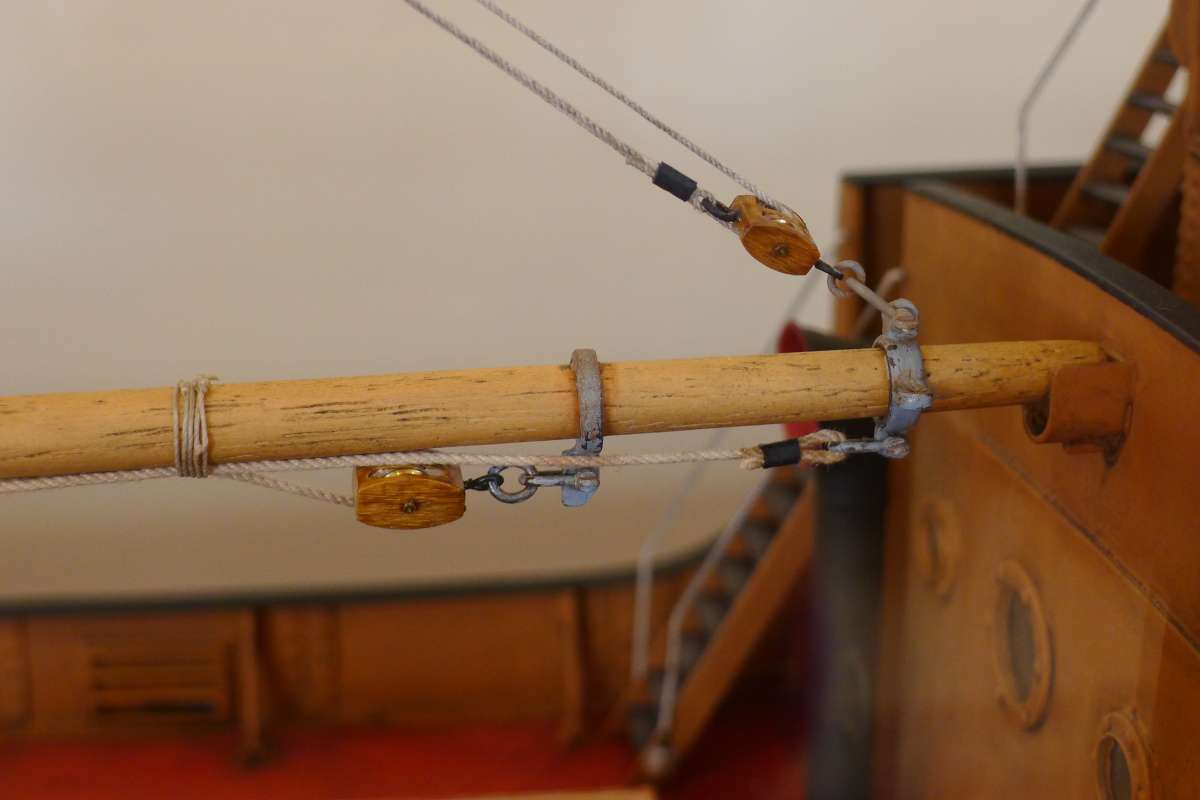
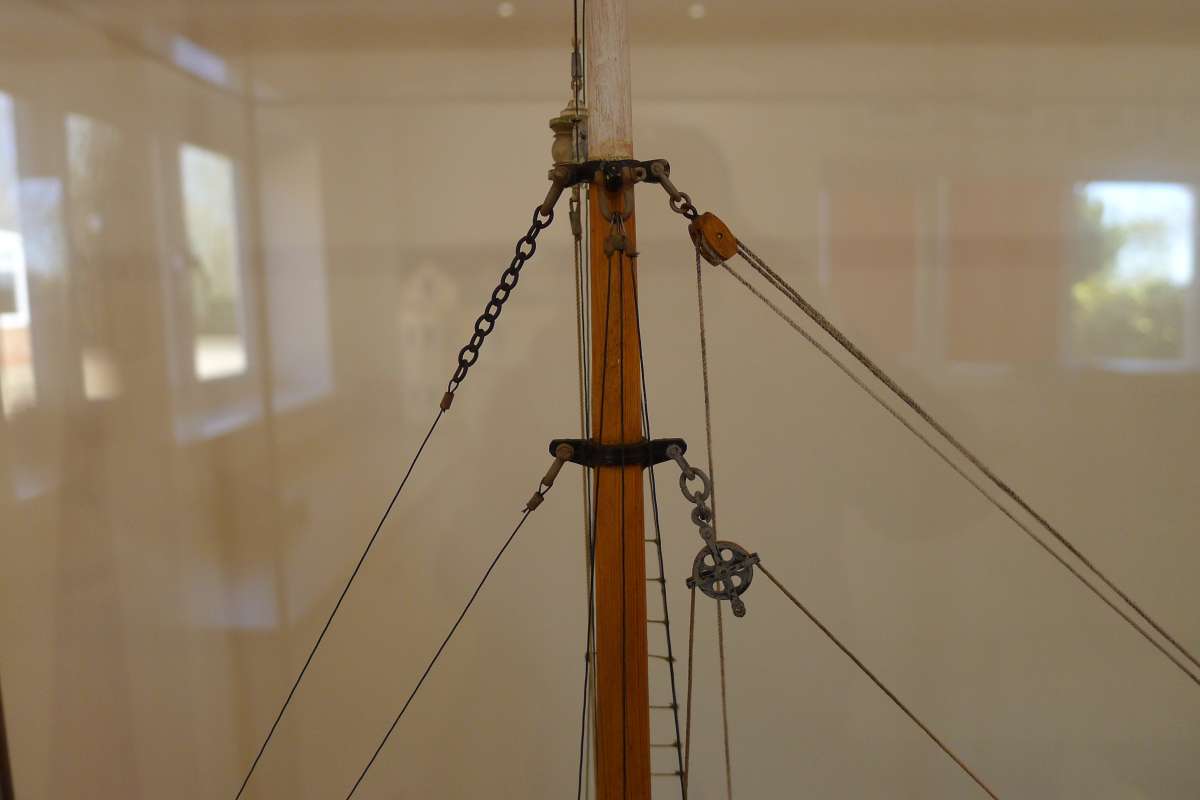
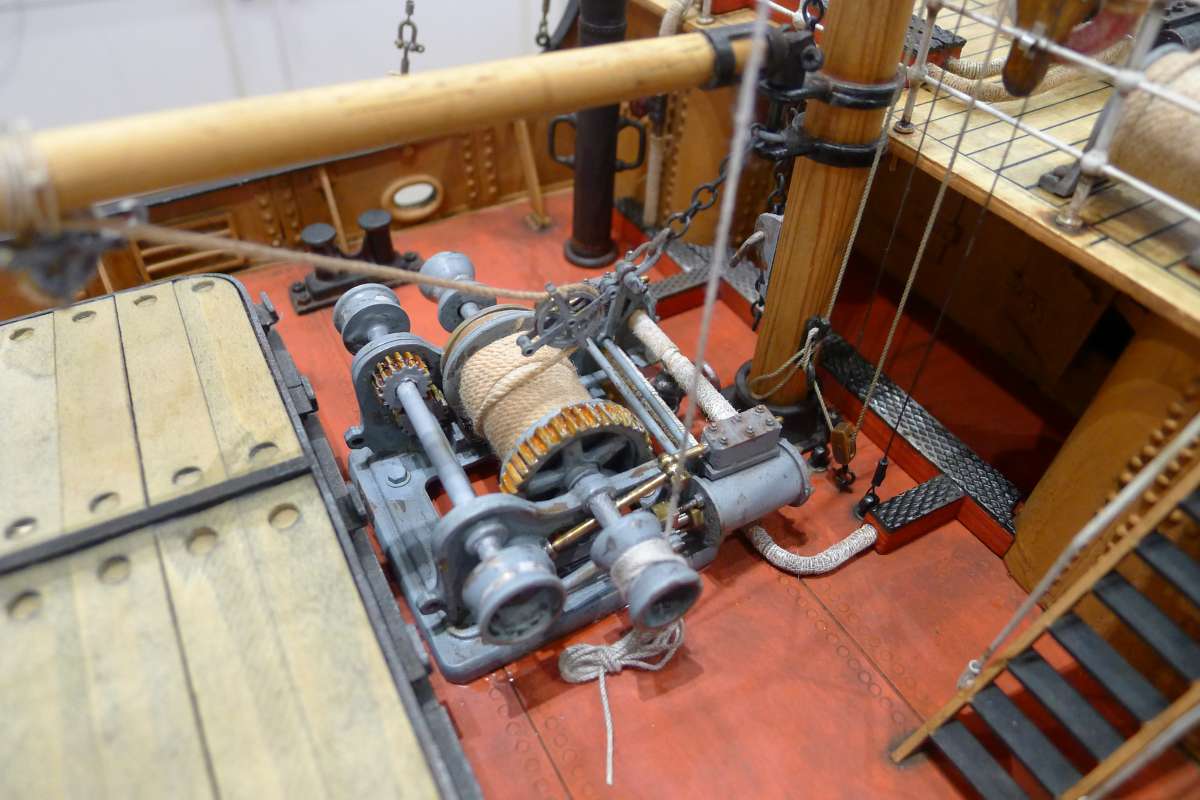
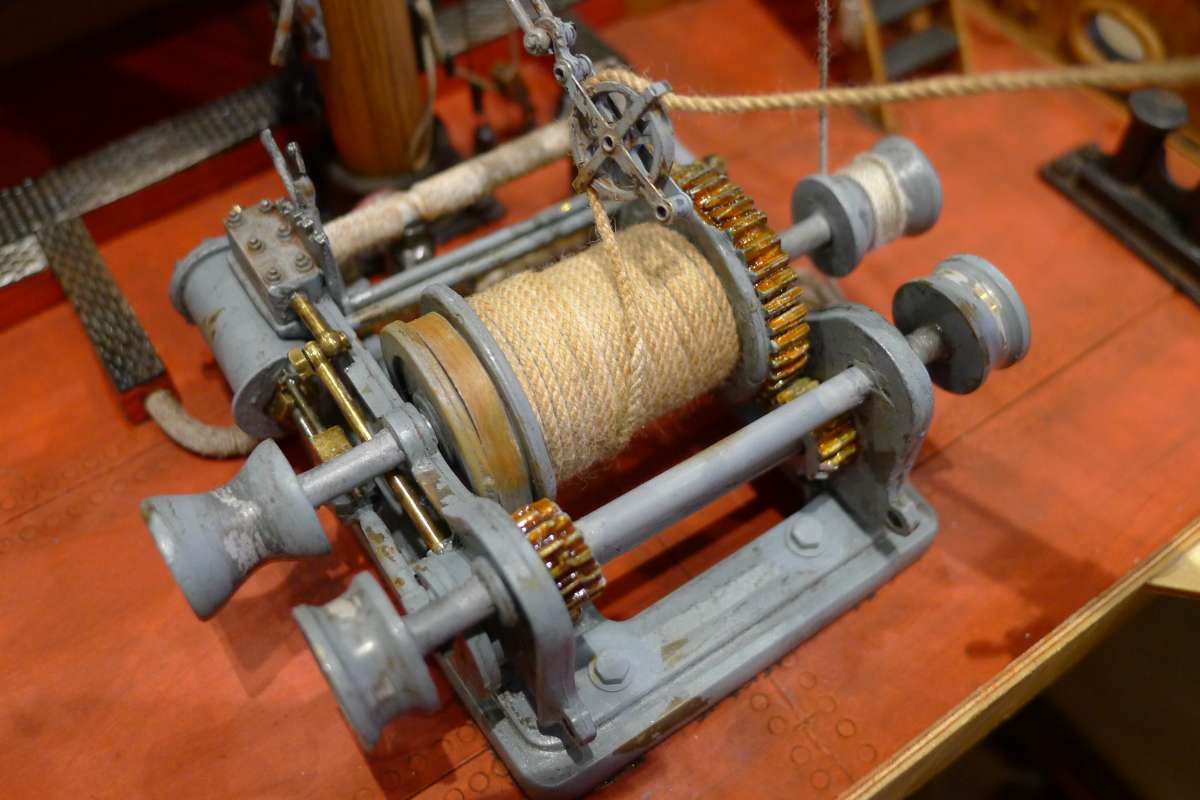
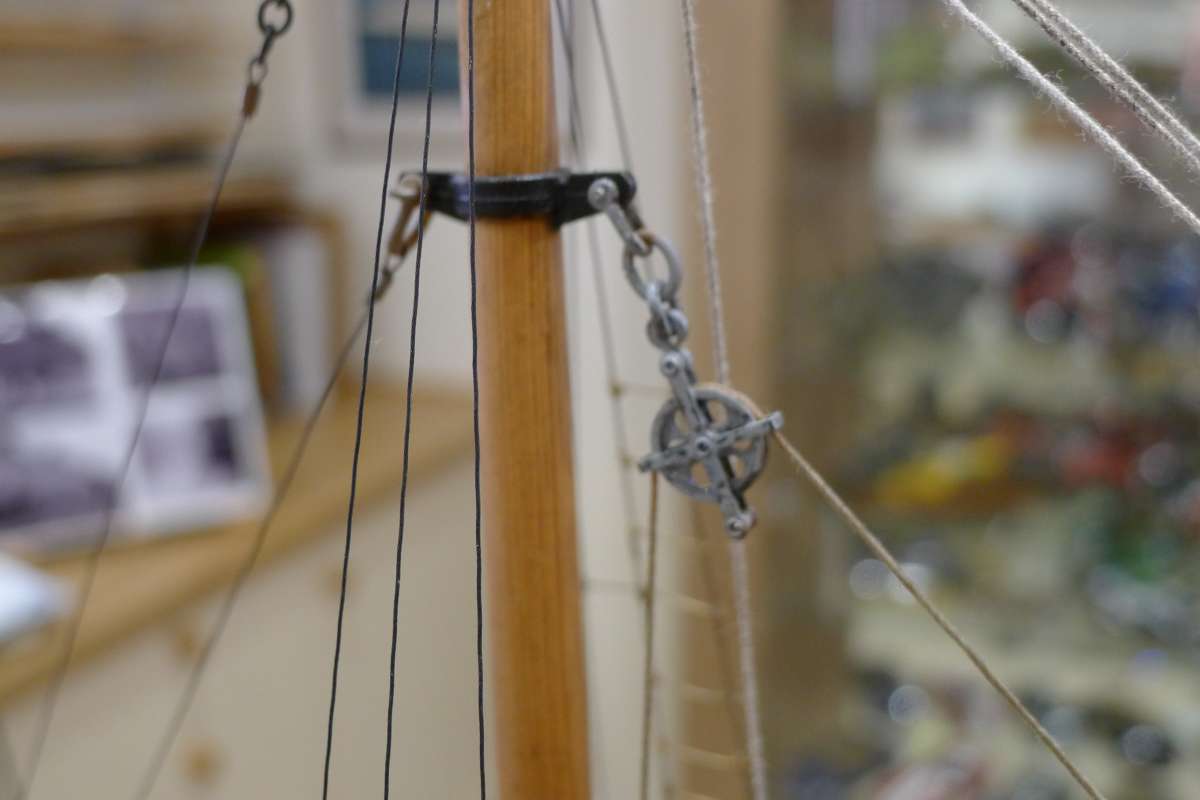
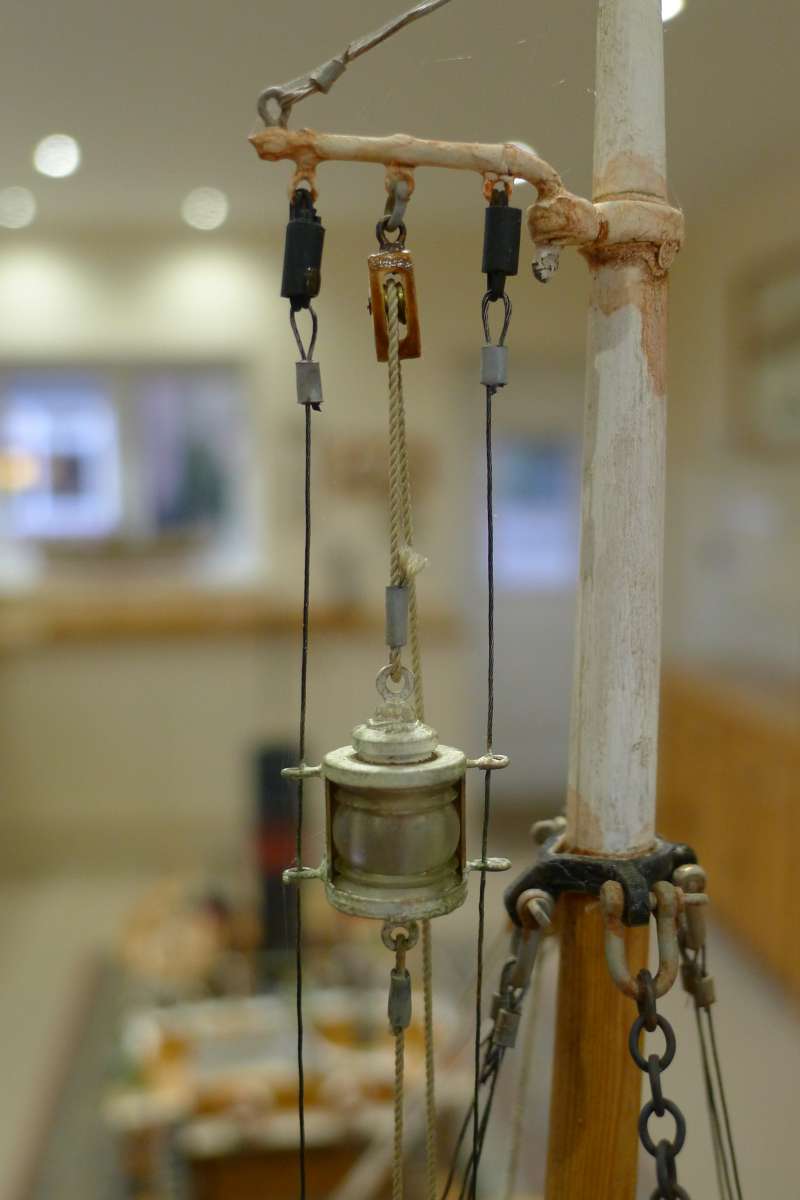
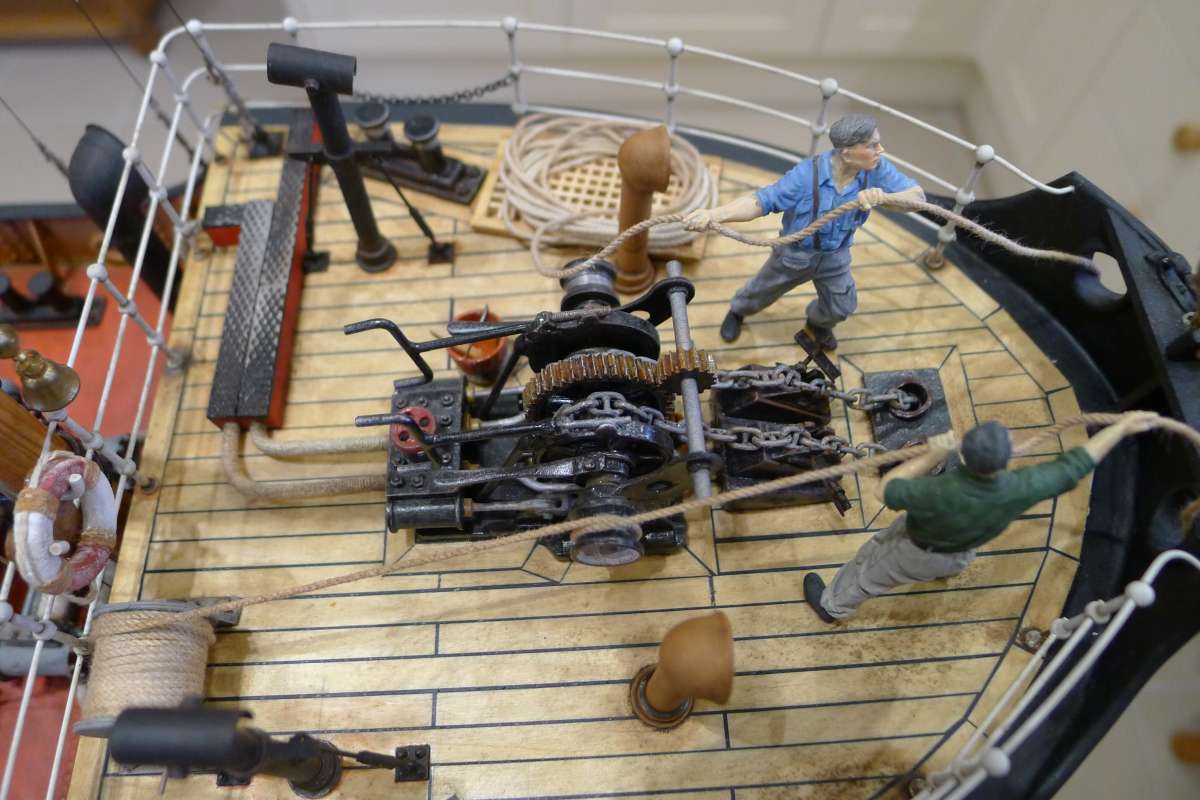
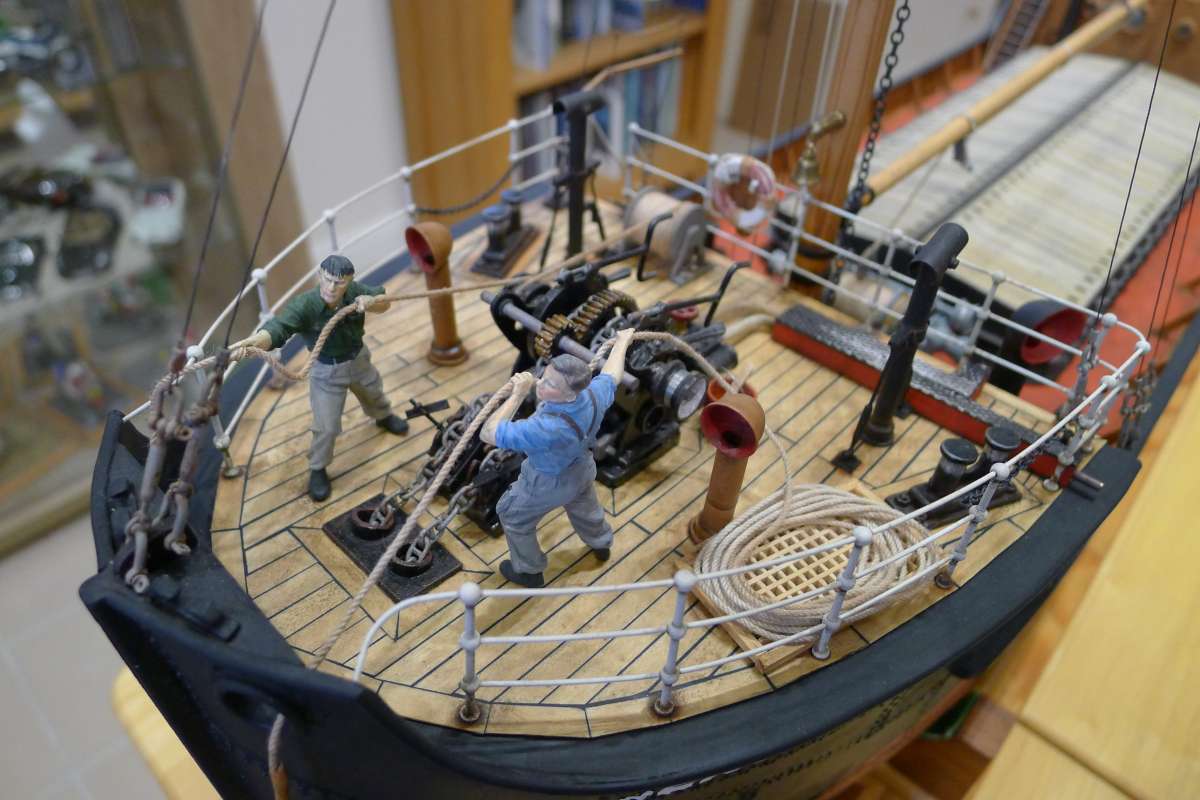
      The main remaining work was the running rigging, the derrick and the steam winch and the main hatch cover.

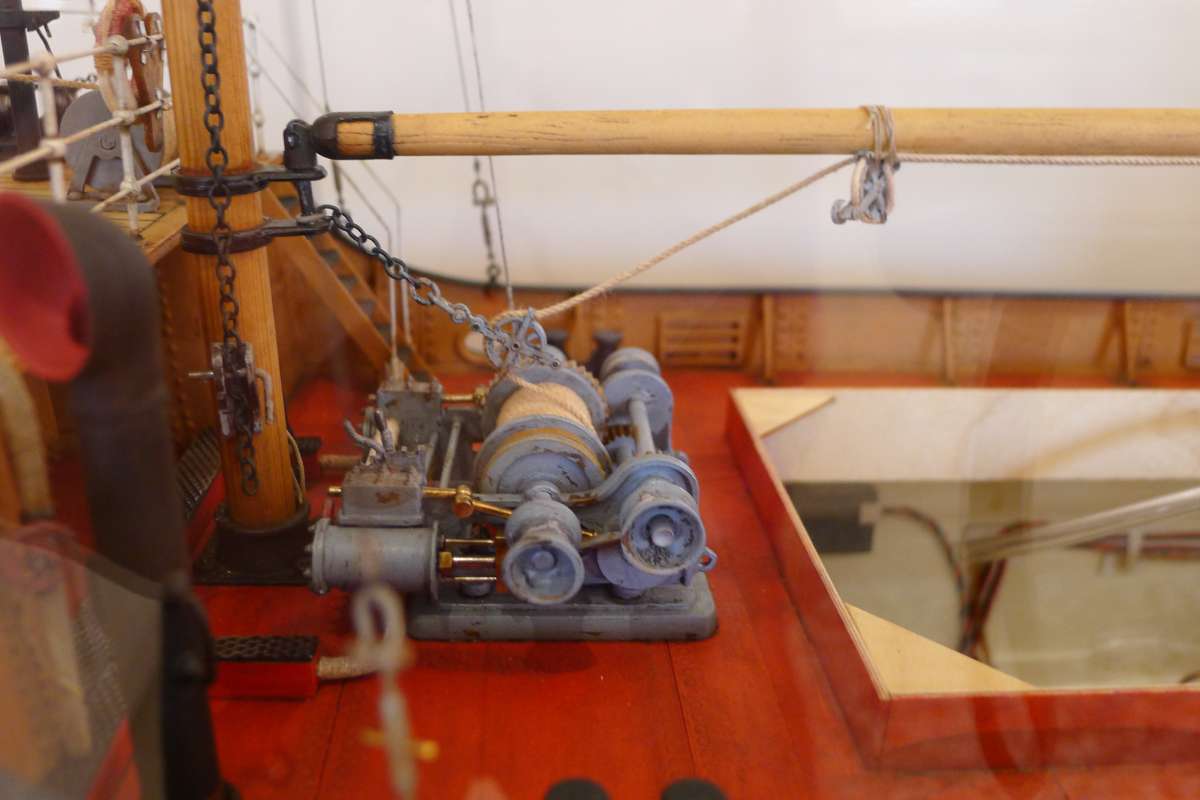
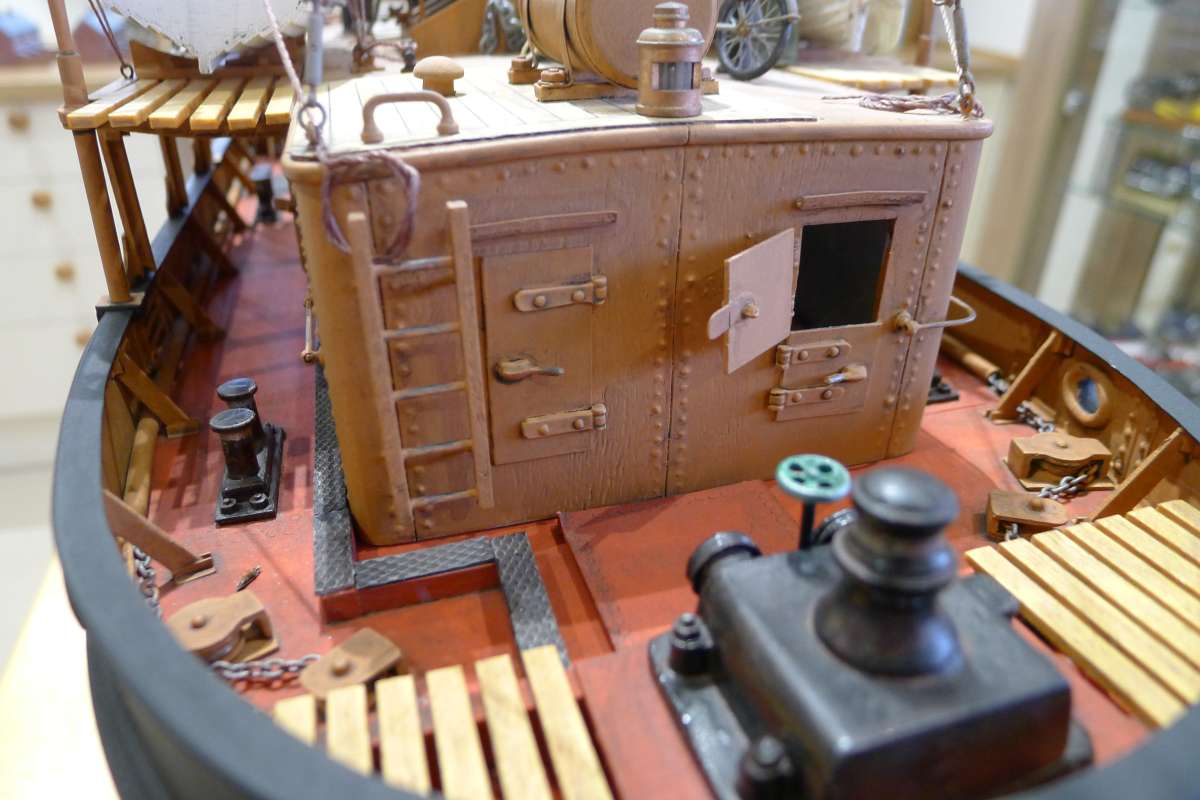
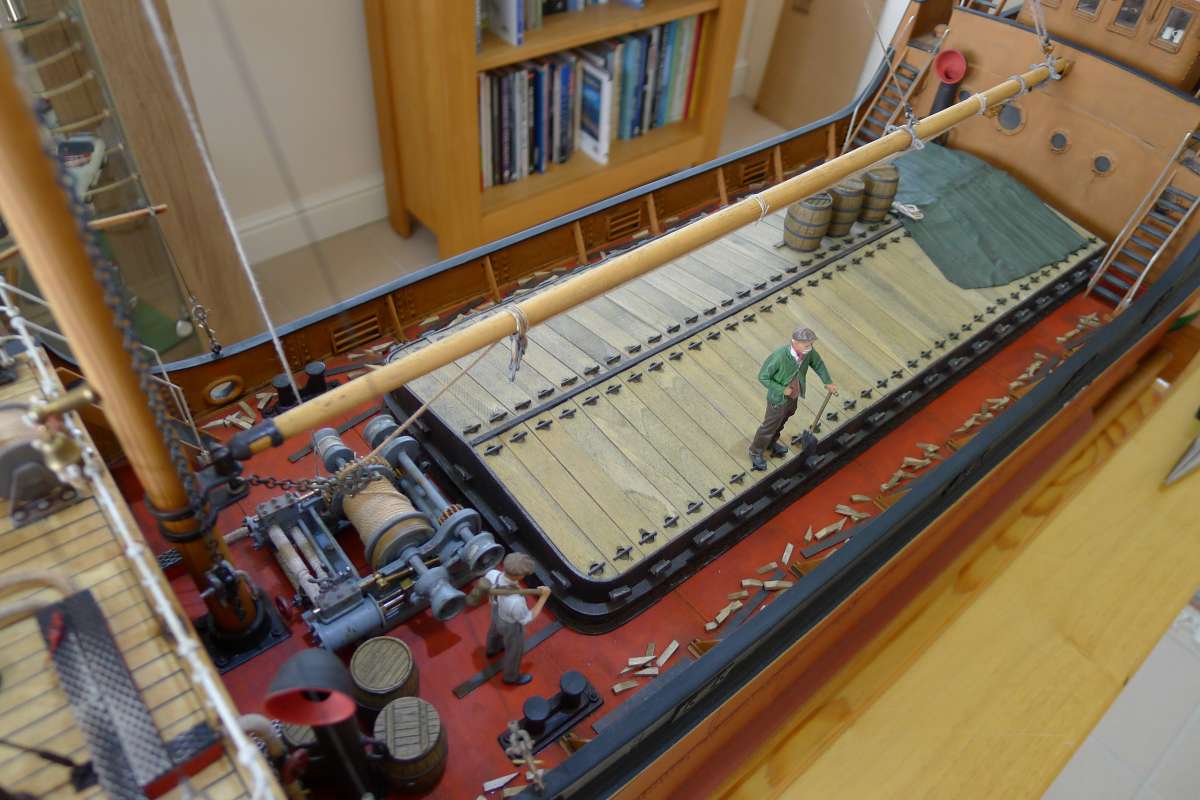
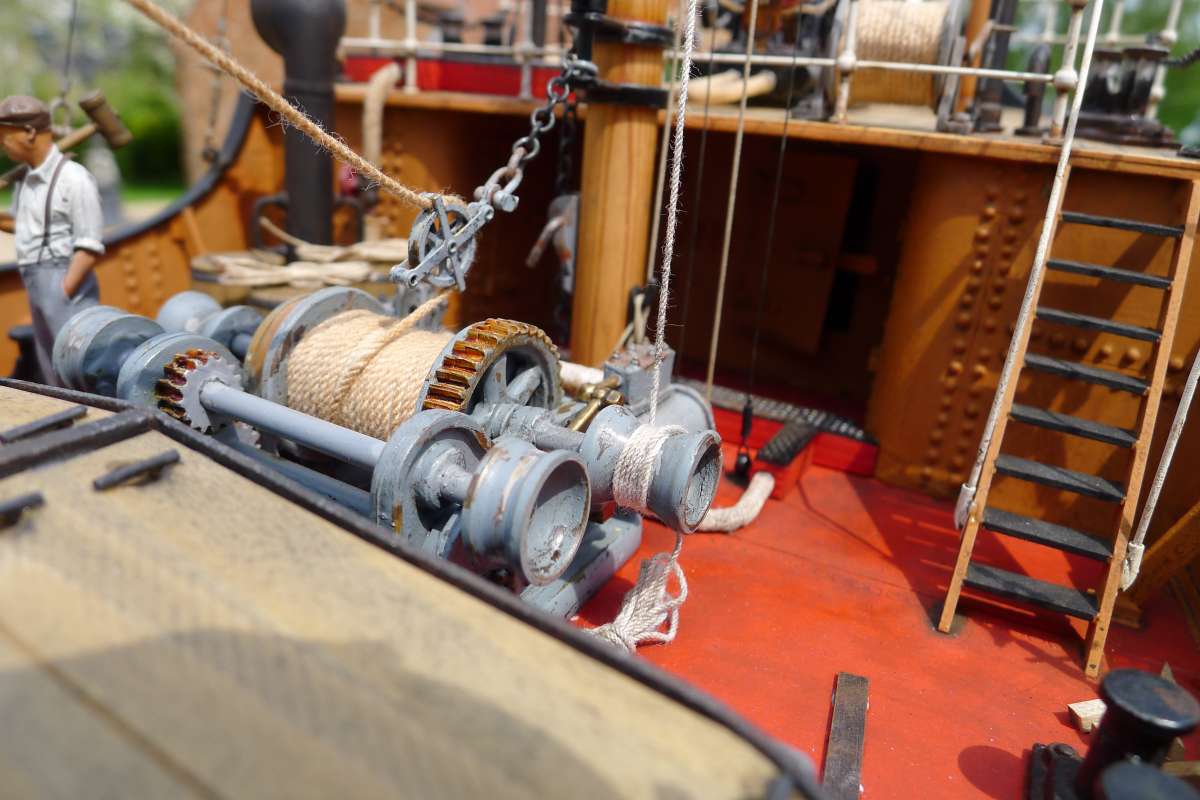
      I turned attention to the build of the steam winch, which I modified by quite a bit and is the subject of a magazine article so I won’t go into the details here.  Most of the running rigging was improved by the use of after market blocks and pulleys and a selection of scale ropes.  All was then finished off with a light weathering.

      05-04-21-06BenAinWinch1

      05-04-21-07BenAinDerrickRigging1

      05-04-21-08BenAinMastHead1

      P1100773

      P1100782

      P1100783

      P1100784

      Advert
      #118694
      Richard Simpson
      Participant
        @richardsimpson88330

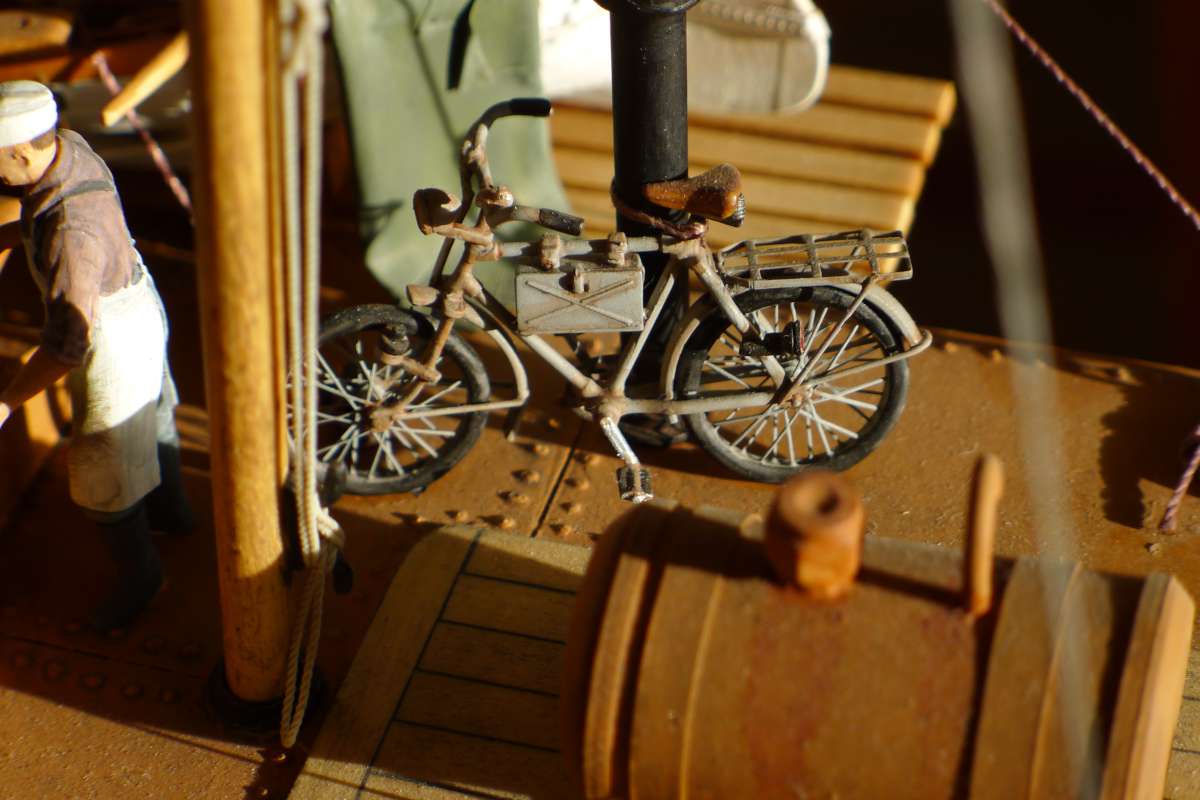
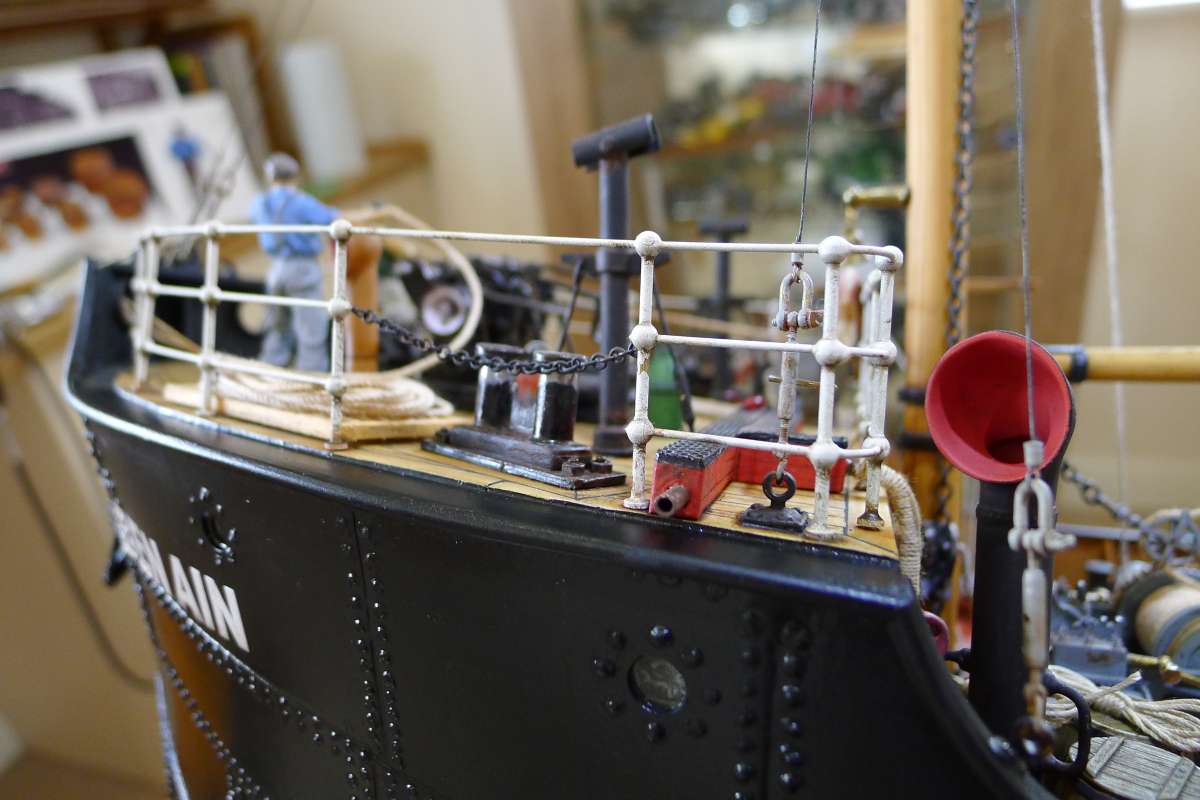
        A lot of bits and pieces of detailing was then attended to such as more gentle weathering and items such as the deck steam pipes.  The cast white metal steam pipes supplied were replaced by copper pipes of a suitable diameter, which was then bound with string and painted white to resemble steam pipe lagging.  Where the pipes run through deck conduit the chequer plate was painted a matt black , weathered and then gently worn away in areas of hight traffic with very fine wet and dry paper, to give a suitable worn and scuffed look.  Additional appropriate pipes were added and a couple of additional valves were added where I would expect them.  The kit supplied white metal anchor chain was replaced with a propper studded scale anchor chain.

        P1100770

        P1100772

        P1100776

        P1100777

        P1100779

        P1100780

        08-06-17-16BenAinQuarterDeckBike3

        #118695
        Richard Simpson
        Participant
          @richardsimpson88330

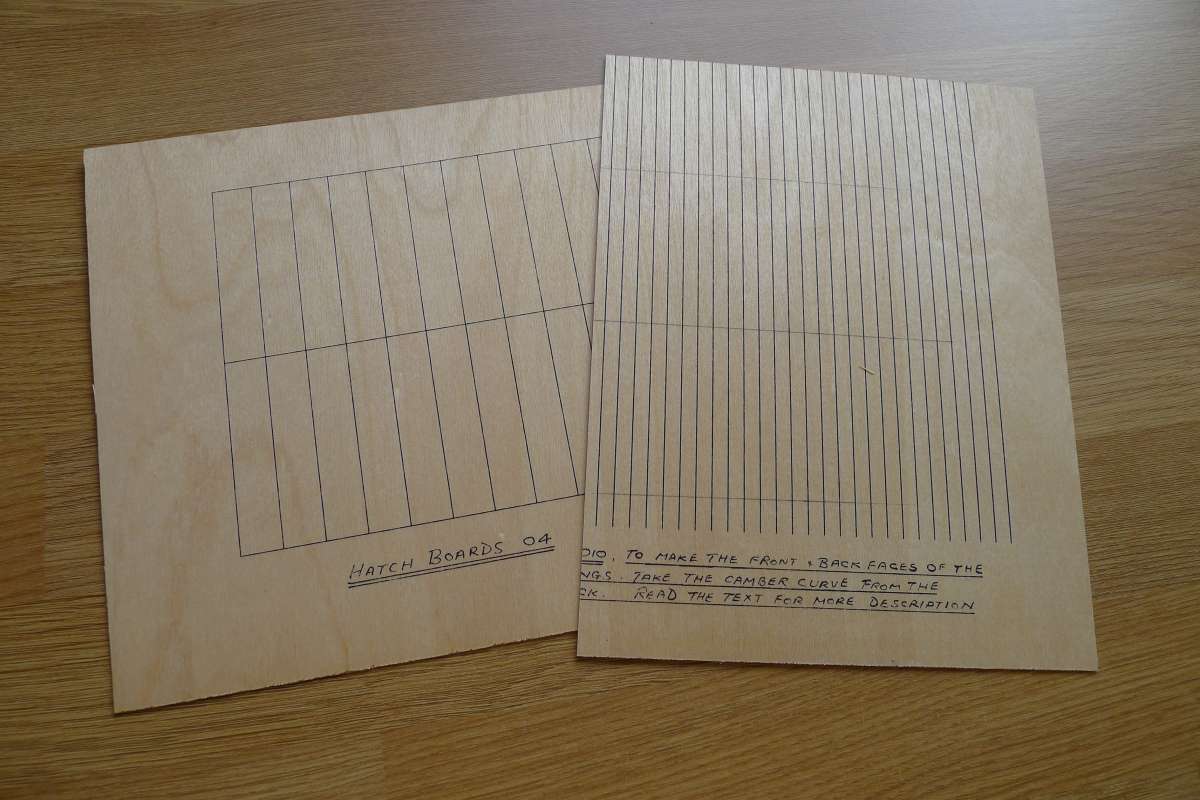
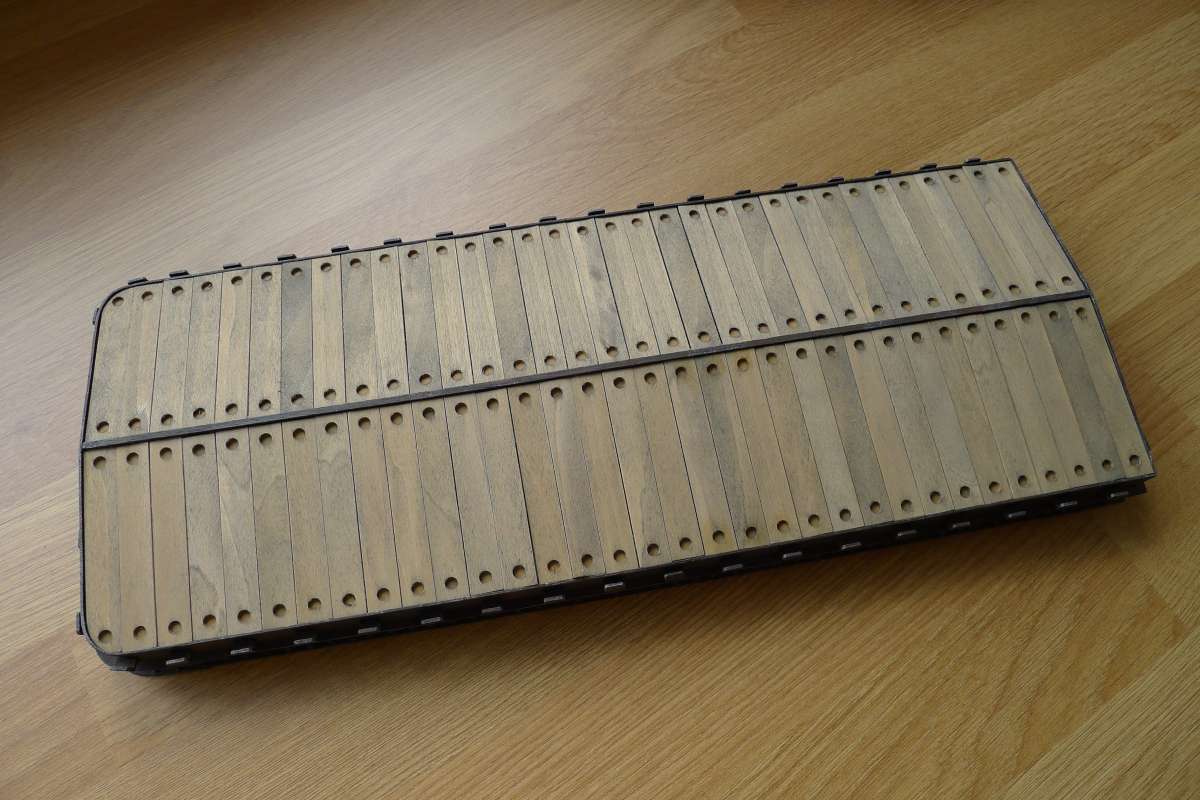
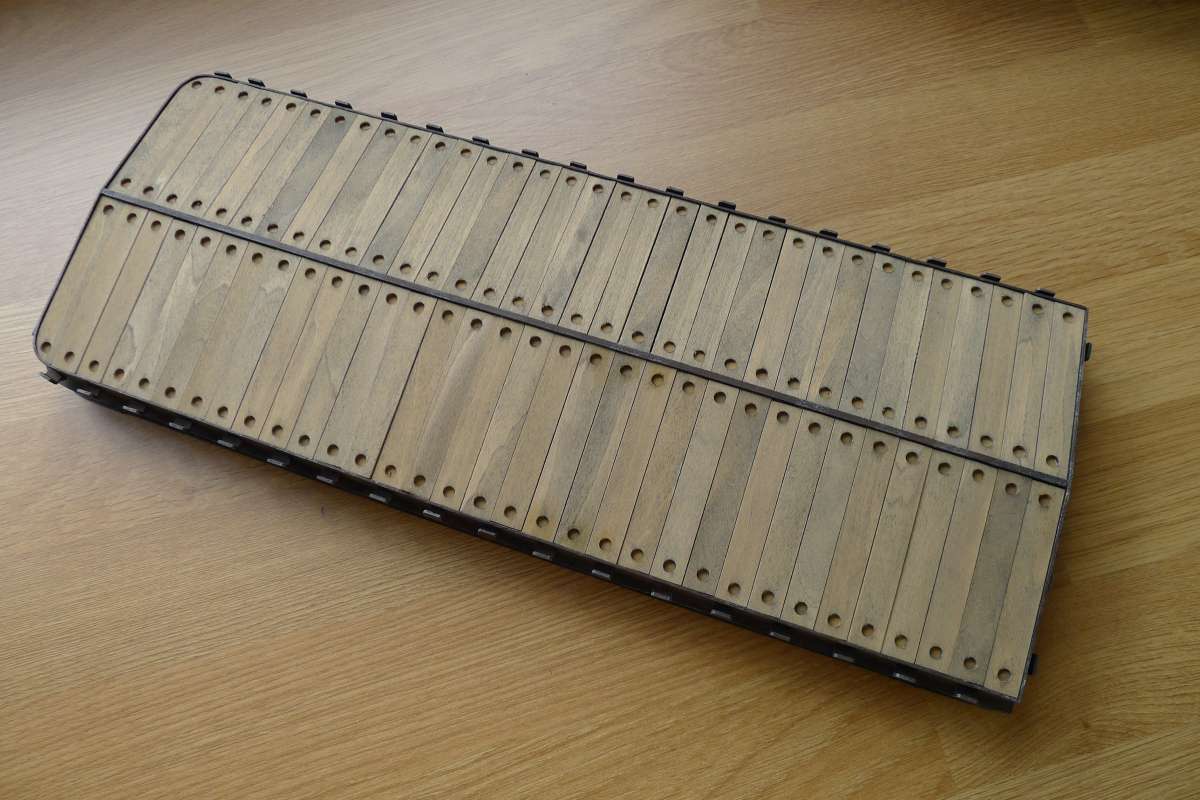
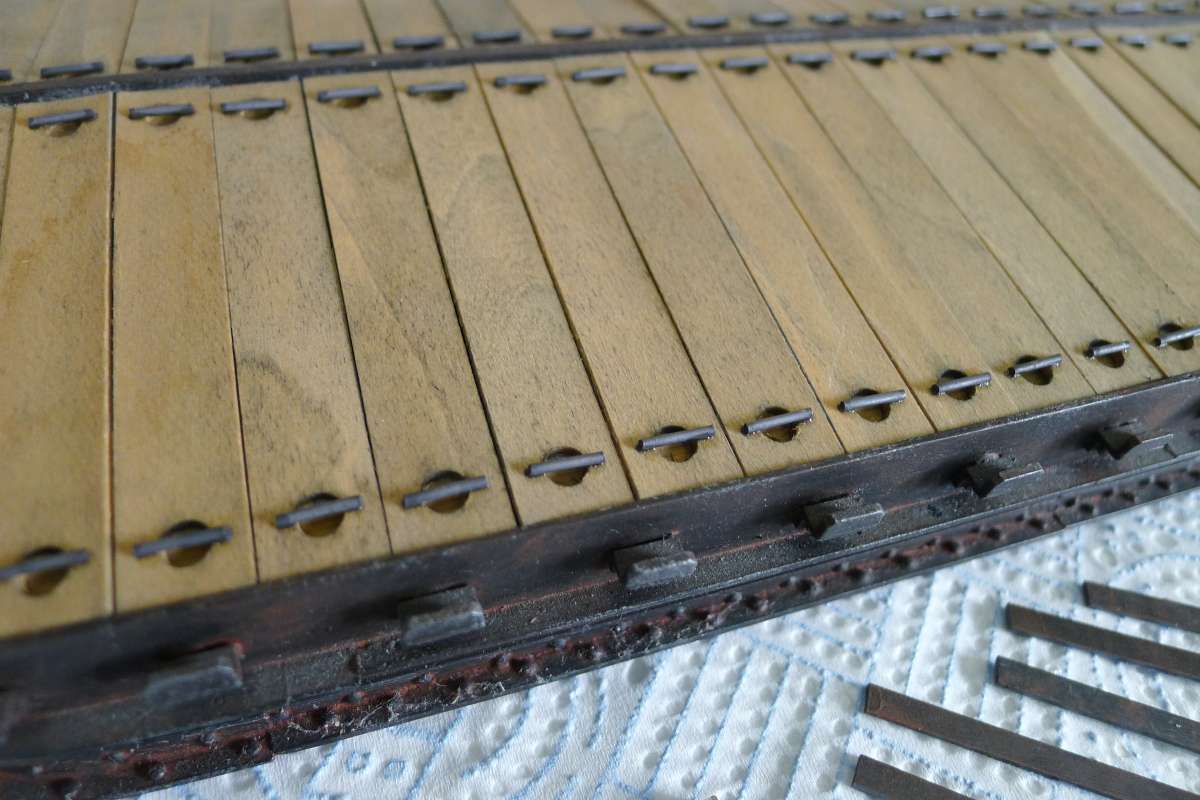
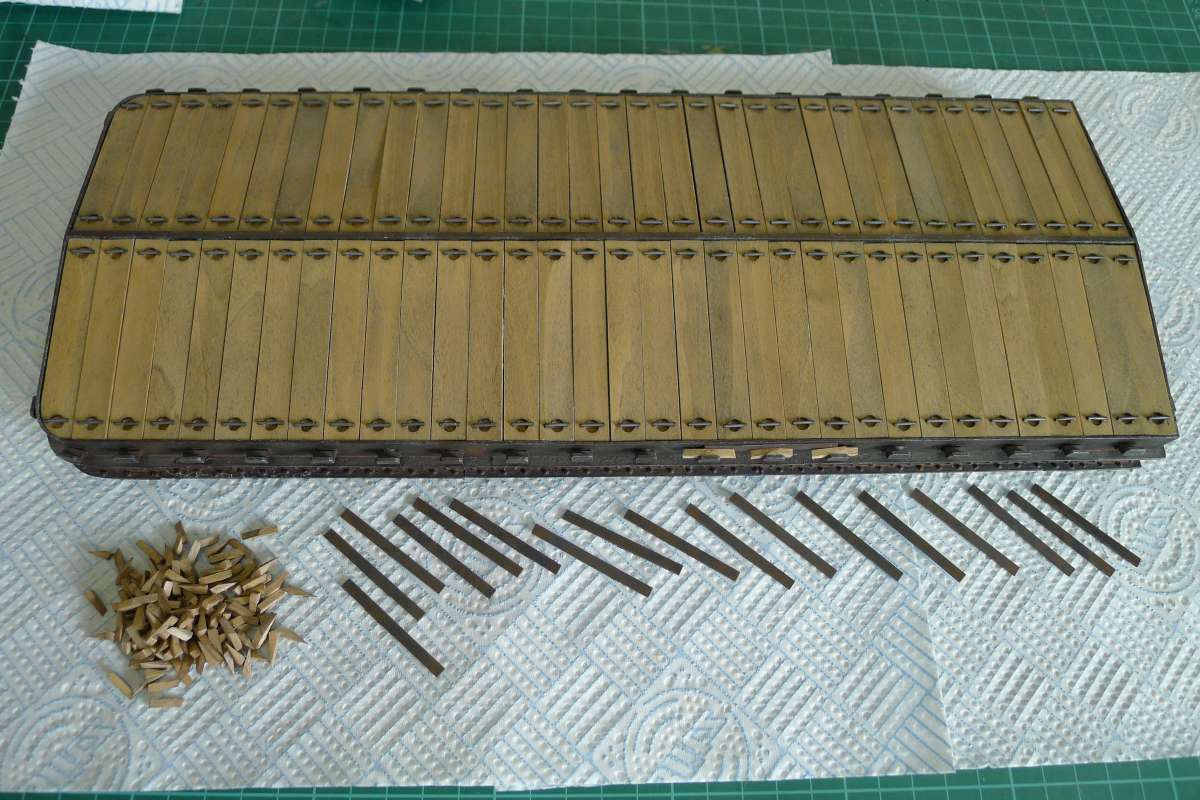
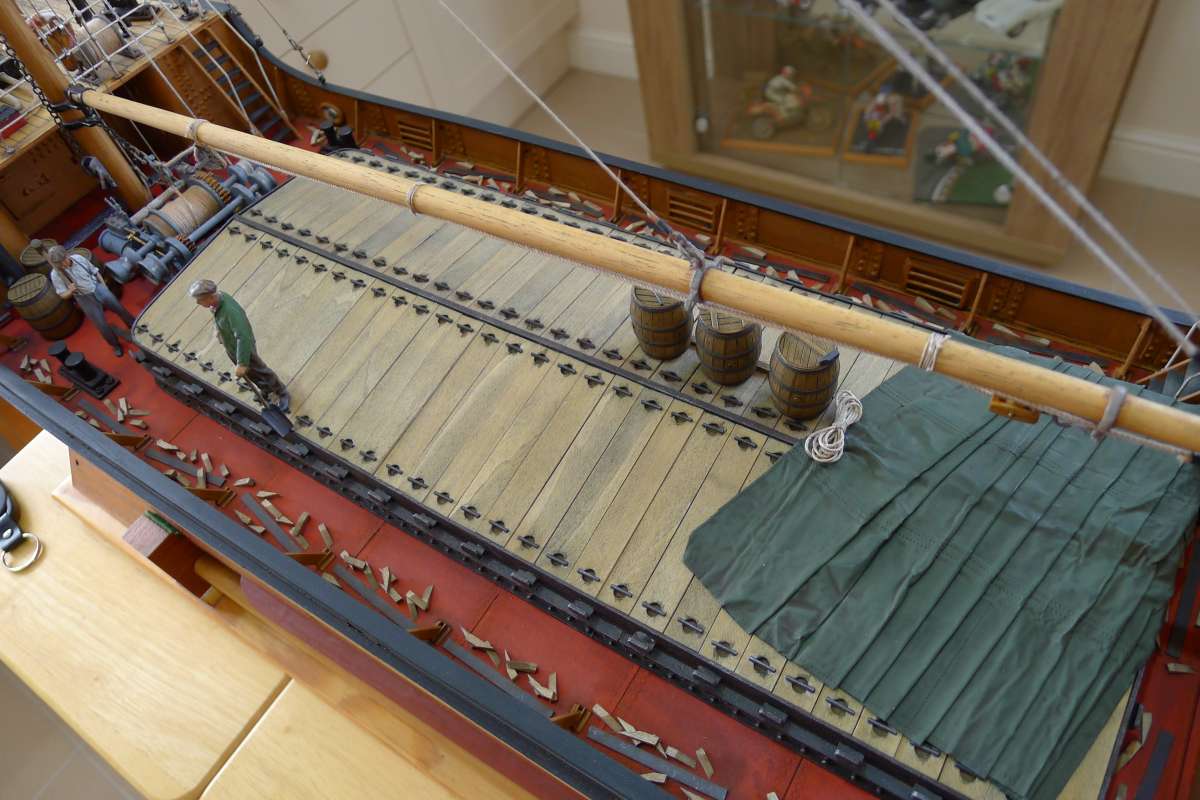
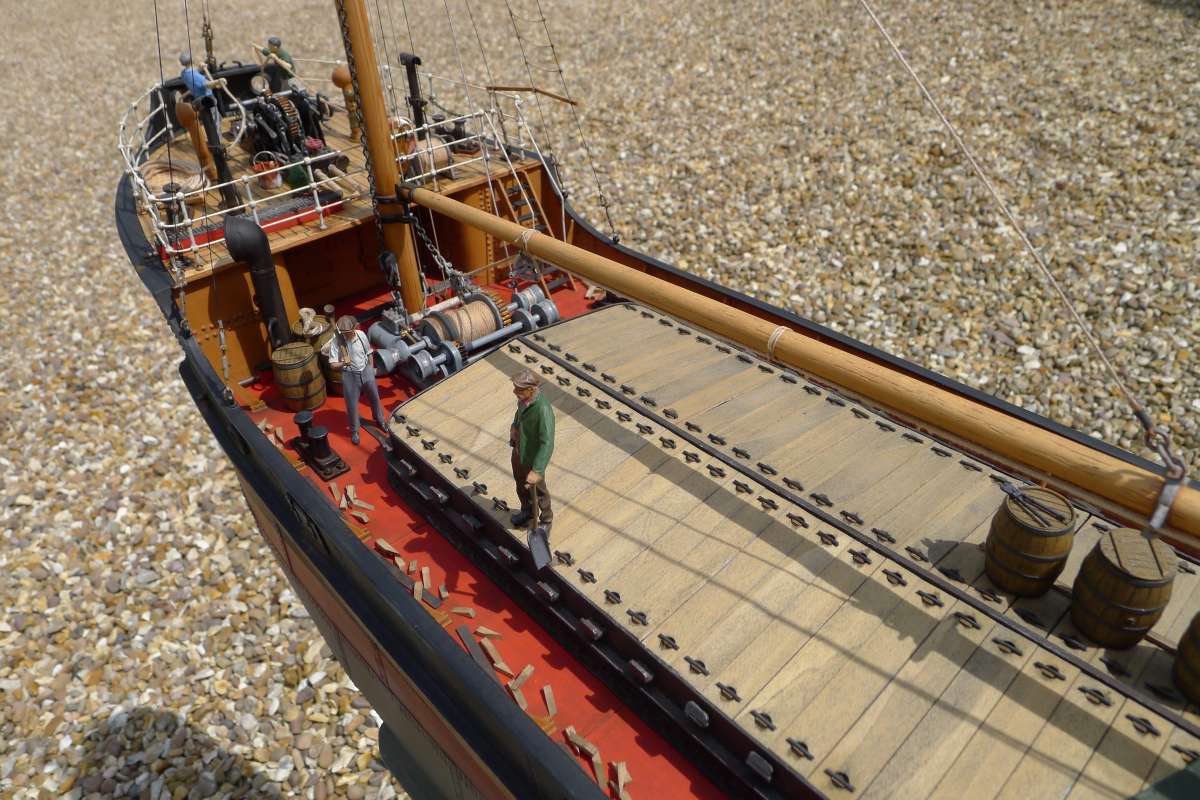
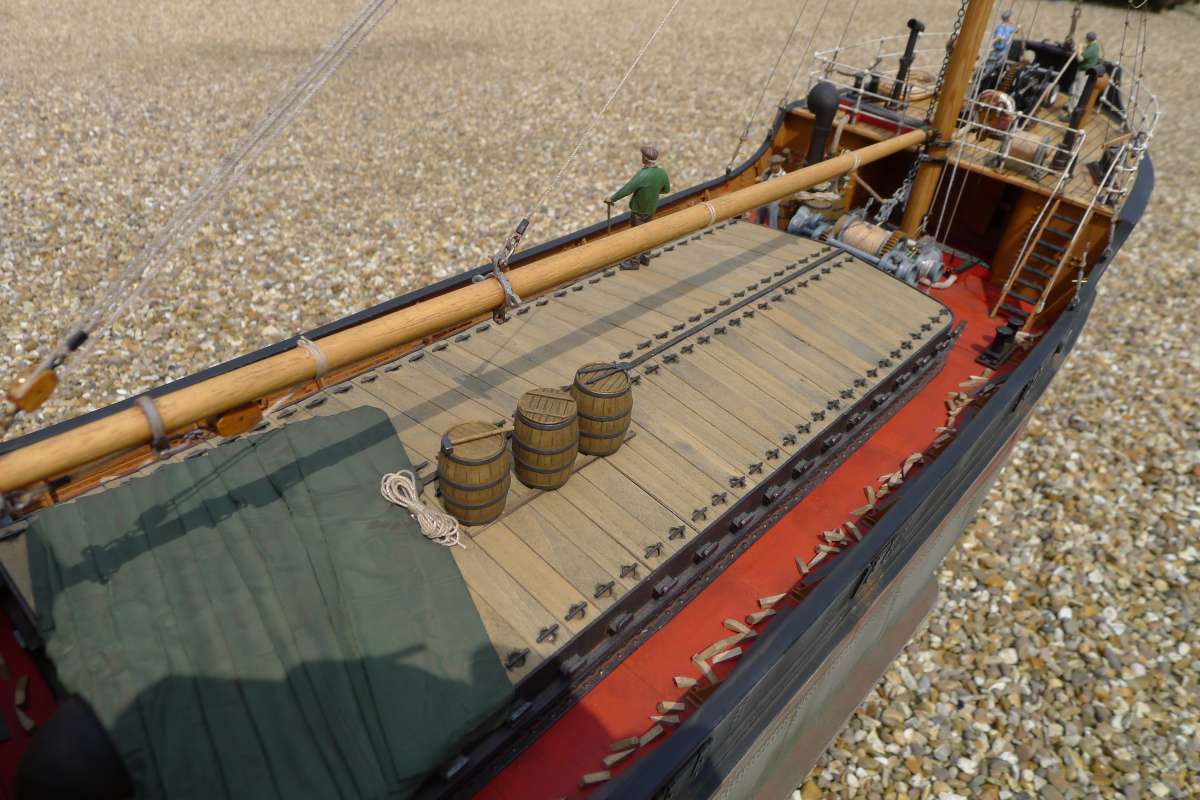
          So to finally bring us up to date I turned my attention to the hatch cover.  Again the supplied part was a printed ply overlay which did not look as realistic as I wanted.  With the grain going so obviously across all the planks it tended to stand out as a single peice rather than individual.  The overlay could be cut into individual planks, which would be a huge improvement but, my concern then was that the overlay was so thin, I suspected the planks would warp easily.  I decided to cut up my own planks.  First I obtained stripwood of the suitable width and thickness, made up a small jig and set about cutting the planks.  When I had a pile of planks I then adapted the jig to make a drilling jig and drilled the ends of the planks.  This was tricky as the wood was fairly soft and thin so had a tendency to split.  A very sharp drill, spinning fast and drilling fron both sides helped.  With the planks made the rear of the hand holes were blanked off with cartridge paper, which was then painted to match the colour of the wood and then the hatch boards were all weathered with a weak enamel wash.

          08-06-17-02PrePrintedPlyOverlay2

          08-06-17-03BenAinConstruction700

          08-06-17-04BenAinConstruction701

          #118696
          Richard Simpson
          Participant
            @richardsimpson88330

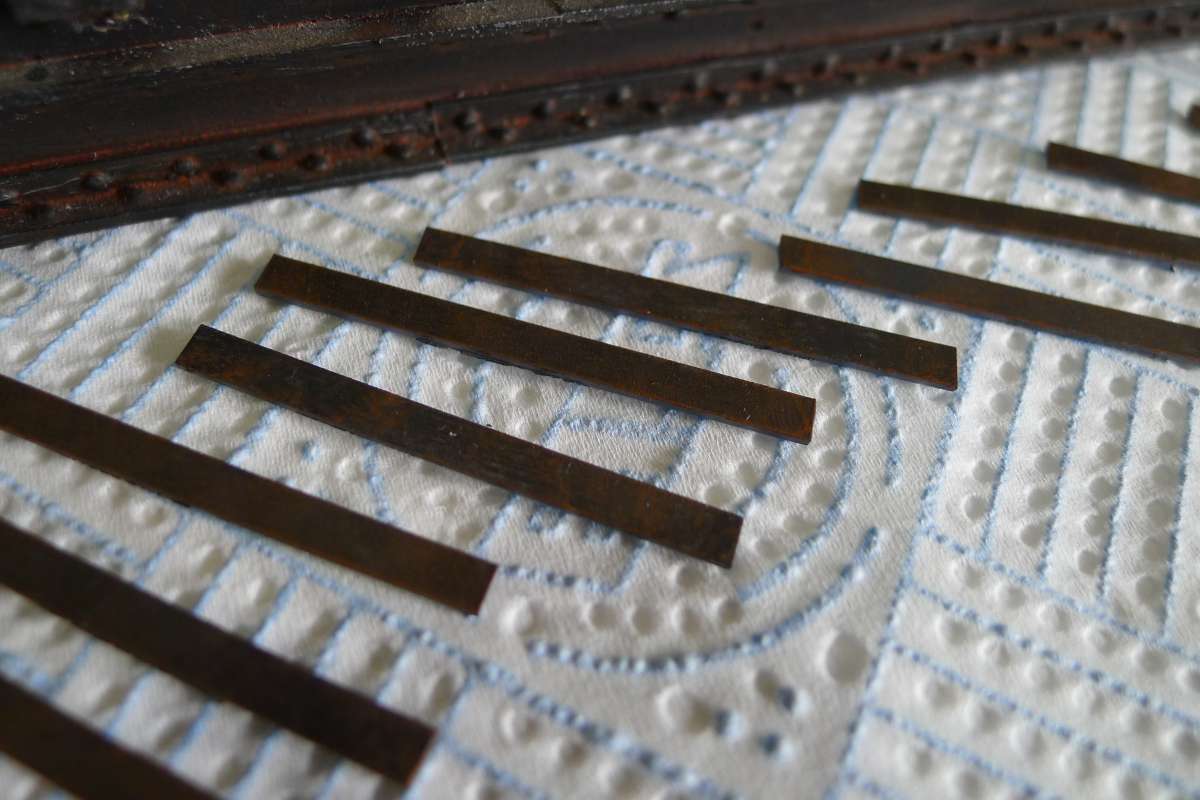
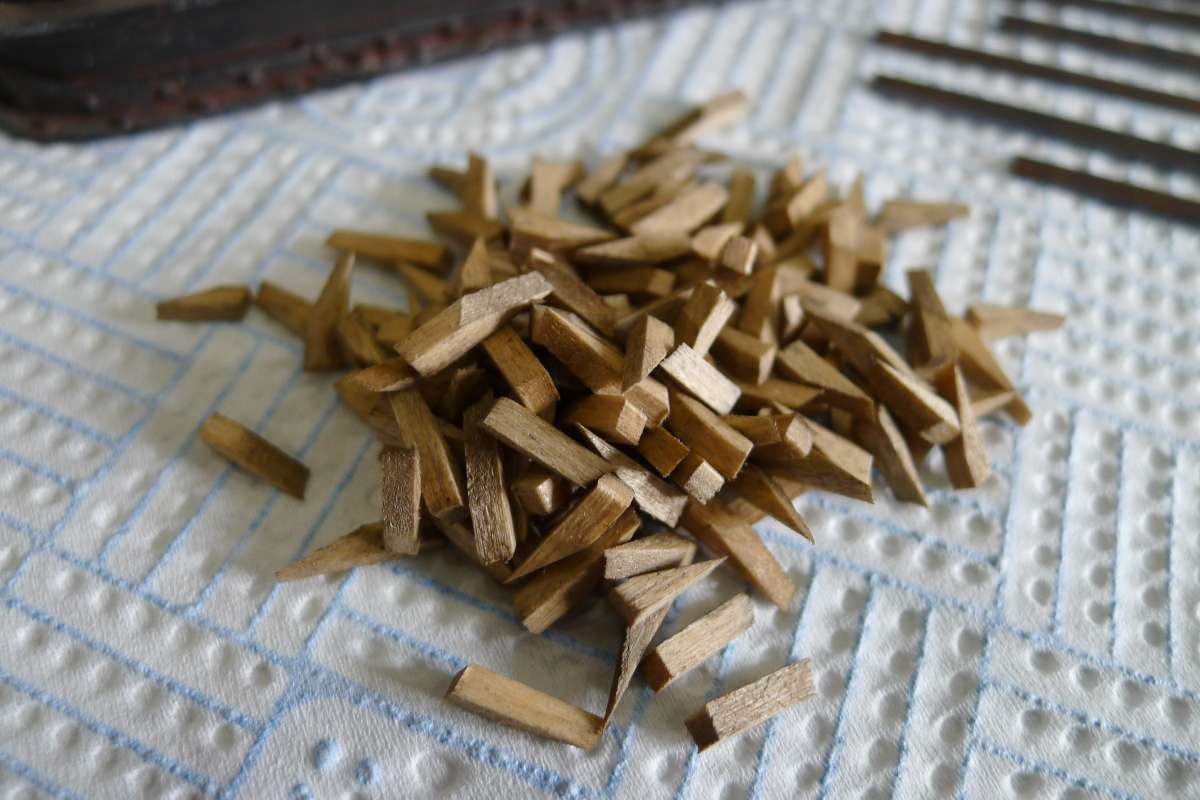
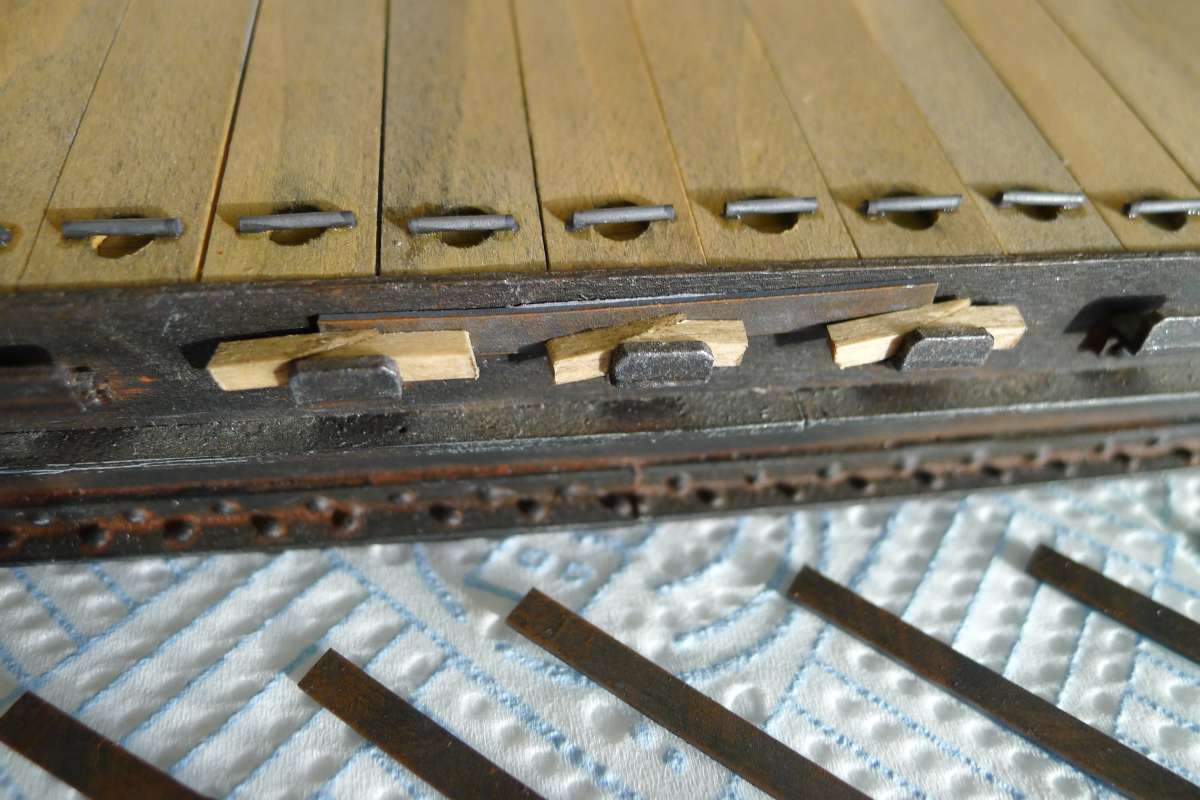
            Then the fittings.  The strongbacks were simply cut from suitable strips of Evergreen, painted and weathered and the wooden wedges were cut from a suitable square section peice of softwood freehand.  The wedges were then all placed in a bath of thinned enamel wash and laid out on kitchen roll to dry .

            P1100809

            P1100808

            The biggest job was making the handles.  This was Evergreen rod cut to consistent pieces, again by making a little brass cutting jig and glued across the hand holes with a spot of cyano.  I pre painted the rod but the white cut ends stood out so every single one had both cut ends painted up after they were glued in place.

            P1100810

            So then I had the components I needed and, just to prove everything went together as they should I tried to assemble them.  They did the job.

            P1100807

            P1100813

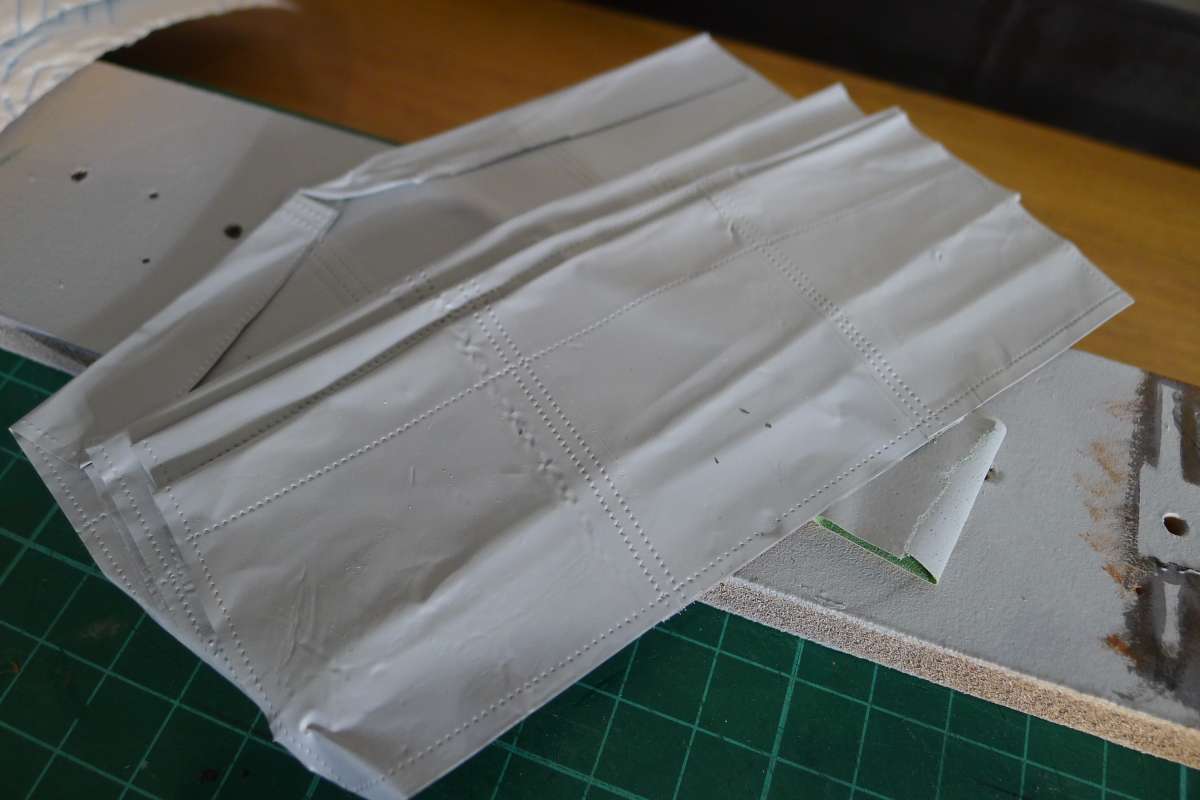
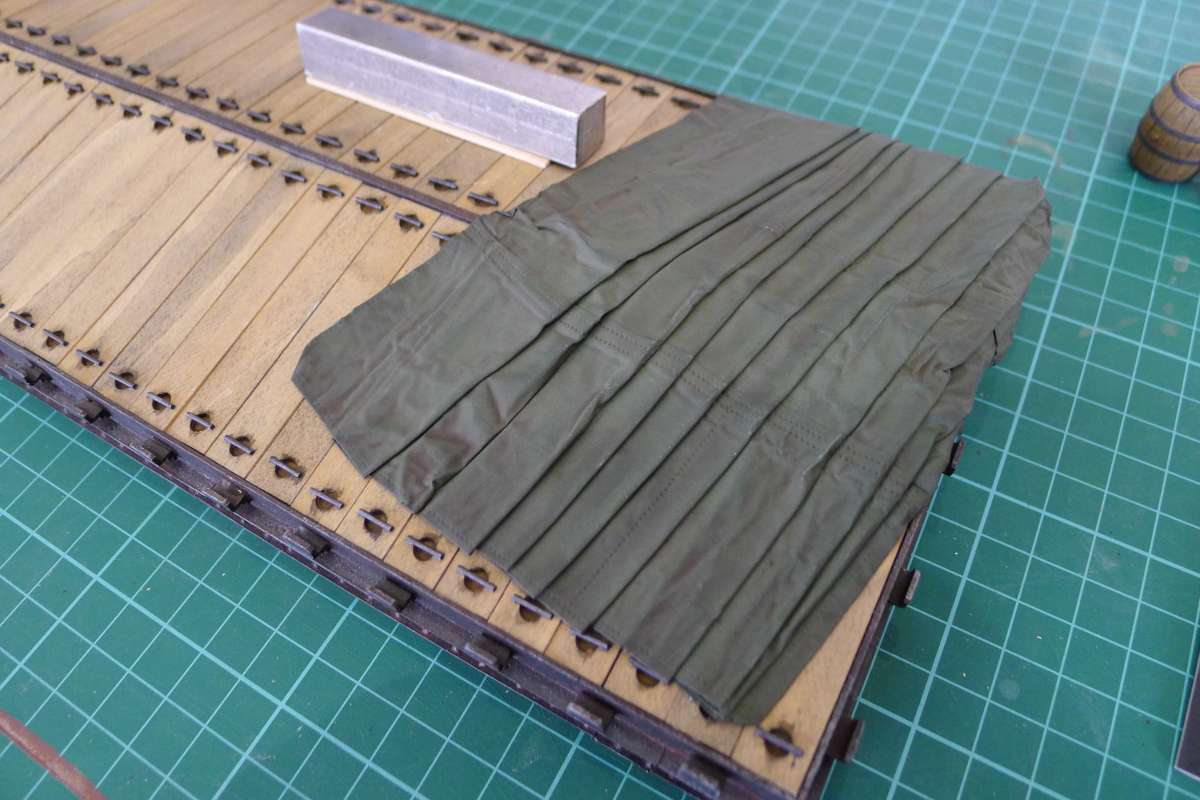
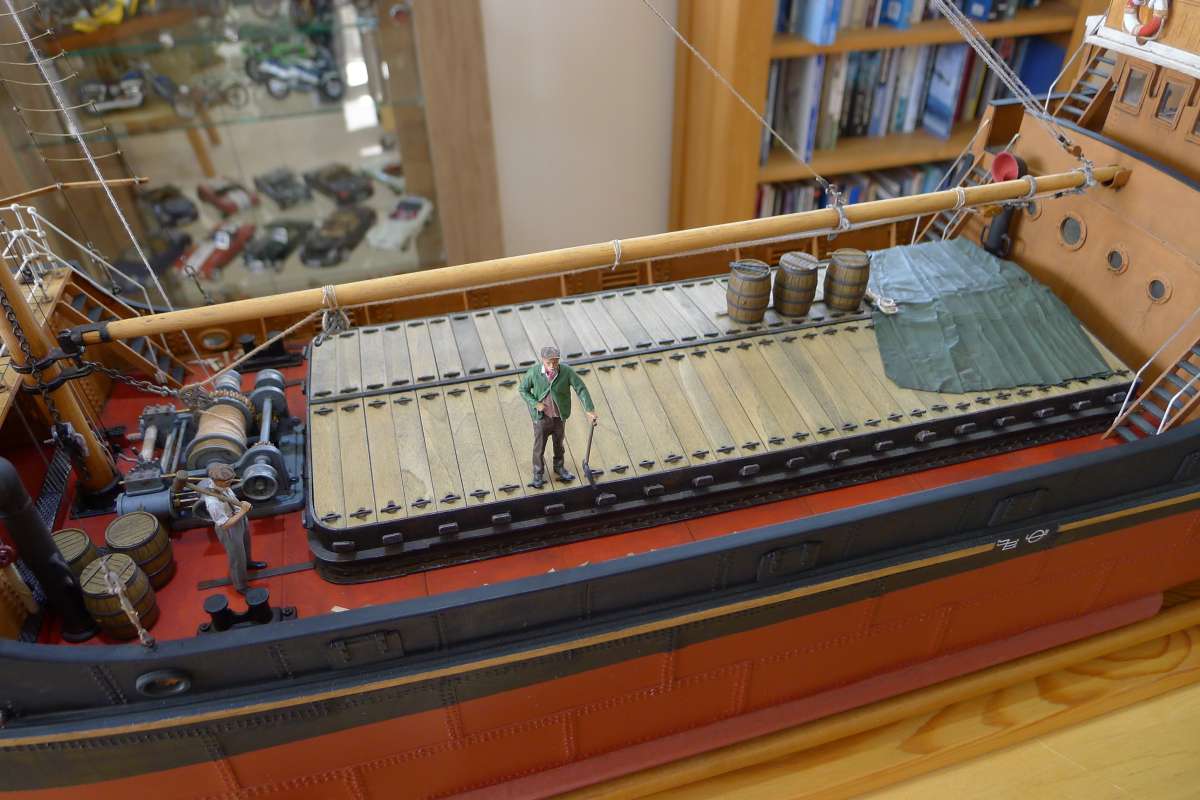
            Finally I needed a tarpaulin cover so this was made up from air conditioning duct tape, with the gum removed, stuck together and detailed with the pounce wheel.  This was then folded in a fairly typical arrangement ready to be draped across the hatch and given a coat of acid etching primer.

            P1100814

            #118698
            James Hill 5
            Participant
              @jameshill5

              Great pictures Richard.

              The close up nature of the way you’ve taken them shows the quality of work you’ve taken to get the result shown.

              Jim.

              #118701
              Richard Simpson
              Participant
                @richardsimpson88330

                Sometimes its a bit scary when you see things so close up and can see all the faults!  Sometimes I take a picture, look at it and then decide to redo it because I’m not happy with it.

                #118924
                Richard Simpson
                Participant
                  @richardsimpson88330

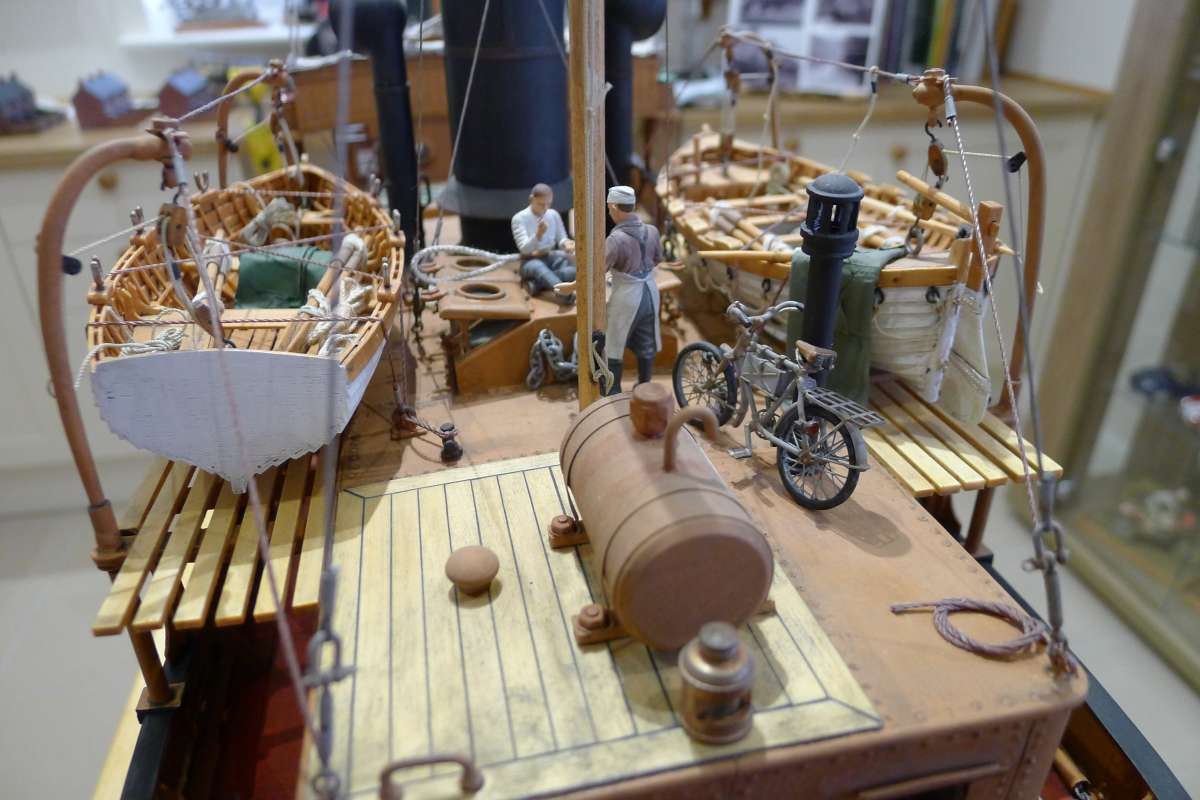
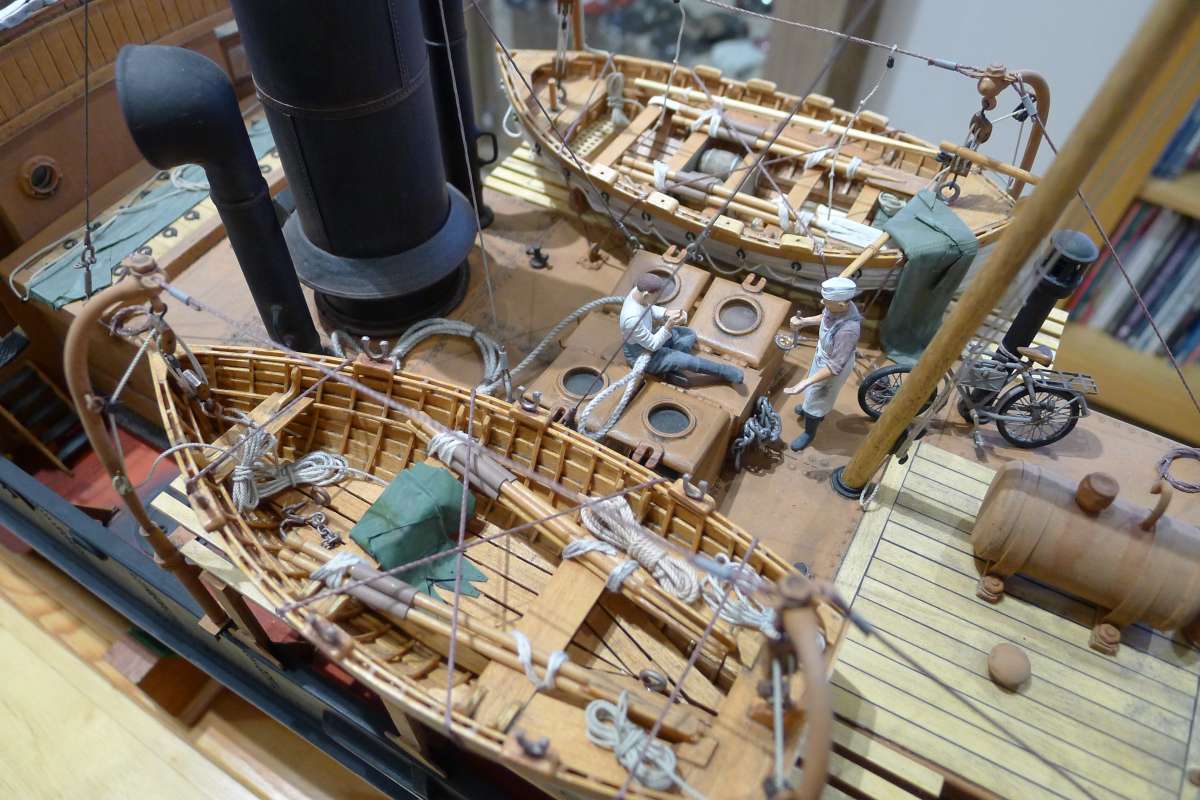
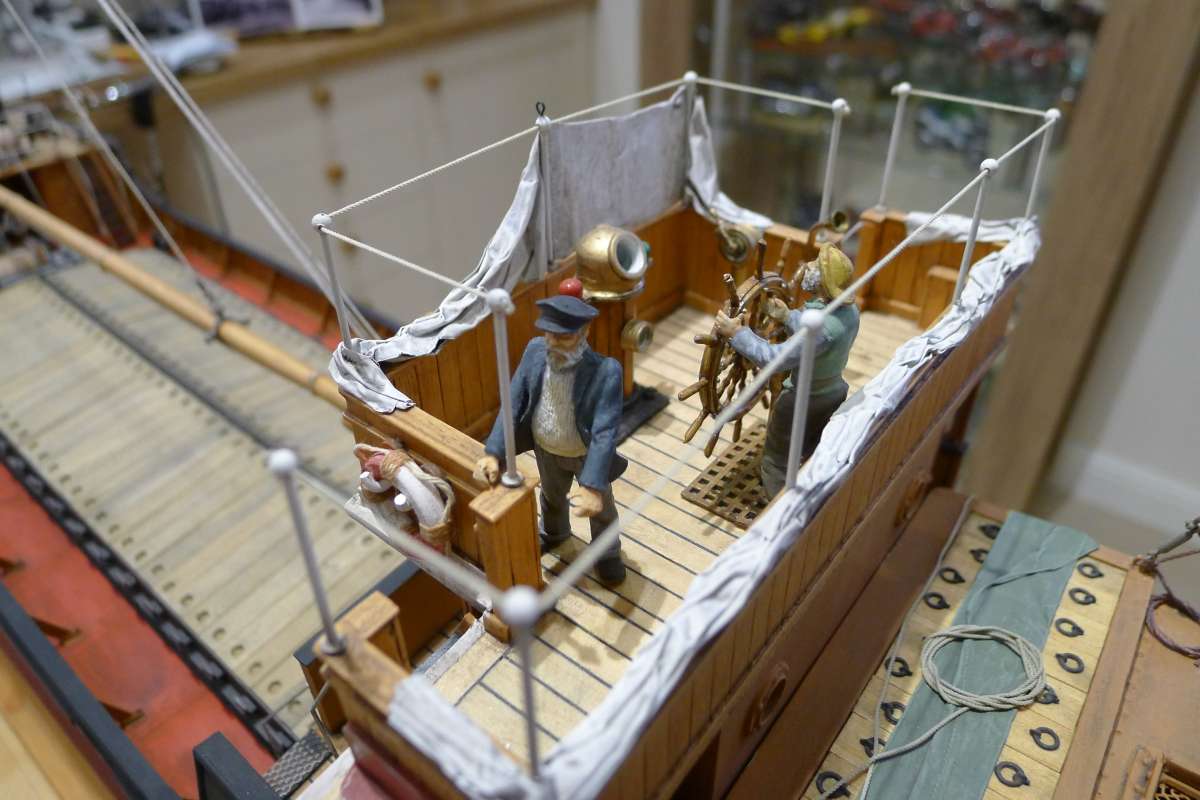
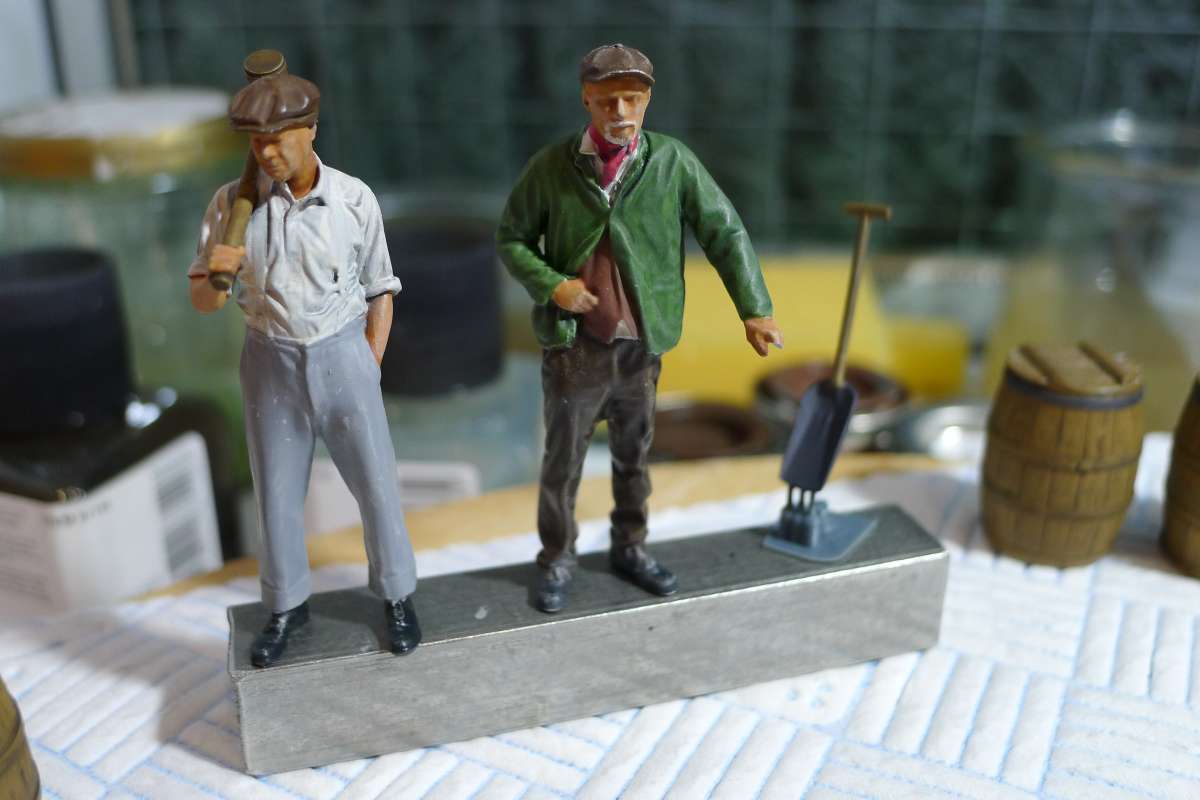
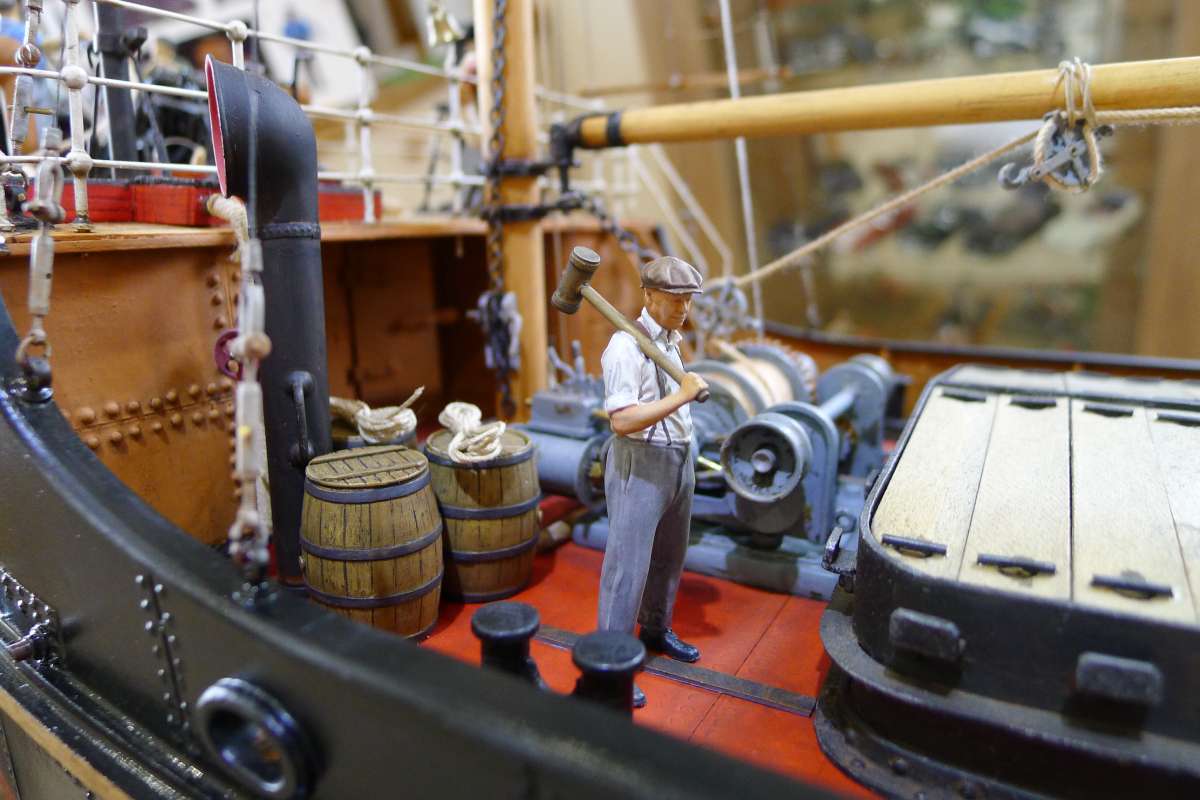
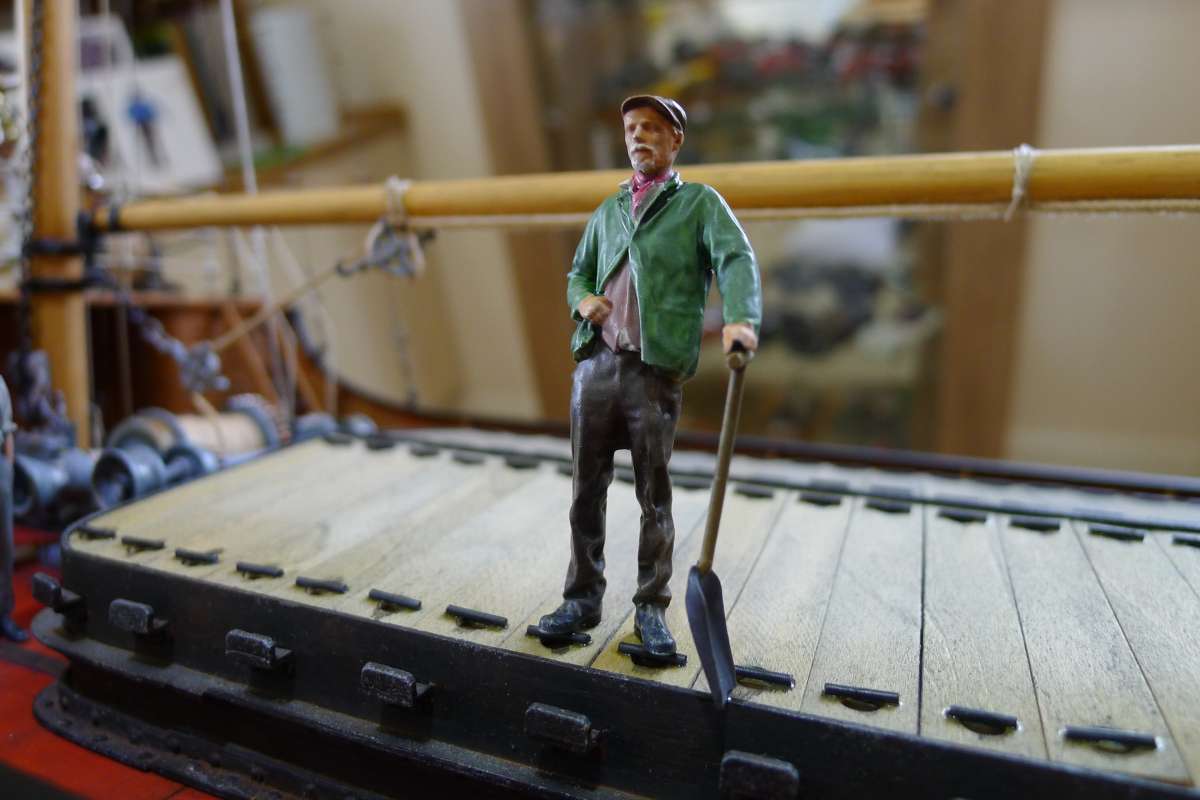
                  As usual it is those last little bits and pieces that seem to absorb so much time.  I have been working on a few detail pieces that I want to add to the hatch area to just enhance that ‘busy’ feel about the model.  The figures are in the process of being painted and have one or two more things to do to them but they are coming along and I’m quite pleased with them.  There is still more painting to do to both of them yet though.

                  P1100884

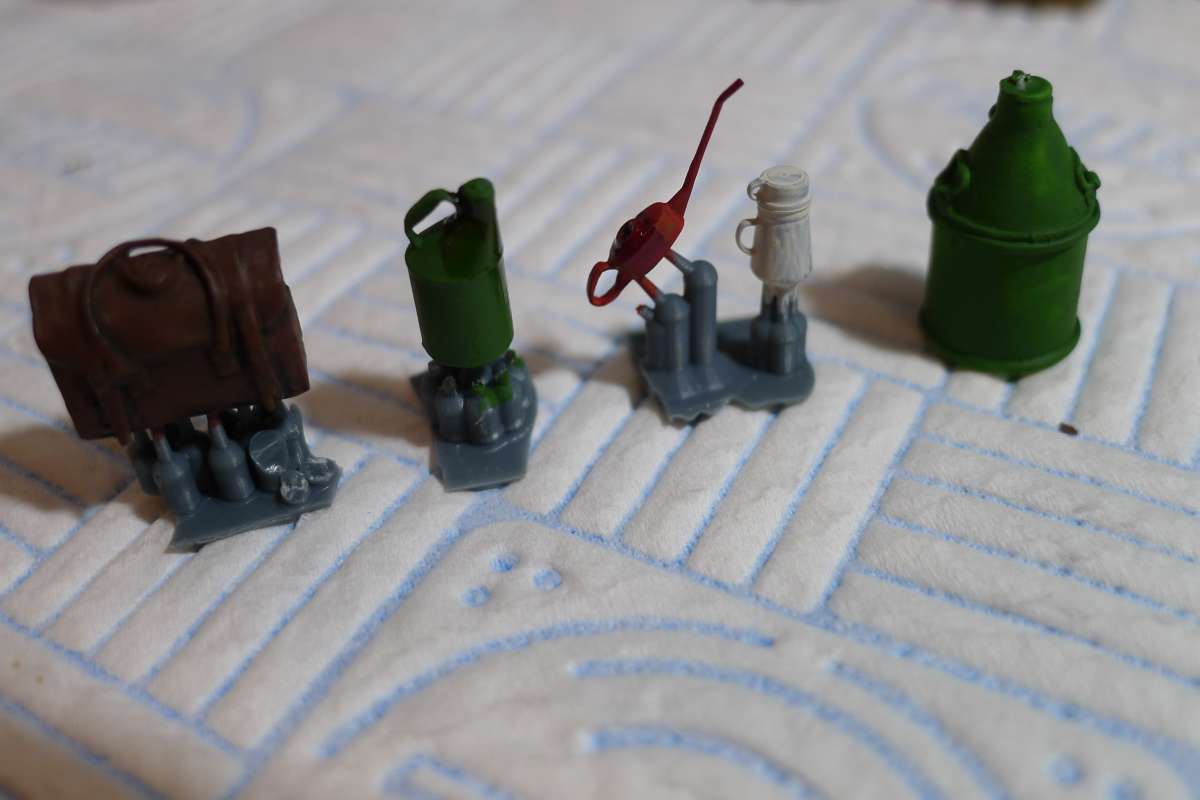
                  I got hold of some bits and peices of detail such as oil can, a leather bag and a tea flask, all of which need further painting but are coming along nicely.

                  P1100885

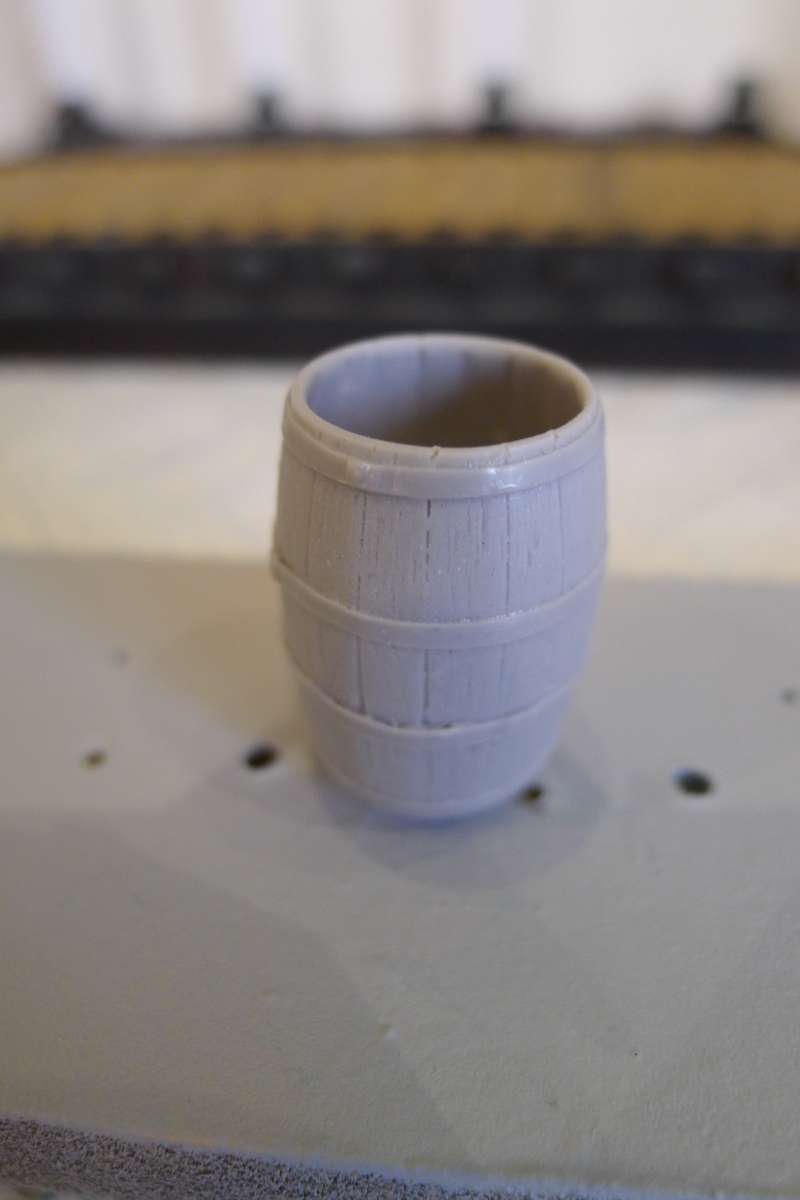
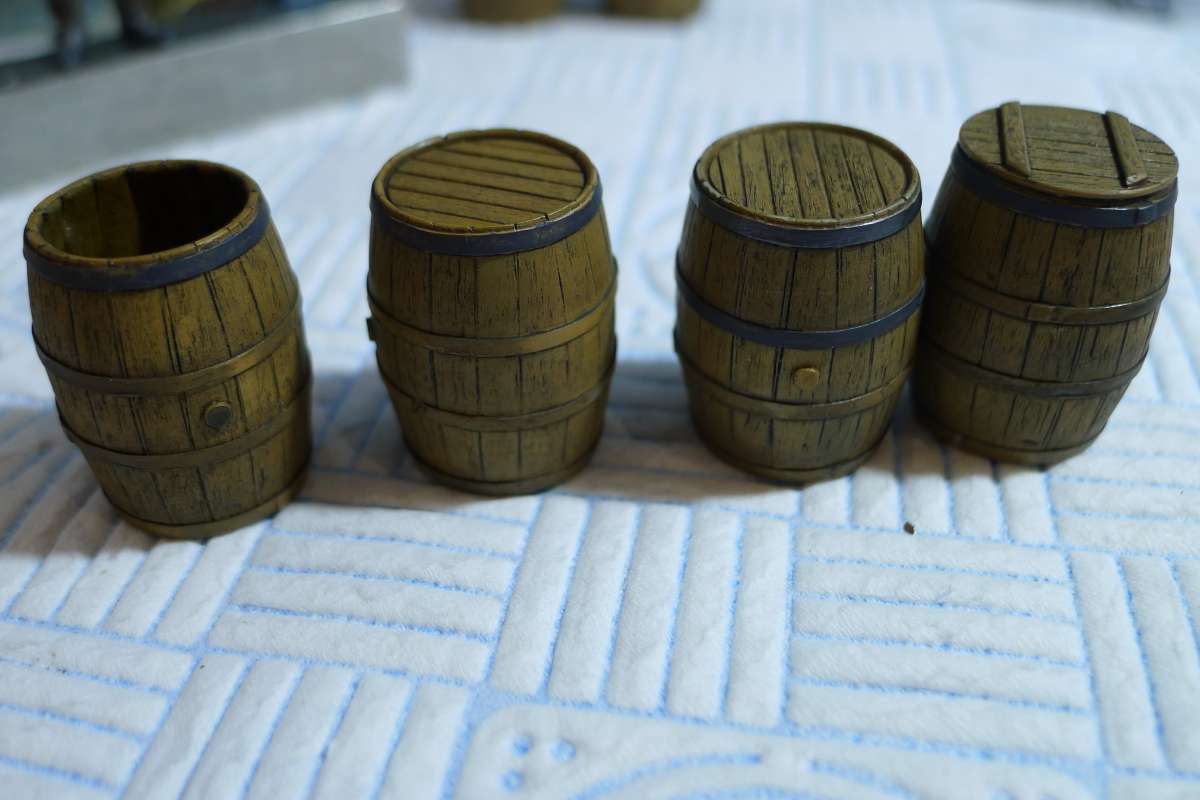
                  Finally I read that it was common in the 1920s and 1930s for coastal steamers to carry barrels of lubricating oil on deck as a deck cargo.  I managed to find myself some 1/32nd scale cast resin wooden barrels and painted them up with a buff base coat and a dark brown wash over the top.  The hoops will be picked out with gunmetal enamel, which polishes up when rubbed and looks very effective against the wooden finish.  One is open so will be put somewhere appropriate as a barrel for something like treating standing rigging ropes.  I still have a lot of the hoops to paint as it is a very laborious and painstaking process.

                  P1100886

                  P1100883

                  #118930
                  James Hill 5
                  Participant
                    @jameshill5

                    Very nice weathering detail Richard. As you say, it’s the fiddly little detail that makes any model come to life. Always worth the effort though.

                    Jim.

                    #120118
                    Richard Simpson
                    Participant
                      @richardsimpson88330

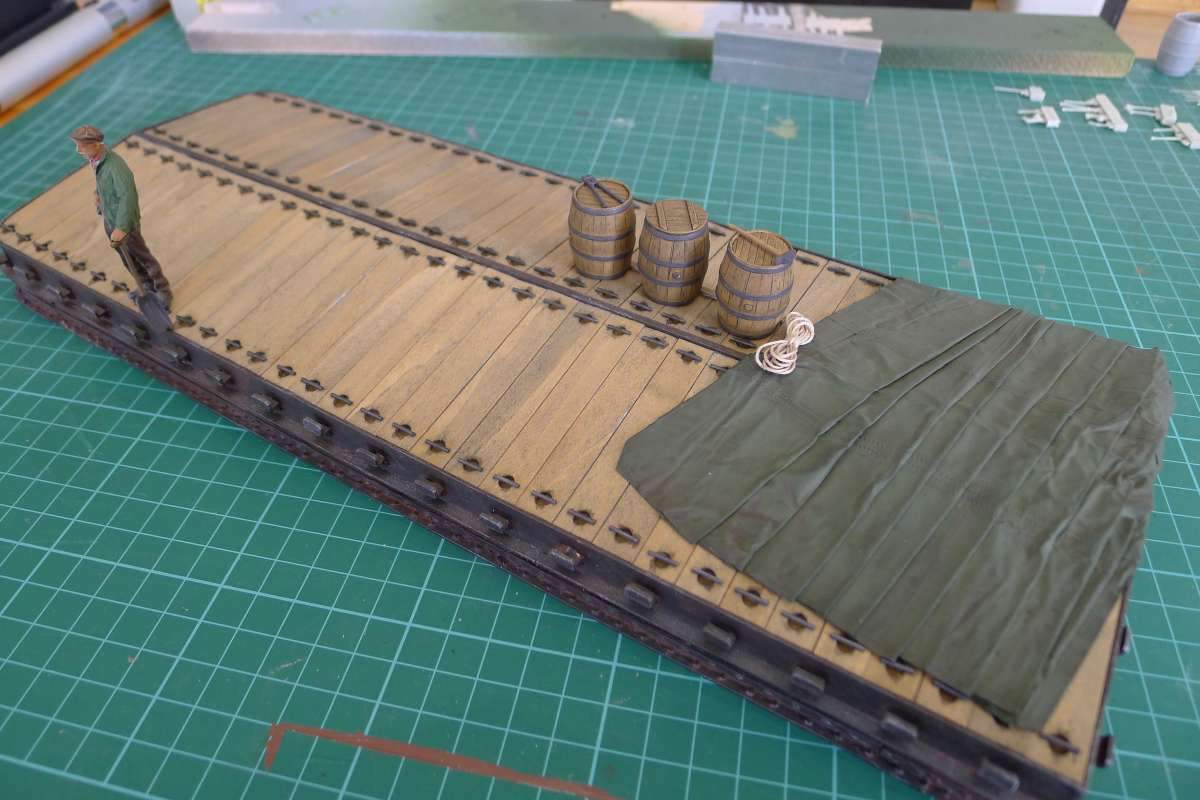
                      A little bit of progress on the hatch recently.  The figures are now in place securely, the tarpaulin has been painted up and the barrels placed on the hatch waiting for stowage.  It could of course be argued that the ship wouldn’t be under way with unsecured deck cargo and the tarpaulin not fitted, which would be quite right, but, as this has now become a static model I can argue that she is still tied up!  I’m not too bothered either way but I do know she won’t be seeing water again.  Sad in a way but I’ve thoroughly enjoyed the build and I have plenty of other, more robust, seaworthy models to enjoy on the pond.

                      Work progresses on weathering the hull so pictures of that to follow soon.

                      P1100909


                      P1100912


                      P1100914


                      P1100915


                      P1100916


                      #120119
                      Richard Simpson
                      Participant
                        @richardsimpson88330

                        And a couple more to bring the deck work to a completion.  The first picture is the first process in weathering the hull.  That was a watered down dark brown wash, painted over the entire hull to add a bit of depth to the shadows and around the rivet detail.

                        P1100917


                        P1100918


                        P1100919


                        P1100920


                        #120122
                        James Hill 5
                        Participant
                          @jameshill5

                          Lovely model Richard,

                          Well worth the time taken to get to this point. Although not going in the water it would certainly be a talking point for anyone who saw it. I’ve followed the posts with great interest, hoping to learn things as it’s gone along.

                          Jim.

                          #120130
                          Tim Rowe 1
                          Participant
                            @timrowe1

                            Simply brilliant Richard. It is a shame that it will not get wet again.  Would you consider running it in an indoor pond such as used in exhibitions?

                            GRP is so easy to repair.  I would be sorely tempted to cut out the steel from outside. Bond in a watertight internal shin and then replace the cut-out part to restore the finish.  I am sure there were no puffers out there that did not have bottom plating repaired at some time or another.

                            Tim

                            #120136
                            Richard Simpson
                            Participant
                              @richardsimpson88330

                              Many thanks for the thought Tim.  I have actually considered exactly your approach to resolve the ballasting issue but, unfortunately there are two main problems with it.  One is the ballast, which while on the heavy side, could be reasonably accommodated with calm water, but the other is the levels of detail I have included.  It has made the model very delicate and while it all adds to the overall effect I was trying to achieve it has resulted in a model that would be very easy to damage.

                              I think basically I had given up on the idea of it being an operational model some time ago now, which then really gave me the green light to go to town on the detail.  For instance while the hatch cover is removable, having a fully scale rigged cargo boom over the top of it and figures liberally scattered around demands great care when removing and not the robust thing you need to be taking off the model so frequently.  I had thought of maybe putting it into a show but the thought of just knocking the mast on something and seeing the rigging all coming adrift ensures I will be far happier when it is safe in a glass case.

                              I’ll be sure to take plenty of pictures before it goes into its case though.  I’ve also rigged up the lighting to work from a key fob via a receiver and relay and I’ve fitted batteries with a ten year shelf life so I’m hoping the lights will work for a good few years before I have to lift the top off again.

                              #120151
                              Richard Simpson
                              Participant
                                @richardsimpson88330

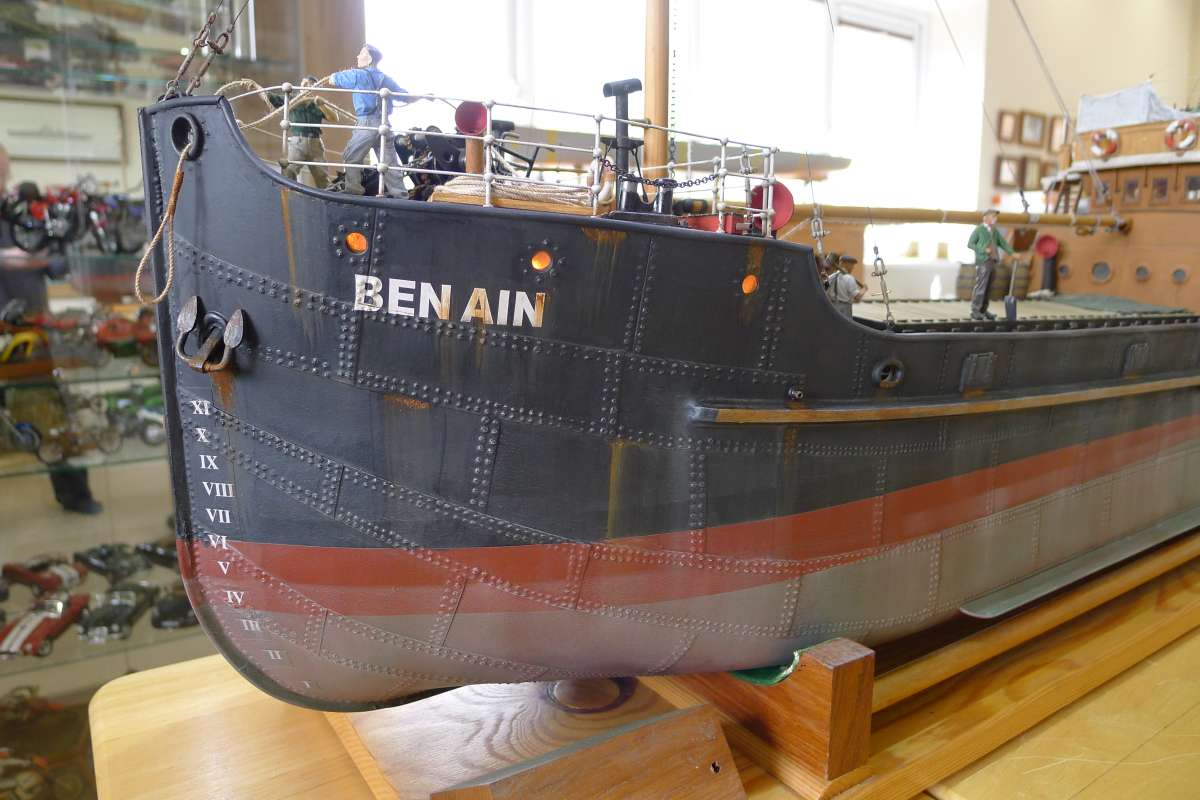
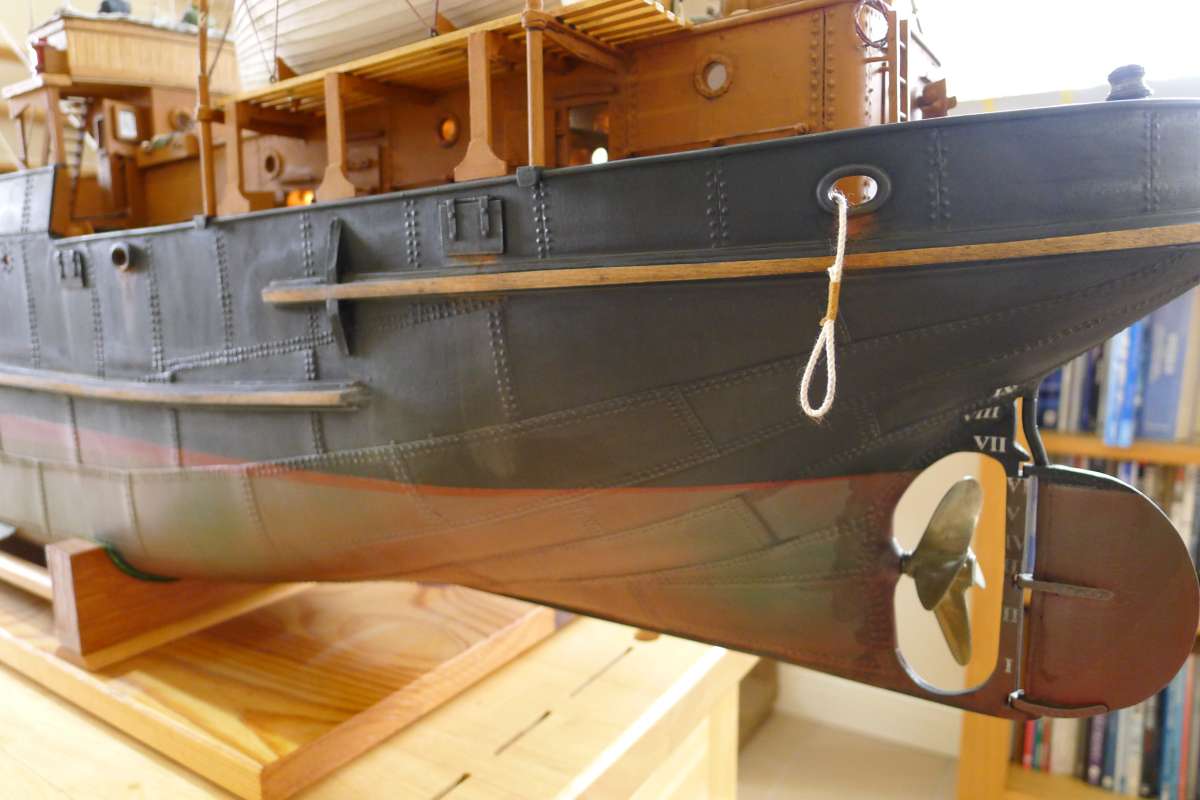
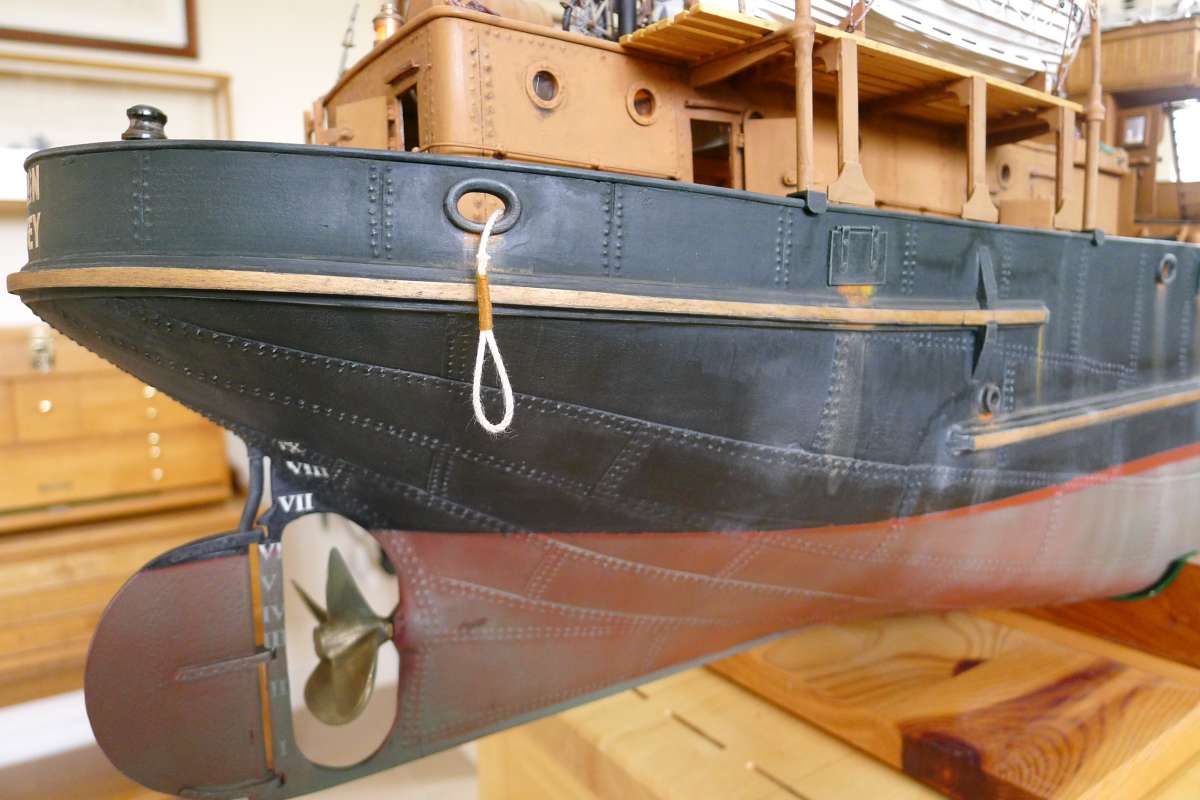
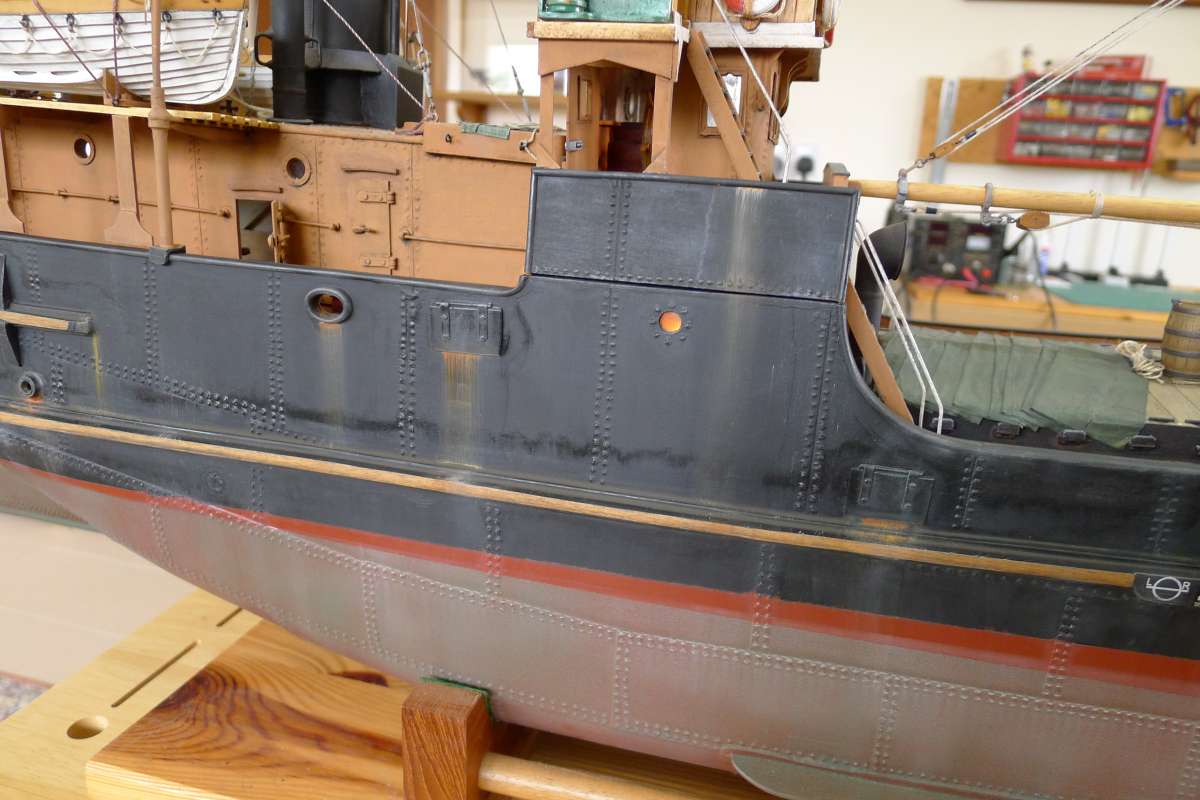
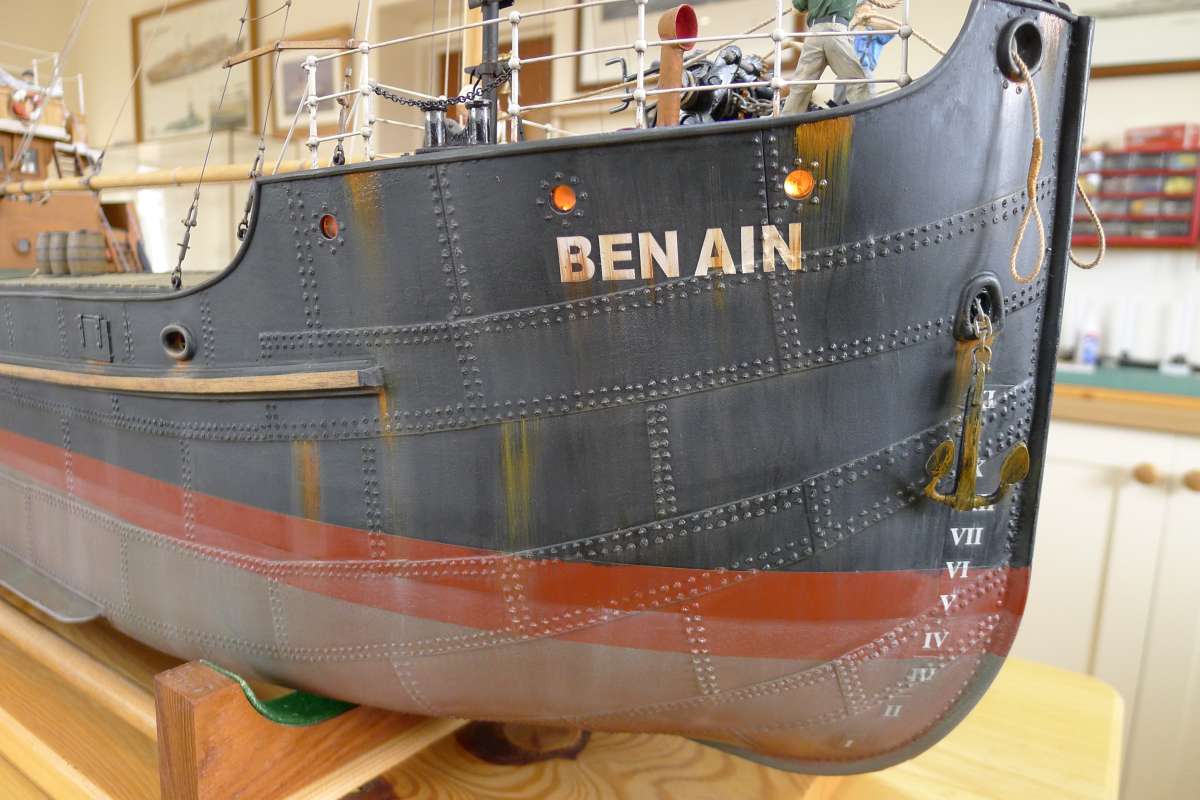
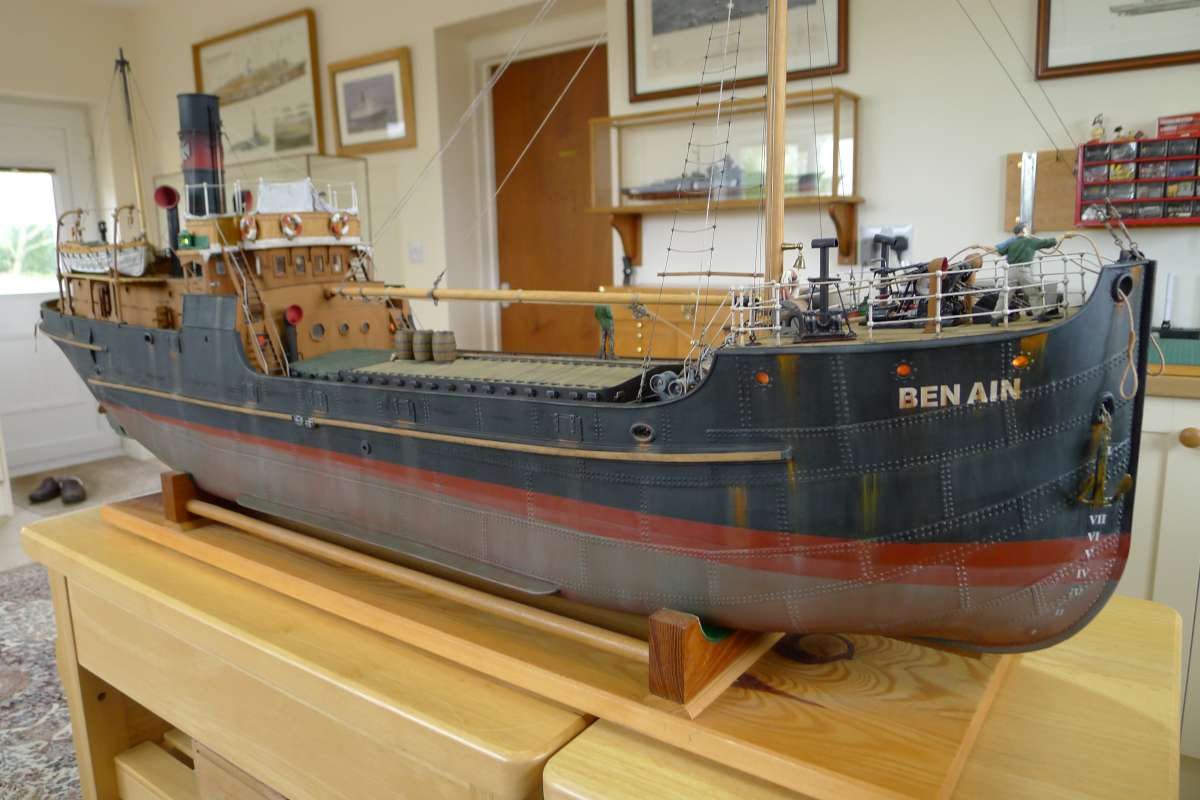
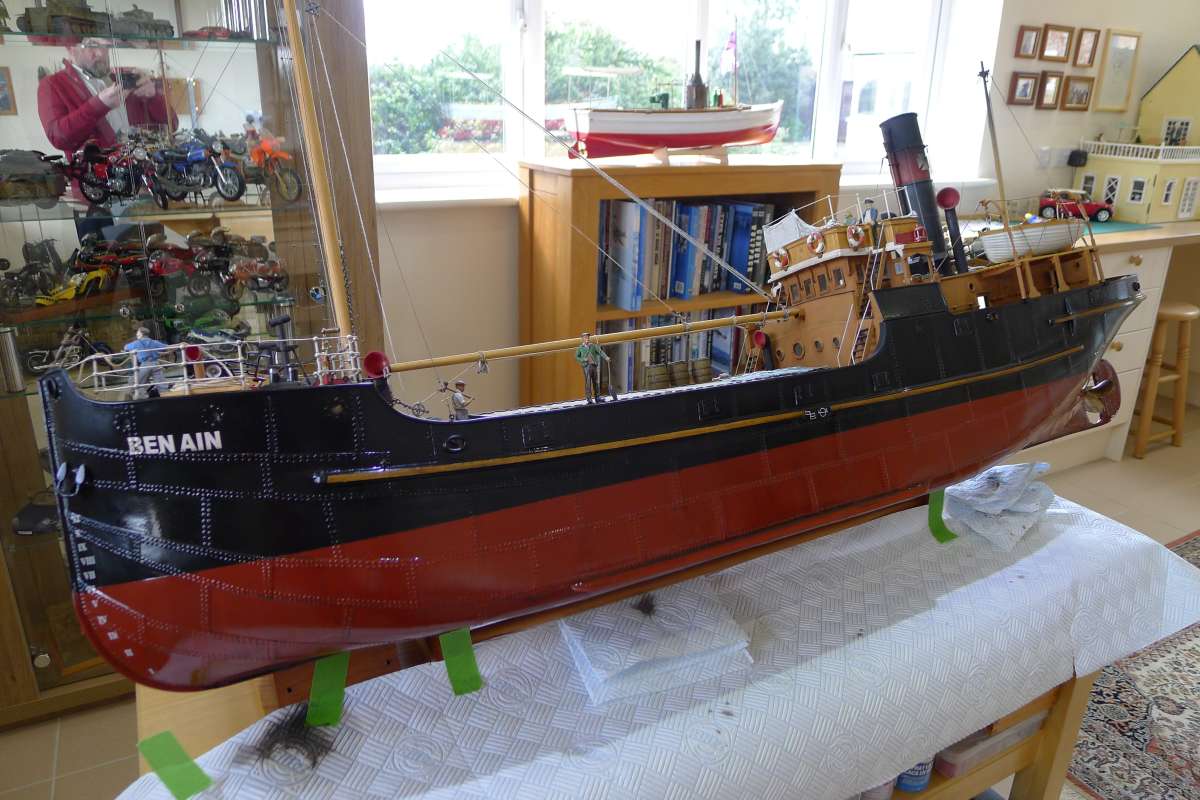
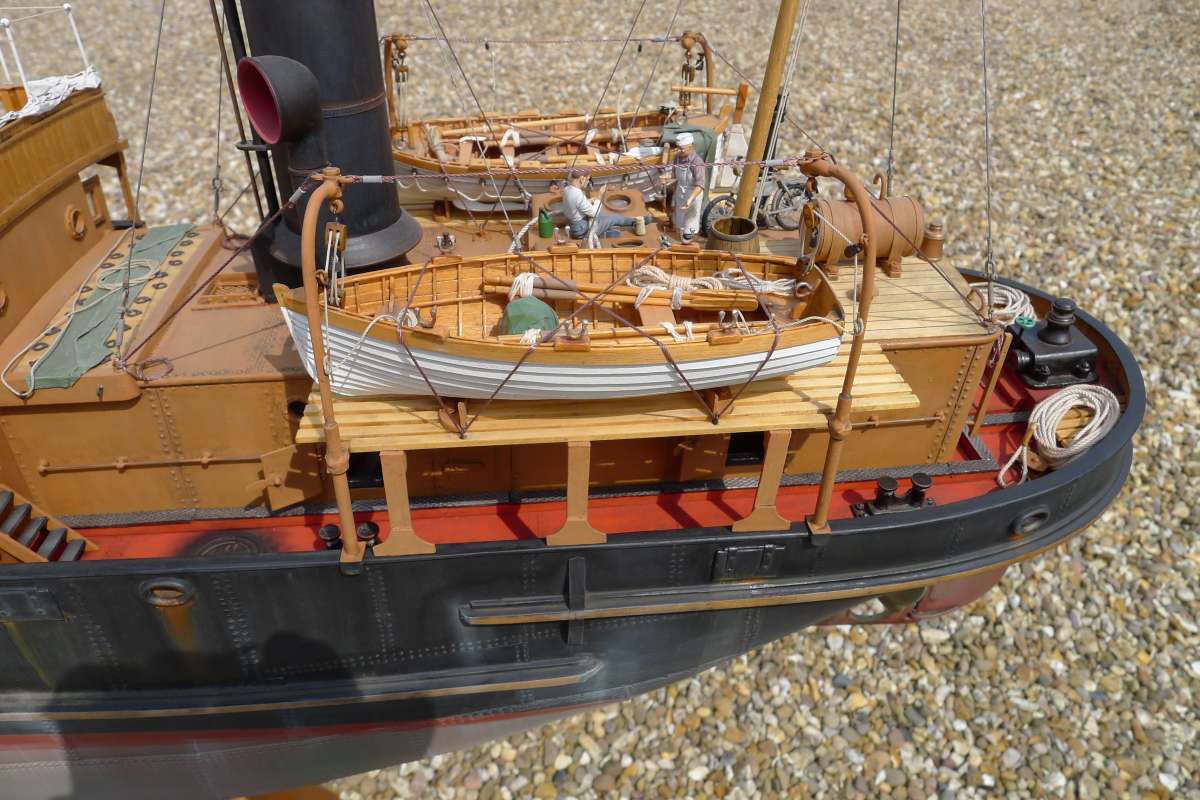
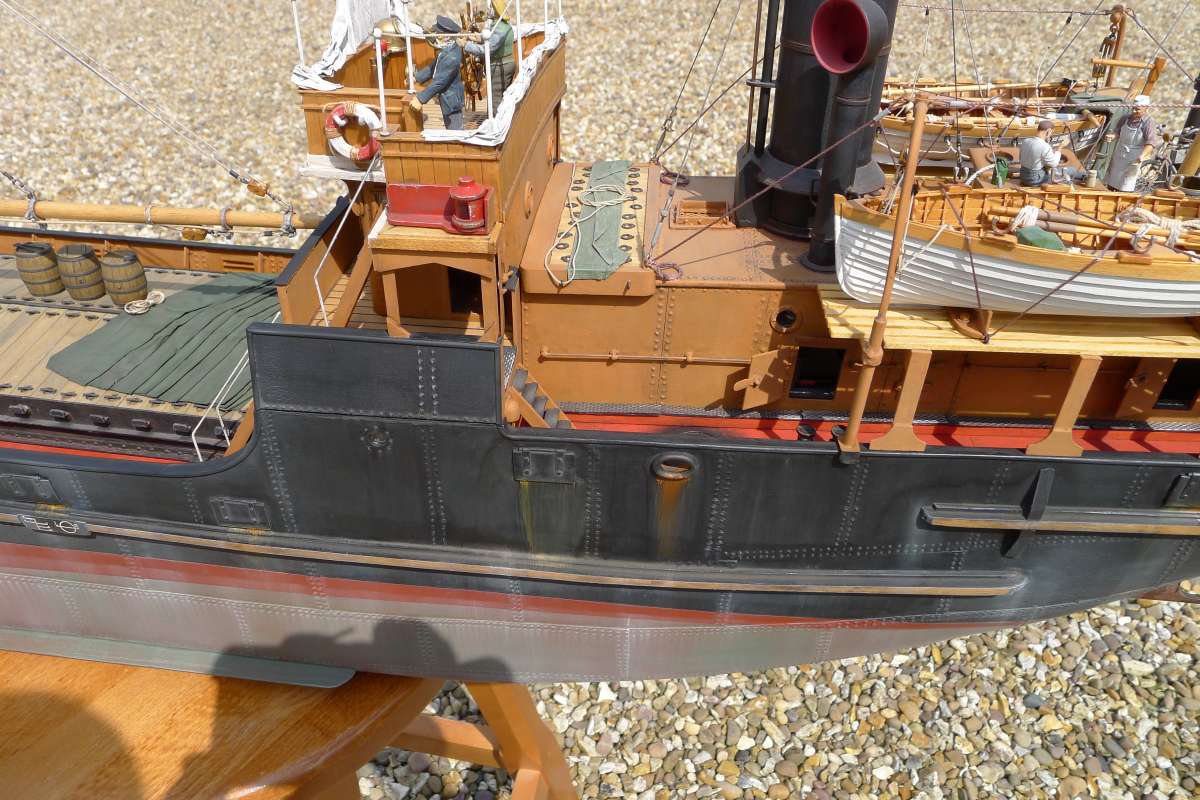
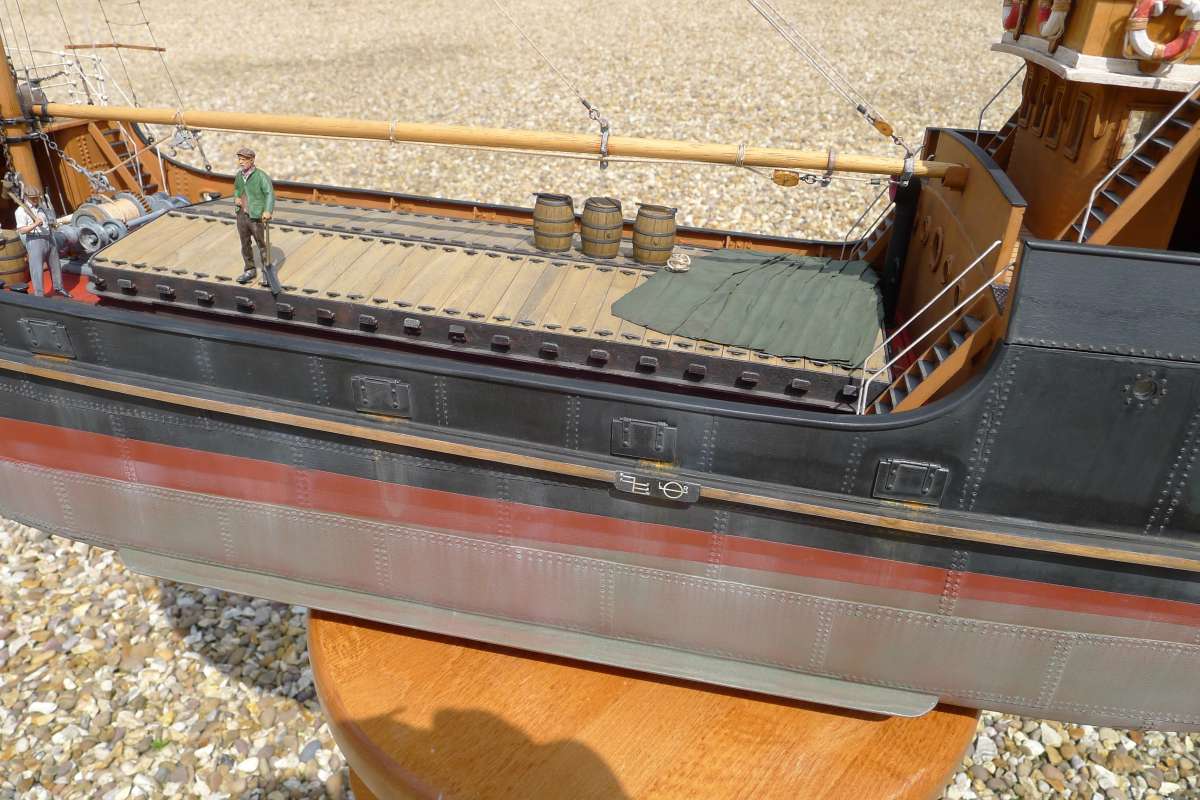
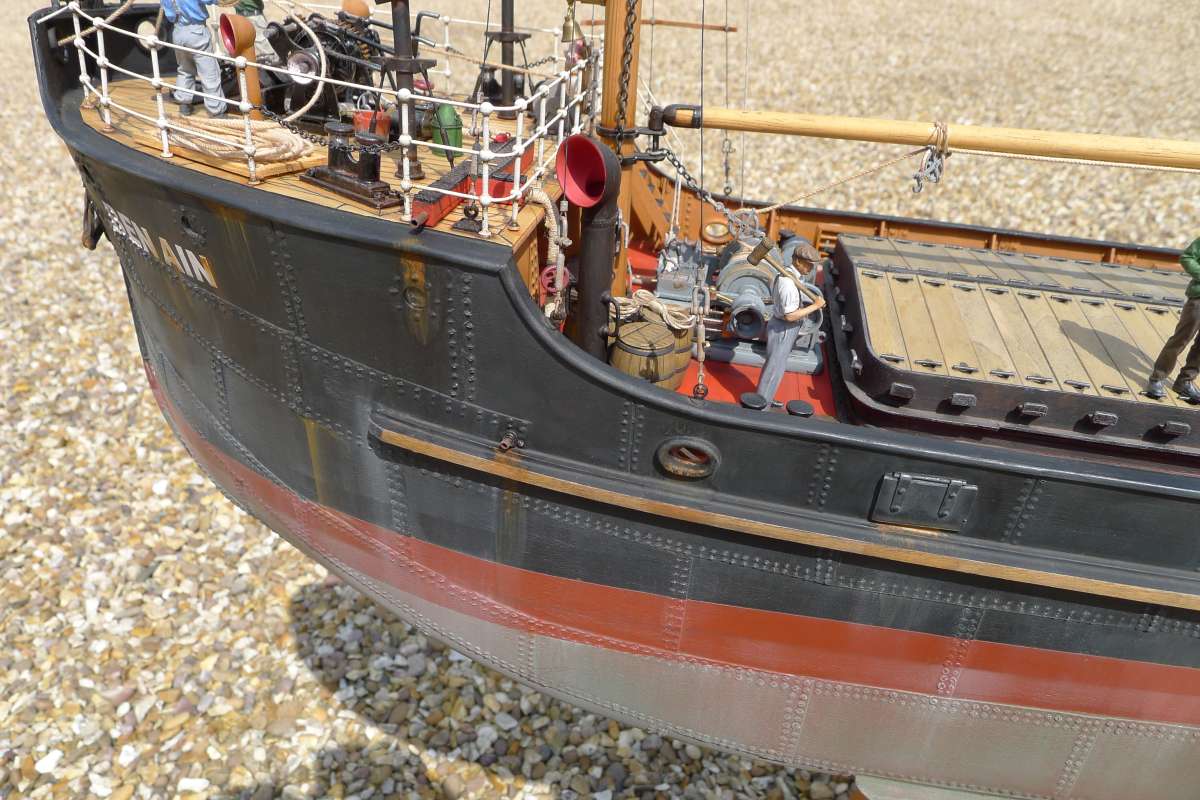
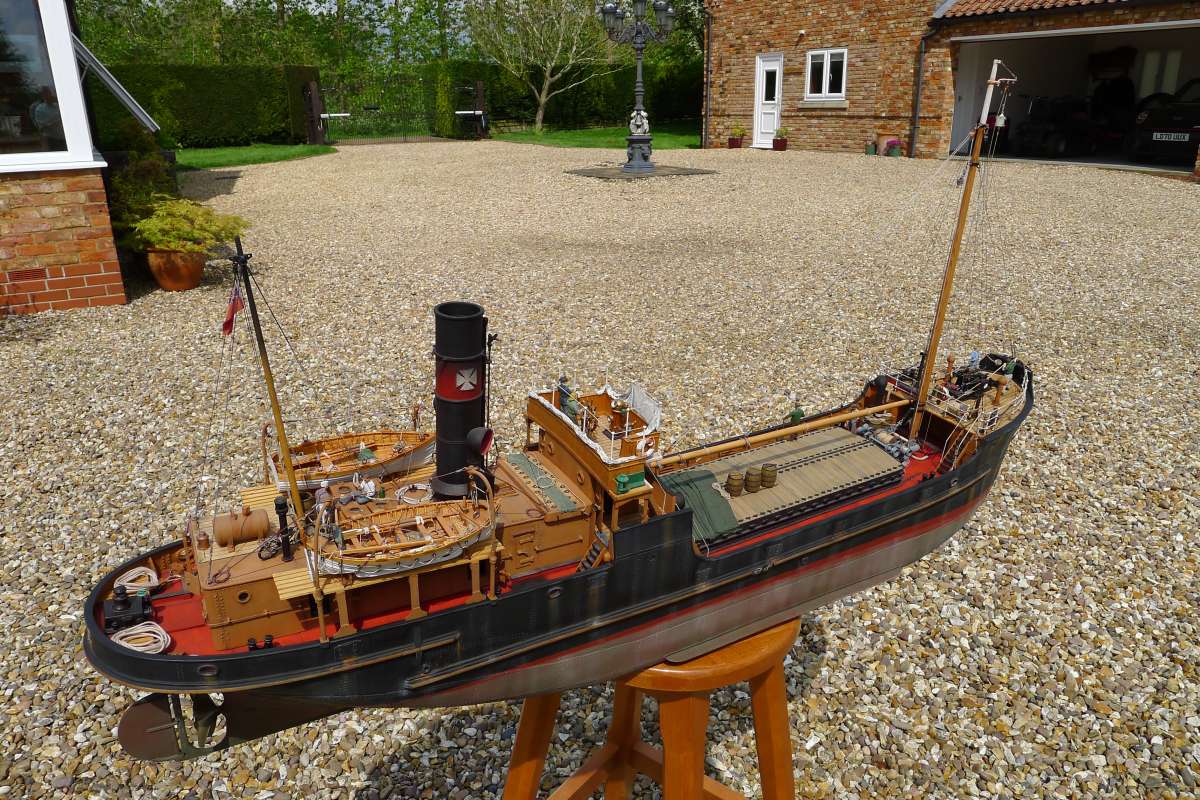
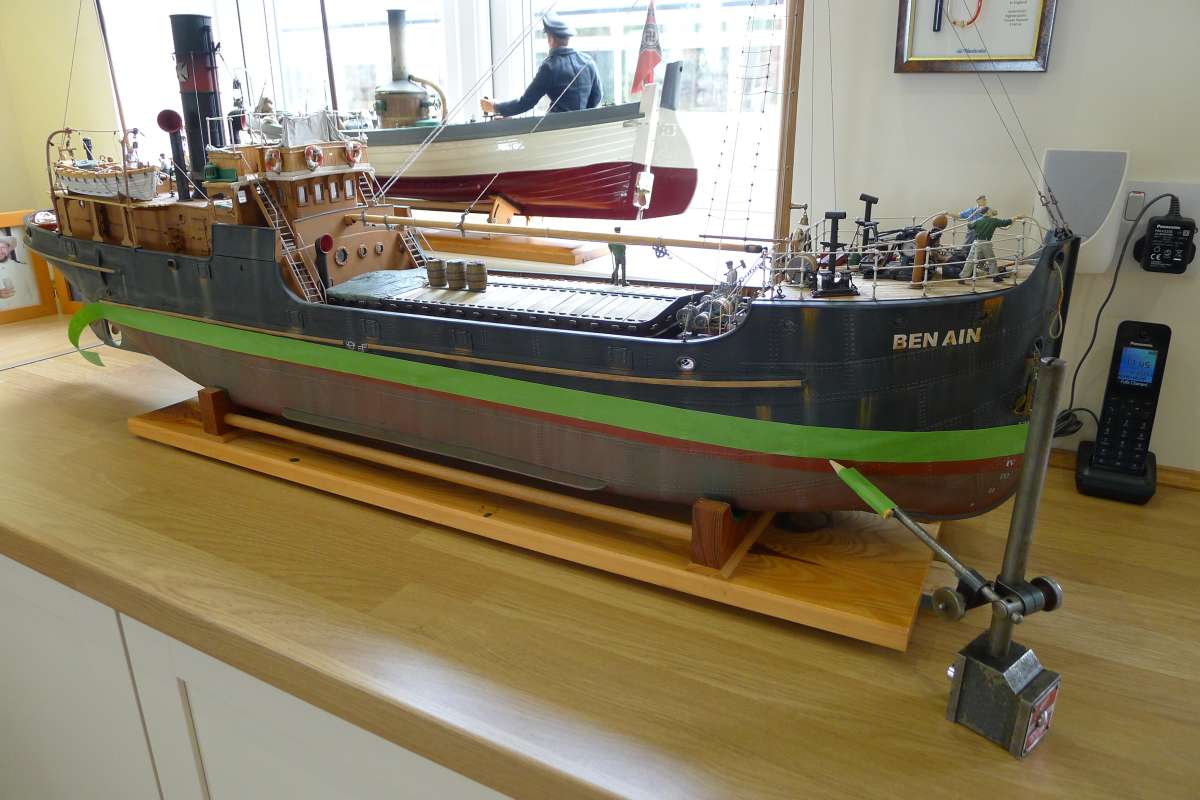
                                The final stage of this build, apart from adding an ensign to the aft mast, was always going to be the weathering job on the hull.  The big challenge with this was always going to be that vessels of this type and age were always worked incredibly hard.  Consequently there was frequently little time for maintenance nor money for materials so usually only the bare minimum was done.  I have studied many pictures of this ship and others of the same era working similar passages and can see very clearly that many of them are what could best be described as heavily weathered.  The challenge is transferring this to a model without it looking a mess!  So very tentative steps were taken in an attempt to remain in control.  As mentioned above before anything the entire hull was given a watered down wash with a dark brown enamel wash.  Everything was done on one half of the model with it sat at around 45 degrees before turning it around and doing the other side.

                                One of the best shots I have of the ship is along side in Douglas harbour sat on the sand so the whole hull is visible.  What can clearly be seen is not only the bleached and salt streaked upper paintworks but also how the barnacles form below lightship water line and how different loaded waterlines are visible in the salt stains.  I wanted to try to catch some of these effects but first was to introduce some rust streaking.  I didn’t want it to look over done so I added some around the bow plating and the anchors and then some below the freeing ports and mooring chocks or hawseholes.  The method was to place a piece of masking tape on the edge of the plate and then stipple some oil paint on the edge of the masking tape with a small tatty old brush.  The paint was random light and dark rust colours and ochre.  A large flat wide brush was then dipped in thinners and almost dried before dragging it vertically downwards through the paint.  This was then cleaned off the brush and the stroke repeated until the right amount of streaked paint was left.

                                After that had thoroughly dried a very light grey pigment was streaked lightly downwards in a random manner, concentrating on fittings but using enough to create a bleached and salt streaked effect over the entire black part of the hull.

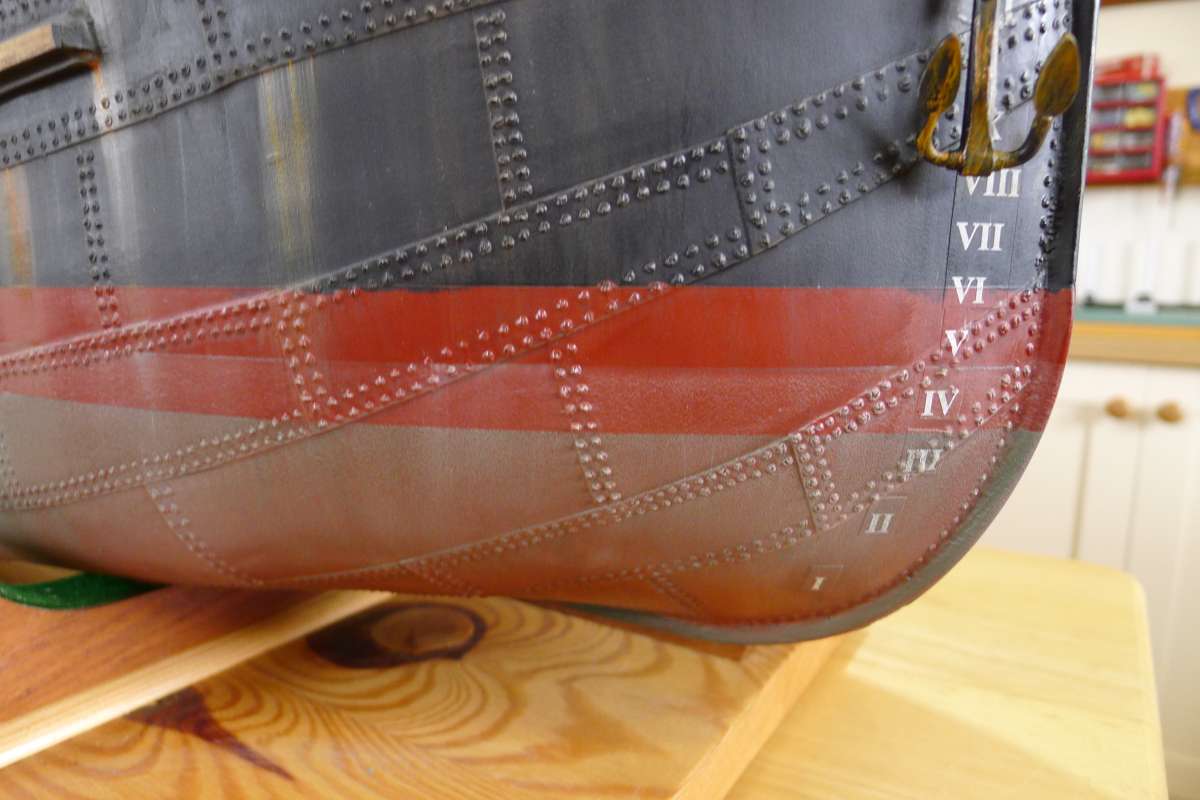
                                When I was happy with that it was time to have a go at below the waterline. I set the model up on a base in exactly the same way as I would when drawing a waterline but this time the model was set at a light ship level.  Basically the stern was pretty much a similar level but the bow was much higher out of the water.  I drew the new water line, masked off the line and covered the model with bin bags to protect it.  Below the masking tape was then given a very light dusting with a dark green acrylic paint from a rattle can.  Holding the can a good distance from the model and trying to get a bit of random shading.  Once that had dried I again dragged some very light grey pigment powder down over the edge of the masking tape.  All the masking was removed to reveal the shaded lower hull.  I then wanted to create another salt stain shadow at another level so again the waterline was marked out at an intermediate load level, masked up and this time further pigment only was dragged down over the edge of the making tape.

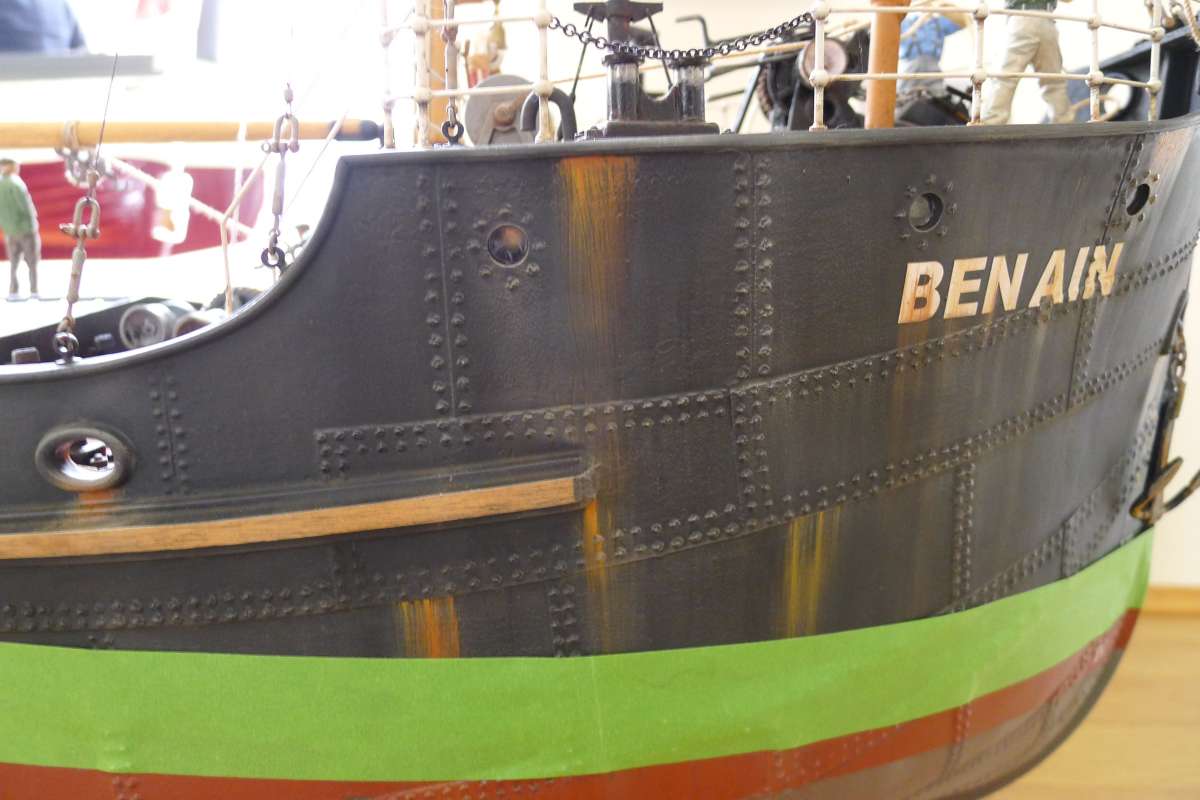
                                At the end of the process I already wish I had done some things a little differently but this is the first time I have tried to recreate such an effect and, overall, I’m reasonably pleased with it.  I just need an ensign for it now then some final pictures outside.
                                P1100935

                                P1100937

                                P1100938

                                P1100940

                                P1100941

                                P1100943

                                P1100944

                                P1100946

                                P1100947


                                #120152
                                James Hill 5
                                Participant
                                  @jameshill5

                                  That’s finished to exhibition standard Richard.

                                  The rivetting shows up extremely well and sets the model off so well especially after your weathering. You ought to enter it into competitions, although built for your own pleasure.

                                  Jim.

                                  #120162
                                  Richard Simpson
                                  Participant
                                    @richardsimpson88330

                                    Many thanks Jim.  I’m just waiting for the arrival now of a red ensign and, when that is fitted, I’ll be happy to call it complete.

                                    #120246
                                    Richard Simpson
                                    Participant
                                      @richardsimpson88330

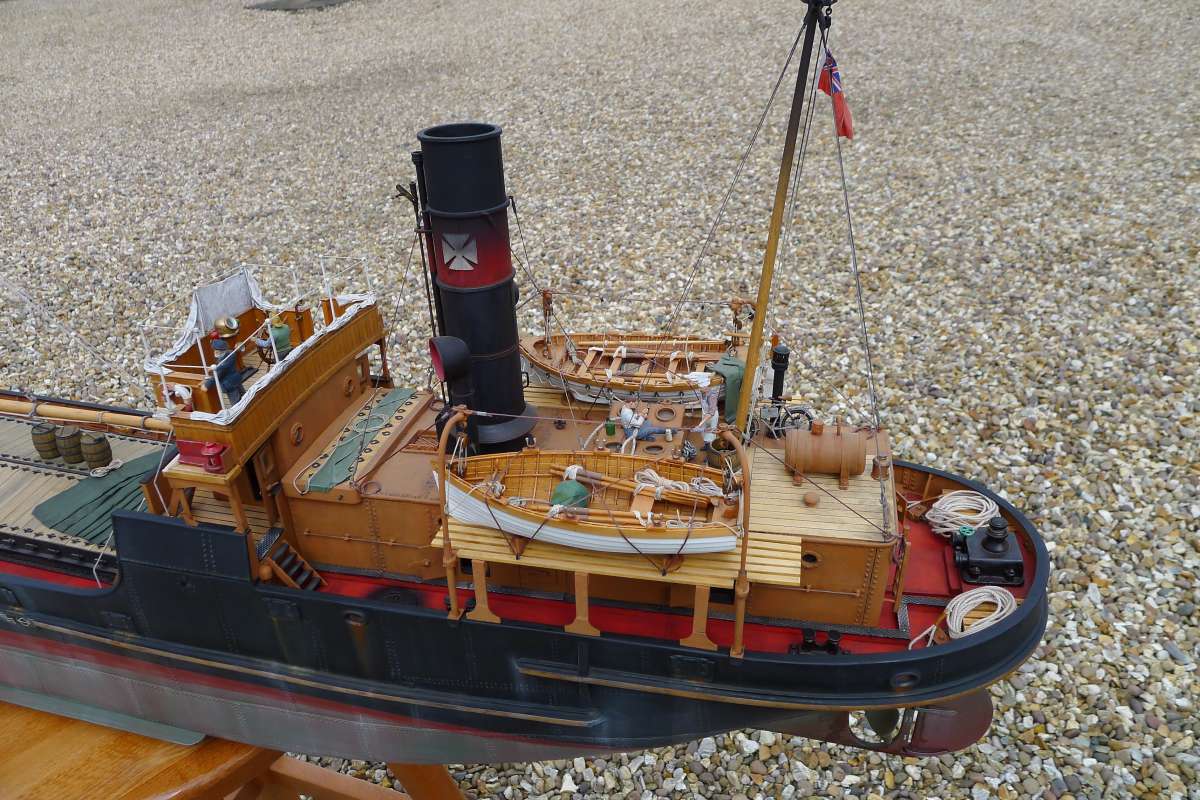
                                      So the final piece of the model, a BECC Red Ensign was received, fitted and given a slightly worn look.  I’m now going to consider it done so time to get it back into its glass case.  The lights appear to be working reliably with the key fob and the batteries should be good for a few years so hopefully it won’t need removing for some time.  They are supposed to have a shelf life of ten years, which I take with a big pinch of salt but I’d be happy with anything over five years before I need to take the glass case off again.

                                      P1110001

                                      P1110003

                                      P1110004

                                      P1110005

                                      P1110006

                                      P1110013

                                      #120247
                                      Richard Simpson
                                      Participant
                                        @richardsimpson88330

                                        And the final few.
                                        P1110018

                                        P1110019

                                        P1110020

                                        P1110023

                                        #120248
                                        Colin Bishop
                                        Moderator
                                          @colinbishop34627

                                          It could be real if it wasn’t so clean Richard!

                                          Colin

                                          #120249
                                          Richard Simpson
                                          Participant
                                            @richardsimpson88330

                                            I wanted it to look real, not necessarily too dirty!

                                            #120254
                                            James Hill 5
                                            Participant
                                              @jameshill5

                                              A lovely job Richard.

                                              You should be very pleased with the result.

                                              Jim.

                                              #120259
                                              Richard Simpson
                                              Participant
                                                @richardsimpson88330

                                                Thanks Jim, I am.  Although I do look at it and see things I know I could have done better, but that’s modelling!

                                                #120261
                                                Ray Wood 3
                                                Participant
                                                  @raywood3

                                                  Hi Richard,

                                                  Lovely work as usual 🙂

                                                  My favourite feature is the lagging to the steam winches pipework , I hope it’s asbestos string like the old days ??

                                                  Best Regards Ray

                                                  #120268
                                                  Richard Simpson
                                                  Participant
                                                    @richardsimpson88330

                                                    Absolutely Ray!  As I was told repeatedly in my early days “The job’s not finished until the lagging is replaced”.  Around engines this might also have included tin plate cladding or sticky foil tape over the top of the lagging and around boilers and other equipment it might have included plaster impregnated bandage wrapped over the top of the asbestos cord.  Nothing smarter than nice clean machinery, well lit with all the lagging freshly painted white.  And if you have a bit of time left polish the copper pipes and brass cocks for the drains and gauge connections.


                                                  Viewing 24 posts - 76 through 99 (of 99 total)
                                                  • Please log in to reply to this topic. Registering is free and easy using the links on the menu at the top of this page.

                                                  Code of conduct | Forum Help/FAQs

                                                  Advert

                                                  Latest Replies

                                                  Home Forums Steam powered models Topics

                                                  Viewing 25 topics - 1 through 25 (of 25 total)
                                                  Viewing 25 topics - 1 through 25 (of 25 total)

                                                  View full reply list.

                                                  Advert

                                                  Newsletter Sign-up