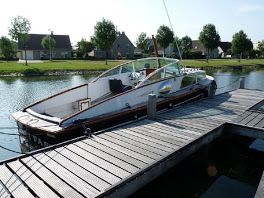
Fairey Huntsman 28

Advert

Fairey Huntsman 28

Home Forums Build Blogs Fairey Huntsman 28

  • This topic is empty.
Viewing 25 posts - 51 through 75 (of 193 total)
  • Author
    Posts
  • #81691
    Chris Fellows
    Participant
      @chrisfellows72943

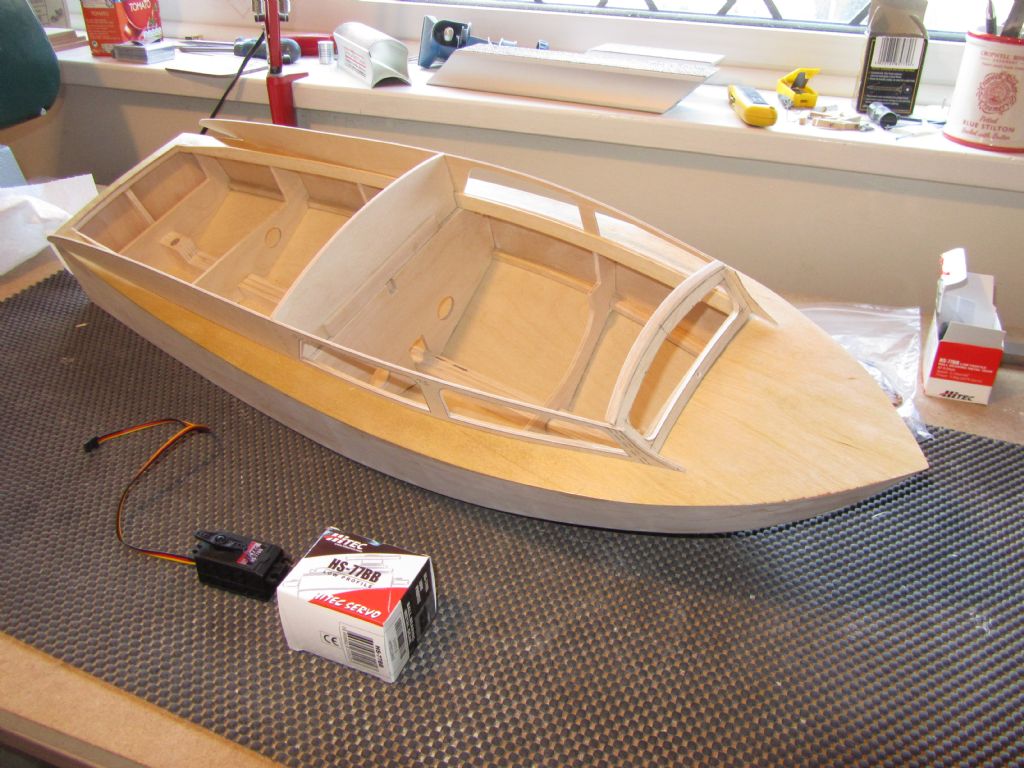
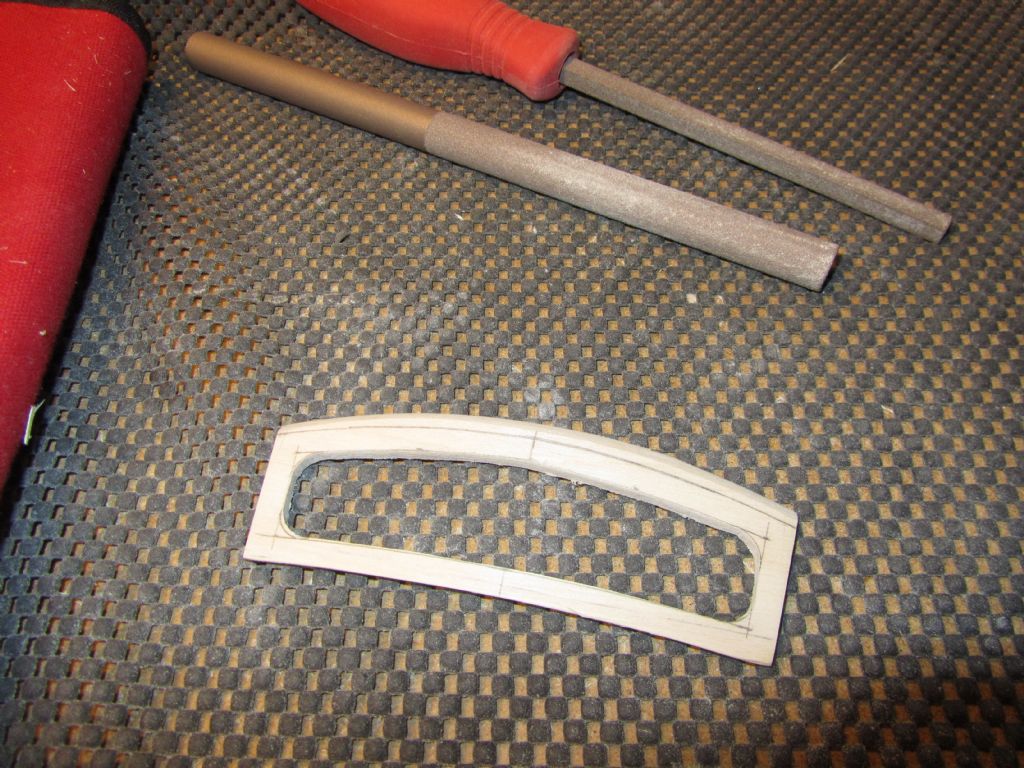
      window glued and servo.jpgfront window.jpg

      Advert
      #81692
      Chris Fellows
      Participant
        @chrisfellows72943

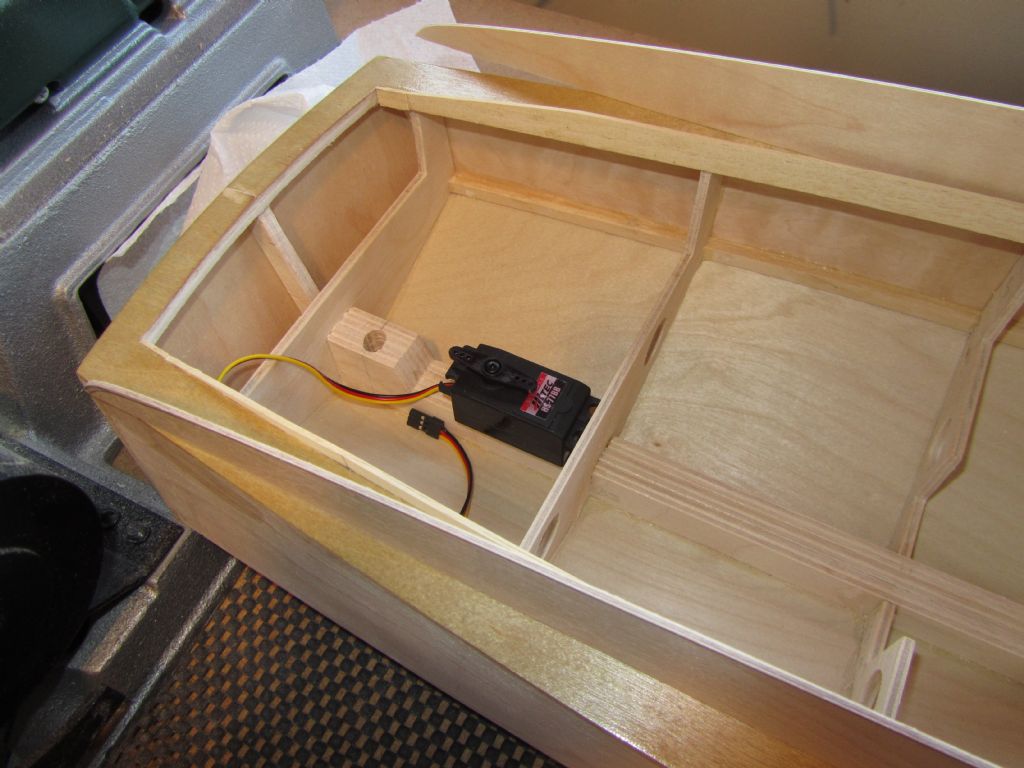
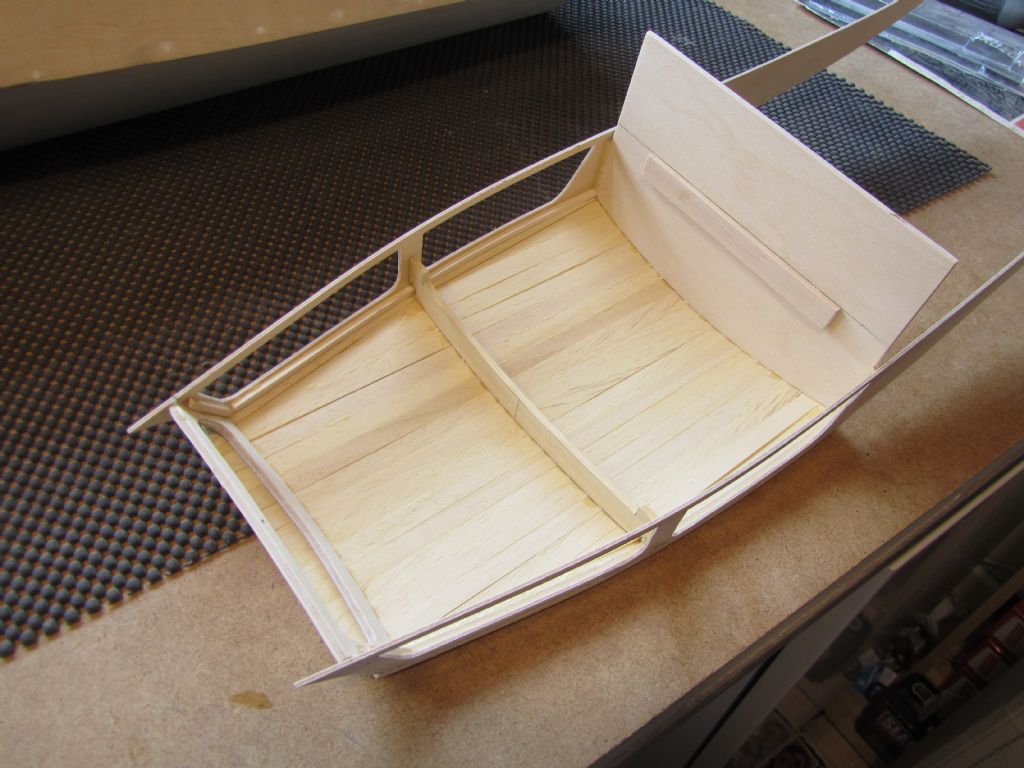
        Before gluing the inner cockpit sides and floor together I wanted to ensure that there was sufficient depth available for the rudder and servo. Measurements for a Hitec low-profile servo suggested there was but wanted to be certain, so ordered a couple (one for the River Cruiser, though height isn't a concern as has a rear cabin) and a conventional, more powerful one for the Swordsman 33.

        The servo will fit in fine.

        servo.jpg

        #81707
        Tim Rowe
        Participant
          @timrowe83142

          Hi Chris

          Such a good looking boat the Huntsman 28 and your model is a great tribute. I like your nice neat interior woodwork.

          I have lost track of how many variations you are building at the moment.

          Tim R

          #81708
          Chris Fellows
          Participant
            @chrisfellows72943

            Thanks Tim. Three at the moment, this one, the River Cruiser and the Swordsman 33. I'm going to concentrate on the first two though now and see them through to completion. I'm going to plank the deck and rear cabin roof on the Swordsman so it's going to take longer.

            I have started drawings for a Fisherman 27 and Huntsman 31 as well!

            I shall be able to get back into my work room (small bedroom) again, later on today, so can get back on the Huntsman 28.

            Chris

            Edited By Chris Fellows on 31/03/2019 11:31:01

            #81752
            Chris Fellows
            Participant
              @chrisfellows72943

              cabin 3.jpg

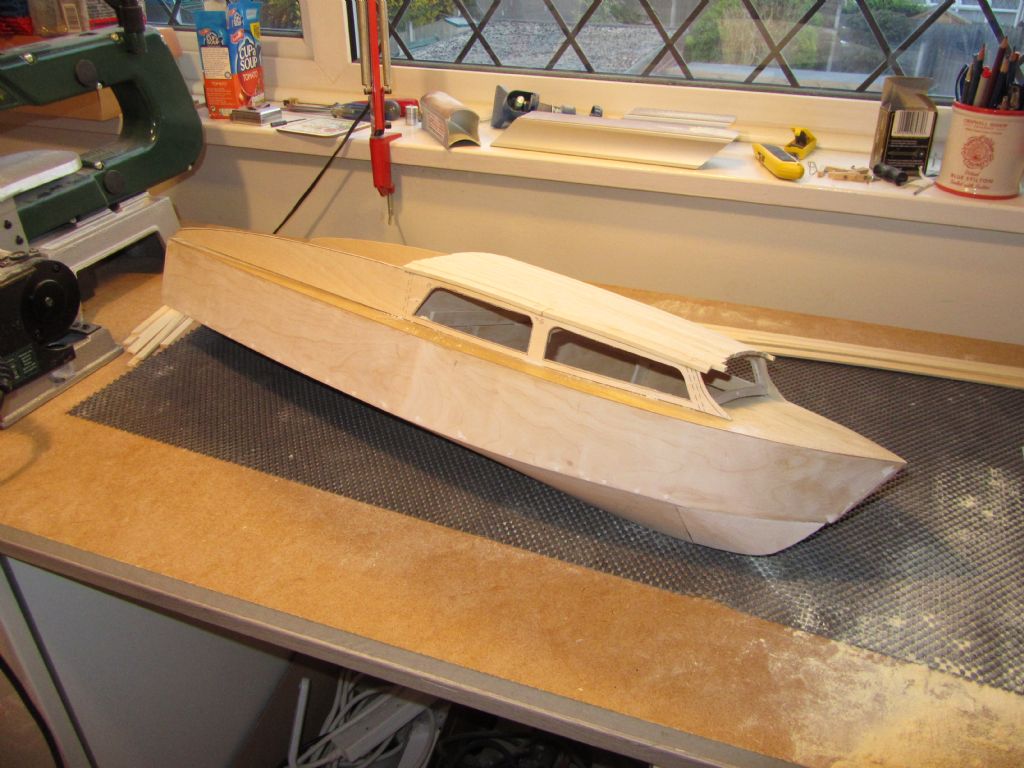
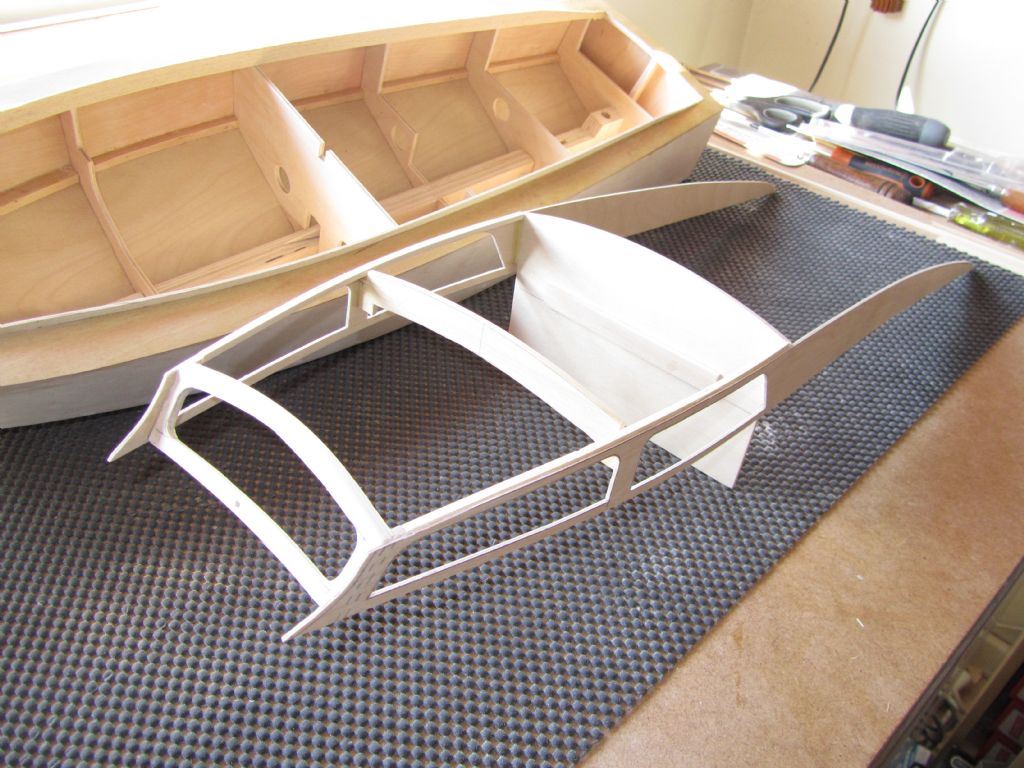
              cabin 2.jpgBit more progress on the cabin/cockpit framework. During the week I've added 3mm x 3mm strengthening timbers at the junction of the front window frame and cabin sides – they ain't coming apart again now! Also added the central support for the roof.

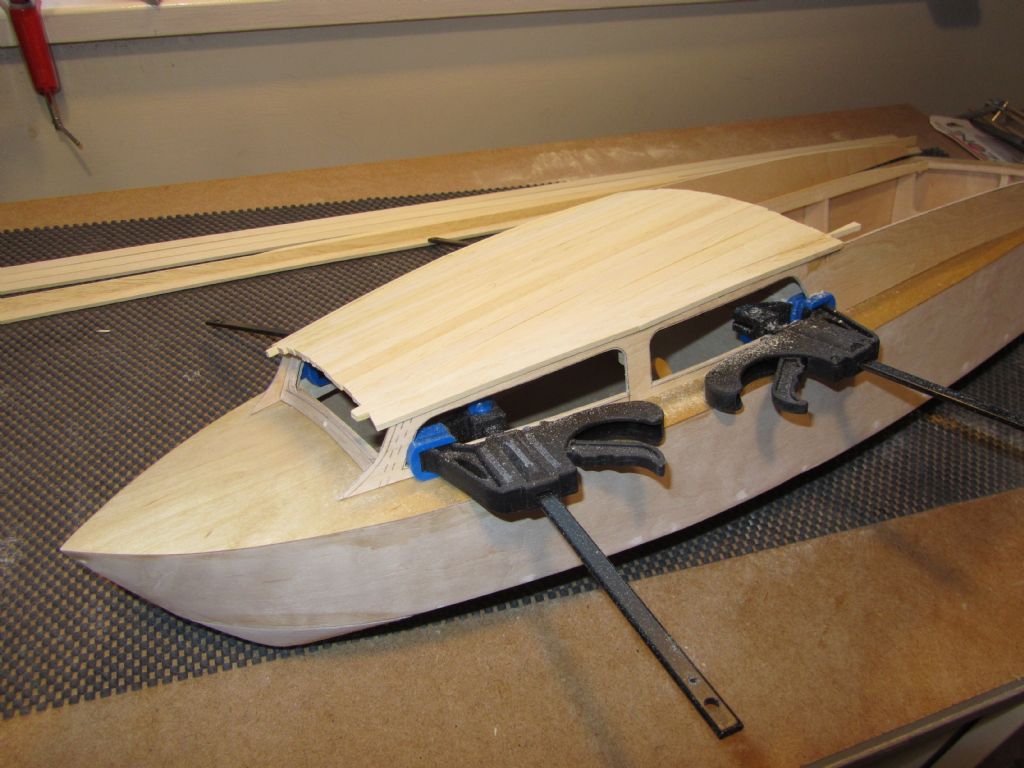
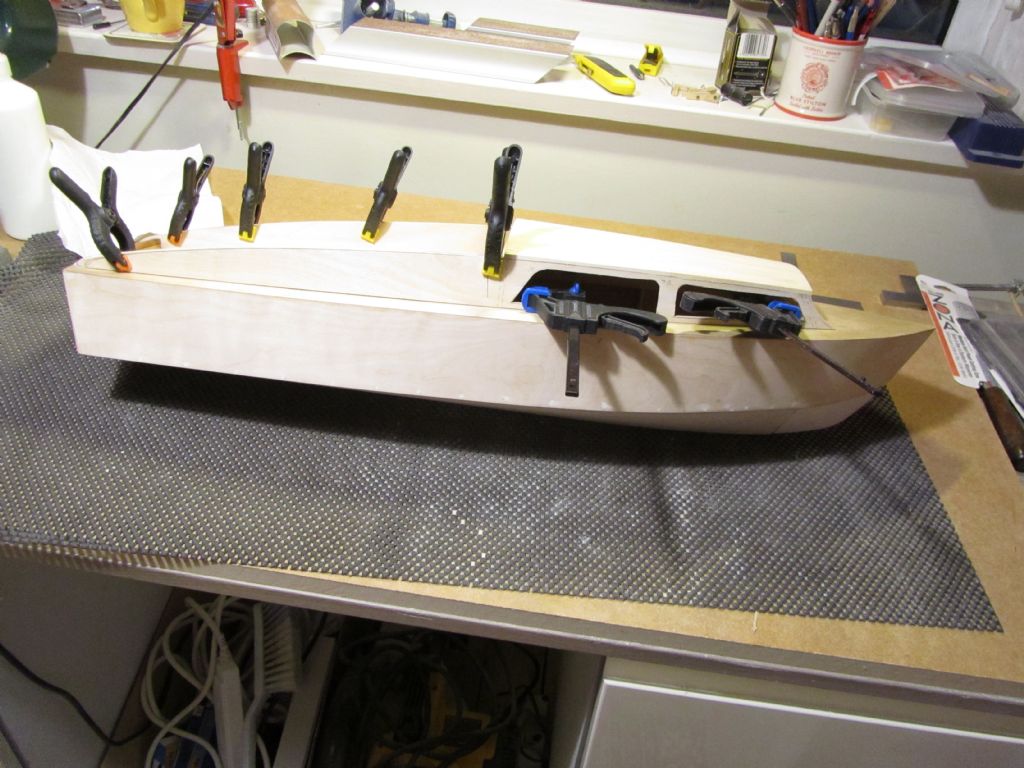
              Today I planked the roof which was satisfying. Fairly simple and relaxing job but progresses the build nicely. Tomorrow I shall trim the planks at the front, rear and sides and give the roof a preliminary sanding.

              Then it's on with the cockpit. Despite me clamping the cabin and cockpit sides to the coamings whilst working on the roof a bit of twist has been introduced which has resulted in the rearmost parts of the cockpit sides sitting a couple of mm above the deck. The cabin area is a nice snug and accurate fit though. I'm not worried though as I can remedy the twist when I fit the inner cockpit sides even if, as I think, I will have to put some saw cuts in the existing outer cockpit sides and then fill later. The situation isn't helped by the Huntsman 28 having such a long cockpit.

              Early on in the build I was concerned that I'd got my drawings/measurements wrong as the hull looked so long and narrow, well it is! But now that the superstructure is taking place it is starting to look as it should and the cockpit won't look as long once the engine cover and seats etc. have been installed.

              I retired yesterday and whilst I will have other calls on my time I should be able to spend more time on these and future builds, especially if the weather is not too clever. Yippee!

              Chris

              cabin 1.jpg

              #81753
              Ray Wood 3
              Participant
                @raywood3

                Hi Chris,

                Congratulations on your retirement 😀 sounds good to me ! We can expect loads of boats now !!

                Regards Ray

                #81754
                Tim Cooper
                Participant
                  @timcooper90034

                  Chris

                  Congratulations on retiring! It 's amazing how the days seem to get filled once you retire, or perhaps you just relax a bit more . I am into my thirteenth year of retirement. Enjoy it you have earned it..

                  Tim

                  #81755
                  Andrew Waters
                  Participant
                    @andrewwaters50002

                    Yes congrats. Me too recently, aint it just grand cool

                    #81756
                    Chris Fellows
                    Participant
                      @chrisfellows72943

                      Thanks chaps. It will start to sink in on Tuesday when I don't have to do my 20 mile commute each way and get stuck in traffic on the way home.

                      Chris

                      #81757
                      Brian White 3
                      Participant
                        @brianwhite3

                        Congrats Chris, I retired in 2012 and never looked back! Have a great retirement. My man cave is in the garage, so had some time off from my H28 due to the cold weather. I've just made a slow re-start on making apertures for the two prop shafts and will be starting on the above deck structure. Once the extended warm weather comes it will be painting the hull and varnishing the deck and cockpit.

                        Regards, Brian

                        Edited By Brian White 3 on 07/04/2019 08:53:34

                        #81758
                        Chris Fellows
                        Participant
                          @chrisfellows72943

                          Brian – thanks for that. Was wondering about your H28, at least it's allowed me to catch up!

                          Bit annoyed this morning to find that the superstructure has twisted a bit more. Took the clamps off last night to photograph it and thought it would be OK to leave off as the Cyano holding the planks to the structure would have gone off. The A/resin between the planks wouldn't have though and it's that drying that has caused the distortion.Beginners mistake and one for the memory bank. It's not bad though and I can sort it or make it worse, one or the other!

                          Talking of the memory bank I think I may make a start on a Huntsman 31 whilst I can still remember and learnt from building the hulls on my current builds!

                          I don't intend doing much more on the River Cruiser and H28 until the weather is suitable for painting and the Fisherman and Swordsman are longer term projects though hopefully things speed up a bit more now!

                          Chris

                          #81776
                          Chris Fellows
                          Participant
                            @chrisfellows72943

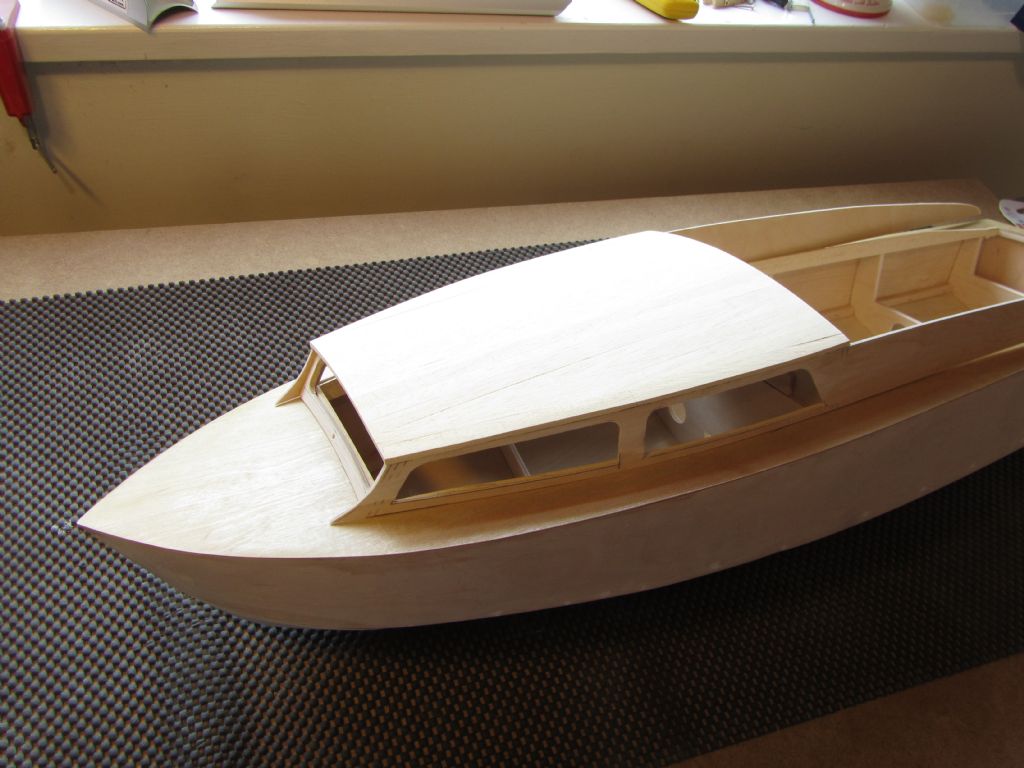
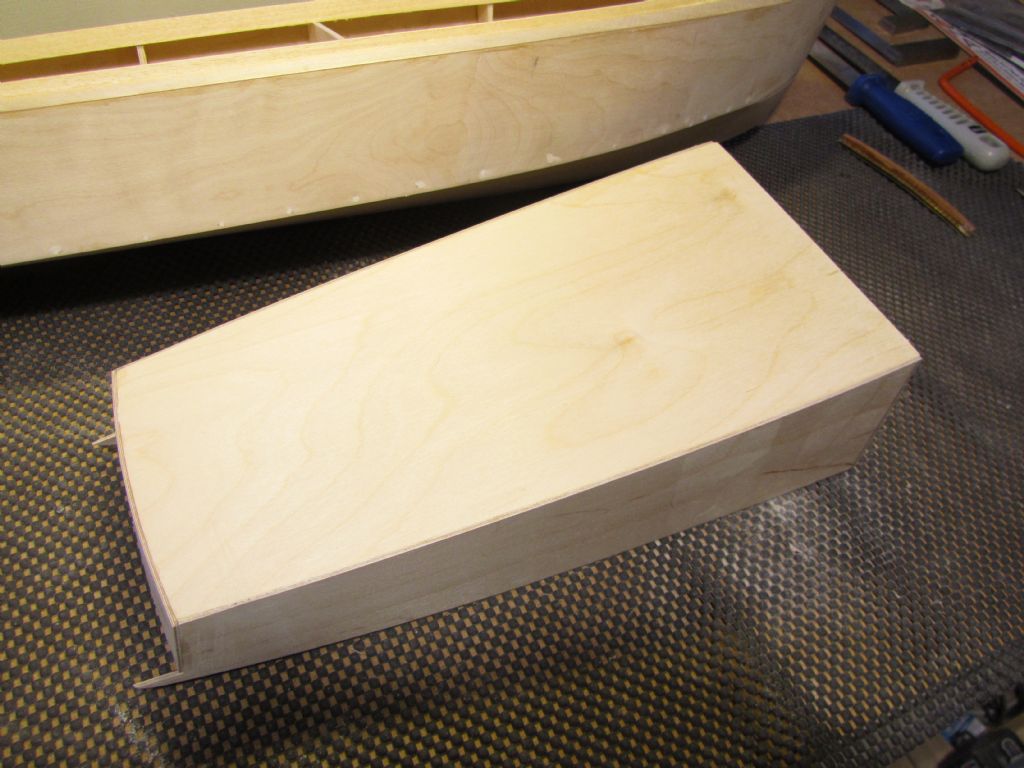
                            channel glued to capping.jpgsaw cut.jpgbow in sides.jpgcockpit commenced 2.jpgcockpit sides & bottom.jpgcockpit commenced.jpgRoof trimmed and sanded to all sides and the top has been given a preliminary sanding with the PermaGrit.

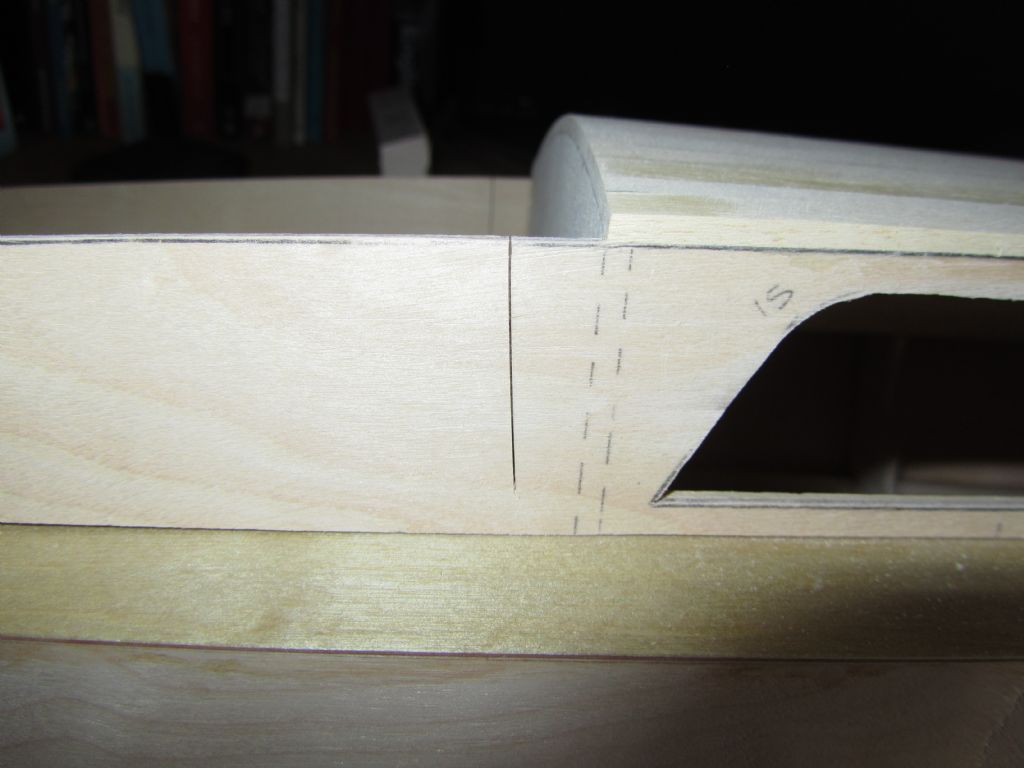
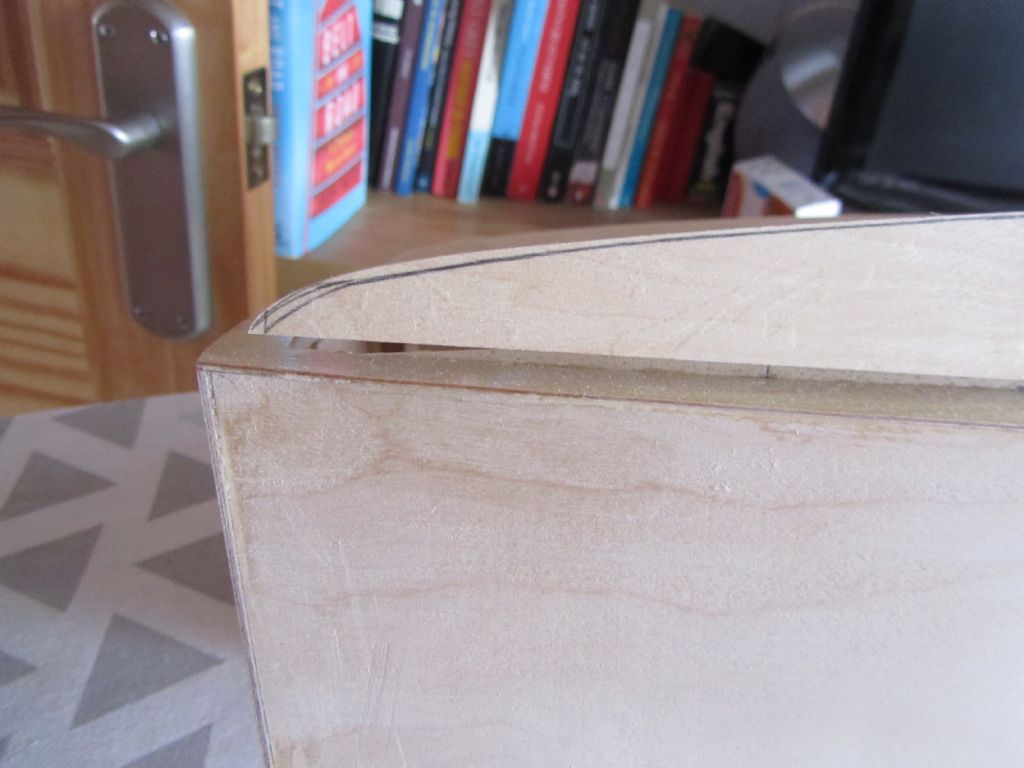
                            Part of the twist was found to be due to a build up of saw dust laugh and most of the problem is due to bowing front and rear along the sides – looks worse than it actually is. As said the cabin is a pretty good fit so I've put a saw cut in each cockpit side, just behind the cabin, so that the cockpit sides can be "bent" down to touch the top of the deck. Fitting the superstructure hasn't been made any easier of course by having a curved deck. When clamping the cabin sides to the coaming there was a cracking sound – the coaming is only 1.6mm thick and had cracked up by the window frame. Soon fixed with some reinforcing pieces of coaming.

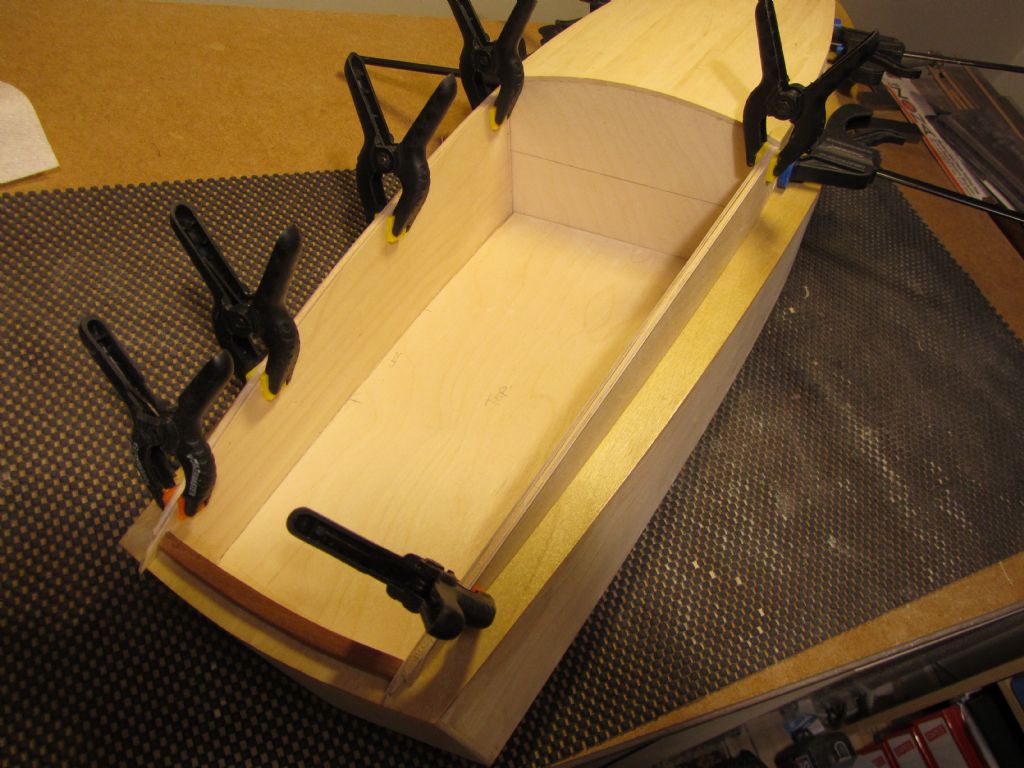
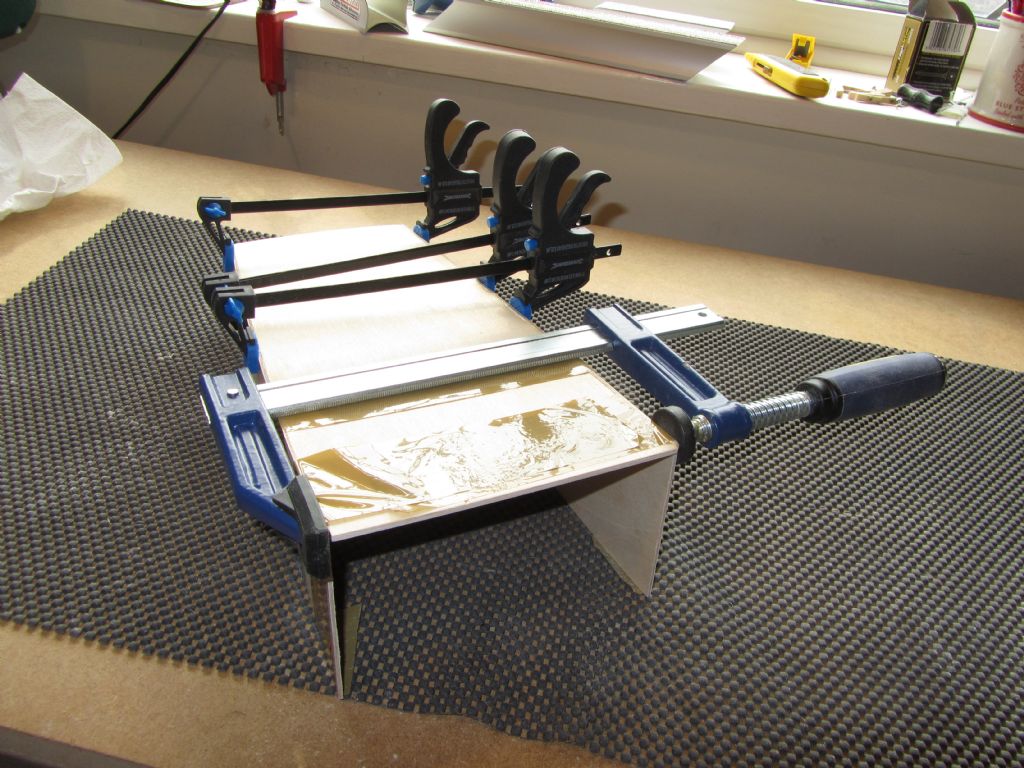
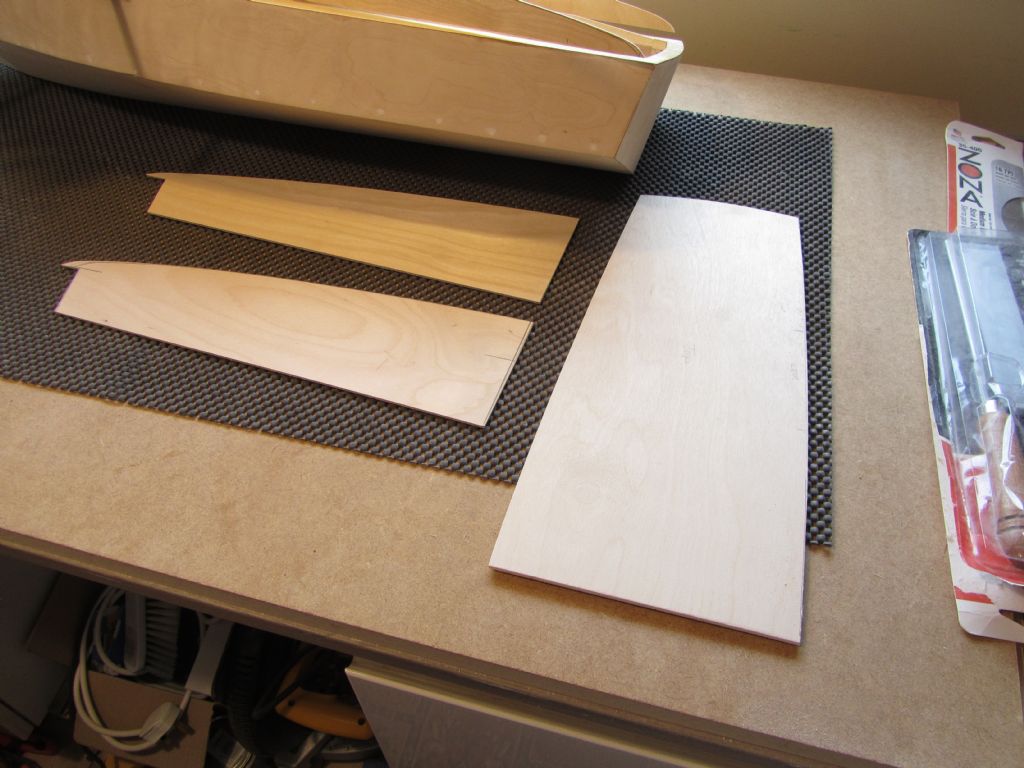
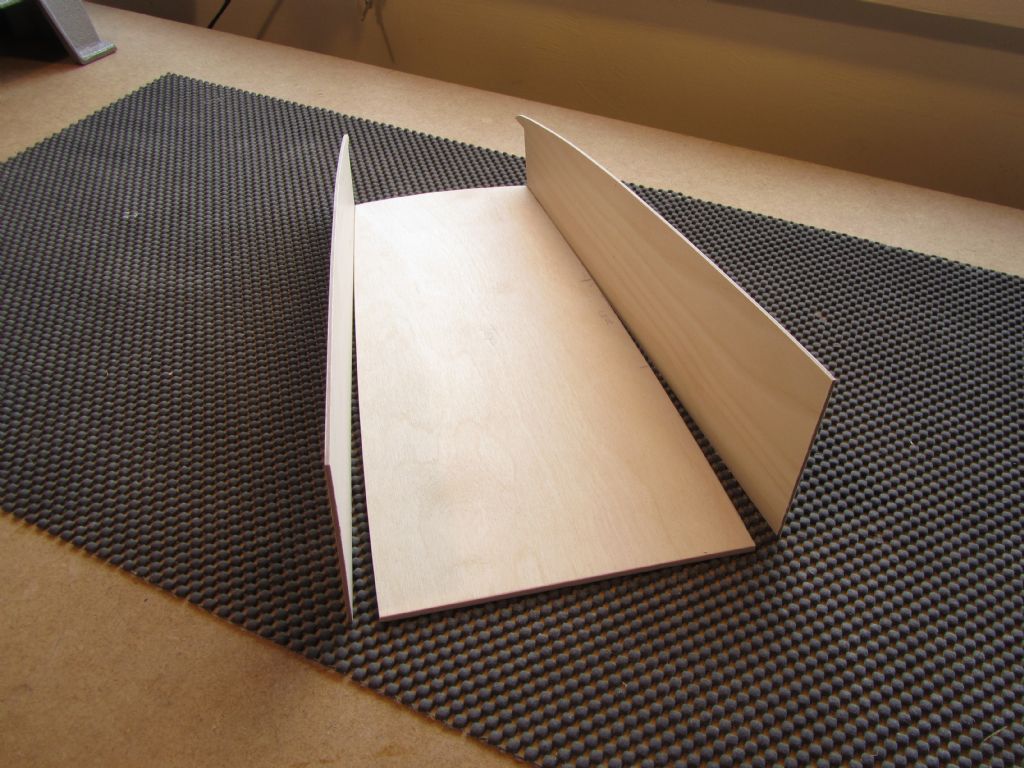
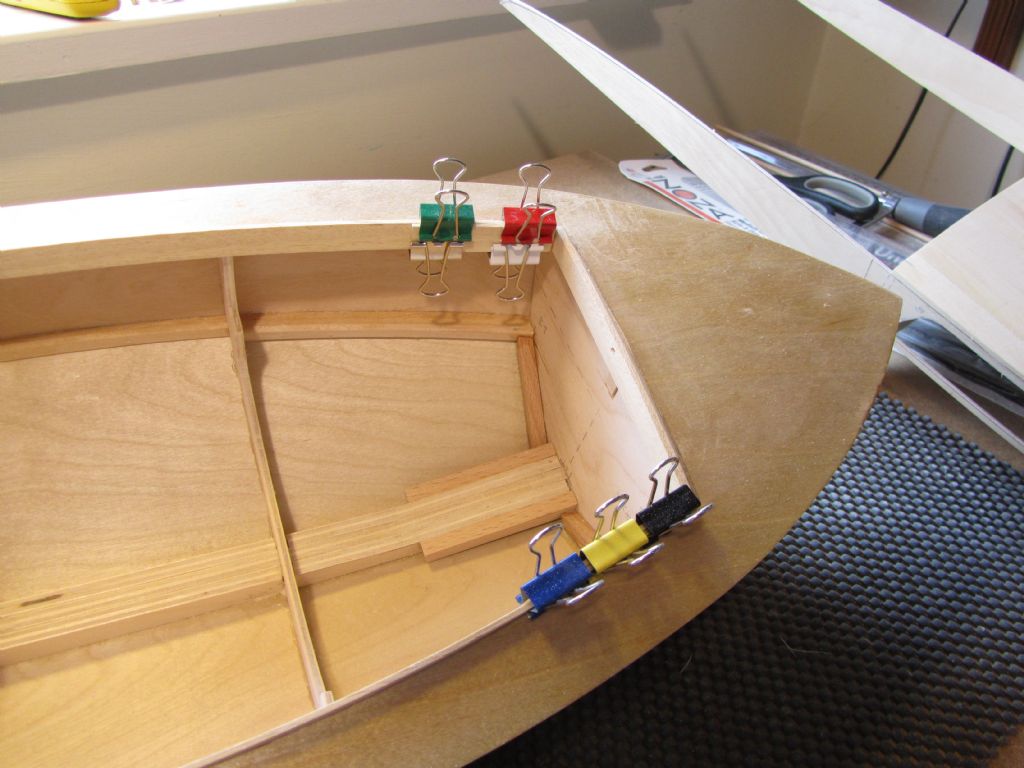
                            A start was then made on the cockpit. I'd previously cut out the cockpit bottom and sides and just needed to sand 2mm from each side of the bottom to allow for the thickness of the sides and cut a bit off the end of the bottom at the cabin end so that it would drop into the hull. I then tacked the pieces together at the transom end with cyano and once set clamped that area. I then glued the rest of the side and bottom joints with a/resin, clamped and set aside overnight.

                            I'd decided that it was best to deal with the construction of the cockpit at the transom end first due to the envisioned difficulty of making everything fit as it should. The sides and bottom by the cabin have been left longer so that they can be sanded back to size.

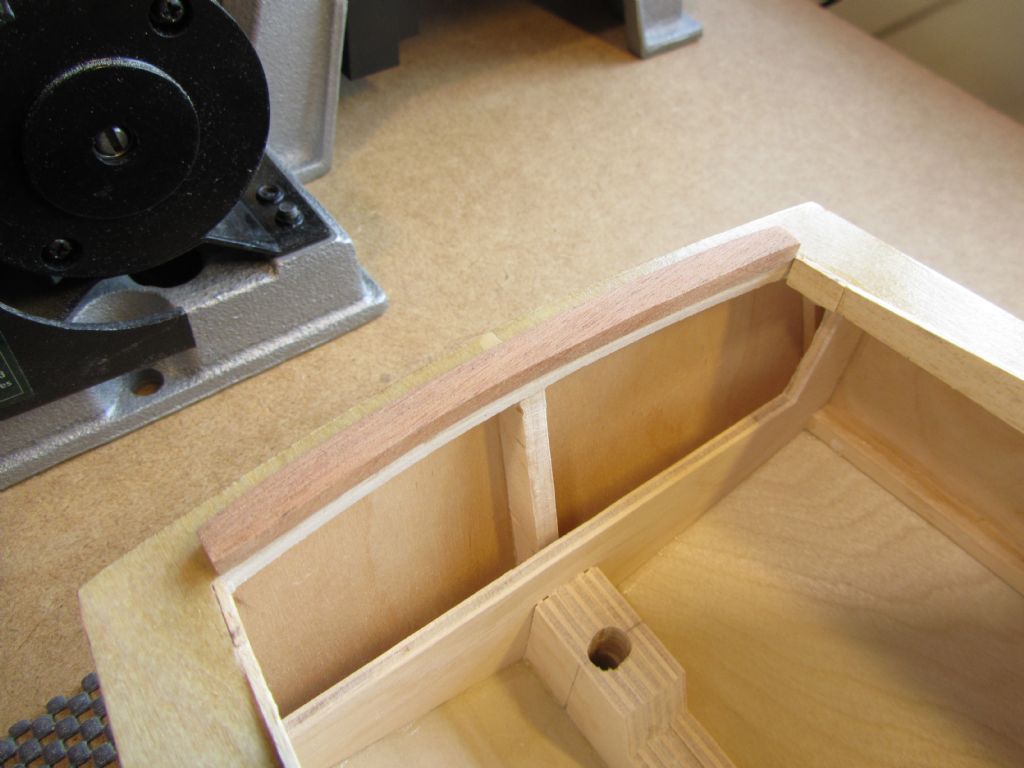
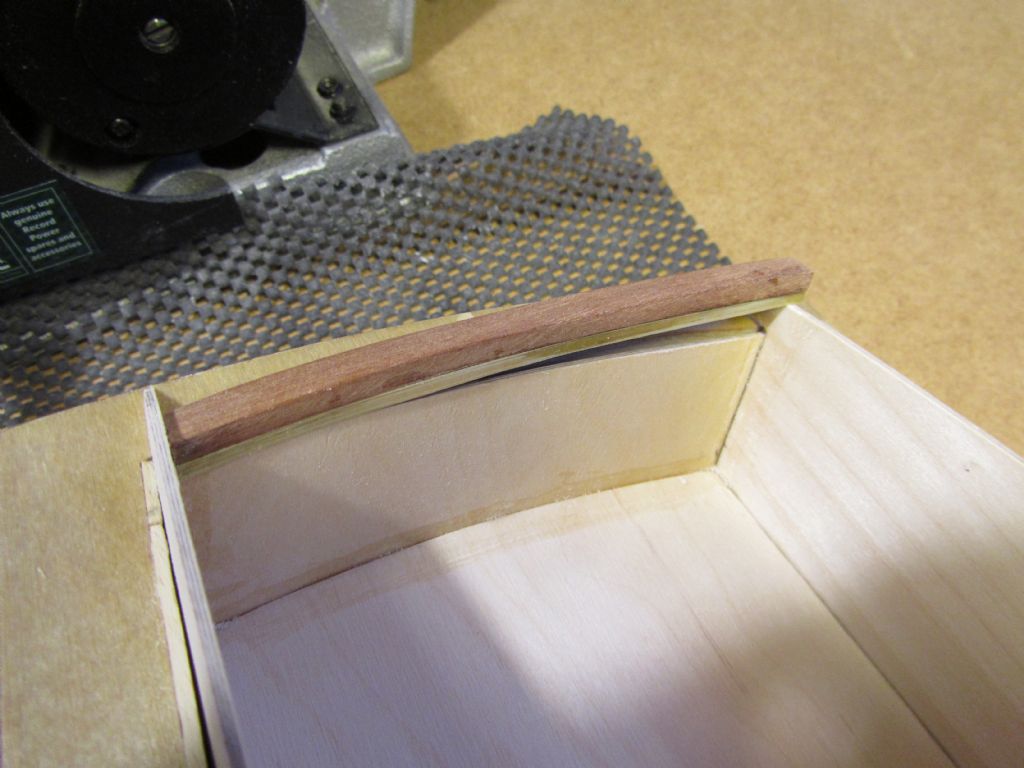
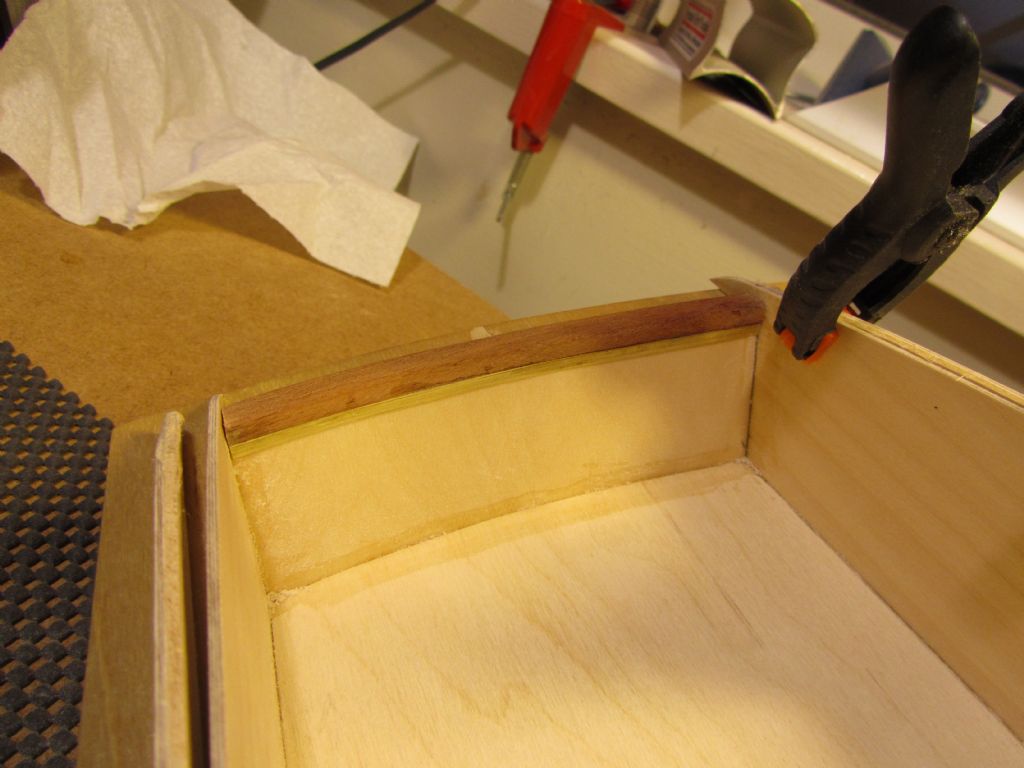
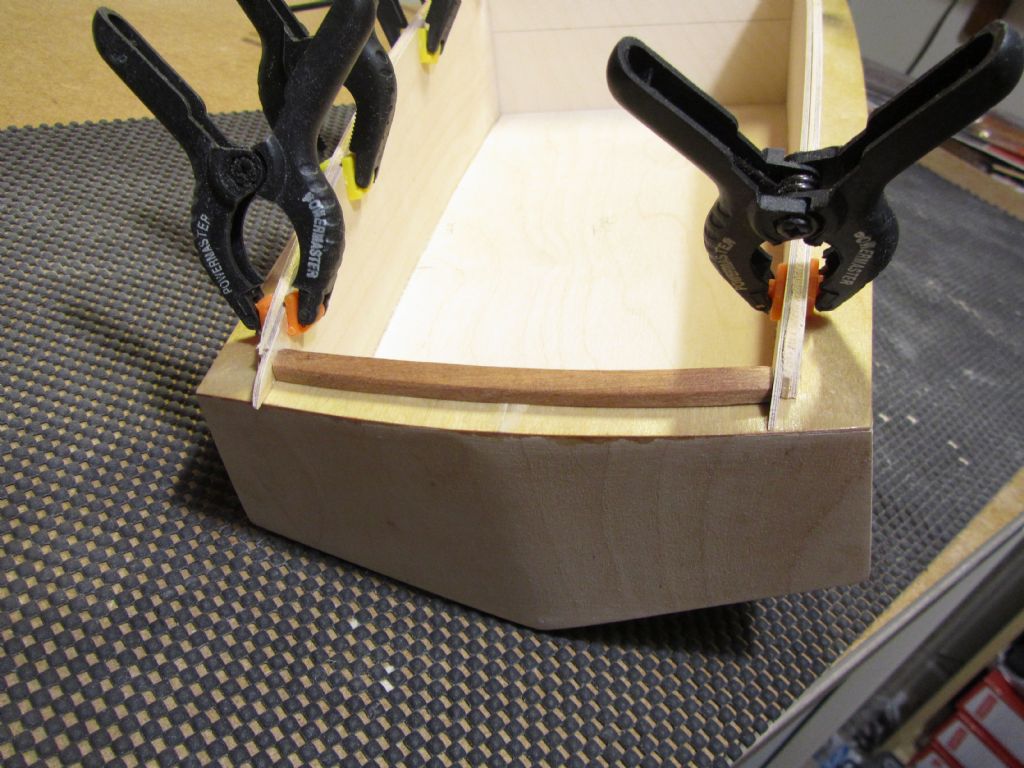
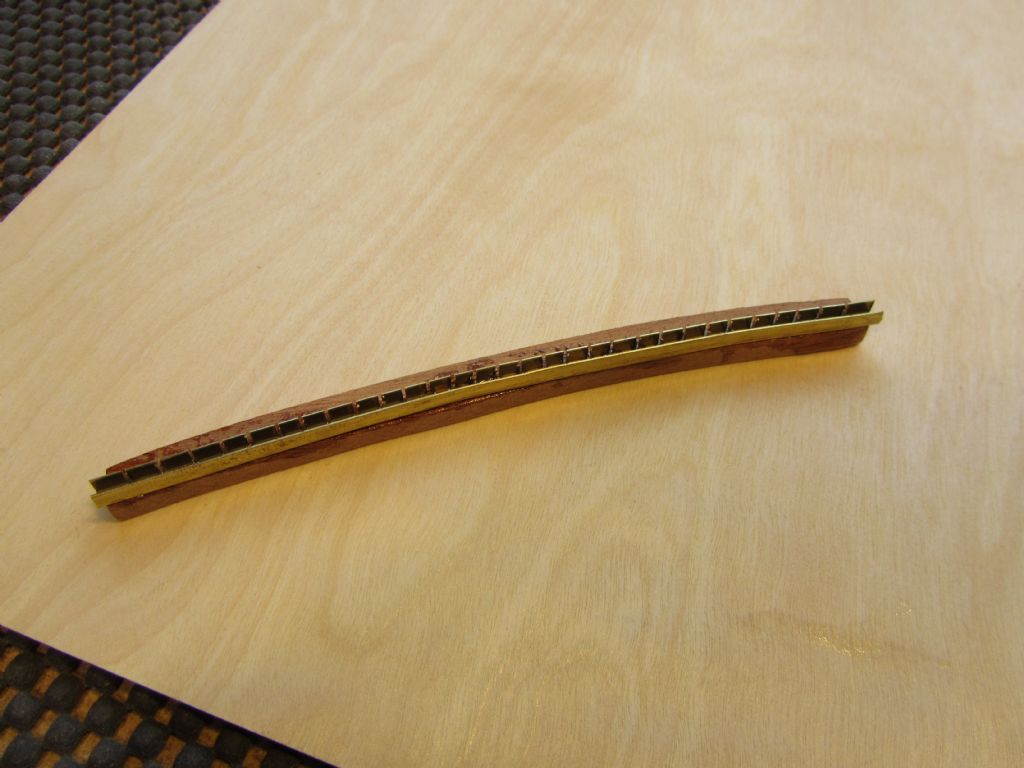
                            So I then moved onto the transom and sanded a piece of mahogany strip to shape having marked it out using the card template for the cockpit bottom. I also reduced the section of the capping by sanding the top to a slight angle and rounding off the rear corner. As the top of the transom is slightly curved I also sanded the underside of the capping to get a good fit.

                            To locate the top of the 2mm ply forming the inside of the transom/rear of the cockpit I've used a brass channel, bought previously for the purpose. To enable it to be bent easily I made numerous saw cuts and then glued it in place with 5 minute epoxy.

                            Chris
                            coaming repair.jpg

                            Edited By Chris Fellows on 08/04/2019 18:59:31

                            #81778
                            Chris Fellows
                            Participant
                              @chrisfellows72943

                              transom capping 3.jpgroof sanded.jpgFew more photos. I don't even try now to get them into anything like the right order!

                              roof underside.jpg

                              Edited By Chris Fellows on 08/04/2019 19:29:08

                              #81780
                              Ray Wood 3
                              Participant
                                @raywood3

                                Hi Chris,

                                The old cabin sides and curved deck syndrome, rather late now! But scribing the sides to the deck before marking out the Windows and curves is the only way to achieve a good fit in my experience, maybe ply wedge shaped pieces fitted to fill the gap ?

                                Regards Ray

                                #81783
                                Chris Fellows
                                Participant
                                  @chrisfellows72943

                                  Yes Ray, with hindsight that is what I should have done. As I keep saying, part of the learning experience! It will come in useful for the Swordsman 33 and then a future Huntsman 31.

                                  With the saw cut I'm pretty confident I can achieve a good fit and the outer skin of the cockpit sides will be glued to the inner skin, sandwiching coaming width timber, so it will be all good and strong.

                                  Chris

                                  #81796
                                  Chris Fellows
                                  Participant
                                    @chrisfellows72943

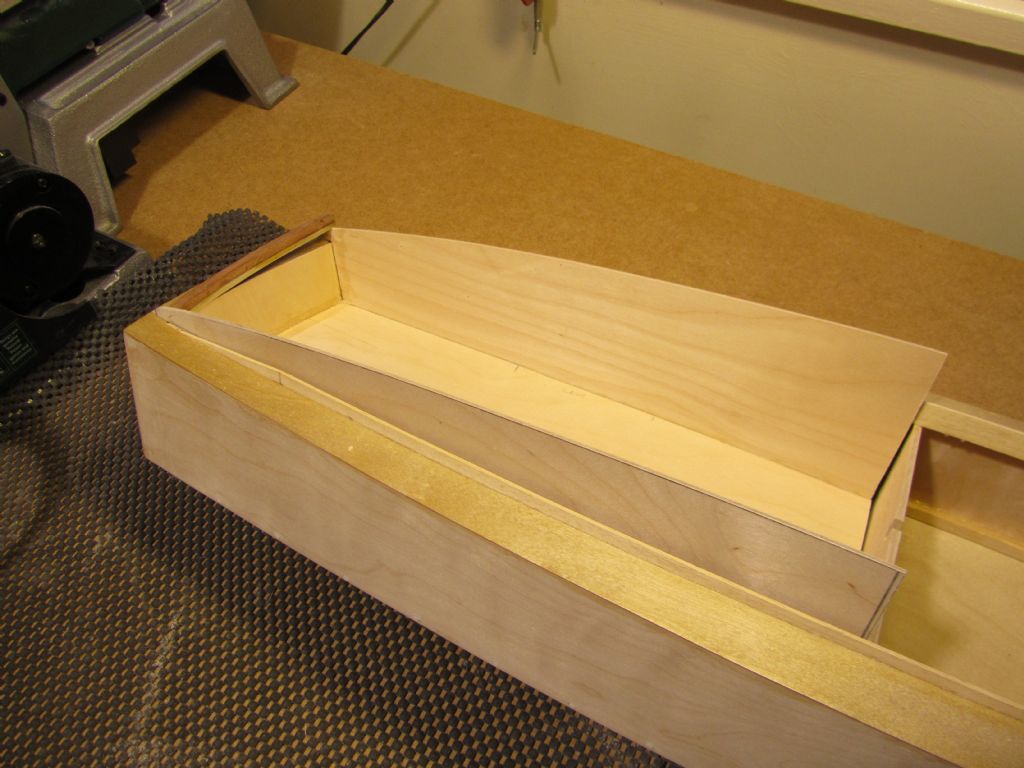
                                    cockpit 5.jpgcockpit 4.jpgWho thought it a good idea to have the superstructure lift off in one piece! This is turning out to be the trickiest part of my builds so far.

                                    Bit more done today, rear of cockpit cut out of 2mm ply an glued in place. More needs cutting/filing off the end of the capping and then that can bb glued to the top of the cockpit rear.

                                    Chris

                                    cockpit 3.jpg

                                    #81797
                                    Dave Milbourn
                                    Participant
                                      @davemilbourn48782

                                      Yeah – that transom area is the really interesting bit, Chris – and the main reason I'm watching ths thread!

                                      Dave M

                                      #81799
                                      Chris Fellows
                                      Participant
                                        @chrisfellows72943

                                        I've been doing a bit more this morning Dave and it will soon be revealed. Or I will be posting a picture of my dustbin! laugh

                                        Chris

                                        #81801
                                        Dave Milbourn
                                        Participant
                                          @davemilbourn48782

                                          First proper day of your retirement and you're already showing signs of losing your patience…..tut, tut!

                                          I'm just finishing off the swimming platform and ladders on Swordsman #2. Looks very good, even though I says it meself!

                                          DM

                                          #81803
                                          Chris Fellows
                                          Participant
                                            @chrisfellows72943

                                            No, quite the opposite Dave, I'm feeling very relaxed!

                                            But I've just had a thought and hope that you're not going to be disappointed? sad Are you expecting to see some sort of upstand at the transom? I decided early on that it will be unlikely that much water, if any, will come over the stern, even if reversing. It can be seen from the photos that I've stopped the side coamings/upstands short of the stern.

                                            If my assumption is wrong I can modify it later on, even incorporating an upstand if necessary.

                                            As regards the Swordsman I wouldn't expect anything less! I reckon it's the best looking Fairey of the lot. Big though, mine's the same scale as the Huntsman and makes it look tiny.

                                            Chris

                                            #81806
                                            Dave Milbourn
                                            Participant
                                              @davemilbourn48782

                                              Swordsman isn't that much longer than H31 (two feet) but has a much broader beam – certainly towards the stern. That was to accommodate six berths and led to both its nickname of Floating Country Cottage and its sometimes unpredictable handling. Sharp turns at speed are definitely not recommended as S33 has been known to broach and chine-ride. It's definitely more of a Grand Tourer than a circuit racer.

                                              I'm interested in seeing what you do at the back end of H28, rather than expecting any specific feature.

                                              Incidentally, I spent years telling folks that my chronic psoriasis was nothing to do with stress. It disappeared almost without trace just three days into my retirement. Ain't life strange?

                                              Dave M

                                              #81811
                                              Chris Fellows
                                              Participant
                                                @chrisfellows72943

                                                That's funny, during my last couple of weeks at work I suffered from pain in one shoulder and knotted neck and shoulder muscles. Helen kept saying it was stress which I laughed at.

                                                Guess what, last day in the office was Friday and have hardly had any symptoms since!

                                                As far as H28 goes it's pretty much going to be as per the photo shown with the capping sitting above the transom before final filing to fit.

                                                Having looked at a number of photos of the real thing the details seem to vary from boat to boat and I've just gone for something practical at scale size. As you know some of the full size timbers are quite small and would be too small, fiddly and weak when scaled down. Well, that's going to be my excuse!

                                                Chris

                                                #81813
                                                Chris Fellows
                                                Participant
                                                  @chrisfellows72943

                                                  Sorry about the small size, but similar to this one, albeit with a narrower deck above the transom as per the original Fairey drawings.

                                                  Just got to finish off sanding the forward edges of the cockpit to fit in place and I'll post some further photos.

                                                  2292742_3.jpg

                                                  Edited By Chris Fellows on 10/04/2019 18:52:28

                                                  #81816
                                                  Chris Fellows
                                                  Participant
                                                    @chrisfellows72943

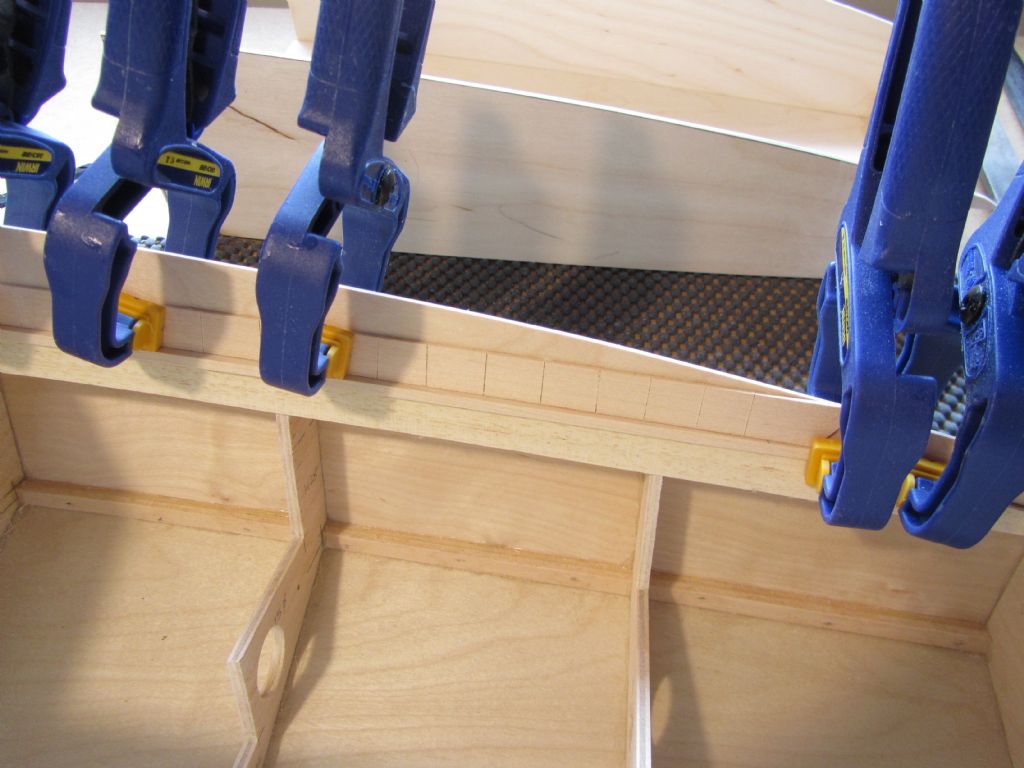
                                                    sandwich timber.jpginside cockpit.jpgside view 2.jpgcapping in place 2.jpgDay started with fitting timber strips inside the cockpit sides that would be the sandwich between the inner and outer sides. These were 1.6mm bass, the same thickness as the obechi coaming but being bass they were softer and bent more easily and therefore less likely to spring back straight but even so before gluing in place I made saw cuts in both sides to reduce the tendency and to maintain a good fit with the curve of the coamings. The photo shows the lower strip set 3mm above the coaming by sitting it temporarily on a 3 x 3mm strip. A second strip was then glued in line with the top of the cockpit side. As well as keeping the inner and outer sides apart these strips provide strength across the saw cut and as you can see the joint between the sides and deck is pretty good now.

                                                    I then returned to the transom capping and filed both ends until it was a snug fit between the inner cockpit sides. Once done it was back onto the cockpit itself and sanding the ends of the bottom and sides until the cockpit dropped into place. Before I glue it to the outer cockpit sides and back of the cabin I will do a last bit of sanding to give it a bit of wiggle room.

                                                    I used 2mm ply for the inner cockpit sides to give me a good gluing area but it's a bit stiff to curve. So before gluing to the outers I will put some partial depth saw cuts in it, from top to bottom.

                                                    Chris

                                                    capping in place.jpg

                                                    #81827
                                                    Tim Rowe
                                                    Participant
                                                      @timrowe83142

                                                      Romping along now Chris

                                                      Those cockpits were huge.

                                                      Tim R

                                                    Viewing 25 posts - 51 through 75 (of 193 total)
                                                    • Please log in to reply to this topic. Registering is free and easy using the links on the menu at the top of this page.

                                                    Code of conduct | Forum Help/FAQs

                                                    Advert

                                                    Latest Replies

                                                    Home Forums Build Blogs Topics

                                                    Viewing 25 topics - 1 through 25 (of 25 total)
                                                    Viewing 25 topics - 1 through 25 (of 25 total)

                                                    View full reply list.

                                                    Advert