Tin Plate Clyde Puffer

Advert

Tin Plate Clyde Puffer

Home Forums Scratch build Tin Plate Clyde Puffer

Viewing 25 posts - 26 through 50 (of 170 total)
  • Author
    Posts
  • #106081
    James Hill 5
    Participant
      @jameshill5

      Hi Len.. Great progress being made.

      Interesting comment about the layout of the plating. Like you, I looked at a load of pictures and came to the same conclusion, that there was no set layout really.

      As you know, my plating is from card so the detail is not so obvious as yours looks like it will be. I`m going to have to be careful when painting the hull that I don`t lose it all. The only time the plating detail would show is when the boat is on it`s stand. Out on the water we won`t see it.

      I used a pounce wheel but had to be careful I didn`t go right through the card, which is why my detail isn`t quite so obvious

      Following your progress with interest,

      Jim.

      Advert
      #106085
      Len Morris 2
      Participant
        @lenmorris2

        Thanks for that Jim. I'm following your progress with very great interest and hope to learn a lot from your thread.

        Totally agree about the rivet detail being almost invisible once the boat is in the water and your boat is almost twice the size of mine!

        I've no idea on how you'll keep the rivet detail after your sealing and finishing and it will be good to see. In the past I've resorted to finishing the hull and then sticking on rivet heads that the model train shops sell. Not a quick process!

        I just intend to solder mi plates on, give it a quick spray and then some weathering detail. It will probably look like it's making it's last voyage before the the breakers yard. Suspect yours will look far younger and healthier.

        Len.

        #106097
        Len Morris 2
        Participant
          @lenmorris2

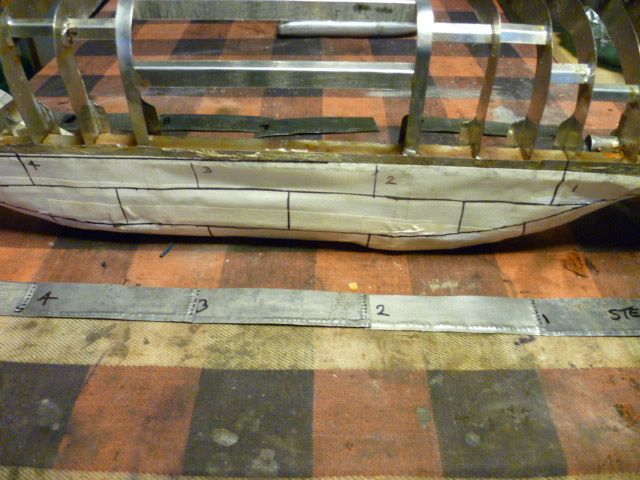
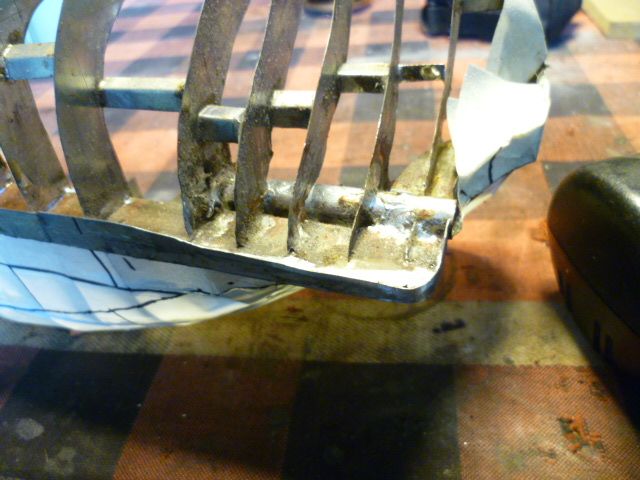
          Time now to start plating. The plan is to plate the bare side first and keep the masking tape in place for reference. Then remove the tape and plate the other side. The plates are going to overlap 'roof tile fashion' vertically and bow to stern horizontally meaning the first plate on will be the keel plate around the propshaft, plating along to the bow.

          The T section keel needs to be thinned at the bow and stern lower areas. The first picture shows the plates ready to go and the second picture shows the keel plate shaped at the stern on one side.

          Len.p1050180.jpgp1050182.jpg

          #106098
          James Hill 5
          Participant
            @jameshill5

            Hi Len,

            Looking at your plating layout, you`re going to be far more realistic than my effort. My plating is basically butt joined, ( or I should say, the attempt at. ) The only thing on my hull is the slight flattening of the card at the curved points which gives a degree of realism, but not much.

            Looking forward to seeing how you progress.

            Jim.

            #106101
            Len Morris 2
            Participant
              @lenmorris2

              Kind comment Jim but I'm not sure you're right. I think the plates should be butt jointed perhaps with a twin line of rivets on the verticals where they where attached to internal fish plates. Doing so in tin plate takes a quantum leap in accuracy and the use of backing strips that would be very time consuming.

              I think my plates will be well out of shape but as I said earlier Lens shipyard was notorious for slapping on plates just to get the job done.

              Your boat is looking excellent and I do hope you find a solution to the sealing and finish that you're happy with.

              Len

              #106107
              James Hill 5
              Participant
                @jameshill5

                Hi Len,

                I meant to say to you earlier that there is program that bbc Scotland made a while back on the Clyde Puffers, fronted by the actor David Hayman. It mainly concentrates on the Vic 32 but is an interesting hours viewing. You may of course already be aware of it.

                I had a scrap piece of card laying around, just an offcut with some rivetting detail on it. Just out of curiosity I gave it a light spray with black paint. The rivet detail all but disappeared so I`m thinking I`m probably going to have to go over the rivet lines using Neils method. I`ve done a test piece using that method and when its dry I`ll try the paint on it tomorrow to see what it looks like. Your pictures of your rivets mean they certainly won`t get hidden when painted.

                Jim.

                #106108
                ashley needham
                Participant
                  @ashleyneedham69188

                  I have found that you cannot necessarily “go real” to achieve the best look, and what follows is no criticism of your tin boat Len, but just a few thoughts on the matter.

                  With regards to rivets, I see three avenues to explore in order that they are visible on a model.

                  First is…space them out a bit, so that they look like bumps and not a continuous raised line,

                  secondly, make them as big as you can in order to see them,

                  and third, use gloss paint, as this always makes imperfections on a surface (like rivets) stand out.

                  Neither of these avenues leads to a realistic finish of course, and I might add a fourth method….paint them on! Use PVA or a special craft glue made for such things (it’s thick) to dob blobs of paint on.

                  I remember seeing the telly program where Guy Martin somehow persuaded JCB to make a WW1 MkIV tank, they cut all the panels out, welded them together and then spot welded hundreds of ‘rivet heads’ in place and it looked fantastic.

                  I think your rivets will look great given that the model is relatively large scale and the plates are large. A boat at a smaller scale would probably not benefit from rivets at all, and you are making a working boat and not a display model, for which scale would be paramount.

                  Ashley

                  #106111
                  Len Morris 2
                  Participant
                    @lenmorris2

                    Totally agree! I had a shiny black car once and it showed every minute imperfection. Not sure it will work on mi boat though as it's going to be well weathered. However, rust will drip from every rivet head to stand them out.

                    I saw Guy Martin's tank program but had forgotten the rivet heads were welded on. Suppose I've played the same game sticking on the rivet heads you can get from the model train shops. it works very well but takes forever!

                    Len

                    #106114
                    Len Morris 2
                    Participant
                      @lenmorris2

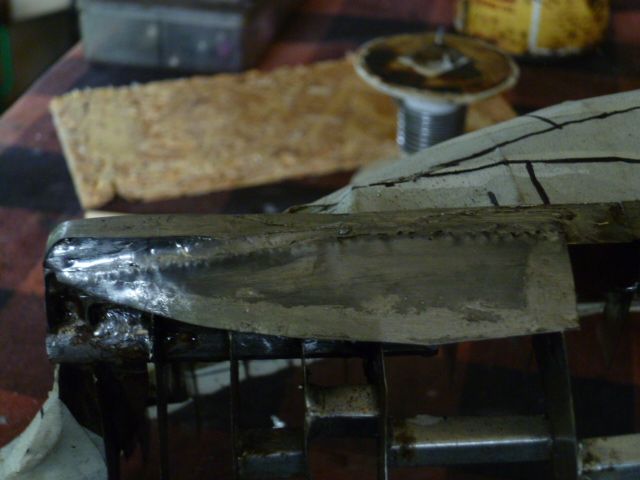
                      Here's a picture of the first stern plate soldered in position. I was going to wait until the whole lower strip was in place but thought I'd get this posted before our site heads down the black hole in a couple of days.  The solder is a bit blobby but that'll all clean up with a hot iron when it's time for the finishing touches

                      Hope to see you all on the other side!

                      Lenp1050197.jpg

                      Edited By Len Morris 1 on 03/10/2023 12:03:01

                      #106115
                      Colin Bishop
                      Moderator
                        @colinbishop34627

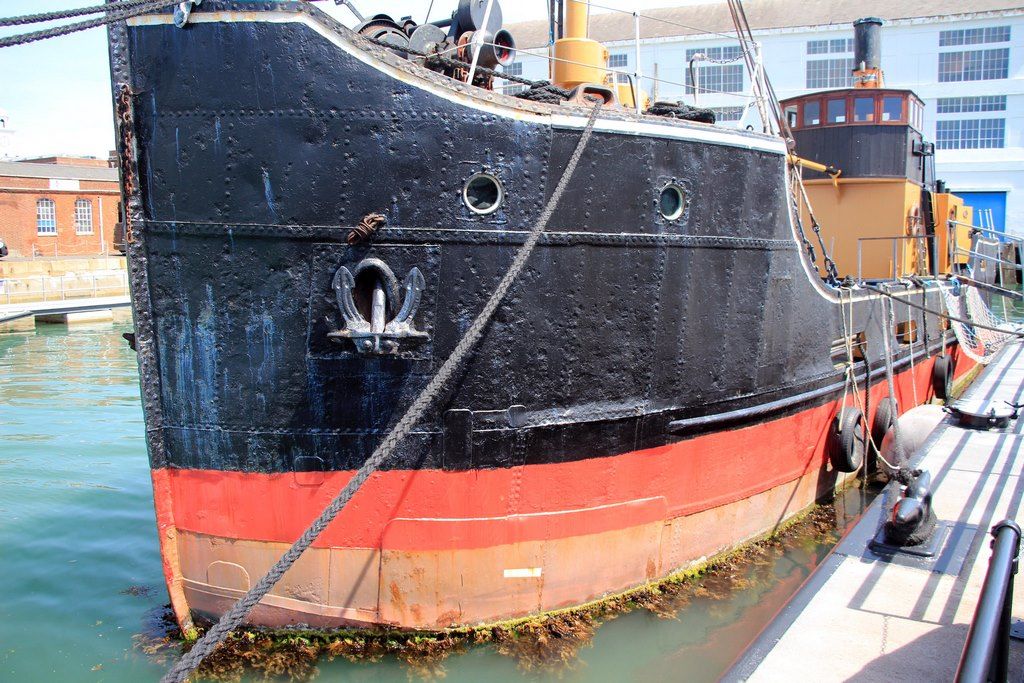
                        Just a reminder of my previously shown photo of VIC 56 at Portsmouth.

                        Colin

                        vic  56.jpg

                        #106116
                        Len Morris 2
                        Participant
                          @lenmorris2

                          Thanks Colin, I feel a whole lot better. I'll stop worrying. She's a mish mash of single / double row rivets welded repair plates, dents and stains. Just hope I can get my hull to look as bad. Suspect with my skills it might not be that hard! Love the water line growth. How that could be modelled I have no idea.

                          Len

                          #106117
                          ashley needham
                          Participant
                            @ashleyneedham69188

                            I think that the tin plates will look suitably…authentic! Even modern warships show really dished panels.

                            Marine growth..best check out model railway undergrowth?

                            Ashley

                            #112111
                            Len Morris 2
                            Participant
                              @lenmorris2

                              Just to see what happens now.  My last post with a picture just appears with the statement ‘This post is awaiting moderation’ whatever that means.

                              #112100
                              Len Morris 2
                              Participant
                                @lenmorris2

                                Plating on the bottom of the hull is progressing reasonably well.  It all looks a bit tarnished but that’s mainly residue from all the flux.  Hope the picture appears.

                                Len

                                P1050200

                                #112437
                                James Hill 5
                                Participant
                                  @jameshill5

                                  Hi Len,

                                  Just managed to get on after trying all afternoon. Took a look first to see how you`re doing. Good to see the plating coming along.

                                  Hoping Ill get things right when I try pictures next time. Well get used to it eventually.

                                  Jim.

                                  #112483
                                  Len Morris 2
                                  Participant
                                    @lenmorris2

                                    Jim!  You made it and you’re alive!  Well done.

                                    I kept mi picture small and just uploaded it straight from mi pictures file on my own computer.  The post appeared eventually after being checked for secret messages.

                                    I’m going to try and send you a pm.  Fingers crossed!

                                    Len


                                    #113420
                                    Len Morris 2
                                    Participant
                                      @lenmorris2

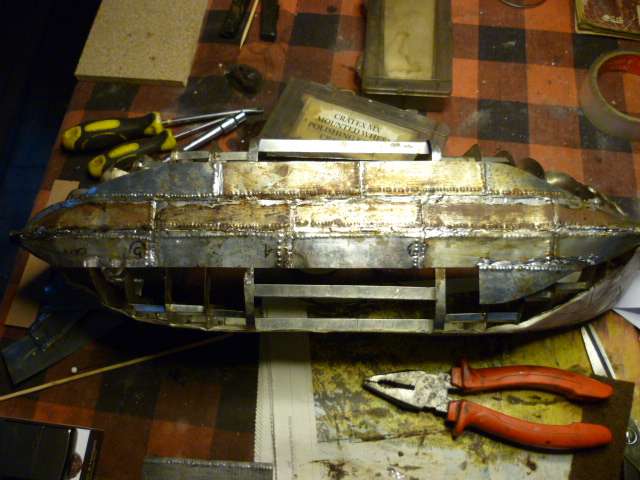
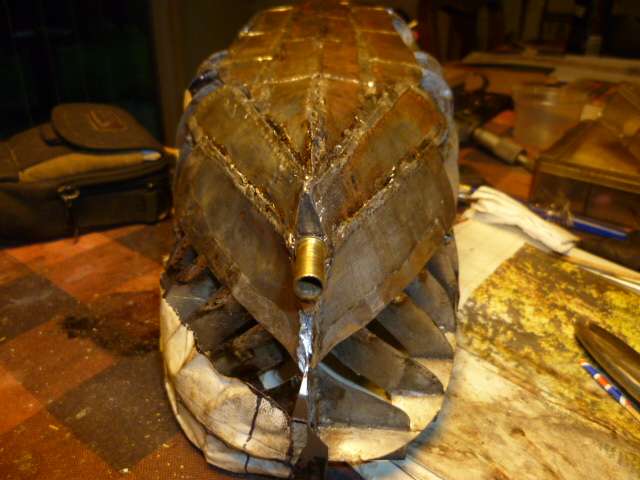
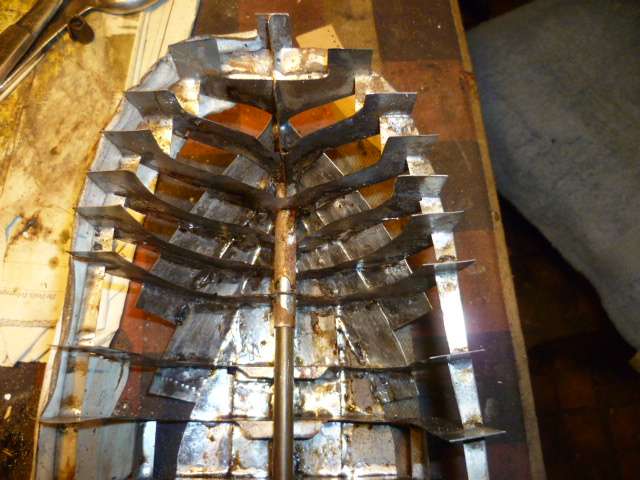
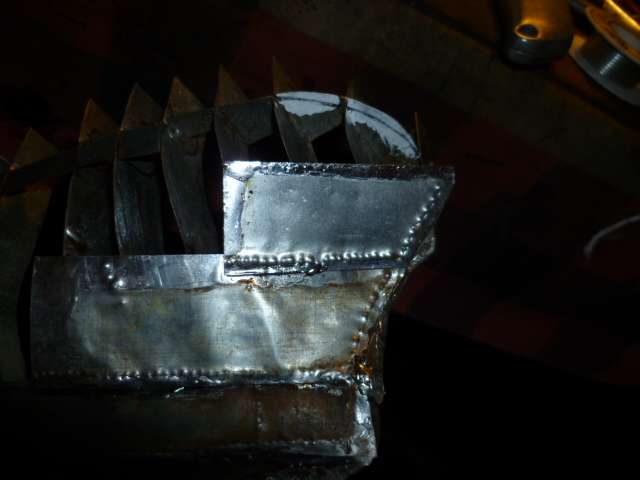
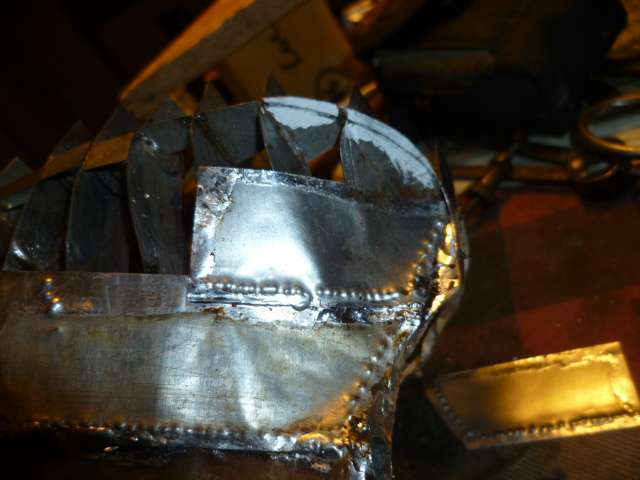
                                      Finally managed to get the 4 stern plates fitted that surround the propshaft housing.  These were always going to be time consuming as they have double compound curves that reverse half way through.  Job done and I now have a clear run to the bow for two vertical runs.  A couple of pictures attached, one internal and one external.  Notice that the shoring between the frames has gone as it’s no longer needed. Len.

                                      P1050209

                                      P1050211

                                      I think I’ve worked out this picture posting business.  Firstly the pictures appear in reverse order to how they are posted.  Secondly, if you put the cursor on the lowest bottom right of the last picture and then press enter, you seem to get a clear shot at text below the picture.  See what happens!

                                      #113421
                                      Colin Bishop
                                      Moderator
                                        @colinbishop34627

                                        Clever stuff Len, I will never build a soldered model but I am very much enjoying your explanation of how it is done.

                                        Colin

                                        #113469
                                        James Hill 5
                                        Participant
                                          @jameshill5

                                          Good progress Len,

                                          Beginning to take shape nicely. How will you make the cabin? Is that to be tinplate as well or is that a daft question?, seeing as you`re using a steam power plant.

                                          I did answer your PM but not sure if you got it with all the change going on at the time.

                                          Jim.

                                          #113529
                                          Len Morris 2
                                          Participant
                                            @lenmorris2

                                            Thanks Colin for the kind comment.  It occurred to me that I haven’t really shown how it’s done, more what’s been done.  I didn’t want to bore any anybody with old school tech.  On mi next plates I’ll show the whole process (or at least what I do).  Just might make even you pick up a soldering iron!

                                            Len

                                            #113532
                                            Len Morris 2
                                            Participant
                                              @lenmorris2

                                              Hi Jim,

                                              Apart from a few bits of brass tube and the prop she’ll all be out of tin plate.

                                              Got your PM reply Jim.

                                              Len

                                              #113924
                                              Len Morris 2
                                              Participant
                                                @lenmorris2

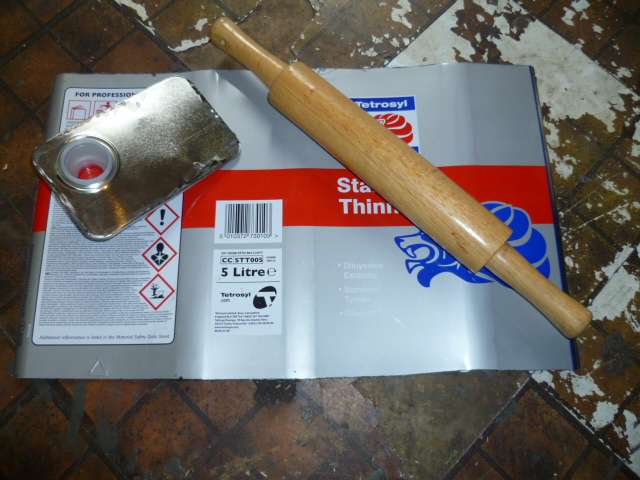
                                                This post is start to finish on the next two stern plates, just to give some more detail on how I do it for this model with a frame construction.  It starts with the material.  A gallon can chopped up.
                                                P1050212

                                                I use an angle grinder with a 1mm cutting disk to remove the top and bottom and then slice down the welded seam.  It cuts easily like a red hot knife through butter.   It can be done with shears but the distortion is much more.  The rolling pin is just to get the main sheet reasonably flat.  I keep the end pieces as they are slightly thicker, 11 thou compared with 9 thou.  Doesn’t sound much but they are much tougher to work with yet useful for decking etc.

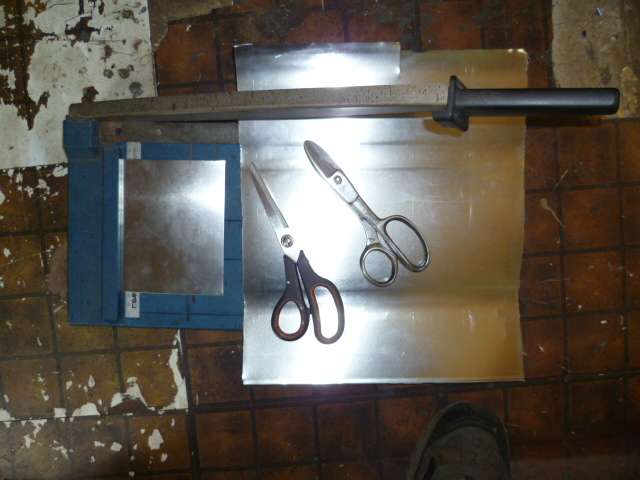
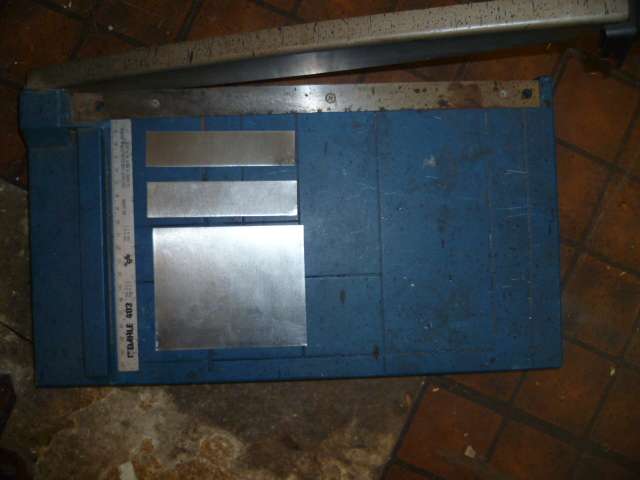
                                                Apiece is then cut from the main sheet to make the plates.  It can be done with shears and scissors but I prefer to use an old office guillotine.  It’s only meant for cutting paper but laughs at tin plate.  It leaves flat edges and square sections.  The picture shows the piece needed on the left.
                                                P1050213

                                                Strips are then cut of this the width of the plates that are needed.  If the plates are butt jointed then they are cut to the size of the plating plan.  As my plates overlap they are wider.  I only mention this because a couple of times I forgot and just made scrap!P1050215
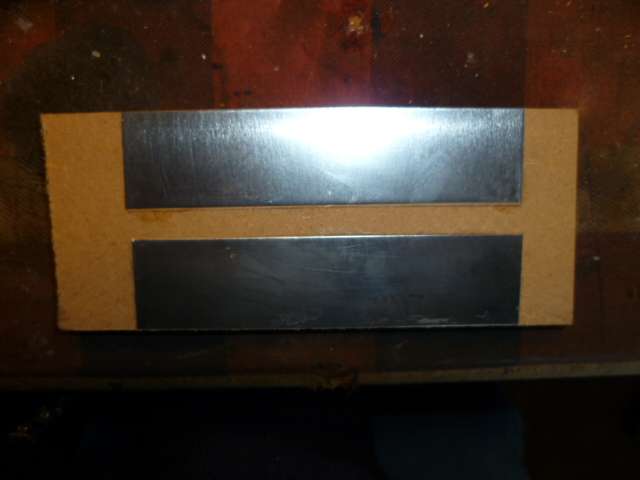
                                                I then stick the plates to a piece of wood with contact adhesive and squeeze them up in a vice.  This gets them very flat.  One edge of each plate is aligned to an edge of the wood.
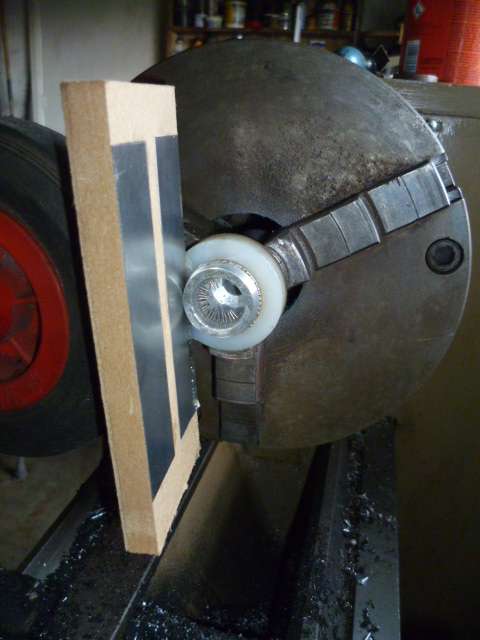
                                                P1050216

                                                The job is then passed through the rivet roller in mi lathe.  I originally tried it at the lowest speed but found it wasn’t necessary.  I now just put the lathe in neutral and turn the chuck by hand.
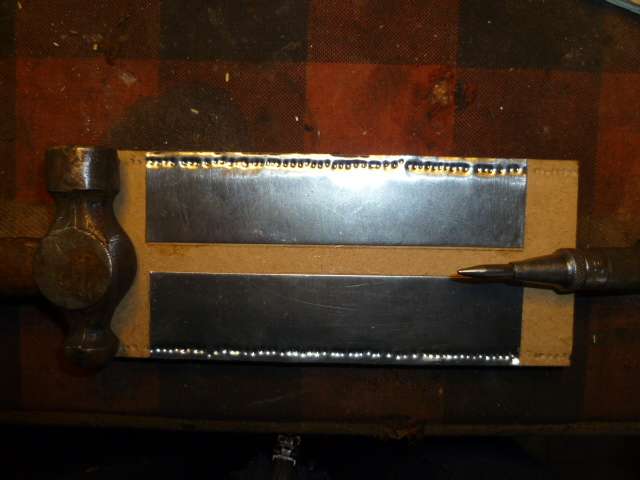
                                                P1050218

                                                There’s inevitably some edge distortion and some of the impressions are not that good.  Both are corrected by small hammer blows and use of mi automatic centre punch with it’s tip ground to rivet shape.
                                                P1050219

                                                The plates are now tinned all over on the visible internal face.  I use mi big iron with a wide tip.  I recently ran out of my 30 year old flux and had to use one of the new environment friendly fluxes.  It was horrible.  Eventually found some of the old ‘nasty’ stuff.
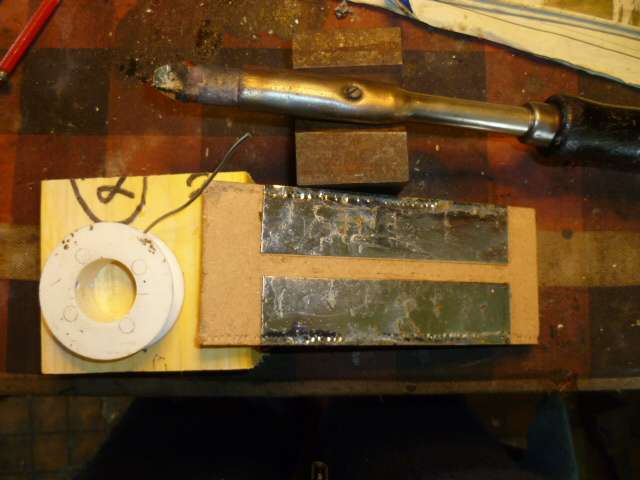
                                                P1050220

                                                The plates are now released from the wood with a bit of lighter fuel or petrol and wiped clean.  They are now cut to approximate size and tinned on the outside edges.

                                                Sorry all for now, seemed to have lost all the tool bar icons for posting.  Back soon.

                                                Len


                                                #113925
                                                Colin Bishop
                                                Moderator
                                                  @colinbishop34627

                                                  Len,

                                                  It’s possible that your post is a bit too big. It shouldn’t be the case but not everything yet works the way it is supposed to. Might be worth trying to make several smaller posts one after the other.

                                                  Colin

                                                  #113949
                                                  Len Morris 2
                                                  Participant
                                                    @lenmorris2

                                                    Try again.

                                                    Here’s the picture.

                                                    P1050223

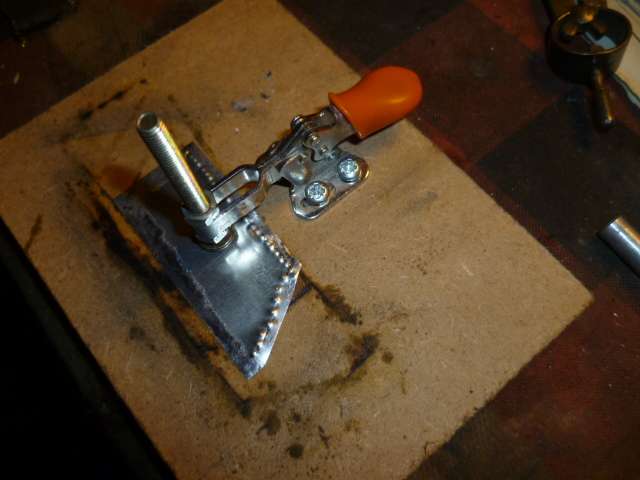
                                                    Mi little jig just holds the plate steady while its being tinned.  It’s not vital but does make things easier.  The next step is to tack solder it onto the hull after a bit of bending just by hand.

                                                    P1050224

                                                    It’s then seam soldered along the obvious bits that touch, pushed into place with a bit of wood for the other bits and tapped with a small jeweller’s hammer to get it round the frame curves.  The hammer blows are no more than the weight of the head and done machine gun fashion.  As the edges come together I correct any mismatches with a stone in a Dremel or a linisher type power file.  The inside seams are soldered and here’s the end result.

                                                    P1050225

                                                    It all looks a bit lumpy but that will planish out if needed.  The nice thing about tin plate is that once it’s on the jobs done.  No need for anything other than a final paint.

                                                    Sorry if all that seemed a bit long winded but it took more time to write this post than it does to fit several hull plates.

                                                    Len

                                                    #113954
                                                    Len Morris 2
                                                    Participant
                                                      @lenmorris2

                                                      Thanks Colin, thought that might be the case.  Surprised you clocked it so quickly.  Not a problem, I’m sure you have some much bigger issues to deal with.

                                                      Len

                                                    Viewing 25 posts - 26 through 50 (of 170 total)
                                                    • Please log in to reply to this topic. Registering is free and easy using the links on the menu at the top of this page.

                                                    Code of conduct | Forum Help/FAQs

                                                    Advert

                                                    Latest Replies

                                                    Home Forums Scratch build Topics

                                                    Viewing 25 topics - 1 through 25 (of 25 total)
                                                    Viewing 25 topics - 1 through 25 (of 25 total)

                                                    View full reply list.

                                                    Advert