Fairey Huntress 23 Long Cabin Version

Advert

Fairey Huntress 23 Long Cabin Version

Home Forums Build Blogs Fairey Huntress 23 Long Cabin Version

  • This topic has 216 replies, 3 voices, and was last updated 5 months ago by Chris Fellows.
Viewing 25 posts - 1 through 25 (of 217 total)
  • Author
    Posts
  • #89908
    Chris Fellows
    Participant
      @chrisfellows72943

      Hi All

      My intention at some point was to build my own Huntress, but not just yet as I own one of DM's lovely creations and thoughts were it being on a Captain's Boat version, but other builds were going to come first.

      Whilst my goal is to build all of the classic Faireys; Huntsman 31, Swordsman 33 etc. all at 1:12 scale, I do like to have a go at the more unusual, hence the River Cruiser and the Fisherman 27 – the latter being planned for a winter start.

      Anyway a discussion on Alan Bell's Huntsman 28 thread on stern-drives had me looking at my Fairey Marine book and I came across a preliminary design by Alan Burnard, Faireys' designer, for a longer cabin Huntress (still using the 23 foot hull) with twin stern-drives. Some Huntresses were fitted with stern-drives for particular customers, particularly where hulls were supplied for completion by other yards, but most were traditional prop shaft.

      Along with the longer cabin there were longer and deeper side windows which look more modern and I reckon the overall look is very nice. It was penned (or should I say pencilled) in the early 1960s, so alongside other designs, and it was a pity that it never went into production. I guess that being the early days of stern-drives was part of the reason.

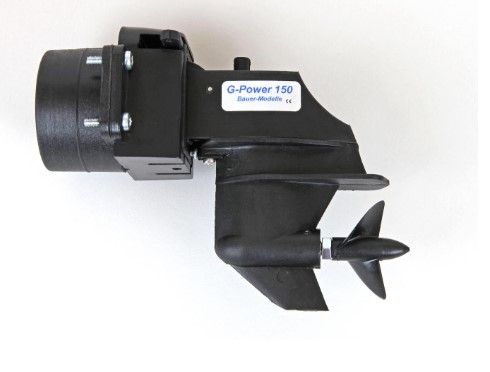
      Upshot is that I decided I had to build one. First thing to look at was the availability of stern/Z-Drives to suit a small boat at 1:12. Not much out there really, well I found one at Bauer-Modelles in Germany which is slightly bulkier than ideal but it fits the bill and has a 36mm prop. It's made from plastic but it will have to do. The alloy ones are too big but are works of art with prices to match!

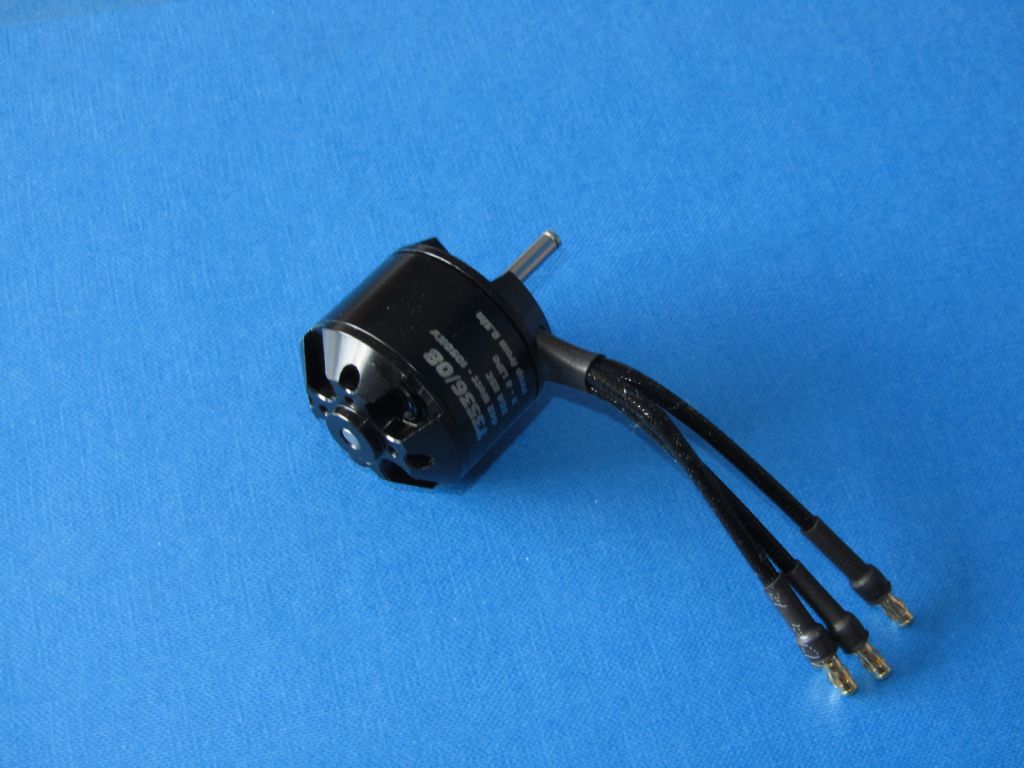
      So with a suitable drive found and winging its way here the build is a goer. I've bought the motor as well, my usual choice of Overlander, whilst still in stock.

      I need to wait until the drive arrives, but this particular one has quite a large piece where it fixes to the transom and initial thoughts are to recess it into the transom, we shall see.

      Forgot to mention, due to the relatively small size of the model and the added complication and weight particularly of drives and motors etc. I've decided on one rather than two. It was only a preliminary design afterall!

      When the drive arrives I can make the necessary tweaks to the Huntress drawings and start on the hull build. Well, after sorting out my work room again!

      Chris
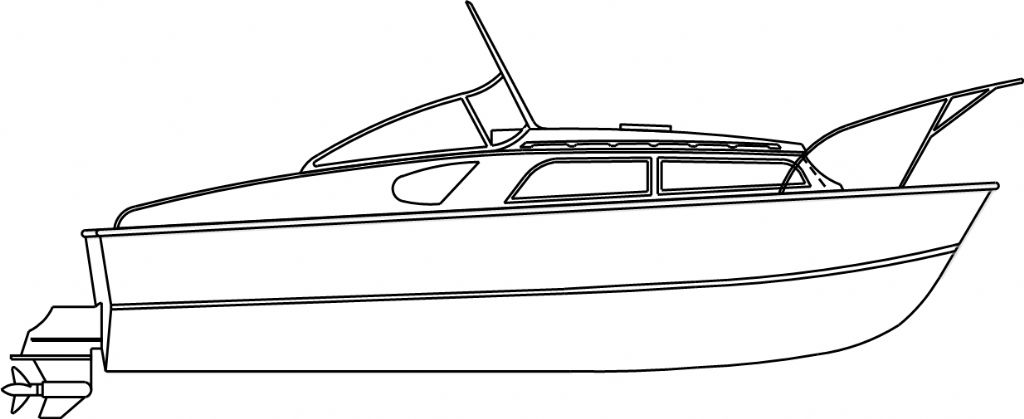
      side view.jpg

      stern drive.jpg

      motor.jpg

      Advert
      #9806
      Chris Fellows
      Participant
        @chrisfellows72943
        #89910
        Alan Bell
        Participant
          @alanbell30496

          Looks good Chris, I think you’re going to need a bigger work room for all these projects you have on the go….
          Alan.

          #89914
          Tim Rowe
          Participant
            @timrowe83142

            Great to see you back Chris

            Few marques managed to equal or beat the Fairey range and all were hugely more expensive.

            I will see if I can do justice to the Spearfish kit you kindly sold me.

            Looking forward to the Fisherman and then you might need an Atlanta

            Tim R

            #89915
            Chris Fellows
            Participant
              @chrisfellows72943

              Yes Alan, I've got boats scattered around the house at the moment, post decorating, only a matter of time before you know who says something! I've bought a few loft boards to put down so at least some of the stuff out of the work room (not model related) can go up there.

              I'm sure you will Tim, given your skills. Funny you should mention Atalanta! I've already got some drawings!

              Chris

              #89921
              Colin Bishop
              Moderator
                @colinbishop34627

                How do you steer it? I've had a look on the Bauer site and it isn't obvious. Aroound £85!

                Colin

                #89922
                Dave Milbourn
                Participant
                  @davemilbourn48782

                  Colin

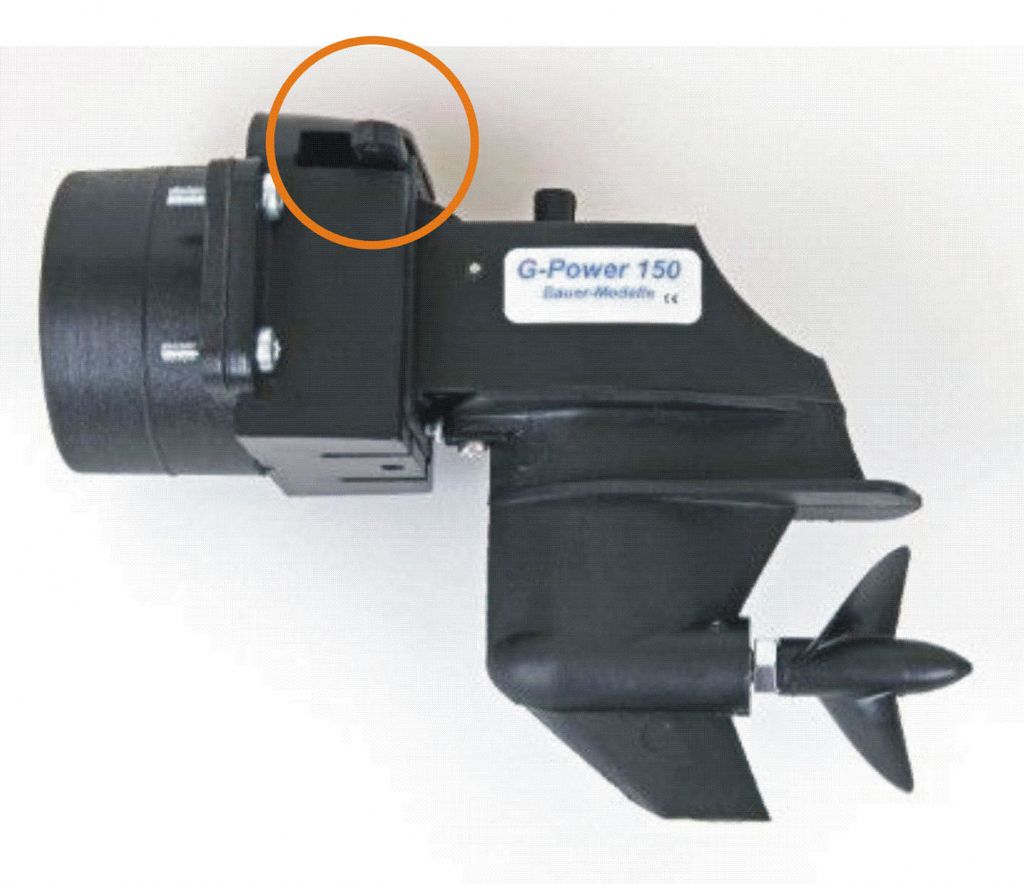
                  stern drive.jpgI reckon this might be the answer.

                  DM

                  #89923
                  Colin Bishop
                  Moderator
                    @colinbishop34627

                    Dave,

                    I can't make out where it pivots from looking at the Bauer images. None of them show this

                    **LINK**

                    Nor does the data sheet:

                    **LINK**

                    I must be missing something.

                    Colin

                    Edited By Colin Bishop on 12/07/2020 19:47:53

                    #89926
                    Chris Fellows
                    Participant
                      @chrisfellows72943
                      Posted by Colin Bishop on 12/07/2020 18:58:21:

                      How do you steer it? I've had a look on the Bauer site and it isn't obvious. Aroound £85!

                      Colin

                      Hi Colin

                      The pivot will be in that box shaped part where the mounting bolts are. You can see a hole on the bottom where I assume the pivot pin locates. Drive, plus props, grease and and postage came to over a hundred quid. Then there's the motor, another reason for only one! No choice though really, apart from not doing it! The cheapest alloy ones I found were over three hundred quid and too big anyway.

                      Having said that I use the Raboesch maintenance free prop shafts usually and they are pretty expensive so the overall cost won't be that much different. At least I've got most of the other materials and tools already now.

                      Those cross-head mounting bolts with have to go though and be replaced with some allen head ones.

                      Chris


                      Edited By Chris Fellows on 12/07/2020 21:30:29

                      #89927
                      Colin Bishop
                      Moderator
                        @colinbishop34627

                        Chris,

                        Yes, I see what you mean, it certainly looks like a nice piece of kit. and very realistic.

                        I see what you mean about recessing the mounting box into the transom, it would look better if you can do it that way.

                        I think we will all be very interested in seeing how it installs and performs in due course. You don't seem to see many scale Z drives on models. Must be quite a tight bend for the flexi drive and I see that they don't recommend putting too much power in reverse, otherwise it locks up.

                        Congrats on doing something a bit different.

                        Colin

                        #89929
                        Chris Fellows
                        Participant
                          @chrisfellows72943

                          Thanks Colin

                          It does use a flexi-drive but only a short straight one. The drive is transmitted to the prop via steel bevel gears and SS bearings are used – as per your first link. The flexi-shaft is there to accommodate differing tilt angles and as you say in reverse if too much throttle is used as the unit is designed to tilt up if running over an obstacle.

                          Chris

                          #89933
                          harry smith 1
                          Participant
                            @harrysmith1

                            Hi Chris

                            Flexi-shafts are really only design to turn one way and using too much reverse un winds them.

                            I hope the ones in this unit are designed to go forward and reverse !!!!

                            Dam nice looking unit, I must say.

                            Harry Smith

                            #89934
                            Chris Fellows
                            Participant
                              @chrisfellows72943

                              Hi Harry

                              It is designed to go in forwards and reverse but warns of using too much throttle in reverse as the drive can kick up as when going over obstacles which puts strain on the flexi-shaft. So no tearing towards the jetty and slamming into reverse!

                              Chris

                              #89935
                              harry smith 1
                              Participant
                                @harrysmith1

                                Hi Chris

                                I sent my ESCs to 25% power in reverse which is enough to stop the boat and give a bit of turning in reverse.

                                Full power in reverse the boat will R SEND to the bottom !!!!

                                Harry

                                #89951
                                ashley needham
                                Participant
                                  @ashleyneedham69188

                                  Do you have to strip and regrease these cable driven outboards like you should do on flexidrives after each outing??

                                  i have heard too many people complain that these cables do not last very long, but it that due to the fact that they are being driven whilst being in a tight bend, or lack of maintenance?..or is it that they are simply thrashed to death.

                                  Ashley

                                  #89960
                                  harry smith 1
                                  Participant
                                    @harrysmith1

                                    Yes, a total strip down and regrease after each outing!!!

                                    Also leave the flex in an oil bath to stop rust .

                                    The ones in the Hobbyking outboards are only 3mm and on the 28mm 3000kv 700Watt motor do not last long.

                                    Also they do not have replacement !!!

                                    Harry Smith

                                    #89968
                                    Chris Fellows
                                    Participant
                                      @chrisfellows72943

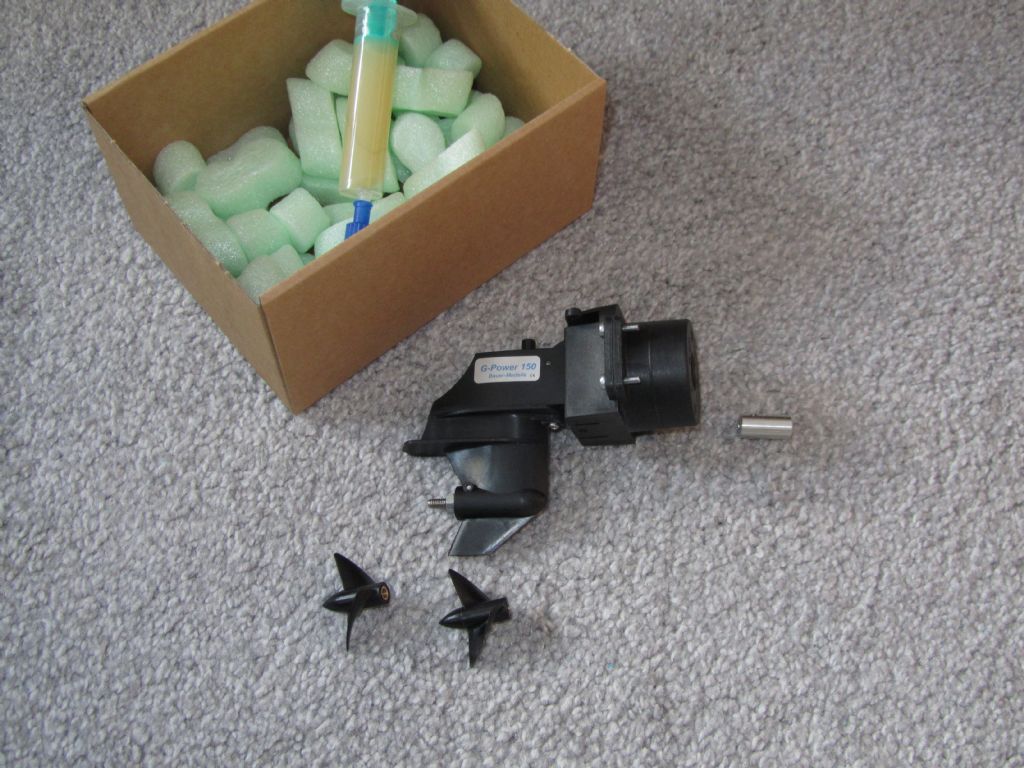
                                      Just had a box delivered. smiley

                                      The instructions are minimal (so going to ask for more information) but they do say to strip down and regrease if not going to be used for sometime but I will do it more frequently than that. The boat is going to be built to be used but not that often, having other boats, and certainly not thrashed or abused, well not intentionally anyway! I have the Club 500 for that!

                                      The flexi-drives I've heard about having problems are longer ones used in race boats. The flexi-drive in this unit is only short and you can only see the part that goes into the coupling on the motor shaft. Replacements and other parts are available.

                                      Now that I've got it I can think some more about how to mount it and the construction of the transom area and may well do a mock up.

                                      Chris

                                      #89972
                                      Chris Fellows
                                      Participant
                                        @chrisfellows72943

                                        arrived.jpg

                                        #90530
                                        Chris Fellows
                                        Participant
                                          @chrisfellows72943

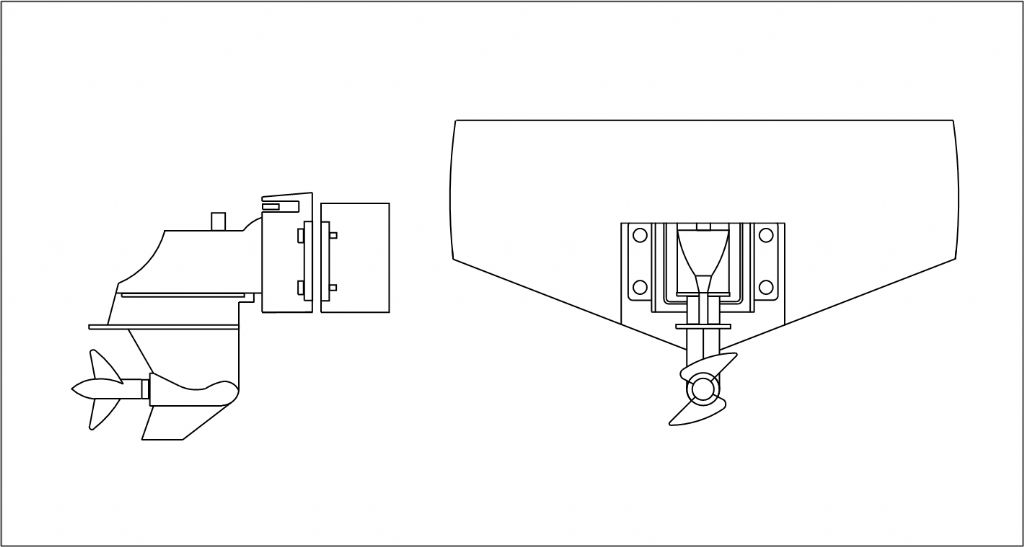
                                          After getting the stern-drive I spent some time measuring it up and drawing it so that I could work out how the hull needs to be constructed to install it.

                                          Stern drive drawing

                                          #90533
                                          Chris Fellows
                                          Participant
                                            @chrisfellows72943

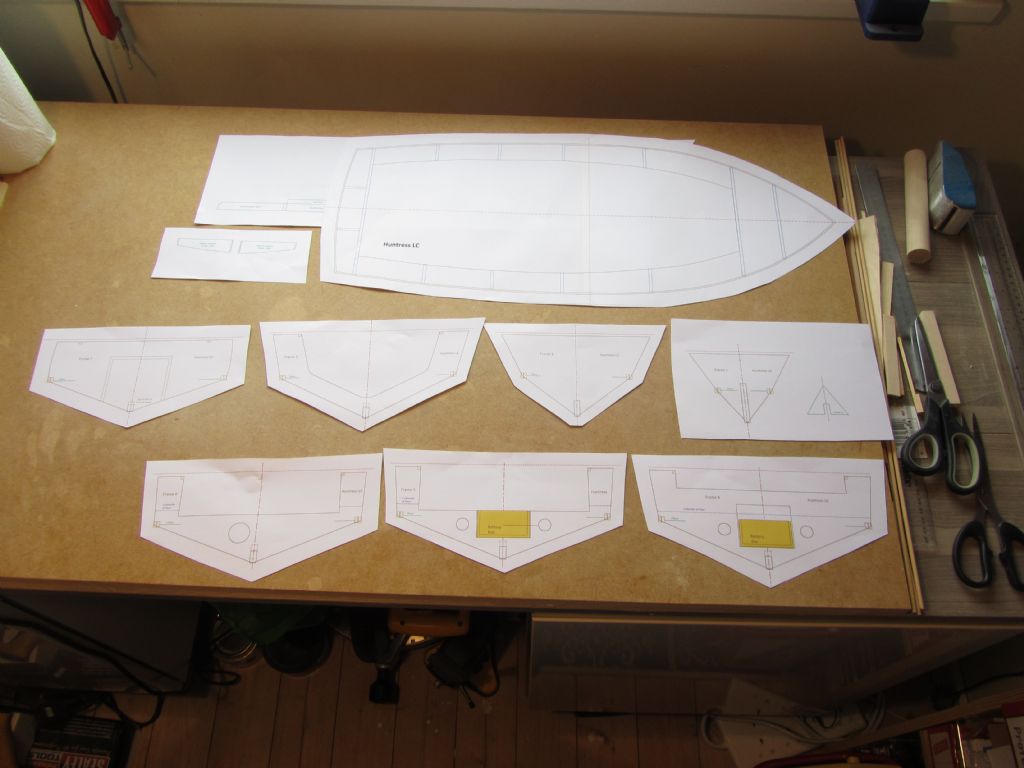
                                            Then the modified drawings could be produced for the hull with the main changes being to the keel (no prop shaft and rudder to be accommodated so could be less deep) and the repositioning of the frames to suit the longer cabin and the position of the stern-drive.

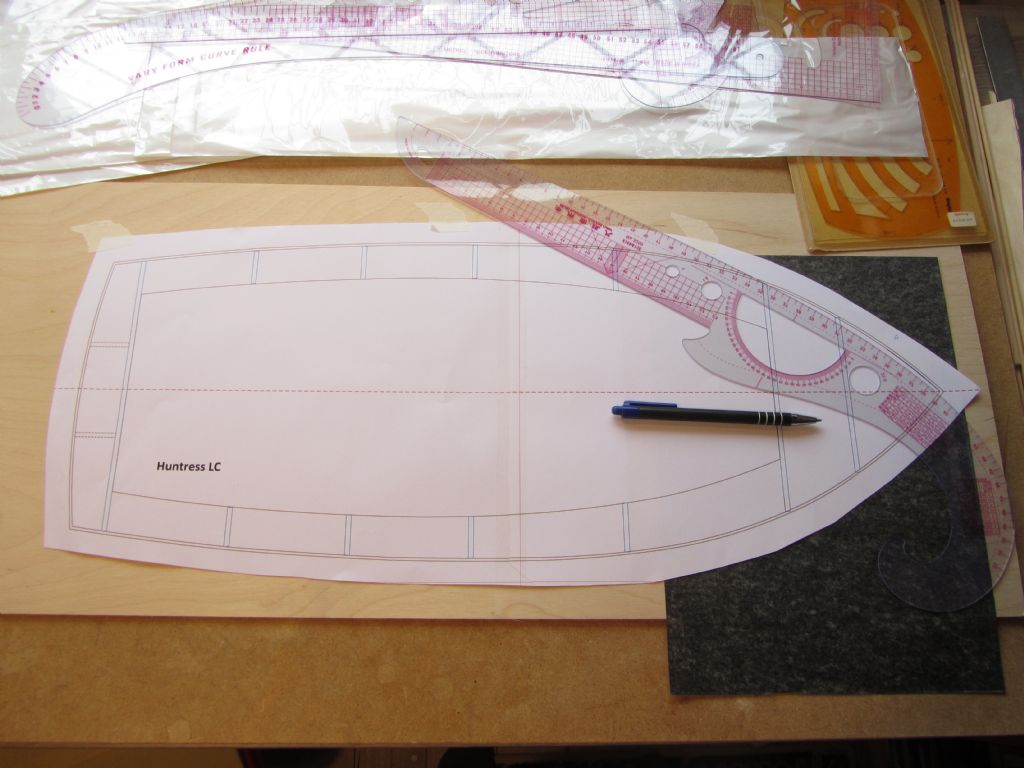
                                            The parts for building the hull were then printed out onto A3 and taped together for the larger pieces – the keel and deck – and then transferred to 3mm and 6mm ply by my preferred method of carbon paper. This was the first time I'd used my set of big curves (thanks to Bob Wilson for his recommendation) and they work a treat.

                                            Templates

                                            Transferring to ply

                                            Edited By Chris Fellows on 02/08/2020 18:54:44

                                            #90534
                                            Chris Fellows
                                            Participant
                                              @chrisfellows72943

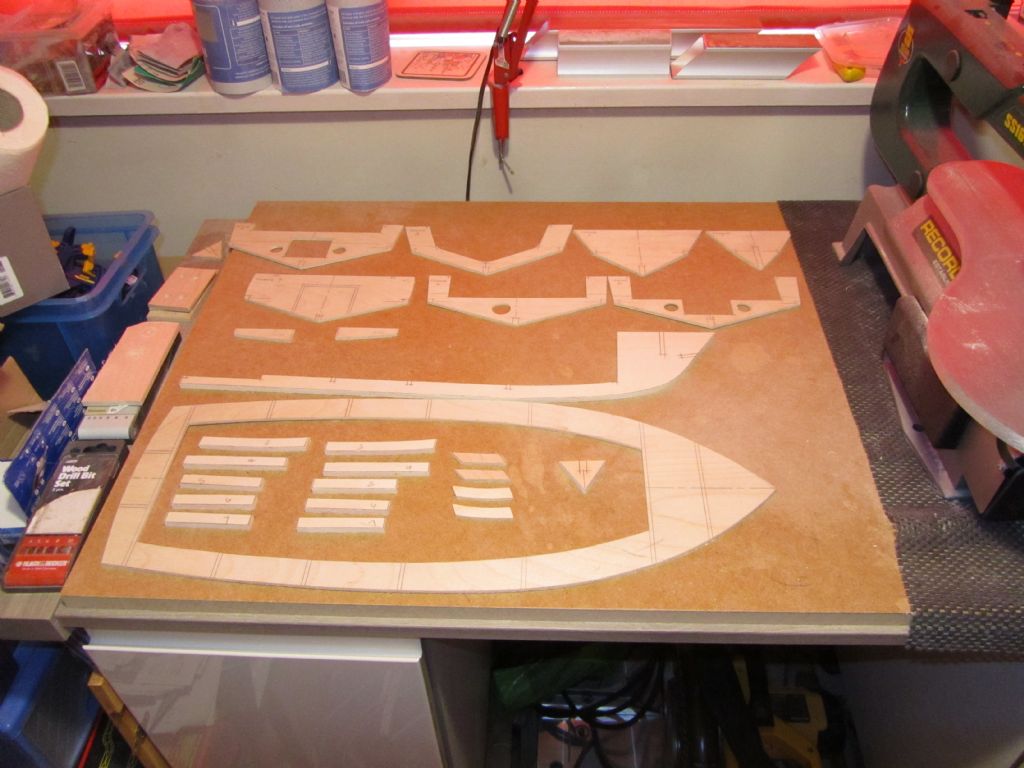
                                              Parts were then cut out on the scroll saw. For some reason, now that our bedroom has been decorated and carpeted Helen wasn't keen on me sanding the parts on my workmate in there so I did it outside which was very pleasant on the decking in the sunshine. Just need to cut out the slots etc. for assembly.

                                              Hull parts cut out

                                              #90535
                                              Chris Fellows
                                              Participant
                                                @chrisfellows72943

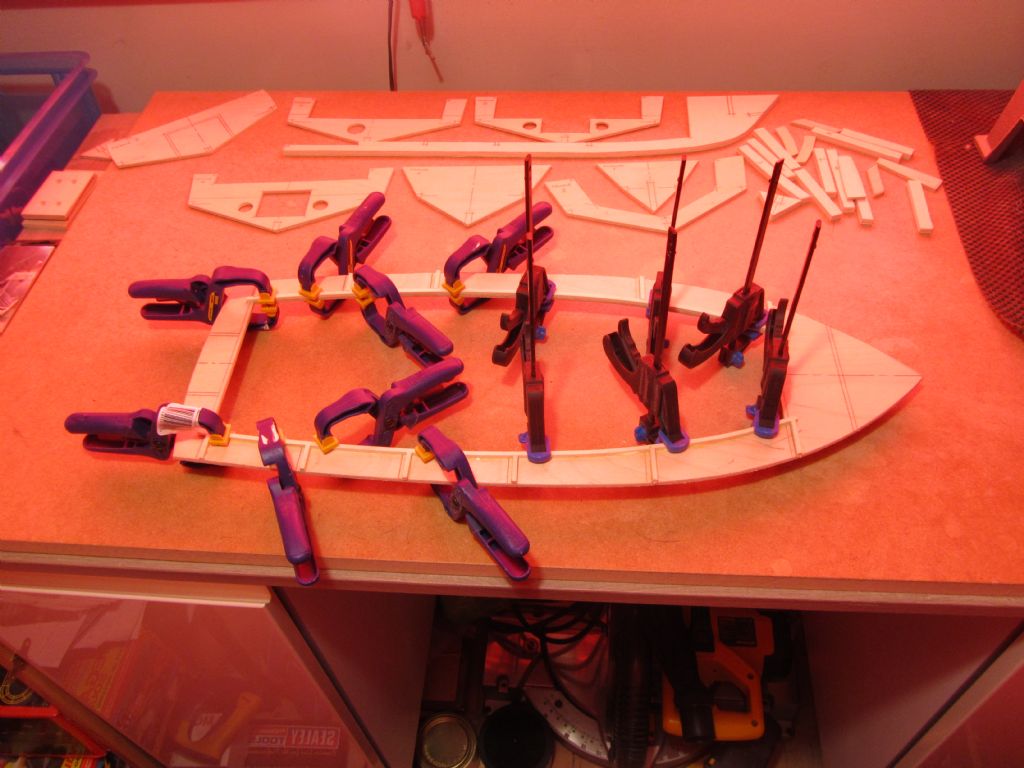
                                                Today I glued the 3 x 3mm bass fillets to the inside of the deck for the coamings and for locating the frames which brings me to where I am now. Assembly of the hull can then begin.

                                                Chris

                                                Photo taken under the red light from my blind!Coaming & frame fillets fitted

                                                #91020
                                                Chris Fellows
                                                Participant
                                                  @chrisfellows72943

                                                  Things have been getting in the way of modelling again but that's life and so progress has been slow – no change there then!

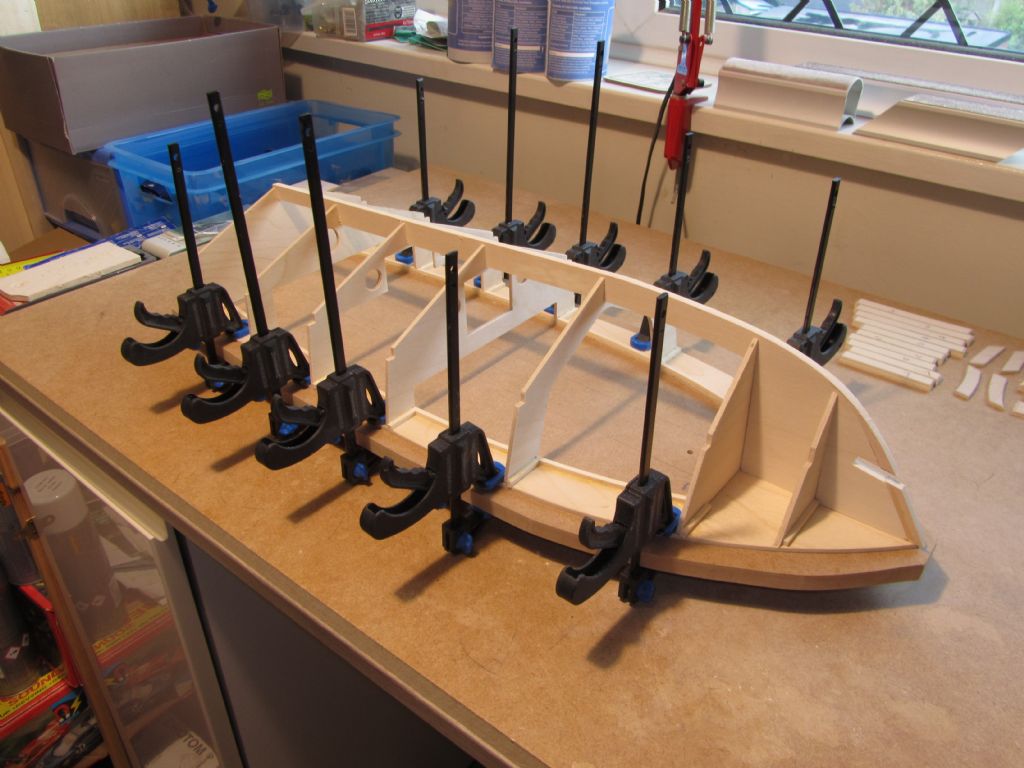
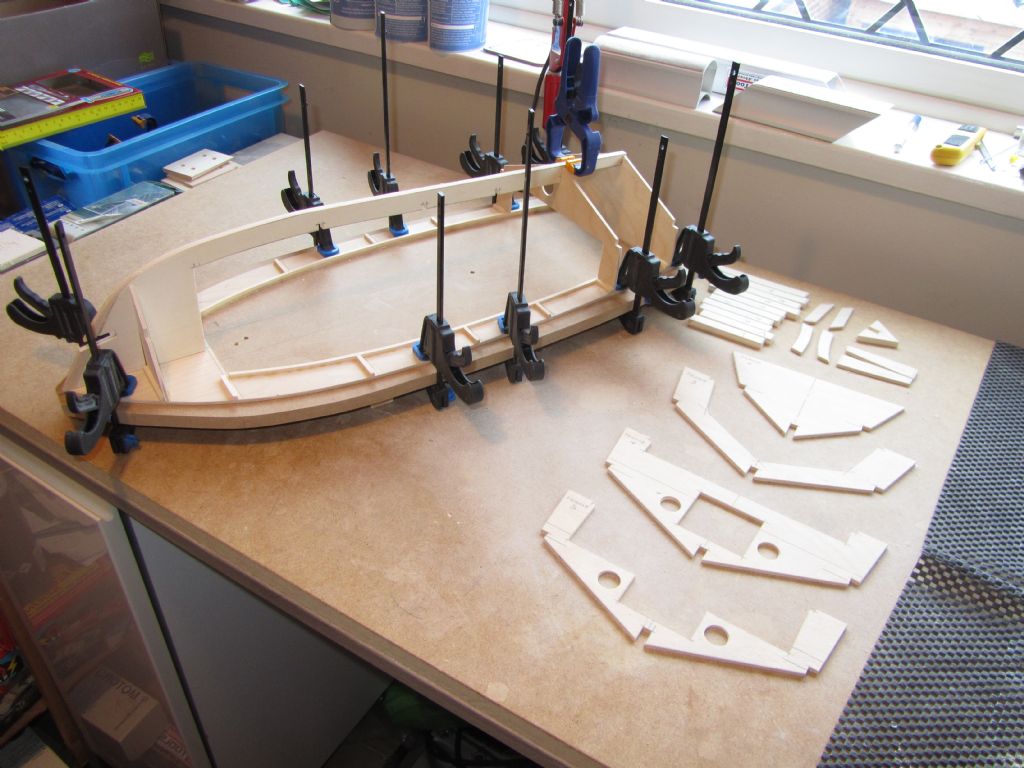
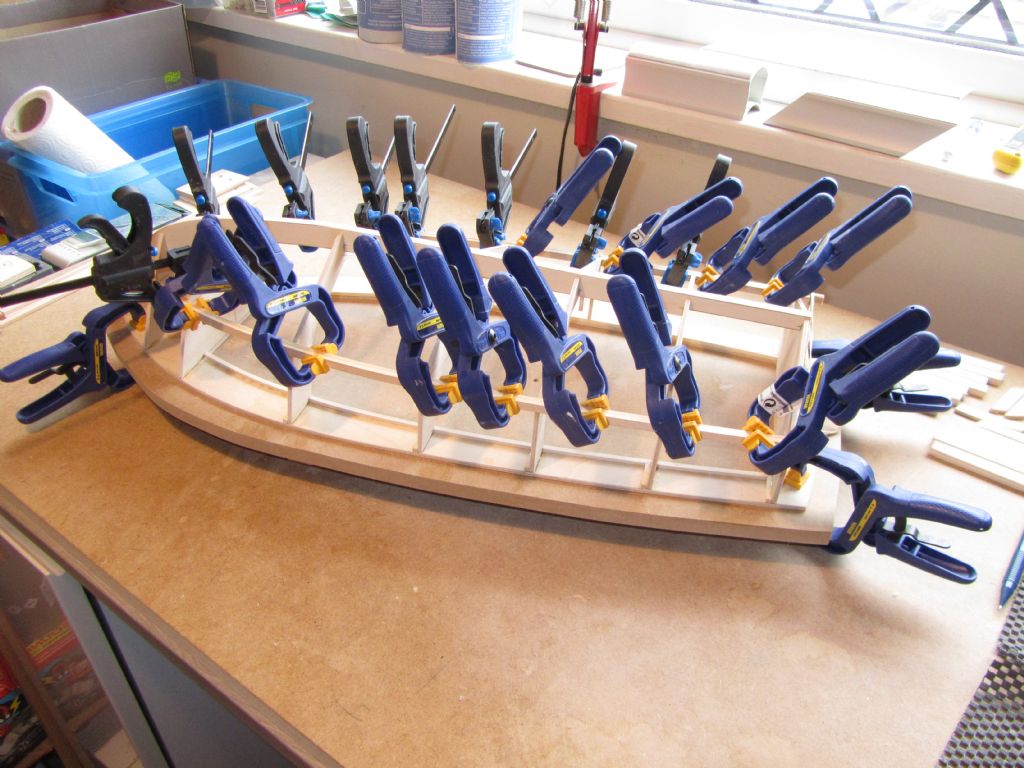
                                                  The frames have been glued in place and I have just started fitting the stringers. I cut out a piece of MDF as a flat and manoeuverable baseboard to clamp to whilst fitting the frames and even with those fitted the deck springs up slightly if I remove the clamps – the ply I used for the deck was a bit warped as is usually the case and picked the best sheet I could. Once the stringers are all fitted it should stay flat but failing that the ply skins! We aren't talking much spring from flat but we have standards!

                                                  Chris

                                                  Fitting frames 2Fitting frames 1

                                                  Stringers started

                                                  #91110
                                                  Chris Fellows
                                                  Participant
                                                    @chrisfellows72943

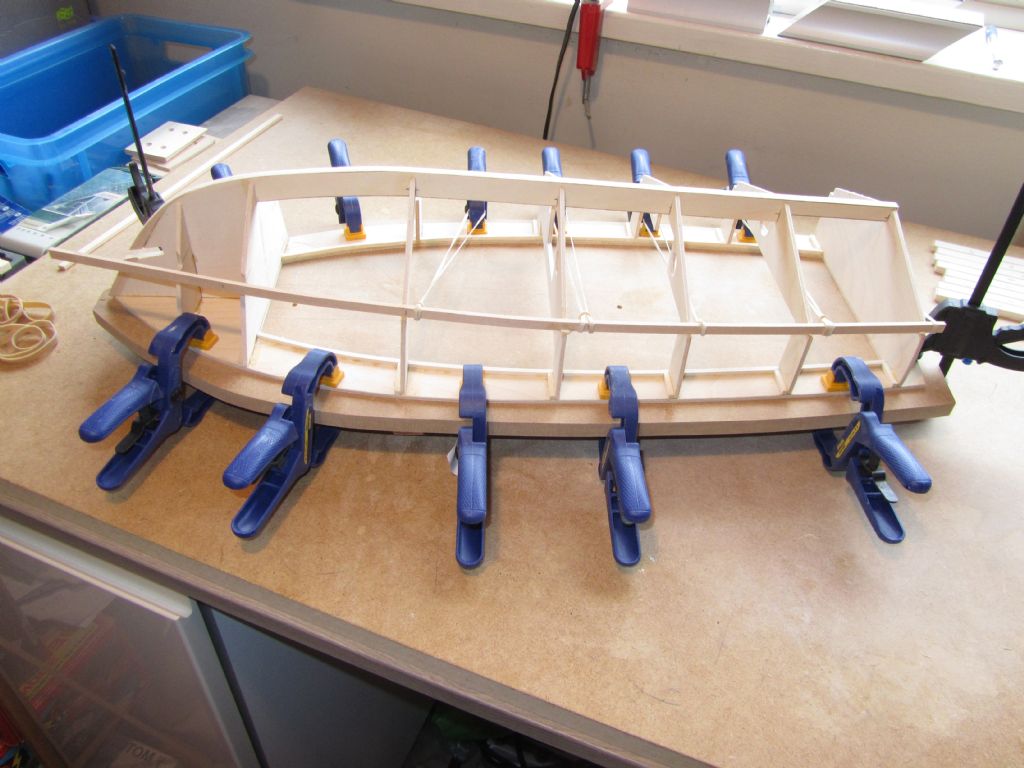
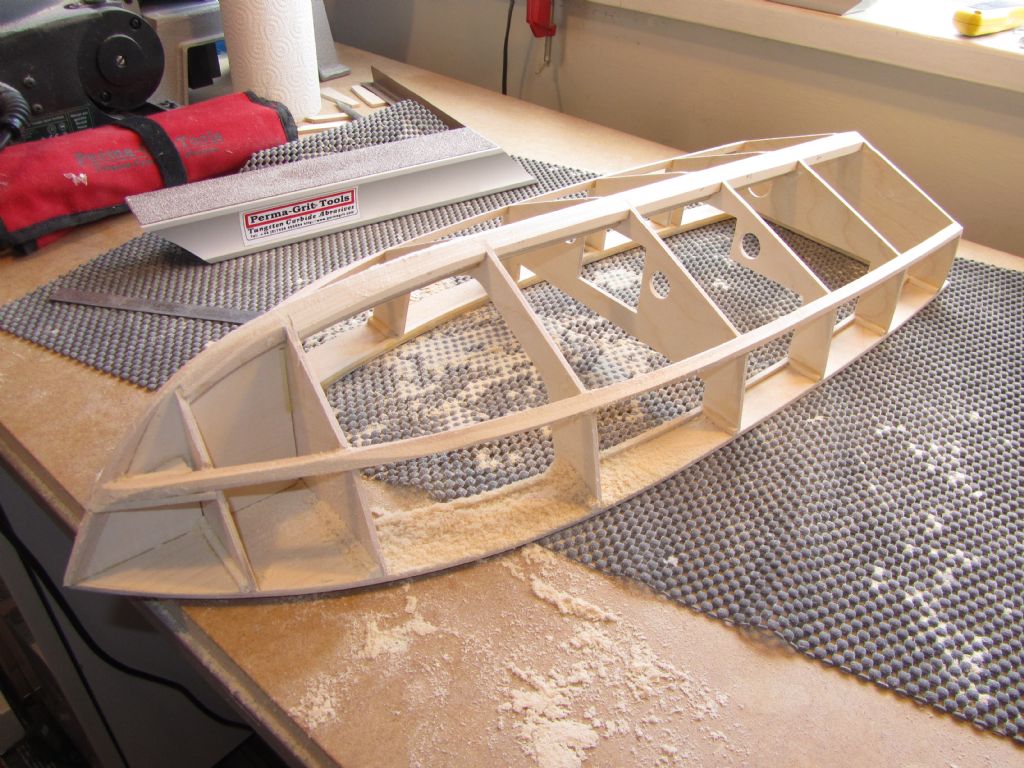
                                                    Fitting of stringers completed after which they and the keel were shaped with the trusty PermaGrit blocks for the skins.

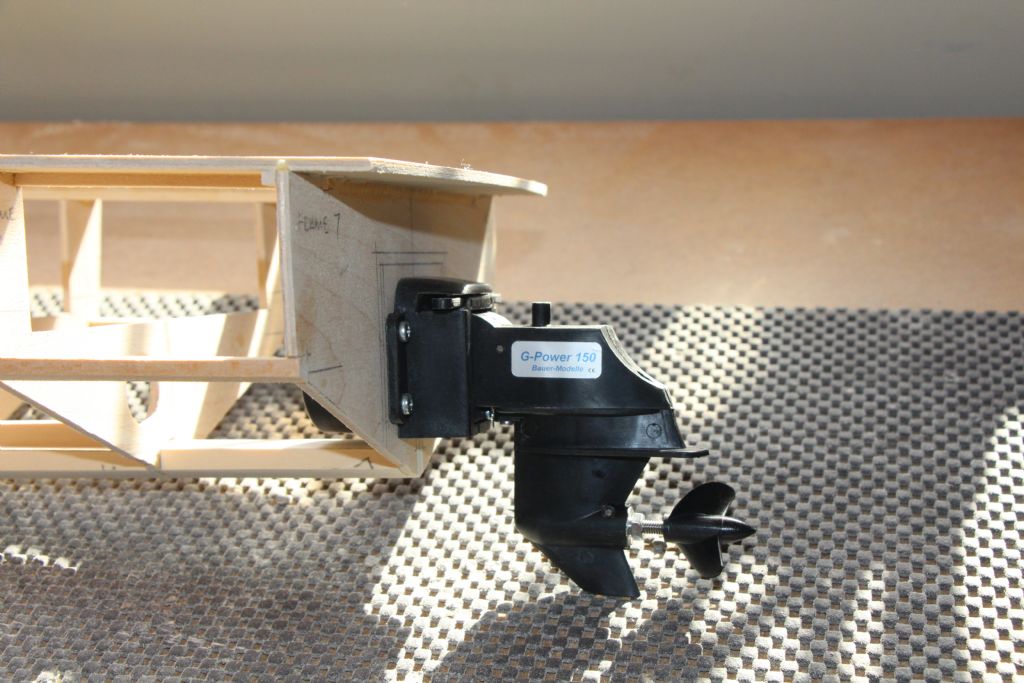
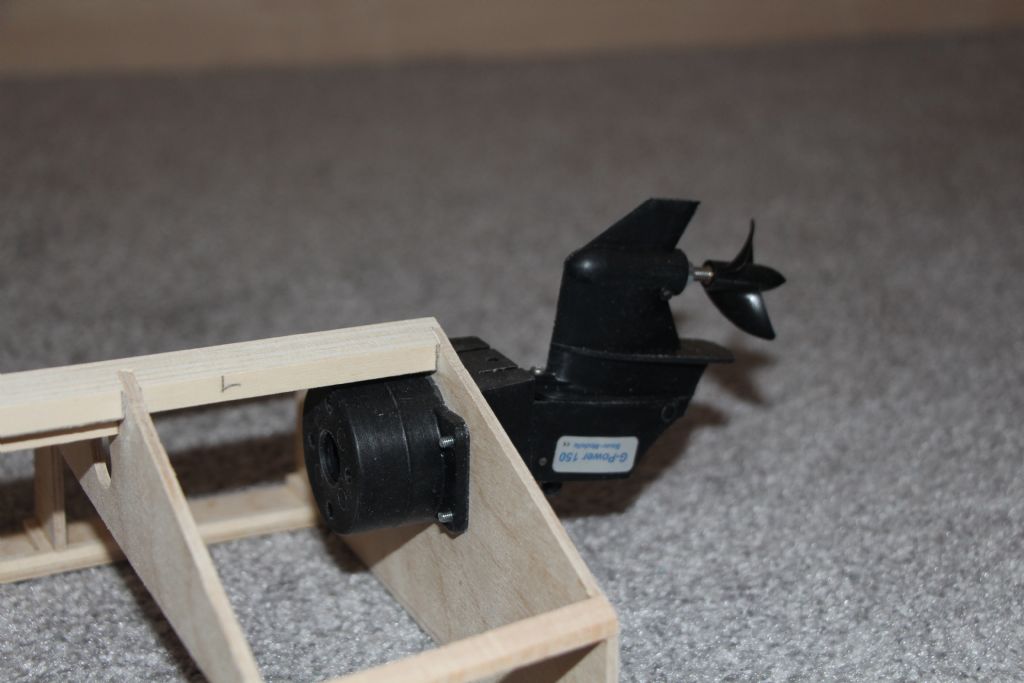
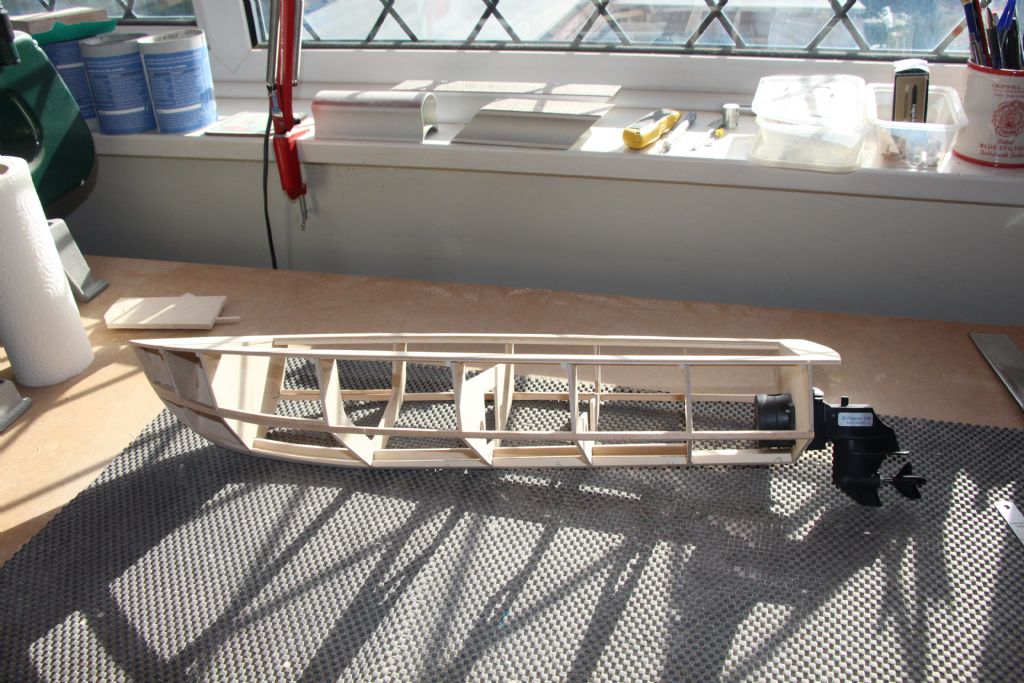
                                                    Holes were then drilled through the rearmost bulkhead for mounting the stern-drive and a trial fit made. The circular part inside the hull is for mounting the motor to with the coupling from the motor to the flex-drive being fitted inside. The prop hasn't been screwed all the way on – it's very tight and I'm checking with the supplier before I take a spanner to it!

                                                    Next job is to cut and fit the plywood etc. to form the surround to the drive and support for the transom in readiness for applying the hull skins. A package arrived from SLEC today containing the birch ply for the skins and the superstructure.

                                                    Chris

                                                    2nd stringers fitted

                                                    Shaping keel & stringers

                                                    Stern drive 2

                                                    Stern drive 3

                                                    Stern drive 4


                                                    Edited By Chris Fellows on 26/08/2020 18:33:39

                                                    #91112
                                                    Ray Wood 3
                                                    Participant
                                                      @raywood3

                                                      Hi Chris

                                                      That outdrive looks a bit brutal, it's going to be a speed machine 😀

                                                      Did they mount it on the traditional round transom on the full-size ?

                                                      Regards Ray

                                                    Viewing 25 posts - 1 through 25 (of 217 total)
                                                    • Please log in to reply to this topic. Registering is free and easy using the links on the menu at the top of this page.

                                                    Code of conduct | Forum Help/FAQs

                                                    Advert

                                                    Latest Replies

                                                    Home Forums Build Blogs Topics

                                                    Viewing 25 topics - 1 through 25 (of 25 total)
                                                    Viewing 25 topics - 1 through 25 (of 25 total)

                                                    View full reply list.

                                                    Advert