Fairey Huntress 23 Long Cabin Version

Advert

Fairey Huntress 23 Long Cabin Version

Home Forums Build Blogs Fairey Huntress 23 Long Cabin Version

Viewing 25 posts - 51 through 75 (of 217 total)
  • Author
    Posts
  • #93892
    Chris Fellows
    Participant
      @chrisfellows72943

      Yes, being a perfectionist is something I've been labelled with by friends and family over the years even if the results of my labours don't always live up to it. It's a cross some of us have to bear!

      The robin's nest box benefited from the use of my model boat tools and materials and is quite wide so that our visiting squirrels and magpies can't reach the nest.

      Chris

      Advert
      #93894
      Will Mason 1
      Participant
        @willmason1

        All I can tell you is that if I had managed to produce a planked deck like you did, I would be very chuffed. Quite probably the only people who would have seen any split planks are the ones that you had told or pointed it out too.

        I do get why you are redoing it though, to please your self.

        Keep up the great work Chris. Really looking forward to seeing the finished items and especially them on the water.

        Will

        #93915
        Chris Fellows
        Participant
          @chrisfellows72943

          Thanks.

          Yes you are right, I'm doing it to please myself and knowing that I could do a better job of it I just had to have another go. Not trying to achieve the perfection that the Diva builders aim for though as that is a whole different ball game!

          Well it's not perfect but is better than the first attempt so I'm going to leave it at that as I want to get on with the build now. It's been sanded and is ready for varnishing and gluing down.

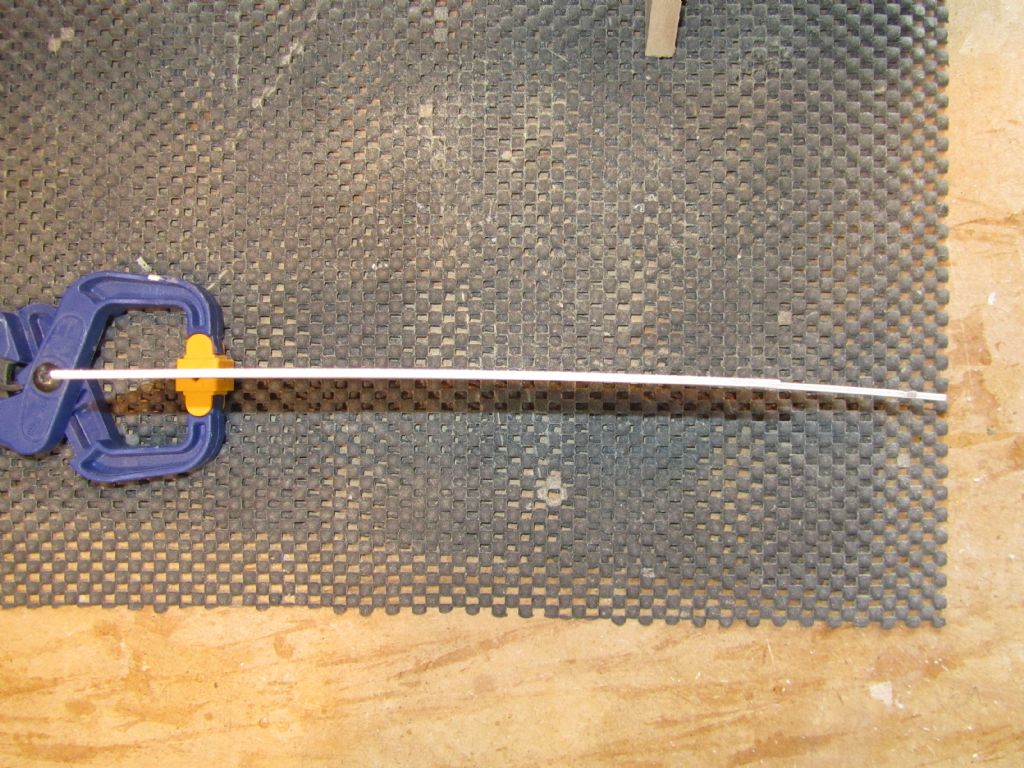
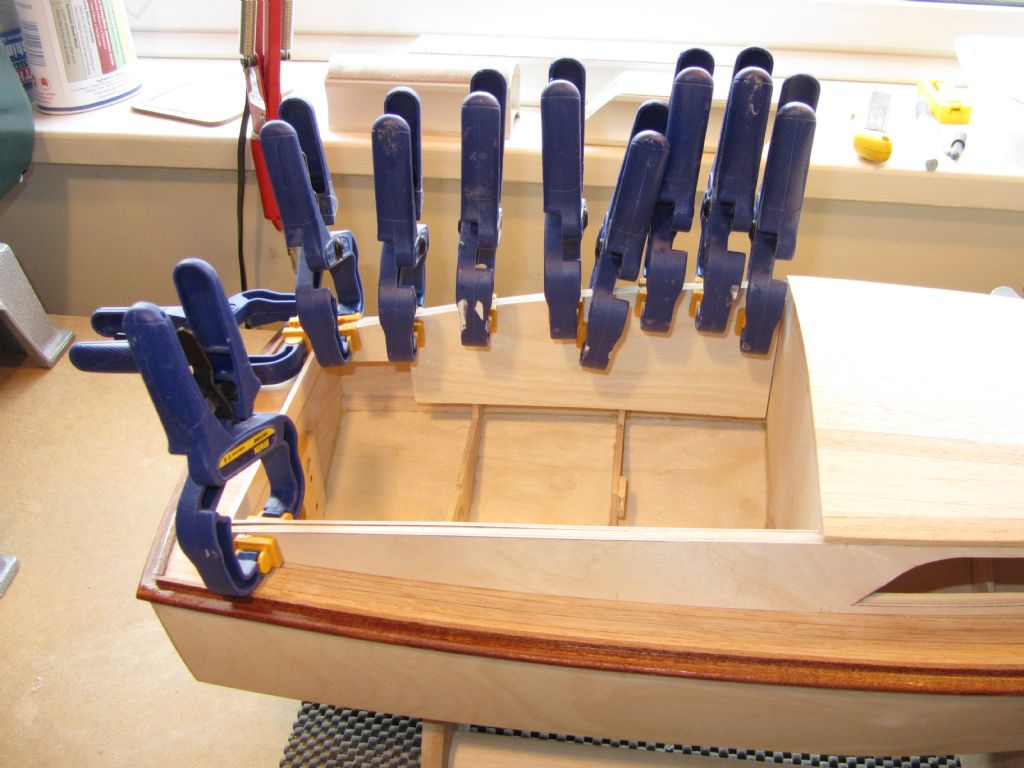
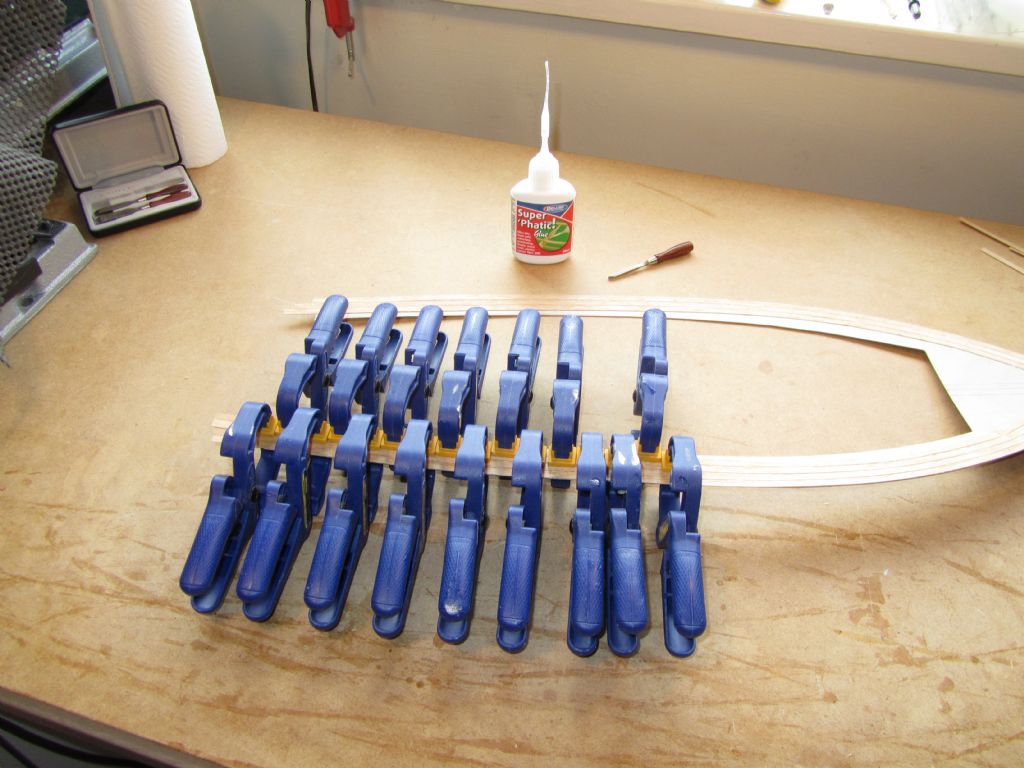
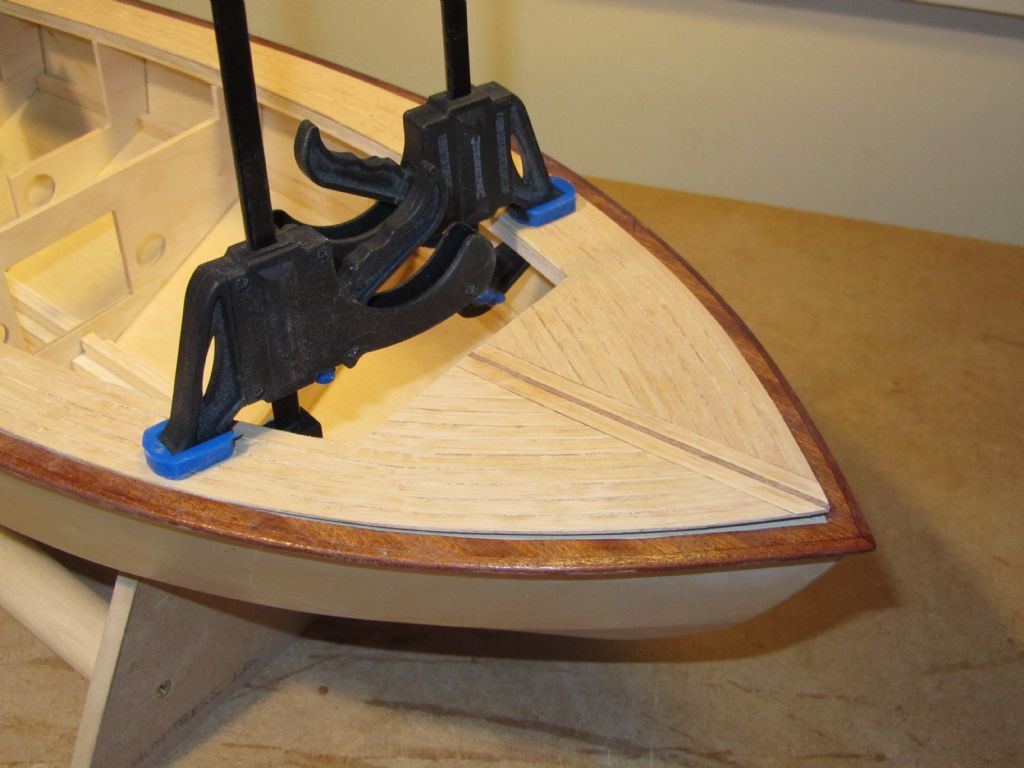
          No reason why you can't do it Will. Huntress was more difficult as the planks bend all the way to the bow and as I found out is stretching things with this method. With the Huntsman 31 and Swordsman type bows with their mahogany details you can stop the planking short with less bending and using the Super Phatic glue with plenty of clamps it will be pretty straightforward if you take your time. I used thin CA on those decks and the first Huntress one which made it harder. The Super Phatic is ideal as it gives you plenty of working time but then sets in 10 to 20 minutes, cleans off with water but is then waterproof once dry.

          The good thing with this method is that you can use clamps, even to the bow area, and if the first attempt isn't good enough then you can have another go as you are doing it off boat.

          Chris

          Plenty of clamps required!

          planking5

          planking6

          #93916
          Eddie Lancaster
          Participant
            @eddielancaster

            Hi. Chris, you can't beat the look of a nice planked deck instead of a varnished ply deck, and yours is looking really good.

            Regards.

            Eddie.

            #93918
            Chris Fellows
            Participant
              @chrisfellows72943

              Thanks Eddie. It's worth the effort in the end!

              Chris

              #93944
              Chris Fellows
              Participant
                @chrisfellows72943

                Hi

                I meant Riva builders in my post!

                I gave the deck a coat of Schooner varnish this morning and that is now ready for gluing in place.

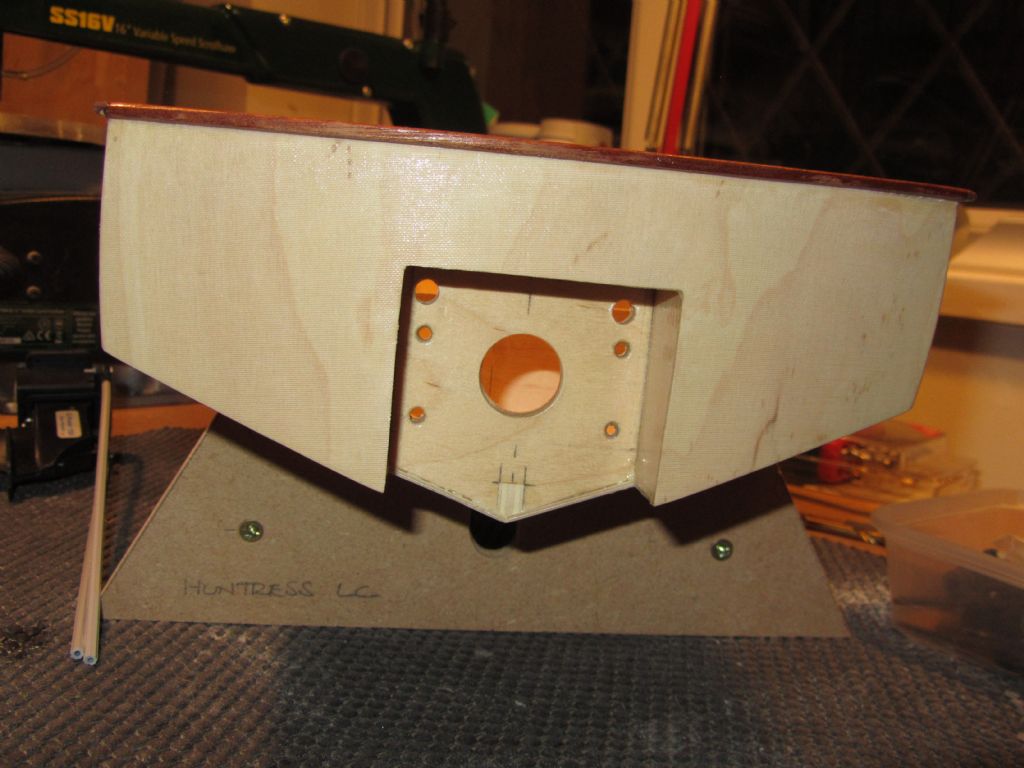
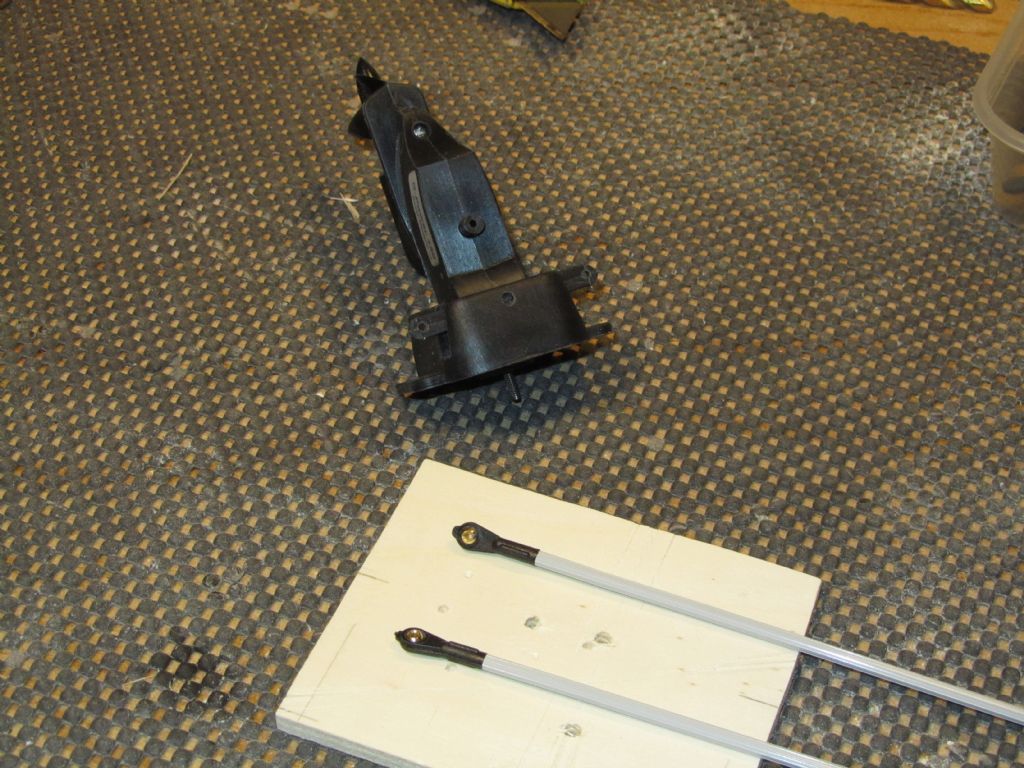
                After doing a bit in the garden I started doing what I've been looking forward to and that's sorting out the steering. Having a good look there's more room than I initially thought and I thought I may be able to use 2mm steel rod linkages so first job was to drill two holes through the transom for them to pass through. I started off small and increased in size so that I didn't cause any damage.

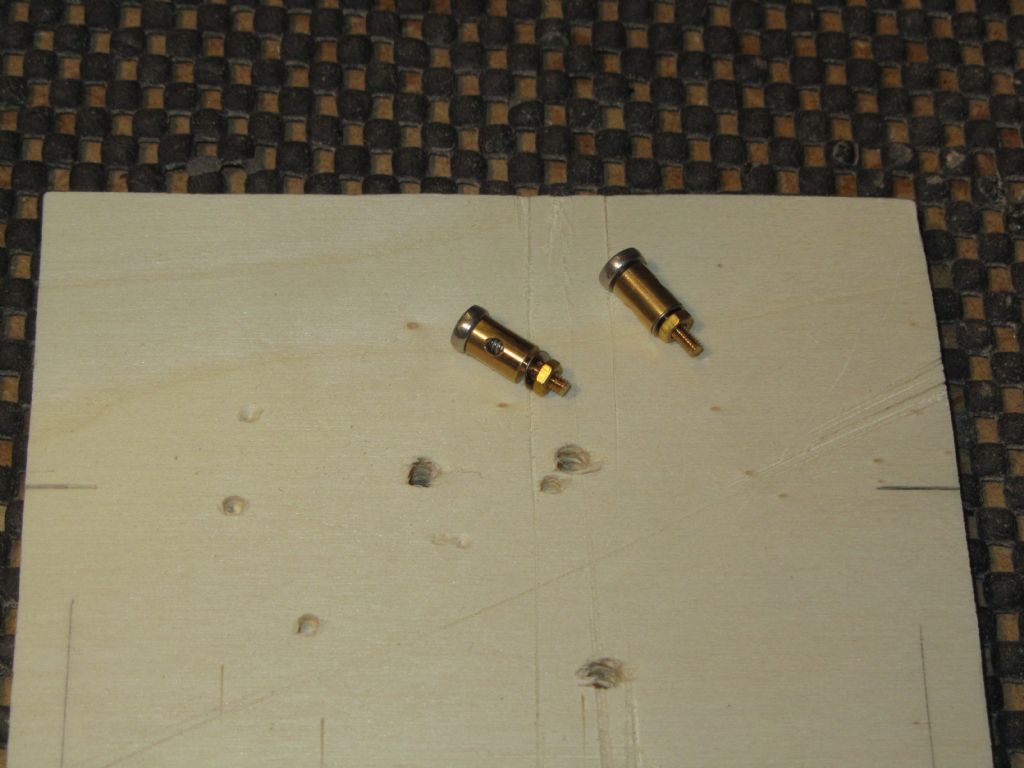
                Thoughts of using the brass screw connectors were soon dispelled as they wouldn't fit in. I then tried swivel ball connectors, having opened up the holes even more, which fitted and I like them, but the shoulders were catching on the holes and I didn't really want to make them any larger. So I turned to the nylon snake and thought I'd attach a small length (enough to deal with passing through the hole) to the swivel ball connector with screwed rod and then attaching the linkage rod to the other end. This has the advantage of providing some flexibility where passing through the transom to take account of the arc of the stern drive arms. I've actually left the inner nylon part of the snake quite long at the moment and may even use it all the way to the pivot arm. As I'm using a push pull system I don't really need the outer part of the snake but may use some anyway.

                I had thought about putting the pivot arm and servo in the bay in front of the motor but that will be in the way of the battery, which even with the added weight of the stern drive and motor at the rear, will I think need to go in around the usual place but probably a little further forwards. So with that in mind I will position the pivot arm and servo in the cabin area.

                Chris

                planking7

                stern drive 14

                stern drive 15

                stern drive 16

                stern drive 17

                Edited By Chris Fellows on 25/02/2021 20:49:44

                #93951
                Will Mason 1
                Participant
                  @willmason1

                  Deck looks great Chris, grand job.

                  This is the first time I Have seen the transom of your Huntress. I like how you're going about this conversion.

                  Will definitely be interesting to see how it performs and handles.

                  Will

                  #94015
                  Chris Fellows
                  Participant
                    @chrisfellows72943

                    Thanks Will.

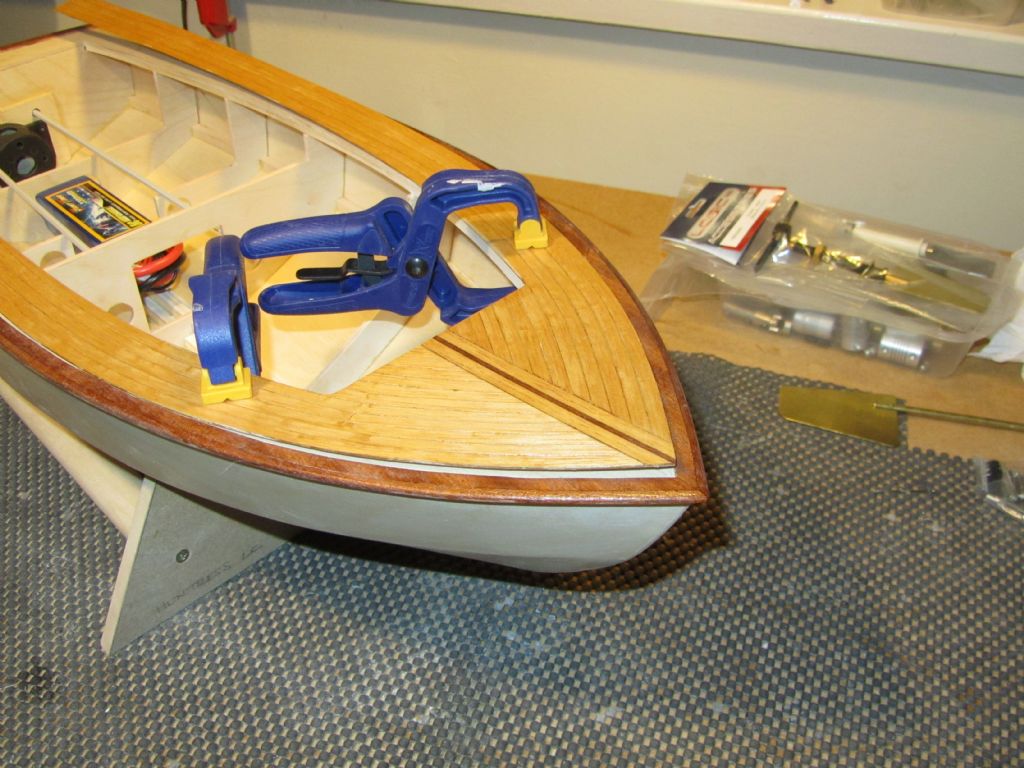
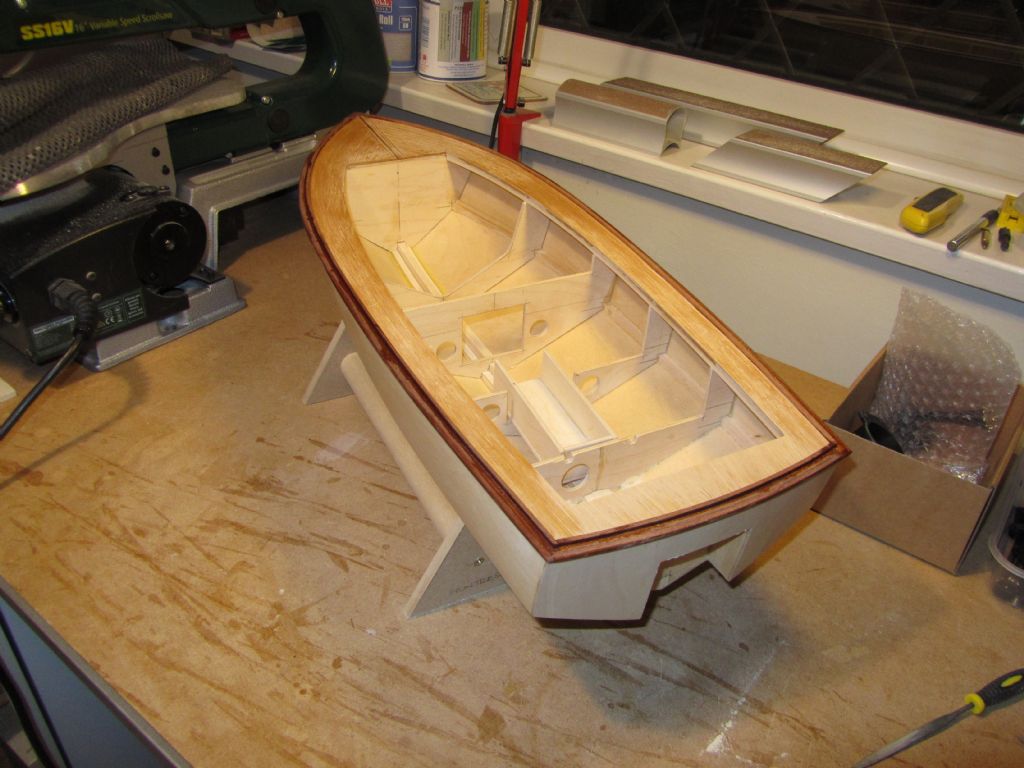
                    The deck took some time to glue down and as usual I was filled with trepidation – it's not a job I like at all! Previously I've glued the bow area down with a/resin or contact adhesive if I've used some filler, then the side pieces with a/resin. This means that you can spend time making sure the bow area is bonded down properly, held with parcel tape, and then clamp the side pieces. This time, as I'd bought some Titebond III recently and the instructions said it took 30 minutes to bond I thought I'd use that and do the whole of the deck in one go. Big mistake, after about 10 minutes (warm bedroom/work room) the glue began drying before I could clamp it down properly. There was no going back though so I just had to clamp it as best as I could and leave it.

                    Next morning I found that it was pretty well bonded over most of the area but the rear edge of the bow and parts of the edges to the sides hadn't taken and had significant gaps and in some places were filled with hardened glue. So I then spent some time getting the glue out with a Stanley knife to get the deck to sit down as tightly as I could get it. Slo Zap was then run into the gaps and clamped in position. The result was pretty good, though in a few places the decking was sitting slightly above the mahogany edging, due to the hardened Titebond, and there was nothing I could do about it – the planks are only 0.5mm thick so there is a limit to the amount of sanding you can do!

                    The area of deck adjacent to the transom was then carried out by first cutting out some 0.8mm ply to fit the space and gluing with a/resin. Once dry this was then covered in planks fixed with Super Phatic. Having left to dry for some time I then fitted the mahogany toe rails – these were steamed to the curves (kettle) and glued with thin CA wicked into the joints. The sharp eyed amongst you will notice that I haven't left any gaps at the rear corners for any water on the deck to run out of. This is because this is where the deck stood proud the most and the toe rail disguises it nicely!

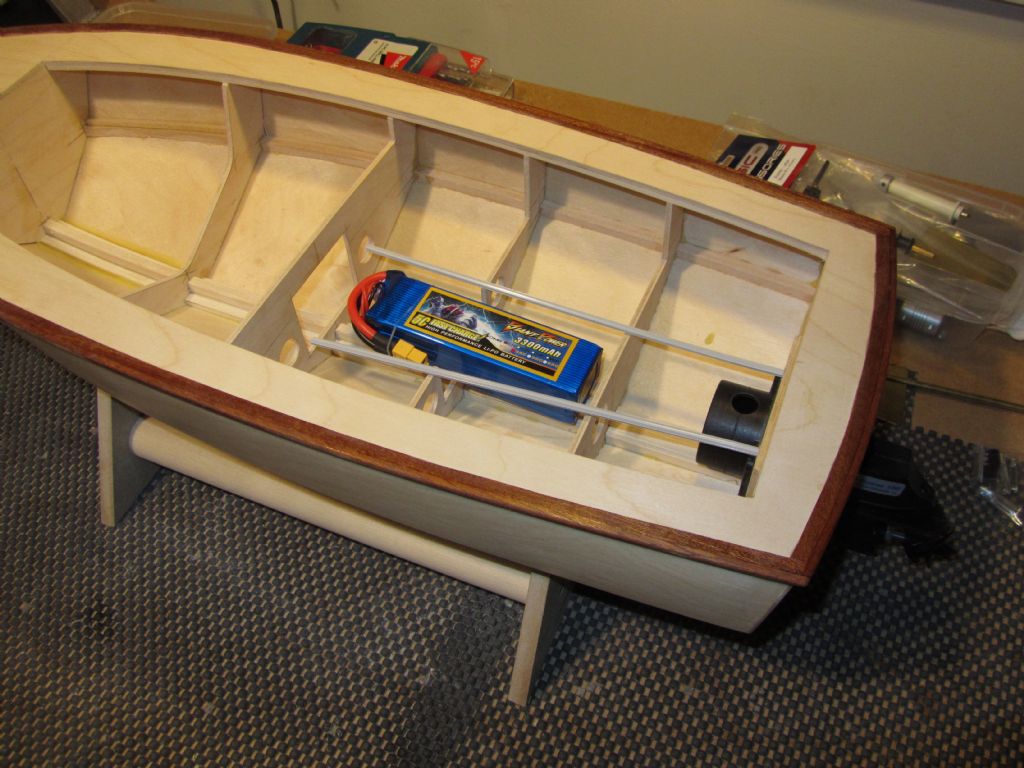
                    Time was also spent in making the battery box, to ensure there is sufficient clearance for the stern drive linkage, opening up the holes in the transom a bit more to provide smooth unhindered operation and making supports for the snake – I've decided to use the inner and outer parts now.

                    Before I go any further with the installation though I'm going to build the superstructure after which I can do a bath test and see how the battery position looks.

                    Chris

                    planking8

                    #94093
                    Chris Fellows
                    Participant
                      @chrisfellows72943

                      I'm dedicating this build to our dear friend Dave. Not only because it's a Fairey but because Dave was one of the reasons I built it. He and Paul were having some of their usual banter on one of the threads which went along the lines of Paul saying that stern-drives were the best method for providing propulsion for boats and Dave replied that putting a stern-drive on a Fairey would be like putting a moustache on it!

                      Reading that and wanting to wind Dave up I had a look in my Fairey Marine book and found the perfect boat, a Huntress with a stern-drive. I wanted to build a Huntress anyway and one a bit different, with it's longer cabin and the stern-drive it had to be done. And so drawings were produced and the build began.

                      I guess it sort of backfired though as Dave never mentioned it, even in our email exchanges and I wasn't going to mention it!!

                      Chris

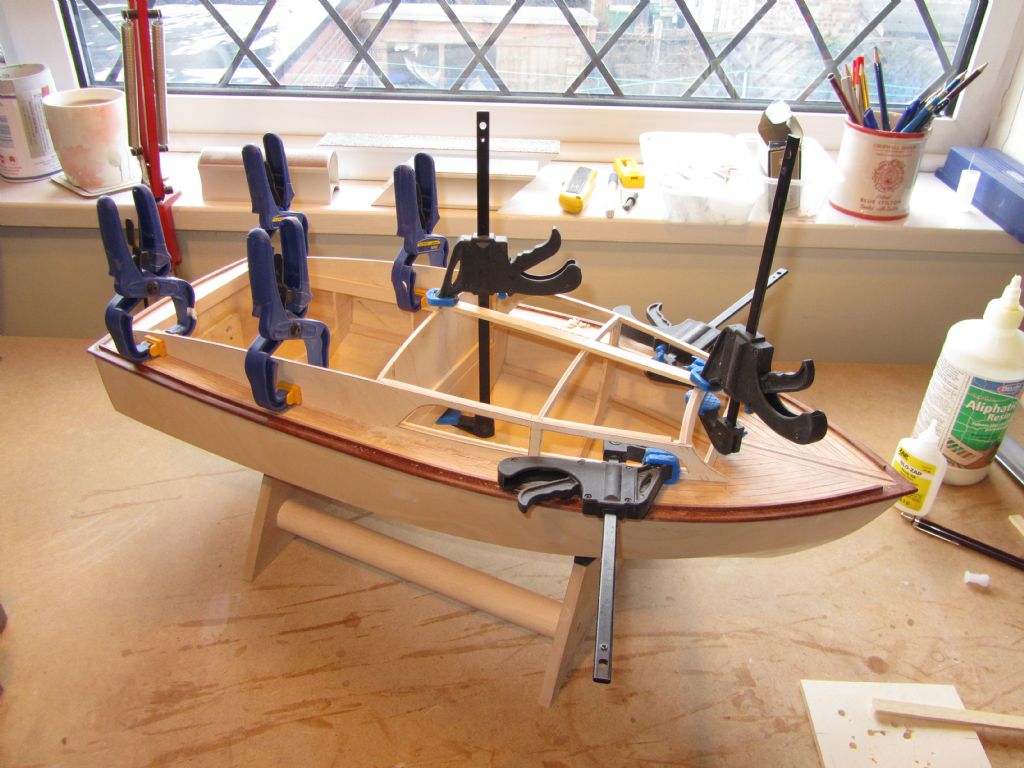
                      #94094
                      Chris Fellows
                      Participant
                        @chrisfellows72943

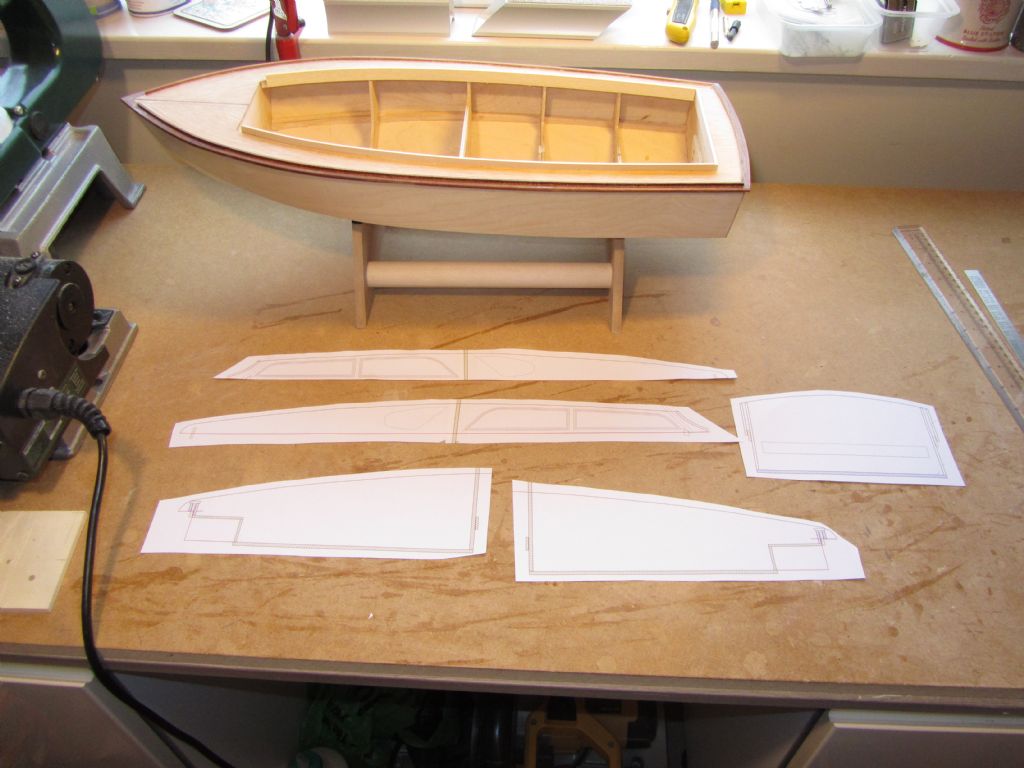
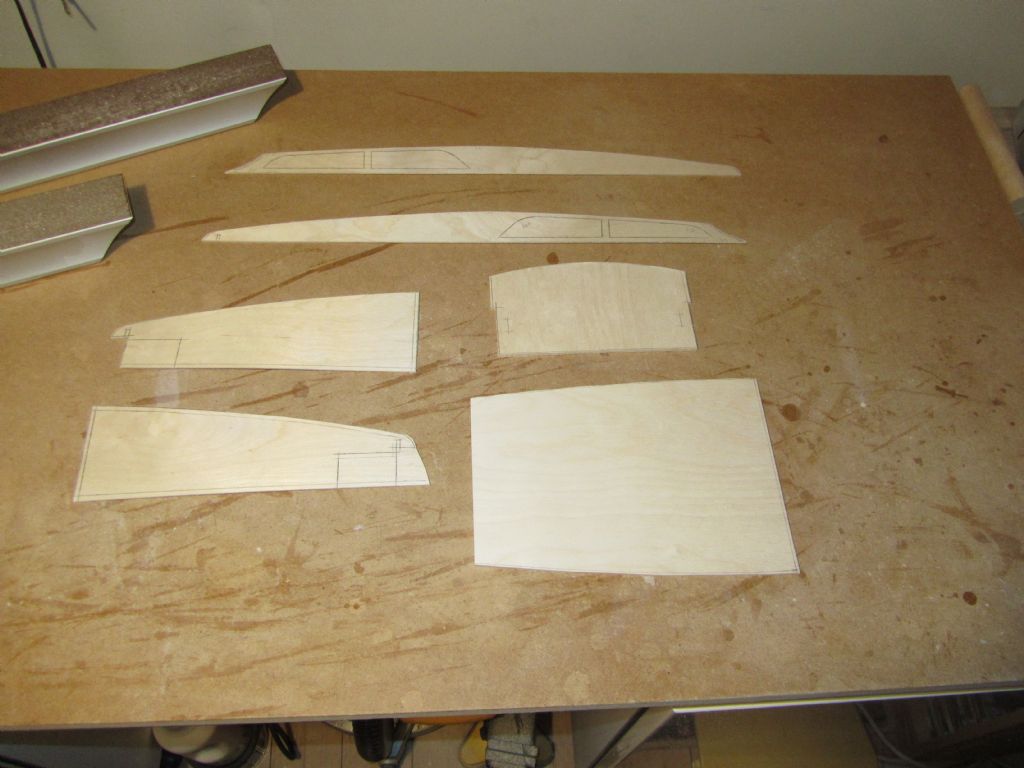
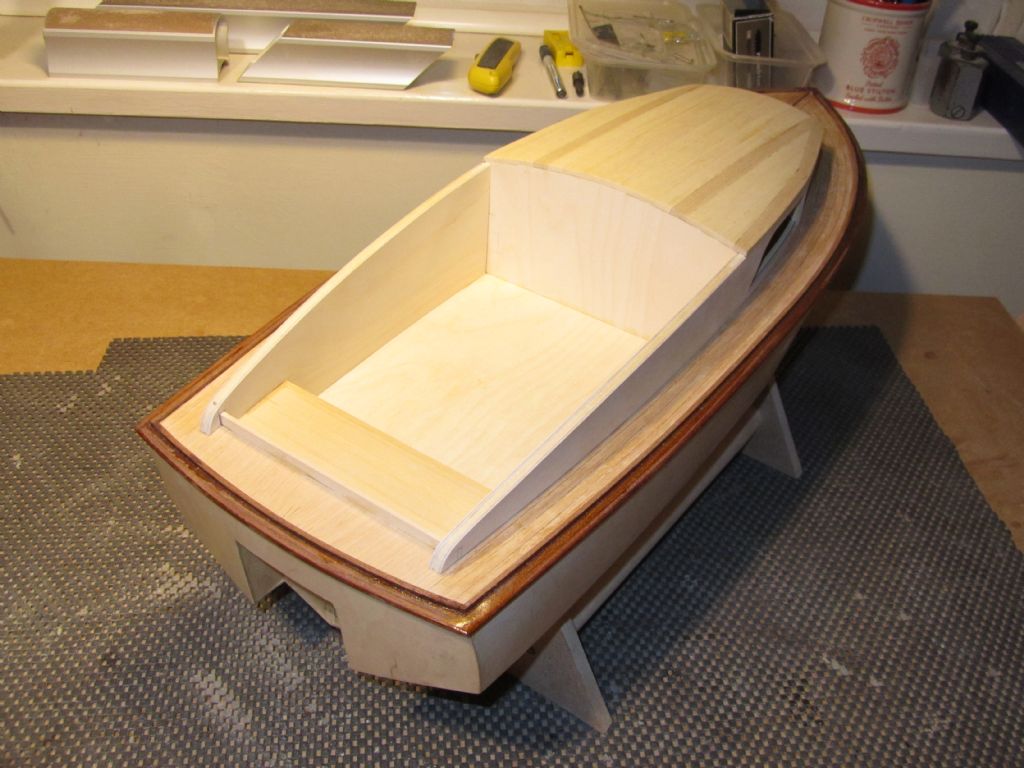
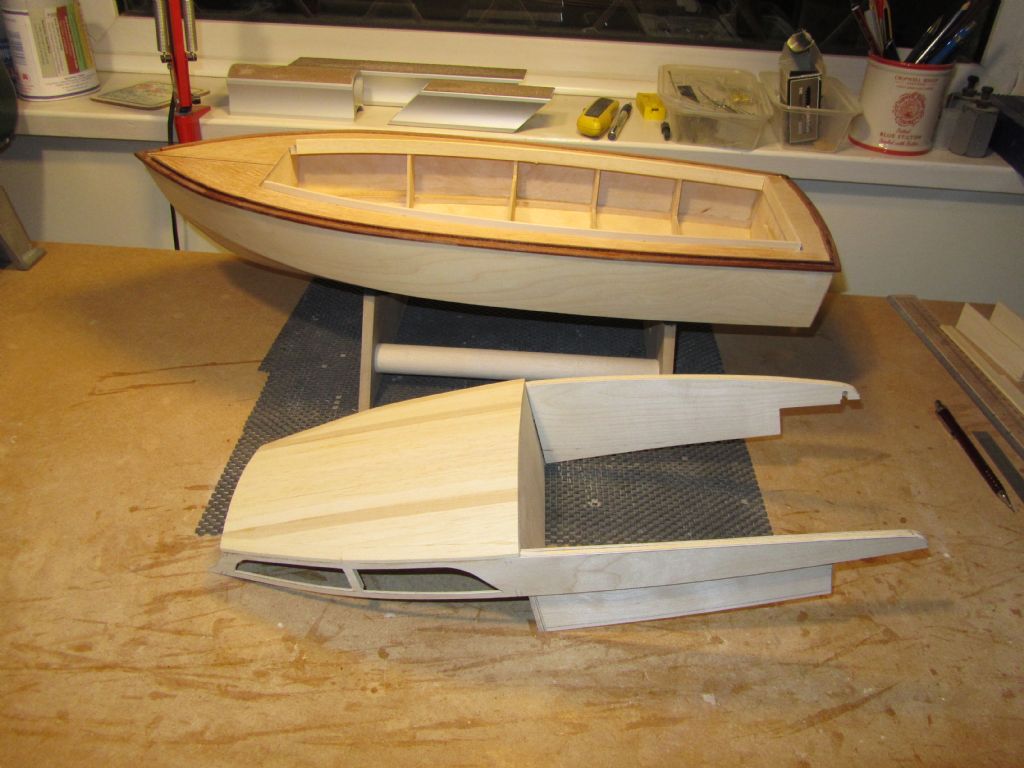
                        To enable the superstructure to be built I first fitted the upstand around the inside of the deck. Drawings were then completed and printed out for the various parts, transferred to birch ply and cut out with the scroll saw.

                        Edges were then sanded to ensure a good fit between the rear of the cabin and the cabin sides/coamings. A 3 x 12mm timber was glued to the forward face of the rear of the cabin for it to sit on the bulkhead to hold it at the correct height and position whilst it was glued to the sides with Slo Zap.

                        Chris

                        superstructure2

                        superstructure3

                        superstructure4


                        Edited By Chris Fellows on 06/03/2021 20:46:19

                        #94096
                        neil hp
                        Participant
                          @neilhp

                          it will be a lovely fitting tribute, moustache and all, to a very lovely man, Chris.

                          i dont think he'll haunt you for doing so.

                          #94101
                          Chris Fellows
                          Participant
                            @chrisfellows72943

                            Thanks Neil. I'm sure he won't.

                            Chris

                            #94129
                            Chris Fellows
                            Participant
                              @chrisfellows72943

                              A bit of progress has been made over the last few days. Interspersed with replacing a failing 2D light fitting in the downstairs loo/utility which entailed a trip to Screwfix. Went for an LED one this time and very impressed, comes on instantly and is bright.

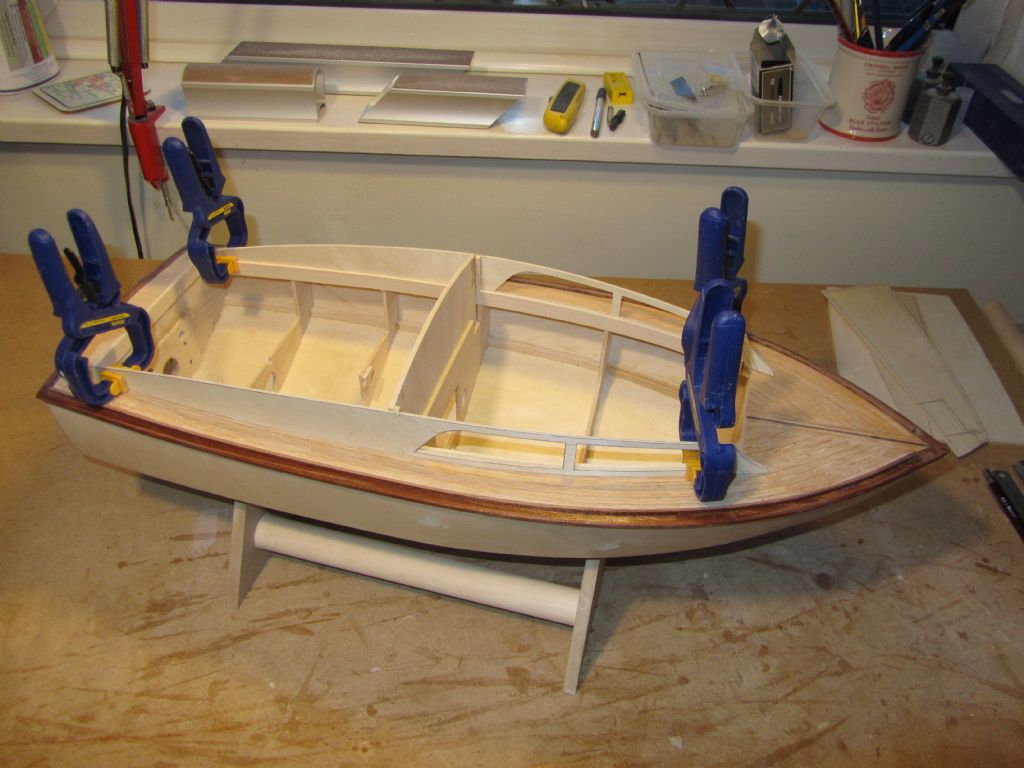
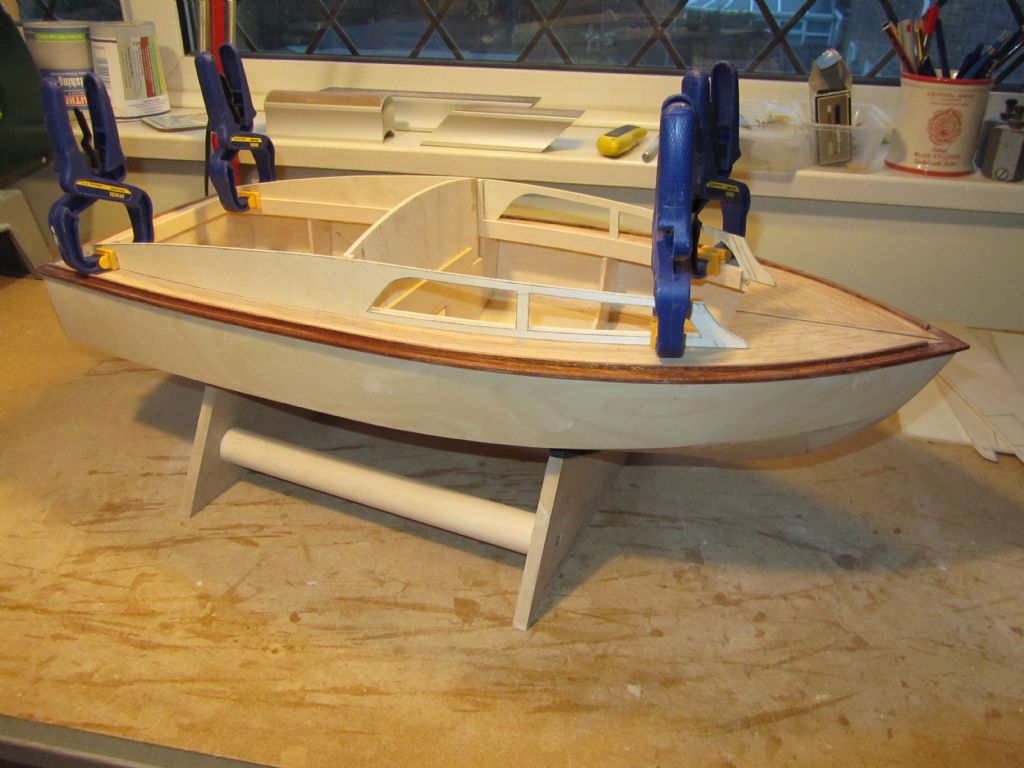
                              Construction of the superstructure started with gluing a timber on the front face of the rear cabin wall so that it sat at the right height on the bulkhead. The cabin sides/coamings were then clamped to the upstands and short lengths of 3 x 3mm timber were used to glue the coamings to the cabin wall.

                              The roof beam and front window were then drawn up, printed and cut out of 3mm birch ply. Then sanded to ensure a good fit and glued in place. Despite clamping the cabin sides tightly down, gluing in of the window caused them to twist slightly resulting in one side having a small gap with the deck. That's one problem I find with a/resin, that after leaving overnight it does tend to pull. Also if using for say roof planking, when initially glued they are nice and level but next day are like a thrupenny bit! Hopefully when doing the roof planking and clamping even tighter I can lose most if not all of the twist.

                              Last job was then to cut some lengths of 3 x 3mm and glue to the top inside of the cabin sides to give support for the roof planking.

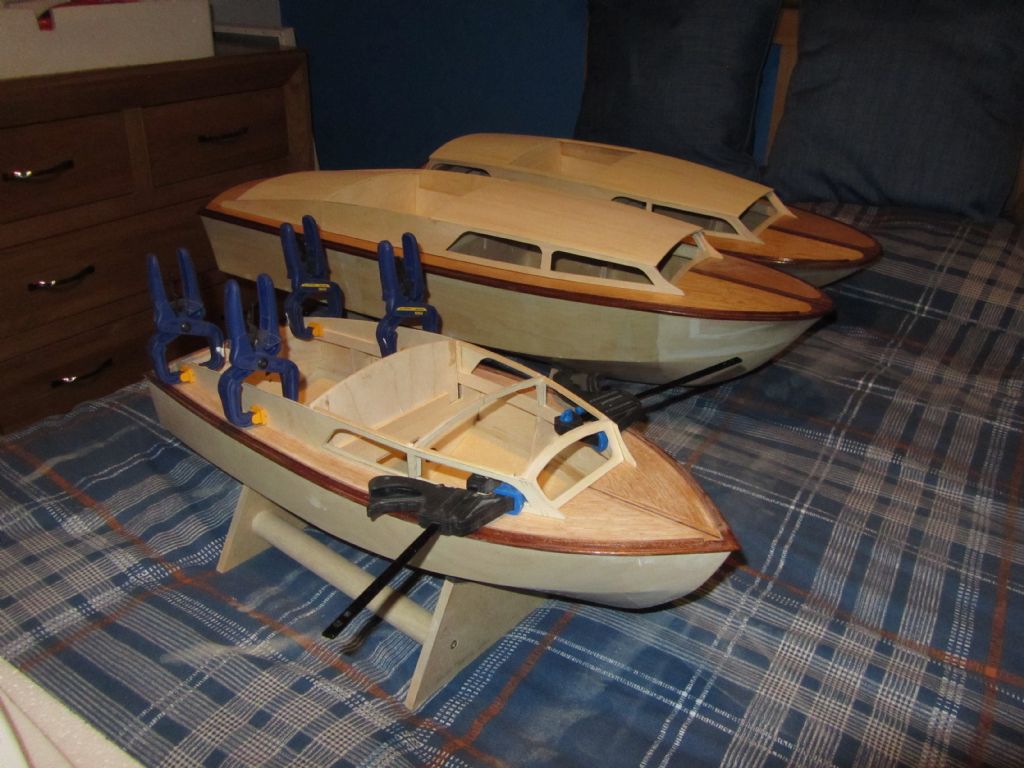
                              Nothing done today as gave the lawn its first cut of the year and had to make some space in the garage for the engineer to service the boiler tomorrow. Some of my DIY tools have been put in my workroom (small bedroom) which is why the Huntress is gracing the bed in the spare room with its bigger siblings!

                              Chris

                              superstructure4

                              superstructure8

                              #94202
                              Chris Fellows
                              Participant
                                @chrisfellows72943

                                No progress on Wednesday due to the aforementioned boiler service which entailed moving two of my motorbikes out of the garage and moving them back in again afterwards (rain just got me sad) and putting my DIY tools back. This was followed by a trip to Costco, first time for a long time – upside is that my wine rack is well stocked again and it's Friday today!

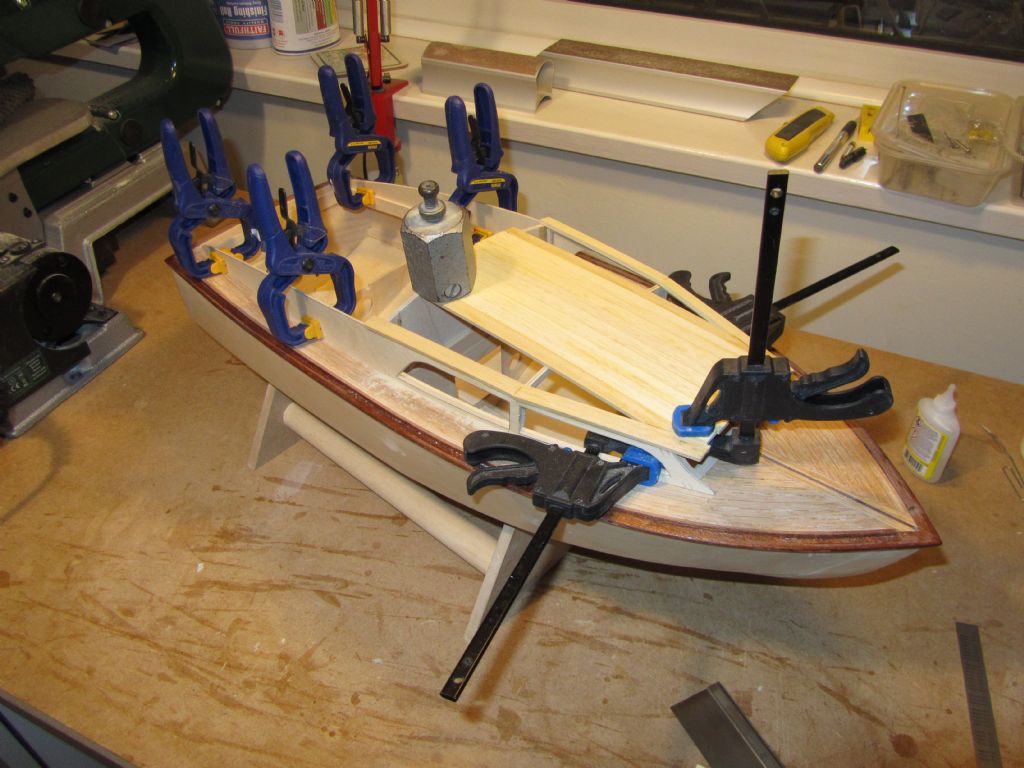
                                Yesterday I made sure that the superstructure was securely clamped down and then planked the roof in my usual way with 3 x 9mm obechi planks. These were glued where sitting on the rear of the cabin and window with Slo Zap and along the edges with a/resin and then clamped and/or weighed down for about 15 minutes or so. Pieces were cut to shape to suit the angles at the sides of the roof with my razor saw and the odd bit of sanding.

                                Once finished it was left overnight and as well as clamping it was weighed down with an oil stone to stop the superstructure from twisting.

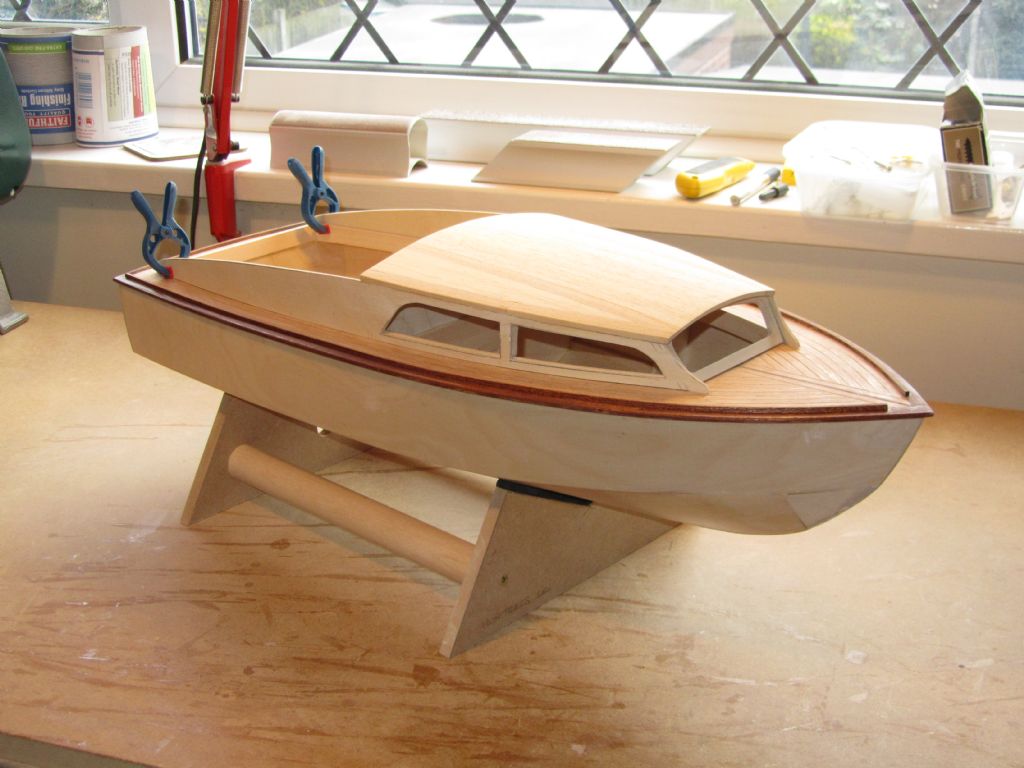
                                Today I gave the planking a preliminary sanding with 80 grit, trimmed the front of the roof (carefully!) with the razor saw and sanded the rear and side edges flush with a PermaGrit file.

                                Chris

                                superstructure9

                                superstructure10

                                superstructure11

                                superstructure12

                                #94207
                                gecon
                                Participant
                                  @gecon

                                  Hi Chris, a most impressive sight to see all 3 together. Are they all to have the same colour scheme? Do we call this a flight, a shoal, a school or an armada…of Fairey's? Will they all be on the water this summer? A bit too much perhaps to get them all fitted out together.

                                  I note from your text that I have been spelling 'coamings' (combings) incorrectly for over a year now! I often google to check such things, but this one has eluded me. Over 40 years in Norway does not improve one's command of one's original tongue. I'll look in here even more often to keep the 'lingo' refreshed!

                                  I always look forward to seeing your progress photos.

                                  George

                                  #94211
                                  Chris Fellows
                                  Participant
                                    @chrisfellows72943

                                    Hi George

                                    A flutter maybe? I like flight though, but I think I will stick with the traditional fleet. It would be nice to get them all on the water this year but summer might be pushing it, will certainly try and get a couple ready for then even if not completely finished. My wife has already made rumblings about my builds and that summer is coming. Also that there are some DIY jobs that need doing!

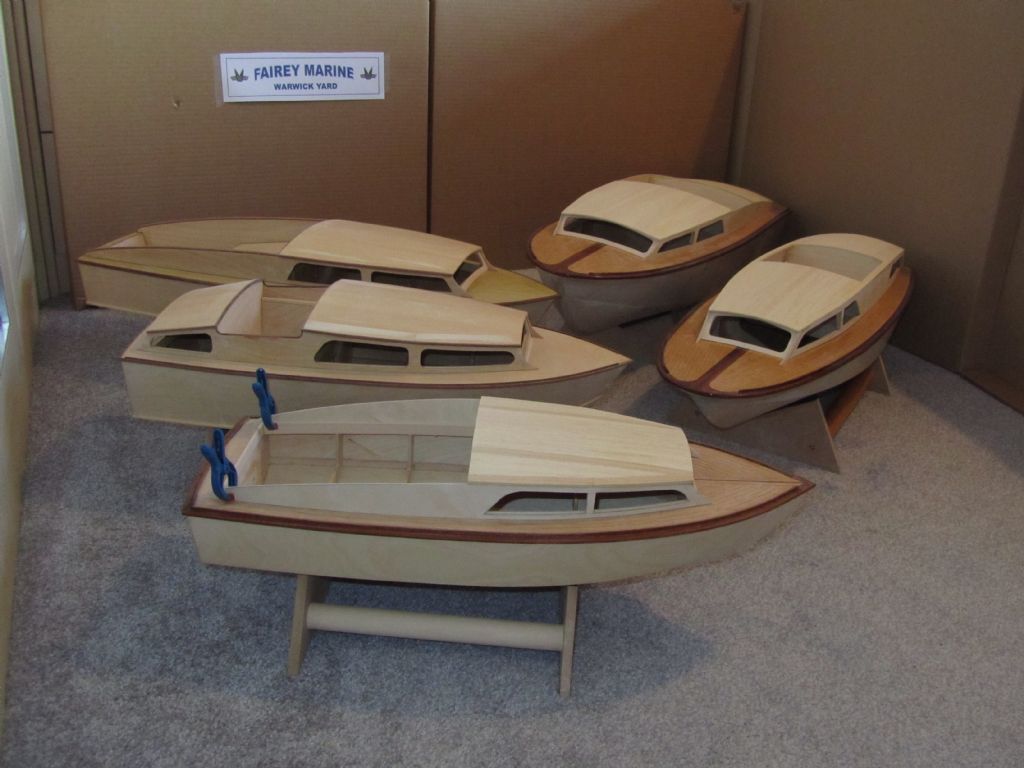
                                    I've had passing thoughts on colour-schemes, which did include painting them all the same, but that was dismissed as they need to have some individuality. Also the River Cruiser was a one-off prototype so really needs to reflect the original colours, which I think I can work out from a black and white photograph! And the Huntress Long Cabin never got any further than the drawing board so I think I will follow the author's illustration in my Fariey Marine book. But whatever I decide on it will be a combination of the traditional Fairey colours.

                                    If you like the 3, see the photo which I've taken for a bit of fun and as a change to building. Whilst they are all the same scale, the relative sizes are wrong due to the perspective of a wide angle lens.

                                    I should imagine that you are pretty fluent in Norwegian then? A hard language to learn.

                                    Chris

                                    5 Models 1

                                    #94246
                                    Chris Fellows
                                    Participant
                                      @chrisfellows72943

                                      Bit of a lazy day today, well it is Sunday! Started doing some modelling late morning, but then stopped to watch a film and a bit of a snooze!

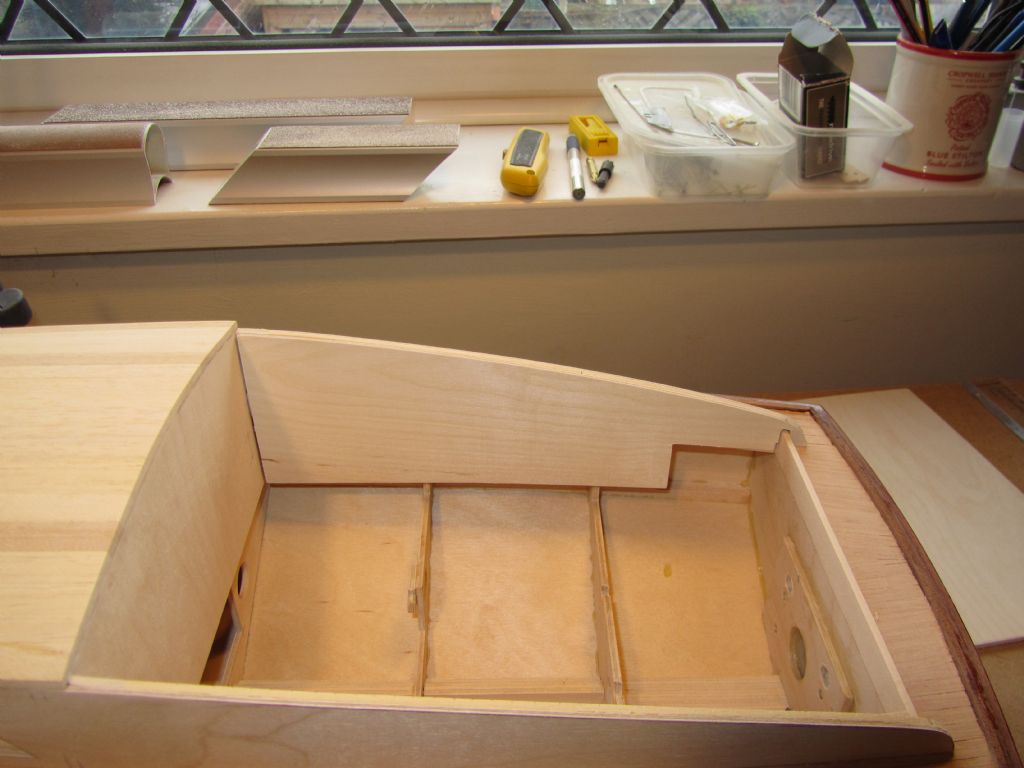
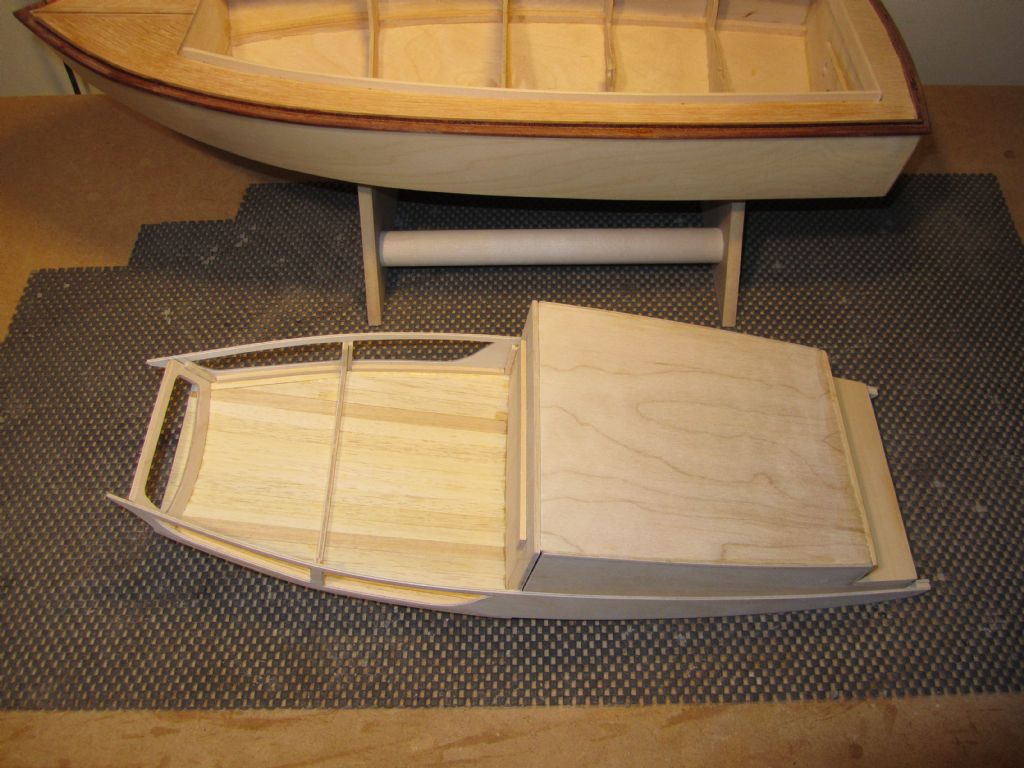
                                      I made a start on the cockpit area. I reckon that with the lift off superstructure that this is quite a tricky part of the build. Not only do the coamings need to be snug fit against the upstand on the outside but you have coamings on the inside as well, which also have to fit against the upstand, match the shape of the outer coaming, fit between the cabin and transom and have a floor as well with a stepped area for the seating to give clearance for the stern-drive and motor!

                                      You just have to take your time and be careful. First job was to fit some 2mm bass, same thickness as the upstands, on the inside of the coamings, to which the inner coamings would be glued. The pieces along the top were partially cut through with the razor saw at intervals so that they would bend easily and maintain the curve of the coamings and then glued in place with a/resin. I then started to cut and sand the inner coamings to get a good fit.

                                      Chris

                                      superstructure14

                                      superstructure15

                                      #94275
                                      Chris Fellows
                                      Participant
                                        @chrisfellows72943

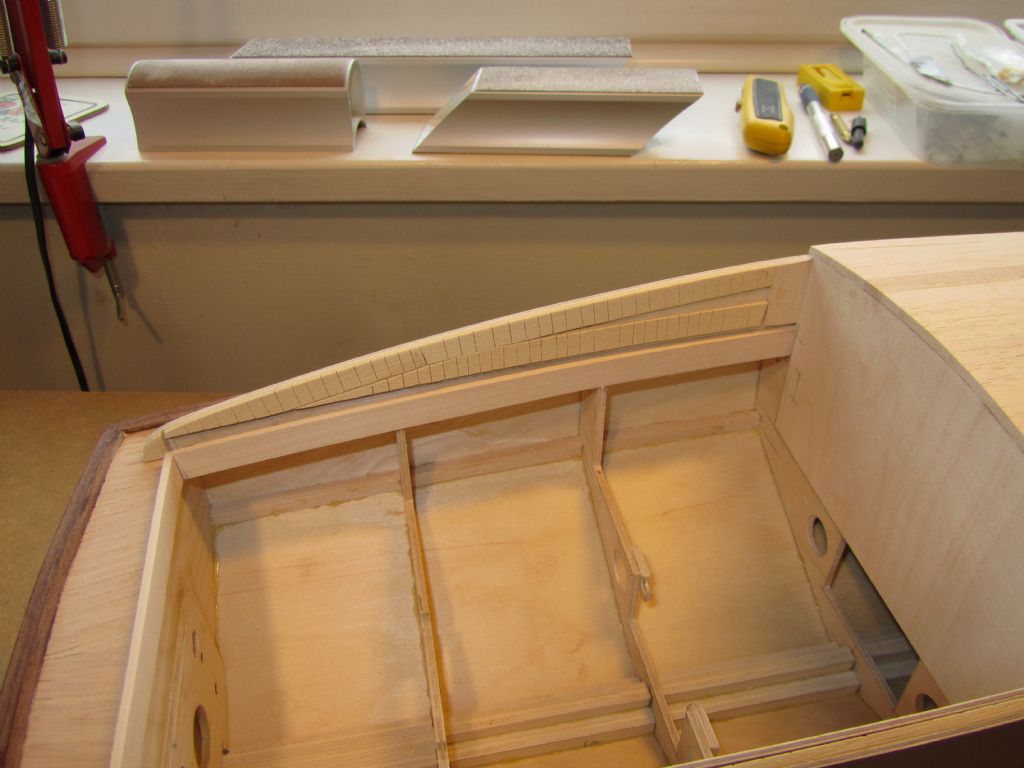
                                        Added some more 2mm bass strip towards the bottom of the outer coamings to provide more support and glue area for the inner coamings, again with saw cuts so that it bent easily.

                                        When I built the Huntsman 28, which is a similar build and very much like a longer Huntress Long Cabin (but without the stern-drive) I began the build of the cockpit area by gluing the inner coamings and floor together first. Whilst it worked out fine it is tricky in the that the floor has to be a good fit inside the upstand and allow for the thickness of the coamings, which due to the curve need to be glued to the outside of the floor. Also it was difficult to ensure that the rear of the coamings was tight to the deck. So with the Huntress I decided to glue the inner coamings in place first and the floor afterwards.

                                        It's usually annoying when you find that your ply has warped but in the case of the inner coamings the 2mm warped piece that I selected was almost the perfect curve required! With the Huntsman 28 (it may been thicker ply as well) I put some saw cuts in the inner coamings to bend them more easily and reduce the stress on the outer coamings and the effect of trying to straighten them.

                                        When I took the clamps off after gluing the bass to the top of the outer coamings, I was a bit dismayed to see a bit of daylight under the coamings. However I thought that once the superstructure was clamped down again and the inner coamings glued in place that the problem would be rectified and indeed once one side had been done and left overnight it was found still to be tight to the deck in the morning. It can't be stressed enough that when building a lift off superstructure that it has to be kept clamped down until the glue has completely dried, and with a/resin this means overnight, otherwise twist will be introduced – as I found out to my cost on a previous build even though it had been left for a few hours!

                                        This morning the other inner coaming was glued in place and clamped and will be left until tomorrow. This does result in slow progress (yeah, slower than usual! smiley) but it's not worth the risk of removing the clamps sooner.

                                        I've got some additional shelves to put in a couple of the kitchen cupboards, so I'm multi-tasking anyway!

                                        Chris
                                        superstructure16

                                        superstructure17

                                        superstructure18

                                        superstructure19


                                        Edited By Chris Fellows on 16/03/2021 12:10:12

                                        #94276
                                        Ray Wood 3
                                        Participant
                                          @raywood3

                                          Hi Chris,

                                          Quality work as always you must have nerves of steel not to put Clingfilm over the coaming, I always dread the moment when it should not have stuck to that bit !!!
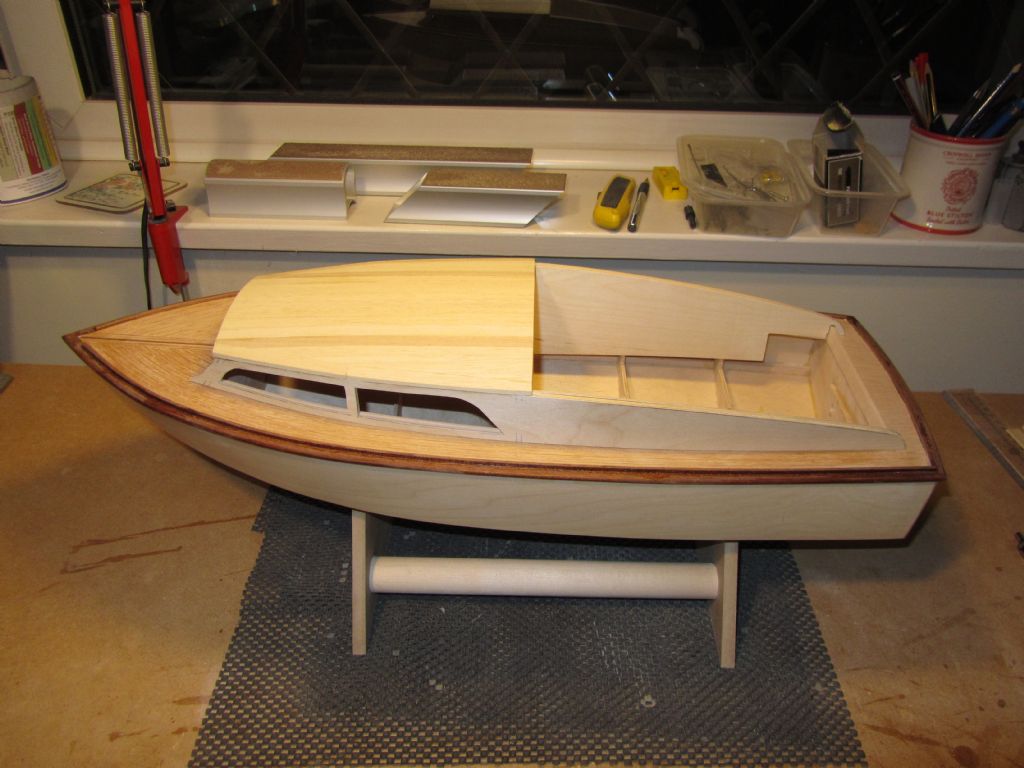
                                          Fisherman not far away ? Or are you up for Eddies IOM Nimbus challenge ??

                                          Regards Ray

                                          #94281
                                          Chris Fellows
                                          Participant
                                            @chrisfellows72943

                                            Thanks Ray

                                            I have used cling film when gluing the sides to the cabin bulkheads in the past but I only realised once the pieces were clamped in place on this build that I hadn't used any and so risked it. It did stick, but fortunately only slightly.

                                            With the cockpit I've left a gap above the upstand and put the a/resin on thinly using a scrap of wood so it should be Ok! I'll let you know tomorrow!

                                            Got to do a bit more on the 3 builds before they can be left ready for painting and then yes, I should make a start on the Fisherman and maybe the Faun smiley though as we go into spring and summer I will have less time to spend on building.

                                            Our club lake is quite small and most of us sail/race DF65 size yachts and so an IOM is probably a bit on the big size for me.

                                            Chris

                                            #94285
                                            Chris Fellows
                                            Participant
                                              @chrisfellows72943

                                              Ray

                                              Not quite tomorrow! But thumbs up

                                              Chris

                                              superstructure20

                                              superstructure21

                                              #94286
                                              Ray Wood 3
                                              Participant
                                                @raywood3

                                                Hi Chris,

                                                All's well that ends well

                                                You will have to finish one of them off for the new season ??.

                                                I have PM'd you

                                                Regards Ray

                                                #94290
                                                Chris Fellows
                                                Participant
                                                  @chrisfellows72943

                                                  Whilst this was the last one started I wouldn't be surprised if it is the first one to see water – I'm interested to see how the stern-drive installation works out and how it performs. The River Cruiser could well be next as it is a bit different to the usual Faireys.

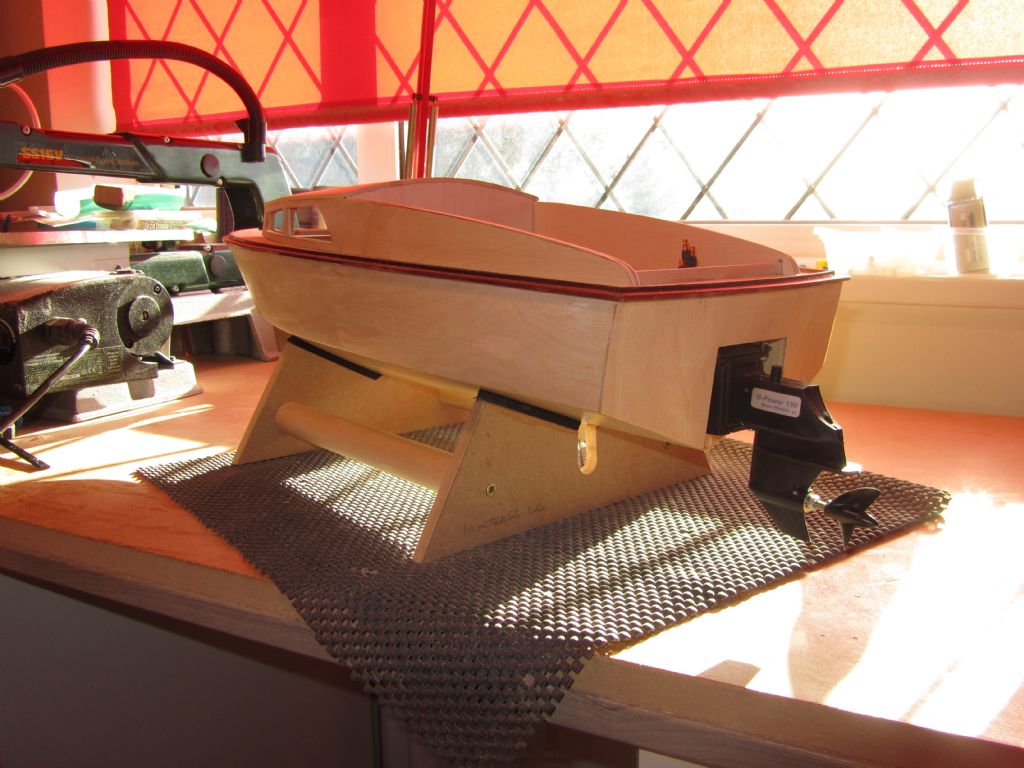
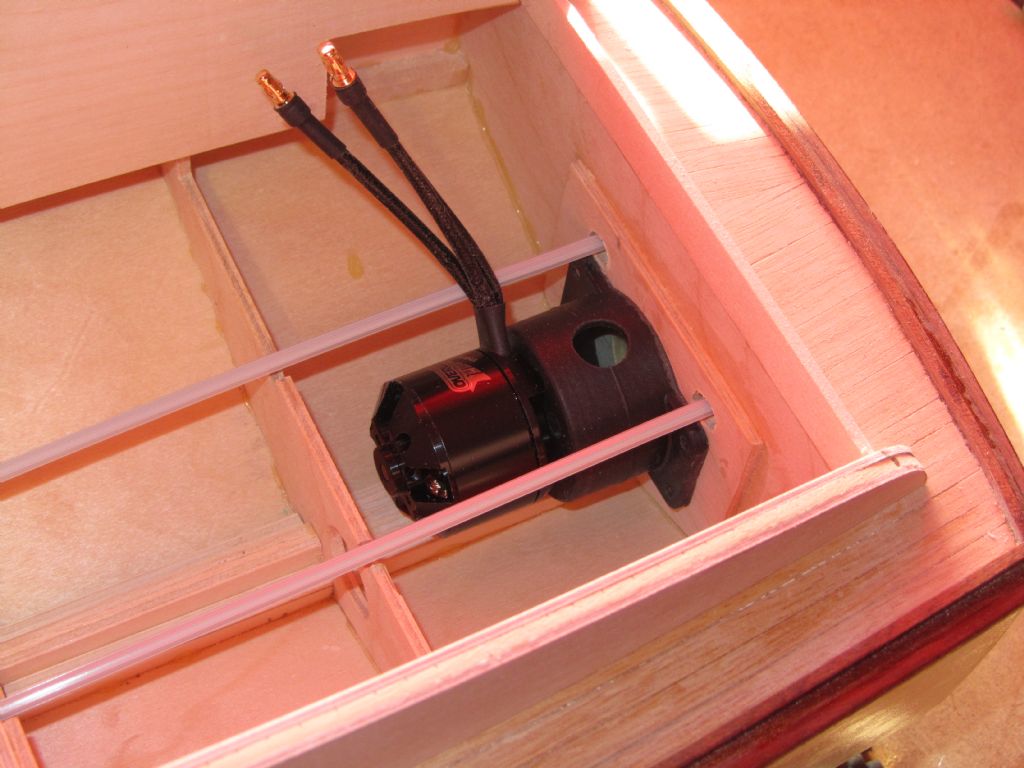
                                                  Delayed start as had to go shopping first but a bit more progress to the cockpit. First job was to fit the stern-drive and motor to check that the clearance drawn for the floor and rear seat boxing was sufficient, which it was.

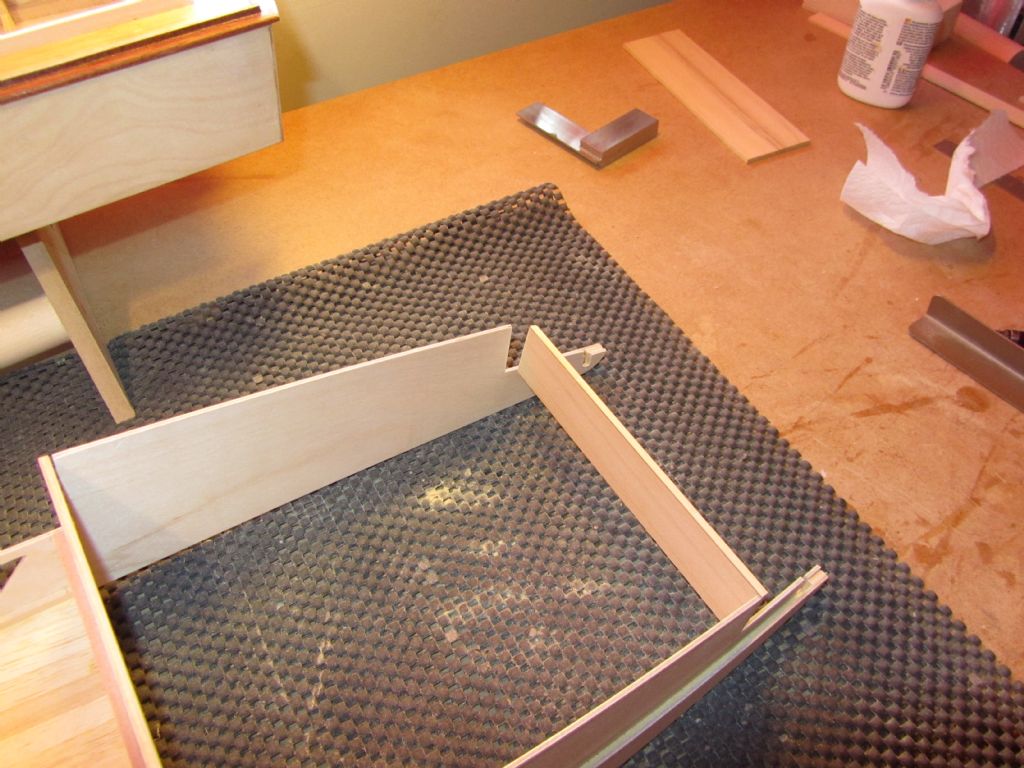
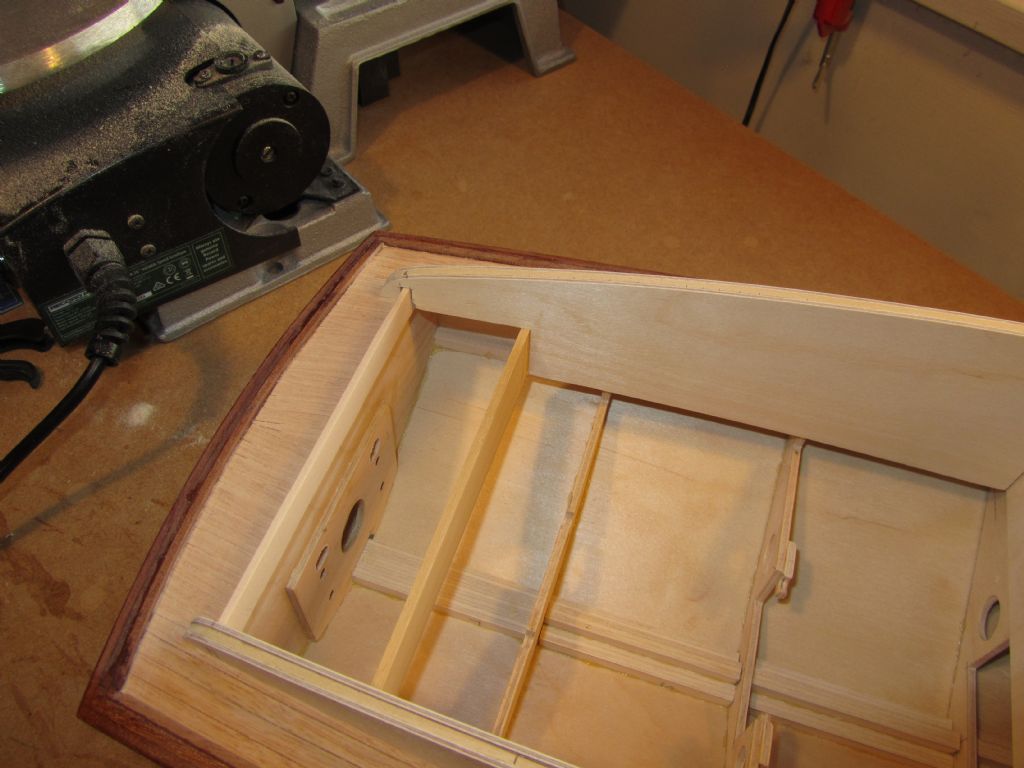
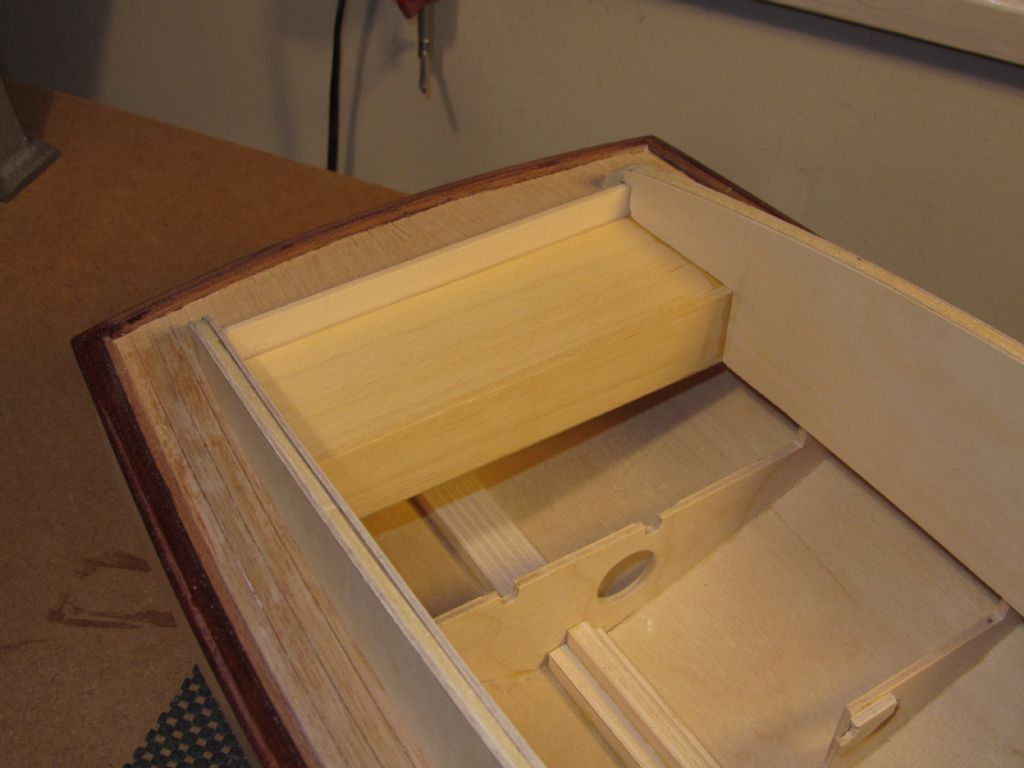
                                                  Then I started on the boxing which entailed some accurate carpentry. The coaming sandwich is a very snug fit on the upstand and there is no leeway for them moving laterally. Of course, as soon as you take the superstructure off, the coamings spring outwards a bit and so the boxing has to be done in-situ, well some of it. Firstly I tackled the vertical piece and wanting a timber that was easier to cut and file I used 3mm bass sheet which is nice to work with and was nice and flat. The piece was cut out slightly oversize, sanded to the required height and one end glued with Super Phatic to the inner coaming whilst it was off the hull. It was then just a case of progressively filing the other end until the superstructure i.e. the coamings dropped into place. The inner coaming, which is being glued to, is only 2mm thick so you have to take it steady! Additional strength will be provided by the floor when that is fitted.

                                                  Once the other end was glued I started on the horizontal piece. Again it was cut out slightly oversize and one end sanded to the curve of the coaming. Even with the vertical timber glued securely in place there was still a very small amount of spring left in the coamings if the superstructure was taken off and so the whole of the horizontal piece had to be fitted with the superstructure in place. This piece was easier to do as the sanded end could be fitted in place and the other end scribed and progressively sanded until that fitted. Both ends were then glued with Super Phatic and held in place until set.

                                                  Apologies for the amount of detail with regard to this aspect of the build but it may be useful for anyone building the standard Huntress. I don't have the build instructions for that and it may be that the method set out is to glue the inner coamings to the floor first.

                                                  Chris

                                                  superstructure22

                                                  superstructure23

                                                  superstructure24

                                                  superstructure25

                                                  superstructure26

                                                  #94315
                                                  Chris Fellows
                                                  Participant
                                                    @chrisfellows72943

                                                    No progress yesterday as was working on a kitchen cupboard. More brownie points earned!

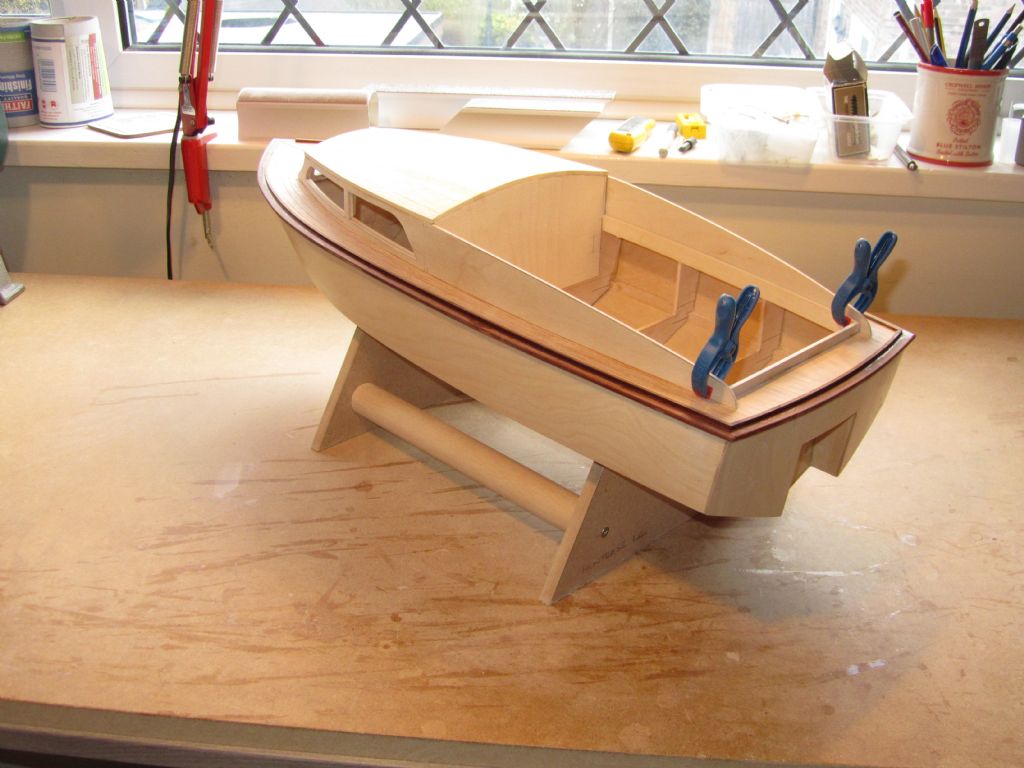
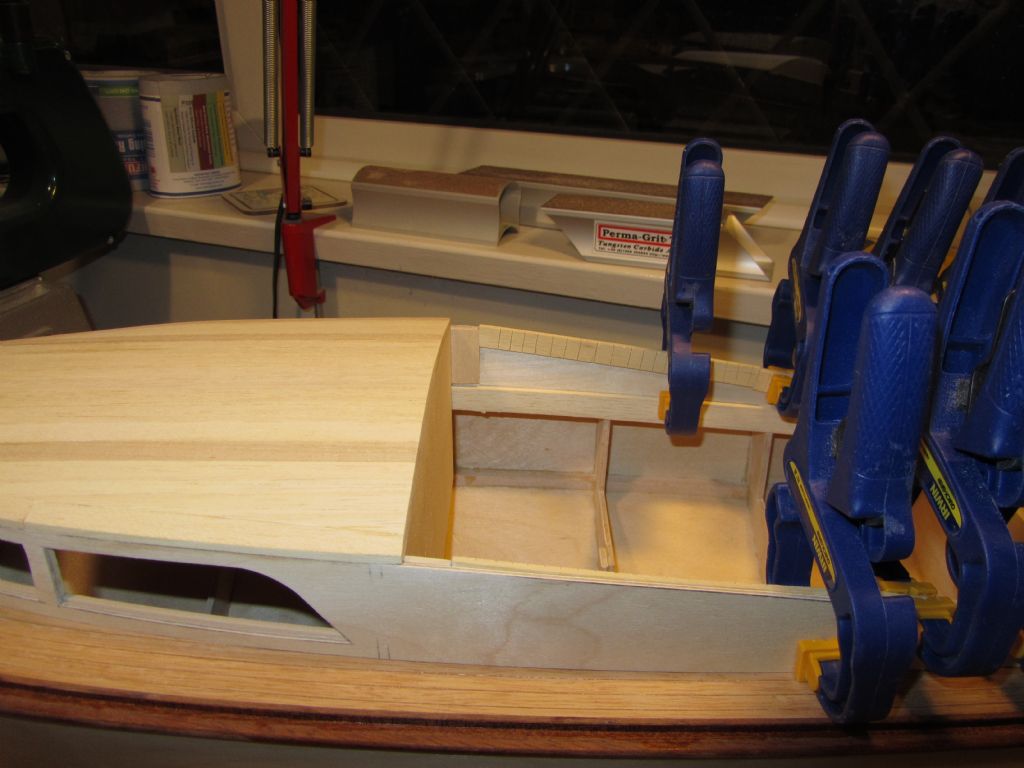
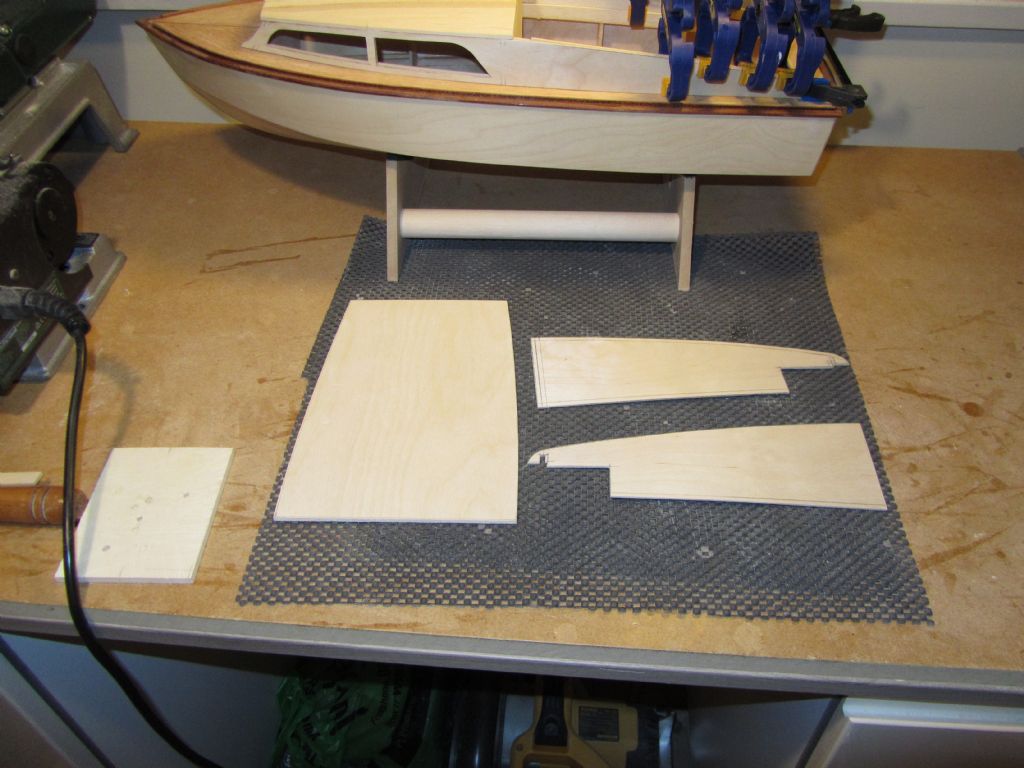
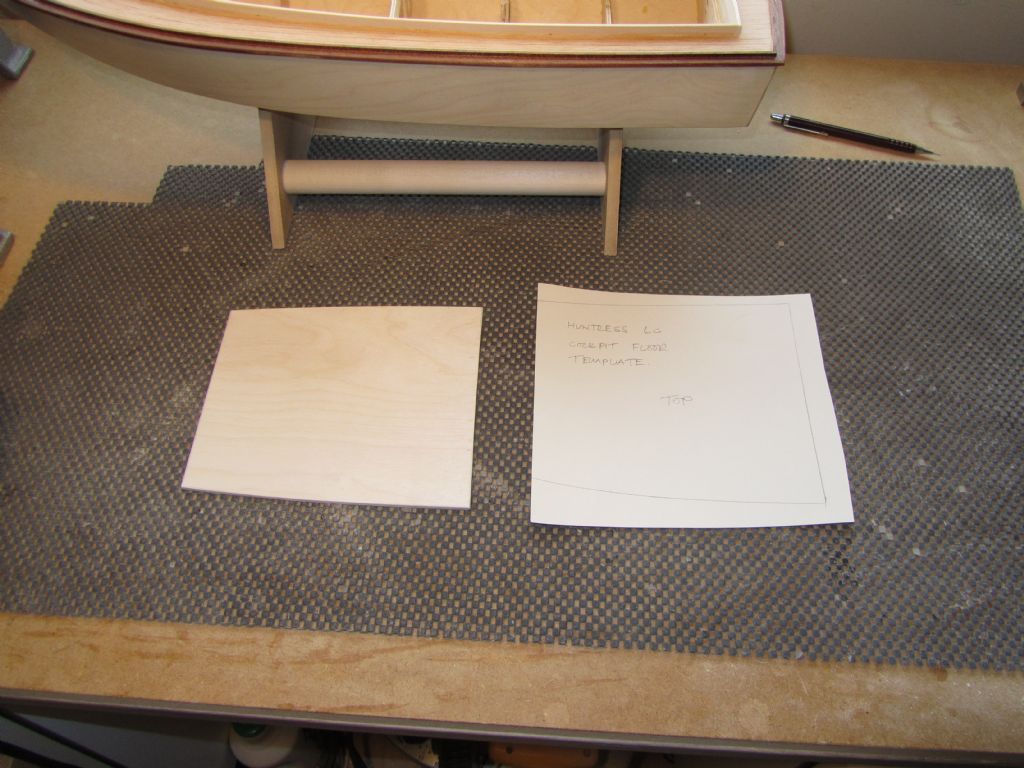
                                                    I'd made a template for the cockpit floor previously (before deciding to fit the floor last) by holding a piece of card to the underside of the upstand and running a pencil round and then allowing for the 2mm cockpit sides/coamings. The floor was then cut from 3mm birch ply.

                                                    The floor was reduced in length to butt up to the boxing and then offered up to the base of the cabin, boxing and sides and a pencil run round. As you'd expect it wasn't far out having used the upstand as a template and just required a mm or two sanding off the edges. The floor was then glued in place with a/resin and once held the superstructure was trial fitted, found to be Ok and then clamped up for awhile. Photo has just reminded me that I produced another card template by scribing around the floor which will be used when the floor is planked.

                                                    The mahogany cappings need to be fitted to the coamings and over the rear upstand and finishings etc. applied but other that the basic superstructure is now finished and will allow me to return to the steering installation and do a bath test to determine the battery position and see how the boat sits on the water.

                                                    Chris

                                                    superstructure27

                                                    superstructure28

                                                    superstructure30

                                                    #94318
                                                    Ray Wood 3
                                                    Participant
                                                      @raywood3

                                                      Hi Chris,

                                                      Nice looking cockpit plenty of space for the crew

                                                      I have PM'd you

                                                      Regards Ray

                                                    Viewing 25 posts - 51 through 75 (of 217 total)
                                                    • Please log in to reply to this topic. Registering is free and easy using the links on the menu at the top of this page.

                                                    Code of conduct | Forum Help/FAQs

                                                    Advert

                                                    Latest Replies

                                                    Home Forums Build Blogs Topics

                                                    Viewing 25 topics - 1 through 25 (of 25 total)
                                                    Viewing 25 topics - 1 through 25 (of 25 total)

                                                    View full reply list.

                                                    Advert