Fairey Huntress 23 Long Cabin Version

Advert

Fairey Huntress 23 Long Cabin Version

Home Forums Build Blogs Fairey Huntress 23 Long Cabin Version

  • This topic has 216 replies, 3 voices, and was last updated 5 months ago by Chris Fellows.
Viewing 25 posts - 26 through 50 (of 217 total)
  • Author
    Posts
  • #91118
    Chris Fellows
    Participant
      @chrisfellows72943

      Hi Ray

      Yep, should go well with the Overlander 3536 1050kV brushless motor.

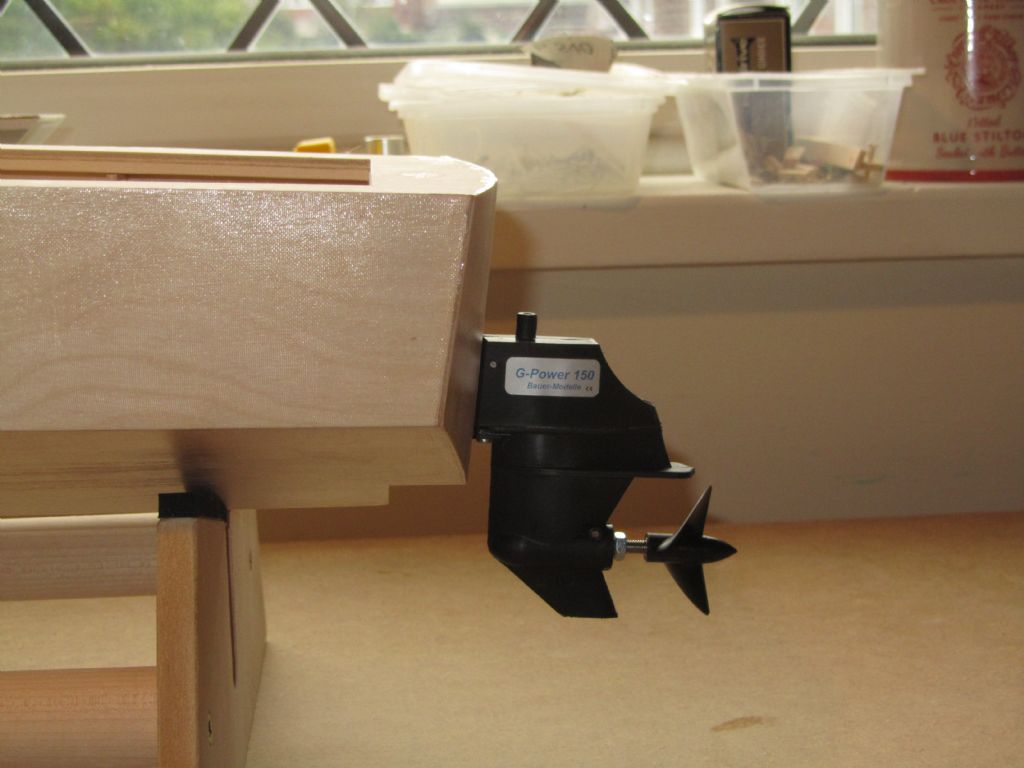
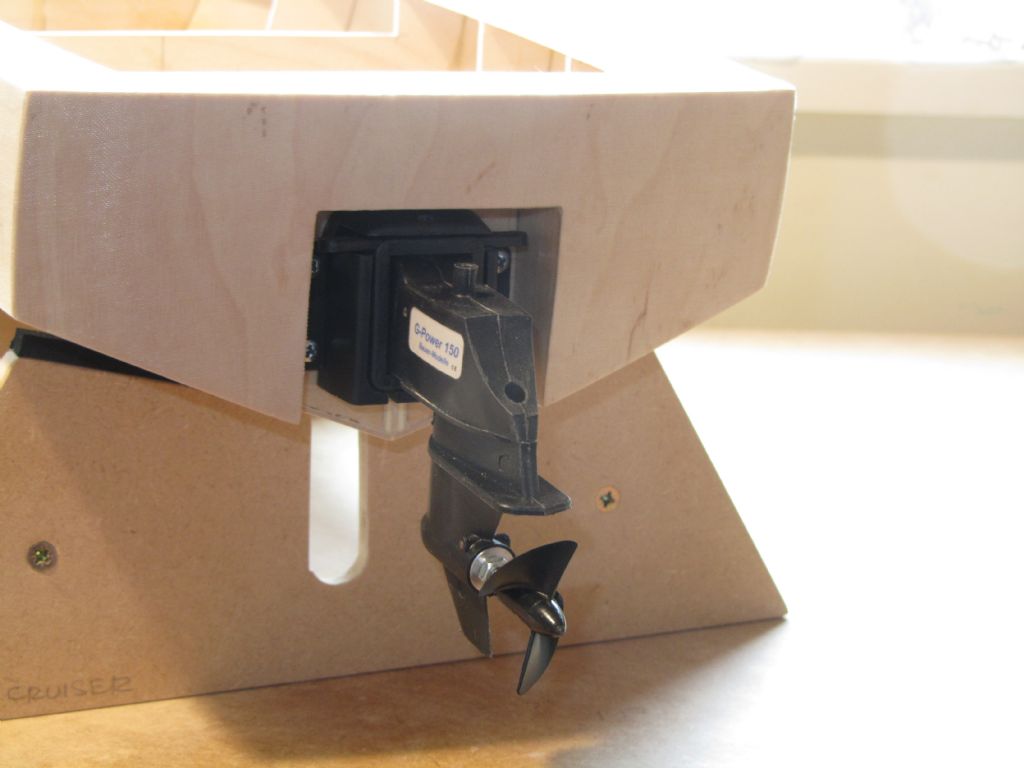
      Yes, mounted on the round transom but the curve is not that great and the drive mounting was quite narrow relatively speaking compared with the model one. It would have been nice to have gotten something slimmer but it would have had to be in metal and as I said before the only ones I could find were too big.

      It looks OK on the model though and even better when I've formed the transom around the boxy part of the drive. Looking forward to doing that bit!

      Chris

      Advert
      #91120
      Chris Fellows
      Participant
        @chrisfellows72943

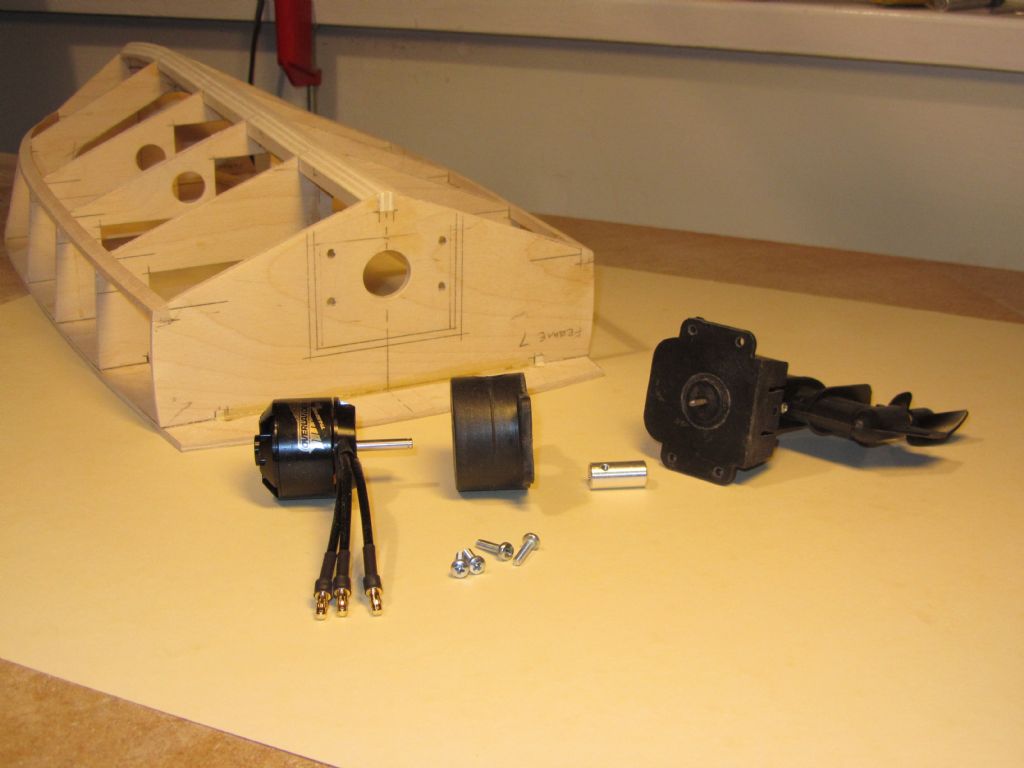
        Here are the motor and stern-drive components.

        Chris

        Motor & drive components

        #91142
        Chris Fellows
        Participant
          @chrisfellows72943

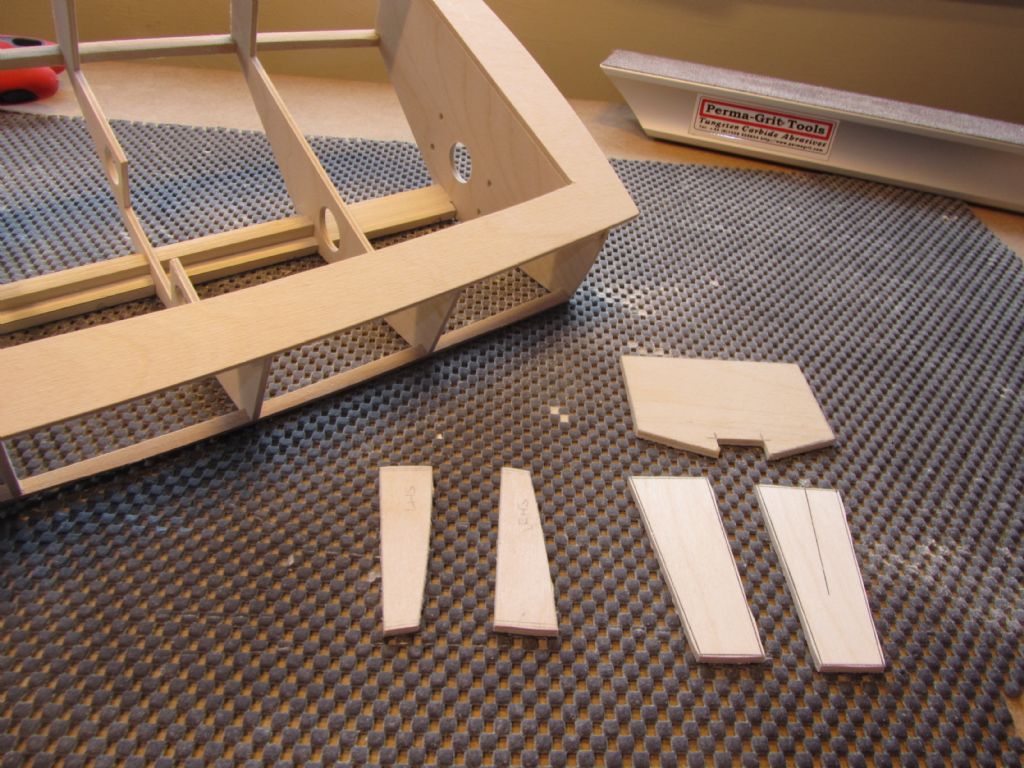
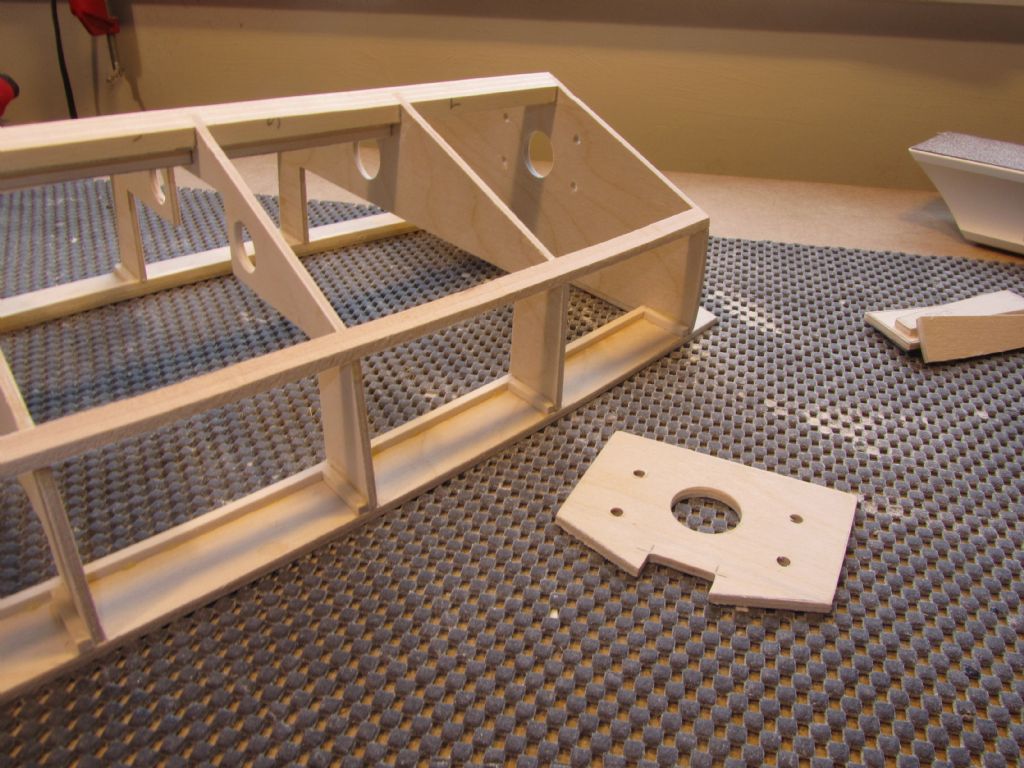
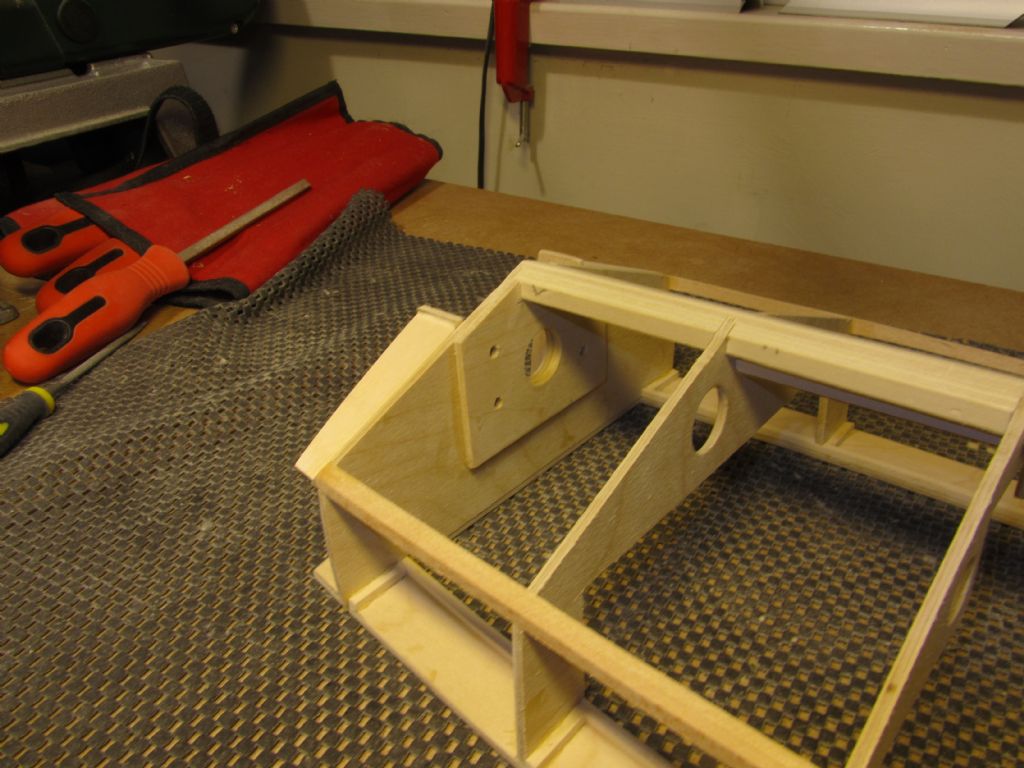
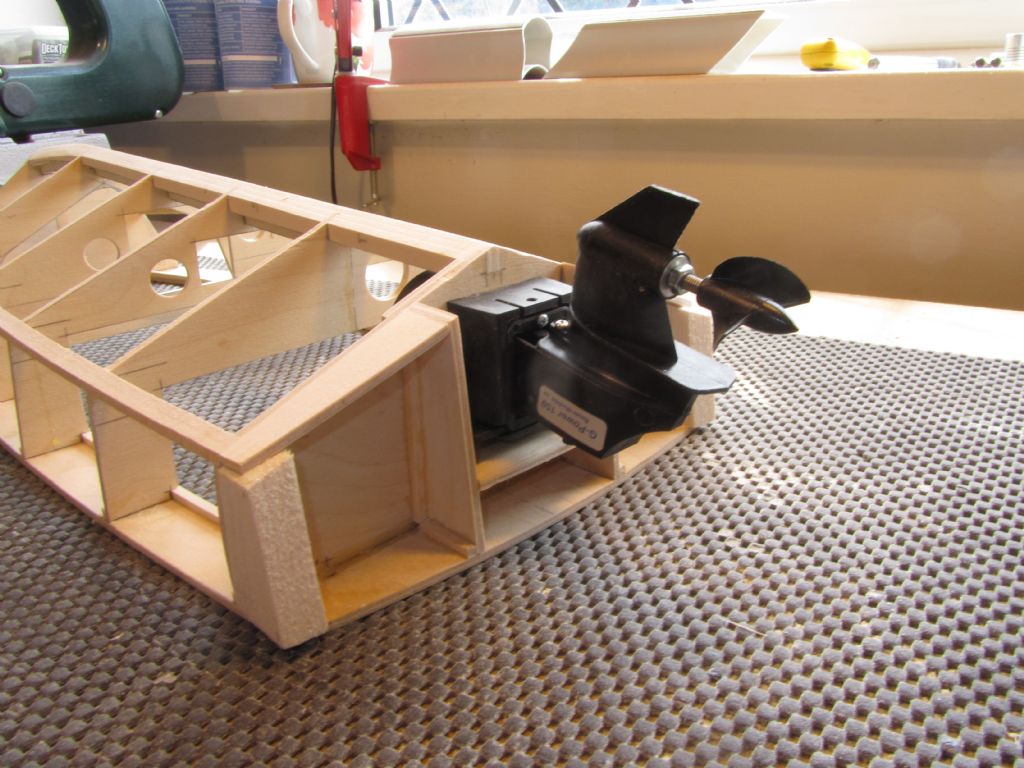
          When doing the trial fit I found out that the bulkhead needs to be a bit thicker as when the coupling is fed all the way onto the flexi-drive and the motor shaft the motor sits a couple of mm away from the mounting. Some motors have a shorter shaft and so it wouldn't be a problem. I'm not brave enough to cut the motor shaft down or reposition it and risk damage to that lovely piece of engineering and it's easier to make a packer which will also have the benefit of beefing up the bulkhead where the drive and motor are mounted. With hindsight and if I'd taken the drive apart before I would have made the bulkhead out of thicker ply.

          I drew up the packer and the side pieces for the recess that the drive sits in and cut them out of 3mm ply. The packer was clamped to the bulkhead and the various holes drilled through it. It was then removed and then glued and clamped in place.

          After being left for a while for the glue to take hold I started assembling the pieces to form the angled and curved transom and the sides of the recess for the stern-drive.

          Chris

          Transom parts

          Transom packer

          Transom packer 2

          Transom being formed

          Edited By Chris Fellows on 27/08/2020 22:23:05

          #91158
          Chris Fellows
          Participant
            @chrisfellows72943

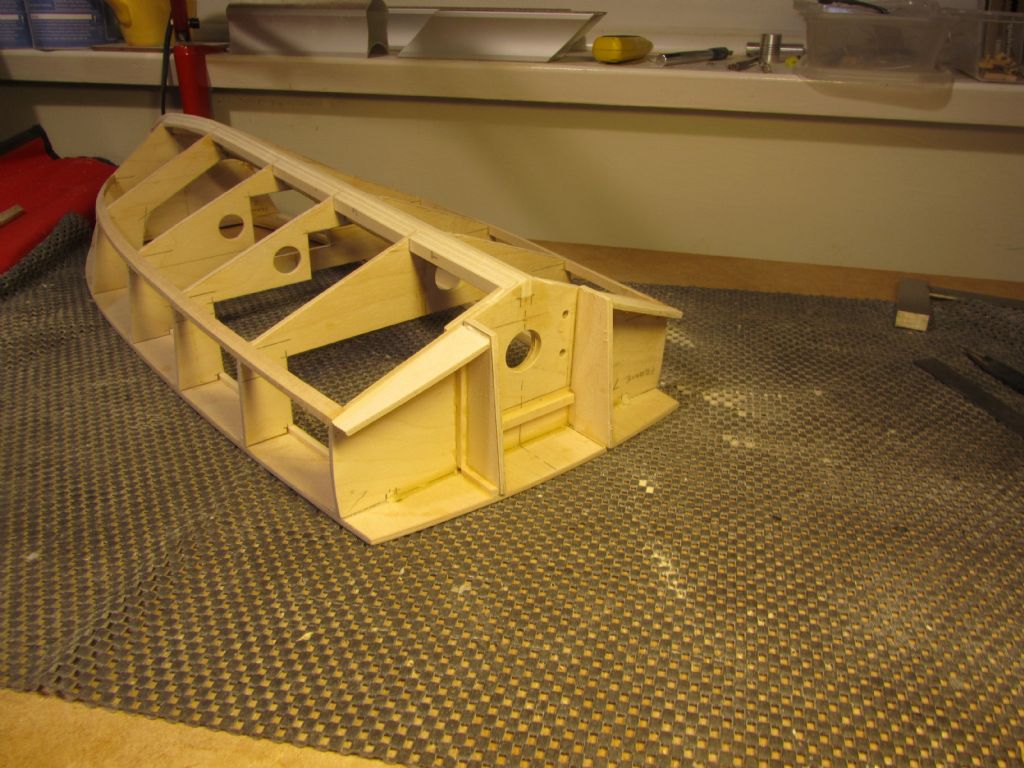
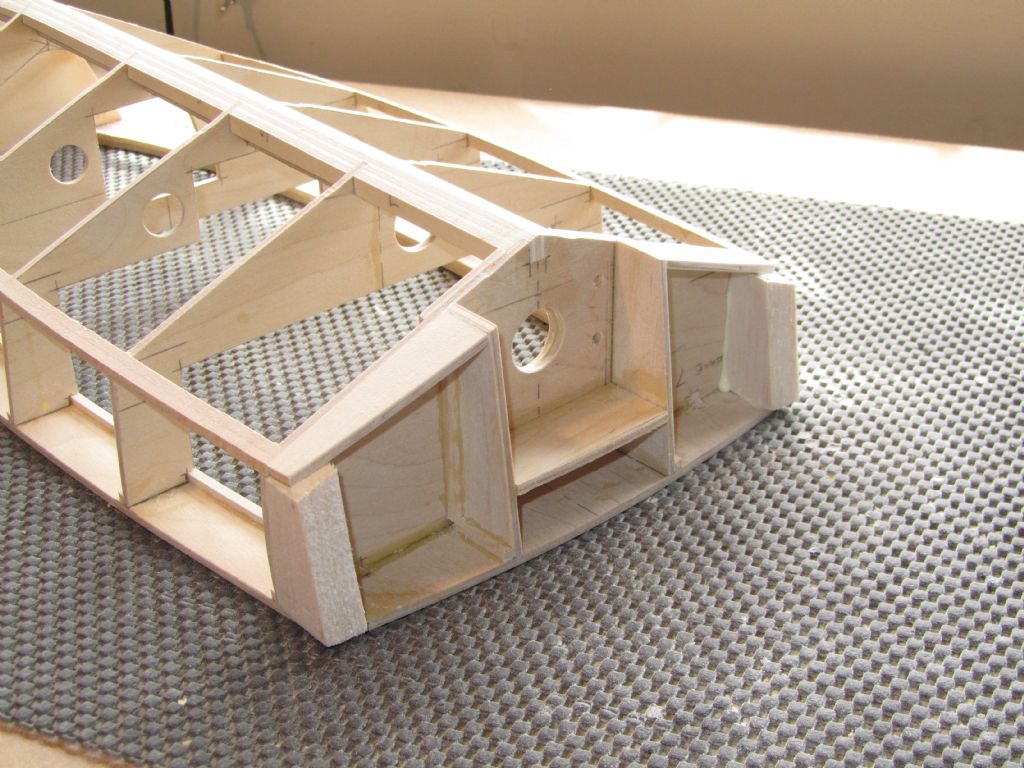
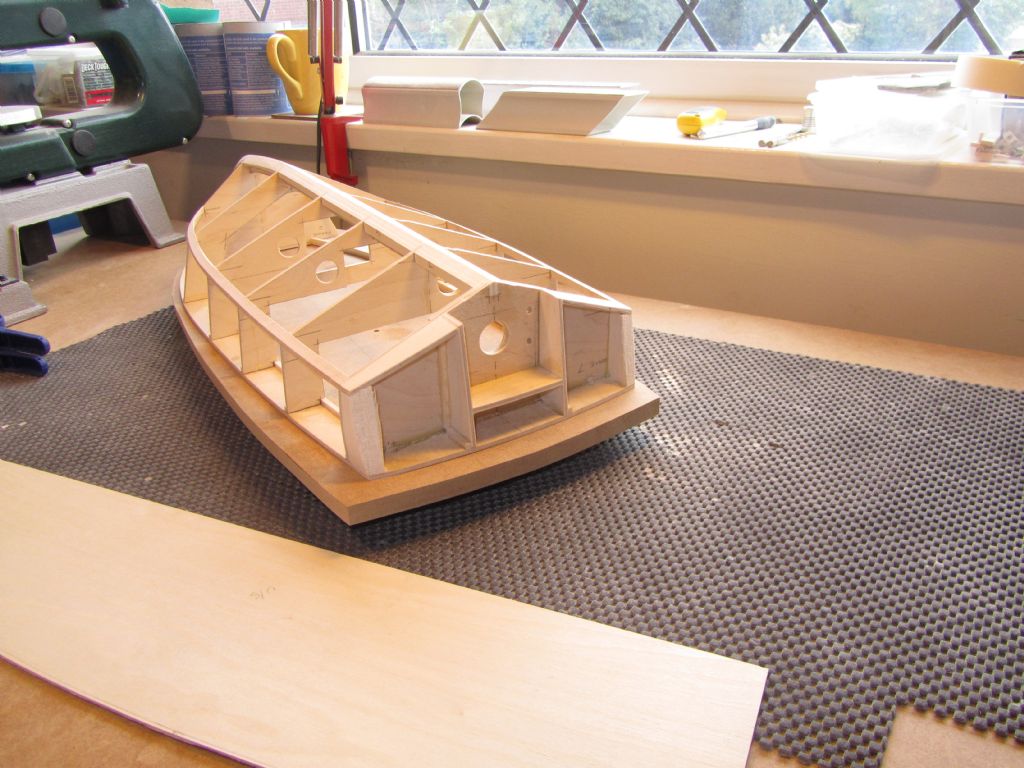
            Bit more done this morning. Finished off the recess in the transom by fitting the horizontal piece of ply. Sanded down the side pieces flush and glued in balsa blocks to provide support for the hull skins at the corners. I like to have a bit more to rely on than just the joint between the side and transom skins!

            Chris

            Transom recess

            Transom recess 2

            Stern drive 7

            Edited By Chris Fellows on 28/08/2020 15:17:42

            #91178
            Chris Fellows
            Participant
              @chrisfellows72943

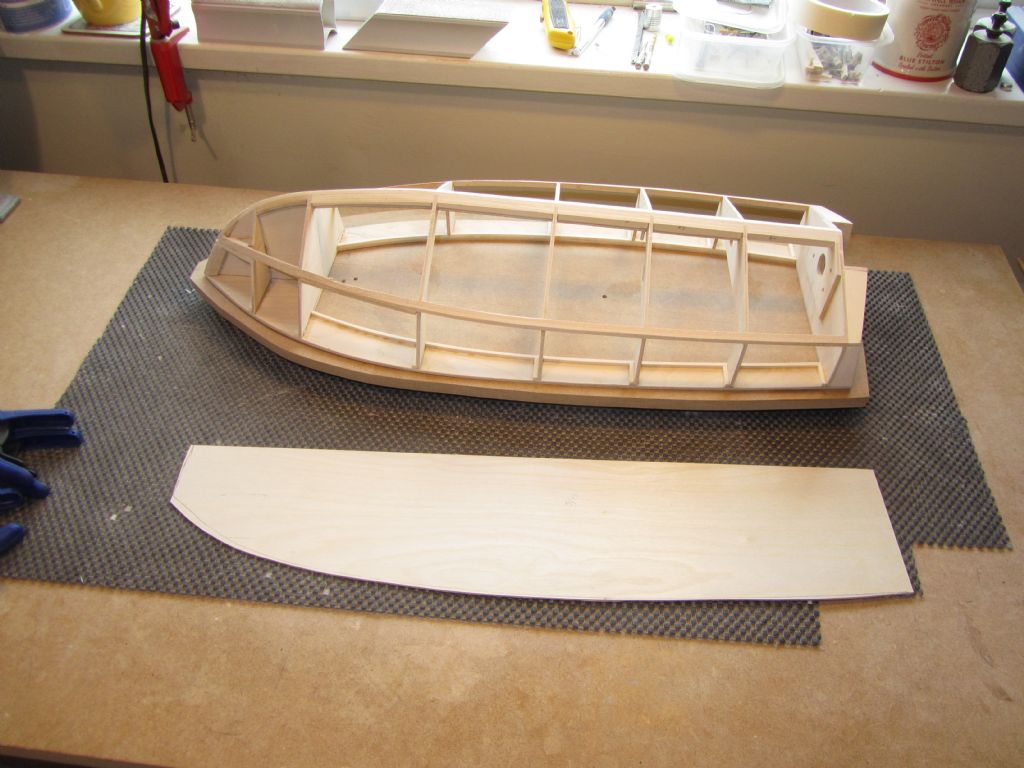
              The balsa blocks at the outside of the transom have been sanded to shape. A card template was then made of the first of the bottom skins and then traced around on 1.5mm birch ply. It was then cut out with a Stanley knife and then glued in place and held with screws and clamps.

              Chris

              Transom blocks sanded

              1st hull skin cut out

              1st skin fixed

              #91192
              harry smith 1
              Participant
                @harrysmith1

                Hi Chris

                This may help get a boat in the water.
                Watch for the Spearfish !!!!
                NO, I was not driving !!!!
                Harry
                #91201
                Chris Fellows
                Participant
                  @chrisfellows72943

                  What are you saying Harry! blush smiley

                  Good turn out of folks at the canal. Pity about the one that almost sank, did he get all the bits?

                  Sun was shining this morning so booked a slot at the club to take the yacht and the Club 500. But then clouded over and looked like rain so I fitted the other bottom skin instead. Weather here has been very poor of late.

                  Chris

                  Edited By Chris Fellows on 30/08/2020 18:11:53

                  #91205
                  harry smith 1
                  Participant
                    @harrysmith1

                    Hi Chris

                    20 people turned up with 3 more jointing the club !!!

                    The boat hull was OK, lost all the wheelhouse.

                    Just one big gust of wind caused all the mayhem.

                    My rescue add on to the barge saved a few bits.

                    But one of the members is a diver, so we hope we find it on Wednesday if the weather is OK.

                    We have had sunny weather but we a lot of wind.

                    Harry

                    #91265
                    Chris Fellows
                    Participant
                      @chrisfellows72943

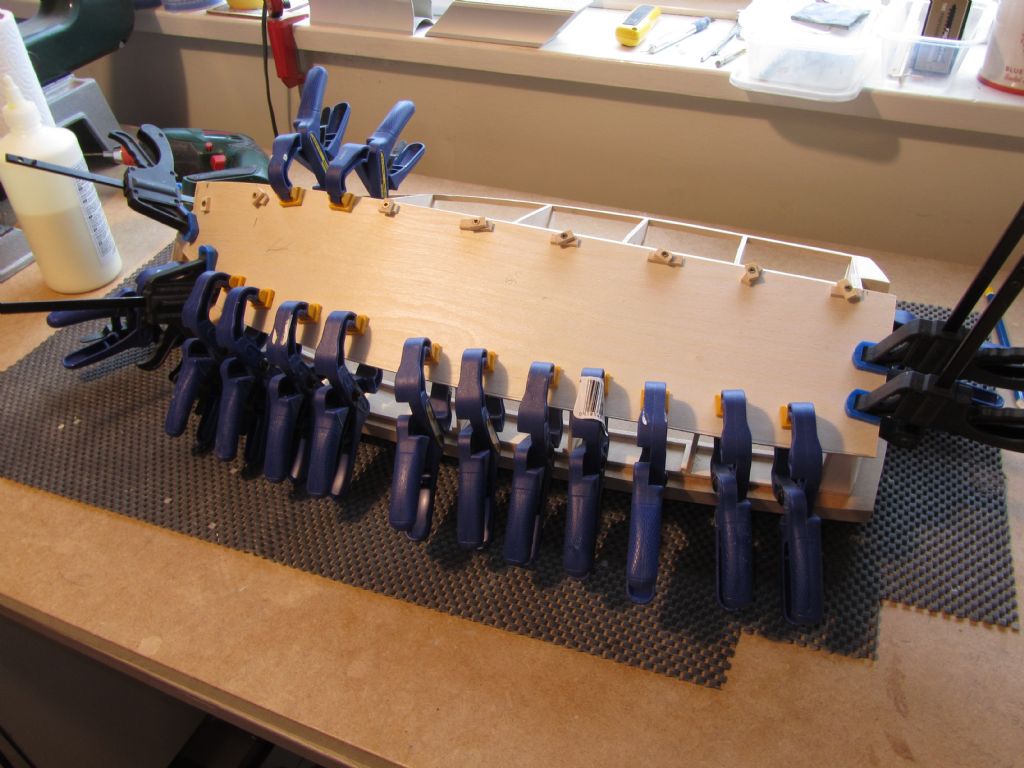
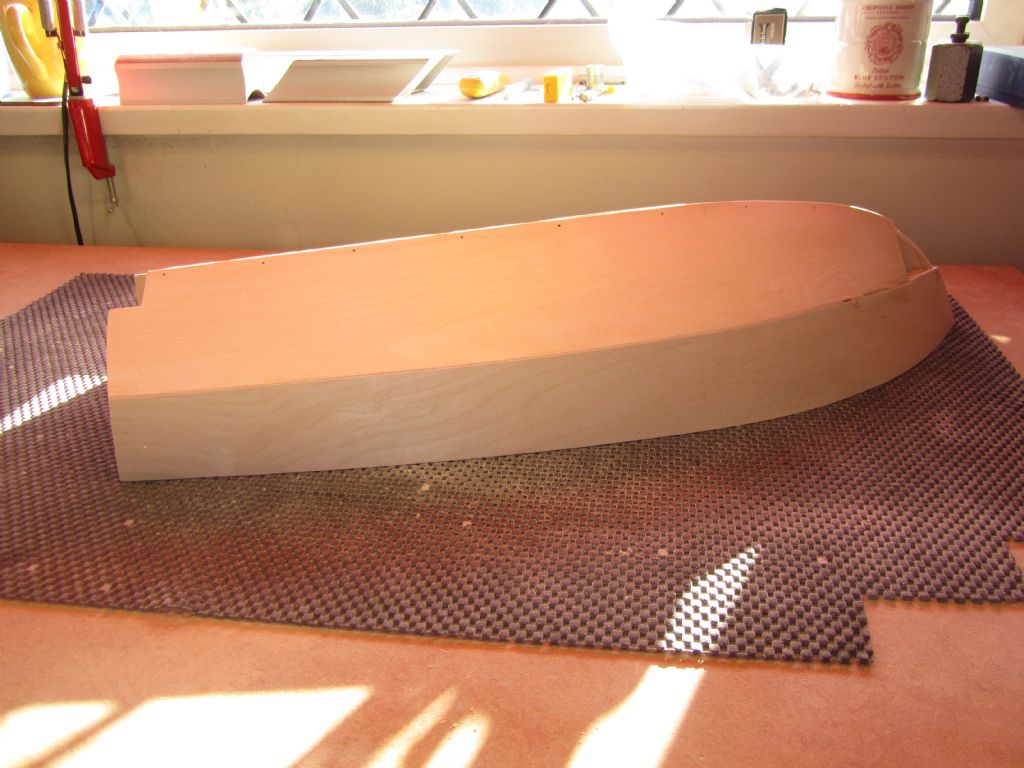
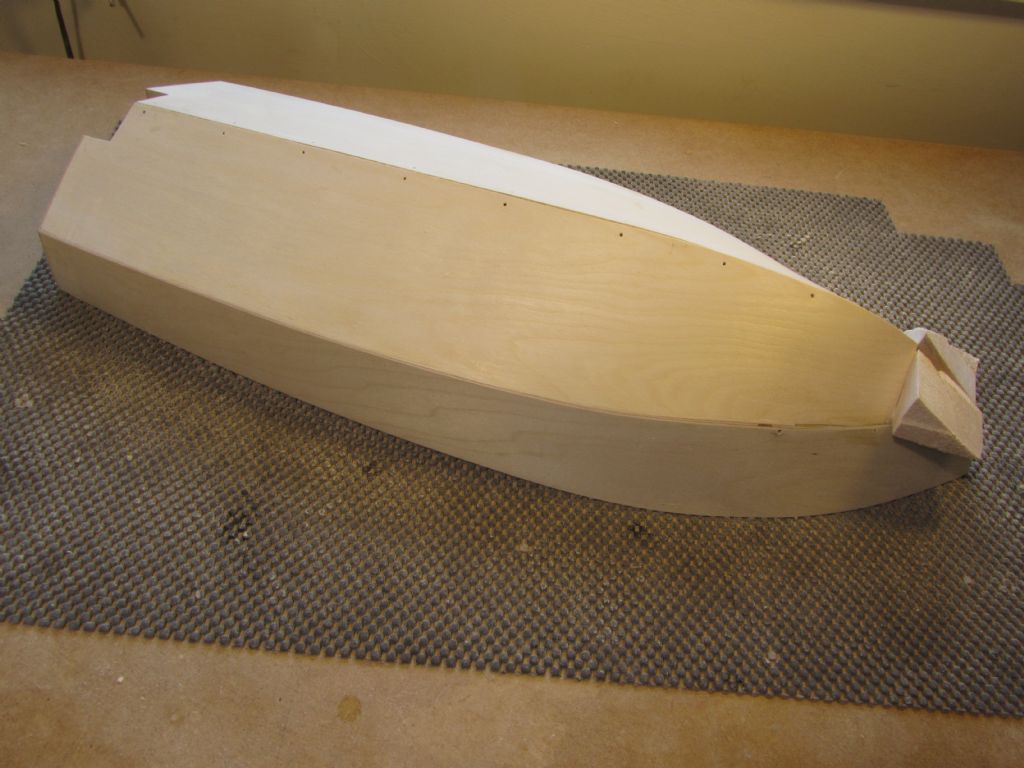
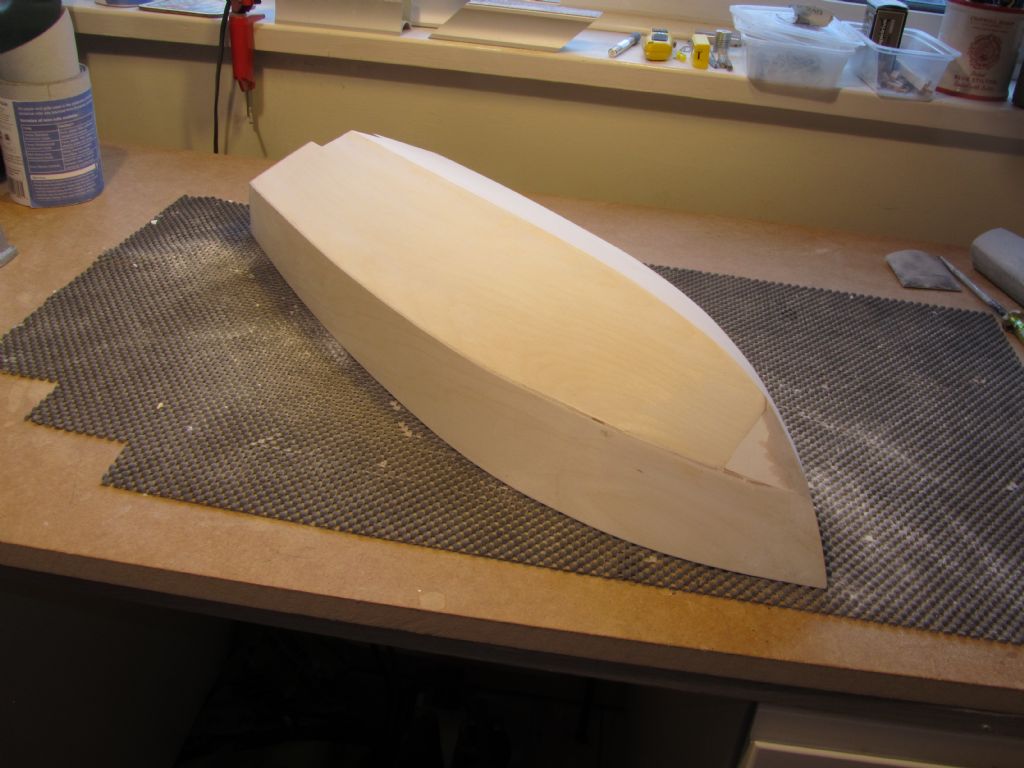
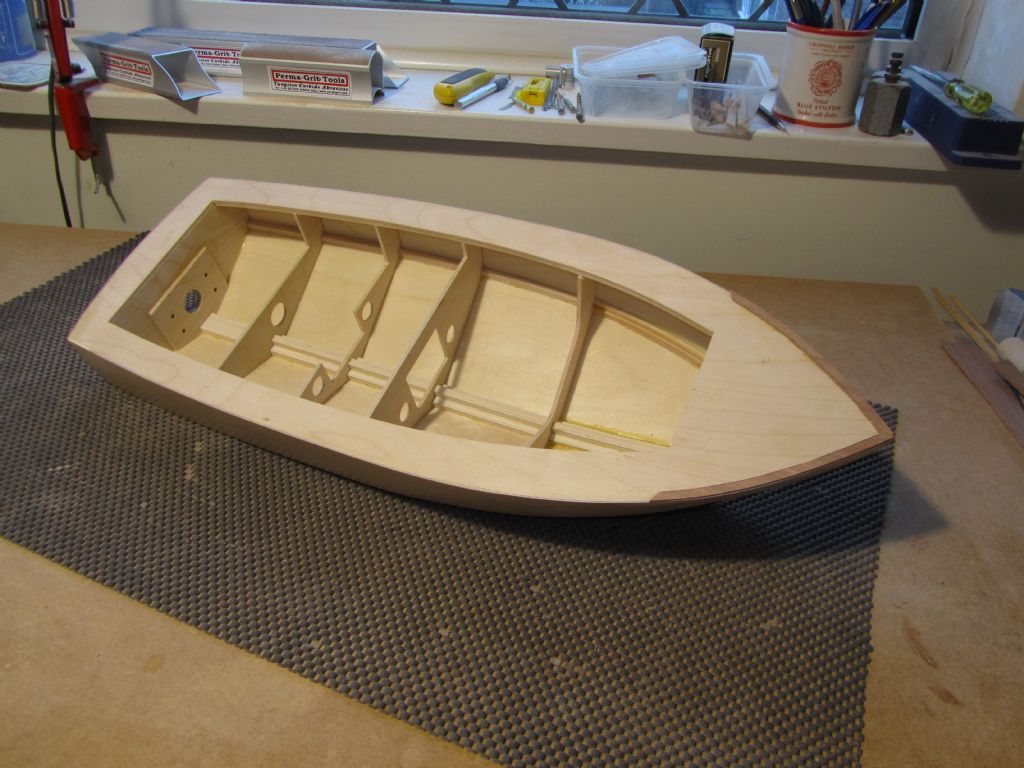
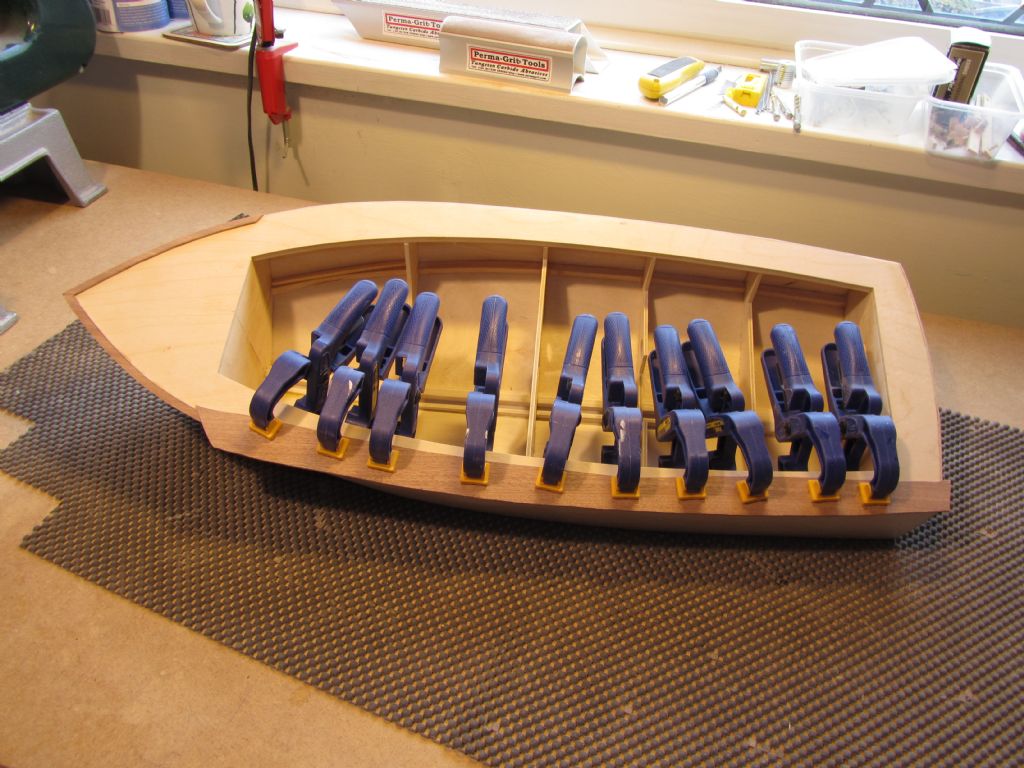
                      Bottom and side skins now fitted and sanded at edges to deck and adjacent skins. I always get a lot of satisfaction at this point as the hull, well looks like a hull and hopefully the joints are tight and follow a nice line at the chine. The Huntress has a pretty looking little hull and one thing I like about it is that it only requires two small blocks of balsa (one each side) at the bow bottom. One thing I don't particularly like doing is sanding large chunks of balsa like I did on the Swordsman for instance.

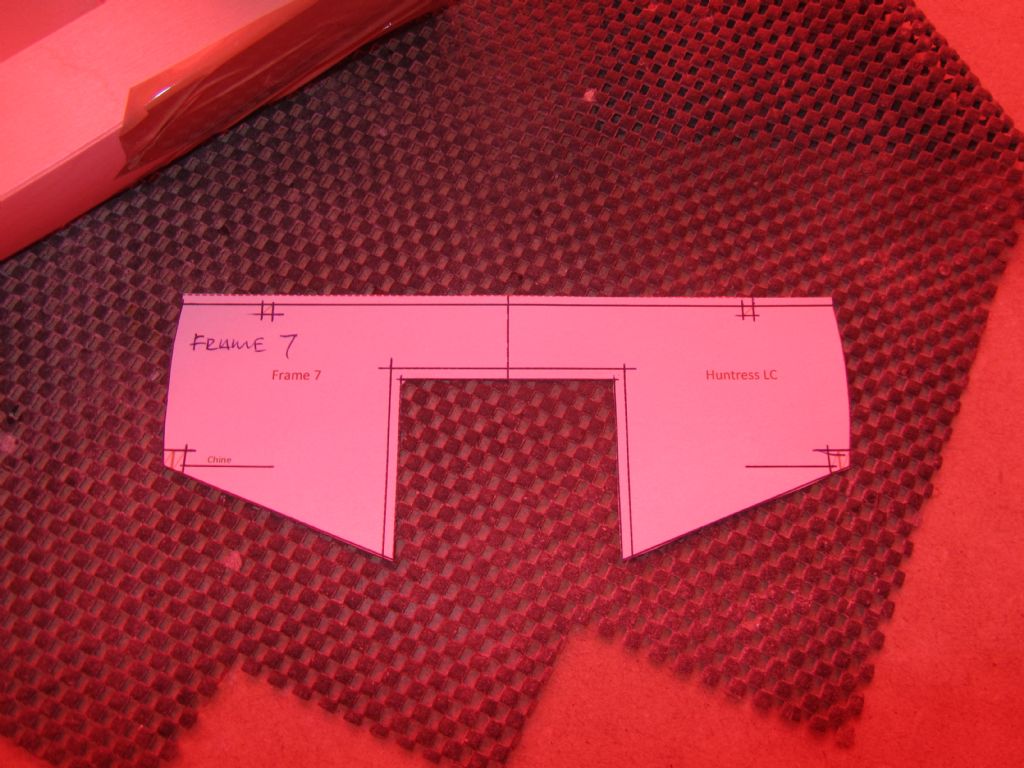
                      Now ready for the transom to be skinned and as a template I used that for the last bulkhead and added about 5mm all round. I have only used aliphatic resin glue so far and again this was used for the transom. The ply skin was held tight to the transom with parcel tape at the abutment with the bottom skins and clamps along the deck – I think I used enough clamps!

                      Chris

                      Hull skinned except transom

                      Transom ready for skin

                      Used as transom template

                      Transom glued and clamped

                      #91274
                      Chris Fellows
                      Participant
                        @chrisfellows72943

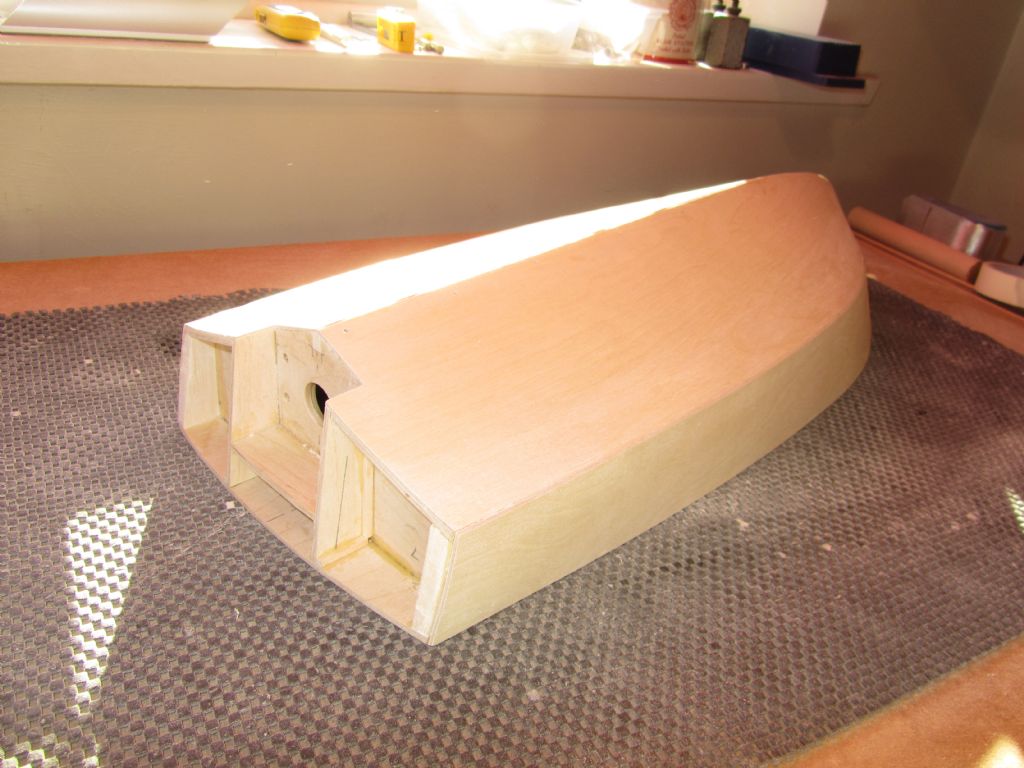
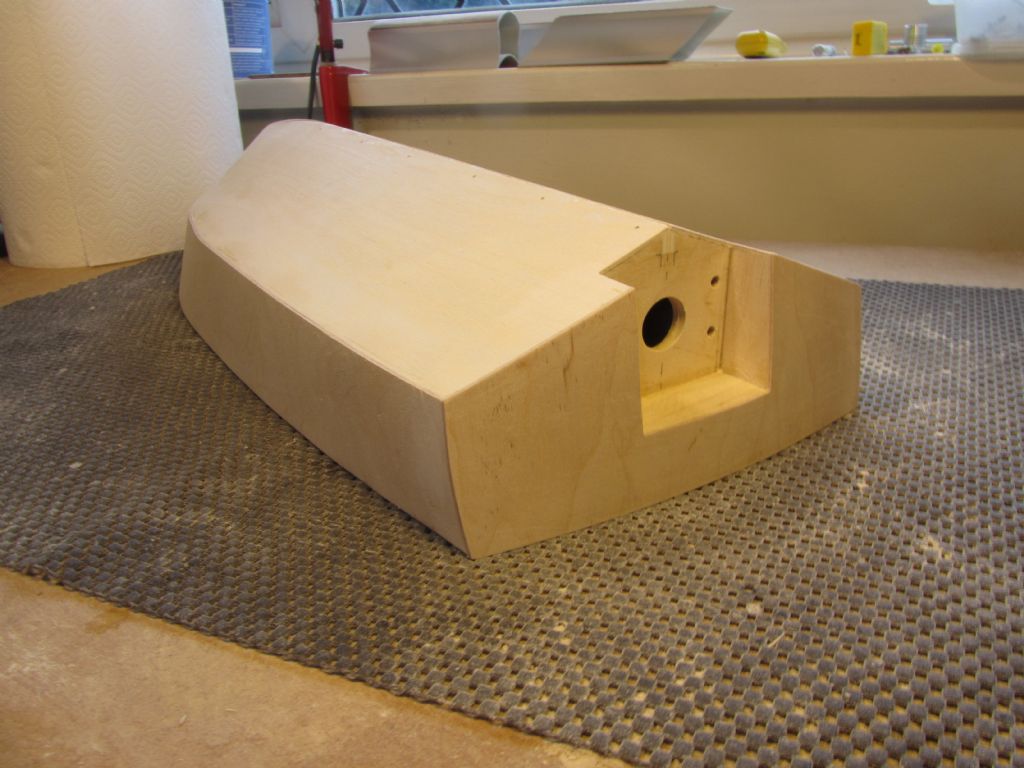
                        Transom skin left to dry overnight as I do with all the skins and anything else that is going to be attacked with a saw and PermaGrit blocks and files etc! Removed the parcel tape and clamps and was pleased to see they had done their job well and the joint to the whole of the perimeter of the transom was nice and close.

                        Removed some of the overlap with my razor saw and then sanded flush with the deck, sides and bottom with the sanding block. The recess for the stern-drive was sanded flush using a PermaGrit file.

                        Balsa blocks were then roughly cut to shape and glued in place.

                        Chris

                        Transom skinned

                        Balsa blocks2

                        #91721
                        Chris Fellows
                        Participant
                          @chrisfellows72943

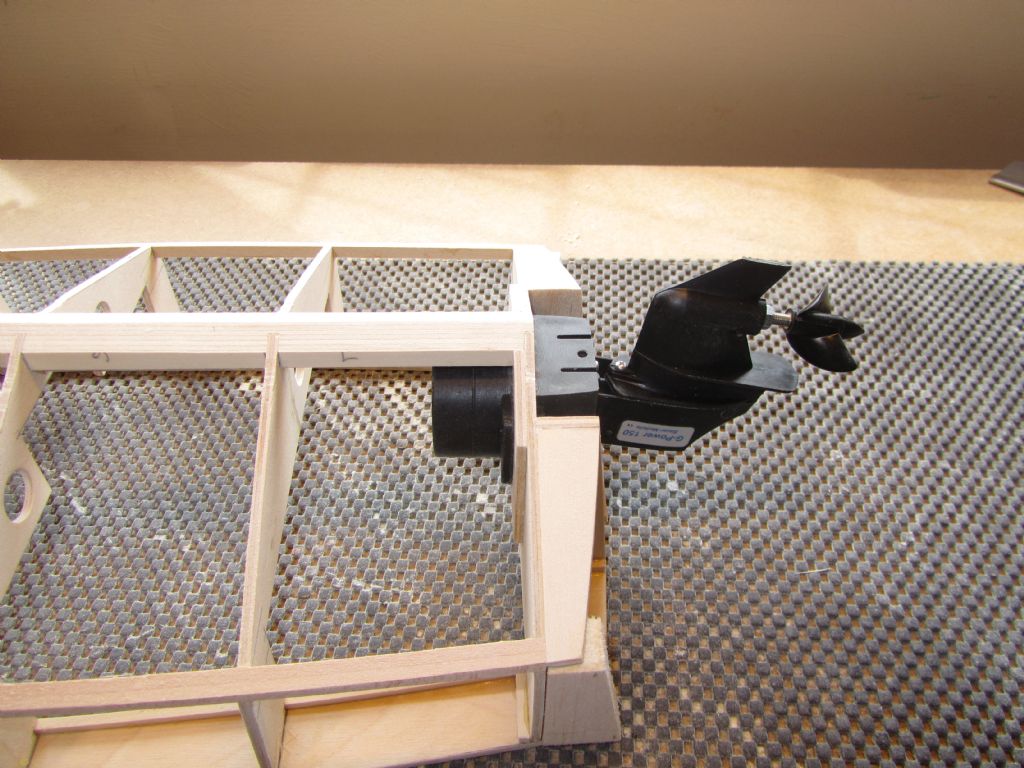
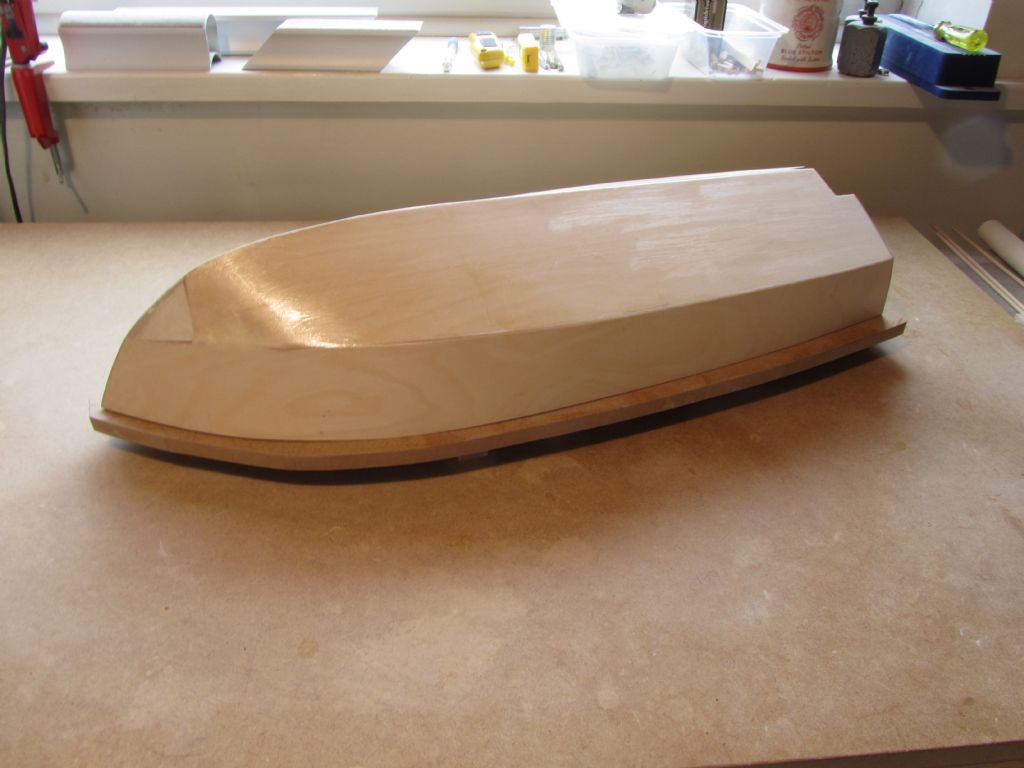
                          Haven't done anything to it for a couple of weeks but since the last post I've sanded the bow blocks, bit of filling and covered the hull in lightweight cloth and Eze-Kote.

                          Fixed the stern-drive in place again to see how it looked.

                          Chris

                          Bow filled and sanded

                          Resin & cloth completed

                          Stern drive 9

                          Stern drive 10

                          #91917
                          Chris Fellows
                          Participant
                            @chrisfellows72943

                            Well, I couldn't leave the baby of the fleet out could I!

                            So I've started fitting the mahogany edging to the Huntress as well in readiness for planking. A veritable Fairey production line!

                            Chris

                            Edge detail 1

                            #91938
                            Chris Fellows
                            Participant
                              @chrisfellows72943

                              Today I finished off the edging by fitting the side pieces and that to the transom.

                              Chris

                              Edge detail 2

                              Edge detail 3

                              #92063
                              Chris Fellows
                              Participant
                                @chrisfellows72943

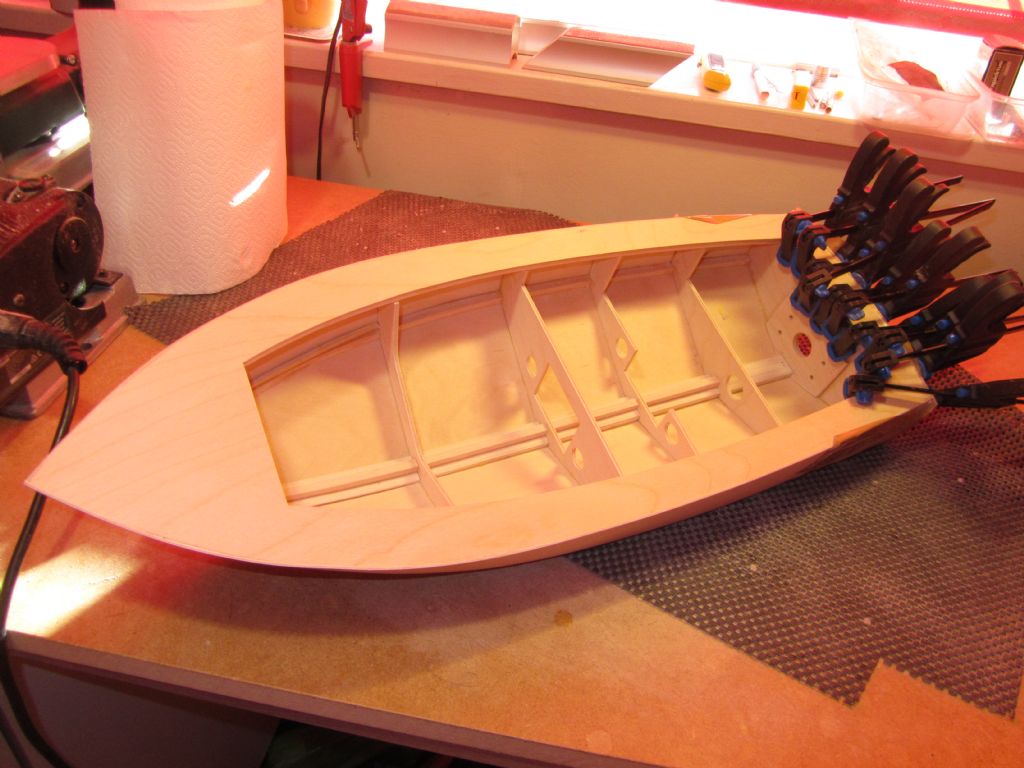
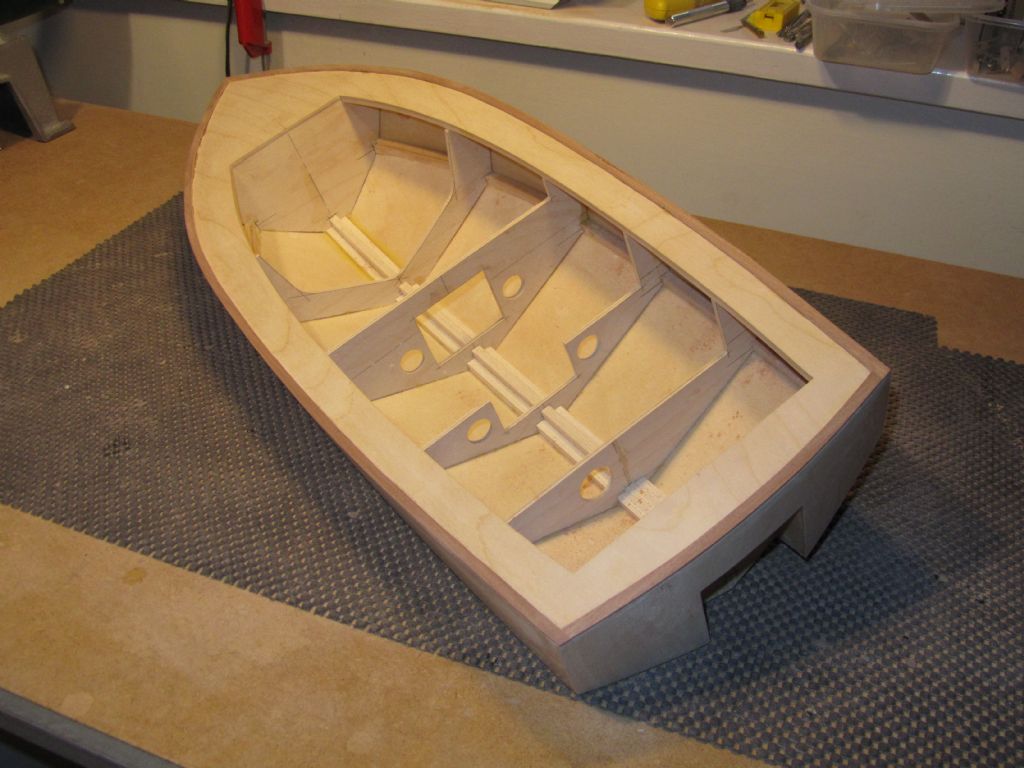
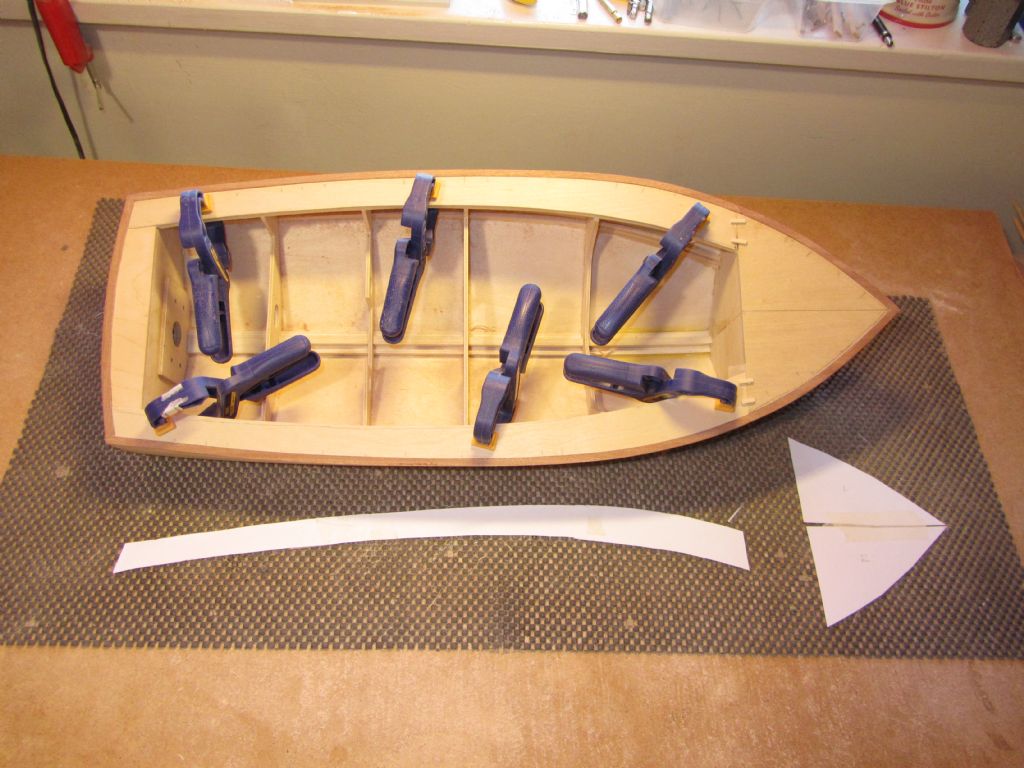
                                Whilst it will be easier to plank the deck in the more traditional way than for the other two models, i.e. gluing the planks straight onto the deck, due to it being a smaller hull and a pointed prow, I decided I'd do it in the same way as the other two and so again a sub-base was required.

                                I must admit that by the time I was finishing that for the Huntsman it was becoming a little tedious and time consuming in having to sand bit by bit to the correct shape but I was determined to do all three before I started planking. Serves me right for having three hull builds on the go at once! I'm sure that my small PermaGrit block is now showing signs of wear after all the birch ply that it's sanded since I started building models!

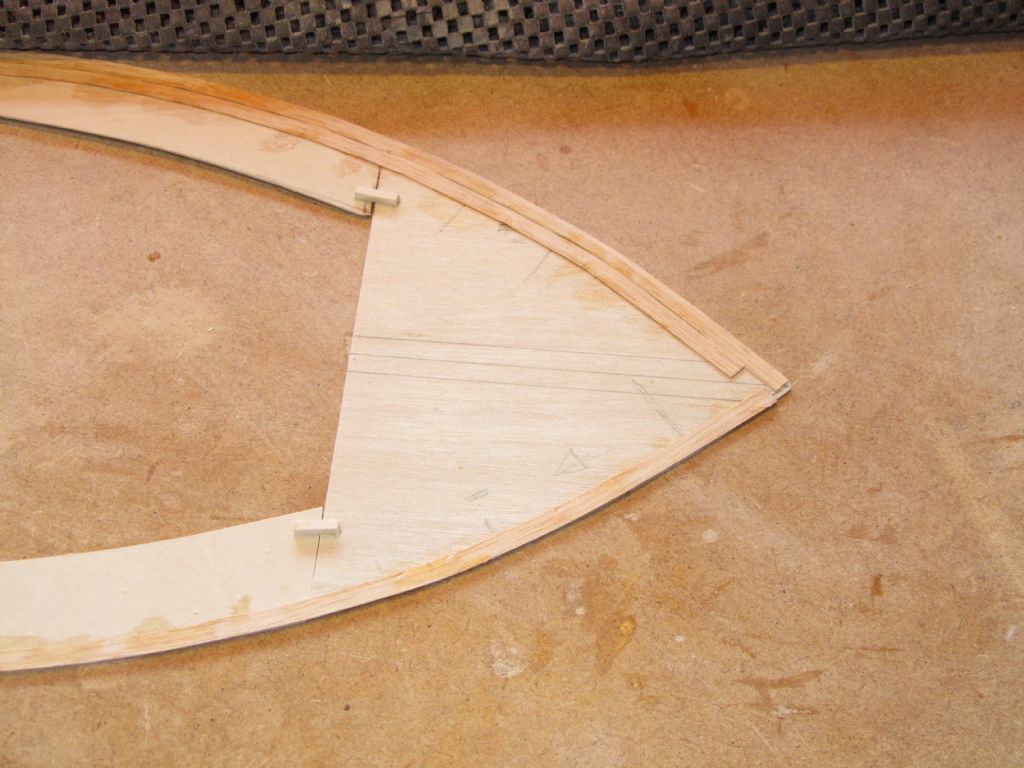
                                As I only had off-cuts of 0.8mm ply left now I had to make the sub-base out of three pieces. Paper templates were made for the bow and side pieces, drawn around on the ply and then cut out. They were then sanded to fit within the mahogany edging and flush with where the internal coaming will sit. Finally I glued the joins between the pieces with Slo Zap and added some temporary reinforcing pieces of 3 x 3mm bass with a/resin which will be removed once planking commences.

                                Chris

                                Sub base

                                #92064
                                Paul T
                                Participant
                                  @pault84577

                                  A stern drive is the best power train for these boats, the engines are flat and level and driving a prop that is at the best angle.

                                  #92069
                                  Chris Fellows
                                  Participant
                                    @chrisfellows72943

                                    They do have advantages Paul but as with outboards they do have one disadvantage at very slow speeds of a lack of steering.

                                    We used to have a cabin cruiser many years ago with an outboard and when going into locks and moorings etc. at very slow speed it was difficult to control. Couldn't use a blip of the throttle as that would increase speed when you didn't want it!

                                    Our answer was to bolt a plate onto the outboard which worked really well as long as you had some forward motion faster than the current.

                                    Chris

                                    #92166
                                    Chris Fellows
                                    Participant
                                      @chrisfellows72943

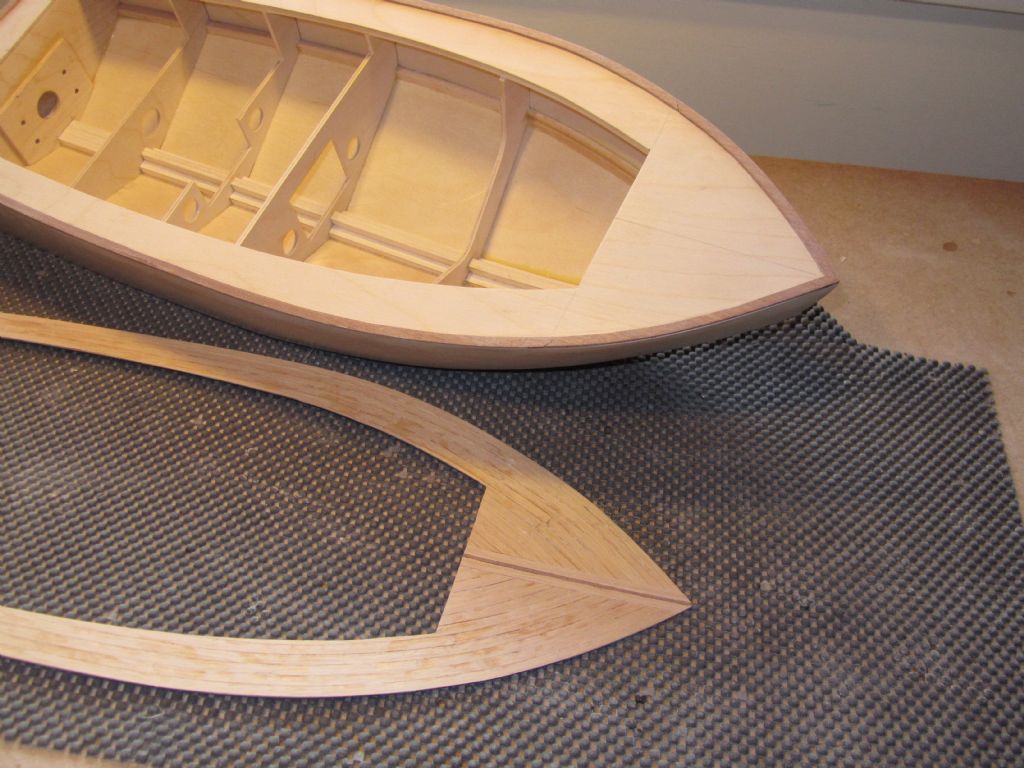
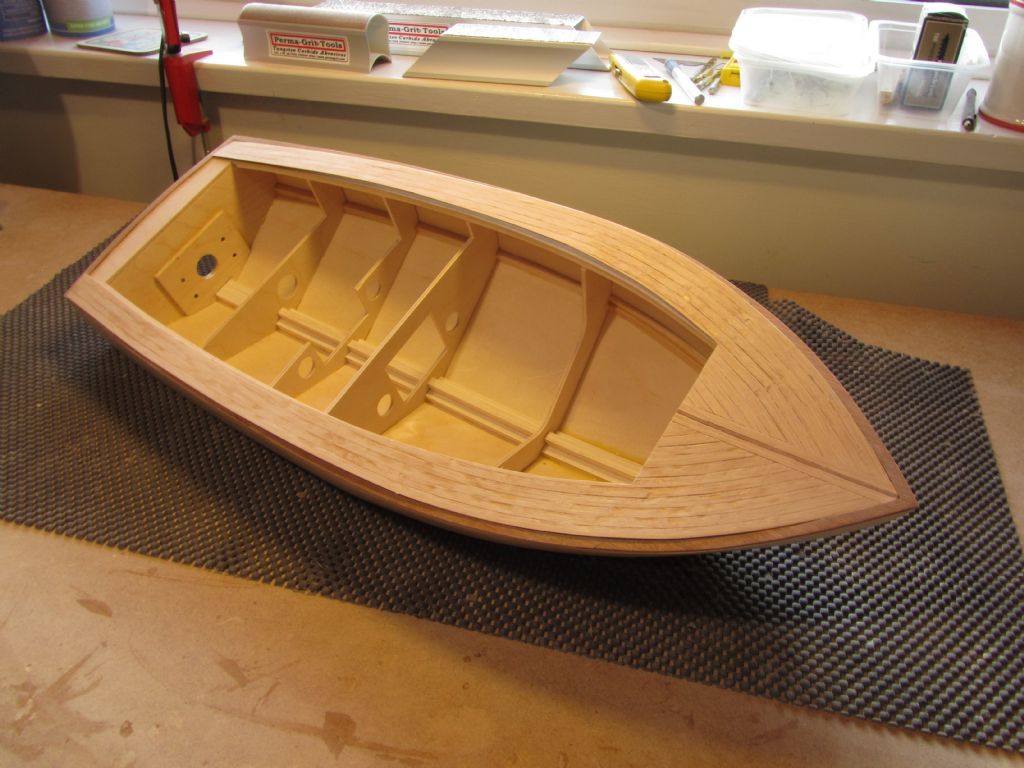
                                      After my experience with the other two hulls I had my doubts as to whether I could dry bend the planks all the way to the prow. I nearly straightened out the curve to the bow area but decided to go for it.

                                      Had 3 or 4 breakages which meant removing the offending plank, difficult with CA, but I got there in the end. One side is better than the other. Looked at it this morning when the glue had fully dried and there were undulations to the bow area and I thought about scrapping it and planking it in the traditional way, but that would require me to get some thicker planks and delay.

                                      After a quick sanding with 240 grit it looked better (as per the photo) and with more sanding it will just about look Ok. Got to be careful though with 0.5mm thick planks.

                                      You'd think letting in the the two fore and aft planks to the bow would be the easy part wouldn't you? But no I managed to cut out about 1.5mm too wide, what the!! Thoughts were to cut down another length of plank to fill the gap, but then thought I've got some 2mm square mahogany, so the gap was opened up a tad and the mahogany glued in. I quite like it (happy cock up!) and as none of these particular Huntresses were ever built, no problem!

                                      I've been putting off building the stands but that needs to be done now to make fitting the rubbing strips etc. easier.

                                      Chris

                                      planking1

                                      planking2

                                      planking3

                                      #92167
                                      Ray Wood 3
                                      Participant
                                        @raywood3

                                        Hi Chris,

                                        Well you have certainly mastered the technique of curved planking it looks jolly good

                                        I've just nipped out and had probably my last flight of my RC electric aeroplane for 2020 this afternoon in near perfect conditions, all good !

                                        Regards Ray

                                        #92169
                                        Chris Fellows
                                        Participant
                                          @chrisfellows72943

                                          Thanks Ray, we're never completely happy with our building though are we!

                                          Chris

                                          #92271
                                          Chris Fellows
                                          Participant
                                            @chrisfellows72943

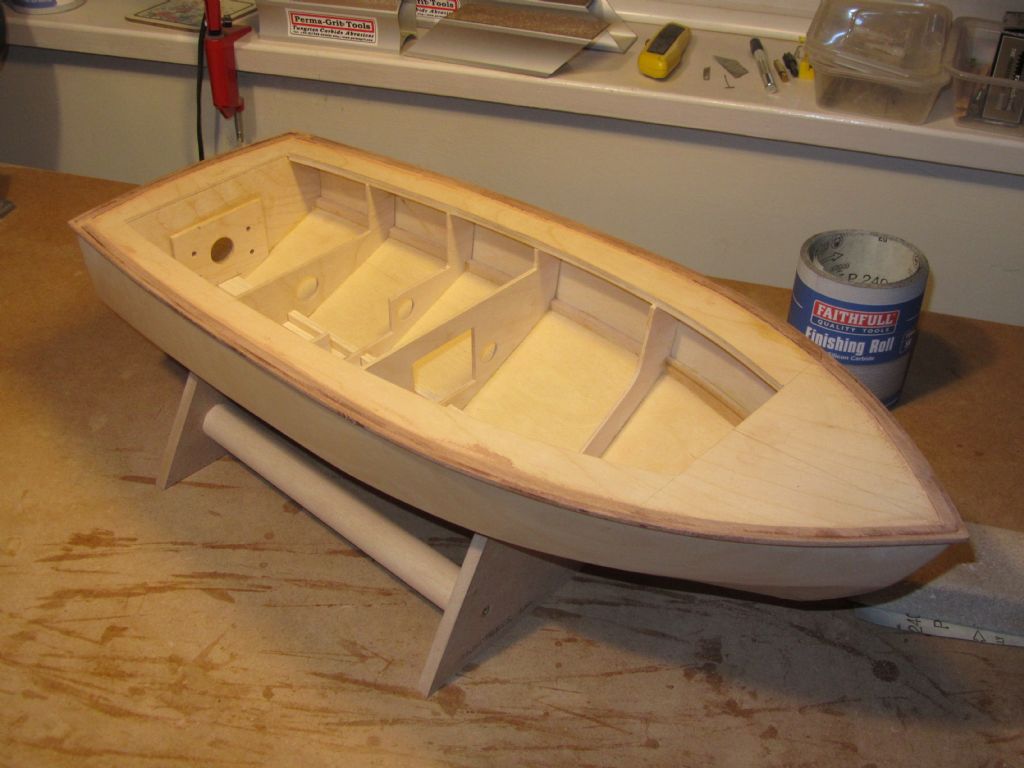
                                            Gave the planking another sand and it didn't look too bad and thought I could hide the defects on the port side with some deck furniture. But I then filled a couple of depressions and after sanding noticed I'd gone through to the ply on the edge. sad

                                            Gave it a coat of varnish and the overall effect looks good but I don't think I can live with where I've sanded through in addition to the other defects. I'll set it to one side for the time being but I think I'm going to have to give it another go.

                                            Trouble is I don't have enough 0.8mm ply now and don't want to use anymore of the planks as I need them for the Swordsman rear cabin roof.

                                            At least I've got the other builds to carry on with.

                                            Chris

                                            planking4

                                            #92373
                                            Chris Fellows
                                            Participant
                                              @chrisfellows72943

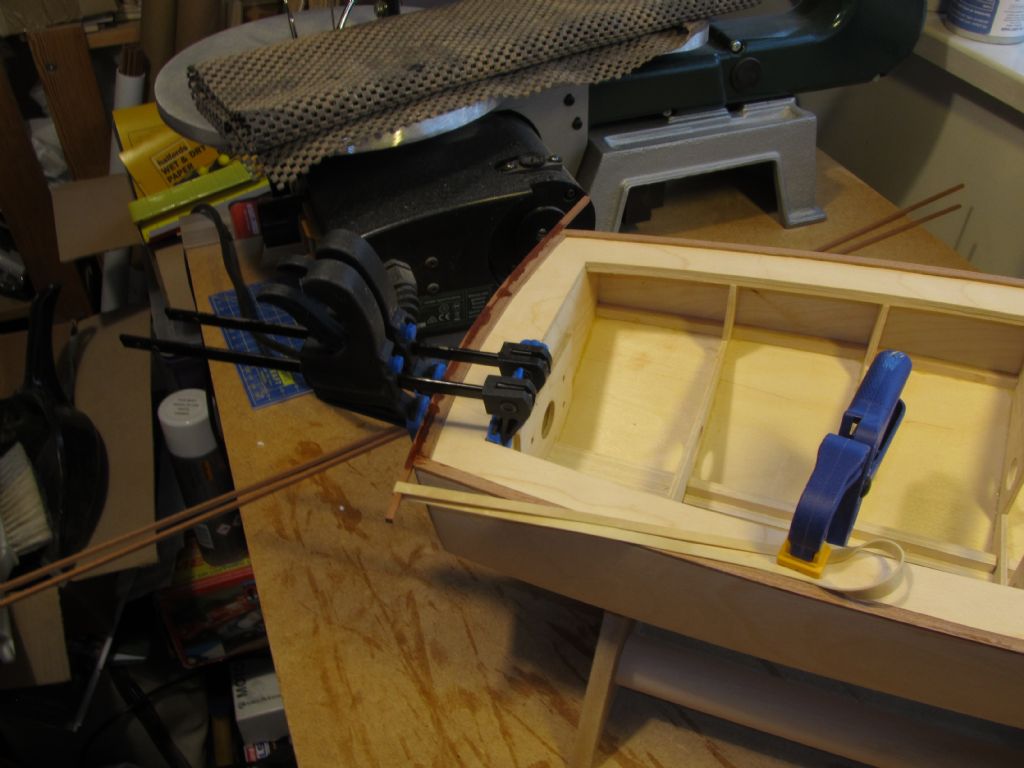
                                              I've left the easiest hull to fit the rubbing strips to until last. Flat deck, smaller section mahogany and no rounded bow. Preliminary sanding carried out.

                                              Chris

                                              rubbing strips 1

                                              rubbing strips 2

                                              #93877
                                              Chris Fellows
                                              Participant
                                                @chrisfellows72943

                                                As per the Swordsman thread I've taken time out to build a Robin's nest box and an unplanned job of having to buy and install a new tumble drier.

                                                Have now returned to the Huntress and the first job was having a look at how I'm going to move the stern-drive for steering. Space is tight and hindered by the position of the motor and so I think I'm going to have to use snakes, so I've bought a cable one and a nylon one to see which would be best suited – the cable is looking favourite at the moment. I've also bought a couple each of single, double and triple rudder arms to give me options in linking to the servo.

                                                Space is also tight where I need to connect onto the stern-drive and first thought is to solder a connector onto the cable and so have taken the opportunity to buy a small butane torch and silver solder etc. to do the job – I need one anyway for when I solder the pulpit rails up on my builds. Once all the bits and pieces have arrived I can decide how to tackle it, which may or may not involve the snakes!

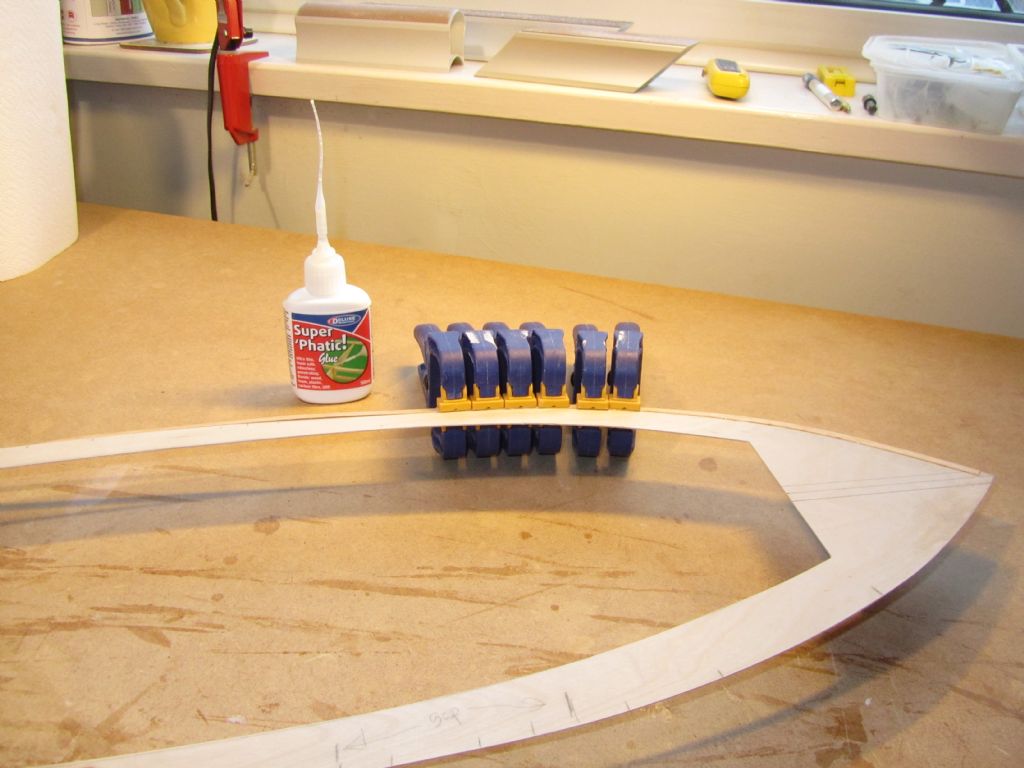
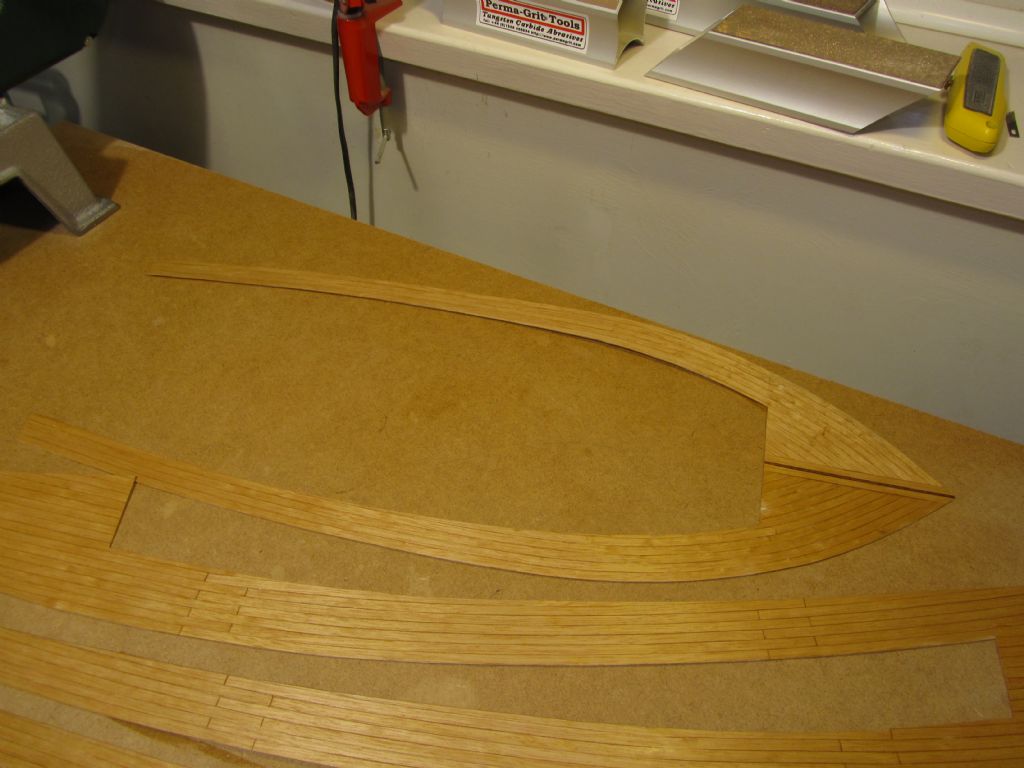
                                                In the meantime, I've decided that I am going to have another go at planking the deck, especially having bought some more thin ply and planks. This time though, rather than using thin CA (as like others it affects me, causing my nose to run for a couple of days) I've taken up Colin's suggestion of using Super Phatic. This doesn't have the instant grab of CA and takes 10 to 20 minutes to dry and as well as taking longer I'm having to approach the job in a different way. Upside is that the glue dampens the planks so helping with bending and getting them to lay down and they can be clamped in place and best of all I'm not gluing my fingers to the planks! Only on the first plank at the moment but I'm much happier with the result, though it will take me somewhat longer.

                                                Chris
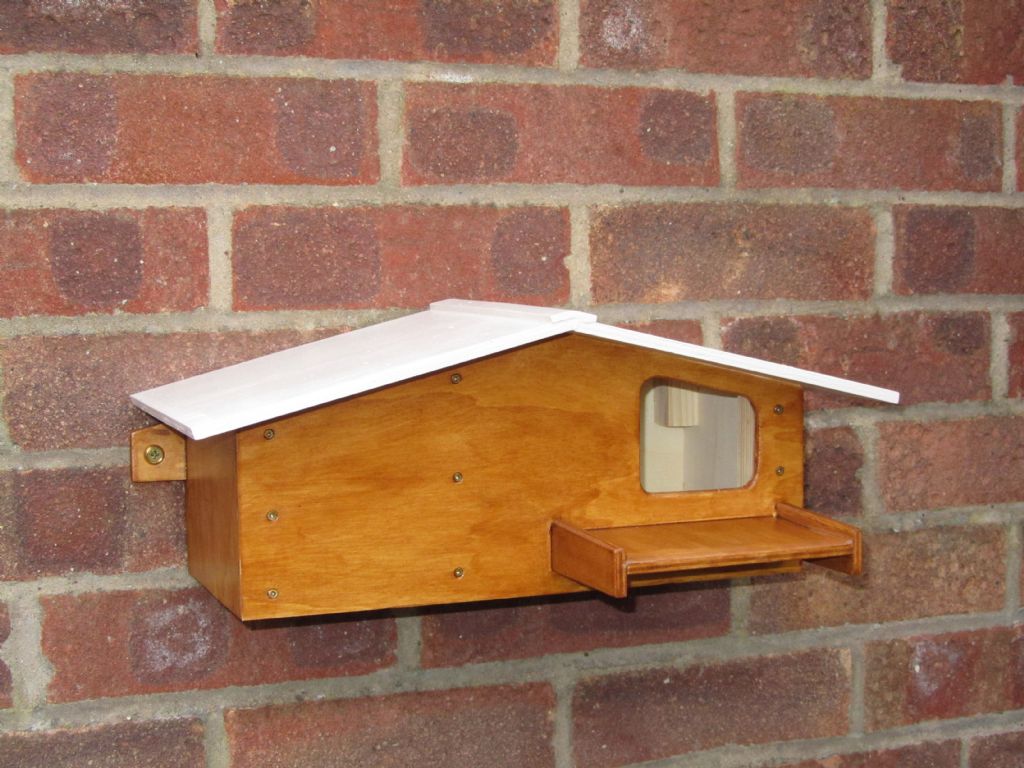
                                                Robins Nest Box

                                                planking4


                                                Edited By Chris Fellows on 20/02/2021 16:48:15

                                                #93880
                                                Colin Bishop
                                                Moderator
                                                  @colinbishop34627

                                                  Yes, I think the Superpahatic is a better bet is it is more forgiving than cyano. It takes longer to dry but certainly sticks well enough. I have been using it on the Greek fishing boat kit I'm currently building.The hull of that uses 0.5mm thick plankingfor the second layer and also on the deck and has gone on OK.

                                                  Colin

                                                  #93888
                                                  Chris Fellows
                                                  Participant
                                                    @chrisfellows72943

                                                    Yep, thanks for the heads up on it, wished I'd used it for planking the three decks now, the more I use it the more I like it.

                                                    There's going to be times when I'm going to have to use cyano though and will just have to bite the bullet! I've tried wearing my filtered mask and goggles but it still gets me!

                                                    Chris

                                                    #93891
                                                    Will Mason 1
                                                    Participant
                                                      @willmason1

                                                      You certainly are a glutton for punishment Chris, but with you being a bit of a perfectionist, I can understand why you want to redo the deck.

                                                      I will attempt deck planking 'one day', but for now, I'm happy with simulated planking as that's within my current skills.

                                                      Keep up the good work.

                                                      Will

                                                      P/s, posh robin house, lucky robin.

                                                    Viewing 25 posts - 26 through 50 (of 217 total)
                                                    • Please log in to reply to this topic. Registering is free and easy using the links on the menu at the top of this page.

                                                    Code of conduct | Forum Help/FAQs

                                                    Advert

                                                    Latest Replies

                                                    Home Forums Build Blogs Topics

                                                    Viewing 25 topics - 1 through 25 (of 25 total)
                                                    Viewing 25 topics - 1 through 25 (of 25 total)

                                                    View full reply list.

                                                    Advert