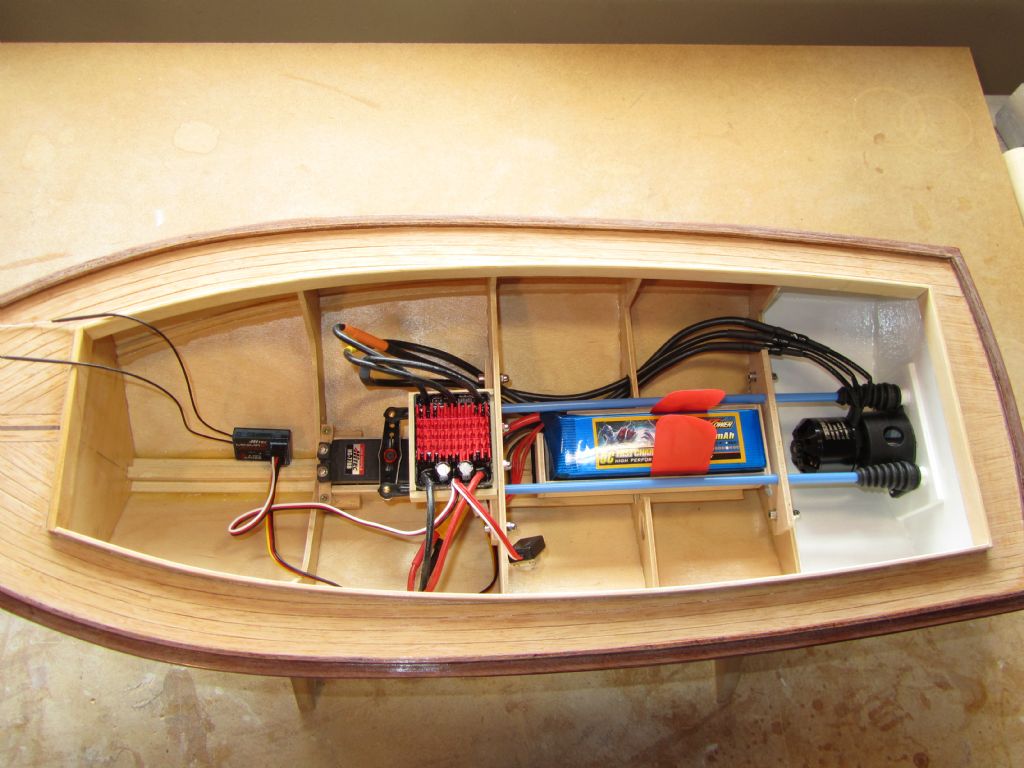
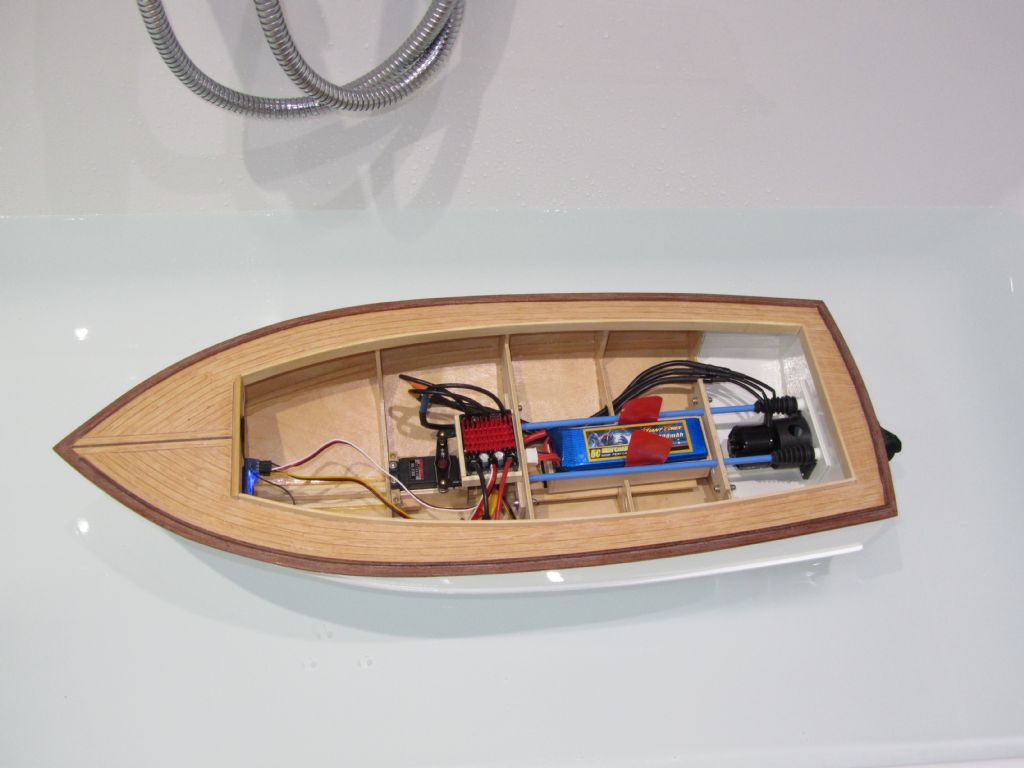
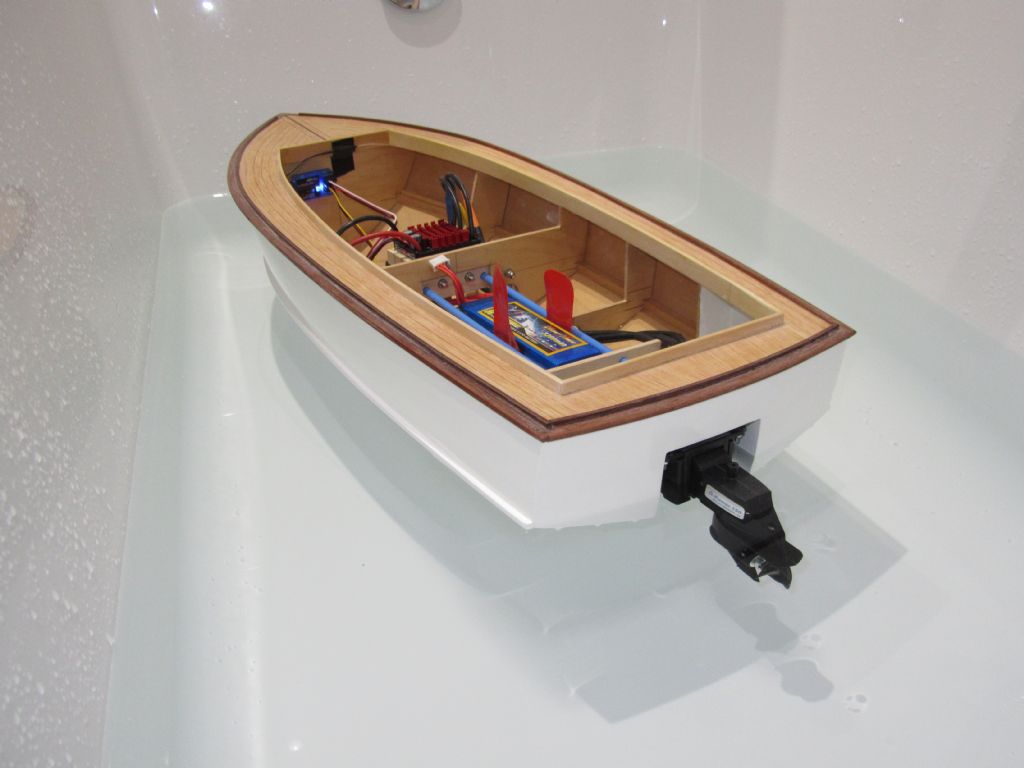
Fairey Huntress 23 Long Cabin Version

Advert

Fairey Huntress 23 Long Cabin Version

Home Forums Build Blogs Fairey Huntress 23 Long Cabin Version

  • This topic has 216 replies, 3 voices, and was last updated 5 months ago by Chris Fellows.
Viewing 25 posts - 176 through 200 (of 217 total)
  • Author
    Posts
  • #104313
    Chris Fellows
    Participant
      @chrisfellows72943

      Thanks Ashley.

      I'm committed to putting the effort into the Faireys now but I've got some future builds planned that will be about getting them on the water quicker!

      I'm almost embarrassed to still be posting about my Fairey builds!

      Chris

      Edited By Chris Fellows on 21/03/2023 11:38:34

      Advert
      #104315
      Ray Wood 3
      Participant
        @raywood3

        Hi Chris,

        I'm speechless for a change !!

        Ashley, we are perfectionists But ……………………

        Regards Ray

        #104340
        Chris Fellows
        Participant
          @chrisfellows72943

          I am a perfectionist but sadly my results sometimes fall short and I have to be realistic.

          Two coats of Toplac Plus have been applied to the rear compartment so the hull is ready for installation of the hardware. Before doing that though I shall varnish the deck.

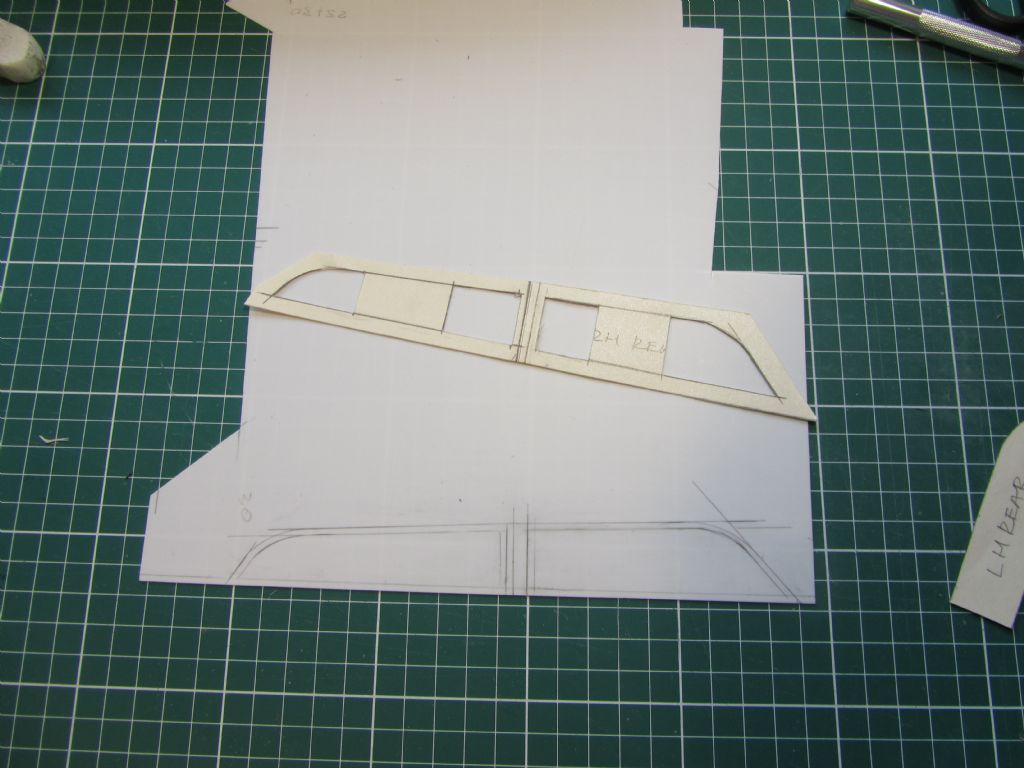
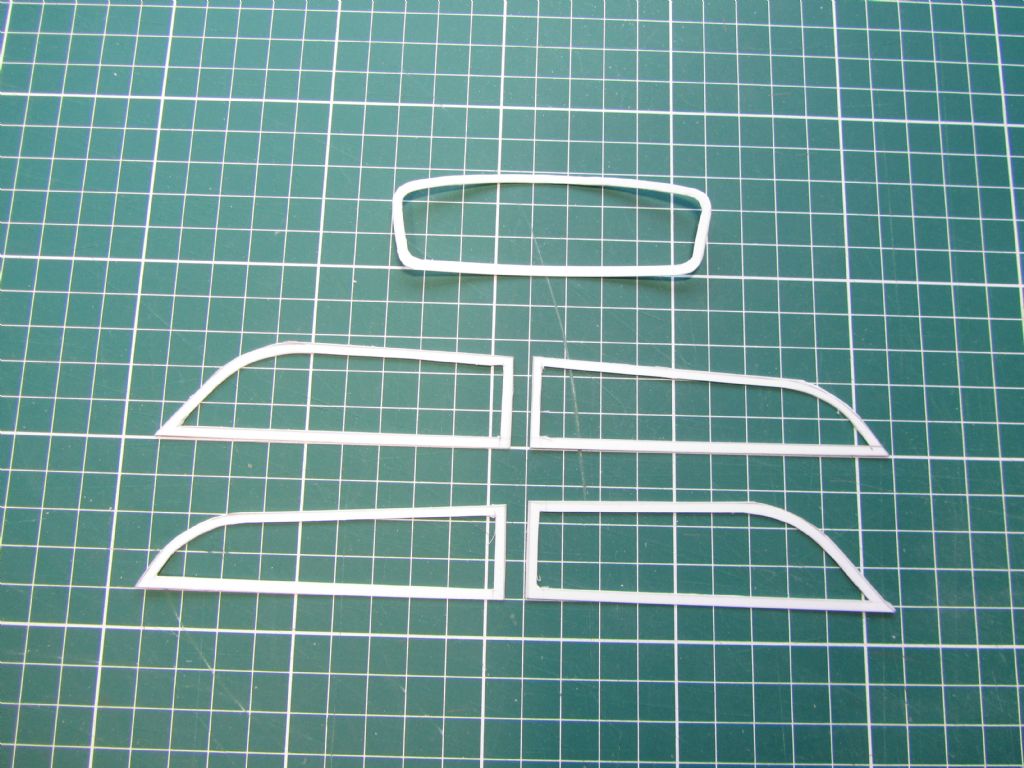
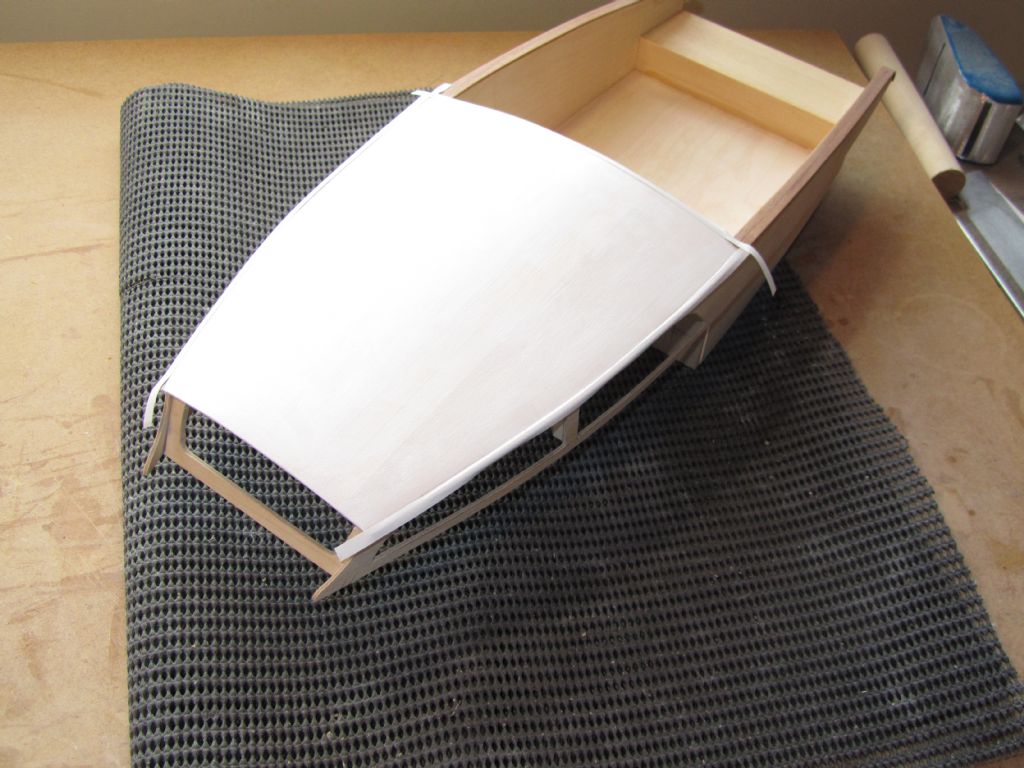
          I pretty much ended up remaking all the windows! As well as the side windows not being quite the same height, when offered up the top of one of them wasn't parallel to the roof. So to remedy this I made a card template first. This will be my method on the other builds. Took two attempts to produce the front window, my first attempt using a wood drill to produce the radiused corners was only partially successful so I reverted to the use of needle files. Need to order some 0.5mm acetate for the glazing now.

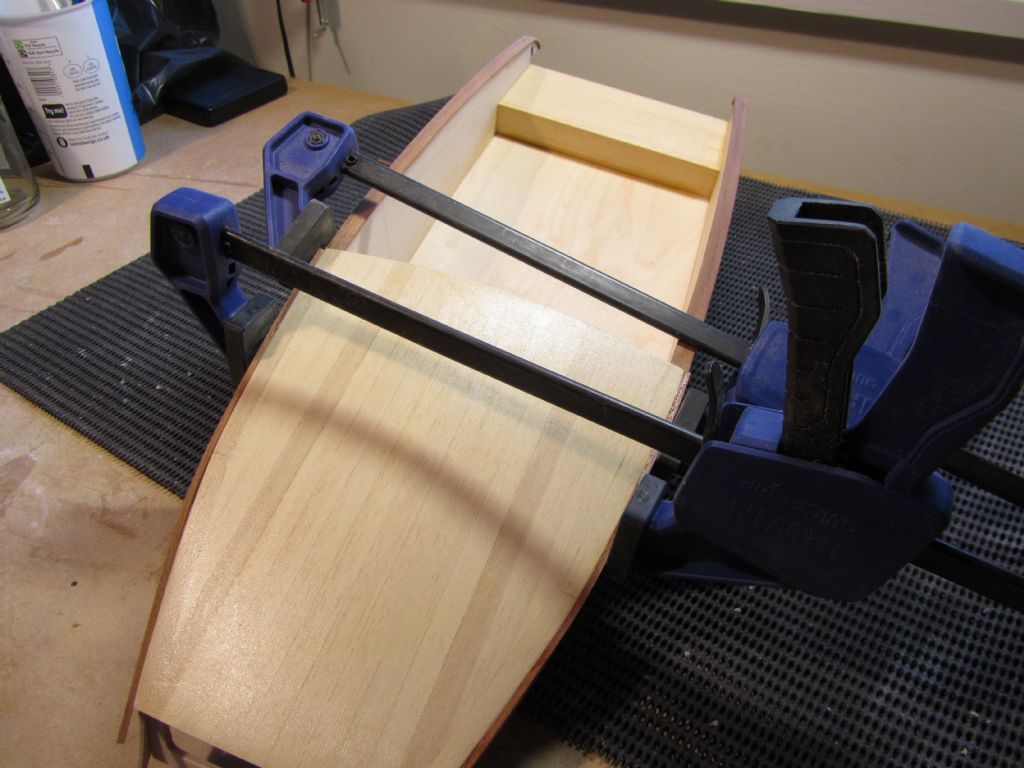
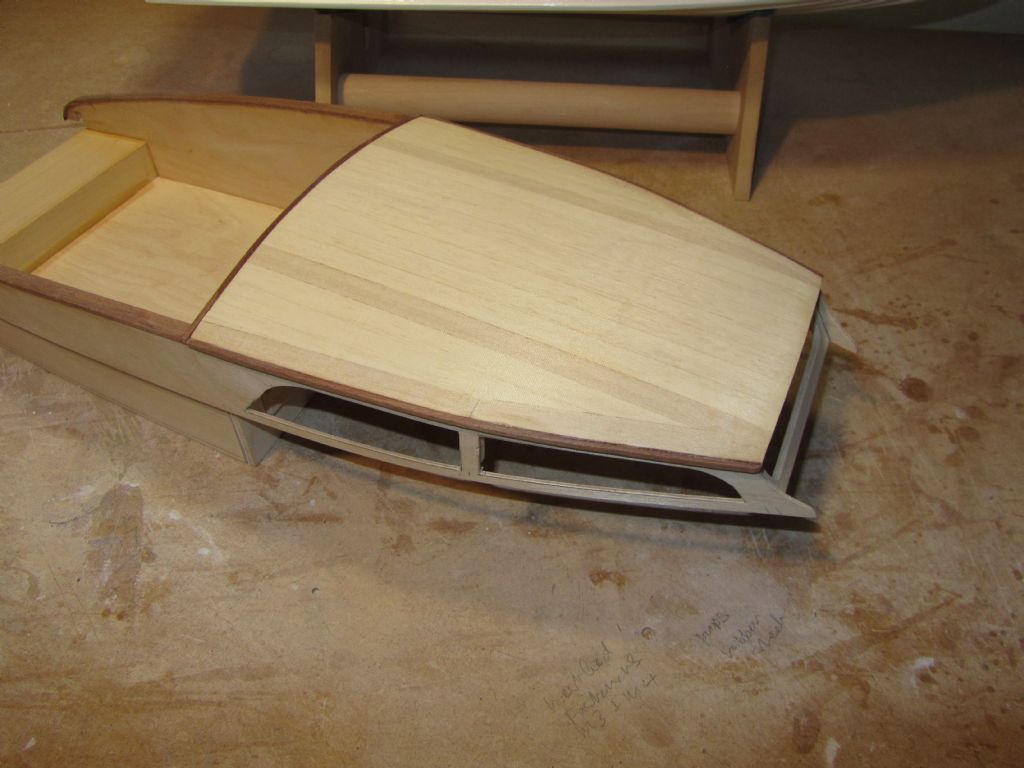
          Then back onto the superstructure so that I can get that ready for painting. I've used cyano in the past for gluing mahogany strip but this time I used Super Phatic. Its a great glue but doesn't have the grab of cyano and so I had to bring out the big clamps to hold the roof side strips in place. It will be difficult/impossible to clamp the piece that runs along the rear of the roof so I may have to run the gauntlet of cyano and break out the tissues!

          Chris

          windows 6.jpg

          windows 7.jpg

          superstructure 37.jpg

          Edited By Chris Fellows on 24/03/2023 19:18:45

          #104410
          Chris Fellows
          Participant
            @chrisfellows72943

            Was able to clamp front to back of the roof so no problem fitting the mahogany strip to the rear of the roof after steaming it to a curve.

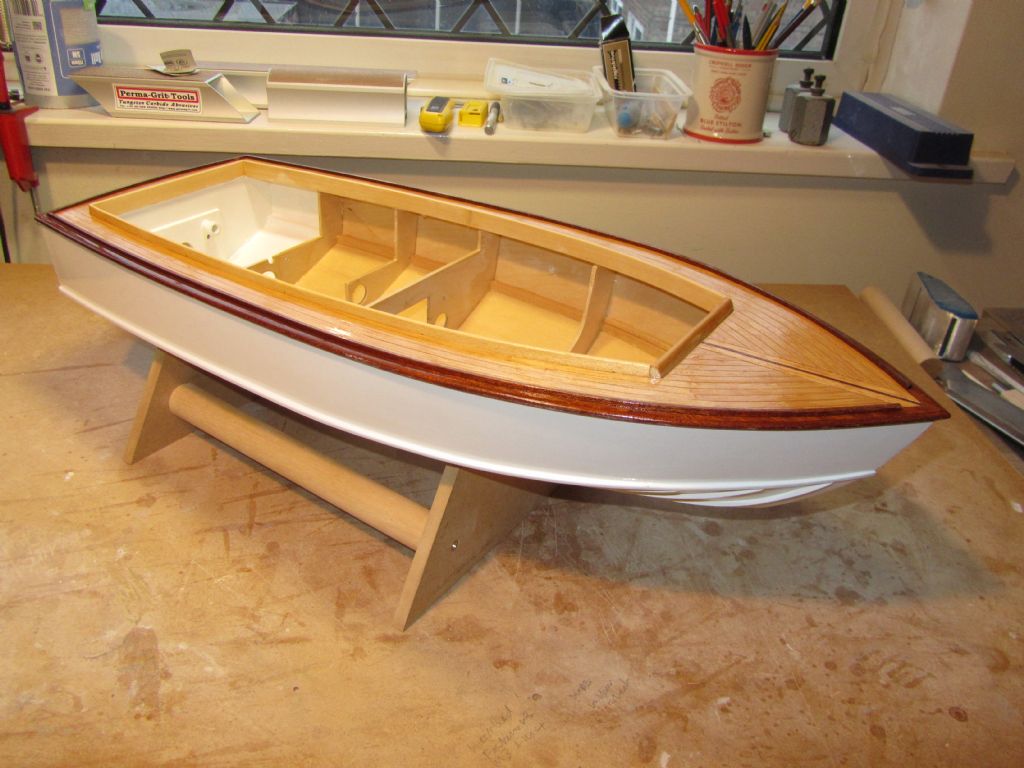
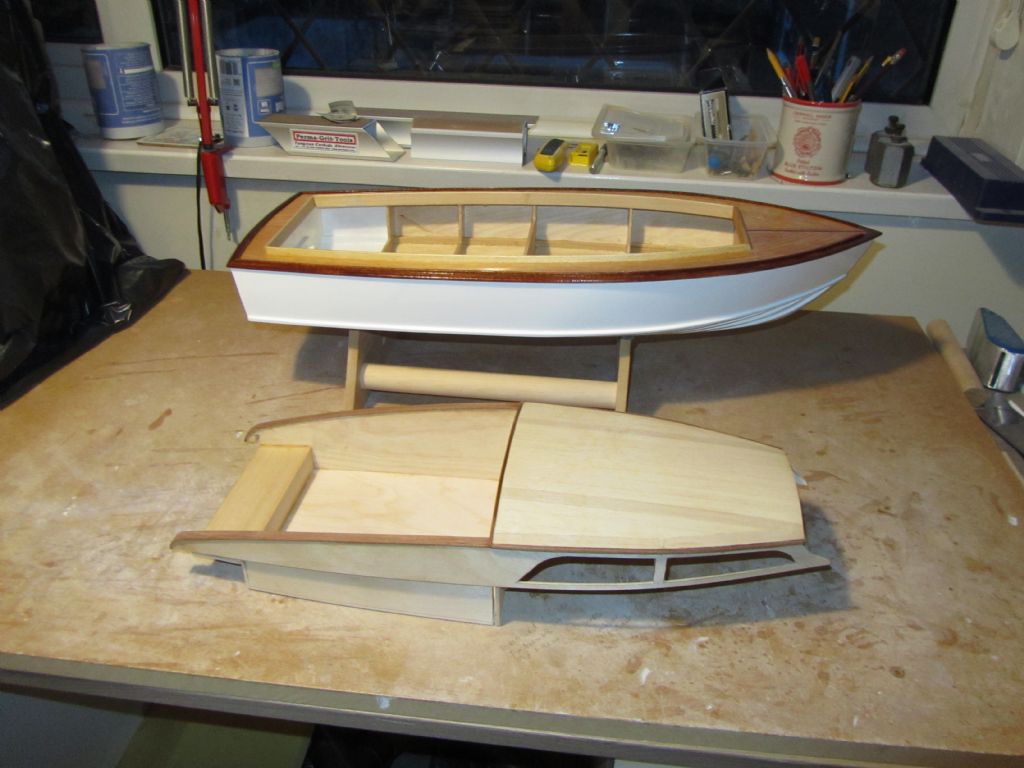
            Gave the rubbing strips and deck etc. a light sanding with 400 grit and then applied a coat of International Yacht Paints Schooner varnish – I like this part! A small sheet of 1.5mm thick rubber sheet should be arriving soon to make a gasket to mount the stern-drive. I've mentioned before about the difficulty in mounting the prop i.e. it won't screw on very far and I've ascertained that it's the thread on the drive that's causing the problem so I'm going to get a die nut to hopefully sort it. I can then fit the stern-drive and steering servo etc.

            Chris

            superstructure38.jpg

            hull1.jpg

            hull & superstructure.jpg

            Edited By Chris Fellows on 29/03/2023 20:03:18

            #104443
            Chris Fellows
            Participant
              @chrisfellows72943

              The deck is too shiny for a Fairey (I put the varnish on a bit thickly) so I've sanded it ready for a really thin coat or I may use some other varnish I have.

              On the superstructure I've taken the edges off the mahogany edgings to the roof, masked up with Tamiya tape and given the roof a coat of primer/undercoat.

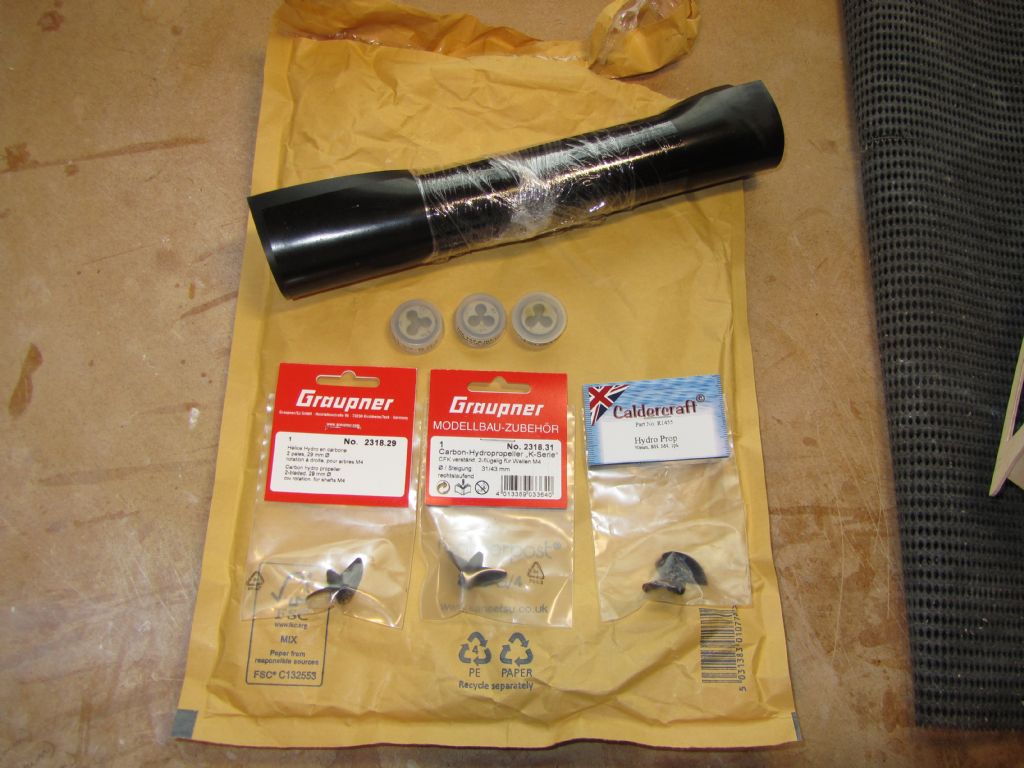
              Some goodies have arrived. 1mm and 1.5mm rubber sheet for making a gasket for the stern drive, I shall try the 1mm first. Hopefully it does the job as I don't really want to use silicone. M2, M3 and M4 dienuts, the M4 to ease the thread on the stern-drive. Didn't use in the end as I wound an nut on Ok. Some smaller/spare plastic props.

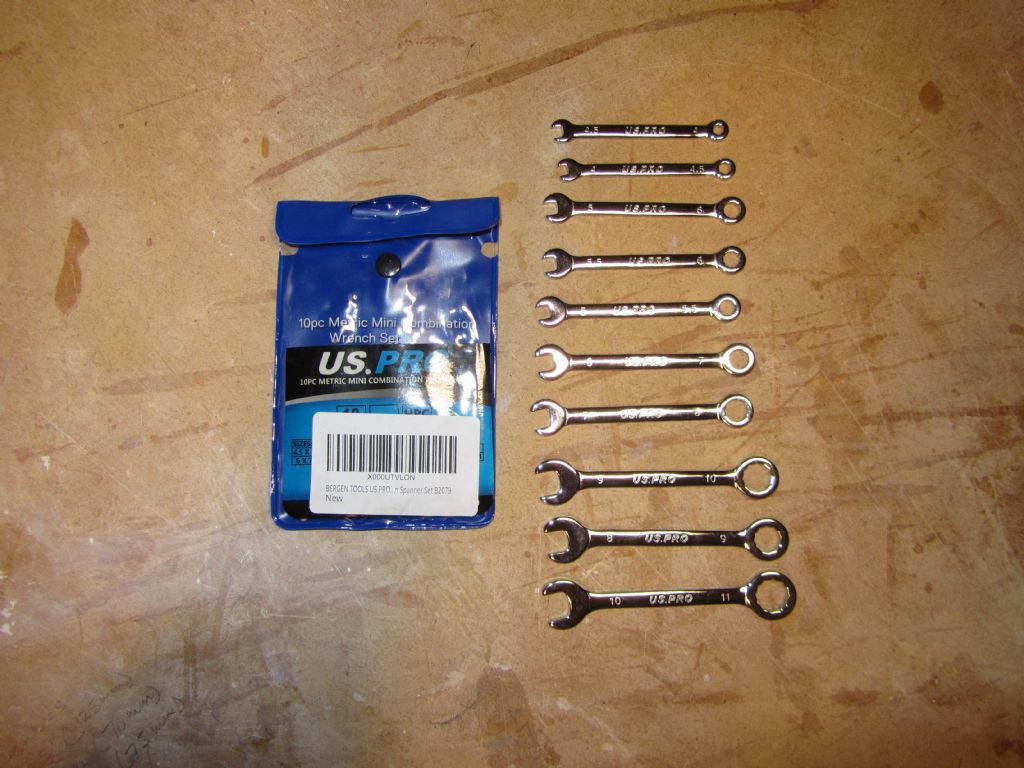
              And the next day a set of small spanners. £9.45 from Amazon. Really pleased with them as they are good quality and the same size is on two spanners, so no need to buy two sets! Brilliant!

              Chris

              superstructure40.jpg

              bits & pieces.jpg

              small spanners.jpg

              #104445
              Chris Fellows
              Participant
                @chrisfellows72943

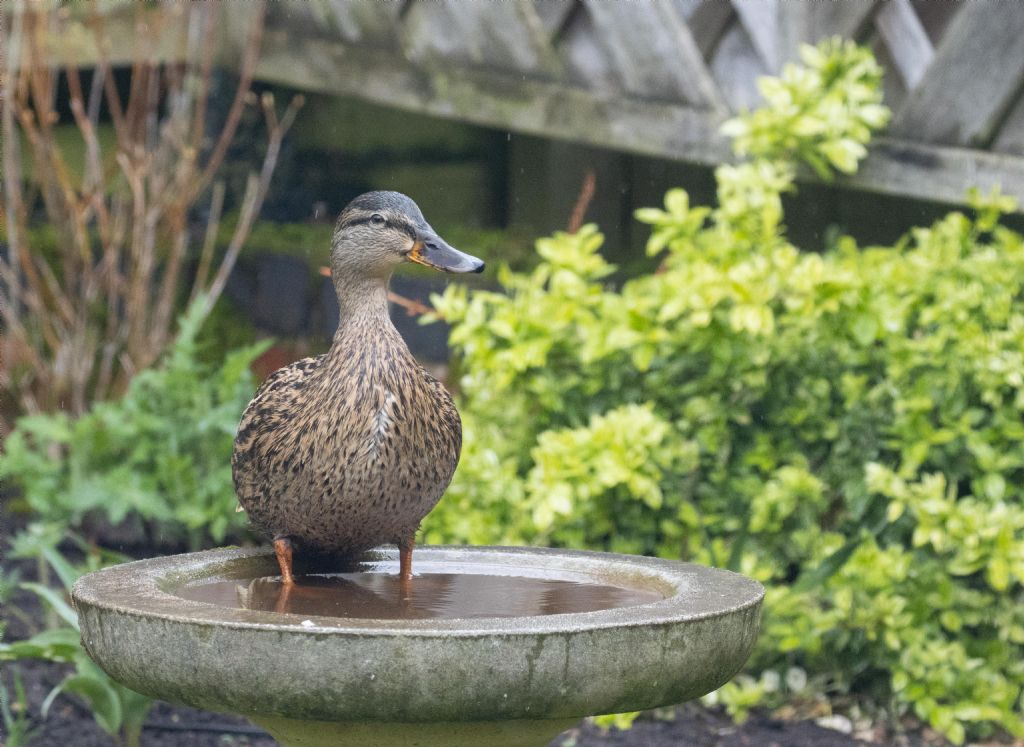
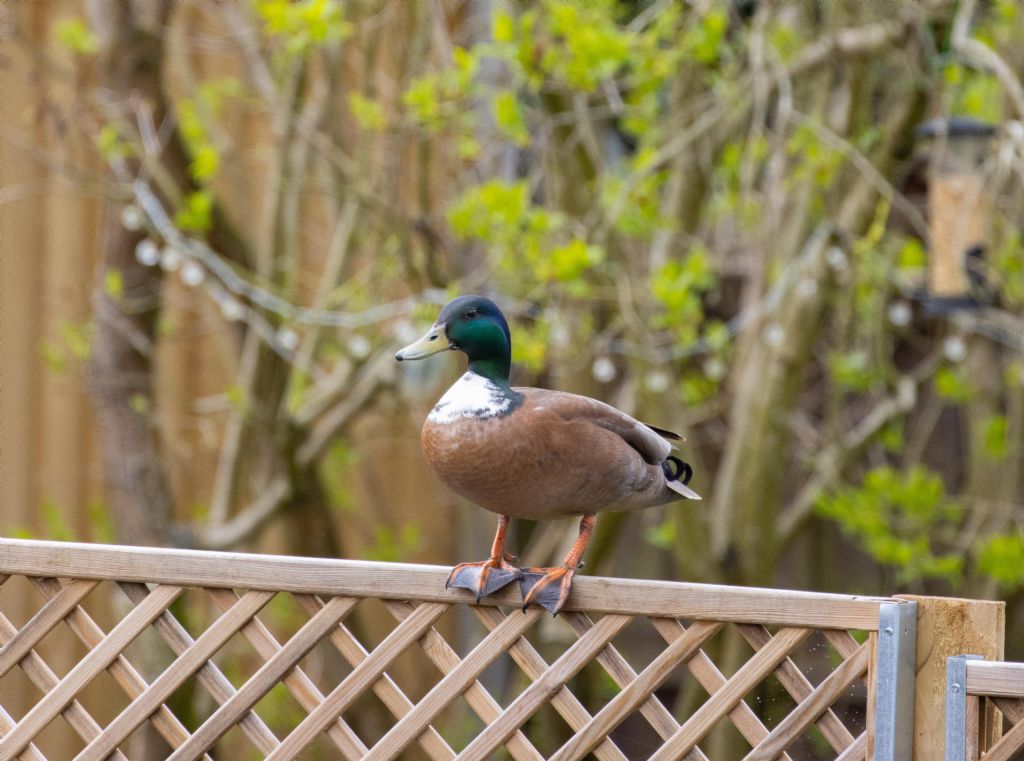
                Start of modelling was delayed yesterday whilst I grabbed my camera! Unexpected as we are on an estate with fairly small gardens and 6 foot fences!

                Have been three days on the trot now!

                Chris

                duck 1.jpg

                duck 2.jpg

                #104454
                Derek Bradley
                Participant
                  @derekbradley32270

                  Chris,

                  From where did you get the rubber sheet? It sounds like just what I need to make a gasket between the bottom of the fin keel and the ballast keel on 'Ardent'. TIA.

                  Derek.

                  #104455
                  Chris Fellows
                  Participant
                    @chrisfellows72943

                    Hi Derek

                    Bought from EBay. Searched for Rubber Sheet. Item No. is 372772265481. But plenty comes up.

                    Chris

                    #104466
                    ashley needham
                    Participant
                      @ashleyneedham69188

                      Old inner tubes from bike my go-to for rubber for gaskets and washers.

                      Ashley

                      #104467
                      DJW
                      Participant
                        @djw

                        Looking good for a rollout of the fleet at the end of May at Wicksteed Chris… wink

                        And Ashley, I do like the inner tube as a gasket, good idea.

                        Best regards David.

                        #104501
                        Chris Fellows
                        Participant
                          @chrisfellows72943

                          I don't have any old inner tubes and my pushbike ones are probably too small anyway. Not really thick enough for this job either.

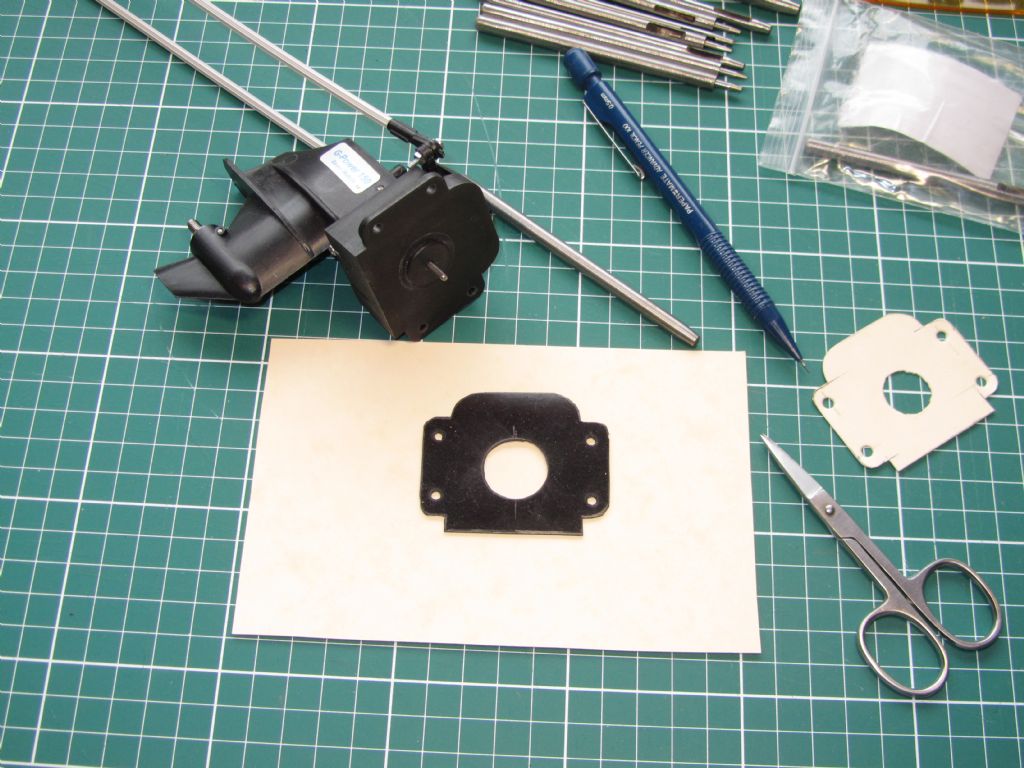
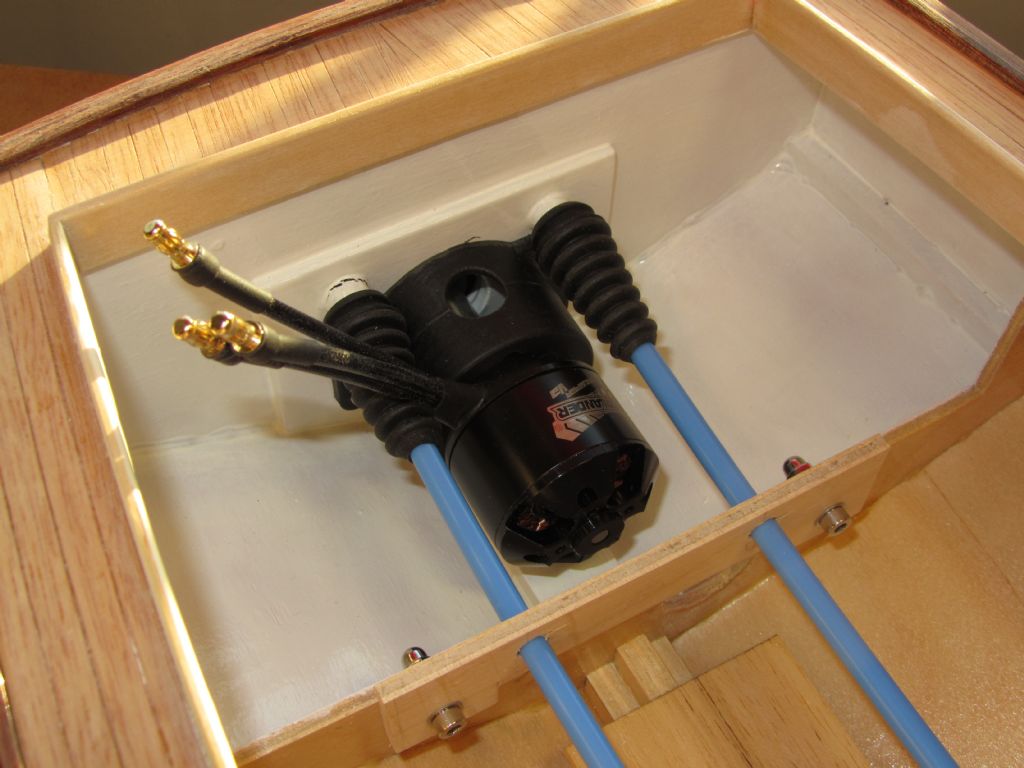
                          Decided that the 1mm was about right and made a cardboard template which I traced around on the rubber sheet. Cut out the hole and around the perimeter with a pair of nail scissors. I'd bought a set of hole punches not long ago for adjusting a belt and other jobs and this was one of those, so punched out the bolt holes, just the job!

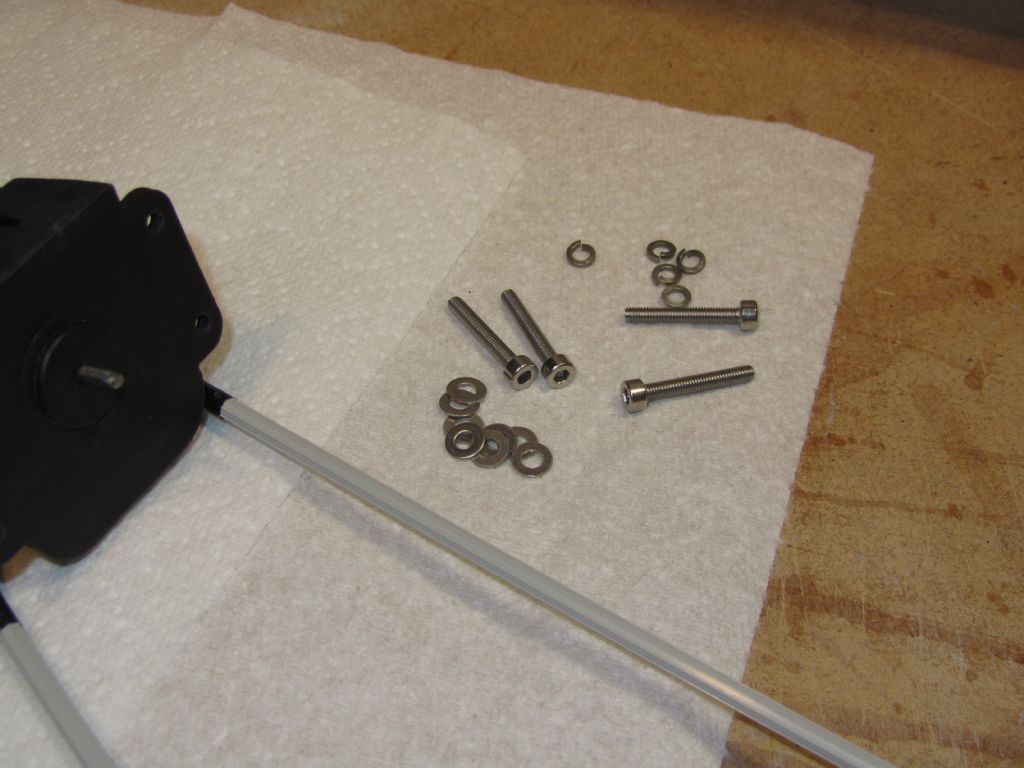
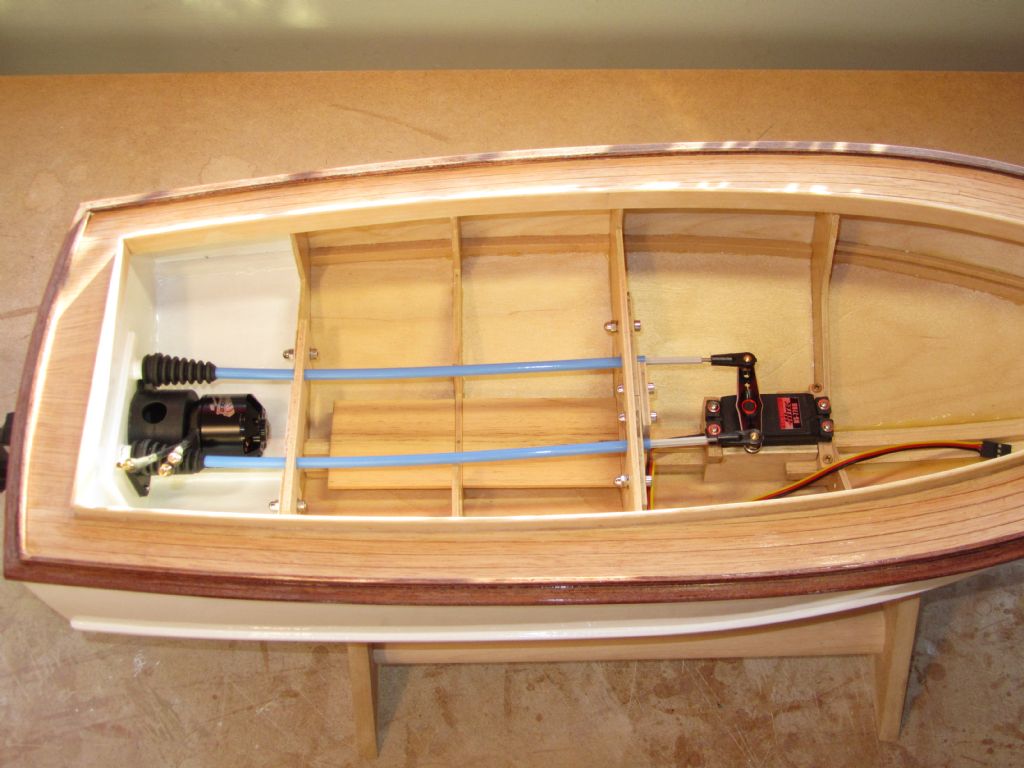
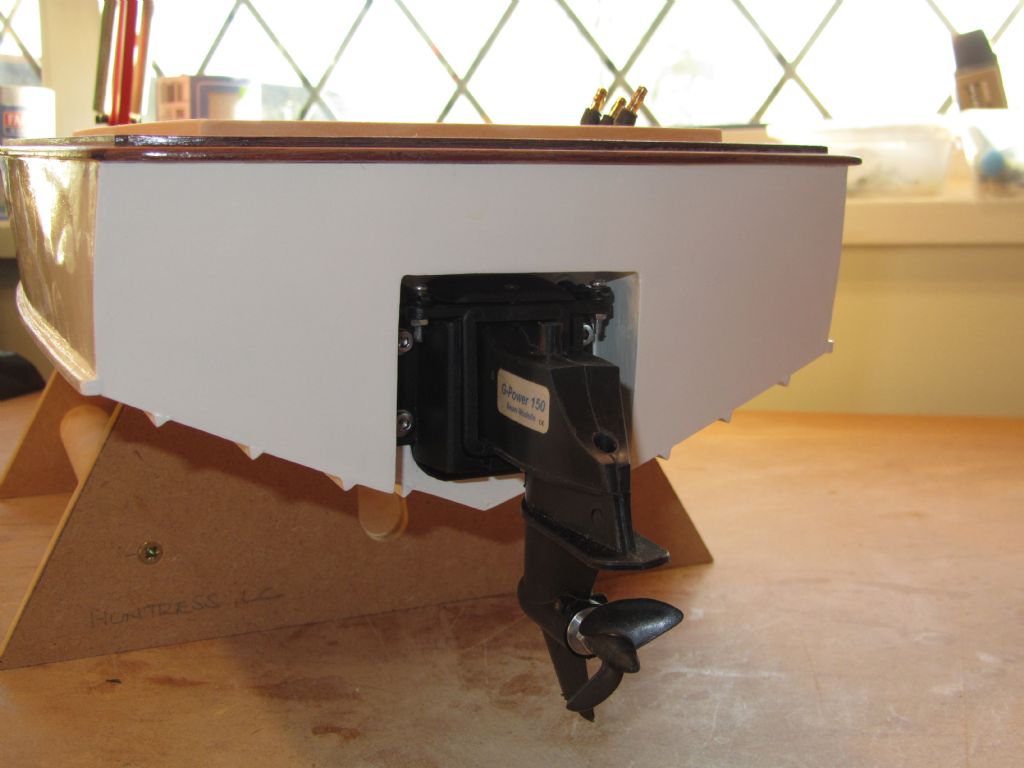
                          Fitted the motor to the housing using stainless allen head bolts, washer and a spring washer. Access is inside the housing so you don't want them coming loose as the whole installation would have to come out. I then fitted the stern-drive to the transom, having replaced the cross-head screws with more allen head bolts and bolted it to the housing. Easier said than done as access was tight with the snakes in the way and I had difficulty getting the bolts into the threaded holes in the housing. Also the solid coupling inside the housing has to positioned to allow installation and then pushed along onto the flexi-drive – all done through a small hole!.

                          Stood back to admire my work and noticed that I hadn't installed the rubber bellows, doh!! That was it for that night!

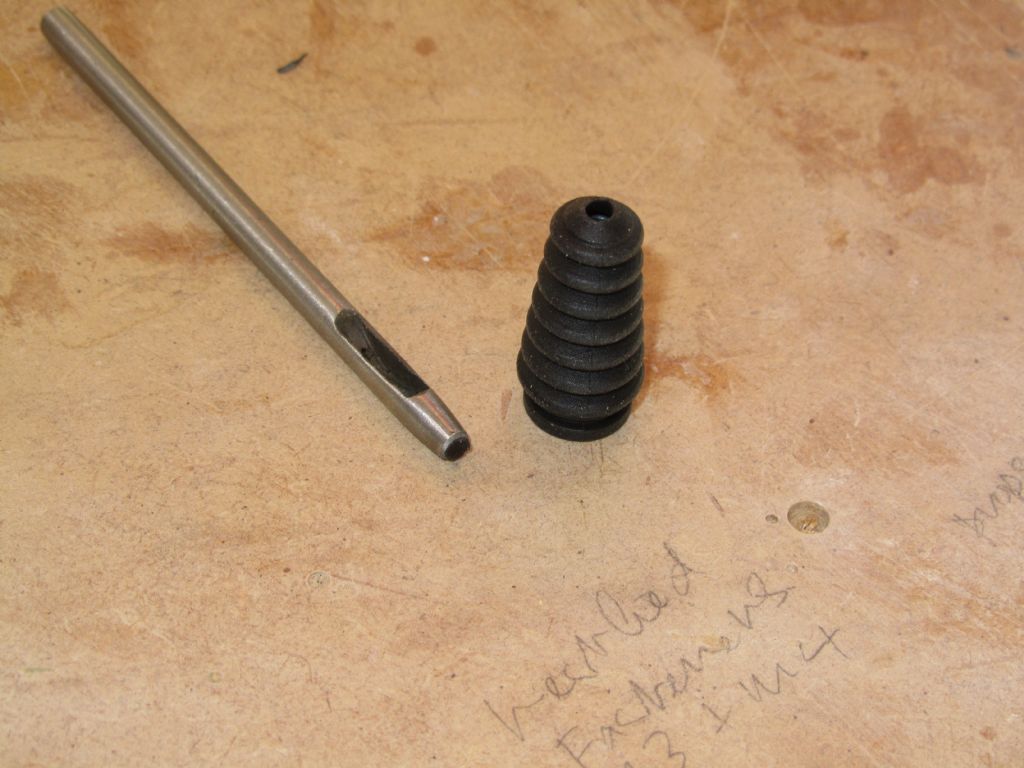
                          Didn't do anything yesterday as was out but this morning I took it all out again. Originally I wasn't going to use the outers of the snakes, and hence the bellows, but having decided to use the outers to avoid rubbing on anything I could have dispensed with the bellows and taped the outers to the plastic tubes going through the transom. But as I'd gone to the trouble of fitting flanges to the tubes and the bellows would be a neater solution then bellows it was! The small hole in the bellows was too small to go over the outer casing and so I enlarged it by cutting the end off with a knife. This was a failure and the hole was too big. Then I remembered the punches, chose one to give a nice snug fit and hey-presto.

                          Reinstalling was even fiddler now with the bellows fitted but at least the bolts went in easier this time. Had to refer to photos again to remind me which servo and horn I was using and that was it. Battery box had been made previously so that can go in and then onto the ESC and wiring etc. My first!

                          Chris
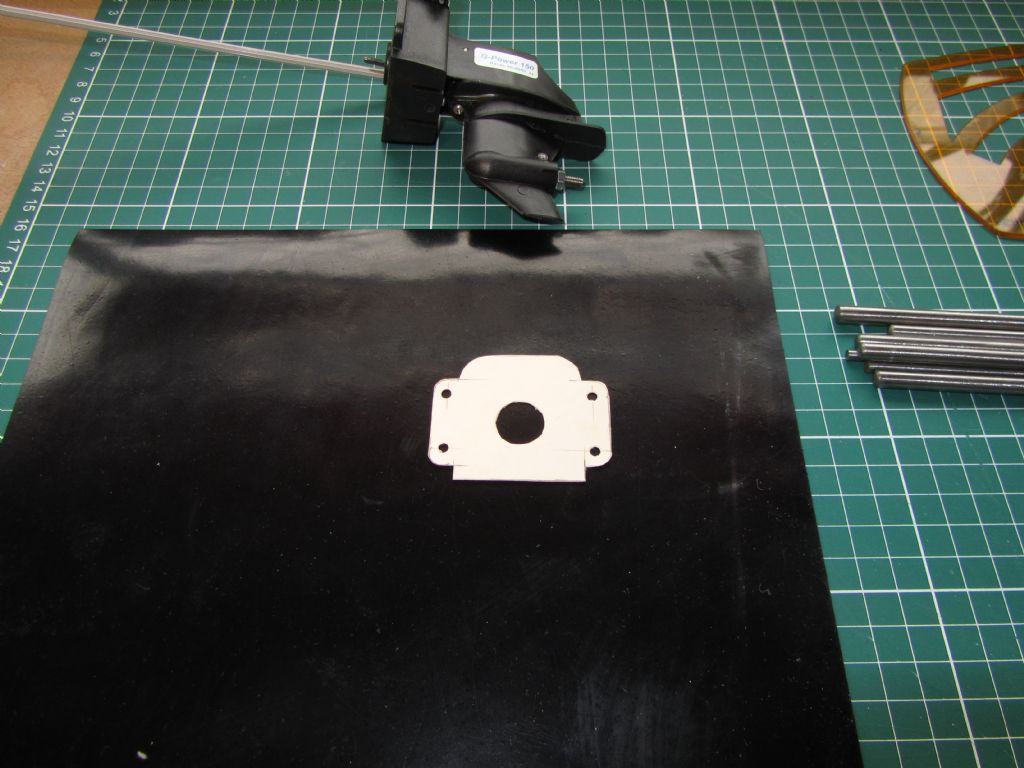
                          fitting out 2.jpg

                          fitting out 3.jpg

                          fitting out 4.jpg

                          fitting out 5.jpg

                          fitting out 6.jpg

                          fitting out 7.jpg

                          fitting out 8.jpg

                          fitting out 9.jpg

                          Edited By Chris Fellows on 07/04/2023 20:27:46

                          #104508
                          James Hill 5
                          Participant
                            @jameshill5

                            Lovely work Chris,

                            You`ll get a lot of deserved praise when it takes to the water. Try as I might , I don`t seem to be able to build as tidyly as you do.laugh

                            Jim.

                            #104510
                            Chris Fellows
                            Participant
                              @chrisfellows72943

                              Thanks James. Soon as I've finished the installation I'm going to try it on the water and then finish off the superstructure. I'll progress the River Cruiser so that I can try that as well. The nice weather is motivating me!

                              Chris

                              #104564
                              Chris Fellows
                              Participant
                                @chrisfellows72943

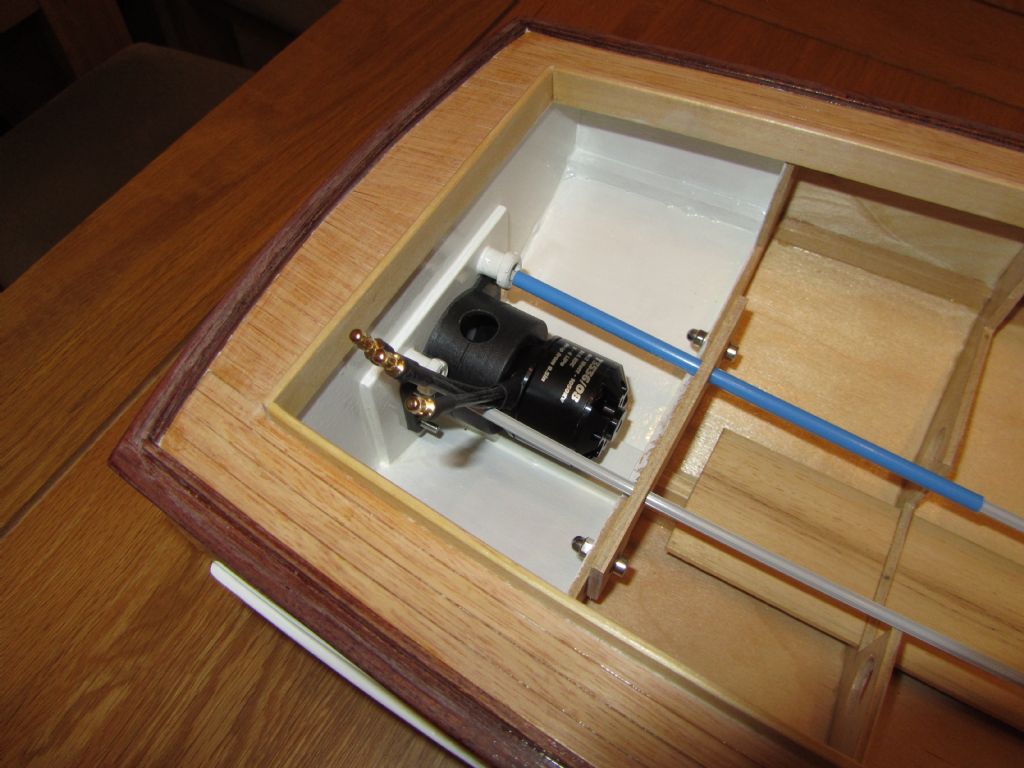
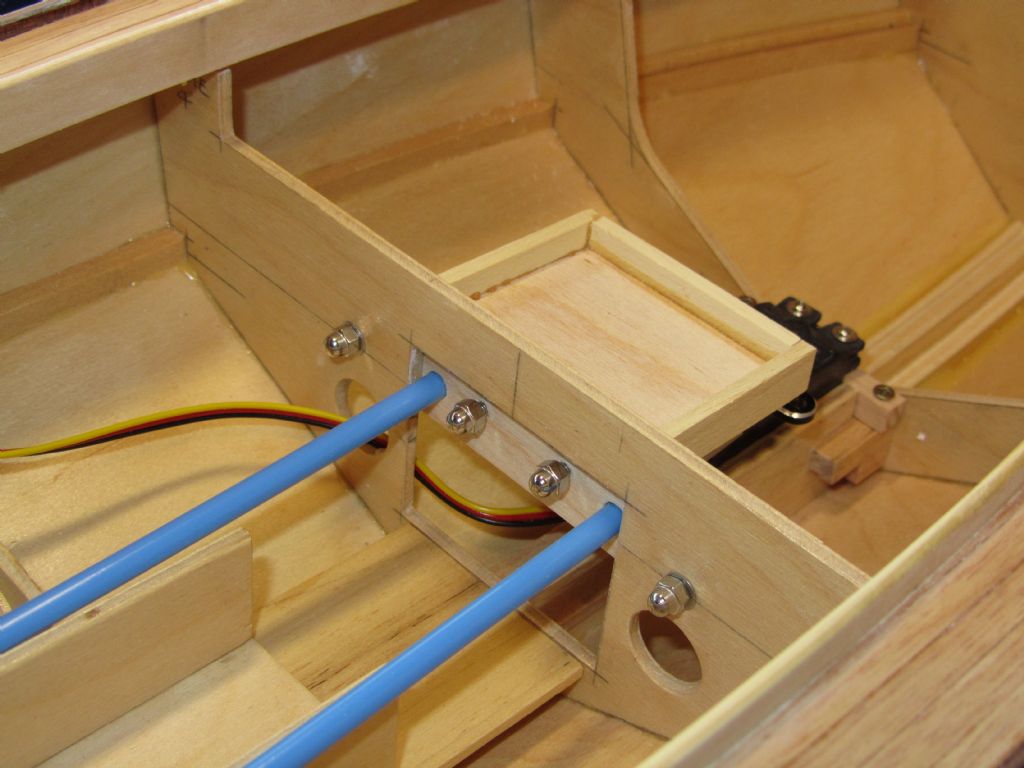
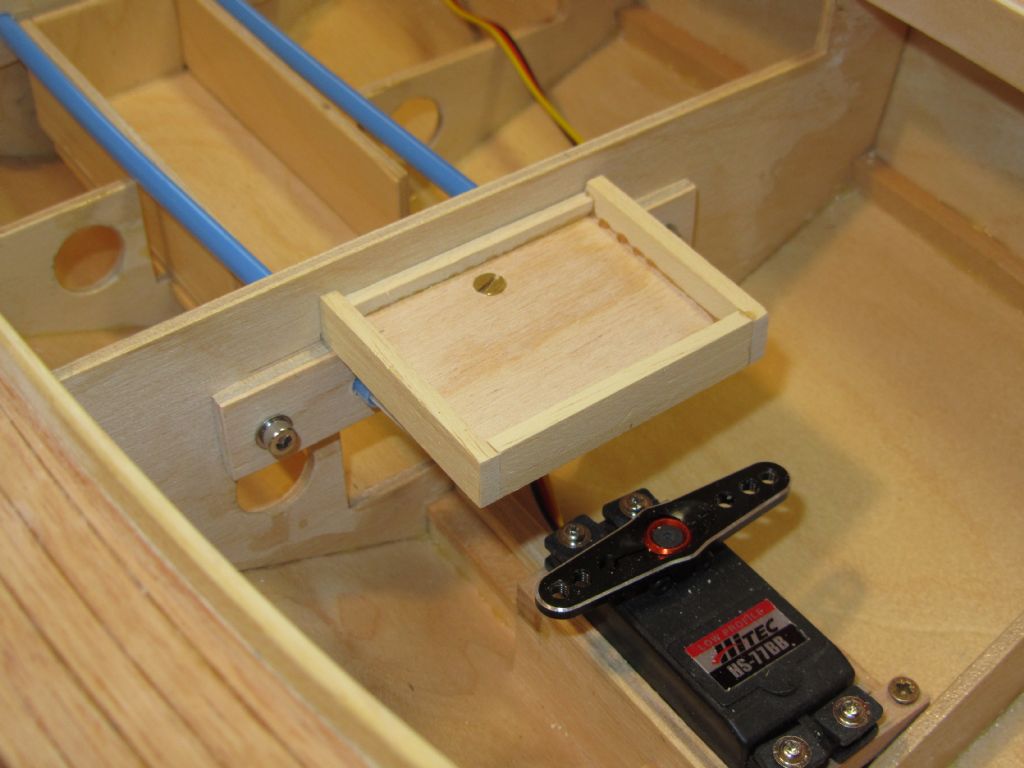
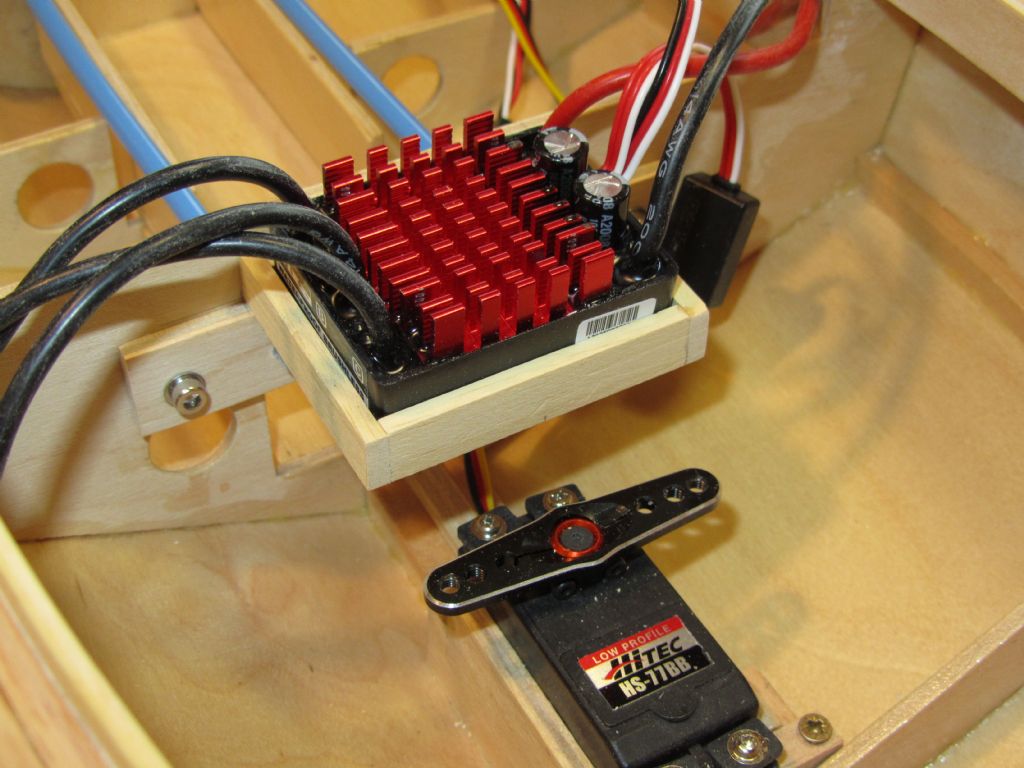
                                Little bit more progress having decided where to fit the ESC. Made a shelf in the cabin area to fit it on. It is bolted in place so that I have access to the snakes and servo. Velcro will be used to secure the ESC.

                                Have ordered some gold bullet connecters so that I can extend the ESC to motor leads and then I can finish the installation. Before connecting the servo back up again I will piggyback it off another boat to check that it is in a neutral position.

                                Chris

                                fitting out 10.jpg

                                fitting out 11.jpg

                                fitting out 12.jpg

                                #104628
                                Chris Fellows
                                Participant
                                  @chrisfellows72943

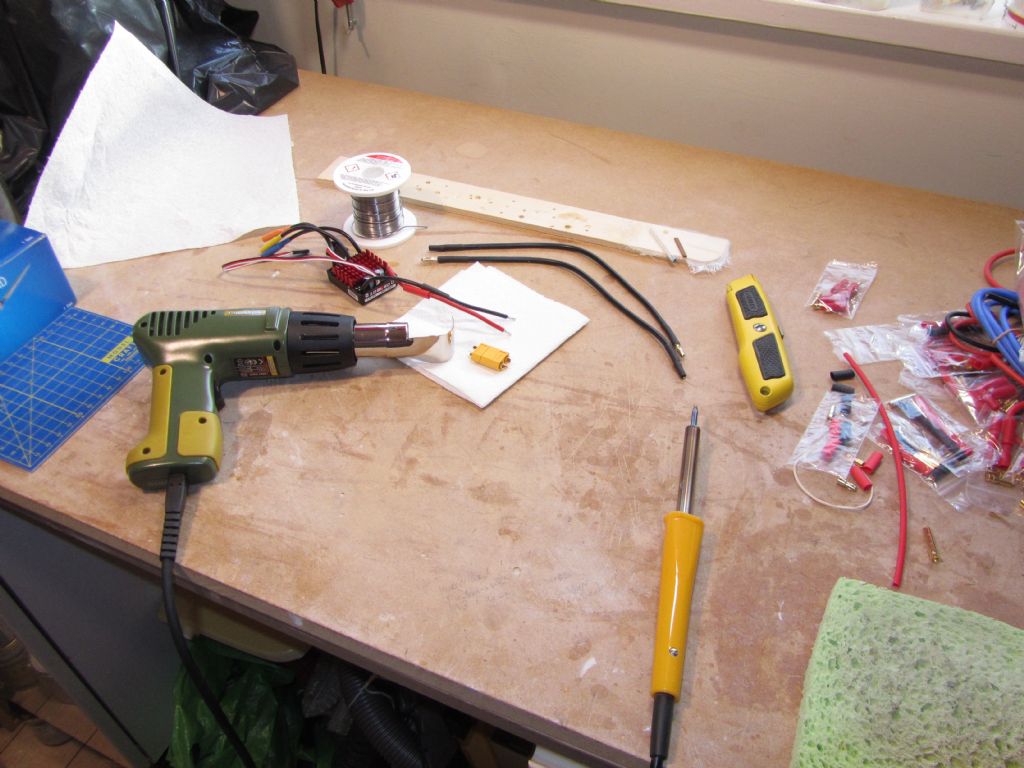
                                  Haven't had much time to spend on the models over the last week but yesterday I got the soldering iron out.

                                  First job was to make up the extension cables for between the ESC and motor. Cables fitted to these are 14 AWG so I went up a thickness to 12 AWG for the extensions.

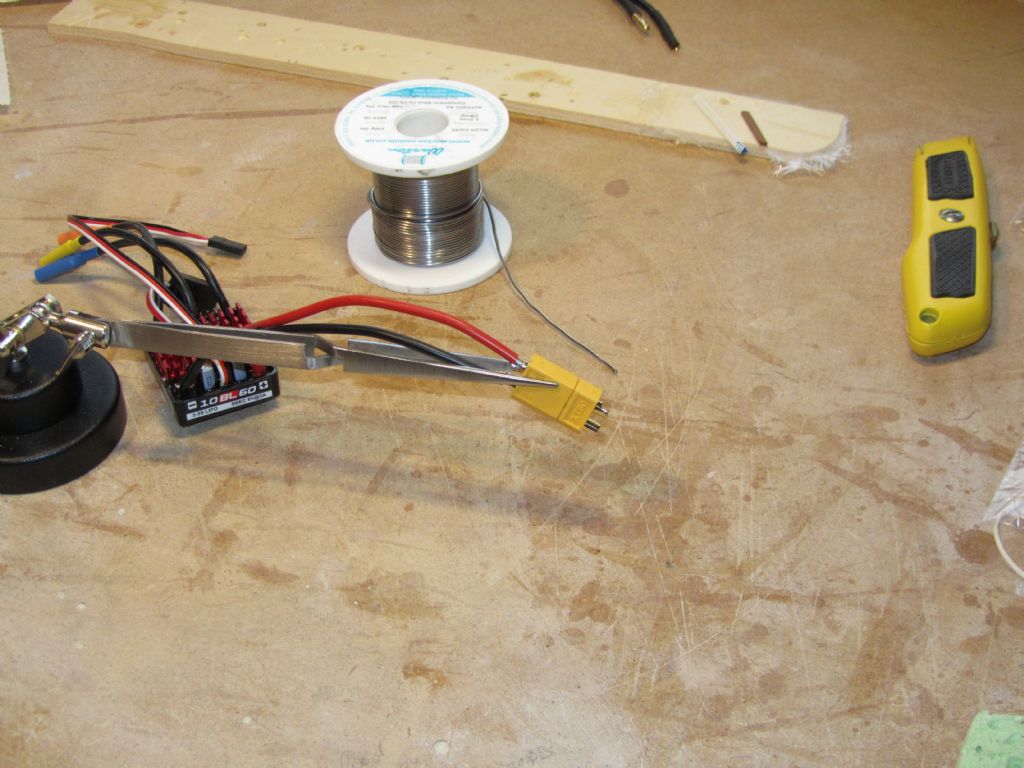
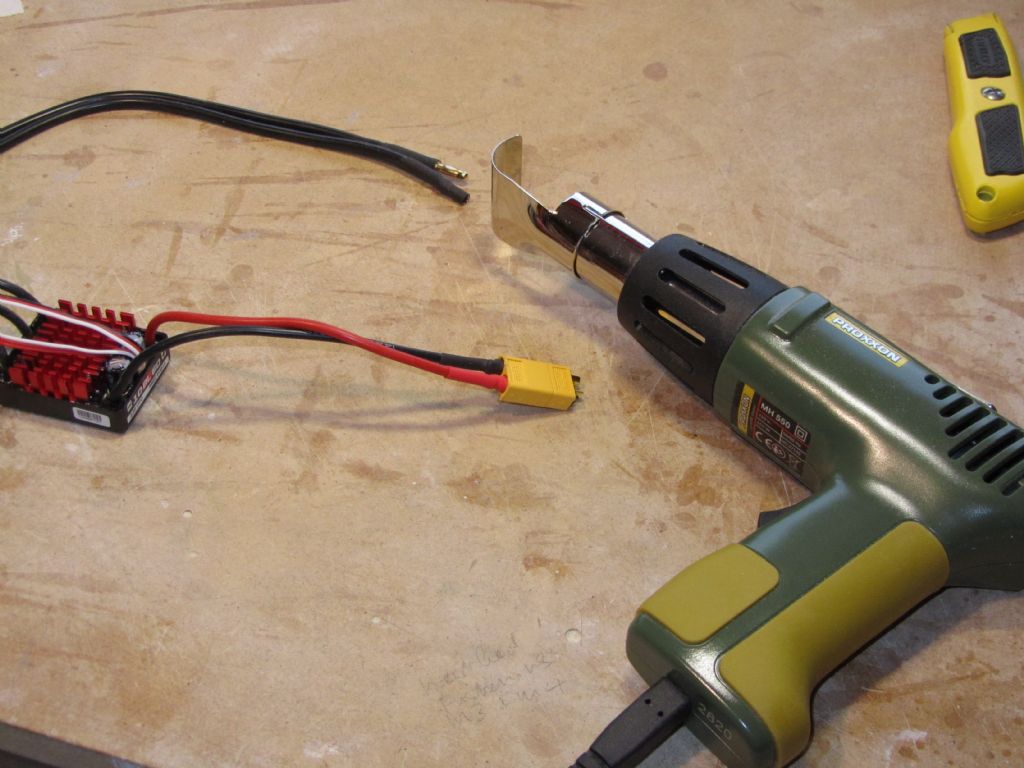
                                  Next the ESC to battery connection. The 3S battery I'm going to use already has an XT60 connecter on it so I just needed to fit the corresponding part onto the ESC cables. These come without connecters on the 60amp and up, which is a good idea, with the cable ends already pre-soldered. So just had to add some solder to the connecter and job done, followed by the heat strink. The little Proxxon heat gun makes this a doddle, much better than a match!

                                  Chris

                                  fitting out 13.jpg

                                  fitting out 15.jpgfitting out 16.jpg

                                  #104634
                                  Chris Fellows
                                  Participant
                                    @chrisfellows72943

                                    It was a good job I tried the steering servo recently whilst the snakes were disconnected! The servo was an unused, new one and when connected up rotated through 90 degrees which could have done some real damage as there is limited movement with the stern-drive.

                                    I then bound the Rx and programmed the ESC using a program card. Initially I've set the start to the softest possible. Bit disappointed to find that with the 30amp ESC I'm using in the River Cruiser that I can't use the program card as it makes things so much easier and clearer especially when setting the cut-off voltage for the LiPo. Will have to see how I get on with bleeps! I can always use a NiMH pack I've got instead.

                                    Once this was done I tried the servo and then refitted the servo horn in the correct position and reconnected the snakes and refitted the ESC tray.

                                    I had set the movement of the servo via the Tx to 25% and gave it a try which works fine. It needs more movement but I shall work up in increments so that the stern-drive doesn't hit the stops. I then connected up the motor, which worked but in the wrong direction which was soon fixed.

                                    So everything works! Pleased about that as it's my first ever installation and I was a bit apprehensive, trust me to start with something more complicated though! The ones with prop shafts will be easier and at least I know what I'm doing now, well to some extent!

                                    Chris

                                    fitting out 17.jpg

                                    #104640
                                    DJW
                                    Participant
                                      @djw

                                      Hi Chris

                                      Very tidy installation, given the extra hardware at the stern it'll be interesting to see the waterline when you get her afloat.

                                      Best regards David.

                                      #104642
                                      Chris Fellows
                                      Participant
                                        @chrisfellows72943

                                        Thanks David.

                                        I did do a bath test quite sometime ago with the stern-drive, motor and battery and the superstructure fitted. I was a bit nervous with all that weight at the rear but was pleased and relieved to find that it sat bang on the waterline i.e. the chine rails and at the right attitude. These boats are very buoyant!

                                        I will try it again before testing it on the lake but I'm not expecting much difference with the ESC etc. added and at some point the bow rail.

                                        I remember one of your aims, which you achieved, was to get a nice slow and smooth start. Interestingly, I get that in reverse but it's a bit more sudden in forward. I don't think it will be a problem but it would be nice in forward as well. Perhaps it's because I reduced the power to 50% in reverse when programming the ESC? I know brushed motors can be different in forward and reverse but didn't expect it with brushless.

                                        Chris

                                        Edited By Chris Fellows on 24/04/2023 13:45:17

                                        #104643
                                        DJW
                                        Participant
                                          @djw

                                          Hi Chris

                                          Waterline sounds fine, I think you're right that the ESC and bow rail won't do too much. Does the sterndrive have some sort of tilt adjustment for the drive angle..? If so I guess this will have more effect than anything else on the eventual ride characteristics of the boat on the water.

                                          The ESC startup. I don't think the motor cares about its rotation direction, no difference one way or the other. You could try temporarily setting the same 50% power limit on forward just to see if the soft startup is then same as reverse. Would be useful to know if the power limiting affects startup. Which ESC is it..?

                                          Sounds like you'll have a boat ready for Wicksteed… smiley

                                          Best regards David.

                                          #104666
                                          harry smith 1
                                          Participant
                                            @harrysmith1

                                            Hi Chris

                                            My transmiiter's I can change the throttle curve from standard 45 degrees lineal to a curve at the center for a more

                                            softer start.

                                            Remember the original boats would be stern heavy with motors and fuel tanks.

                                            Also used trim tabs to correct the ride.

                                            Harry

                                            #104673
                                            Chris Fellows
                                            Participant
                                              @chrisfellows72943

                                              David – yes, the stern-drive has adjustment but only in one direction i.e. to bring the bow up. The reduction to 50% for reverse was carried out when programming the ESC and can't be done for forwards. I'm actually going to reduce it to 25% as the stern-drive can be damaged if reversing too fast. I can of course alter the end-points for the throttle in the Tx which I assume alters the motor speed? ESC is a 60amp HobbyWing Quicrun.

                                              Harry – I can change the throttle curve with my Hi-TEC Flash 8 Tx but with it being primarily an aircraft Tx (like most are) I don't think I can set a curve to give me a soft start, will have a play though. When programming the ESC I set the start power to Level 1 of 9 so it should be pretty mild, which in reverse it is. Forwards will probably be fine but I need to try it on the water. All good fun!

                                              Chris

                                              #104674
                                              harry smith 1
                                              Participant
                                                @harrysmith1

                                                Hi Chris

                                                The Hobbywing Quicrun brush ESC are the best I have had, but I not tried the Brushless ones.

                                                My Turnigy/Flysky A6 tx, I can change the throttle curve, both forward and reverse.

                                                Also can change the end stops which cuts down full throttle.

                                                I just finished doing all this on my Nordkap fishing boat.

                                                I did not change full reverse end stop because on it because they do not steer too well in reverse !!!

                                                But did increase it's rudder area.

                                                Harry

                                                #104902
                                                Chris Fellows
                                                Participant
                                                  @chrisfellows72943

                                                  Been away for a couple of short breaks so progress came to a halt and with the wet weather in between I was in no rush to try it on the water.

                                                  With some dry weather this week though I'm keen to see how it goes so this afternoon I fixed the ESC in place with some double-sided 3M tape which was supplied with the ESC, attached the Rx with Velcro and taped the antennas to the coaming. I then reset the throttle positions via the ESC and then reverse to 25% in the Tx. I then increased the steering from 25% to 50% with the stern-drive just stopping short of the stops.

                                                  Then into the bath to check for leaks and that forward is actually forward! No leaks so the rubber gasket worked. I needn't have worried about the moving off. In the water it moves off nice and slowly and smoothly in forward and reverse and will just tootle along.

                                                  So tomorrow down to the lake for trials!

                                                  bath test.jpg

                                                  Chris

                                                  bath test 2.jpg

                                                  #104906
                                                  DJW
                                                  Participant
                                                    @djw

                                                    Looking good Chris..! Hope the lake trial goes well too.

                                                    Best of luck. David.

                                                    #104907
                                                    Chris Fellows
                                                    Participant
                                                      @chrisfellows72943

                                                      Thanks David.

                                                      Must try and avoid the buoys!

                                                      Chris

                                                    Viewing 25 posts - 176 through 200 (of 217 total)
                                                    • Please log in to reply to this topic. Registering is free and easy using the links on the menu at the top of this page.

                                                    Code of conduct | Forum Help/FAQs

                                                    Advert

                                                    Latest Replies

                                                    Home Forums Build Blogs Topics

                                                    Viewing 25 topics - 1 through 25 (of 25 total)
                                                    Viewing 25 topics - 1 through 25 (of 25 total)

                                                    View full reply list.

                                                    Advert