Spider J

Spider J

Home Forums Scratch build Spider J

  • This topic is empty.
Viewing 25 posts - 176 through 200 (of 201 total)
  • Author
    Posts
  • #79948
    Banjoman
    Participant
      @banjoman

      Gareth,

      She looks truly and stunningly beautiful on the water, even under 'just' the trial set of sails! A most impressive and admirable build from start to finish, and one that it has been a joy to be allowed to follow.

      I take my hat off to you, Sir!

      Mattias

      #79954
      Gareth Jones
      Participant
        @garethjones79649

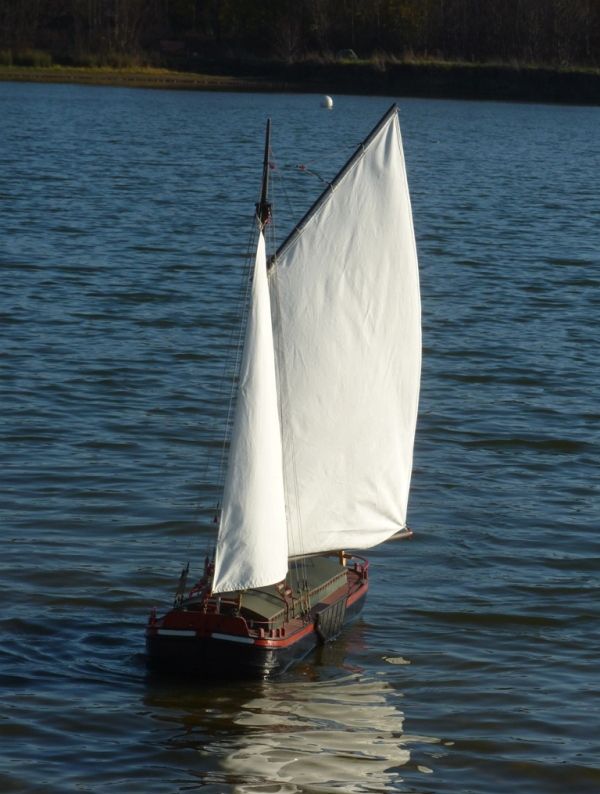
        Glad you like it Mattias. We sailed Spider J again yesterday in a bit of a breeze, around 10 mph. We were pleasantly surprised how well it sailed, only a slight sideways drift with the wind directly side on and it went quite nicely across the wind and downwind. No tendency to heel over when cross wind. It does not point very high or have the speed or manoeuverability of a modern racing yacht but its not bad for a 100 year old barge design. Unfortunately both times when we sailed at the weekend we were looking more or less directly into a low sun so the photos are not very good but here's another from yesterday.

        spider 217.jpg

        Ray, the ballast is made up of three groups. There is about 2 lb of lead right at the back, below the propshaft in the form of lead flashing strips along the bottom of the hull between the frames.

        spider 218.jpg

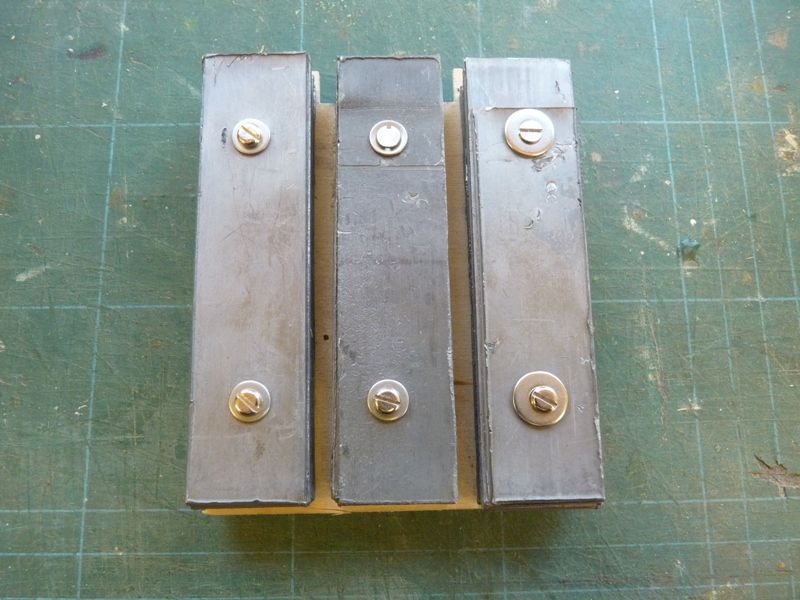
        There are three blocks each weighing 3 lb made up of lead flashing fixed to plywood plates which also sit right on the bottom, between the frames.

        spider 219.jpg

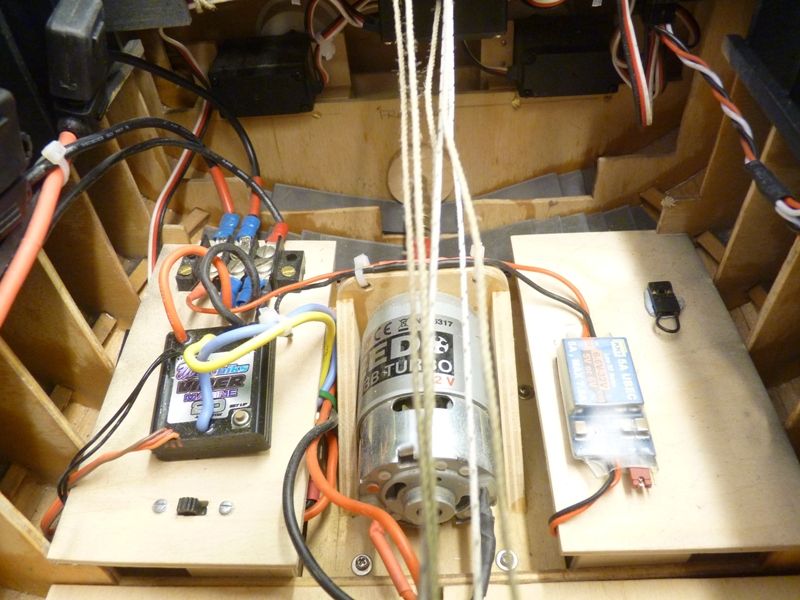
        Two of these fit just ahead of the motor, towards the back of the hold.

        spider 220.jpg

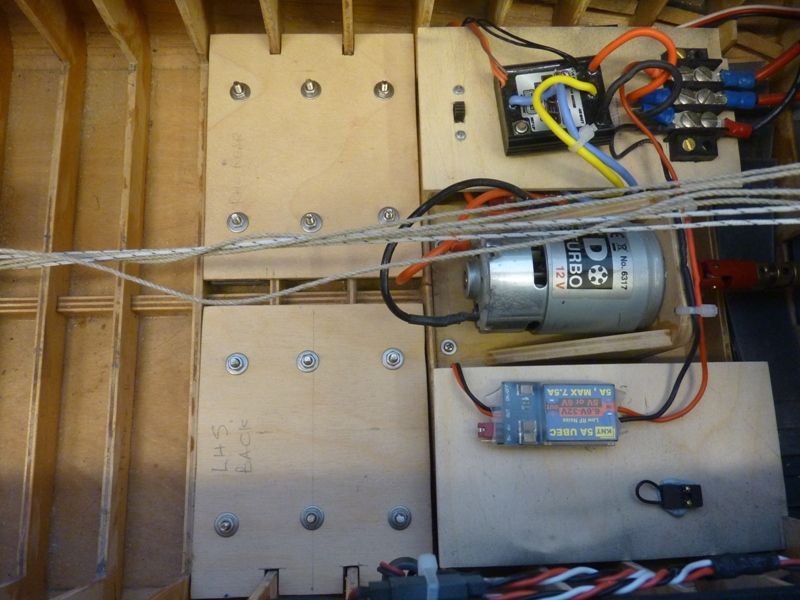
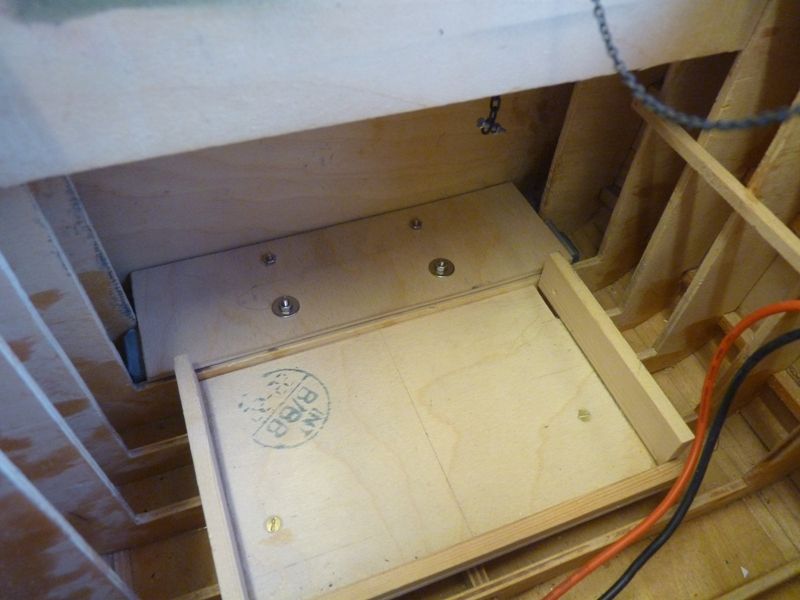
        The third one sits right at the front of the hold and covers the full width of the hull, just in front of the 12V 7ah lead acid battery which goes on the flat ply mount you can see in the picture below..

        spider 221.jpg

        The normal procedure is to leave these ballast weights fitted unless they need to be removed for access or ease of working in the workshop. The battery is fitted and power switched on for radio checks. The front and rear hatches are then fitted which leaves access to the carrying handle in the middle. If I am launching from a jetty Spider J is normally lifted into the water in this configuration, in which it weighs approx 34 lb.

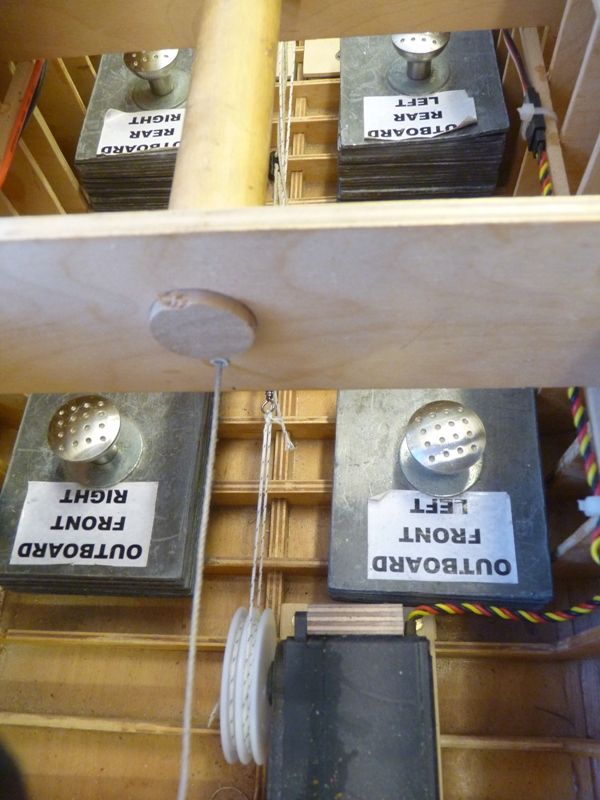
        The next step is to fit 4 additional ballast blocks shared with my trawler Shemarah. These weigh a total of 25 lb and are fitted through the center hatch and sit in the middle of the hull. The center hatch is then fitted and off she goes.

        spider 222.jpg

        The outboard wording on the label refers to Shemarah where these 4 blocks fit rotated 90 degrees from the position in Spider J

        The normal sailing weight for Spider J is therefore about 58 lb, which is quite heavy but it is practical to lift the boat with the handle even at that weight. Its about the same as our A class yacht Serica III.

        Gareth

        Edited By Gareth Jones on 19/11/2018 16:39:13

        #80359
        Gareth Jones
        Participant
          @garethjones79649

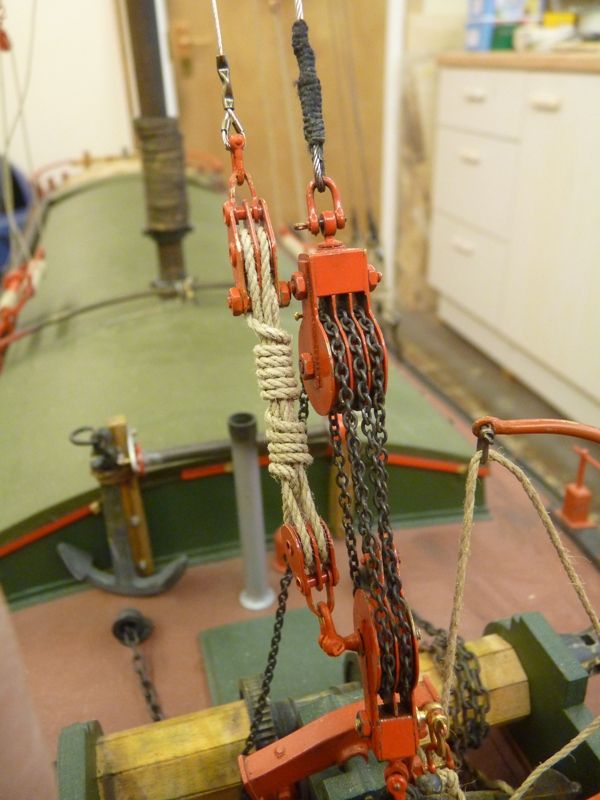
          The Spider J build is inching towards a conclusion now. I have made and fitted the forestay block which attaches to the side of the stayfall block. There are a few bits of brass that need either painting or weathering yet.

          spider 223.jpg

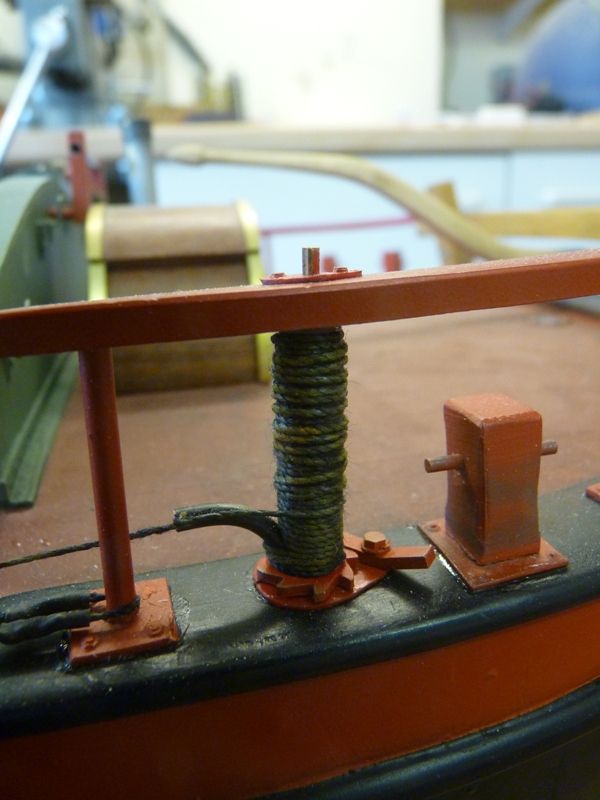
          I have also made and fitted the leeboard rollers. They have been fitted so as to try and disguise where the model leeboard cables exit the hull by way of a short curved length of brass tube, but of course they are in the position they would be on the real boat. It was planned that way and for once worked out reasonably well.

          spider 224.jpg

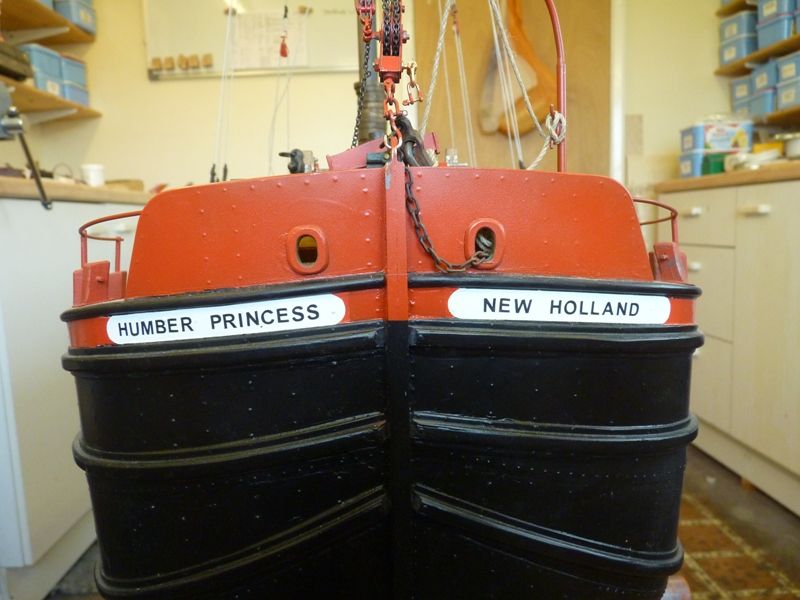
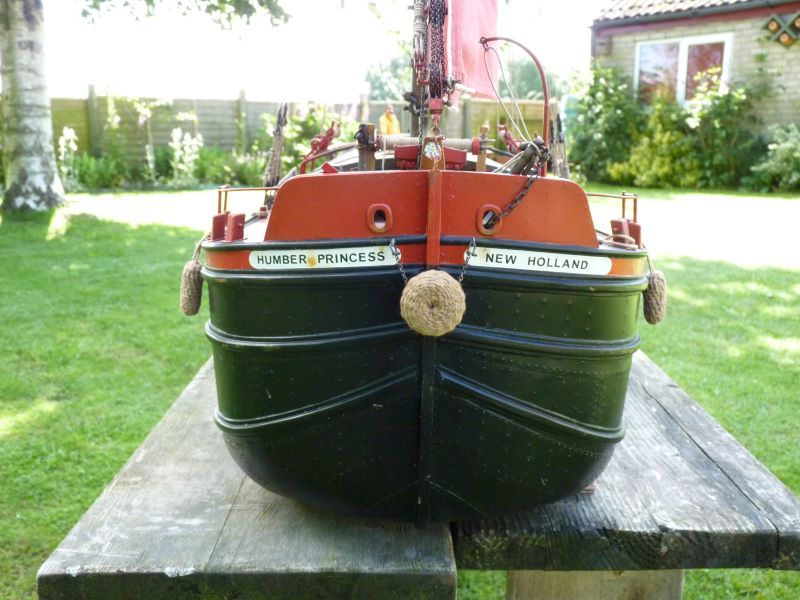
          The model has also finally got its 'proper name, after having the working name of Spider J for the last 4 years. The model is based on the drawings of the sloop Spider T, (T being short for Tomlinson) but I did not want to closely ally the model to that vessel as Spider T is still around and now looks quite different. My wife has a tradition of giving her yachts names with the word Princess in them, in memory of the horse she used to own. She (the horse that is) was a thoroughbred with an official name of Palace Princess, although she was usually known as 'P' To continue the tradition my Humber Sloop has been given the name Humber Princess. The chosen port of registry is New Holland, which is where Spider T was built, in Warrens shipyayd.

          spider 225.jpg

          Tomorrow I will add some photos of the anchors and the ongoing work on the aft hatches.

          Gareth

          #80364
          Gareth Jones
          Participant
            @garethjones79649

            A few more photos of bits and pieces added to the model recently.

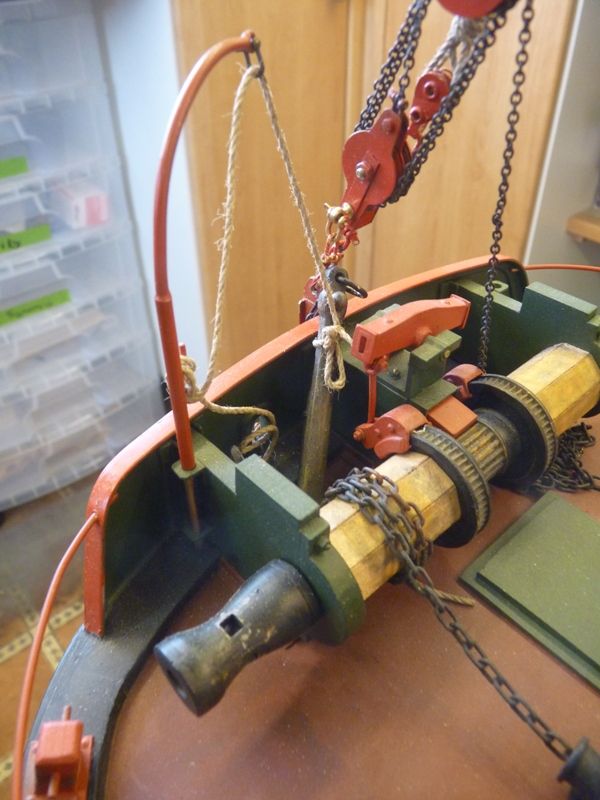
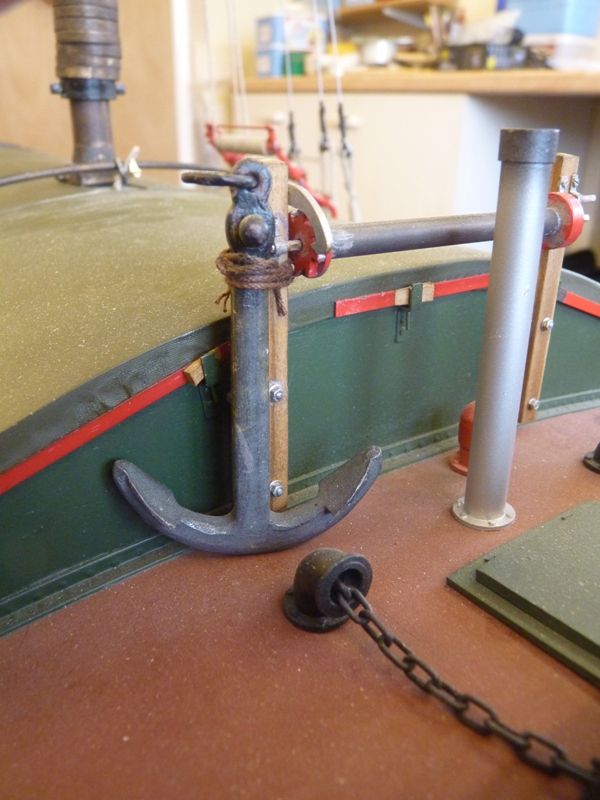
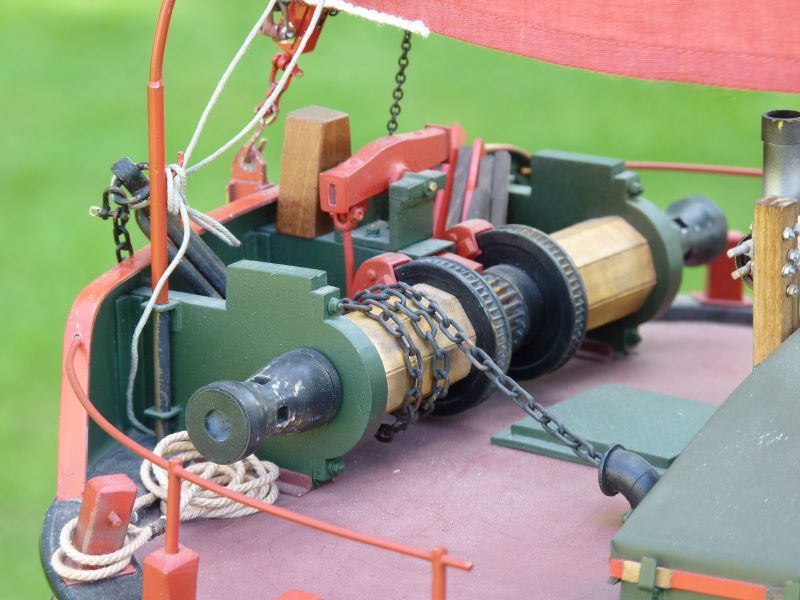
            There are two anchors, although I admit I cheated and bought these some time ago. One is stowed adjacent to the windlass and attached to the davit on the left side of the bow. The 'rope' is a bit thick and hairy and needs a bit of titivation or replacing with some finer cord.

            spider 227.jpg

            The other is stowed as a spare attached to the front headledge roller support on the right side of the foredeck.

            spider 226.jpg

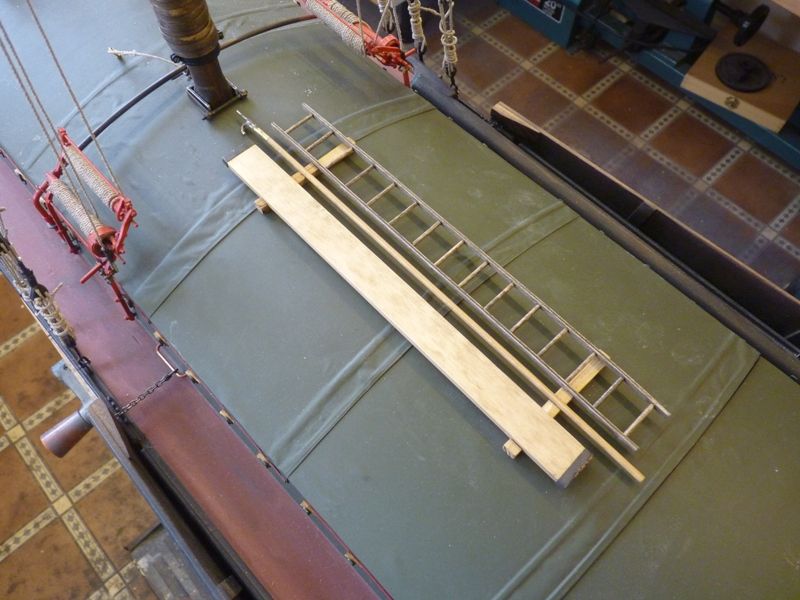
            I have also made a ladder, gangplank and boat hook which are stowed on the centre part of the hatch covers. These will be pinned and glued on in due course. The ladder stiles are made from 2 mm ply after several attempts to use pine strip failed when they splintered while drilling. The rungs are made from cocktail sticks.

            The plank is a simple piece of pine strip with a short length of blackened brass strip round each end to protect the ends from damage. The plank has been stained and then weathered with some Tamiya weathering 'soot' to make it look a bit more grubby and used.

            The boathook working end is made from two pieces of 1/16 brass wire soldered into a short length of brass tubing which fits on to a kebab skewer.

            spider 231.jpg

            Gareth

            Edited By Gareth Jones on 20/12/2018 13:42:29

            #80365
            Gareth Jones
            Participant
              @garethjones79649

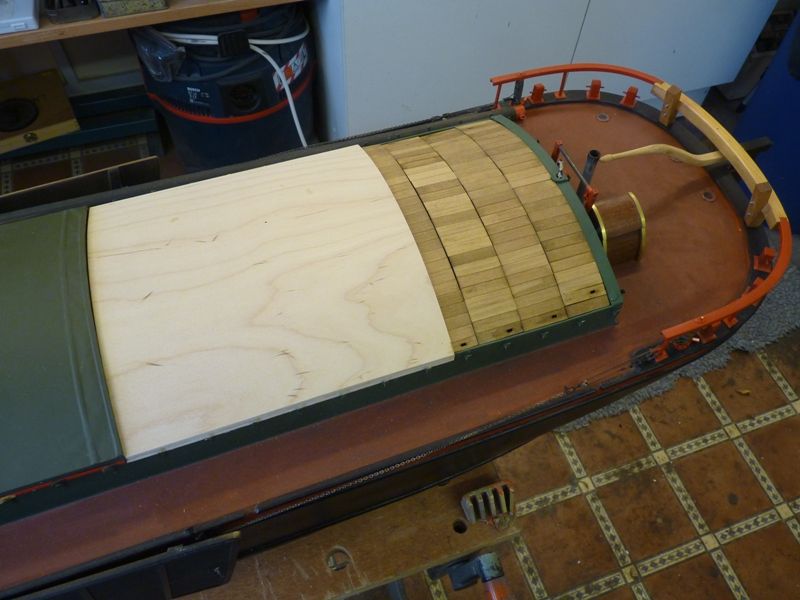
              When Spider J is on static display at a show I intend to remove the rear section of the dummy hatch covers to display the real hold covers and cargo underneath. To this end I have made up a shorter dummy cover section which will replace about 60% of the rear section of the hold cover. This has been made in the same way as the other dummy covers from 1/16 play with 1/8 ply formers underneath.

              spider 228.jpg

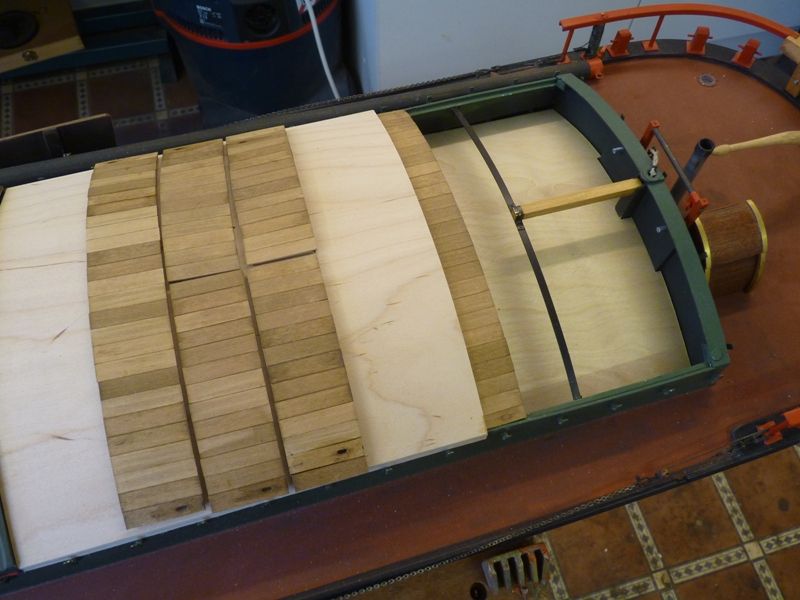
              The real hatch covers were made some time ago and described in an earlier post. The 2 rear sections are split into two separate parts each of which spans half the hold. The two half covers at the very back have a small sub hatch of 4 panels, one in each corner which are known as fast hatches and used if the crew needed to get into the hold quickly. Each hatch has a small hand hold in the outside corner.

              spider 229.jpg

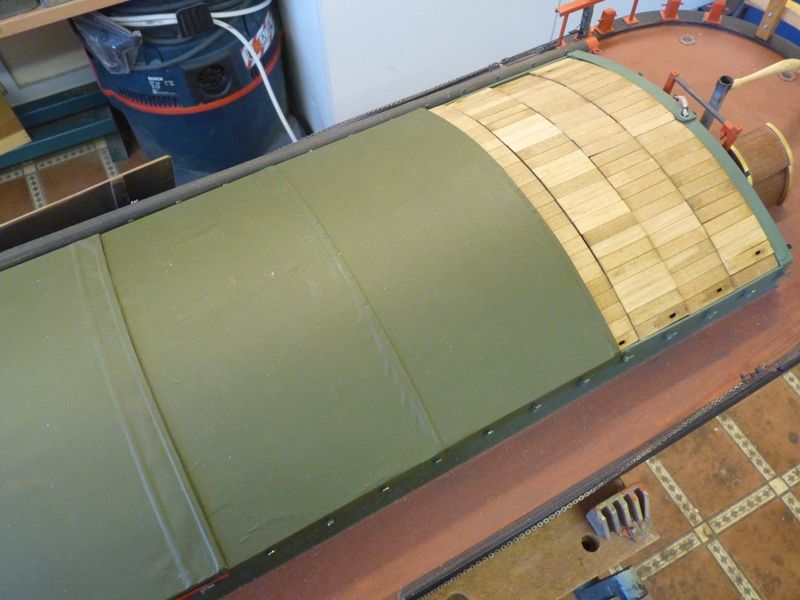
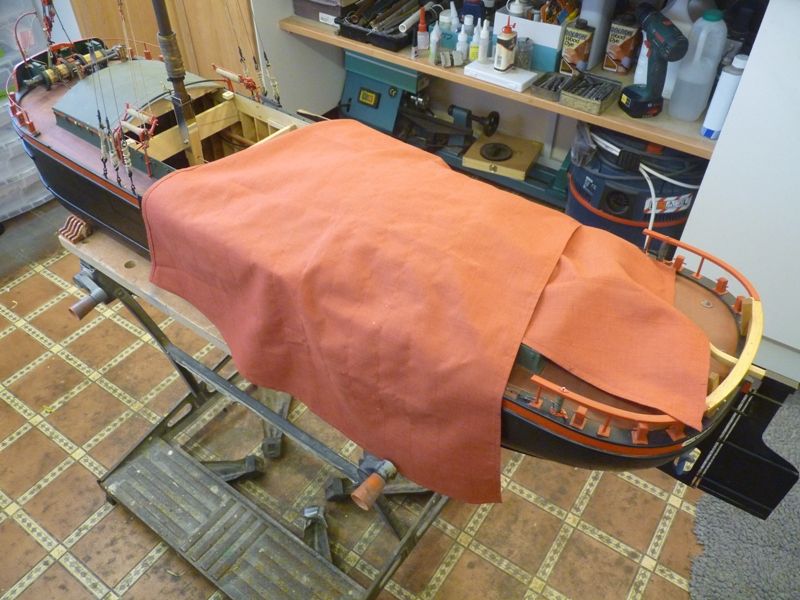
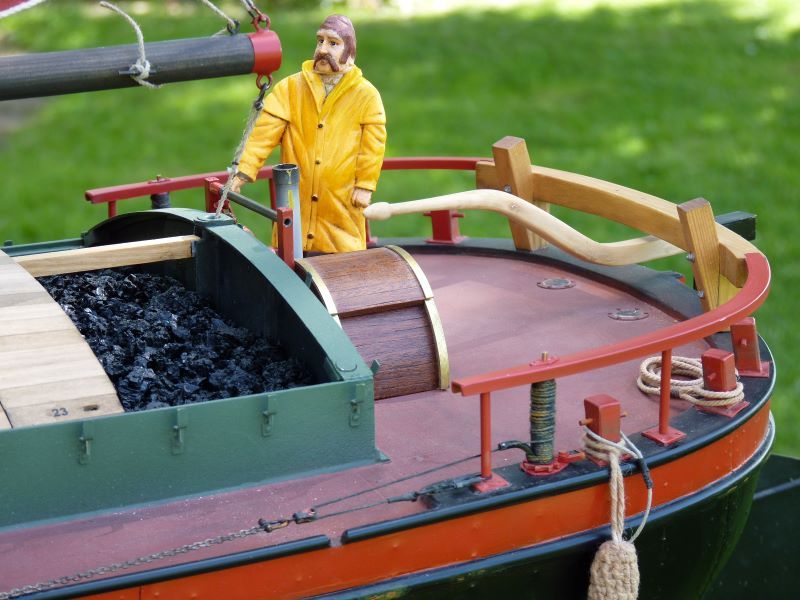
              The false floor can be seen underneath and this will be covered in crushed coal to represent the cargo. The short dummy hatch has been covered in Solartex to match the rest of the covers. A folded piece of cloth will be laid over it to represent the tarpaulin removed from the rear section of the hold.

              spider 230.jpg

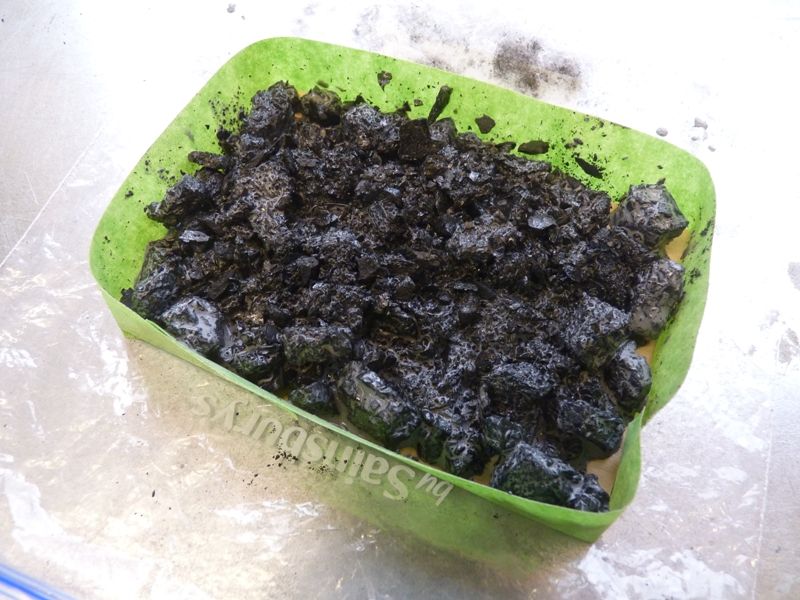
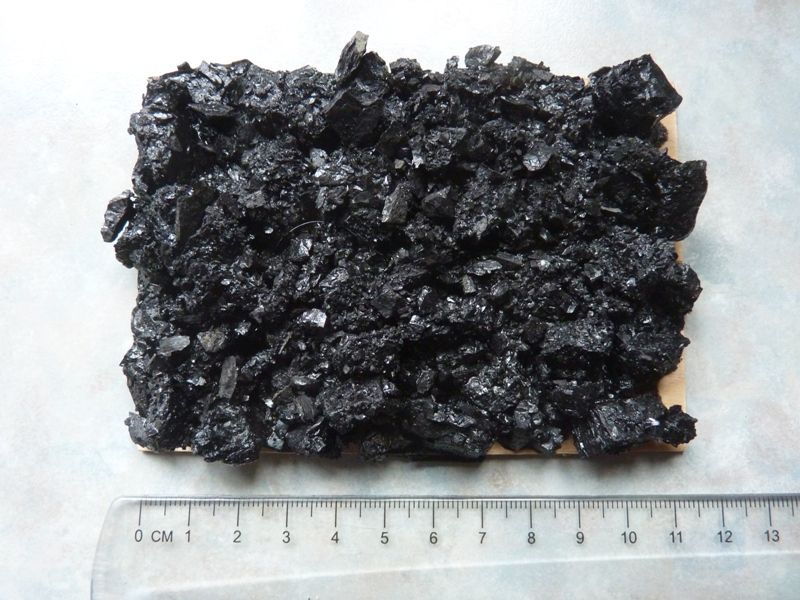
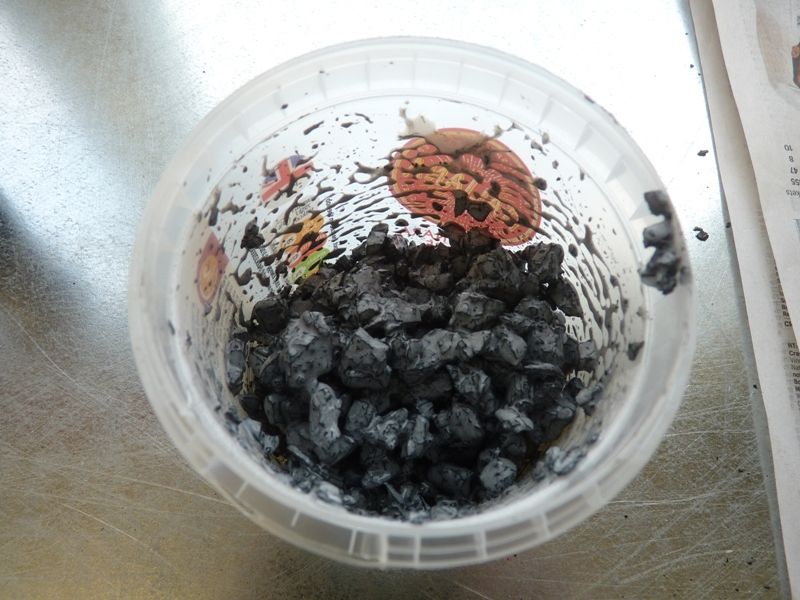
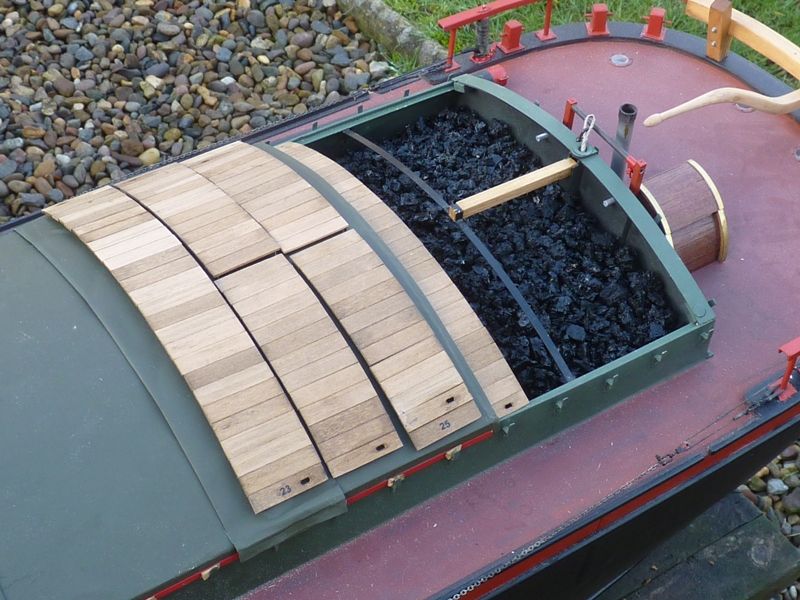
              Here is my first trial attempt at the cargo of coal. Its made from some real house coal crushed to a representative size by putting a few lumps in a double plastic zip seal bag and bashing it with a hammer. A proportion of this was then mixed in a plastic pot with some PVA wood glue, thinned about 50% with water. After a good stirring it was scooped out and laid on a bit of scrap ply with masking tape around the edge to avoid too big a mess. A small amount of the dried dust and smaller particles of coal was then sprinkled on top of the wet mix. Its now on the radiator in the house drying to see what it looks like, but at the moment it looks quite promising. If this method fails, Deluxe Materials do some adhesives specially designed for this type of task and I might have to resort to them. In the meantime I have plenty of spare common PVA glue.

              spider 232.jpg

              Gareth


              Edited By Gareth Jones on 20/12/2018 15:30:14

              #80366
              Gareth Jones
              Participant
                @garethjones79649

                What Gareth does not mention in his last post is that his coal mixture dripped onto the floor and stuck soundly. Even our hearing dog puppy could not remove it and he's very good at removing things dropped on floors, the workshop being one of his favourite haunts for treasure.

                Posted by the long suffering wife!

                #80368
                Chris Fellows
                Participant
                  @chrisfellows72943

                  Gareth, as others have said, you have made a wonderful job of this build and your attention to detail is admirable.

                  Dare one ask what your next project is going to be?

                  Chris

                  #80369
                  John Dickins
                  Participant
                    @johndickins22212

                    Gareth, what a superb model. I know because I have seen it. Elizabeth, what's all this "Long suffering Wife" ? I know it's a combined effort, well done. John.

                    #80376
                    Gareth Jones
                    Participant
                      @garethjones79649

                      Chris,

                      What is my next project? – good question there are just too many choices and not enough time. I have a mini project to do to complete the Humber sloop and that is to build a 1:16 scale cog boat, the 12 ft clinker built sculled dinghy that most keels and sloops had. The Richard Simpson article in the winter special edition of Model Boats was quite topical as it pointed me towards some useful information and a set of plans I can adapt.

                      When Spider J is finished I have a 10 Rater model yacht which needs the hull painting to finish it off. Its about 78 inches long so its not a small job but will take up the workshop for a while and need time in the spare bedroom for the paint to dry and harden. We have another 10 Rater to finish off by fitting the radio gear and making some brass fittings. That is also awaiting its turn in the workshop for Elizabeth to paint and varnish the hull and deck before I do my bit.

                      My next planned project is to refurbish my 1:24 Elco PT boat which I originally restored about 10 years ago. There is an article on that work here **LINK** The model has a failed speed controller and I think it would be a good opportunity to do yet another powerplant makeover and convert it to twin brushless motors. There are also quite a lot of details on the model that could be improved, such as decklights, cabin windows, ventilators etc. There are also quite a lot of 3D printed parts available for these models so I might add a few more bits and pieces. The paintwork is getting scruffy as well so a complete respray is in order. Since it will by then have been through several more iterations of motor sizes and types I might end up writing another article, Snogg the sequel perhaps.

                      After that, who knows. I had planned to build another local vessel to accompany Spider J, this time a 1:16 scale wooden hulled Humber Keel and I have the hull lines and plenty of photos of the real thing. I have the plans for the Spurn lightship, but no hull lines, which puts me off a bit. I have always fancied building a submarine, but the one I am attracted to is the T class, as I have a family connection to Thetis. However I don't think there is a fibreglass hull available now. Finally I quite fancy building another fast patrol boat such as a Fairmile D at 1:24 scale but can't make up my mind whether to scratch build or buy a kit.

                      John,

                      The 'long suffering wife' is just an act and she did manage to clean up the sticky black spot on the kitchen floor near the radiator.

                      The trial cargo of coal worked really well, I now need to bash up some more lumps of the real thing. I think this time I will grade it a bit better and try and apply a slightly thinner layer to avoid too much weight high up. I will also spray the supporting plywood sheet matt black before gluing the coal on. It seems to have set very solidly, no loose bits and a nice shine to the surface that looks just like wet coal.

                      spider 233.jpg

                      Gareth

                      #80383
                      Chris Fellows
                      Participant
                        @chrisfellows72943

                        You certainly have enough to keep yourself occupied for quite some time yet!

                        The coal looks great and will finish off your model very nicely.

                        Chris

                        #80410
                        Gareth Jones
                        Participant
                          @garethjones79649

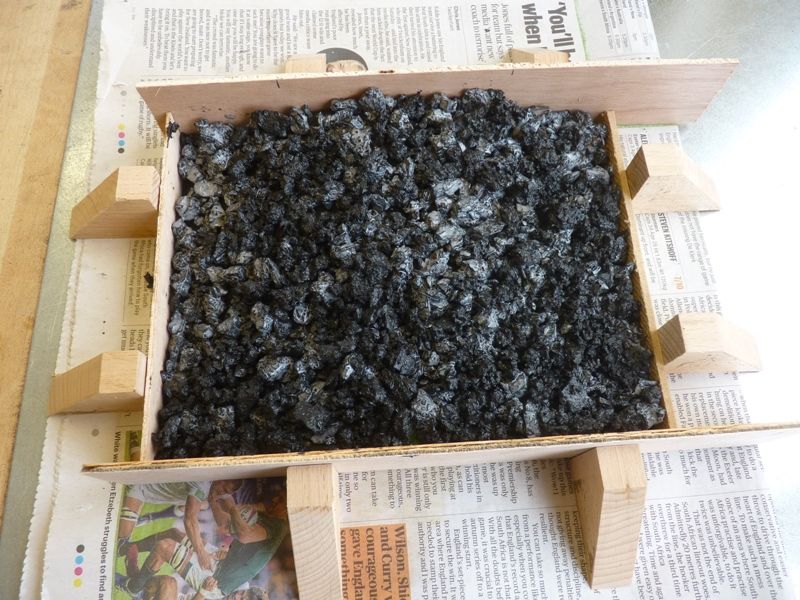
                          I have mixed up a new batch of crushed coal and PVA glue in a slightly drier mix than the trial example. I also tried to eliminate any excessively large chunks of coal so that it looked more realistically to 1:16 scale, bearing in mind it would have been delivered by barge direct from the colliery so it probably had not been particularly finely graded at that stage.

                          spider 234.jpg

                          The coal and glue were laid over the curved former with some scrap bits of plywood around the edges to hold it all in place but allow any excess glue to run out. Surprisingly there was very little leakage around the edges. My magnetic block and steel sheet on the workbench came in useful. I left it to dry for a few hours on the workbench and then overnight on the boiler in the house.

                          spider 235.jpg

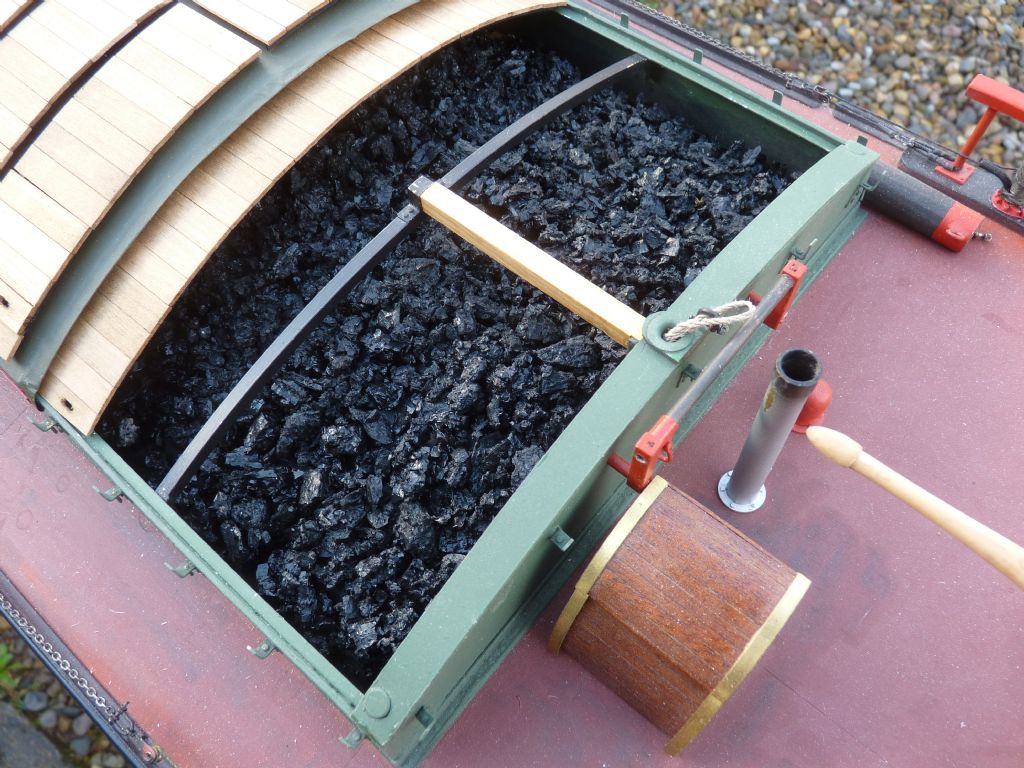
                          The milky appearance has completely cleared and I have a bright shiny layer of coal stuck firmly to the plywood. There are a few small gaps round the edge where pieces have come away but the plywood was painted black before sticking the coal on and they don't really show up. I might stick a few extra small pieces in to fill the gaps.

                          spider 236.jpg

                          It looks really good in the model, better than I had hoped.

                          spider 237.jpg

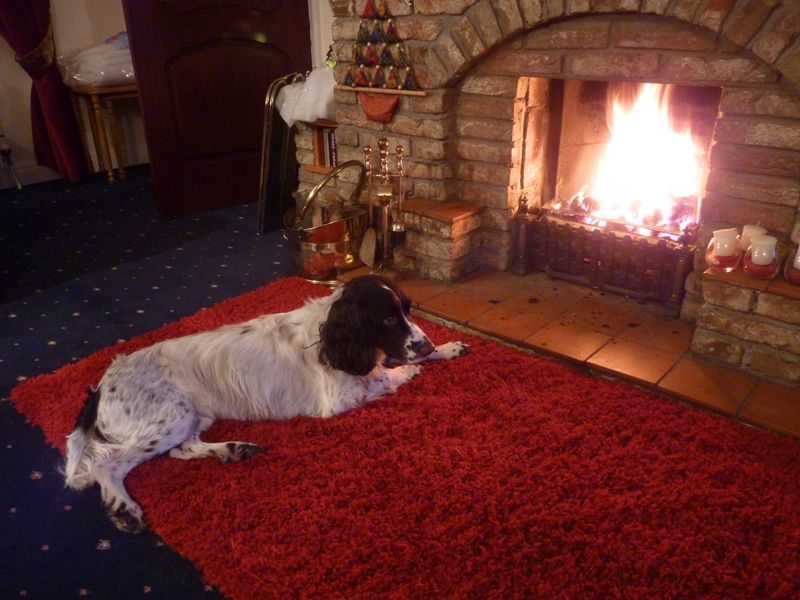
                          The test piece of coal and plywood I made to try out the method met a suitably pyrotechnic end on our fire last night and our trainee hearing dog Rodney enjoyed the benefit of it along with the rest of us.

                          spider 238.jpg

                          Merry Christmas and a Happy New Year to all the model boaters out there.

                          Gareth

                          #80411
                          John Dickins
                          Participant
                            @johndickins22212

                            Gareth and Elizabeth, A Very Merry Christmas and Happy New Year to you both. Nice to see Rodney enjoying the results of your modelling too.

                            A related tale:- Some years back Chesham Model Railway Club were invited to an event at a local museum. We took, amongst other layouts, a new version of our "Childrens" layout. Not quite finished (are they ever?) One of the guys was sitting doing some finishing touches which included "ballasting" the track. He was watched by several visitors and one mother asked what he was doing. "Glueing down the ballast" was his reply. "Why do you glue it down?" she asked. Mike looked around carefully, lent down close to her ear and whispered to her, "To stop people stealingt it"

                            #80416
                            Bob Abell 2
                            Participant
                              @bobabell2

                              All the best for the Festive Season, Gareth and Liz

                              Very nice coal effect, Gareth

                              How about a few lumps on deck?…….Eh?

                              Bob

                              #80464
                              Gareth Jones
                              Participant
                                @garethjones79649

                                Hi Bob,

                                I will certainly be adding some typical clutter and debris to my sloop to make it look like a well used example. I have just been reading a book about the life of a Yorkshire Ouse bargeman and it seems stealing buckets of coal from the steam tugs when in dock was a common practice among the barge crews in order to keep the stoves in their cabins going.. If they had coal as a cargo I guess there was not much of it left around lying on the deck.

                                I hope you and your good lady are both keeping well and have a very happy New Year.

                                Gareth and Elizabeth

                                #80477
                                Gareth Jones
                                Participant
                                  @garethjones79649

                                  The sails have been sewn by my wife Elizabeth and are now awaiting her sewing on the bolt ropes and fitting the thimbles in all the sheet and halyard attachment points and also fitting the reefing lines. I will then have to fit all the eyelets for the attachments to the forestay, mast hoops and gaff boom.

                                  spider 239.jpg

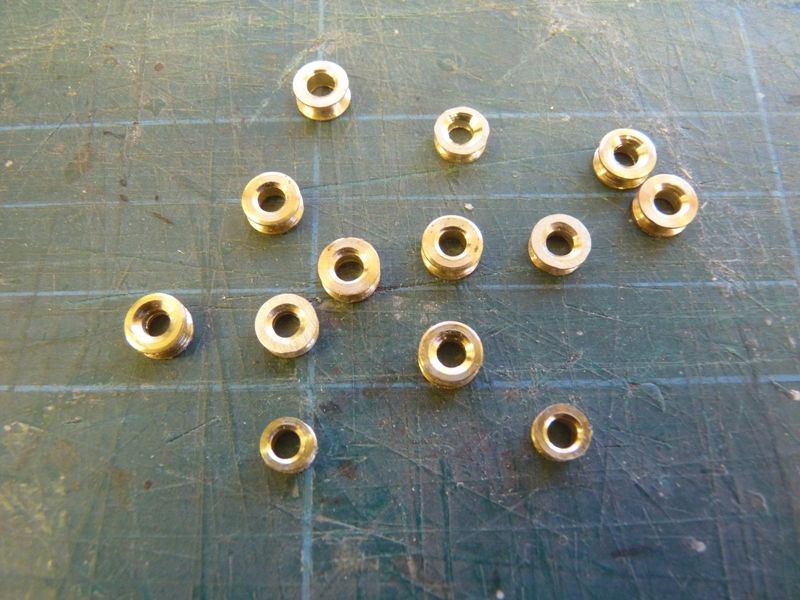
                                  I could not find any suitable thimbles so I have made my own by modifying some small pulleys by rounding the outer groove with a small needle file while the pulley is spinning in my pillar drill (with a 2 mm nut and bolt through the centre hole). I then drilled out and countersunk the centre hole. These will be blackend before fitting to the sails.

                                  spider 240.jpg

                                  I have started on the cog boat, having cut out all the shadows to build it over. These have been spaced with the shadows at the front closer together than those at the back to give the required shape to the dinghy. Cog boats were usually attached to the stern of a keel or sloop and, if there was a big difference in height, it could be difficult to step up from or down into the cog boat. They were therefore deliberately built with a very full front end to make sure the cog boat did not dip too far into the water when stepping down into it or up from it. Apparently it was common practice to bounce up and down on the front end of the cog boat to get a spring up on to the keel or sloop.

                                  spider 241.jpg

                                  After some adjustments to the shape and alignment of the shadows I have now attached the keel to the stem and stern. Planking will be in 8 mm wide lime planks. I will probably have to steam or at least soak the first few in hot water to get them to conform to the bend and twist required. The ends will be tapered down to about 5 mm wide to compensate for the different overall width to be covered at the ends and in the middle.

                                  spider 242.jpg

                                  Gareth

                                  #80840
                                  Gareth Jones
                                  Participant
                                    @garethjones79649

                                    The sails have now been finished and fitted to Spider J. The only problem I have is the reefing lines which do not hang down in a realistic fashion. They have been temporarily tacked in place with a bit of masking tape. I might have to try and glue them to the sails, unless someone knows of a better method.

                                    spider 243.jpg

                                    spider 244.jpg

                                    spider 245.jpg

                                    There are still a few detail bits to add to the finished sloop, including the crewman and the cog boat but it is now approaching the end at last.

                                    Gareth

                                    #82682
                                    Gareth Jones
                                    Participant
                                      @garethjones79649

                                      Spider T is now pretty well complete and I will post some photos if it ever stops raining. There are a few minor details still to add and a bit of weathering to do but it should be finished by the end of next month at the latest. Elizabeth is making the fenders at the rate of about 1 a night so they will be added this weekend.

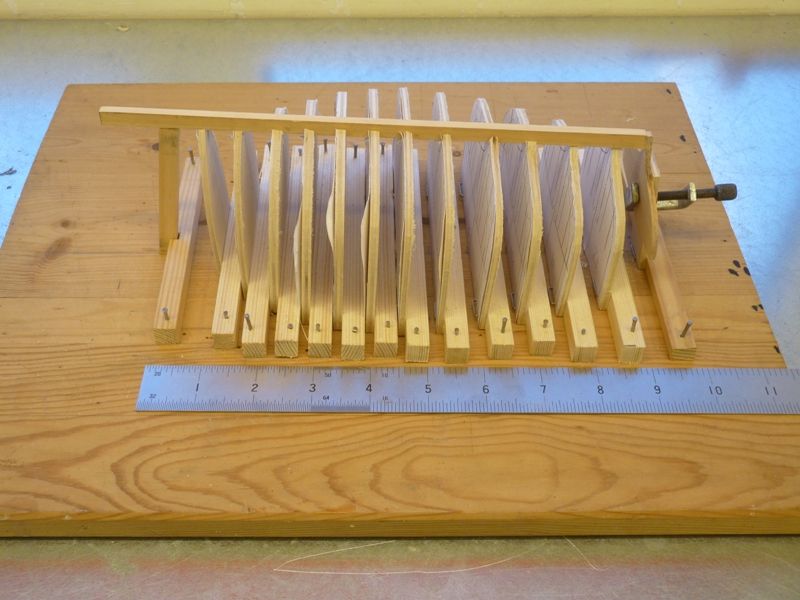
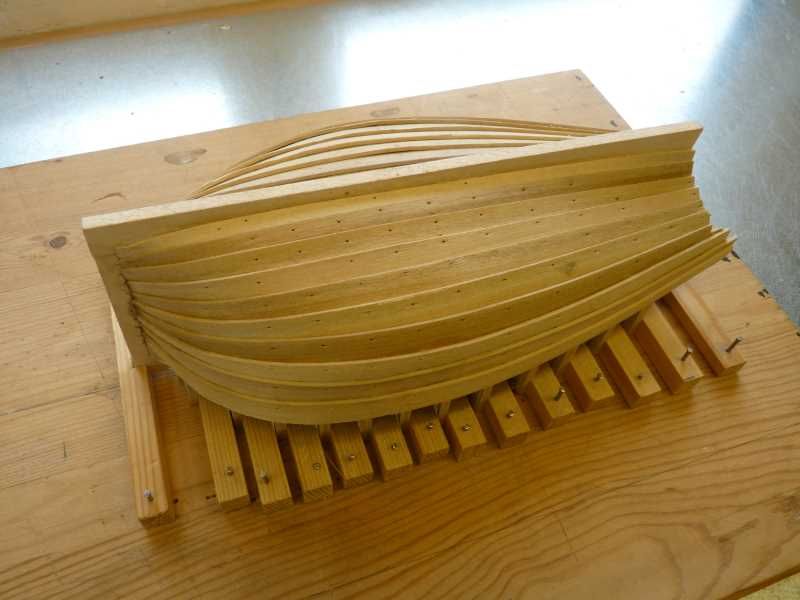
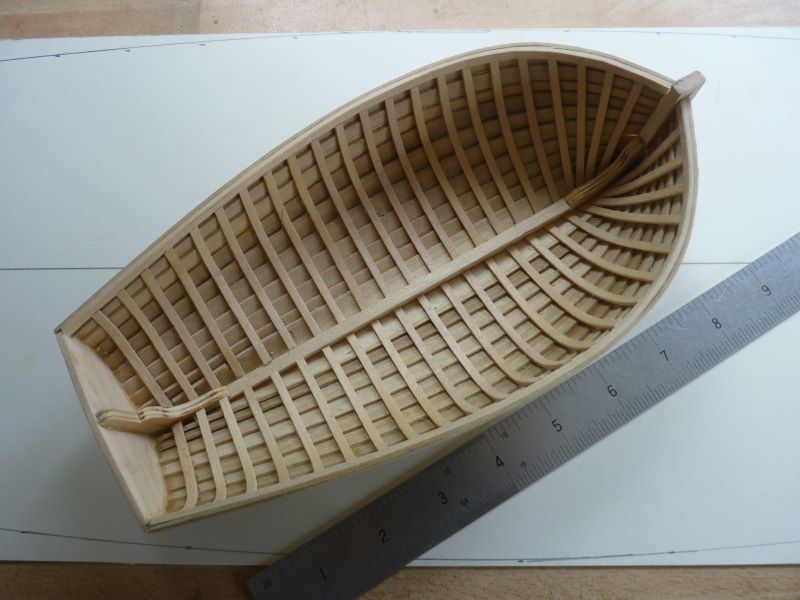
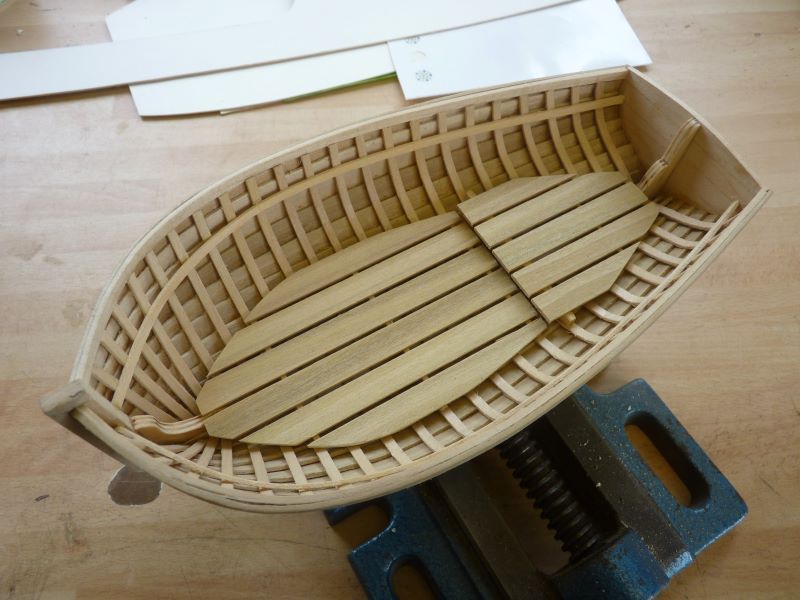
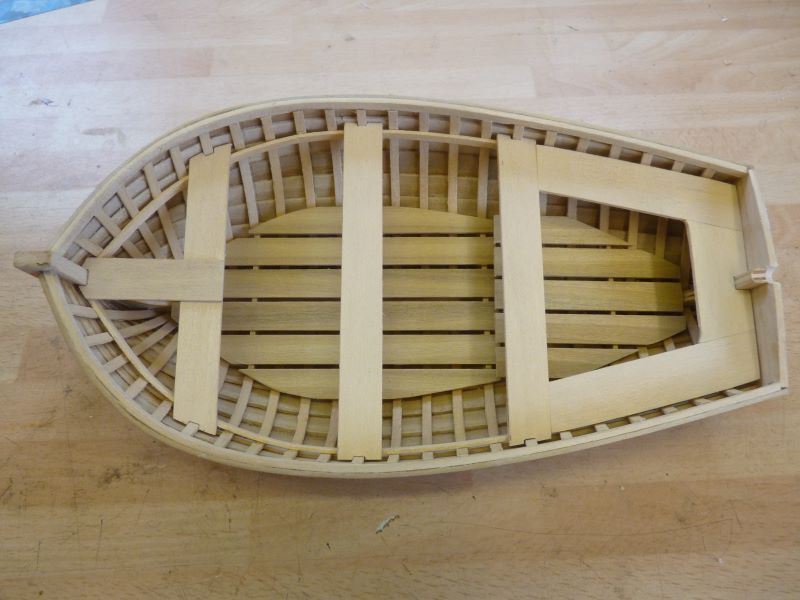
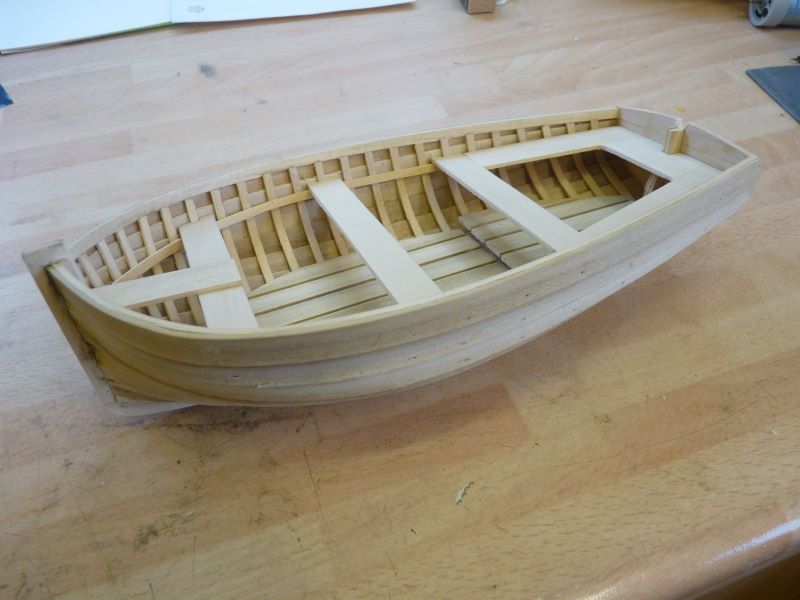
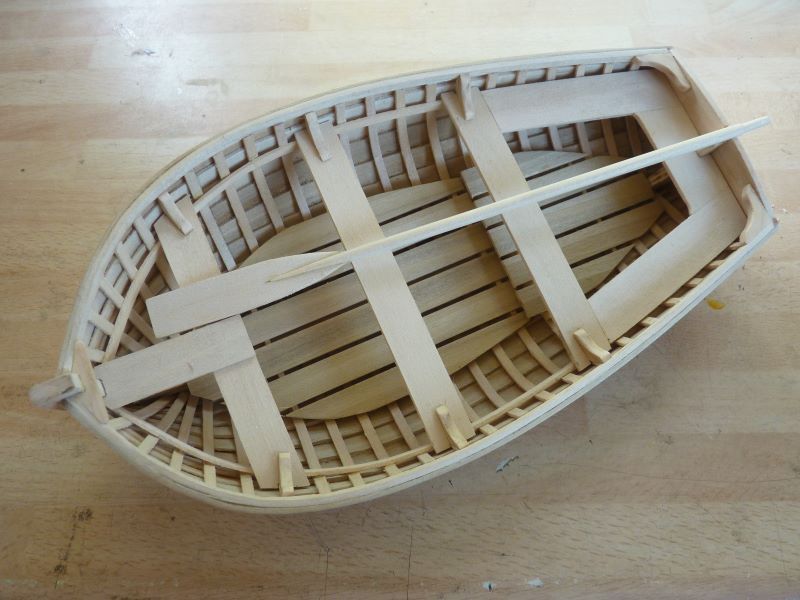
                                      The major task over the last few weeks has been the completion of the cog boat. I started this a few months ago but was not impressed by its looks. The planks were too narrow and too thick so I ended up abandoning that one and starting again, this time with 10 mm x 1,5 mm lime planks in lieu of 8 x 2. I am really pleased with the way this Mk 2 cog boat has come out and the only remaining parts to make are the knees and oar for sculling over the stern.

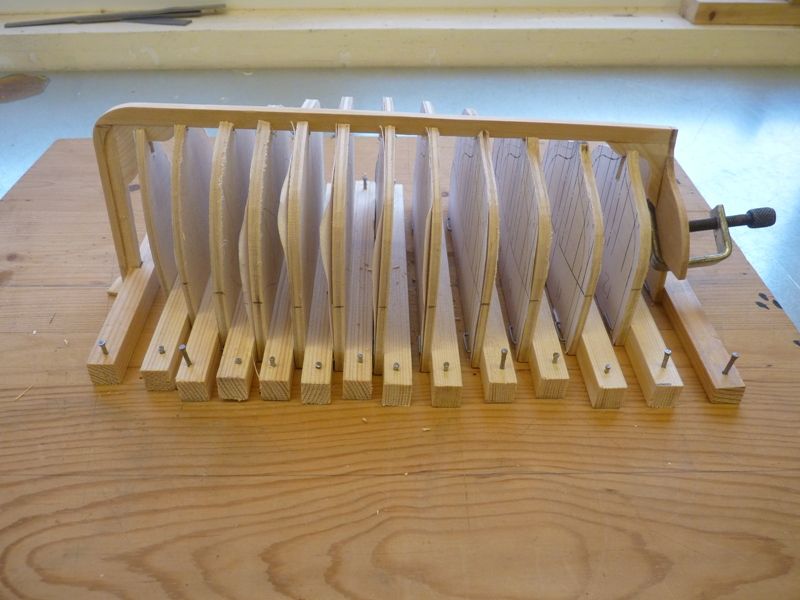
                                      Here is a view of the planked hull on its building jig.

                                      spider 246.jpg

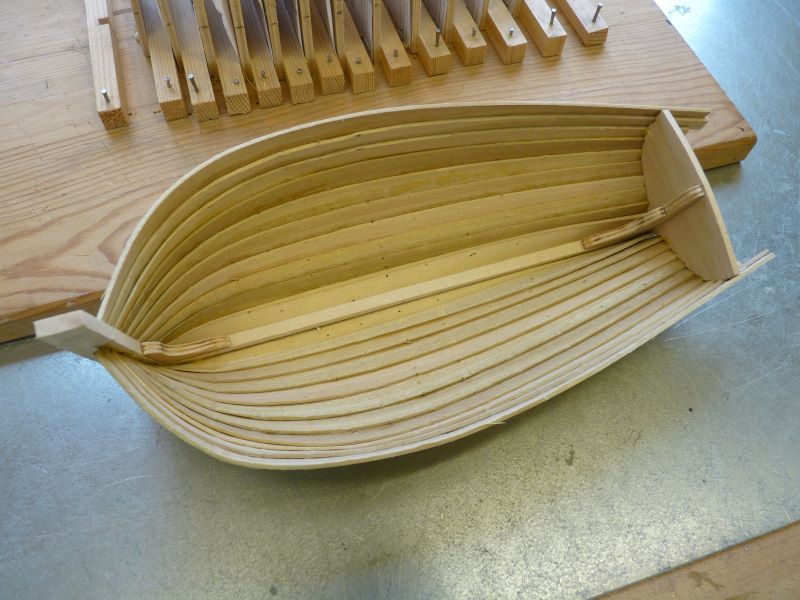
                                      The next picture shows the inside of the hull.

                                      spider 247.jpg

                                      Here the gunwhales have been added and the start of the ribs, I think the ribs are slightly on the thick side but look to be about the right spacing at a scale dimension of about 6 inches.

                                      spider 248.jpg

                                      Here is the fully ribbed hull

                                      spider 249.jpg

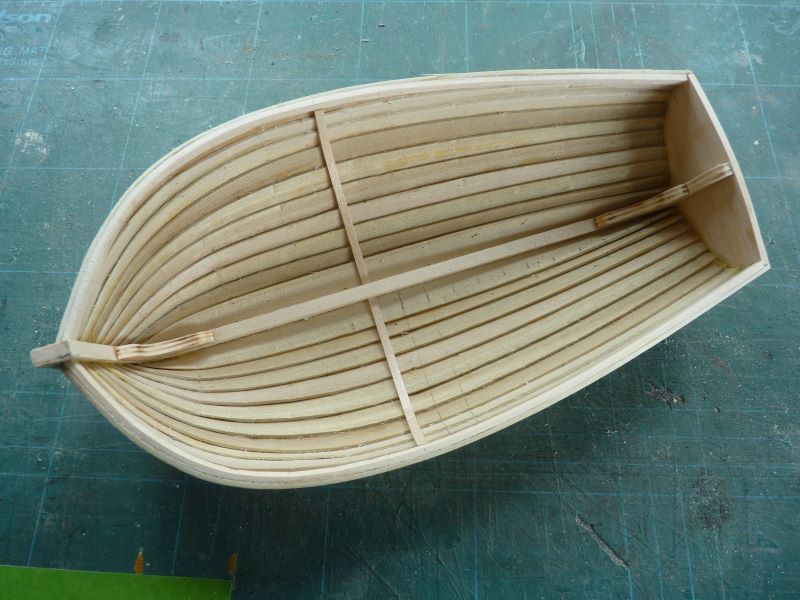
                                      And now I have added the floor beams and floor planks

                                      spider 250.jpg

                                      Currently I have fitted the seats but still have the knees to fit in the various corners,

                                      spider 251.jpg

                                      spider 252.jpg

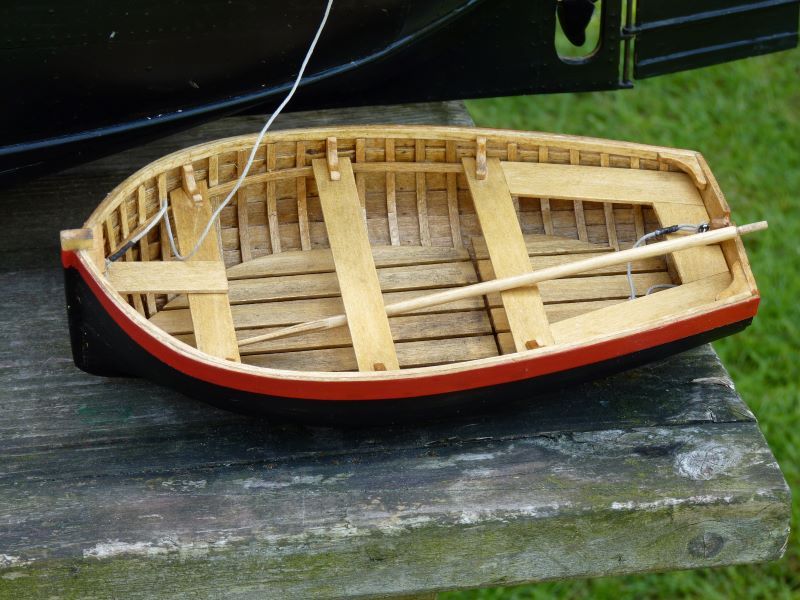
                                      After that its varnishing and painting. I plan to do the outside of the hull in black with a red stripe along the top plank. The inside of the hull will be varnished. Typically cog boats were finished with a tarred hull inside and out. The single oar for sculling over the transom is part finished, awaiting the glue attaching the paddle to the shaft to dry.

                                      All this woodwork has re-awakened the thought of building a wooden hulled Humber keel next, but who knows?

                                      Gareth


                                      Edited By Gareth Jones on 19/06/2019 10:13:29

                                      #82683
                                      Banjoman
                                      Participant
                                        @banjoman

                                        Gareth,

                                        That is one seriously impressive and absolutely beautifully built cog boat! Just gorgeous!

                                        Having missed some of your posts above while I was in Australia for most of January, I would also like to mention that the lovely cast bronze thimbles that Keith Jewell of Modelling Timbers used to sell before he closed shop are still, I think, available from a chap in Munich called Stefan Bauer at **LINK** (see page 33 of the online catalogue). I have not yet tried to order anything from him, as I bought up the remainder of Keith Jewell's stock when he was closing down, but I know of at least one other model boater who has.

                                        Please note, too, that the measurement given in the catalog listing seems to refer to the largest internal width of the eye, rather than any overall size of the thimble.

                                        Unfortunately, and in spite of the UK flag icon, both site and catalog seem to be available in German only, but it is at least fairly well illustrated; if anyone needs a hand with a translation of any passage in particular, I'd be happy to help out. Other than the thimbles, there are also plenty more things of interest to model boat builders, I'd say.

                                        Actually, looking through said catalogue, I cannot help but wonder if Mr Bauer might have been Keith Jewell's source of stock for a number of items?!

                                        Mattias

                                        Edited By Banjoman on 19/06/2019 10:35:20

                                        #82684
                                        Chris Fellows
                                        Participant
                                          @chrisfellows72943

                                          Yes, that's lovely. You've certainly put some work into that.

                                          Chris

                                          #82687
                                          Gareth Jones
                                          Participant
                                            @garethjones79649

                                            The cog boat is now ready for staining, varnishing and painting.

                                            spider 253.jpg

                                            #82688
                                            Tim Rowe
                                            Participant
                                              @timrowe83142

                                              Gareth

                                              Lovely Job. Very well done.

                                              Tim R

                                              #82689
                                              Ray Wood 3
                                              Participant
                                                @raywood3

                                                Hi Gareth,

                                                I'll second that 😀 superb craftsmanship, what's next ??

                                                Regards Ray

                                                #82729
                                                Gareth Jones
                                                Participant
                                                  @garethjones79649

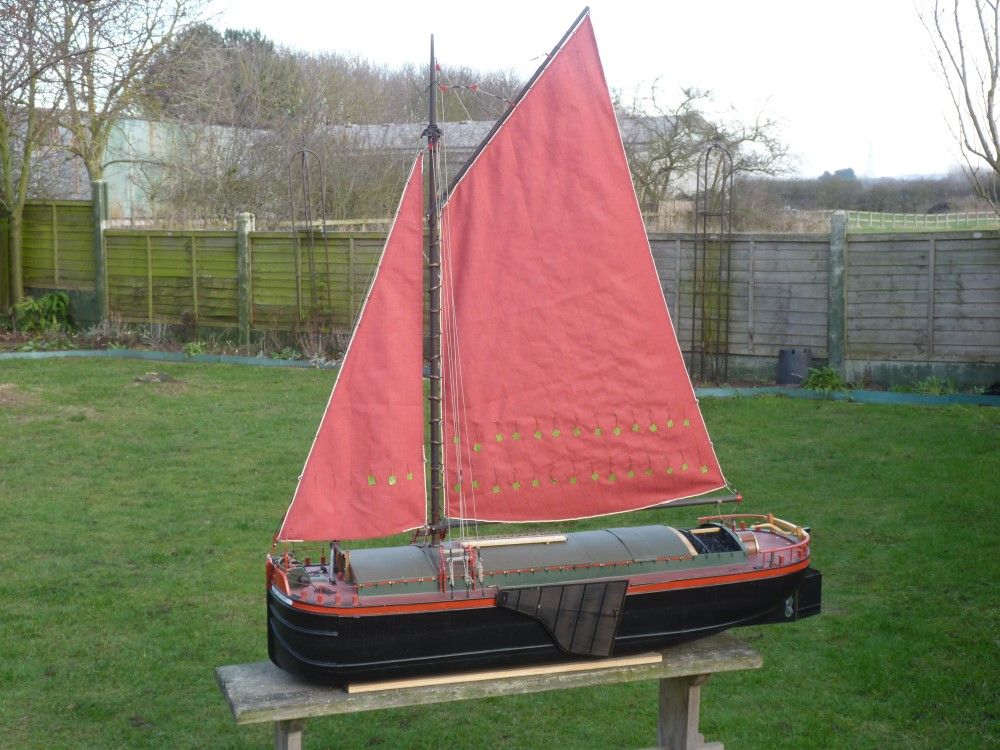
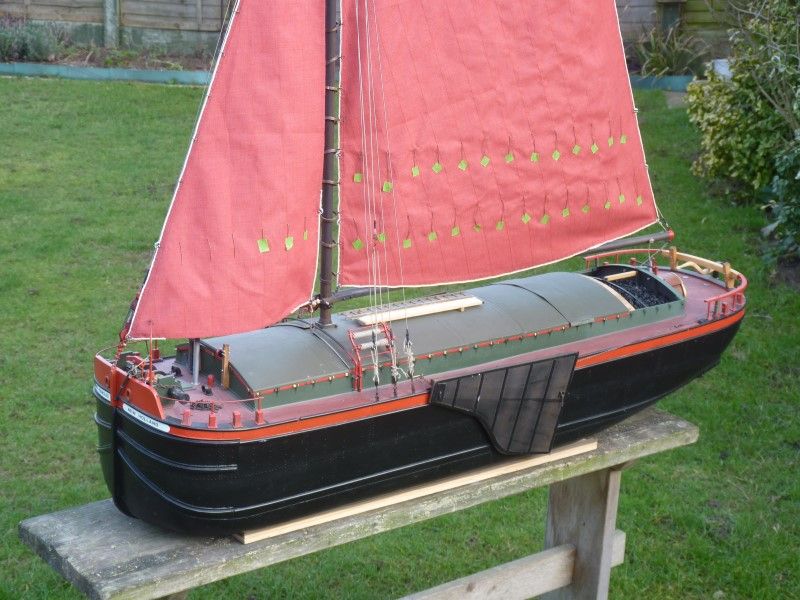
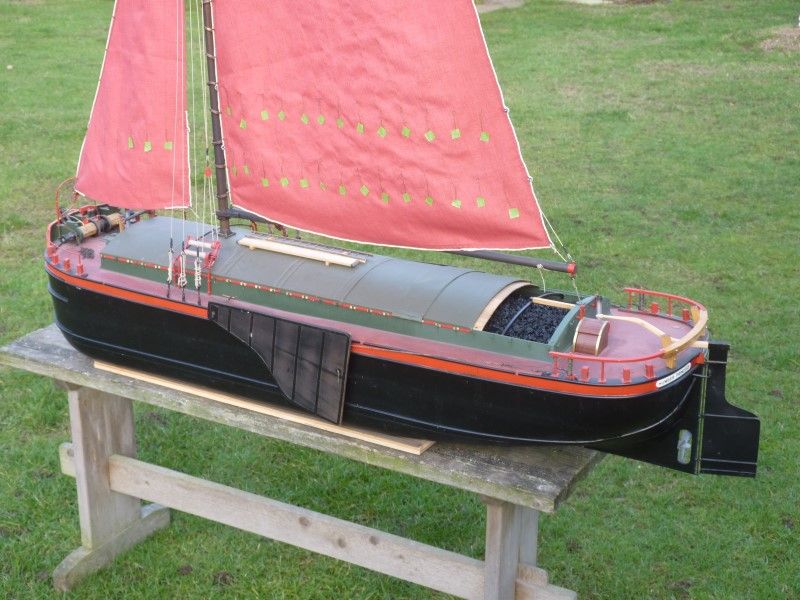
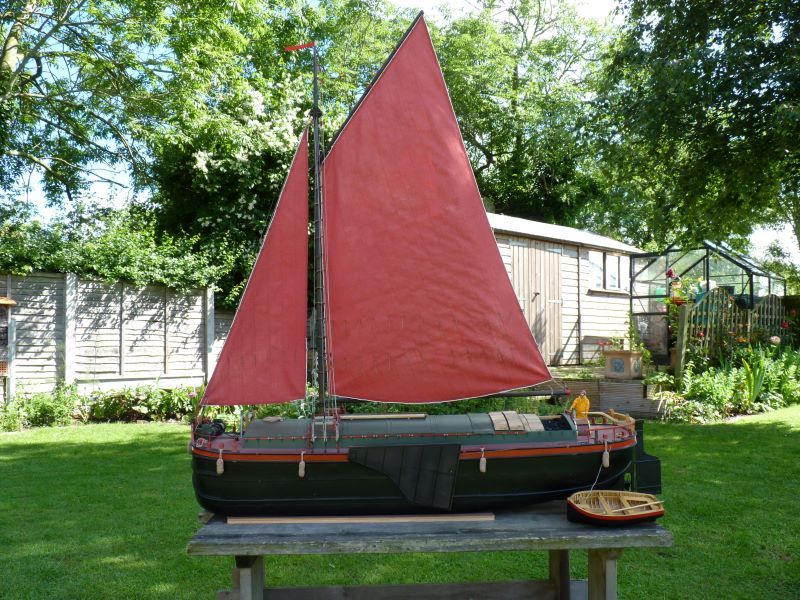
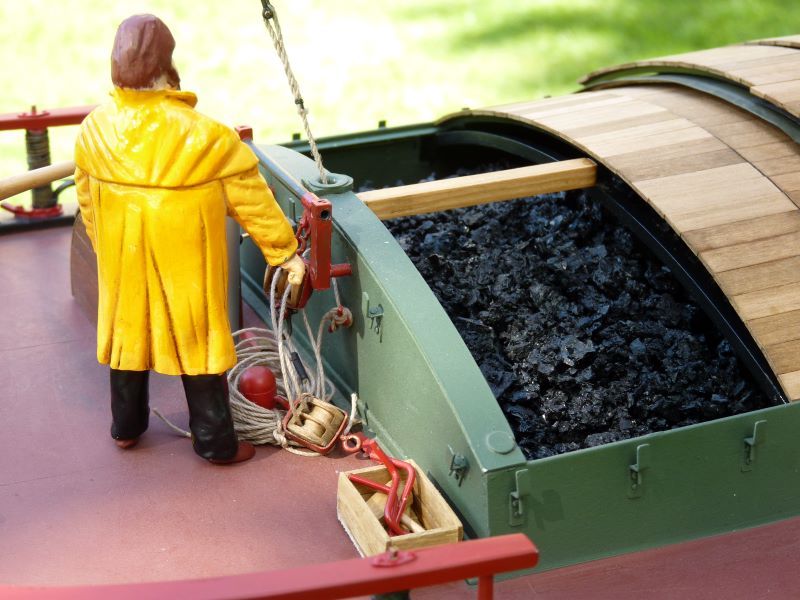
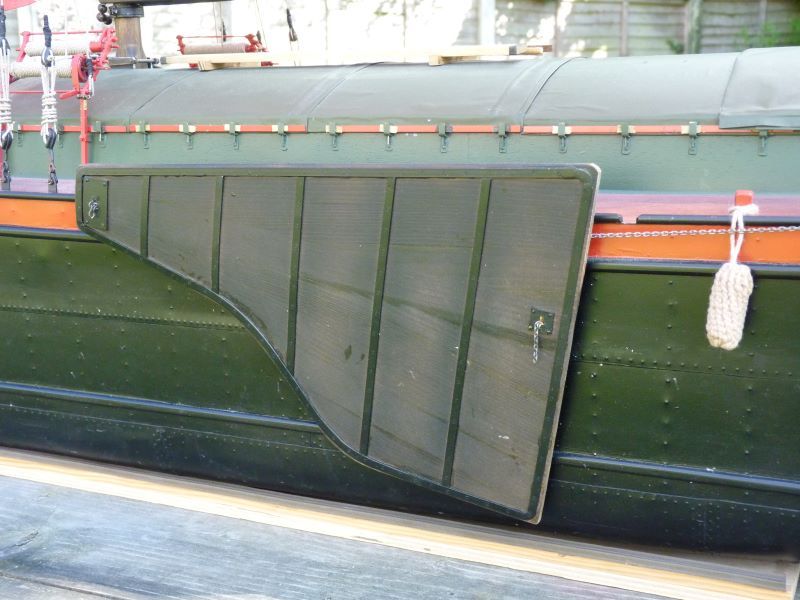
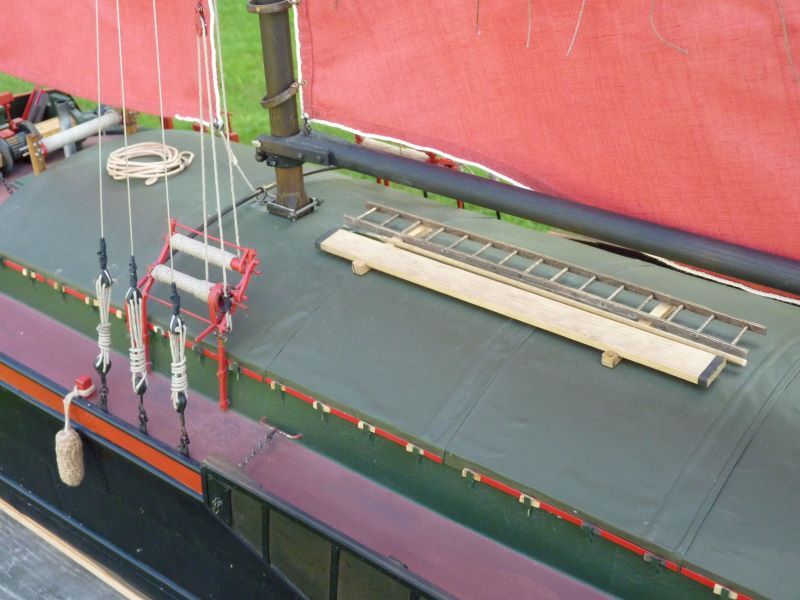
                                                  Spider T is now effectively complete and as near as makes no matter finished. The only remaining tasks are to do a bit more weathering to make it look slightly more used and add a second crew member when I find a suitable subject. Here are a few photos taken this morning. I will add a few sailing photos when I get the opportunity to do some sailing, hopefully this coming weekend.

                                                  spider 254.jpg

                                                  spider 256.jpg

                                                  spider 257.jpg

                                                  spider 258.jpg

                                                  spider 259.jpg

                                                  spider 260.jpg

                                                  spider 261.jpg

                                                  spider 262.jpg

                                                  What next, I hear you ask Ray. Well the long term plan is still to build a similar size and scale model of a wooden hulled Humber keel, but before I start that I am going to have a bit of a change.

                                                  I have a fibreglass hulled 36R yacht to build as a vane steered variant, still at the planning stage, although I have the hull and keel weight.

                                                  Next month we are expecting to get a bare fibreglass A class hull of a John Lewis design called Challenge to add to our collection of vintage racing yachts. That will be a bigger job as I will need to make a keel weight pattern and get it cast using around 42 lbs of lead.

                                                  I have a 1:24 scale model of an Elco PT boat that needs refurbishing and it will probably get a brushless conversion as it is missing both speed controllers. I also plan to add a lot more fine detail to the deck and superstructure.

                                                  I have also been given a plan and fibreglass hull for a 1:24 scale German S boat which will complement the PT boat well, but its probably a 3 or 4 year project. I was also very kindly given a whole series of supporting books, along with the hull by Peter Robinson so it should be given a fairly high priority really.

                                                  We have several other yacht refurbishments on the go and I am currently adding the control gear to a model of an International Dragon that Elizabeth is building in the style of Bluebottle, originally, maybe still, owned by the Duke of Edinburgh. There are also three Marbleheads in the loft (one of them built by Bob Abell) that all need major refurbishment so I am not going to be short of work over the next few years.

                                                  Gareth

                                                  #82734
                                                  Tim Rowe
                                                  Participant
                                                    @timrowe83142

                                                    Gareth

                                                    A busy lad indeed. In the meantime however Spider J is a credit to you. Simply excellent.

                                                    Really interested to see how your yachts shape up after this.

                                                    Best regards

                                                    Tim R

                                                    #82740
                                                    Banjoman
                                                    Participant
                                                      @banjoman

                                                      Gareth,

                                                      I stand (well, sit, but you know what I mean) in total, complete and utter awe! It is of course no surprise, given your track record, but it should still be said: this is a stunningly beautiful model!

                                                      I take my hat off to you, Sir!

                                                      Mattias

                                                    Viewing 25 posts - 176 through 200 (of 201 total)
                                                    • Please log in to reply to this topic. Registering is free and easy using the links on the menu at the top of this page.

                                                    Code of conduct | Forum Help/FAQs

                                                    Latest Replies

                                                    Home Forums Scratch build Topics

                                                    Viewing 25 topics - 1 through 25 (of 25 total)
                                                    Viewing 25 topics - 1 through 25 (of 25 total)

                                                    View full reply list.