Spider J

Spider J

Home Forums Scratch build Spider J

  • This topic is empty.
Viewing 25 posts - 51 through 75 (of 201 total)
  • Author
    Posts
  • #54527
    Gareth Jones
    Participant
      @garethjones79649

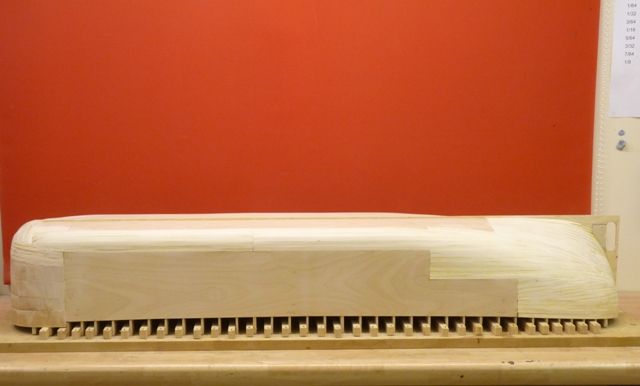
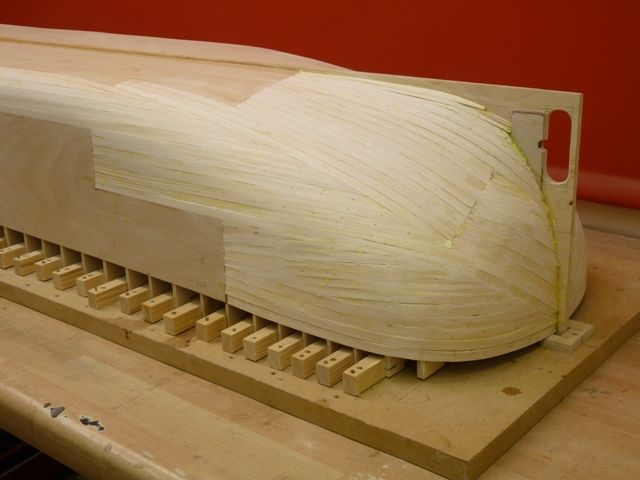
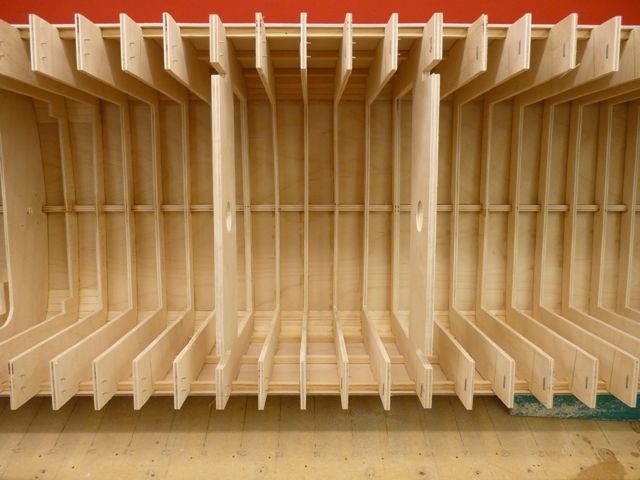
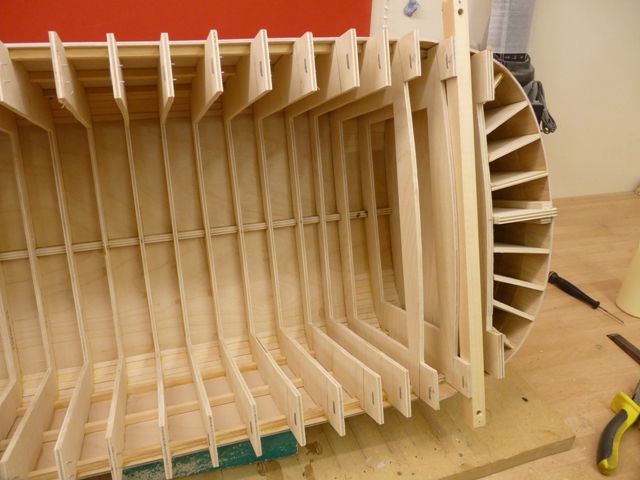
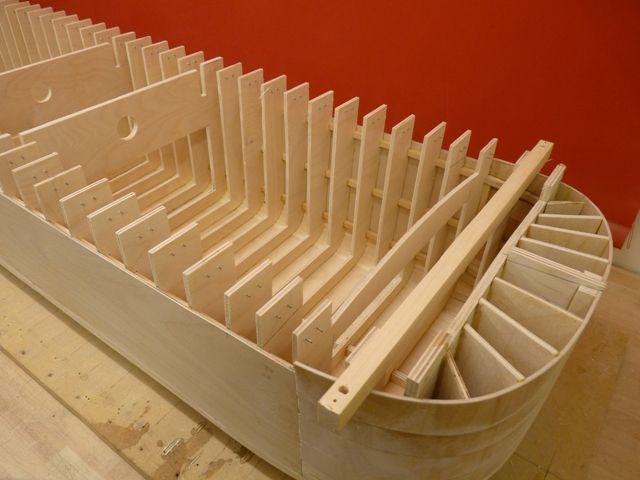
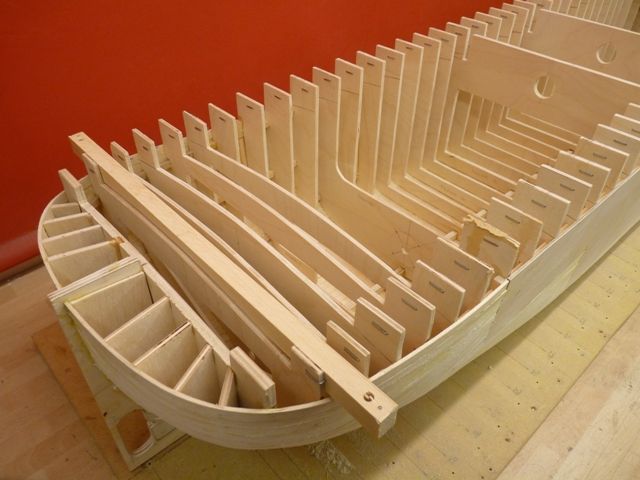
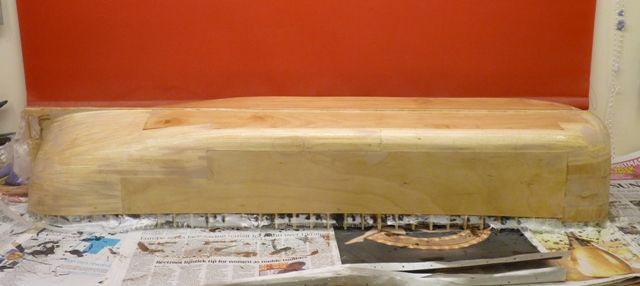
      Planking is now complete on Spider J's hull.

      spider 32.jpg

      spider 33.jpg

      In this view you can admire the sleek curvaceous, brick like lines of the hull.

      spider 34.jpg

      spider 35.jpg

      spider 36.jpg

      spider 37.jpg

      Reluctantly I have to admit Bob Abell is right, the planking does look a bit hotch potch. However I have a long term plan to atone for this lapse in quality control. It was always the plan to build two hulls, the first to be completed as a Humber sloop and the second as a Humber keel. The first hull will be plated to represent a rivetted steel plate hull and the hotch potch planking will be hidden. The second hull will be built as a wooden hulled keel, although I don't think I will build it with a true representation of the internal timber frames, just make the planking on the outside of the hull and inside of the hold representative of the real construction. That should be a good enough incentive for me to do it properly next time. I will have to arrange a trip into the maritime museum in Hull to take some photos of the wooden model in their exhibition.

      Here are a couple more pictures.

      spider 38.jpg

      spider 39.jpg

      The next job is filling and rubbing down the planking before the hull is covered in a layer of glass cloth and resin. I am not sure what resin to use yet. Shemarah was done with David's Fastglass resin but this time I think I will try Z-poxy finishing resin as I have been told its easier to sand.

      That's all for now. I would like to wish all our readers, contributers and moderators a very merry Christmas and a happy new year, all the best for 2015 and I look forward to meeting some of you at the shows and regattas next year.

      Regards

      Gareth Jones


      Edited By Gareth Jones on 23/12/2014 20:03:16

      #54528
      Bob Abell 2
      Participant
        @bobabell2

        Hello Gareth

        I'll bet you are glad that the planking is finished at long last?

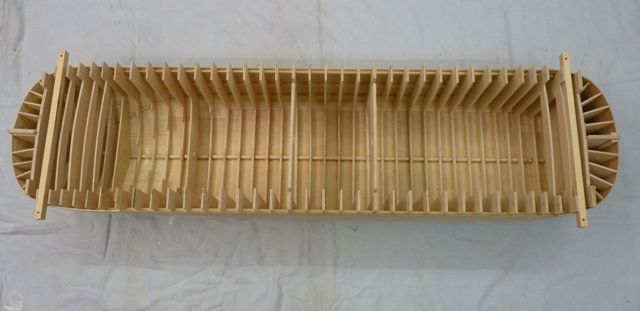
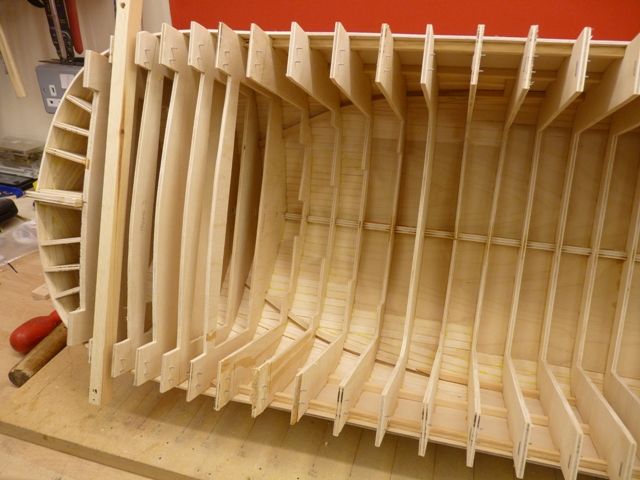
        Hope we can see the lovely inside construction, when the lid comes off, as it will be a real shame to cover it up

        Seeing the scale formers will be very impressive

        Don't like the idea of smothering the outside with hard to sand gooey resin? Wouldn't just paint be good enough?

        The skin needs to be delicate, with an indication of the plating

        Just being, overbearing, old chap

        Regards to the missus and yourself…..Have a nice one and looking forward to meeting you again at the shows

        Always a good laugh

        Bob

        #54694
        Gareth Jones
        Participant
          @garethjones79649

          Bob,

          I prefer a tough outside skin which is completely watertight. I think the risk of leaks is too high just painting over a planked hull. Anyway according to Dave Milbourn Z-poxy finishing resin is reasonably easy to sand. Time will tell as I have just cut out the glass cloth to cover the hull and tomorrow I hope to get the Z-poxy applied.

          spider 40.jpg

          spider 41.jpg

          This is the first time I have attempted to cover a hull in a single piece of glass cloth. Shemarah was done with several pieces of tissue. The cloth seems to drape over nicely although I guess I will have to cut a few slits in the bow section to get it to fit around the curves. It looks straightforward at this stage but its less so when your fingers are covered in sticky goo and bits of glass fibre and the resin is starting to go off before you have got all the wrinkles out.

          Gareth

          #54699
          Bob Abell 2
          Participant
            @bobabell2

            Don't do it, Gareth!

            Let's talk about it first?

            Only hope, we're not too late?

            Bob

            #54706
            Dave Milbourn
            Participant
              @davemilbourn48782

              Gareth

              ZAP every time. It really is MUCH easier to sand. I apply it thinned down with Isopropyl Alcohol using equal parts resin, hardener and IPA. Silicon carbide abrasive paper is the best sort; I buy it on-line from toolbank.com **LINK** Use a stiff brush about 1" wide and spread the resin from the centre outwards. It has a long working time and is very runny if you use IPA to thin it. I've also had some success using a flat piece of styrene sheet as a squeegee to remove excess resin. Clean up with standard thinners and don't forget to use surgical gloves throughout the whole job.

              Dave M

              Edited By Dave Milbourn on 01/01/2015 08:50:46

              #54707
              Gareth Jones
              Participant
                @garethjones79649

                Bob,

                Its not too late, in the sense that I have not covered it yet, but I have made up my mind to do it. Shemarah was hard work, so much so that when Elizabeth restored her 100 year old gaff rigged ketch I suggested that she just gave the inside of the hull a good coat of resin and painted the outside. Within a year the hull had cracked along the joints between the planks and it leaked and looked awfull. I lost a lot of brownie points for that and the following year, Elizabeth had to take off all the masts, riggig, superstructure and fittings, fibreglass the outside of the hull and rebuild the model. It now looks lovely again, the hull is watertight and the lesson has been learned. I think its too big a risk not to do it on a planked wooded hull – but having said that I am planning to build the next model as a wooden keel so I will have to come up with some solution for that.

                Dave, thanks for the information, unfortunately I have not got any iso-propyl alcohol to thin down the resin. Where did you get yours from – maybe I will wait a few days to get some if you think it will make a big difference to the job.

                Happy new year to you both.

                Gareth

                #54708
                Bob Abell 2
                Participant
                  @bobabell2

                  Gareth

                  Still don't like the look of that FG blanket!

                  Have a small practice run on something round and see what happens?

                  In days of yore, they only used varnish ……Ask Lizzie

                  Get her advice and then you can blame her, when it goes wrong!

                  Bob

                  #54709
                  Gareth Jones
                  Participant
                    @garethjones79649

                    Dave,

                    I have discovered I could get a litre tin from Maplins today so we might venture out to York this morning.

                    Gareth

                    #54710
                    Dave Milbourn
                    Participant
                      @davemilbourn48782

                      Gareth

                      I bought mine on-line for about eight quid a litre plus P&P but I'm blowed if I can remember where. Bob would presumably have you wallpapering the hull – a nice Anaglypta or woodchip and some Vinyl Silk Magnolia would look just peachy. O – and don't forget the wheels.

                      PS A very light spray of 3M Spraymount will tack the cloth to the hull and help prevent any wrinkles in it.

                      Dave M

                      Edited By Dave Milbourn on 01/01/2015 09:32:13

                      #54711
                      Gareth Jones
                      Participant
                        @garethjones79649

                        Bob,

                        I have seen a few leaky yacht hulls that have been covered in glass cloth and resin. The coating is so thin and transparent that the cloth is virtually invisible. Certainly that was the case with Elizabeth's ketch and I hope might be the solution to finishing the wooden hulled Humber keel when I get round to doing that one. Spider J will be plated and painted afterwards so its a good hull to try out the glass cloth and Z-poxy process. I have a leaky 36R yacht to do before the summer season starts so if it works on Spider J, Ladyshave will be next.

                        Gareth

                        #54713
                        Kimosubby Shipyards
                        Participant
                          @kimosubbyshipyards

                          Hi Gareth,

                          my tuppence says use the Z-poxy, all my hulls are liberally coated inside with it and my 36R has the cloth and resin over the outer hull too. I found a second coating of resin filled the cloth mesh nicely. Be careful as too much brushing can stretch the cloth out of shape, I like DM's suggestion of the 3M Spraymount, that I will try. I've a river barge hull nearly done so will practice on that [Dutch canal barge with lifting wheelhouse etc].

                          I shall certainly use it on the marblehead and you've seen the sprung planking on that.

                          Just about to jump in the sea for charity, 11am, the sort of thing we do over here all round the Island. And it's raining and blowing a SW gale too, so the sea will feel warmer. Pity it's near low water, a long haul across the sand to get wetter.

                          Regards to you both, aye, Kim

                          Edited By Kimosubby Shipyards on 01/01/2015 09:48:23

                          #54716
                          Dave Milbourn
                          Participant
                            @davemilbourn48782

                            Kim/Gareth

                            That's a VERY FINE spray – more of a 'misting' from about a foot above the model. Midwest Kits recommend tacking the cloth every three inches or so along the keel line with thick cyano but I found that left hard blobs which had to be sanded out later. As Kim says you need a second coat of resin with less thinning to fill the weave. Use the plastic squeegee to prevent the resin pooling anywhere. I've also discovered Halfords spray primer/filler which is a thick yellow primer which fills the weave very quickly and sands down beautifully with 240 silicon carbide paper.
                            As regards the weight of cloth, I've used Delux Materials' 1oz/sq.m and also some 2.3oz cloth which came with a Dumas kit. The lighter stuff has also been used in two layers as per the Midwest kit suggestion. As you'd expect the heavier cloth takes more filling and sanding but is the strongest, while the double-thickness 1oz yields a good finish but takes a lot longer to apply. The single layer of lightweight cloth is the easiest to apply and fill, as you'd expect, but it's all too easy to sand right through it unless you're very careful; OK for smaller hulls up to about 24" long. For the actual coating resin I've stuck firmly with ZAP which is easily the best I've ever used.

                            Dave M

                            #54718
                            Bob Abell 2
                            Participant
                              @bobabell2

                              Gareth and Elizabeth……….Just another super simple idea……

                              Why use the cloth anyway?

                              Just apply the gunge and rub it down?

                              Bob

                              #54719
                              Gareth Jones
                              Participant
                                @garethjones79649

                                Bob,

                                Its the cloth or matting that gives the coating its strength and toughness. A coat of resin is very thin and even if it soaks into the timber and joints it is still not that strong and is liable to crack along the joints or changes in section. The cloth or fibres bond the whole thing together in a tough, waterproof and slightly flexible membrane.

                                A good comparison is concrete, very strong in compression but weak in tension and liable to crack, hence you need to reinforce it with steel bars or mesh. However even I would admit reinforced concrete would be a bit of an overkill on a model boat – but it has been used to build real ones.

                                Gareth

                                Edited By Gareth Jones on 01/01/2015 12:46:04

                                #54723
                                Gareth Jones
                                Participant
                                  @garethjones79649

                                  Bob,

                                  Its definitely too late now as its been done.

                                  spider 42.jpg

                                  First impression was it was easier than doing Shemarah but the shape of Spider J is much simpler.

                                  I marked the centreline of the glass cloth after cutting it about an inch oversize all round. The cloth is from an old Fibretech Kit from may years ago and I think it is around 50 grm /sq m. (Fibretech are now known as Bucks Composites)

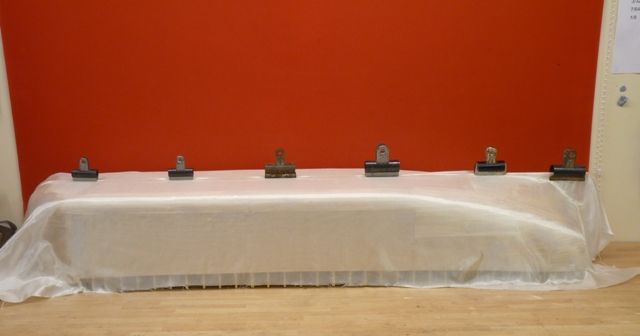
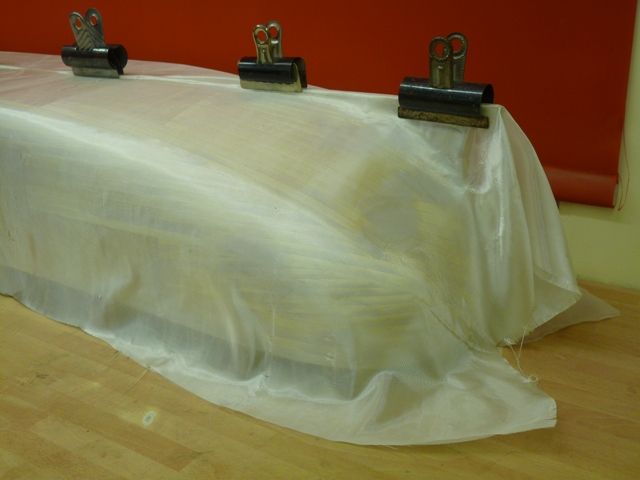
                                  I made up 60 ml of mixture, 20 ml resin, 20 m hardener and 20 ml isopropyl alcohol. I painted that on one side of the hull, starting from the keel and working outwards. I then overlaid the material, lining up the centreline along the keel and being careful not to get any resin on the dry side. I then clamped the cloth to the keel usng a number of bulldog clips and pressed the cloth into the resin using an old flexible friend and occasionally a brush. It was not too difficult to pull out the wrinkles and get a smooth finish. I had to make a small longitudinal cut at the stern and a couple of longer radial cuts at the bow to get the material to lie smoothly on the hull.

                                  I allowed the first side to dry for a couple of hours and then repeated the process on the other side. It was tricky to avoid pulling the material away from the keel but generally I managed to keep it tucked into the corner between keel and skin. I get the impression there are fewer bubbles in the material than when I used Davids Fastglass resin and tissue, but time will tell.

                                  The Z pozy was less smelly than the material I used on Shemarah but not completely odour free. 60 ml of resin mixture was about right for each side of the hull, which is about 4 square feet per side in area. I cleaned out the measuring containers and brush using some isopropyl alcohol which seems to be quite an effective solvent, at least while the resin is wet.

                                  I am going to leave it to cure overnight and give it a second coat to fill the weave tomorrow.

                                  Kim,

                                  I hope you have dried out and warmed up now. If jumping in the sea is the mainstream activity on the Isle of Man in winter we will stick to visiting in the summer.

                                  Gareth

                                  #54727
                                  Bob Abell 2
                                  Participant
                                    @bobabell2

                                    Well done, Gareth

                                    I`m suitably impressed…….Didn`t think it was that versatile

                                    Bob

                                    #54734
                                    ashley needham
                                    Participant
                                      @ashleyneedham69188

                                      That very fine cloth is suprisingly flexible.

                                      Gareth has dived in, and i dont think theres another way to do it, you cant practice, you just have to slap it on (carefully of course). Well done.

                                      I am making notes as the skin on the LOTUS needs something similar, the thing has turned out so heavy my current covering is not up to the job.

                                      Ashley (HNY by the way beer)

                                      #55033
                                      Gareth Jones
                                      Participant
                                        @garethjones79649

                                        I am a definite convert to Z-poxy. I reckon it took half a day to put on the first coat and the glass cloth, half a day to rub it down and put on a second coat and a further half day to finish rubbing down afterwards. It helps that Spider J is flat sided and flat bottomed but even so it was very easy. There is virtually no filling required, only a tiny bit here and there. I am not after a mirror smooth finish as the hull is going to be covered in card representing the plating and rivets, all it needs to be is flat and a good key for the adhesive. I think Shemarah took about three weeks, but even allowing for the simpler shape of Spider J, the Z-poxy was much easier to work than Davids Fastglass resin. An excellent recommendation from Dave Milburn.

                                        You can't see the glass cloth in the resin. I am in two minds now how to make the wooden keel as the next project. Do I make a proper planked hull and then cover it in resin and cloth as with Spider or do I do a roughly planked hull as Spider, cover that in cloth and resin and then put some thin planks on top as an outer covering. At the moment I am tending to the second option, but its a long way off yet.

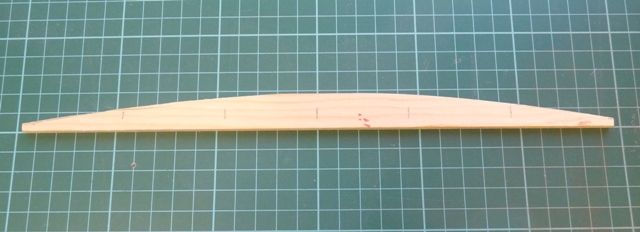
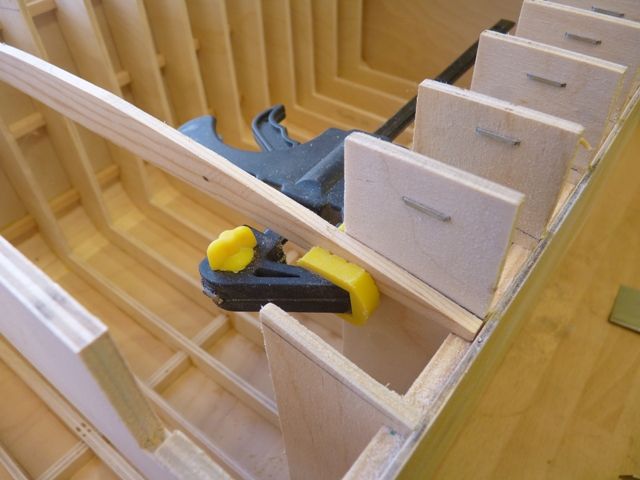
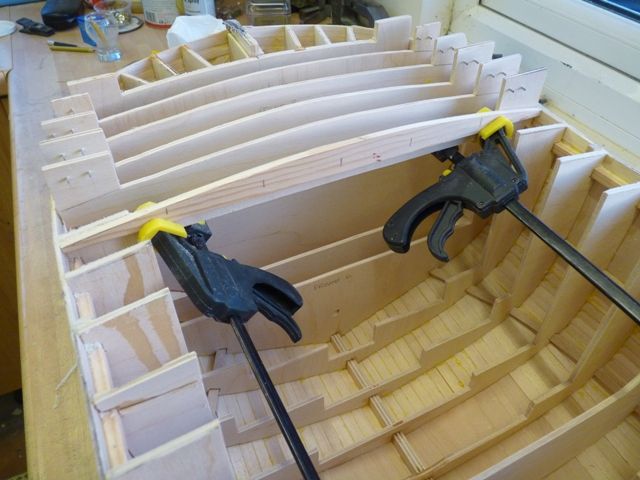
                                        The next job was to cut off all the frame extensions to deck level. I made a template of the deck camber from a strip of pine, about 20 mm x 5 mm thick. The initial length was just long eough to fit between the hull skins.

                                        spider 43.jpg

                                        The pattern is clamped to each frame in turn and the extended top pieces cut off with a razor saw.

                                        spider 44.jpg

                                        The deck line was marked on all the frames before they were cut out but, because of tolerances in drawing, cutting and fitting they tend to be bit higgledy piggy when they have all been completed. On Shemarah I made the mistake of cutting them all off along these lines and then trying to level them all up afterwards – what a pain that was.

                                        On Spider J I cut the main side skins with the appropriate degree of sheer and clamped them to the frame sides at the correct height, measured from the building board. Rather than line up the frame cutting template with the marked line I lined it up with the edge of the side skin instead which gives a much smoother curve and better fit along the length of the hull.

                                        spider 45.jpg

                                        All the surplus pieces have now been cut off apart from the two 6 mm thick frames at the front and back, so the hull can be turned over and still supported level when its upside down.

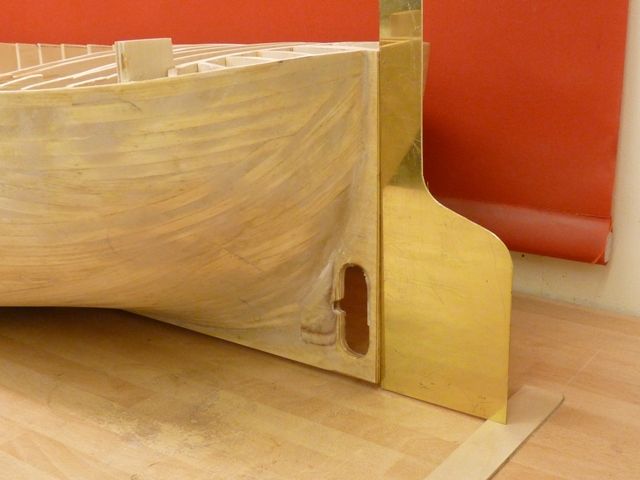
                                        The next step was to cut out the rudder from a piece of brass sheet. I tend to use door finger plates from B and Q as they are reasonably priced and an appropriate thickness. I now need to make up the rudder hinge plate to fit on the stern and the hinges and stiffners that go on the rudder. I have still not decided how I am going to drive the rudder from an internal servo. I need to come up with a discrete connection through the rear of the hull. I might follow Banjoman's method and have a camouflaged closed loop pair of push rods at deck level but I would prefer something a bit lower down where it will be less obvious It might need to be made watertight if it is very low down although I am not planning to fit it under water. Maybe a centimeter below deck level and sealed with a grommet might work, as long as the rods are flexible enough to flex sideways as they pass through the grommets.

                                        spider 47.jpg

                                        I will ponder the solution over the next few days. The rudder needs to extend above deck level as its to be fitted with a large oak tiller – or at least it was oak in real life.

                                        Gareth

                                        #55037
                                        Bob Abell 2
                                        Participant
                                          @bobabell2

                                          Gareth

                                          Yes, it`s me again!

                                          The close pitch formers and visible inner planking looks nice

                                          How`s this for an idea?………Instead of using card as the plating…….Use beer can aluminium?

                                          It will be ok for the rivets and can probably be dished using a tea spoon and soft pad below?

                                          Give it a try….eh?

                                          Bob

                                          #55040
                                          Gareth Jones
                                          Participant
                                            @garethjones79649

                                            I might try and have a little experiment sometime this week. What do you reckon will be a good adhesive? A problem might be that both the hull and plating will be impermeable and effectively airtight so it might need a some special adhesive.

                                            Gareth

                                            Edited By Gareth Jones on 11/01/2015 19:21:21

                                            #55041
                                            Bob Abell 2
                                            Participant
                                              @bobabell2

                                              Hello Gareth

                                              Pleased that you like the idea….It would certainly promote your build

                                              I would try waterproof PVA …….As it will give you time to slide the panels about, before it sets

                                              A few coats of paint, should secure them later

                                              The spooning is the tricky part

                                              I believe Lithoplate is the stuff to use really, but it`s hard to find these days

                                              All the best……Bob

                                              #55042
                                              Dave Milbourn
                                              Participant
                                                @davemilbourn48782

                                                I've been doodling with the tiller linkage and came up with the idea of a tiller rod set into the rudder and extending through the hull to the inside. As the hull is so wide at that point you could use the rotary motion of the servo disc to operate the tiller side-to-side, with the rod sliding through one of those SLEC connectors (without its set screw). Sketch hopefully explains it better (plan view).

                                                Ref the adhesive, I once recall a model WW1 fighter being covered with litho-plate at the nose end. This was stuck on with double-sided tape. Contact adhesive might also be worth an experiment. I can't see PVA sticking very well to metal or smooth GRP cloth and resin.

                                                spyder tiller.jpg

                                                #55044
                                                Bob Abell 2
                                                Participant
                                                  @bobabell2

                                                  Gareth…..Chains would look authentic!

                                                  The PVA would stick to an abraised hull surface and the rivet indentations of the plates

                                                  Bob

                                                  #55050
                                                  Kimosubby Shipyards
                                                  Participant
                                                    @kimosubbyshipyards

                                                    Looking at a close up of a Humber keel model there does not seem much space on the deck between the tiller end and the hatch coaming. The tiller was obviously controlled by hand and not by pulley ropes either side and certainly not chains – whatever next. Your initial approach I assume has the servo in the hatch and the rod to the tiller passing through a slot in the coaming.

                                                    Here's a suggestion – now the amount of tiller movement might be a problem but what if you went for a jack-staff arrangement. The rod now passes to the underside of the tiller via a pivot point in or just under deck level and to the servo set up you have designed, the servo now on its side. The rotation of the servo moves the bottom of the jack-staff one way, the top moves the other and the tiller arm with it. It might be a bit more complicated but almost everything is out of sight.

                                                    As with a thames barge, the rudder is only really used in tacking and docking, the sail settings will dictate the direction the hull wants to sail in, so there shouldn't be great pressure on the rudder. I only use a standard servo and that with a servo slower to stop 'rudder waggle'.

                                                    As to your next keel hull, I'd love to get to grips with the planking and attempt it shipyard style. The hull shape is near enough an 18C hull shape (see HMAV Bounty etc), and I know you'd have proportional dividers to hand.

                                                    Kimmo

                                                    #55052
                                                    Dave Milbourn
                                                    Participant
                                                      @davemilbourn48782

                                                      Kim

                                                      My idea was to bring the tiller arm into the hull at some suitable level below the deck. This means that the steering mechanism proper would be hidden away and that a totally scale (but dummy) tiller etc could be fitted above. If that leaves the "hole" where the functional tiller enters the hull below water level then a rubber bellows (like the ones the powerboat boys use in their radio boxes) might be used on the inside to prevent the ingress of water.

                                                      Dave

                                                      Edited By Dave Milbourn on 12/01/2015 10:40:25

                                                    Viewing 25 posts - 51 through 75 (of 201 total)
                                                    • Please log in to reply to this topic. Registering is free and easy using the links on the menu at the top of this page.

                                                    Code of conduct | Forum Help/FAQs

                                                    Latest Replies

                                                    Home Forums Scratch build Topics

                                                    Viewing 25 topics - 1 through 25 (of 25 total)
                                                    Viewing 25 topics - 1 through 25 (of 25 total)

                                                    View full reply list.