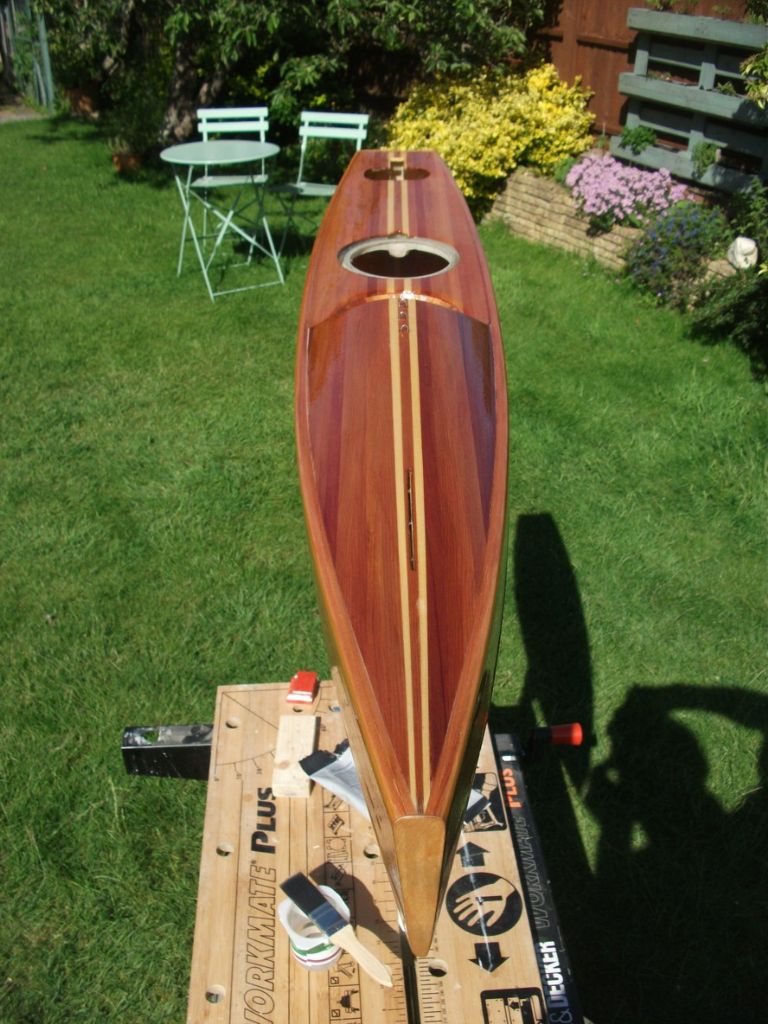
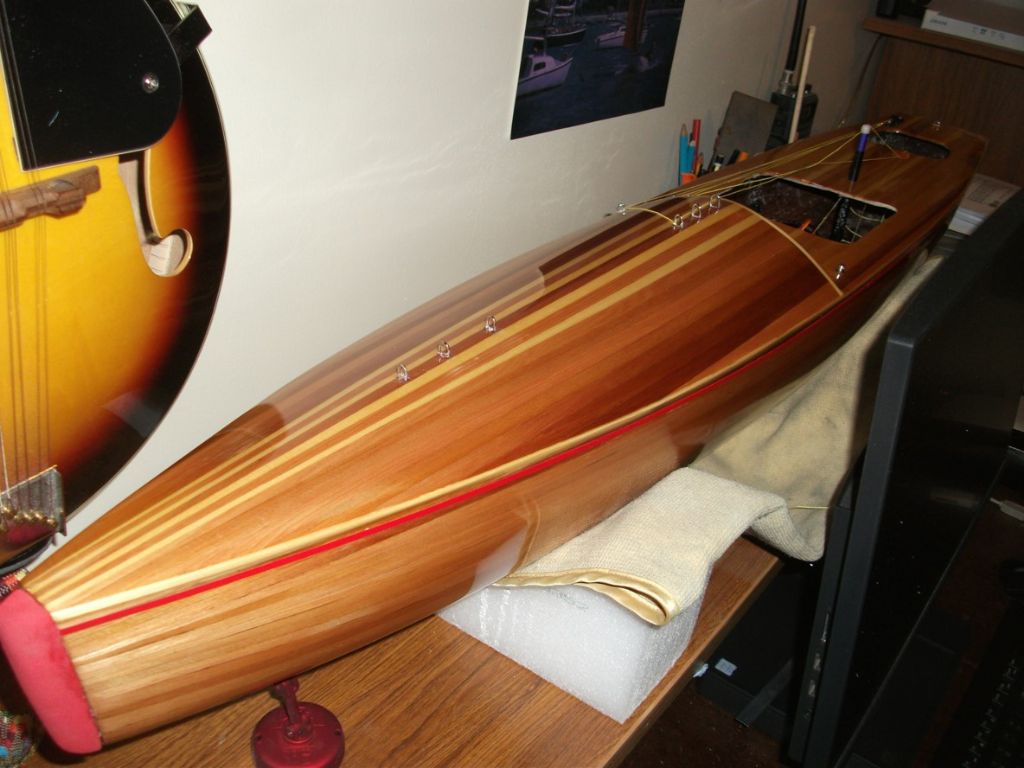
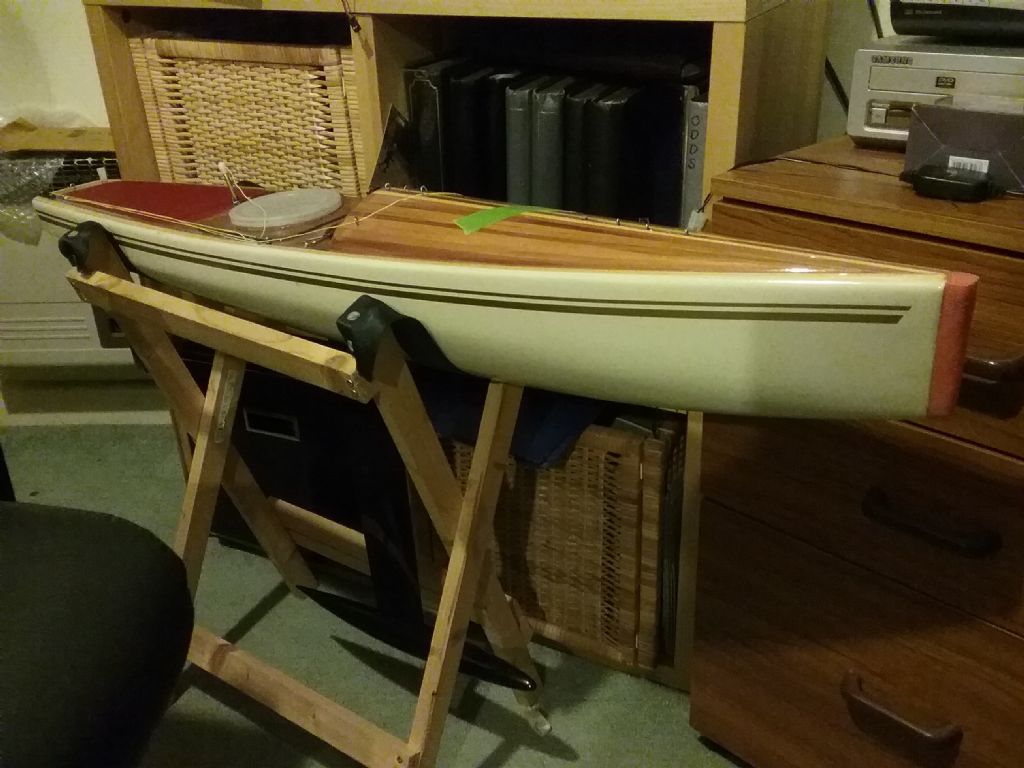
IOM Boxkite

Advert

IOM Boxkite

Home Forums Sailing Models IOM Boxkite

  • This topic is empty.
Viewing 25 posts - 26 through 50 (of 52 total)
  • Author
    Posts
  • #94754
    Tim Rowe
    Participant
      @timrowe83142

      Hello Eddie

      I think the idea is that the bumper has to be a minimum 10mm. On many dimensions there are tolerances of +/- 1mm so I reckon 11mm is fine. There would be no advantage or incentive to make a bumper any larger so I reckon Frank is just playing safe for the home builder. He is an experienced designer.

      Mine has come out at 10.5 mm again as a tolerance because if you are less than 10 you are out of class.

      Have you made a start on the Ellipsis. It is next on my IOM list.

      Tim R

      Advert
      #94756
      Eddie Lancaster
      Participant
        @eddielancaster

        Hi. Tim, thanks for that, but on the older drawings it does show the bumper as part of the 1 metre lengh,ie.the hull is 1980mm and the bumper 20mm.

        I have not started Elipsis yet, I am still finishing the two Nimbus 3's, plus my printer insists on printing the A4 drawings 3mm short,no matter what I try,but hopefully the print shop will be able to open on Monday so I will get the printing done there.

        I hope to be able to give my first Nimbus, the Spruce one, its maiden voyage this Sunday.

        Eddie.

        #94757
        Tim Rowe
        Participant
          @timrowe83142

          Hello Eddie

          As long as the hull length doesn't exceed 1000mm I suppose it is not too critical how long the bumper is. I would not want to make it longer than 20mm on an IOM and think between 10mm and 11mm is ideal.

          Tim R

          #94804
          Tim Rowe
          Participant
            @timrowe83142

            Getting there with the hull. Deck patches are the next job.
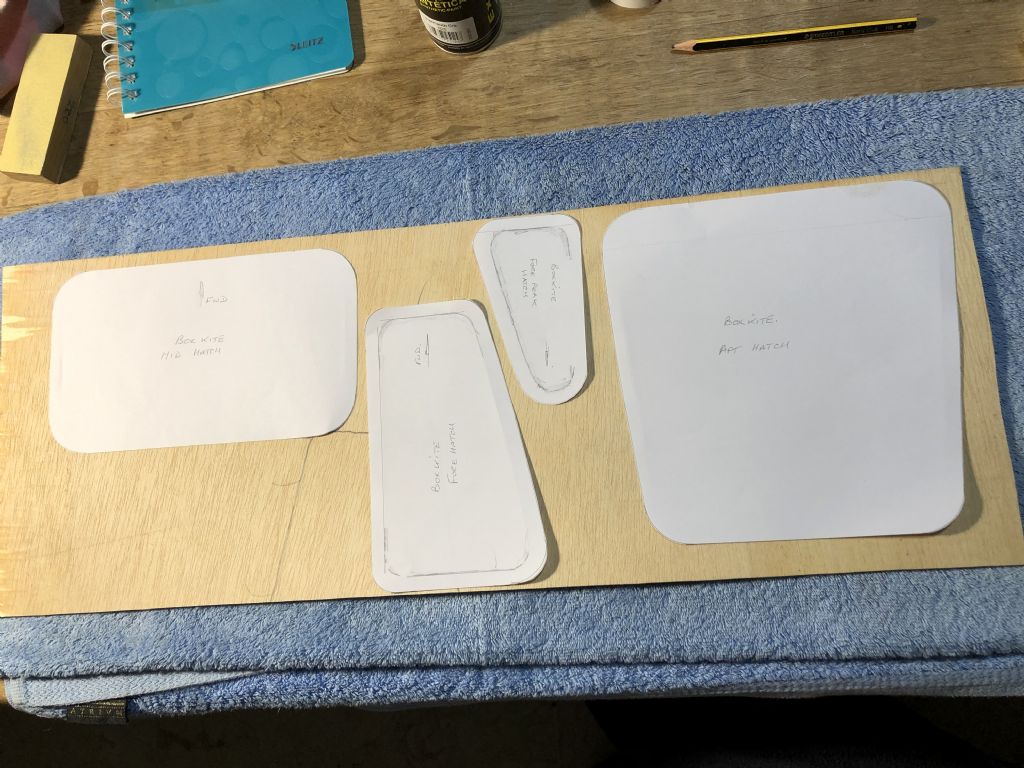
            img_5568.jpg

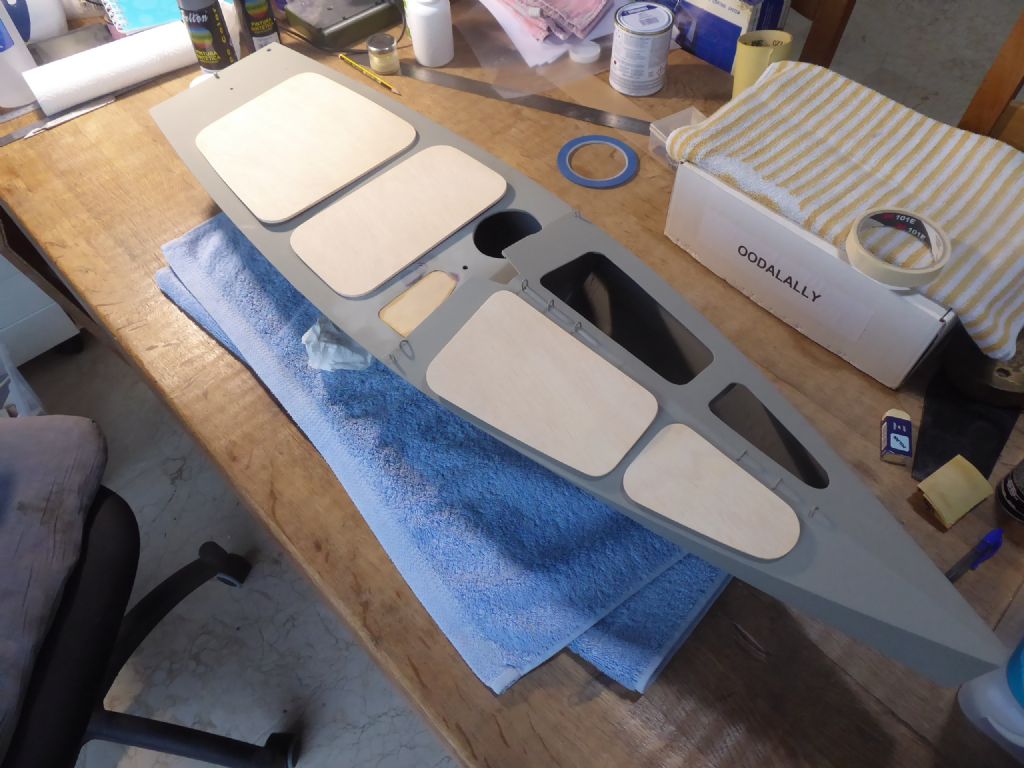
            To make the paper templates I marked the edges of the apertures with the side of a pencil lead in the style of church Brass Rubbings. I then added 8mm all around for the patches to overlap. I read somewhere that 6mm was the minimum but that looked a bit skinny and I had 8mm space available to keep them all the same so that decided it. These were then stuck to some ply we use for templates (similar to Lite Ply but a lower quality and the offcuts are generally free) with my favourite method with Pritt Stick.
            p1230295.jpg

            Here we have the complete set with the forward two doubling up as mirror images.
            p1240509.jpg

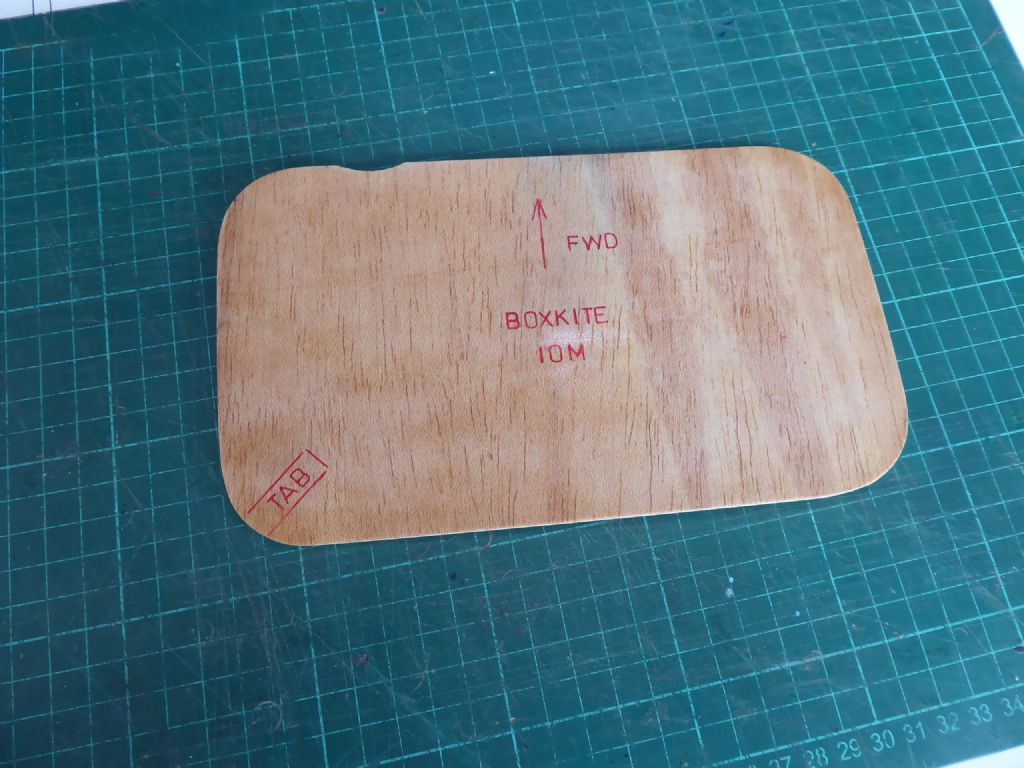
            This is the midship patch template as an example. I told a slight fib as I had to make a small scallop to clear the radio pot.
            I am a big fan of making templates and jigs and furthermore have learnt the hard way to label them. I still have a small collections of things I have no idea what I made them for.
            p1240510.jpg

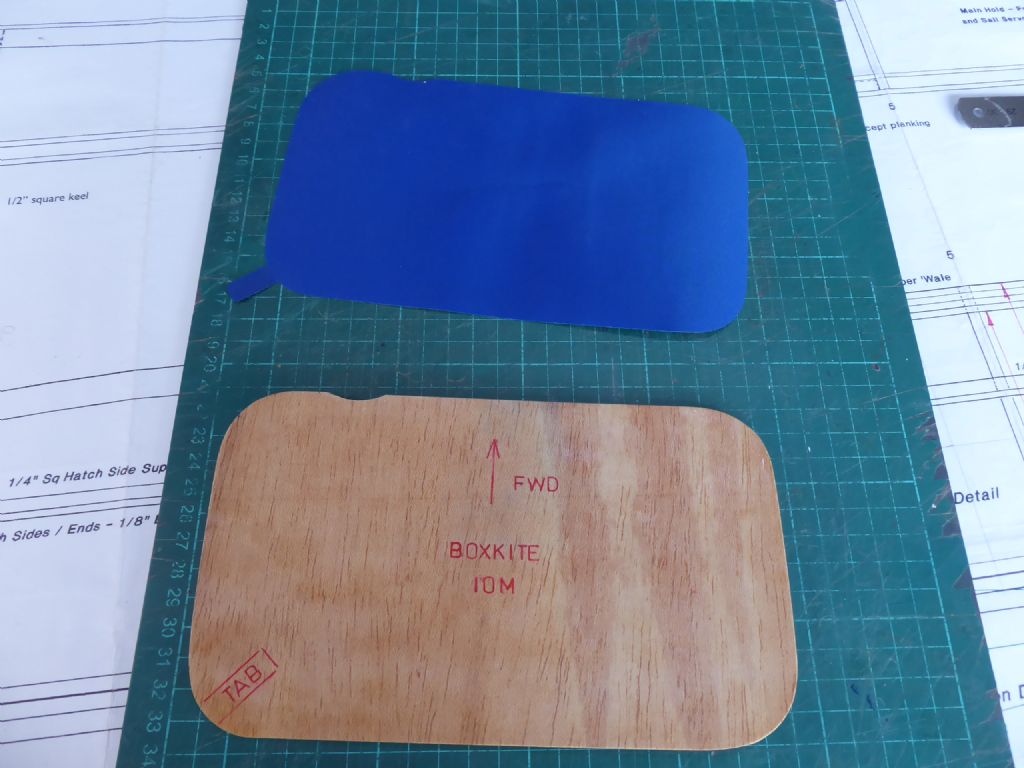
            It is then dead easy to cut the patch around the ply using a very sharp scalpel. The patch material is woven, self adhesive and a selection of colours is available from SailsEtc where I got mine.

            This centre patch is the one that is more likely to need removing periodically as that is where all the gubbins are. For that reason I made a tab to make it easier to start the peel. If you have to scratch away at an edge, the patch pretty soon becomes useless and the deck gets scratched.

            Before painting the final spray coat on the deck I lightly scribed the corners of each patch. This shows up in the top coat and means that the position and orientation of the patches can be found easily.
            p1240511.jpg

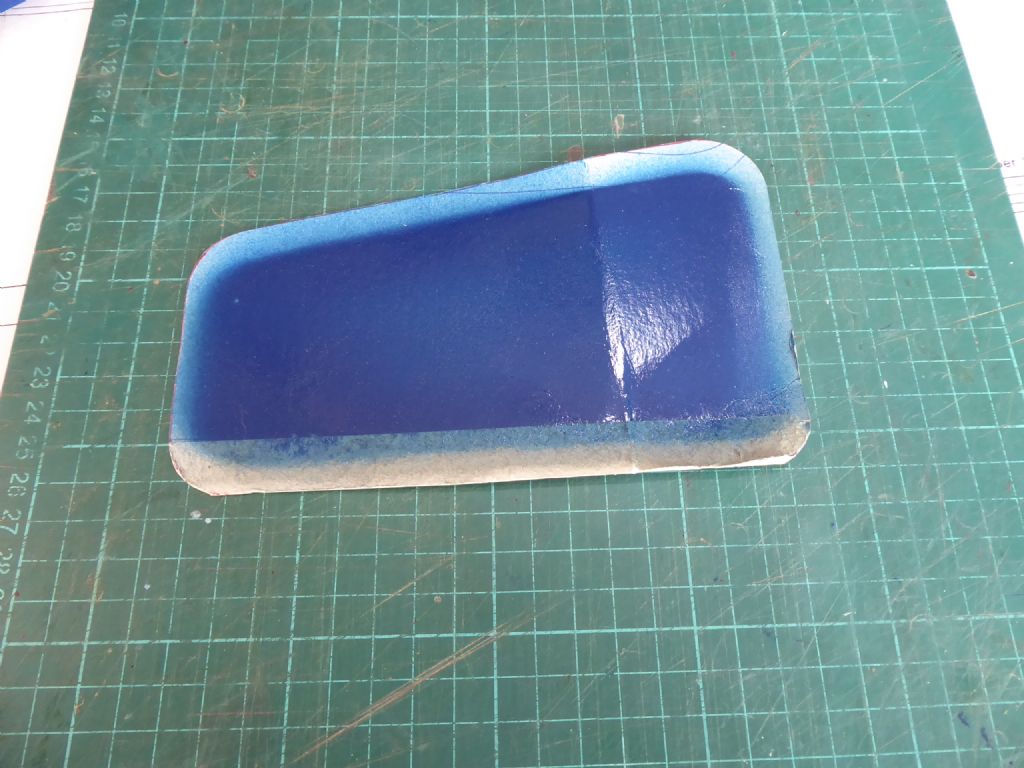
            While the ply templates were out I made some paint screens from some cereal box card. These protected the inside while the deck was being painted.

            I can now get on with the rig.

            Tim R

            #94812
            Eddie Lancaster
            Participant
              @eddielancaster

              Again Tim; some more great tips for mere mortals like myself to follow, I hadn’t thought of leaving a tab or marking permanently the position of the patches.

              I am now waiting for your rig building ideas.

              Eddie.

              #94832
              Tim Rowe
              Participant
                @timrowe83142

                Thanks Eddie. I should have said the actual tab was twice as long in the cut state. I was then folded back on itself so it wouldn't stick to the deck.

                By moving the winch to the middle section I did create a a bit of extra work.

                img_5849.jpg

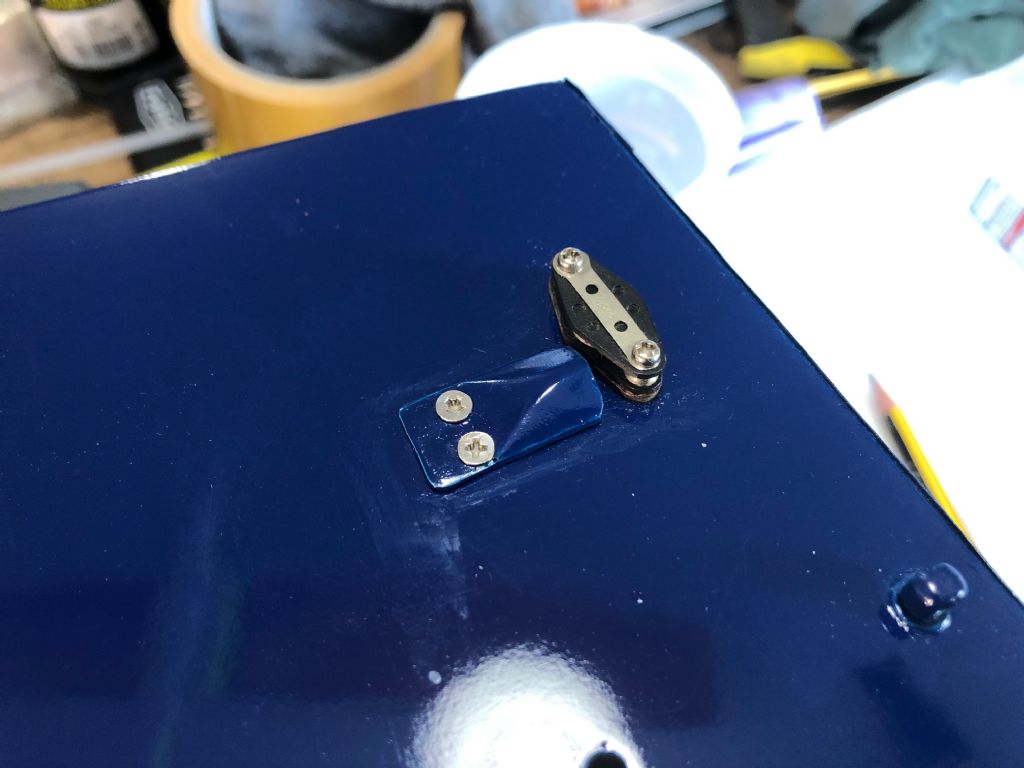
                The winch line originally came out through this break in the deck but now with the winch relocated to the mid section as shown I had to make arrangements to get the winch line back on deck.

                img_5862.jpg

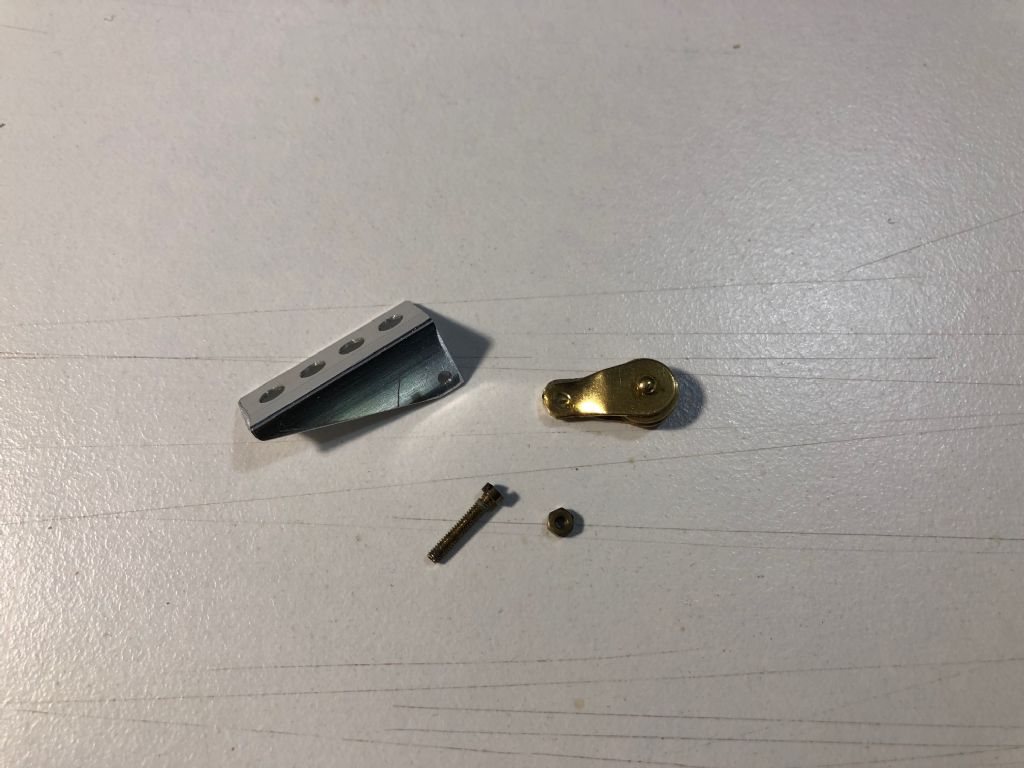
                I has to have a lead-out fitting and as Ray has commented on the price of commercial fittings (in this case around £15 and a long lead time) I decided to make one. The basis is a small aluminium plate with a slot in the middle. The slot houses a short length of alloy tube formed into a shallow S bend. As I don't yet have the facilities for aluminium soldering, the fitting was bulked up with epoxy and micro-balloons and sanded into the shape in the photo. The fitting is bolted through the deck just forward of the turning block that the boat was already fitted with. The new lead-out fitting takes the line from under the deck straight into the turning block and the closeness with hopefully prevent any tangling. It does mean that I have one less line on deck which is a little bit neater.

                Tim R

                #94833
                Eddie Lancaster
                Participant
                  @eddielancaster

                  Very neat and and tidy.

                  I do wish this phone would stop changing my typing to gobble de gookangry.

                  Eddie

                  #94901
                  Tim Rowe
                  Participant
                    @timrowe83142

                    Moving on to the rig there was a fair bit to do. It had all the bits and pieces but I found out quite quickly that it was not the original or proper mast for the boat. My friend had puzzled over that too. This was not a disappointment however because the spars, fittings and sails were from SailsEtc and all in good shape.

                    p1230236.jpg

                    As delivered the first thing to note was that the mast was too long at the lower end. You can see that the boom vang gooseneck is a long way above the deck. Also with the rigging screws wound as as far as one could dare, the mast was raked back at an alarming angle leaving a huge gap under the jib. I wanted to get the mast as low as possible because this would still not be an extreme position according to the rules.

                    p1230645.jpg

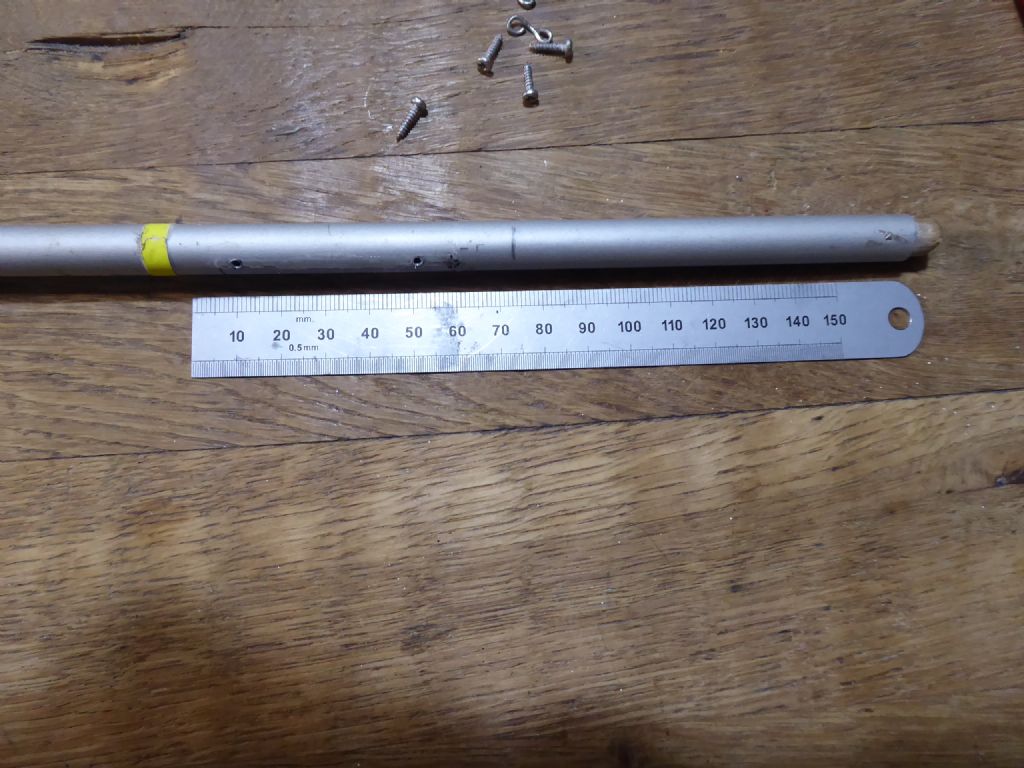
                    Taking out the rig (The big A rig) and stripping off the fittings for cleaning I found that the base of the mast had a wooden dowel plug inserted, glued and riveted through the aluminium tube. There was also a loose piece of roughly carved wood in the mast hole acting as a further extension. All a bit messy and the wood was a bit pointy concentrating the load in the mast box.

                    img_5769.jpg

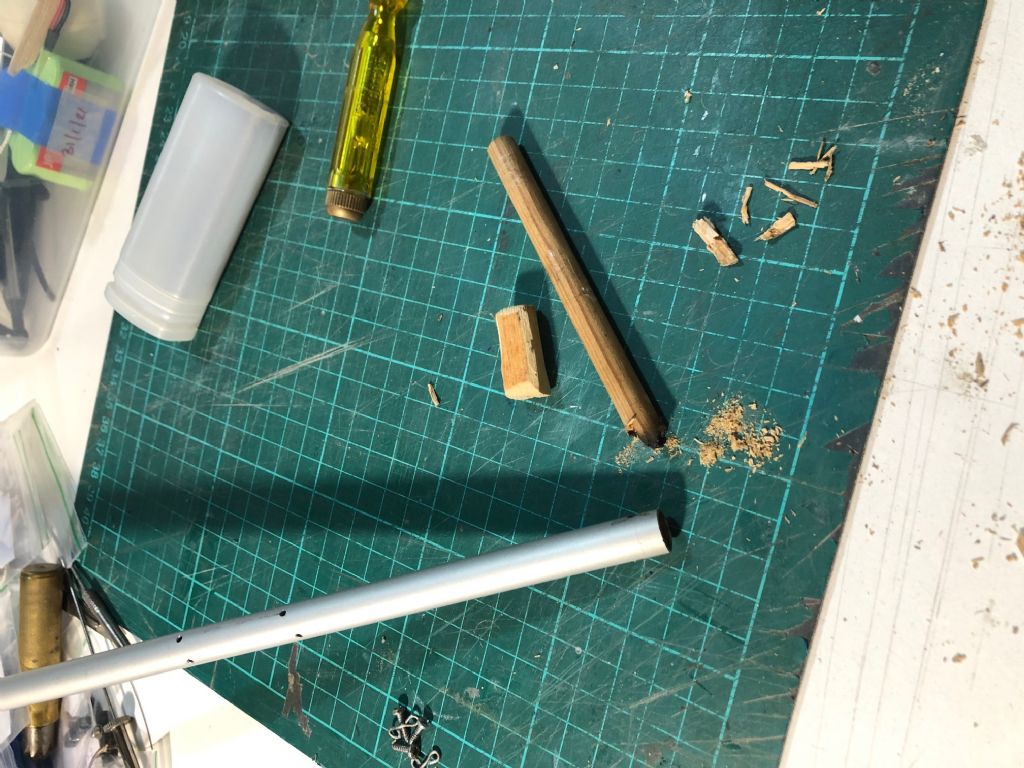
                    The short piece was the loose insert and the long piece the riveted dowel. I have no idea why it was so long and the only way I could get it out was with a blow torch to burn off the epoxy. Taking care with the very smelly fumes and equal care not to melt the aluminium it came out. Heating aluminium is tricky because it melts before it gets visibly red hot so you get no warning. Now I have a bare mast and can make the mast the exact length I want.

                    img_5775.jpg

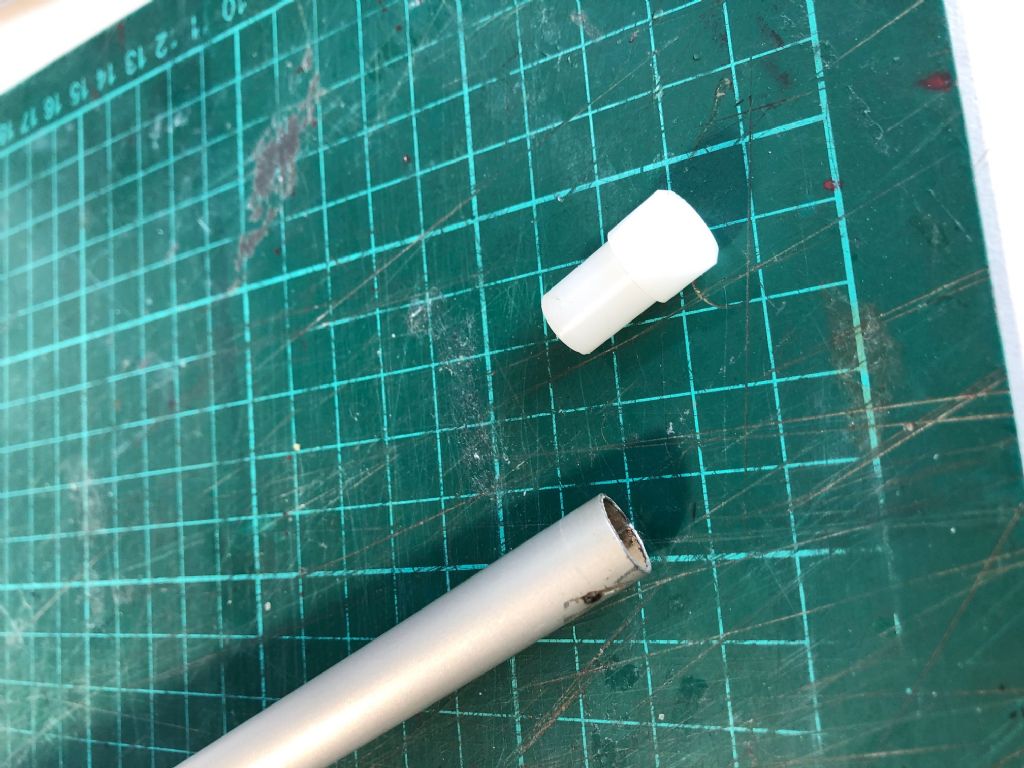
                    The wood insert was replaced with a shouldered Delrin plug turned to be a push fit in the mast section.

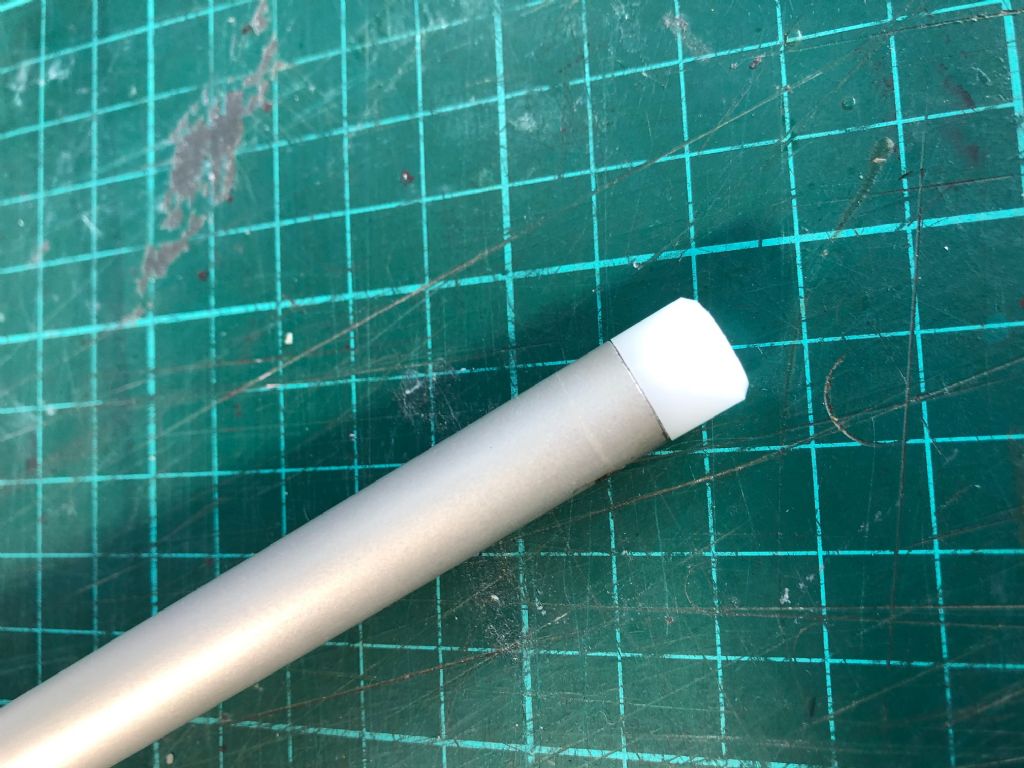
                    img_5777.jpg

                    And the finished job with a nice flat bottom to spread the load in the keel box. No fastenings needed because it is always in compression against the shoulder.

                    #94902
                    Eddie Lancaster
                    Participant
                      @eddielancaster

                      Hi. Tim, the drawings show a half round hole across the mast box bottom, a half round plug in the bottom of the mast fits into that. allowing the mast to pivot back and forth but stopped it from rotating.

                      My mast measures 75mm from the lower band to the deck and a further 100mm to the bottom of the mast.

                      BTW I had the drawings for Elipsis printed yesterday.

                      Regards.

                      Eddie.

                      #94904
                      Tim Rowe
                      Participant
                        @timrowe83142

                        Hello Eddie

                        I didn't know that and it was difficult to see into the bottom of the hole. I will have a closer look and see if I have to round it off. That would mean a new plug if the mast went any lower as the vang gooseneck would hit the deck. What I might do instead is drip some epoxy into the bottom of the hole to make a flat base. If I overdo it I can always take a fraction off the plug.

                        I am not too concerned about stopping the mast from rotating as the tension in the shrouds acting through the spreaders seems to be good enough. That is the only thing stopping the mast rotating on the Topiko.

                        Thanks for the heads-up. It sounds like a good idea.

                        I bet the Ellipsis drawings are exciting. It will be very interesting to see the form difference from the Nimbus.

                        Tim R

                        #94906
                        Eddie Lancaster
                        Participant
                          @eddielancaster

                          The drawings are very comprehensive, with all the dimensions needed, even the position of the keel from the quarter chord position just above the bulb, to both stem and stern, this was not shown on either of the other two drawings.

                          There is one sheet with the shadows drawn full size, so just cut them out and stick them onto a piece of light ply and your good to go.

                          The hull form is very similar to the Nimbus, but only 61/2” wide, my boats have gone from 11” beam to 8” and now 61/2” in three boats and less than two years.

                          The foot of the mainsail is shown 40mm below the foot of the jib, so not sure how that is going to effect the sails at the top of the mast.

                          Eddie.

                          #94957
                          Tim Rowe
                          Participant
                            @timrowe83142

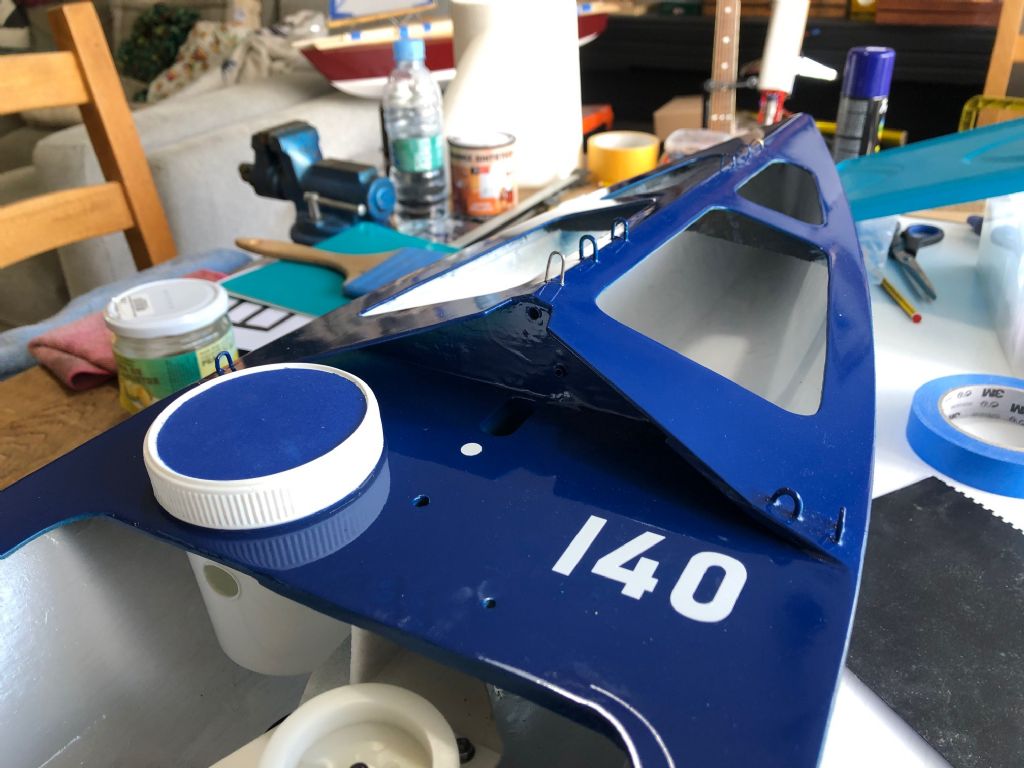
                            A few little jobs to do. Like sorting out the bung.

                            p1230251.jpg

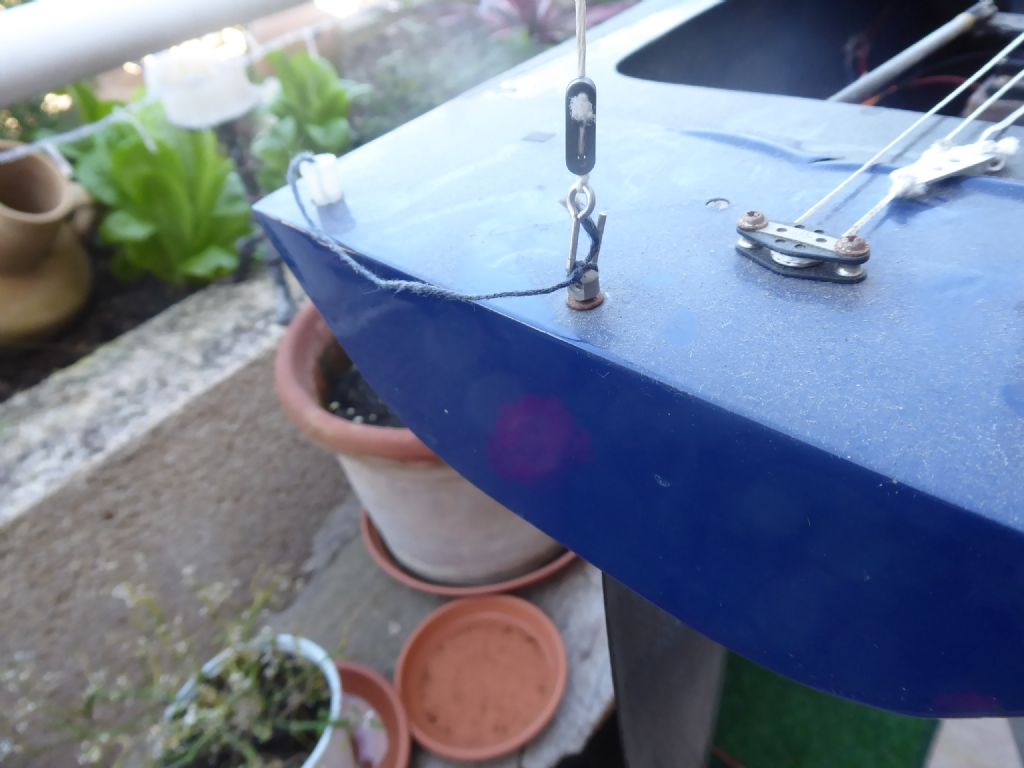
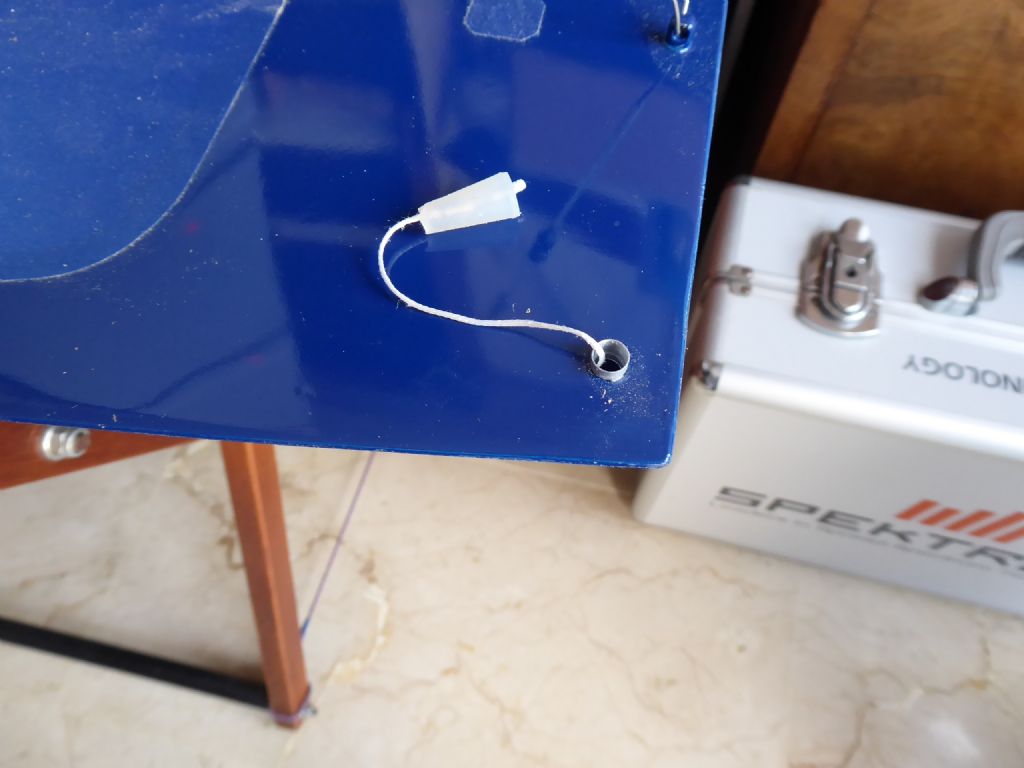
                            This was the original arrangement with a retaining string attached to the backstay fitting. I decided to lead the string inside the boat as it would be one less thing to catch on.

                            p1240103.jpg

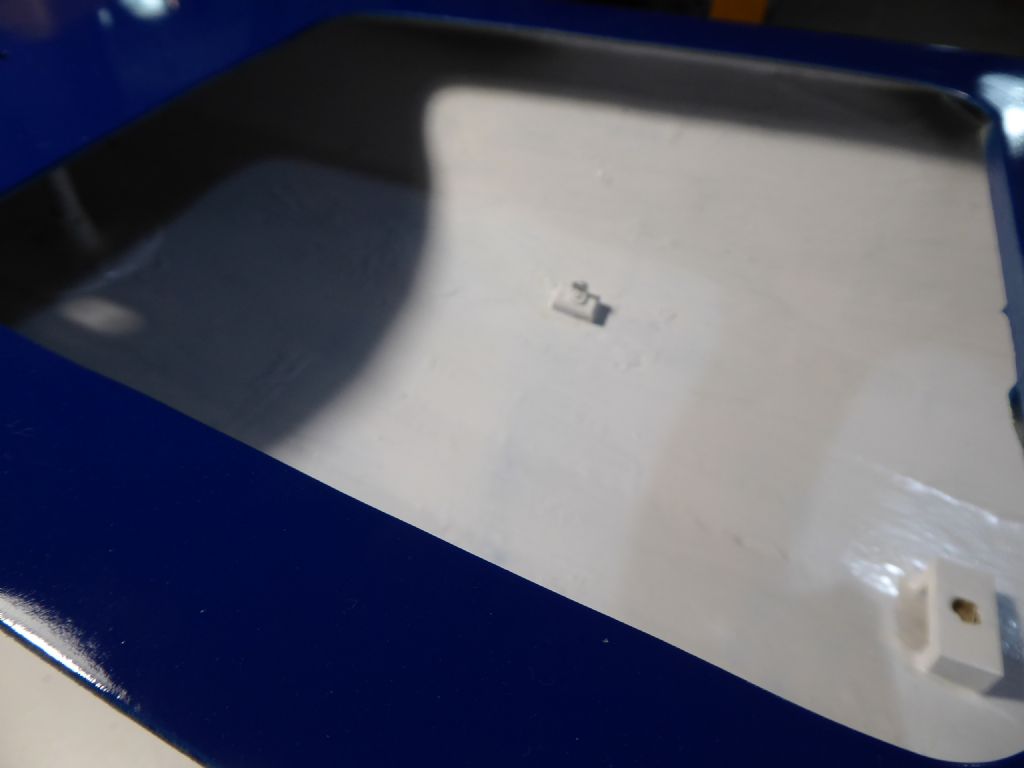
                            Which meant gluing an attachment point inside the hull. This has a dual purpose that I will come to later.

                            p1240514.jpg

                            The new string now leads into the boat and I fitted a short length of aluminium tube reamed out as far as I dared with a taper. The original hole in the ply deck was a bit ragged and I thought it would leak. Water will always get into a boat but I want to give it a hard time.

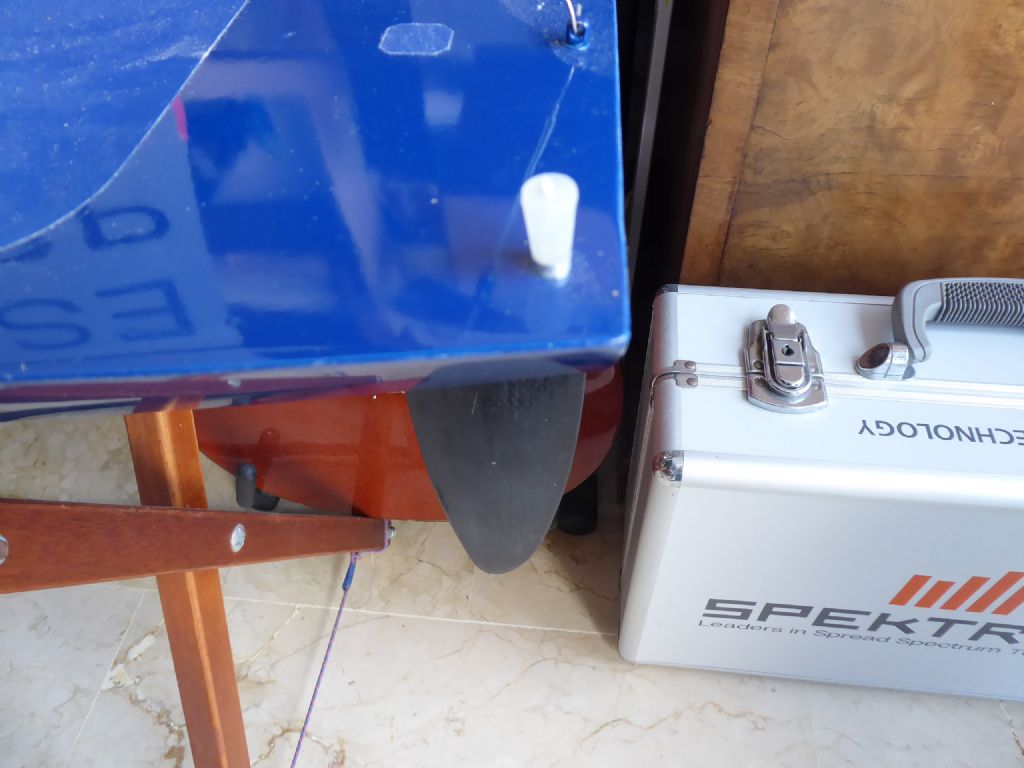
                            p1240515.jpg

                            Now firmly in place.

                            The tiny deck patch covers the top of the rudder tube for good measure.

                            Tim R

                            #95082
                            Tim Rowe
                            Participant
                              @timrowe83142

                              In reality there hasn't bee a great deal to do to the rig. The main consequence of lowering the mast was adjusting the shroud and backstay lengths.

                              p1230245.jpg

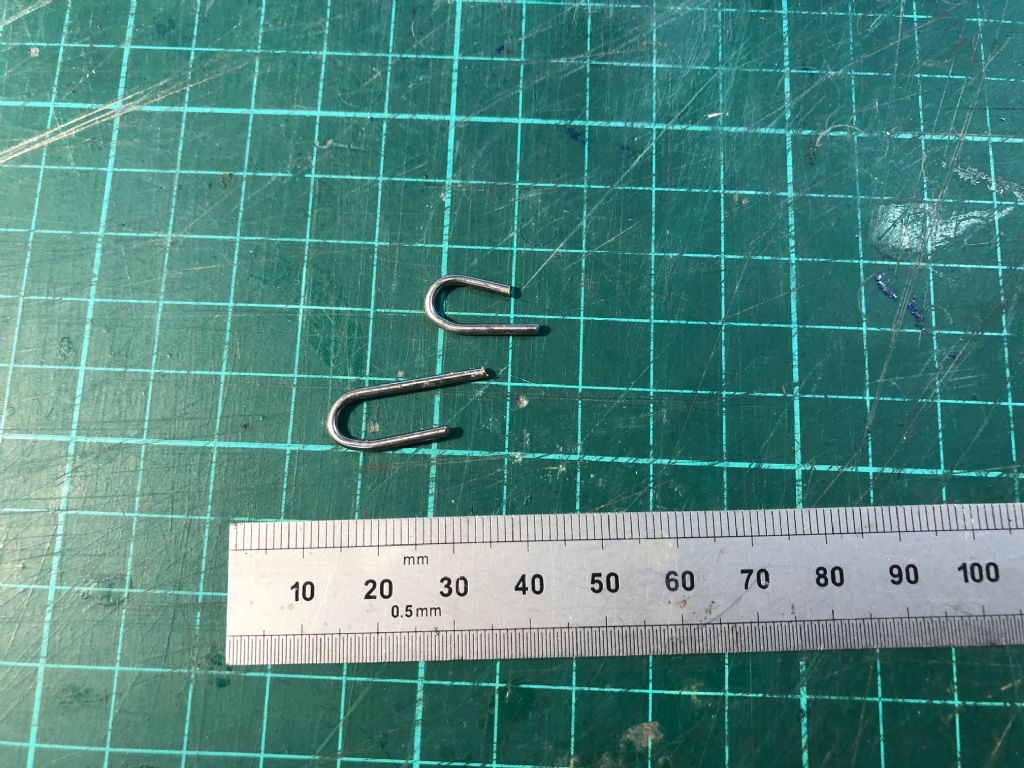
                              This is what we had originally with some very deep hooks. These are real pain as it is necessary to unwind the rigging screws every time the rig is removed. This means you loose the tension setting you have been so carefully tweaking over the last few outings.

                              img_5860.jpg

                              With careful measuring after setting the hull horizontal and the mast truly plumb the old hooks were ground off with a cutting disc in a Dremel. The shrouds weren't an equal length anyway hence the difference in the offcuts.

                              p1240516.jpg

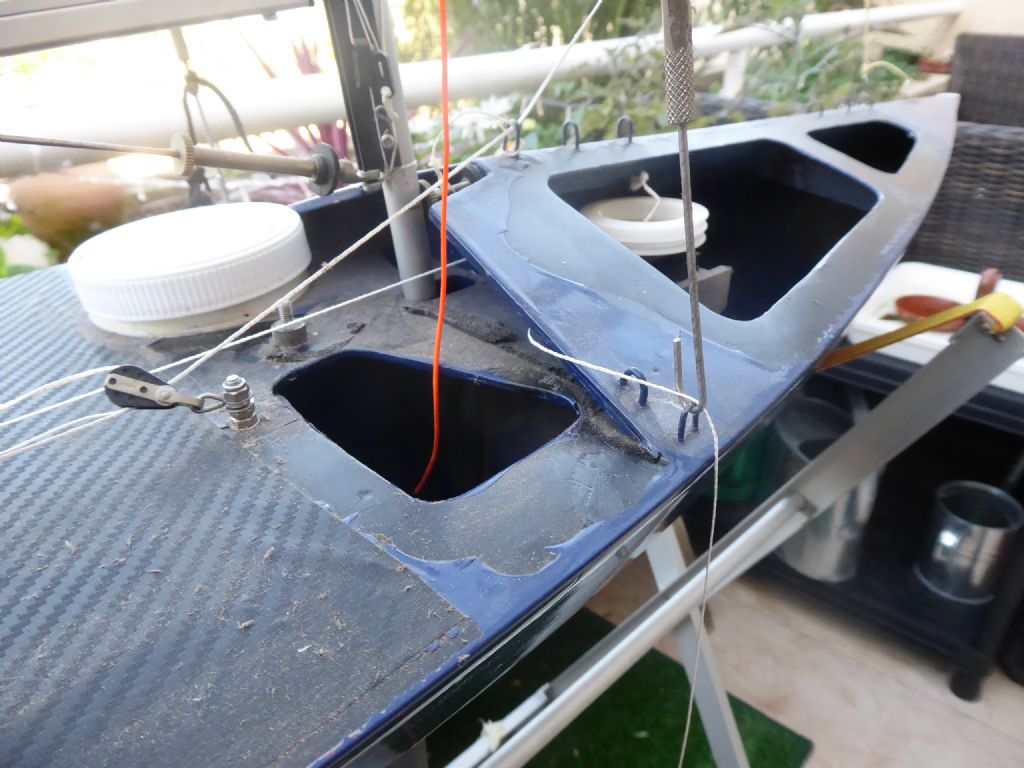
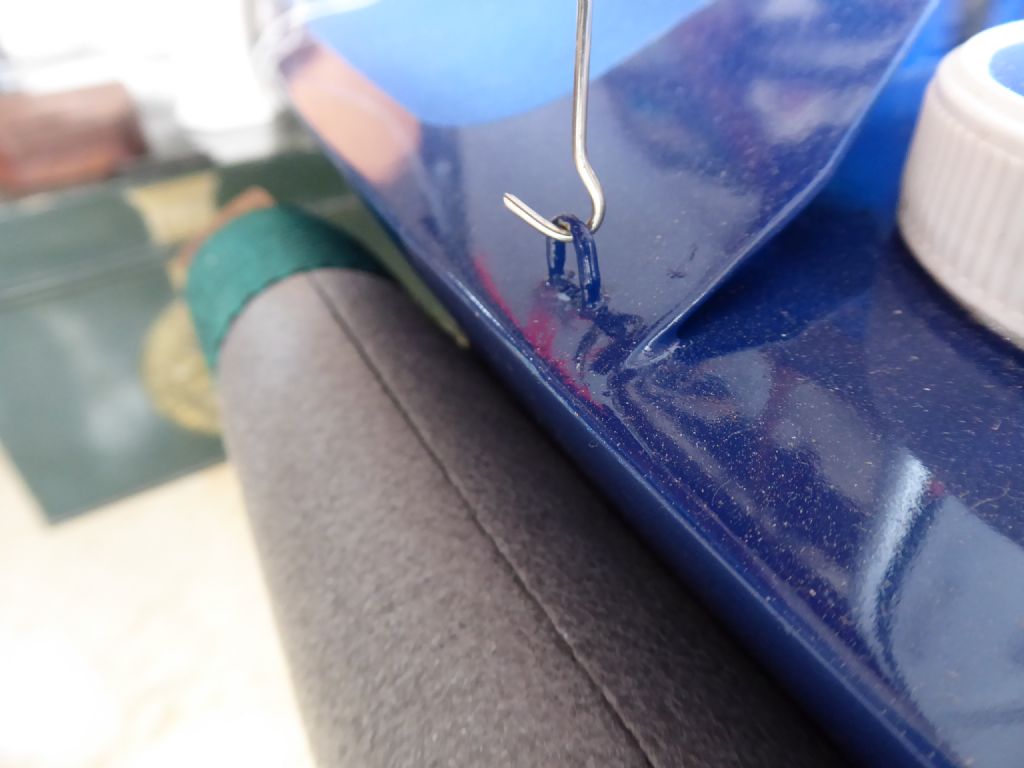
                              Now cut to equal length and with plenty of adjustment on the rigging screw, the wire was bent to a shallow hook. This means that if I release the forestay or jib swivel, the mast can be leaned back and the hook can be slipped out of the eye. No need to touch the rigging screws unless wanted.

                              Most people tend to place the hook from the outside – in because it is slightly easier than the orientation in the picture. The picture shows the safe way because if the lee rigging goes slack the hook won't fall out. Other way round and it can, with the risk of breaking the mast.

                              Tim R

                              #95089
                              Eddie Lancaster
                              Participant
                                @eddielancaster

                                Hi. Tim, I have put a nylock nut on each of my rigging screws so that I can easily reset the tension and keep the mast vertical side to side. I put my hooks the other way round giving less chance of snagging other boats.

                                It is interesting the different thoughts people have for doing the same job.

                                Eddie.

                                #95090
                                Tim Rowe
                                Participant
                                  @timrowe83142

                                  Hi Eddie

                                  The method I describe really comes into its own if you are racing and need to change rigs due to changes in wind speed. Normally you have very little time so having everything pre-set as much as possible helps a lot.

                                  The rules say that nothing must project outside the line of the deck so in that case the risk of snagging should be very low. Admittedly if the loops for the shrouds are very close to the deck edge you are limited in choice.

                                  Tim R

                                  #95099
                                  Eddie Lancaster
                                  Participant
                                    @eddielancaster

                                    I have yet to experience racing, and have only once used my No. two rig.

                                    Eddie.l

                                    #95228
                                    Tim Rowe
                                    Participant
                                      @timrowe83142

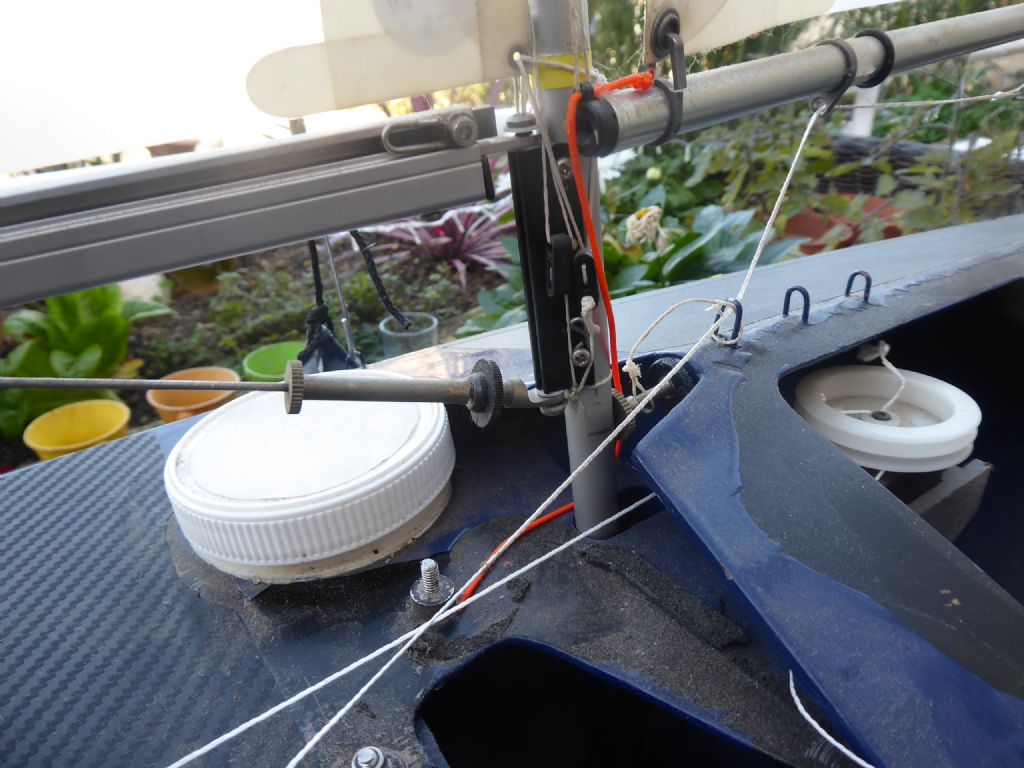
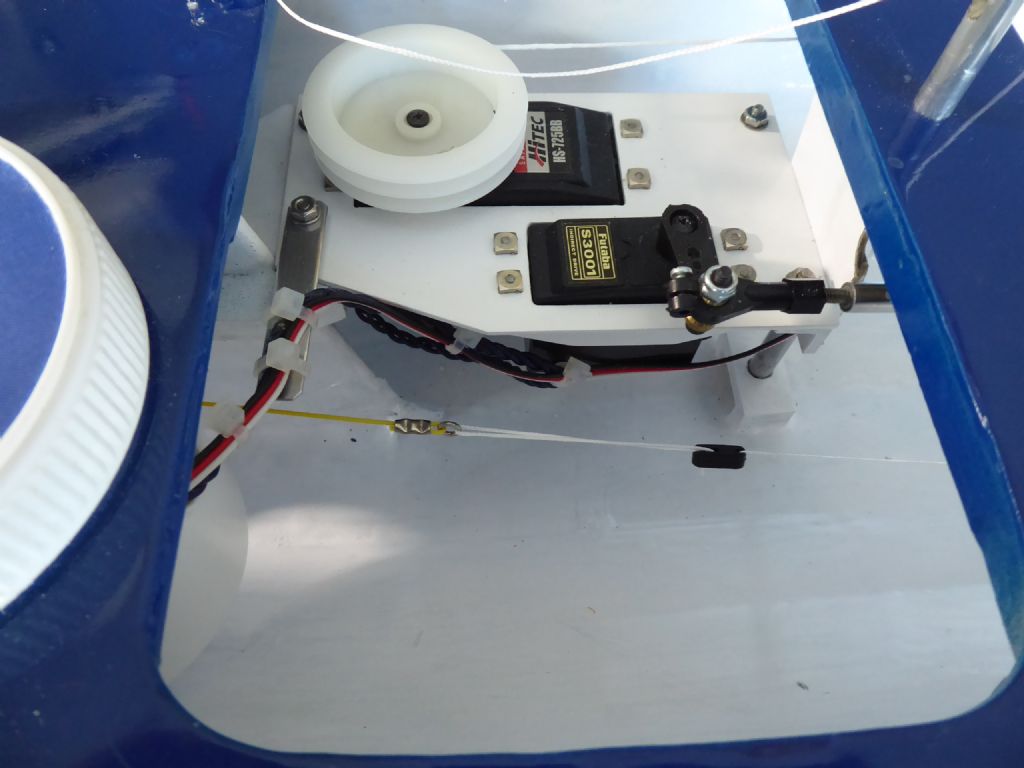
                                      The Hitec drum winch is set up as a single line so it need a tensioner to stop the line coming off the drum. The sheet travel is around 270mm so that is a lot of stretch for the rubber tensioner. One way to deal with this is to take the rubber to a turning block in the bow and then bring it back aft. The longer the better as it is best the still have the least amount of tension possible with the booms sheeted in but still some tension when sheeted fully out.

                                      img_5900.jpg

                                      The anchor plate is a piece of T section aluminium extrusion drill out to make glue "rivets" and a brass block courtesy of some random Billing fittings.

                                      p1240274.jpg

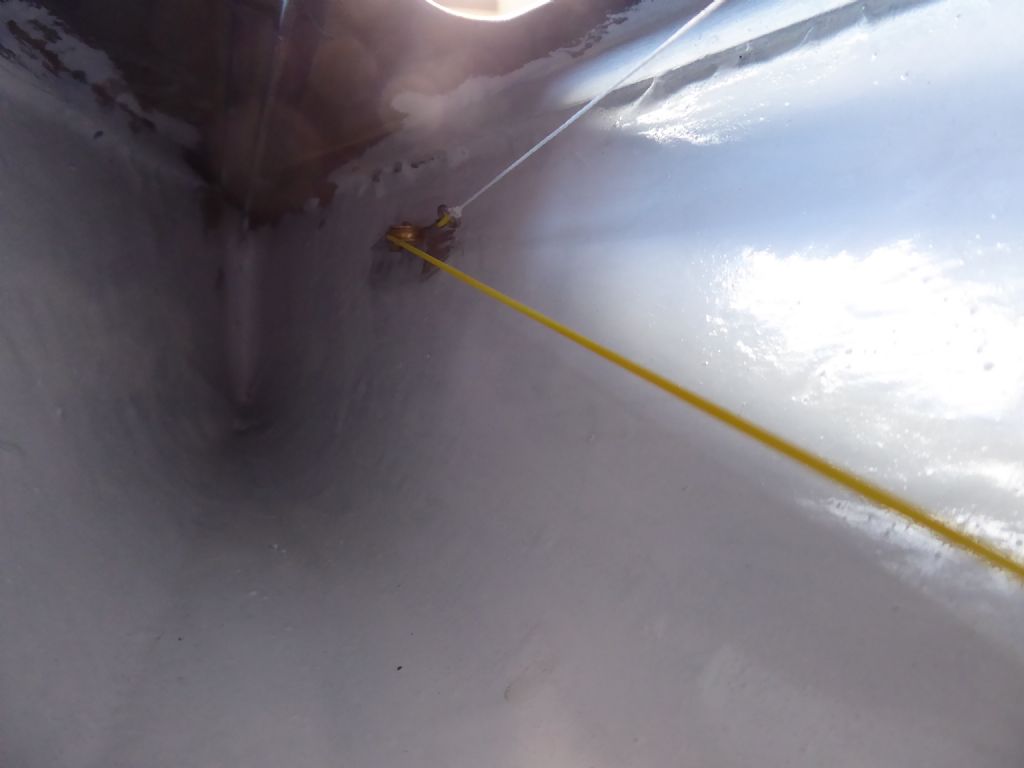
                                      The turning block was glued as far forward as possible. The line goes back to the sheet connector on deck and is tied to a stainless steel ring to which the rubber is also attached. The ring stops the knots getting accidently pulled through the block and jamming.

                                      p1240275.jpg

                                      The rubber is led back into the mid section where it is crimper to a ring. The line goes back to the look that retains the drain plug and the tension can be adjusted with the bowsie. Over time the rubber relaxes so the tension has to be restored. It is set up so that there is some residual tension with the sheets fully out with a small safety margin to allow for an offset trim position on the Tx.

                                      p1240517.jpg

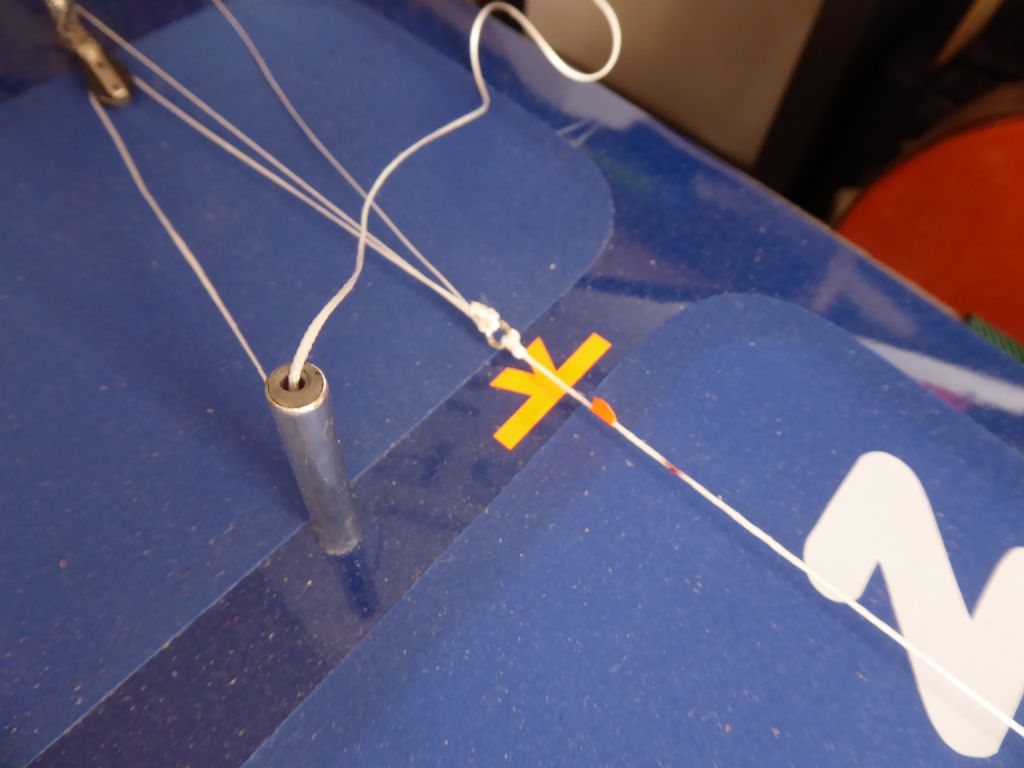
                                      The tensioner is the middle of the group of three. The marker on the deck is a visual warning. If the little flag on the sheet line goes forward of the arrow marker the tension has gone and the line will fall off the drum. That would mean taking off the patch and re-setting. Scuse the dust!!

                                      Tim R

                                      #95230
                                      Tim Rowe
                                      Participant
                                        @timrowe83142

                                        Nearly there. The radio and battery pot to glue in.

                                        p1240105.jpg

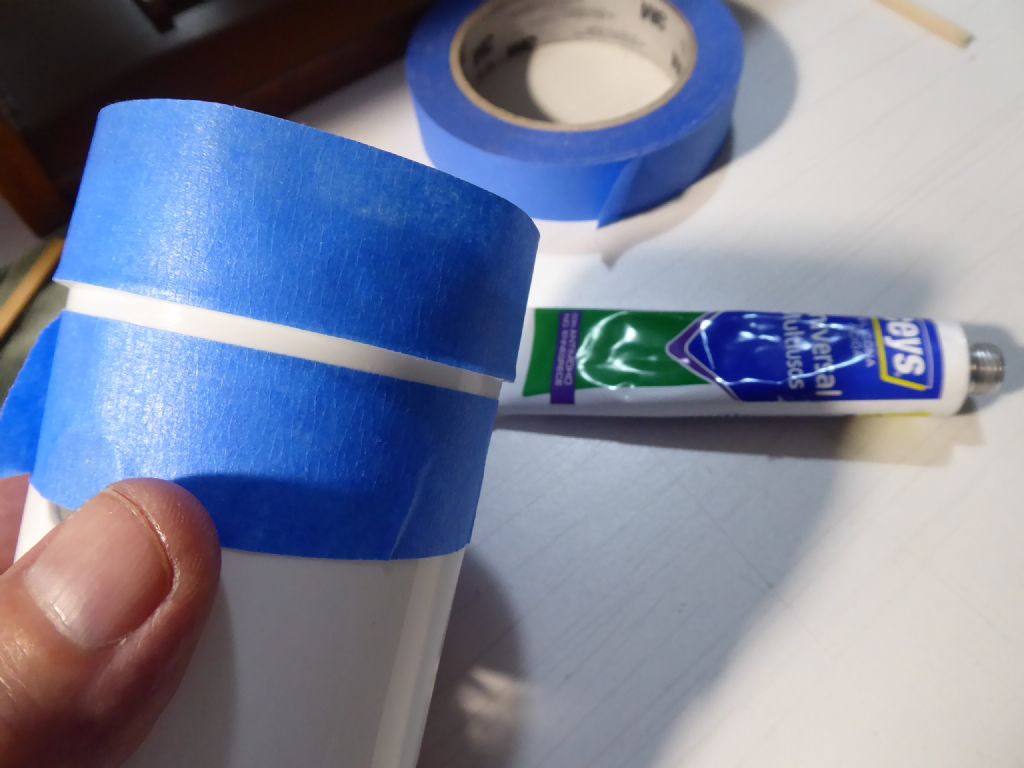
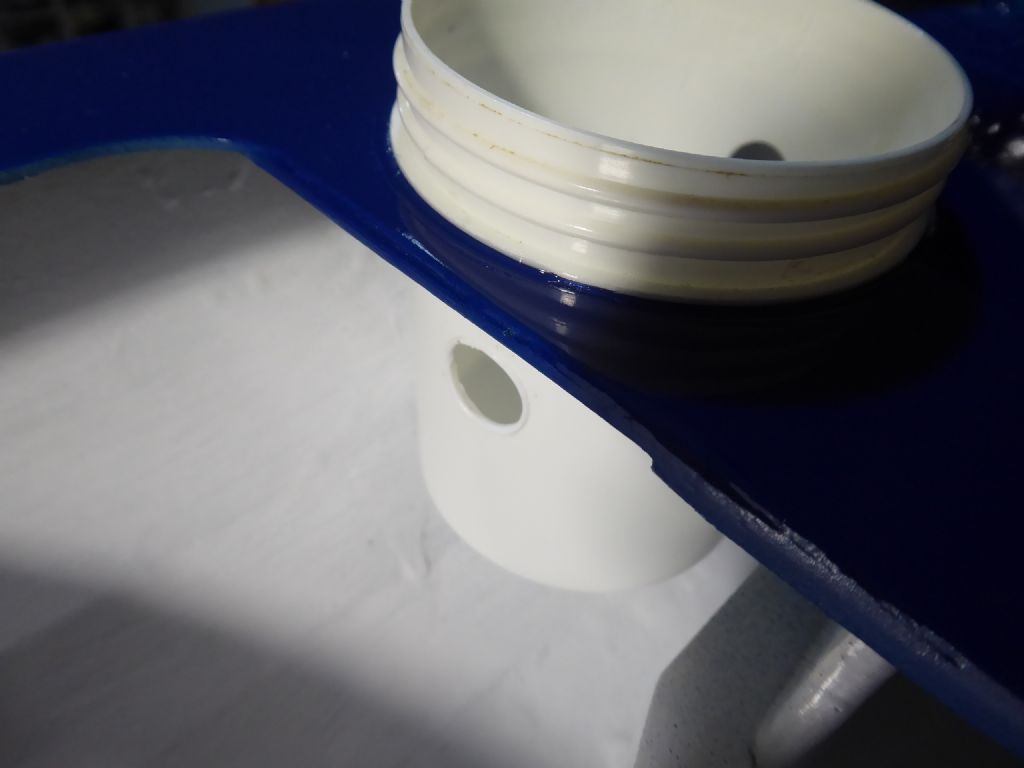
                                        The glue of choice for this is clear silicone but I don't need much and I don't want it everywhere. The pot was masked up just leaving a narrow band for the silicone. This was wiped into the band and the tape removed taking with it all the excess.

                                        p1240106.jpg

                                        Sliding into place with a good seal and no mess.

                                        Tim R

                                        #95231
                                        Chris Fellows
                                        Participant
                                          @chrisfellows72943

                                          Nice neat work as usual Tim. 270mm is a lot of travel. Talking of elastic, I've just had to buy some replacement for my Hydropro. It must be around 3 years old and badly deteriorated and on the verge of breaking.

                                          Chris

                                          #99299
                                          Tom Roberts 2
                                          Participant
                                            @tomroberts2

                                            d48d39a651634d928f81dd6ba653942c.jpgba54dc8305004a3e9a4e934ef452938c.jpgHi

                                            Good to see other people working on IOMs , here in the UK there is a growth in home build wood and also epoxy boats. The cost of some IOMs is way outside the pocket of some engineers some I think this is good for the sport and class. Great to see h8gh class workmanship still exists , well done. Here are a couple of boats have built in 2021/2

                                            20210809_223101.jpg

                                            #99328
                                            Ray Wood 3
                                            Participant
                                              @raywood3

                                              Hi Tom,

                                              Welcome to the forum, good to see your super new builds, I know there must be specialist forums for out & out racers, but It would only fair that some time advantage for own builds be applied for racing ? As it's almost given that to be competitive these these days you start with a moulded hull for a Britpop or similar for £2,000

                                              The same high costs killed off Marblehead racing I think.

                                              Do you race with a club ??

                                              Regards Ray

                                              #99330
                                              Richard Simpson
                                              Participant
                                                @richardsimpson88330

                                                Absolutely beautiful woodwork.

                                                #99913
                                                Ray Wood 3
                                                Participant
                                                  @raywood3

                                                  Hi David,

                                                  Regarding your Nimbus Mk3 bow rubber

                                                  Have a look at page 3 of this thread the way Tim made his own, his attention to detail is second to non

                                                  Regards Ray

                                                  #99917
                                                  Andrew Biggs
                                                  Participant
                                                    @andrewbiggs29914

                                                    Stunning

                                                    #101780
                                                    Former Member
                                                    Participant
                                                      @formermember9104383963

                                                      [This posting has been removed]

                                                    Viewing 25 posts - 26 through 50 (of 52 total)
                                                    • Please log in to reply to this topic. Registering is free and easy using the links on the menu at the top of this page.

                                                    Code of conduct | Forum Help/FAQs

                                                    Advert

                                                    Latest Replies

                                                    Home Forums Sailing Models Topics

                                                    Viewing 25 topics - 1 through 25 (of 25 total)
                                                    Viewing 25 topics - 1 through 25 (of 25 total)

                                                    View full reply list.

                                                    Advert