IOM Boxkite

Advert

IOM Boxkite

Home Forums Sailing Models IOM Boxkite

  • This topic is empty.
Viewing 25 posts - 1 through 25 (of 52 total)
  • Author
    Posts
  • #9712
    Tim Rowe
    Participant
      @timrowe83142

      A refit story

      Advert
      #93849
      Tim Rowe
      Participant
        @timrowe83142

        A few years ago I gave an IOM to a very good friend. It was an ebay purchase and the photos turned out to be an honest picture of the condition of the boat ie basically OK but some tidying to do. At the time I did not know it was a Boxkite (Graham Bantock design) but the idea was that my friend and I could could sail with each other with me using my Topiko which is another Graham Bantock design. For those who don't know, Graham is a champion sailor and owns SailsEtc which is a go-to place for model yacht fittings, sails and accessories.

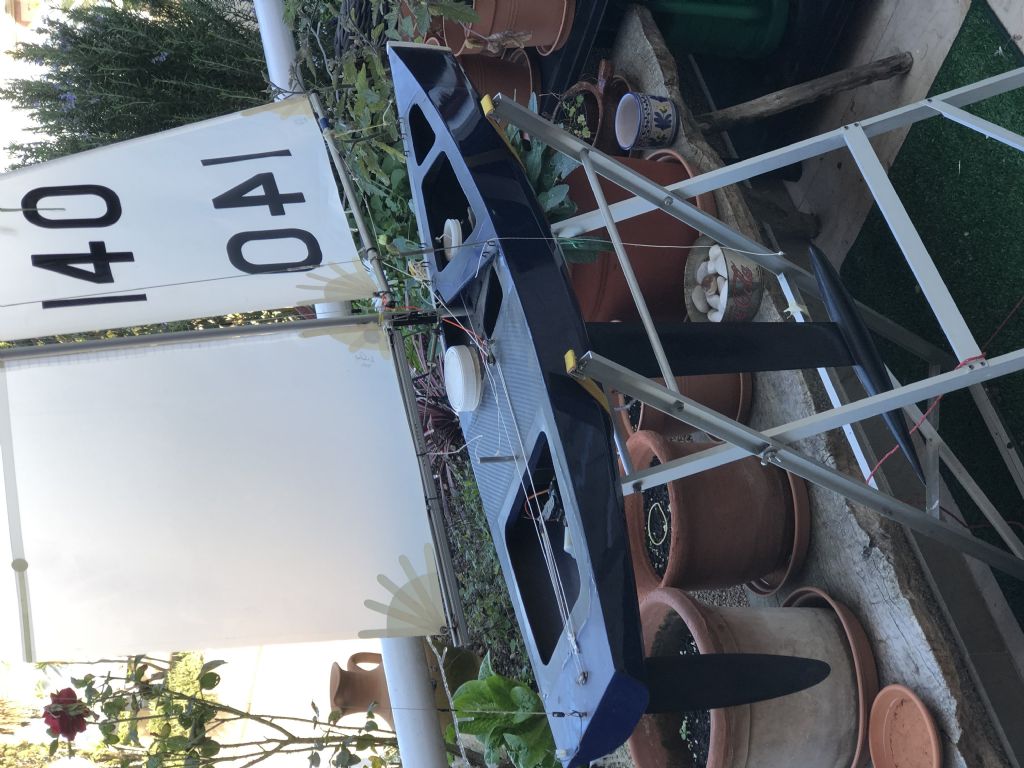
        img_5473.jpg

        The boat had been hanging on a wall for some time and had not been sailed. With my friend in lockdown in the UK we agreed that I would raid his house and get the boat in working order. This is how it was when it came down from the shelf and apologies for the sideways photo.

        It only has the A Rig (the big one) but came with the winch and steering servo. No receiver but I would have changed that anyway.

        Tim R

        #93852
        Ray Wood 3
        Participant
          @raywood3

          Hi Tim,

          The IOM racing boats always looked an expensive way of sailing ! I recall chatting to Kenny Binks 10 years ago at the lake at Eastbourne and asking him how much the hull & deck for his state of the art Yellow Canary from Australia was and him replying £1500 !!!! then more recently they are sailing Brit Pop's same sort of cost ??

          My experience of model yacht racing with an RG65 is they take it very seriously and shout at each other alot

          Where as the Thames Sailing Barge racing is much more sedate, I'm sure your restoration of your friends boat will be first rate

          Regards Ray

          #93853
          Tim Rowe
          Participant
            @timrowe83142

            Hello Ray

            If you are sailing at International or top National level then you are going to need a recent design and it will cost a lot of money as you say. At club level it isn't so expensive as there is an active second-hand market and it is still possible to build yourself and be competitive. If you are careful you can build where you still need corrector weights and the rigs are not too expensive. Ideally you will have a carbon fin and rudder along with a long torpedo keel weight. Those cost a bit I admit.

            I have a Topiko that I bought second-hand for €600. It was fully equipped and has a class certificate. If I was good enough I could get to the top group at club level with this boat. I don't have a C rig which is tiny. If it is C rig conditions I prefer to stay indoors.

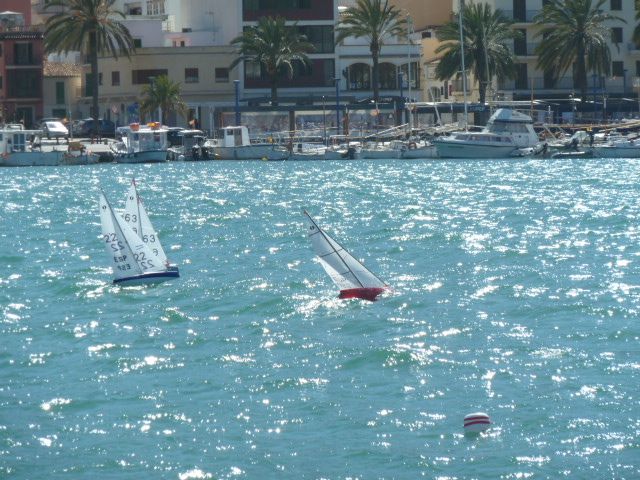
            p1120646.jpg

            I am the red boat and this was my first outing. This was the top of B rig conditions and it was very windy.

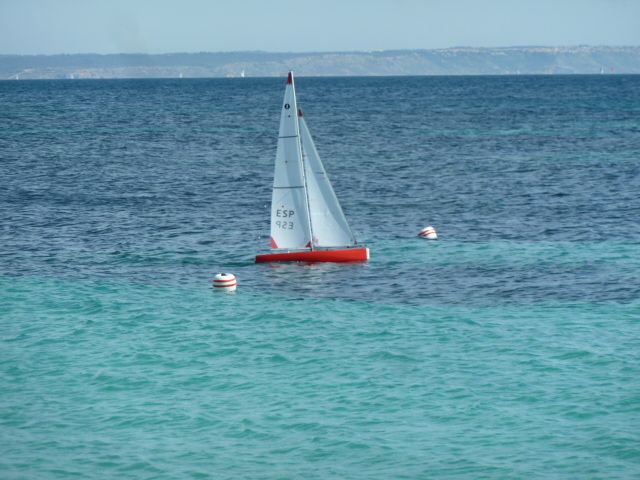
            p1130033.jpg

            This was the second outing in much calmer conditions using the A rig. As it happens I had much bigger problems that day. The top of the mainsail came untied and a hook on the sheeting started to peel off one of the deck hatches. I nearly lost it but rushed round to the beach where it was drifting to and waded in to get it out of the surf. All my fault entirely as I thought I was properly prepared but I wasn't. Its the old saying – To finish first, first you have to finish!

            My IOM is called Footloose and has had a refit too. The Graupner winch failed during bench cycling so it has not sailed yet. Really I should be fitting a RMG winch for power and reliability but they are a lot more expensive than than a Hitec winch for instance. The Boxkite has a Hitec so I am going to evaluate that before splashing out for Footloose.

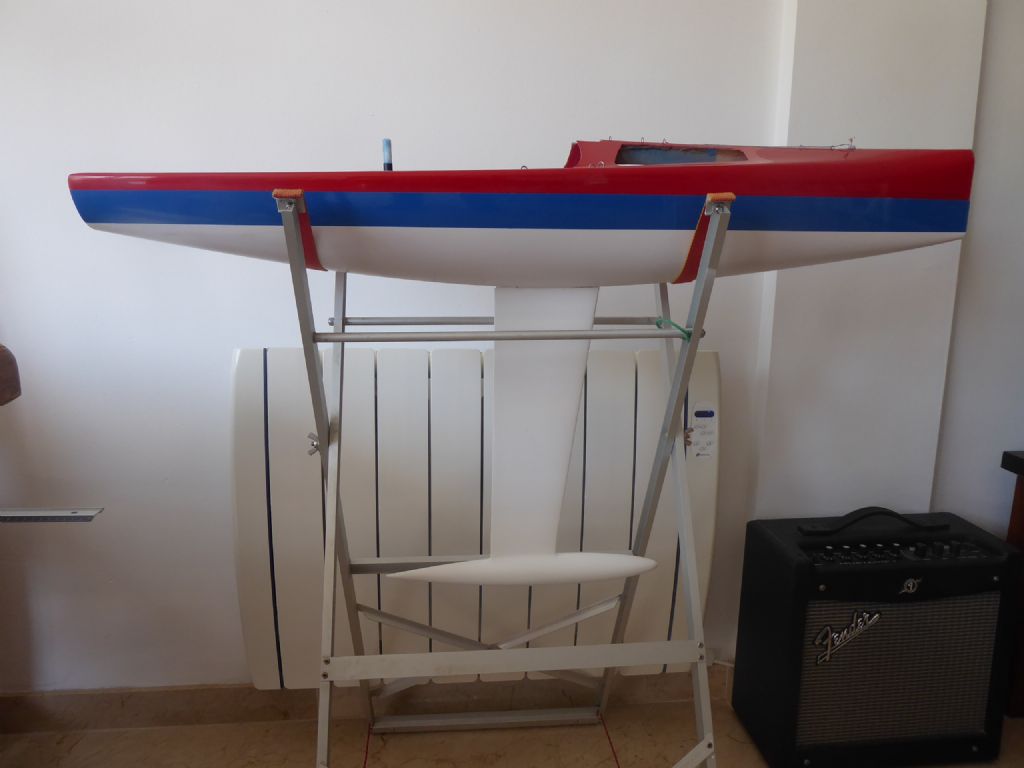
            p1070217.jpg

            Here is Footloose just out of painting. The hull was all red gelcoat before but there was some repaired damage that was showing through the gel prompting the new colours.

            Anyway, back to the Boxkite.

            Tim R

            #93870
            Tim Rowe
            Participant
              @timrowe83142

              I checked over the hull of the Boxkite (Now named Too Easy after a Beneteau my friend owned) He wanted a modern, non serif font for the name so it was condensed to "2EZ". Suits me fine as here are less letters to cut out.

              The hull was in very good shape with just some very tiny cracks at the fore and aft end of the keel slot. Internally everything was fine so I decided not to worry about them.

              The main problem was the deck paint and lack of deck patches.

              p1230245.jpg

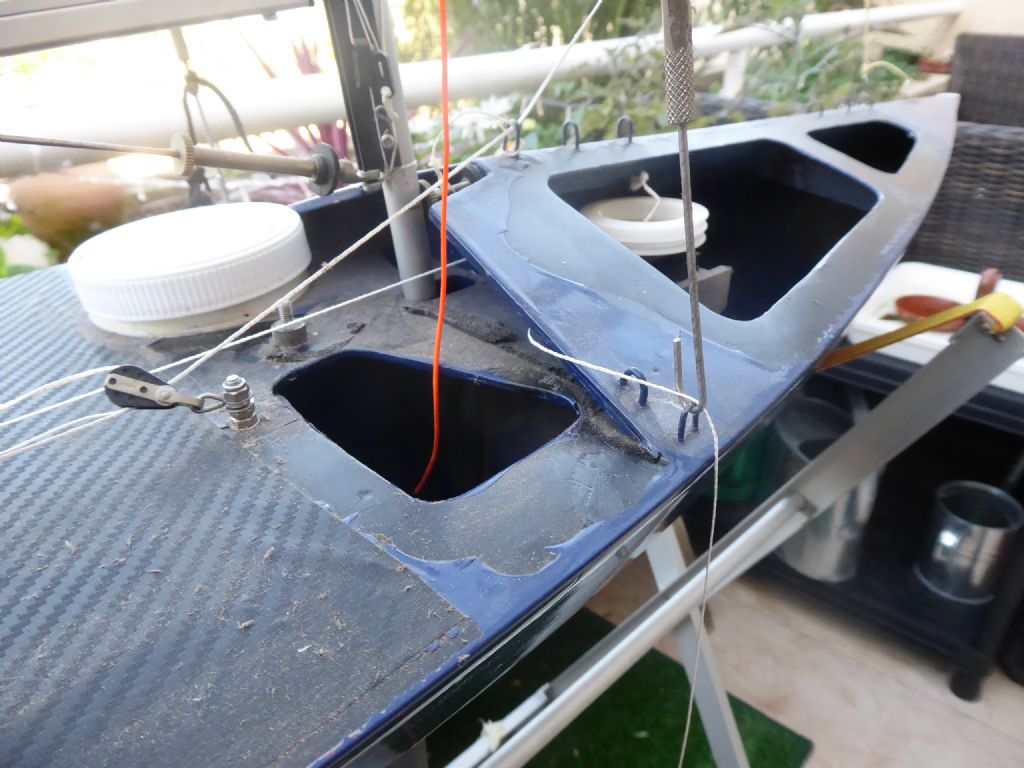
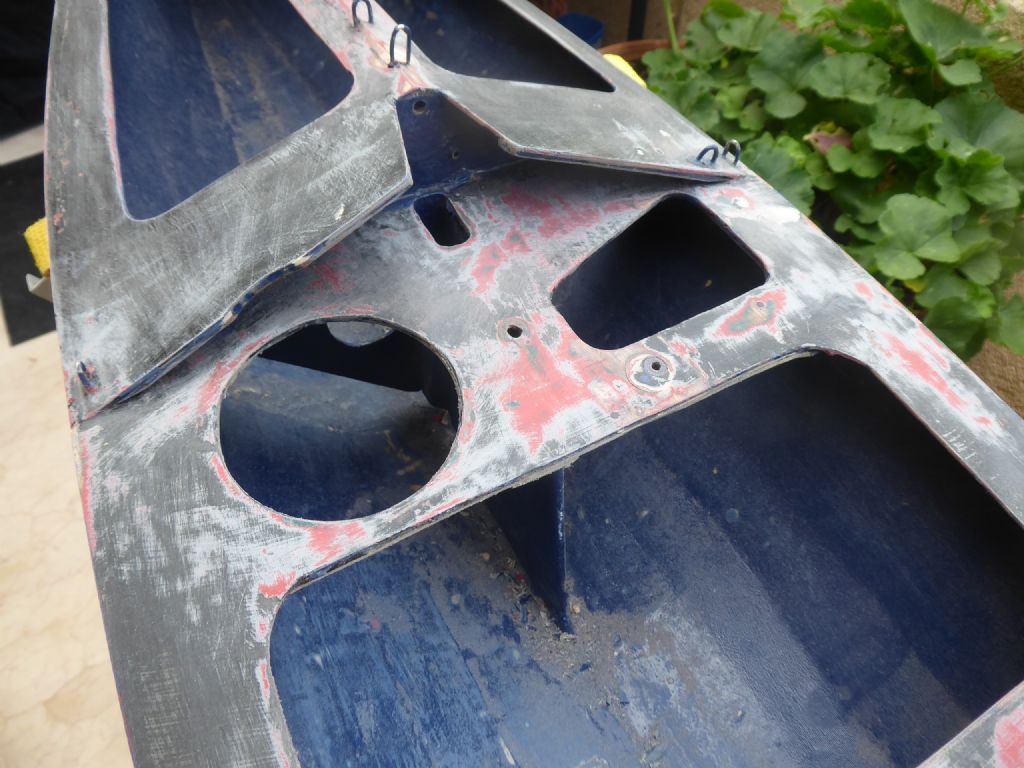
              The paint had no adhesion and had pulled off when the patches had been removed. As you can see it was also very dusty. The sheeting wasn't rigged correctly and the mast was raked back at a crazy angle. The backstay was at its limit of adjustment so needs lengthening later.

              With no time pressure I decided to see if I could tweak a few things to make the boat more competitive as the design is now quite dated, and to make it easier to operate and maintain.
              The main thing that stood out immediately was that the winch was mounted forward and the battery was mounted aft. The boat design places the winch forward but it is not a good distribution of weights. On a sailing yacht it is important to keep the weight out of the ends. Also it was very inconvenient having the battery under the big aft patch which either would have to be charged in position (something I don't do if at all possible) or unstick the patch every time the battery is swapped. The steering servo was under the same patch as well so in the event of a failure, or adjustment required, off comes the deck patch again! The first decision was to move the winch aft and the steering servo forward into the centre compartment so that all the equipment is now under one hatch. The battery is now going to live in the screw top pot so swapping it out with a freshly charged one is a doddle, no patches have to be disturbed and the weight distribution is optimised. Other than that it was going to just be a tidy up – or so I hoped!

              Tim R

              #93874
              Eddie Lancaster
              Participant
                @eddielancaster

                Hi. Tim, I am using the Hitec HS-785HB with the arm in my Boxkite and that seems to be coping well so far.

                I will be using the same servo but with the winch drum in the two Nimbus hulls as these boats are 3” narrower than the Boxkite.

                I was going to follow the same placement of the servos as they are in the Boxkite, but after reading your points on weight distribution I will put the sail control servo as it is shown on the plans, alongside the fin box. It is already in this position in the balsa planked hull.

                Regards.

                Eddie.

                #93875
                Tim Rowe
                Participant
                  @timrowe83142

                  Hi Eddie

                  I think it makes things a lot easier. If you use a "buggy" type battery you can fit it in a pot and have room for the RX above it. I use Ni-Mh 1600 mAh 6v batteries. It also means you can have nice short leads.

                  Tim R

                  #93878
                  Eddie Lancaster
                  Participant
                    @eddielancaster

                    Hi.Tim, thanks for the info.

                    Eddie.

                    #93883
                    Tim Rowe
                    Participant
                      @timrowe83142

                      The hull had been spray painted and had a good gloss. I wasn't planning a complete re-paint but when peeling off the deck paint (literally) some of the topside paint came off too.

                      In fact crying

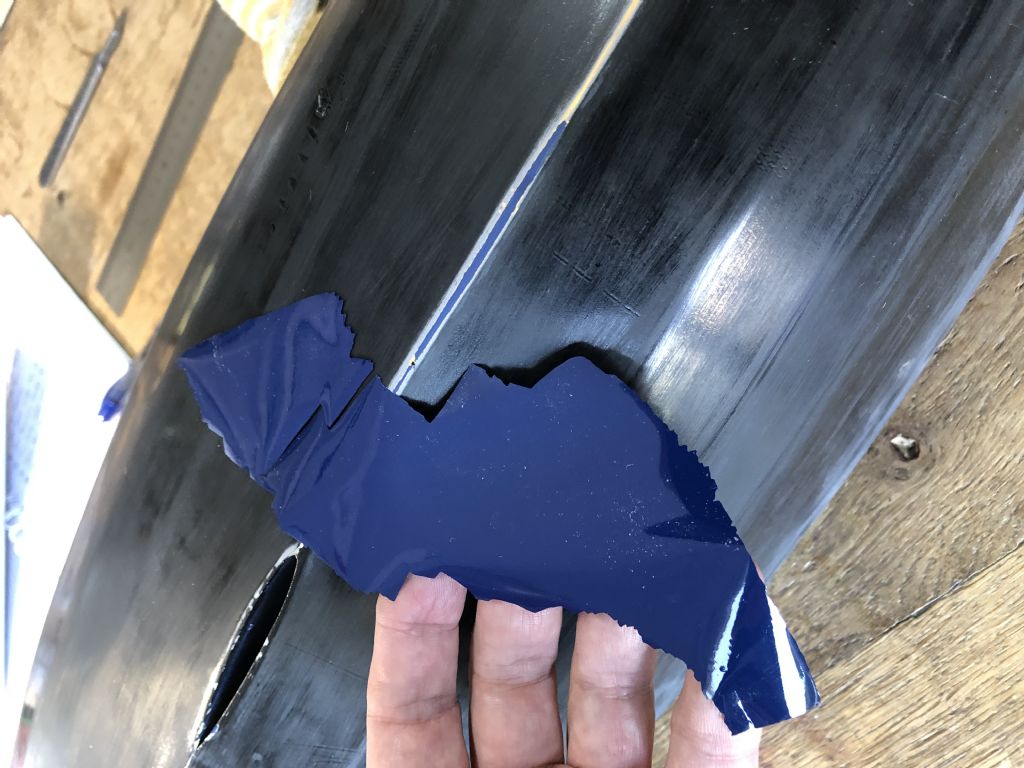
                      img_5506.jpg

                      This is how it came off leaving not a trace behind. I have no idea what the black coating was but it was quite hard and perfectly ok, or would have been if it had been prepared properly.

                      In the end this was the only big surprise.

                      Tim R

                      #93884
                      Tim Rowe
                      Participant
                        @timrowe83142

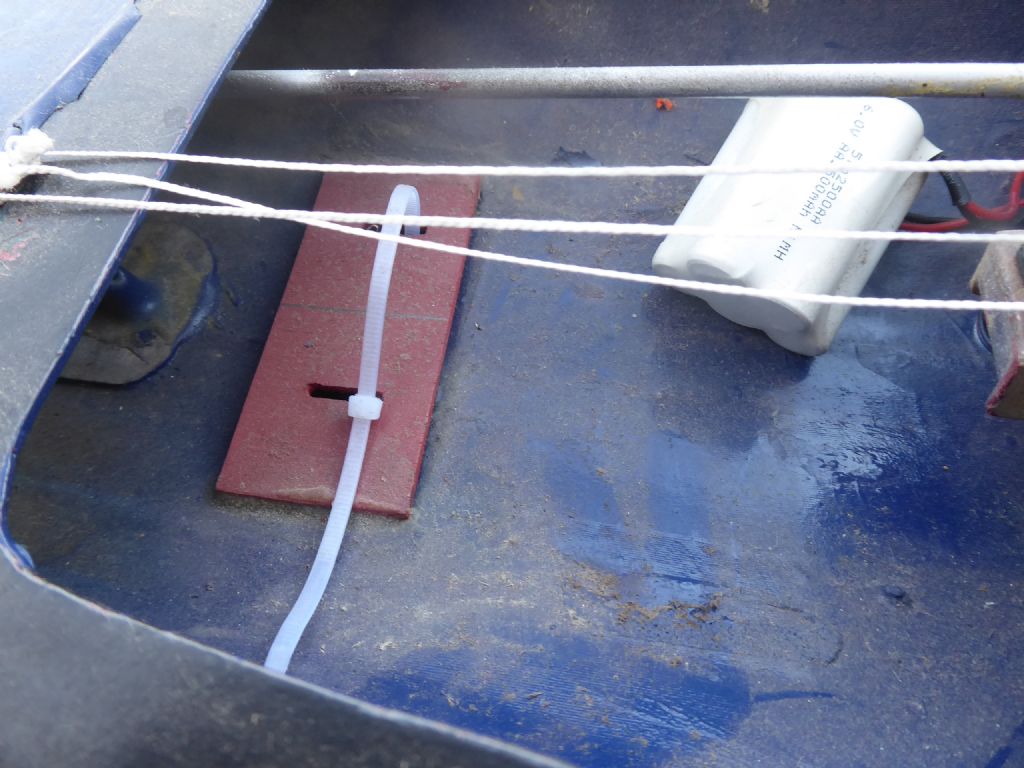
                        This shows the the position of the battery.

                        p1230243.jpg

                        Right aft under the big patch and held don with a cable tie.

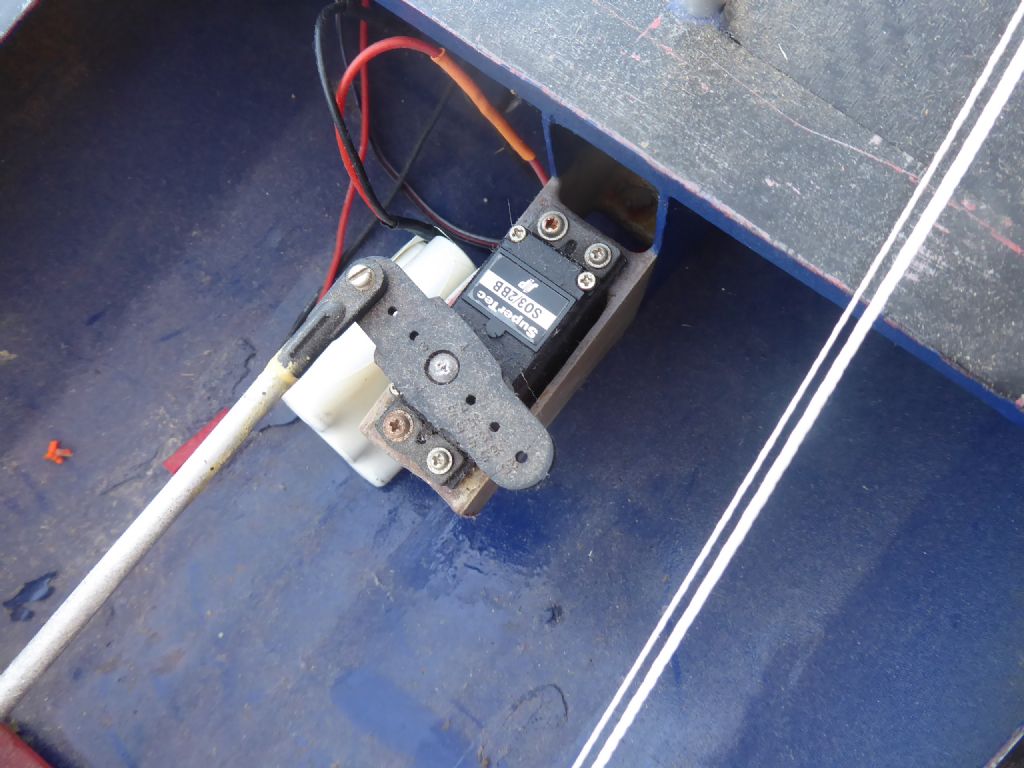
                        This was the original position of the steering servo.

                        p1230241.jpg

                        Again under the big patch. I am not familiar with this model of servo. The sealing rubber was damaged and it was a bit noisy so I have swapped it out with a Futaba S3001. This is the design position of the servo but destined for the centre compartment. This meant making a new longer link tube but I had some allow tube that was slight larger in diameter but much thinner walled so the new one was stiffer and lighter.

                        Tim R

                        #93935
                        Tim Rowe
                        Participant
                          @timrowe83142

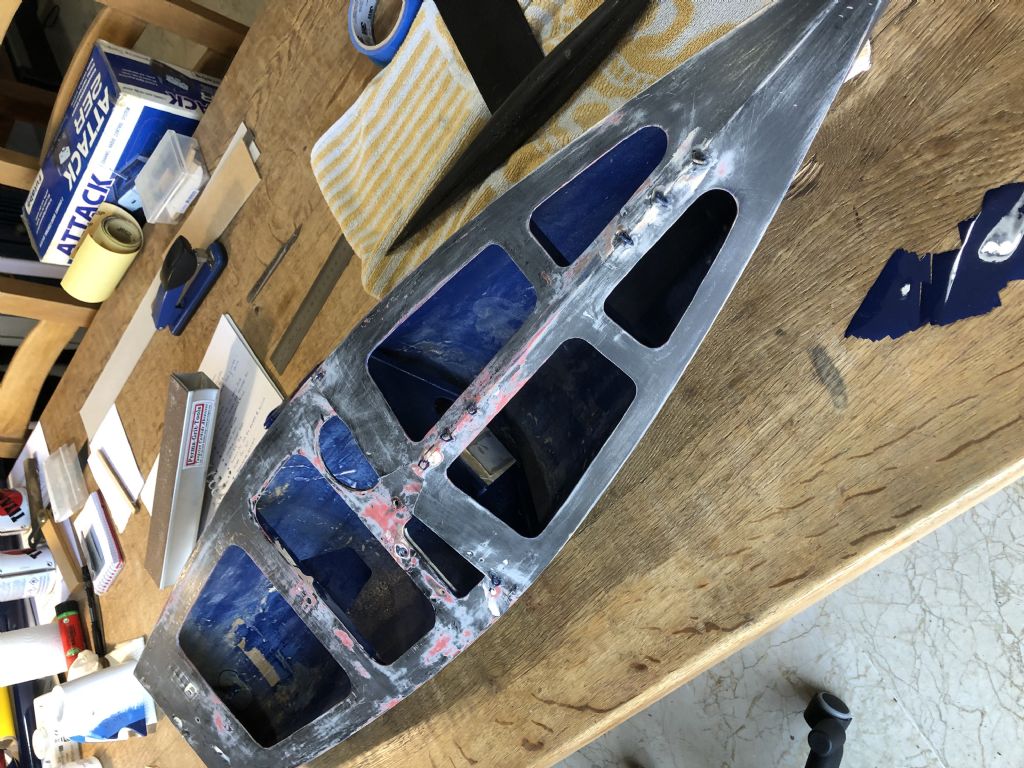
                          The paint coming off the hull was a shame because they sprayed finish was very good and quite a high benchmark for me to restore. Anyway we got back to to the undercoats that were sound and took out a few lumps and bumps from the inside to make things a bit tidier and a few grams of weight.

                          img_5505.jpg

                          This was the result at the turning point and the hull came out at a respectable 926 grams empty. Again excuse the orientation please.

                          In all these kind of projects if one improves one thing it highlights another and so it was with the bow bumper. The IOM rules require 10mm of flexible material at the bow.

                          p1230228.jpg

                          p1230229.jpg

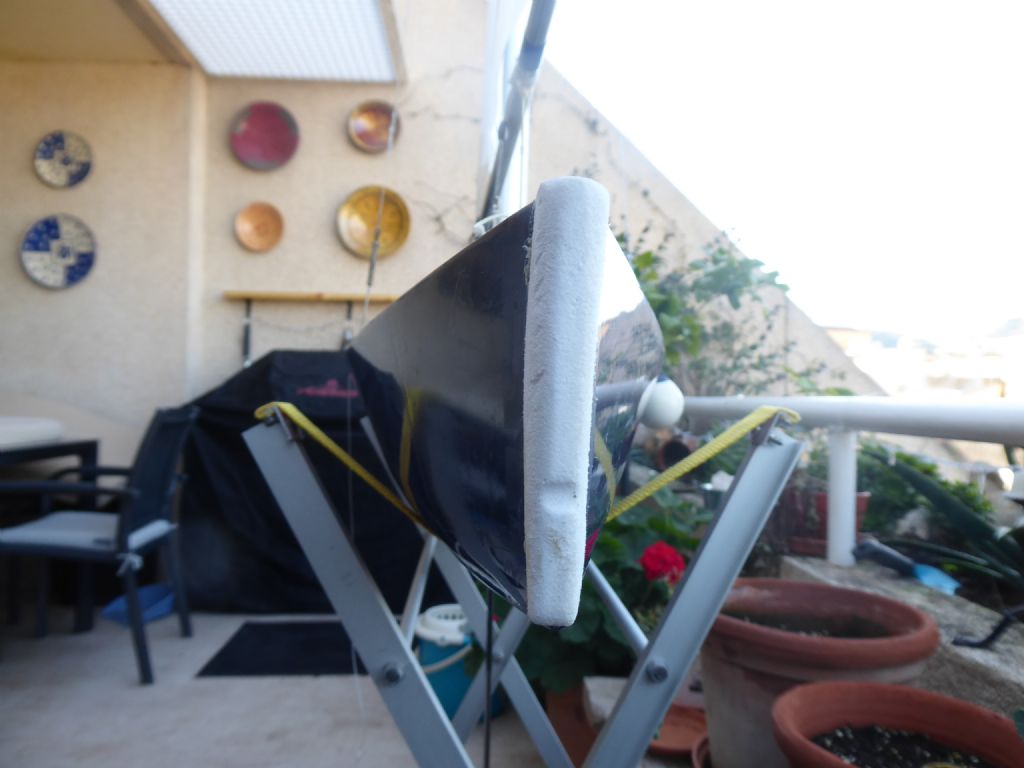
                          This was the original and far from matching the profile at the bow. It was acting more like a crumple zone than a bumper so I took it off and threw it away before I was tempted to cheat. Slippers courtesy of the local Chinese shop and very necessary on a marble floor in a Mallorquin winter.

                          Talking of shoes, a cheap and simple bow bumper can be cut out of a flip-flop.

                          Tim R

                          #93940
                          Chris Fellows
                          Participant
                            @chrisfellows72943

                            Hi Tim

                            Good to see some of your work again even if it's not your boat. Bit of a b*gg*r with the paint as it makes more work you hadn't bargained for. It will be as fresh as a daisy once you have finished!

                            Was going to say nice slippers!

                            I've got an RG65 class yacht that I use for club racing. Our lake's not that big so doubt I will go for anything bigger. Will probably buy a DF65 and fit an A rig for lighter winds so that I don't have to change suits.

                            Chris

                            #93950
                            Ian Bell 1
                            Participant
                              @ianbell1
                              Posted by Chris Fellows on 25/02/2021 17:17:39:

                              Will probably buy a DF65 and fit an A rig for lighter winds so that I don't have to change suits.

                              Hi Chris,

                              From experience of sailing both Rg65's and a DF65, if you want to sail the DF sucessfully in light winds you really need to invest in the A+ suit . They are very slightly "tardy" in light airs with the A suit that comes in the kit.

                              #93954
                              Chris Fellows
                              Participant
                                @chrisfellows72943

                                Thanks Ian, I'll look at a set when the time comes. Trouble with our lake is that quite often the water level drops and you need taller sails to catch the wind. There is also a line of trees and a hedge nearby so the wind is often all over the place. You can be almost submarining in one place and in the doldrums in another!

                                Chris

                                #93959
                                Tim Rowe
                                Participant
                                  @timrowe83142

                                  Hi Chris

                                  The paint is no big deal and it will give me a chance to try out my brand new Proxxon polisher. I polished Galileo by hand and that was hard work. It will get back to that post sometime.

                                  Having made the decision to move the winch and rudder servo into the mid hatch position there was a bit more stripping out to do.

                                  p1230271.jpg

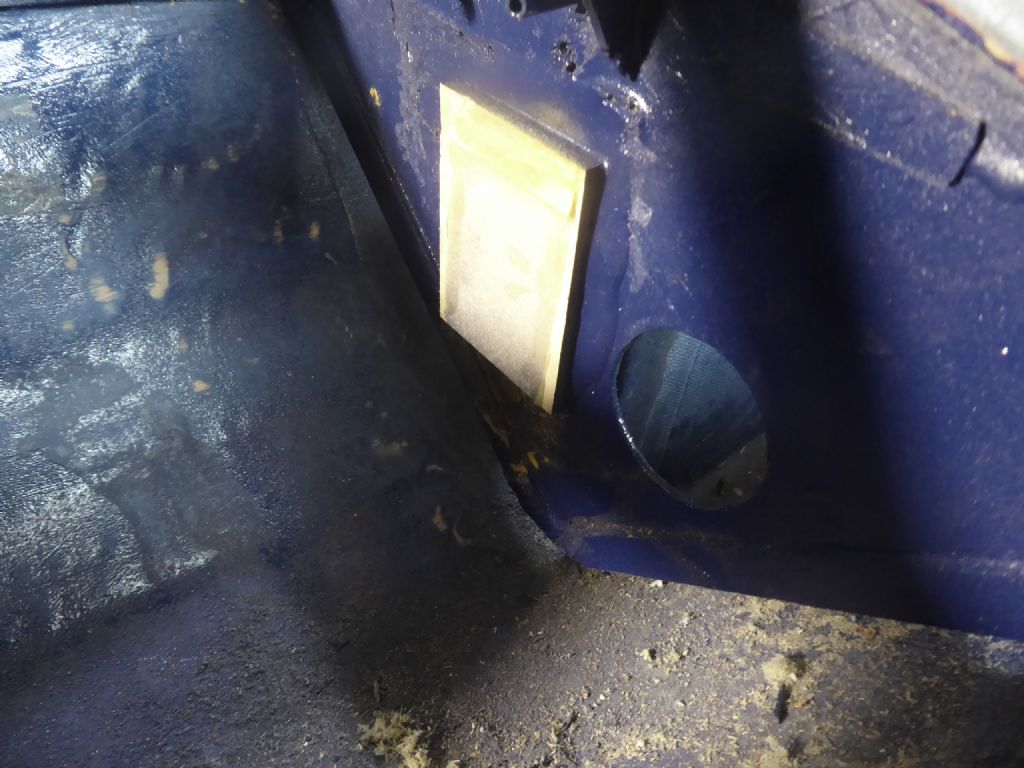
                                  This is the remains of the rudder servo mount. This also carries the mainsheet tube that as delivered was a.bit high. In view of this and to take the reaction off the mount I decided to create a socket on the hull and here the paint was scuffed off in readiness.

                                  img_5527.jpg

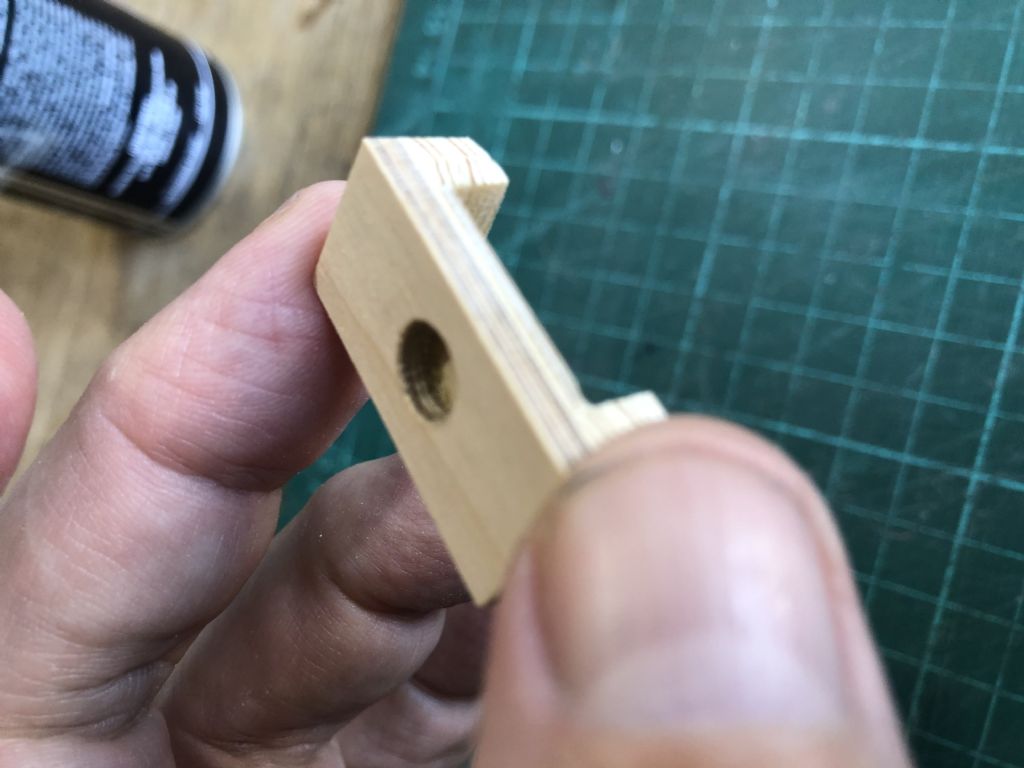
                                  So this little piece was epoxied into the base of the hull. The tube now supports the mount instead of the other way round and will help provide the stiffness and strength for when the winch becomes involved.

                                  p1230272.jpg

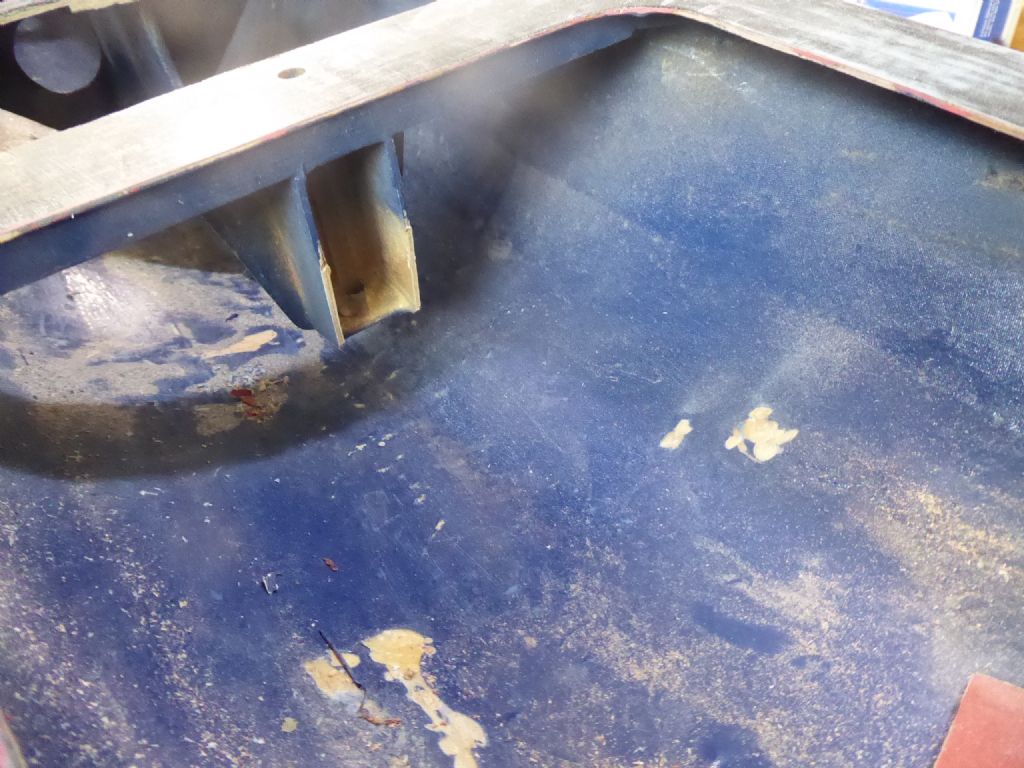
                                  Here is the remains of the winch mount and you can see clearly that the only bulkhead does not touch the hull anywhere!

                                  Looking ahead to another potential problem I could see difficulty with one of the deck patches.

                                  p1230279.jpg

                                  Here you can see that the corner of the starboard opening is very close to the foredeck overhang. Not nearly enough for an overlap on the self-adhesive patch. I think the recommended minimum is 6mm but I like to use 8mm to give a bit of tolerance if they are not applied accurately. As there is no equipment under this opening it was decided to close it permanently. This also gave a bit of clear space to stick the sail number which has to be a minimum 20mm high on the hull somewhere. The rest of the deck is almost all patch.

                                  Tim R

                                  #93967
                                  Eddie Lancaster
                                  Participant
                                    @eddielancaster

                                    Hi. Tim, looks like it’s turning into a major rebuild, don’t know if you have the drawings but it looks like it was built according to the drawings, the main sheet mast is shown as 50mm above the deck, they drawings first came out twenty years ago, and I built mine following the drawings.

                                    The Nimbus follows the same principle by not having any frames attached to the hull, only at the deck and inwales only the finbox attaches to the hull and of course the rudder tube.

                                    Regards.

                                    Eddie.

                                    #93970
                                    Tim Rowe
                                    Participant
                                      @timrowe83142

                                      Hi Eddie

                                      I don't have the drawing but I am sure you are right about it following the instructions. Basically it is nicely made but I don't know what an earth went wrong with the paint. It's a nice little fill in project and is allowing me to try out a few new things.

                                      I have just confirmed that the rig was not set up for this boat so a few more things in the pipeline.

                                      Tim R

                                      #94700
                                      Tim Rowe
                                      Participant
                                        @timrowe83142

                                        I have made some progress with the Boxkite so time to report in.

                                        img_5546.jpg

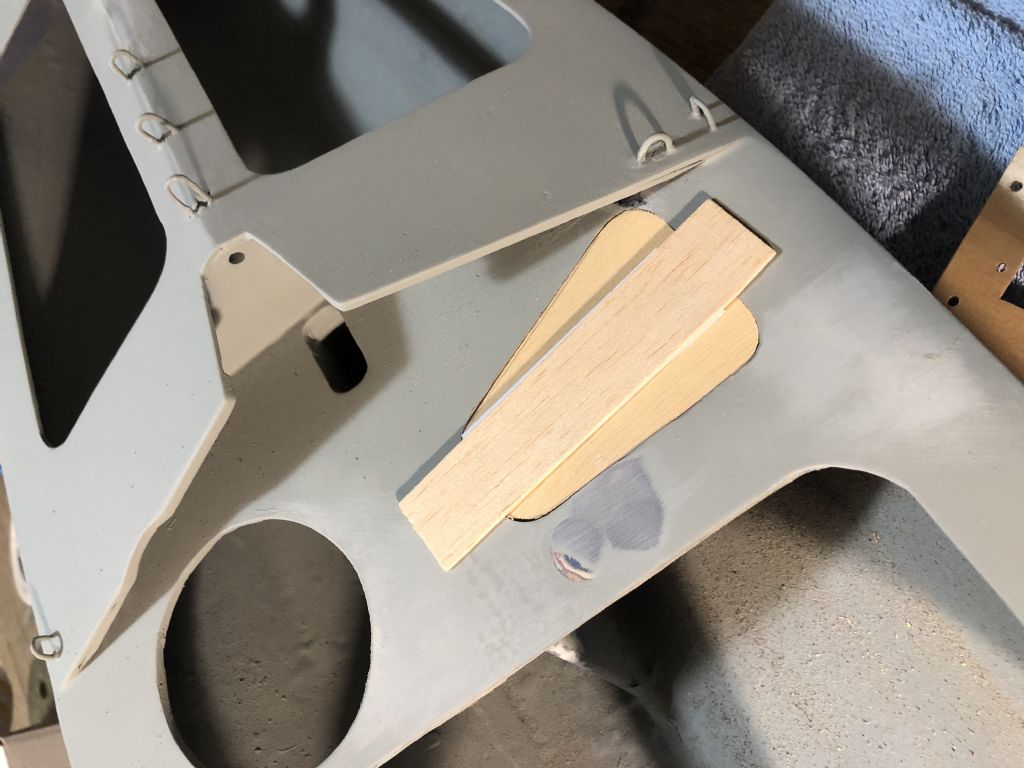
                                        A suitable piece of ply was found for the hole and glued in place using epoxy. The same epoxy was used to seal the underside as it would be tricky to completely seal with paint or varnish afterwards. The brace across the top was a piece of soft balsa held with a couple of tiny spots of glue so it it be broken off easily when the patch had cured. The balsa keeps the patch in perfect alignment with the top of the deck.

                                        img_5576.jpg

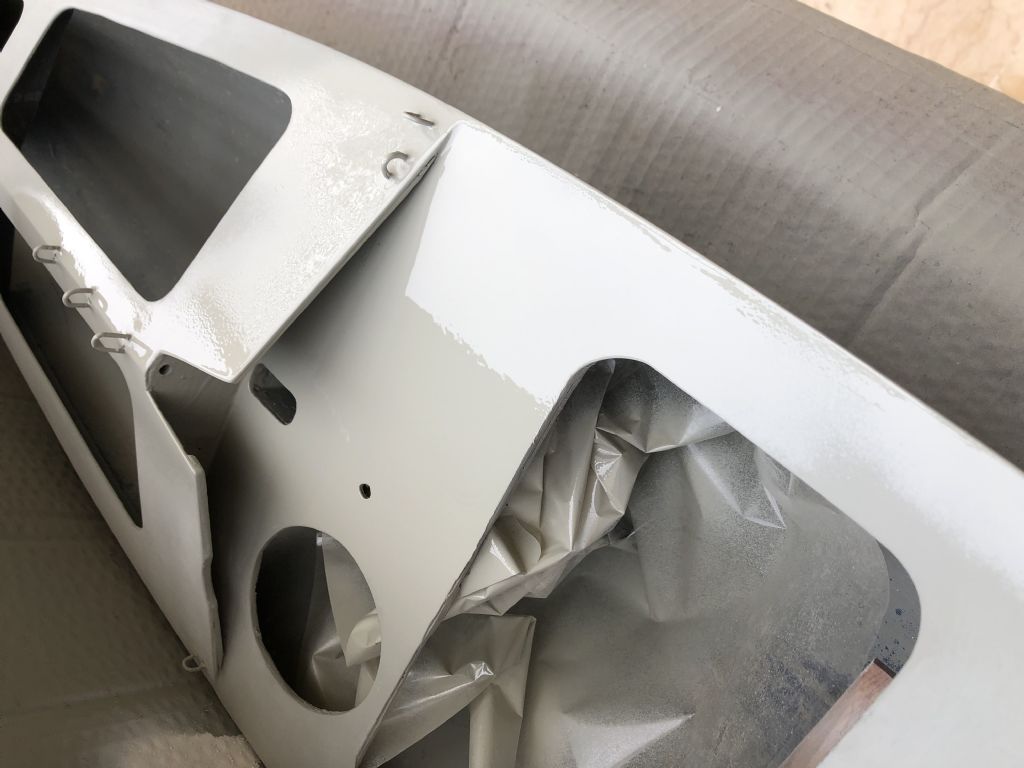
                                        When coated with the high build primer the patch disappeared. The paper scrunched up inside was to stop primer getting onto the keel box because I need to stick things on that later.

                                        p1230647.jpg

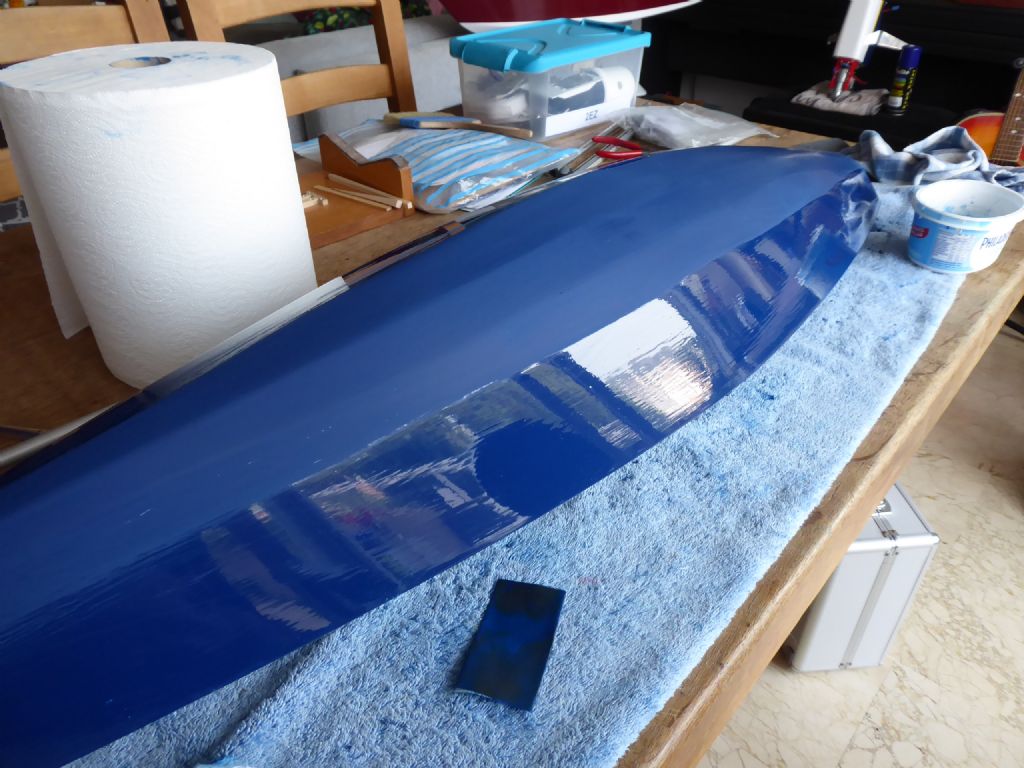
                                        The paint stages are too boring for the interim stages but two coats of spray primer gave me a uniform base surface. Eight coats of enamel were then hand painted just sanding enough in between coats to remove dust and to get a good key. The penultimate coat was flatted right back so that the final coat would be as smooth as possible. This cuts down the work at polishing stage and creates a very fair surface.

                                        In this photo you can see the final coat which has a good gloss but has the brush marks and the odd speckle here and there. The bottom has been prepared for final polishing using wet / dry paper used wet going from 400 to 800 to 1200 and finally 1500 grit. This leaves a perfectly matt surface and if you are lucky this can be done within the thickness of the last coat so you don't get any beach marks. It doesn't matter too much because on final polishing these tend to disappear.

                                        The hull was left in this un-polished state while the rest of the work was completed. Two reason for this:
                                        If the coatings got scratched I could repair before polishing . The other is that the paint will continue to harden over the 4 further weeks or so needed to complete. Fully hardened paint takes a much better polish.

                                        p1240107.jpg

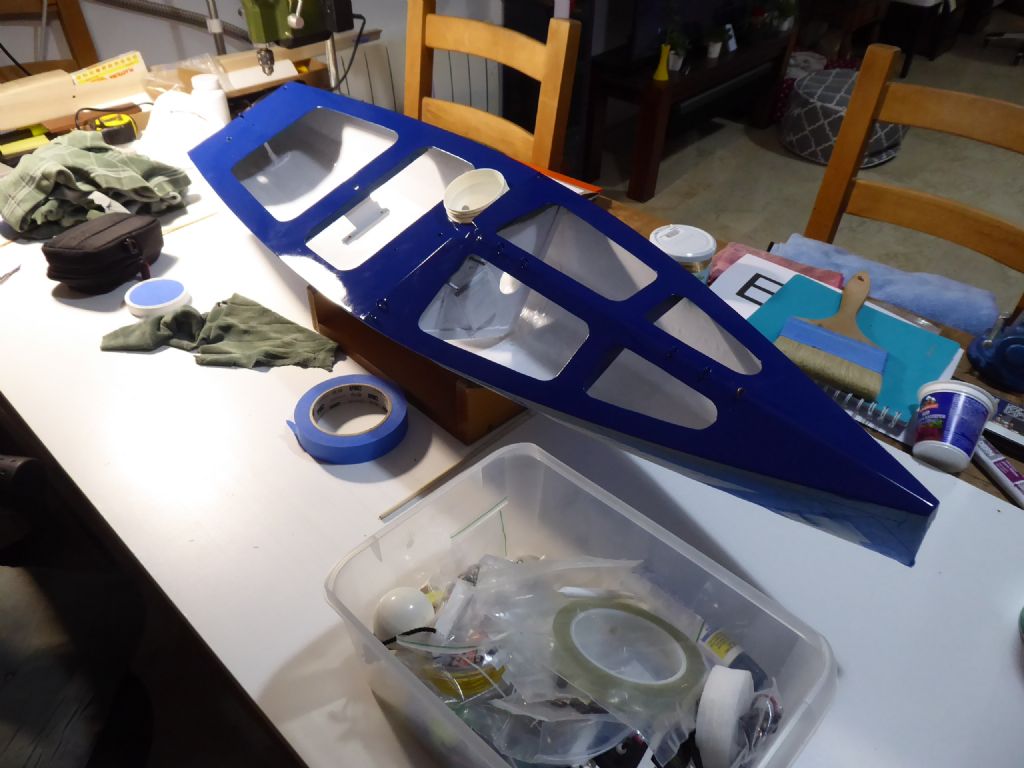
                                        The decks were self finished with a rattle can as they would be a nightmare to polish without breaking through and anyway, not really necessary as by the time the deck patches are fitted along with the hardware, not much of the deck is on show. There was one problem caused by a previous owner using a silicone based lubricant around the mainsheet turning block. The minutest trace of silicone contamination causes the paint to kick and produce fish eyes. I was able to improve it a bit but it still remains as a feature!

                                        Tim R

                                        #94702
                                        Eddie Lancaster
                                        Participant
                                          @eddielancaster

                                          Hi. Tim. That is looking really good, with a good finish even before the final polish. I like that colour blue, very smart.

                                          That small opening you have filled in is not on the original drawings, and the radio pot is not shown either, but it where I have fitted mine.

                                          Regards.

                                          Eddie.

                                          #94706
                                          Tim Rowe
                                          Participant
                                            @timrowe83142

                                            Hello Eddie

                                            We have a hardware shop right opposite and I try to find what I need there as it will be a lot cheaper than the model shop 35 kilometers away in Palma. Especially for standard stuff like paint. They can mix to a colour chart but this blue was of the shelf and very close to the original colour.

                                            Right from the outset, the plan was to get all the weights concentrated as close as possible to the middle. In a racing yacht it is very important to keep weight out of the ends. It helps on all sailing boats, models and full size. A new tray was needed.

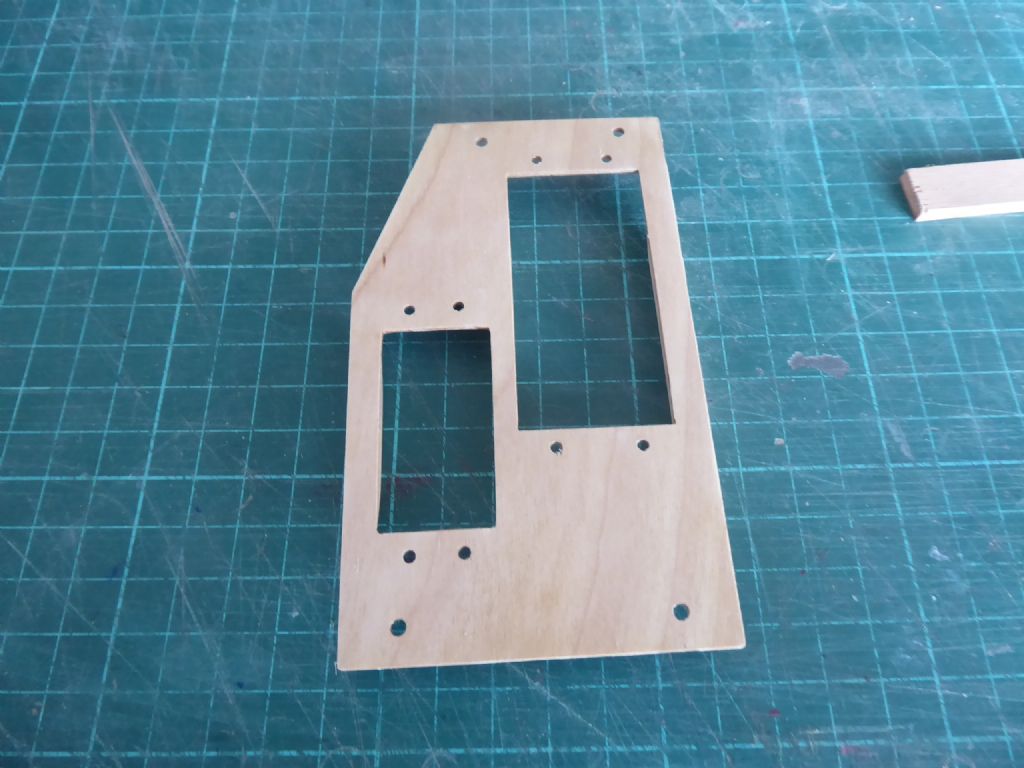
                                            p1230291.jpg

                                            A top view of the tray made from 1.5mm ply.

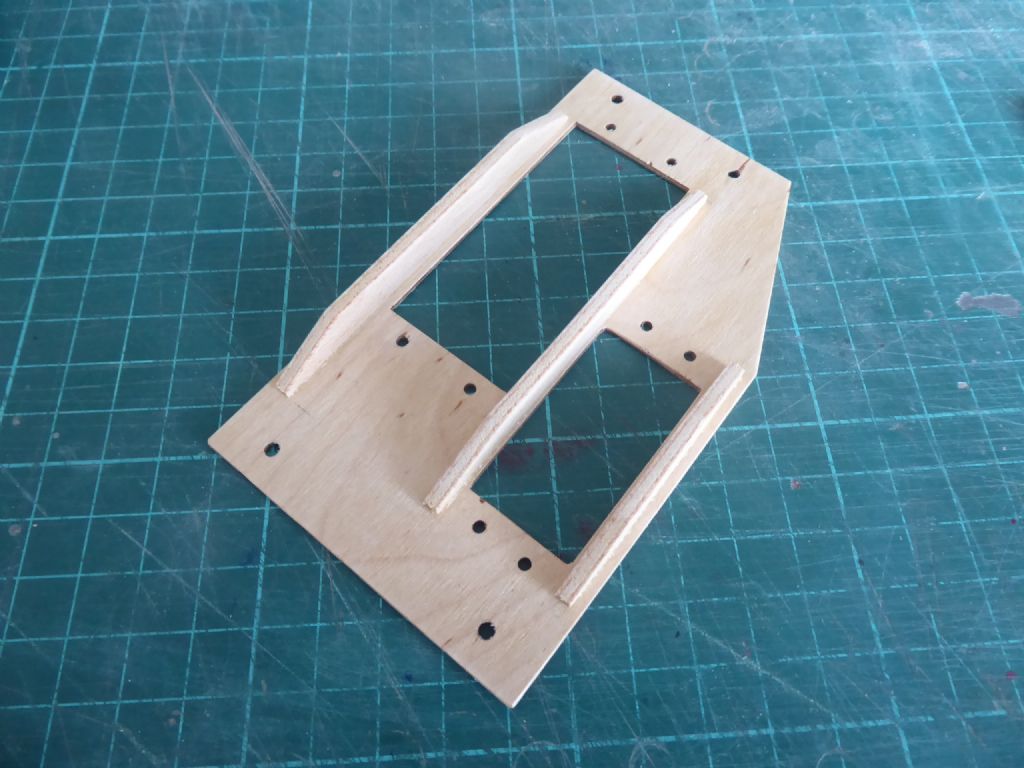
                                            p1230292.jpg

                                            A bottom view of the tray with some Liteply stiffeners.

                                            p1240109.jpg

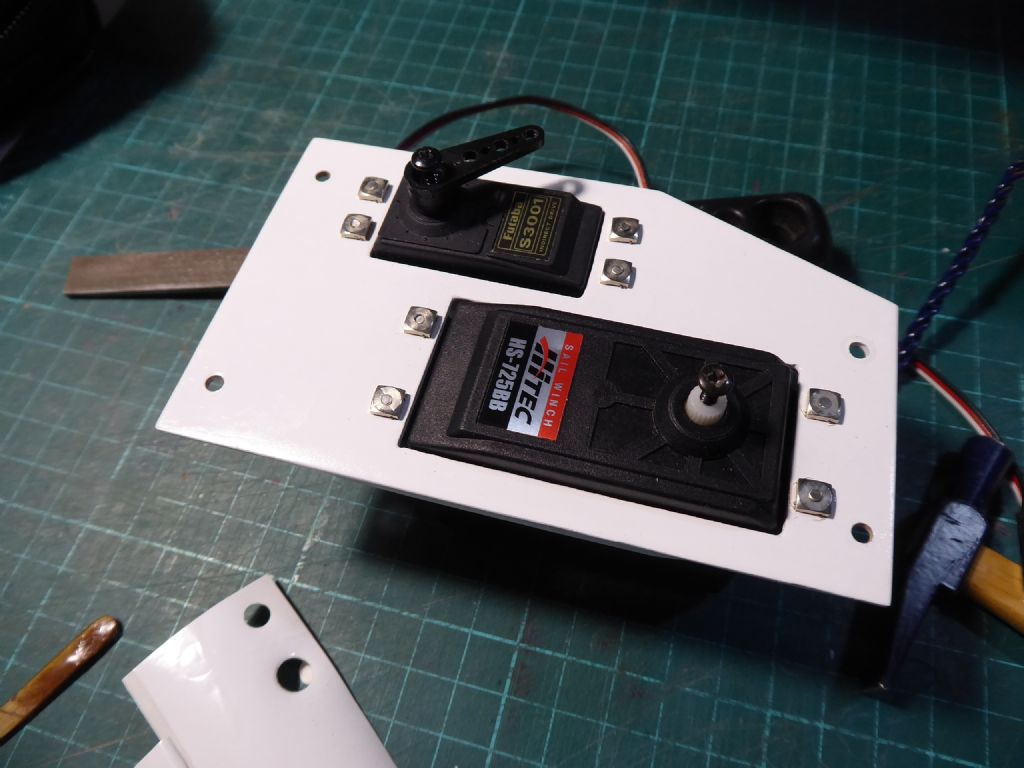
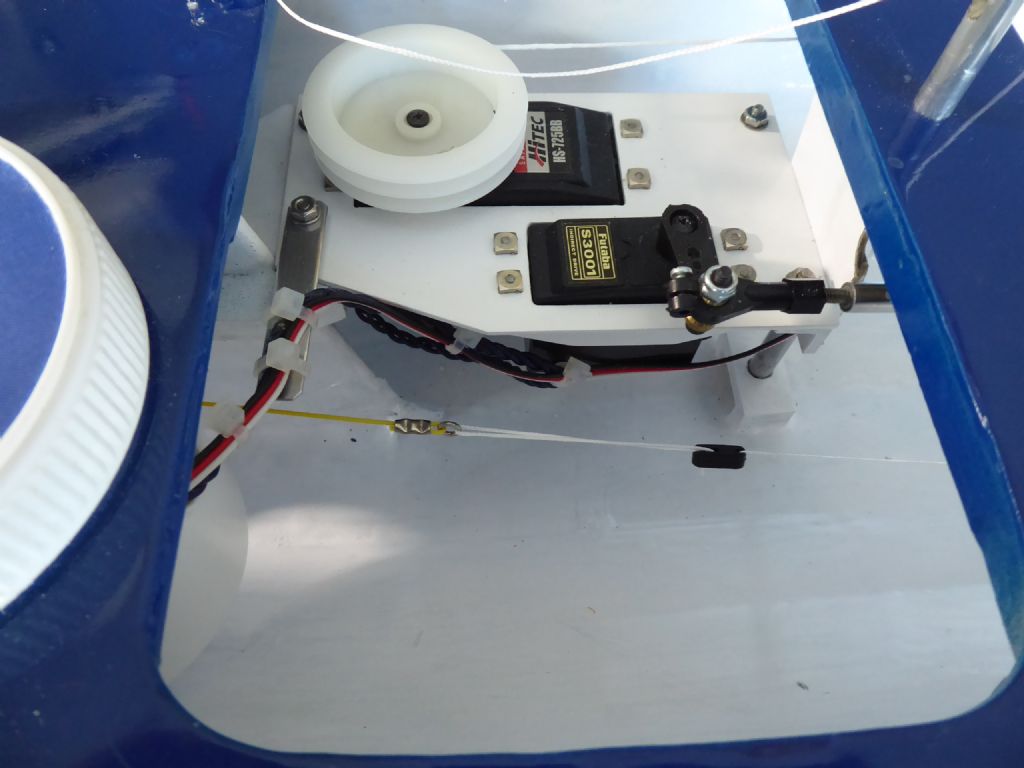
                                            Now painted and with the steering servo and sail winch fitted. The unit can be taken in and out of the hull by releasing four bolts and the servos are bolted through the tray. On final fitting I needed a fraction more clearance for the steering link rod under a deck beam so I underslung the servos.

                                            p1240275.jpg

                                            Finally installed in the hull. The tray bolts to a cross piece glued to the remnants of the old mount for the steering servo and to a notched piece of ply glued around the aft end of the keel casing.

                                            Everything important is now under one deck patch in the middle of the boat and the battery now goes in the base of the pot with the Rx sitting on top.

                                            Tim R

                                            #94707
                                            Chris Fellows
                                            Participant
                                              @chrisfellows72943

                                              Hi Tim

                                              Your friend is a lucky chap with you doing the refurb to your usual high standard. It will look very smart once finished.

                                              Chris

                                              #94714
                                              Tim Rowe
                                              Participant
                                                @timrowe83142

                                                Thanks Chris and Eddie

                                                My friend has more or less decanted back to the UK. He never intended to become a Spanish resident and just enjoyed the freedom of movement. He tried to give the boat back to me but I just can't bring myself to take possession. I am now therefore the custodian and really I am the lucky chap.

                                                It has been a bit of a change from building and in a way, a bit more of a challenge because it didn't start from where I would have done and tricky sometimes to know when to stop.

                                                I am enjoying every bit.

                                                Tim R

                                                #94725
                                                Tim Rowe
                                                Participant
                                                  @timrowe83142

                                                  There has been a bit of talk on Carl's threads about bow bumpers.
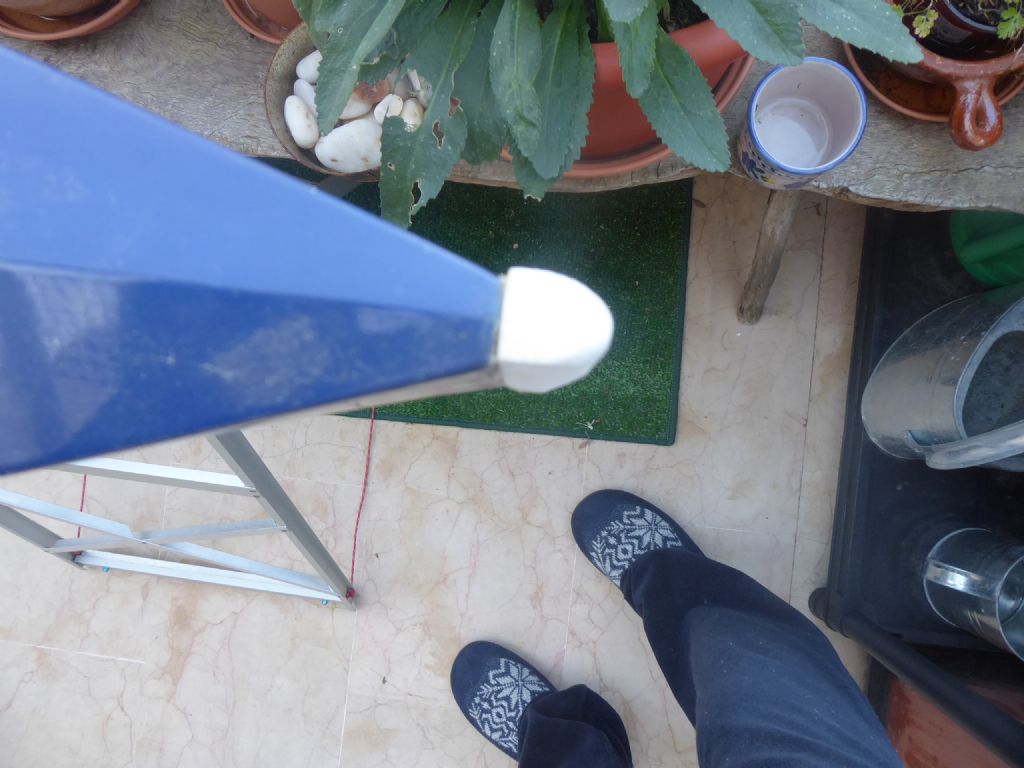
                                                  p1230229.jpg

                                                  This is a reminder of what the original foam version looked like and it had been used in anger with a permanent dent half-way down. It definitely had to go and this is what I did:
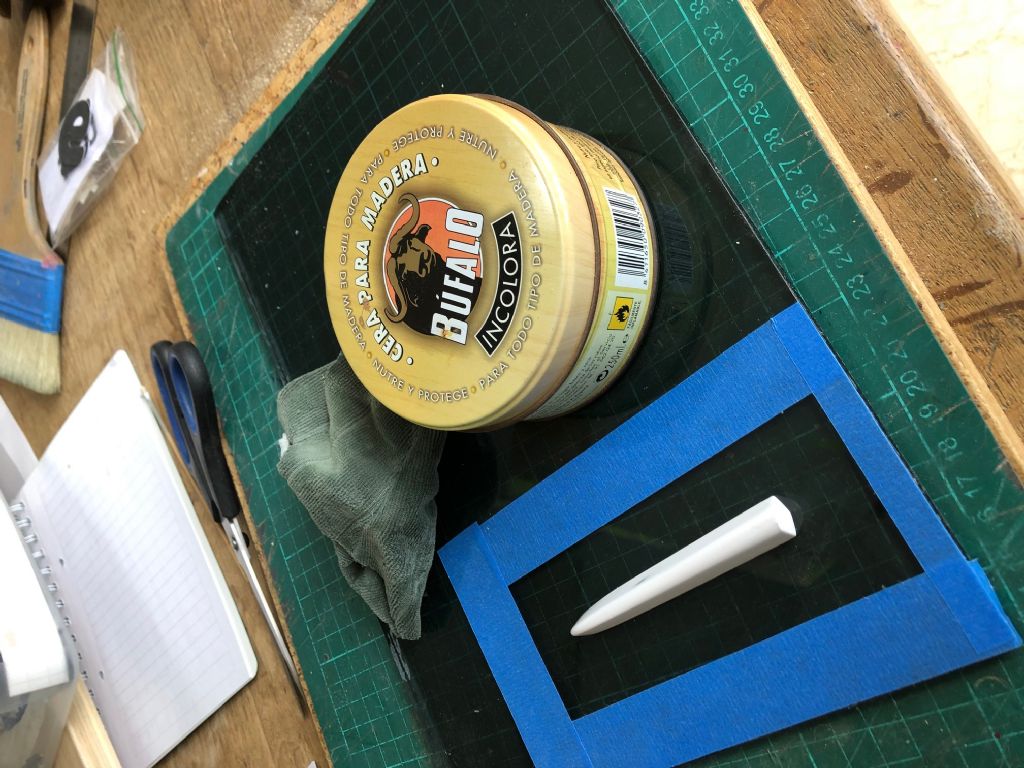
                                                  img_5637.jpg

                                                  I carved and profiled a piece of medium hard balsa that was stuck temporarily to the bow with double sided tape. After fairing and painting, the pattern was stuck to a piece of glass plate (again with double sided tape) and then given multiple coats of wax.
                                                  The blue tape creates a trim line for the completed mould and facilitates releasing from the glass.

                                                  A fairly stiff mix of epoxy and micro-ballons was pasted over the pattern and glass and allowed to gel. The rest of the mould was then made up with odd bits of glass cloth and rovings inside a balsa frame. When the mould was finished and thoroughly cured, out came the pattern. Not in one piece however which was a bit too much to hope for. The mould surface though was good.
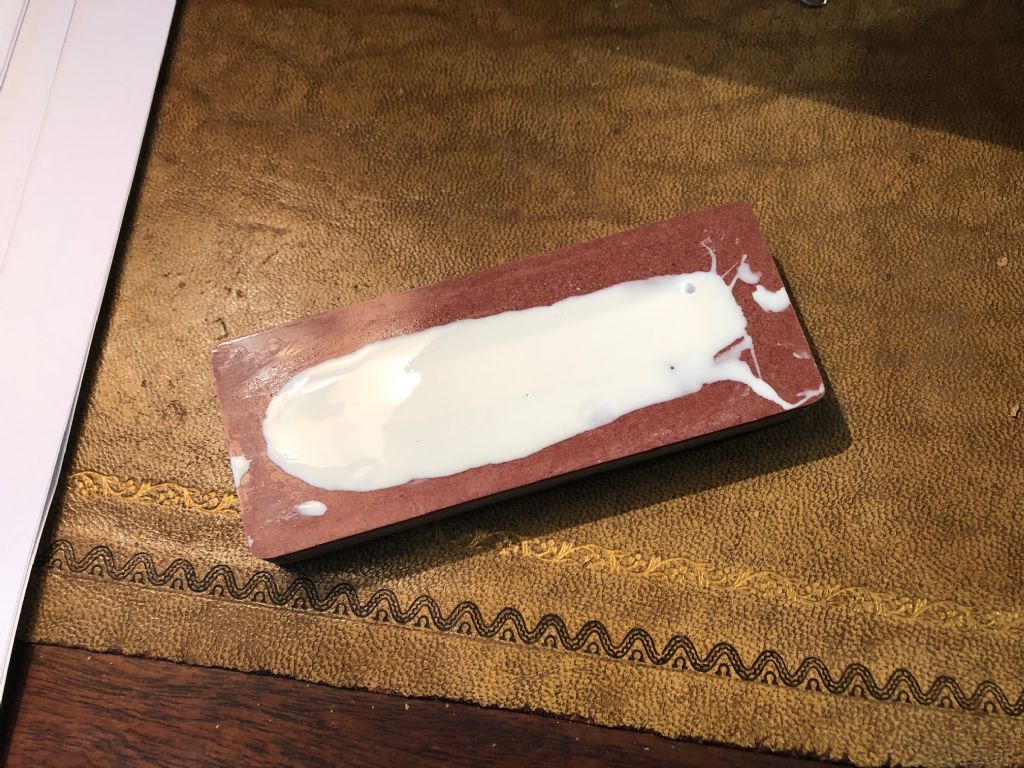
                                                  img_5818.jpg

                                                  The mould was then filled with liquid silicone catalysed at 5%. Although I mixed carefully and gently I did manage to introduce some air and you can see some bubbles rising in the liquid mix. The lesson for next time is that there is no rush as the silicone is very slow curing. There were a few bubbles in the final moulding and I should have let the mix stand for probably 1/2 hour before pouring.
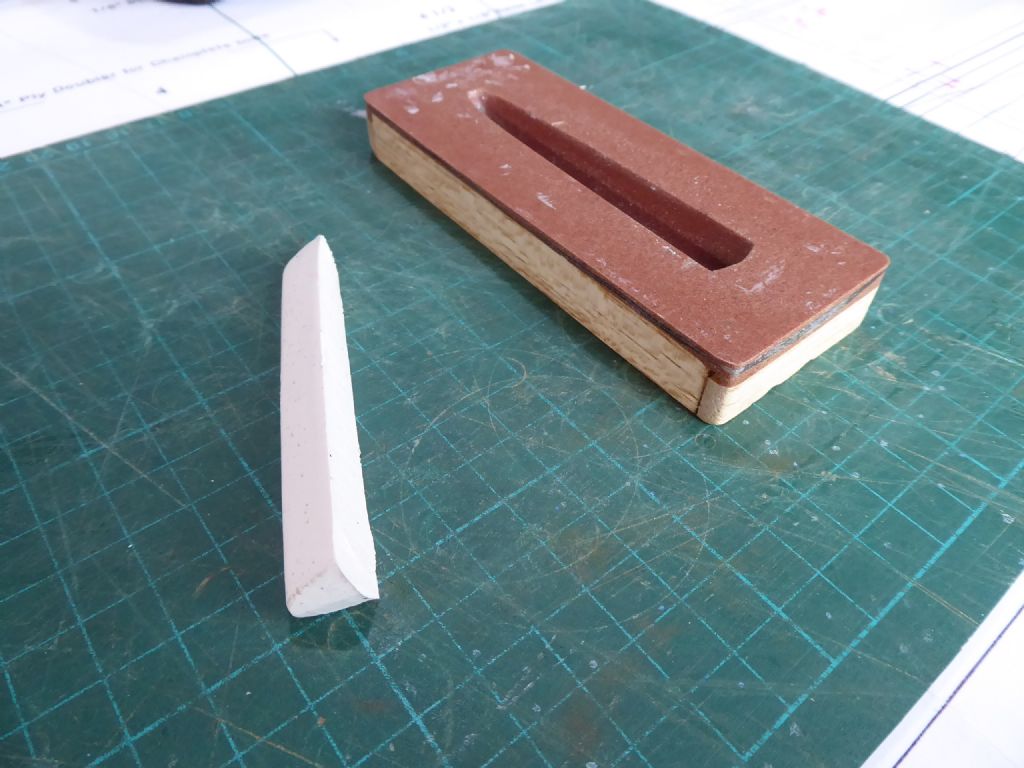
                                                  p1240507.jpg

                                                  This time though, using a very light smear of Vaseline in the mould, the bumper release very easily. Before doing that however, the top (mating) surface was carefully trimmed with a brand new traditional razor blade.
                                                  Here you have a better view of the mould construction.
                                                  For the technically minded the Shore hardness for this silicone was stated at 25. On the IOM the hardness is not stated but usually is limited at 70 otherwise it starts to take on battering ram characteristics and you quickly lose popularity with your racing mates. 25 is quite nicely squidgy.
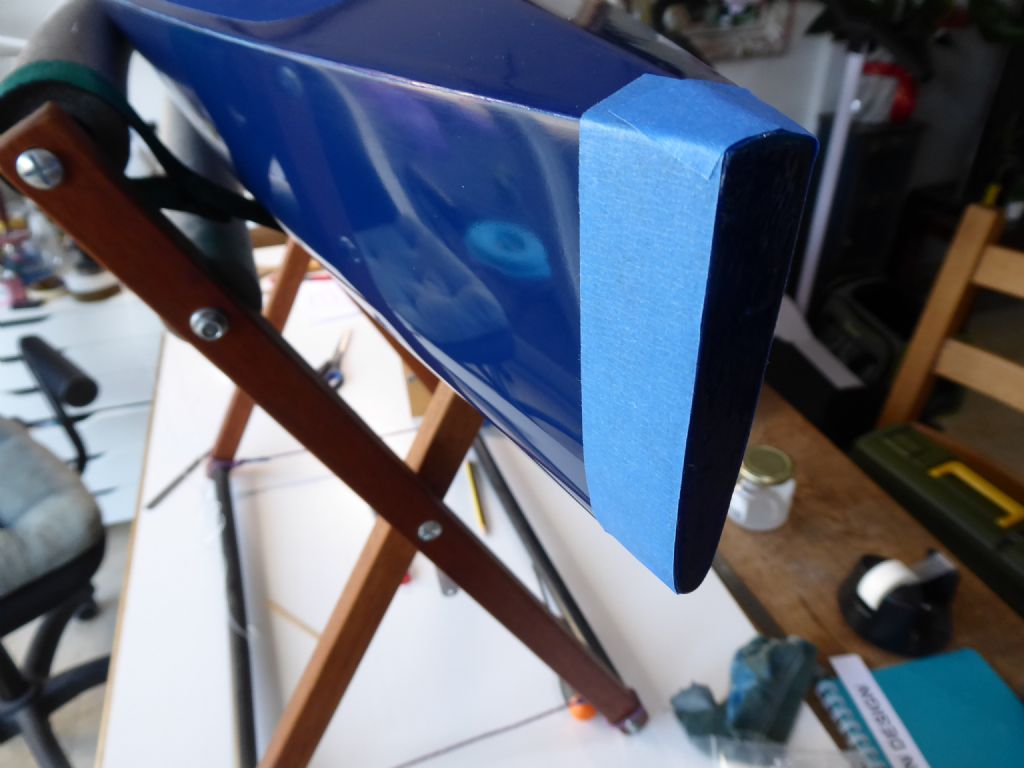
                                                  p1240279.jpg

                                                  The bow area was then masked off to keep the bonding silicone off the paint.
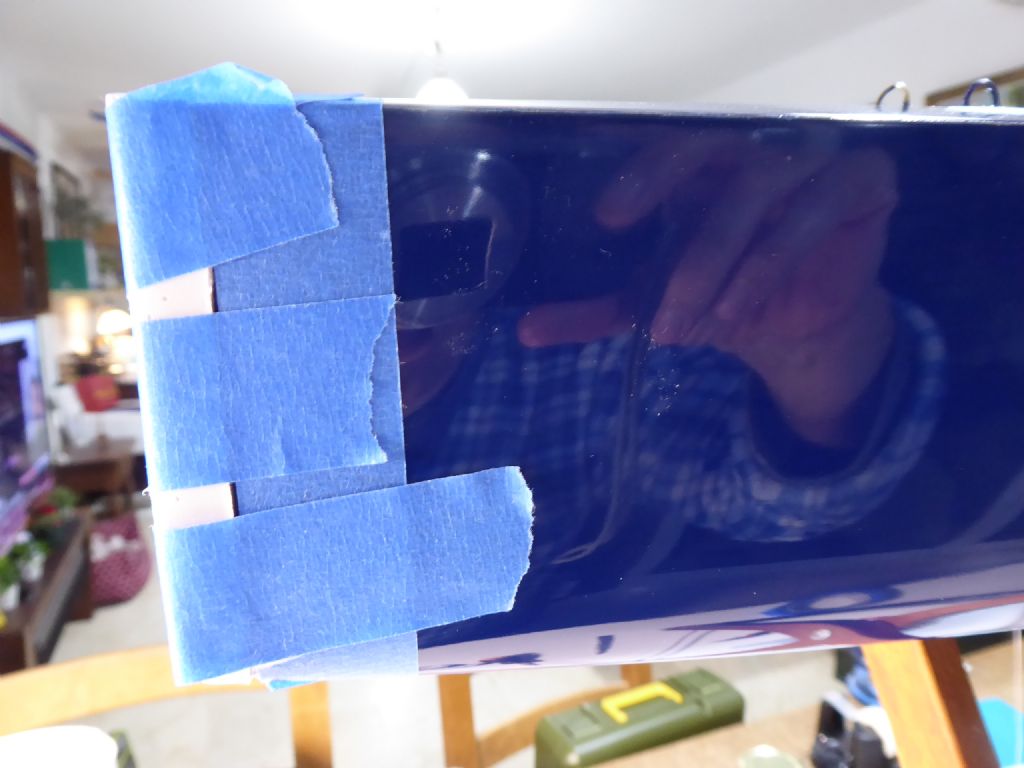
                                                  p1240284.jpg

                                                  And the bumper taped in places while the moisture curing bathroom type white silicone did its stuff. The bow bumper now matches the hull profile accurately and it now looks the part.

                                                  Just to note that the hull has now had its primary polish and the deep gloss is starting to develop.

                                                  Tim R

                                                  #94742
                                                  Chris Fellows
                                                  Participant
                                                    @chrisfellows72943

                                                    I always enjoy the technical aspects of your posts Tim and your attention to detail.

                                                    I'm looking forward to working with other mediums rather than just ply etc. though I do enjoy it. I did do some soldering today which made a change!

                                                    Chris

                                                    #94753
                                                    Eddie Lancaster
                                                    Participant
                                                      @eddielancaster

                                                      Hi. Tim, do you know what length of bumper is allowed? Looking at the rule book it says 10mm. But the two drawings I have for Boxkite and Nimbus, both older designs, but the drawings for Frank Russell’s Ellipsis show it as 11mm, confusing.

                                                      Regards.

                                                      Eddie.

                                                    Viewing 25 posts - 1 through 25 (of 52 total)
                                                    • Please log in to reply to this topic. Registering is free and easy using the links on the menu at the top of this page.

                                                    Code of conduct | Forum Help/FAQs

                                                    Advert

                                                    Latest Replies

                                                    Home Forums Sailing Models Topics

                                                    Viewing 25 topics - 1 through 25 (of 25 total)
                                                    Viewing 25 topics - 1 through 25 (of 25 total)

                                                    View full reply list.

                                                    Advert