Building Ardent

Building Ardent

Home Forums Scratch build Building Ardent

  • This topic is empty.
Viewing 25 posts - 1 through 25 (of 179 total)
  • Author
    Posts
  • #74575
    Eddie Lancaster
    Participant
      @eddielancaster

      Hi All

      I have decided to start a new thread as I felt that I was hijacking Ray's thread!

      I hope to upload some pictures when I get back home and I have something ti show.

      I considered a number of options of transferring the drawings to the plywood, including tracing them as you suggest Chris, but as I am not at home and have limited tools with me here at my Daughters I decided to go down the route of direct measurement from the drawings and then onto the ply, this decision was reinforced when a large pack of timber arrived less than 24 hrs. after ordering from SLEC.

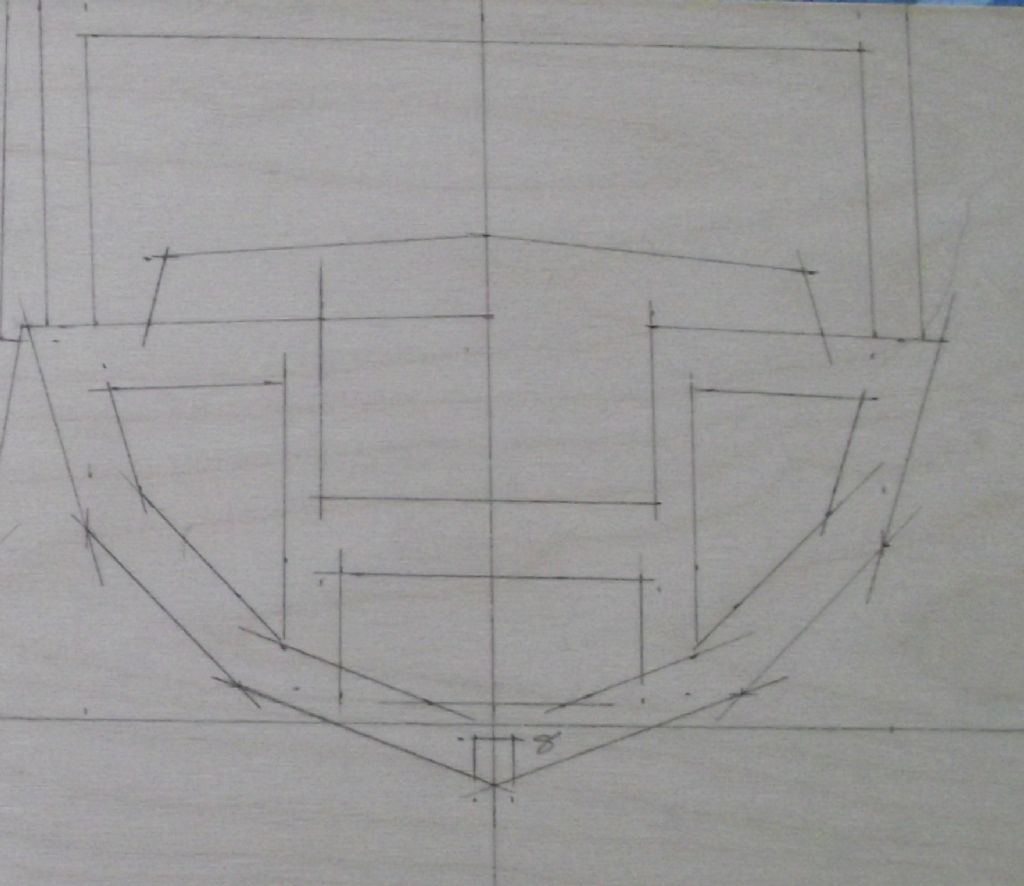
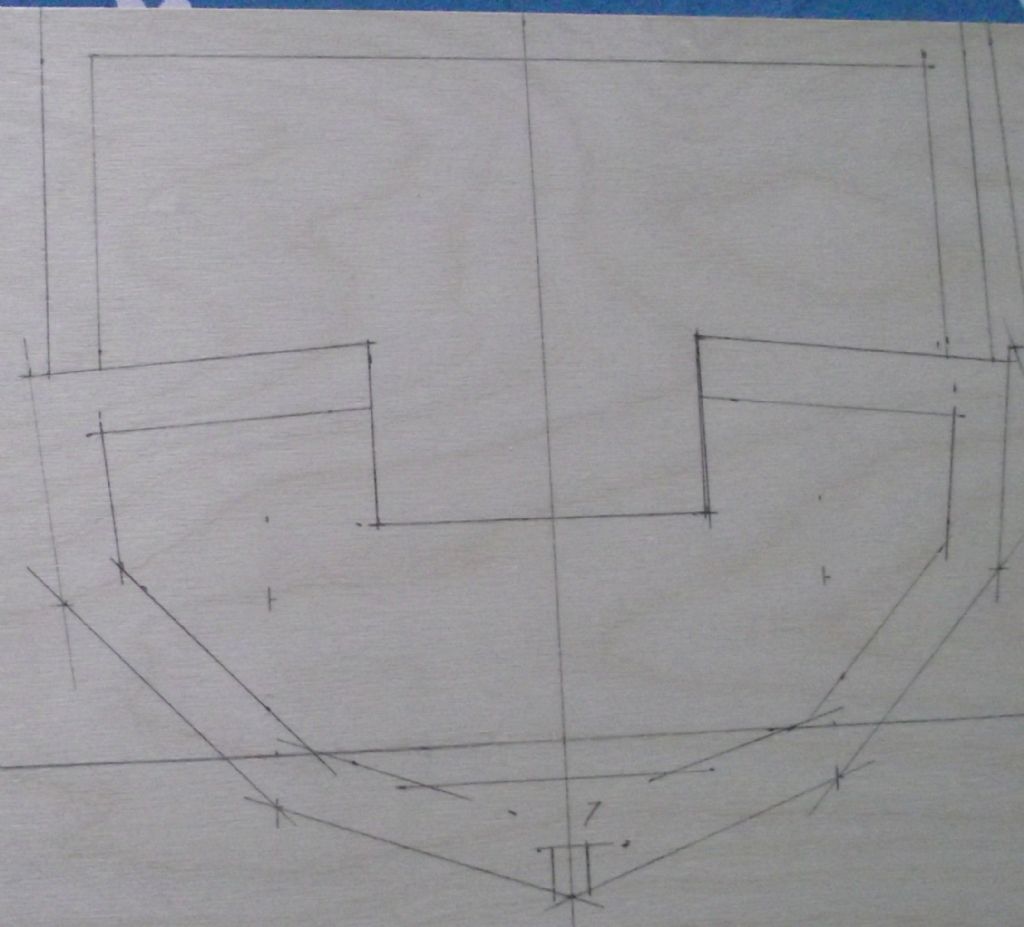
      With access to my Daughters dining room table during the day ( when she is at work) I was able to start work with two rules, a 12" and 24", a square and a newly sharpened pencil I now have 5 frames marked on the ply with just 4 more to go, the keel has also been marked out using the pin prick method.

      When I get home after Christmas I can unpack and set up my Christmas pressy to me, a scroll saw! Then in the new year I can get building, as well as finishing my Grandsons boat that is ready for painting.

      Until then a Happy Christmas to all.

      Eddie.


      Edited By Eddie Lancaster on 20/12/2017 15:55:27

      #7115
      Eddie Lancaster
      Participant
        @eddielancaster

        A vintage near scale cruising yacht.

        #74720
        Chris Fellows
        Participant
          @chrisfellows72943

          Hi Eddie

          Good to hear that you are making progress.

          Funnily enough I recently bought a scroll saw which my wife said could be my Christmas present. This was fair enough as I've added a few other tools since as well!

          Scroll saws are brilliant for cutting out the frames etc. Another "essential" is various Permagrit tools!

          Chris

          #74736
          Eddie Lancaster
          Participant
            @eddielancaster

            Hi Chris, Yes the scroll saw is a great tool, mine is a Clarke tools one, a bit fiddly fitting the pin blades and haven't tried pinless yet but I suspect will be even harder to fit.

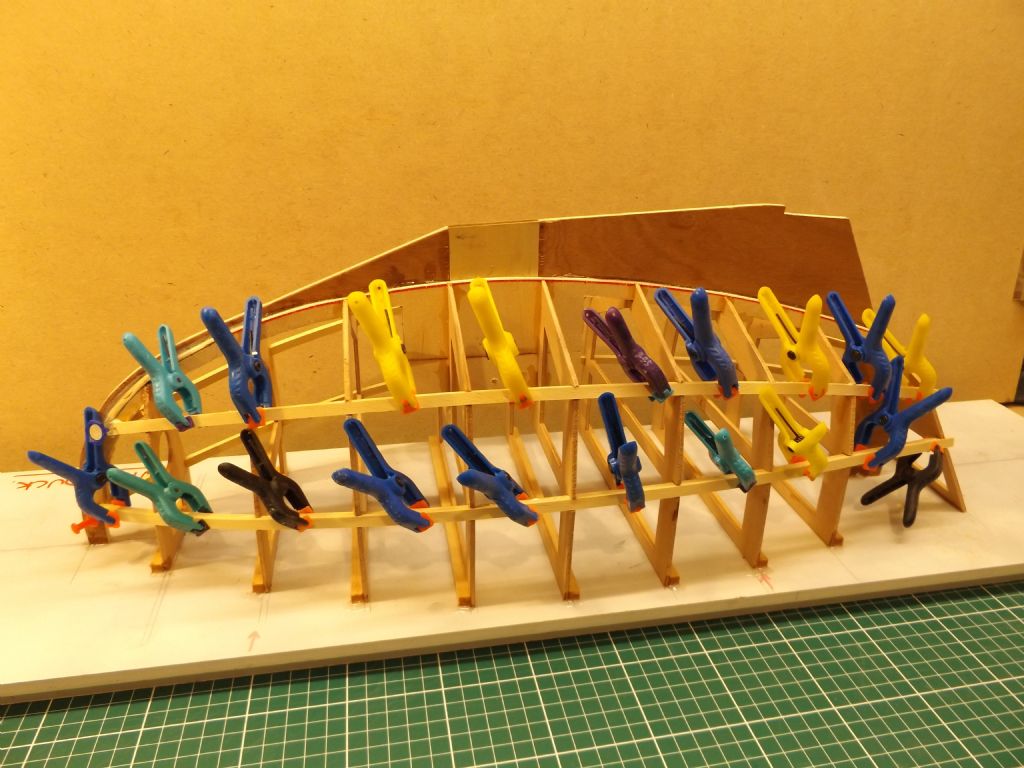
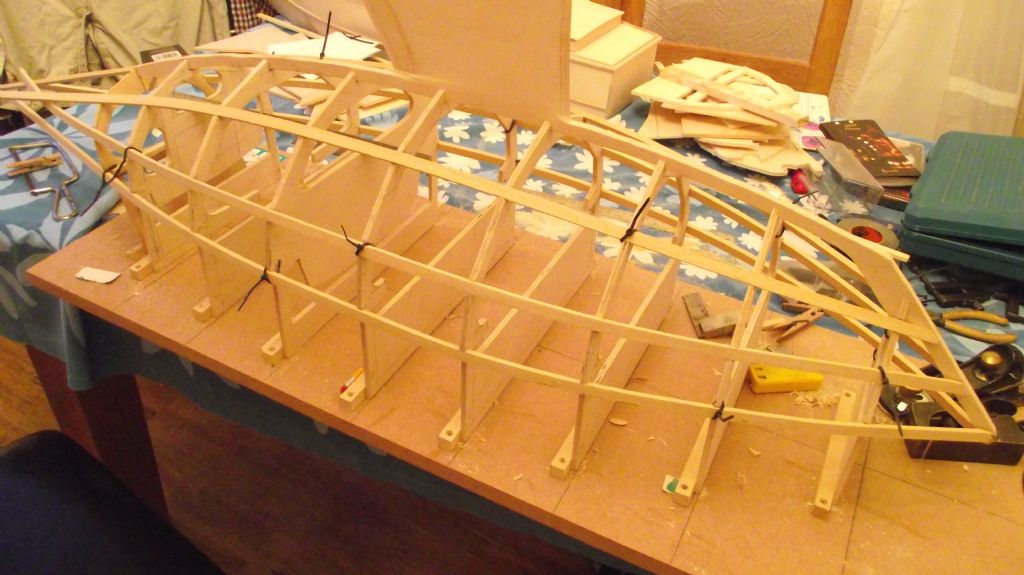
            I have cut all the frames and keel and am now setting them up on a building board. I have glued a 1/2" square piece to each frame and then using a couple of screws to attach them to the board, this will allow me to mark off all the chine lines and the deck line making sure they are all in straight lines, I can then remove the frames and cut the notches and then return them the board for final fitting.

            I intend to get a set of permagrit tools when I visit Ally Pally at the end of January.

            Eddie.

            #74746
            Chris Fellows
            Participant
              @chrisfellows72943

              I bought a Record which is very similar. As you say fitting the blades is a little fiddly especially when putting through a pilot hole for cutting out internal shapes!

              I have tried some pinless blades – Olson double tooth/crown tooth for less ripping – but found that they were a bit fine for cutting the 6 mm ply I was using for the keel etc. though well within their capabilities They will be better for thinner ply but to be honest the thicker pinned blades are fine, not much ripping and do the radii required no problem.

              Whilst fitting the pinless blades into their mounting blocks wasn't difficult for using them for cutting along the axis of the saw it is more difficult when turning the blade sideways for cutting long lengths like for the keel. As I said not a problem though as the pinned blades are fine.

              I'm at a similar stage and will soon be mounting the keel on a building board. I've added some "fingers" to the keel and spine for screwing to a substantial piece of timber which will be screwed to the mounting board. Likewise I've added the chine lines to the frames along with a horizontal datum line to help with accurate alignment.

              Chris

              #74799
              Ray Wood 3
              Participant
                @raywood3

                wd6.jpgHi Eddie/Chris

                It sounds like your well on the way with Ardent can you take some photos for us of the build ??
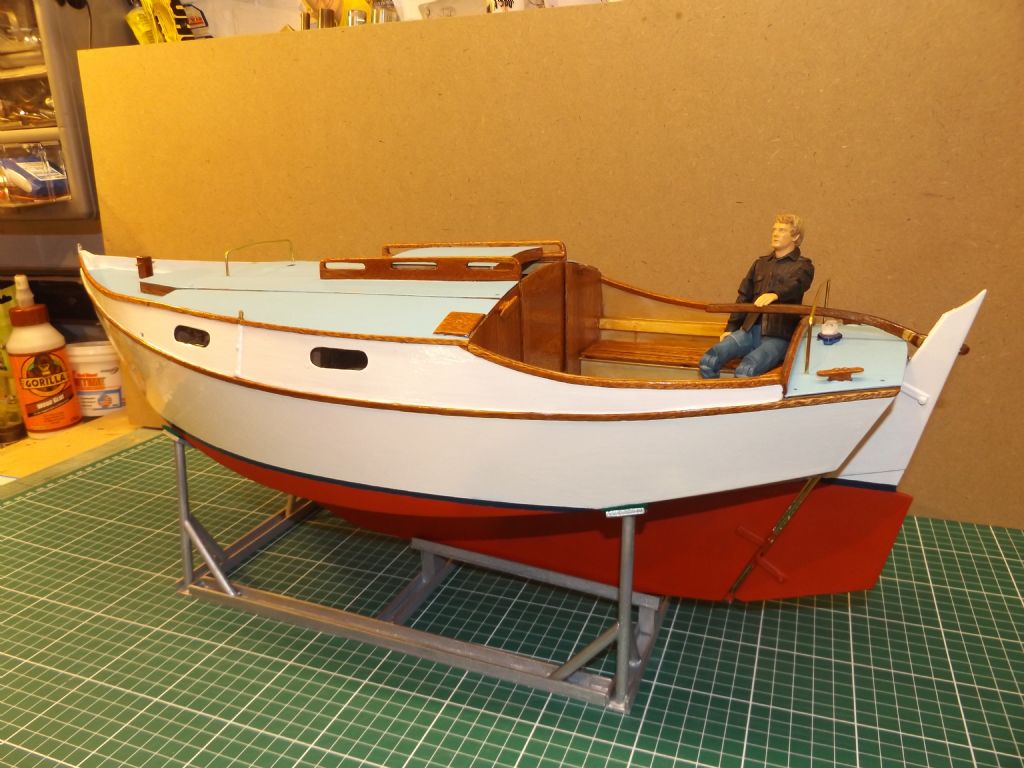
                Here are a few pictures of Wild Duck a small sailing cruiser which I had published in MB's last year.

                Regards Raywd34.jpg

                #74800
                Eddie Lancaster
                Participant
                  @eddielancaster

                  Hi Ray, first, Happy New Year to you and all.

                  The frames are all set up and the chines, keel etc. are all in place but dry fitted, I am going to have another look at them now to make sure everything is true and fair. Before I fit the keel I need to file,plane ,and sand it to an aerofoil section, this could take some time!

                  I have taken some photo's but I now need to find the thread that tells me how to upload them, wish me luck.

                  Cheers

                  Eddie.

                  #74801
                  Dave Milbourn
                  Participant
                    @davemilbourn48782

                    Eddie

                    Scroll down to Forum FAQs and start from there

                    **LINK**

                    Dave M

                    Edited By Dave Milbourn on 02/01/2018 13:59:09

                    #74803
                    Eddie Lancaster
                    Participant
                      @eddielancaster

                      Thanks Dave, am going back to modelling now, but will try to make an album later.

                      Eddie.

                      #74845
                      Eddie Lancaster
                      Participant
                        @eddielancaster

                        dscf0492 (2).jpg

                        dscf0494 (2).jpg

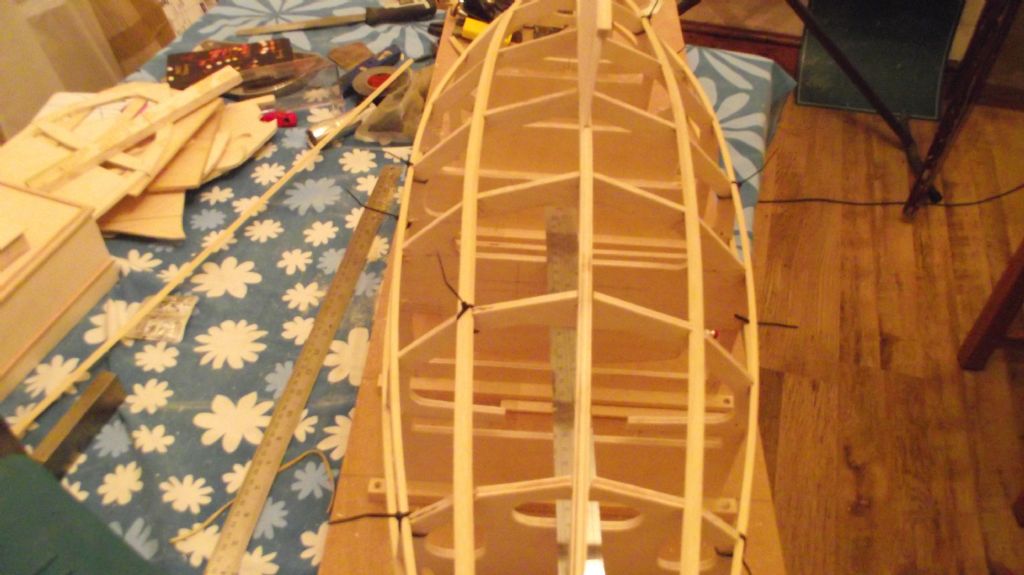
                        The frames were marked out using direct measurements from the drawings and worked very well, using the centre line and the water line as a datum.

                        dscf0495.jpg

                        dscf0498.jpg

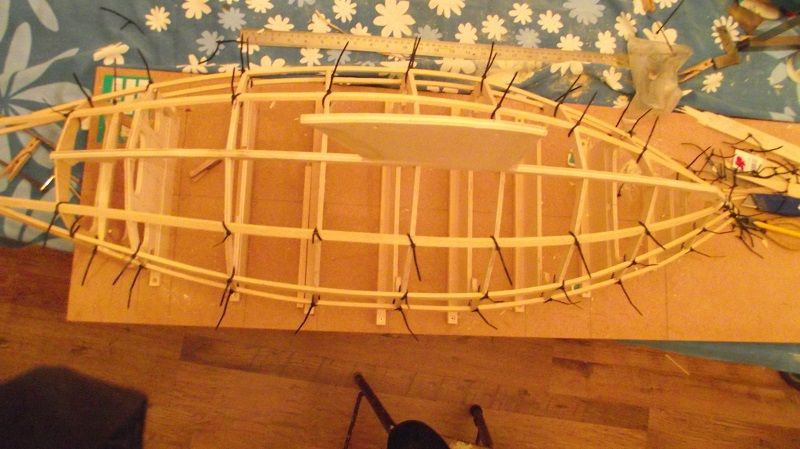
                        With the frames set on the building board using screws, this enabled me to check the position of the chines and deck line before I cut the notches for them, just taking out two screws cutting the notches on the scroll saw and the replacing them.

                        The chines etc. were then tried in place dry to see if any adjustment to depth or the angle of the notch was required.


                        Edited By Eddie Lancaster on 04/01/2018 16:46:31

                        Edited By Eddie Lancaster on 04/01/2018 16:56:54

                        #74856
                        Eddie Lancaster
                        Participant
                          @eddielancaster

                          I was feeling quite pleased with myself, having created an album and then loaded photo's into my thread, but not sure what happened after that! stupid boy!

                          Eddie.

                          #74857
                          Ray Wood 3
                          Participant
                            @raywood3

                            Hi Eddie

                            Well done indeed, don't worry I can't seem to post my photos in the right order !!

                            Ardent is coming along well keep up the good work.

                            Regards Ray

                            #74858
                            Dave Milbourn
                            Participant
                              @davemilbourn48782

                              I was feeling quite pleased with myself, having created an album and then loaded photo's into my thread, but not sure what happened after that! stupid boy!

                              Eddie
                              I reckon you nodded off after posting the last photo with your finger on the Send key.
                              Dave M

                              #74867
                              Eddie Lancaster
                              Participant
                                @eddielancaster

                                Hi Ray,Dave,

                                Thanks for your encouragement, much appreciated. You could well be right Dave that seems to happen on a regular basis these days!

                                Eddie.

                                #74868
                                Colin Bishop
                                Moderator
                                  @colinbishop34627

                                  In the meantime you can see the pics here:

                                  **LINK**

                                  Colin

                                  #74883
                                  Eddie Lancaster
                                  Participant
                                    @eddielancaster

                                    dscf0502.jpg

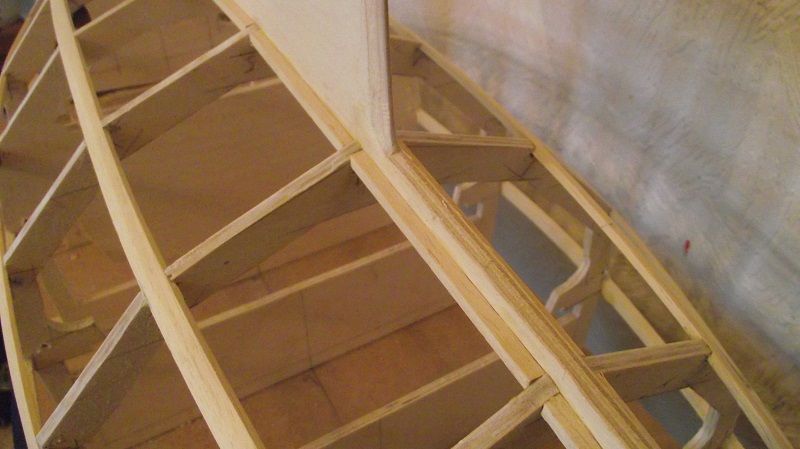
                                    The chines etc. have now been glued into the notches and held in place with sealing wax and string or at least the modern equivalent, cable ties!

                                    dscf0512.jpg

                                    I added fillets along the length of the keel to support the skins.

                                    dscf0513.jpg

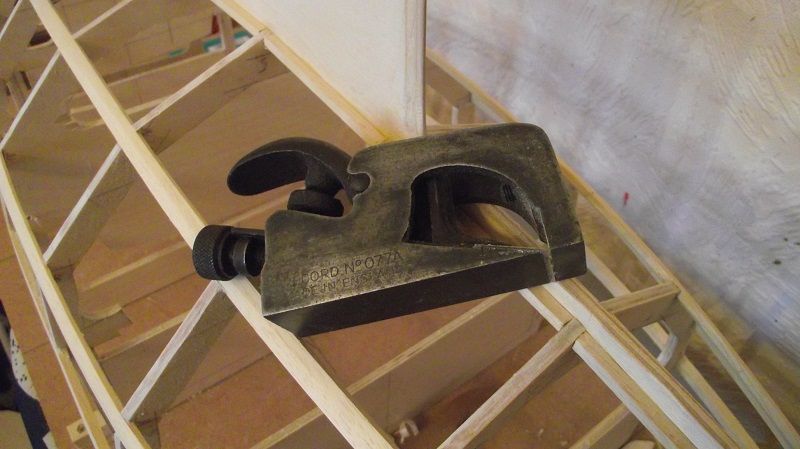
                                    ready for fairing everything in using my favourite little plane, this I bought for my father nearly 60 years ago when he was building a 12" to the foot river cruiser. the blade of the plane cuts on 3 sides allowing it to cut into a corner.

                                    dscf0515.jpg

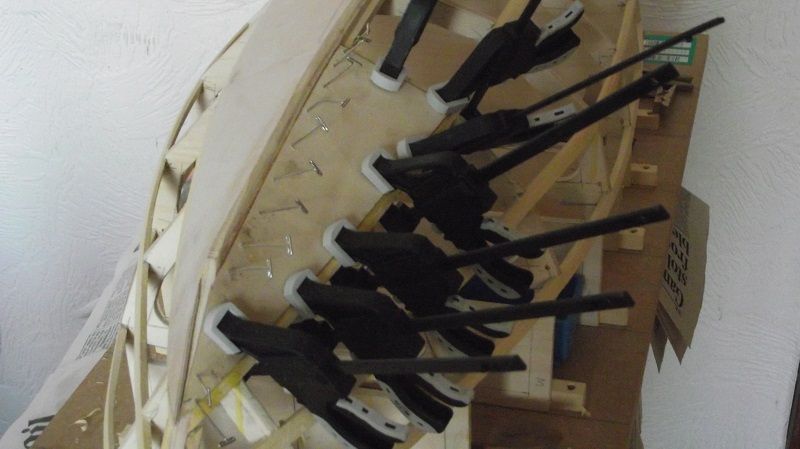
                                    Starting to cover the frame with 1/16 birch ply, the first 2 pieces had to have the grain running crossways to allow it to bend from the first frame to the near vertical stem of the keel. To fit the tee pins I drilled a .9mm pilot hole, this size drill allowed enough friction on the pin to hold the ply in place.

                                    #74916
                                    Eddie Lancaster
                                    Participant
                                      @eddielancaster

                                      dscf0520.jpg

                                      dscf0521.jpg

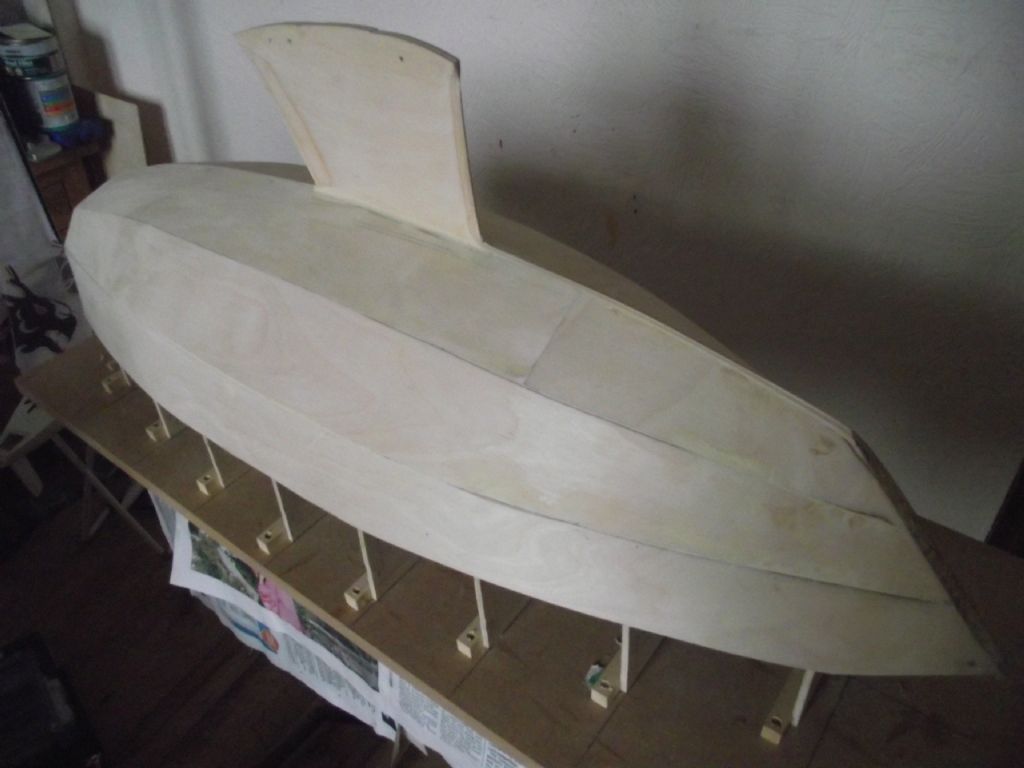
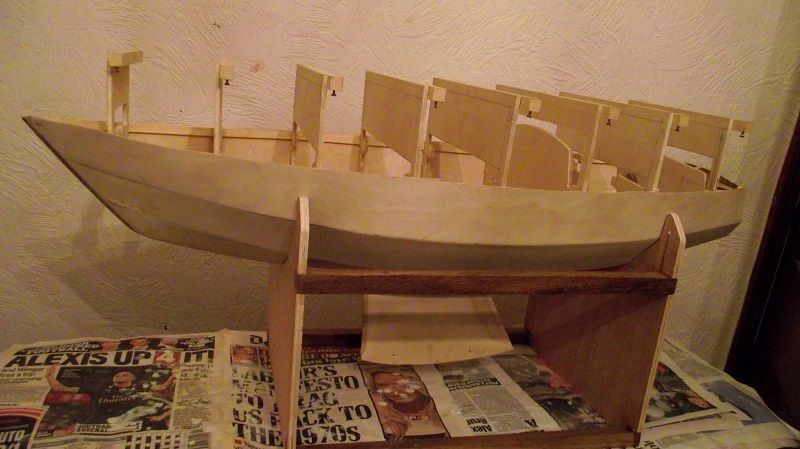
                                      The hull for Ardent is now ready for removal from the building board, but I need to make a stand for it first.

                                      #74951
                                      Eddie Lancaster
                                      Participant
                                        @eddielancaster

                                        dscf0524.jpg

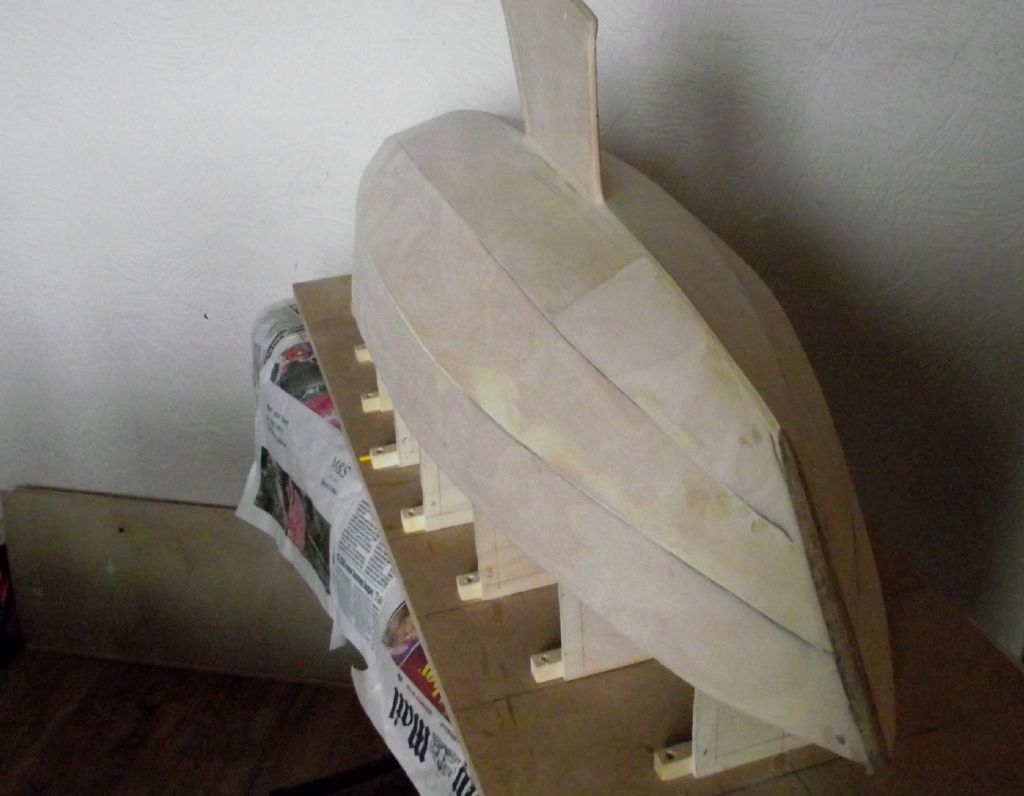
                                        The hull has now been removed from the building board and is on its stand. I now need to study the plans carefully and try to turn 2D drawings into 3D objects and there are no straight lines anywhere! I also have to remove the frame extensions, when I am sure they are no longer required, I have already drilled for the rudder post putting the hull under the drill press so that it is vertical and at 90deg. to the waterline.

                                        #74954
                                        Ray Wood 3
                                        Participant
                                          @raywood3

                                          Hi Eddie

                                          Ardent is looking very good I'd put some temporary deck beams in before you cut off the extensions as they are keeping hull shape at the sharp end. Keep us posted

                                          Regards Ray

                                          #74972
                                          Eddie Lancaster
                                          Participant
                                            @eddielancaster

                                            Hi, Ray.

                                            Thanks for your kind remarks and helpful suggestion, as the notches for the inboard deck rails were already cut in the frames I was able to fit these, steaming them so I could bend them on edge to fit the curve of the hull, I have also been able to fit the centre deck support back from the stem to just aft of the No.2 frame with a cross beam attached to that, so perhaps some more temporary ones across the open frames Nos. 3,4,and 5 as you suggest ?

                                            Regards

                                            Eddie.

                                            #75015
                                            Eddie Lancaster
                                            Participant
                                              @eddielancaster

                                              dscf0527.jpg

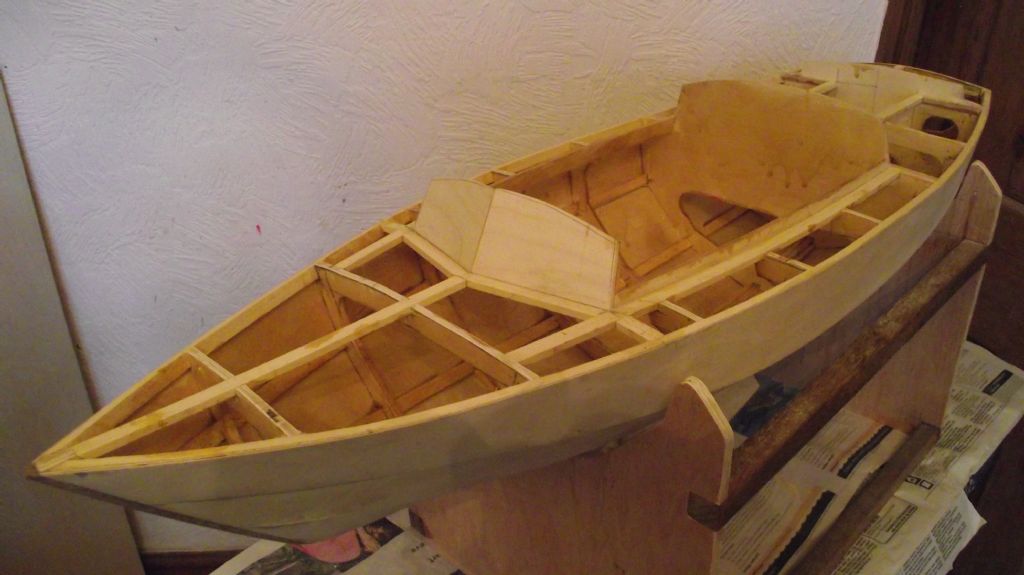
                                              I have now removed the frame extensions, keeping Rays remarks in mind I first removed the extensions from the frames with deck beams I then cut through one side of another frame, as this one didn't move I then removed the others one at a time making sure there was no movement when I cut through the first side.

                                              With all the frames removed I fitted the cabin front and then gave the inside a couple of coats of varnish.

                                              dscf0525.jpg

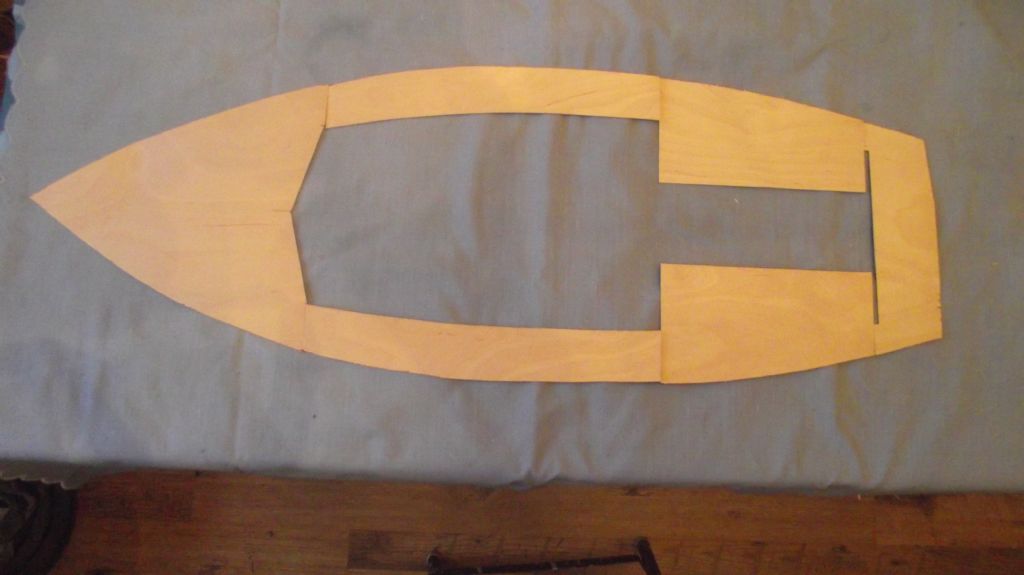
                                              With the varnish dry I then made the deck coverings ready for fitting at a later date, when the servos etc.have been fitted. I also need the rudder before I can fit the servo so that is my next job.

                                              dscf0529.jpg

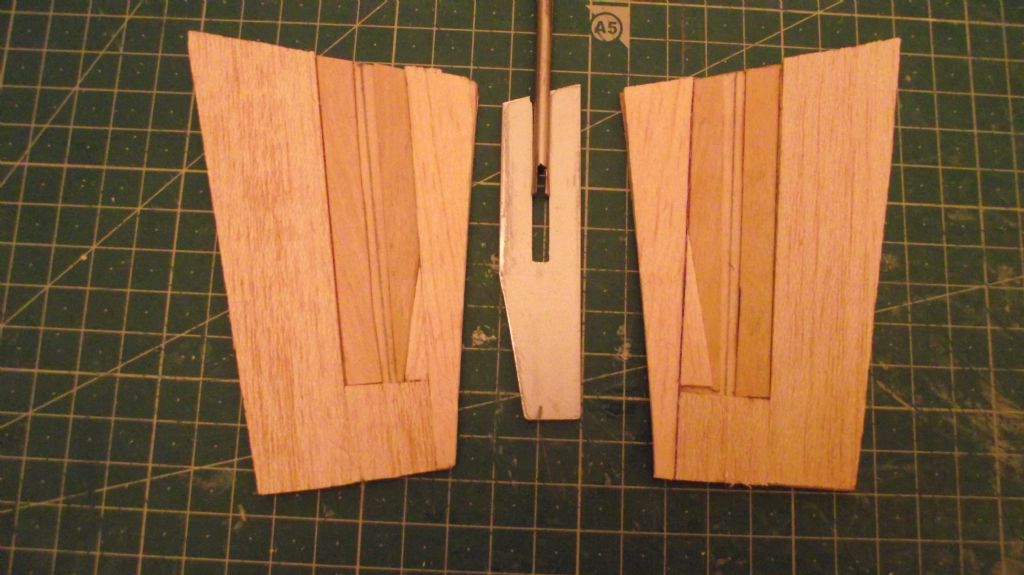
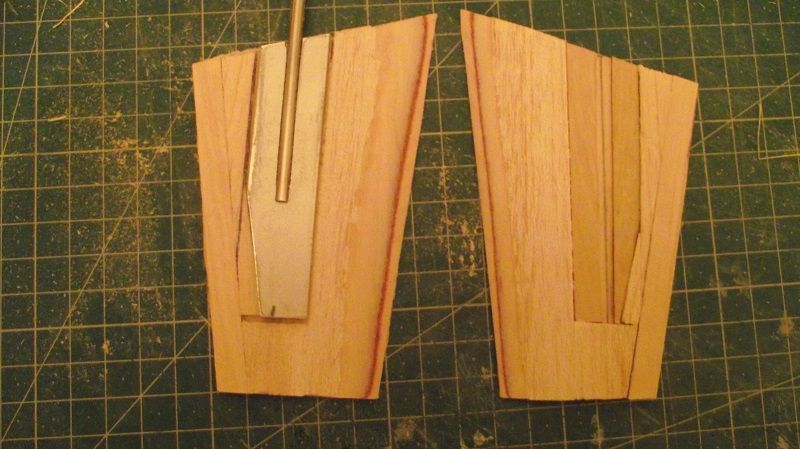
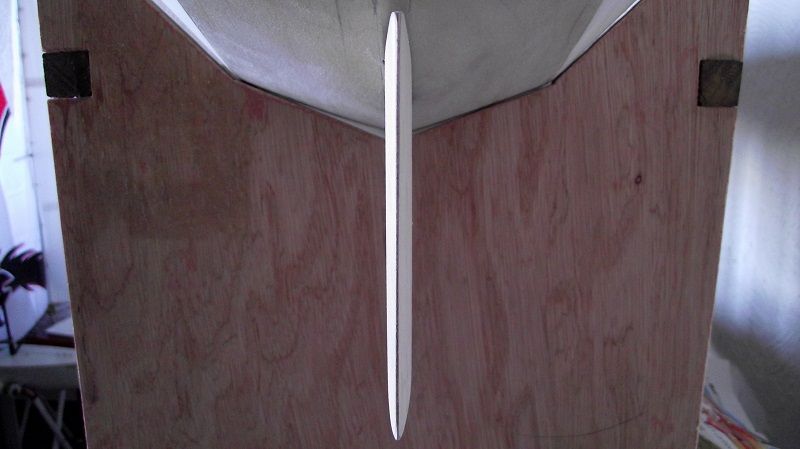
                                              I started with a piece aluminum 2mm. x 15mm. I cut a slot in this to take a piece of 4mm. stainless steel rod, I made a slot in the end of this to fit over the aluminum at the bottom of the slot, this will give a positive drive to the blade.

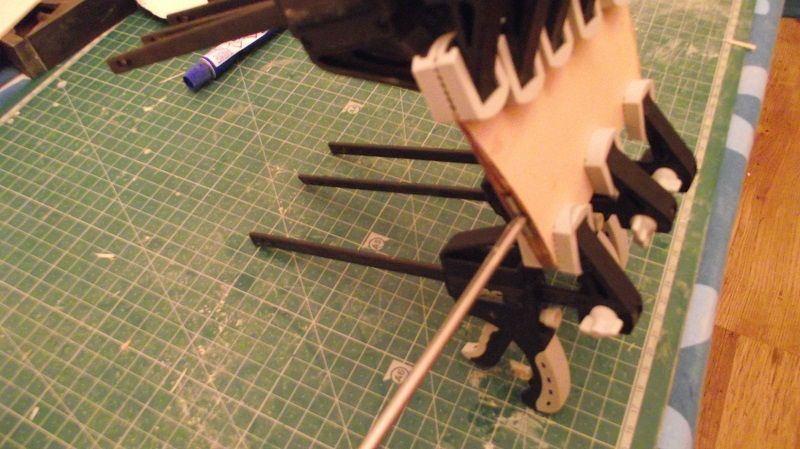
                                              The centre of the blade has been filled with balsa and ply glued onto the outer pieces of 1.5mm. ply, the balsa will be sanded to give the aerofoil section when the two sides are glued together using epoxy glue.

                                              #75018
                                              Ray Wood 3
                                              Participant
                                                @raywood3

                                                Hi Eddie

                                                Looks like your engineering bias is coming through with that neat rudder arrangement, I like the slotted tube over the Ali plate idea I'm just going to start refurbishing my 3 1/2" gauge Tich, first loco I built in the late 60's early 70's my Dad bought me the copper for the boiler for my 12th birthday !! (No Xbox's then)

                                                Regards Ray

                                                Edited By Ray Wood 2 on 16/01/2018 08:16:56

                                                #75022
                                                Eddie Lancaster
                                                Participant
                                                  @eddielancaster

                                                  Good morning Ray,

                                                  Even when working with mainly wood a metal work shop is also very handy, especially when it comes to the mast and boom fittings.

                                                  You started your engineering very early in your life, I went through model aircraft, starting at about 12 years old, then onto boats and finally engineering at about 40 years, so I have now gone almost full circle!

                                                  I have some more photo's of the rudder that I will post later on.

                                                  All the best

                                                  Eddie.

                                                  #75052
                                                  Eddie Lancaster
                                                  Participant
                                                    @eddielancaster

                                                    dscf0530.jpg

                                                    All ready for gluing together using epoxy.

                                                    dscf0531.jpg

                                                    Glued and clamped

                                                    dscf0534.jpg

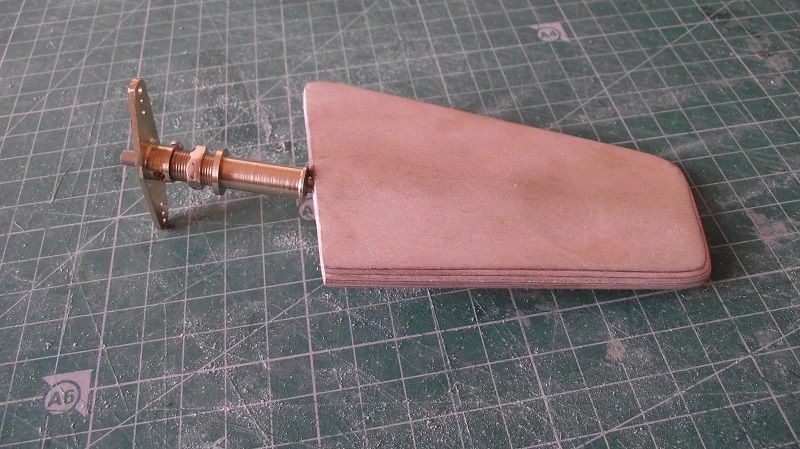
                                                    Ready foe profiling.

                                                    dscf0543.jpg

                                                    Ready for fitting to the hull.

                                                    dscf0541.jpg

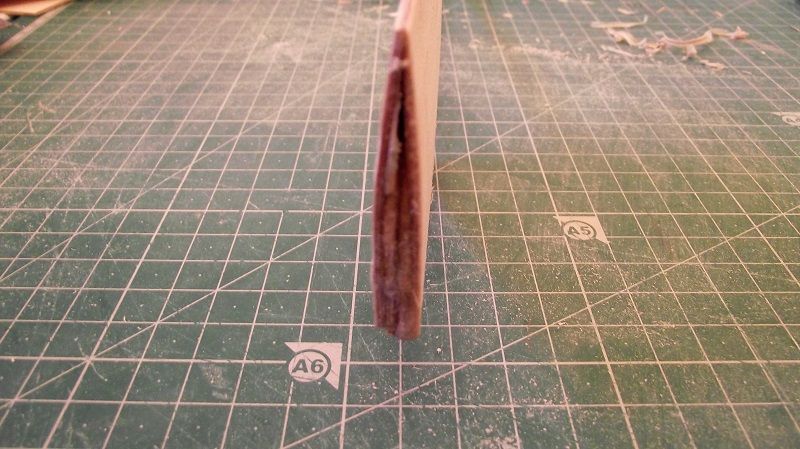
                                                    The trailing edge, the dark line is the inner core of the 1.5mm. outer skins were it has been tapered to a feather edge.

                                                    I have got to leave modelling for a week now, I have a friend visiting this weekend before we go to Ally Pally on Sunday,I then have another boating friend and his wife visiting for the week, so I have to return the dining room to its proper use! ready for inspection.

                                                    Cheers for now.

                                                    Eddie.

                                                    #75498
                                                    Eddie Lancaster
                                                    Participant
                                                      @eddielancaster

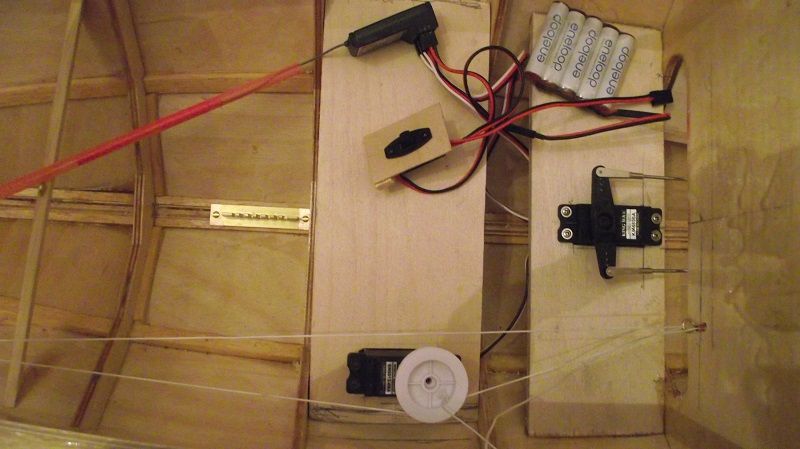
                                                      All my visitors have now left so I am back in the boatyard AKA the dining room! I collected the winch and rudder servos from the component shop at Ally Pally and fitted them into the hull, using screw eyes temporarily to check the run of the winch line, they will be replaced with pulleys when they arrive from Poland.

                                                      dscf0544.jpg

                                                      the mast step has also been fitted.

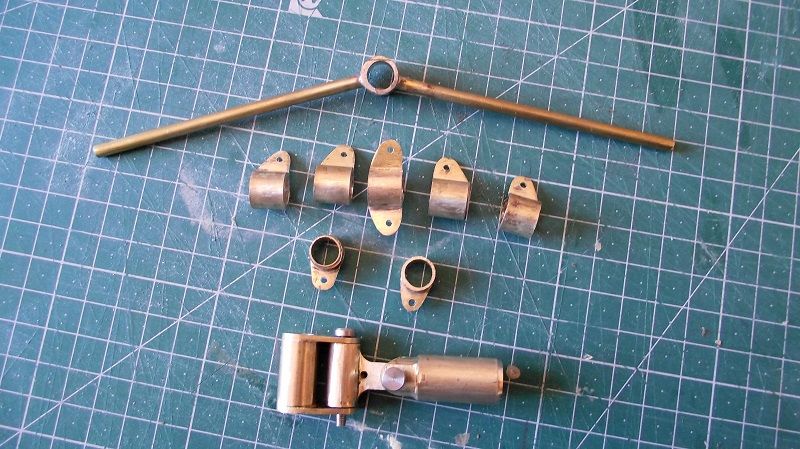
                                                      I have also made all the mast fittings.

                                                      dscf0548.jpg

                                                      The mast is 10mm. aluminium tube from B&Q. I think on reflection I should have used 12mm. but as there is no mention of size on the plans I went for this size, I think it should be strong enough as the sails are not that large for this size of boat.

                                                      The fittings slide onto 8mm. tube which is a slide fit inside the outer 10mm. tube, the mast is then made in sections to get the height required, I will post a photo of that when it is finished.

                                                      I know this may not be true to scale but I want a boat I can sail and have fun with, not to exhibit, I can always go down the scale route at a later date if I need to.

                                                      Edited By Eddie Lancaster on 30/01/2018 12:58:32

                                                      Edited By Eddie Lancaster on 30/01/2018 13:00:10

                                                    Viewing 25 posts - 1 through 25 (of 179 total)
                                                    • Please log in to reply to this topic. Registering is free and easy using the links on the menu at the top of this page.

                                                    Code of conduct | Forum Help/FAQs

                                                    Latest Replies

                                                    Home Forums Scratch build Topics

                                                    Viewing 25 topics - 1 through 25 (of 25 total)
                                                    Viewing 25 topics - 1 through 25 (of 25 total)

                                                    View full reply list.