Brutus

Brutus

Home Forums Scratch build Brutus

  • This topic is empty.
Viewing 25 posts - 151 through 175 (of 1,017 total)
  • Author
    Posts
  • #46167
    Bob Abell 2
    Participant
      @bobabell2

      Shop floor to top floor

      You'll swoon with shear delight, when you see it!

      I'm on a roll now

      The formers are taking a lot of time and effort…..3/8" ply takes some shaping!

      Pictures in about one hour!

      Ha! ha! Ha!…..(.Insane laughter)

      Bob with arms going like Bee's wings!

      #46168
      Bob Abell 2
      Participant
        @bobabell2

        Here we go, Paul

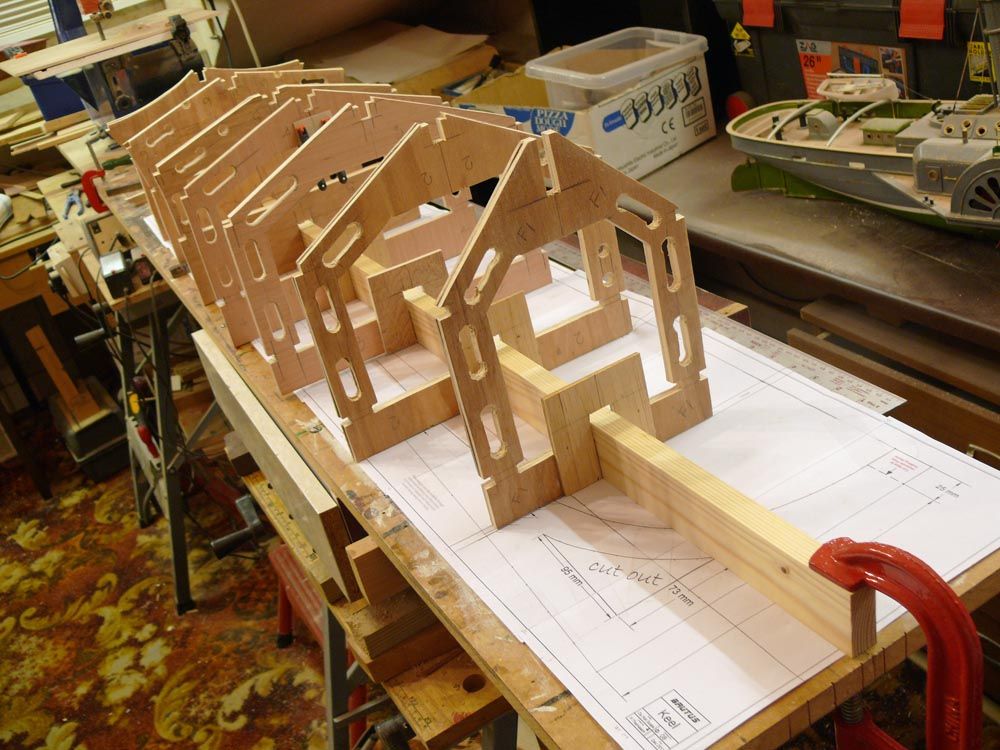
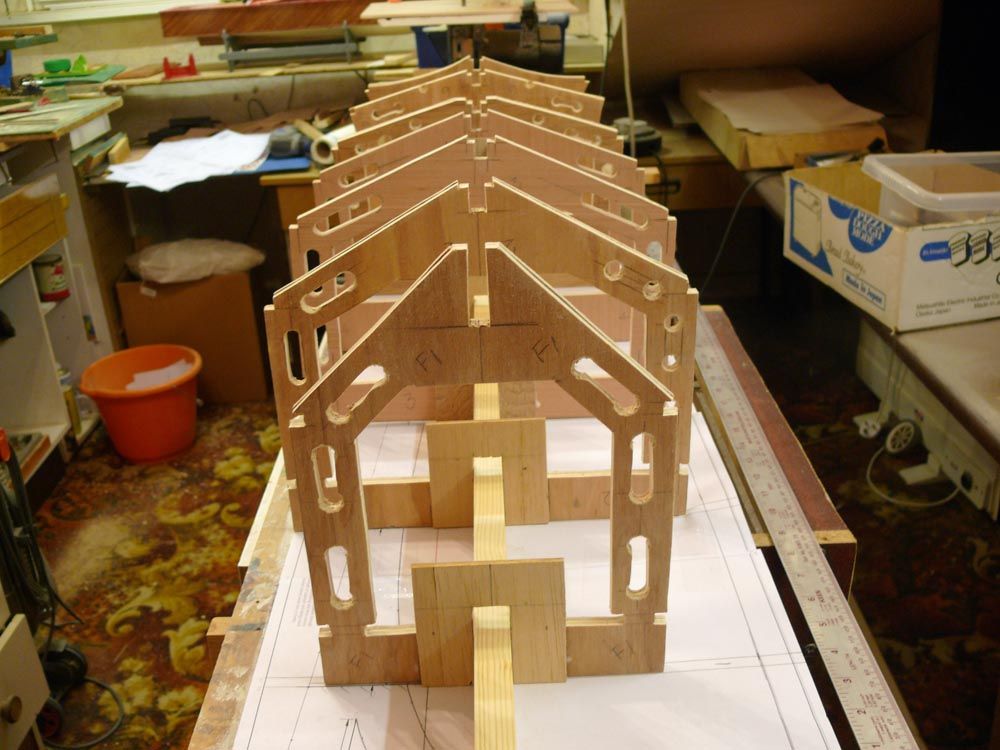
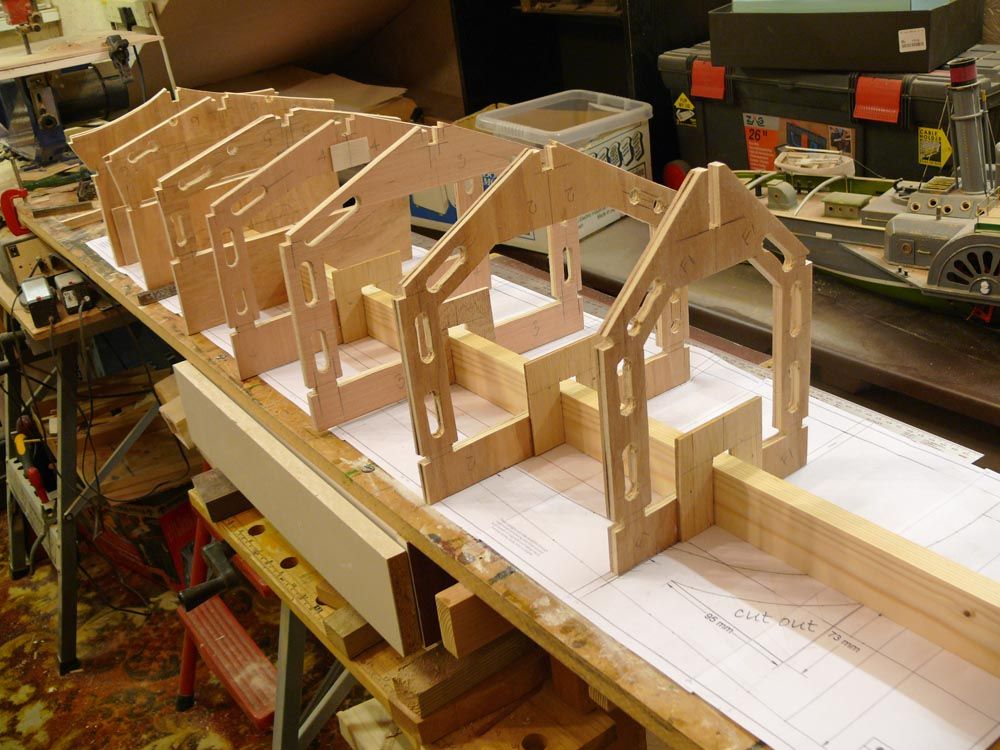
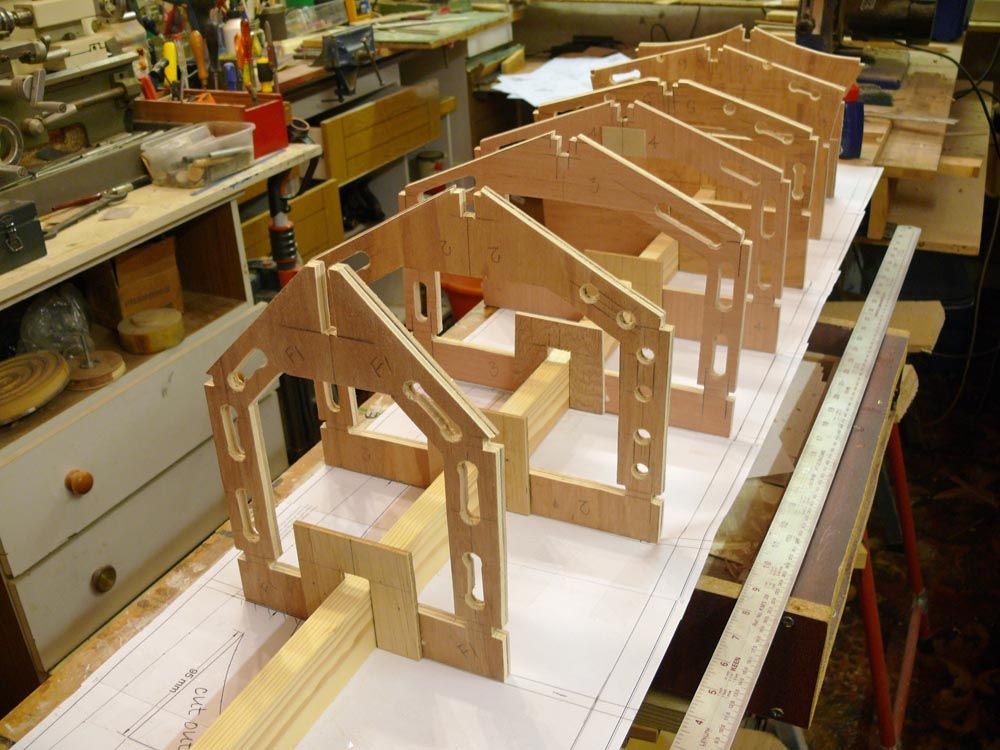
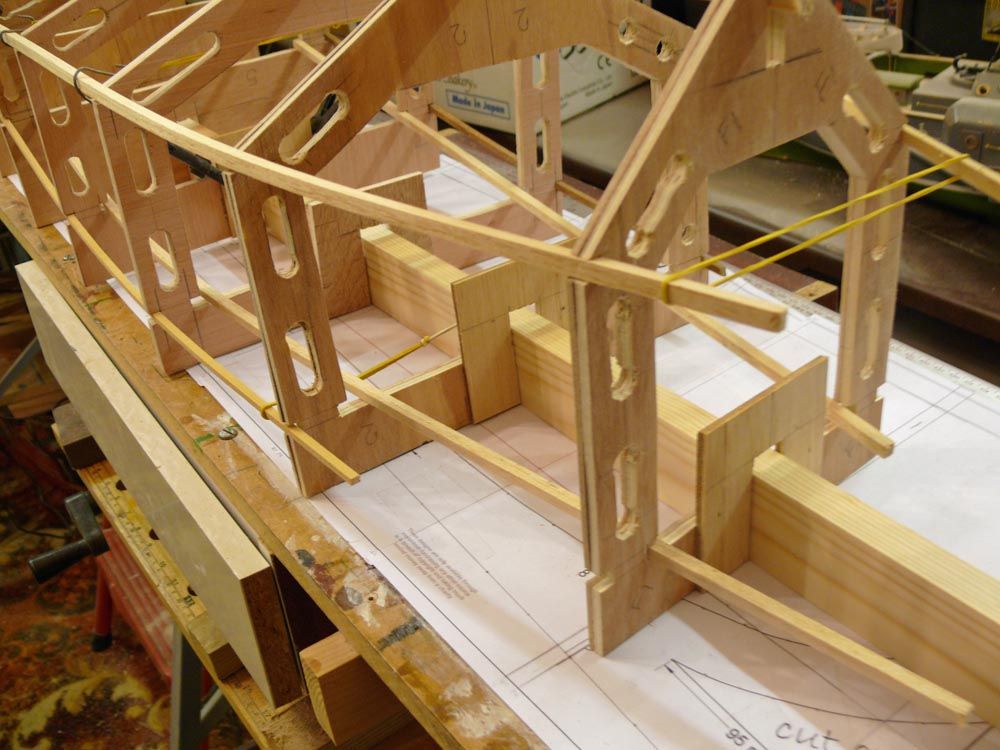
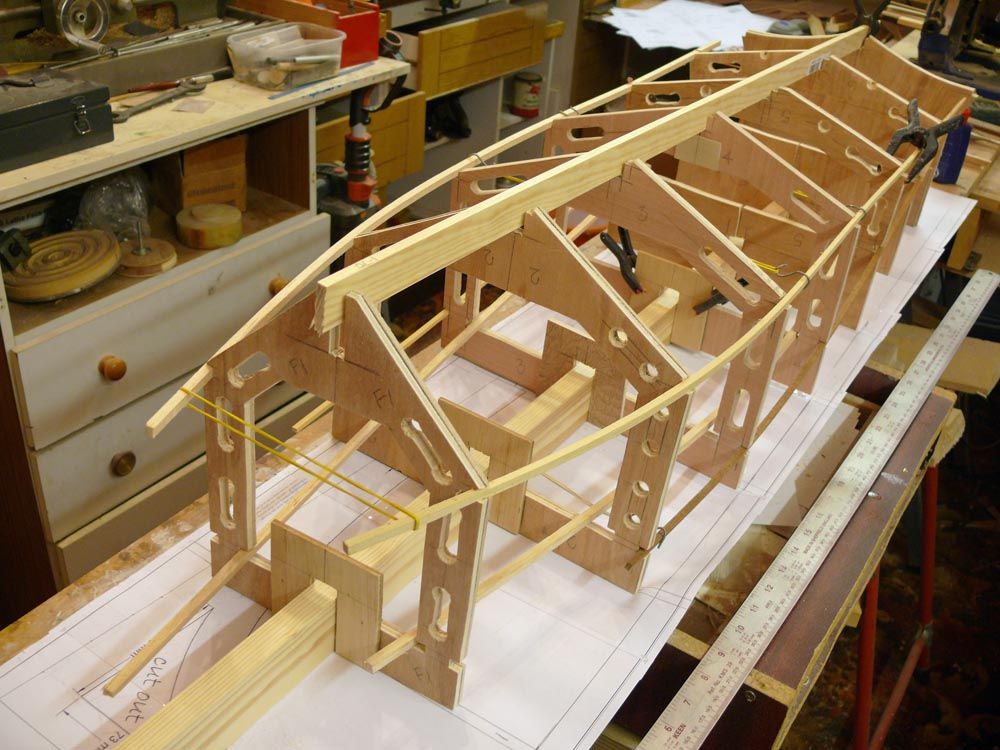
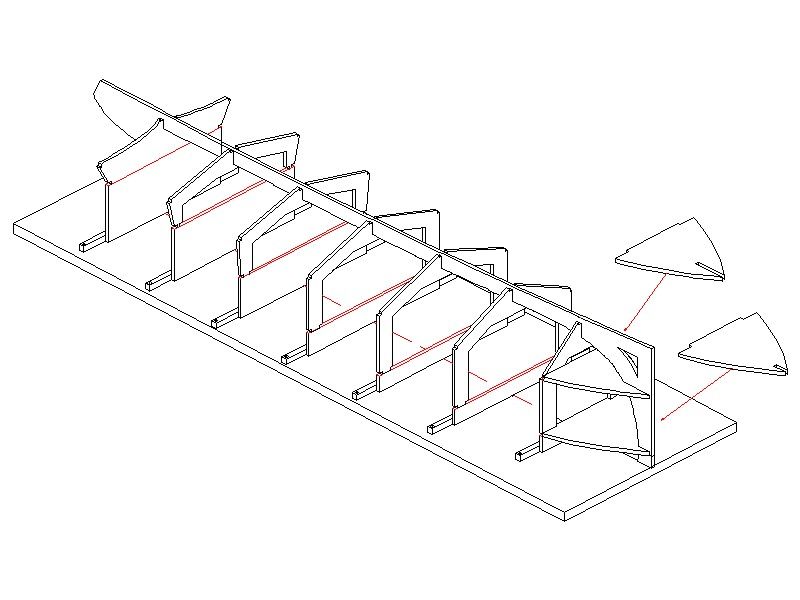
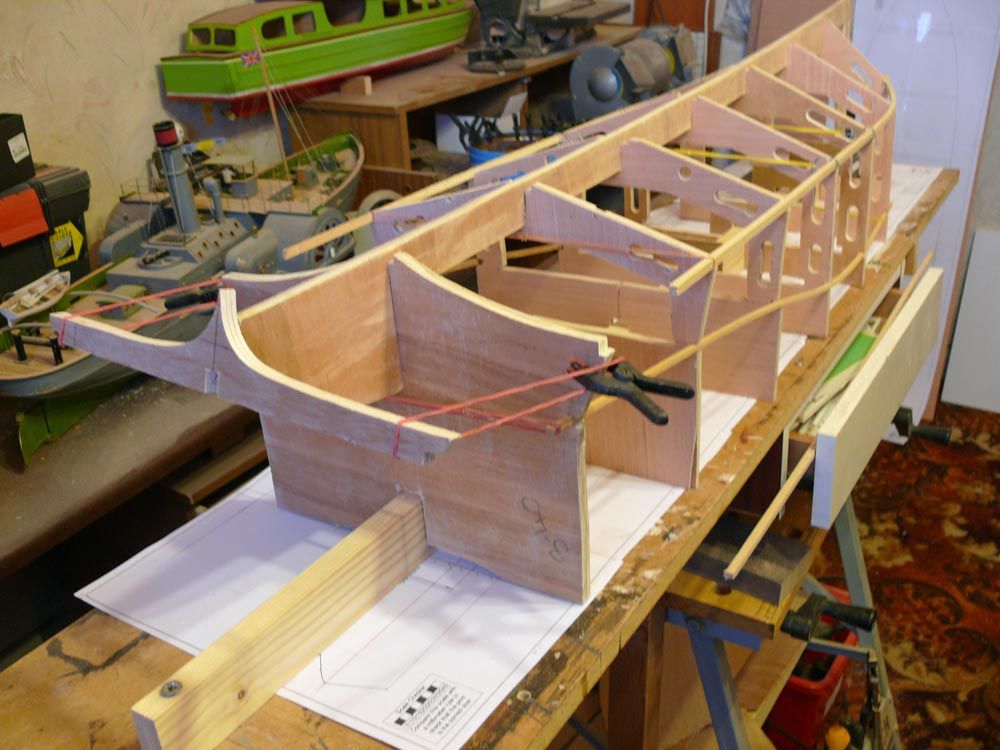
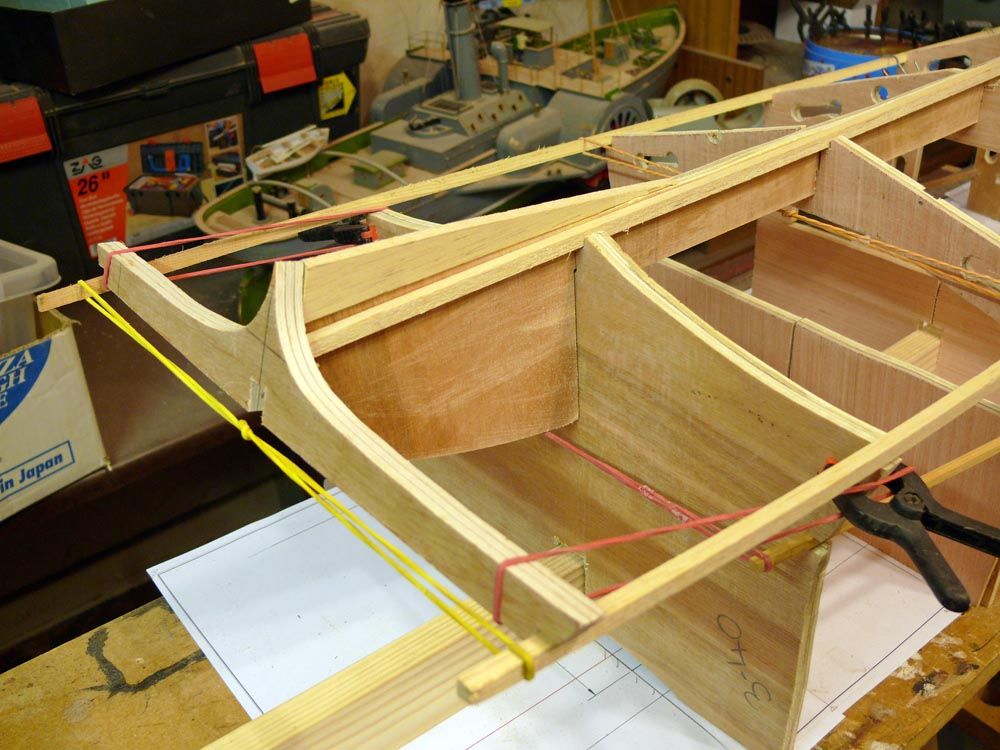
        All the formers located on a central spine!………Like it?

        The first set of pictures show work in progress, with the semi finished formers roughly in position

        Bob

        More following…

        c001.jpg

        c005.jpg

        c006.jpg

        c007.jpg

        #46169
        Paul T
        Participant
          @pault84577

          Cracking idea Gromit

          I like the spine its a brilliant concept………..wish I had thought of it.

          Paul

          #46170
          Bob Abell 2
          Participant
            @bobabell2

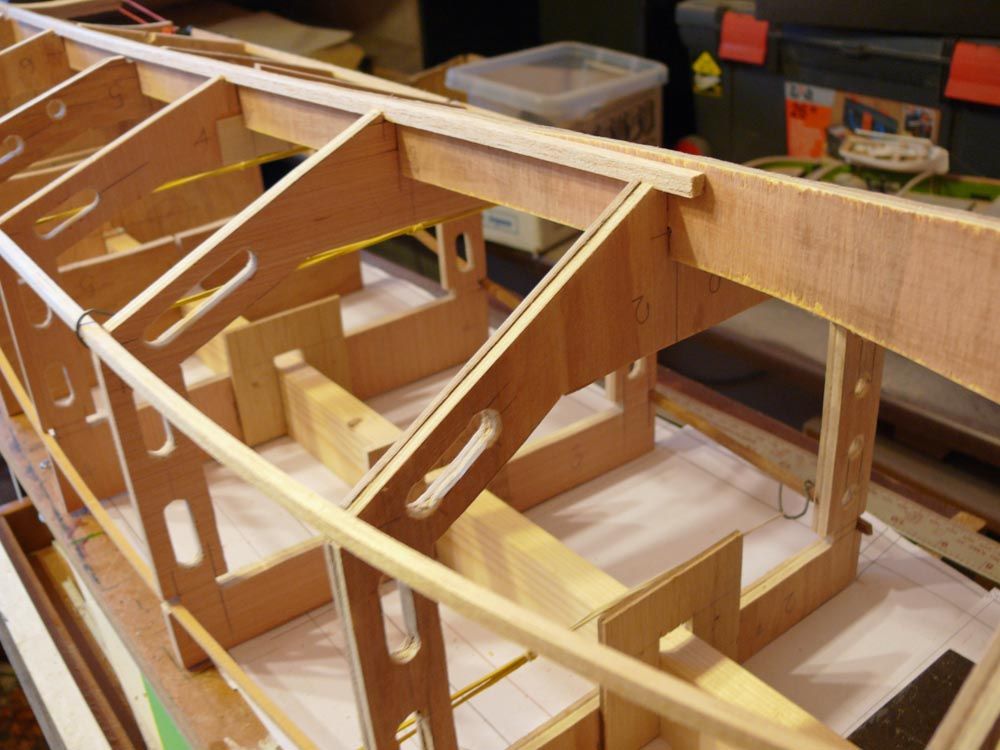
            This set of pictures show the formers with temporary stringer material roughly in position, to show Paul how it will look eventually

            The keel will be fitted as soon as the formers are finalised

            What`s the verdict, Paul?

            Bob

            c018.jpg

            c016.jpg

            c018.jpg

            #46171
            Paul T
            Participant
              @pault84577

              Looking good to me Bob but I will be a lot happier when the keel is in place.

              #46172
              Bob Abell 2
              Participant
                @bobabell2

                Thanks Paul

                Need to know how the stringers meet the keel prow, please

                Bob

                #46176
                Paul T
                Participant
                  @pault84577

                  Hi Bob

                  Remember those instructions that I sent you……that you said you wouldn't need, lol

                  brutus horizontal frames.jpg

                  There are two horizontal frames in the bow that take the place of the stringers, you will find them on drawings 9 and 10

                  Paul


                  Edited By Paul T on 08/01/2014 11:21:45

                  #46179
                  Bob Abell 2
                  Participant
                    @bobabell2

                    Thank you Paul

                    Can you show the transom in position, please

                    Is the keel flush with the top of the formers….ie….No keel?

                    Should have the keel on by tea time

                    Just got in from a campervan trip to Etherow……Very mild today

                    Bob

                    #46182
                    Colin Bishop
                    Moderator
                      @colinbishop34627

                      Lovely looking work Bob.

                      Colin

                      #46183
                      Bob Abell 2
                      Participant
                        @bobabell2

                        Thank you, Colin

                        I am enjoying the build, as the finished result is a complete mystery at the moment

                        We are expecting to be surprised with the performance…….Hopefully

                        I am impressed with Paul's CAD skills, especially predicting the former shapes and associated calculations

                        Bob

                        #46184
                        Bob Abell 2
                        Participant
                          @bobabell2

                          Hello Paul……You can stop worrying now!

                          It all fits together ok……But I don`t really know how the keel and formers should be?……The keel is almost flush with the hull surface?…….I think you`ve just sent me a cross section, I`ll have a look

                          The transom has a very sharp pointy bit……..Does the keel match it with a filler strip of some sort

                          To be honest it`s a bit too early to be asking these questions

                          Study the pictures and report back?

                          The first picture shows how the keel is almost flush with the hull bottom….ie……No keel?

                          The third picture shows the transom pointy bit, as mentioned

                          Anyway, Paul……..The build is great fun!

                          Bob….R & D Dept

                          k 4.jpg

                          k 3.jpg

                          k 2.jpg

                          k 1.jpg

                          #46187
                          Paul T
                          Participant
                            @pault84577

                            Hi Bob

                            It looks very good and everything seems to fit as intended.

                            No keel showing but the keel timber will have to be shaped at the bow and stern to suit the hull profile.

                            The flat top of the transom fits flush with corner (straight meets curve) on the aft end of the keel.

                            Paul

                            #46188
                            Bob Abell 2
                            Participant
                              @bobabell2

                              How about this fairing for the transom crest?

                              Bob

                              transom fairing.jpg

                              #46196
                              Paul T
                              Participant
                                @pault84577

                                Hi Bob

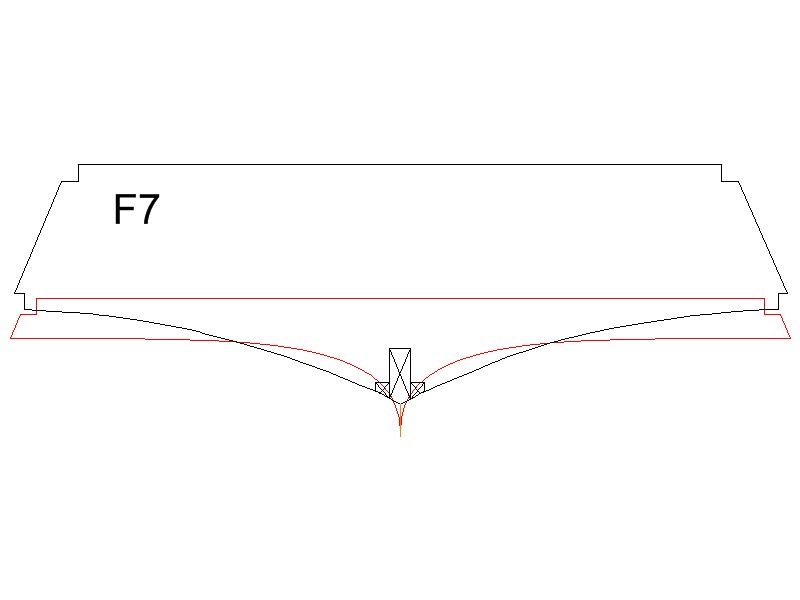
                                I'm sorry Bob but I didn't make this connection very clear on the drawings as the pointy bit of the transom fits flush with the base of the keel and the two stringer cutouts are for the deck stringer.

                                The keel to the rear of Frame 7 has to be shaped to accept the curved skin so the keel stringer will almost disappear.

                                Paul

                                #46198
                                Bob Abell 2
                                Participant
                                  @bobabell2

                                  Paul

                                  The depth of the transom pointy bit is about 1/2" deeper than the land on the keel

                                  Send a picture worth a thousand words!

                                  Bob

                                  #46200
                                  Paul T
                                  Participant
                                    @pault84577

                                    Bob

                                    You are right (as usual) the pointy bit is 12mm lower than the keel. The following image shows the relationship of F7 to the Transom (in red).

                                    transom to f7.jpg

                                    Sorry for missing that detail Bob, my excuse is that I am busy working up a set of sketches for a nice chap who wants to build a multi hulled, sea axe style futuristic warship (project Triton) currently the rough design is 2m long  and 0.5m at its widest point

                                    Paul


                                    Edited By Paul T on 09/01/2014 14:23:09

                                    #46202
                                    Bob Abell 2
                                    Participant
                                      @bobabell2

                                      2M long!……..Wow!

                                      So….Is there a filler strip in front of the famous pointy bit?

                                      I`m working on the Upper and Lower horizontal panels

                                      Upper seems ok

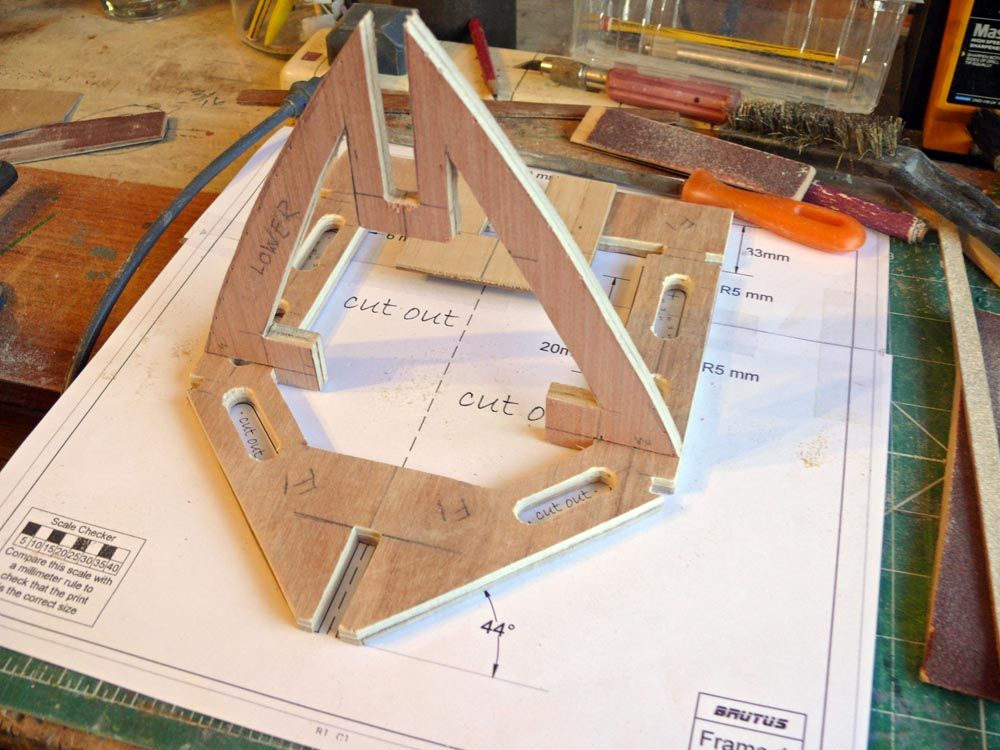
                                      Lower……If it`s supposed to line up with the stringer height…..Then the tenons are too wide

                                      Picture to follow

                                      Bob

                                      Can you see what I`m on about?

                                      Note, I`ve taken some weight out of the middle….We need the rim for clamping the ply

                                      nose lower panel.jpg

                                      Edited By Bob Abell on 09/01/2014 15:09:39

                                      #46203
                                      Paul T
                                      Participant
                                        @pault84577

                                        Hi Bob

                                        2m is the reduced version but not to worry as knowing the client has a restricted workshop the model will be designed to split into four pieces.

                                        No there isn't a fillet piece as the transom and skins have to be 'worked' together, its a difficult detail as the transom is so slender but it should look super when finished.

                                        The lower horizontal panel should line up with the chine stringer cut outs so please trim the tenons to suit.

                                        Paul

                                        #46209
                                        Paul T
                                        Participant
                                          @pault84577

                                          Drawing Office to Shop Floor

                                          I have just had the MD on asking why I was playing around with futuristic warships and not writing up the Brutus building instructions.

                                          But when I explained who the client was and how much he wanted a statement piece for the next Haydock show I was given the nod to continue so the instructions might take a couple of days whilst I sketch up this Trident project.

                                          The hard working designer is having his tea now.

                                          #46211
                                          Bob Abell 2
                                          Participant
                                            @bobabell2

                                            That's very flattering, Mr Chief Engineer, sir

                                            But don't you go working too hard!…..There's no need to over exert yourself

                                            I've got my hands full at the moment, as you know

                                            Sounds very exciting though!

                                            I think a 3D illustration would be nice to look at first?

                                            Bob

                                            #46216
                                            Bob Abell 2
                                            Participant
                                              @bobabell2

                                              Shop floor to him upstairs!

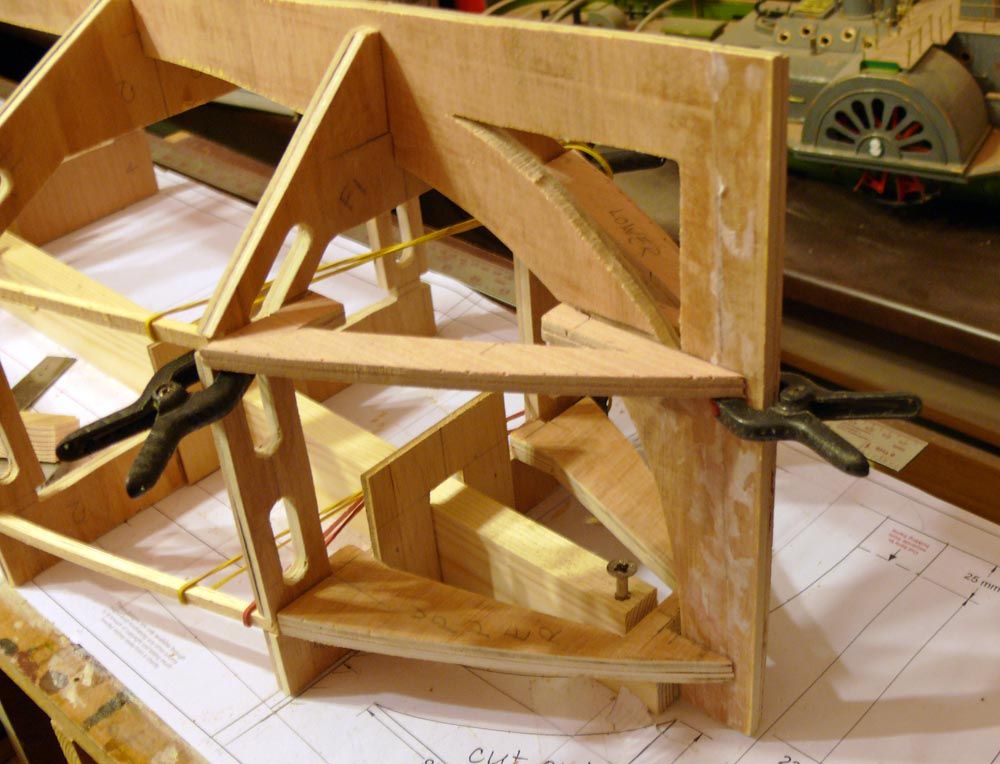
                                              The upper and lower panels fit ok, Paul

                                              I`m clockin` off now

                                              Bob

                                              horizontal panels fitted.jpg

                                              #46250
                                              Amy jane September
                                              Participant
                                                @amyjaneseptember49770

                                                You're really flying along there Bob, A nice work shop, plenty of time, I'm sooo jealous!crying

                                                #46253
                                                Bob Abell 2
                                                Participant
                                                  @bobabell2

                                                  Thank you, Amy for your kind comments

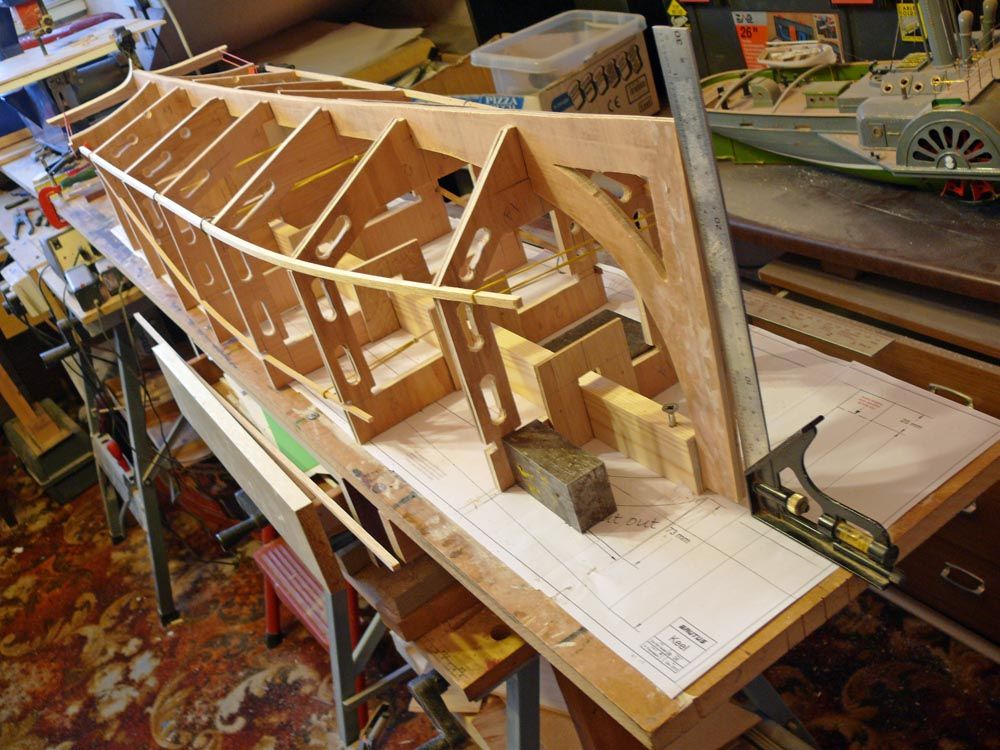
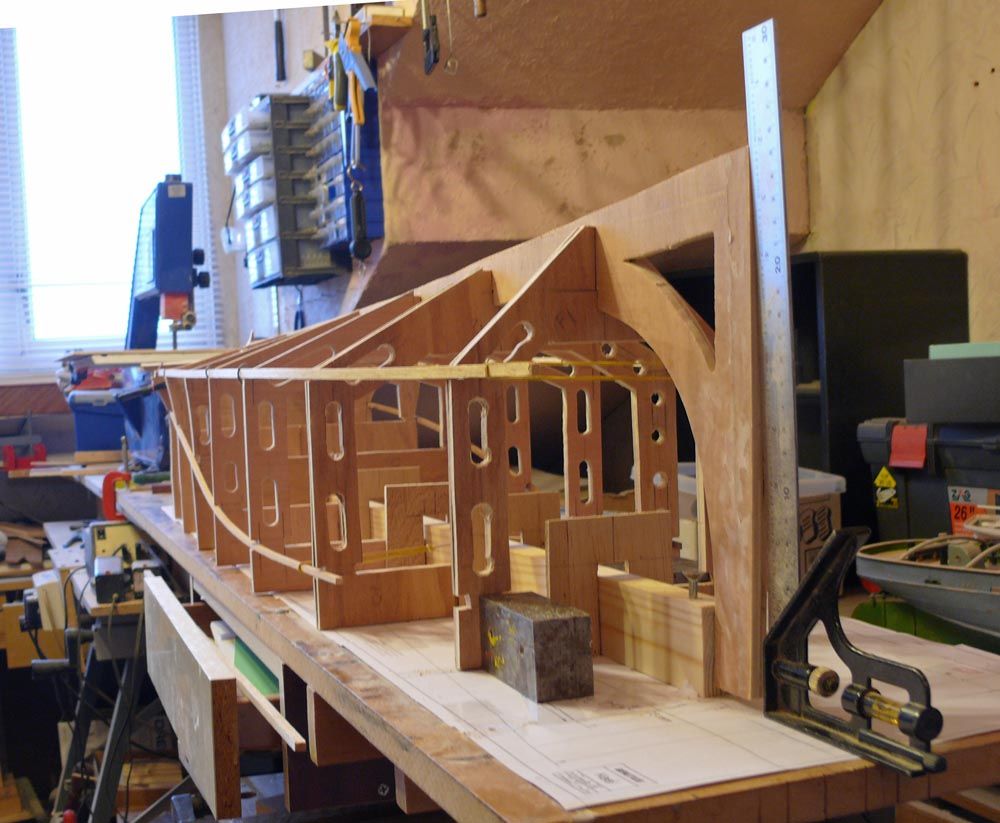
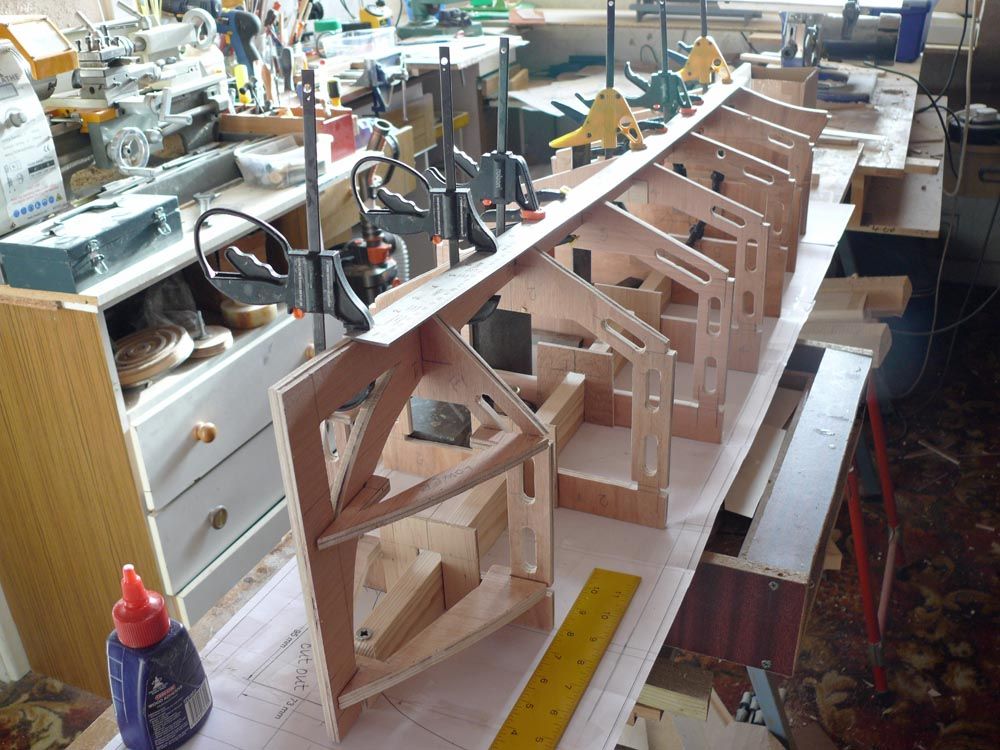
                                                  Finally got the structure set up to my engineering satisfaction!………lol

                                                  Everything lined up and dead square etc……..Note the steel rule clamped to the spine, to eradicate any bowing.

                                                  The problem now is that I`ve not used the glue yet!

                                                  Can`t possibly dismantle it all, so I`m going to "Tack weld" all round with glue seams and reinforcing where necessary with balsa strips

                                                  Bob

                                                  final setup.jpg

                                                  #46254
                                                  Andy C
                                                  Participant
                                                    @andyc56856

                                                    Looking good Bob. I like the holes in the frames for added lightness. Was that done with a router or drill and sanding?

                                                    Andy

                                                    #46255
                                                    Bob Abell 2
                                                    Participant
                                                      @bobabell2

                                                      Hello Andy

                                                      Thanks for your comments

                                                      Cutting those slots out was quite a big job, in 3/8" plywood too

                                                      I drilled a hole at each end then cut the slots out with a fretsaw and cleaned up with a file

                                                      Can't see them doing much good, but they do look technical?

                                                      Now in the process of applying the glue

                                                      I'm really enjoying the build

                                                      Bob

                                                    Viewing 25 posts - 151 through 175 (of 1,017 total)
                                                    • Please log in to reply to this topic. Registering is free and easy using the links on the menu at the top of this page.

                                                    Code of conduct | Forum Help/FAQs

                                                    Latest Replies

                                                    Home Forums Scratch build Topics

                                                    Viewing 25 topics - 1 through 25 (of 25 total)
                                                    Viewing 25 topics - 1 through 25 (of 25 total)

                                                    View full reply list.