TYNE Class Lifeboat build

Advert

TYNE Class Lifeboat build

Home Forums Build Blogs TYNE Class Lifeboat build

  • This topic is empty.
Viewing 25 posts - 1 through 25 (of 593 total)
  • Author
    Posts
  • #88357
    neil hp
    Participant
      @neilhp


      the two sailing lifeboats are now history with respect to a build thread, and so it is on to the next project.

      not one to hang about I will have a tidy up of my workshop and put away lots of little things that might come in handy for another build, and then once I have working space on my benches I will crash on with the next build.

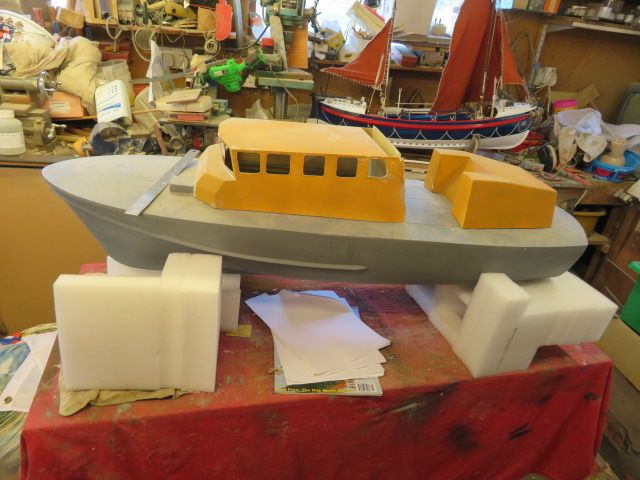
      as I have said before it is going to be the Tyne Class 47-038 William Street, Fleetwoods just recently retired boat.

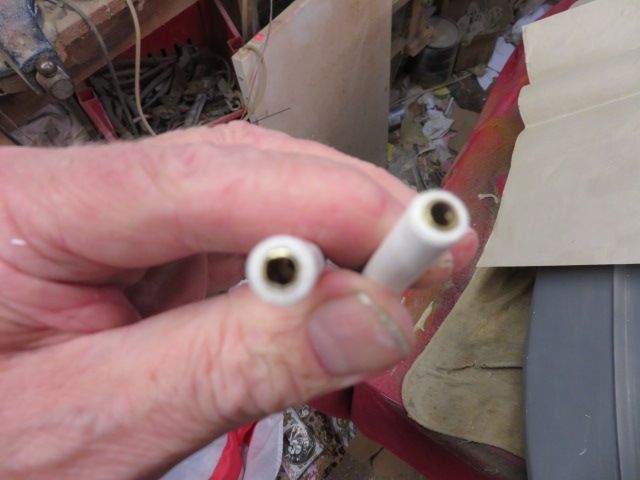
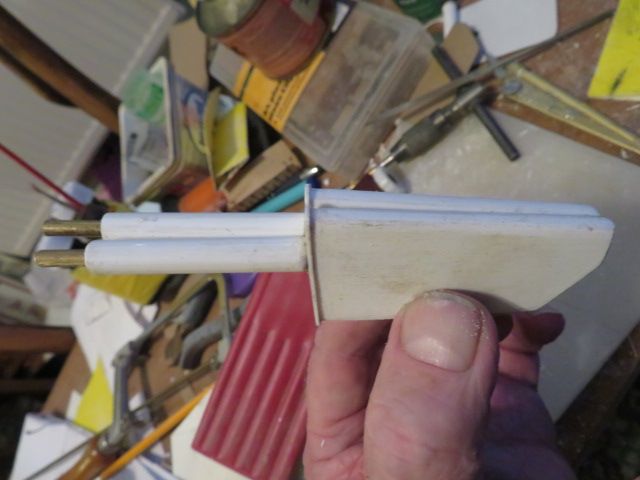
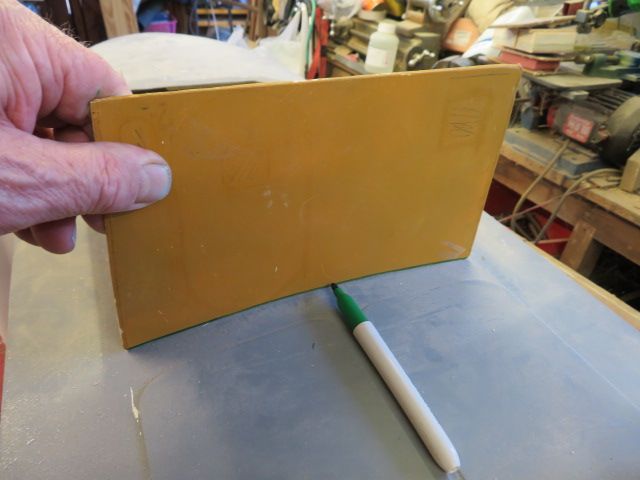
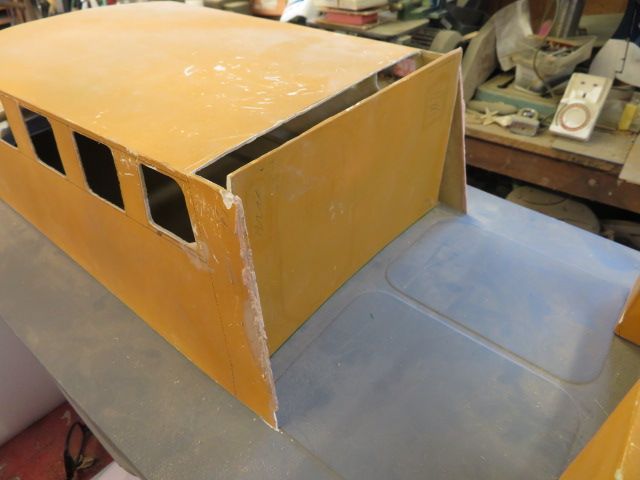
      I had a little play with it for a few minutes on the aft bulkhead of the main cabin, as it wasn't fitting right in the condition that I bought it. the bottom had no camber to follow the deck and it was slightly too wide at the top, forcing the bottom sides of the cabin out and distorting the shape of the rear of the cabin…..so all was trimmed and it now "fits" where it was marked to go.

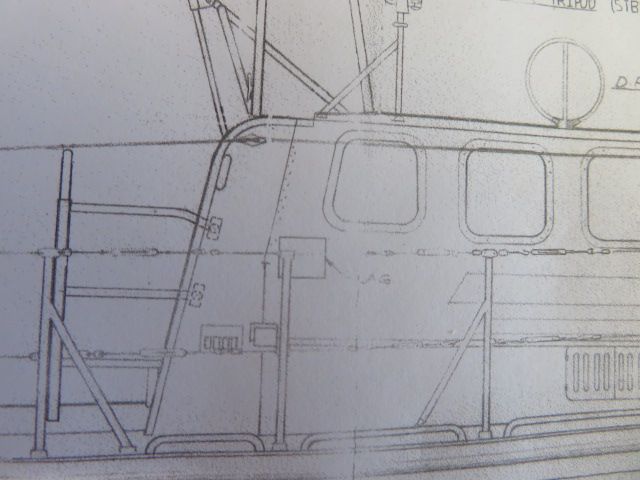
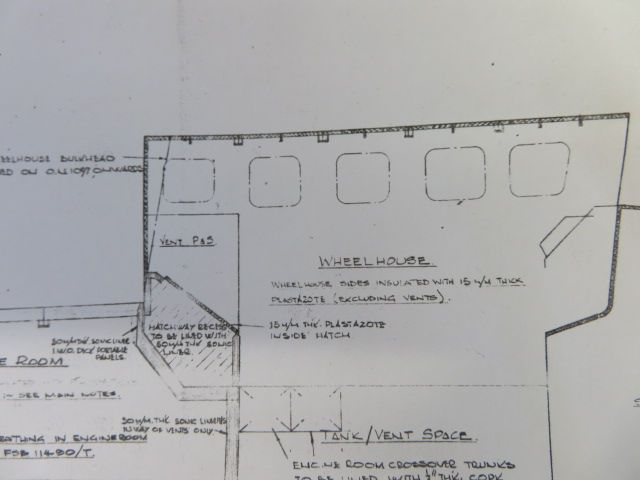
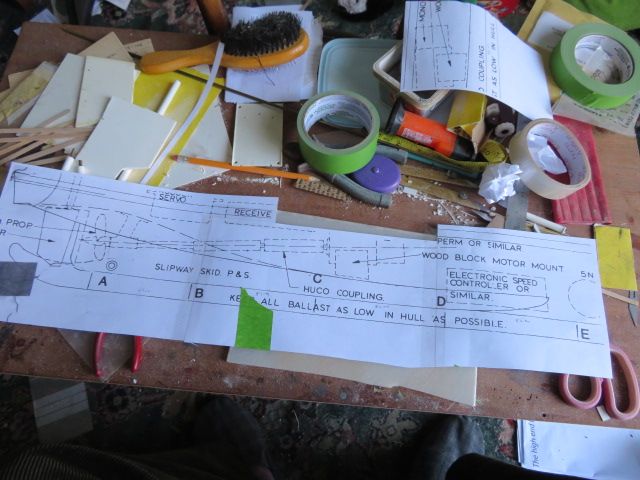
      however……I have a set of Dave Metcalfs plans blown to size from model boats…….but I also have a full set of RNLI OFFICIAL drawings on 4 sheets.

      and here is the perplexing thing about this all. Dave's and one sheet of the RNLI plans show one shape of the rear of the bulkhead……..and the other two sets show two totally different side profiles as to how the rear bulkhead should be……..

      and so, now realising that this build is NOT going to be straight forward, I am now going to wade through all of the photos of the different rear bulkheads and see which one is suitable to the WILL STREET.

      Nothing is ever straight forward in life but that is half the fun, isn't it?

      But on the plus side there is acres of space in the hull for some nice toys like an engine sound generator and stuff.


      img_4941.jpg

      img_4931.jpg

      img_4939.jpg

      img_4937.jpg

      img_4938.jpg

      Edited By neil howard-pritchard on 24/05/2020 18:40:55

      Advert
      #9801
      neil hp
      Participant
        @neilhp

        step by step build of a semi kit lifeboat the RNLB WILLIAM STREET of Fleetwood

        #88373
        Bob Abell 2
        Participant
          @bobabell2

          Hi Neil

          It's looking a bit manky at the moment?

          But we've got every faith in your building skills to produce another Masterpiece?

          Looking forward to the build

          Bob

          #88395
          neil hp
          Participant
            @neilhp

            aye Bob……..its a bit rough in places, and a good bit to do to restore order, but I love a challenge as much as a scratch build….………

            and gladly not too much was done by the original butcher who did the work to it before the person I bought it off gained possession of it,lol.

            hopefully it will shine once I get going…….

            just ordered my epoxy glues off ebay………….one of them is a 2 part epoxy that I used many years ago before it ran out and couldn't get anymore called Devcon……I saw a company selling it on ebay last night, so ordered a pack.

            ….it beats ZAP Z-Poxy hands down for sticking power,…… it is super tough…..….so am waiting for that and a pack of Z-Poxy 30 minute setting to come and then I can start to regenerate the model.

            it came with almost a full fittings set, and prop shafts/ A frames but I will need some "Prop Shop" Scimitar type 4 blade 50mm props to drive her, plus 2 rudders which I will make from 3 layers of plasticard and brass rod…………more to come on this build when I get going.

            #88410
            neil hp
            Participant
              @neilhp

              I suppose i'd better crack on…

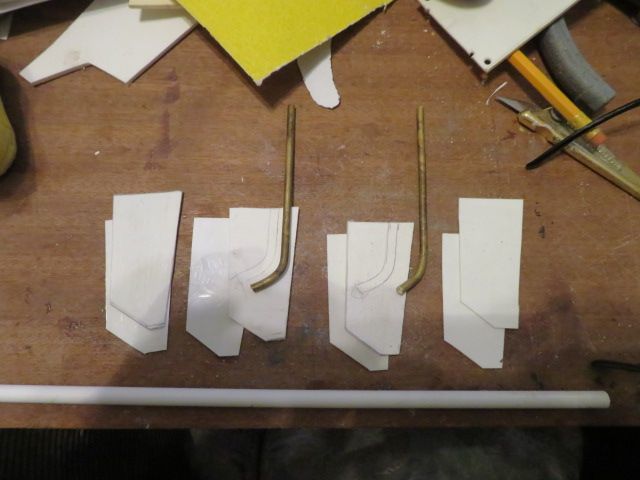
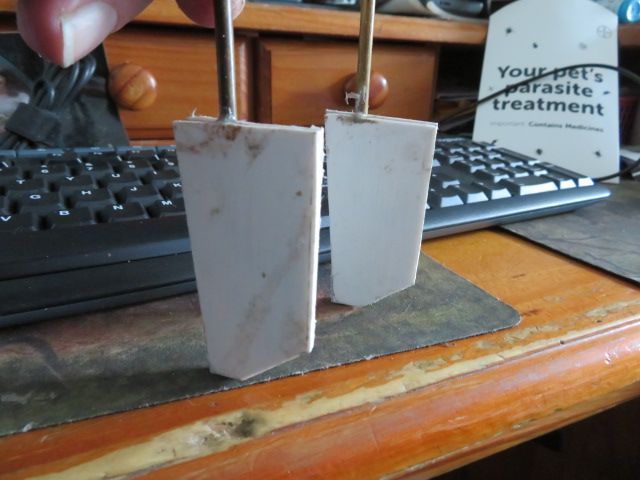
              so started on the twin rudders this evening……thought i'd earned a little modelling time after spending the afternoon clearing crap and tidying some areas of my workshop……….more to do tomorrow.

              but tonight, as I always do with my scratch build boats is to use some 4mm brass rod that fits into thick walled 4.5mm inner bore plasticard tube nicely with some Vaseline impregnated with carbon powder to give a perfectly water resistant seal[ I also use this method for packing my prop tubes and shafts.

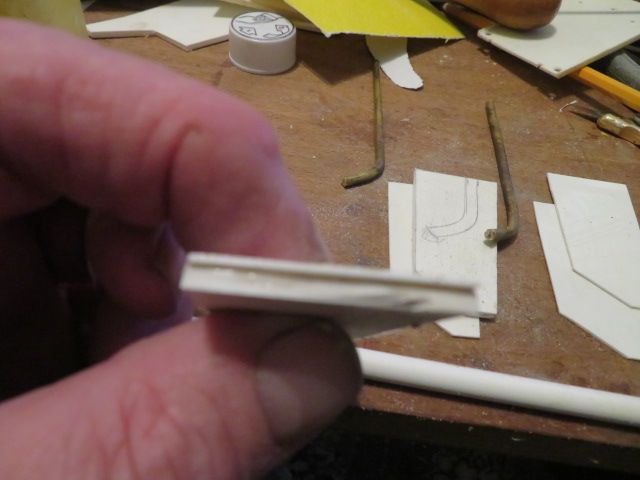
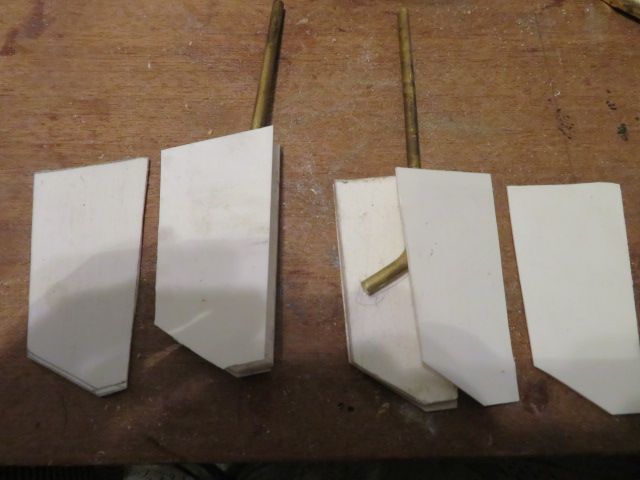
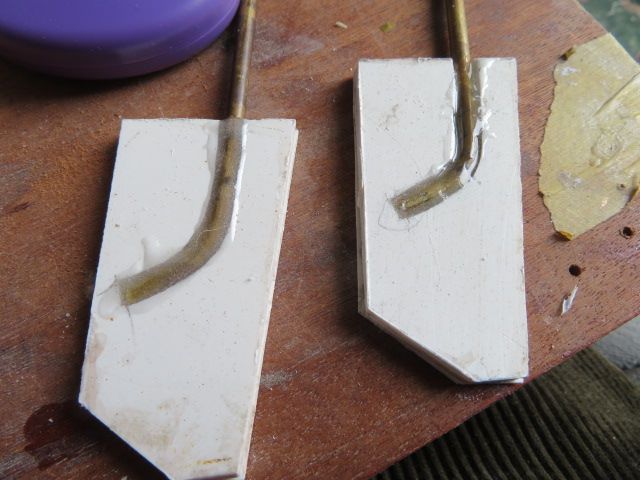
              I then bend the end of each rudder shaft to about 30 degrees, and mark out the area of the rudder that this shaped rod will fit into…….the bend stops the rudder blade from working loose inside the rudder and becoming inoperable and useless. it is set into the slot cut into the rudder blade with epoxy, and then two pieces of plasticard cut to the same shape as the rudder blade are glued either side of the blade, enclosing the shaft.


              img_4945.jpg

              img_4946.jpg

              img_4947.jpg

              Edited By neil howard-pritchard on 26/05/2020 01:01:31

              #88413
              Bob Abell 2
              Participant
                @bobabell2

                How big is this model, Neil and what motors?

                Bob

                #88426
                neil hp
                Participant
                  @neilhp
                  Posted by Bob Abell on 26/05/2020 06:49:03:

                  How big is this model, Neil and what motors?

                  Bob

                  its 47 inches long Bob. ..AS for motors, someone has suggested NOT TO engage in a brushless set up but rather go for 2 Torpedo 800's…[I think he said 800's and not 850's………….but what ever, the faster revving motors…..I am tending to agree, as I don't understand much about brushless set ups…….hence I haven't got my Shannon on the water yet…………get puzzled with more than two wires to and from electrical goods, lol.

                  as for the build.……….that carries on with part 2

                  Part two of the rudder construction…

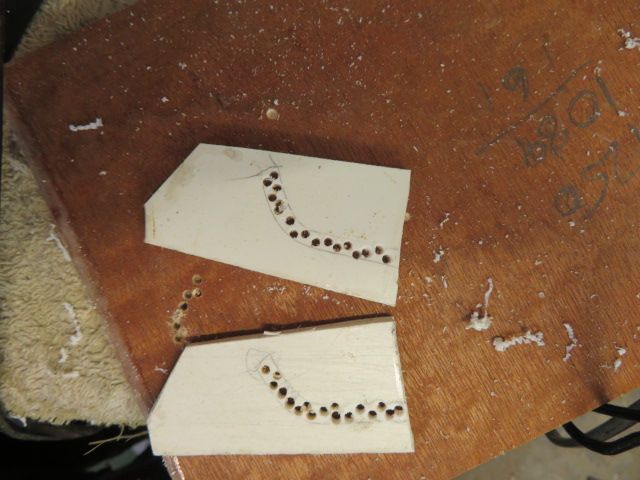
                  drill and cut out the slot in the centre slice of the rudder and make sure the two sides are not forced out by the brass rod.

                  glue on to the centre section one of the outer slices.

                  using 30 minute 2 part epoxy glue into the slot, the brass rod.

                  once set, remove any residue sticking up from the slot and rod with a knife and abrasive paper.

                  finally for this part of the build, glue on the other outside slice, giving two rough but complete rudders that wont ever work loose on the stock, and waggle in the wind.

                  img_4955.jpg img_4957.jpg

                  img_4958.jpg

                  #88427
                  Colin Bishop
                  Moderator
                    @colinbishop34627

                    I used to like Devcon too and had no problems getting hold of it but I got a bit disillusioned when I found that they were now only filling the tubes 50% full. Not impressed with that!

                    Z Poxy 15 minute seems a decent substitute to me.

                    Colin

                    #88431
                    neil hp
                    Participant
                      @neilhp

                      I use Z-Poxy all the time Colin, but just saw the Devcon whilst searching last night, and as it's 4.25 oz in each tube as opposed to 4oz in z-poxy for virtually the same price, I would try it again.

                      see what its like on the shafts and rudder tubes when it comes………..

                      which brings me to Rudders, part 3 lol.


                      Part 3 of my rudder construction for the Tyne.

                      I like to make my models as maintenance free as possible.

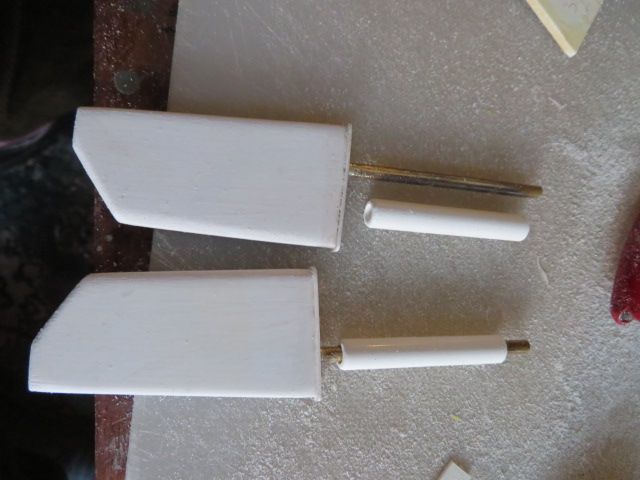
                      and so, after sanding and trimming the rudders to shape and cleaning them up. I thought I would use my normal method and take some thick walled plastic tubing from plastikard, Matlock for the rudder tubes.

                      tough, strong and perfect for threading some brass rod through………no reaction between plastic and brass, self lubricating and normally the brass would just fit, with very fine tolerances………..

                      ahh, there came the problem. I had run out of my old internal diameter plastic tube for the brass rod of the rudder shaft………….and the plastic tube I had was of a bigger diameter.

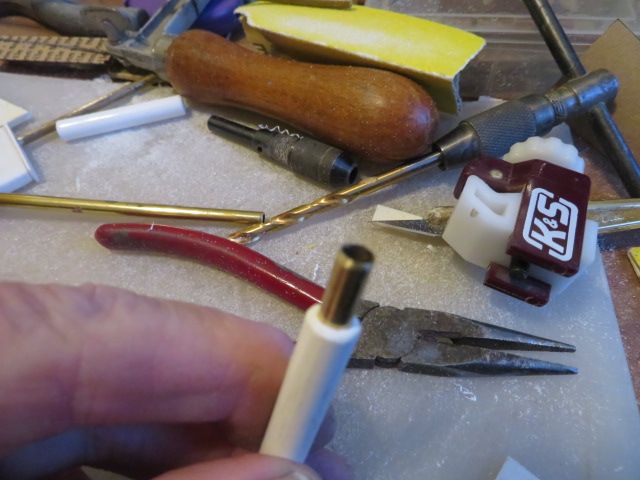
                      not to worry, I found some brass tube with internal diameter perfect for rudder shaft to fit in, but just too large outside diameter for the brass to fit into the plastic tube.

                      found a drill bit the same dia. as he brass tube outside, found my larger mandrel and reamed out about 10mm of the plastic tube to take some small lengths of the brass tube to act as bearings.

                      took the bits and pieces to the workshop, and using my small engineers vice as a bearing press, inserted the "bearings" into the plastic tubes…voila' Two bearing tubes to take the rudder shafts!……..scratch building brings out all sorts of creative thoughts.
                       

                      img_4961.jpg

                      img_4963.jpg

                      img_4967.jpgimg_4970.jpg

                      Edited By neil howard-pritchard on 26/05/2020 22:57:45

                      Edited By neil howard-pritchard on 26/05/2020 22:58:11

                      #88432
                      Bob Abell 2
                      Participant
                        @bobabell2

                        Blimey Charlie, Neil, what a story!

                        Your Talle of Two Rudders, make the Tale of Two Cities look like a brief Encounter!

                        Boom! Boom!

                        It's the way I tell'em

                        Bob

                        #88434
                        ashley needham
                        Participant
                          @ashleyneedham69188

                          The two 800s on my 48 inch Fantome propel it ok, enough for lifeboat speeds. 850s are the higher revving ones 10000 verses 5000 rpm.

                          My Invincible aircraft carrier goes very well on a pair of 800s (as Colin has seen) on x50 props, and is a bit heavy with it. In fact, they were partly chosen for their weight as obviously I needed a degree of weight in the boat.

                          Some detractors would say that’s all they are good fo, but ignore them….

                          Ashley

                          Edited By ashley needham on 27/05/2020 08:18:44

                          #88453
                          neil hp
                          Participant
                            @neilhp

                            cheers Ashley..…..it must be the 850's then with the higher revs as these boats used to get up on the semi-plane as you can see in the final stages of this video.from youtube.

                            #88454
                            neil hp
                            Participant
                              @neilhp
                              Posted by Bob Abell on 27/05/2020 07:00:50:

                              Blimey Charlie, Neil, what a story!

                              Your Talle of Two Rudders, make the Tale of Two Cities look like a brief Encounter!

                              Boom! Boom!

                              It's the way I tell'em

                              Bob

                              when I do a build blog Bob, I like to tell people how I overcome little problems that pop up, rather than just I did this and did that without any form of explanation……then if people who are building a similar vessel and come up with a similar problem………..someone has worked it out before……..

                              no good doing a build blog if you don't explain how and why you do such a process.

                              they may be long winded, but at the end, I can rest easy in that I have tried to help as much as I can, lol…..

                              you think this bit is an epic…..wait till I get on to silver soldering the rails and pulpits, and mast. lol.

                              #88455
                              Bob Abell 2
                              Participant
                                @bobabell2

                                Hi Neil

                                I didn`t mean to cause offence, old chap………It was a witty play on words

                                Read it again

                                Bob

                                #88456
                                neil hp
                                Participant
                                  @neilhp

                                  you didn't cause any offense at all Bob………found it to be amusing I'm known by my kids for being a boring old fart…..rambling on……..well, you've met me, lol……..what do you think?

                                  in 25 years of teaching I was called a lot worse and had far worse said to me, especially by headmasters, hahaha. so don't worry…….it would take a lot more than some witty repartee' to upset me.

                                  #88476
                                  neil hp
                                  Participant
                                    @neilhp


                                    NO stopping me now!!!.

                                    looks like another model I have found to be enjoyable building.

                                    I decided that before I fitted the rudders I needed something to protect them as I have yet to build a stand for the model…….

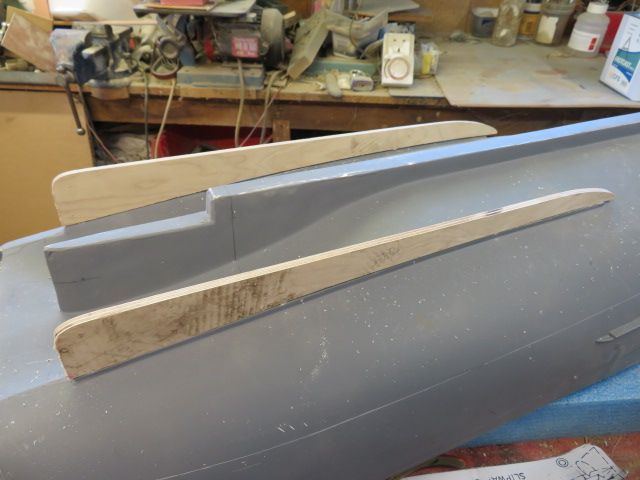
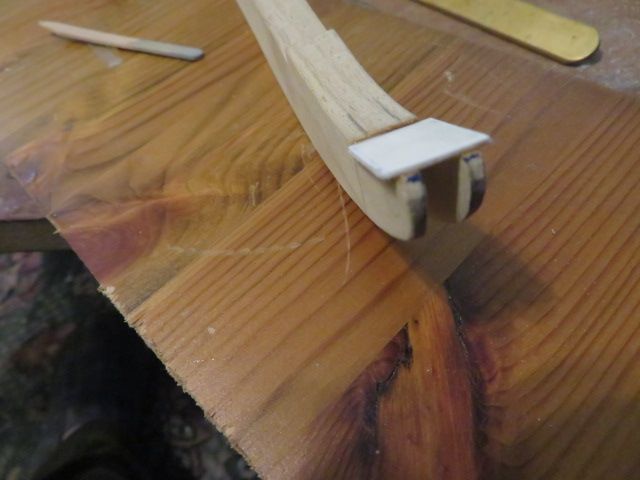
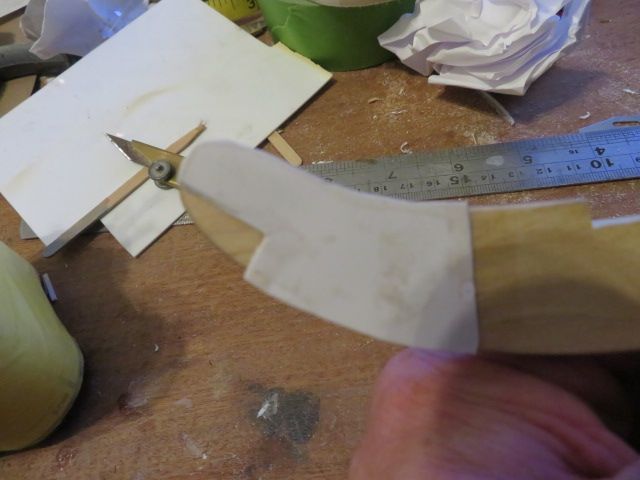
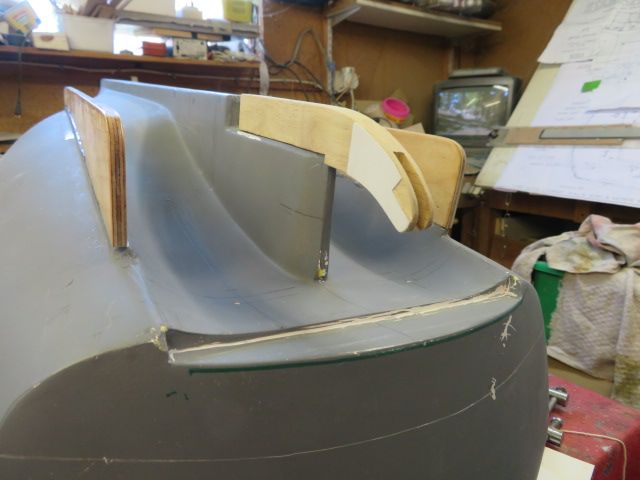
                                    so first things first, make the keel skegs that these boats run on when being slip launched.

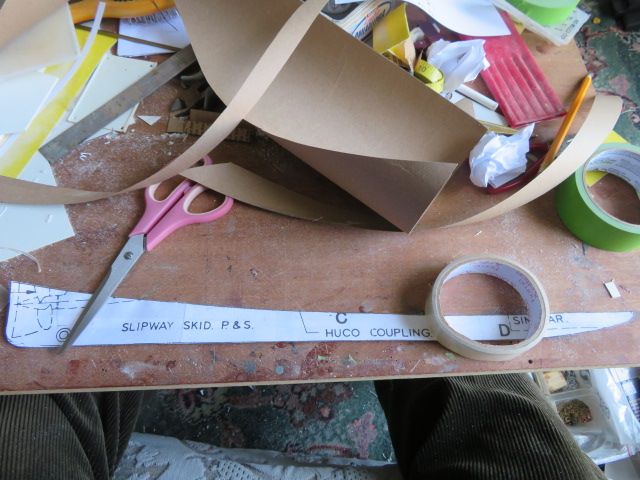
                                    photocopied the skegs in 3 parts from my Dave Metcalf plans and joined together, and then mounted onto some thicker card.

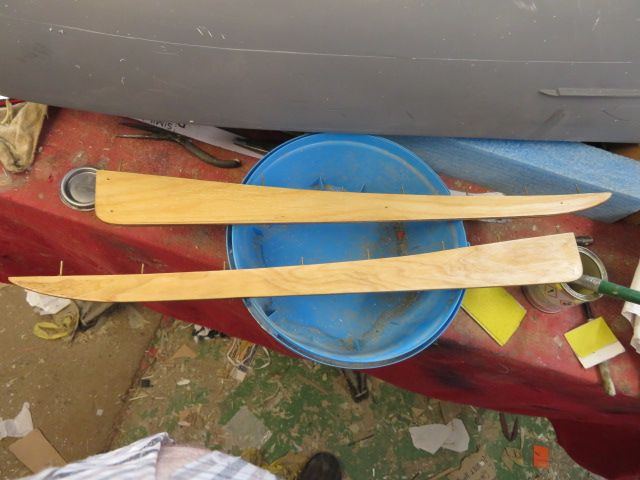
                                    cut them out and mounted onto 2 layers of 8mm birch faced ply.

                                    cut the ply on the band saw, sanded them down and made to fit the moulded skeg. there is a slight discrepancy between the length of the skeg and the keel, but this can be filled with car body filler.

                                    I then drilled the keels and fitted some brass wire pins. mated them up to the skegs, drilled the holes to receive the pins and dry fitted the keels to the skegs…….nice fit!.

                                    I took them off and gave two coats of sanding sealer [ dries quickly in this weather….and sat back thinking I would glue them in place with two part epoxy when my new supply comes next week as estimated.

                                    my daughter came in to my workshop as I was thinking so, and handed me a package saying one of your "friends" has sent you a bomb.[can quite believe it, the number I upset by being forthright]…..and carefully opened it………..boooooom!!!! she shouted from outside the door, as I took the wrapping off……..poohed myself, cheeky git!……..but incredibly it was my Devcon super strong 2 part epoxy that I ordered 2 nights ago…….so just waiting for the sealer to harden and then I'll glue the keels in place a little later.

                                    img_4977.jpg

                                    img_4980.jpg

                                    img_4981.jpg

                                    img_4992.jpg

                                    img_4989.jpg

                                    Edited By neil howard-pritchard on 28/05/2020 18:39:56

                                    #88480
                                    Chris Fellows
                                    Participant
                                      @chrisfellows72943
                                      Posted by neil howard-pritchard on 27/05/2020 16:45:24:

                                      Posted by Bob Abell on 27/05/2020 07:00:50:

                                      Blimey Charlie, Neil, what a story!

                                      Your Talle of Two Rudders, make the Tale of Two Cities look like a brief Encounter!

                                      Boom! Boom!

                                      It's the way I tell'em

                                      Bob

                                      when I do a build blog Bob, I like to tell people how I overcome little problems that pop up, rather than just I did this and did that without any form of explanation……then if people who are building a similar vessel and come up with a similar problem………..someone has worked it out before……..

                                      no good doing a build blog if you don't explain how and why you do such a process.

                                      they may be long winded, but at the end, I can rest easy in that I have tried to help as much as I can, lol…..

                                      you think this bit is an epic…..wait till I get on to silver soldering the rails and pulpits, and mast. lol.


                                      I totally agree Neil. Yes, experienced builders might find the detail too much but beginners/less experienced will find it invaluable. It's a build blog and no-one is forced to read it. Otherwise you may as well make one post and show a photograph of it finished! smiley

                                      Chris

                                      Edited By Chris Fellows on 28/05/2020 22:59:11

                                      #88481
                                      neil hp
                                      Participant
                                        @neilhp

                                        agree totally Chris……..I find it incredibly frustrating on build blogs when some talk about electronics as though everyone is a "sparks"……….

                                        I rule Dave Milbourn out of this catagory………..he talks to me as what I am, an idiot in the subject…..and I appreciate it…………….and we get things sorted…he's a star with abundance of patience lol.

                                        but one guy on a forum today said of my comment about putting a sound system in my new build of Tyne engines…….oh yeh just do this and that…………

                                        wey hay……..I said I don't understand what you are talking about…………….

                                        oh just go to this site he said, giving me a link….it will explain it all…..

                                        it was all in BLOODY GERMAN fgs

                                        I gave up communicating on that note lol.

                                        #88485
                                        Bob Abell 2
                                        Participant
                                          @bobabell2

                                          Neil……I have already apologised for my OTT comment regarding your Tale of Two Rudders…..It was purely a friendly play on words, intended to create amusement

                                          Bob

                                          #88490
                                          Eddie Lancaster
                                          Participant
                                            @eddielancaster

                                            I have been modelling for over forty years now, but I still find there is something new to learn from other’s build blogs, so keep them coming, long winded or not.

                                            Eddie

                                            #88491
                                            neil hp
                                            Participant
                                              @neilhp

                                              Bob, please do not take those comments as aimed at you,

                                              Chris and I were having a grouch at people who post a "build" on other forums and never explain how or why they did it………no detriment to you at all Bod, and sorry if I have upset you……….but definitely NOT aimed at yourself. cheers.

                                              and your comments did and do amuse me…………you are like myself……..you say what you mean, and i both admire and respect you for that.


                                              Edited By neil howard-pritchard on 29/05/2020 09:11:52

                                              #88498
                                              Bob Abell 2
                                              Participant
                                                @bobabell2

                                                OK, Thanks Neil

                                                I won't mention it again

                                                All the best, my mate

                                                Bob

                                                #88503
                                                neil hp
                                                Participant
                                                  @neilhp

                                                  yes

                                                  #88514
                                                  neil hp
                                                  Participant
                                                    @neilhp

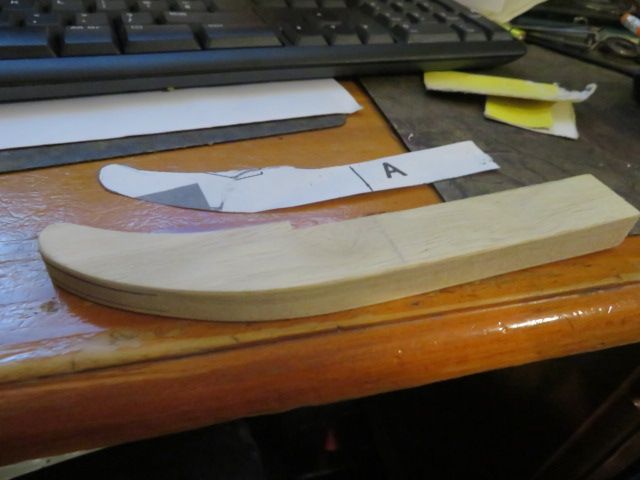
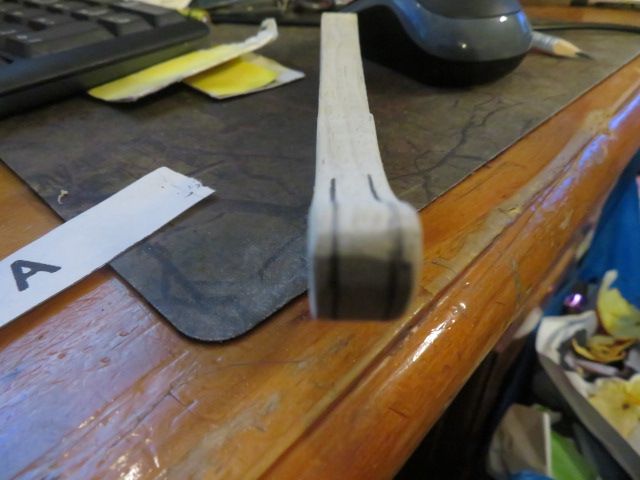
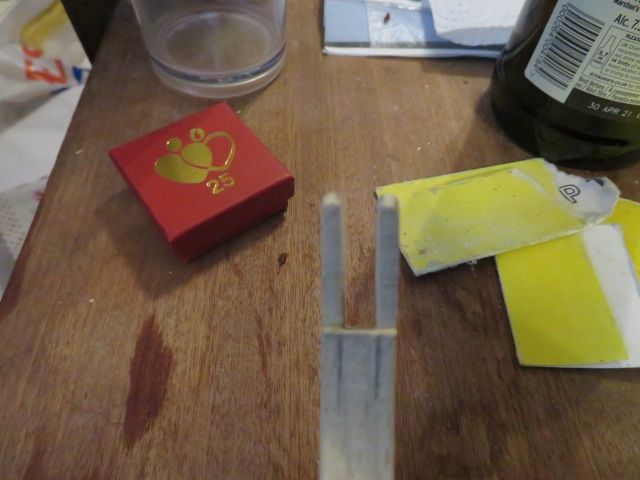
                                                    last night I used my woodworking skills to cut, shape and configure the rear launching skeg.


                                                    made it from a lump of obeche, a band saw, some plasticard, which was the detailing and glued to the timber simply with plastic weld glue, and some sand paper………

                                                    no more explanation really for this one.

                                                    i'll fix it to the keel after I have fitted the trim tab., which lies under it.

                                                    img_5011.jpg

                                                    img_5012.jpg

                                                    img_5018.jpg

                                                    img_5019.jpg

                                                    img_5020.jpg

                                                    img_5030.jpg


                                                    Edited By neil howard-pritchard on 29/05/2020 21:12:56

                                                    #88532
                                                    neil hp
                                                    Participant
                                                      @neilhp

                                                      I have wanted to build a Tyne Class lifeboat from the first time I say our boat sail down the River Wyre in 1989 to become Fleetwoods new lifeboat, the sound of those General Motors V6 diesel two stroke engines, were just incredible, and I knew I just had to build my own representation of her.I WANT MY BOAT to have bells and whistles built into it.

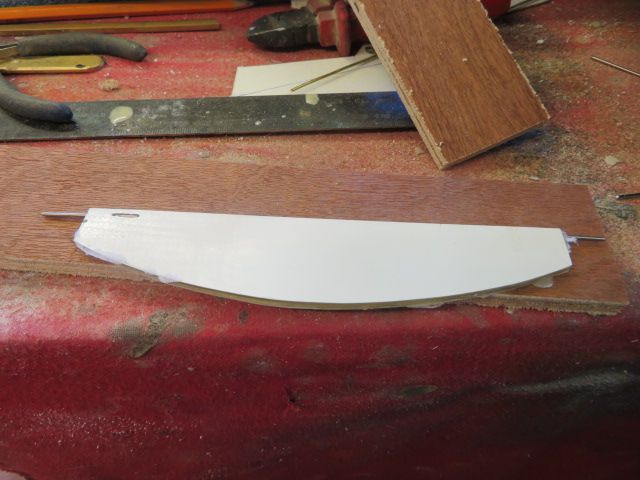
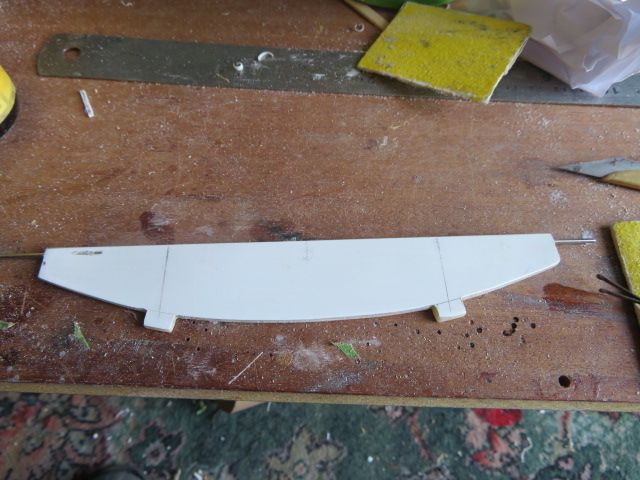
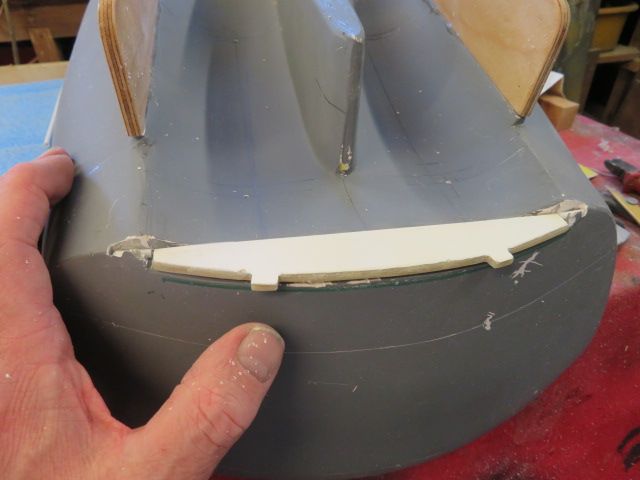
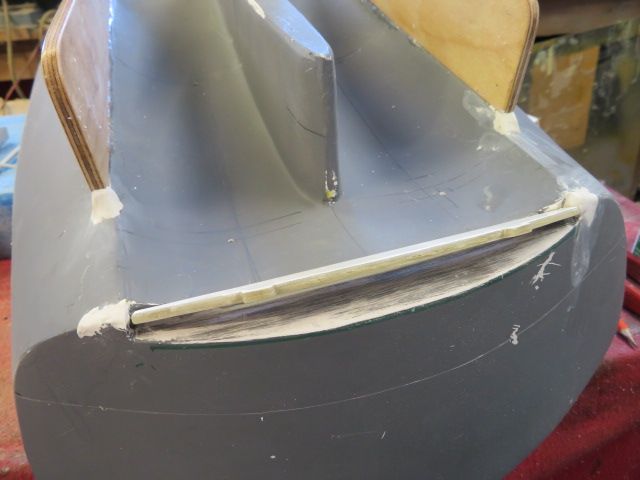
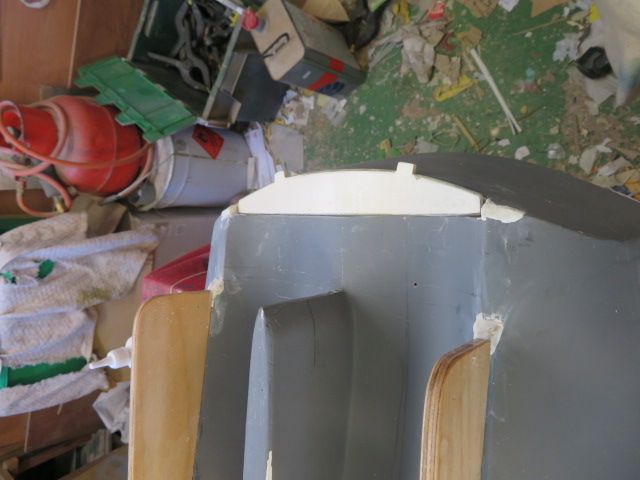
                                                      And the first thing I wanted, which I haven't seen on any other model Tyne was a working trim tab. it is one tab running across some 60% of the stern, very narrow and unusual shape, as can be seen on the boat.

                                                      I pondered for days as to how to do this and how to hinge the tab. Finally I came up with a solution,and that was to hinge the tab close to the rear of the plate, and to use stainless steel pins 1.8mm diameter, set into plastic tubing, but first I had to decide what to make the trim tab out of. I decided on two layers of grp sheet, and that came from the residual of another boat built some time ago. I made a template of the overall plate, cut two pieces out and then glued together with epoxy.

                                                      Next I cut the plate to shape including leaving the tabs on for connecting the rams to a bracket. once ready I sanded the plate down and set the stainless steel pins into the ready drilled holes on the extremities to the plate, port and starboard.and cut out the area with a reamer bit in my minicraft drill to sit some ready cut plastic tube [taking the pins into, and making sure that the tab lifted with no hang ups and smooth movement, I filled in on top of the plastic tube with milliput white….once that has set and cured I will back fill the holes left in the hull under the tubing, with car filler from the inside.

                                                      This is a big triumph and job done, and i'll have a working trim tab on my boat……aim completed.

                                                      Needless to say I didn't glue onto the boat the launching skeg as I said I would last night. thought it might get in the way.

                                                      img_5030.jpg

                                                      img_5033.jpg

                                                      img_5039.jpg

                                                      img_5042.jpg

                                                      img_5046.jpg

                                                      img_5051.jpg

                                                    Viewing 25 posts - 1 through 25 (of 593 total)
                                                    • Please log in to reply to this topic. Registering is free and easy using the links on the menu at the top of this page.

                                                    Code of conduct | Forum Help/FAQs

                                                    Advert

                                                    Latest Replies

                                                    Home Forums Build Blogs Topics

                                                    Viewing 25 topics - 1 through 25 (of 25 total)
                                                    Viewing 25 topics - 1 through 25 (of 25 total)

                                                    View full reply list.

                                                    Advert