Fairey 23 River Cruiser

Advert

Fairey 23 River Cruiser

Home Forums Build Blogs Fairey 23 River Cruiser

  • This topic has 115 replies, 1 voice, and was last updated 5 months ago by Chris Fellows.
Viewing 16 posts - 101 through 116 (of 116 total)
  • Author
    Posts
  • #105521
    Ray Wood 3
    Participant
      @raywood3

      Hi Chris,

      I have painted at least 2 sailing dinghies that light blue that's why I stick with Humbrol colours as its the right consistancy without thinning for model work, at least you know the real Fairey's would have been brush painted It is cheating slightly painting the roof without the grab rails insitu !!

      I did the same with a litre of International deck paint

      No rain today what a relief !!

      Regards Ray

      Advert
      #105526
      Chris Fellows
      Participant
        @chrisfellows72943

        Hi Ray

        It was bad enough getting a decent finish without the roof rails being there!

        When I opened the tins of blue I was surprised at how thin it was. The white was probably like that when first opened but over time it's got thicker and I've had to thin it.

        Chris

        #105532
        Chris Fellows
        Participant
          @chrisfellows72943

          Well, that's another lesson learned!

          Started putting another coat on and thought no, this isn't going to work. The patchiness is due to me sanding after the first coat of gloss and going through the primer/undercoat in places. I should have applied another coat, but with the blue being quite dark, and my eagerness to start the glossing, thought it would cover Ok. Wrong, not even as well as the white. So I shall leave it to dry, sand it and start again!

          More haste, less speed!

          Chris

          #105620
          Chris Fellows
          Participant
            @chrisfellows72943

            I'm still painting!

            The patchiness wasn't all down to me! After virtually starting again by applying two coats of primer/undercoat and light flattening with micro-mesh I had a nice consistent base to start from. But even after three coats of gloss it's still patchy!

            Quite a few more coats to go methinks!

            Chris

            #105662
            Chris Fellows
            Participant
              @chrisfellows72943

              Don't worry I'm not going to mention painting! Though I have put more coats on and am still undecided about the colour.

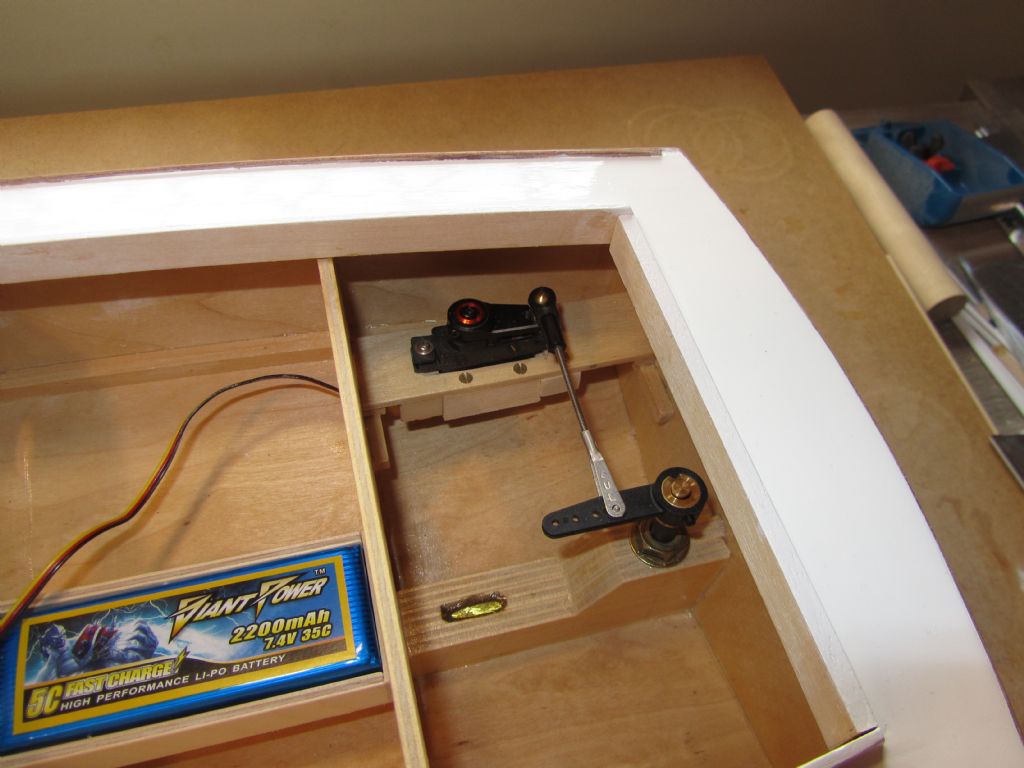
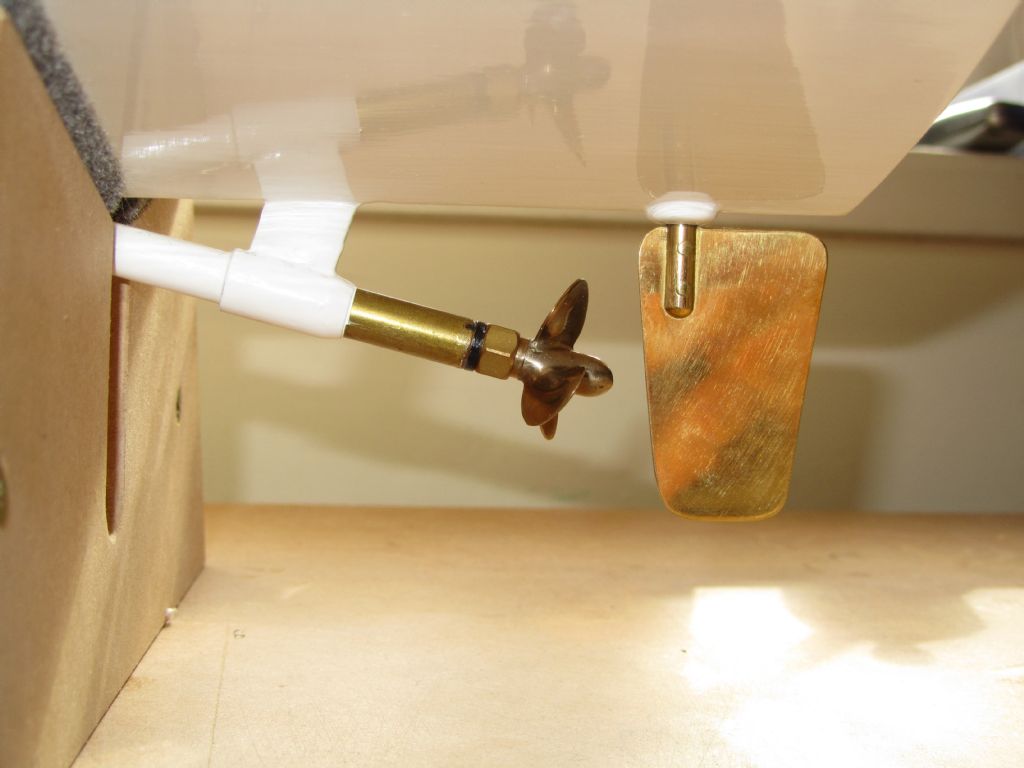
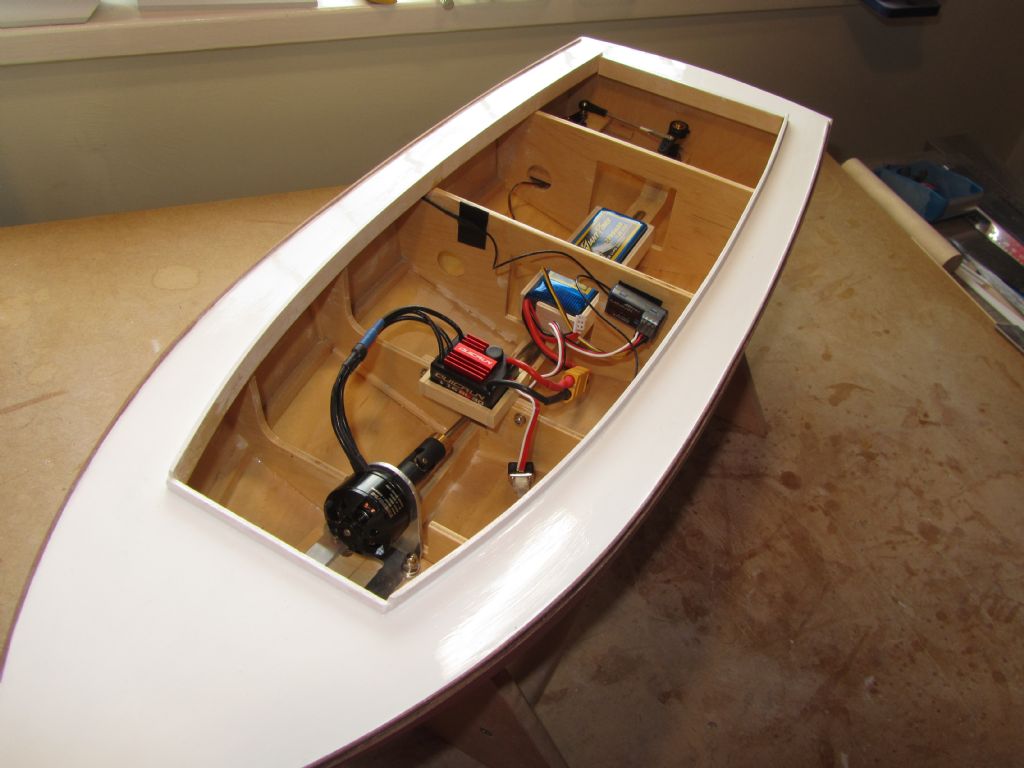
              No, I'm keen to try it on the water and so have completed the propulsion installation. I fitted a couple of bearers to the underside of the battery box I'd made earlier to locate it on the keel and fixed it in place with a brass screw. Then fitted the prop shaft and coupler, rudder and the radio gear.

              My concerns around setting up the ESC without a program card (the ESC doesn't facilitate the use of one) didn't materialise, though I had to read the instructions a few times and concentrate on the beeps and flashing red and green lights!

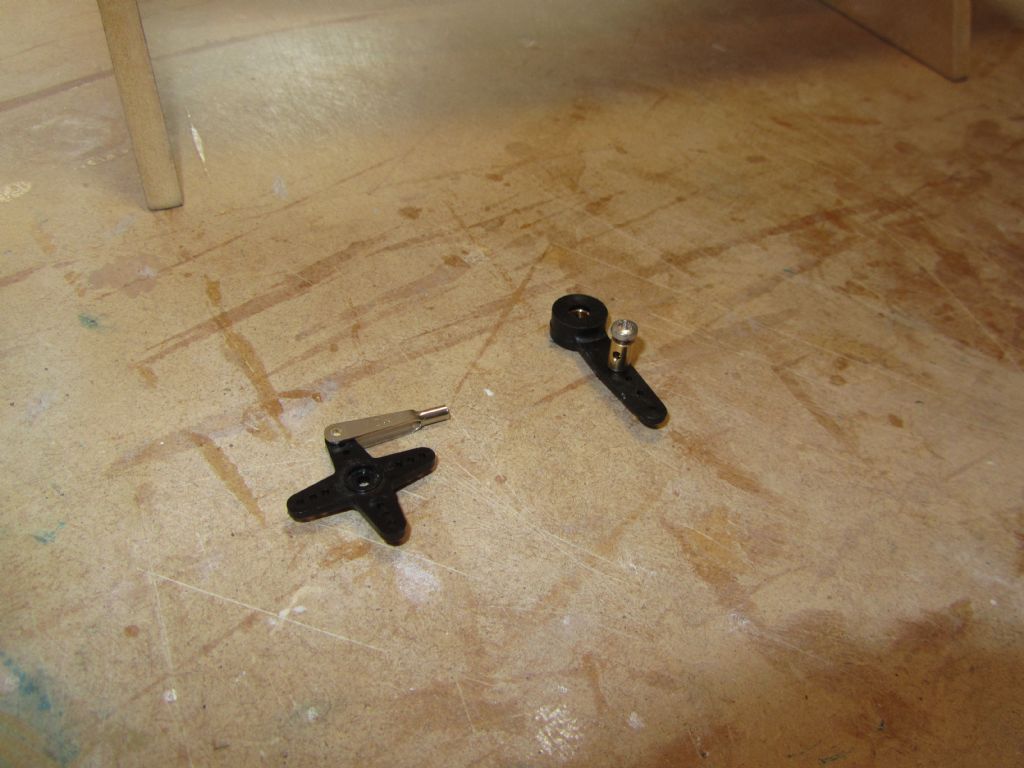
              As mentioned in Beginners I did have a bit of a problem with the rudder though. I'd fitted the small Hitec servo with one of the supplied actuators, a four armed one, but it wasn't big enough and on full rudder it was interferring with the clevis pin. So I replaced it with a Fastrax one (nice alloy!) with a longer throw and only one arm and fitted a ball and socket connecter. Trouble was that when going back to centre it was buzzing which it hadn't done before. After trying the rudder arm upside down, to change the angle of the rod, still no good and decided that it due to the clamp fitting on the rudder causing binding or pressure on the servo even though it turned freely.

              Before this I was going to replace the Fastrax arm with another plastic one I'd found but couldn't get it off! Whilst trying to get it off I found that the ball joint came apart reasonably easily, some don't and require a tool, and so I could use a clevis connecter on the rudder, screw in the threaded rod to adjust and then clip the ball joint back together. Silence, brilliant!

              Reduced the movement of the rudder (too much now) via the Tx and swopped a couple of the motor wires over, Velcroed the Rx to the bulkhead and taped the aerial in place and job done.

              So down to the lake soon.

              Chris
              rc installation 3.jpg

              rc installation 4.jpg

              rc installation 5.jpg

              rc installation 6.jpg

              #105732
              Chris Fellows
              Participant
                @chrisfellows72943

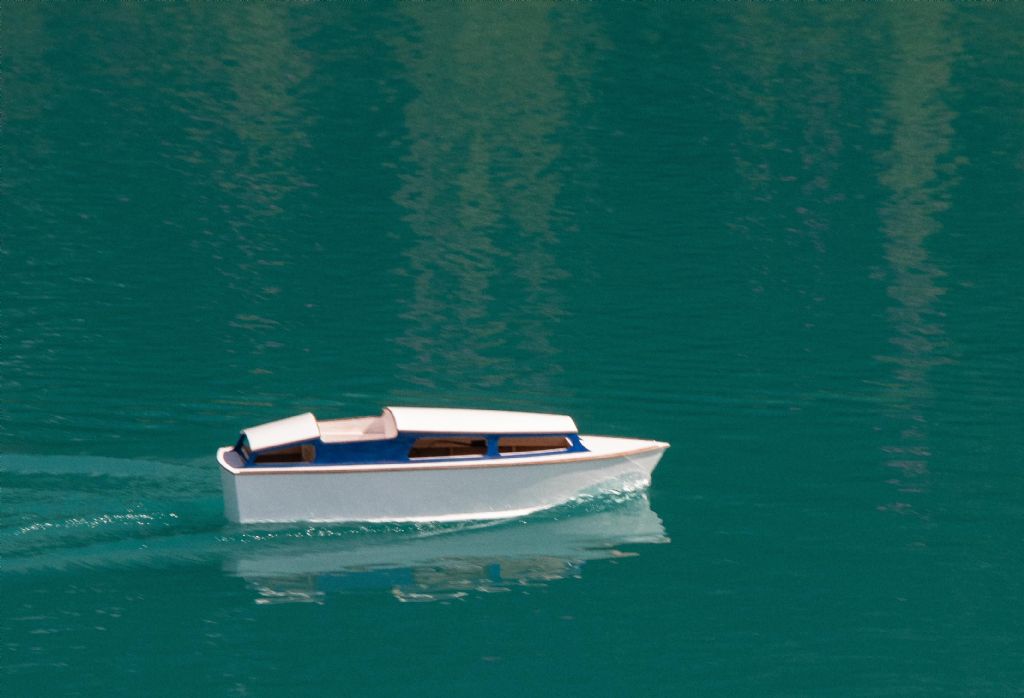
                Been to the lake to carry out trials. Kept to slow and medium speeds as is appropriate for a cruiser smiley and very pleased with the results.

                Quiet and pulls away smoothly with a bit of throttle.

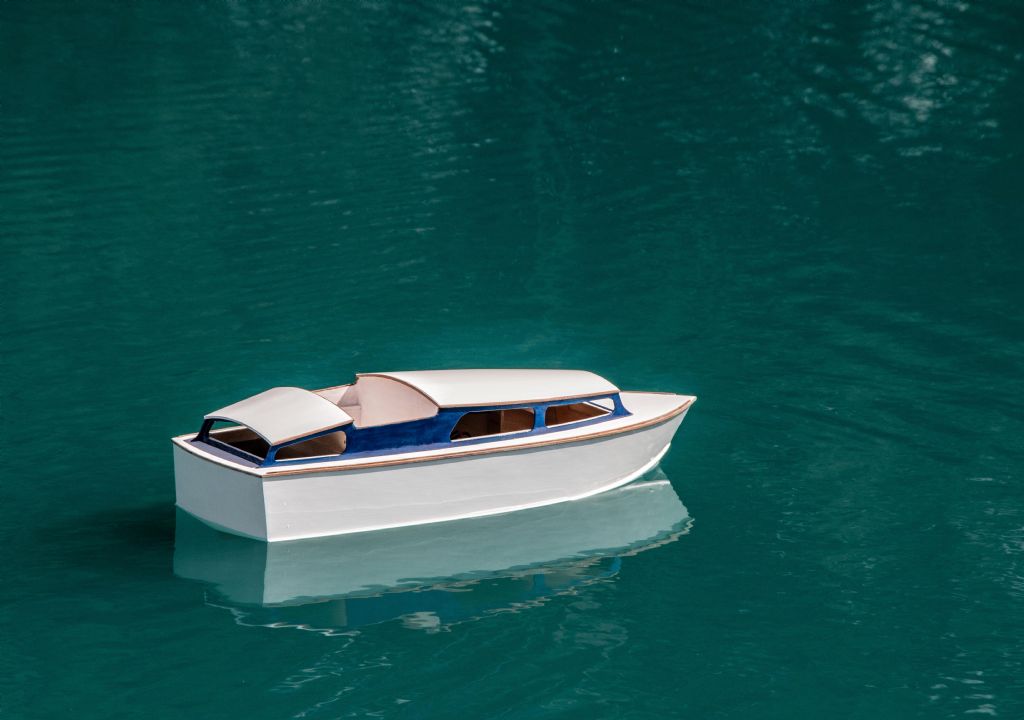
                Photos emphasize the increased freeboard over the Huntress hull which I think is why in the photograph there is what looks like a dark blue band immediately under the rubbing strip which I shall apply later.

                That's two that have seen water now!

                Chris

                river cruiser trials 1.jpg

                river cruiser trials 2.jpg

                #105733
                Colin Bishop
                Moderator
                  @colinbishop34627

                  Yes it does look boxy with that high hull. A generous stripe under the rubbing strip would certainly help to improve the proportions. Might be worth experimenting with a drawing to see how wide the stripe should be and whether it should be painted a bit further down leaving a narrow white area above it.

                  Maybe a curve down from the bow even?

                  The windscreen and mast will help to 'raise' the cabin height when fitted.

                  Looking back at the photo, you have certainly capured the shape.

                  Colin

                  #105734
                  Chris Fellows
                  Participant
                    @chrisfellows72943

                    Thanks Colin.

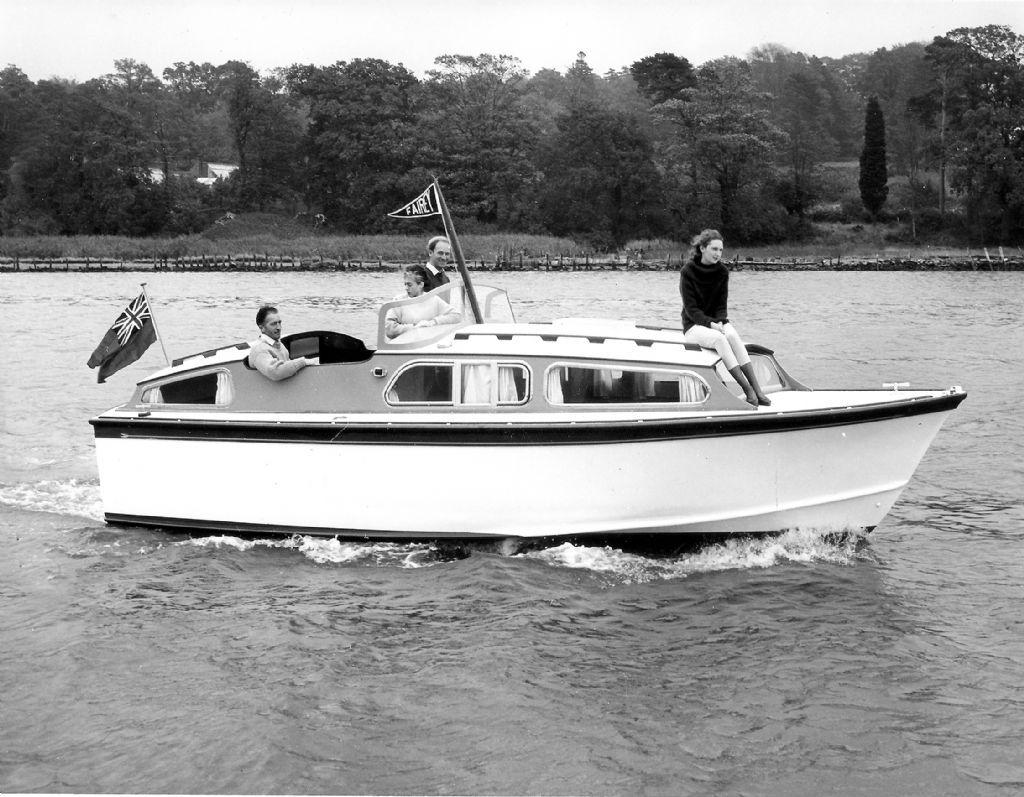
                    Being as there was only one prototype, plan was to replicate it as closely as possible, so I'm going to put the stripe under the rubbing strip as per the photo – this will mean only masking one edge as well! As you say, the windscreen and mast etc. will help as well.

                    I know I should paint the bottom of the hull also!

                    Adding the stripe in dark blue is why I've been disappointed with the colour on the cabin/cockpit sides, it's got to be much lighter. I'm going to try mixing the white and blue but failing that I'm going to have to use e.g. Craftmaster as International Paints don't do a light blue which is a bit surprising.

                    I've been assuming it's the blue as used on the Swordsman but maybe I'm completely wrong and it's another colour entirely?

                    Chris

                    Photo from my pre-build thread in Scratch Builds.

                    783157.jpg

                    Edited By Chris Fellows on 26/08/2023 17:22:51

                    #105735
                    Colin Bishop
                    Moderator
                      @colinbishop34627

                      I know I should paint the bottom of the hull also!

                      Yes, that would also help to 'squeeze' the white area.

                      I think this shows just how much a paint job can affect the appearance of a boat. The visual proportions do matter. The blue waterline and stripe under the rubbing strip make a huge difference in mnimising the height of the topsides and give the boat a much sleeker look.

                      Colin

                      #105736
                      Chris Fellows
                      Participant
                        @chrisfellows72943

                        Yes, I see that the hull colour is even above the chine rail to increase the effect.

                        #105737
                        Colin Bishop
                        Moderator
                          @colinbishop34627

                          This is an interesting example of how a paint scheme can enhance the appearance of a boat. The blue along the chine rail is quite significant.

                          On a larger scale the same apples to cruise ships, most of which have little sheer in the hull but a paint line can work wonders in improving the appearance.

                          Even the QE 2 benefited from this.

                          With the Faireys, sonetimes painting the transom in a different colour (blue) can prove effective. Not sure if that would work with the River Cruiser but it's just a thought. All good fun!

                          Colin

                          #105740
                          Ray Wood 3
                          Participant
                            @raywood3

                            Hi Chris,

                            I agree with everybody's comments about narrowing the white topsides to make her look longer, poor little boat looks like they just chopped 10 feet off the back of a H31

                            I would also put a couple pf pounds of ballast at the stern to bring her nose up ? currently she looks like a powerboat which wants to get up on the plan ?

                            Tugs & Warships at the Cygnets at Mote Park Maidstone today so I have dug out a couple of my older boats for a run Cullamix & HMS Diamond neither have seen the water in the last couple of years !

                            Regards Ray

                            #105786
                            Chris Fellows
                            Participant
                              @chrisfellows72943

                              Painting again, sorry!!

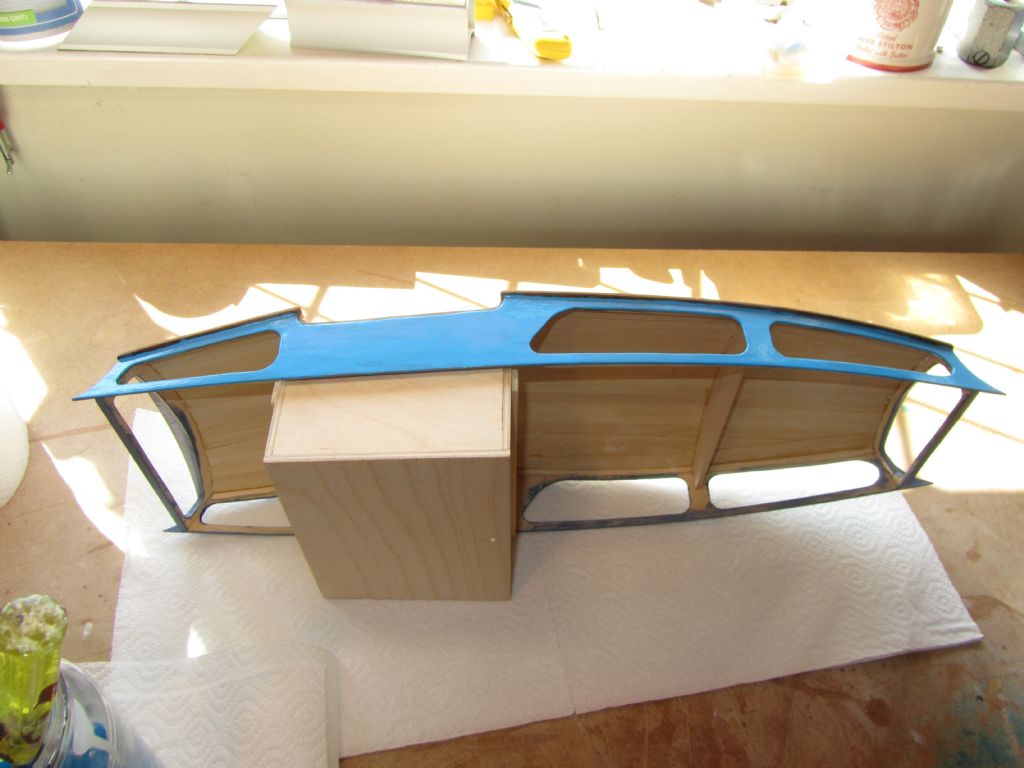
                              Sanded down the cabin/cockpit sides and the front and rear windows and for the third time applied a coat of primer/undercoat. This morning gave it a sanding with fine micro-mesh.

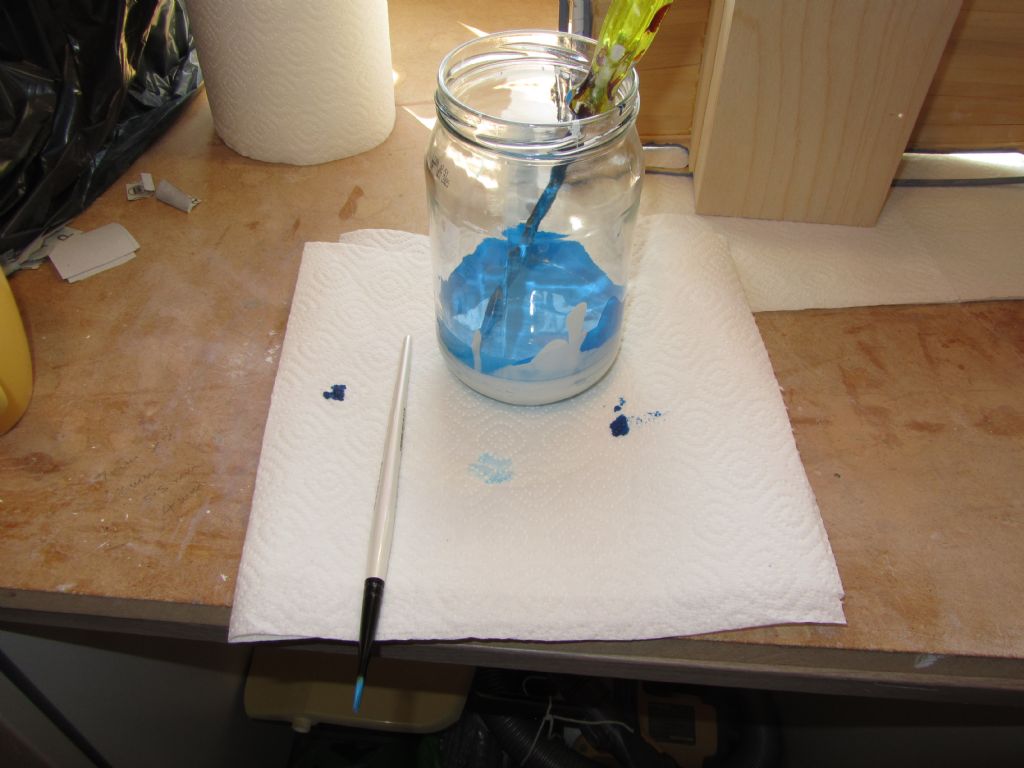
                              Then I mixed up some white and Sapphire Blue topcoat, about 50/50, which came out the colour I wanted all along and annoyingly very close to the colour on the Bondi Blue tin!

                              Applied one coat to the sides and found that it covered better than the Bondi Blue, no doubt because of the white, which covered well. Few coats of this and I shall be happy, third time lucky! This will link it to the colour-scheme to be used on the Swordsman.

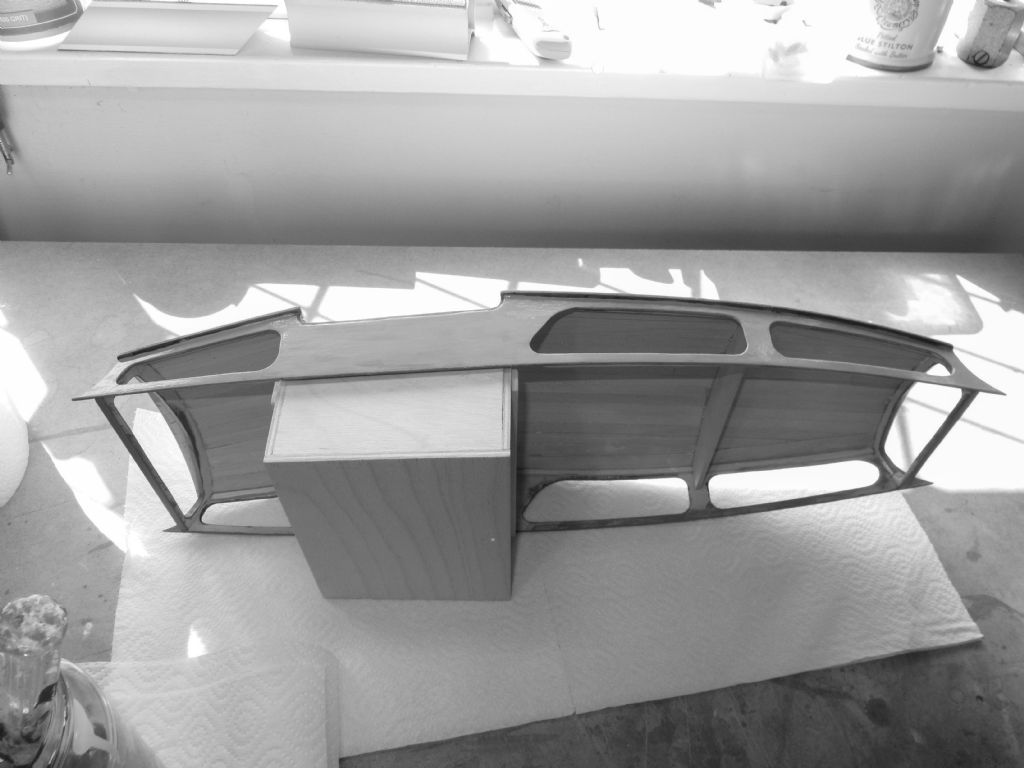
                              Black and white photo shows this is pretty close to that shown in the full-size photo shown previously.

                              painting 9.jpg

                              painting 10.jpg

                              river cruiser light blue b+w.jpg

                              #105788
                              ashley needham
                              Participant
                                @ashleyneedham69188

                                That’s a lovely blue to be sure.

                                b/w picture interesting. I have de-coloured a few of my 30’s specials photos and they look very period, almost to the point that they should only be seen in b/w.

                                Ashley

                                #105791
                                Chris Fellows
                                Participant
                                  @chrisfellows72943

                                  Thanks Ashley, and the photo doesn't do the blue justice really. Advantage of mixing your own is that if it starts getting too dark then more white can be added. Well, I suppose you can do that anyway!

                                  It was interesting when going through a box of old photographs at my mother's. Start off with black and white and then progress to colour which initially don't look real as you have got used to looking at the b&w ones.

                                  Chris

                                  Edited By Chris Fellows on 31/08/2023 09:47:19

                                  #116485
                                  Chris Fellows
                                  Participant
                                    @chrisfellows72943

                                    Started to do a bit more again on and off over the last few days.

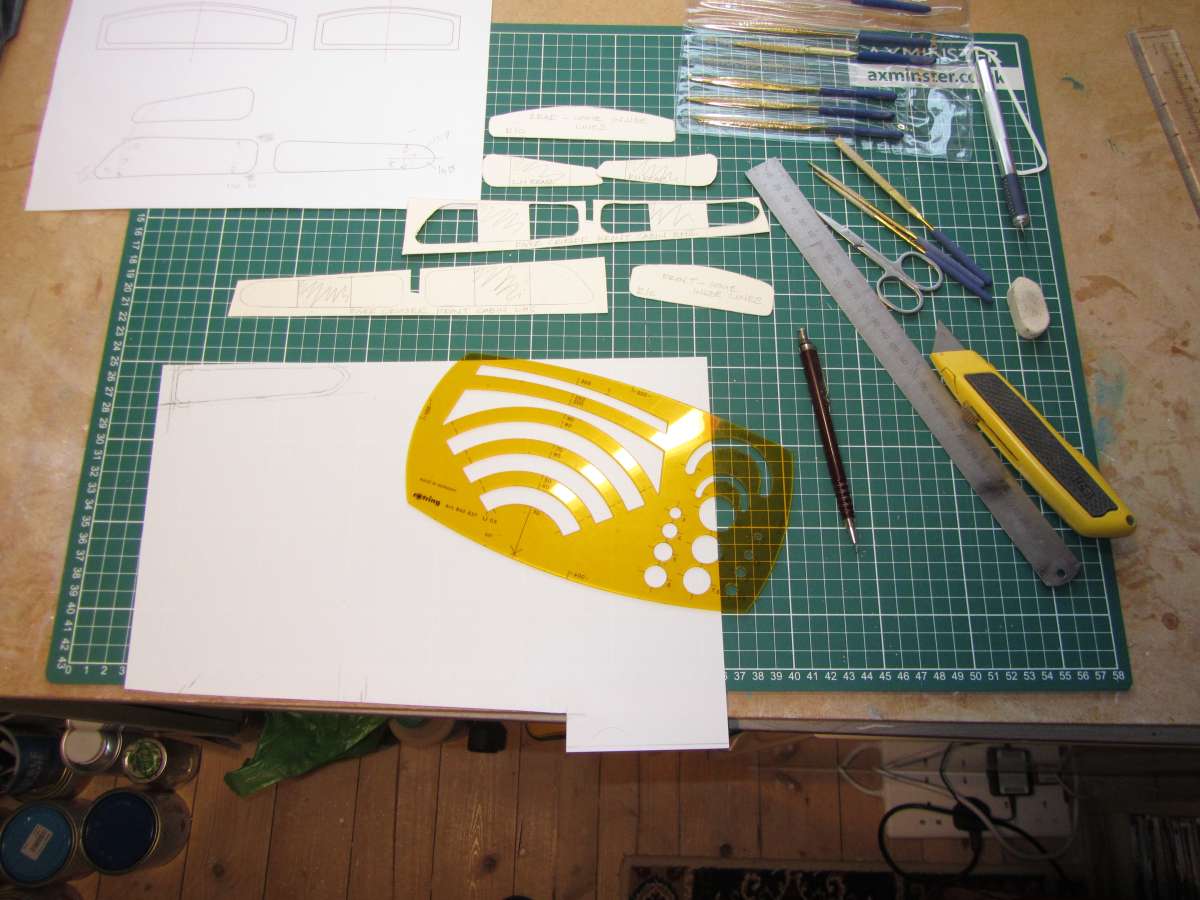
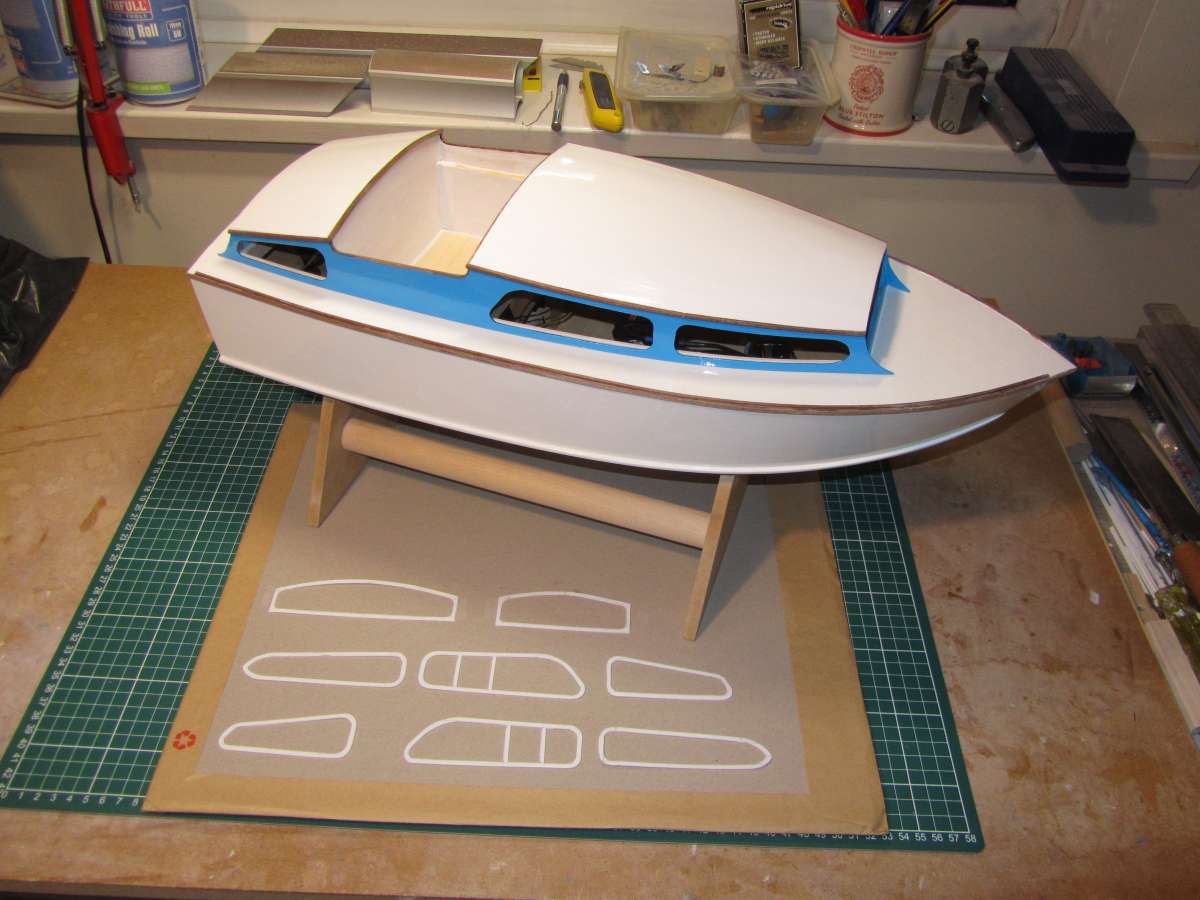
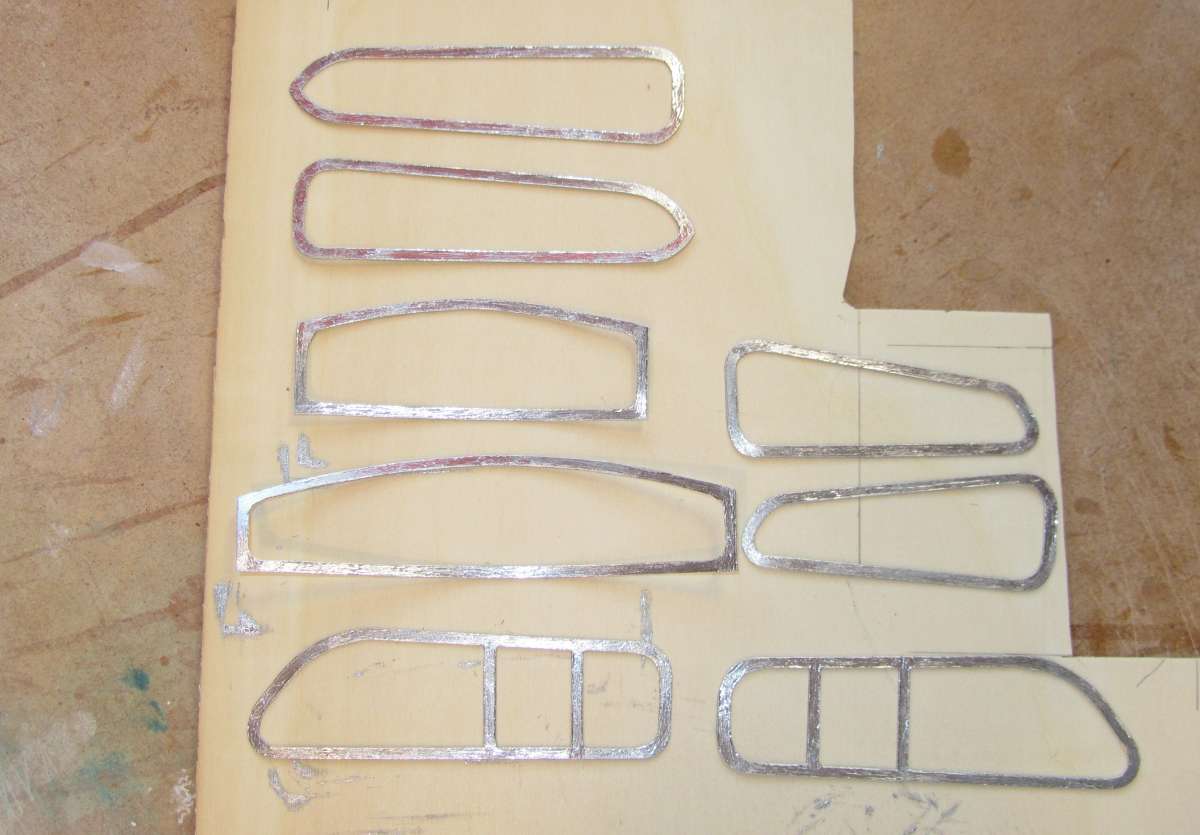
                                    Cut the windows out of 0.5mm styrene sheet, all eight of them, and after a bit of fettling with needle files and fine grit paper I gave them a coat of paint.

                                    Whilst that’s hardening off ready for gluing to the acetate I can start thinking about fitting out the cockpits to this and the Huntress which I’m looking forward to.

                                    Chris

                                    Windows 1Windows 3Windows 4

                                  Viewing 16 posts - 101 through 116 (of 116 total)
                                  • Please log in to reply to this topic. Registering is free and easy using the links on the menu at the top of this page.

                                  Code of conduct | Forum Help/FAQs

                                  Advert

                                  Latest Replies

                                  Home Forums Build Blogs Topics

                                  Viewing 25 topics - 1 through 25 (of 25 total)
                                  Viewing 25 topics - 1 through 25 (of 25 total)

                                  View full reply list.

                                  Advert