Fairey 23 River Cruiser

Advert

Fairey 23 River Cruiser

Home Forums Build Blogs Fairey 23 River Cruiser

  • This topic has 115 replies, 1 voice, and was last updated 5 months ago by Chris Fellows.
Viewing 25 posts - 1 through 25 (of 116 total)
  • Author
    Posts
  • #75559
    Chris Fellows
    Participant
      @chrisfellows72943

      Further to my thread in Scratch Built I've now started the actual building process so will continue in here.

      Given the association between the River Cruiser and the Huntress (hulls built from the same mould but for the RC with it's reduced vee tapered blocks were laid in the bottom of the mould and the freeboard increased) I thought it only right and proper to continue this association and nick Dave's construction method for his Huntress i.e. building upside down off a flat deck – thanks Dave.

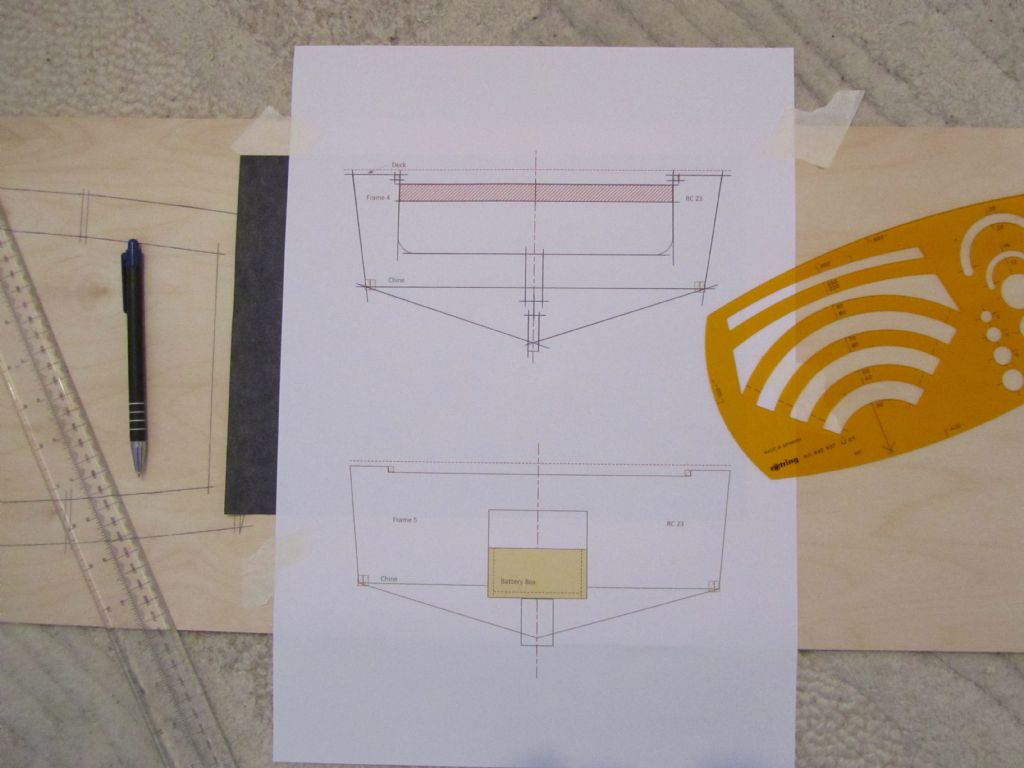
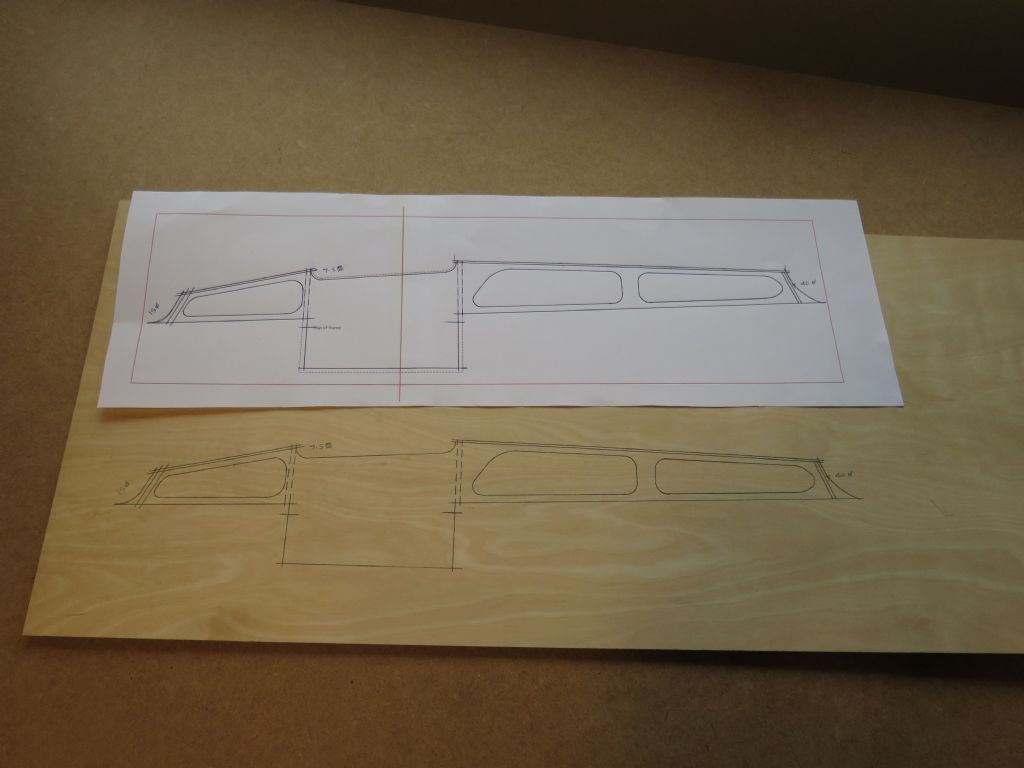
      I transferred my drawings to the ply using the carbon paper method which I favour (well apart from when I start tracing and have forgotten the carbon paper!) onto the flattest parts of the ply I could find. Is anyone able to obtain flat 3mm ply or is it all warped to varying degrees! Not a major problem as the frames etc. aren't that big and the deck will be clamped down during construction.

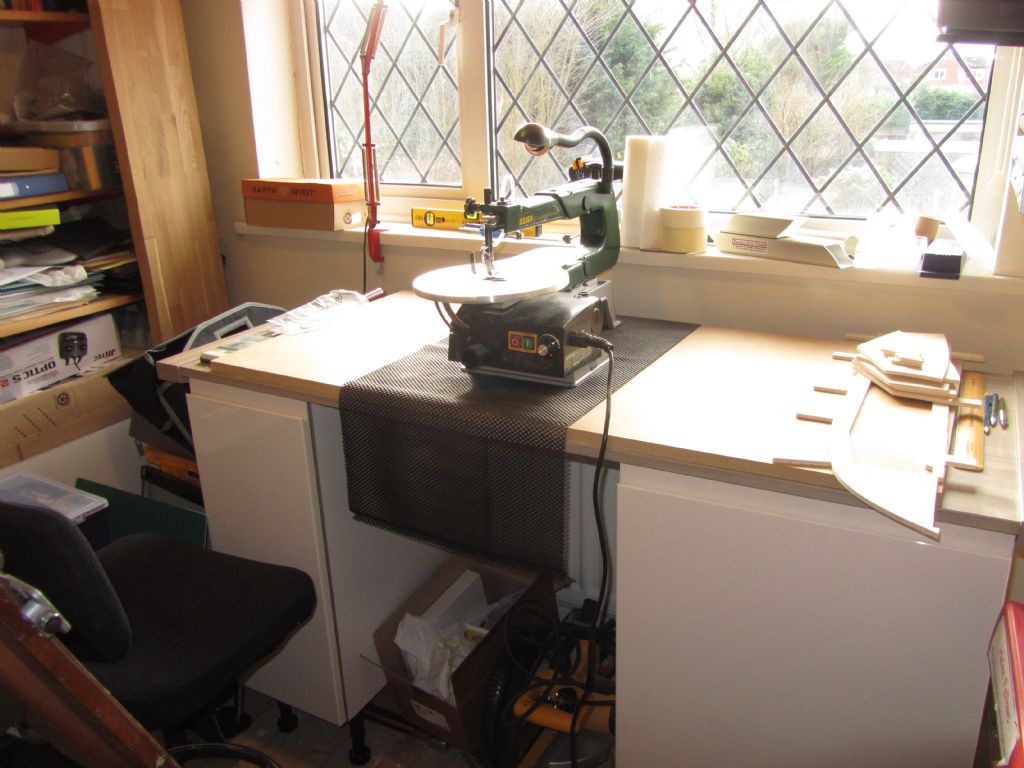
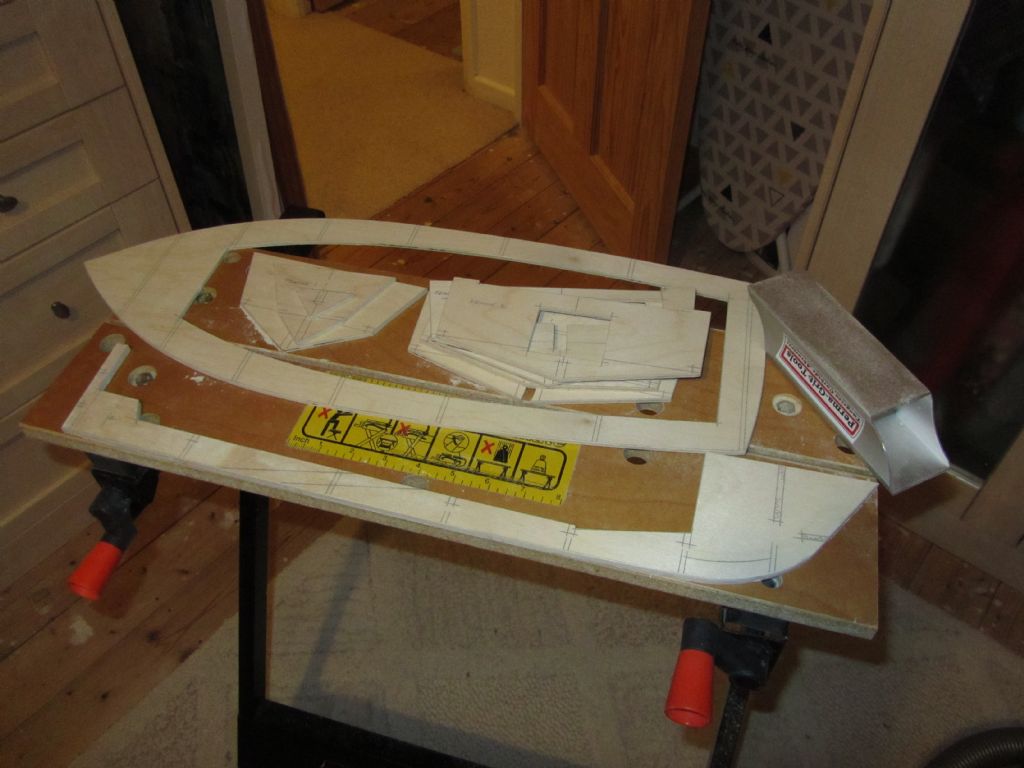
      Had a quick tidy up of the work area; tools and the offcuts from the Swordsman build and set to cutting out the parts for the hull about 1mm from the lines followed by sanding.

      This wasn't carried out as quickly as it sounds and was carried out over a couple of weekends and a little time during the week as I'm still working part-time.

      Tomorrow I'm going to finish sanding the Swordsman hull parts I've cut out (started before Christmas) and then it will be out with the glue! It's all gone pretty well so far!

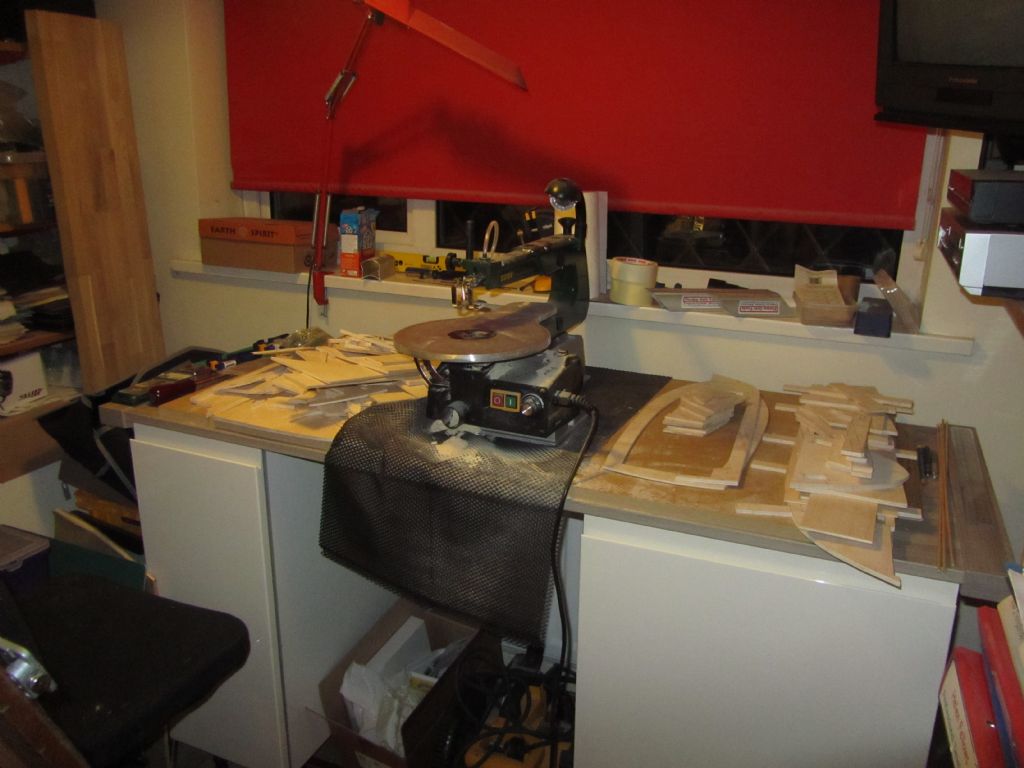
      I've added the photos separately:  Tidied up, transferring to ply, sanded and not so tidy!

      Chris 


      Edited By Chris Fellows on 03/02/2018 22:00:13

      Advert
      #9763
      Chris Fellows
      Participant
        @chrisfellows72943

        Scratch Build of a Prototype

        #75560
        Chris Fellows
        Participant
          @chrisfellows72943

          tidied up.jpgtransferring.jpgsanded.jpg

          not so tidy.jpg

          Edited By Chris Fellows on 03/02/2018 21:48:51

          #75561
          Colin Bishop
          Moderator
            @colinbishop34627

            Looking good Chris.

            Colin

            #75566
            ashley needham
            Participant
              @ashleyneedham69188

              Yes, looking good so far.
              BUT a bit of sawdust and a pile of cut items is not untidy in my book!! You should see my workspace halfway through the build!

              Ashley

              #75582
              Chris Fellows
              Participant
                @chrisfellows72943

                Sorted out the useful off cuts and the rest has gone down the tip. I think ply is like mustard, they make their money from what you throw away!

                Tidy again now, it's my only workspace so it needs to be. Well apart from having the Workmate in the bedroom and sitting on the bed doing the sanding!

                That photo reminds me, I must finish decorating the bedroom and get some carpet fitted! Winter is for modelling though, so that can wait. My wife mentioned it the other day, it's only been a couple of years!

                #76017
                Chris Fellows
                Participant
                  @chrisfellows72943

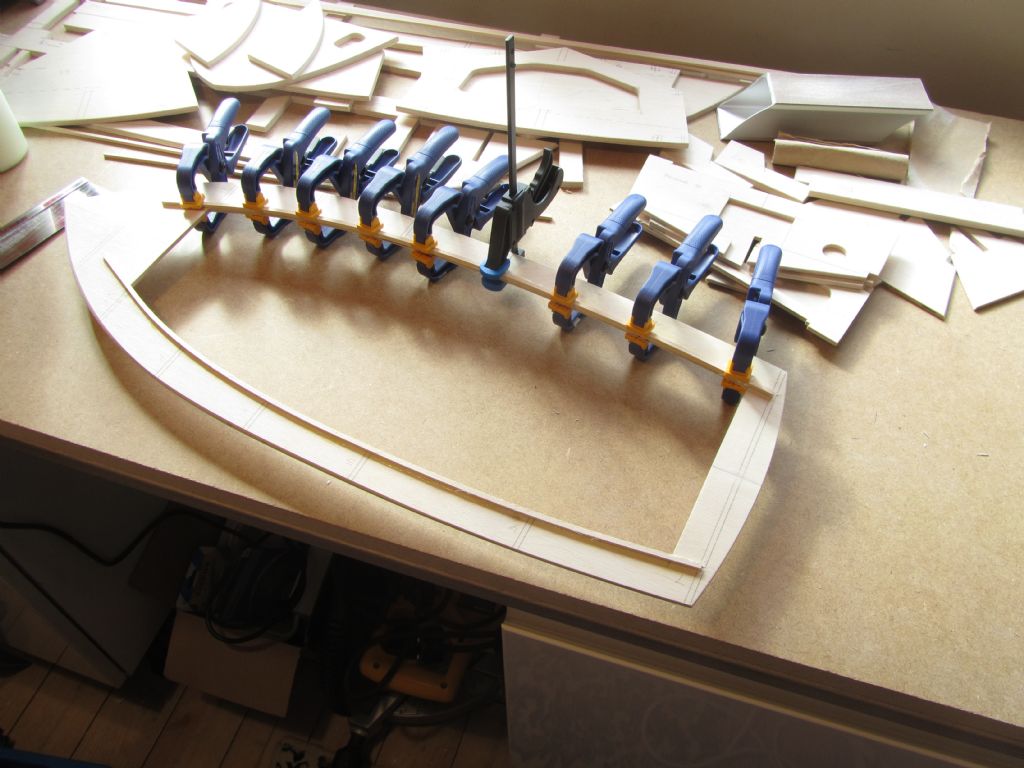
                  Progress has been slow of late for various reasons but I'm back on the case and I've been spending time cutting out the cut-outs for the stringers and slots in the frames and keel.

                  I've also done a dry fit of the deck, frames and keel and have done some preliminary sanding to angle of the deck top edge and at the bow end of the keel whilst it's easy being able to hold them in the Workmate and not having the frames in the way.

                  Surprising how long all this takes (well it does for me!) but it will make it easier in the long run.

                  I've also been doing the same with the Swordsman so that is making progress as well.

                  Chris

                  #76099
                  Chris Fellows
                  Participant
                    @chrisfellows72943

                    timber to inside.jpgpropshaft hole.jpgpropshaft check.jpgProgress is steady but at least I'm making some now!

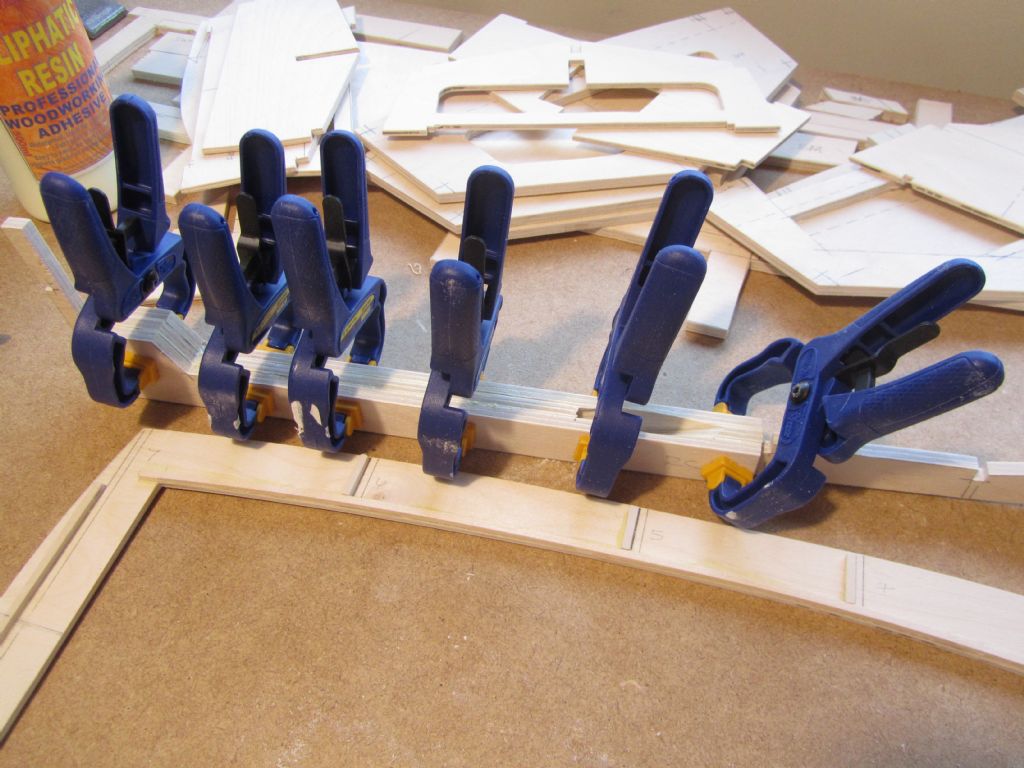
                    Fitted the 3 x 3 timber that goes around the inside of the deck.

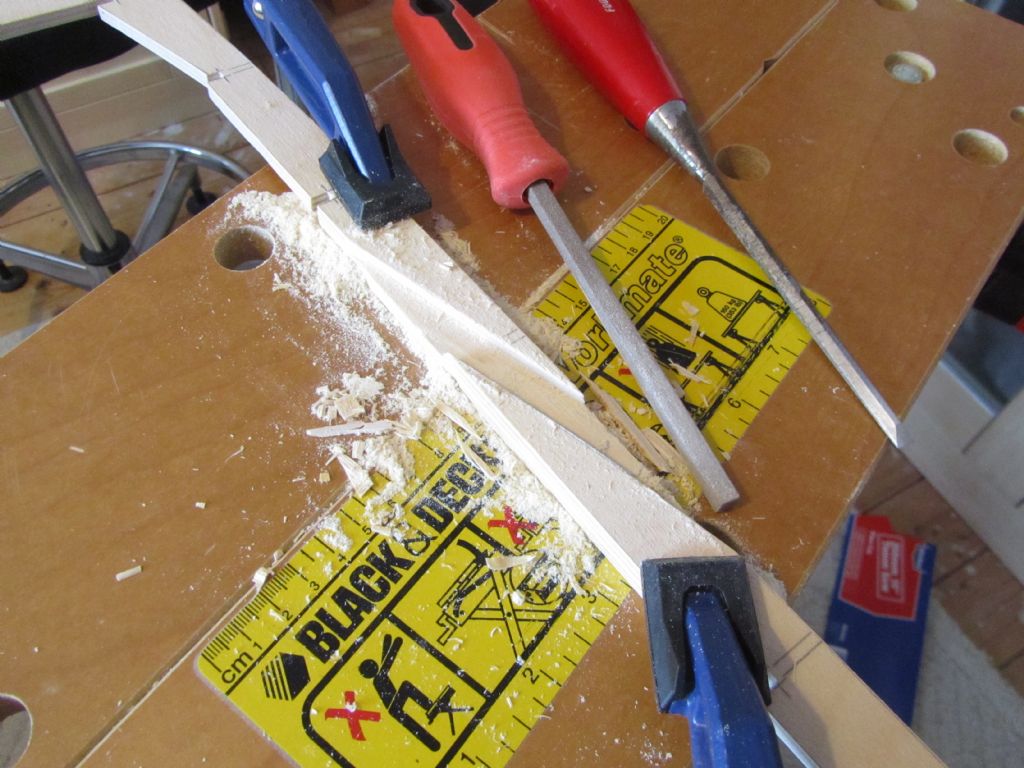
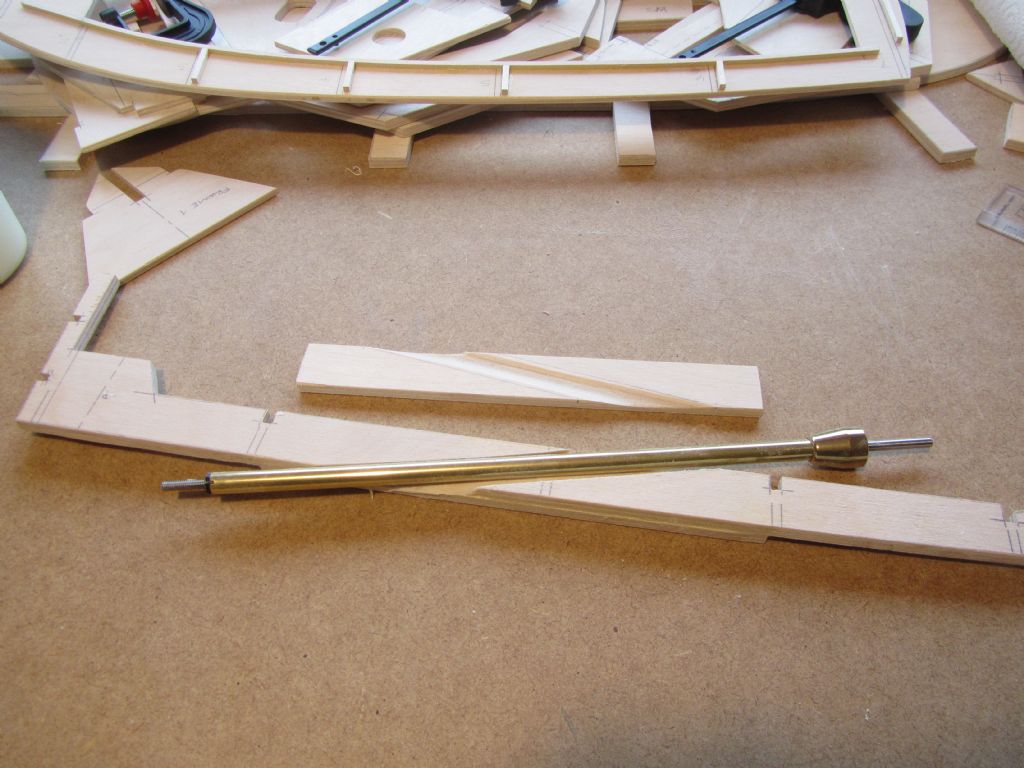
                    Then glued one of the doublers to the keel where the prop shaft goes. Woke up this morning with the thought "why didn't I put some tape where the prop shaft goes so that the doubler and keel don't stick at that point"? Two saw cuts and the strip of timber would be out. Lesson learnt for next time! Not much of a problem though as a few minutes with a chisel and file soon sorted it.

                    Then a few more minutes, well quite a few, with the round file, working on the doublers to provide sufficient room for the prop shaft. After a test fitting I glued the other doubler in place.

                    Plan for the weekend is to glue the deck, frames and keel together and fit the chine stringers ready for the skins – gulp!

                    Chris

                    doublers.jpg

                    Edited By Chris Fellows on 02/03/2018 17:36:16

                    #76134
                    Chris Fellows
                    Participant
                      @chrisfellows72943

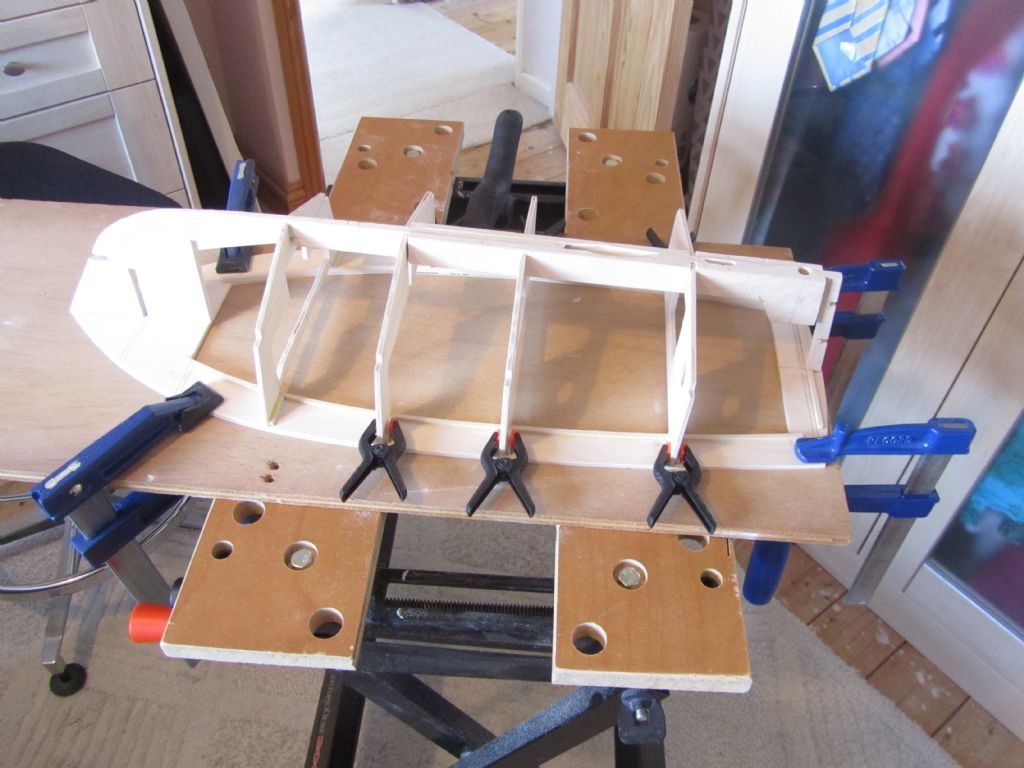
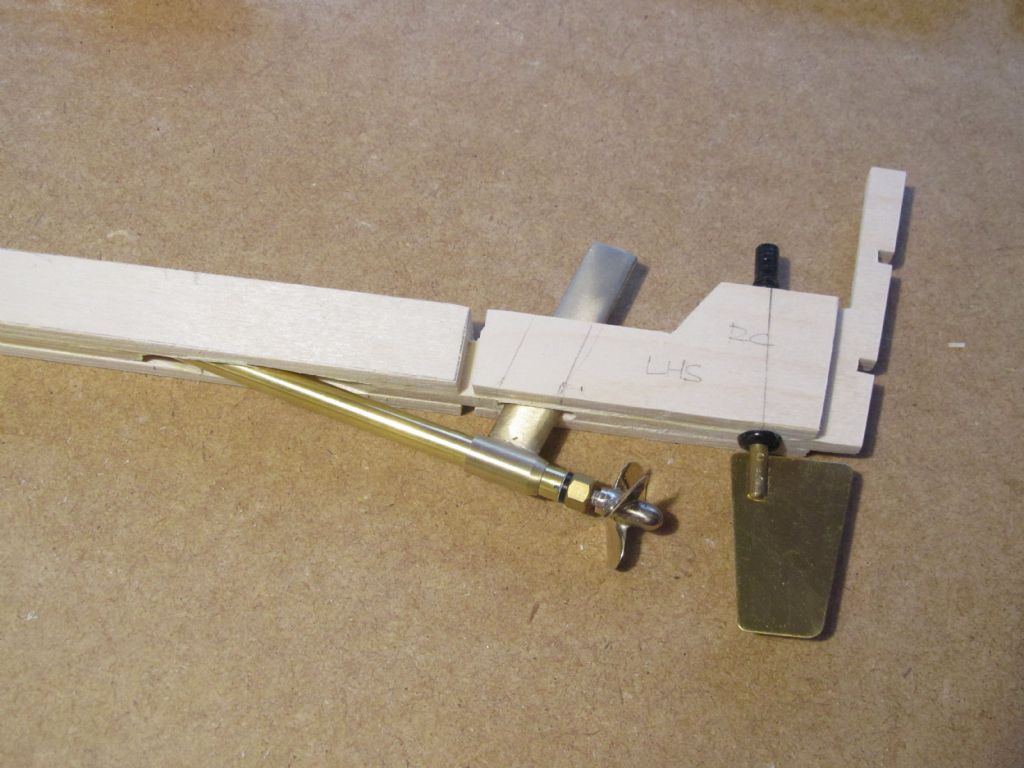
                      frames glued.jpgBit more progress; holes drilled/filed for rudder and P bracket and test fitted. Most of the frames glued to the deck.

                      Whilst they dry I've dropped back onto the Swordsman so it won't be long before I start assembling that as well.

                      Chris

                      rudder etc fitting.jpg

                      #76172
                      Chris Fellows
                      Participant
                        @chrisfellows72943

                        Didn't get as much done as planned at the weekend because the washing machine decided it didn't want to play. Spent some time trying to get it to work but no luck. It's a few years old now and has been making some noises on and off for sometime so no big surprise. So a trip to Currys PC World was called for and a new one ordered. Being delivered Sunday, so what with taking out the old one and installing the new one that's going to be a big chunk of next weekend written off.

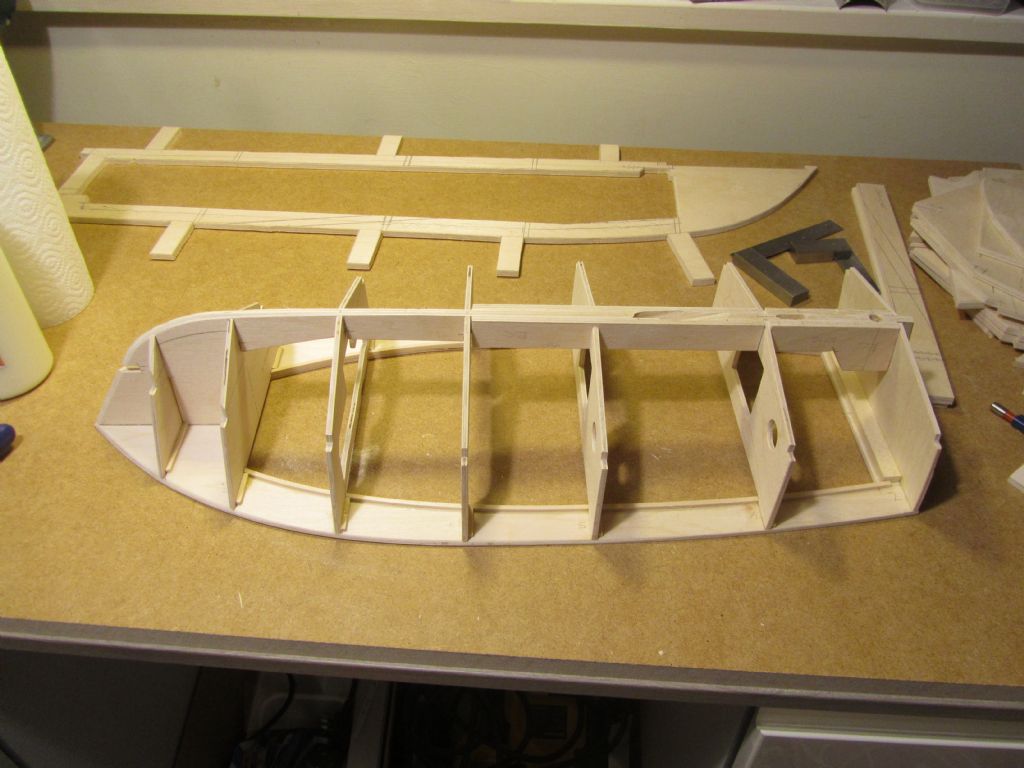
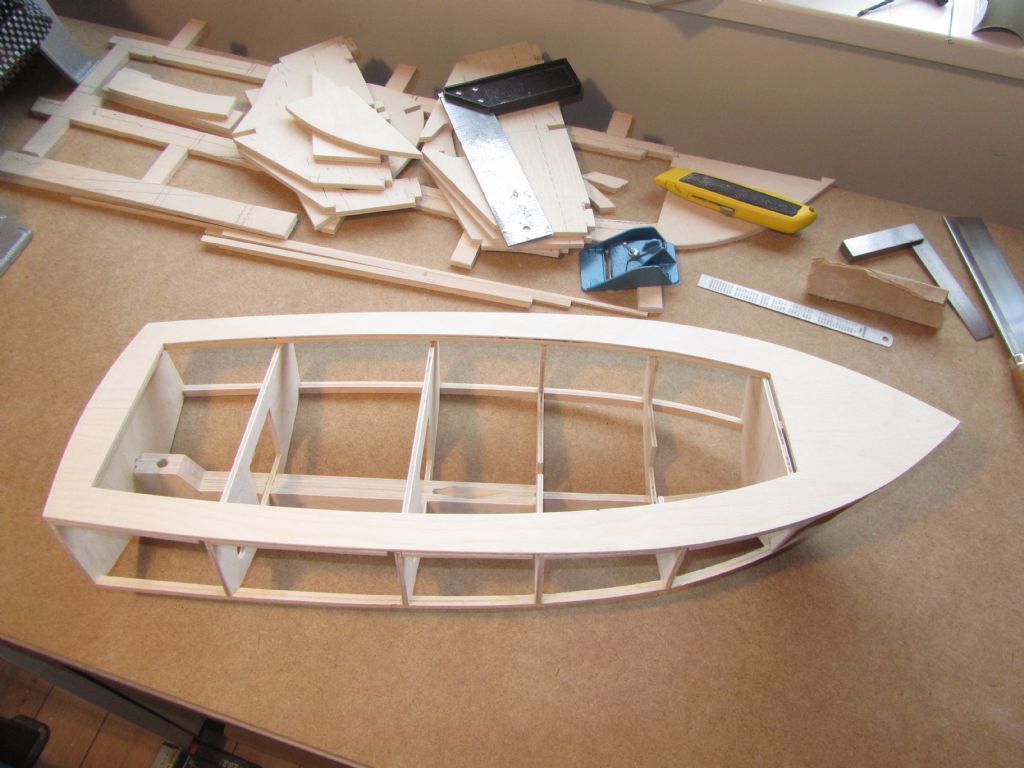
                        Anyway been doing a bit more and all the frames are now glued in place. Rather than have the more usual upright frame just ahead of the transom I decided to have it on an angle to follow the line of the transom. Seemed like a good idea when I was doing the drawings! Anyway having cut it out and sanded the top edge at an angle to suit the deck I found that there was a gap between the frame and the deck. I could have overcome the problem but I decided to cut out another one which didn't take long and with a bit of sanding fitted nicely.

                        Another thing, I wished I hadn't profiled the edge of the deck at the bow before fitting the frames now. I overdid the angle a bit. Not a major problem and I can soon sort it. As said before, all part of the learning process and will be put down to experience.

                        Chris

                        Frames completed

                        #76768
                        Chris Fellows
                        Participant
                          @chrisfellows72943

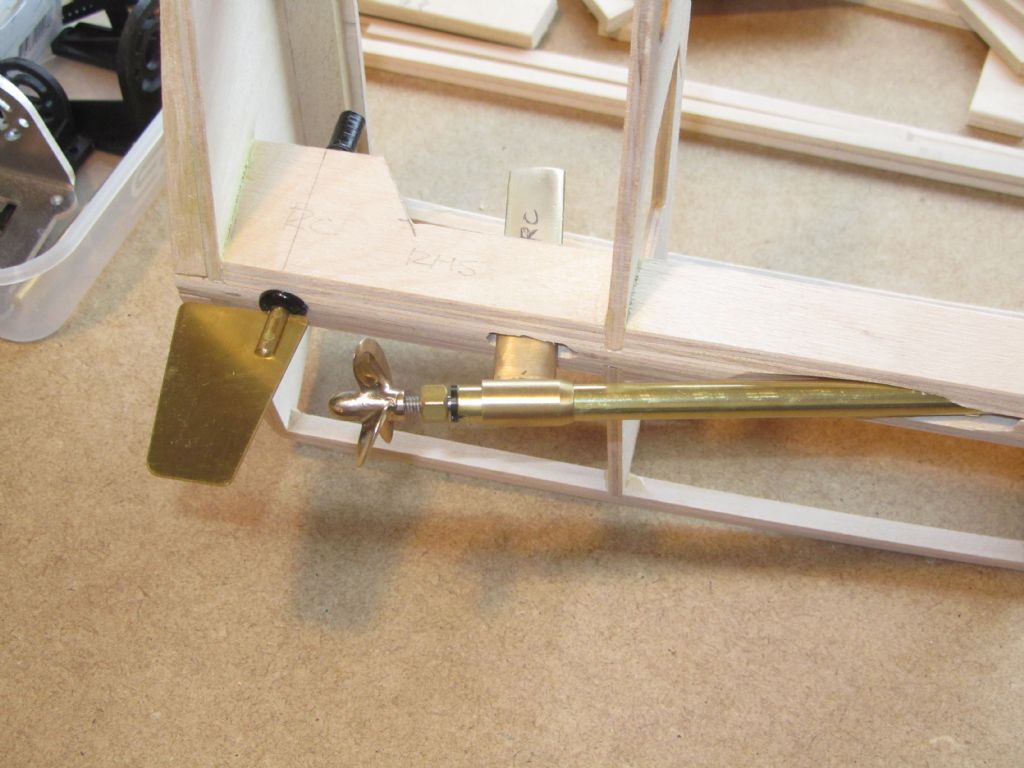
                          rudder & prop etc.jpgtransom.jpgWell progress is still steady. Trouble is I keep getting distracted. Had to fit a couple of intumescent fire collars to the soil pipe and waste to the bathroom where they go through the garage ceiling which also needed some additional boxing and my SiL has decided to have an extension on the house which I've started doing the drawings for.

                          Anyway, profiling of the keel and stringers wasn't as bad as I thought it was going to be and the hull is now ready for skinning. Something else I'm not relishing but hopefully will go as well as the profiling. Once that is done I will feel much more confident for my next build – don't forget this is my first ever!

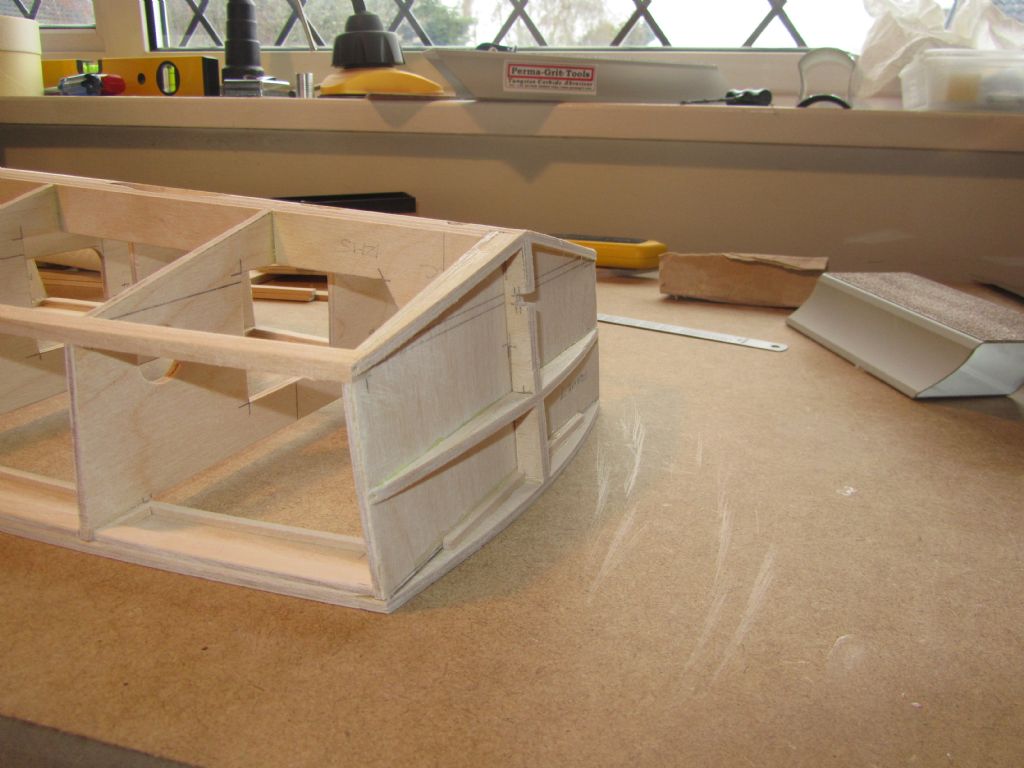
                          I've also fitted the framing to the transom and sanded to shape. As you can see it didn't need the intermediate former, all part of my learning!

                          Have also made and dry-fitted the ply base for the motor mount whilst access is still easy and also test fitted the prop shaft and rudder again.

                          Whilst waiting for glue to dry I've been doing a bit more on the Swordsman but won't post until more progress has been made.

                          Chris

                          taking shape.jpg

                          #80043
                          Chris Fellows
                          Participant
                            @chrisfellows72943

                            After many months I've returned to the River Cruiser.

                            As with the sanding/profiling of the stringers, the fitting of the skins is another task that I was apprehensive about, and despite putting off the day of reckoning by starting the building of the other two hulls, they are at the same stage, so I could procrastinate no longer!

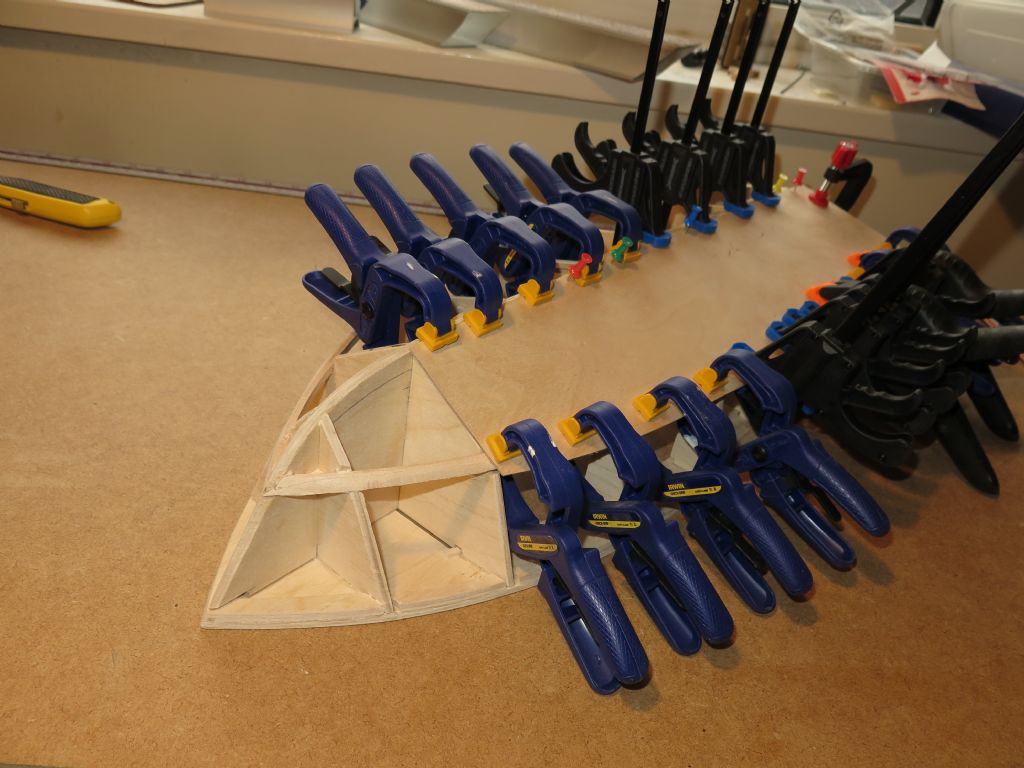
                            So, this morning I cut out and fitted the first of the bottom skins. I've used 1.5mm birch ply which is very nice and will be a pity to paint! Holding it in place using pins wasn't very successful so as you can see I used a multitude of clamps! Don't know how I'm going to clamp along the keel when I do the other side though, probably use some weights.

                            Will do the other bottom skin tomorrow and feeling more confident now, but I'm not counting my chickens as I'm sure to have problems fitting the side skins.

                            started skinning.jpg

                            #80061
                            Chris Fellows
                            Participant
                              @chrisfellows72943

                              Took the clamps off yesterday and was a little peeved to find that the skin had moved whilst clamping. Only by a small amount, about 1.5mm, but if I'd noticed it I would have repositioned it. No real problem as a bit of filler will sort it, but annoying.

                              Also, where the skin curves towards the bow, it had sprung the stringer out of the second frame. Serves me right for not steaming it. But as it didn't take much force to bend it I thought it would be OK. Another lesson learnt! Again, it's not much but I know it's there. As before, not much of a problem to remedy.

                              I then did the other bottom skin but couldn't get it to sit tight along the keel, even using some weights, as the birch ply is quite stiff. Had to resort to using some small screws. I steamed it this time which made it much easier to fit.

                              Then tonight I fitted the first skin on the Huntsman 28. Actually found this a little easier, being a bigger hull I suppose. Not all plain sailing though as again the skin slipped when clamping despite putting some pins in first – but at least I was looking out for it this time. So took off all the clamps, pulled it off, reglued it and clamped it again. Then blow me it slipped again. I thought modelling was supposed to be relaxing, I was started to get a little stressed! But third time lucky I had it beat!

                              #80062
                              Ray Wood 3
                              Participant
                                @raywood3

                                049.jpgHi Chris,

                                We need to look at how Aerokits were put together as they had it right, with no clamps in sight ! Brass flat head pins to secure the 1/16" ply to the frames, I drill the ply with a no.70 drill to give the pin a start and knock in with a tack hammer it works what adhesive are you using?

                                Regards Ray

                                Edited By Ray Wood 2 on 27/11/2018 22:19:21

                                #80063
                                Chris Fellows
                                Participant
                                  @chrisfellows72943

                                  Hi Ray – mainly aliphatic resin which I have to say in the main I have found to be brilliant. The problem with the stringer was partly due to it having a small gluing area due to a poorly cut out notch and the force on it from not steaming the skin. As I said lesson learnt.

                                  Apart from the odd stressful moments I'm really enjoying the builds which is what it's all about. I'm looking forward to finishing the hulls though and getting on with the superstructures.

                                  Cheers, Chris

                                  #80064
                                  Eddie Lancaster
                                  Participant
                                    @eddielancaster

                                    Hi. Chris, that is one smart looking boat, I am looking forward seeing it finished and on the water.

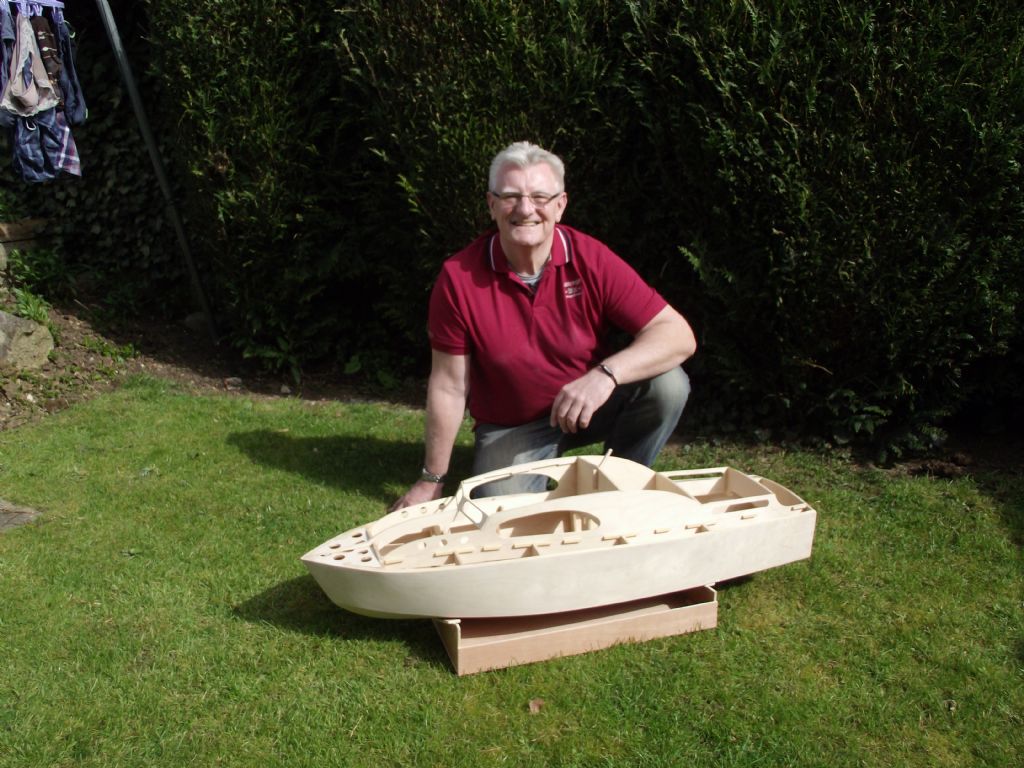
                                    You don't get an impression of the size of a boat until you have something to compare it with, as in your photo, in my early days of model boats that would have had a big infernal commotion engine to drive it!

                                    Best wishes.

                                    Eddie.

                                    #80066
                                    Chris Fellows
                                    Participant
                                      @chrisfellows72943

                                      Thanks Eddie. Are you getting confused with Ray's boat?

                                      My River Cruiser is based on the Fairey Huntress hull (but with a deeper freeboard etc.) and at the scale I'm building it at, i.e. 1:12, it's only 23" long, so not that big. As it's a cruiser rather than a sport boat I'm putting a relatively low powered motor in it.

                                      I'm also looking forward to seeing it finished! See one of my albums for how the River Cruiser will look.

                                      Cheers, Chris

                                      #80067
                                      Ray Wood 3
                                      Participant
                                        @raywood3

                                        Hi Eddie,

                                        Yes that's my part built Sea Queen 46" long is big, but only floated it twice and sold it, but may scratch build another one from the drawings and SLEC cheap cross-grained ply

                                        Regards Ray

                                        #80158
                                        Chris Fellows
                                        Participant
                                          @chrisfellows72943

                                          We're cooking on gas now, though it's on low!

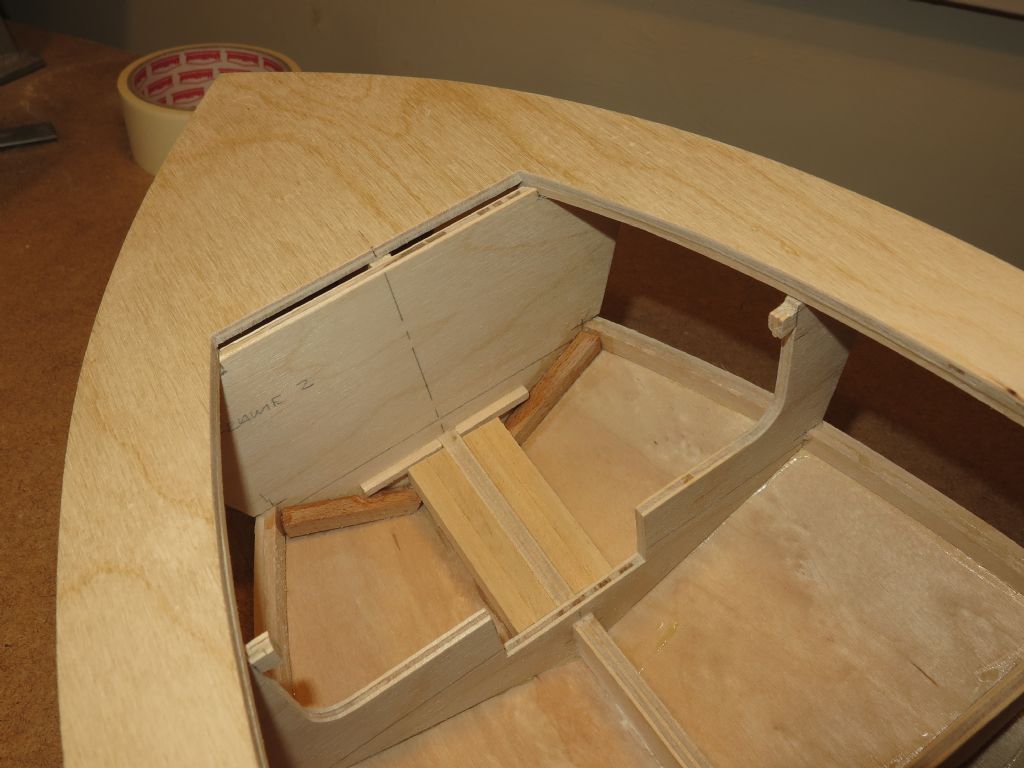
                                          Fixed the errant stringer, piece of beech glued in place with InstaTite thick CA. That ain't going anywhere! Did the other side as well for balance and so that it looks intentional!

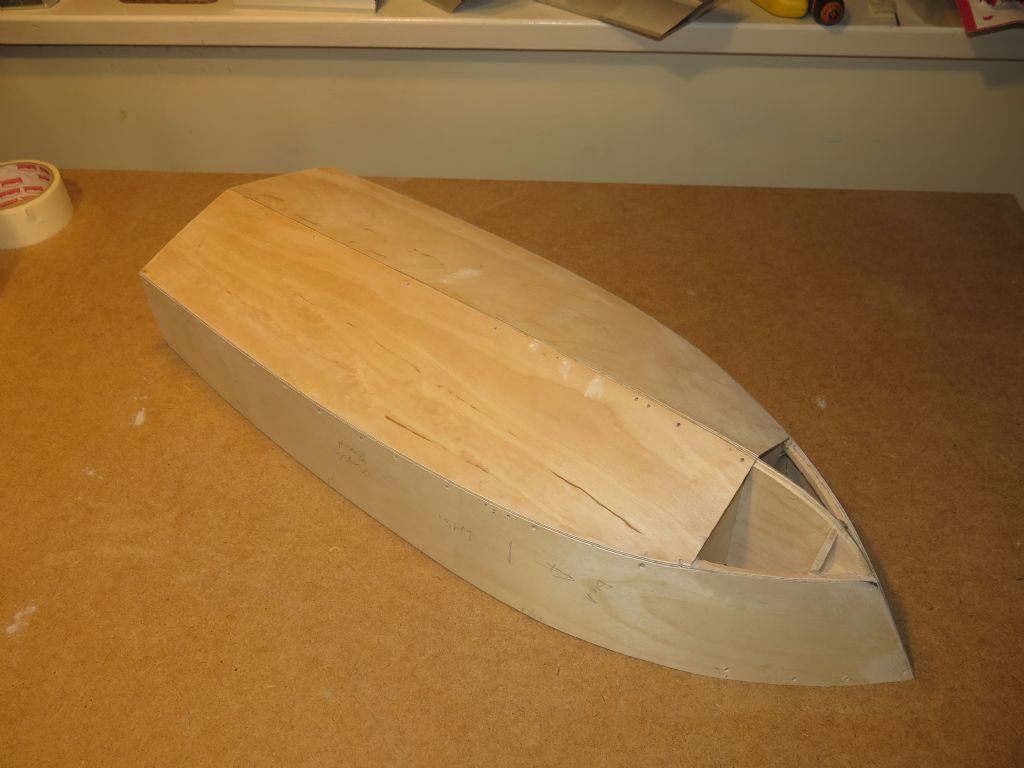
                                          And all the bottom and side skins are fitted now. It looks a bit like a Swiss cheese with all the screw holes but it was the only way I could hold the skins in nice and tight at the joins. Once filled, cloth and resin applied etc. it will be fine. Really pleased with the joins and how the birch ply sands to a nice sharp and clean edge. Hard work sanding it though (thank gawd for Perma-Grit – I have a real respect for those guys who turn out first class work using glass paper etc. fixed to blocks) even though it's only 1.5mm. In fact I'm really chuffed at how the hull has turned out and gives me confidence in tackling the others.

                                          I've returned to the Huntsman to finish fitting the skins on that but I'll soon be starting on the superstructure.

                                          all skinned.jpgchine stringer refixed.jpg

                                          #80160
                                          Dave Milbourn
                                          Participant
                                            @davemilbourn48782

                                            2mm Liteply is a lot easier on a two foot hull, m'duck – that's why I use it. My next model is half as big again so I'll probably use 1.6mm birch ply for the skins on that one….. or maybe not….

                                            DM

                                            #80171
                                            Chris Fellows
                                            Participant
                                              @chrisfellows72943

                                              Yes, when I was doing it I thought that it being a small hull wasn't helping matters and if not Liteply then a thinner birch ply would have been easier to fit. But it's done now and as I said I'm pleased with the result and it's bloomin' strong!

                                              Fitting the bottom skins to the Huntsman 28 was certainly easier and the Swordsman should be a doddle.


                                              Edited By Chris Fellows on 03/12/2018 23:01:05

                                              #80268
                                              Chris Fellows
                                              Participant
                                                @chrisfellows72943

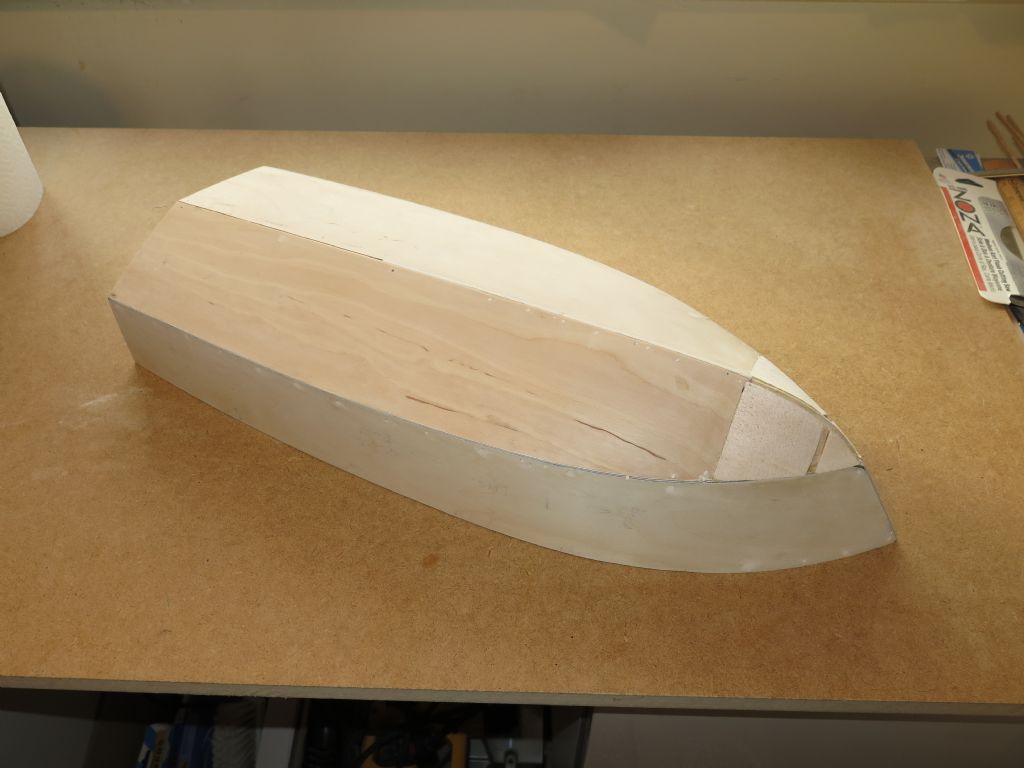
                                                As with the Huntsman 28 I've fitted the balsa blocks to the bow and sanded to shape.

                                                I'm working on the drawings for the superstructure/cockpit floor and shall be checking with card before I cut out in ply. I'm making allowance for the cabin/cockpit sides needing to be longer than if just viewed side on because of the curve.

                                                It's not a cheap hobby is it! I need to get together the materials for finishing the hull etc. and looking at the prices it's going to cost a fair few quid. Hate to think how much I've spent so far on tools, materials, motors, prop shafts etc. over the last couple of years and I've still got to buy the ESCs, receivers, batteries etc. and additional motors and prop shafts etc. for future builds. Serves me right for building more than one boat at once! I haven't skimped though.

                                                Obviously it's been pretty expensive as I was starting from scratch but now that I've got most things I need future expenditure won't be so great.

                                                I'm not complaining though, as it's been a great hobby to have gotten involved in and is relatively cheap compared to some of my other interests.


                                                rc balsa to bow.jpg

                                                Edited By Chris Fellows on 10/12/2018 13:09:35

                                                #80271
                                                Ray Wood 3
                                                Participant
                                                  @raywood3

                                                  Hi Chris,

                                                  Look on the brightside, when they are finished they will probably be worth half as much as you spent 😁

                                                  But seriously this size of hull for electric power could be Depron sheet glass clothes for a fraction of the cost, Aerokits were 1/16" ply because of diesel or glow powered requiring plenty of strength .

                                                  Regards Ray

                                                  #80272
                                                  Chris Fellows
                                                  Participant
                                                    @chrisfellows72943

                                                    Go and wash your mouth out Ray! Constructing a wooden Fairey out of anything other than timber is heresy!

                                                    I shall have to use a little of other materials like styrene etc. for certain parts but to be honest a big part of the enjoyment of building model boats for me is working with timber and I won't be using anything else, it doesn't hold any interest for me. Anyway it's fairly easy to put mistakes right!

                                                    I have bought a kit of a Spearfish which has a fibre glass hull, but so did the original, and also like some of the early boats I will be building the superstructure in timber, so much nicer.

                                                    Chris

                                                    #80345
                                                    Chris Fellows
                                                    Participant
                                                      @chrisfellows72943

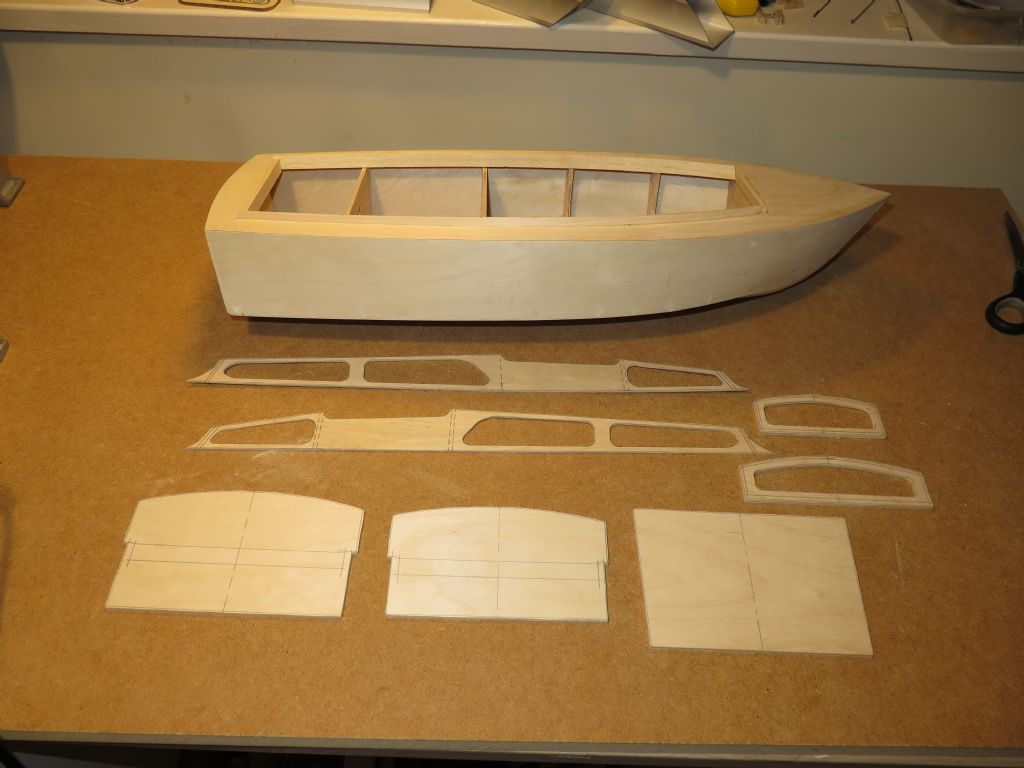
                                                      Finished drawing up the superstructure and have cut out the parts ready for sanding and assembly.

                                                      As you can see from the cabin/cockpit sides I had a bit of a brain fade moment and added the cockpit side pieces which go on the inside of the cockpit! Couldn't even blame the red wine as I hadn't started on it then!

                                                      Soon sorted though.

                                                      Chris

                                                      superstructure1.jpgsides.jpg

                                                    Viewing 25 posts - 1 through 25 (of 116 total)
                                                    • Please log in to reply to this topic. Registering is free and easy using the links on the menu at the top of this page.

                                                    Code of conduct | Forum Help/FAQs

                                                    Advert

                                                    Latest Replies

                                                    Home Forums Build Blogs Topics

                                                    Viewing 25 topics - 1 through 25 (of 25 total)
                                                    Viewing 25 topics - 1 through 25 (of 25 total)

                                                    View full reply list.

                                                    Advert