Fairey 23 River Cruiser

Advert

Fairey 23 River Cruiser

Home Forums Build Blogs Fairey 23 River Cruiser

Viewing 25 posts - 51 through 75 (of 116 total)
  • Author
    Posts
  • #84076
    Chris Fellows
    Participant
      @chrisfellows72943

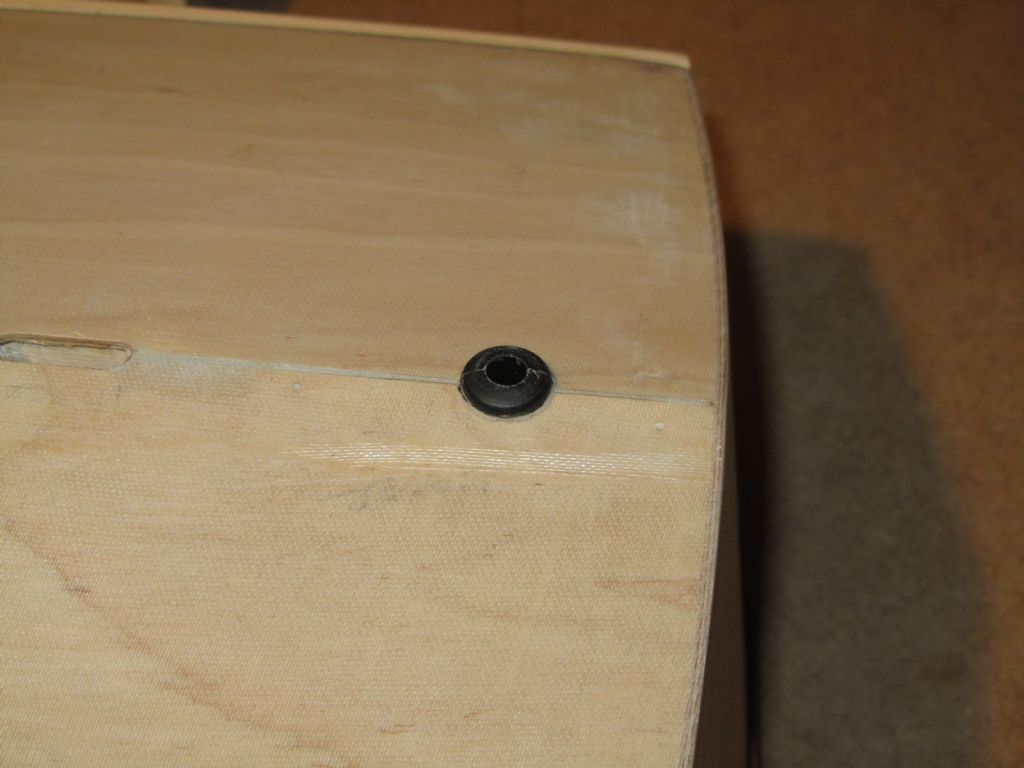
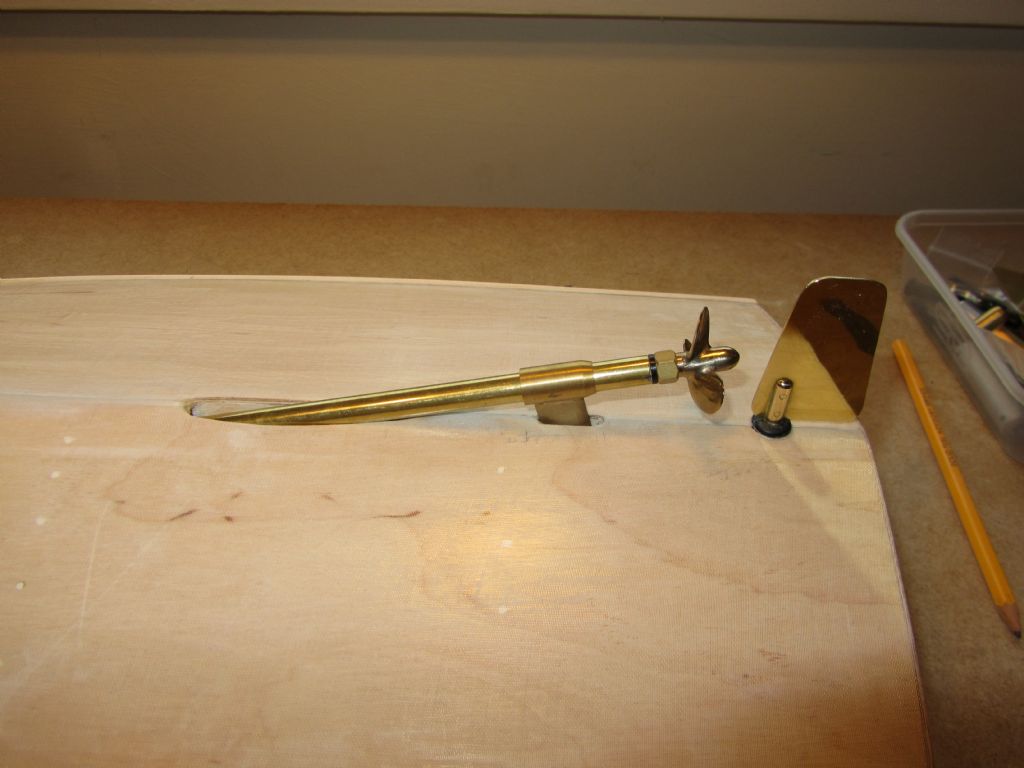
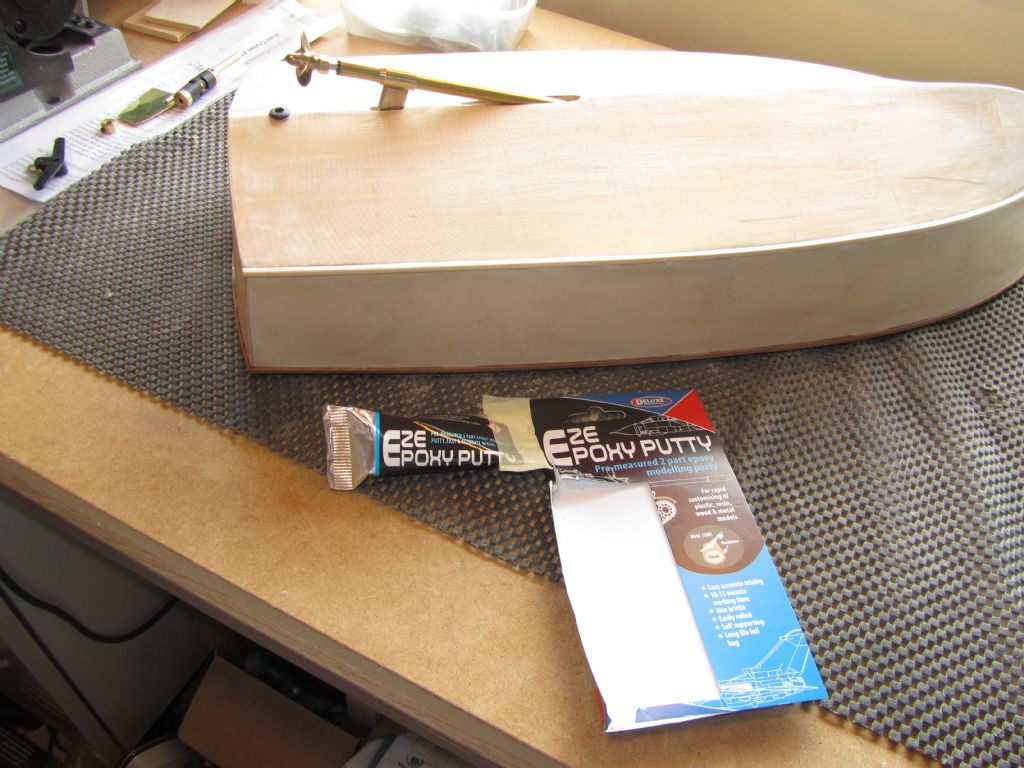
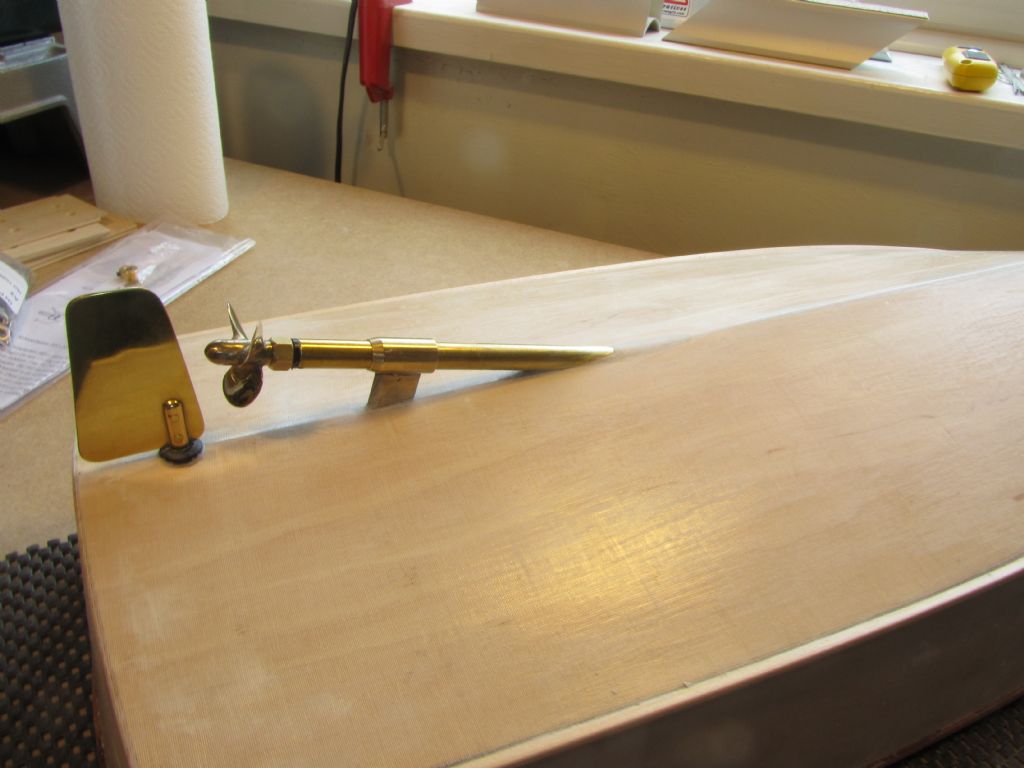
      Unlike with the H28 I drilled the hole for the rudder tube central and at right angles to the keel and so it was a simple task to wrap a strip of Eze Epoxy Putty around the tube and press it home, squeezing out some of the putty as the flange of the tube was bedded against the hull. The vee on the River Cruiser is less than on the H28 and therefore no need to file a flat and the gaps are less so there was no need to do any fairing in, just wiping off the excess putty with a finger.

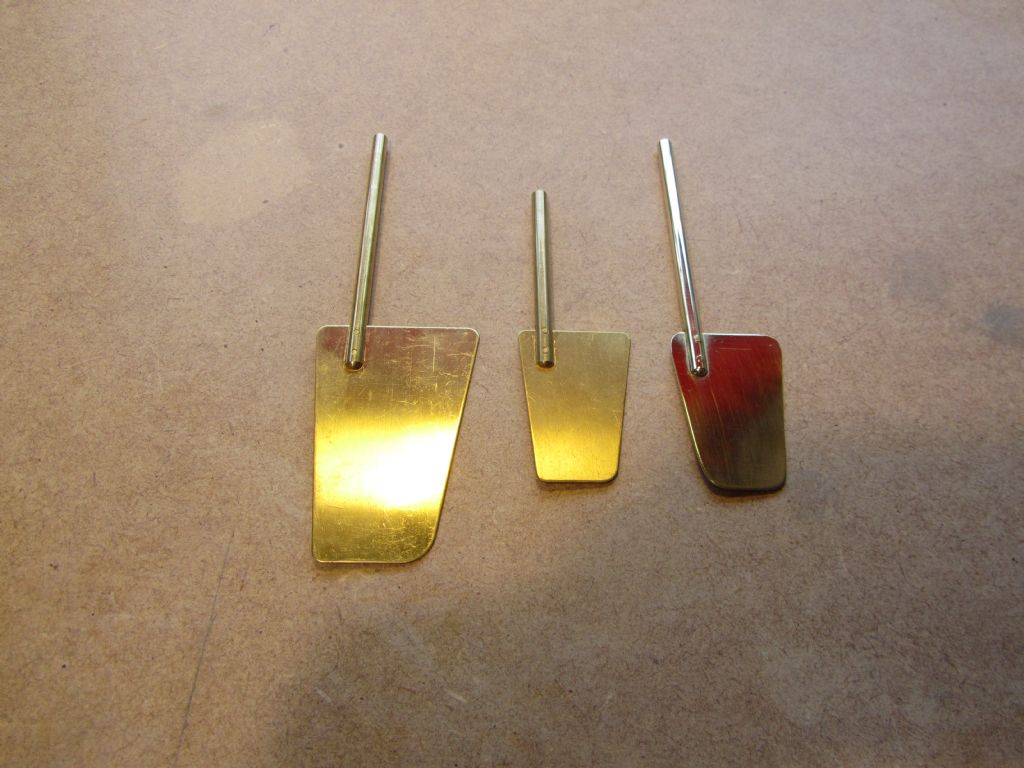
      The small rudder I had was the right size but the shaft needed to be a little longer so I cut down one of my big ones bought for that purpose. Couldn't help giving it a little polish whilst I was at it! smiley

      Chris

      rc rudder tube.jpg

      Rudder cut down

      Edited By Chris Fellows on 08/10/2019 20:09:38

      Advert
      #84098
      Chris Fellows
      Participant
        @chrisfellows72943

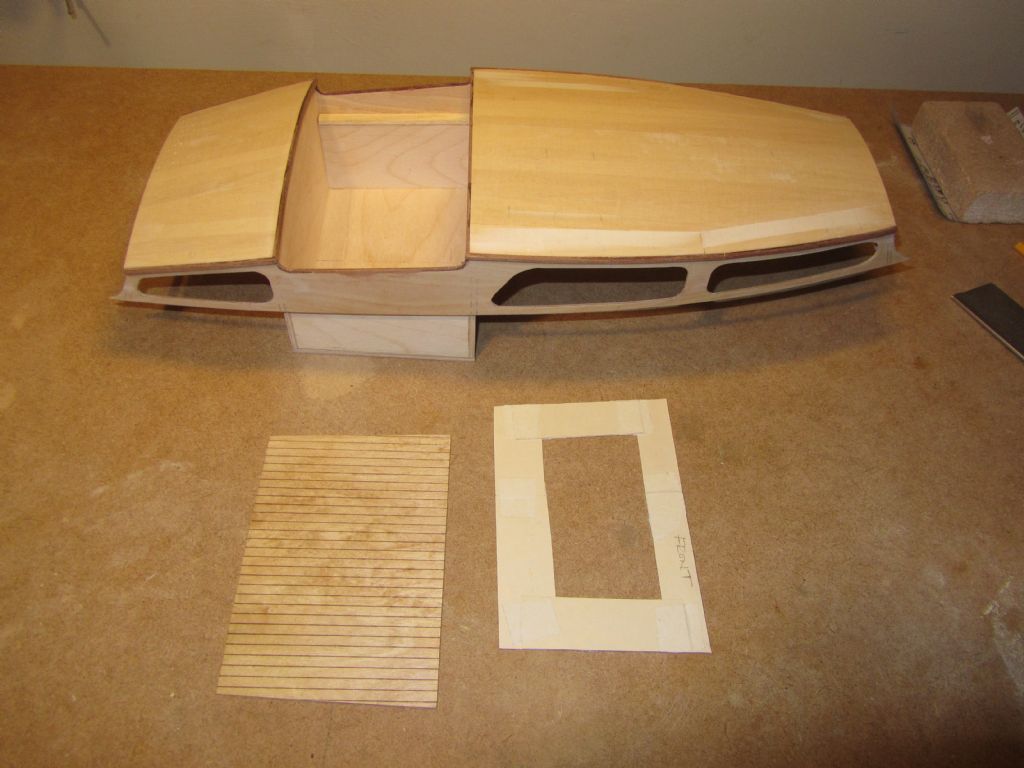
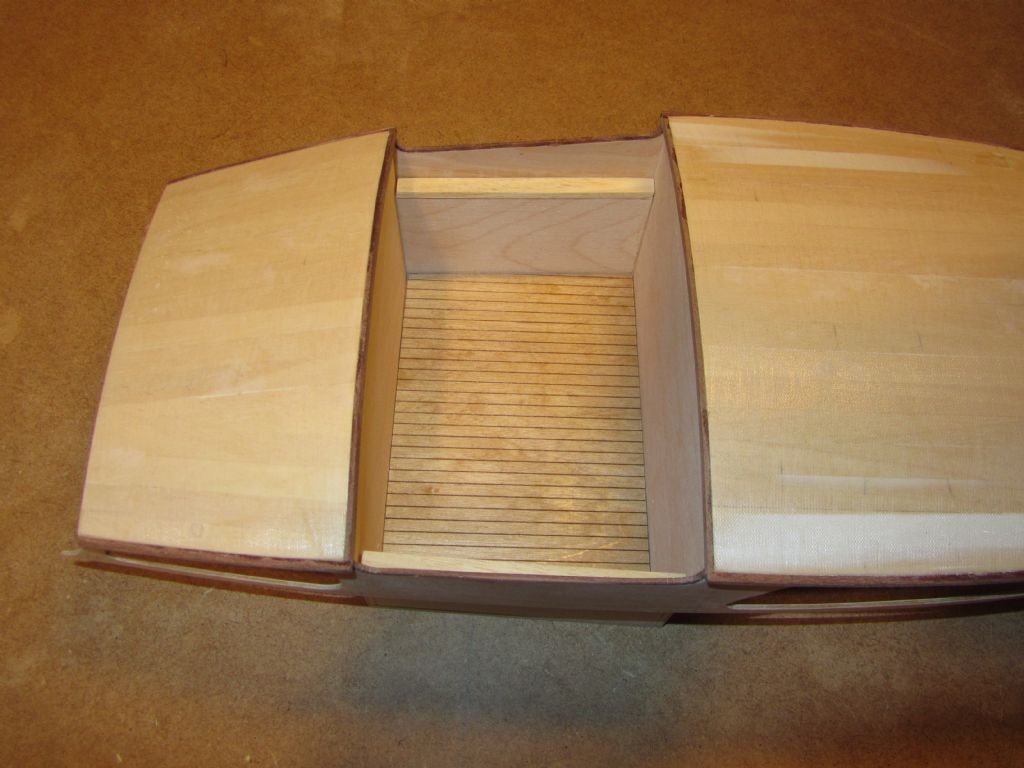
        As with the H28 I've been doing some work on the cockpit. Followed the same process of producing a card template and then cutting the planked ply from it, which again gave a very good fit. I then gave it a coat of the International Paints Schooner varnish which will be followed by another one. Reason I'm doing this is that I will either glue the planking in place and then mask it off to paint the superstructure and if any paint bleeds onto the planking it can be sanded off without damaging the ply or I will glue the floor in place after painting with a risk of scratching the paint. Decisions, decisions.

        I've also cut and fitted the two cappings part way down the cockpit sides which cover the gap over the location upstand/coaming.

        Chris

        cockpit template & floor.jpg

        cockpit floor & cappings.jpg

        #84121
        Chris Fellows
        Participant
          @chrisfellows72943

          Some days can be so frustrating can't they?

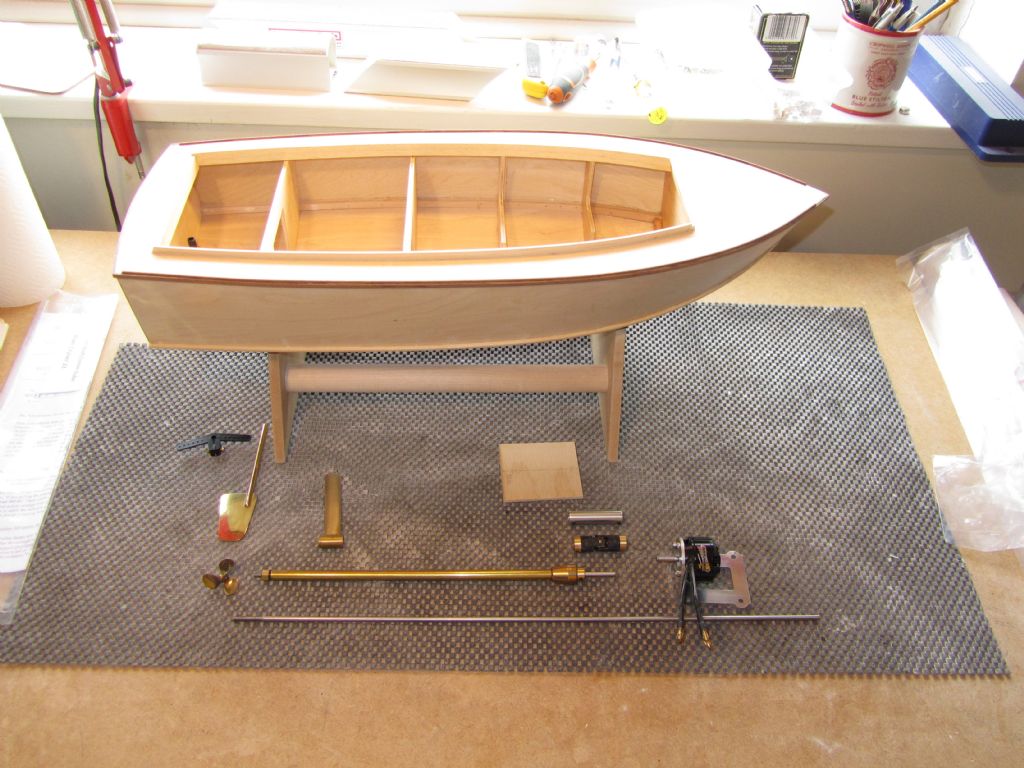
          Plan today was to get at least the prop shaft for one of the boats glued in. Started off with the Huntsman 28 but decided that the 40mm prop was too big. The motor would turn it no problem but it didn't look right and the 30mm being used for the River Cruiser was too small. As I was having to remove some of the threaded part of the shaft for the prop to tighten against the nut and the length of the hub varies from prop to prop I decided to leave it until I get a 35mm prop. Something else to bloomin' order!

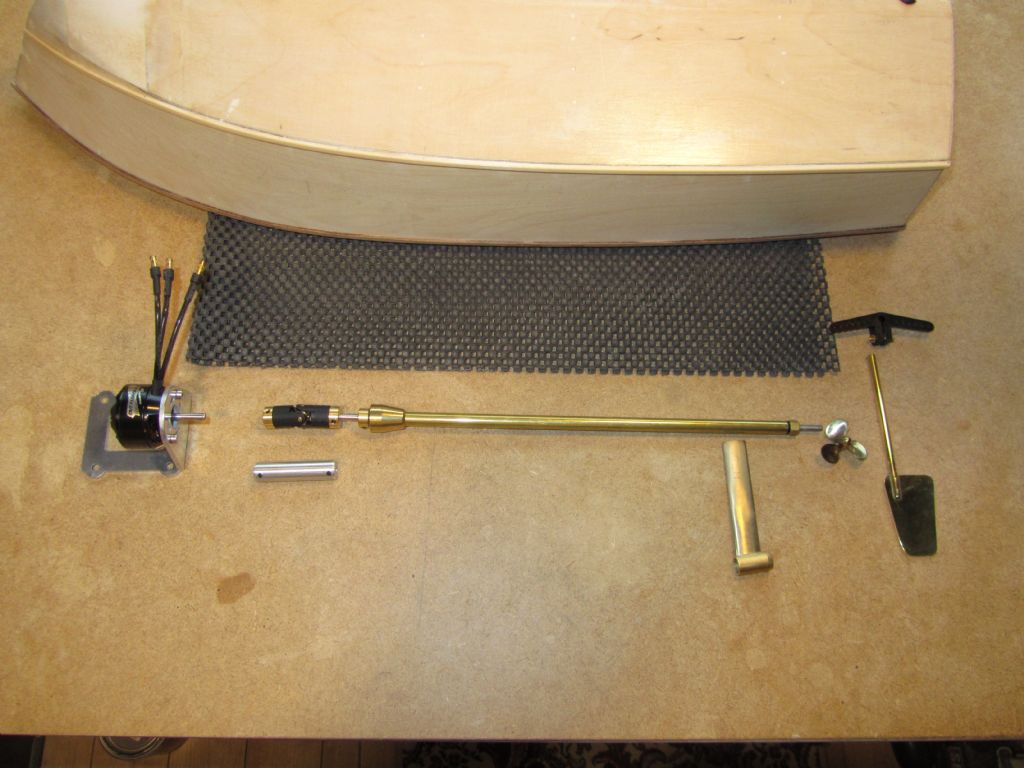
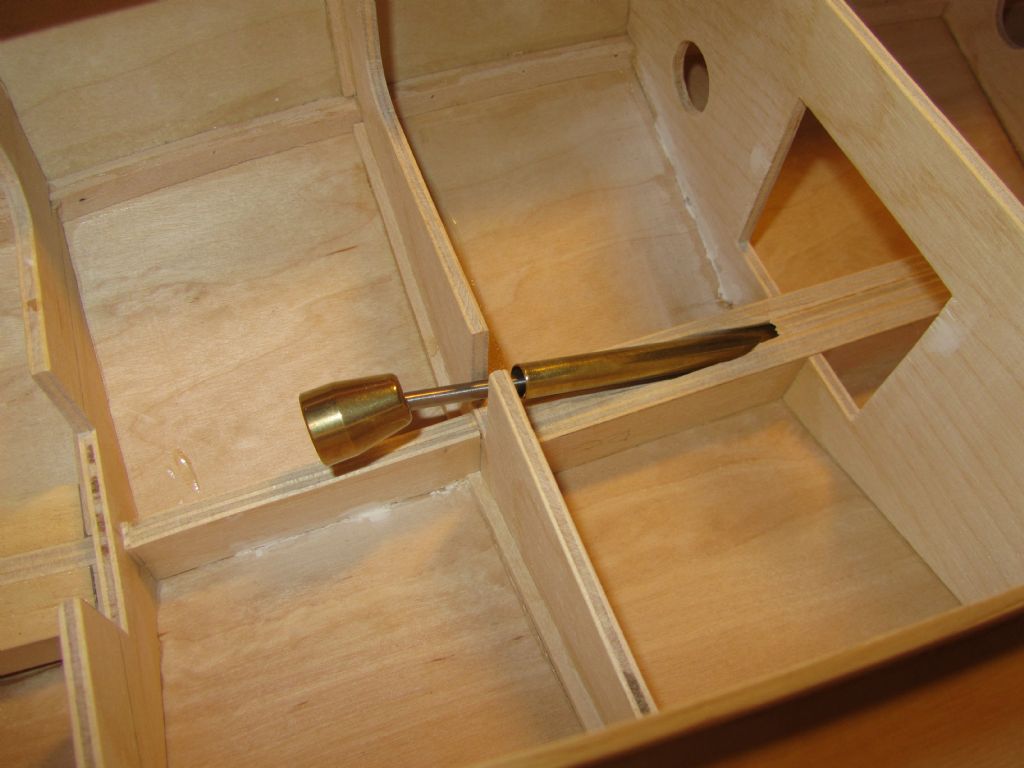
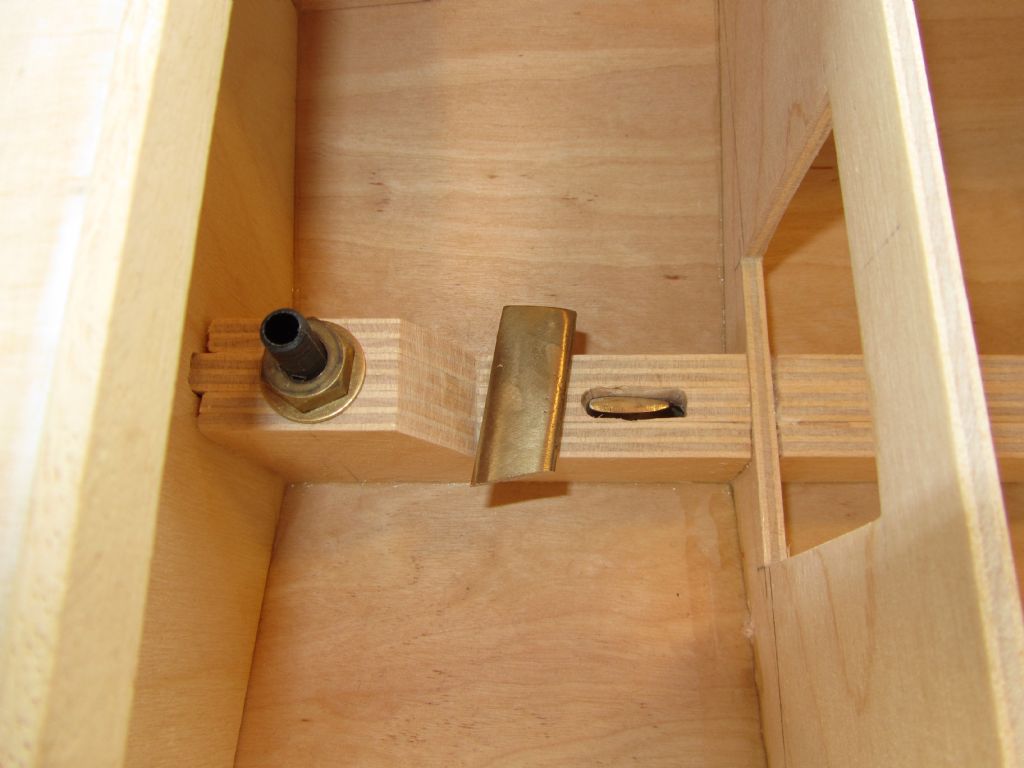
          So onto the River Cruiser. Goodies got out of the cupboard and laid out in readiness. Fitting the prop shaft I found it wouldn't fit quite central to the keel so I set to with my small files on the hole through the keel until it was. Then I found that the bearing fouled one of the frames – I'd cut a slot through it when originally cutting out the frames but only wide enough for the tube. Producing drawings is all well and good but with things like the prop shaft it isn't until you start fitting the bits together and setting the distance from the rudder etc. that you find out exactly where things go. So I had to widen the slot which isn't as easy in a constructed hull, but with the aid of a razor saw, junior hacksaw blade (to cut the horizontal bits out) and file it was done.

          I thought I'd use a Raboesch UJ coupling I'd got as they are well made but when everything was assembled I was about 10mm too short and I couldn't move the prop shaft or motor enough to compensate. A heavy duty coupling (the alloy/rubber/alloy type) was found to be about right but of course I hadn't ordered a 4/4mm and the alignment coupling when I recently ordered the different dia. ones for the other boats! More frustration when trying the 4/5mm alignment coupling when it got stuck on the shaft and took some getting off. I tried drilling it but it still wouldn't go on properly. The 5mm end fits the motor (for the H28) fine and the flexi-couplings, both 4 and 5mm are fine. I checked the prop shaft and found it to be between 3.96 and 3.99mm so reckon that the drill used for the 4mm holes is worn – not very good really.

          Not a completely wasted day but I didn't do what I wanted to do. Will take a while before I can get the parts so will leave both boats for now and return to the Swordsman.

          Chris

          powertrain parts.jpg

          prop & rudder.jpg

          bearing.jpg

          #84179
          Chris Fellows
          Participant
            @chrisfellows72943

            Just a quick update. I've ordered a longer inner shaft, which I shall cut down, so that I can use the coupling that I originally wanted to. Part of the reason for doing this is that when getting the alignment coupling off I had to hold the lower part of the shaft with pliers and despite taping up the shaft it did get a little marked very close to where it sits in the Delrin bearing. I did use some fine emery on it but wasn't completely happy as it could cause additional wear on the bearing. Better safe than sorry. Note for future, always try couplings on the shaft first before putting in the boat!

            I wouldn't use one of the cheaper UJ couplings in a boat like this, which does have some weight to it, but the Raboesch ones are well made and it's only a cruiser, so gentle take offs and no high speeds for this Fairey!

            Chris

            #87477
            Chris Fellows
            Participant
              @chrisfellows72943

              Cough, cough, dust and spider's webs! smiley

              Whilst waiting for the cloth for the Huntsman 31 build I thought I'd return to the River Cruiser and Huntsman 28 and fit the prop shafts. Looked at the H28 first but the prop from Prop Man hadn't arrived yet and as with the RC the thread needs to be reduced in length to fit inside the prop.

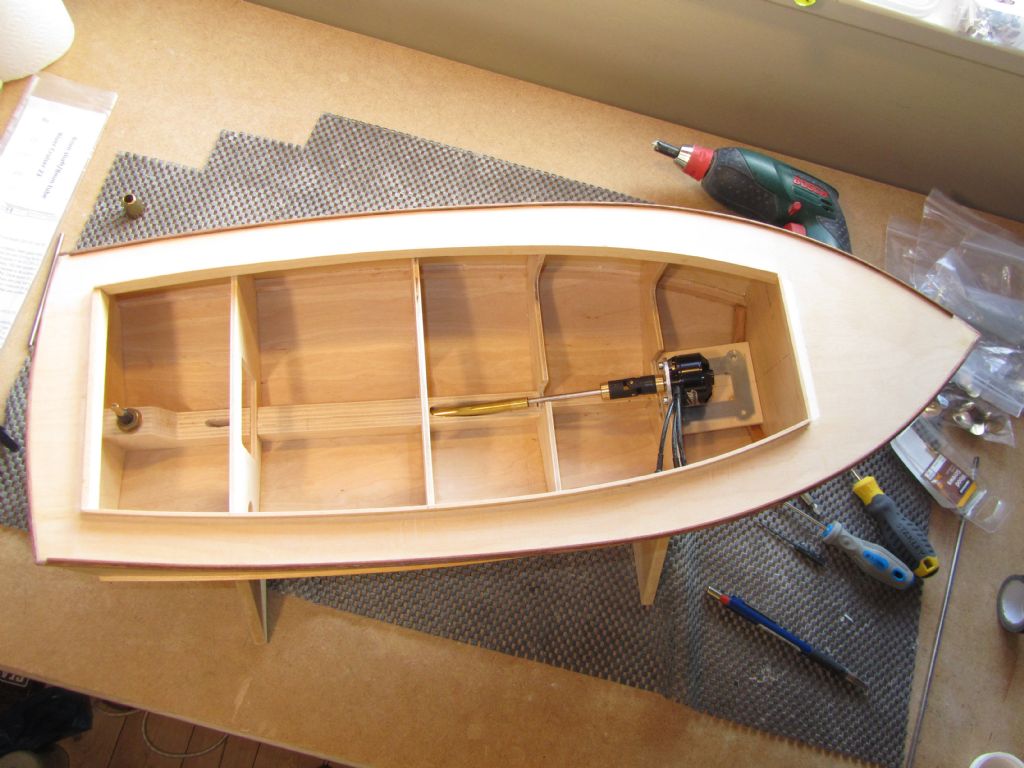
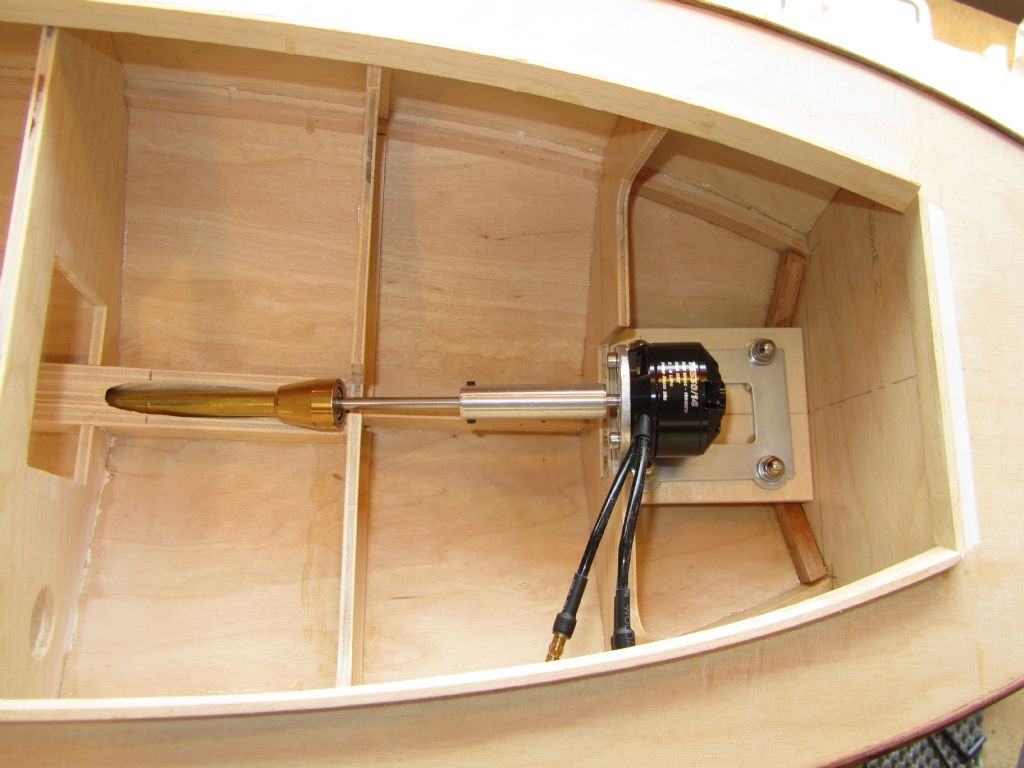
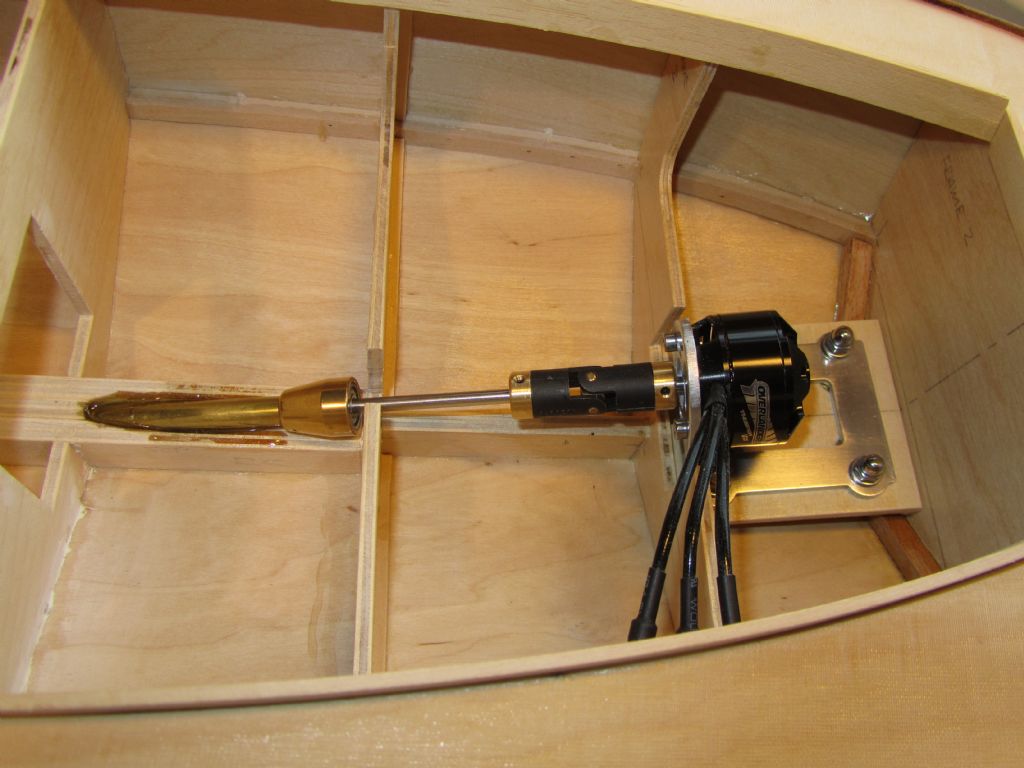
              So onto the RC. I'd made a ply base for the motor mount some time ago and first job was to drill and countersink 4 holes in it and then screwing it down with brass screws. As per a previous post I'd obtained a longer (much longer!) inner shaft and removed some of the thread to suit the 30mm prop. Some of the motor end was then cut off as it was too long to fit in the hull when the prop was positioned near the rudder!

              The motor was then fitted with the coupling and placed in position along with the prop shaft assembly in order that the prop shaft could be marked for cutting – and double checked! This was duly done.

              Chris

              propshaft install1.jpg

              propshaft install3.jpg

              #87492
              ashley needham
              Participant
                @ashleyneedham69188

                Chris. Nice and clean! Are you going to have a collar at the inner end of the prop shaft?

                Ashley

                #87495
                Ray Wood 3
                Participant
                  @raywood3

                  Hi Chris

                  It looks like its going to be a fast river cruiser 😀

                  Regards Ray

                  #87516
                  Chris Fellows
                  Participant
                    @chrisfellows72943

                    Ashley – yes, the first photo shows it fitted along with the ballrace. 

                    Ray – It's getting to be quite a heavy little thing but even with a small motor and prop I think it will go pretty well which will be useful for getting out of the way if required.

                    Chris

                    Edited By Chris Fellows on 03/05/2020 15:46:16

                    Edited By Chris Fellows on 03/05/2020 15:52:09

                    #87528
                    Chris Fellows
                    Participant
                      @chrisfellows72943

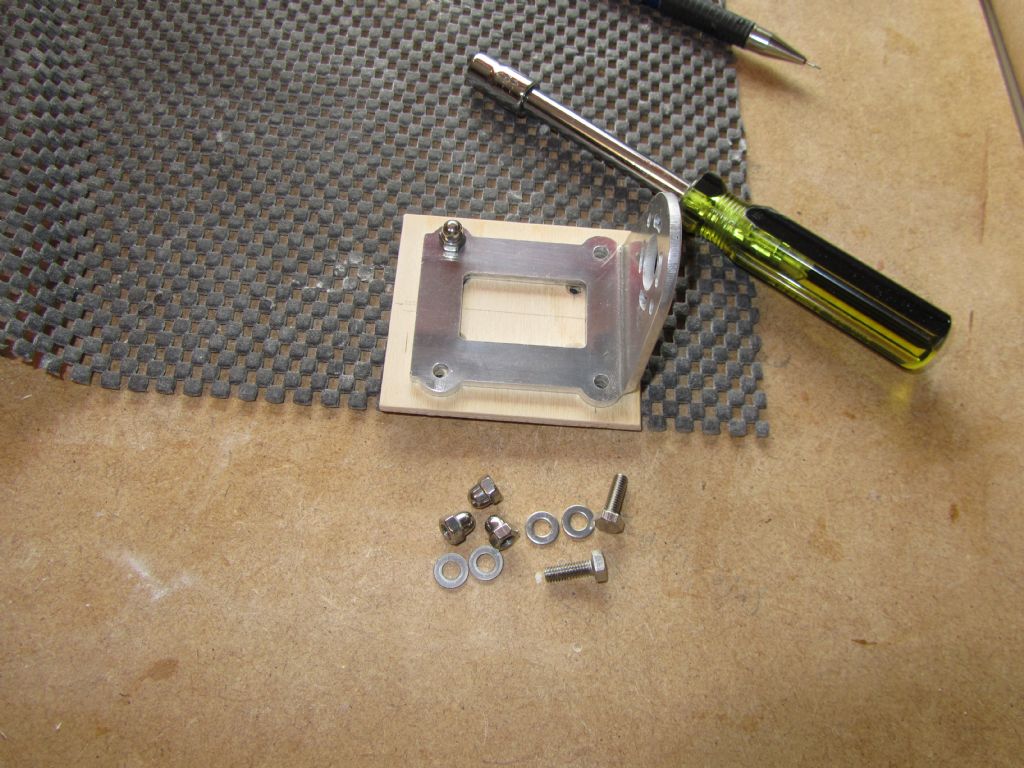
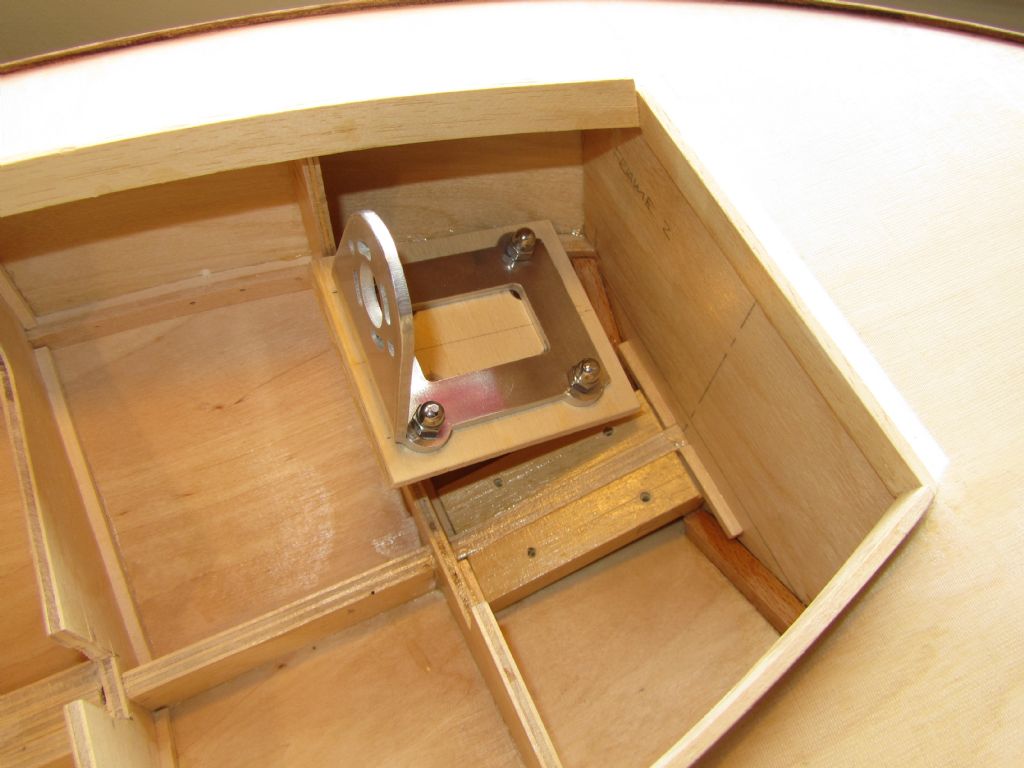
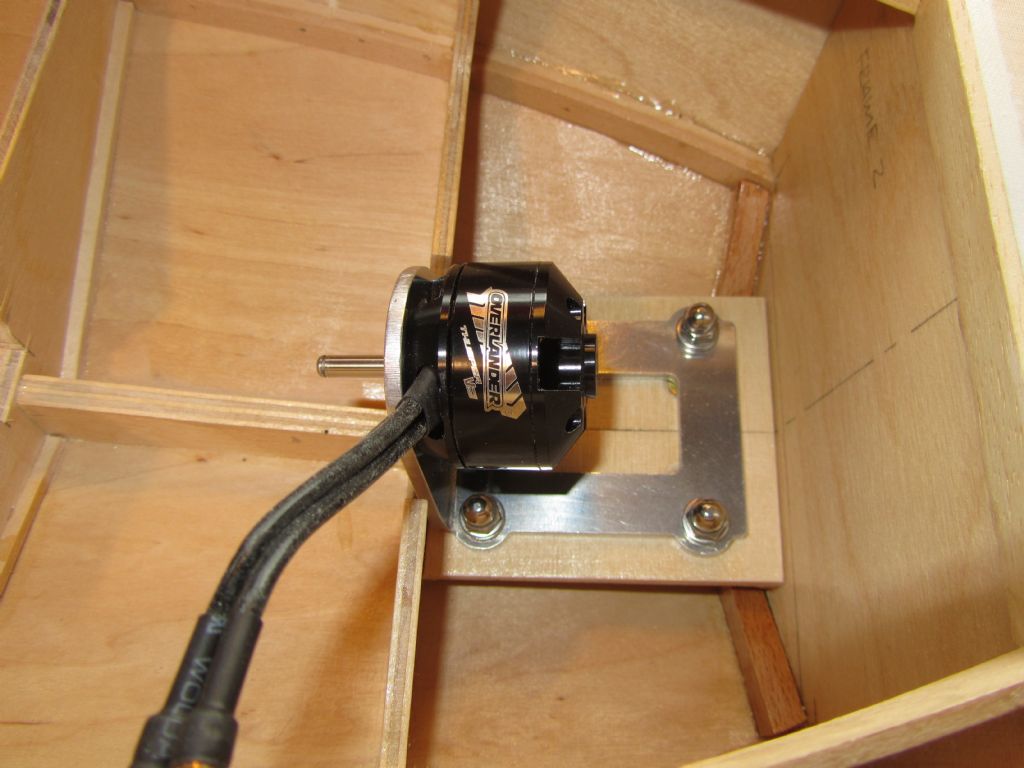
                      I bought some M4 stainless bolts, domed nuts and washers sometime ago for mounting the motor. These were a little tight in the mounting holes so I ran a drill through them. First plan was to recess the heads of the bolts into the underside of the mounting board and epoxy them in but as luck would have it after a bit of filing to one face of the bolt heads they dropped in either side of the mounting timbers in the boat. The bolts are held in place by being a good fit in the ply and tighten against the timbers so that was job done. The mounting board was given a coat of resin and once dry the motor could then be secured in place ready for aligning the prop shaft.

                      Chris

                      mounting motor1.jpg

                      mounting motor2.jpg

                      mounting motor3.jpg

                      #87558
                      Chris Fellows
                      Participant
                        @chrisfellows72943

                        Alignment of the motor and prop shaft looked pretty good by eye and the system turned easily but as I'd bought a solid coupling for the job I thought I'd better do it properly. Before taking apart to do that I put a pencil mark on the prop tube and adjacent keel so that it would go back in the same place. Reason being is that when using the solid coupling the inner shaft wouldn't go as far in as with the UJ coupling. I also marked the leg of the P bracket with black tape so that the top would be below the keel, cut to length and roughed up the area for gluing with a file. The prop tube was also roughed up with glass paper where it was to be glued. I drilled and filed the holes in the motor mount to give some wriggle room and to make sure there was no tension in the set up.

                        Everything was then reassembled and with the hull upside down pushed some Eze Epoxy Putty around the leg of the P bracket and the prop tube. This is great stuff that I used when fitting the rudder tube. You just cut off what you need. Knead the two ingredients/parts together and it's ready to use. After 20 mins it can be filed and sanded etc. I'm leaving for longer than that though as I'll be filling from the inside with epoxy.

                        Chris

                        prop shaft alignment.jpg

                        p bracket cut down.jpg

                        fixing prop shaft etc..jpg

                        #87748
                        Chris Fellows
                        Participant
                          @chrisfellows72943

                          Hi All

                          Been a bit of a break due to spending most of one day giving the car a much needed clean (mainly dust!) and another with the VE Day celebrations with the neighbours along the street which involved mucho wine etc.

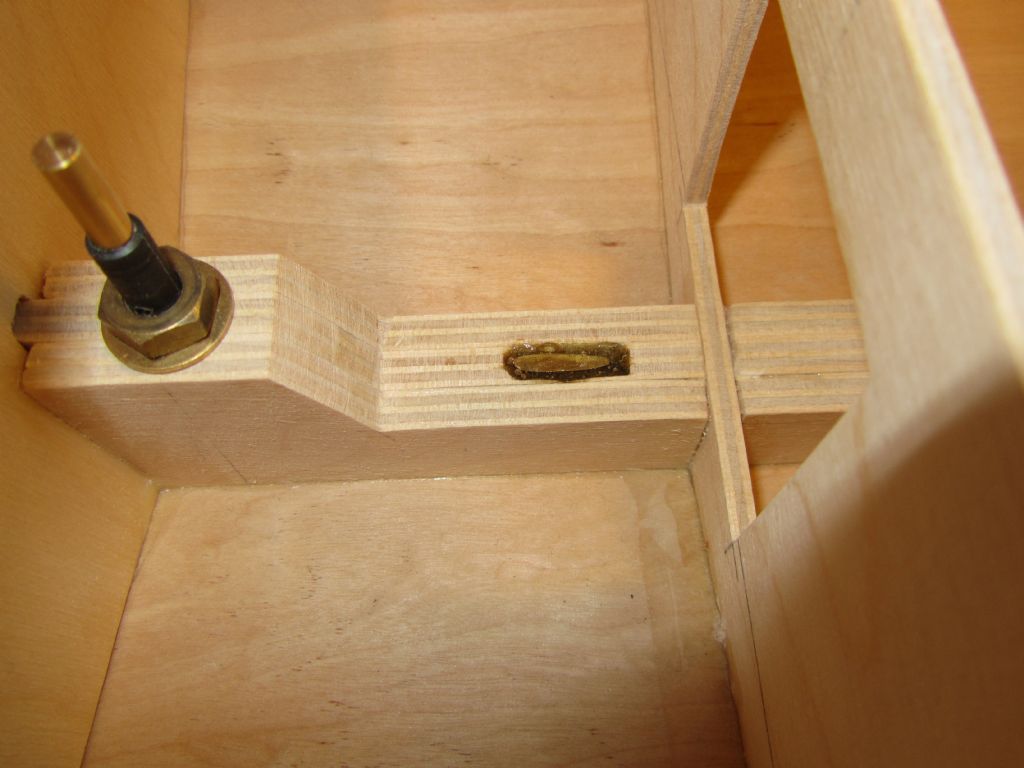
                          Having left the epoxy putty overnight it was filed and sanded down around the P bracket and prop tube. Just the putty holds things firmly in place so that they don't move when you turn the hull over for the epoxy.

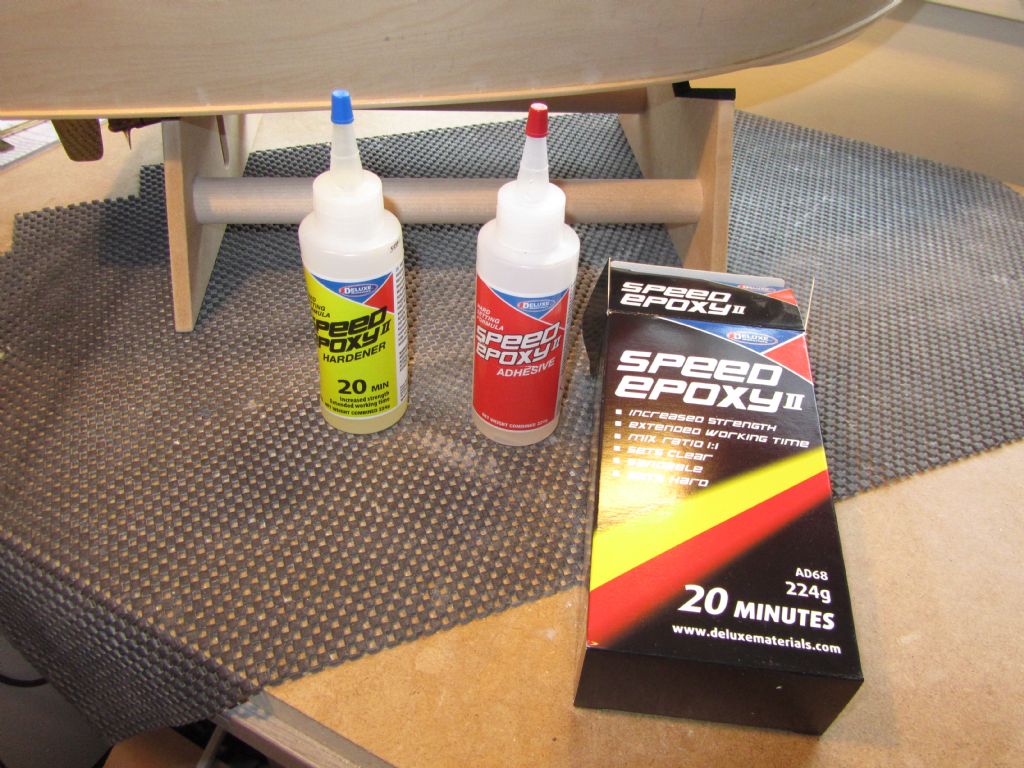
                          I used a slow setting 2 part epoxy, 20 minutes in my case, which gives plenty of time to get it where required and it's not too stiff so it runs down well around the prop tube and P bracket. For this thickness it's going to take longer than 20 minutes to harden so was left over night. This morning I replaced the solid coupling with the UJ and it turns nice and smoothly with the only thing being felt are the poles of the motor.

                          It was smooth with the solid coupling but I suppose it's wise to use a flexible coupling of some sort as things are going to move slightly when removing and refitting the motor and there is going to be slight movement in the hull due to temperature and humidity.

                          Ready for painting now.

                          Chris

                          prop shaft faired in.jpg

                          epoxy.jpg

                          p bracket glued in.jpg

                          prop shaft glued in.jpg

                          #88355
                          Chris Fellows
                          Participant
                            @chrisfellows72943

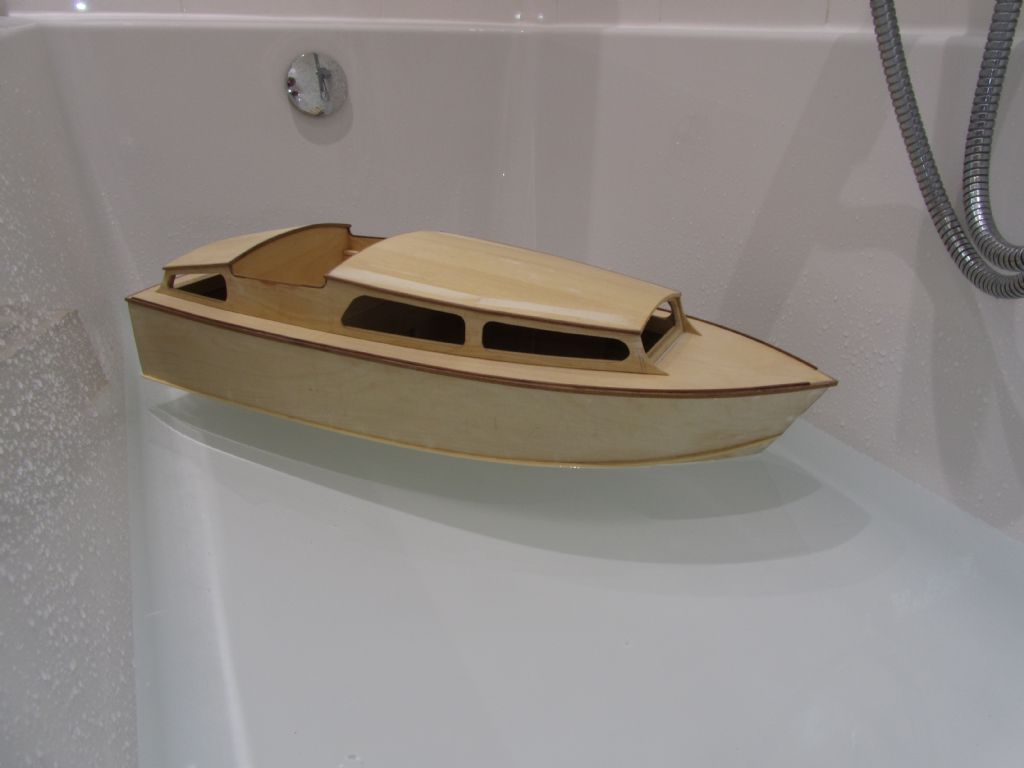
                            I was just about to take the inner shaft and motor etc. out and prompted by a comment I made on Tim's current thread I thought I'd try it at the Hamble test facility.

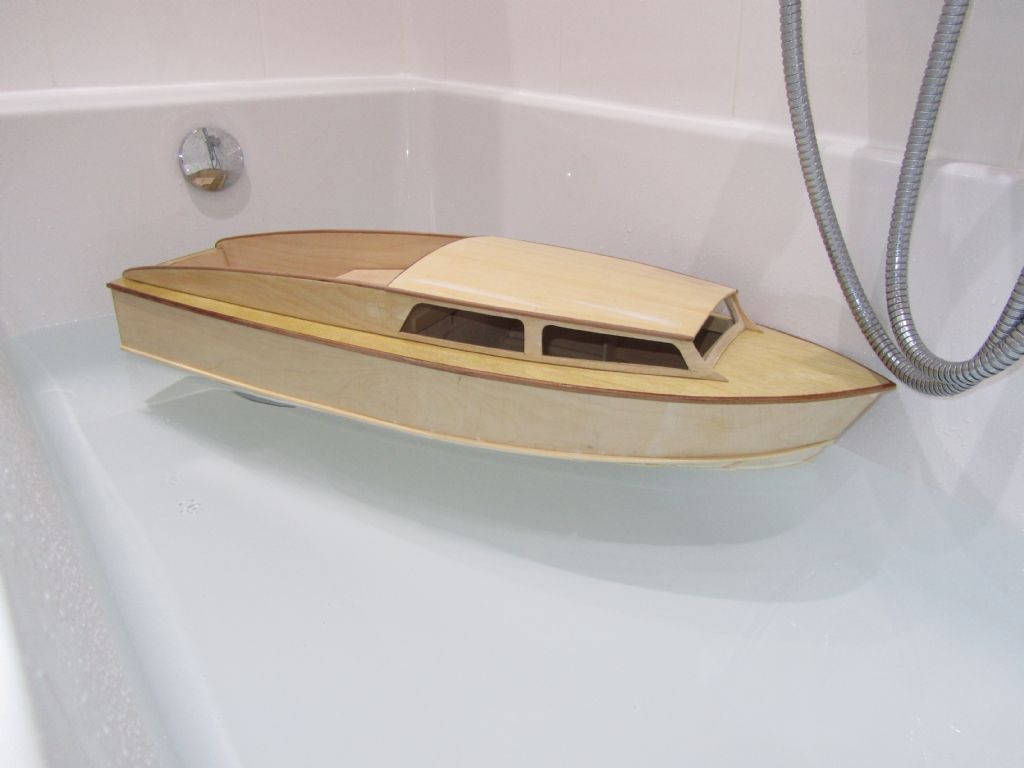
                            Put a 2S LiPo in it about where the battery is supposed to go, picked it up and thought this is getting to be quite a heavy little beggar (surprise, surprise!) and with some trepidation put it in the bath. Well to say I'm chuffed is an understatement. The water was just below the chine rail and the attitude of the boat is pretty much spot on and looks very much as per the photo of the full sized boat. Finishing it with paint, window frames and other details etc. won't add that much to the weight and due to the buoyancy of the model will have negligible effect.

                            Tried the Huntsman 28 as well with the same result, though that is more of a known quantity. Hope the H31 is the same.

                            A very relieved and happy, Chris.

                            rc bath test.jpg

                            h28 bath test.jpg

                            #88358
                            Dave Milbourn
                            Participant
                              @davemilbourn48782

                              NOW will you get some %£!&! paint on them, Chris???

                              DM

                              #88360
                              Tim Rowe
                              Participant
                                @timrowe83142

                                Two lovely boats Chris and an exiting moment.

                                Tim R

                                #88362
                                Eddie Lancaster
                                Participant
                                  @eddielancaster

                                  Hi. Chris, totally agree,two lovely boats, but other kids have ducks in their baths😀.

                                  Eddie.

                                  #88370
                                  Chris Fellows
                                  Participant
                                    @chrisfellows72943
                                    Posted by Dave Milbourn on 24/05/2020 18:38:37:

                                    NOW will you get some %£!&! paint on them, Chris???

                                    DM

                                    laughWell, I've just got to put some servo brackets in them, and then yes, I will!!

                                    Thanks Tim and Eddie.

                                    Chris

                                    #88505
                                    Chris Fellows
                                    Participant
                                      @chrisfellows72943

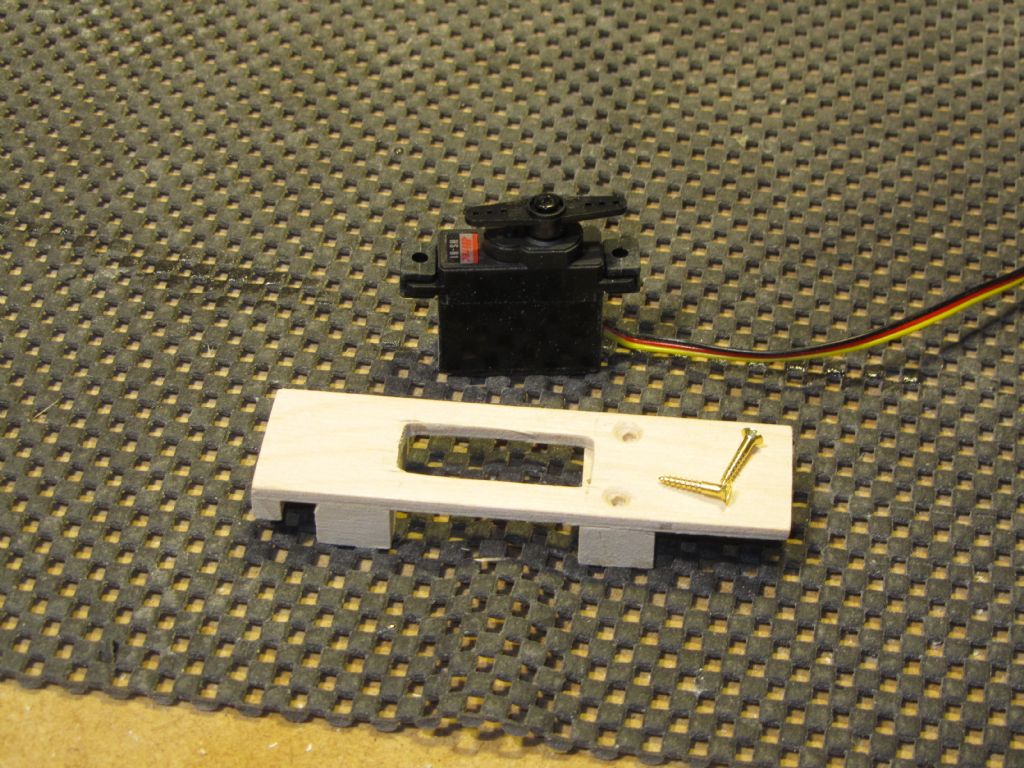
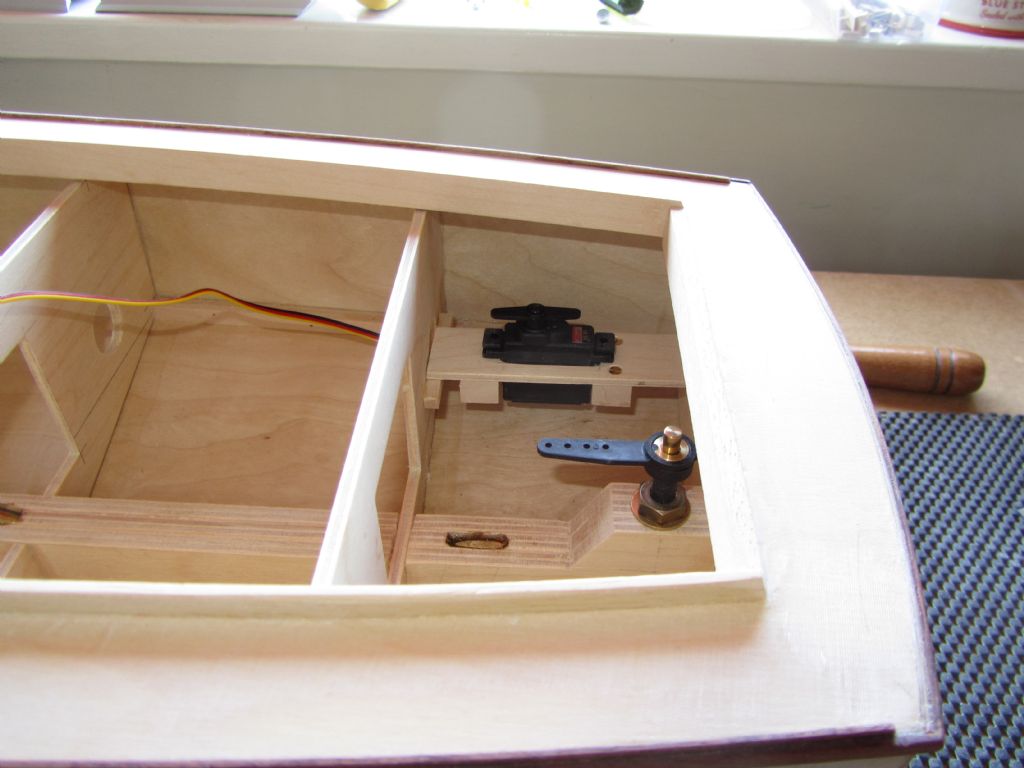
                                      Aforesaid servo bracket. Rudder close to the transom so servo going to the side. Straightforward mounting but fiddly because of the amount of space and the overhang (or is that innerhang!) of the deck.

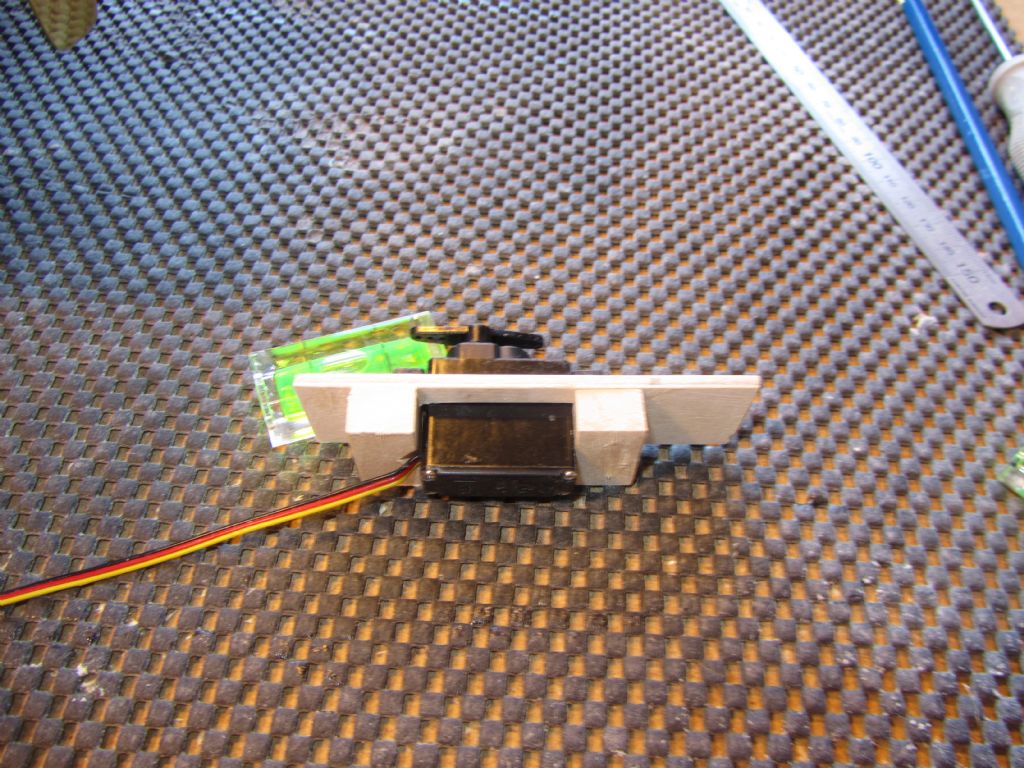
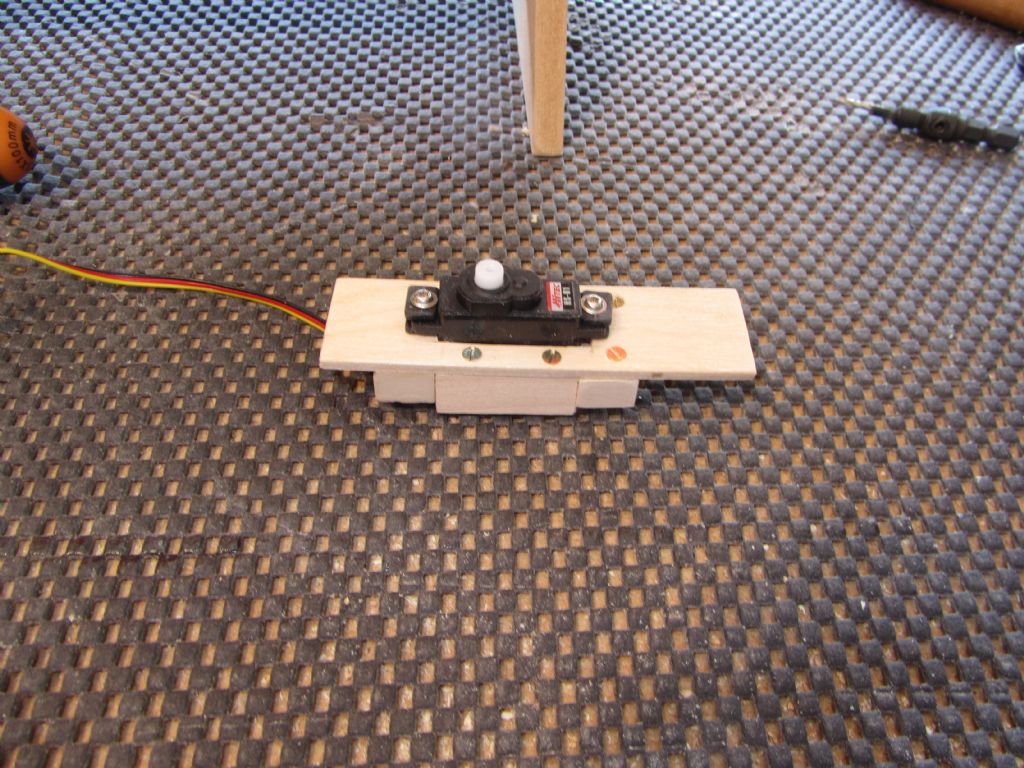
                                      Mounting was cut out of 3mm ply and two bearers were attached (obechi I think). A test fit of the servo found that the fit was too sloppy (due to making allowance for getting the cable in with the servo) and the mounting screws wouldn't have much timber to screw into, so I cut one of them off and then fixed with brass screws so that it could be pushed tight to the servo but also allow easy fitting and removal without having to use force.

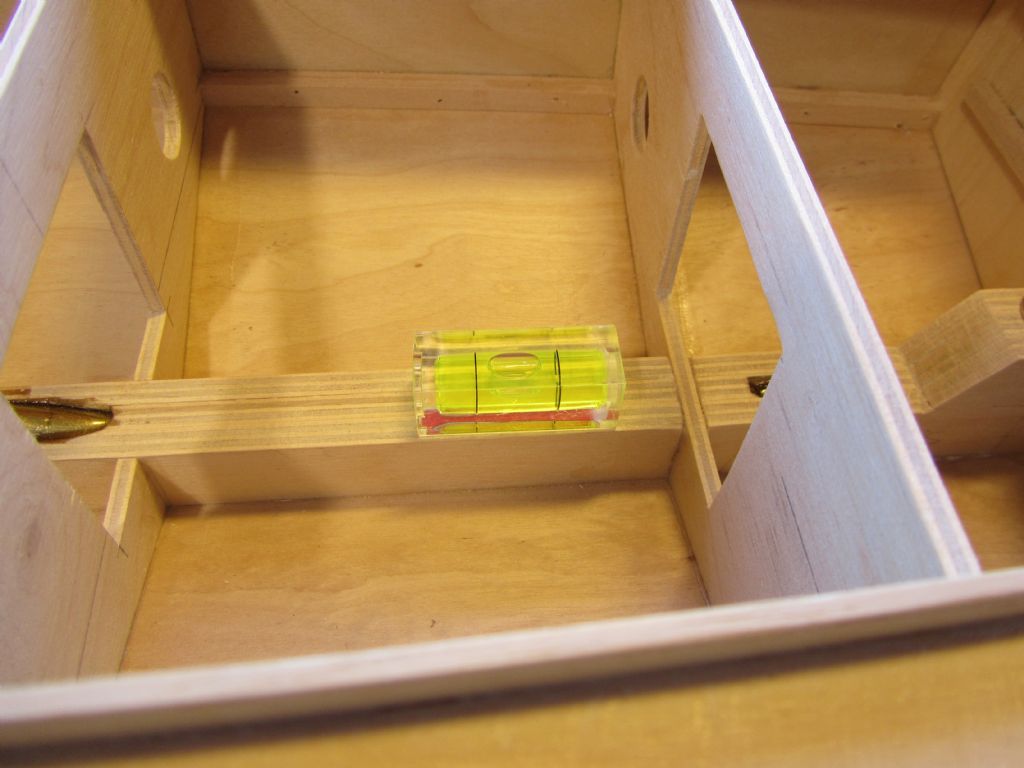
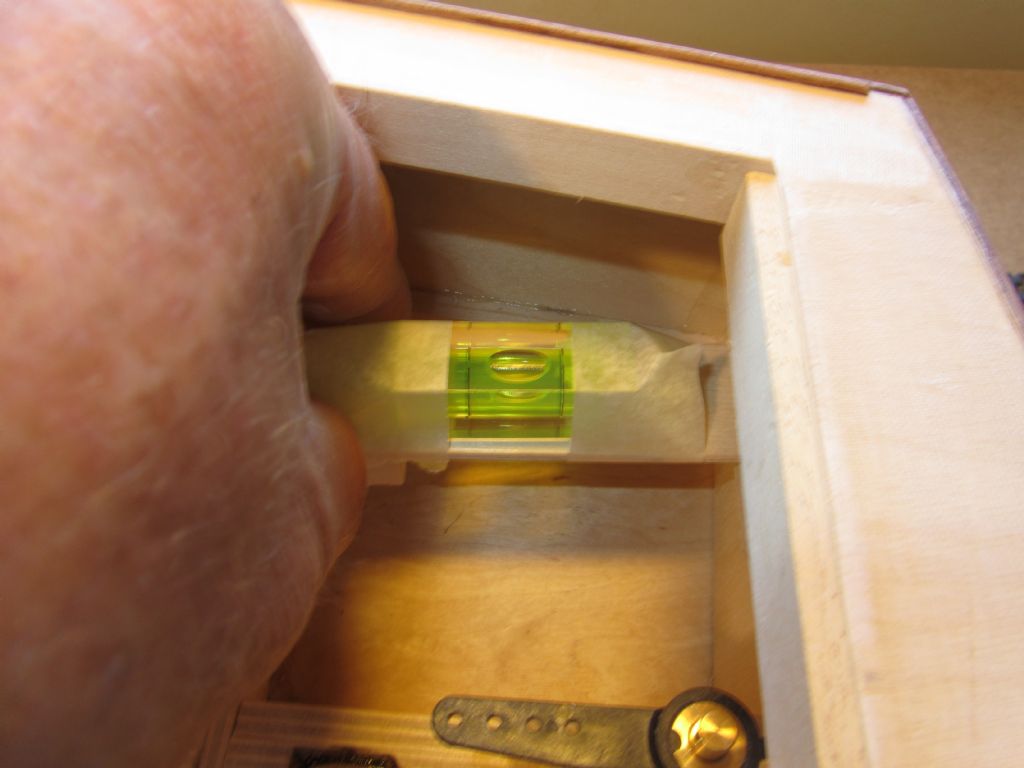
                                      I bought a couple of small, cheap bubble levels for positioning the supports. I first levelled the keel and also from side to side. Then marked on the transom the top of the rudder arm and extended this across using a level and then marked down to where the top of the support needed to be and drew a horizontal line using the level and then cut and glued a 5mm square support/bearer. I had glued the other support to the mounting, but then cut it off as I thought it would be easier to have the two supports glued to the hull first. This was done by transferring the position of the first support to the other bulkhead using the mount and bubble level, which was difficult with big hands – not as big as the photo though! And to hold and photograph! The second support was then glued in place. The area needs to be coated with resin and then the mounting can be glued in.

                                      Chris

                                      servo 1.jpg

                                      servo 2.jpg

                                      servo 3.jpg

                                      servo 5.jpg

                                      servo 6.jpg

                                      #88511
                                      Tim Rowe
                                      Participant
                                        @timrowe83142

                                        Just a wee small point Chris.

                                        Probably not that important in this boat where the rudder is likely to be quite lightly loaded but servos are more stable in their mountings if the long axis of the servos is at right angles to the tiller arm. In your case and particularly with these small units, the single screw at each end on a rubber grommet, the servo can rock.

                                        Nice photos and interesting commentary to complement your models.

                                        Tim R

                                        Edited By Tim Rowe on 29/05/2020 19:44:56

                                        #88519
                                        Chris Fellows
                                        Participant
                                          @chrisfellows72943

                                          Hi Tim

                                          Thanks for the advice, much appreciated and timely as I haven't glued the mounting in yet! smiley

                                          As you say the rudder will be lightly loaded due to the low speed of the boat but I will screw the servo down and see how much it moves. If only a bit I'll try it without the rubber grommets. Failing that, and I might do it anyway, I'll remake the mounting to move the servo through 90 degrees.

                                          Cheers, Chris

                                          #88528
                                          Chris Fellows
                                          Participant
                                            @chrisfellows72943

                                            Had a look at how the servo would sit if rotated and whilst certainly doable the distance between the arms would be shorter, but still Ok, to avoid one of the mounting screws going inside the deck overhang so I parked that.

                                            Put the mounting screws in and the servo was pretty rigid. Of course it would only need the screws to come slightly loose and the servo, as Tim says, would move.

                                            So I've added a couple of timbers along the sides of the servo and tight to it and it's solid as a rock. Bit over engineered I know!

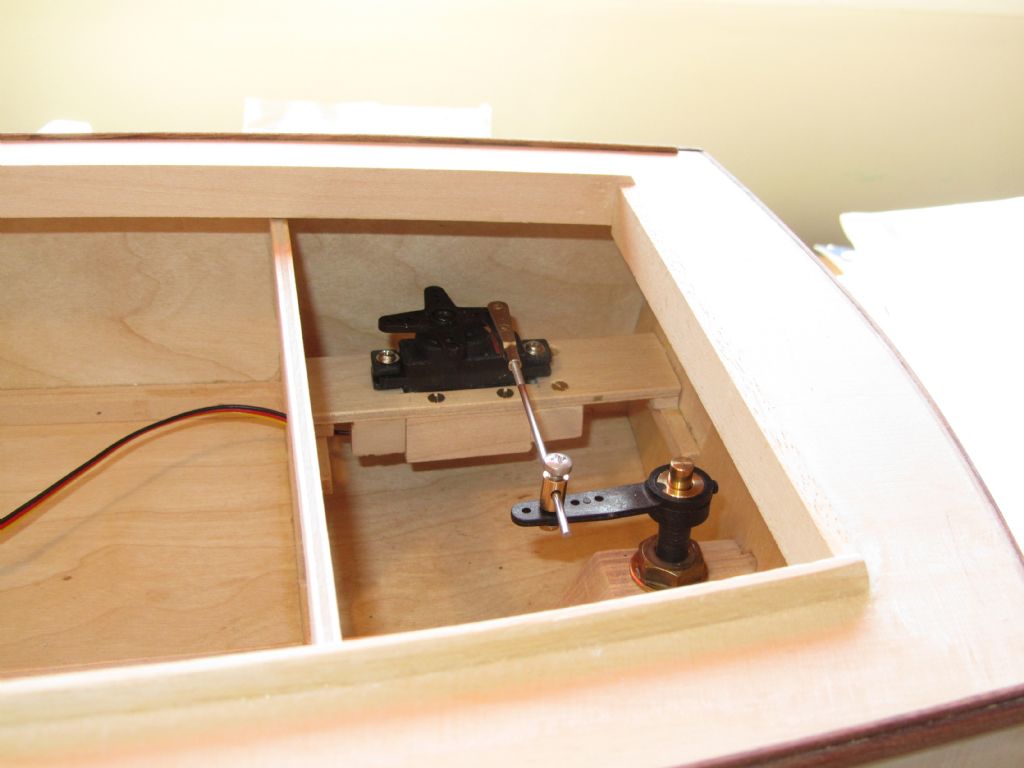
                                            Mocked up the connection fittings and due to the height of the one in the rudder arm needed to raise the servo mounting a bit so glued some additional bearers in and then glued the mounting in place.

                                            Chris

                                            servo 7.jpg

                                            servo 8.jpg

                                            #88530
                                            neil hp
                                            Participant
                                              @neilhp

                                              lovely boats…..…… beautiful woodwork…….pity to cover with paint……….but hey ho!!

                                              #88533
                                              Chris Fellows
                                              Participant
                                                @chrisfellows72943

                                                Thanks Neil. Much appreciated coming from someone with your skills.

                                                Yes, it's very tempting to leave them au naturel! smiley

                                                But the day of reckoning is getting closer!

                                                Chris

                                                Edited By Chris Fellows on 30/05/2020 21:05:57

                                                #102695
                                                Chris Fellows
                                                Participant
                                                  @chrisfellows72943

                                                  Remember this one!!! Last post over 2.5 years ago!

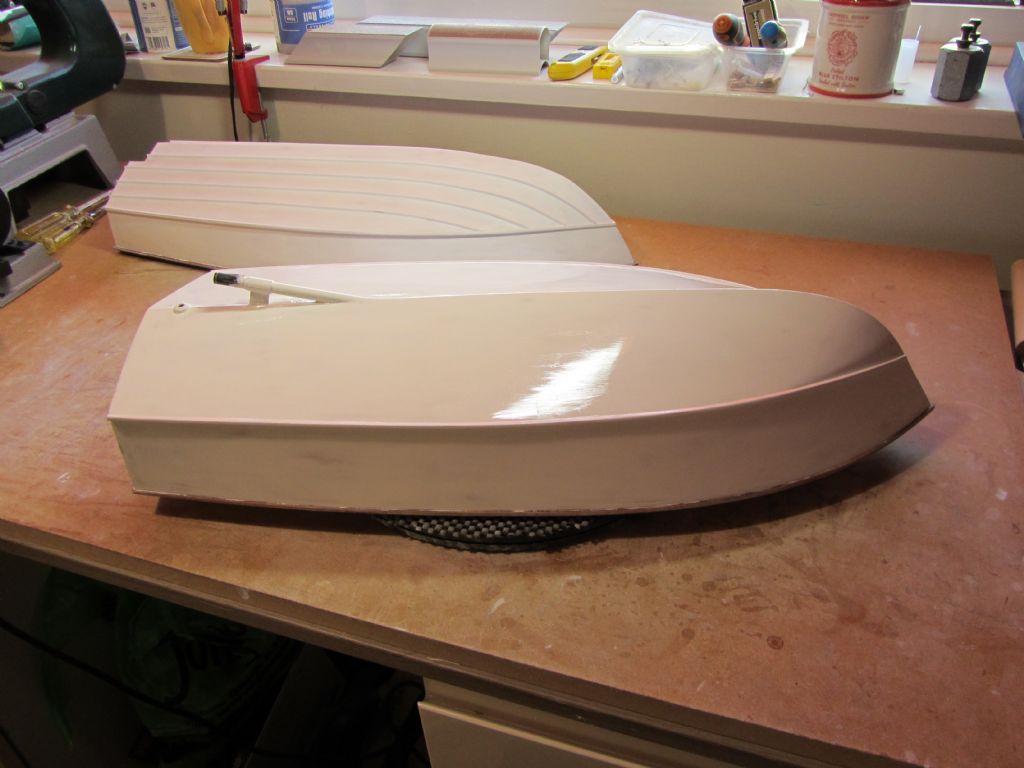
                                                  But the plan was to get all 5 builds to the painting stage which I have done. Though it was earlier in the year and summer delayed progress.

                                                  I was just going to paint the hulls initially on the Huntress and H28 but decided I might as well do this one as well as it is easier with no strakes. It had coats of One UP primer undercoat as per the other hulls, but unlike with those it didn't need any additional spot priming yesterday but just a bit more sanding with 400 grit silicone-carbide paper.

                                                  So today I tackled this one first and applied a coat of Toplac Plus topcoat to the hull bottom. After some frustration with the primer undercoat (see Huntress thread) I have to say it went on beautifully with my good quality brush. The paint is so much thinner, flows nicely and tolerates over brushing as it is slower drying than the One UP. Even after one coat the finish is lovely and high gloss. Sanding scratches are visible under close scrutiny but multiple coats and sanding with a finer grit should sort that.

                                                  I've done plenty of household painting but this is the first time I've painted a model with top quality brush paint and as such I was going to have to go through a learning curve. Maybe I should have done it on one hull first rather than three though! With the other two I shall certainly thin the primer undercoat down a bit.

                                                  I also gave the hull sides of the Huntress their first coat of gloss.

                                                  Chris
                                                  painting 2 - first gloss.jpg

                                                  #102697
                                                  Richard Simpson
                                                  Participant
                                                    @richardsimpson88330

                                                    That's a lovely finish Chris.

                                                    #102698
                                                    Chris Fellows
                                                    Participant
                                                      @chrisfellows72943

                                                      Thanks Richard.

                                                      As you found with the Craftmaster paint it certainly gives a lovely finish.

                                                      Chris

                                                    Viewing 25 posts - 51 through 75 (of 116 total)
                                                    • Please log in to reply to this topic. Registering is free and easy using the links on the menu at the top of this page.

                                                    Code of conduct | Forum Help/FAQs

                                                    Advert

                                                    Latest Replies

                                                    Home Forums Build Blogs Topics

                                                    Viewing 25 topics - 1 through 25 (of 25 total)
                                                    Viewing 25 topics - 1 through 25 (of 25 total)

                                                    View full reply list.

                                                    Advert