Colin Archer 1:15 scale

Advert

Colin Archer 1:15 scale

Home Forums Building Kits Colin Archer 1:15 scale

  • This topic is empty.
Viewing 25 posts - 1 through 25 (of 290 total)
  • Author
    Posts
  • #89339
    gecon
    Participant
      @gecon

      Hello, and I'm sorry, I did said I would not bore everyone (how many is that I wonder?) with a Colin Archer thingy. But….

      having had another quick look at the parts list while waiting for Fisher 34 epoxy to cure and reading that a bearing for the anchor windlass is refered to as a….'tarpaulin' I said to myself…"this has to be made public". All formed plastic parts are called a "plast steep". This reminds me of 'Roger Bacon's yuckspeak library' in Flight International Mag.

      How has anybody managed to produce a finished Colin Archer RS1 ? Finding parts is like going on a treasure hunt. I can understand why a certain lifeboat-keen forum member lost heart and sold his kit.

      Getting this Danish version of Norwegian history to be a waterbourne product is going to cause some new adjectives to eminate from my home shipyard/kitchen table.

      Another issue of 'never min the quality, feel the width' I fear.

      Hope I feel better tomorrow,

      George

      Edited By George Edward Connery on 21/06/2020 18:59:33

      Advert
      #6329
      gecon
      Participant
        @gecon
        #89342
        Ray Wood 3
        Participant
          @raywood3

          Hi George,

          Don't worry about the instructions, you know what it should look like complete plastic mouldings are a pain, but it does build into a lovely looking boat in the end

          Practical Boat Owner this month has an article regarding Fishers, PM your address I'll send it to you.

          Regards Ray

          #92477
          gecon
          Participant
            @gecon

            As mentioned on the 'soapbox' I've ended up with another Colin Archer model. Not because I think it's so great but merely that -for me- it seems to tick all the boxes. Now that I've done so much on the scratch build Fisher, I'm no longer afraid of a kit with scanty instructions. At least all parts are already there! -contra drawing them on a piece of wood and cutting them out.

            Buying the same kit again when the first one has only just been started on as a bit 'nuts' but, after looking around for another build and considering the prices here in Norway buying an abandoned, not-started kit is value for money AND environmentally freindly! There are several different CA models in the RS1 size of 46' so there is room for variations in the next kit.

            For me, the Colin Archer is the right size, can take a wave or two, can sail in a breeze, can motor in 'no breeze', fit's in the car (just) and is not too heavy to lug around.

            This kit has existed for many years so I expect that there no members here who are interested in a build log on it. I intend to complete the Fisher 34 build log but I won't be 'nagging the forum' with the Colin Archer kit build. If anyone wants to ask, I am of course I'm keen to tell what I learn from the build…if I can remember!

            George

            #95565
            gecon
            Participant
              @gecon

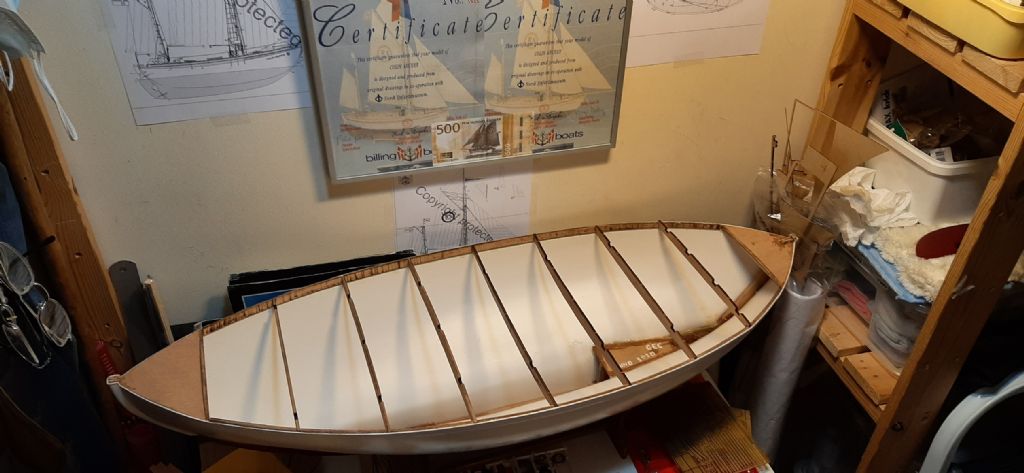
              20210517_085838.jpgThe Colin Archer is now up from cellar storage and moored in the flat's store-room/dry-dock. Some basic internals were epoxied in place last year. The cross-members have been loosely fitted to the hull. Some of them are a bit bent, having been stored in some other cellar -or loft- for years.

              I hope that building a kit will not be as labour-intensive as the scratch-built Fisher. However, due to the scanty instructions, a lot of time will be needed to study the drawings in order to find out what's going on. I am irrespective, looking forward to the build. A lot of ballast and R/C fittings have to go into the hull before the deck goes on so it'll be a while before there's much to report. I seem to remember promissing not to write a build log on this due to that anybody even remotely interested in the Colin Archer -built it years ago! I'll try to keep relatively quiet.

              I'll be using just 2 winchservos -each with enclosed drums. No long internal winch lines will be needed -just sheets to each clew. The two smallest sails will probably be self-tacking via 1mm elastic cord attached to a 'horse'.

              George


              Edited By gecon on 17/05/2021 08:55:45

              #95567
              Chris Fellows
              Participant
                @chrisfellows72943

                I for one will be following the build George.

                The number of views will tell you if folks are interested or not even if they don't post! There aren't enough build blogs!

                Chris

                #95592
                Eddie Lancaster
                Participant
                  @eddielancaster

                  Totally agree Chris.

                  Eddie.

                  #95626
                  gecon
                  Participant
                    @gecon

                    Having re-read some of my Fisher 34 build-blog I note that there's a lot of 'talking to myself'. After Ray said that this was actually permittedyes and was probably good Covid-therapythumbs up, it got even worse!

                    In that I actually have two identical Colin Archer kits in store, I will be writing my own building instruction sequences on the PC -so that I can follow my own instructions in case I do actually start kit nr.2.

                    Perhaps I can restrain myself to just writing a log (not a babbling-blog) of the completed sequences, err.. I'm talking to myself again.

                    Time will tell,

                    George

                    #95629
                    neil hp
                    Participant
                      @neilhp

                      oh , a babbling blog is so much better….then you don't miss any of the important points that you have to make.

                      I had one of these kits given to me by the wife of an old friend who sadly died from ahlziemers, and please dont castigate me when i make a jolity of it, as it was with humour that i got through the trauma of my mum dying from it 15 years ago, after 9 years of downhill suffering………we all cope in our own way with the disgusting desease. and mine was to make fun of the desease, and its consequenses, and not the person who, you love and doesn't know they are suffering..

                      But when i got the Archer, almost every part of the wooden deck beam support ladder was held together I presume by gravity and spittal……….my dear old friend had probably forgotten to put the glue in the joints, but he was a tryer, eveN to close to the end, but half the time didn't know what kit he was working on next……….never were two kits in all his collection that i sold for the RNLI complete, and had to go through them all to sort them out……..think he knew and sent me the task of sorting them whilst driving me crazy,

                      and so i sold it at the blackpool show along with all his others with all funds going to the RNLI, as he would have probably desired, as he was a ships captain of deep sea cargo vessels during his life,,,,,,,


                      and so i will be following this build to see just what i missed,

                      Edited By neil howard-pritchard on 19/05/2021 21:58:44

                      #95642
                      gecon
                      Participant
                        @gecon

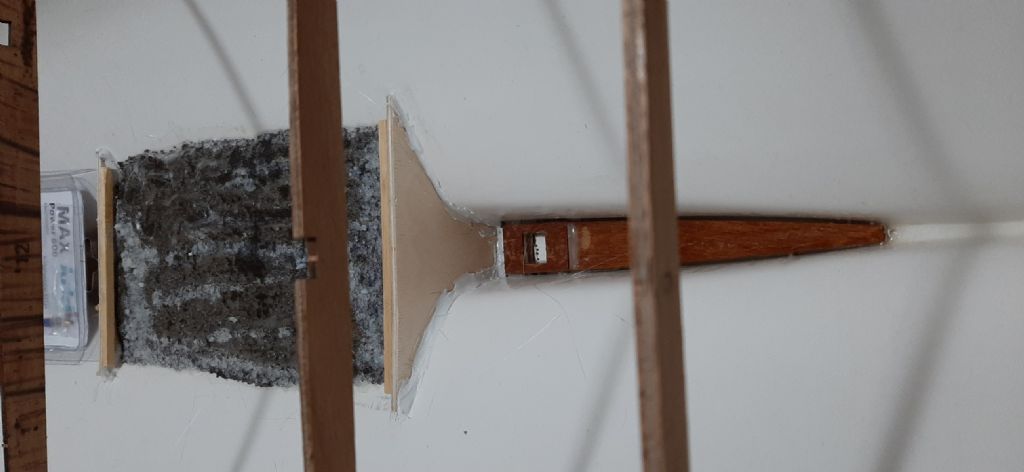
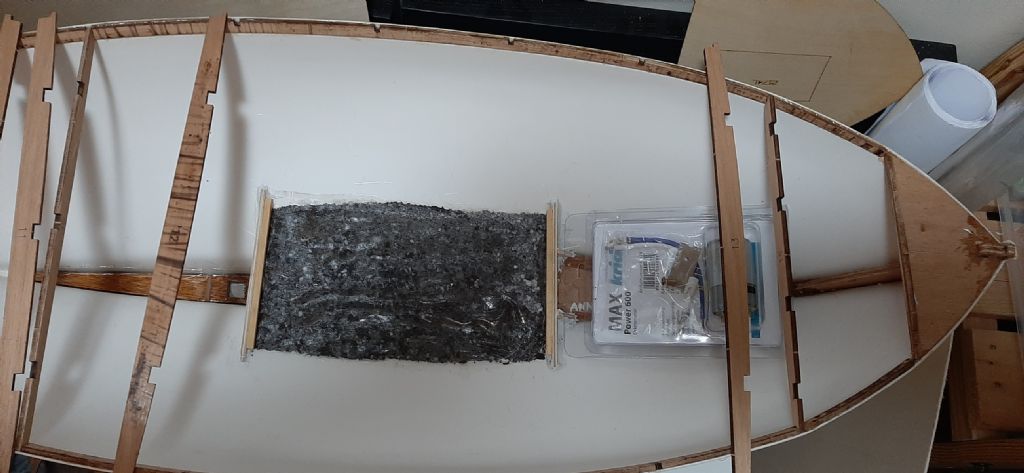
                        20210521_080135.jpgLight-ply bulkheads have been added forward of the motor platform and aft of the main mast. 6 kg of iron shot has been 'poured' in. Some thickened resin poured over it. Glass cloth laid on and then more resin to seal the cloth.

                        The ballast area will then be covered by a removeable light-ply deck with space below for about another 1kg ballast.

                        George20210521_000549.jpg

                        #95650
                        Chris Fellows
                        Participant
                          @chrisfellows72943

                          Photographs and blogs are so useful. I find myself referring to them quite often to see how I did things on previous builds.

                          Rambling is an essential ingredient!

                          Chris

                          #95654
                          gecon
                          Participant
                            @gecon

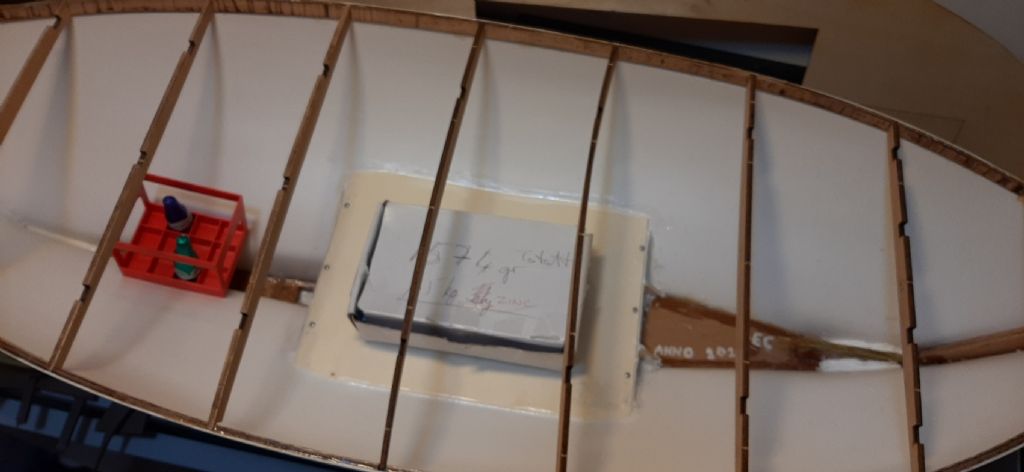
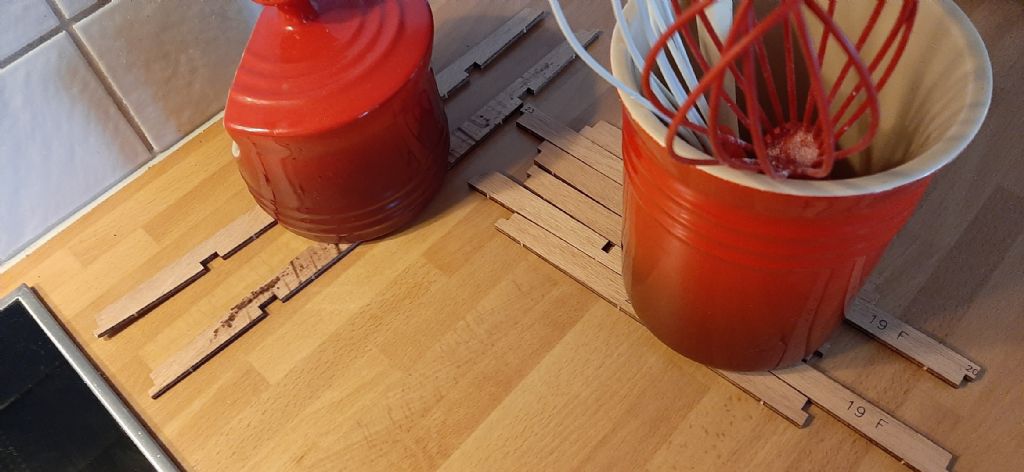
                            A 3mm light-ply cover screwed in place over the ballast. Thin layer of silcone applied to seal it along the edges. Wood sealer will be applied when the silcone has set. Bent crossbraces (not glued in yet) will not be noticed later as these are to be cut away for the hatch opening, but they will be straightened up before glueing!

                            Well, it's Friday again and you what they say…."work is the curse of the stanchion support-wire collector's club".

                            George20210521_145343.jpg

                            #95680
                            gecon
                            Participant
                              @gecon

                              A few cross beams were soaked in hot water and laid out to dry under press.

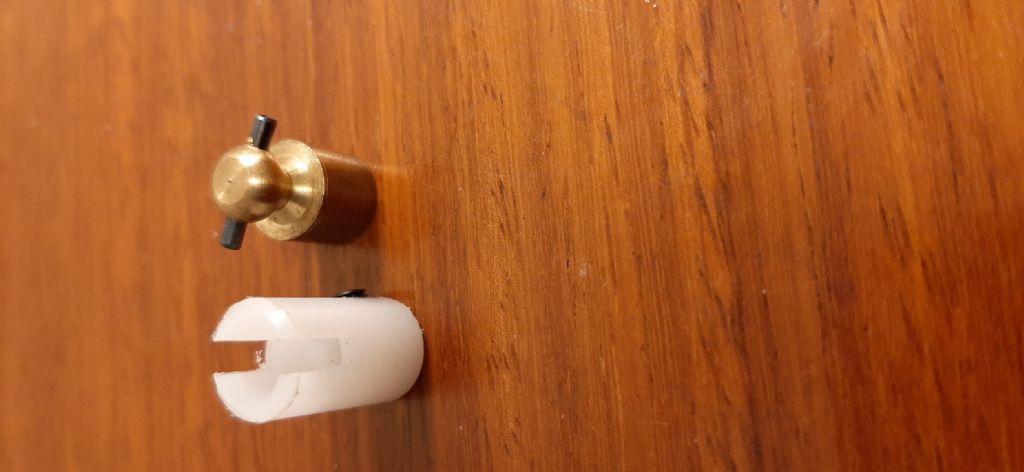
                              In the meatime I had a look at the U/J supplied in the kit. Not exactly world class quality, and the plastic part was out of true. Had to order a propper U/J. In their defense, it was probably produced 25 years ago.

                              George20210522_185405.jpg20210522_185933.jpg

                              #95828
                              gecon
                              Participant
                                @gecon

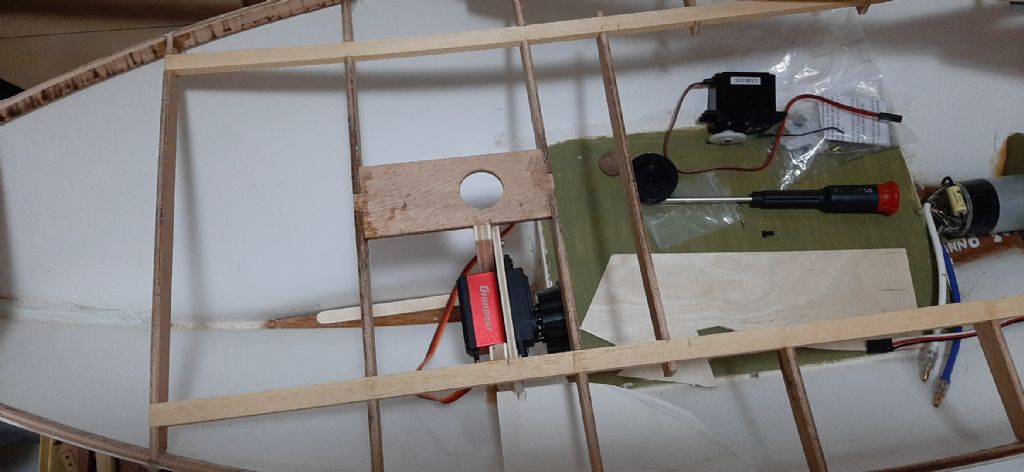
                                I remembered that I had another CA kit in the cellar, so I dug that out, but the U/J was no better. It may be that there is enough 'give' in the nylon to absorb som misalignment but I didn't want to put that to the test just yet.

                                I expect it will tolerate an angular difference of a few degrees in one plane, but I'm not sure about the slight rotational 'wobble' i can see when the plastic part is screwed to the shaft and rotated.

                                I have received a 'propper one' in the post now, made by Krick Ro-Marin (Robbe).

                                George

                                #95909
                                gecon
                                Participant
                                  @gecon

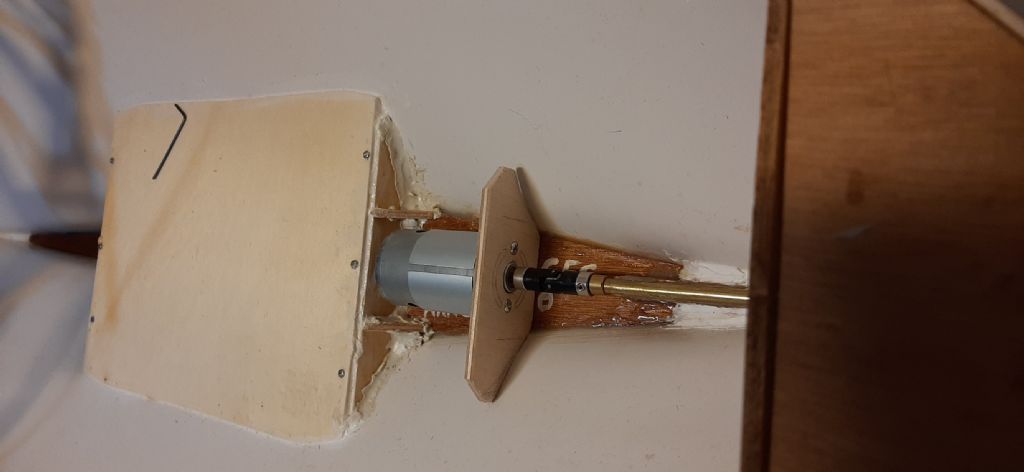
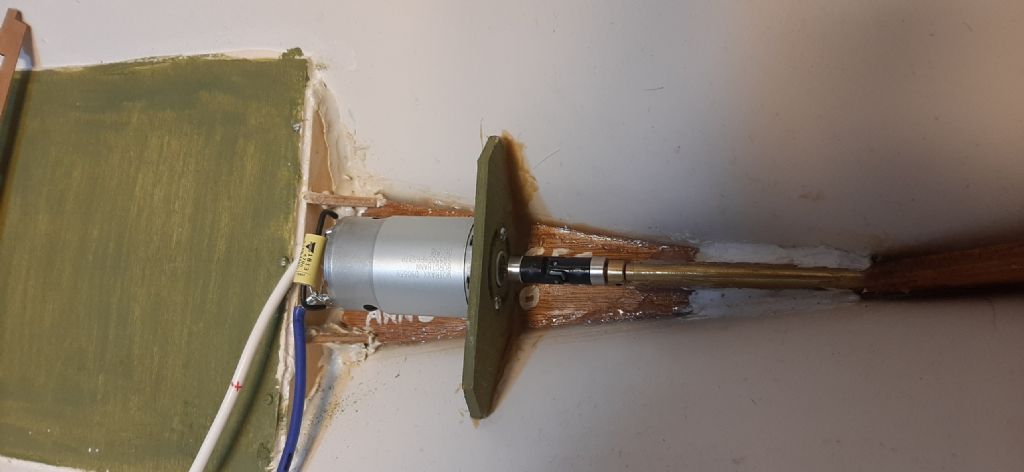
                                  20210603_103805.jpg Proprietary motormounts will not fit into narrow 'engine room' , so made a simple motormount/frame and bedding plate.

                                  It's now been painted it a greenish colour; a clear woodstain mixed with 25 year-old matt green Humbrol enamel.

                                  George20210603_103841.jpg

                                  #95984
                                  gecon
                                  Participant
                                    @gecon

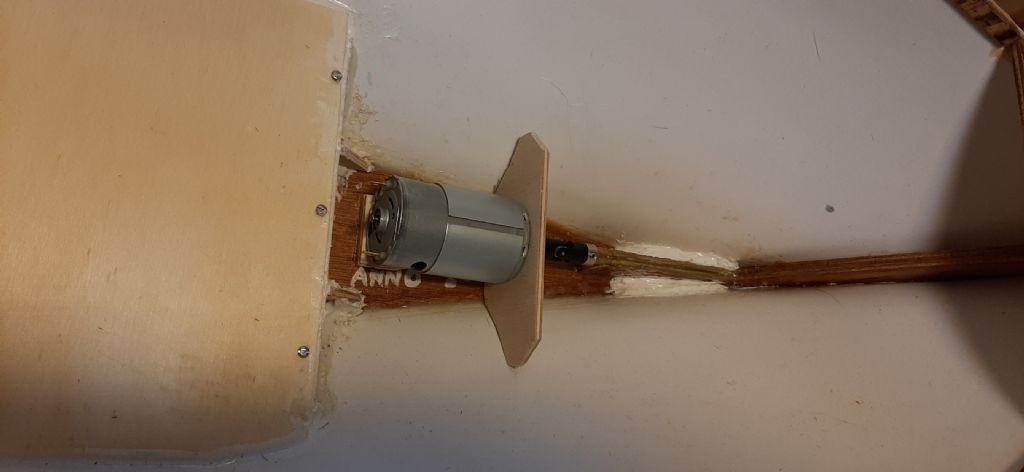
                                    20210606_152924.jpgThe motor has been comprehensively 'suppressed' and is now installed in spite of the discovery of a slightly bent propshaft. I hope that the U/J won't complain too much. I will be able to replace the shaft later if tests show too much vibration. The motor will only be run at around 2000-4000 rev's and for short runs, so I hope that will be OK for the new U/J to 'absorb'.

                                    I'll send an e-mail to Billing Boats in Denmark and test out their after sales service for products purchased years ago! I suspect that they use the same shaft and coupling in today's kits.

                                    I have once again just remembered that I have another kit in the cellar! I'll try the shaft in that kit! You never know, I might strike lucky.

                                    The green woodstain and messy Stabilit Express will not be visible when the interior detail is installed.

                                    George

                                    Edited By gecon on 06/06/2021 15:03:19

                                    #96006
                                    gecon
                                    Participant
                                      @gecon

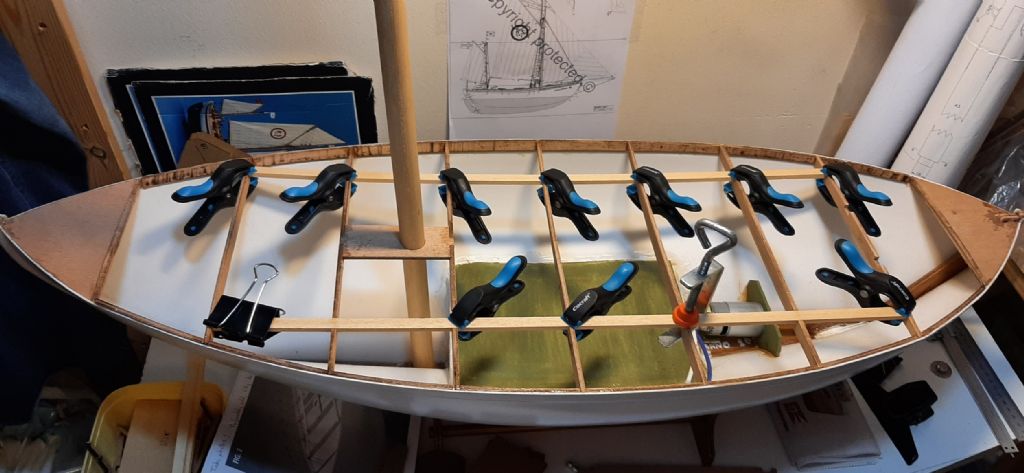
                                      Rest of the crossbraces glued in place last evening and stringers done this morning. A couple more braces and short stringers which surround the aft cockpit area still to go on. Exact position of all of these is not shown on plan or instructions, so have to loose fit the laser cut deck to help get them in the right place.

                                      After that, there'll be even slower progress while planning some interior detail which -hopefully- will hide some of the RC gear.

                                      George20210608_100741.jpg

                                      #96033
                                      gecon
                                      Participant
                                        @gecon

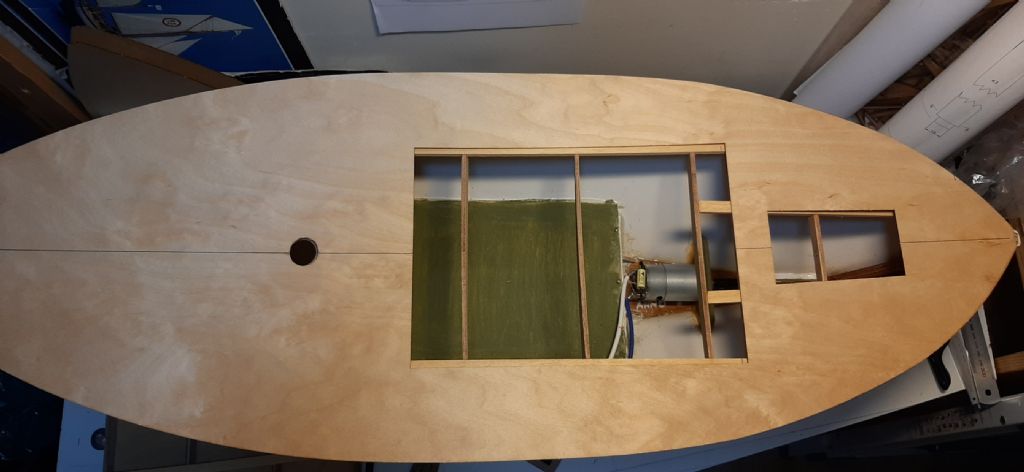
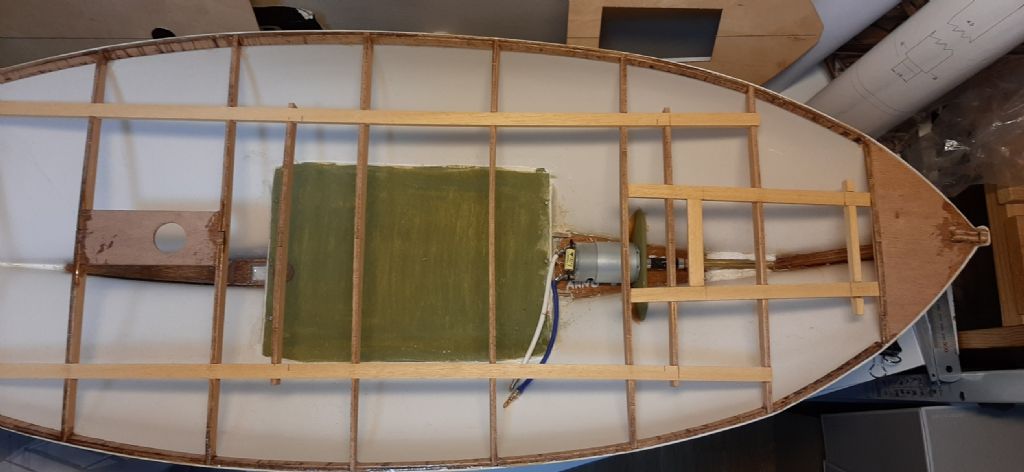
                                        20210609_214246.jpgAlmost as boring as whatching paint dry, but a build log is never going to be exciting reading/looking. The deck was loosely fitted onto the hull to determine the positions of the final aft cockpit stringers and 2 hull cross beams which were then all glued in place.

                                        Some beams have to be partially cut away in order to access the internals and to fit the cockpit unit into the aft well.

                                        I'll then have to work on installing the R/C units and then -perhaps- try to make interior 'furnishings'. I like the idea, but it's going to take a long time to achieve, I fear.

                                        George20210610_115308.jpg

                                        #96071
                                        gecon
                                        Participant
                                          @gecon

                                          Sorry, but I need to deviate from the promise of 'no babbling' in order to mentioned sail winches.

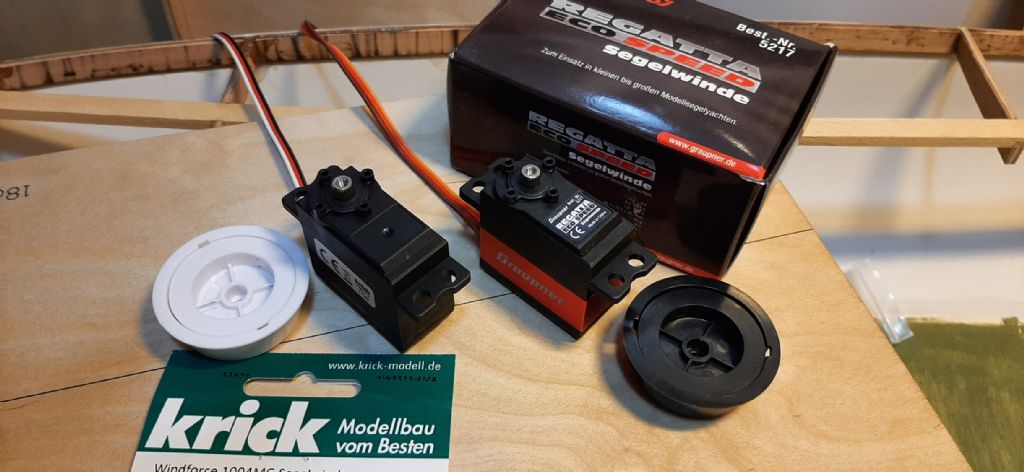
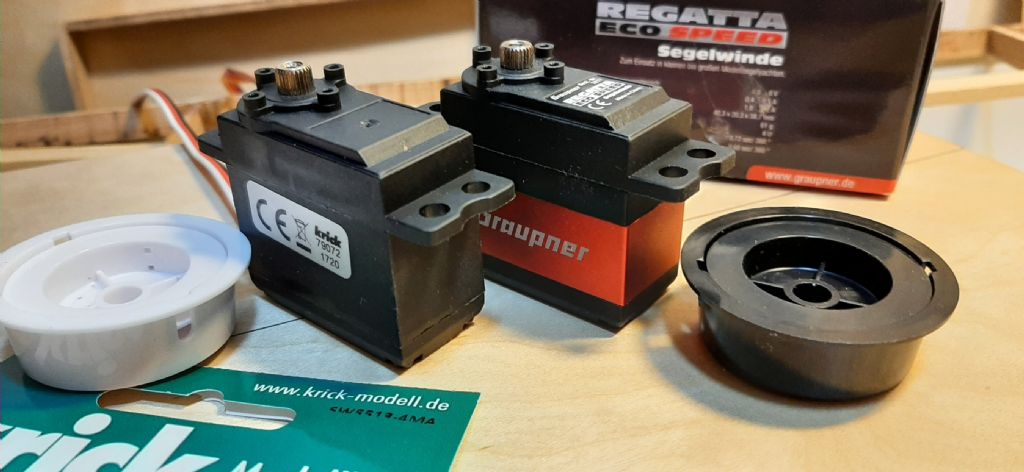
                                          I mentioned a little about choice of sail winches long ago in the Fisher blog. Initially the only one I could get hold of easily (and almost locally) was the Graupner Regatta Eco Speed nr. 5217 -shown in the photo. The Fisher has 3.

                                          The Krick sail winches were unknown to me until I bought the Comtesse yacht. This has only one winch – a 1406 MG – which has exactly the same specs as the Graupner 5217. The Krick is only marked with CE electrical approval label -embellished with "krick 79074". The case is exactly the same shape and size as the Graupner. The Graupner comes in a glossy sponge-filled box. The Krick comes in a 'plackey bag'. This may be why there's £40 price difference!

                                          Graupner state that the 5217 as 'anologue'. Krick say their's is 'digital'.

                                          I have bought both Graupner and Krick winches both locally, and from CMB -depeding on who had them in stock at the time. CMB with postage to Norway is about 30-40% cheaper than buying in Norway. Graupner winches are available again at graupner.de. I don't know what they cost now.

                                          I recently bought two Krick 1004MG winches from CMB which have only 4 turns -as apposed to the others which have 6 turns. This winch has less power than the others is stated as being 'analogue' and is half the price. I would have prefered the 1006 MG which has 6 turns and same spec, but none were in stock. I will try the 1004MG on the Colin Archer mainsail as 4 turns should give sufficient sheet length.

                                          All the Krick winches and the Graupner 5217 have enclosed drums which – I believe- will obviate the need for long sheet control runs below decks. I will probably need some spring tensioning on the foresail sheets to absorb the small differences in inhaul/outhaul lengths, but will try a different method than that used in the Fisher.

                                          OMG; this really was a 'big babble' -and so far I'm only on coffee! Photos of the winches will be posted seperately.

                                          George

                                          #96073
                                          gecon
                                          Participant
                                            @gecon

                                            20210611_135352.jpgGraupner and Krick sail winches. The Krick shown is the 1004MG which is a 4-turn winch to be tested out on the Colin Archer mainsail.20210611_135434.jpg

                                            Edited By gecon on 12/06/2021 08:23:59

                                            #96095
                                            gecon
                                            Participant
                                              @gecon

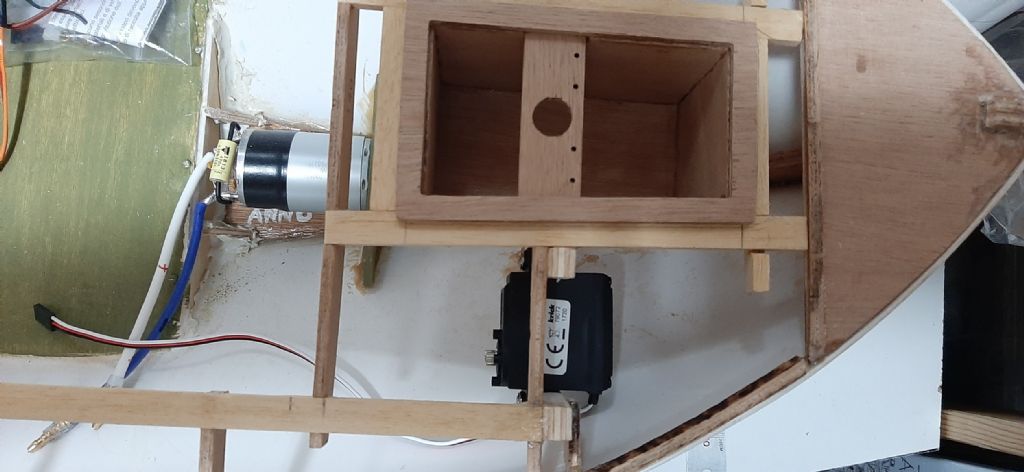
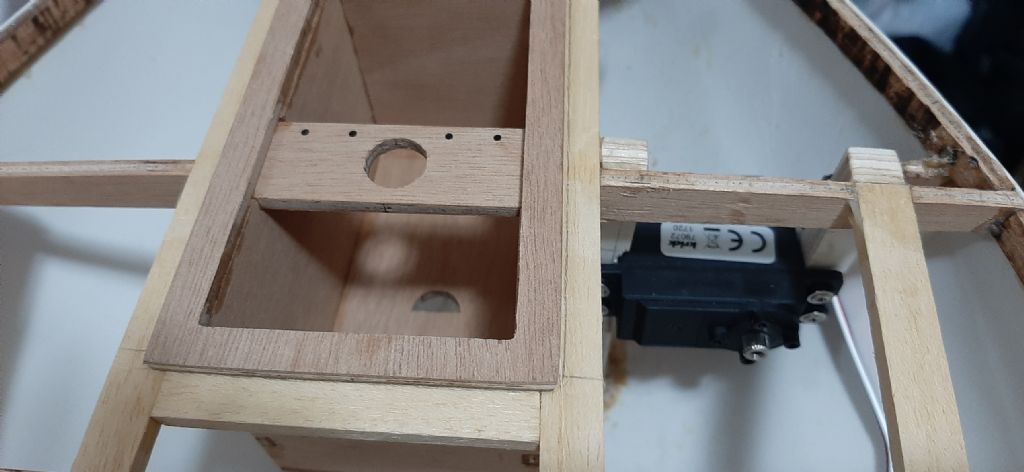
                                              20210612_222654.jpg20210612_222703.jpgThe 4-turn Krick sailwinch is now lurking below deck abeam the cockpit / steering well. The winch drum will be attached later on in the build. The mainsheet will be routed through the side of the steering well via a brass guide tube, up to and through a ring mounted on the mizzen mast and further to the end of the main boom.

                                              The main boom will be controlled only by pulling it in to centre and then releasing on the opposite tack. Which is of course, is as 'standard' as you can get.

                                              George


                                              Edited By gecon on 12/06/2021 22:07:22

                                              #96115
                                              gecon
                                              Participant
                                                @gecon

                                                Graupner 6-turn winch installed abeam the main mast position. Need to devise a cunning spring compensation/tensioning system and attach it20210613_203415.jpg to the hull sides. Still thinking, but getting there -I thinkidea

                                                #96177
                                                gecon
                                                Participant
                                                  @gecon

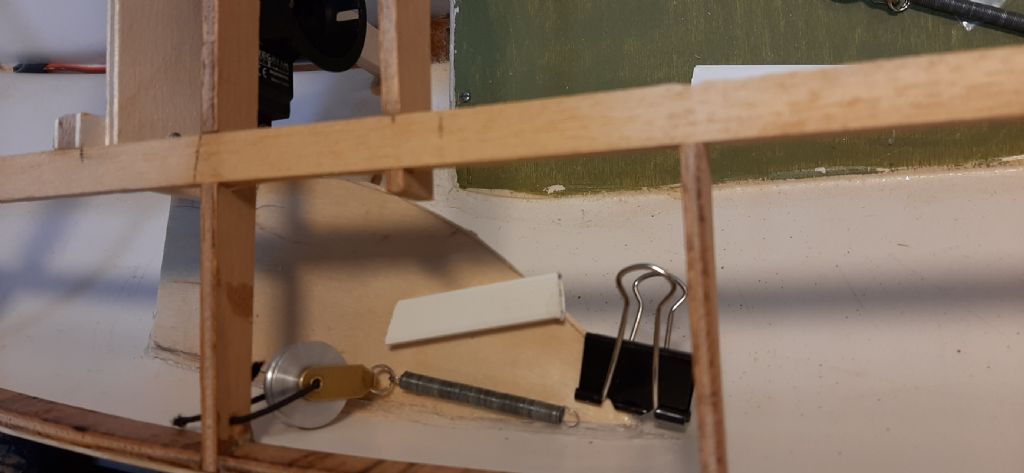
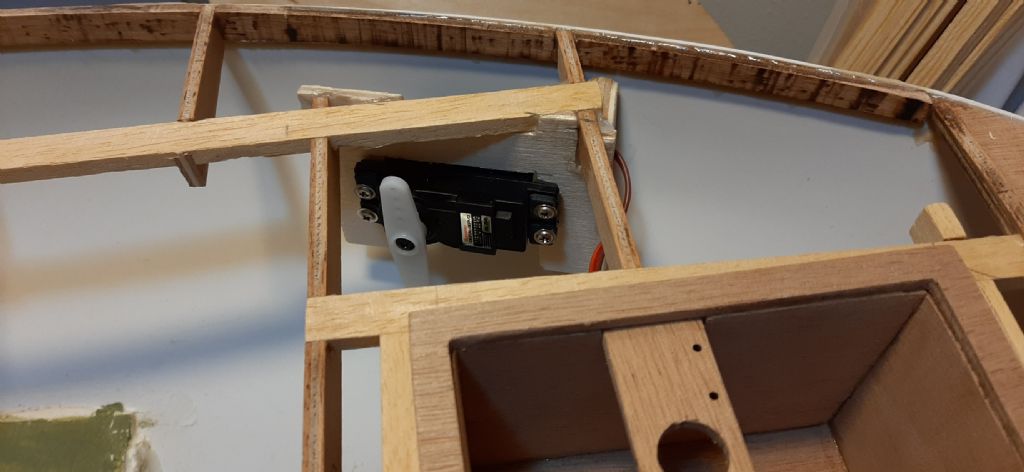
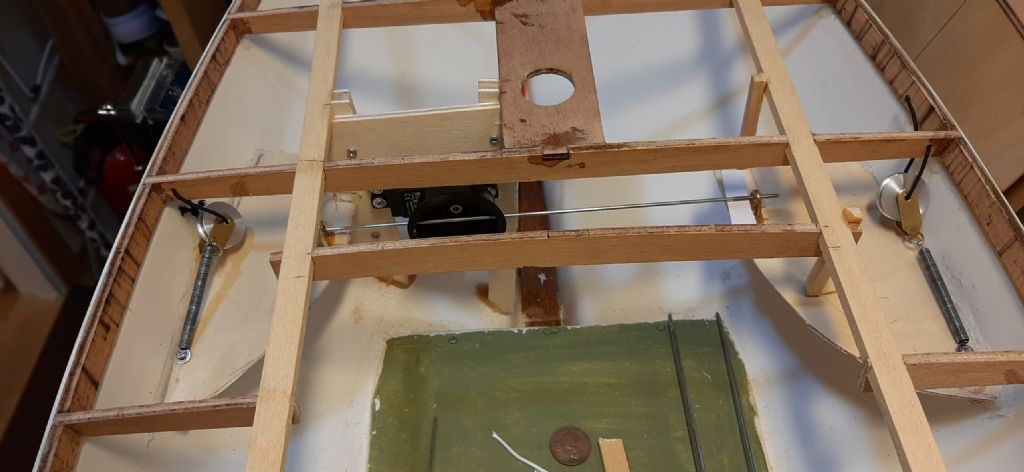
                                                  20210616_171618.jpgInstalled the rudder servo yesterday and started on an attemt to make a simpler type of line tensioner for the jib. A turn pulley will be spring-mounted P&S abeam the winch drum. These will hopefully 'absorb' the extra 1cm of line run caused by the increasing drum diameter as the line is wound onto the drum.

                                                  From the pulley the lines will be guided up through the foredeck P&S via blocks to the clew of the jib. The 'jib' being a medium sized foresail tacked to the end of a longish bowsprit.

                                                  George20210616_171534.jpg

                                                  #96189
                                                  gecon
                                                  Participant
                                                    @gecon

                                                    I have now produced what I hope will function as a combined sheet tensioner and shock absorber for the jib winch. It looks very 'home made', but that's because it's very home made!laugh

                                                    George20210617_161259.jpg

                                                    #96590
                                                    gecon
                                                    Participant
                                                      @gecon

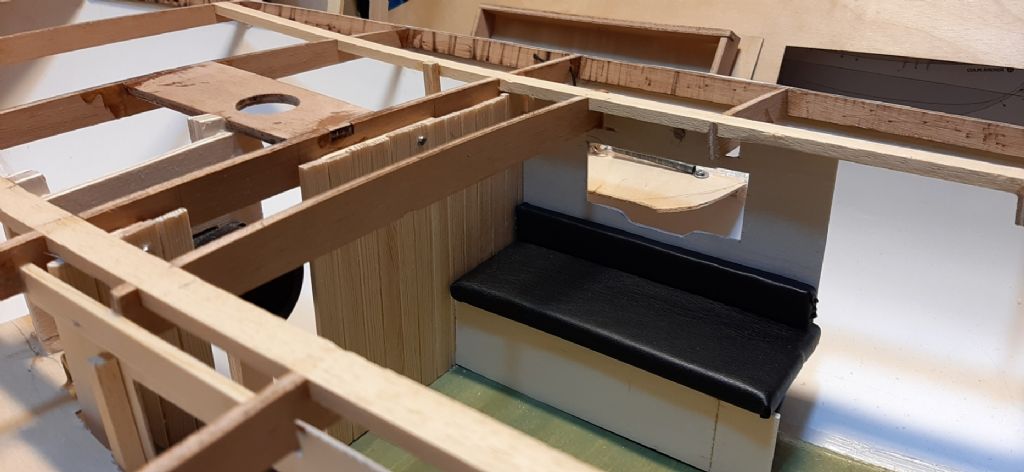
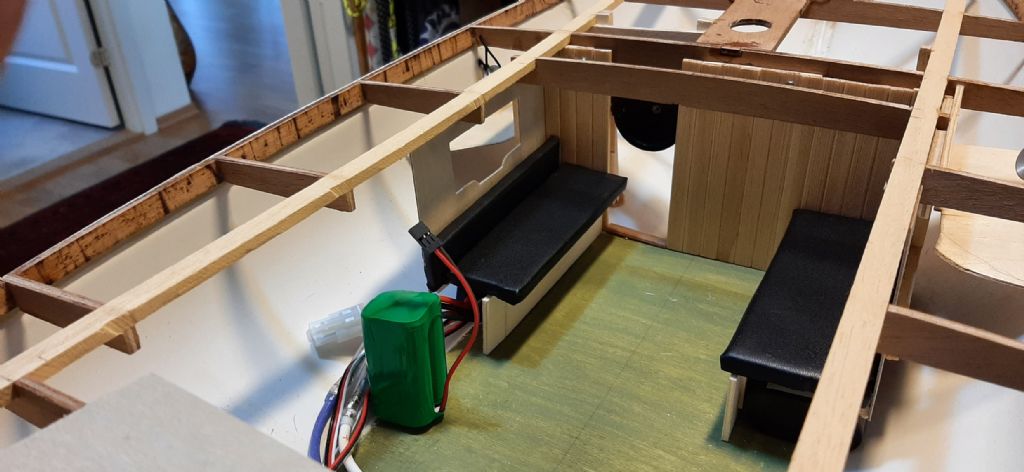
                                                      20210630_112450.jpgSlow progress recently due to unusually good weather. Also, interior fitting out has been as case of one step fwd and two back. Each completed detail shows up two or three additional new ones to be incorporated! I refer to interior photos of the of the full size Colin Archer. A lot of planning needed to hide the R/C and to make benches and lockers removeable to give access to it. Above each bench seat there is access to a sea birth. These will be closed off by a black/white gingham chequered curtain, as the original.

                                                      George

                                                      20210630_112405.jpg


                                                      Edited By gecon on 01/07/2021 15:49:03

                                                    Viewing 25 posts - 1 through 25 (of 290 total)
                                                    • Please log in to reply to this topic. Registering is free and easy using the links on the menu at the top of this page.

                                                    Code of conduct | Forum Help/FAQs

                                                    Advert

                                                    Latest Replies

                                                    Home Forums Building Kits Topics

                                                    Viewing 25 topics - 1 through 25 (of 25 total)
                                                    Viewing 25 topics - 1 through 25 (of 25 total)

                                                    View full reply list.

                                                    Advert