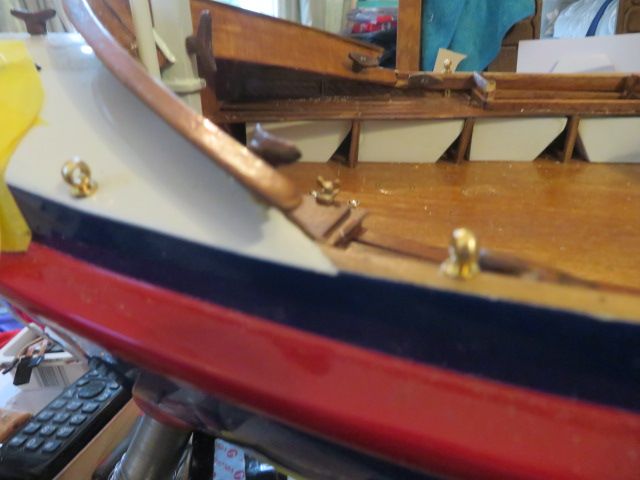
Liverpool class Lifeboat, a Metcalf models kit.

Advert

Liverpool class Lifeboat, a Metcalf models kit.

Home Forums Building Kits Liverpool class Lifeboat, a Metcalf models kit.

  • This topic is empty.
Viewing 25 posts - 176 through 200 (of 214 total)
  • Author
    Posts
  • #100403
    neil hp
    Participant
      @neilhp

      I took delivery today of my set of sails that a lady on Fleetwood market stitched for me.

      they were double rolled hems all round to stop them freighing and line stitched virtically on each sheet.

      And look superb. what she didn't do, and i hadn't asked her to do so, was to stitch the perimeter of each sail with a "rope" strengthener and loops in to each corner of each sail as an attaching loop for the rigging.

      I stitched those into place this evening………..and took me nearly 7 hours………..good job i was only watching probably the most boring film ever whilst doing most of it…….the good bad and ugly………but it helped pass time.

      Any way, the sails are now done and ready to rig…………in fact all construction parts are done and now ready to fit on to the boat, and i think i have found a 40mhz tx/rx set as well……..so things are looking peachy…….

      img_2180.jpg

      img_2181.jpg

      img_2182.jpg

      img_2184.jpg

      Advert
      #100434
      neil hp
      Participant
        @neilhp

        It has been very slow progress so far on my Liverpool lifeboat, and it seems that little has been done.

        Waiting for sails, problems with the radio gear, and other things, plus been feeling low and depressed and lethargic due to personal matters plus covid in late march…….but a reawakening and the thought that the sail is getting closer has given me some impetus to get things going again.

        and so i today fitted the side bench supports and the bouyancy boxes, using a glue that my daughter found me in ASDA a few weeks ago………As it says on the tube Extreme…………it certainly is.

        it is a gell aplied to one surface only on anything to be glued, and as yet i havent found anything that it won't stick yo something else.The only thing with it is that it has a grab time of 30 minutes with a full setting time of 12 – 24 hours depending upon room temperature………..but boy does it stick solidly.

        Just waiting for some odorless superglue to arive so that i can fix all detailing to the fore/aft bulkheads and the decks……..next job.

        img_2240.jpg

        img_2241.jpg

        #100435
        neil hp
        Participant
          @neilhp

          the port side slats have been added to the tops of the supports, and the starboard side side now started but a little more difficult as the overhang of the front top box overhangs and gets in the way of gluing the fore most slat to the support.

          img_0240.jpg

          img_0241.jpg

          img_2242.jpg

          #100436
          neil hp
          Participant
            @neilhp

            both benches now glued and waiting to set…………shall leave it tonight and de-pin it tomorrow before gluing the rope bins on to the slats tomorrow.

            img_2243.jpg

            Edited By neil howard-pritchard on 11/05/2022 16:46:39

            #100437
            Richard Simpson
            Participant
              @richardsimpson88330

              Looking really good Neil. I like the stand, very neat the way it accommodates the keel and the bilge keels. I like the idea of the feet as well. I have just put a large model on a low stand and found that i can't get my fingers below the keel to lift it up. Feet on the stand might be a good idea.

              Edited By Richard Simpson on 11/05/2022 17:42:55

              #100440
              neil hp
              Participant
                @neilhp
                Posted by Richard Simpson on 11/05/2022 16:56:02:

                Looking really good Neil. I like the stand, very neat the way it accommodates the keel and the bilge keels. I like the idea of the feet as well. I have just put a large model on a low stand and found that i can't get my fingers below the keel to lift it up. Feet on the stand might be a good idea.

                Edited By Richard Simpson on 11/05/2022 17:42:55

                thanks Richard,


                that all came about after i had practically finished a shelter deck trawler for the Lerwick Museum in Shetland [reviewed it in a build project for model boats mag years and years ago]


                i was sliding it off the table to put it safely in another room, and because i couldn't get my fingers under the flat board, tilted it……and it took off skidding across the work shop floor doing a lot of damage……so adopted those little feet with an addition after i had repaired the model.


                it got to Lerwick undamaged, via THE fishing trawer and skipper of the model I had been asked to model, aka Sunbeam, lk 335, I met at Aberdeen who then took it home to the Shetlands…..


                Edited By neil howard-pritchard on 11/05/2022 19:48:33

                #100441
                neil hp
                Participant
                  @neilhp

                  I think i have finally got my enthusiasm and mojo back.

                  I think that with the sails, the radio gear and the fact that the bouyancy boxes and benched went well this afternoon, i started on doing little jobs that i have been putting off for fear of making a muck up of them.

                  the first job was to find some rubber gromits that i had been keeping for years thinking they might come in handy for somethig other than what they were ment for………mounting servos.

                  I needed to water proof the exit holes 0 and feed all through the end box without fear of leaking through the enlarged holesfor the two sets of leads for the port and starboard navigation lamps.When i first made the holes for the wires to come out of the end box i drilled just a 3mm hole and fed the wires out to a greater length than i needed so that i could solder the LED leads complete with resisters, knowing that those resisters would ebentually go back under the end box top…..

                  so left long enough leads to drill around with a reamer to get the resisters through a bigger hole, then sealed with the rubber gromit……….all is now set to solder lights to wire, add the nav light boxes and feed the wires throgh without fear of leaks.

                  img_2244.jpg

                  img_2245.jpg

                  img_2246.jpg

                  img_2247.jpg

                  #100458
                  neil hp
                  Participant
                    @neilhp

                    pins removed from the slats and the rope bins added to the benches.

                    I alsi added the printed deck in to the cabin aft space usung 30 minute eboxy so as not to warp the under deck which fits snugly into the deck recess, and "clamped" it down usunf 2 blocks of lead and 3 "sacks" of led shot that i use for moveable ballast in boats when needed

                    img_2249.jpg

                    img_2250.jpg

                    img_2251.jpg

                    img_2254.jpg

                    #100466
                    neil hp
                    Participant
                      @neilhp

                      Remenber the groove i cut into the main mast…………

                      well it was utilised today to set the wiring into for the mast head light and the deck lamp.

                      it has to be filled in with some sawdust mixed with aliphatic resin, and then once set, stained and then painted………….but the lamps work, and tested numerous times during the fabrication and soldering.

                      all lights are 12v LED's.

                      just the port/starboard navigation lights to wire in now and fit into the light boxes.

                      img_2255.jpg

                      img_2257.jpg

                      img_2258.jpg

                      #100470
                      neil hp
                      Participant
                        @neilhp

                        been fitting the wooden cleats ready for the masts and sails going on the boat,

                        and then soldered [tinned] the wires for the navigation lights, plus getting the light boxes ready for taking the LED's

                        img_2259.jpg

                        img_2263.jpg

                        img_2261.jpg

                        img_2264.jpg

                        #100473
                        neil hp
                        Participant
                          @neilhp

                          Started attaching the external fittings to the hull this morning.

                          Have been putting it off as have been waiting for 2 bottles of odourless gel superglue, but after 2 weeks of waiting for it to arive, bought from eBay I checked where it was coming from………COLLERAINE, Northern Ireland………so now realise why it is taking so long…….the EU F*** up with cross sea customs….can't blame the company…..just idiots that make rules. So, beware, if you order from N. Ireland, BE prepared to wait.

                          Anyway, as I still dont have the glue, I decided to add the items to the hull using waterproof double sided tape that I have used before, and started with the wash port covers……

                          Masked off one side, and put on a "placer" so that the others could be measured and fitted, using the masking tape to mark centres, plate to plate.

                          However the sun came out and i fealt guilty that I couldn't see our pug in the long grass so got the mower out.

                          img_2265.jpg

                          img_2266.jpg

                          img_2267.jpg

                          img_2268.jpg

                          #100477
                          neil hp
                          Participant
                            @neilhp

                            tonight, whilst watching an Australian 12 hour endurance race live, i have put on to the boat, the freeing port flaps and the water cooling inlets onto the bilges.

                            No photo description available.

                            No photo description available.

                            #100490
                            neil hp
                            Participant
                              @neilhp

                              I am getting just a tad peee'd off.

                              Now 3 weeks since I ordered two bottles of medium to thick oderless cyano from Northern Ireland and they still have not arived for fitting all the details, so have ordered some thin from down sowf sumwerr.

                              But in the meantime decided to get the rigging underway.

                              First job was to mark the position of the brass tabernacle a mate cut and silver soldered together for me some time ago. I had earlier drilled holes for screwing it to the deck and had reinforced the underside of the deck with 6mm birch faced ply..

                              After marking the possitions of the tab and the screw holes, I drilled slightly undersize for the small receiver box holding screws…..the ones with the soldered washer attached that will hold the tabernacle to the deck.

                              Next was to mark for the eye bolts for and aft that will hold the bottle screws and rigging stays from the mast heads to the bulwarks/end boxes…drill the holes to tightly screw in the eye bolts, and then rig the bottle screws.

                              The bottle screws are working brass fittings that I bought from an Italian supplier I saw on ebay search, and are nice substantial fittings that will when fitted tighten up the rigging nicely.

                              To one end of each I have attached a loop ring [i.e. a link from a cuckoo clock chain] for tying the mast rigging to, and one on the other end of each bottle screw for attaching a fishermans swivel link and clip to attach to the eye bolt.

                              All is now ready for when I can detail the inside of the deck and bulk heads before fitting the masts.

                              img_2295.jpg

                              img_2296.jpg

                              img_2298.jpg

                              img_2301.jpg

                              img_2302.jpg

                              img_2303.jpg

                              img_2304.jpg

                              #100492
                              Richard Simpson
                              Participant
                                @richardsimpson88330

                                Nice job. You can't beat real bottle screws to look the part and to actually make tensioning the rigging easy. I usually then paint them with either a varnish or an enamel wash to help prevent them working loose in operation.

                                #100501
                                neil hp
                                Participant
                                  @neilhp
                                  Posted by Richard Simpson on 16/05/2022 22:47:35:

                                  Nice job. You can't beat real bottle screws to look the part and to actually make tensioning the rigging easy. I usually then paint them with either a varnish or an enamel wash to help prevent them working loose in operation.

                                  not thought of that Richard.

                                  will do that………….

                                  i normally run a lencth of brass wire through the centre holes to stop them spinning……….i'll use both this time for double cover.

                                  #100502
                                  neil hp
                                  Participant
                                    @neilhp

                                    Some odorless cyano arived this lunchtime……..

                                    NO!!! NOT the stuff from Northern Ireland, but some I ordered last night on Amazon, with a 3 day delivery expectancy.

                                    And so began to put together those parts that needed the glue, and i have got further this afternoon, than i have in the 3 weeks that i have been waiting delivery from Ireland…….its just pitiful tbh.

                                    but i have put together the loud hailer, the pins into the stanchions, the carriage quick release brackets, the steering wheel and brackets, plus the wooden brackets for locating and holding the life ring to the cabin top.

                                    Even the padlocks fitted to the lockers, found their way onboard, lol.

                                    img_2306.jpg

                                    img_2307.jpg

                                    img_2308.jpg

                                    img_2309.jpg

                                    img_2311.jpg

                                    img_2312.jpg

                                    img_2313.jpg

                                    img_2314.jpg

                                    img_2315.jpg

                                    img_2316.jpg

                                    img_2317.jpg

                                    #100504
                                    neil hp
                                    Participant
                                      @neilhp

                                      luckily I put the mizzen mast mounted slightly to starboard not because I knew I had to mount the steering rod of the wheel centrally, but because…….

                                      I had forgotten about the steering rod, and it was purely by accident that I did and it fits well.

                                      img_2318.jpg

                                      img_2319.jpg

                                      #100507
                                      Richard Simpson
                                      Participant
                                        @richardsimpson88330

                                        Great job and reminds me I once had a lengthy "discussion" on another model boat related forum with a chap who informed me that I had fitted the wheel on a model I was building back to front. No matter how much I presented him with references he still insisted that my wheel was backwards.

                                        Needless to say he remained adamant he was right so I gave up trying to illuminate him.

                                        #100511
                                        Chris Fellows
                                        Participant
                                          @chrisfellows72943

                                          Well, it is backwards! But that is how it is supposed to be! smiley

                                          #100516
                                          neil hp
                                          Participant
                                            @neilhp

                                            DONE IT!!!!!?

                                            A job I didn't feel like doing and one I couldn't do because I hadn't got any cyano to seal the "rope" ends.

                                            But having received it yesterday, and after I had put together the white metal fittings I spent the next 3 hours to rig 32 blocks I am now ready to rig the masts and sails when the time is right……….

                                            .and I can't see that being long, now that I have the glue to secure all the fittings.

                                            And this afternoon and evening I put together the none working bottle screws and slip links plus anchor points for the chains that run through the stanchions.

                                            plus the eyelets and bases for the safety grab ropes that run from the sides of the boat. they will all go for painting along with the other pieces i put together yesterday, tomorrow morning.

                                            img_2320.jpg

                                            img_2321.jpg

                                            img_2324.jpg

                                            img_2325.jpg

                                            img_2326.jpg

                                            #100532
                                            neil hp
                                            Participant
                                              @neilhp

                                              i have strung the starboard side of the grab ropes, usng a purpose made jig from a piece of scrap ply, so that the thread doesn't twist.

                                              however i have repeated this process many times on different forums so if anyone wants to know the secret of getting the thread to lie flat and straigh …….please go on to one of my recorded builds on mayhem, model boats or RCMB where i have written it in detail many times.

                                              img_2328.jpg

                                              img_2329.jpg

                                              img_2331.jpg

                                              img_2332.jpg

                                              img_2333.jpg

                                              #100536
                                              neil hp
                                              Participant
                                                @neilhp

                                                All lifeboats are different…………a tweek here, a change there, and the Liverpool class was no different.

                                                On some boats, the safety grab lines were mounted in a complete run from bow to stern,whilst others had a run from stern to the end of the bulwarks just aft of the bow top box……..

                                                And some had the brackets mounted on the sides of the bulwarks, whilst others had them mounted on the belting!

                                                I have chosen to use the split safety line format and the brackets mounted on the belting.

                                                As is, all belting has now been completed, and just needs tidying up ready for fitting……..

                                                However, attaching them will be one of the last jobs before rigging the the masts and sails as I don't want to snag them with my hands or jumpers and pull them off.

                                                My last job is to name the boat………..which I am STILL WAITING FOR SUGGESTIONS FOR. !!!

                                                img_2335.jpg

                                                img_2336.jpg

                                                img_2337.jpg

                                                #100606
                                                neil hp
                                                Participant
                                                  @neilhp

                                                  for some unknown reason to both Colin Bishop, myself and Martin Davies owner of Model boat Mayhem, i have been unable to log in………..put it down to my incompetance with computors, but was unable to even change passwords which for the past 8 days have tried again and again.

                                                  However with colin's help this morning sending me another password, i am back on.

                                                  i will catch up on the build by tonight, but looking at the photos i left on, not a great deal to do.

                                                  just to say, thanks Colin, and Martin of Mayhem for trying.

                                                  #100608
                                                  neil hp
                                                  Participant
                                                    @neilhp

                                                    I have just looked on one forum that i have been posting on and to catch up on photos i would have to download and post 125 photos from where i left off up to finishing the boat 2 nights ago, and i think that would be upmost boring for you all.

                                                    so i thought i would post pictures off the finished boat, and if anyone wishes to read the finishing touches, then please go to this forum for any info that you might wish to catch up on.

                                                    Metcalf models liverpool class lifeboat kit. – Page 13 – RC Groups

                                                    img_2478.jpg

                                                    img_2476.jpg

                                                    img_2472.jpg

                                                    img_2471.jpg

                                                    img_2470.jpg

                                                    img_2468.jpg

                                                    img_2467.jpg

                                                    img_2465.jpg

                                                    img_2428.jpg

                                                    img_2427.jpg

                                                    img_2426.jpg

                                                    #100612
                                                    Richard Simpson
                                                    Participant
                                                      @richardsimpson88330

                                                      Absolutely superb Neil, I have thoroughly enjoyed watching you build this model. I take it there will be a couple of shake down sails before the big day? You're a brave man putting this on a course the full length of Windermere but I'm sure that everyone will be willing it on to the finish line.

                                                      I particularly like the brass working bottle screws on the shrouds. I prefer them myself as they are actually quite useful to correctly tension the shrouds. A spot of varnish on the threads will help stop them working loose.

                                                      Its when you study a model like this that you realise that guys went out to sea in stormy weather in boats such as this to rescue others. Incredibly brave people.

                                                    Viewing 25 posts - 176 through 200 (of 214 total)
                                                    • Please log in to reply to this topic. Registering is free and easy using the links on the menu at the top of this page.

                                                    Code of conduct | Forum Help/FAQs

                                                    Advert

                                                    Latest Replies

                                                    Home Forums Building Kits Topics

                                                    Viewing 25 topics - 1 through 25 (of 25 total)
                                                    Viewing 25 topics - 1 through 25 (of 25 total)

                                                    View full reply list.

                                                    Advert