Tancook whaler

Tancook whaler

Home Forums Scratch build Tancook whaler

  • This topic is empty.
Viewing 25 posts - 1 through 25 (of 60 total)
  • Author
    Posts
  • #41626
    Amy jane September
    Participant
      @amyjaneseptember49770

      Hello everyone.

      I have begun my next project, a Tancook whaler. This is a gracefull double ended schooner from Tancook island, Nova Scotia. Tancook is a small group of islands about 30 miles S.W. of Halifax. Once a fishing port, and producer of a certain pickled cabbage product, now days it's all holiday homes, art galleries and cafes.

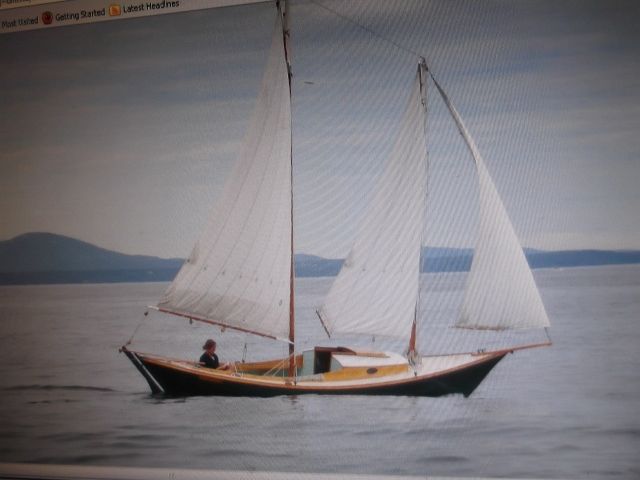
      The boats were deep centre board fishing/cargo vessels, with a knockabout schooner rig. Between 25 and 50 feet in length, they where cheaply built, largely from local soft woods. They were in vouge between 1860 and 1915, and were said to be fast and sea worthy. During the 1970's there was a revival of traditional small craft in America, particularly along the east coast. Many types were brought back into being- Sharpies, whitehalls, flatties, freindship sloops, block island boats, dories of all sorts and tancook whalers to name a few. This revival was spurred along by the writtings of the likes of John Gardner, Pete Culler, Howard Chapple, Peter DeVine and many others Most of my infomation is from Chapple and DeVine. The model will be as I whould build it , full size, today as a pleasure boat. (other than construction). Here is a photo I found on the net of a modern one. It will give a very good idea of what the model will be like.

      dscf4694 (640x480).jpg

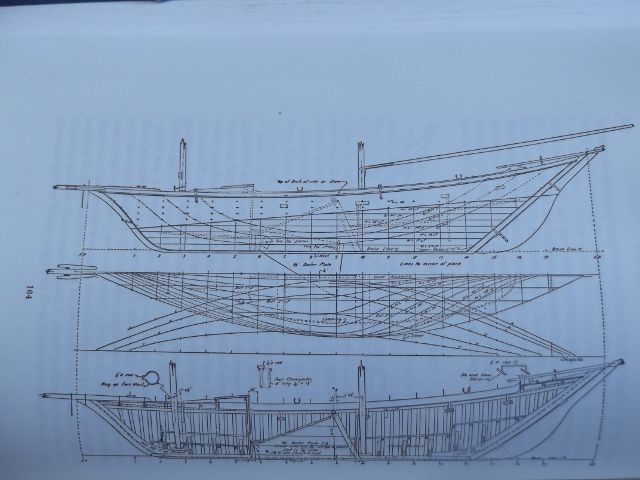
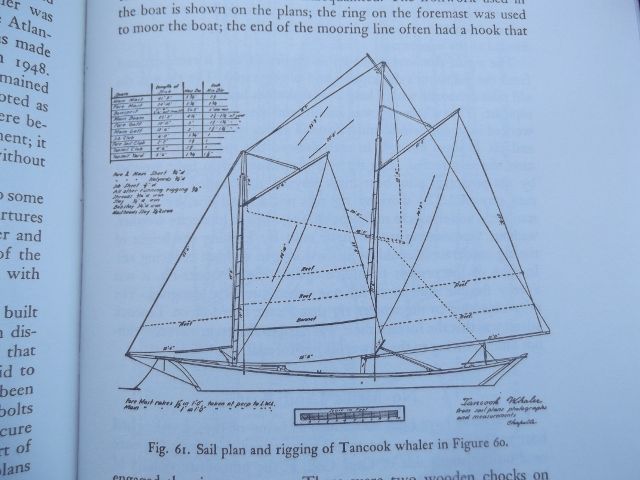
      As you can see, a very pretty boat. Here are some lines for an original, from Howard Chapple

      dscf4655 (640x480).jpg

      dscf4654 (640x480).jpg

      This boat was built in the first decade of the twentith century, 41'x10'x5' my model will be built to these sizes on a 1":1' scale.

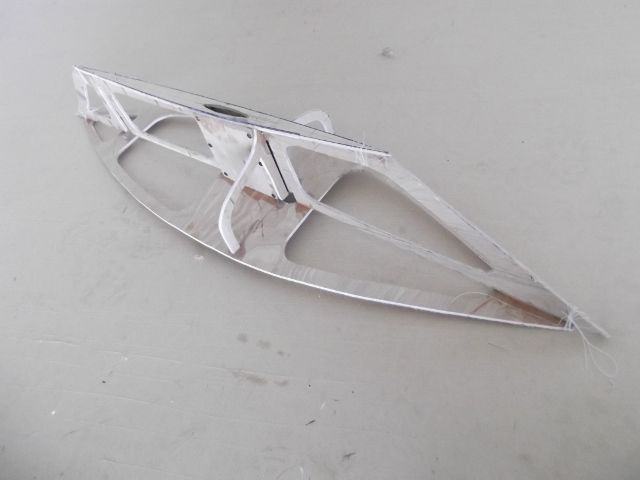
      Construction was begun with a 1/4" ply frame work, consisting of profile, midships section and deck. My design changes so far include a case for a dropp keel, rather than a centre board and reducing the displacement by increasing the hollow in the garboards, and raising and slightly hardening the bildge

      dscf4677 (640x480).jpg

      I have retained the wide plank keel of the original, which is ideal for the keel case.

      #6878
      Amy jane September
      Participant
        @amyjaneseptember49770
        #41628
        Bob Abell 2
        Participant
          @bobabell2

          Hello Amy Jane

          That looks a nice sized model…..Could do with a few more formers though?….lol

          What about two servo sails?……For fine trimming?

          I recommend servo arms for simplicity?

          I would have increased the depth of the keel box, in order to fit a nut and bolt through?

          My apologies if this was your plan anyway?

          Bob

          #41631
          Amy jane September
          Participant
            @amyjaneseptember49770

            Hello there, Bob.

            A few answersfor you. (no apologies required!) The lack of formers will become obvious in due course, as the entire hull can be faired up from the one former.The model will be RC, useing (with my apologies) another car radio, and the sail winch will be a larger version of the 'threaded rod' servo that I used on the paddle wheeler, cheap, simple and powerful. It will operate all 3 sheets. The keel box runs from the deck to the keel, and the drop keel will slide vertically like a dagger board, it will also be ballested. You input is, as allways, welcomesmiley

            Amy jane

            #41633
            LARRY WHETTON
            Participant
              @larrywhetton68737

              **LINK**

              Another great build to follow …Larry..

              Edited By LARRY WHETTON on 18/06/2013 12:15:56

              #41656
              Amy jane September
              Participant
                @amyjaneseptember49770

                Hello again.

                Thanks for the link. Larry, I shall enjoy looking it over.

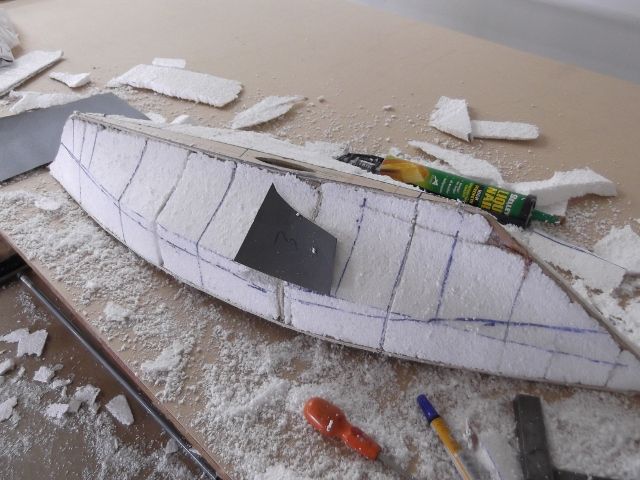
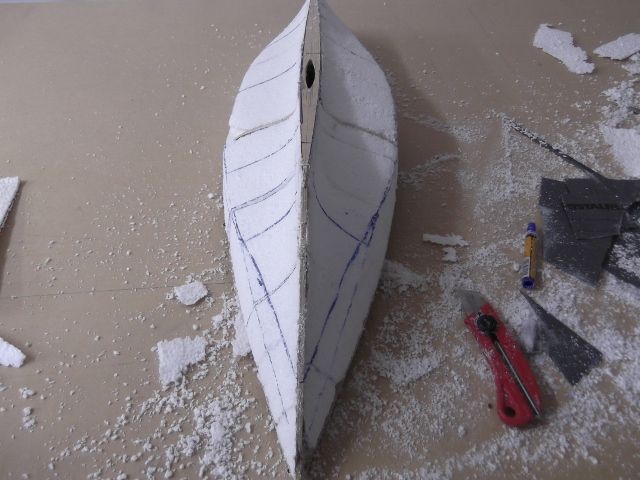
                A little more progress. The frame work is filled in with blocks of polystyrene, and carved to shape. Useing the midship to set the hull shape, I carved the hull as hard chine form. By useing the chine shape, all the other sections are faired in automatically. The "correct" chine profile for a displacement hull is for the chine to cross the stem at, or just below the waterline, then slope down and aft in a straight line for 1/3 its length before curving gently back up and crossing the waterline well forward of the transom and ending on the transom (or stern post) well a bove the waterline. The water line is then used to check the hull's fairness. These hulls have no hollow in the forward waterlines, and a fair amount of hollow in the aft waterlines. The buttocks are long and easy, Combined with a hollow garboard and high bildge, this should produce a fast sailer.

                dscf4695 (640x480).jpg

                Once happy I shaped the other side, useing card templates placed in vertical cuts on the station lines.

                dscf4698 (640x480).jpg

                The chines will then be faceted to a multi chine , then rounded off to end up with a round bildge hull.

                #41657
                Bob Abell 2
                Participant
                  @bobabell2

                  Hello Lady Jane

                  You`ve just been promoted to Model Boat Builder………First class!

                  I`m impressed by your very original build ideas and not to mention your technical marine technology!

                  Don`t really understand the need for card slots, as you could have used external formers…..Anyway….It`s looking good!

                  Looking forward to your next episode

                  Bob

                  #41675
                  Amy jane September
                  Participant
                    @amyjaneseptember49770

                    Thanks Bob, But you're too kind really, pehaps rank beginner to mere novice? (Mind you, 10 years of full size boat building certainly helps!)

                    The cards in the slots is just lazyness on my part, I'm afraid-easier to just slip them in and draw around them ,than cut and try external ones.

                    #41676
                    Bob Abell 2
                    Participant
                      @bobabell2

                      Hello Lady Jane

                      I should have known better!

                      Just realised the purpose of the slots!

                      The formers were placed in the slots in the first place and sanded down to the required profile?

                      More apologies…..Bob

                      ps…..My only experience of full size boat building was a two seater Hobbies canoe in 1955…..Which was great fun….But cutting out the full size formers with only a hand fretsaw was hard work!

                      #41865
                      Amy jane September
                      Participant
                        @amyjaneseptember49770

                        No apologies needed, Bob!

                        Once, in my younger years, I built a 18' rowing and sailing boat, and cut every bit by hand, including ripping all the stringers, oars and spars from 4"x2". Hard work! Now days it's power tools all the way!

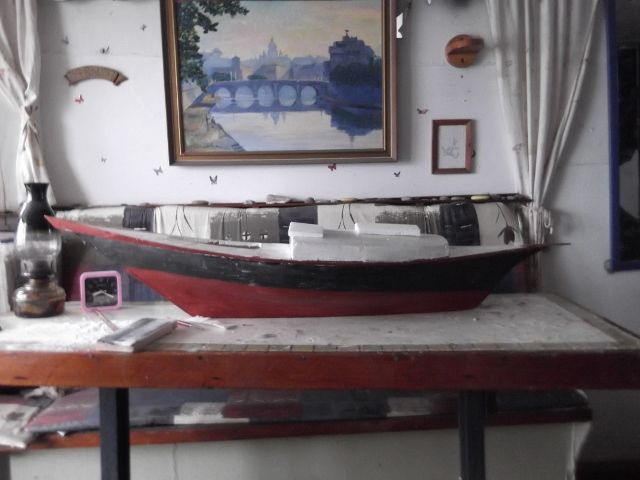
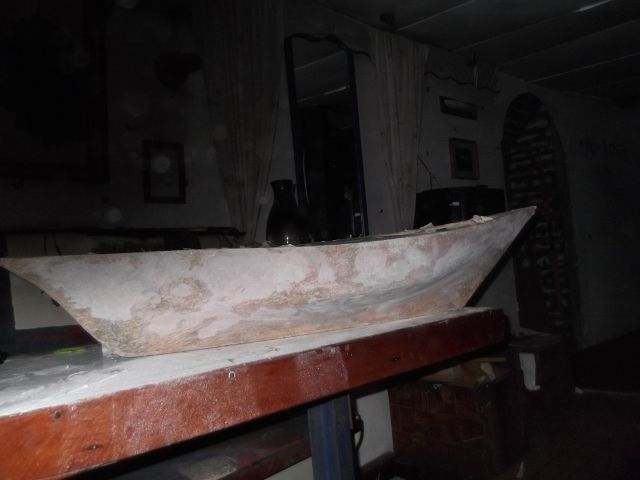
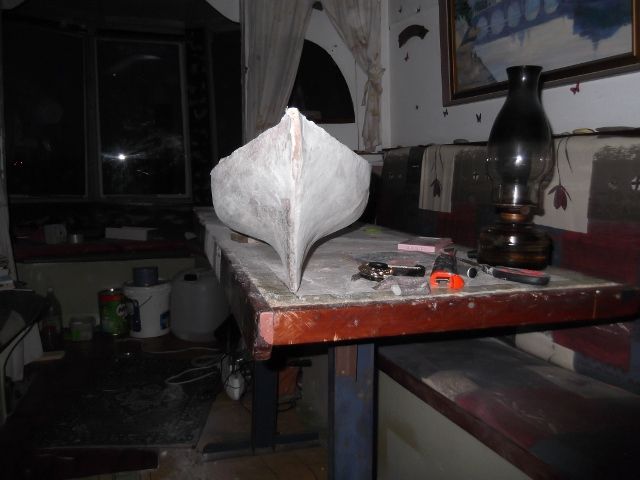
                        Well I'm actually a little embrassed to give this next installment, two steps forward and one backwards I'm afraid. The shaping was finnished on the hull, photos taken, then accidentally deleted!crook On my other two models the hull was skined by sliding it inside the leg of one of my old pantyhose, then coating with expoxy. This wasn't going to work this time, as 1) to many hollows in the sections, 2) my legs aren't that big! Instead I cut a bit of old bed sheet, on the bias, to make it drape properly. This would have been just fine if I had used epoxy.

                        I need to digress just a little here. I have a good freind, Lynn, who is a bit of a tinkerer, (and general nut case ). She is for ever coming up with experiments, many of which don't work, and the odd one that does. These polystyrene models produce a lot of waste, so I gave Lynn a bag full back when I was building Annalisa, to see what she could do with it. She came back with a jar of syrup which she assured me was strong, water proof glue, (it was) and a jar of paste (filler). I tried the glue and found that it set up as hard as epoxy, and as I had run out of epoxy, it got me thinking. I figured if I could protect the polystyrene from being dissolved by the glue, I could use it to glue the cloth on. So I covered the hull with two layers of newspaper glued on with acrylic paint. The glue she provided was a little too thick, so I asked her what solvent the polystrene was disolved in. It turned out to be a combination of acetone and petrol! (It needs both to disolve properly, the more the acetone the better the glue, 5:1 works best, though 1:1 is ok) So I thinned the glue down and glued on my cloth. Well… obviously I thinned it down too much, and it got through to the polystyrene and my once fair hull was fair no more!angry Not a complete disaster, though a fair bit of filling required. I mixed a fresh, thicker batch for the other side, and that worked out much better! Here are some photos of the hull prior to finnal filling and sanding
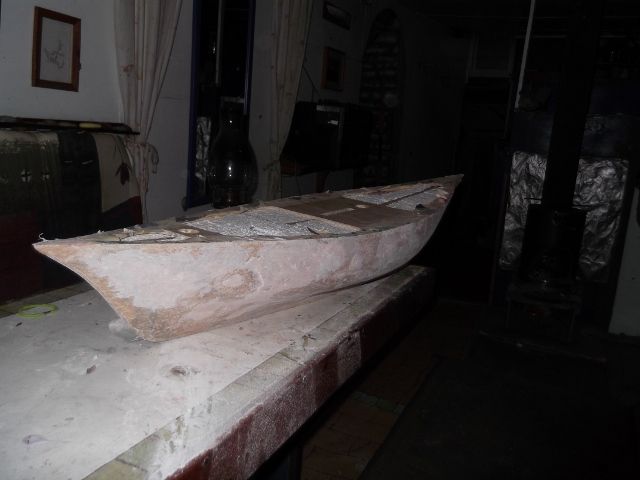
                        dscf4834 (640x480).jpg

                        dscf4832 (640x480).jpg

                        dscf4826 (640x480).jpg

                        #41884
                        Bob Abell 2
                        Participant
                          @bobabell2

                          Hi Amy

                          That's a shame, But working with foam has it's unpredictable problems

                          Suppose PVA might have been safer, using Balsa as the skin?

                          Bob

                          #42043
                          Amy jane September
                          Participant
                            @amyjaneseptember49770

                            Hello all

                            Bob, I didn't think to plank the polystyrene in timber, would have been a good way to go, and saved me alot of filling and sanding too! Next time.

                            The hull is very nearly there now, just a final sand and paint, progress! Between filling sesions I made a start on the sails. I've opted to use polyester thermal curtain linening. Sounds strange I confess, but the polyster weave is strong and low stretch, and the (latex?) backing fills the weave and makes it air tight. I once made a set of sails for a full sized (20' cabin yacht from a much heavier grade of the same stuff, they worked out very well indeed.

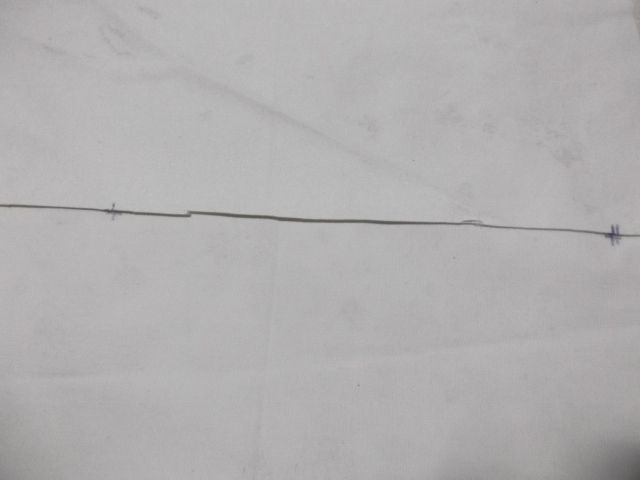
                            Here's my sail making process, fairly traditional. Because one side of the cloth I'm using is noticably different to the other, I decided to make the sail up from 4" strips, alternating sides. I laid the strips up and drew on the 'strike up' marks, every 11/2" or so.

                            dscf4860 (640x480).jpg

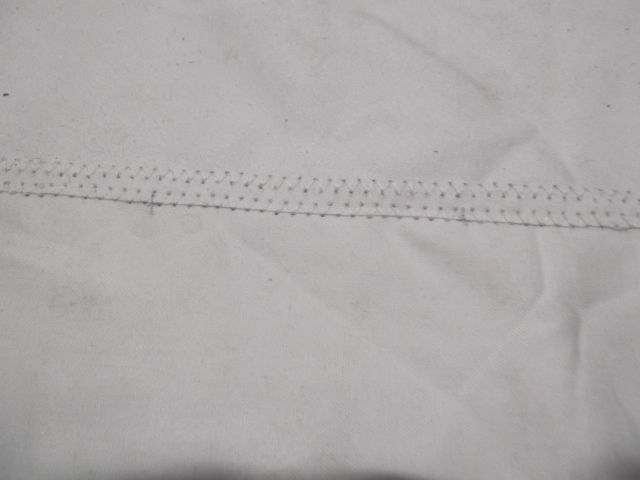
                            By sewing up the strips, linning the marks up exactly the pannels are joinned up with out shape or tight spots. The seems were made over width and sewn down one edge, 'one on one off'. The seam is then trimmed down and the other side stitched

                            dscf4866 (640x480).jpg

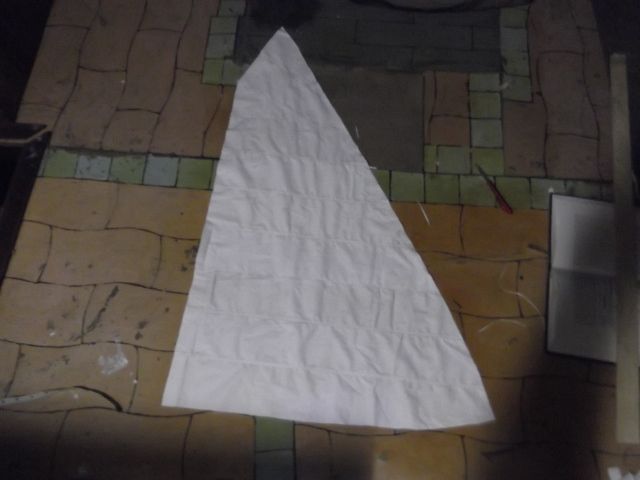
                            The tancook had a tall pole main mast and no tops'l, but carried a large fisherman stays'l for light airs. Since such a sail is not practical on the model, I've made the mains'l with a tops'l built in, Lake Errie style. The shape will be put in the sail by using luff and foot and curves. Here is the mains'l, ready for the tablings.

                            dscf4865 (640x480).jpg

                            more soon…

                            Amy jane

                            Edited By Amy jane September on 07/07/2013 08:12:00

                            #42117
                            Amy jane September
                            Participant
                              @amyjaneseptember49770

                              Hello again.

                              The hull has had the cut water and rudder post added, and is now ready for a coat of paint, and the mains'l is finnished. Here is the rest of the procedure.

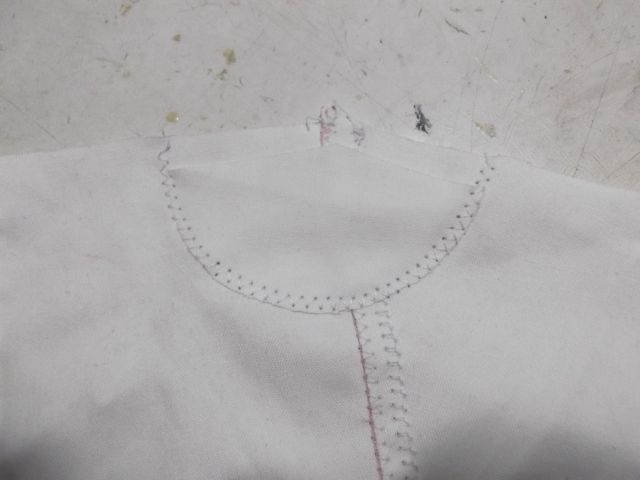
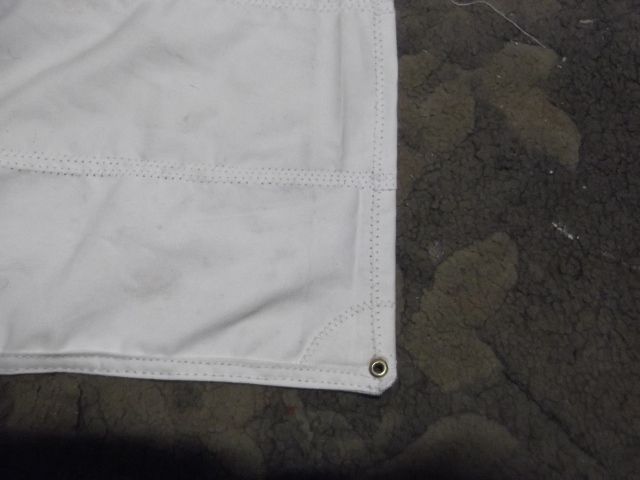
                              Half circles are cut for the patches, and sewn on

                              dscf4889 (640x480).jpg

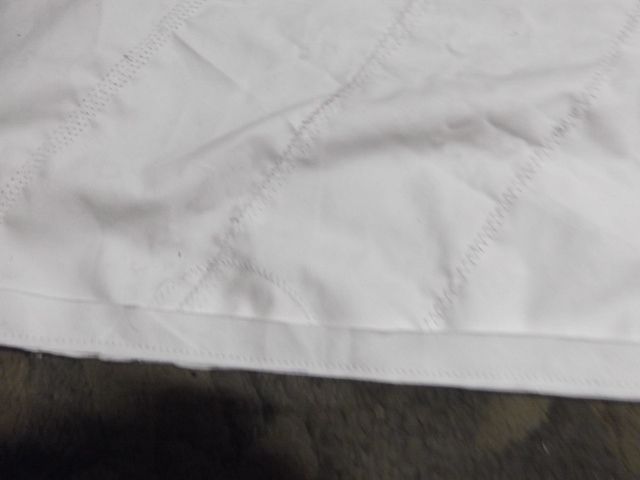
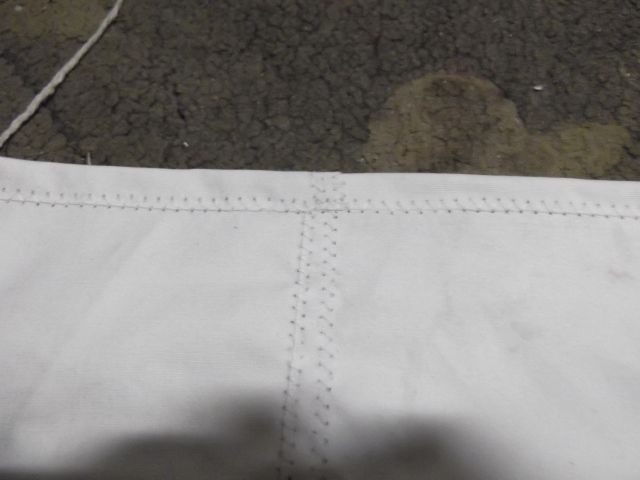
                              and the tablings added. These are a 1/2" wide strip, cut paralell with the weave, so they have very little stretch. The sail is turned over and the liff tabling stitched on, right on the very edge, pulling the tabling tight, and feeding the sail in loose. Done this way, when the luff is pulled tight and straight, the curve cut in the sail luff is pushed back into the sail, giving it it's shape. This removes the need to hand stitch on a bolt rope, tucking in a little sail with each stitch, to achieve the same result.

                              dscf4892 (640x480).jpg

                              The tabling is then folded over onto the other side of the sail and stitched down

                              dscf4895 (640x480).jpg

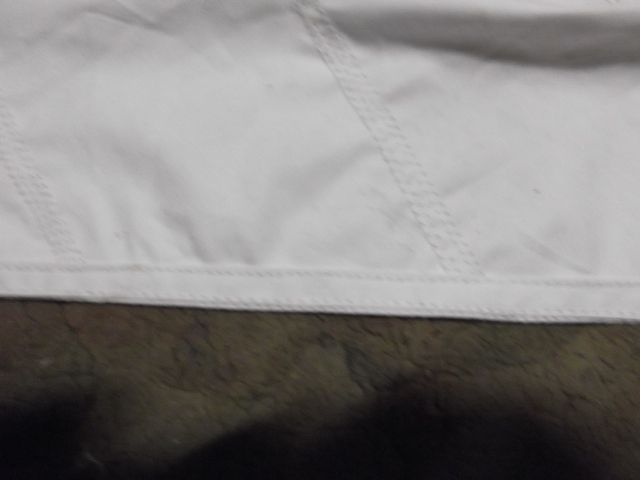
                              The foot is done the same way. The leach is just a single fold, zig zaged down

                              dscf4897 (640x480).jpg

                              eyelets put in

                              dscf4894 (640x480).jpg

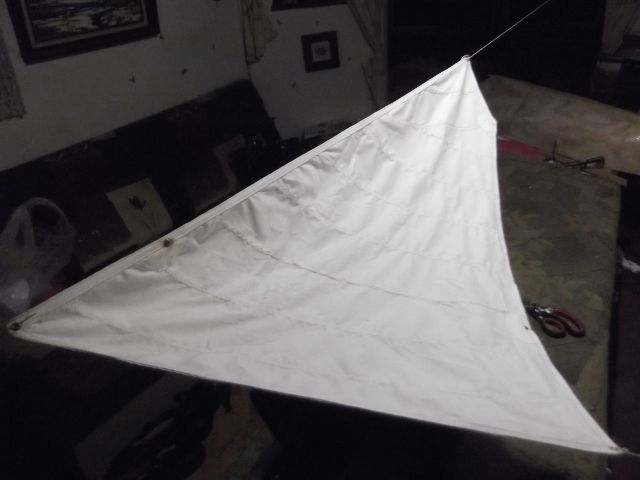
                              And the sail string up to check all is well..

                              dscf4898 (640x480).jpg

                              #42158
                              Mike Prentice
                              Participant
                                @mikeprentice83334

                                Hi Amy. It looks very professional. Very good. Prentice.

                                #42167
                                Amy jane September
                                Participant
                                  @amyjaneseptember49770

                                  Thanks Mike, kind of you to say so.smiley

                                  #42288
                                  Amy jane September
                                  Participant
                                    @amyjaneseptember49770

                                    Hello again.

                                    Well, slow progress, I'm afraid, lucky to get a couple of hours a week on the boat. The joys of a young family, and all that.

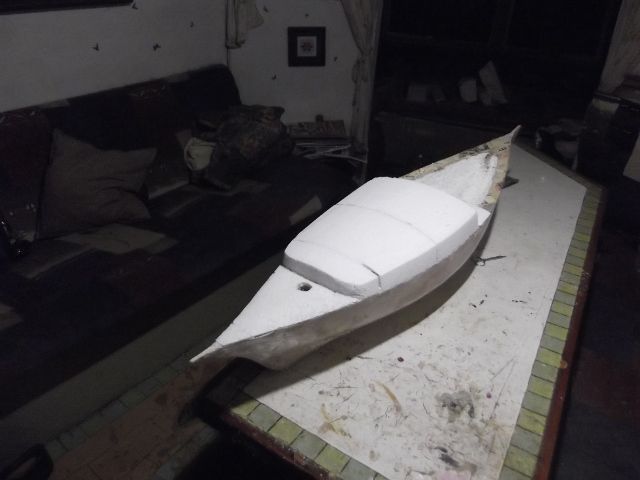
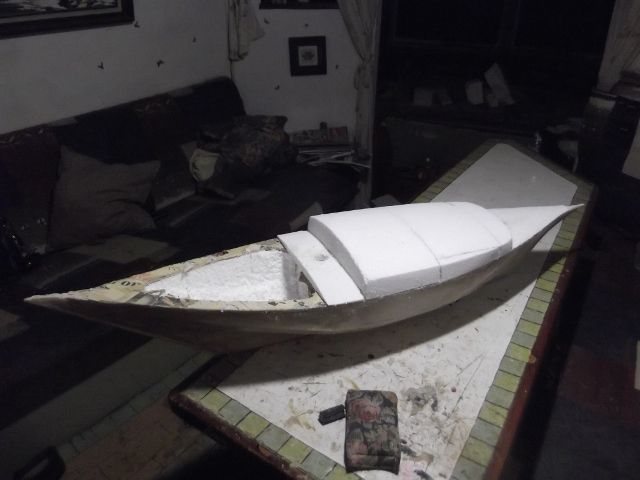
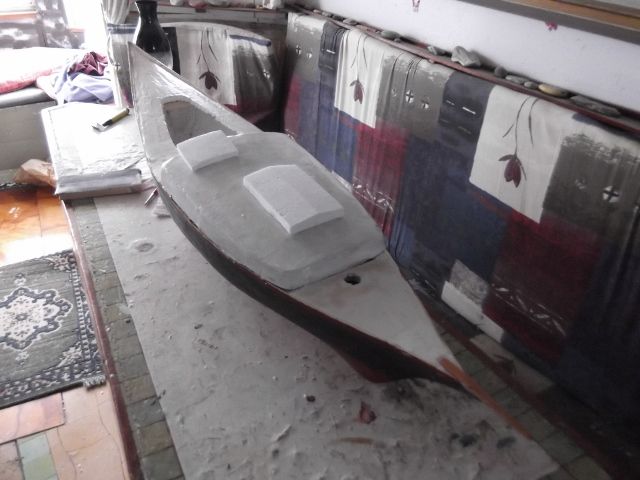
                                    The mains'l and fores'l are done, and the cabin and deck carved out, ready for skinning.

                                    dscf4913 (640x480).jpg

                                    dscf4909 (640x480).jpg

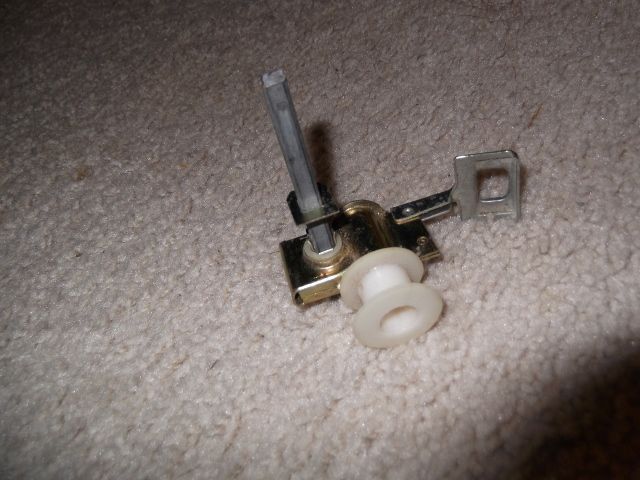
                                    I was chatting to Lynn about a sail winch, I had planned to use the toy car drive motor , turning a length of threaded rod, with a carriage running along it, but she delved into her junk box and came up with this.

                                    dscf4939 (640x480).jpg

                                    It's a worm drive gear box from a discarded vanetian blind. The sheet drum will go on the steel shaft (with some sort of end suport) and the toy car drive motor and gear box will conect to the white plastic drum. Hmmm, should work.. You think? (whould certainly be a lot more compact)

                                    Amy jane

                                    #42293
                                    Ian Gardner
                                    Participant
                                      @iangardner62867

                                      Hello Amy,

                                      I've been following your build with interest and admire your 'lateral thinking'. Too late for this one, but I have found a product called Poly-C which is designed for foam wings on aircraft- works well with nylon tights for skinning hulls. I get the feeling you like to do your building with 'found' materials and that's very commendable, so perhaps expense would be an issue- but it goes a long way- about £9 a half litre.

                                      Looking back through the thread, I noted that Bob suggested a servo with a long arm for sail control, and this may be worth considering if the areas aren't too big. It would certainly save having to arrange some sort of limiting switches on the winch.

                                      I have always admred the Tancook whaler- I have several of Chapelle's books and find them fascinating. I'd also be interested to know what sort of weight you expect your craft to come out at.

                                      Lokk forward to seeing more progress -as and when you find the time.

                                      All the best…Ian

                                      #42301
                                      Amy jane September
                                      Participant
                                        @amyjaneseptember49770

                                        Hello Ian

                                        Thanks for your comments, always welcome! I was not aware of Poly-C, and am not sure if we can get it here, although at 9 pounds, about NZ$18, would be much the same price as epoxy, which is fine on the polystyrene. You are right about expense, whilst I'm not entirely broke, there are more important things to spend my money on! by keeping every thing low budget I can justify this hobby, in my own mind at least. I don't have any proper radio gear, hence the toy car radios. (I should get some proper gear, redundant 40meg sets are turning up quite cheap now, $30 or less) I've found that my somewhat primitive servo set up works well on the other two models, I've gotten used to 'pulsing' the sticks back and forth, to avoid jamming everything up at each end of the travel.

                                        Like you, I love the whole concept of the early American small sailling craft, that Chapple so enthused about. The idea that these guys would set sail on the North Atlantic in any weather, in a small,open and heavily ballested boat! So foreign to todays way of thinking!

                                        I haven't floated the model yet, so would only be guessing at the displacement, but am thinking around 7-8 pounds, will let you know when I get there.

                                        Rgards

                                        Amy jane

                                        #42660
                                        Amy jane September
                                        Participant
                                          @amyjaneseptember49770

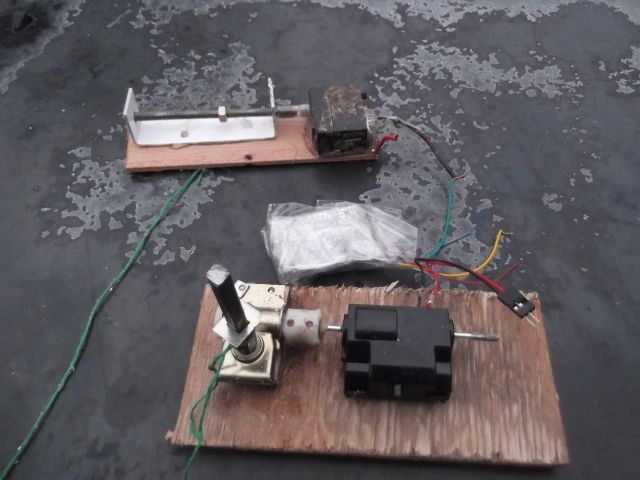
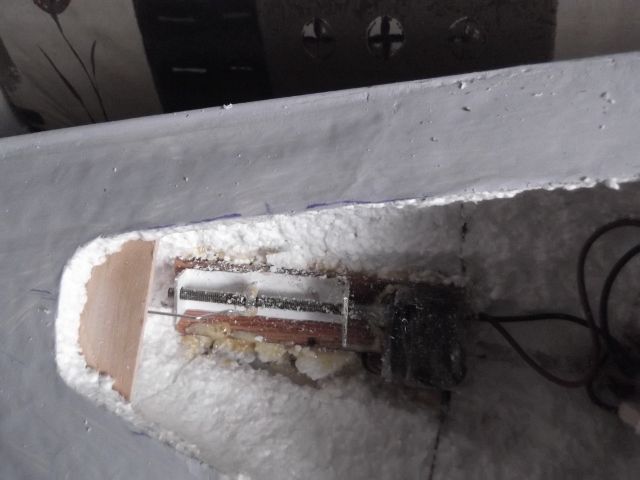
                                          The sail and rudder servos are done. The sail winch as worked out ok, is fairly quick and happily lifts 2 1/2 lbs, which should be plenty. Due to the extreme rake of the rudder post, and the fact the rudder servo is not self centering, I thought that a slow rate of travel whould be usefull, so I used the motor and gear box from a defunct servo, to drive the threaded rod. Very powerful, but I suspect it may be too slow. I shall try it and see first though.

                                          dscf4953 (640x480).jpg

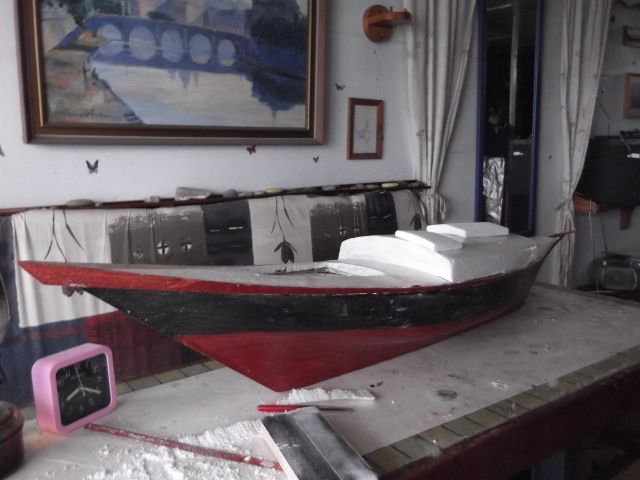
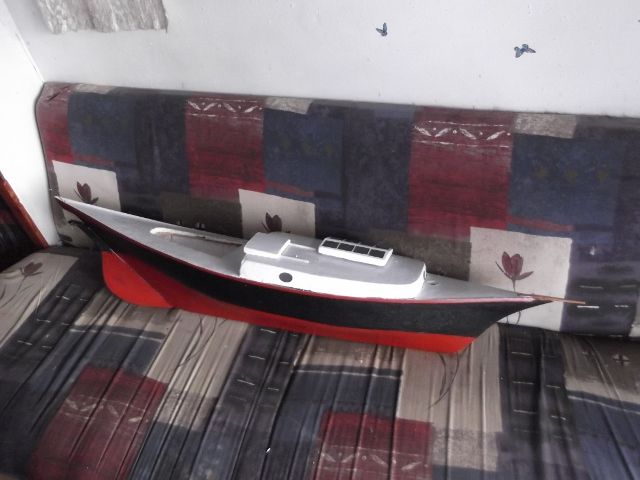
                                          A rough coat of paint on the hull, just to check the colour scheme, will probably make the red a bit brighter. I decided to give her a pinky style stern, just for fun. (Some tancooks did, some didn't) Was tempted to go whole hog on the clipper bow (knight heads and trail boards) but think I might follow tradition and keep the bow bald.

                                          dscf4952 (640x480).jpg

                                          dscf4951 (640x480).jpg

                                          dscf4950 (640x480).jpg

                                          Once done the cabin will be fixed on, and acess will be through the removeable skylight, big enough to get my hand in. (The advantage of small hands!)

                                          #43031
                                          Amy jane September
                                          Participant
                                            @amyjaneseptember49770

                                            Hello again.

                                            Well, it's wet and windy, and I'm stuck in bed with a cold, so now seems a good time for an update!

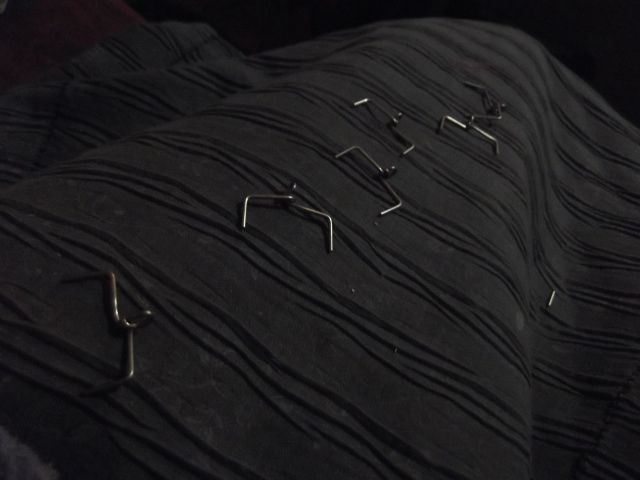
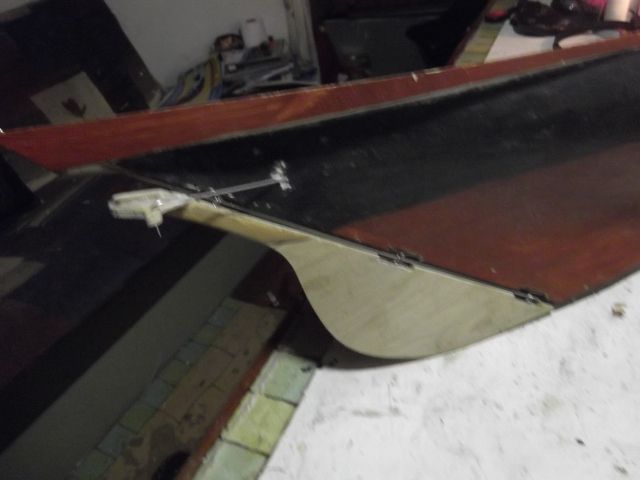
                                            Rudder gudgeons bent up from 1mm s/s rod. these will be glued into cut outs in the rudder and rudder post, and a length of rod slipped in as a long pin.

                                            dscf4954 (640x480).jpg

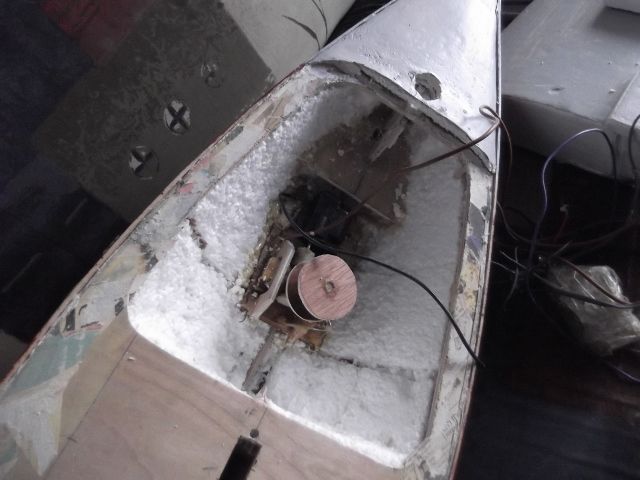
                                            The sail winch and steering servo is in

                                            dscf4966 (640x480).jpg

                                            (plenty of room in there)

                                            #43032
                                            Amy jane September
                                            Participant
                                              @amyjaneseptember49770

                                              dscf4967 (640x480).jpg

                                              rudder set up.

                                              dscf4958 (640x480).jpg

                                              The extreme rake of the rudder post made for a tricky push rod set up, all sorts of difficult angles. (Definatly a case where a proper servo, right aft at deck level would have been a lot better!) Seems to work ok though, on dry land at least!

                                              A little more paint and decoration…

                                              dscf4963 (640x480).jpg

                                              cockpit is under construction, spars and rigging next…

                                              #43095
                                              Ian Gardner
                                              Participant
                                                @iangardner62867

                                                It's looking really good now, Amy. I've just re-read the whole of this thread and reminded myself of the problems you had using polystyrene foam. I wonder if you have considered blue foam? It's a bit less granular and easier to shape- and it can be finished with Eze-Kote, Poly C or, I imagine, dilute PVA. It might be harder to get hold of in smaller quantities, although I have seen it on ebay- builders skip might be a good place to look!

                                                I have never used it myself but would like to give it a try one day for the bread and butter sections of composite hulls, as timber is so expensive these days. I have a project in mind for it- about six boats down the line!

                                                Your template idea is basically how builders used half models in the old days– but of course you know that.

                                                I'm looking forward to seeing how you tackle the spars and rigging- I find your refreshing approach to problem solving interesting!

                                                Ian

                                                #43097
                                                Gareth Jones
                                                Participant
                                                  @garethjones79649

                                                  Ian,

                                                  We have just finished a secret project using foam. I can't divulge the details of the project yet but I can tell you we used Celotex insulation board, bought from a local builders merchant. The sheets we used were 1200 mm x 450 mm x 50 mm thick and cost around £6 each. Bigger and thicker sheets are available but that size is very convenient.

                                                  It's covered with a thin aluminium foil on both sides but that is easily peeled off. Its very easy to carve and sand to shape. Each section of the model was covered with a leg cut from an old pair of tights and finished with Eze-Cote. The end result sems tough and durable and takes the final paint finish well.

                                                  We bonded it together using Gorilla glue to make up double thickness sections or bond the foam to plywood.

                                                  Sorry Amy, I dont think you will have a local branch of Wickes or Travis Perkins where you live but you could Google Celotex and probably find a local equivalent.

                                                  Gareth

                                                  #43120
                                                  Amy jane September
                                                  Participant
                                                    @amyjaneseptember49770

                                                    Hello Gareth

                                                    Yes, we can get celotex here, though not easily it would seem!

                                                    Thanks.

                                                    #43139
                                                    Ian Gardner
                                                    Participant
                                                      @iangardner62867

                                                      Thanks Gareth,

                                                      I will make a note of your suggestions for future reference. During our morning constitutionaI I passed a builders skip with a load of foam in it, but I don't think I would have been too popular if I'd started rummaging around!

                                                      Sorry to hijack your thread Amy!

                                                    Viewing 25 posts - 1 through 25 (of 60 total)
                                                    • Please log in to reply to this topic. Registering is free and easy using the links on the menu at the top of this page.

                                                    Code of conduct | Forum Help/FAQs

                                                    Latest Replies

                                                    Home Forums Scratch build Topics

                                                    Viewing 25 topics - 1 through 25 (of 25 total)
                                                    Viewing 25 topics - 1 through 25 (of 25 total)

                                                    View full reply list.