Fairey Swordsman 33

Advert

Fairey Swordsman 33

Home Forums Build Blogs Fairey Swordsman 33

  • This topic is empty.
Viewing 25 posts - 101 through 125 (of 133 total)
  • Author
    Posts
  • #98355
    Will Mason 1
    Participant
      @willmason1

      Great to see you back on the Faireys again Chris.

      Planes, I'm trying to sell mine.

      1x Spitfire with brushless power, a mid wing 3d flight i.c powered and a semi scale i.c powerd.

      I still have 2x brushless powered foamies, a high wing trainer and a delta wing which is great fun (plus it bounces if/when I get it wrong).

      As Ray said, electric has been hugely beneficial to many model plane pilots, giving the option to fly places at that you couldn't with i.c. A bit like boats I suppose (obviously boats don't fly, intentionally!)

      Anyway, bring on the nights working in the shed/wherever on the boats, instead of the summer projects.

      Maybe even I can get a boat on the water next year surprise

      Will

      Advert
      #98356
      Chris Fellows
      Participant
        @chrisfellows72943

        Hi Will

        Didn't know you were into planes! Yeah, I must get one of my boats on the water as well next year, should have been this year but failed again!

        Will try and spend more and more time on the boats as we go into winter but I've got to do some work on my bikes and the house as well, there is always something.

        Chris

        #98362
        Will Mason 1
        Participant
          @willmason1

          Yes Chris, I've flown for quite a long time on and off. I'm not brilliant (hence the foamies being kept because they bounce), but I do enjoy it now and then.

          Don't talk to me about other jobs getting in the way, I know all about that. I've got so many jobs to do around the house, plus the van conversion to finish. The van is the main reason that I haven't got much boat work done this year, but we've got to a point where it's comfortably useable now, so that should ease things a little bit, plus we're working on it outdoors, so again, that should help me get some boat work done over the winter.

          Will

          #98402
          Chris Fellows
          Participant
            @chrisfellows72943

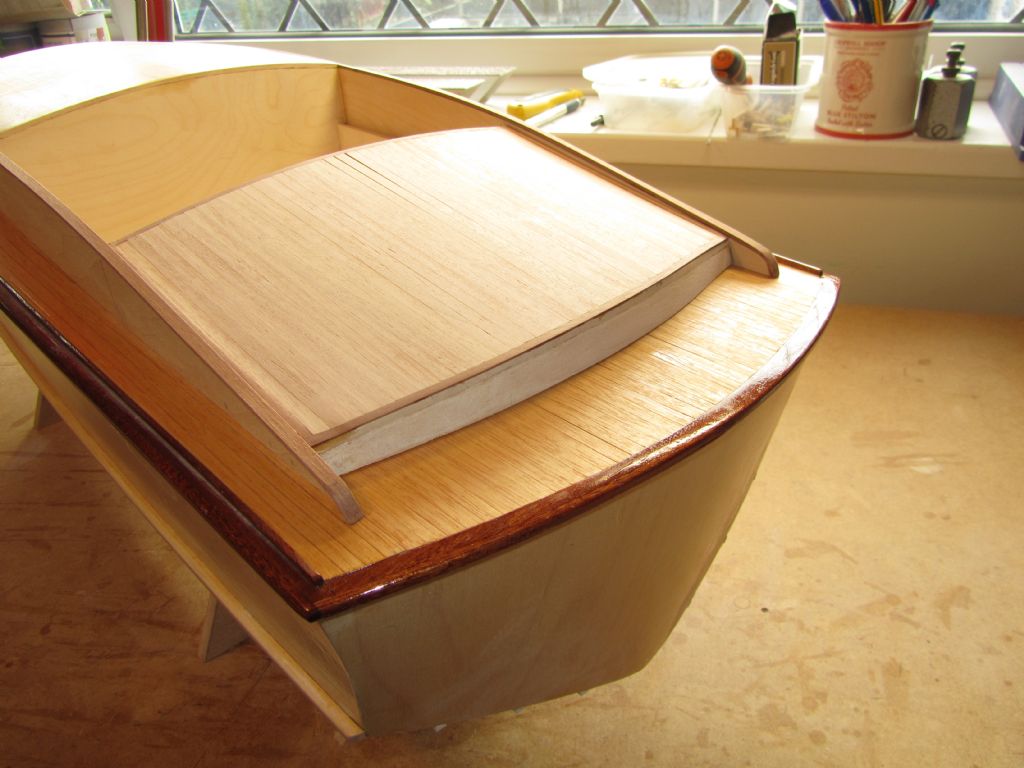
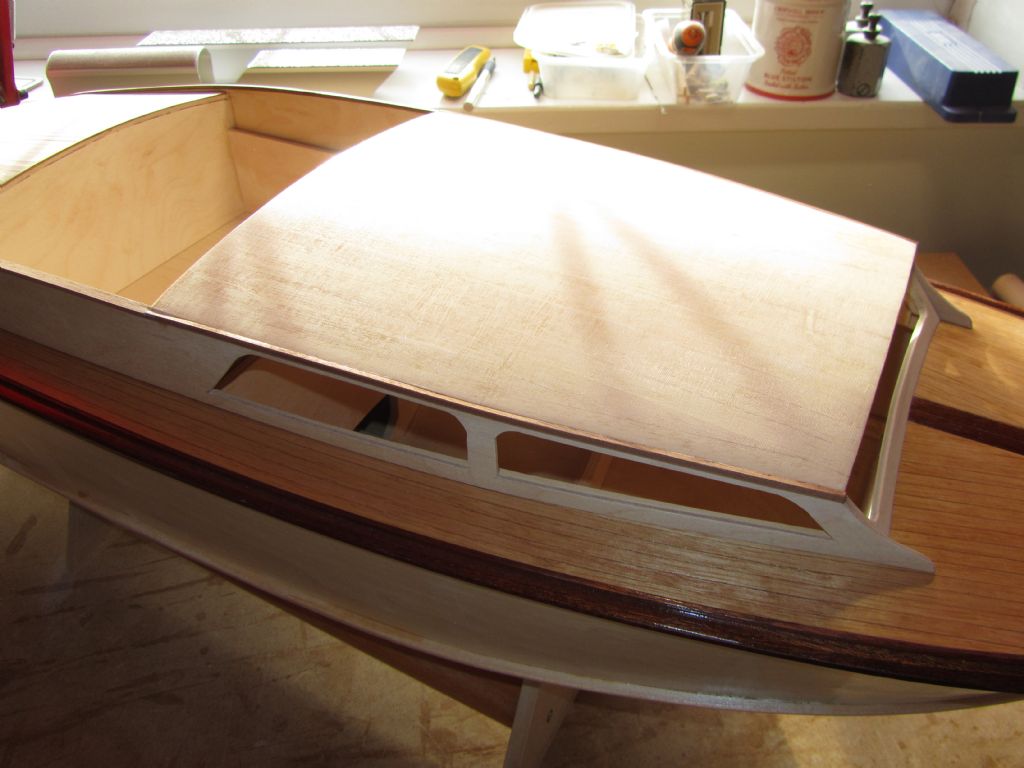
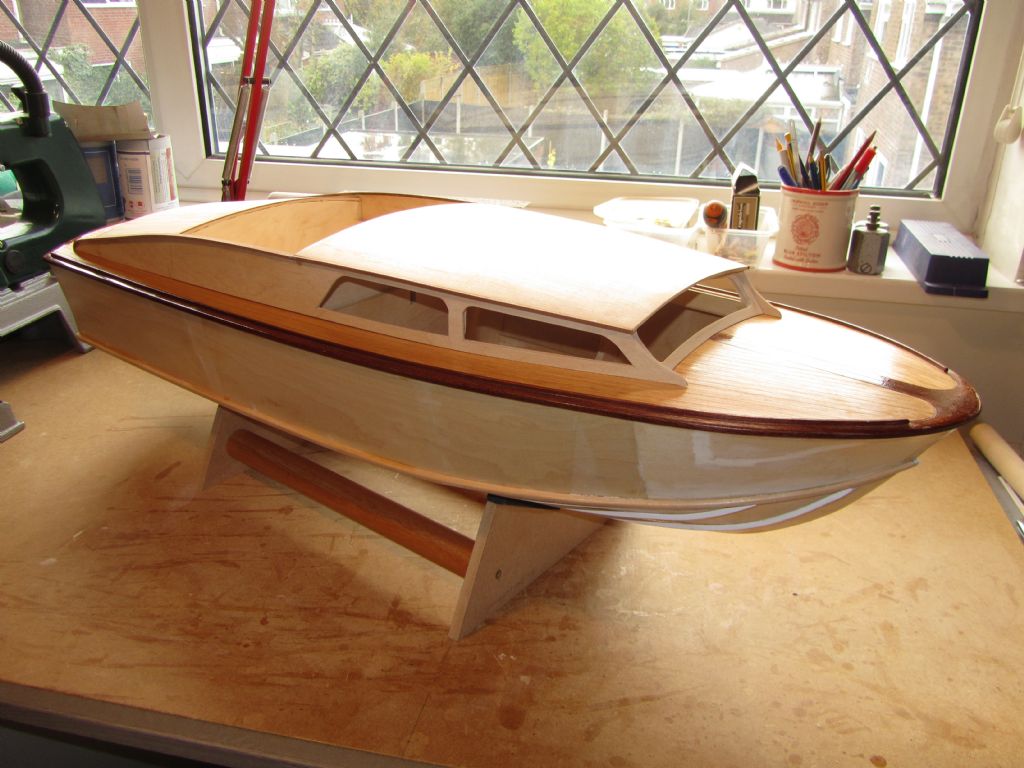
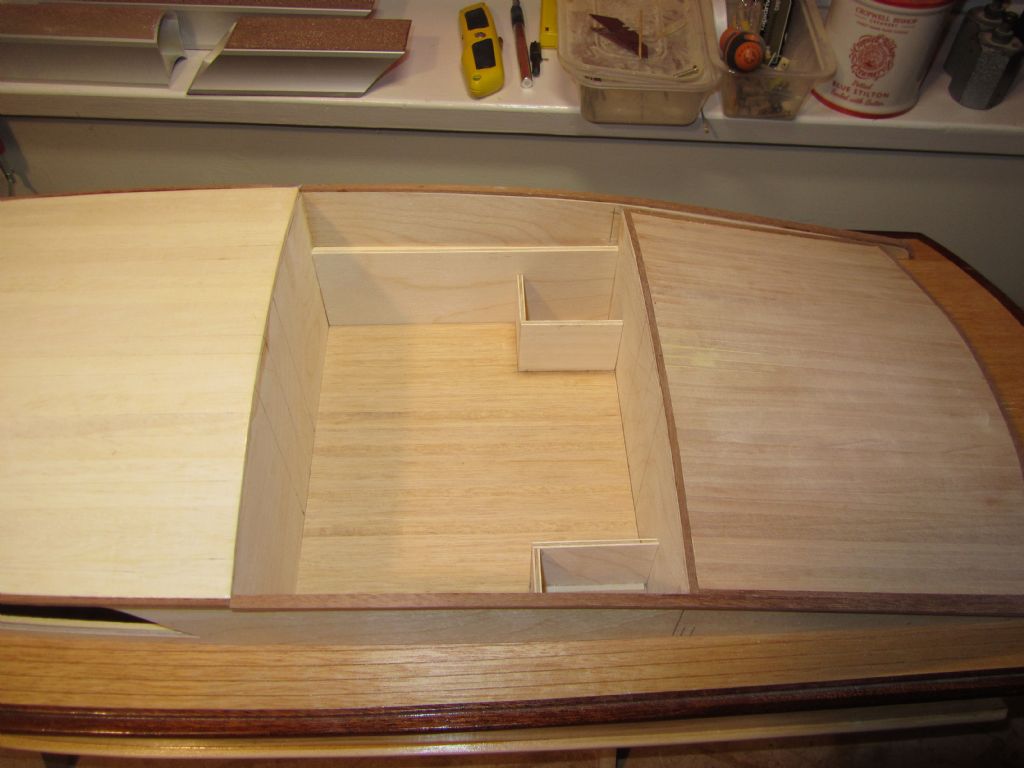
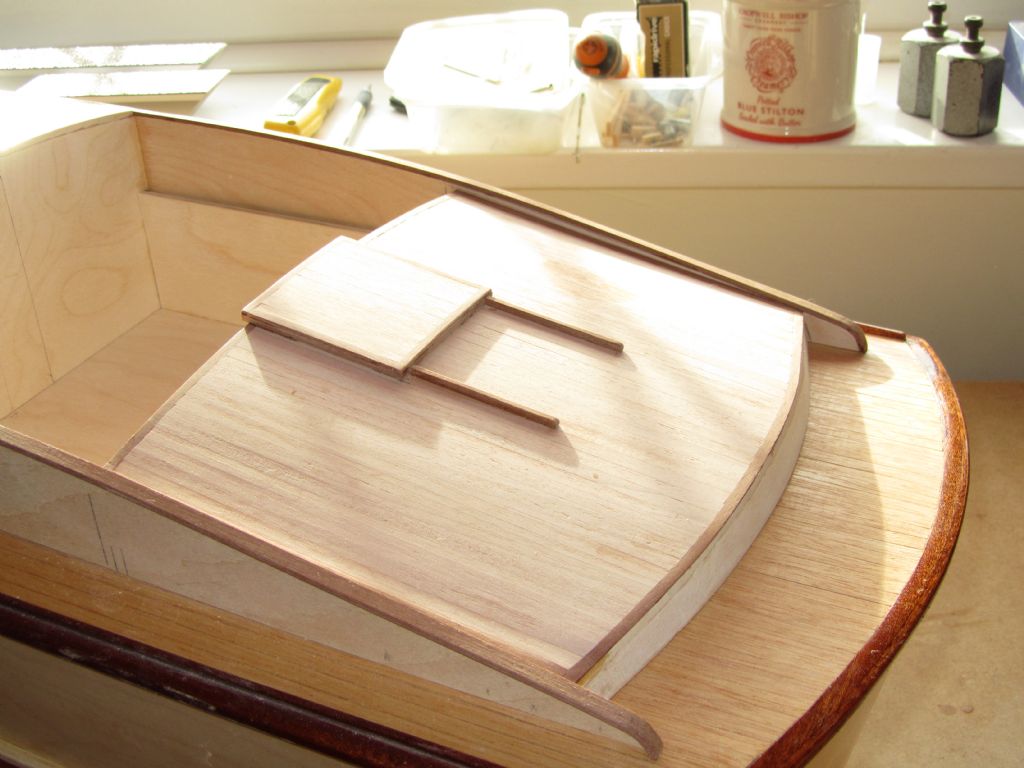
            Only had limited time this week (due partly to one of those jobs getting in the way!) but today I sanded the planking to the rear cabin and fitted the mahogany strips to the sides of the front cabin and the capping to the coamings. As you can see there are some small gaps in the planking adjacent to the cockpit but they will be filled and then covered by the hatch.

            The capping was a bit fiddly as the top of the coaming is pretty thin and the sharp curve where it meets the deck had to be formed with saw cuts and steaming.

            Next job will be to make and fit the access hatch to the rear cabin roof and then I'll probably fit the motor mount and prop shaft.

            Chris

            superstructure34.jpg

            superstructure35.jpg

            superstructure36.jpg

            Edited By Chris Fellows on 29/10/2021 16:13:52

            #98404
            Richard Simpson
            Participant
              @richardsimpson88330

              Really clean, neat and tidy woodwork. Lovely looking model.

              #98413
              Chris Fellows
              Participant
                @chrisfellows72943

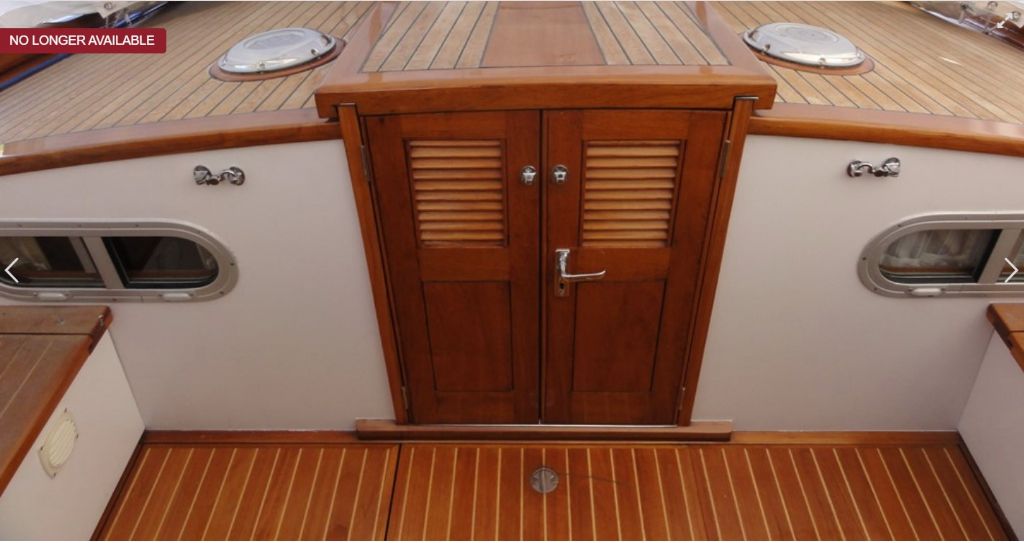
                I was all set to build the hatch after looking at those on the full-size craft and deciding what size to make it but to look right it needs to be slightly curved to follow the line of the roof and to do that it will be easier to build it straight onto the roof. But before doing that I thought it would be better to fit the doors and frames first as the sides of the frame carry up to form the runners for the hatch!

                And as parts will be sticking out into the cabin (also applies to the doors and frames for the front cabin) I decided that the floor needs to be done first otherwise I won't be able to get it in! The joy of scratch building!

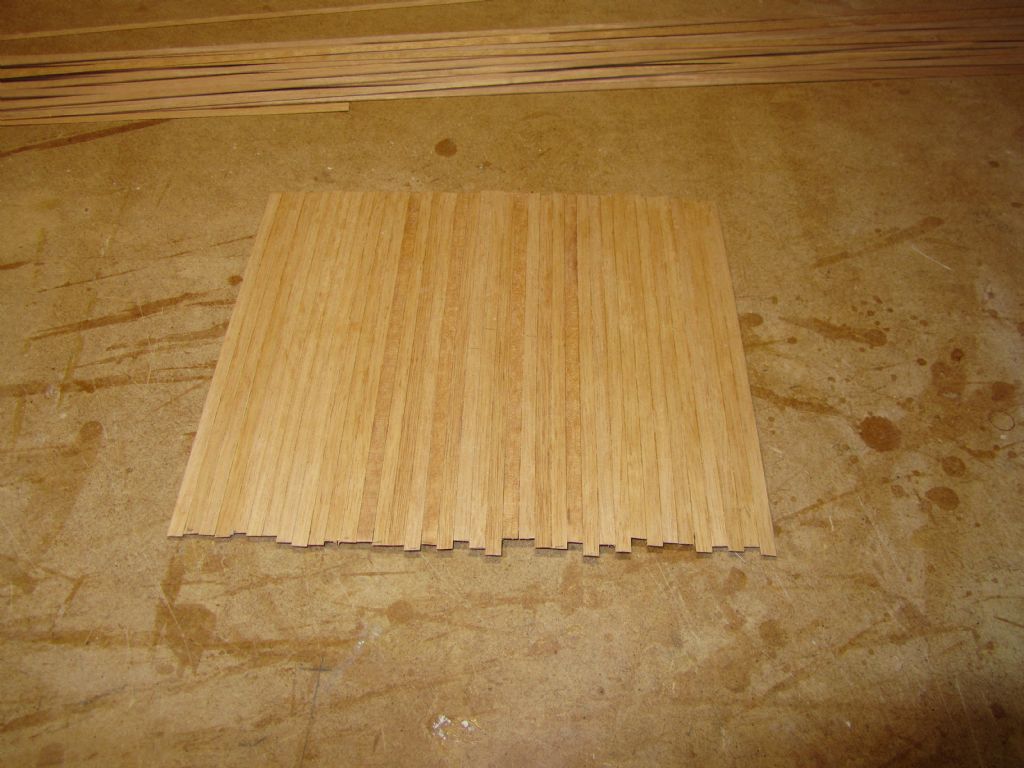
                So floor it was. I've reverted to the 0.5mm thick planks as used on the deck, basically because I've got more of those in stock. I'm going to put some detail into this build but not go mad and so I'm just going to do straightforward planking rather than the more intricate full-size examples where access hatches etc. are framed etc. Anyway a lot of it will be covered up by the seating and storage boxes etc.

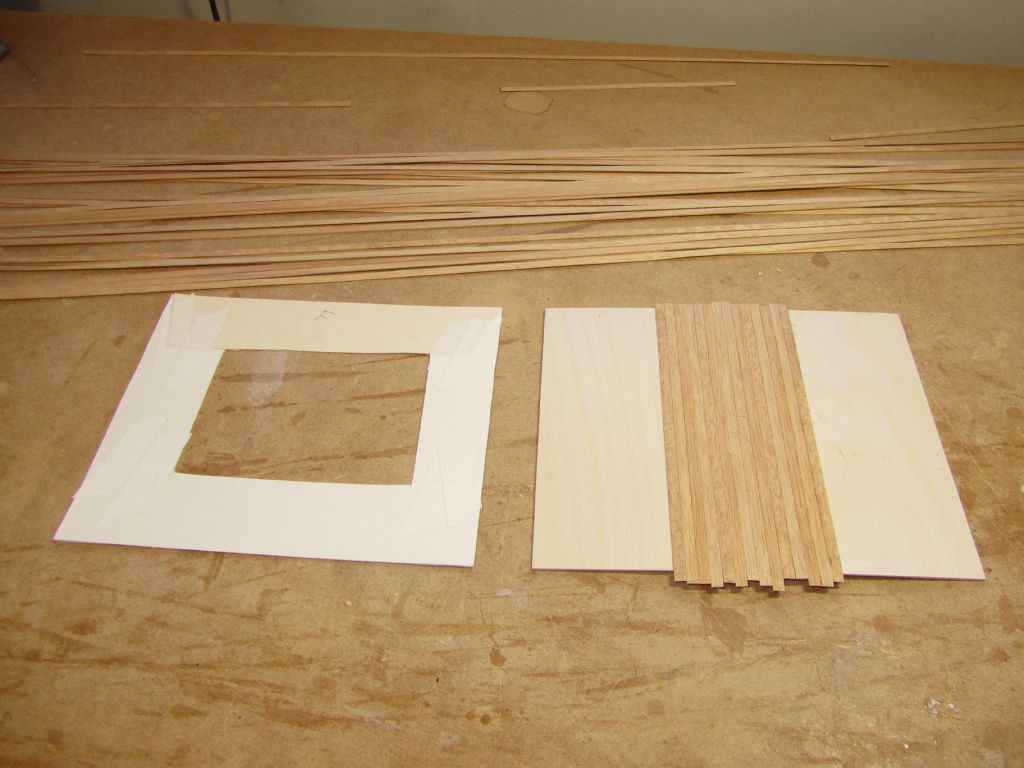
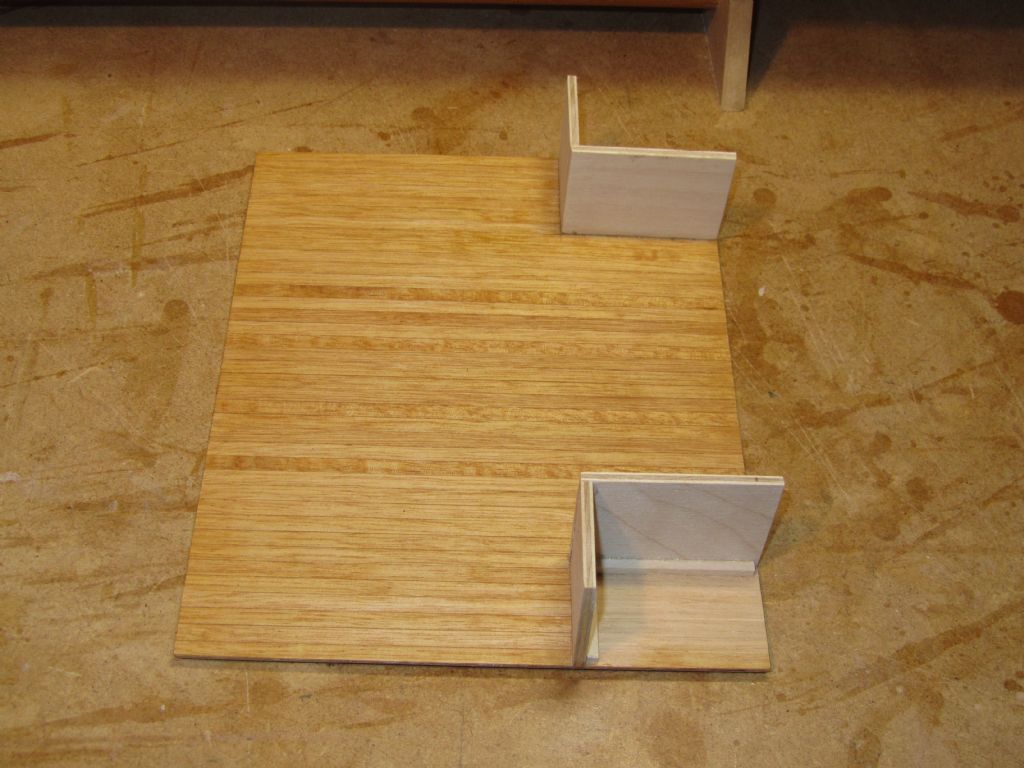
                I want the floor to be a snug fit and so first of all I made a card template. This was transferred to 1.5mm ply and cut out and sanded gradually until it fitted. Tip – drill a small hole through the bottom of the cockpit so that you can push the ply base out as you fit it!

                Once it was a good fit a centre-line was drawn on and planks laid out dry to avoid very thin strips at each side – either start each side of the centre or with the first plank central. The planks were then glued in place using Canopy Glue and to avoid blocks of darker colour cut planks from a number of different long lengths and fitted those from each length symmetrically – this also ensured that the outermost plank on each side would be the same width as the planks do vary in width a bit. Once dry the overhangs can be trimmedsanded back to the ply base and the top of the planks sanded smooth.

                Before gluing in place I shall fit the sides of the storage box so that I can give the planking a couple of coats of varnish.

                Chris
                rear cabin access.jpg

                superstructure37.jpg

                superstructure38.jpg


                Edited By Chris Fellows on 30/10/2021 19:45:46

                #98416
                Ray Wood 3
                Participant
                  @raywood3

                  Hi Chris,

                  Don't you just hate having good photo's of the real boat ? The rear cabin roof having black Sikaflex caulking and the cockpit floor having a lighter infill strip maybe lime or maple ??

                  I have great issues where to draw the line on the level of detail ? even the chrome vents on the cabin roof have inlaid surrounds, but I suppose most models are never 100% finished ? you just need to know when to call it a day

                  Great day for modelling, no Grand Prix, raining & blowin a gale down here !!

                  Regards Ray

                  #98417
                  Chris Fellows
                  Participant
                    @chrisfellows72943

                    Hi Ray

                    Yes, the photos are a mixed blessing!

                    I originally started basing my build on Tireur, a beautifully restored Swordsman, but it will end up as a mixture of different boats (that photo being from a different one) so that I can pick and choose what I want to add and the amount of detail to go into.

                    Certainly is a good day for modelling!

                    Chris

                    #98449
                    Chris Fellows
                    Participant
                      @chrisfellows72943

                      Not much progress I'm afraid as still doing a job around the house.

                      But the cockpit floor has been trimmed and sanded and the sides of the storage boxes have been cut out and glued in position. The floor can then be varnished and glued in place.

                      Hopefully I can start spending more time on the builds soon.

                      Chris

                      superstructure39.jpg

                      #98453
                      Will Mason 1
                      Participant
                        @willmason1

                        Very nice indeed Chris.

                        A coat of varnish will really bring out the colours of all the planking and make a huge difference to the look.

                        Will

                        #98455
                        Chris Fellows
                        Participant
                          @chrisfellows72943

                          Thanks Will. I do like a spot of varnish!

                          Chris

                          #98476
                          Chris Fellows
                          Participant
                            @chrisfellows72943

                            First coat of varnish applied to the cockpit planking and left to dry.

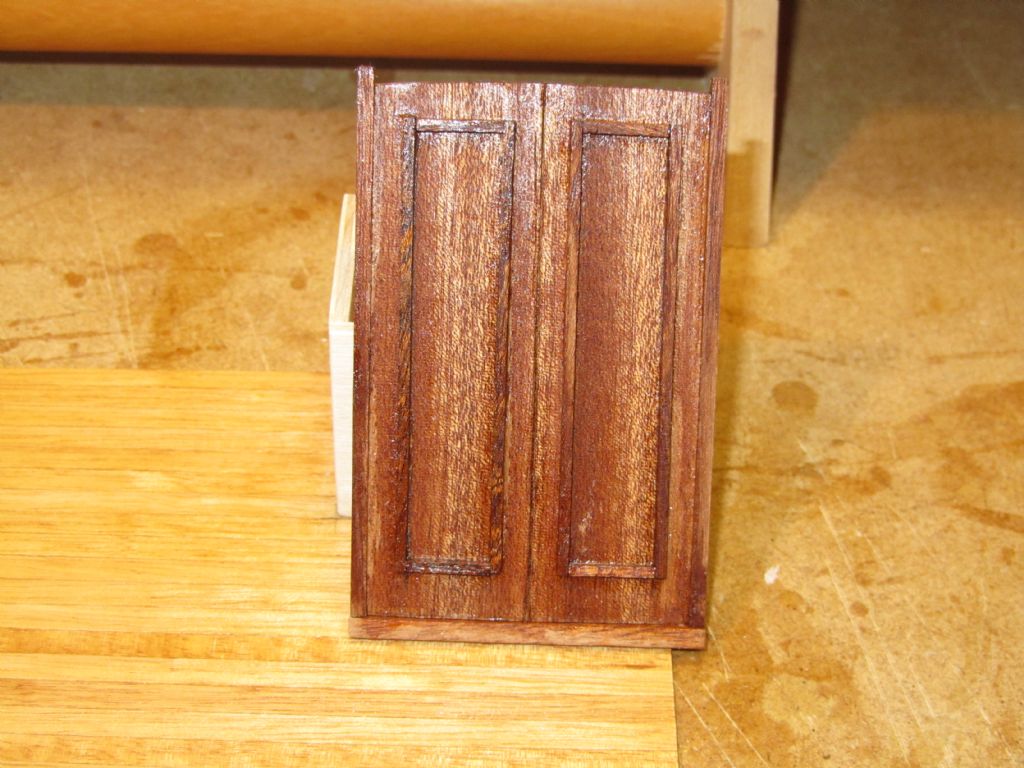
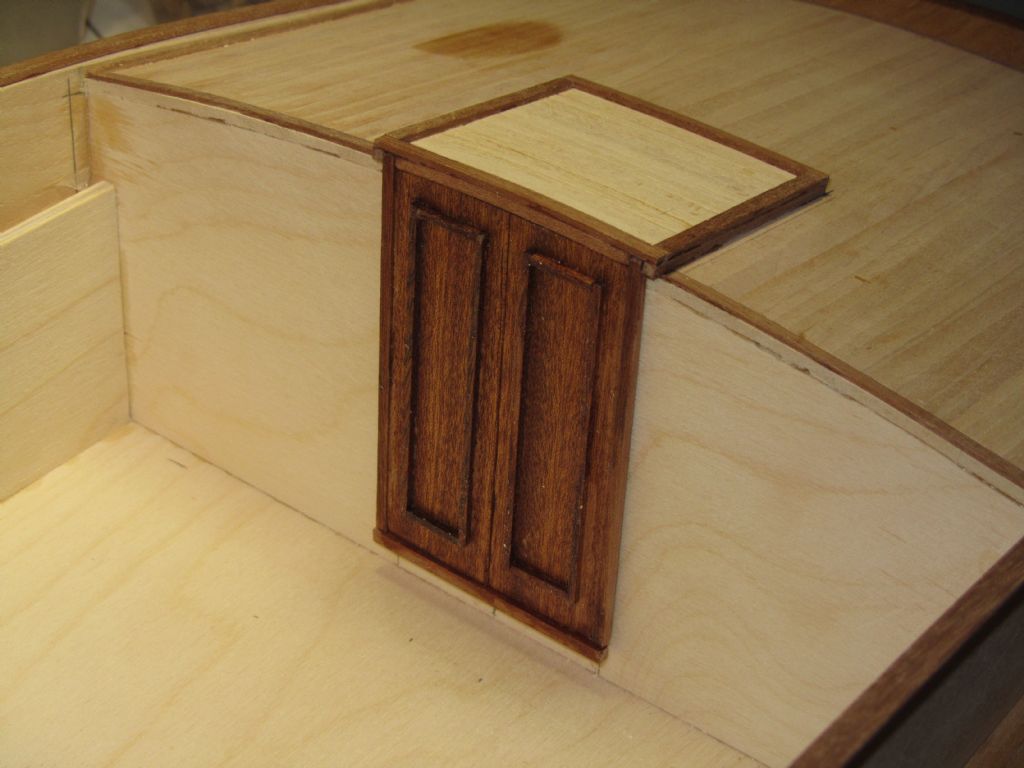
                            Pair of doors for the rear cabin built so that the hatch can then be built off the top. I had some thin mahogany sheet left from doing the deck which is just the job. I wanted the look of the mahogany doors rather than the white as used in Tireur as I reckon they look better and will contrast with the white of the cockpit sides. They look a bit patchy in the photo as I applied some varnish and it is only partially dry. Well, that's my excuse!

                            Chris

                            superstructure40.jpg

                            superstructure41.jpg

                            Edited By Chris Fellows on 05/11/2021 16:15:19

                            #98477
                            Richard Simpson
                            Participant
                              @richardsimpson88330

                              More lovely looking woodwork.

                              #98479
                              Chris Fellows
                              Participant
                                @chrisfellows72943

                                Thanks Richard.

                                Just a bit more from today.

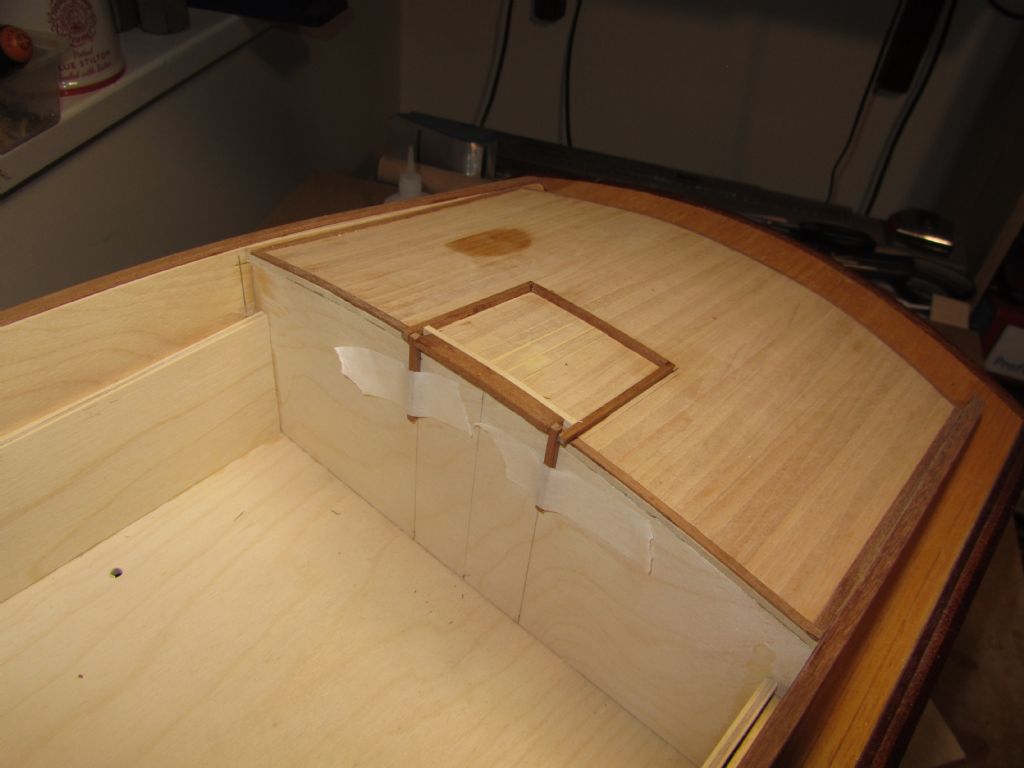
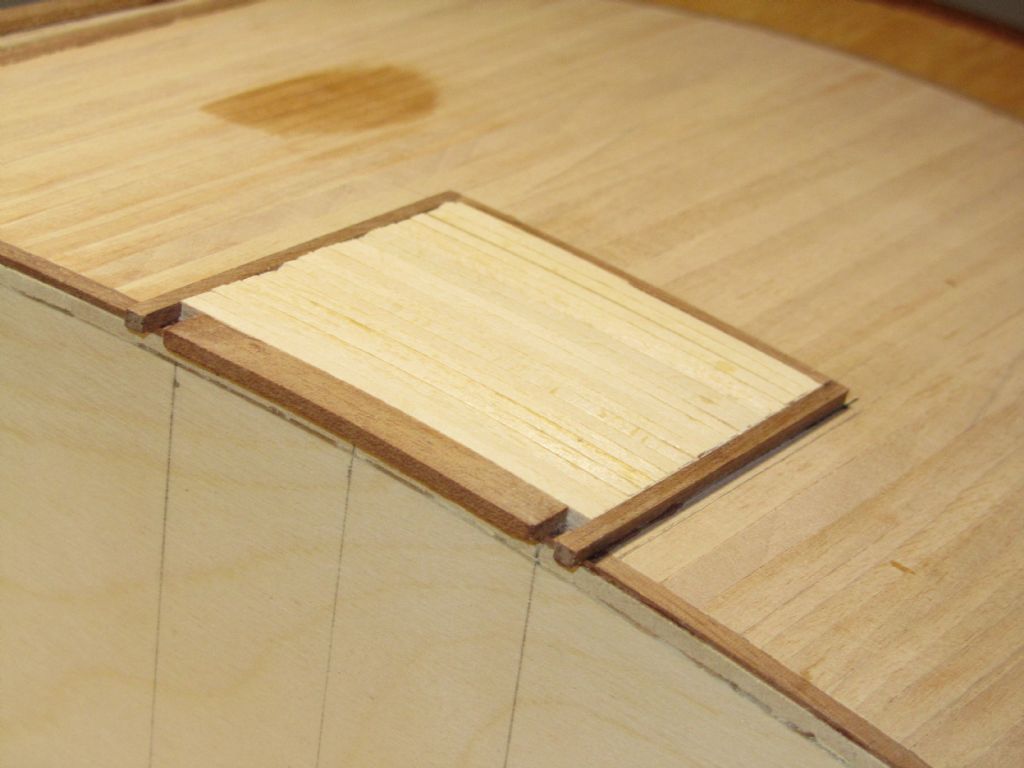
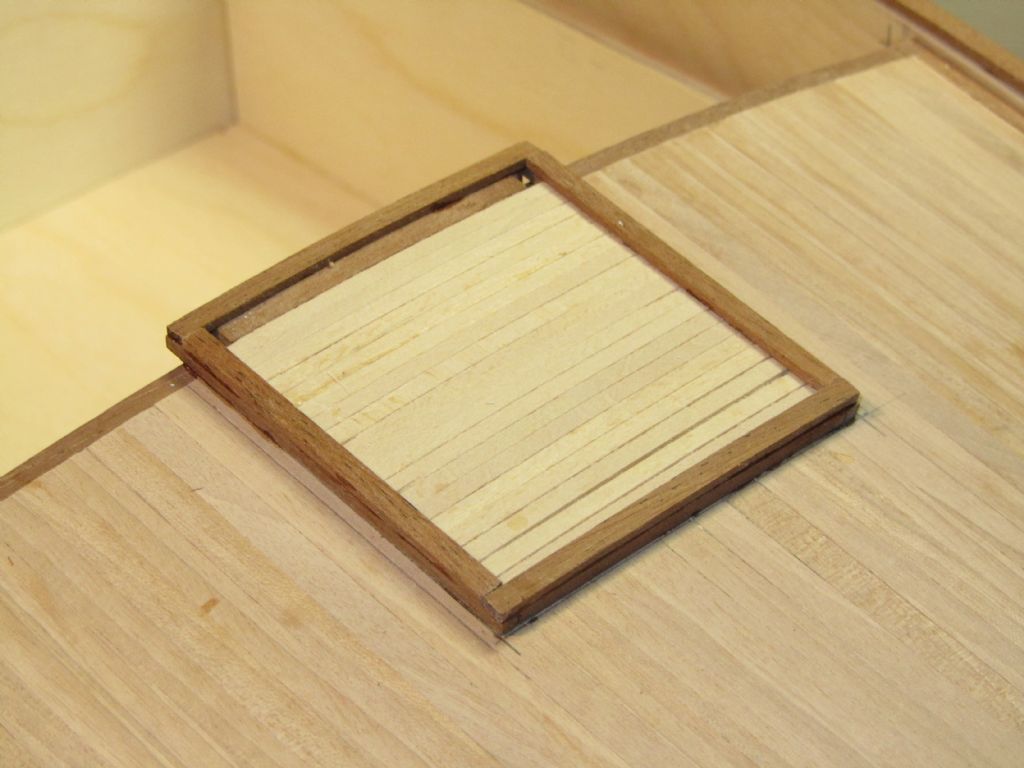
                                Carcass for hatch formed, following the curve of the roof, and ready for planking.

                                The doors are just taped in place as the floor needs to be fitted first.

                                Chris

                                superstructure42.jpg

                                superstructure44.jpg

                                superstructure45.jpg

                                superstructure46.jpg


                                Edited By Chris Fellows on 05/11/2021 20:28:38

                                #98480
                                Will Mason 1
                                Participant
                                  @willmason1

                                  Fair play Chris, that looks spot on.

                                  as you say, the light/dark contrast will work well.

                                  Will

                                  #98482
                                  Chris Fellows
                                  Participant
                                    @chrisfellows72943

                                    Cheers Will.

                                    Mahogany is a bit dark for Faireys as they tend to use a "warmer" timber but as I've used it elsewhere I'll stick with it.

                                    When I start another build I think I'll try some other timbers.

                                    Chris

                                    #98493
                                    Chris Fellows
                                    Participant
                                      @chrisfellows72943

                                      Cockpit floor has been given a light sanding and another coat of varnish and is now ready for gluing in place.

                                      The hatch has been planked and after leaving overnight has been sanded down. The runners for the hatch have been fitted to the cabin roof.

                                      Unfortunately it will be a few days before I can do anymore.

                                      Chris

                                      superstructure47.jpg

                                      #99063
                                      Chris Fellows
                                      Participant
                                        @chrisfellows72943

                                        At long last I've been able to get back to the builds and spend a bit more time on them.

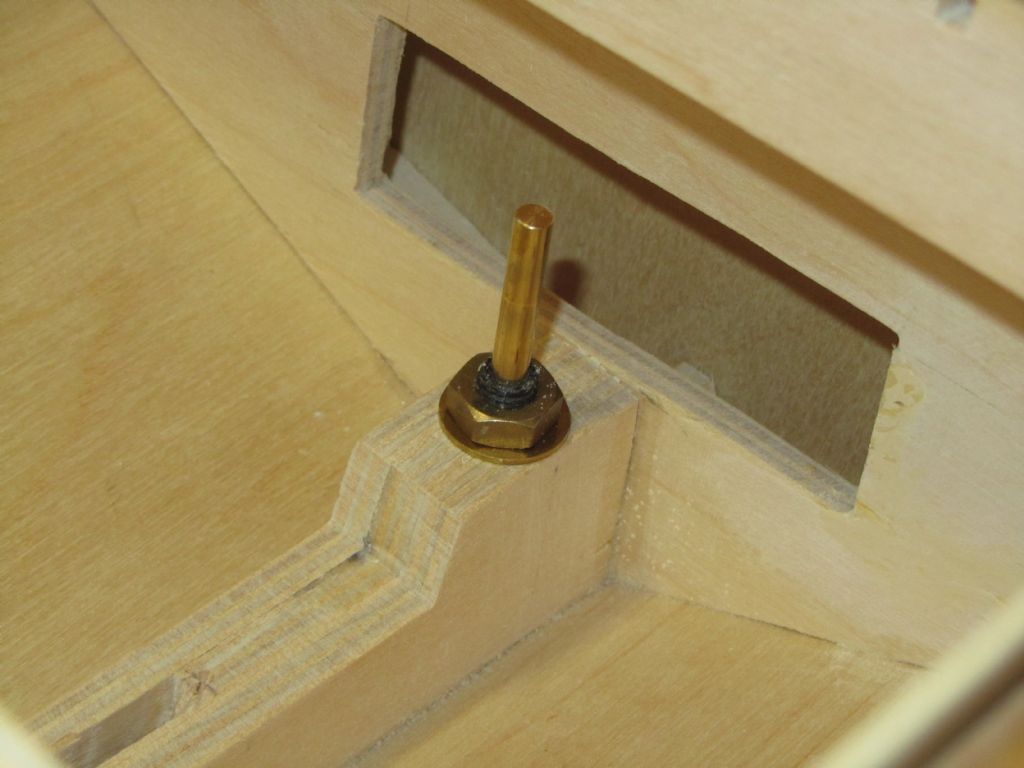
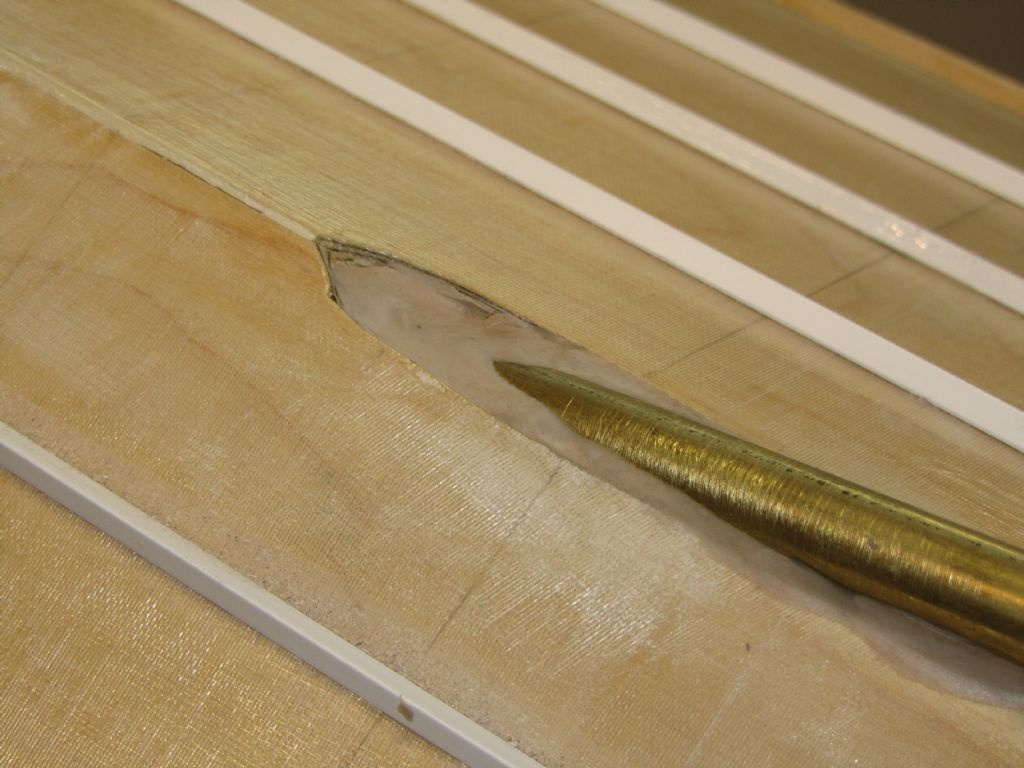
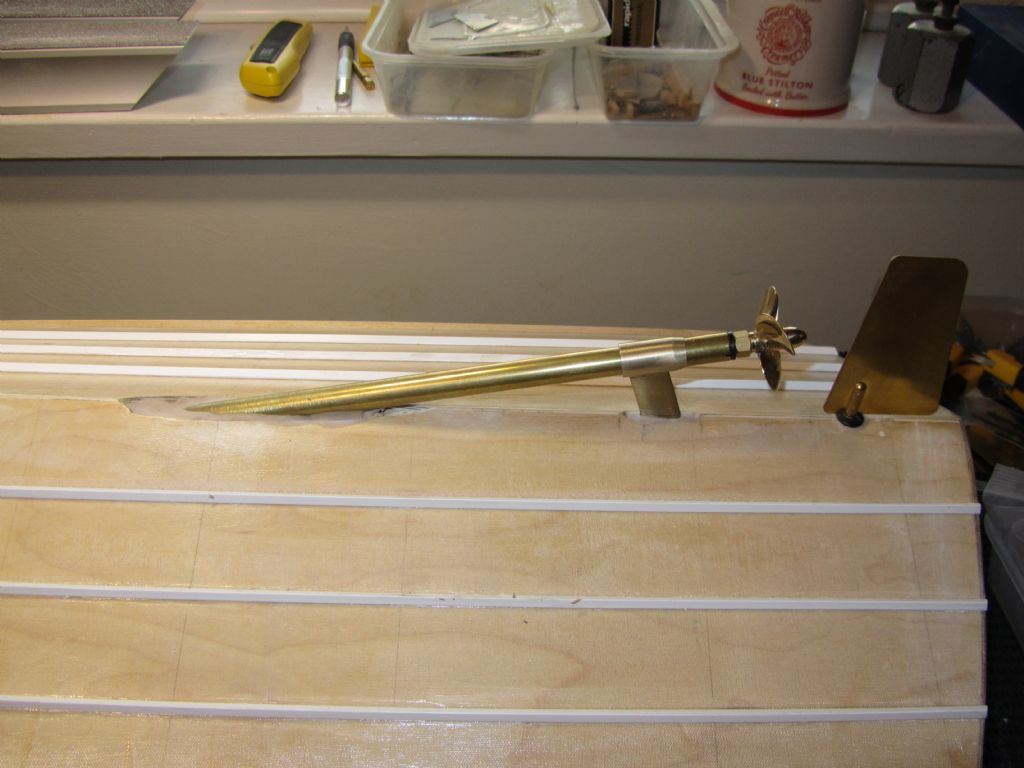
                                        Before I do anymore work on the superstructure I want to completely finish the hull which means fitting the motor mounting base, rudder and prop shaft. For the rudder I cut the plastic tube down so that there was enough thread showing for the washer and nut and the rudder arm would be positioned so that it passed through the hole cut through the bulkhead. A small amount of epoxy putty was then wrapped around the bottom of the tube which was then pushed through the hull and secured with the washer and nut and the putty smoothed off with a wet finger.

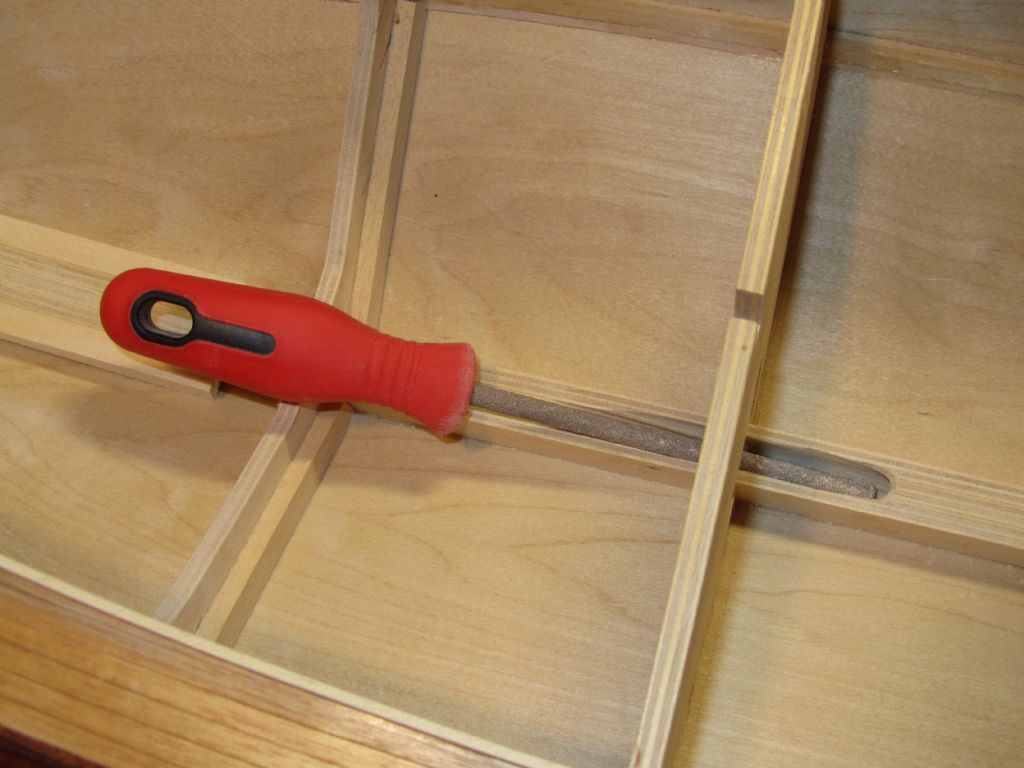
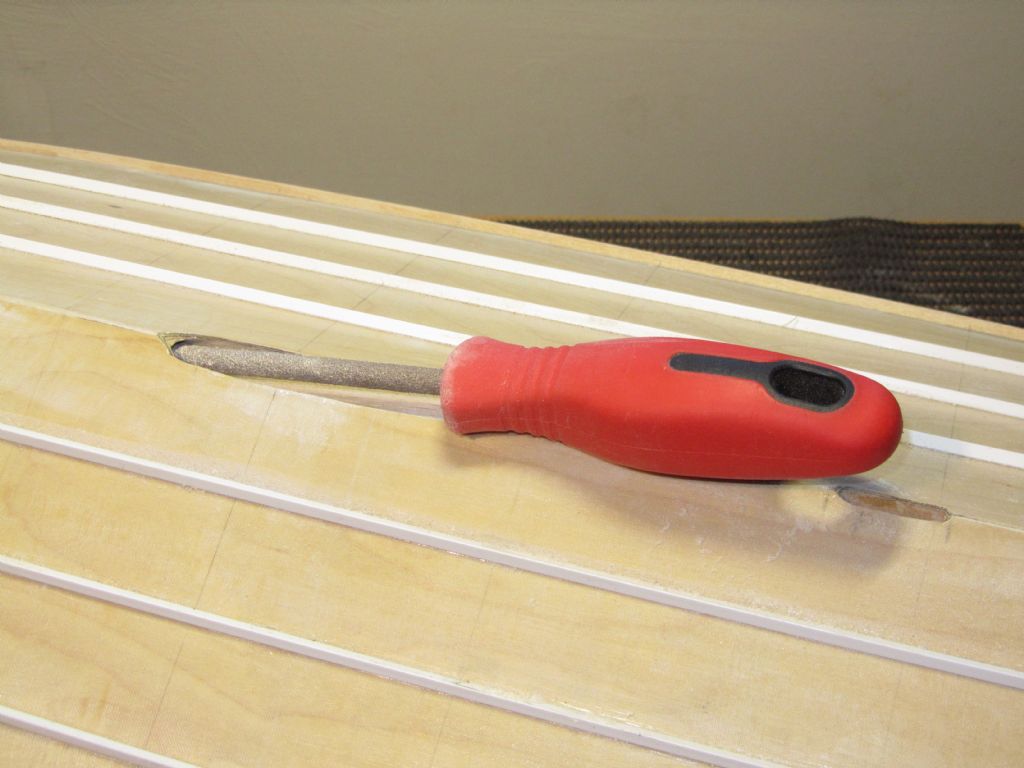
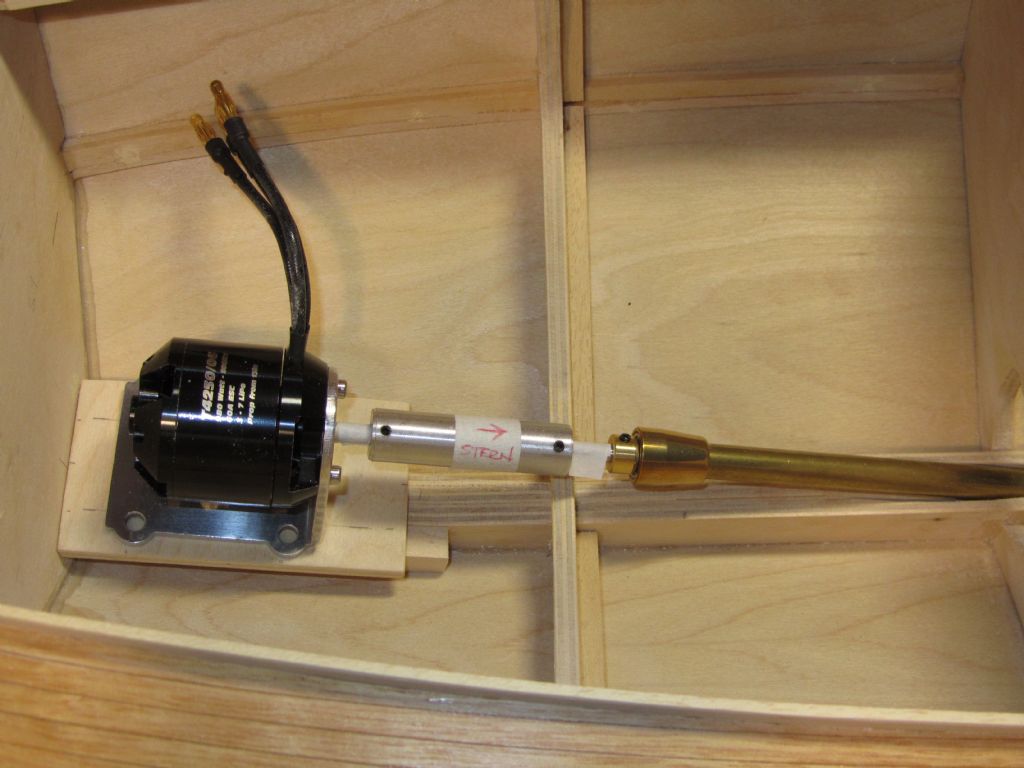
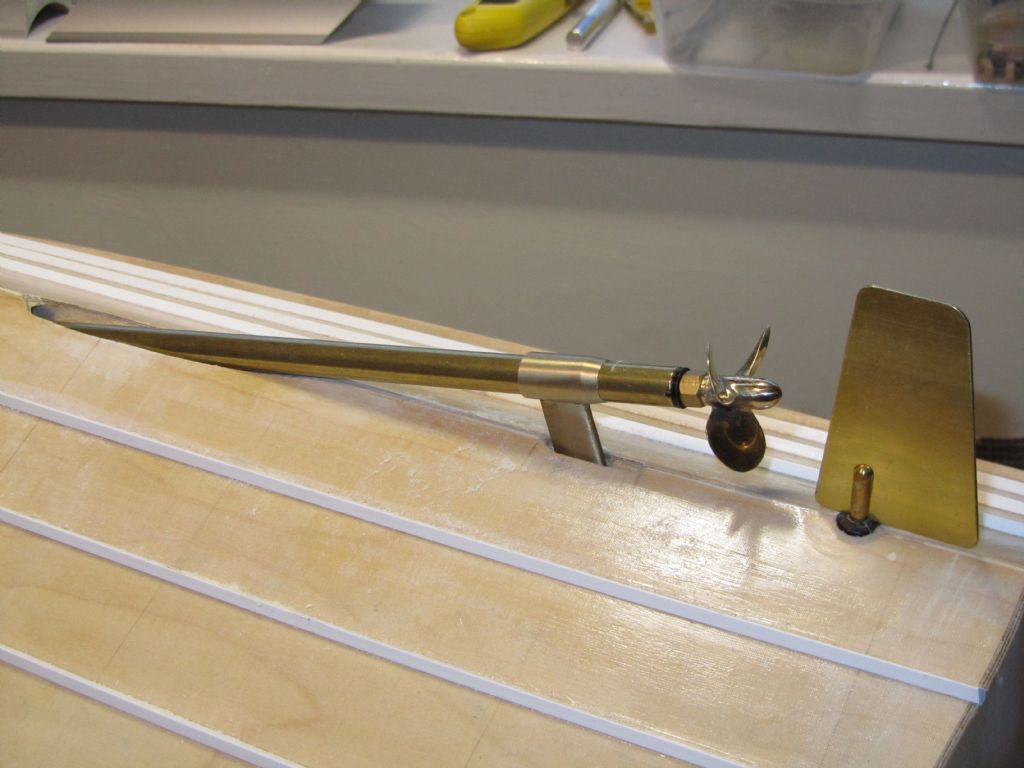
                                        I had drawn the prop tube position on the keel and cut the slot out during assembly but a trial fit showed that some adjustment was necessary to suit the motor mounting and get the prop close enough to the keel. The motor will turn a 45mm prop but I've decided that it looks a bit too big and so will fit a 40mm one. There is sufficient clearance for the 45mm one though if needed. To get the prop tube where required entailed some filing with one of my trusty PermaGrit files and after a number of trial fits I was happy.

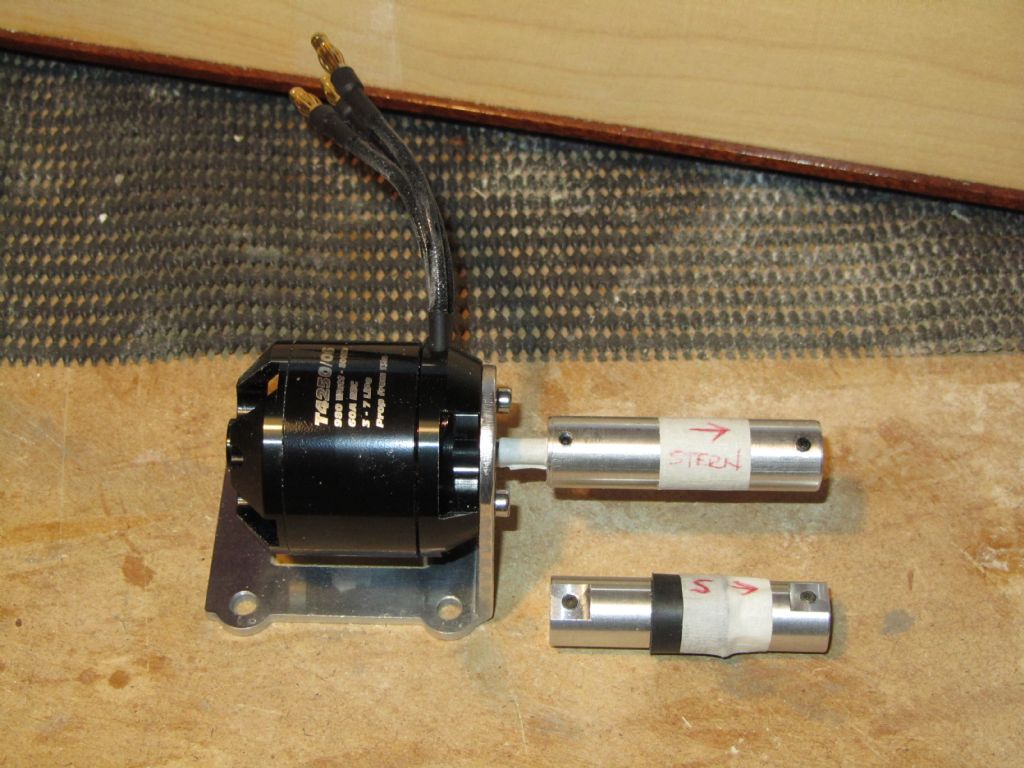
                                        To ensure that the motor alignment is as accurate as I can get it I always use a solid coupling. I've had issues on my other builds where the coupling (different diameters) was very tight on the motor or prop shaft and/or wouldn't go on far enough. No issues with this 5mm/5mm one and you can see where I've used masking tape on the shafts to check.

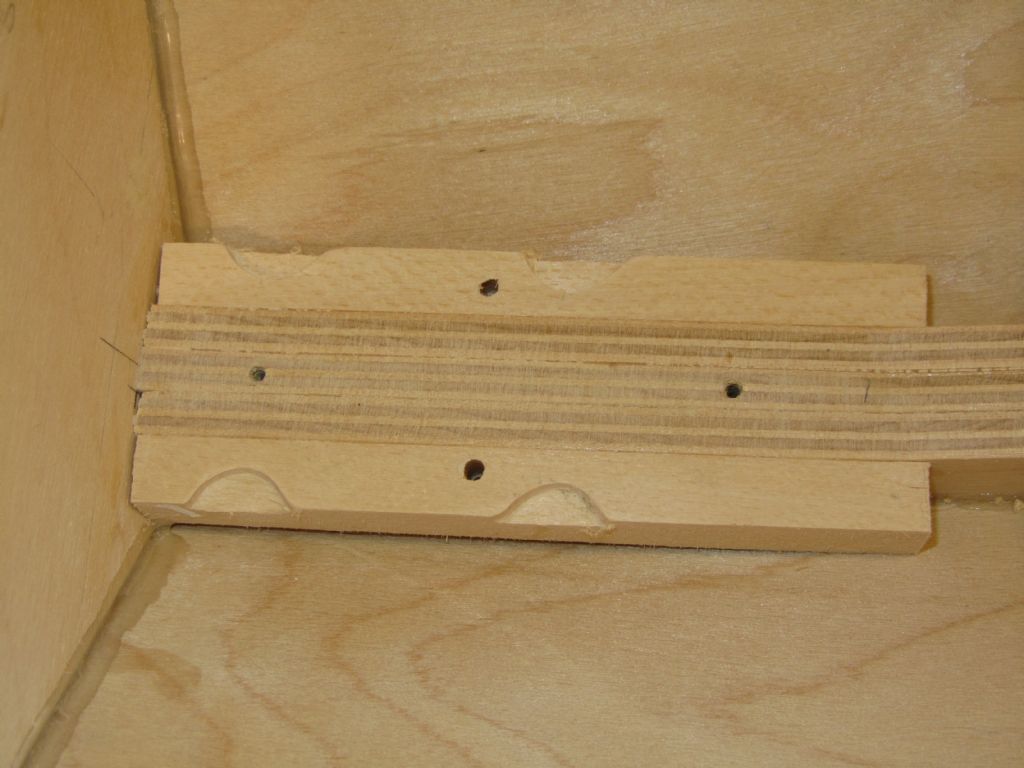
                                        I like to have my motor mounts removeable so that will be screwed in place and then the prop tube and P-bracket will be glued in.

                                        Chris

                                        prop shaft etc. 1.jpg

                                        prop shaft etc. 2.jpg

                                        prop shaft etc. 3.jpg

                                        motor 1.jpg

                                        motor 2.jpg

                                        prop shaft etc. 4.jpg

                                        #99103
                                        Chris Fellows
                                        Participant
                                          @chrisfellows72943

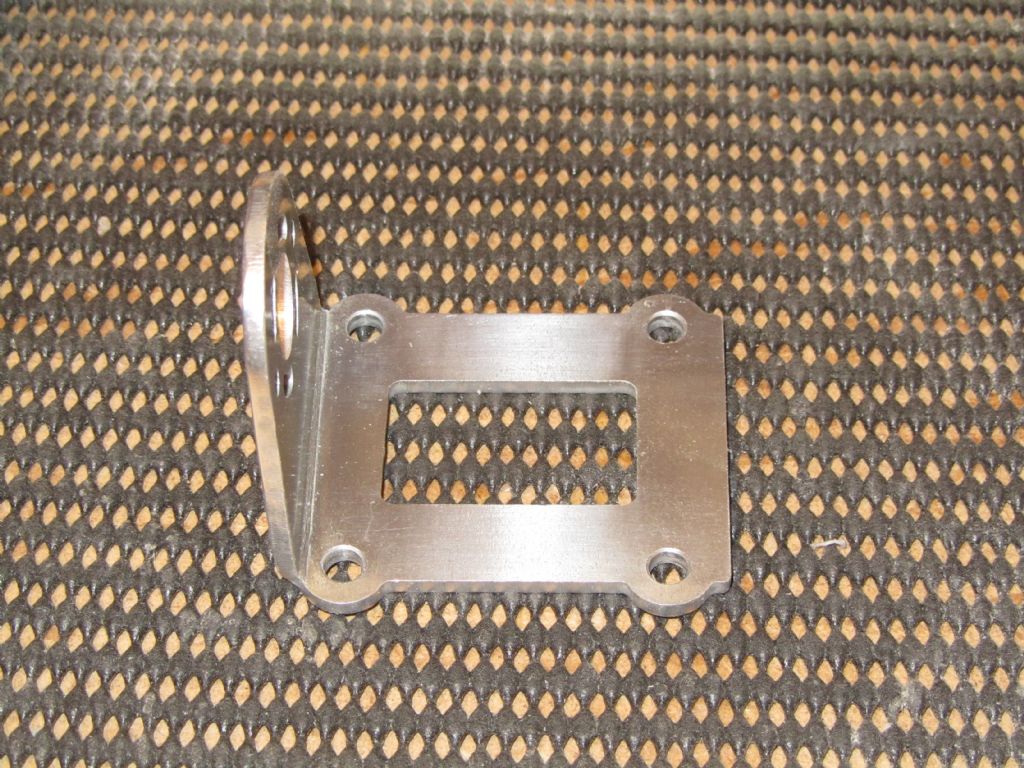
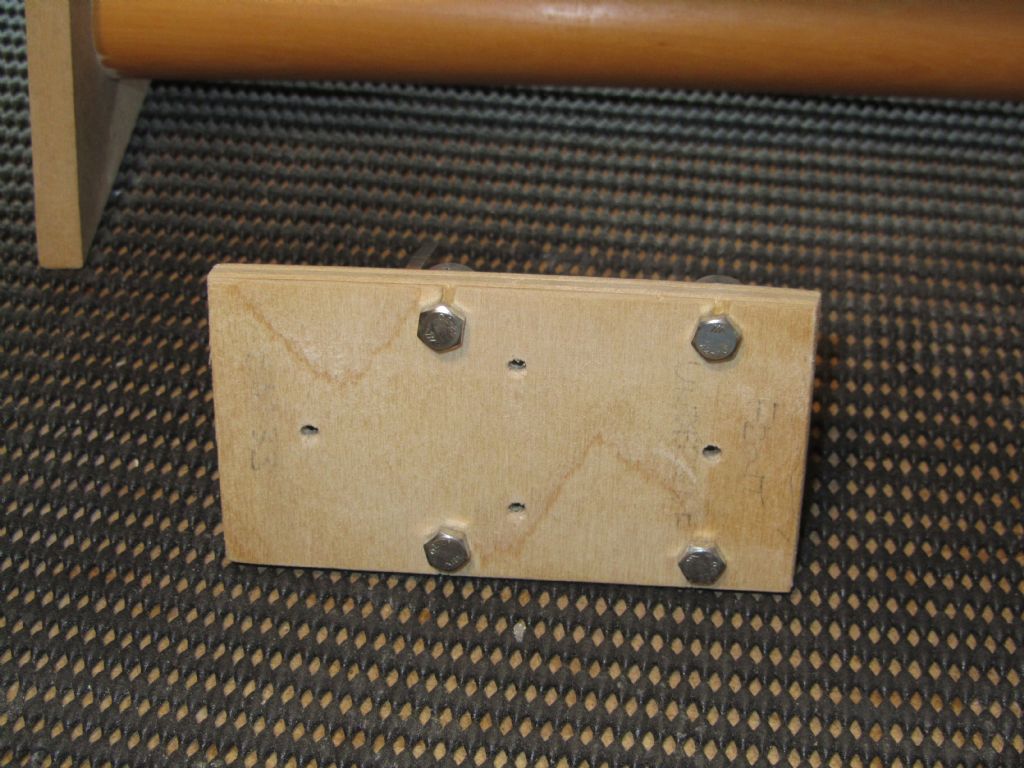
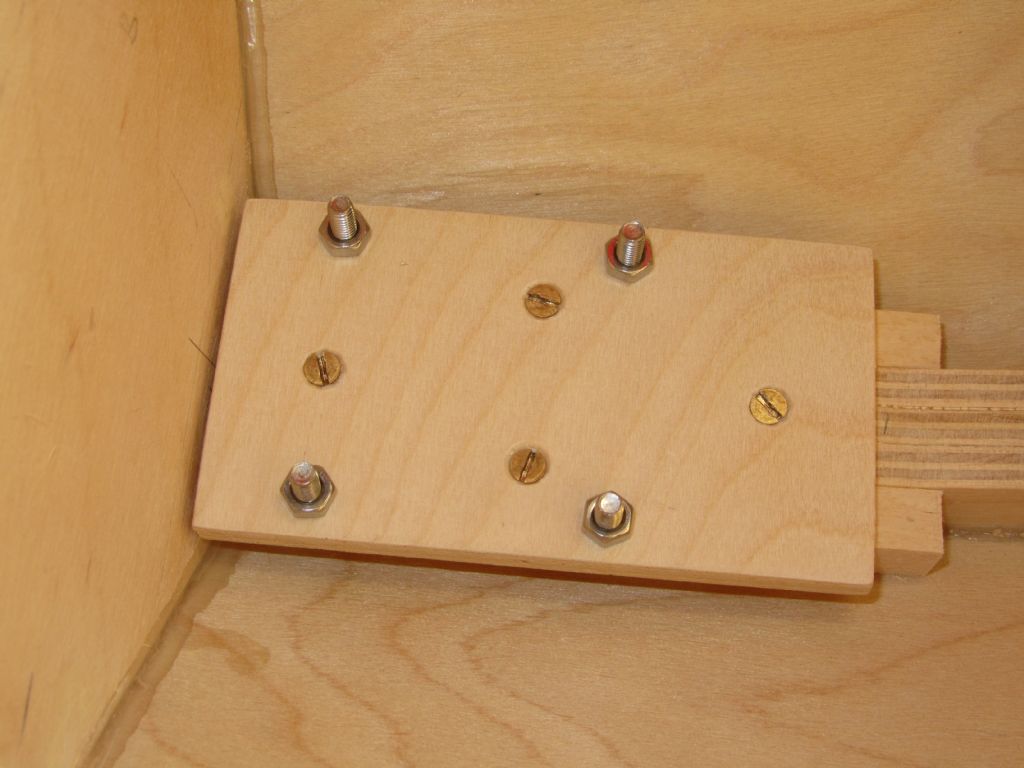
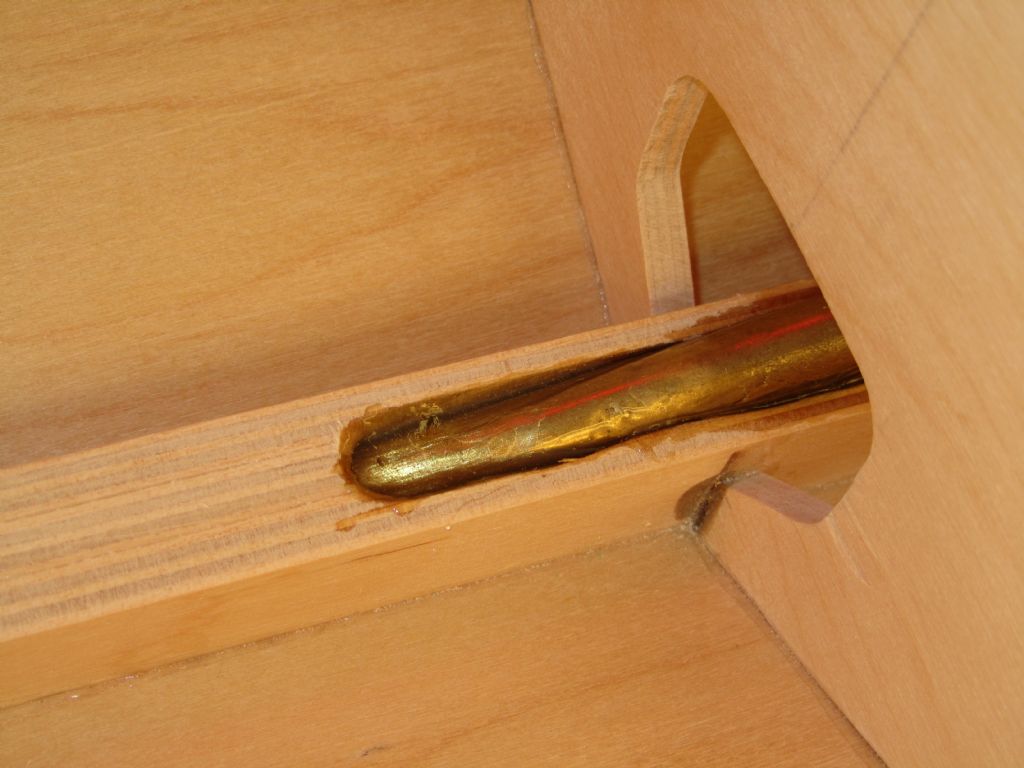
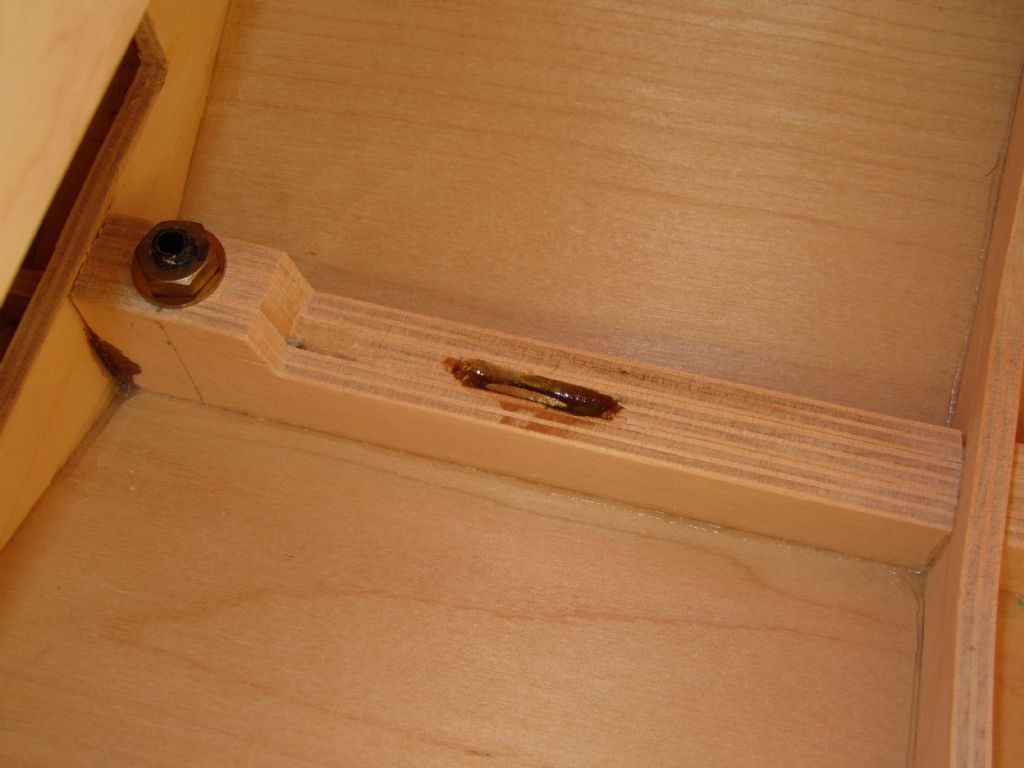
                                          I ran a drill through the alloy motor mount fixing holes as they are just a tad tight for the M4 SS bolts that I like to use. The heads foul the timber bearers either side of the keel so they were cut away using my Proxxon Mill/Drill 230/E (similar to a Dremel). I bought this from the Warwick Show (remember those!) 4 or 5 years ago and this is the first time I've used it! Bought it to take the very small drills at the time. Better for modelling than my Dremel though as the speeds are more adjustable and it can be run slower. I do have plans to use it again in the future though!

                                          I then cut the leg down on the P bracket so that it sits inside the keel and roughed up the leg and the prop tube ready for gluing. The motor base was then secured with brass screws, the motor mount bolted down and the motor fixed to it and the prop shaft installed and connected to the solid connector and motor.

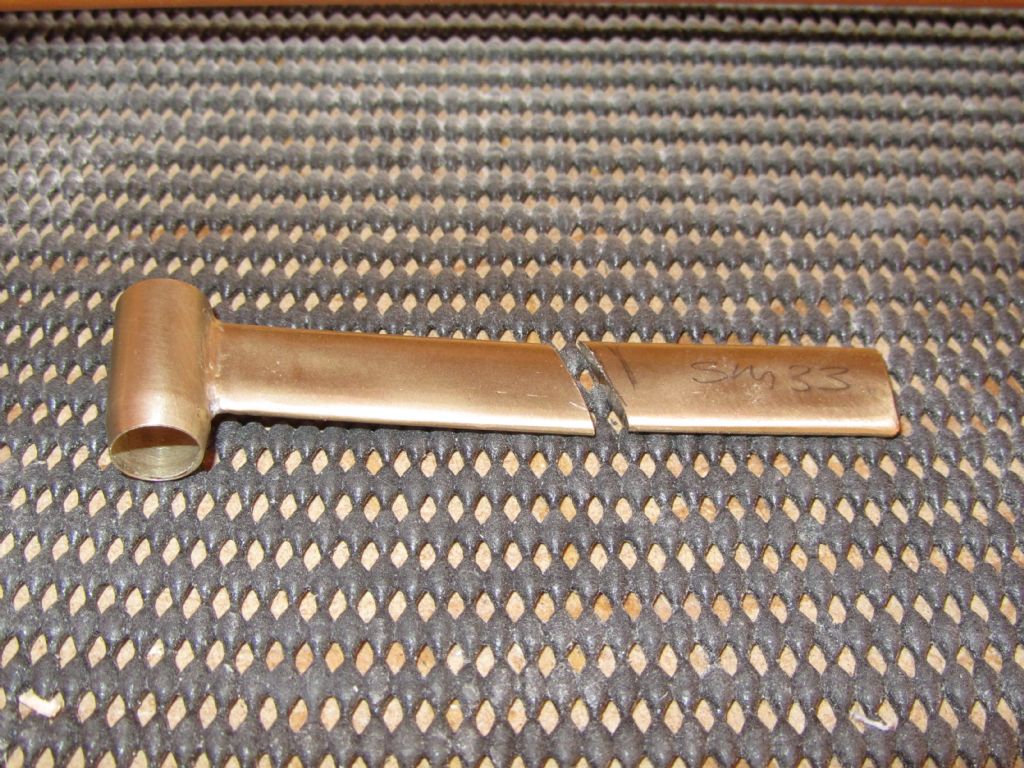
                                          I then used epoxy putty to hold the prop shaft and P bracket in position and to stop the epoxy glue running out which I will do tomorrow. Once that is done I will fair in the prop tube and P bracket with P38. And that will be pretty much the hull finished ready for painting and I will return to the superstructure.

                                          Chris

                                          motor mount.jpg

                                          prop shaft etc. 5a

                                          prop shaft etc. 5.jpg

                                          prop shaft etc. 6.jpg

                                          prop shaft etc. 7.jpg

                                          prop shaft etc. 8.jpg

                                          prop shaft etc. 9.jpg

                                          Edited By Chris Fellows on 12/01/2022 17:18:25

                                          #99104
                                          Ray Wood 3
                                          Participant
                                            @raywood3

                                            Hi Chris,

                                            When I see the high standard of your work, It makes me realise how rough & ready mine is

                                            Yes the Proxxon hand drill is a must for getting out of trouble, wouldn't be without mine although expensive !!

                                            You may want to put an O ring round your rudder stock inside the hull as it looks like it maybe below the static waterline, I had the same issue with the Cigarette filling up in the rear compartment after a run !!

                                            Regards Ray

                                            #99111
                                            Chris Fellows
                                            Participant
                                              @chrisfellows72943

                                              Thanks Ray.

                                              I think I had brain fade when I cut the rudder tube down when I could have opened up the hole in the bulkhead! Been away from building for too long!

                                              Chris

                                              #99113
                                              Chris Fellows
                                              Participant
                                                @chrisfellows72943

                                                Just checked the rudder and the top of the tube is only a few mm below the waterline. It would probably be Ok when it's got some grease in It but to be on the safe side as it's prior to painting I think I'll replace it. I need to order one for the Huntsman 31 anyway.

                                                Just doing a check on my epoxy before I use it on the prop tube and P bracket. It says it's got a shelf life of 1 – 2 years and I've had it longer than that I think. Will see if it's setting Ok in a few more minutes.

                                                Chris

                                                #99118
                                                Chris Fellows
                                                Participant
                                                  @chrisfellows72943

                                                  Epoxy was fine and so sufficient was mixed and then dribbled in to secure the prop tube and P bracket.

                                                  Chris

                                                  prop shaft etc. 10.jpg

                                                  prop shaft etc. 11.jpg

                                                  #99224
                                                  gecon
                                                  Participant
                                                    @gecon

                                                    Chris,

                                                    the woodwork, build quality, and the machanics of your work are a joy to behold. I often study your photos and 'absorb' the clean, preciseness of it all. Then I get back to my efforts and sharpen the chizel a bit more before I hammer at it!

                                                    George


                                                    Edited By gecon on 22/01/2022 06:29:20

                                                    #99237
                                                    Chris Fellows
                                                    Participant
                                                      @chrisfellows72943

                                                      Thanks George but I think you are being modest! Your builds are lovely.

                                                      I look at some other folks builds e.g. a couple on Mahem including a Riva and feel very inadequate! Their workmanship and attention to detail is fantastic.

                                                      My aim is to achieve a very good standard but not go too mad. I'm taking too long as it is but will have five!

                                                      Chris

                                                      Edited By Chris Fellows on 22/01/2022 17:29:35

                                                    Viewing 25 posts - 101 through 125 (of 133 total)
                                                    • Please log in to reply to this topic. Registering is free and easy using the links on the menu at the top of this page.

                                                    Code of conduct | Forum Help/FAQs

                                                    Advert

                                                    Latest Replies

                                                    Home Forums Build Blogs Topics

                                                    Viewing 25 topics - 1 through 25 (of 25 total)
                                                    Viewing 25 topics - 1 through 25 (of 25 total)

                                                    View full reply list.

                                                    Advert