Fairey Swordsman 33

Advert

Fairey Swordsman 33

Home Forums Build Blogs Fairey Swordsman 33

  • This topic is empty.
Viewing 25 posts - 1 through 25 (of 133 total)
  • Author
    Posts
  • #75643
    Chris Fellows
    Participant
      @chrisfellows72943

      As with the River Cruiser I started a thread on the Swordsman (subsequently moved to Building Kits) when I was producing the drawings and as I’ve also made a start on building it as well I’m continuing in here.

      I used the Aerokits kit drawings (plan and side view) for the basis of the drawings but have modified them for the version of the Swordsman 33 that I want i.e. the one with the aft cabin that has the roof just sitting under the top of the coamings.

      The Aerokits has the aft cabin but it is the one where the roof is level with the deck. Fairey Marine aficionados will know that there is also a version without the aft cabin and just a large open cockpit similar to other Faireys. The version I’m building may not be considered to be the best looking of the various options but I’ve not seen a model of that version and hence why I’m attracted to building it.

      I actually started cutting out the parts for the hull (as far as I got with the drawings) before Christmas interrupted proceedings and I started on the River Cruiser. In fact the RC has been a distraction, albeit in a good way, as I was going to start building a Huntsman 28, perhaps I’ll build all three at once! Space may well be a problem though!

      As well as the aft cabin I’ve modified the drawings by adding a temporary spine with “fingers” as well as on the keel. I’m building right way up and the keel fingers are for screwing to a substantial, straight piece of timber which is then screwed to a baseboard. I added them to the spine as well in case I want to work upside down as well, whether I need them or not, time will tell. Obviously the spine will help greatly with alignment and helping to keep the frames in place whilst gluing. This is all a learning curve for me as I’ve never build a model before, well apart from a few Airfix planes when I was young.

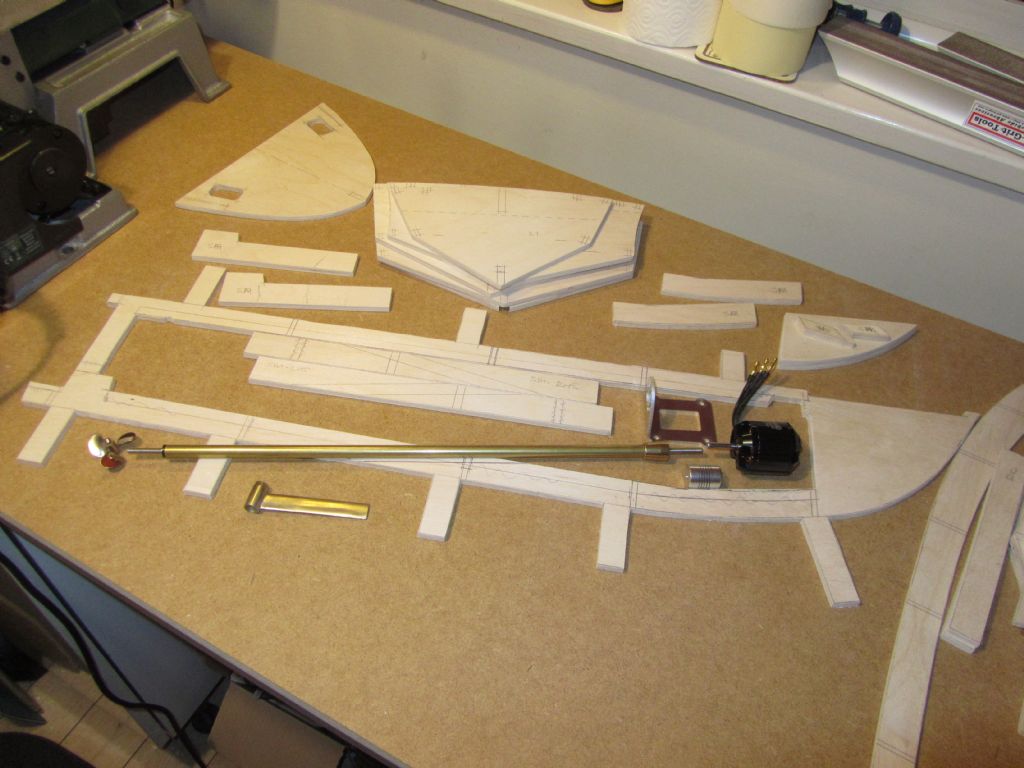
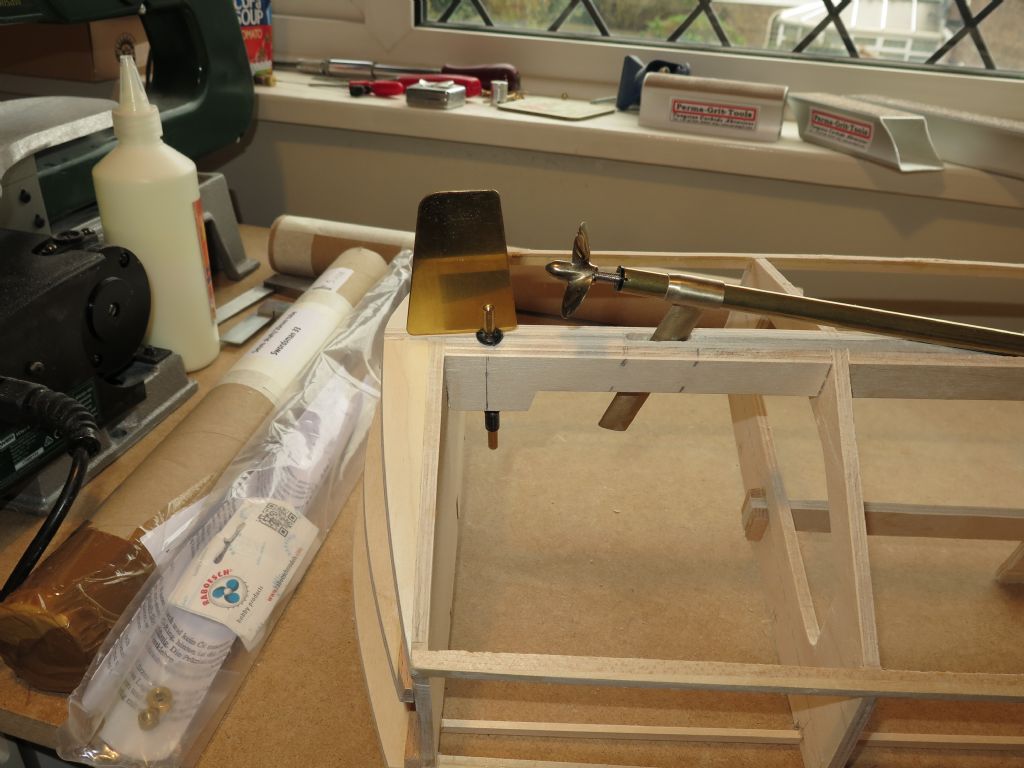
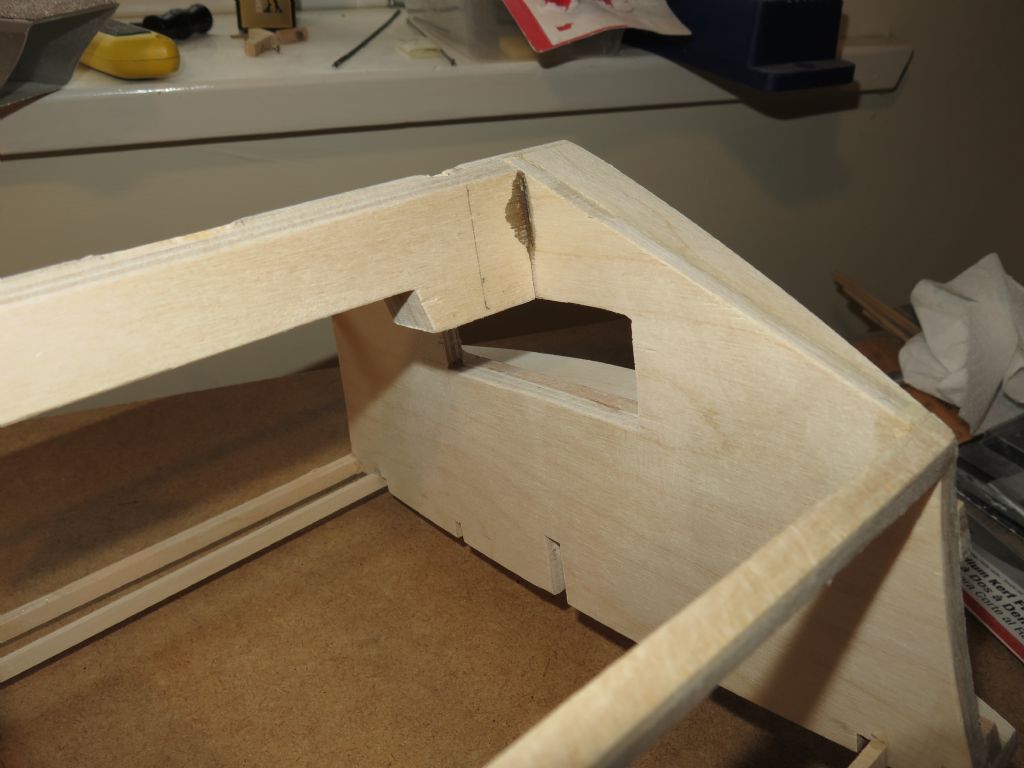
      I made quite a few tweaks to the drawings before I was happy with printing them and today I made my first tweak to the parts. The final positioning of the prop shaft was after I’d decided on the frame positions and drawn-up the frames and I subsequently found that the prop shaft cut through the keel at one of the frame positions (see photo). The doublers were going to butt up to this frame and once all glued up would probably be fine. But why take the risk? So, I’ve cut new, longer doublers, to span completely over the prop shaft cut out and have widened the slot in the bottom of the frame as per common practise.

      So all parts are almost ready for the hull, just need the cut-outs doing for the stringers and will be ready for gluing.

      Photos are:

      Ply cut-out and sanded and prop shaft etc. laid out. Note the longer doublers.

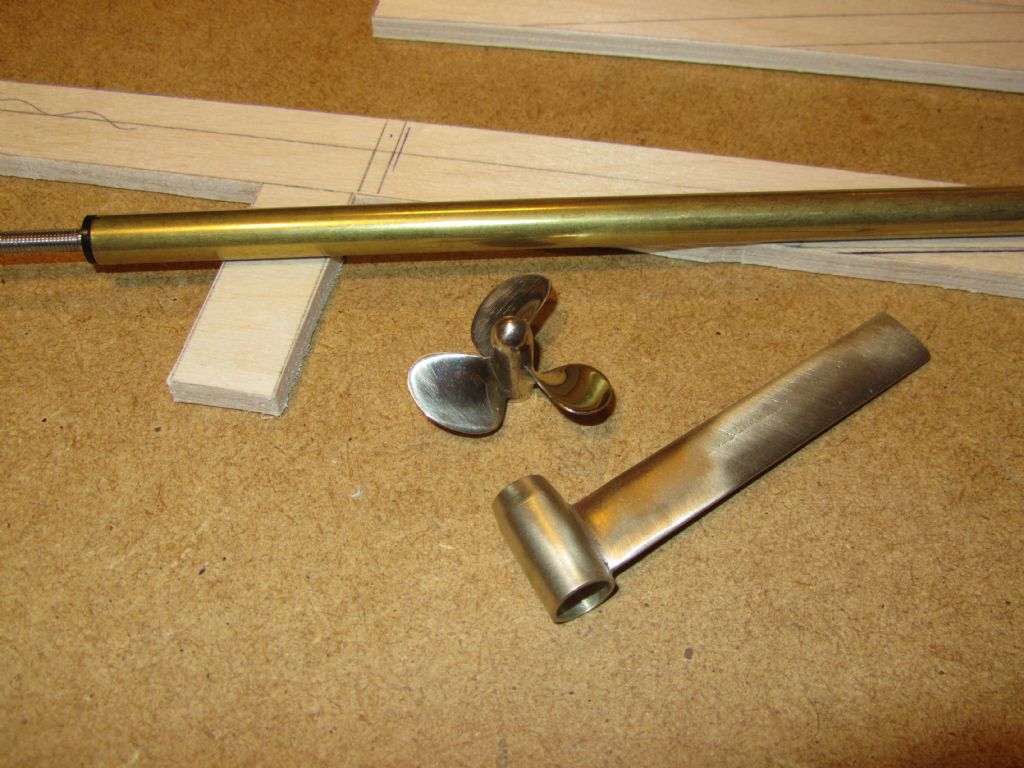
      Goodies from Protean Design. Was expecting the P bracket to be the usual formed from brass strip so this was a nice surprise. Prop as usual is lovely.

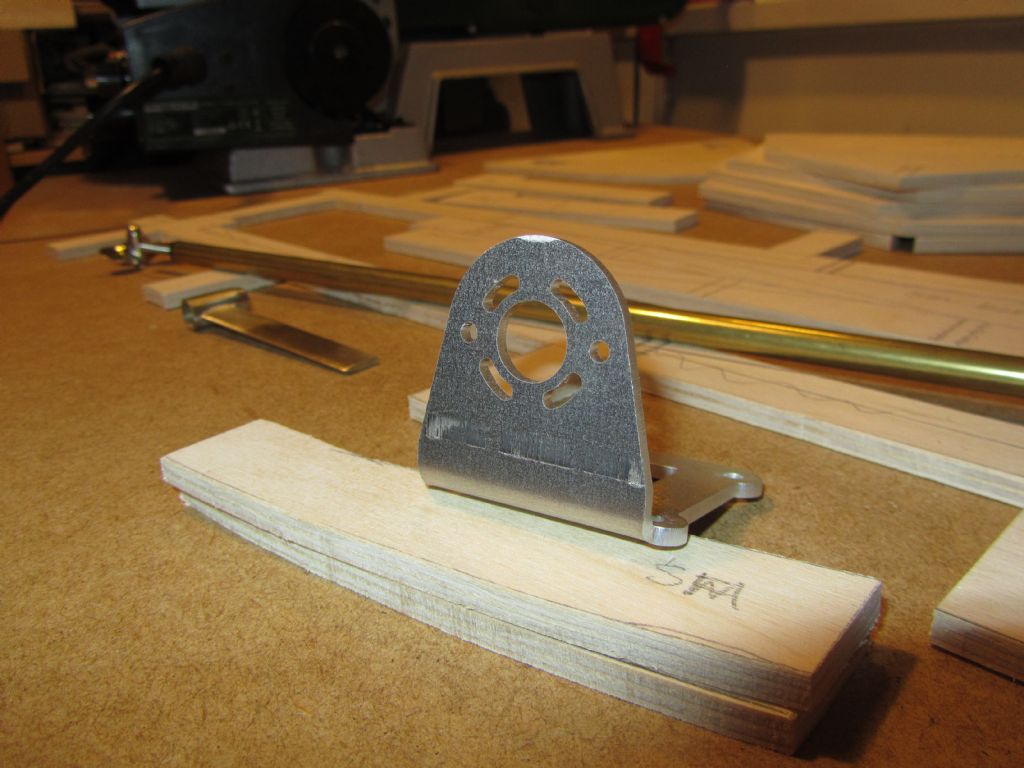
      Motor mount needs some fettling and holes countersunk.

      Chris

      Advert
      #9764
      Chris Fellows
      Participant
        @chrisfellows72943

        Scratch Build

        #75644
        Chris Fellows
        Participant
          @chrisfellows72943

          new doublers & prop shaft laid out.jpgprotean design bits.jpgmotor mount needs fettling.jpg

          #77154
          Chris Fellows
          Participant
            @chrisfellows72943

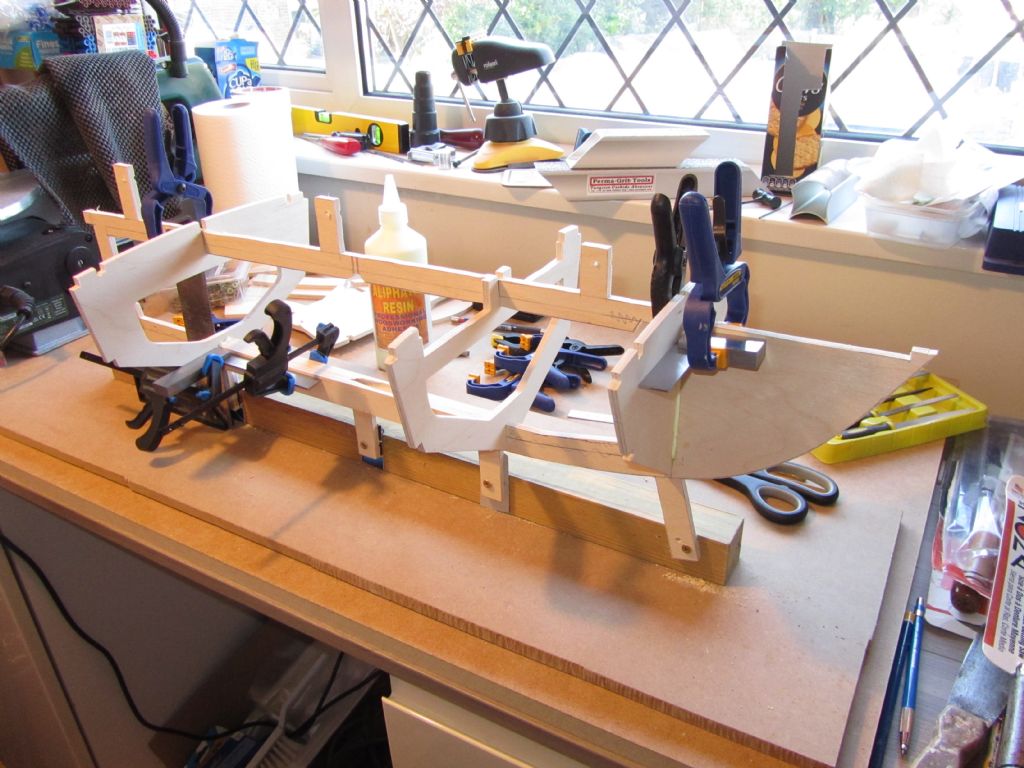
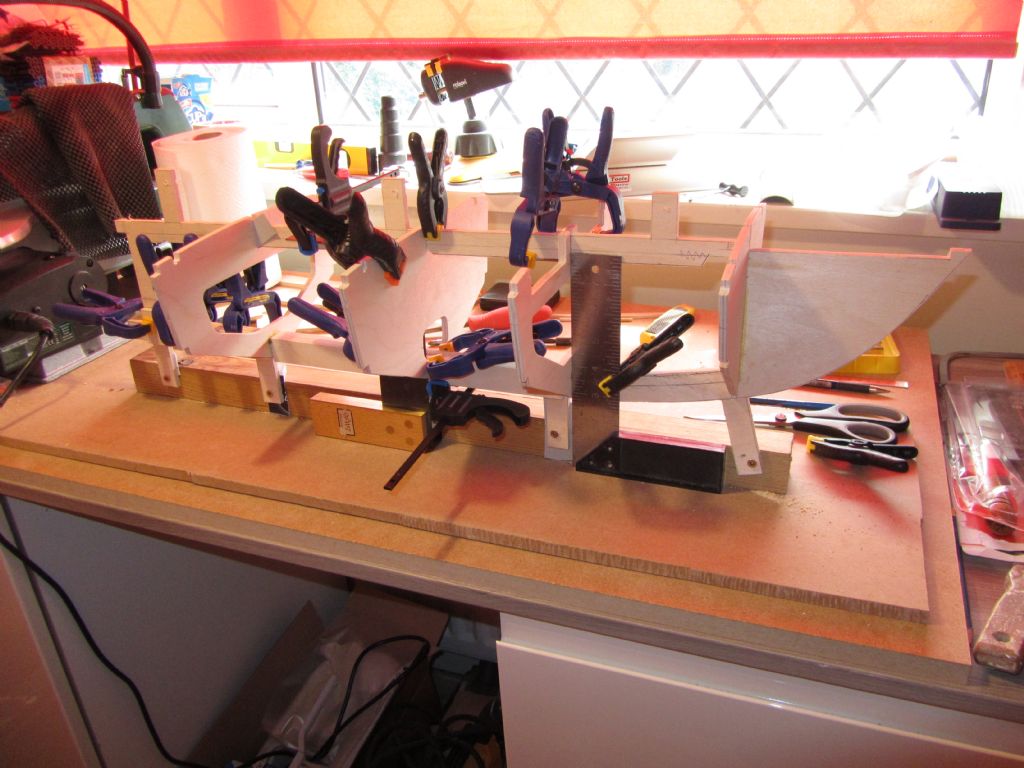
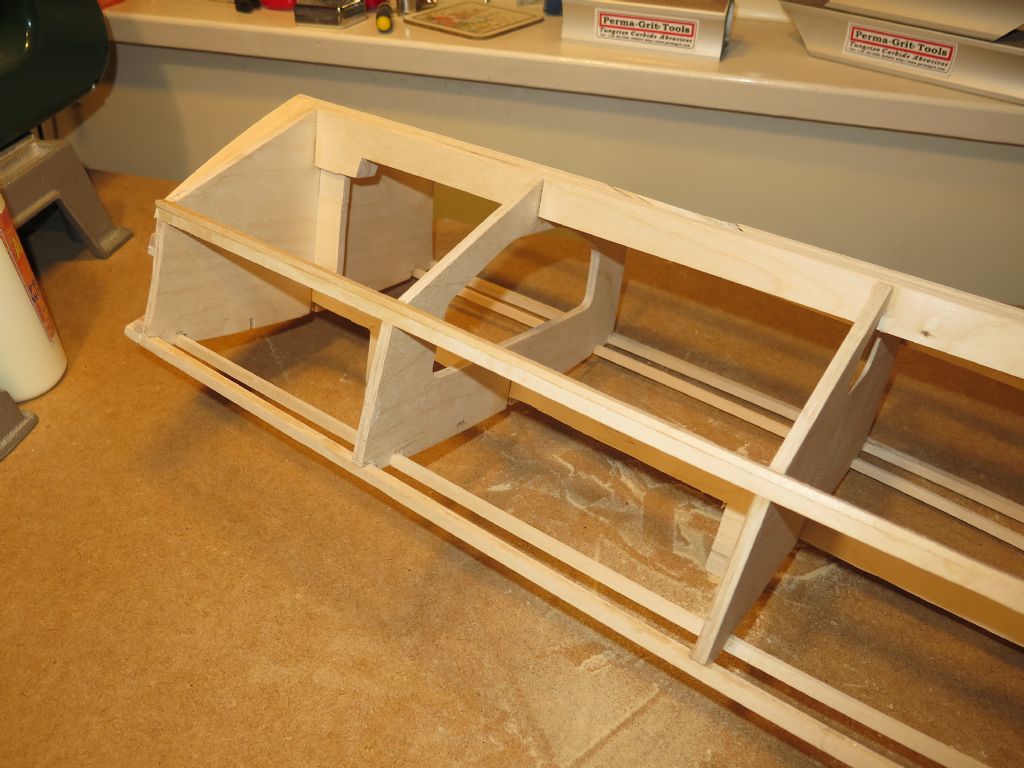
            Swordsman assembly 1.jpgSwordsman assembly 2.jpgAt last I've started assembly of the frames and keel and have fitted the doublers.

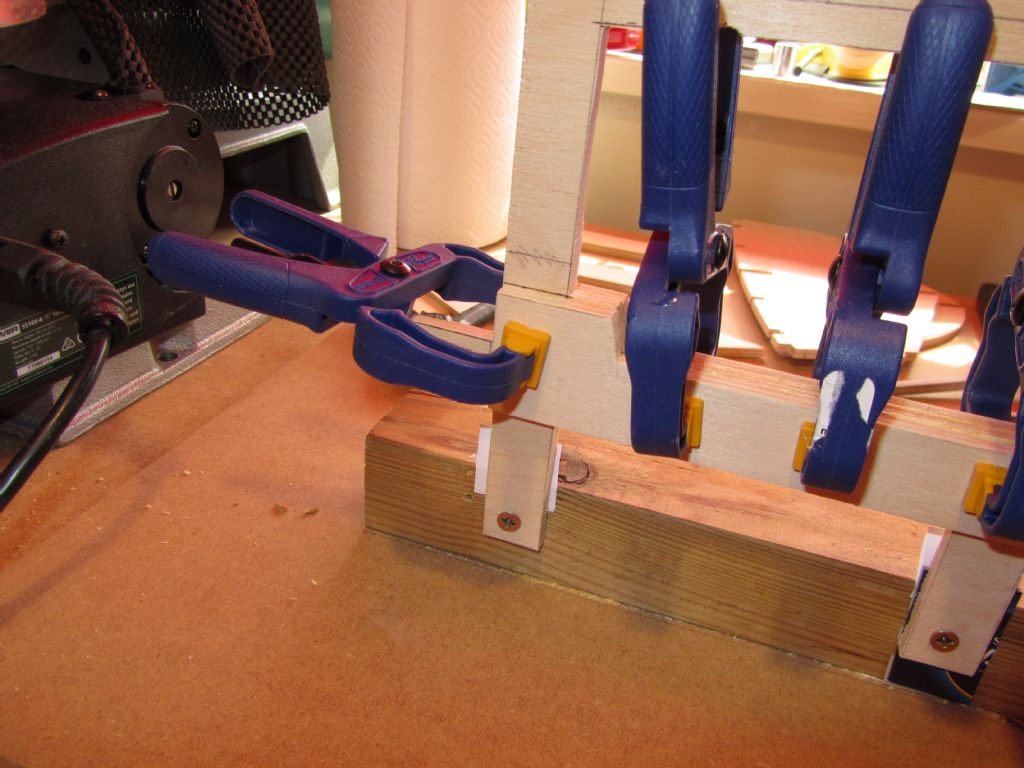
            The last photo shows a mistake at the drawing stage – one of the "fingers" for attaching to the building board is in the way of drilling for the rudder tube. No big deal as I will do this later. Another lesson learnt and I have already altered my drawings for the Huntsman 28 which I will be starting building soon.

            Chris

            Cant drill for rudder!

            Edited By Chris Fellows on 18/05/2018 18:09:54

            #77627
            Chris Fellows
            Participant
              @chrisfellows72943

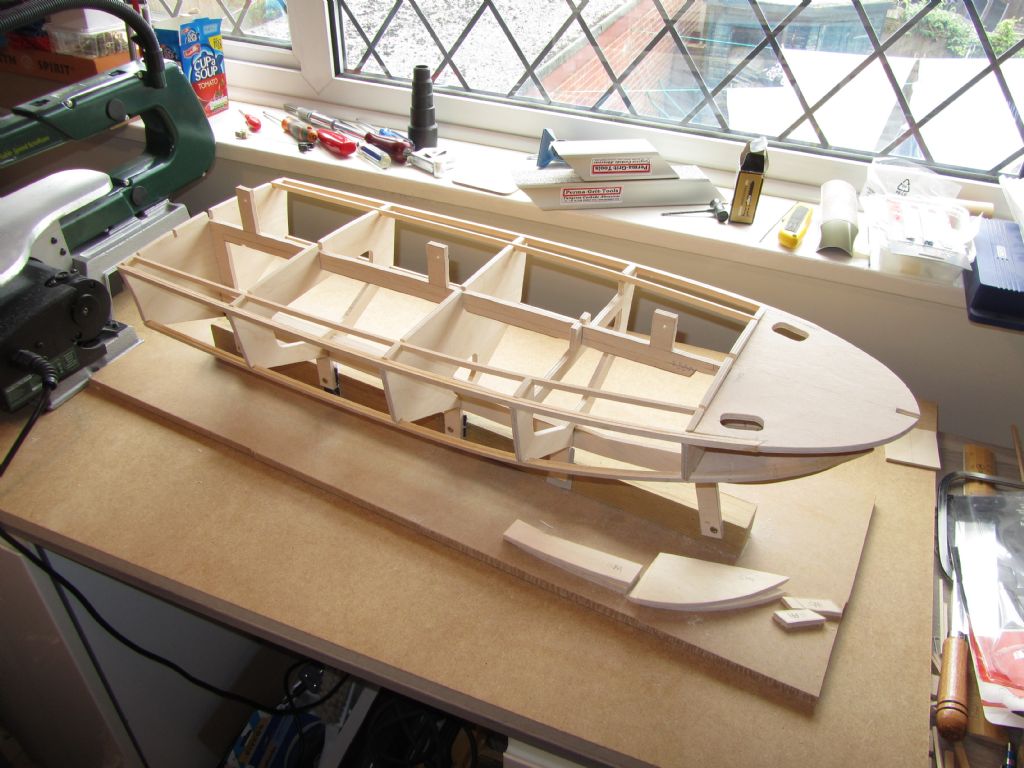
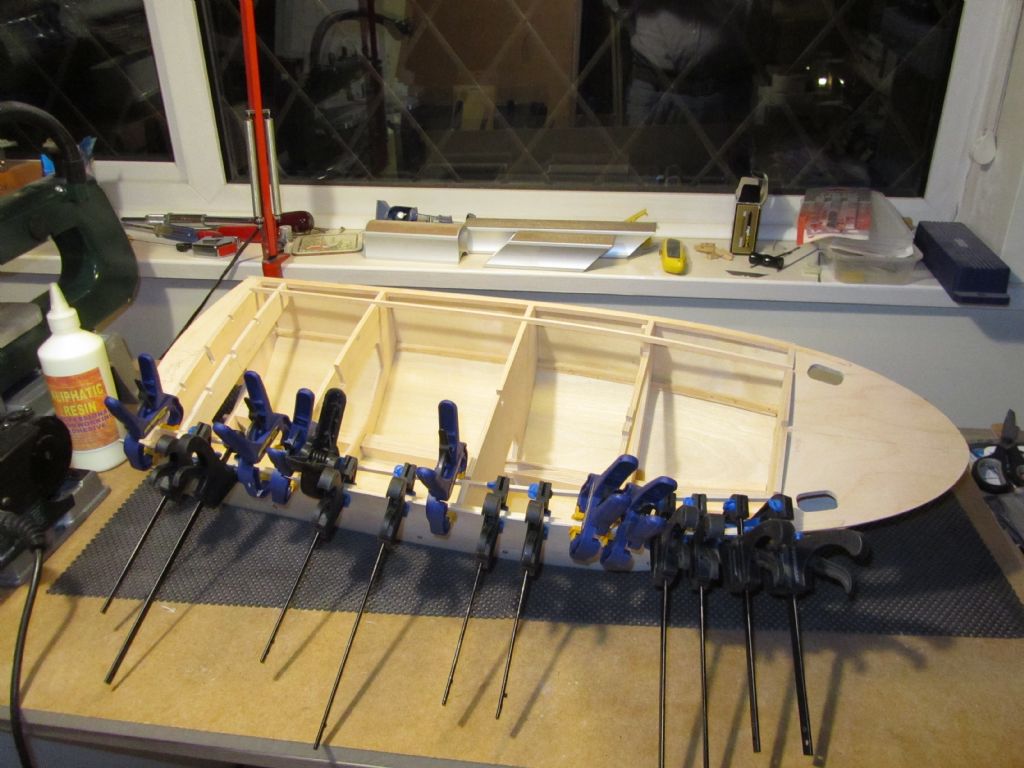
              Progress has been steady, all stringers now fitted.

              Just got to cut down and fit some doublers at the bow and fit the motor mount base and the hull can be taken off the building board and remounted upside down ready for skinning.

              Two down (almost) and one to go!

              All stringers done

              #77822
              Chris Fellows
              Participant
                @chrisfellows72943

                It being one of my non-working days I had to decide between continuing with sitting in the sun in the garden or a spot of boat building!

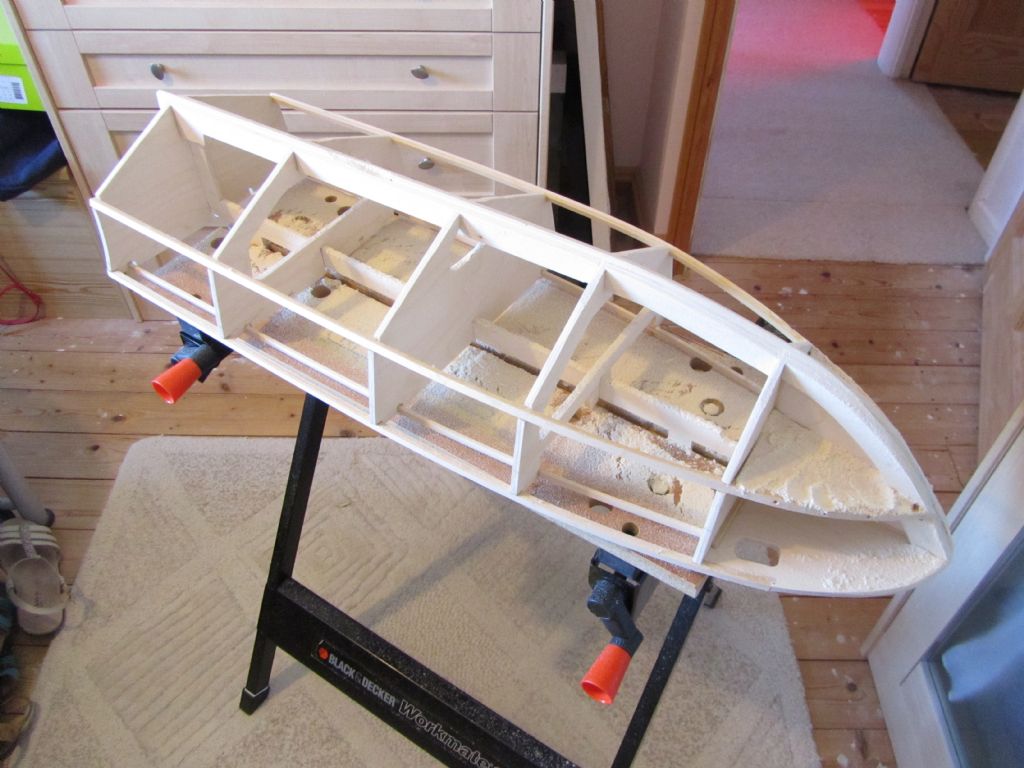
                Well, the latter won and having cut-off the "fingers" on the keel I've started sanding the keel to profile. The plan was to screw the fingers on the spine to the baseboard but they are held fine in my Workmate which is better really.

                Also it's freed up the baseboard, which is better than the one I've been using for the Huntsman 28, which was a bit warped, and now building has been transferred to that.

                As the Swordsman is my second hull I'm much more confident with tackling the profiling of the keel and then the stringers and am really enjoying it.

                I really like this hull, it is a nice shape and just the right size at 33" long.

                Don't know if I've mentioned it but I'm building all my Faireys at a scale of 1:12 to go with Dave's lovely little Huntress.

                Plan is to also build a Huntsman 31 and once that's done (some way off yet!) I've got to decide what to do with my 46.5" one which is too big for me. Either keep it as a display model or sell it on.

                Chris

                sanding keel.jpg

                #79958
                Chris Fellows
                Participant
                  @chrisfellows72943

                  It's been quite a while since I've posted about the Swordsman, due to lack of progress really but now that we're heading into winter I've picked it up again along with the other projects.

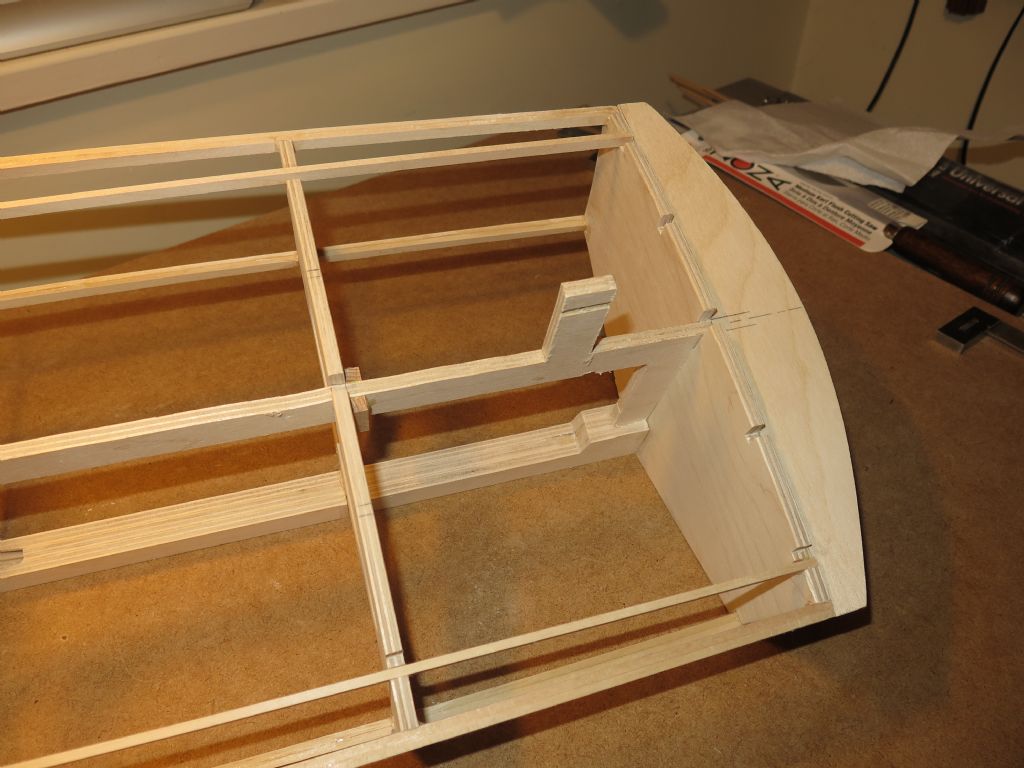
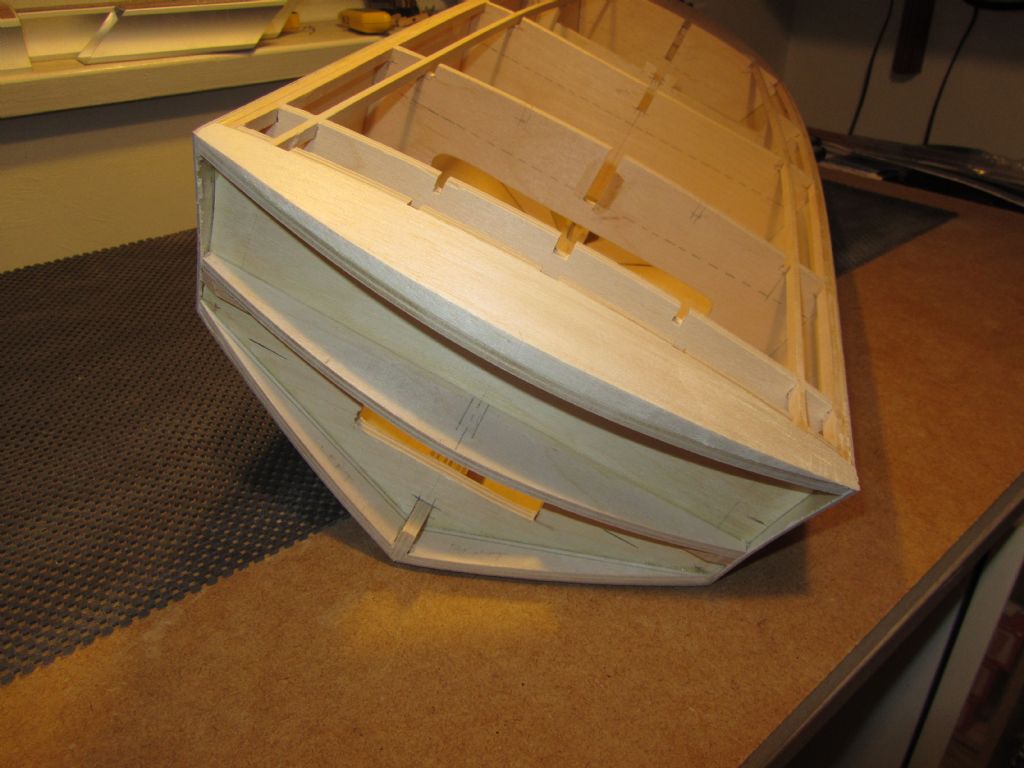
                  I've now added the formers to the transom to give it its shape and will then remove the remaining spine and other temporary timbers.

                  As for the Huntsman I can then drill the holes for the rudders and prop support and finish off profiling the stringers.

                  All three will be ready for skinning then!

                  As you can see I'm not building light (check out the transom!) and even at this stage it's getting quite heavy! Though some of this is down to the temporary timbers. Weight has never been a concern and performance won't be a problem as I've already got a powerful motor for it. For the other, smaller models, I'm using thinner ply etc. and they feel like featherweights in comparison, though again I'm not concerned with weight.

                  transom 1.jpgtransom 2.jpg

                  #80040
                  Chris Fellows
                  Participant
                    @chrisfellows72943

                    Been doing a bit more and even though I haven't been eating any Weetabix I must be feeling stronger as it doesn't feel as heavy now! I have cut out the rearmost part of the temporary spine though to drill the hole for the rudder but that shouldn't have made much difference.

                    This is a warts and all build blog and I wasn't entirely happy when I was fitting the chine stringers. They were the same size as used on the other, smaller builds at 3.2 x 6.5 (1/8 x 1/4) but whilst I wanted to use some deeper timber I hadn't got any. Checking with a straight edge suggested that there would be enough chamfer but the reality when sanding to profile was that whilst there was some it didn't provide as much gluing area as I wanted.

                    So I glued another piece of timber across the bottom of the double stringers. Most of it was subsequently sanded away but I was much happier with the amount of chamfer for gluing.

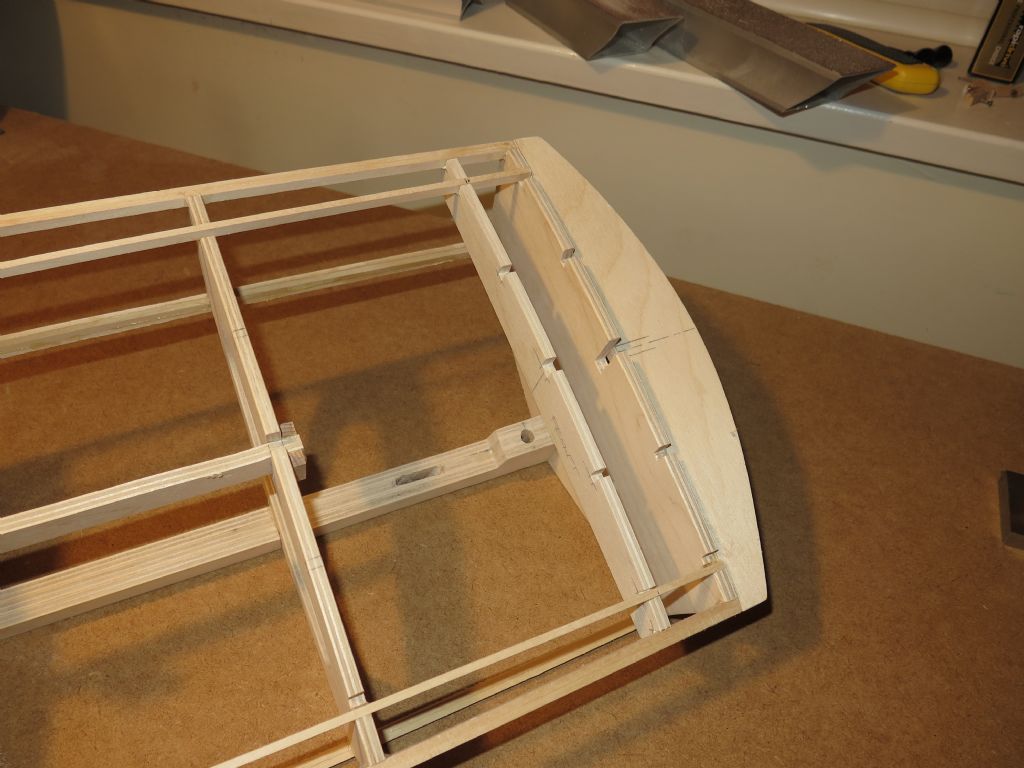
                    As well as that I have drilled the holes for the rudder and prop support, cut a hole in the rear bulkhead to give more room for the rudder arms to move and fitted an additional former by the transom for the area of decking for the superstructure to sit on. So at last it's all ready, along with the other two hulls, for skinning. I shall practise on the smaller hulls though first!

                    additional former.jpgprop shaft test fit.jpgimg_0045.jpgadditional chine stringer.jpg

                    Edited By Chris Fellows on 24/11/2018 19:42:52

                    #80644
                    Chris Fellows
                    Participant
                      @chrisfellows72943

                      It's been quite a time since I've done anything on the Swordsman with most of my recent free time being taken up with the River Cruiser and over the last couple of days the Huntsman.

                      In fact the RC, the baby of the fleet, has had the most time lavished on it as I continued with starting the superstructure whereas the original plan, such as it was, was to get all three hulls skinned at the same time. The next plan is to get all three ready for painting in the spring but as I'm going to plank the Swordsman, which will obviously take longer, that will probably continue to lag behind the other two.

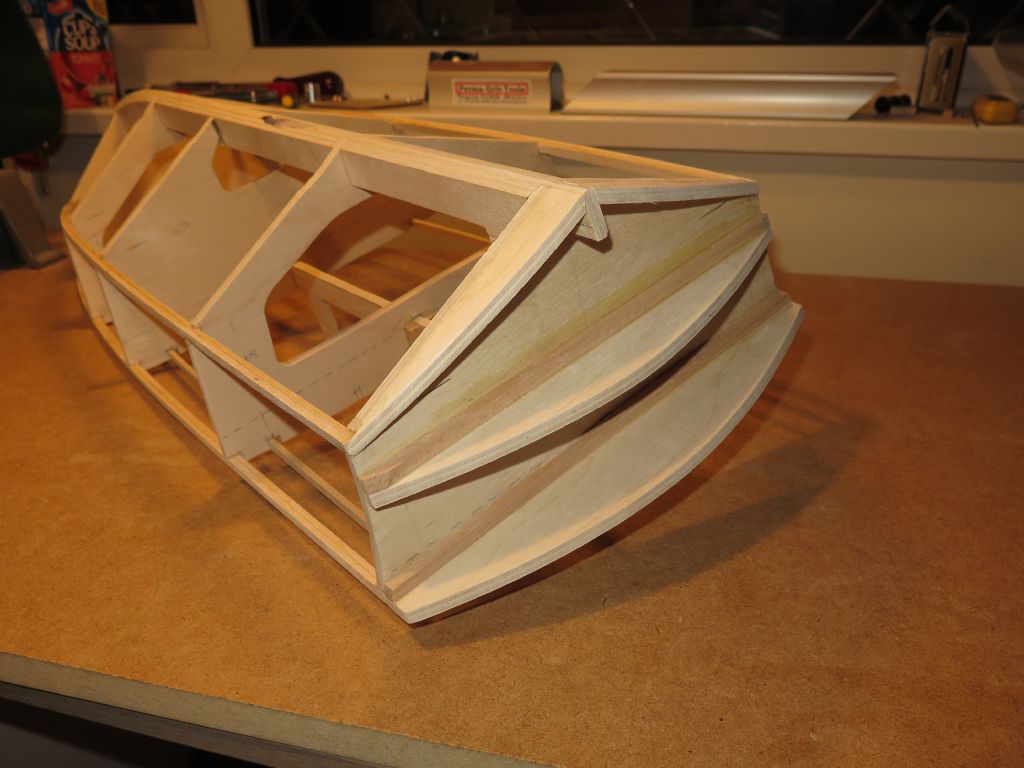
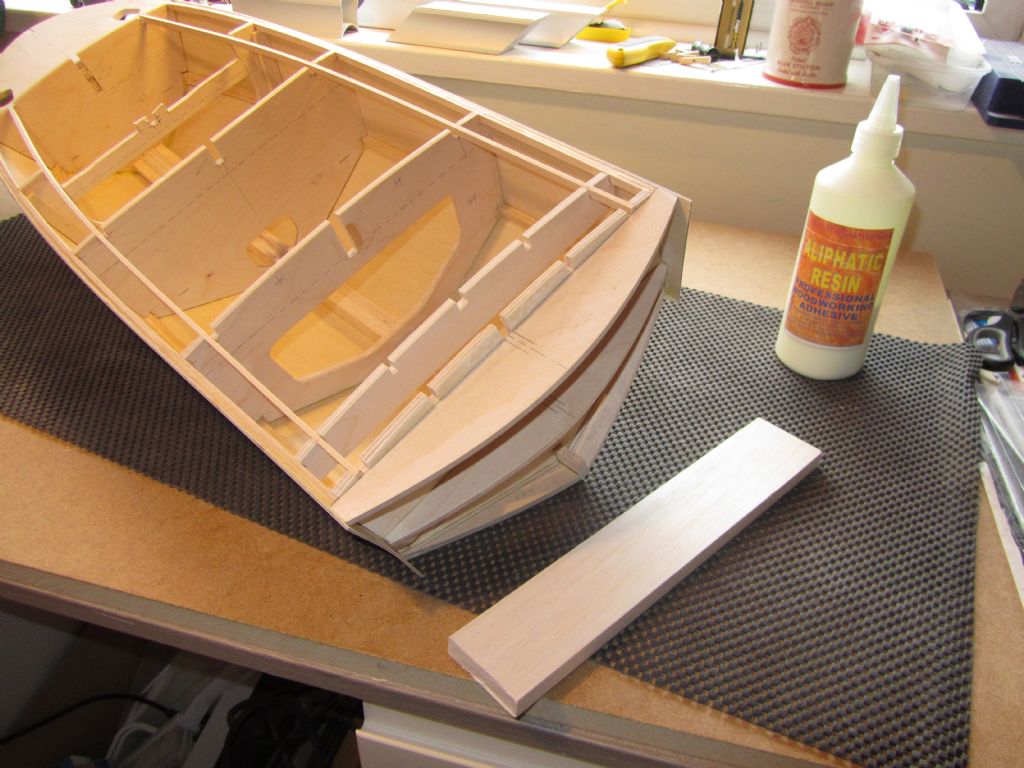
                      Anyway the Swordsman. I've removed the temporary spine and not being sure that I could fit the bottom skins in one sheet all the way from the stern to Frame 1 I added some additional timbers to the edge of Frame 2 in case I had to do it in two pieces and required some additional gluing area and support for the joint. In the event I did it quite easily in one piece helped by steaming it to the required curve.

                      The reason for my uncertainty is that the bow of the Swordsman is much sleeker than the other two and the curve upwards from the keel starts further back which along with the curving in as you approach the bow I thought might give me a problem. Thankfully not and both bottom skins have now been fitted.

                      Chris

                      additional timber to frame 2.jpg

                      1st bottom skin.jpg

                      2nd bottom skin.jpg

                      #80649
                      Tim Rowe
                      Participant
                        @timrowe83142

                        More nice work Chris

                        I see you are a Permagrit fan. Me too. They rank amongst some of the most useful tools I have.

                        Tim R

                        #80652
                        Chris Fellows
                        Participant
                          @chrisfellows72943

                          Yes, I'd certainly struggle without them, particularly as I'm sanding a lot of quite hard ply. I've used 2mm birch ply for the skins and they take some sanding to shape. I think I'm starting to wear out my smaller "block"!

                          I've got a set of the files as well which are useful great for notches and hollowing out for the prop shaft etc.

                          Chris

                          #80716
                          Chris Fellows
                          Participant
                            @chrisfellows72943

                            Little bit more progress with the last of the skins now fitted. Haven't done much this week due to doing my three days at work and by the time I'd done my 20 mile commute home I felt cream crackered and didn't feel like doing much modelling.

                            Hope to get a bit more done over the weekend particularly as the weather isn't looking too clever.

                            Chris

                            final skin.jpg

                            #80837
                            Chris Fellows
                            Participant
                              @chrisfellows72943

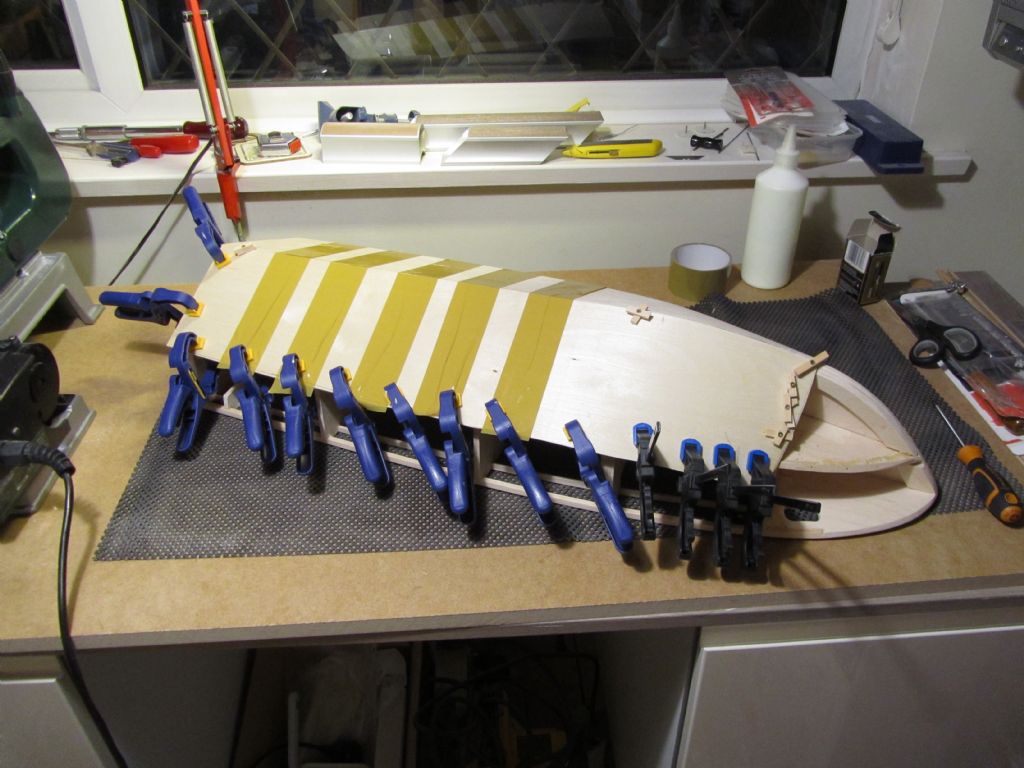
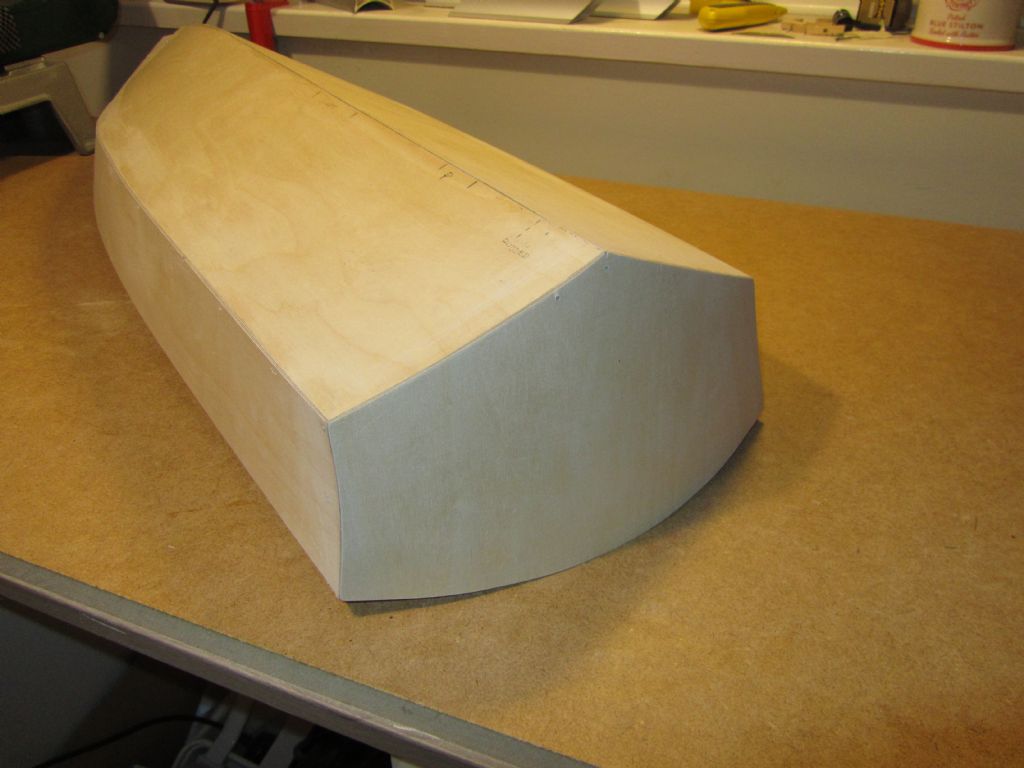
                              To accommodate the curve of the transom and that of the deck I've used a balsa block. This and the rest of the deck will be covered in thin ply as the base for the planking.

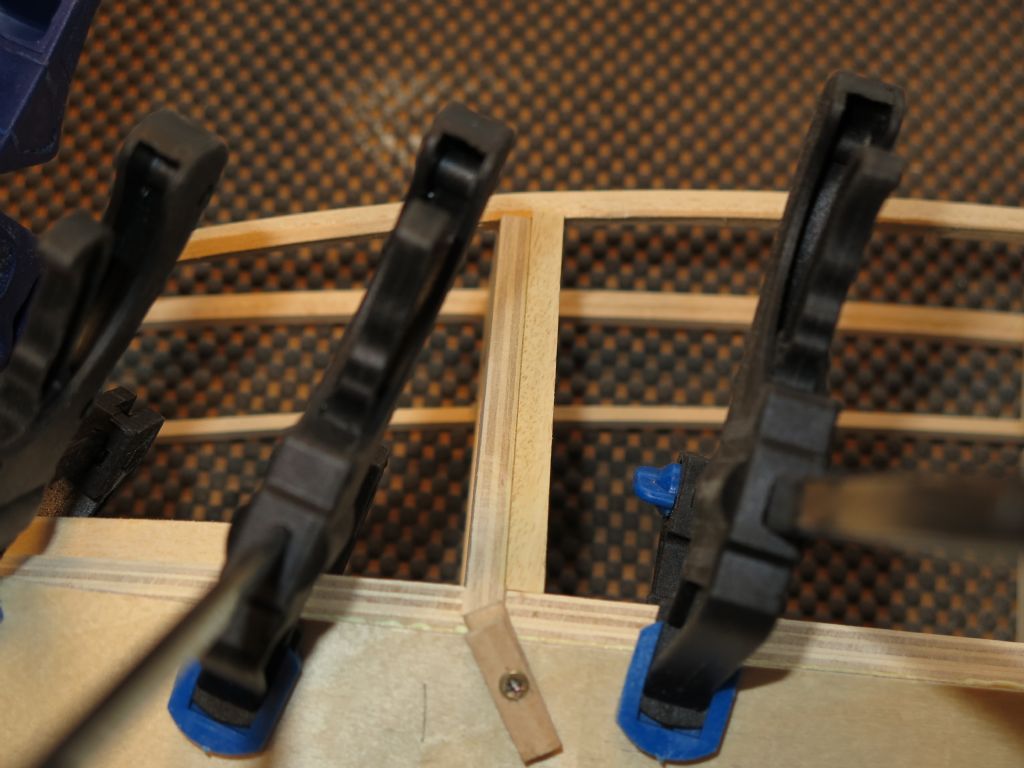
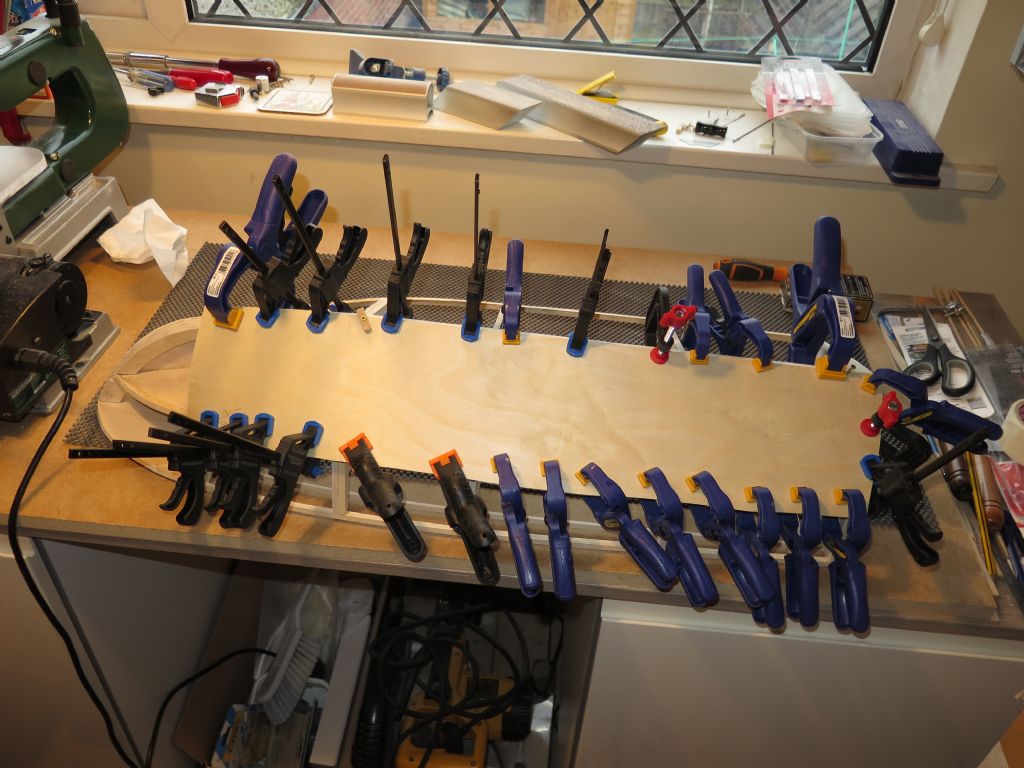
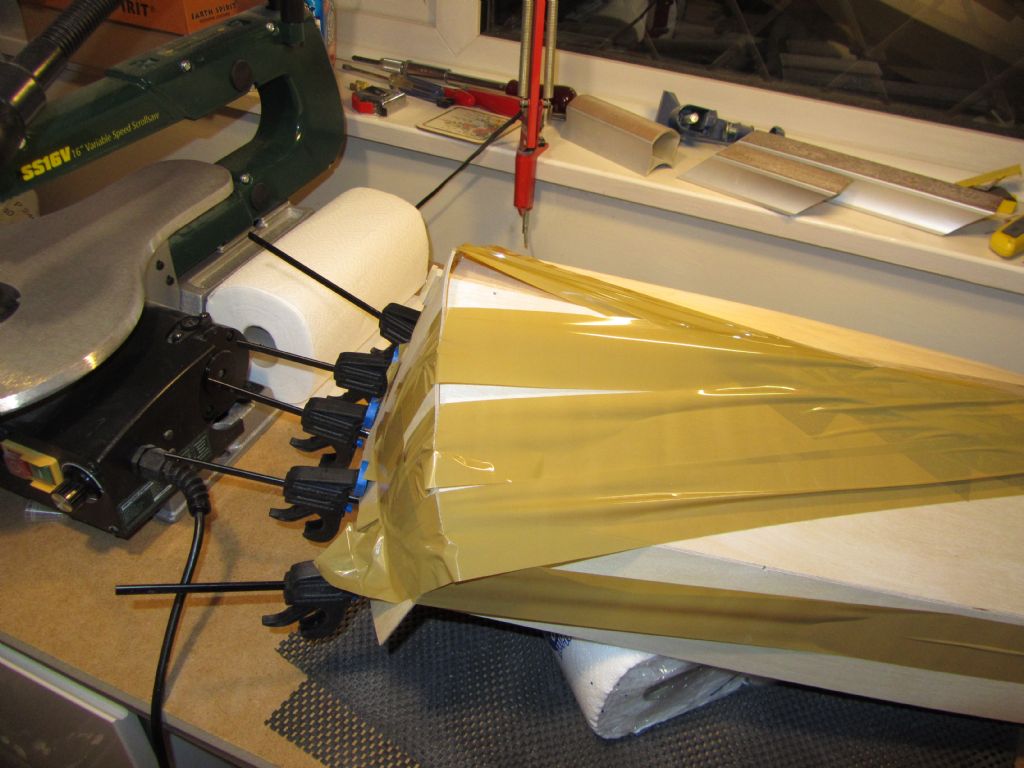
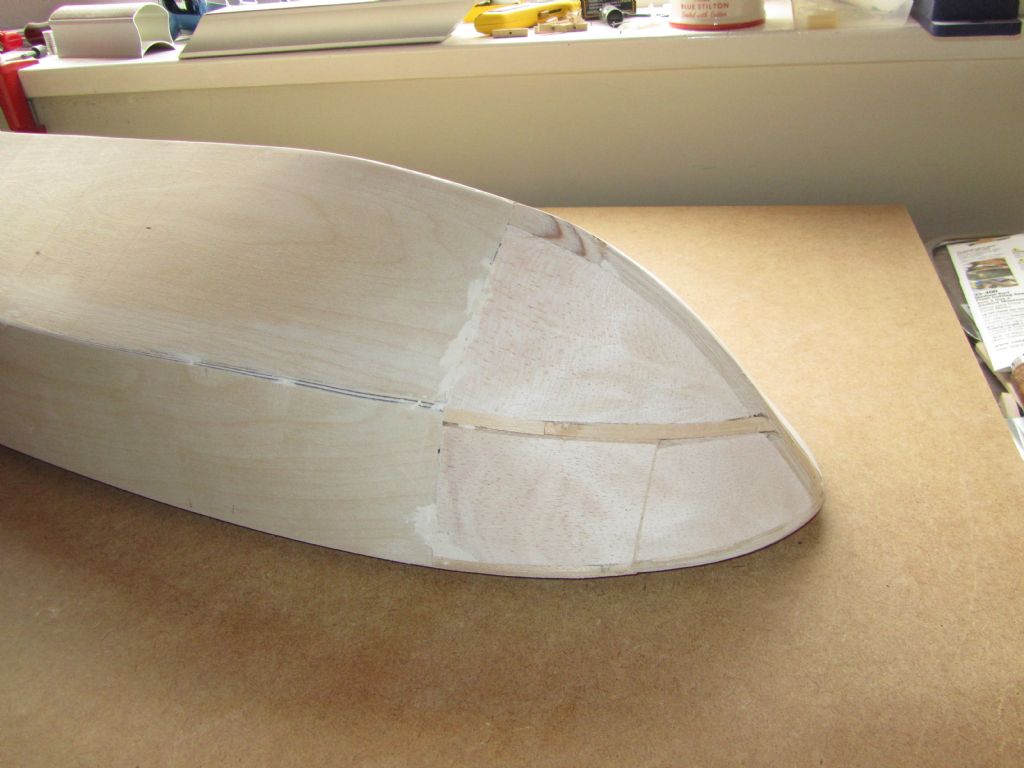
                              Experienced builders will of course know this, but I'm so impressed with the ability of parcel tape to pull in birch ply, in this case 2mm, whilst the glue dries. For my first skinning, the River Cruiser, I used a number of small screws for holding the 1.5mm ply nice and tight but since then have increasingly used the parcel tape. I still use a few screws, mainly for location but also where I can't clamp or tape as you can see near the bow. Looks like wood worm but I'm going to be filling for the balsa blocks in that area so no problem. The tape was used for the transom skin, which once the glue had dried, was trimmed with a razor saw and sanded with PermaGrit blocks, the curved one being just the job for the curve of the side skins.

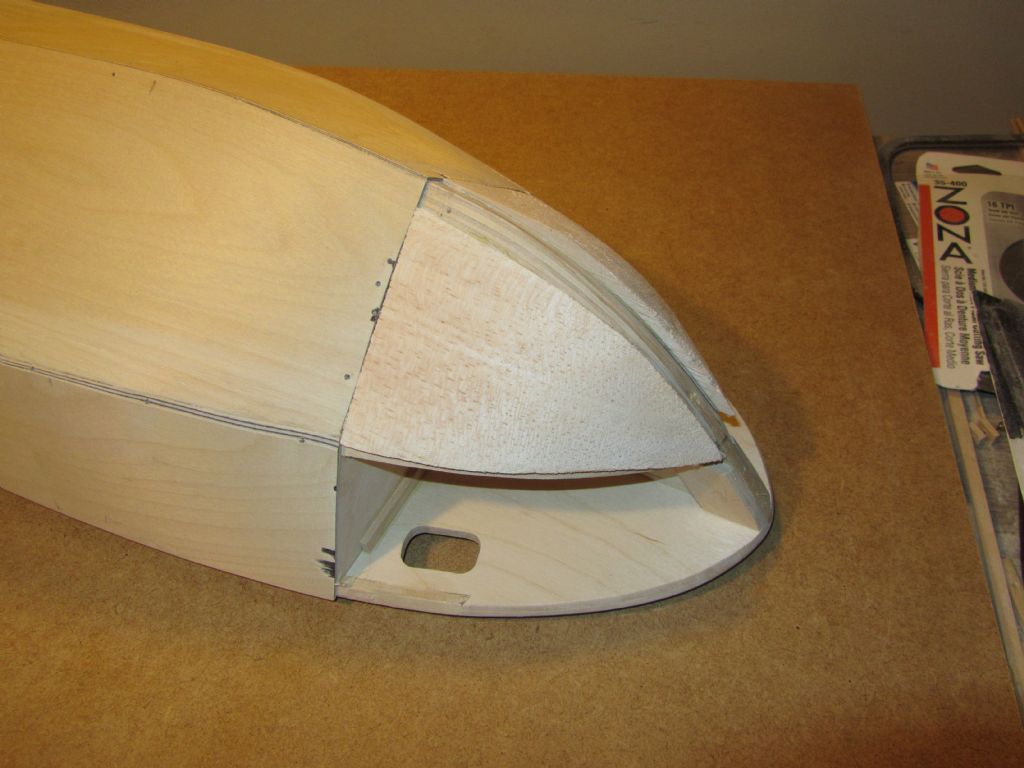
                              I've also fitted the balsa blocks to the bottom of the bow and done the preliminary sanding to shape. Because the Swordsman has a slight concave/flare to the bow balsa blocks are also being used to the top part of the bow. I could do with some advice here as I'm wondering if I should fit a thin strip of the 2mm birch ply as used for the skins around the edge of the breast hook to act as a guide for sanding and a nice uniform edge or should I just fill it and sand to shape? When I build a Huntsman 31 I shall leave the breast hook slightly over size and sand back to the skins unless there's a better way?

                              Chris

                              balsa for deck infill.jpg deck infill sanded to shape.jpg

                              transom glued & secured.jpg

                              transom skinned.jpg

                              lower blocks fitted and roughly sanded.jpg

                              Edited By Chris Fellows on 26/01/2019 16:35:52

                              #80838
                              Chris Fellows
                              Participant
                                @chrisfellows72943

                                Actually after studying the last photo what I might do is use the thin ply or maybe some bass and run it part way along the edge of the breast hook and then fair it in, it's only a couple of mm after all. And maybe do the same with the keel. I will then have some nice solid timber to work to and have at the front of the boat. Don't really fancy having P38 here however good it is.

                                But thoughts and views are welcome.

                                Chris

                                #80843
                                Eddie Lancaster
                                Participant
                                  @eddielancaster

                                  I agree Chris, I prefer to add a piece more wood if there any shortcomings in any frames or stringers, all the material is then the same and will move roughly at the same rate with either temperature or moisture.

                                  I am building a small speed boat for my grandson (honest it is for him m'lud) the Arrow from SLEC.

                                  I have found that with any parts that are to be stained and vanished it is best to stain those parts before gluing them in place, this eliminates any white spots due to glue getting where you don't want it.

                                  Keep up the good work.

                                  Eddie.

                                  #80846
                                  Chris Fellows
                                  Participant
                                    @chrisfellows72943

                                    Thanks Eddie, I'm happier using timber as far as possible and saving the filler for filling gaps, indentations and imperfections so that is the route I shall take. I'm going to cloth and resin the bow area so that will tie the timber and filler together but even so I prefer to keep the filler to a minimum.

                                    Chris

                                    #80853
                                    Ray Wood 3
                                    Participant
                                      @raywood3

                                      Hi Chris

                                      You mentioned in an earlier post you were building heavy typical Aerokits style , you best friend should be a Starett hole cutter the ply is just assh wd sq oct 16 001.jpg strong with holes included 😃

                                      Regards Ray

                                      #80856
                                      Chris Fellows
                                      Participant
                                        @chrisfellows72943

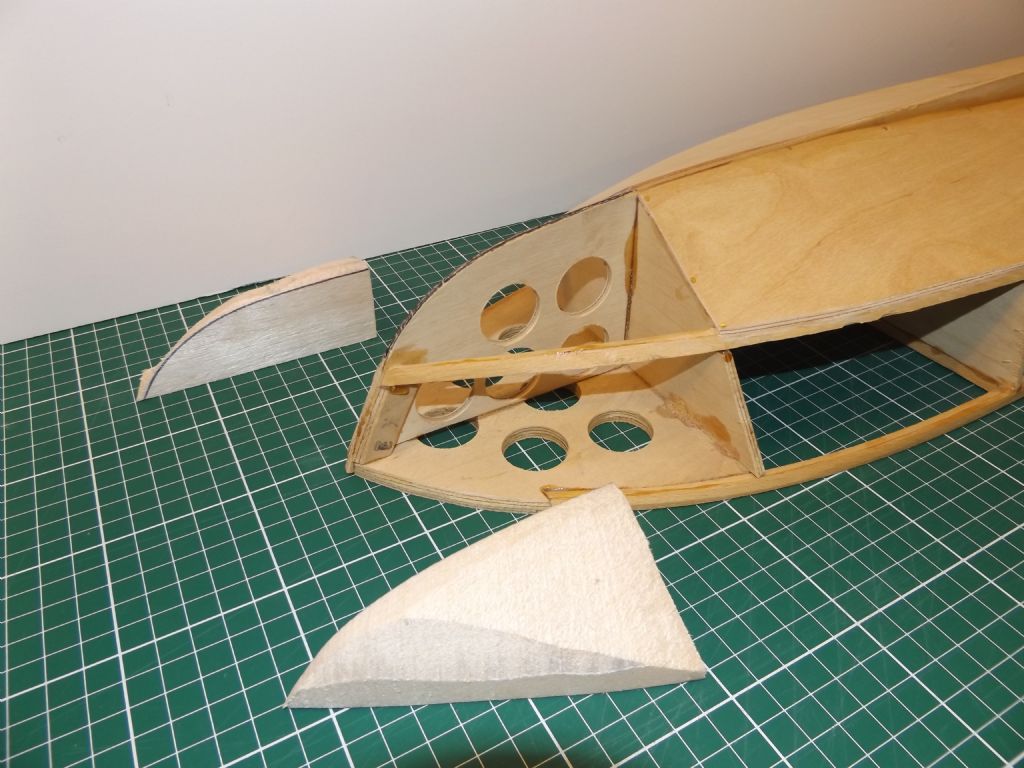
                                        I certainly am Ray, woe betide anyone who gets in the way of this Swordsman! I put some doublers at the bow because I hadn't decided at the time whether I was going to use ply or balsa so there is 18mm of ply in places!

                                        To be honest, it's not feeling too heavy really though obviously there's a way to go yet, particularly as I'm going to plank the deck etc.

                                        I did cut some holes in the pieces forming the bow of the Huntsman and there will be some in the Fisherman.

                                        Chris

                                        Edited By Chris Fellows on 27/01/2019 20:36:49

                                        #80960
                                        Chris Fellows
                                        Participant
                                          @chrisfellows72943

                                          Progress is a little sporadic at the moment but as mentioned earlier I've added a couple of strips of ply part way along the keel and bass part way along the breast hook for blending in.

                                          Then cut and fitted the balsa blocks to the top part of the bow. Had a slight problem the next day when roughly trimming the balsa blocks as I cocked up the angle and the razor saw cut into the area below the breast hook that I wanted to keep! No big deal as I just glued it back in place. Next attempt was more successful and then sanded the blocks approximately to their finished shape ready for some filler and final sanding including adding the bow flare.

                                          Chris

                                          All balsa blocks fitted to bow.jpg

                                          #80962
                                          Tim Rowe
                                          Participant
                                            @timrowe83142

                                            Hi Chris

                                            A lot of work in those distinctive Fairey bows and I bet those Permagrits are getting hot!

                                            A great milestone getting the hull sheeted and blocked. I thinks that's when the boats start to acquire their true character. Following with interest as I have one of the Precedent kits to make sometime…….

                                            Are you planning to make a model of all the Fairey boats in time. That would be quite a list.

                                            Tim R

                                            #80968
                                            Chris Fellows
                                            Participant
                                              @chrisfellows72943

                                              Hi Tim – I don't know about the Permagrits but I was certainly getting hot! Balsa can be surprisingly hard to sand, when in quite large blocks.

                                              You're right about the character emerging via the hulls. The three I'm building at the moment are quite different and when they reach this stage you feel that you are producing something that resembles a boat.

                                              The plan is to build at least one example of the main timber hulled Faireys in addition to the prototype River Cruiser. Trouble is that models like the Huntsman 31 and Swordsman 33 came in a number of different versions and some models came in different lengths. I'm drawing up plans for the Fisherman 27 motor sailer and will maybe do the Atalanta 31 sailing boat – both of these came in different lengths. There are also a number of other Faireys.

                                              So whilst the OCD in me (or that blokes like collecting things!) would like to build every model there are just too many and I've got to be realistic. I might build the two versions of the Huntsman 31 though, certainly the more common aft cabin version and maybe the full open cockpit Sport version. It's all about time really.

                                              I did pick up one of the MFA Spearfish kits, which like the real thing has a fibreglass hull. I shall be building the superstructure in timber though, like some of the examples.

                                              Chris

                                              #80977
                                              harry smith 1
                                              Participant
                                                @harrysmith1

                                                Hi Chris

                                                You lucky duck !!!

                                                The Spearfish the best handling boat I have seen on the water.

                                                I have driven my mate's one after replacing the motor.

                                                The 1100kv was unpowered for the boat.

                                                Installed a 3648-1450kv on a 5800mah 4S Lipo battery pushing a 40mm 2 blade CNC prop.

                                                37KPH drawing 55 Amps.

                                                Tested a 3 blade 37mm CNC prop, same speed but draws 60 Amps.

                                                Harry

                                                #80982
                                                Chris Fellows
                                                Participant
                                                  @chrisfellows72943

                                                  Harry – I'd only intended building the timber hulled boats and all at 1:12 but the Spearfish came up on Ebay and it was manners not too!

                                                  Chris

                                                  #80984
                                                  harry smith 1
                                                  Participant
                                                    @harrysmith1

                                                    Hi Chris

                                                    We ran 10mm stringers on the inside of the hull to strength the bottom to stop the drumming noise from the boat.

                                                    Also to mount the battery which made the boat quieter and so great at speed.

                                                    Cornering is so sweet and handles choppily water with easy!!!

                                                    I have all the running gear, but still look for the boat !!!

                                                    Harry

                                                    #80990
                                                    Chris Fellows
                                                    Participant
                                                      @chrisfellows72943

                                                      Thanks for the tips, will make a note of those for when I start the build.

                                                      I bought mine early last year but then one came up soon after and cheaper in the magazine. But you have to buy when you can – I haven't seen another one for sale since then.

                                                      Chris

                                                    Viewing 25 posts - 1 through 25 (of 133 total)
                                                    • Please log in to reply to this topic. Registering is free and easy using the links on the menu at the top of this page.

                                                    Code of conduct | Forum Help/FAQs

                                                    Advert

                                                    Latest Replies

                                                    Home Forums Build Blogs Topics

                                                    Viewing 25 topics - 1 through 25 (of 25 total)
                                                    Viewing 25 topics - 1 through 25 (of 25 total)

                                                    View full reply list.

                                                    Advert