Moonbeam

Advert

Moonbeam

Home Forums Sailing Models Moonbeam

  • This topic is empty.
Viewing 25 posts - 26 through 50 (of 440 total)
  • Author
    Posts
  • #64205
    Bob Abell 2
    Participant
      @bobabell2

      Nice one, Banjo

      An engraved brass plate will be a nice finishing touch?

      How much lead is required for ballast, Banjo?

      Bob

      Advert
      #64210
      Banjoman
      Participant
        @banjoman

        Thank you, Bob!

        In the build instructions, David Metcalf says that he used 10 lb of lead shot permanently fixed inside the keel, plus two bags of 2 lb each as portable additional ballast for when there is a bit more of a wind.

        As can be seen from Photo 3 in my previous post, I have lead shot a-plenty (used here to weigh things down while the rubber mat glue joint set), as I recently bought 10 kg in bulk from a diver's supply shop in addition to what I had left over from the Eilean Mòr build; each plastic bottle in the above photo contains 2 kg of lead shot.

        And yes: the thought of a nice brass plaque had entered my mind, too; that, however, I will save as finishing touch to be added at the end of the build!

        /Mattias

        #64221
        mark69
        Participant
          @mark69

          10lb of fixed lead plus the weight of the yacht ?? how are you getting that into the water I'm guessing only a few times before your back gives out ! I've put my lead shot into water proof bags and add them at the waters edge ,I bought my bags of eBay ,divers ballast bags the attach to there belts !! just a thought !……..mark

          #64222
          Banjoman
          Participant
            @banjoman

            Hi Mark,

            Many thanks for the kind thought, but I'm not that worried – my Puffer weighs in at around 30 lb, all in all, and as you can see from the below picture, I get her in (and out of) the water by bending through the knees and so putting the weight on the legs rather than the back; Moonbeam is not likely to weigh more than maybe 20 lb at the most, as, ballast apart, it is a quite lightweight construction.

            But yes, I am familiar with the lead shot bags used by divers – as I think I mentioned, I get my lead shot from a diver's supply shop, and some of it I have bought in ready packed bags, although this time I decided to go for bulk packages (5 kg ziploc bags) instead, as it comes a bit cheaper like that than when packed in smaller bags.

            I also looked at various sources on the 'net where, sometimes, lead shot could be had cheaper yet, but at 10 kg total weight (please note: I bought 10 kg, to have a stock for future projects too, but will only put around 10 lb into Moonbeam), the added cost of freight would always cancel out the lower price, and as there's a good diving shop not far away from me I found it both easier and better to just buy in bulk over the counter.

            emsail7.jpg

            /Mattias

            Edited By Banjoman on 30/03/2016 19:05:43

            Edited By Banjoman on 30/03/2016 19:07:47

            #64251
            Gareth Jones
            Participant
              @garethjones79649

              Hi Mattias,

              Elizabeth's Moonbeam weighs 20.2 lb with a bit of additional ballast over and above what was recommended in the kit instructions. The weight is not a problem lifting in and out of the water. Doing it without breaking off the kicking straps is a bit more problematic.

              moonbeam princess.jpg

              Gareth

              #64293
              Banjoman
              Participant
                @banjoman

                Gareth,

                Warmest thanks for confirming my weight guesstimate, and also for the heads-up that a bit more ballast might be a good idea; I'll keep a beady eye on that when loading up!

                As for the kicking straps, I'd already decided to cut off the white metal pins, and then drill for and replace those with brass wire. I dare say they may remain a tad vulnerable, but should at least be stronger that way than with just white metal to hold them …

                Having been otherwise occupied over the weekend, there's not much further progress at the moment; I'm still adding coats of varnish to the stand, but will not further bore the forum readership with more pictures of varnish drying, so no further updates in view until there is something of actual interest to report …

                /Mattias

                #64302
                Gareth Jones
                Participant
                  @garethjones79649

                  Hi Mattias,

                  I do a similar brass wire modification on an attrition basis as as when we break one off. Since its usually me who has to lift it in and out of the water I am also the one who has to do the repairs. The extra ballast is about a pound of lead shot in a zip and seal bag. Its probably part of the 2 lb extra recommended for when its windy but we leave it in all the time.

                  Gareth

                  #64341
                  Banjoman
                  Participant
                    @banjoman

                    Thanks you very much again, Gareth! I'll keep that in mind when adding the ballast!

                    In the meantime, I have continued adding coats of varnish to the stand until, after the 25th one, I was satisfied with the result.

                    Next up, I cut out some strips of green polyester felt, which I had previously tested for compatibility with water, as it is likely to get wet when the boat is put back on the stand after sailing. Happily (but also unsurprisingly, given the 100% polyester) even several hours of soaking did not change or affect the felt, nor did it, when wet, give off any colour.

                    Anyway, I first glued it down under weights at the bottom of each cutout, and left the glue to set …
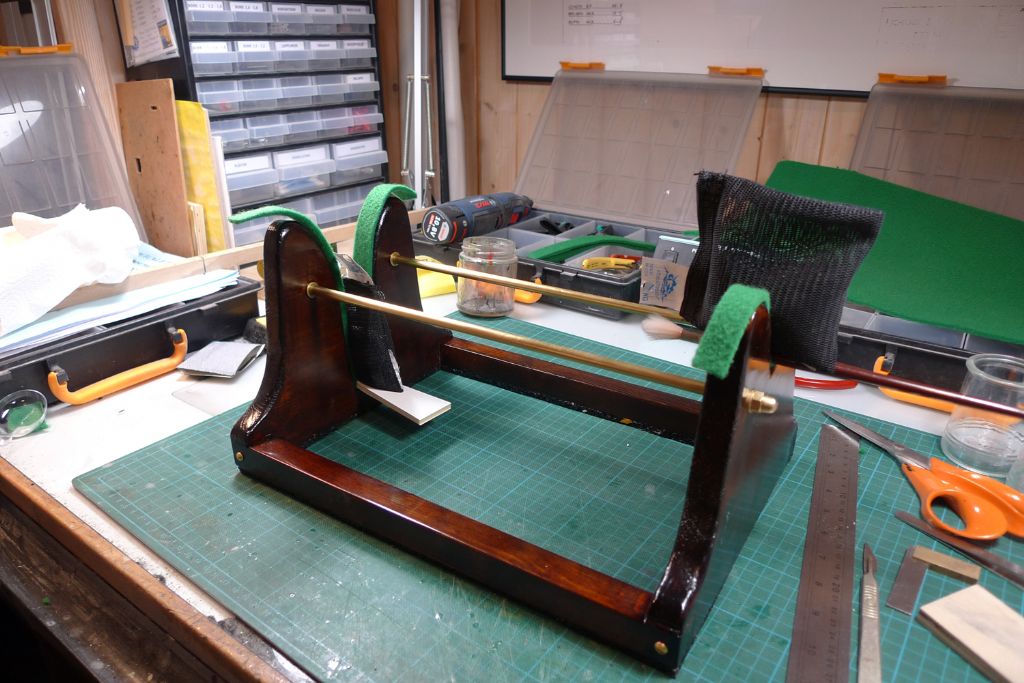
                    mbbygg41.jpg

                    … after which the ends were trimmed and rounded off, the remainder of the felt glued down and the ends further secured with brass screws.
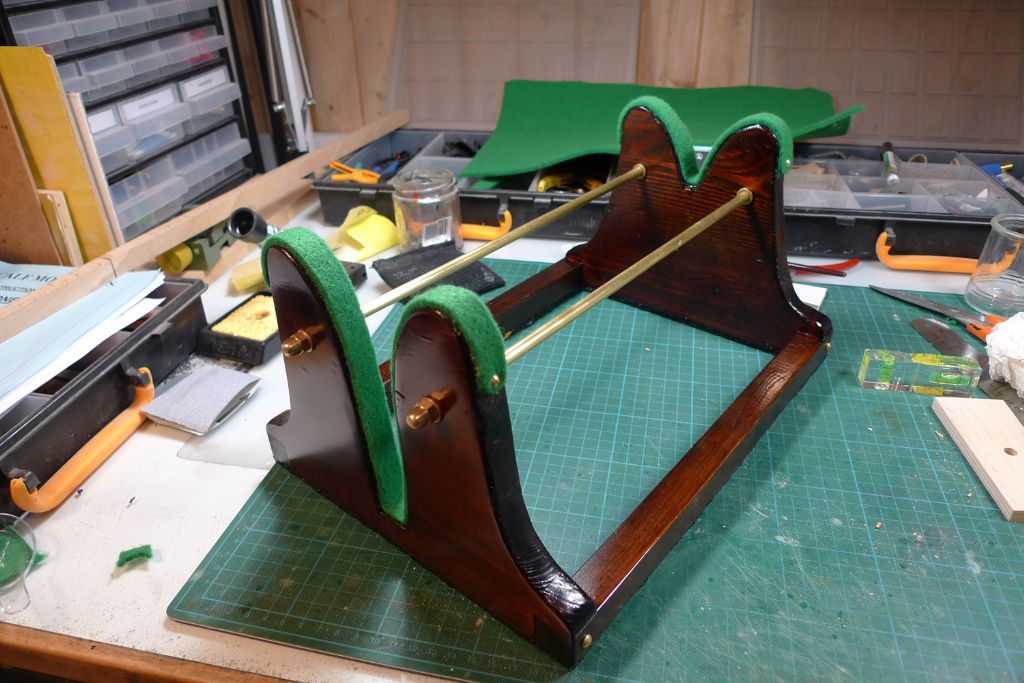
                    mbbygg42.jpg

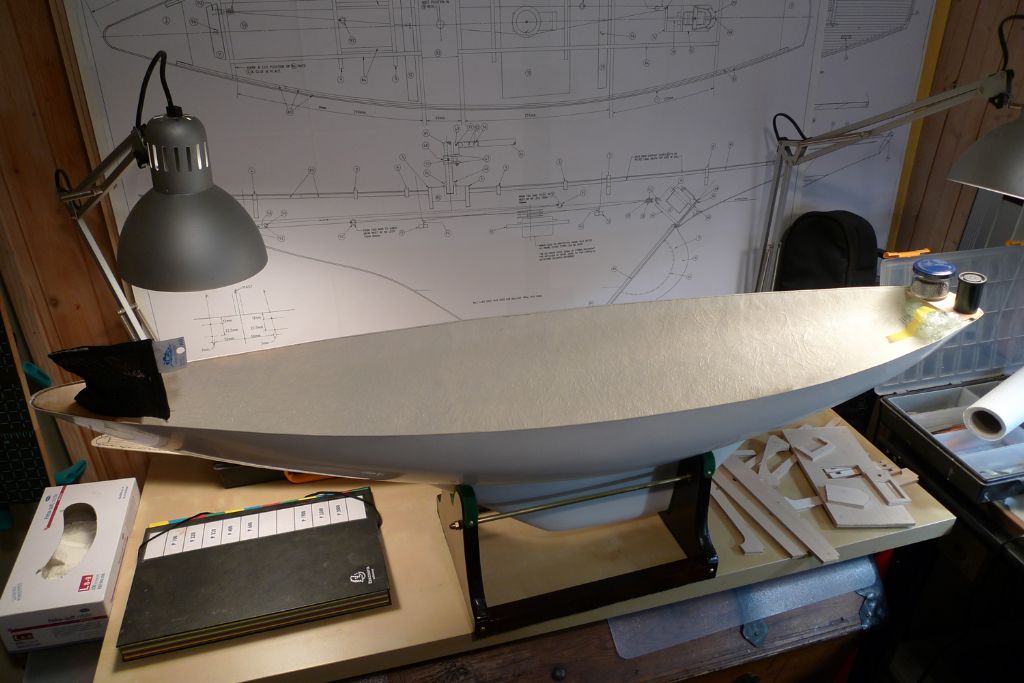
                    This finishes the stand that, as can be seen, fits the hull nice and tight.
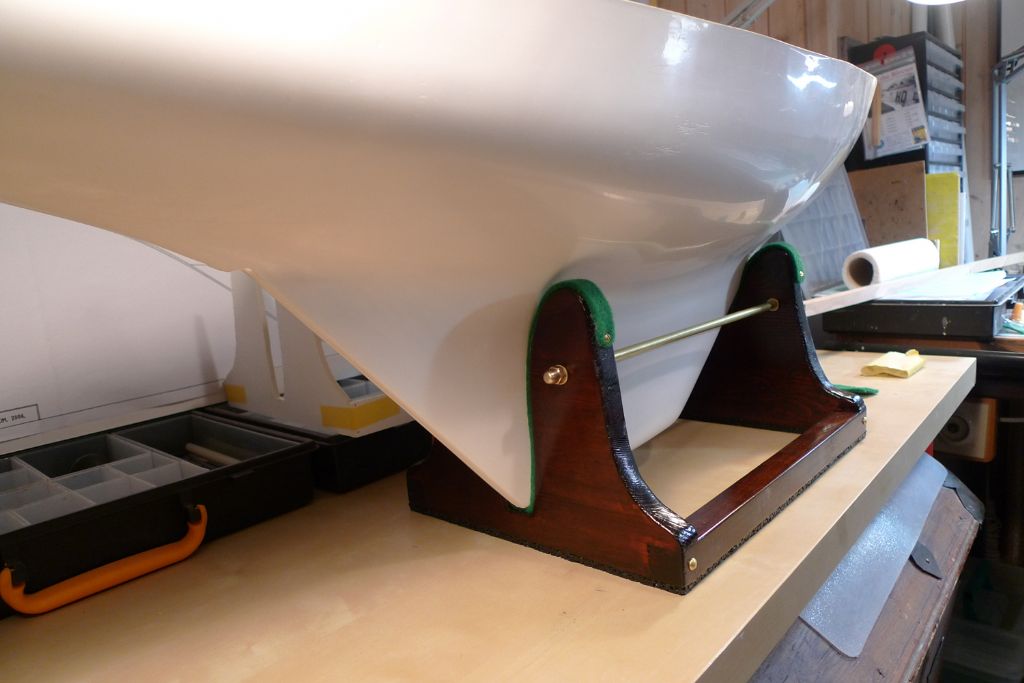
                    mbbygg43.jpg

                    And so, finally, on to the actual build!

                    First job here was to cut out the deack beams and other interior struts, strengthenings and structures from the CNC-routed plywood sheet.
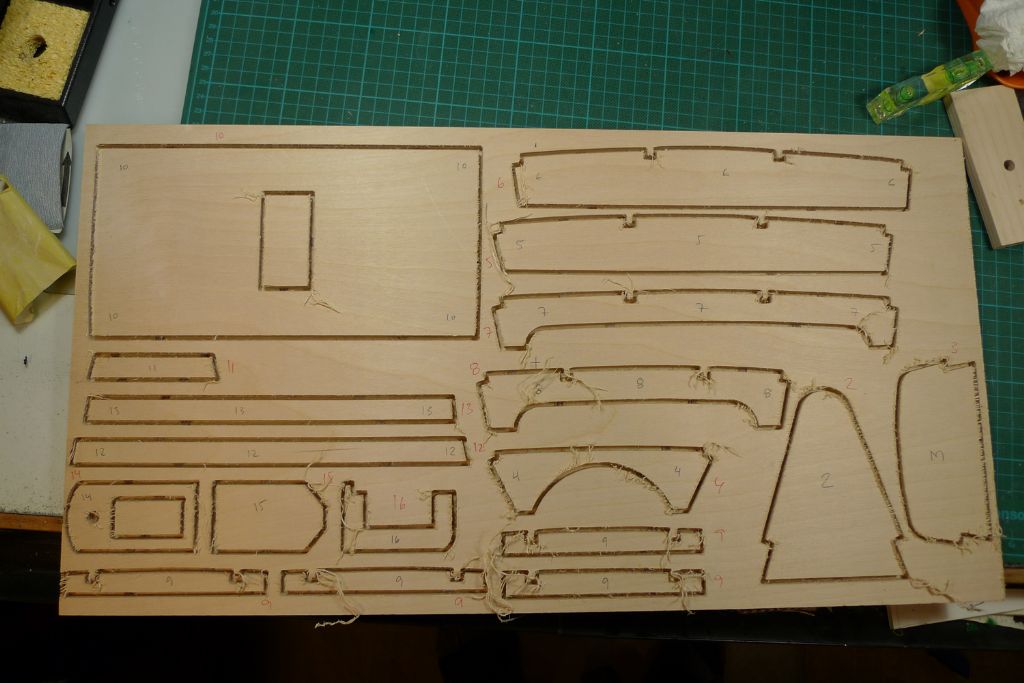
                    mbbygg44.jpg

                    To separte the parts from each other, and for the rough cutouts along the grain, In used the scroll saw …
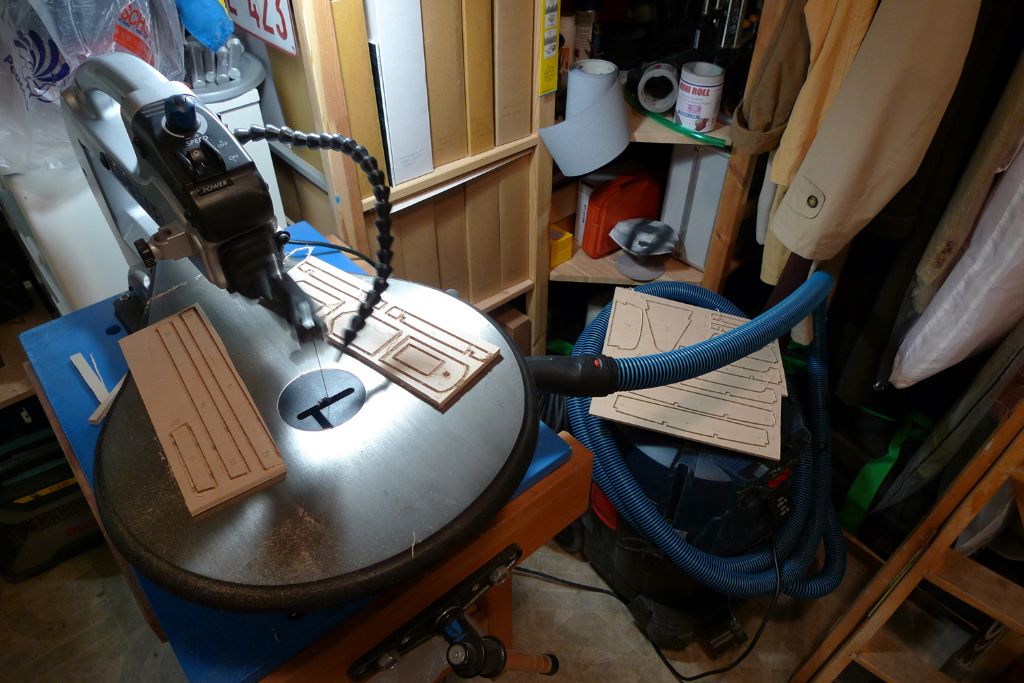
                    mbbygg45.jpg

                    … and then cut off the remainder excess with a scalpel and/or pair of side cutters.
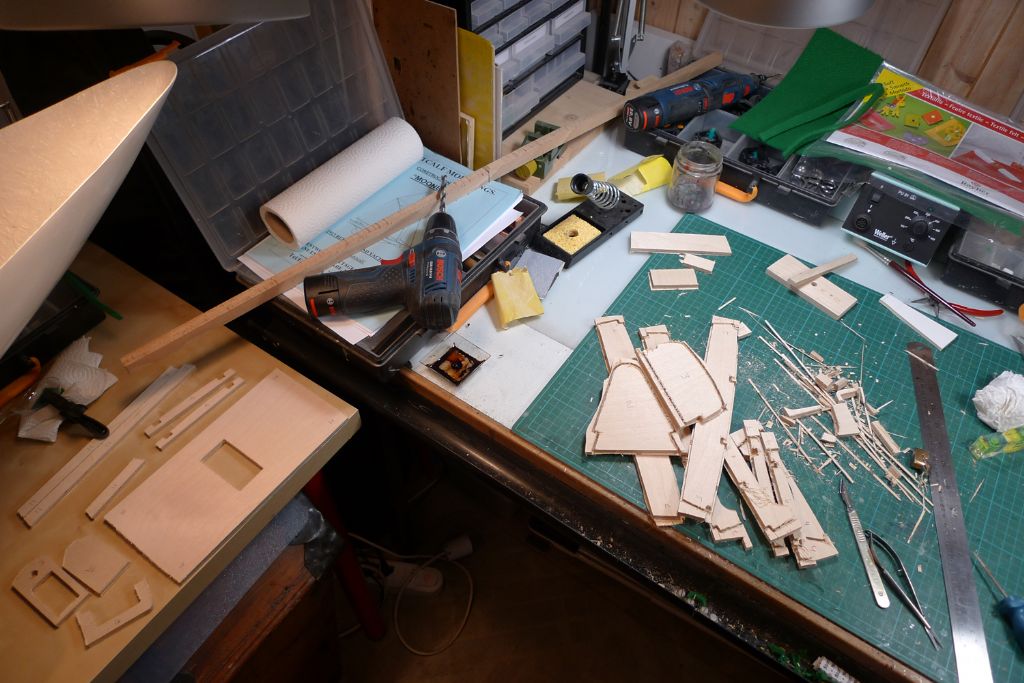
                    mbbygg46.jpg

                    A quick dryfit of the deckbeams showed that most of the fits nicely, but that there might be a slight problem with the hull shape amidships, where beams 5 and 6 sit quite close together.

                    Atually, the instructions warn against the eventuality that the hull might get slightly out of shape between moulding and build, so the next step will be to measure very carefully to establish the exact position for each beam, and, while taking into account any necessary chamfering of the beam ends, check whether the hull side edges needs to be brought back in by taping them together for a while.

                    Remains to be seen, thus, and hopefully I will have enough time this weekend to do a proper job of it!
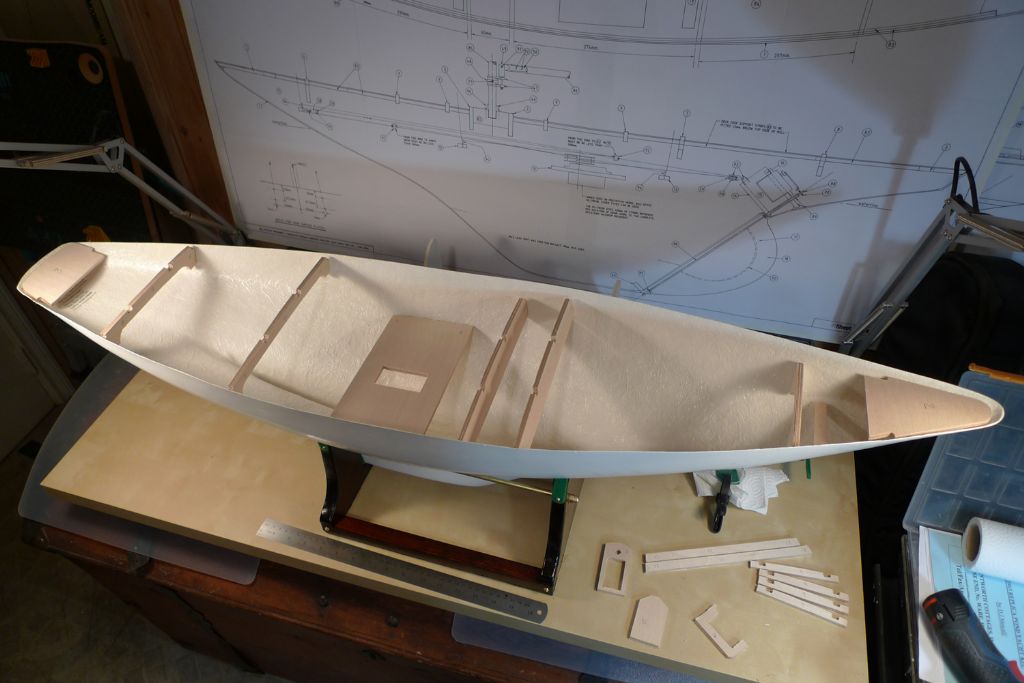
                    mbbygg47.jpg

                    To be continued …

                    /Mattias

                    #64386
                    Banjoman
                    Participant
                      @banjoman

                      Continuing to prepare the parts for assembly, I did a first, rough cut-out of the plywood deck, using both the scroll and band saws to go along just outside the outermost printed line.

                      mbbygg48.jpg

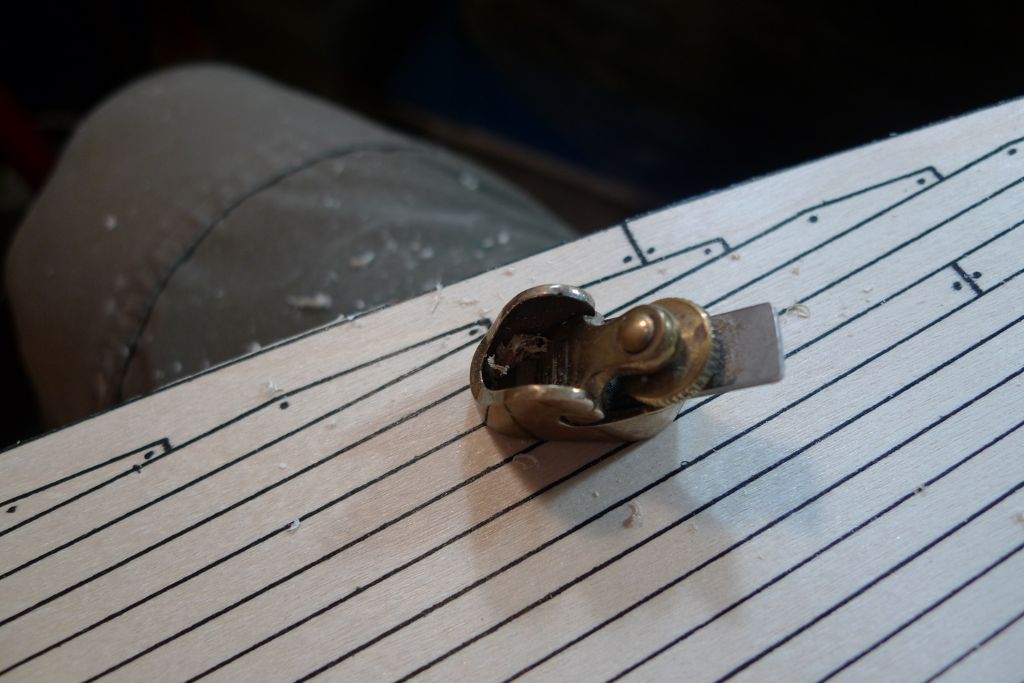
                      The edges where then planed down with a luthier's plane until the outermost printed line had just disappeared.

                      mbbygg49.jpg

                      Once the beams and other support structure are in place, the deck will be sanded along the edges once more for the final fit, but at this stage it at least looks as though it will be a good enough fit.

                      mbbygg50.jpg

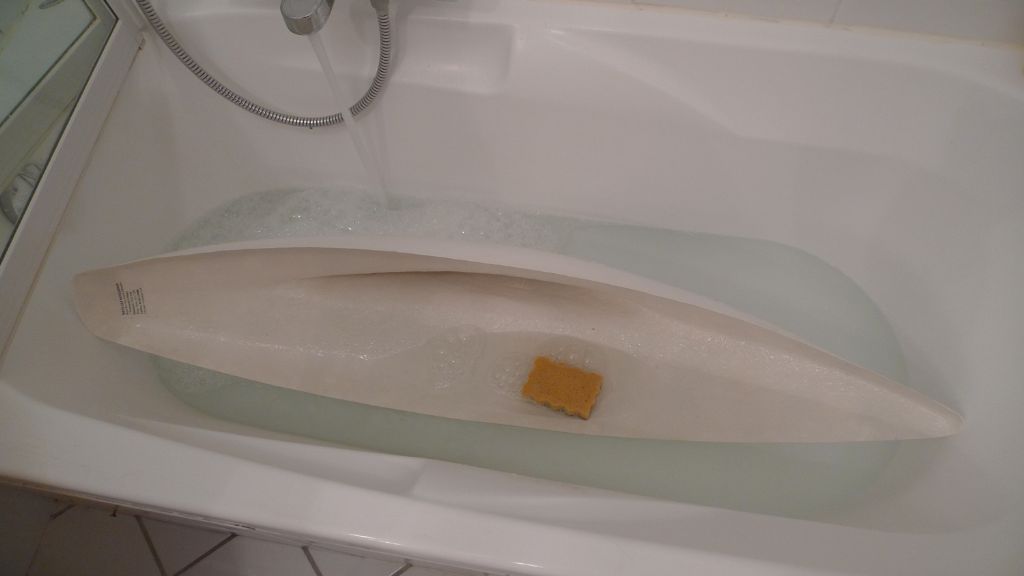
                      Before any further work, though, the hull was thoroughly cleaned, inside and out, with lukewarm water and soap …

                      mbbygg51.jpg

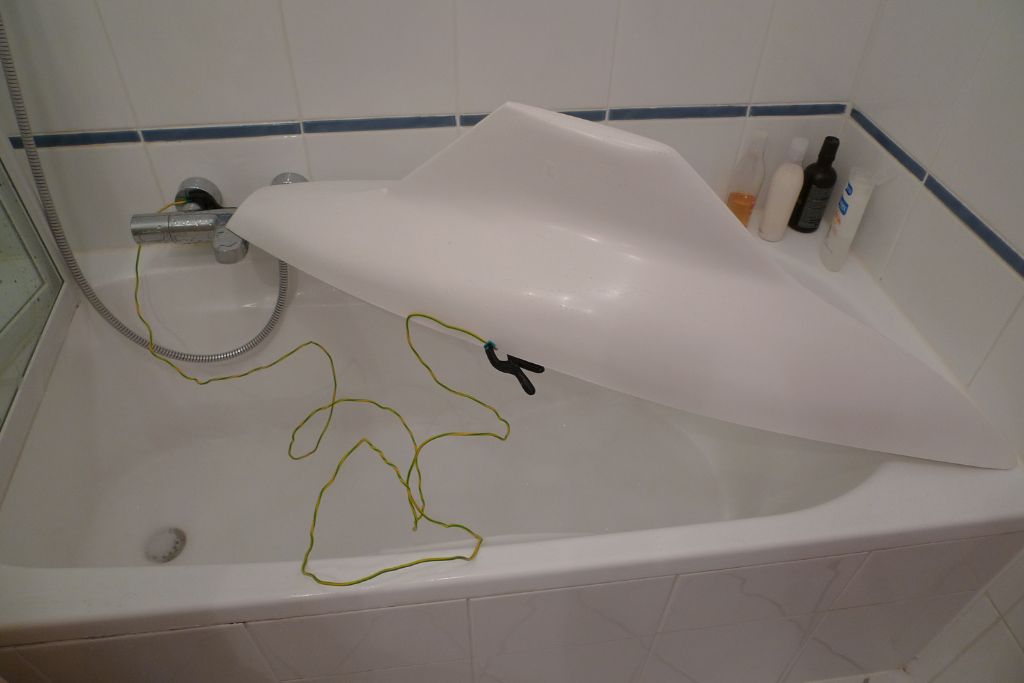
                      … thoroughly rinsed, and left to dry, earthed to the warm water pipes to discharge static charges, if any, in the GRP.

                      mbbygg52.jpg

                      To be continued …

                      /Mattias
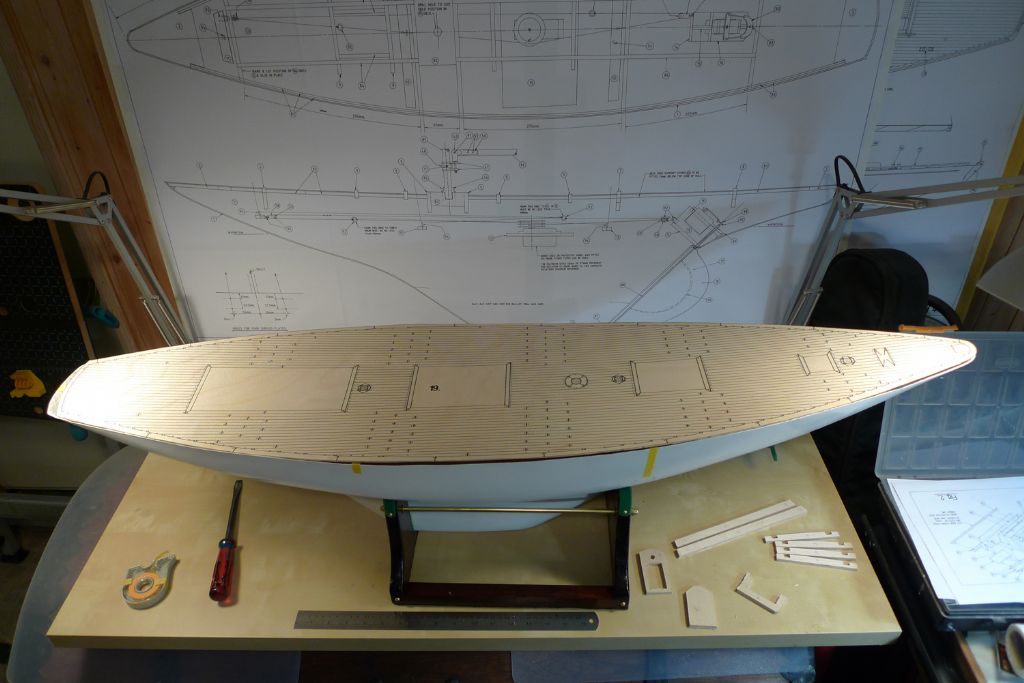
                      Edited By Banjoman on 09/04/2016 15:55:47

                      #64389
                      Ian Gardner
                      Participant
                        @iangardner62867

                        Mattias,

                        I like the boat but love that little plane!

                        Ian

                        #64390
                        Banjoman
                        Participant
                          @banjoman

                          Ian,

                          Yes – luthier's planes are not only lovely to look at, but absolutely marvelous handtools too! They beat razor blade planes any day of the week, month or even year … unfortunately, though, they do not exactly give them away, so I only have the one, but it has been worth every penny many times over already.

                          I picked mine up from a luthier's shop in Antwerp, but I'm sure there will be suppliers to the luthier trade that sell them in the UK too, or there is a very good assortment to be found at the German tool shop Dictum: **LINK**

                          The one I've got is the 8×25 mm Ibex flat sole finger plane.

                          /Mattias

                          #64394
                          Ian Gardner
                          Participant
                            @iangardner62867

                            Thanks for that Mattias- I might just have a look at those. I have done a bit of work on guitars and know of some suppliers in this country, just haven't thought laterally!

                            Ian

                            #64396
                            Bob Abell 2
                            Participant
                              @bobabell2

                              It looks very much like a mini plane used in the manufacture of Violins?

                              Bob

                              #64397
                              Banjoman
                              Participant
                                @banjoman

                                Hello Bob,

                                That is in fact exactly what it is! I use "luthier" as shorthand for "artisan, making wooden string instruments", whether that'd be guitar, violin family or, indeed, lute. Or summat else again.

                                I learnt about the existence of these planes from a very good friend of mine, Christelle Caillot, who earns her crust building gypsy jazz guitars in Paris: **LINK** and https://www.google.be/search?q=guitare+christelle+caillot&client=safari&rls=en&source=lnms&tbm=isch&sa=X&ved=0ahUKEwiuxNS91ILMAhVMvxQKHTp_BSwQ_AUIBygB&biw=1517&bih=964

                                /Mattias

                                Edited By Banjoman on 09/04/2016 23:57:53

                                Edited By Banjoman on 10/04/2016 00:00:51

                                Edited By Banjoman on 10/04/2016 00:01:13

                                #64398
                                Bob Abell 2
                                Participant
                                  @bobabell2

                                  Never heard of that one before, Banjo

                                  Earthing the GRP hull?

                                  Very hi tech, indeed

                                  What would have happened, if the moulding was full of static?

                                  Radio interference?

                                  Bob

                                  #64402
                                  Banjoman
                                  Participant
                                    @banjoman

                                    Bob,

                                    I have no idea whether it is a real risk or not, but it was mentioned as a useful precaution against static in a GRP hull in the build instructions for the Mountfleet Models Highlander kit, instructions which were of course written by Frank Hinchliffe, who was a much more experienced modeler than I shall ever be, and an long.-time producer of GRP mouldings.

                                    Given that it is a quite simple thing to do, I decided when building that kit to follow said recommendation; if it is not really necessary, well, the cost, as it were, is negligible (just some time), and if it does have a use, well, so much the better

                                    As described, the potential risk involved had nothing to do with interference, but rather with the possibility that static, if present, might stop the paint from adhering properly in places.

                                    Again, I've no idea if this is in fact an old wives' tale, or true, but as already mentioned it is so simple to do that I do it anyway.

                                    /Mattias

                                    Edited By Banjoman on 10/04/2016 09:55:30

                                    Edited By Banjoman on 10/04/2016 09:56:09

                                    Edited By Banjoman on 10/04/2016 09:56:34

                                    #64405
                                    Terry Plumridge
                                    Participant
                                      @terryplumridge66794

                                      Hi Mattias,

                                      As you say simple enough to do , so why not. Personally I would not bother until you are about to paint the hull, to stop dust being attracted. Static is strange stuff, if you remove it at this early stage it will probably build up again quite naturally. Before I paint I always prepare GRP in the normal way, abrade slightly, wash, and wipe over with a Tack rag, never had any problems with static.

                                      Cheers, Terry.

                                      #64407
                                      mark69
                                      Participant
                                        @mark69

                                        Sorry but any static that might ! have been there if any (fibreglass cannot store static) would have been discharged as you handle the hull whilst building ,we don't earth our yachts when we paint them !! As Terry suggested sand with 320 paper ,wash with clean water no suds ! alight wipe with a tak rag and then paint ,but as soon as you do paint anything everything that has legs or wings (insects ) will want to walk all over your nice wet paint !!! (sods law) …..mark

                                        #64408
                                        Terry Plumridge
                                        Participant
                                          @terryplumridge66794

                                          Hey Mark,

                                          Electronic Insect Repellent !!! Just a thought.

                                          Cheers, Terry.

                                          #64410
                                          mark69
                                          Participant
                                            @mark69

                                            Terry ..How about a mosquito net that will keep the critters out ? …mark

                                            #64412
                                            Banjoman
                                            Participant
                                              @banjoman

                                              Terry & Mark,

                                              As I already said, I really have no idea whether or not this whole static stuff is true or not; as stated, it comes from a set of Mountfleet Models build instructions, written by Franch Hinchliffe, from which I quote:

                                              "Wash the moulding with hot water and a mild detergent, static will have built up on it so hang it in a suitable place overnight with a wire static leader to a weight on a stone or concrete floor, this will prevent those unsightly bare patches appearing when spraying."

                                              In the Highlander kit review in the September 2000 issue of Model Boats, Dave Abbott repats this advice, adding that "[i]t may seem over the top but it does work".

                                              With this in mind and given that it all it costs me is a minimal bit of effort and some time, I've followed the advice in question.

                                              I will of course, and was already planning to further prepare the hull before painting, including sanding down a few roughnesses and filling in some minor blemishes, then going over the whole thing with a fine grit wet & dry paper, washing down with water, degreasing with methylated spirits and fnally going over it with a tack cloth.

                                              And, indeed, after painting await the first landing by an airborn critter …

                                              /Mattias

                                              #64414
                                              Colin Bishop
                                              Moderator
                                                @colinbishop34627

                                                I hope it isn't a wood pigeon Mattias.

                                                Colin

                                                #64417
                                                Banjoman
                                                Participant
                                                  @banjoman

                                                  Amen to that, Colin!

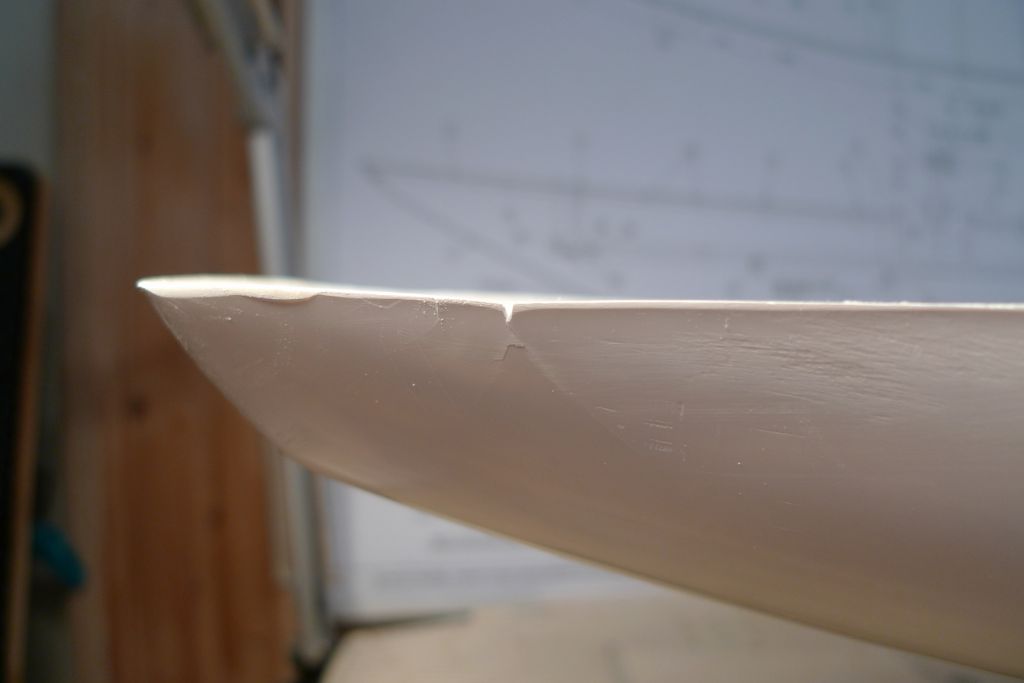
                                                  While lightly sanding down the top line of the hull today, I discovered a spot on the starboard quarter with a shard missing, and the beginnings of a crack! This is, I think, eminently repairable, once the deck bearing structure is in place, so no worries, but it'll have to be kept in mind.

                                                  Likewise, I noticed that the hull edge is a too low by maybe half a millimeter on both sides of this spot; summat to be born in mind during the next few build steps.

                                                  mbbygg53.jpg

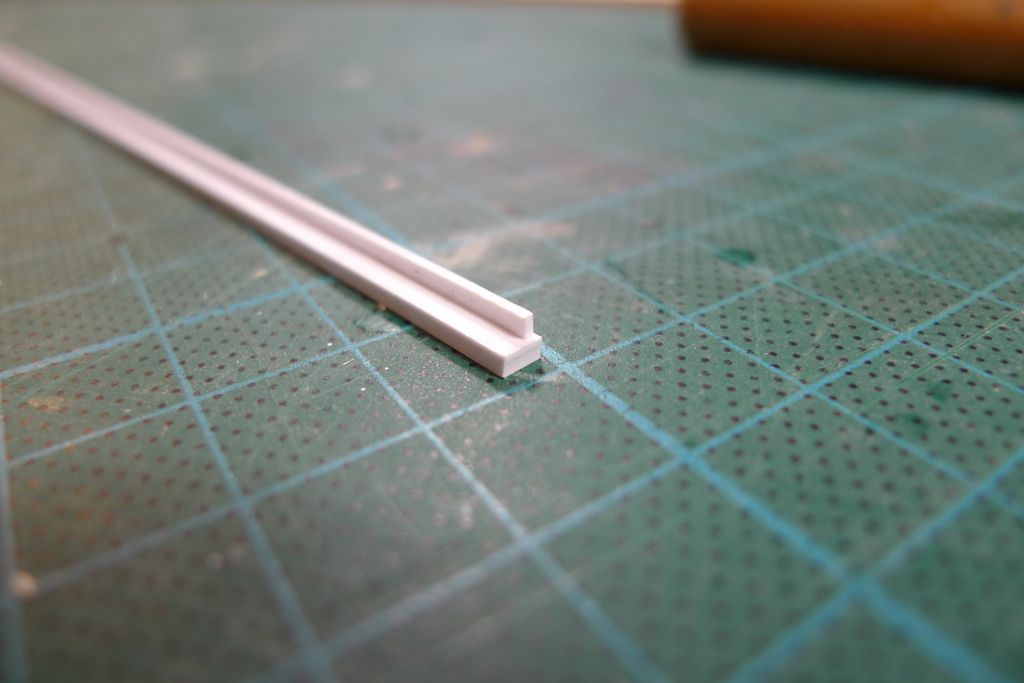
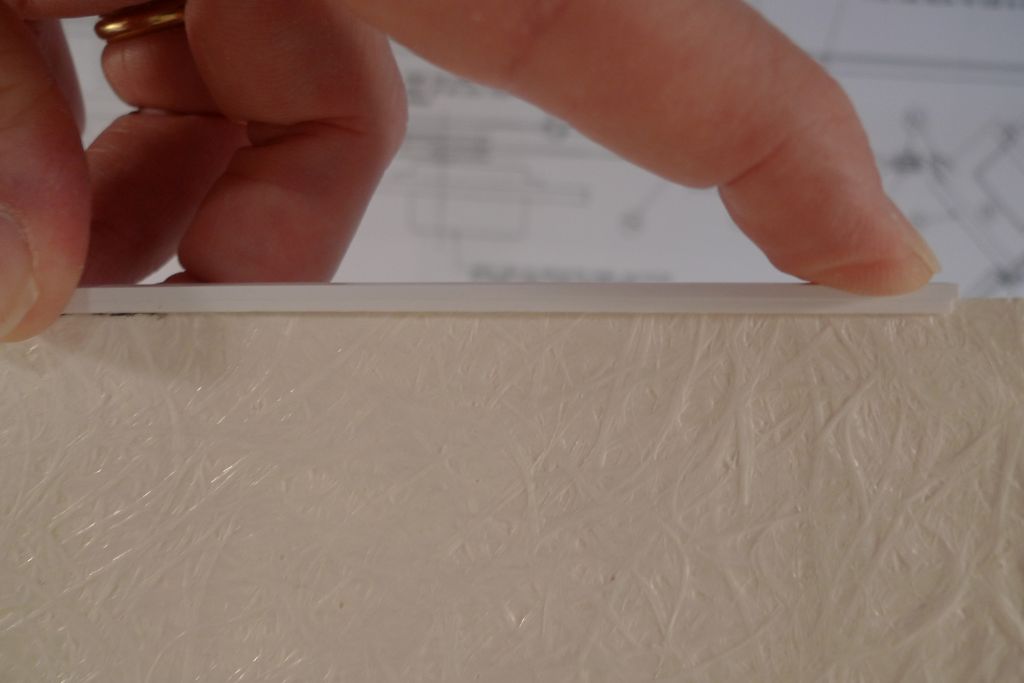
                                                  Anyway, a line needs to be penciled in all around the inside of the hull, 1.5 mm below the top edge, so I made up a gauge from two lengths of styrene strip, the thinner of which is 1.5 mm wide.

                                                  mbbygg54.jpg

                                                  The gauge could easily be held against the top of the hull …

                                                  mbbygg55.jpg

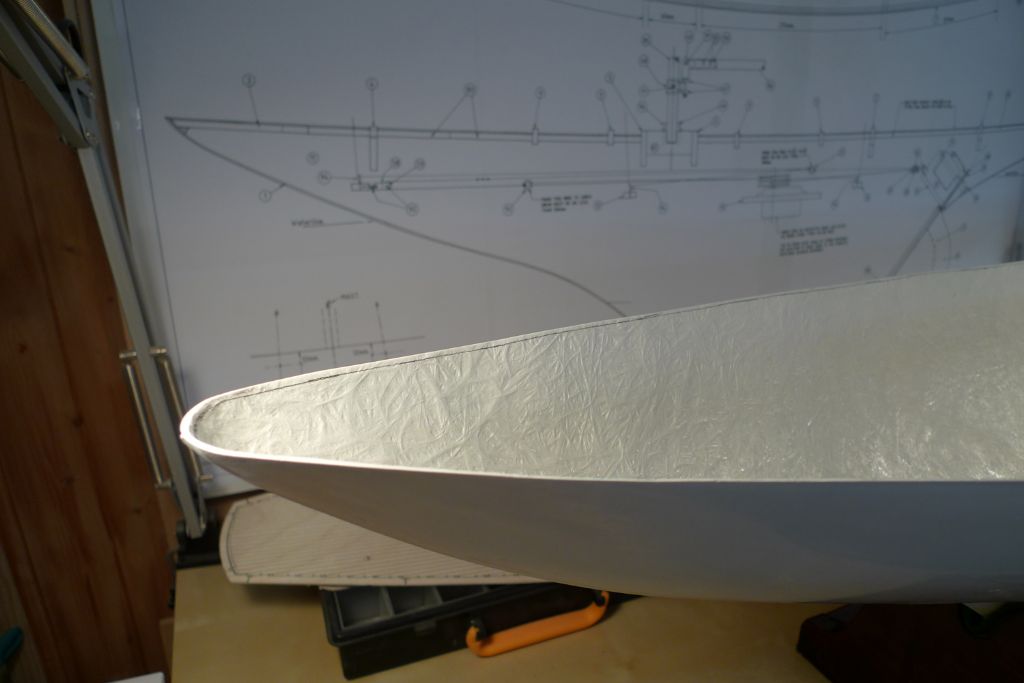
                                                  … and the required line drawn in.

                                                  mbbygg56.jpg

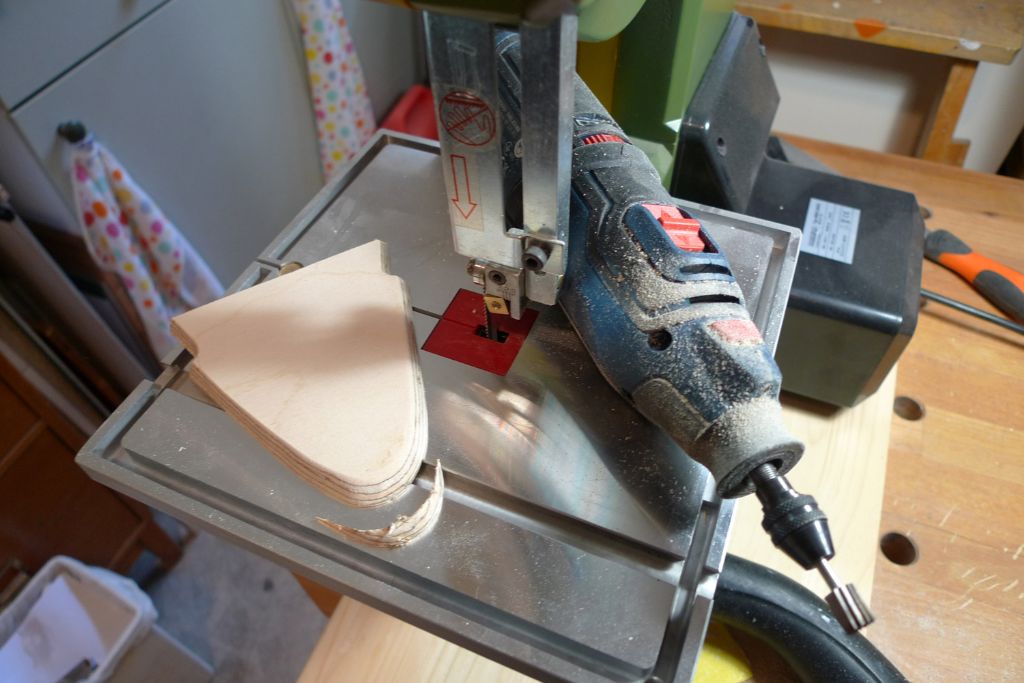
                                                  Next up, the bow and stern pieces were subjected to some mild violence from the band saw and a router bit in t he rotary tool, until suitably shaped and chamfered …

                                                  mbbygg57.jpg

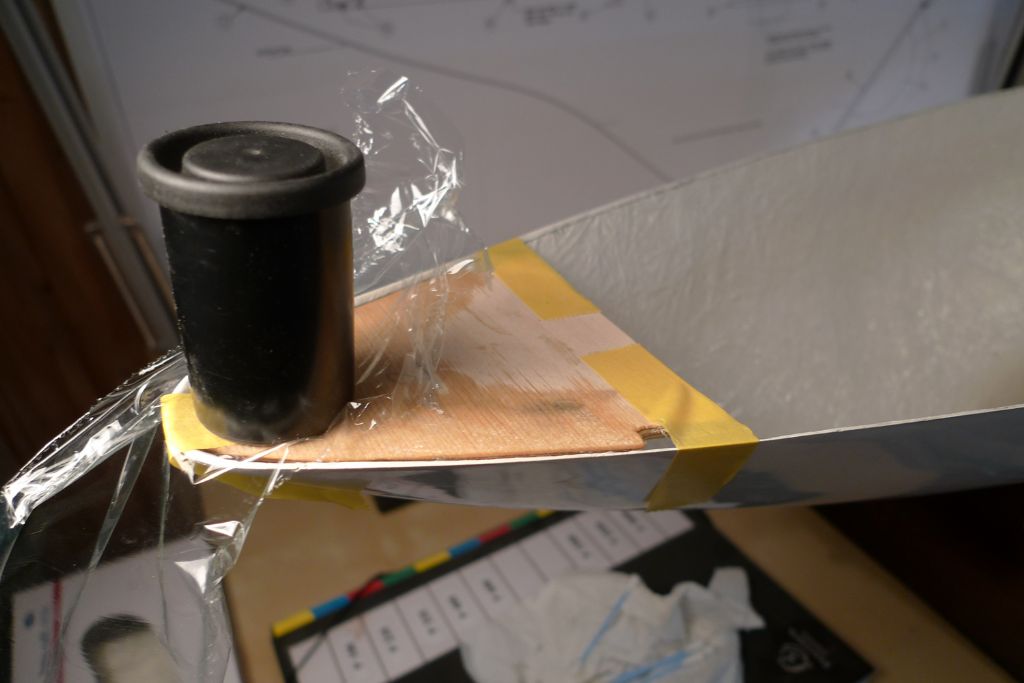
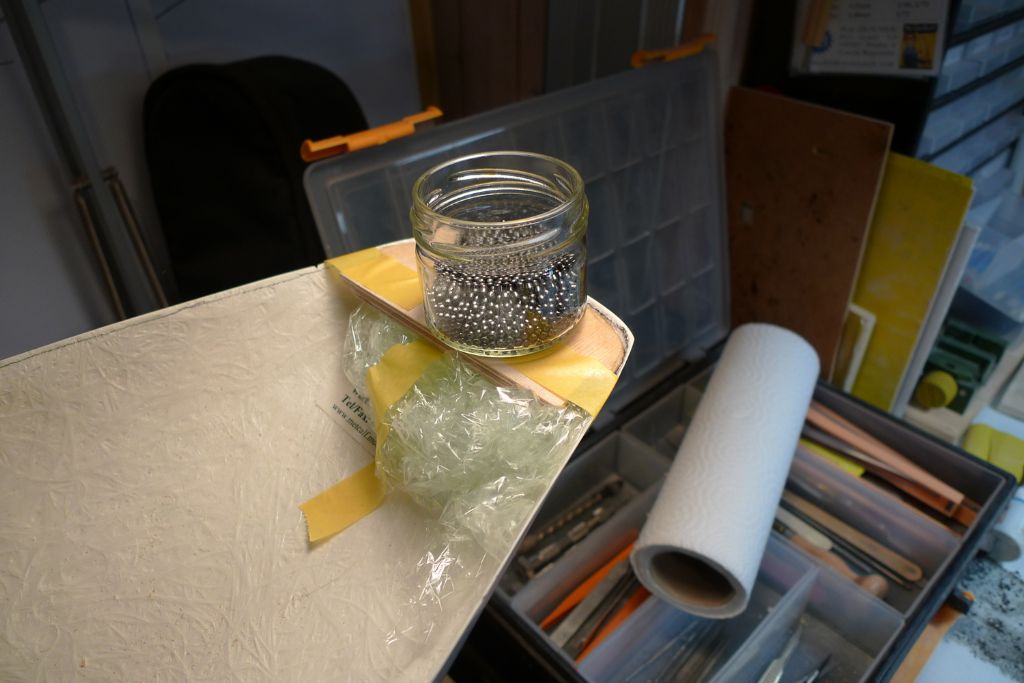
                                                  … so that they could be glued in place with some slow cure epoxy. The old film can contains a small quantity of lead shot …

                                                  mbbygg58.jpg

                                                  … as does the glass jar, to make sure that everything stays nicely in place …

                                                  mbbygg59.jpg

                                                  … while the glue cures.

                                                  As far as the stern piece is concerned, I made sure that it came to sit a smidgen higher than the pencil line of the starboard quarter as a consequence of the slightly too low hull top edge.

                                                  mbbygg60.jpg

                                                  With the bow and stern pieces secured, the first of the edge strips was glued in, also using 24 hour epoxy.

                                                  mbbygg61.jpg

                                                  To be continued …

                                                  /Mattias
                                                  Edited By Banjoman on 10/04/2016 19:04:38

                                                  #64418
                                                  mark69
                                                  Participant
                                                    @mark69

                                                    Banjoman having a closer look at that stb side pic ,that is a crack in the holding and needs to be repaired before you paint it as it will always keep showing up ! I would if I may suggest you sand and glass the inside before it gets worse ,shame to spoil a good build ……mark

                                                    #64421
                                                    Banjoman
                                                    Participant
                                                      @banjoman

                                                      Mark,

                                                      There is indeed the beginnings of a crack there; however, apart from the missing shard in the top line, it is as yet only a tendency towards surface flaking on the outside; there is no trace of it on the inside, so the hull has not actually cracked as such.

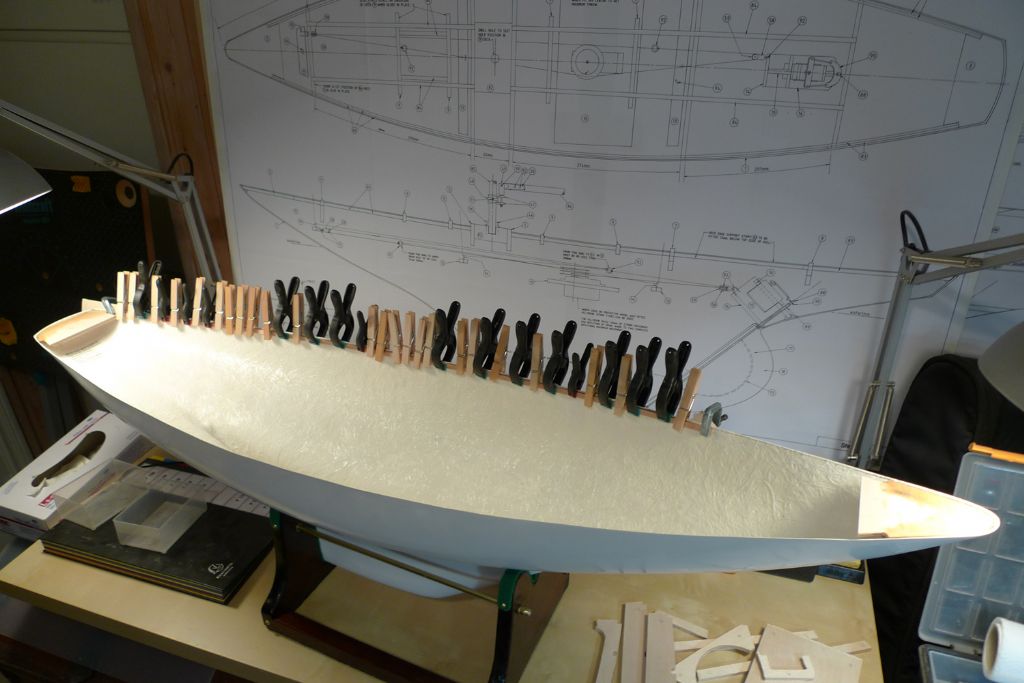
                                                      But yes, I shall certainly have to sort it out well before painting! My plan is to first stabilise the edges by gluing in all of the edge strips. I will then for good measure add a reinforcement on the inside, before I fill in and repair the outside with Milliput.

                                                      Apart from the mould half joint line along the underside centre line, which needs to be sanded down, there are actually a number of uneven spots that shall have to be filled and sanded before the hull can be painted, so while this beginning crack is of a more urgent nature, in that the hull must be kept from developing a real fissure, it is far from the only bit that shall need some TLC before any paint can be applied …

                                                      /Mattias
                                                      Edited By Banjoman on 10/04/2016 20:51:11

                                                      Edited By Banjoman on 10/04/2016 20:51:45

                                                    Viewing 25 posts - 26 through 50 (of 440 total)
                                                    • Please log in to reply to this topic. Registering is free and easy using the links on the menu at the top of this page.

                                                    Code of conduct | Forum Help/FAQs

                                                    Advert

                                                    Latest Replies

                                                    Home Forums Sailing Models Topics

                                                    Viewing 25 topics - 1 through 25 (of 25 total)
                                                    Viewing 25 topics - 1 through 25 (of 25 total)

                                                    View full reply list.

                                                    Advert