Moonbeam

Advert

Moonbeam

Home Forums Sailing Models Moonbeam

  • This topic is empty.
Viewing 25 posts - 1 through 25 (of 440 total)
  • Author
    Posts
  • #63801
    Banjoman
    Participant
      @banjoman

      Well! At long last our 1:1 scale doing-up-the-lounge project is sufficiently advanced (if not fully finished) that the spare time availale to me is once more sufficient to include some model boat building

      Last Sunday, I therefore put in afternoon of cleaning and sorting out my workshop, before breaking out the first of three upcoming build projects, namely the Moonbeam pond yacht kit from Metcalf Mouldings.

      I actually bought this kit back in October last year, and it duly arrived in a fairly hefty double envelope cardboard box.
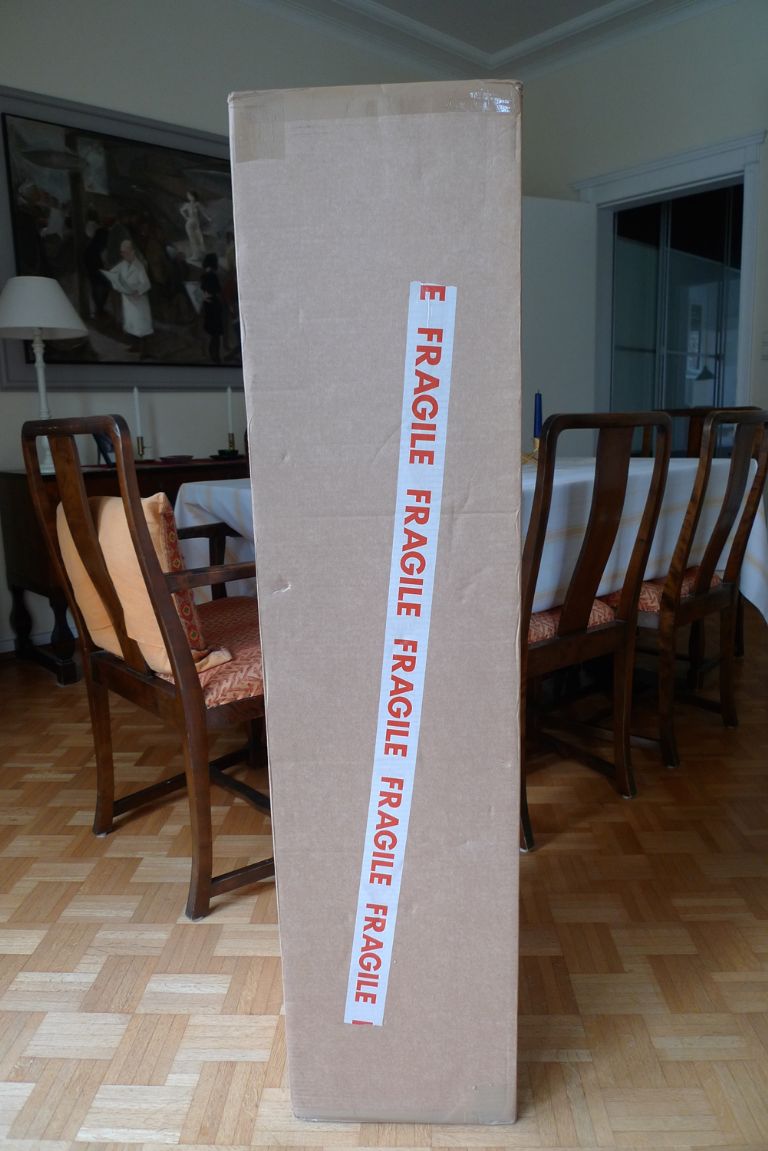
      mbbygg1.jpg

      Inside the outer box was a smaller one, and inside that was (of course) the kit, very well packed, padded and protected.
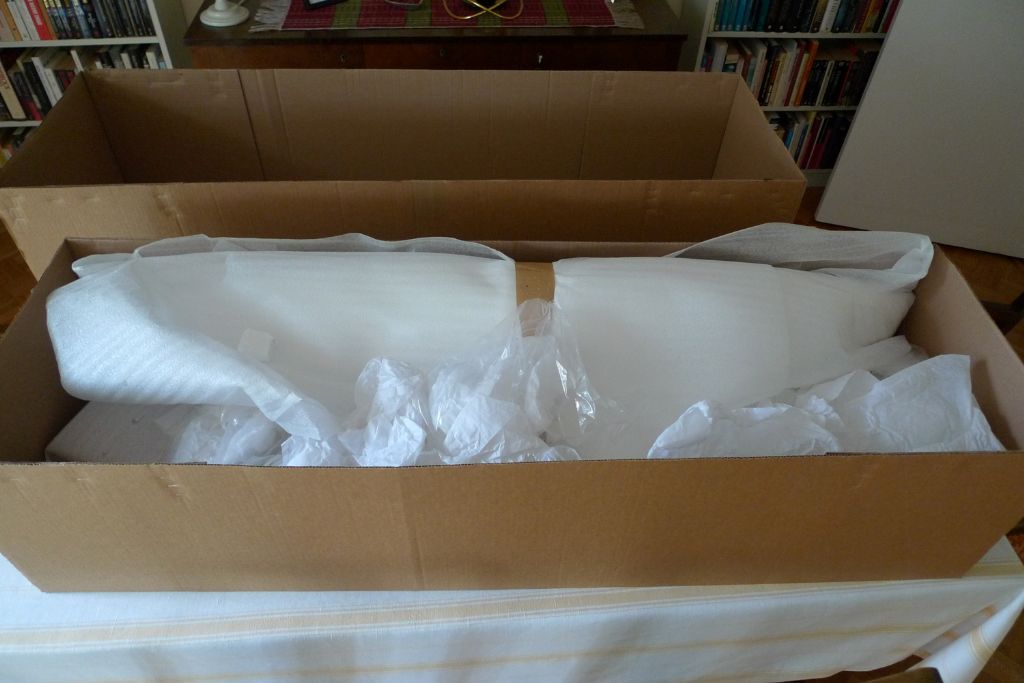
      mbbygg2.jpg

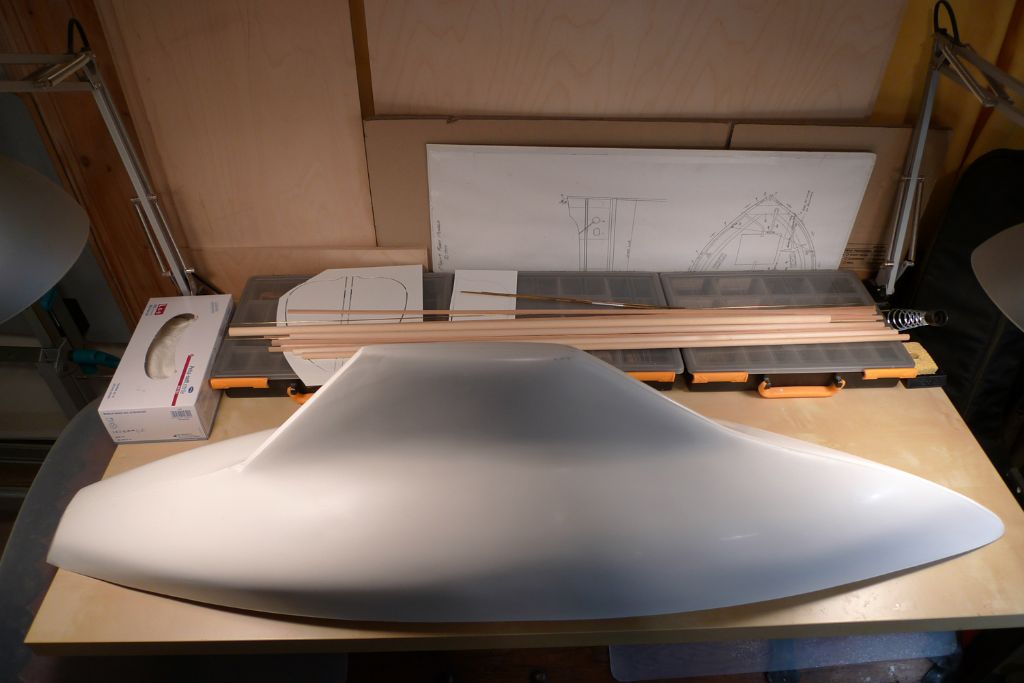
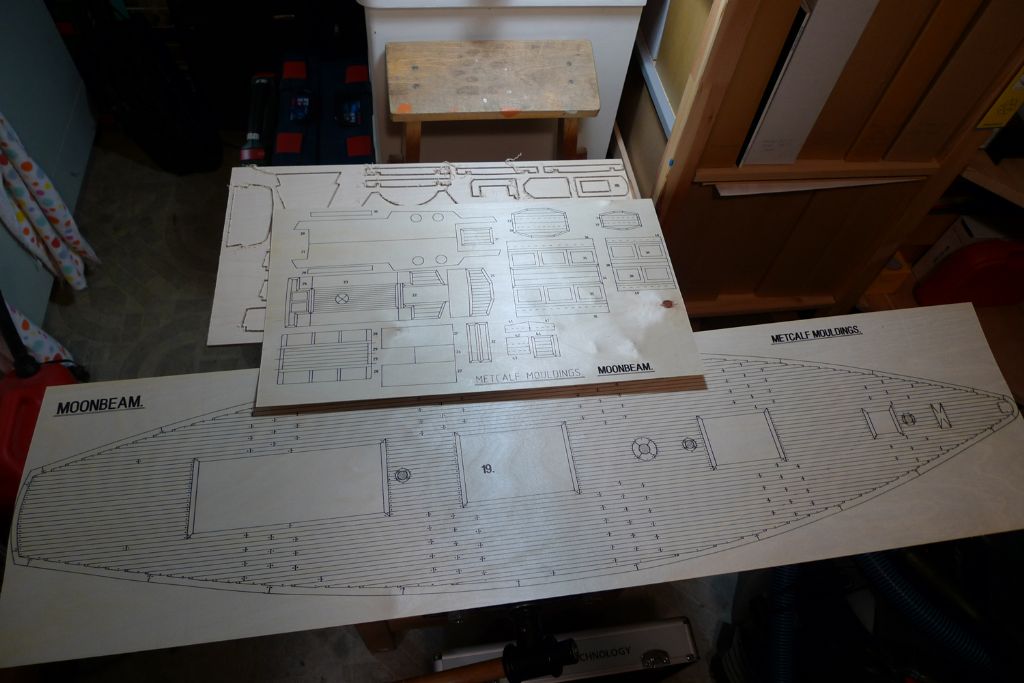
      The GRP hull looked very nice indeed, and the kit also included laser cut and pre-printed plywood, dowel and wood of various sizes, white metal fitting, rigging thread, cotton fabric for the sails, four large, full-size plans and a booklet of building instructions.

      David Metcalf had also separately sent me a cd-rom with some hundred or so photos from his prototype build.
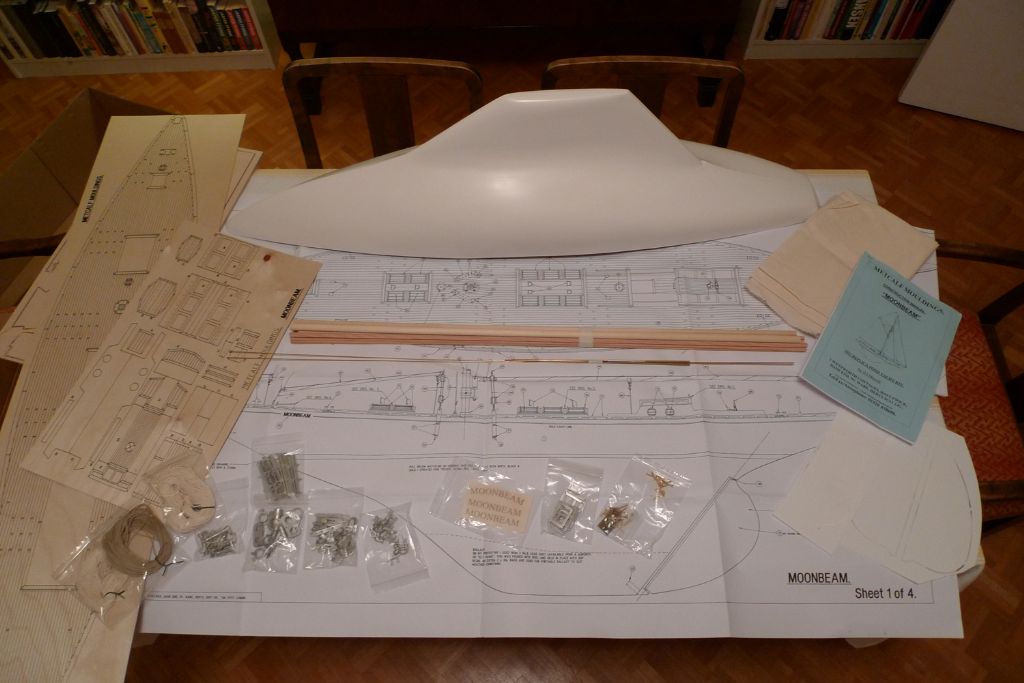
      mbbygg3.jpg

      Before I begin the build proper, I have gotten started on some of the preparations; I thus took the opportunity, while out carpet hunting for the lounge last Saturday, to also pop into Albatros Modelbouw (**LINK**) where I picked up a Spektrum receiver, a 4.8 V NiMH battery pack, a Hitec HS785HB sail winch and a Hitec HS645MG ultra torque servo.

      On Sunday, with the workshop neat and clean, I then duly set up a new model memoryin the t/x, bound the new r/x to the t/x and tested the set-up, which (rather unsurprisingly, given the lack of complexity) seems to work just as it should.
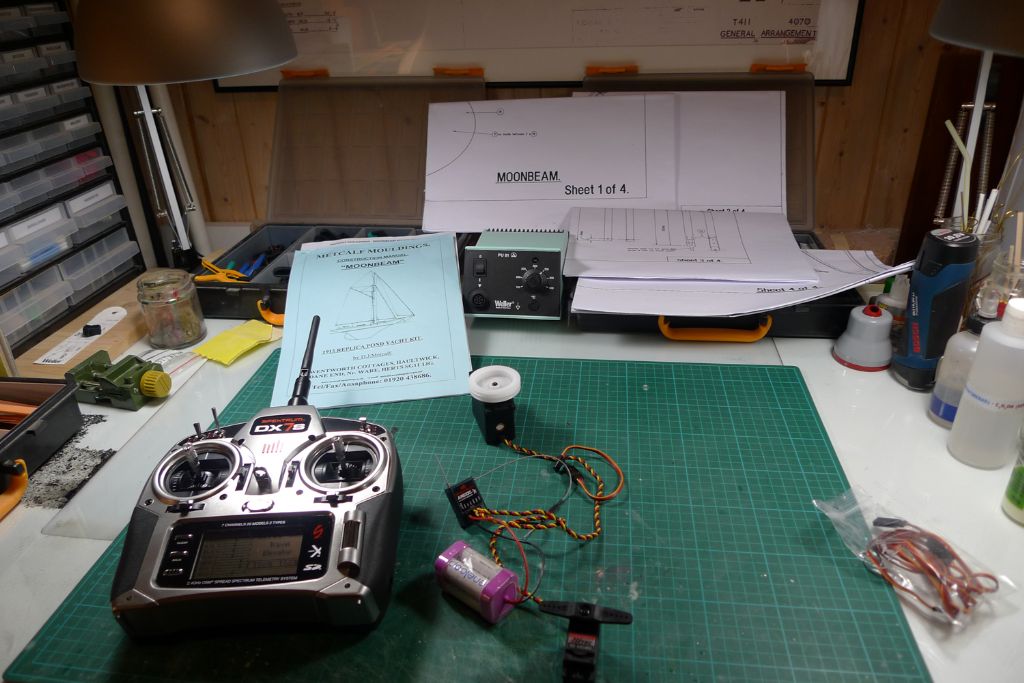
      mbbygg4.jpg

      I also unpacked everything …

      mbbygg5.jpg

      … in further preparation.

      mbbygg6.jpg

      Monday, I picked up four 70×100 cm foam boards from an art supply shop, and proceeded to join these together, two and two, first with some toothpicks …
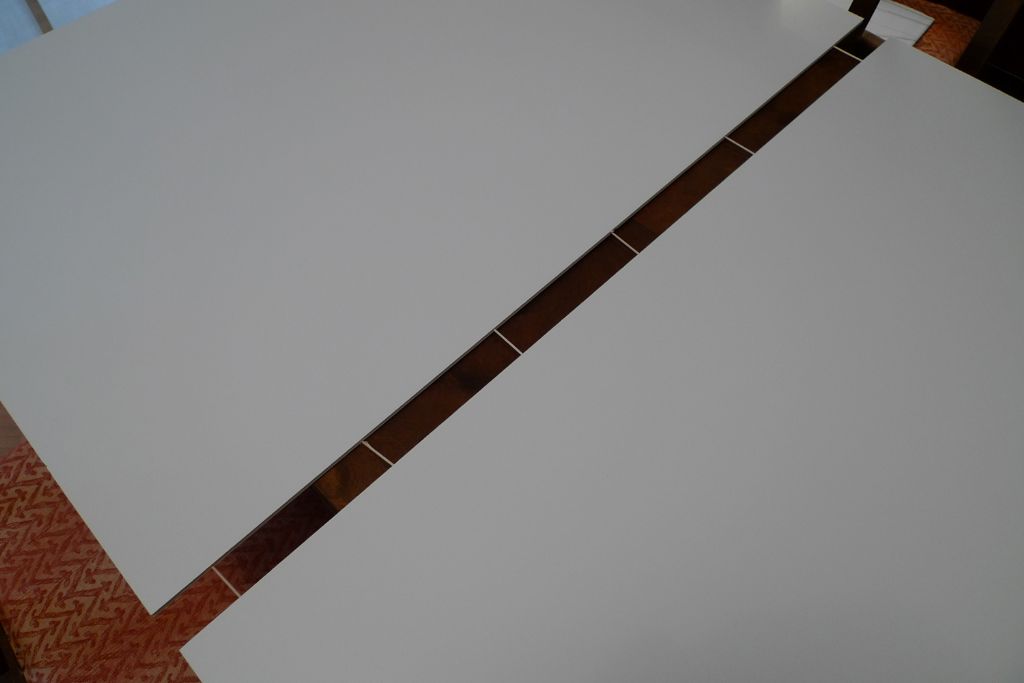
      mbbygg7.jpg

      … and then with fabric-backed sticky tape, in order to form large enough boards …
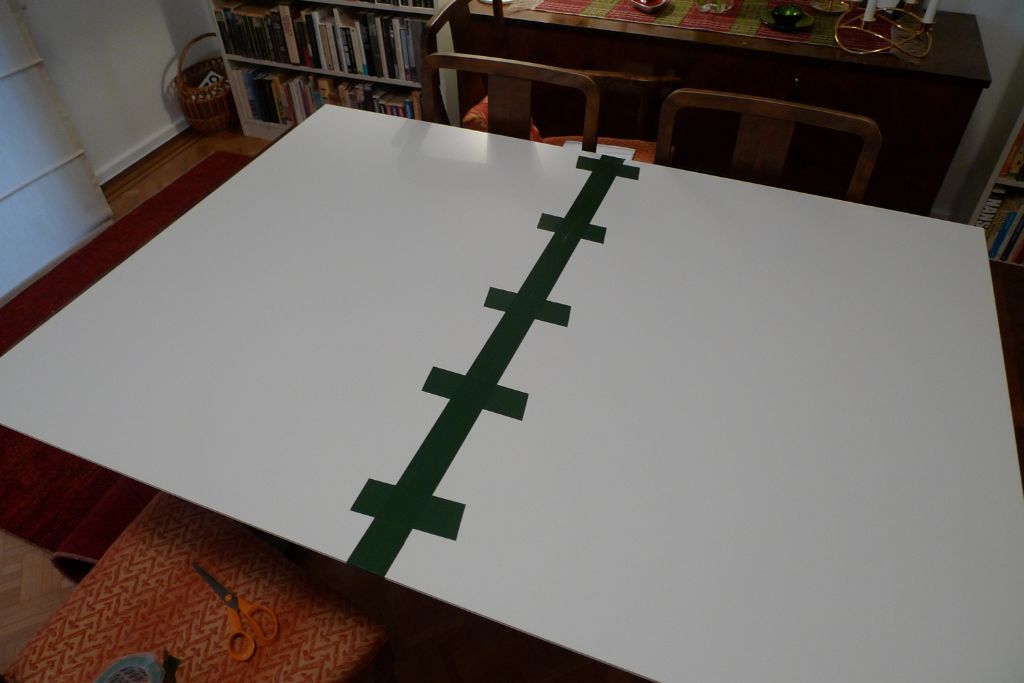
      mbbygg8.jpg

      .. that the plans (which I'd first gone over with an iron on low heat to take out the worst of the folds) could be mounted flat on them and stood up against a wall for (comparatively) easy reference.
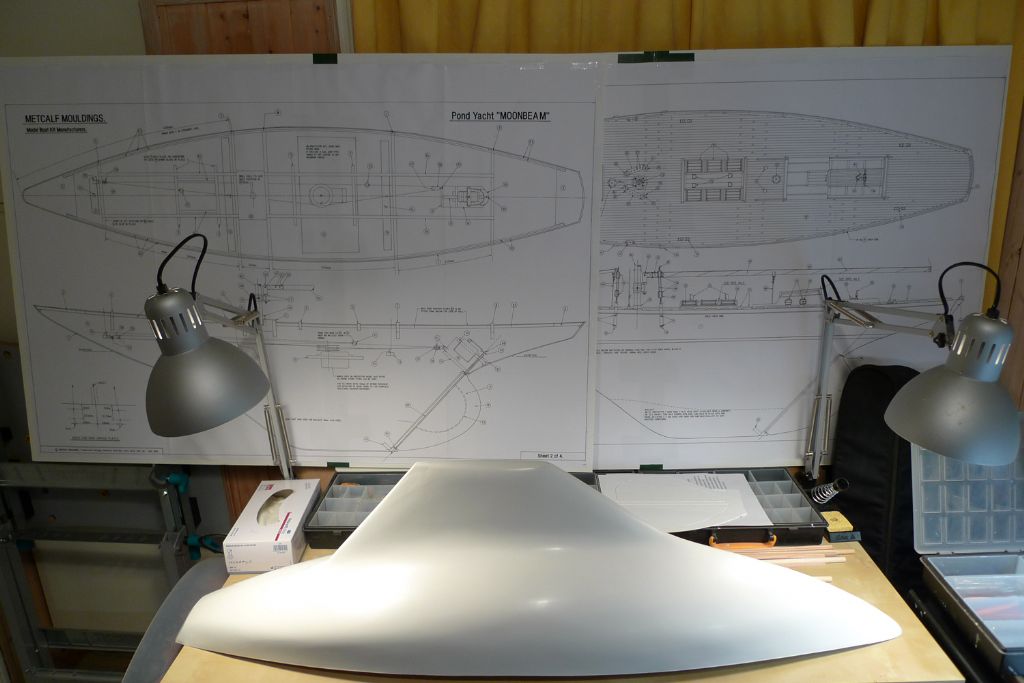
      mbbygg9.jpg

      To be continued …

      /Mattias

      Edited By Banjoman on 09/03/2016 07:27:40

      Edited By Banjoman on 09/03/2016 07:30:52

      Advert
      #9622
      Banjoman
      Participant
        @banjoman

        Building the Moonbeam sail yacht kit from Metcalf Mouldings

        #63802
        Bob Abell 2
        Participant
          @bobabell2

          Hello Banjo……Bob here…….Nice to see you back in action on the Scale Sail front!

          Big question…….Are you going to fit an auxiliary motor?

          In my humble opinion, a motor improves the sailing fun!

          There's nothing worse than faffing about in the doldrums in a light breeze!

          No doubt we'll be inundated by the Purists who seem to think, a motor is some sort of " cheating"….!

          We'll wait and see!

          All the best with the new build, Banjo

          Bob

          #63803
          Dave Milbourn
          Participant
            @davemilbourn48782

            …and don't forget a pair of wheels.

            DM

            #63804
            Banjoman
            Participant
              @banjoman

              Hello Bob,

              And thanks for your comments and your interest!

              No — I'm not going to fit an auxiliary motor! That would take a fairly extensive rebuild of the hull, and while I do not consider myself particularly purist in outlook, the main challenge for myself that I have on mind with this model is not so much the build itself as sailing it under sail power only.

              Also, at least according to the kit publicity and the kit review in Model Boats some years ago, this one is supposed to be at its best in a lighter breeze …

              /Mattias

              #63805
              Bob Abell 2
              Participant
                @bobabell2

                Oh, wheely!

                Bob

                #63806
                Banjoman
                Participant
                  @banjoman

                  Only a pair of wheels? I'd a thunk a proper four-wheel drive system were the cat's jim-jams …

                  /Mattias

                  #63807
                  Bob Abell 2
                  Participant
                    @bobabell2

                    One inboard motor driving twin props with timing belts drives would be an impressive start though!

                    Bob

                    #63808
                    Banjoman
                    Participant
                      @banjoman

                      If one were to add auxiliary motor power to this sort of hull, twin props might indeed be an good option, as the keel would not have to extensively reshaped; however, for my part, on this build I will stick with sails only.

                      /Mattias

                      #63809
                      Bob Abell 2
                      Participant
                        @bobabell2

                        Ok, Banjo…..No motor then

                        Would it be a good idea, to leave a bit of room……..Just in case?

                        Here's how neat at a ltiile prop fits my Britannia….

                        Bob

                        The life saver!

                        #63810
                        Banjoman
                        Participant
                          @banjoman

                          That's a very pretty-looking arrangement, Bob, but again, no: to prepare such a cutout in what is a hollow, GRP moulded deep keel would require GRP surgery to such an extent that one might as well have gone for a motor and prop anyway … which I am thus not going to do!

                          Oh aye — I quite see the advantages of an auxiliary to get a sailing model out of trouble due to the vagaries of the wind, but there are also many a model sail boat that has no recourse to such help, and still manages to make it across the pond and back.

                          In other words, I've paid me money, now I'll take me chances

                          /Mattias

                          #63811
                          Terry Plumridge
                          Participant
                            @terryplumridge66794

                            OH you lucky person, I have wanted to build one of these for a long time. Problem is I have simply run out of room in my small flat. I will enjoy seeing the build though, please keep us up to date.

                            Cheers, Terry.

                            #63812
                            Gareth Jones
                            Participant
                              @garethjones79649

                              Mattias,

                              Some words of advice from my wife Elizabeth, who built a Moonbeam about 5 years ago and has sailed it regularly ever since. Don't bother with a motor, a Moonbeam will sail on a zephyr and you will never be faffing about in the doldrums.

                              Another bit of advice from me. There are worse things in life than faffing about in the doldrums.

                              Gareth

                              #63813
                              Banjoman
                              Participant
                                @banjoman

                                Terry,

                                I know what you mean — I'd been oogling this kit for a number of years before I got around to aquiring one; also, I don't as yet quite know where to store her once she's built. But fiddle-de-dee, I'll think of that tomorrow. Tomorrow is another day … And in the meanwhile, 'tis up to date I shall keep you!

                                Gareth,

                                As you may have gathered already, I am not now nor have I ever been a member of … I mean, I never actually contemplated putting a motor in my Moonbeam; I am nevertheless very glad for the confirmation from Elizabeth and you of her capability to move under even the lightest of breezes

                                /Mattias

                                Edited By Banjoman on 09/03/2016 14:48:10

                                #63816
                                Bob Abell 2
                                Participant
                                  @bobabell2

                                  Banjo

                                  When one is stuck in the reeds, bushes or that inaccessible far bank…….All the zephyrs in the world won't get you out…….But a handy little motor drive will or the rescue boat of course

                                  Bob

                                  #63818
                                  Dave Milbourn
                                  Participant
                                    @davemilbourn48782

                                    Bob
                                    "If at first you don't succeed, try again – then quit. There's no point in being a damn fool about it."
                                    DM

                                    #63828
                                    Banjoman
                                    Participant
                                      @banjoman

                                      Bob,

                                      I am aware of and fully understand the belts-and-braces argument, but have nevertheless made up my mind not to include any auxiliary drive in this build; if, as may indeed happen, I manage to sail the boat straight into the reeds or whatever, I shall have to fall back on the club's dinghy for the rescue operation.

                                      /Mattias

                                      #63863
                                      Bob Abell 2
                                      Participant
                                        @bobabell2

                                        Any WIP pictures to show, Banjo?

                                        Bob

                                        #63867
                                        Banjoman
                                        Participant
                                          @banjoman

                                          Fear ye not, Mr Abell; there are indeed photos!

                                          Mind you, progress is not particularly impressive; a combination of overtime at the office and other stuff to sort means build time has so far been fairly limited.

                                          So. What I have had time to do has been to get on with the stand. For starters, I made a mock-up from some left-over foam board …

                                          mbbygg10.jpg

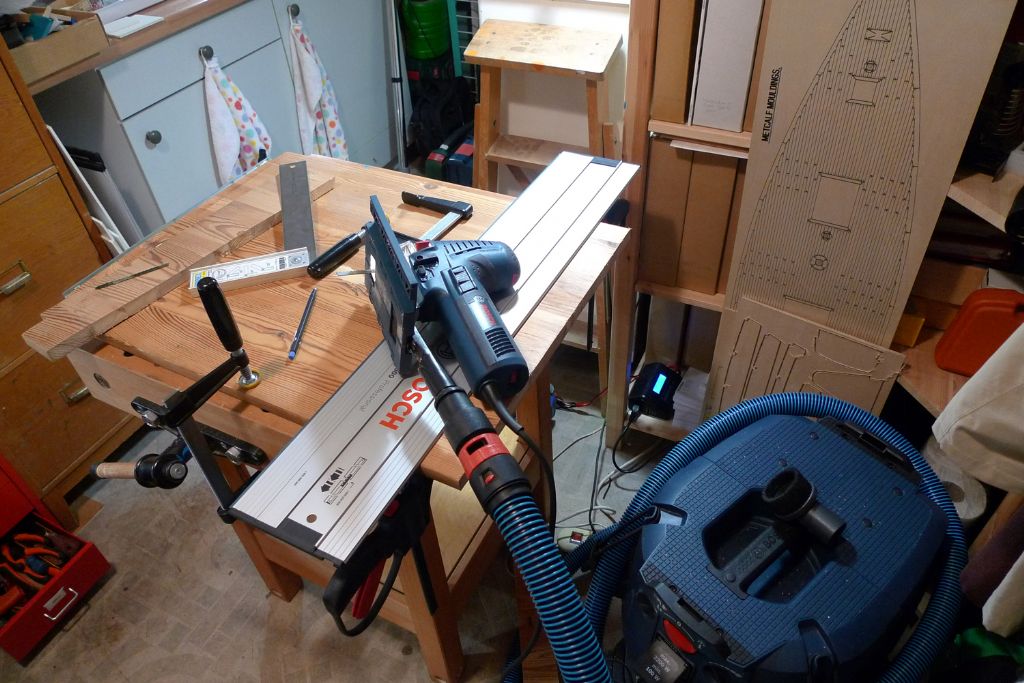
                                          … after which it was time to move on to proper materials. Unlike David Metcalf, I don't happen to have an old mahogany door lying around, so instead dug out a shelf from an old Ikea Ivar, which is made from very solidly glued-together, 18 mm thick pine. With the help of a jigsaw, I cut a 24 cm wide strip out of this …

                                          mbbygg11.jpg

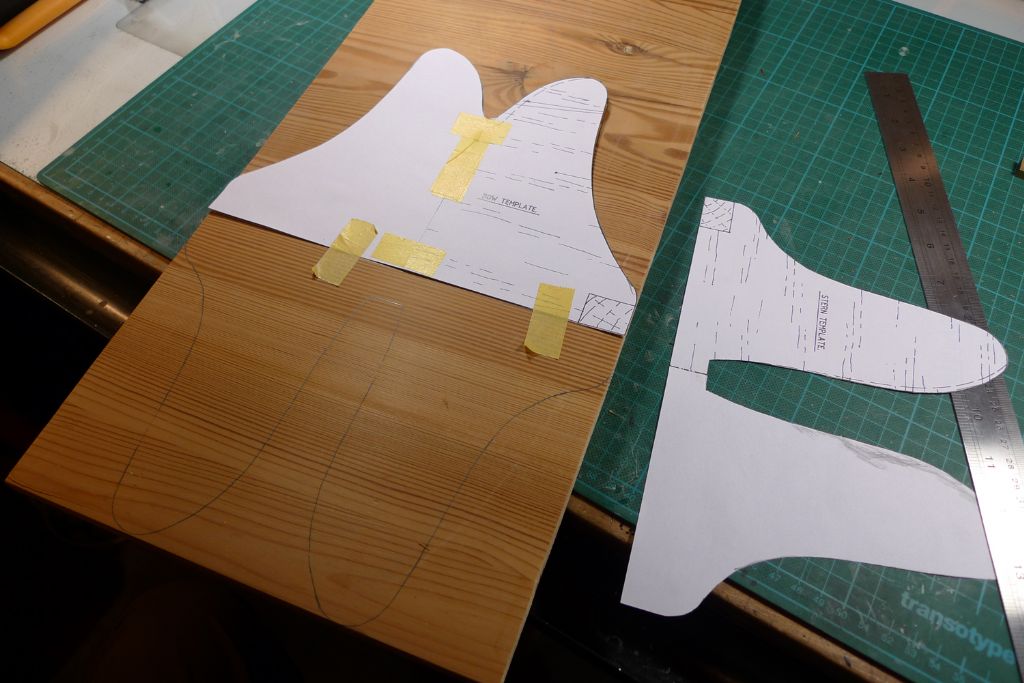
                                          … onto which I transferred the stand upright outlines, copied from the build instructions, and drawn on to the board back to back.

                                          mbbygg12.jpg

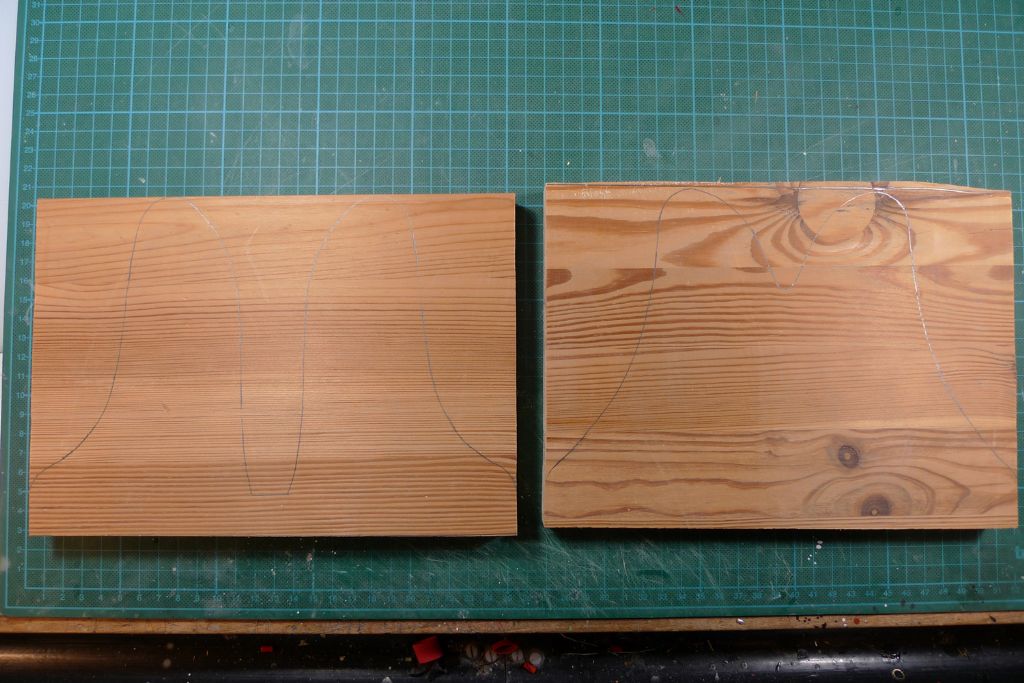
                                          By then cutting them apart along the common, back to back base line, they came apart in what I think should be a sufficiently parallell fashion to make a solid, non-wonky stand.

                                          mbbygg13.jpg

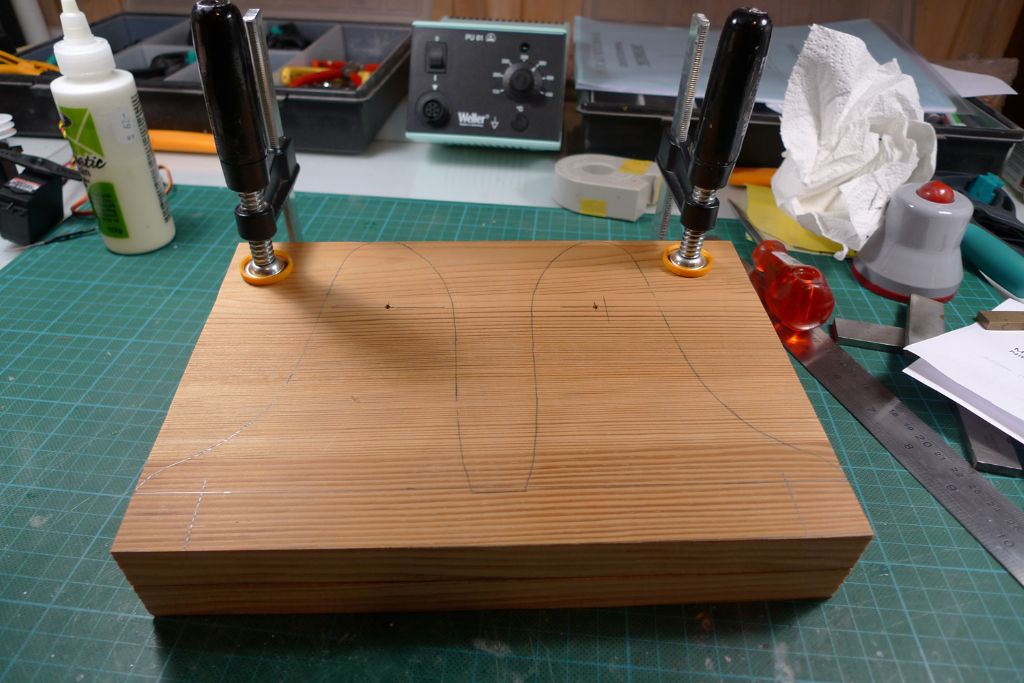
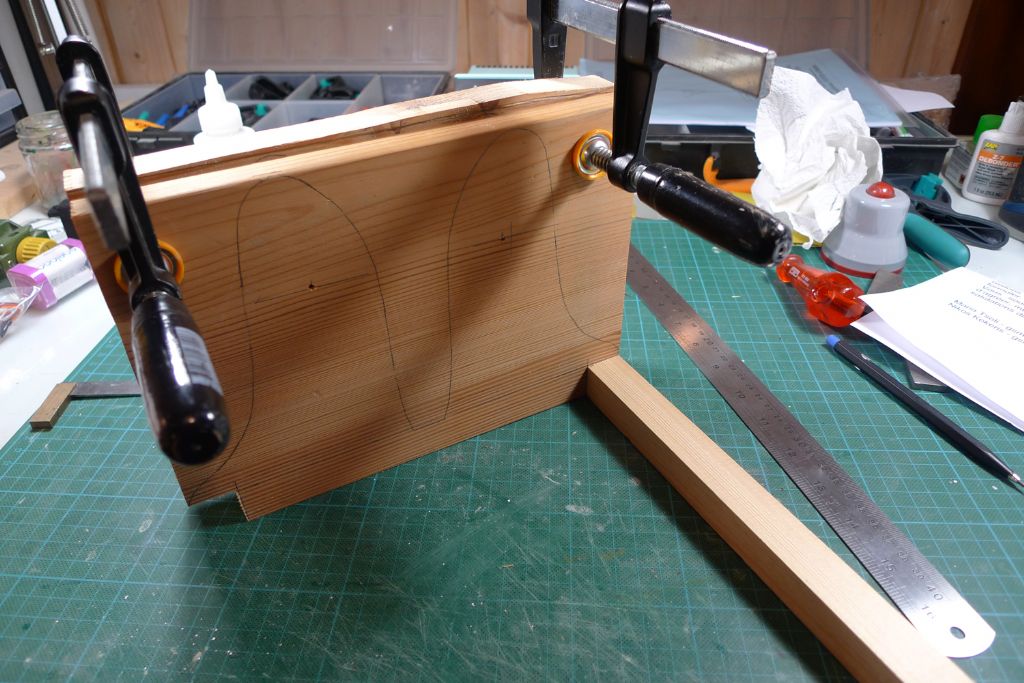
                                          After aligning them to said base line, they were temporarily clamped together …

                                          mbbygg14.jpg

                                          … so that parallell cutouts could be made for the horisontal members, and also two 6 mm diameter holes drilled through the upper faces of the two uprights.

                                          mbbygg15.jpg

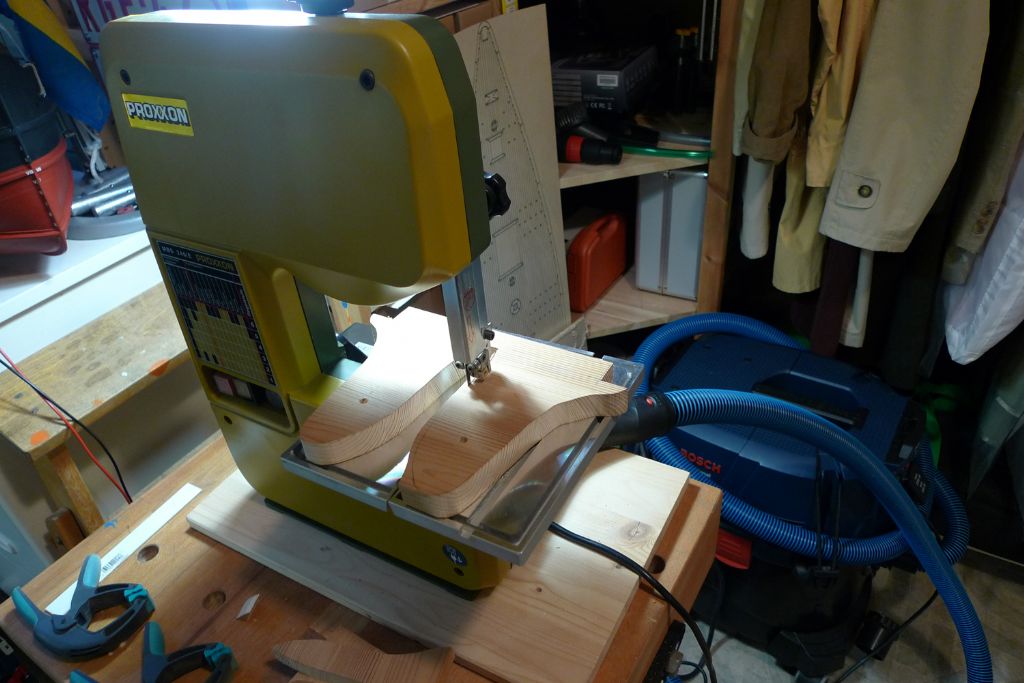
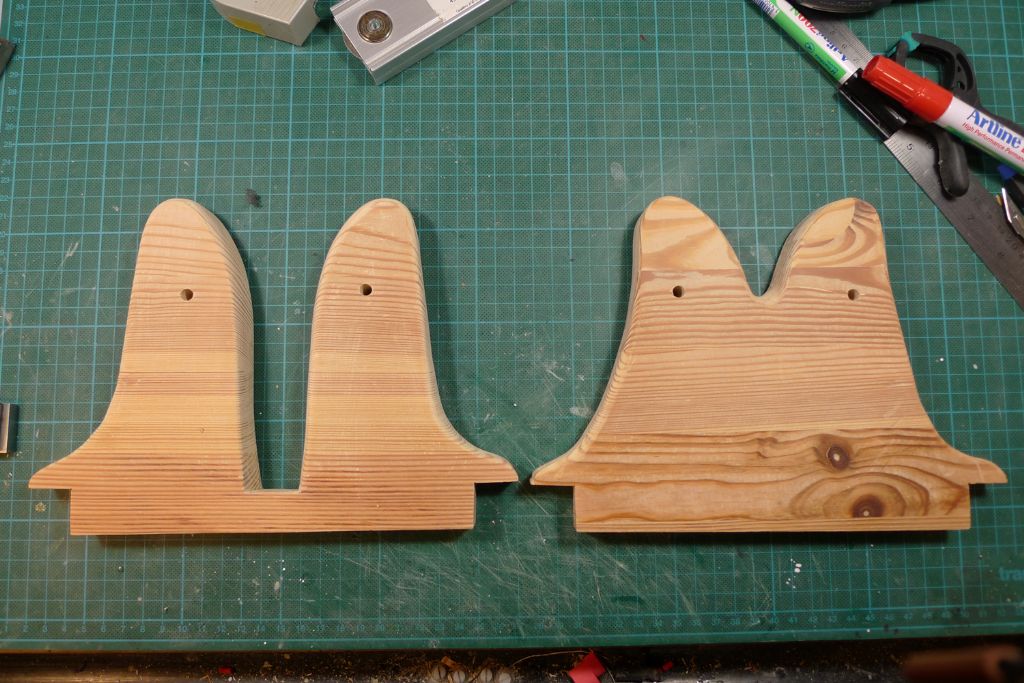
                                          Next the shapes were cut out on the band saw …

                                          mbbygg16.jpg

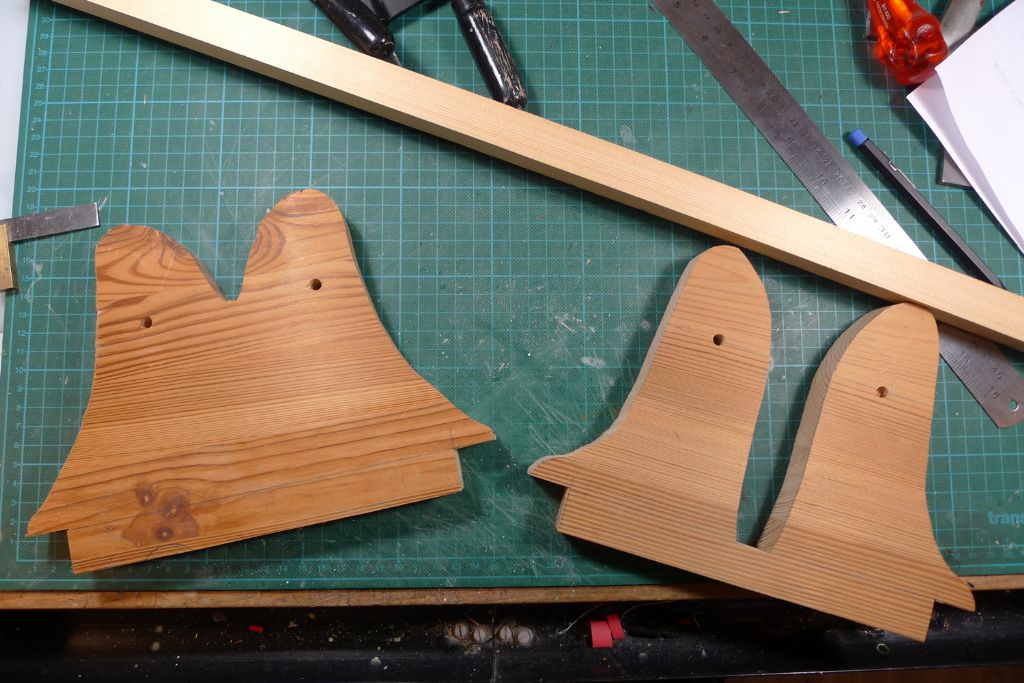
                                          … to produce theses two rough blanks.

                                          mbbygg17.jpg

                                          To be continued …

                                          /Mattias

                                          Edited By Banjoman on 13/03/2016 17:34:57

                                          Edited By Banjoman on 13/03/2016 17:35:49

                                          #63872
                                          Bob Abell 2
                                          Participant
                                            @bobabell2

                                            Thank you, Banjo

                                            Sorry to mention that the run of the grain on the rear stand looks rather prone to splitting?

                                            Would like to see a brass "U" shape plate for peace of mind?……..eh?

                                            It would be in keeping with the style of yacht anyway?……..Might as well put similar on the front stand too?

                                            Hope you find my comments constructive, Banjo?

                                            Bob

                                            #63875
                                            Banjoman
                                            Participant
                                              @banjoman

                                              You're very welcome, Bob!

                                              And yes, of course I find your comments constructive; furthermore, I truly appreciate the interest you take, and although I will in the end make up my own mind about things, I am always most happy to listen to what others have to say!

                                              As for the stand uprights being prone to splitting, I am not very worried about that; I originally bought the shelving unit from which the material was taken back in 1990, so the wood is by now extremely well seasoned. I also found when cutting out the shapes that it is tough as nails, and it showed not the least trace of splitting or being flaky; furthermore, the original 83×50 cm shelf was made to safely carry a load of 45 kilos, so would have been made to fairly strict specs.

                                              That said, in this instance I think that some braces to go with the belt might be a good idea, so I shall indeed add some form of brass strip reinforcements.

                                              /Mattias

                                              #63889
                                              Banjoman
                                              Participant
                                                @banjoman

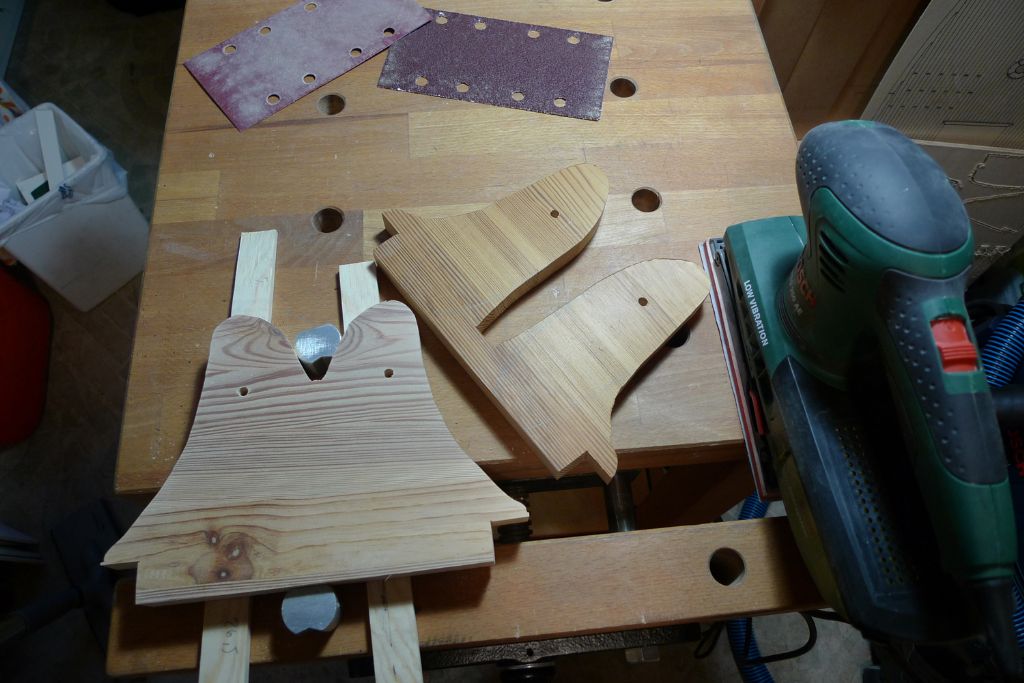
                                                Given that the material is 25-odd years old, with a surface that had never been treated in any way, I decided yesterday to try and take off some of the accrued patina with the sander …

                                                mbbygg18.jpg

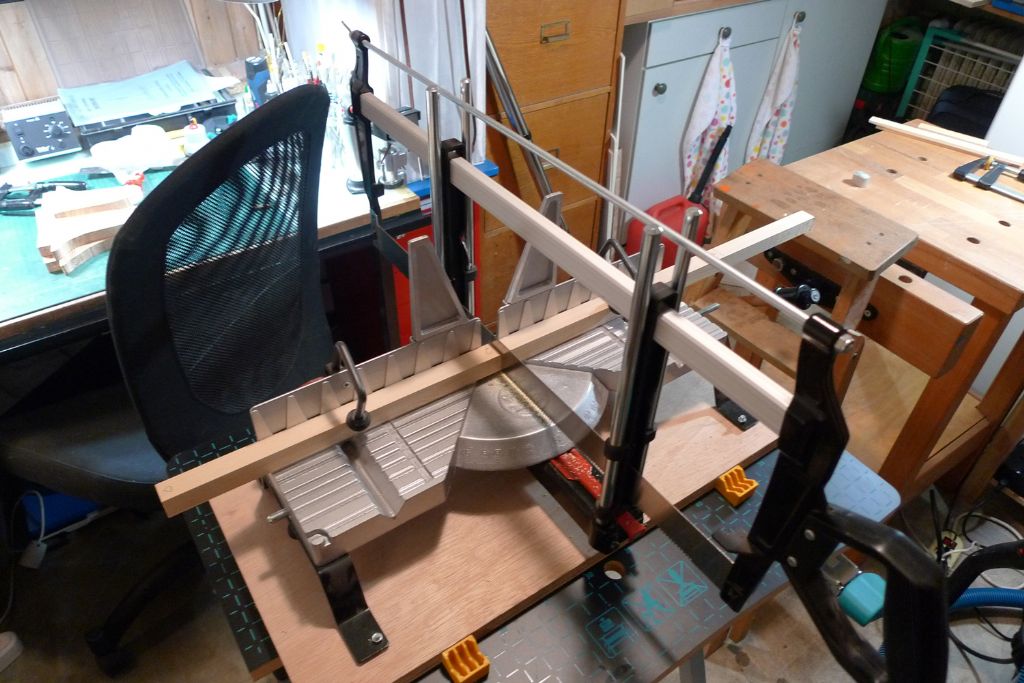
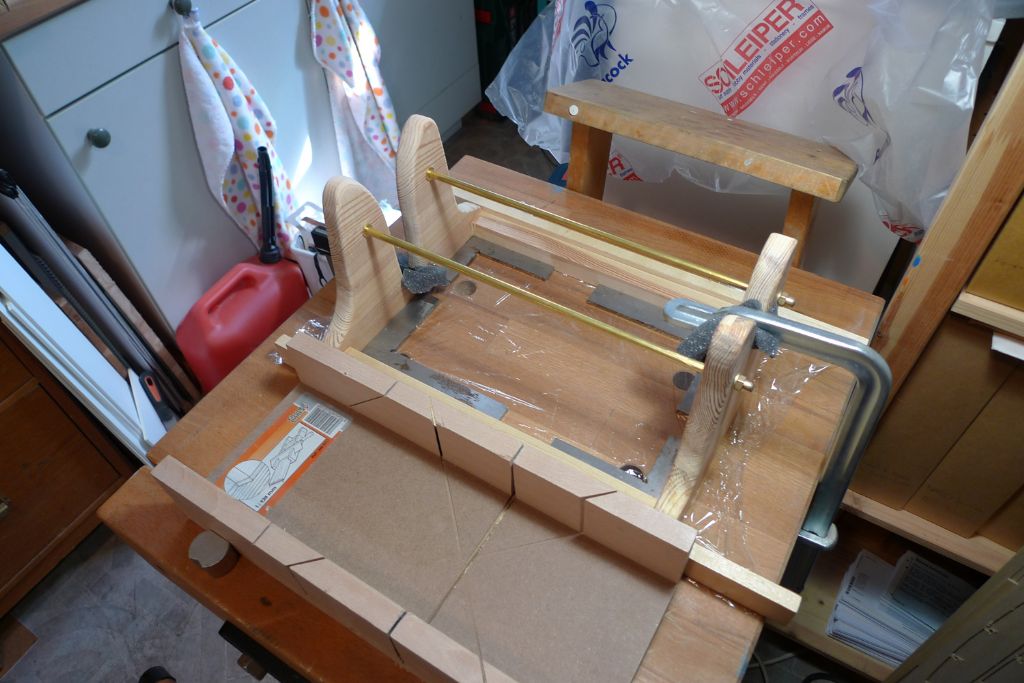
                                                … before getting out the mitre saw and going on to cut off suitable lengths for the horizontal members.

                                                mbbygg19.jpg

                                                The whole was then dryfitted, and checked with trysquares for correct alignments. Before actuially assembling the parts, the next jobs will be to chamfer the edges against which the hull will rest, but that'll be for later.

                                                mbbygg20.jpg

                                                To be continued …

                                                /Mattias

                                                Edited By Banjoman on 15/03/2016 07:36:05

                                                #63904
                                                Banjoman
                                                Participant
                                                  @banjoman

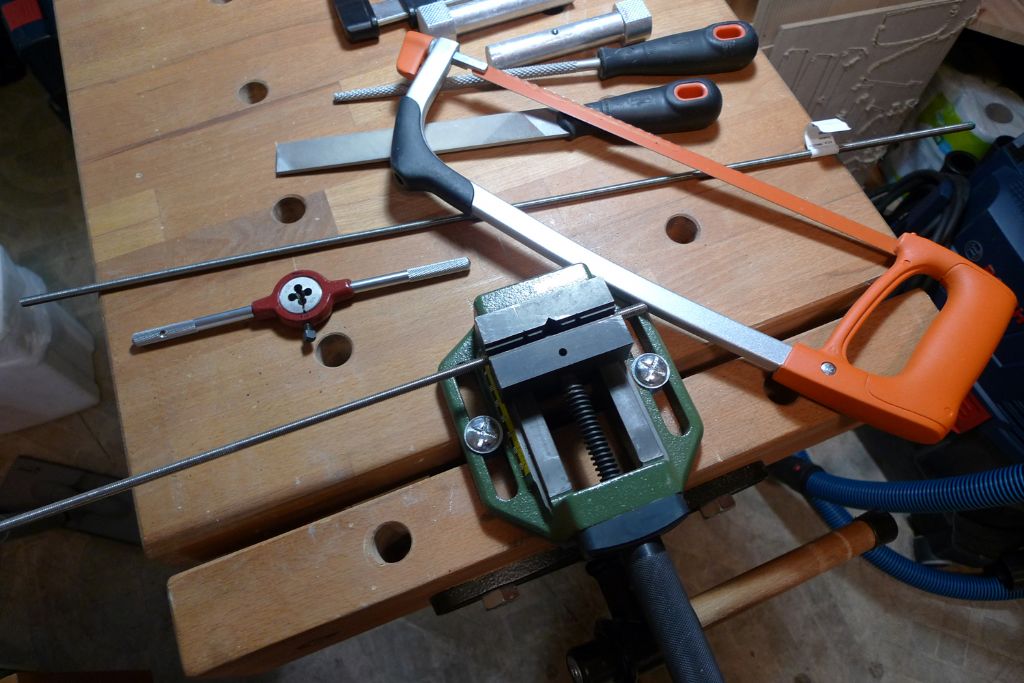
                                                  First job yesterday was to cut some M6 threaded rod to suitable lengths …

                                                  mbbygg21.jpg

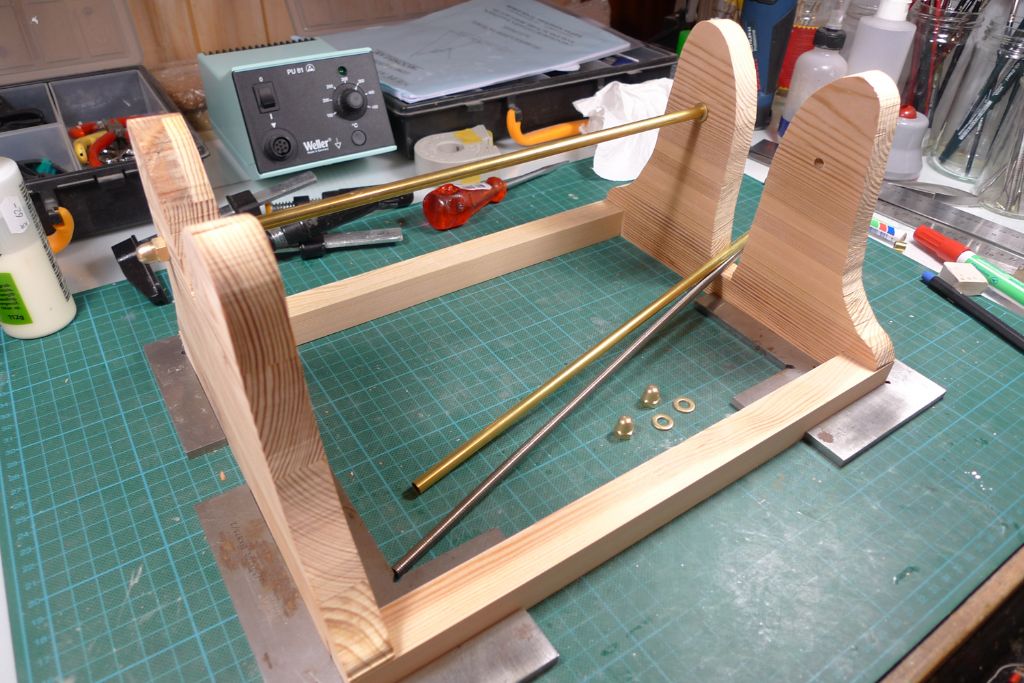
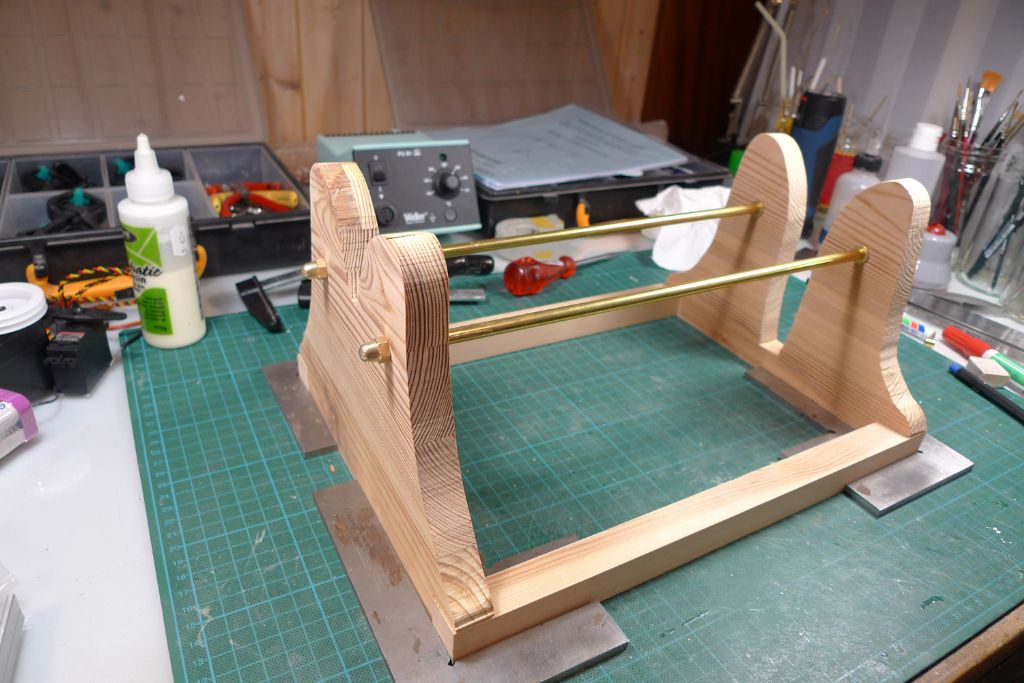
                                                  … for the two reinforcing struts I've decided to add to the stand construction. Each strut is thus made up of M6 threaded rod, over which is fitted a 7 mm brass tube sleeve and a couple of brass washers that, together, are exactly 300 mm long, and thus means that the securing nuts cannot be overtightened, something that would risk putting strain on the uprights, or bending them out of shape.

                                                  mbbygg22.jpg

                                                  These struts help make the structure stronger and more rigid than I think would have been the case had I just gone with the horizontal wood pieces for holding the stand together.

                                                  mbbygg23.jpg

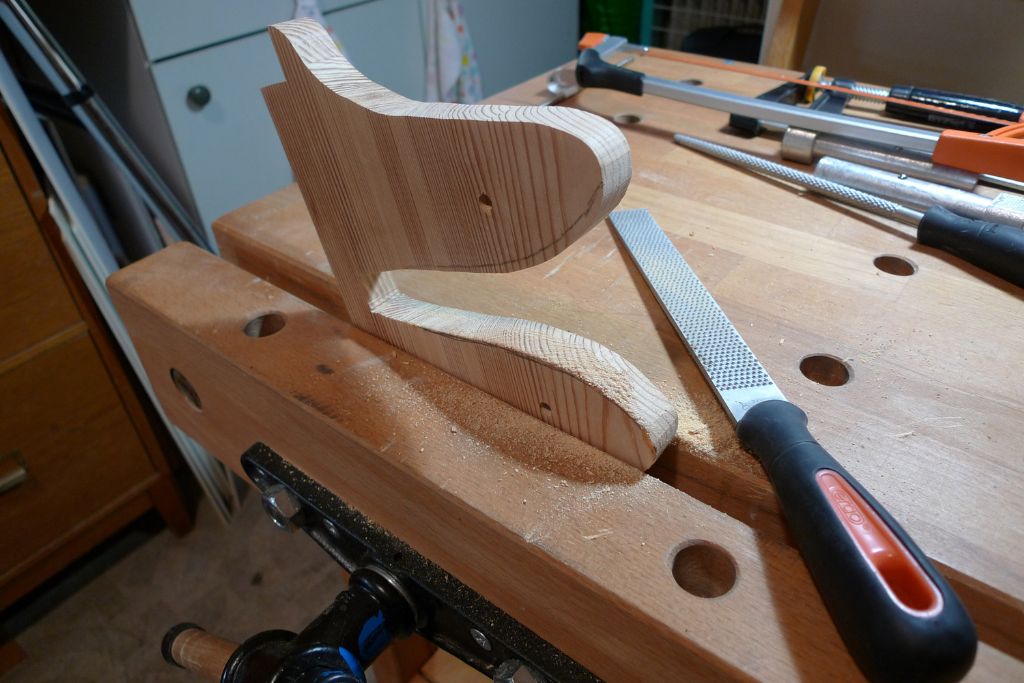
                                                  I've also begun the job of chamfering the inner profiles of the uprights and generally cleaning up and smoothing the various shapes …

                                                  mbbygg24.jpg

                                                  … to produce a stand that will fit the hull shape reasonably well; there's still more work to be done on that, though, before the whole thing can be assembled, stained and varnished.

                                                  mbbygg25.jpg

                                                  To be continued …

                                                  /Mattias

                                                  Edited By Banjoman on 16/03/2016 08:24:53

                                                  Edited By Banjoman on 16/03/2016 08:25:22

                                                  #64104
                                                  Banjoman
                                                  Participant
                                                    @banjoman

                                                    After a trip abroad until a few days ago, I've finally been able to get back to the build, and have continued shaping the stand uprights; as the below image clearly shows, some more wood needed to be taken off the lefthand side of the front piece, so the righthand side shape was traced and transferred, and the superflous wood cut away with the bandsaw.

                                                    mbbygg26.jpg

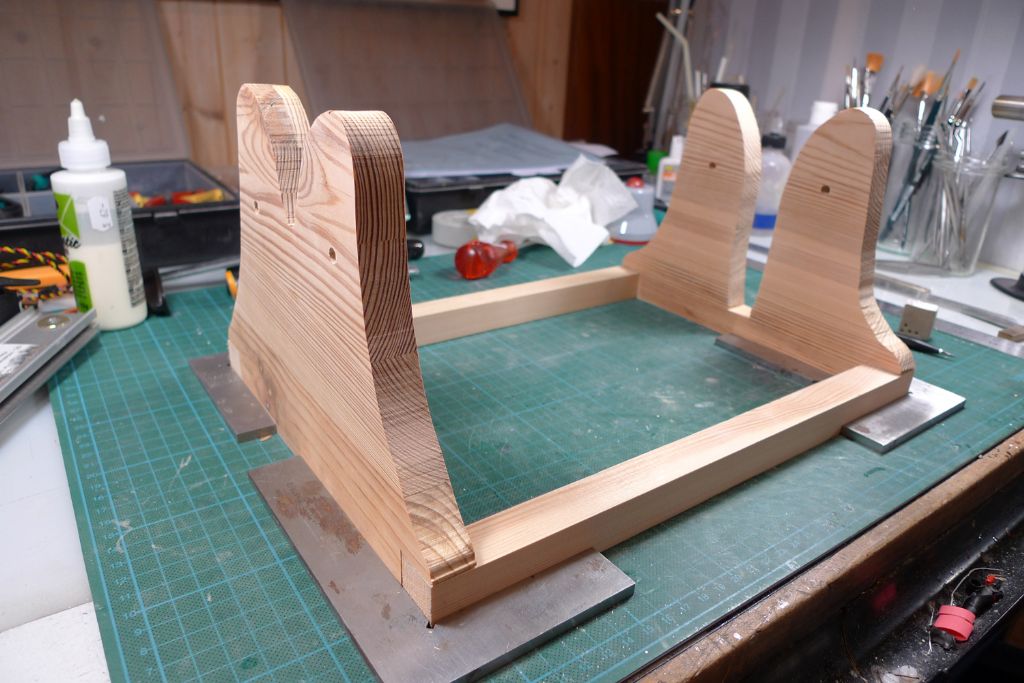
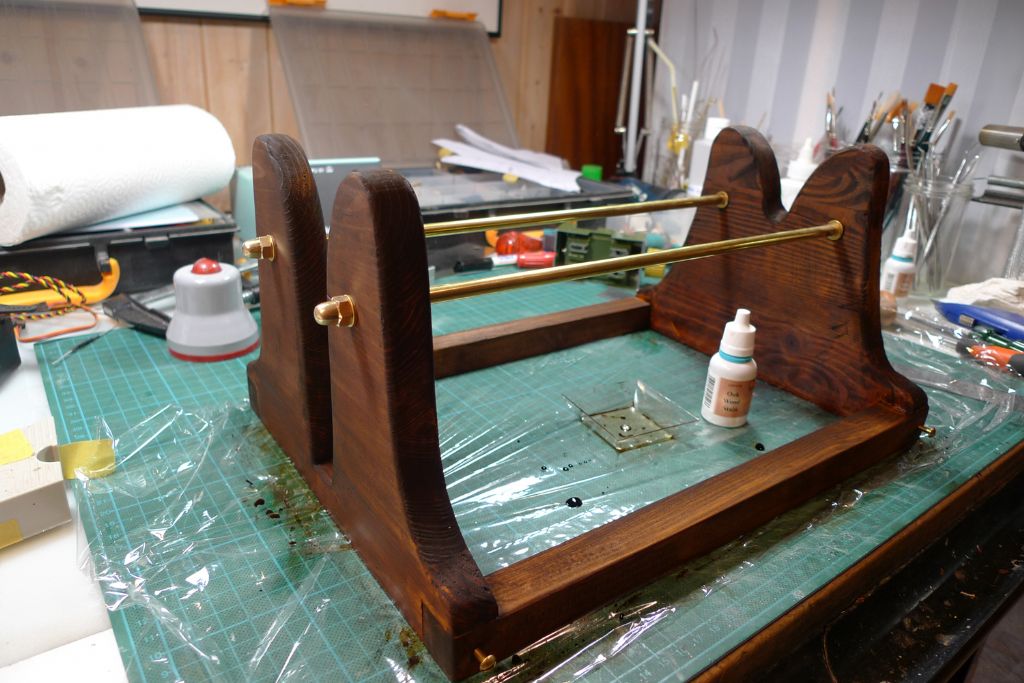
                                                    Several hours worth of shaping, filing and sanding later, it was time to glue the horizontals to the uprights; with some clingfilm underneath, one is sure not to inadvertently glue the whole thingummy to the bench …

                                                    mbbygg27.jpg

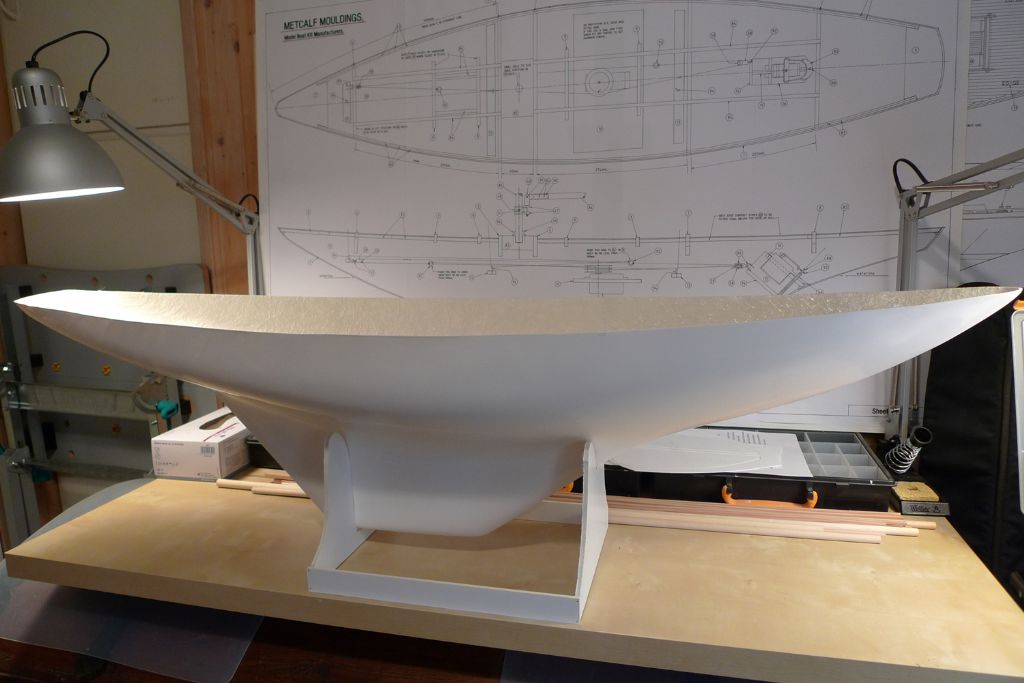
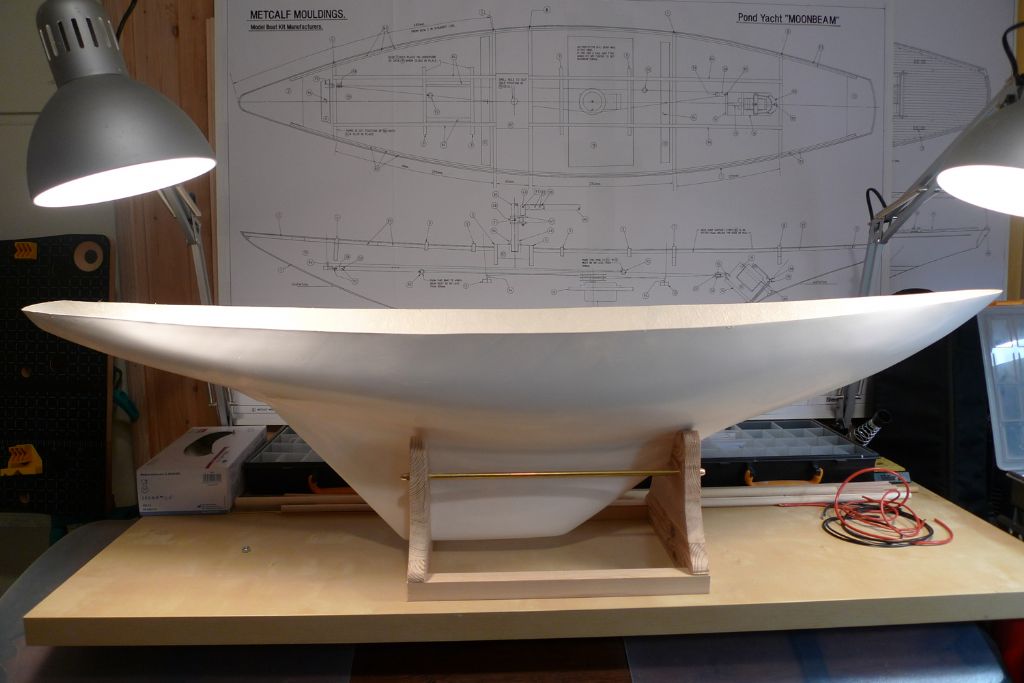
                                                    … after which the stand was given a final check for shape …

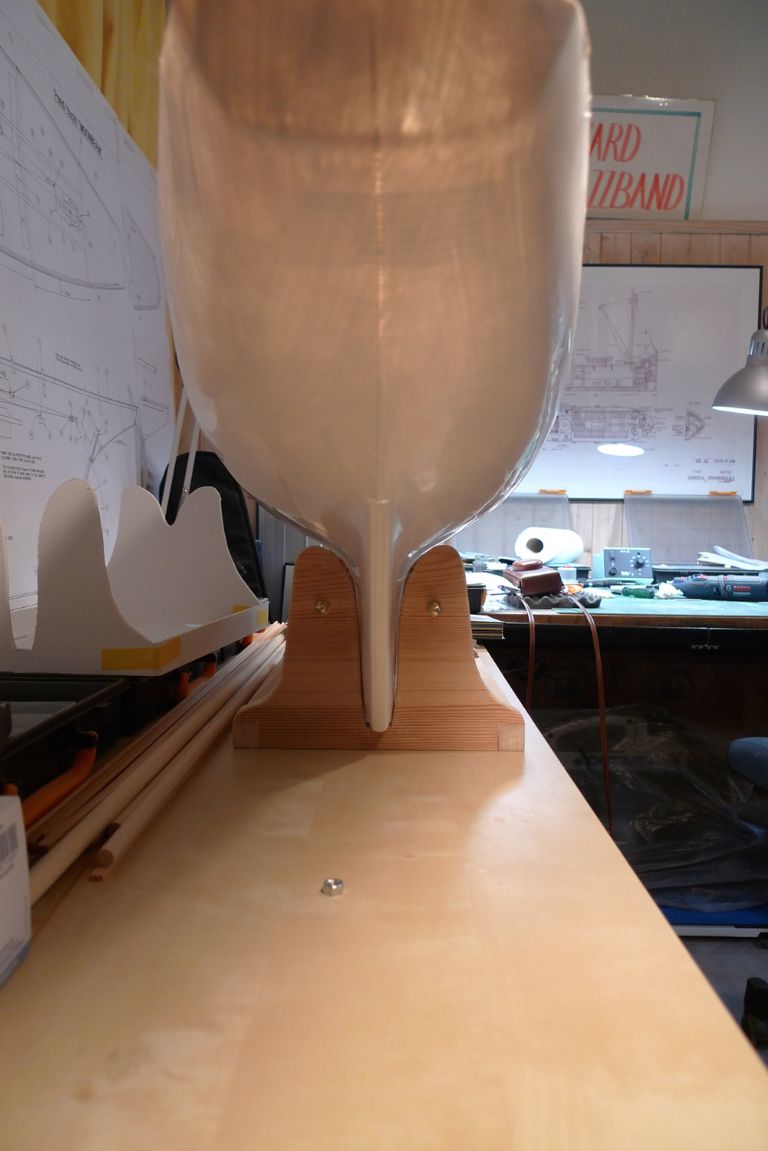
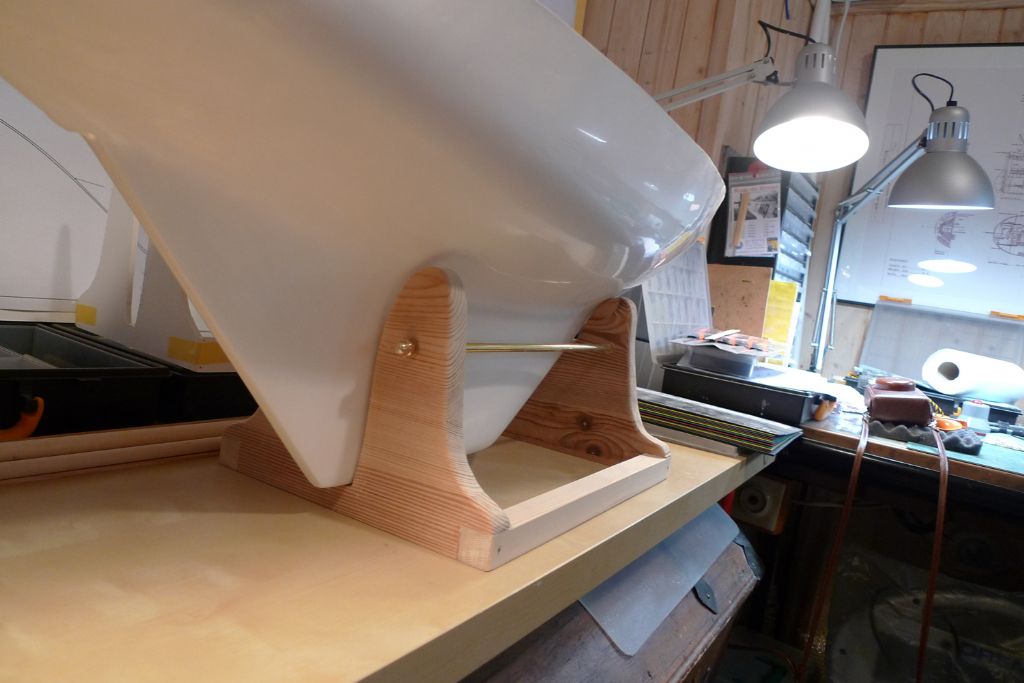
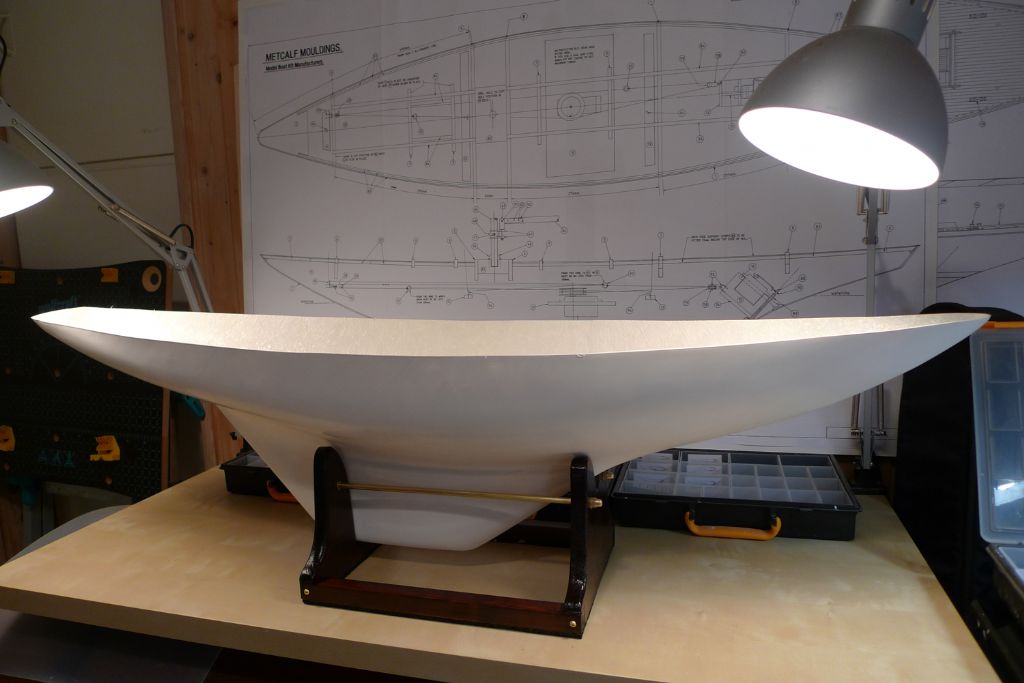
                                                    mbbygg28.jpg

                                                    … against the hull …

                                                    mbbygg29.jpg

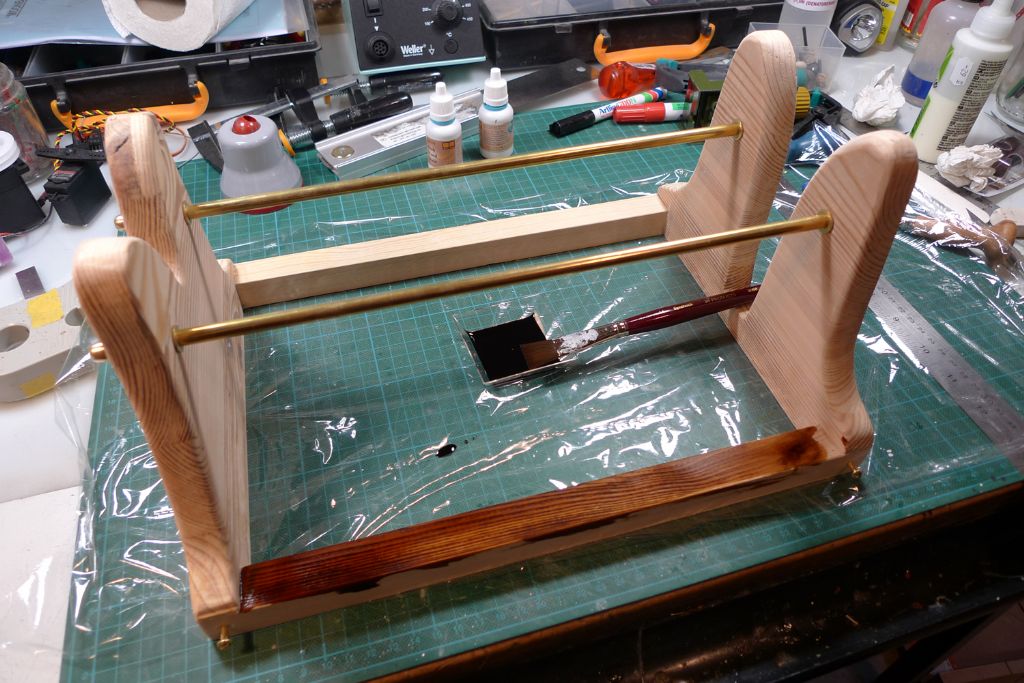
                                                    … and then given a first coating of dark oak stain.

                                                    mbbygg30.jpg

                                                    They may be less economical than mix-your-own, but I really like working with the Caldercraft Admiralty range of stains – they go a very long way indeed! For two generous coats of stain, I used about a bottle and a half, i.e. +/- 25 millilitres of stain! Here the stand is after the first coat …

                                                    mbbygg31.jpg

                                                    … and here after the second had dried properly; I then carefully cleaned and polished the brass parts …

                                                    mbbygg32.jpg

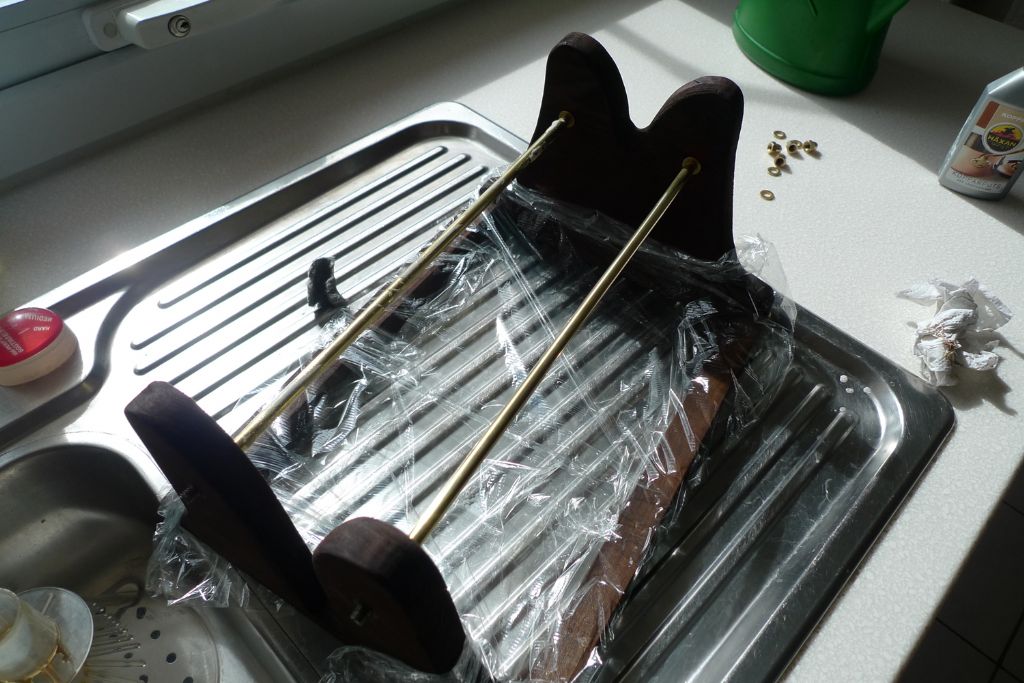
                                                    … and proceeded to apply the first of many coats of clear varnish.

                                                    mbbygg33.jpg

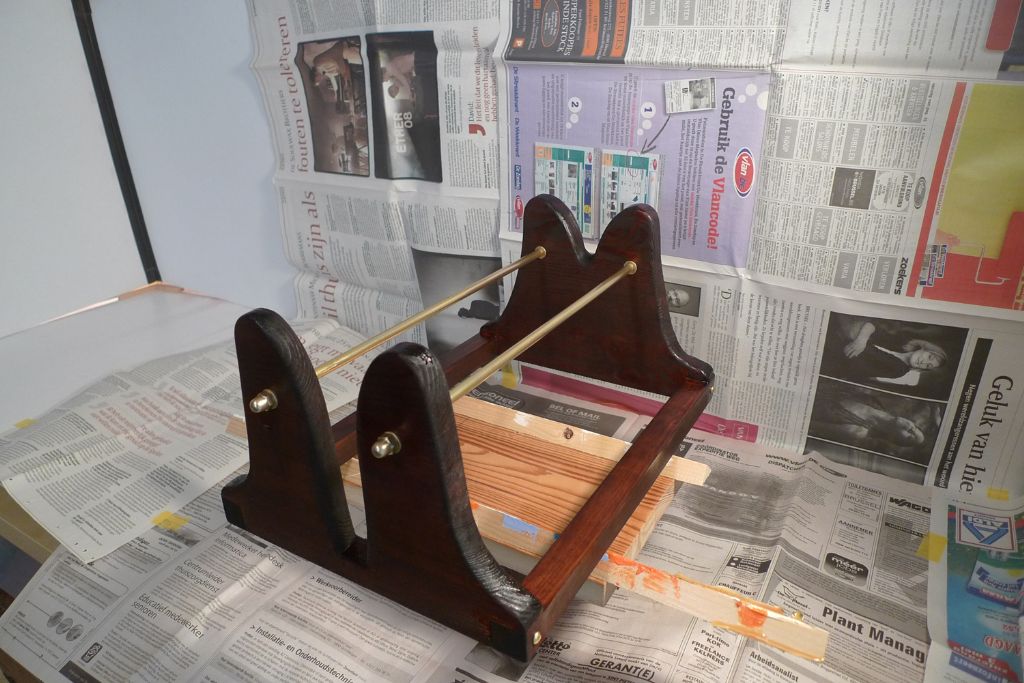
                                                    After the first eight coats, each one rubbed down slightly with a 4000 grit cushion, initial saturation was more or less achieved. This will now be left to dry completely, after which will follow maybe some 20 or 30 further coats; it remians to be seen how many are needed to get a nice high gloss. The disdvantage of doing this with the airbrush is of course that the build-up is very slow, as each coat is very thin indeed, however, this is also the main advantage, as it allows for a very measured application of varnish.

                                                    I*ve also decided to varnish the brass, to give a protection against finger prints and oxidation.

                                                    mbbygg34.jpg

                                                    To be continued …

                                                    /Mattias

                                                    Edited By Banjoman on 27/03/2016 15:41:51

                                                    Edited By Banjoman on 27/03/2016 15:43:26

                                                    #64204
                                                    Banjoman
                                                    Participant
                                                      @banjoman

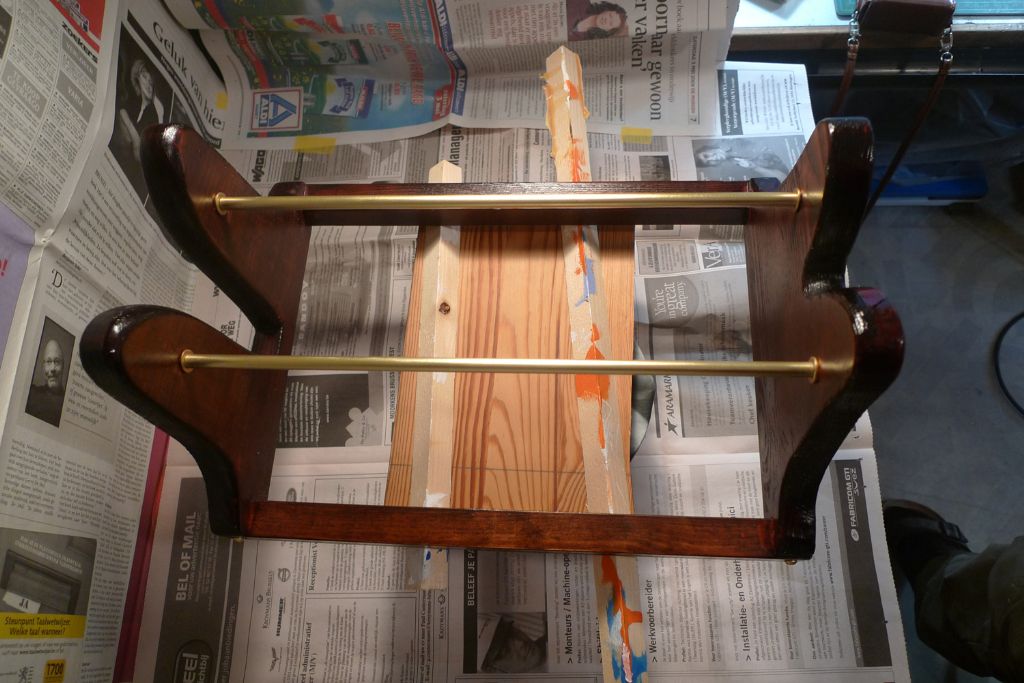
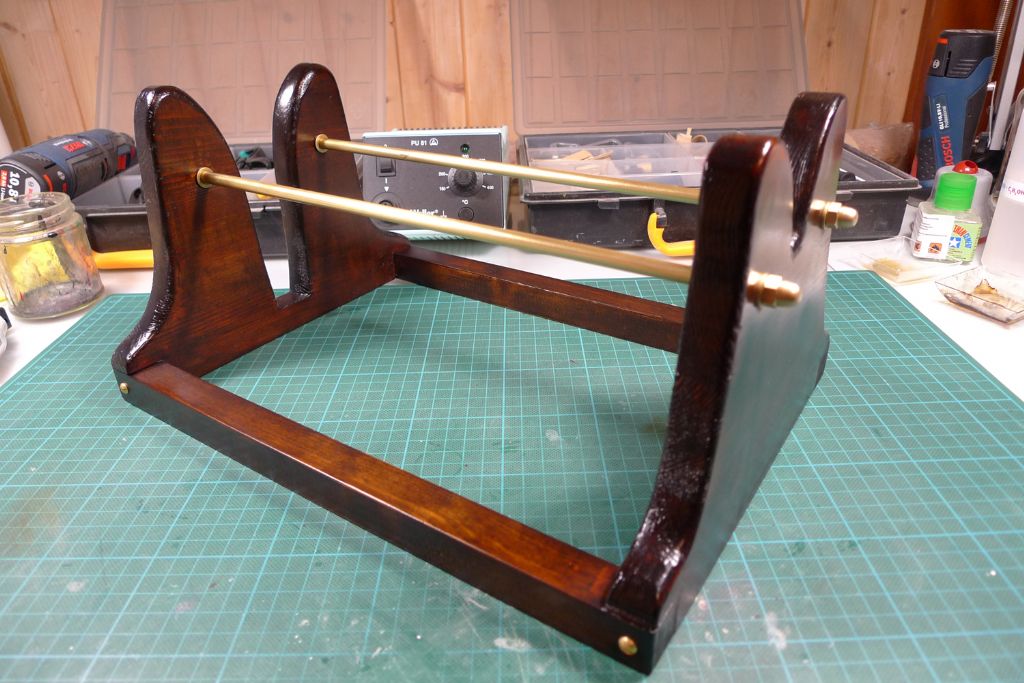
                                                      Well, 16 coats …

                                                      mbbygg35.jpg

                                                      … of varnish later, the stand could, I think, still use a few more; however, at this point the 60 ml bottle of clear varnish I'd been using was empty …

                                                      mbbygg36.jpg

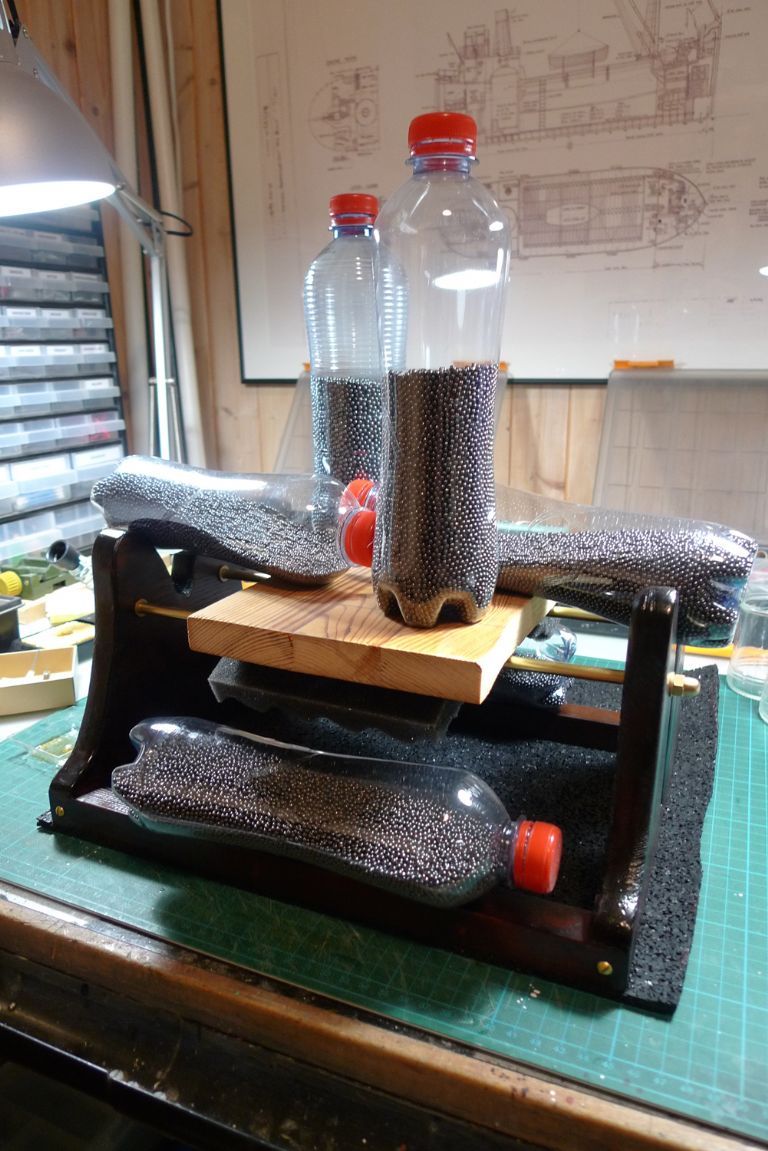
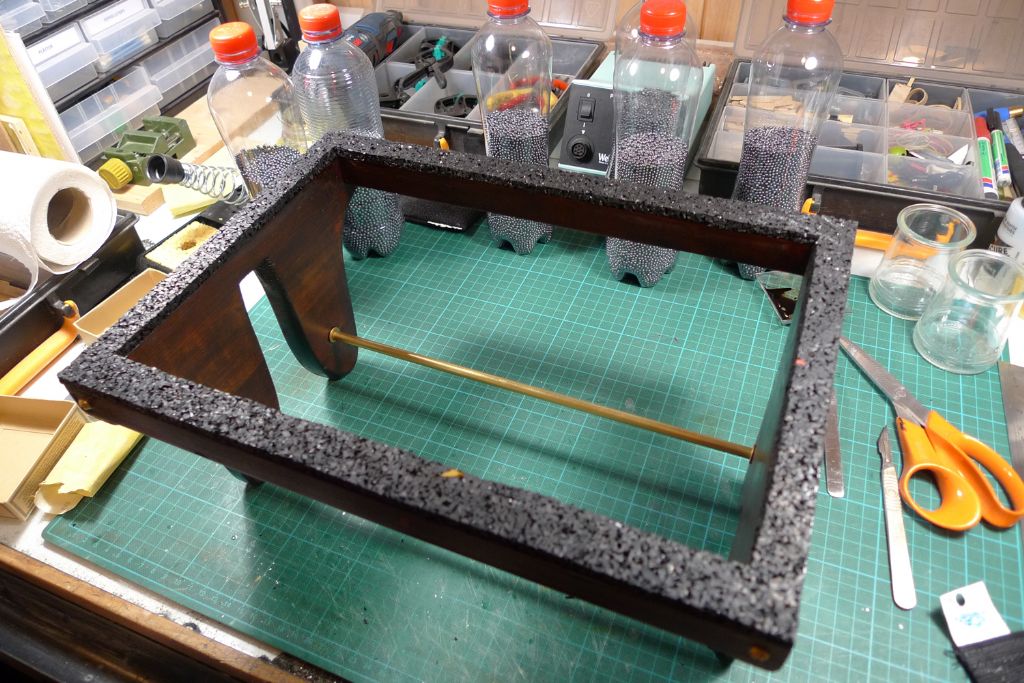
                                                      … so, while waiting for some more to arrive, I glued the stand to a rubber matting cut-off…

                                                      mbbygg37.jpg

                                                      … thus giving it a rubber sole, both as an anti-slip measure and to protect the underside of the wood, should it happen to come to stand in a small puddle of run-off water after sailing.

                                                      mbbygg38.jpg

                                                      Once the varnish has been completely finished (probably this weekend), I'll add some strips of felt where the hull rests in the stand; otherwise it is now pretty much finieshed, and I'm very uch looking forward to finally tackling the build proper.

                                                      mbbygg39.jpg

                                                      To be contiued …

                                                      /Mattias

                                                      Edited By Banjoman on 30/03/2016 07:18:44

                                                      Edited By Banjoman on 30/03/2016 07:19:07

                                                      Edited By Banjoman on 30/03/2016 07:19:59

                                                    Viewing 25 posts - 1 through 25 (of 440 total)
                                                    • Please log in to reply to this topic. Registering is free and easy using the links on the menu at the top of this page.

                                                    Code of conduct | Forum Help/FAQs

                                                    Advert

                                                    Latest Replies

                                                    Home Forums Sailing Models Topics

                                                    Viewing 25 topics - 1 through 25 (of 25 total)
                                                    Viewing 25 topics - 1 through 25 (of 25 total)

                                                    View full reply list.

                                                    Advert