Moonbeam

Advert

Moonbeam

Home Forums Sailing Models Moonbeam

  • This topic is empty.
Viewing 25 posts - 401 through 425 (of 440 total)
  • Author
    Posts
  • #74827
    Banjoman
    Participant
      @banjoman

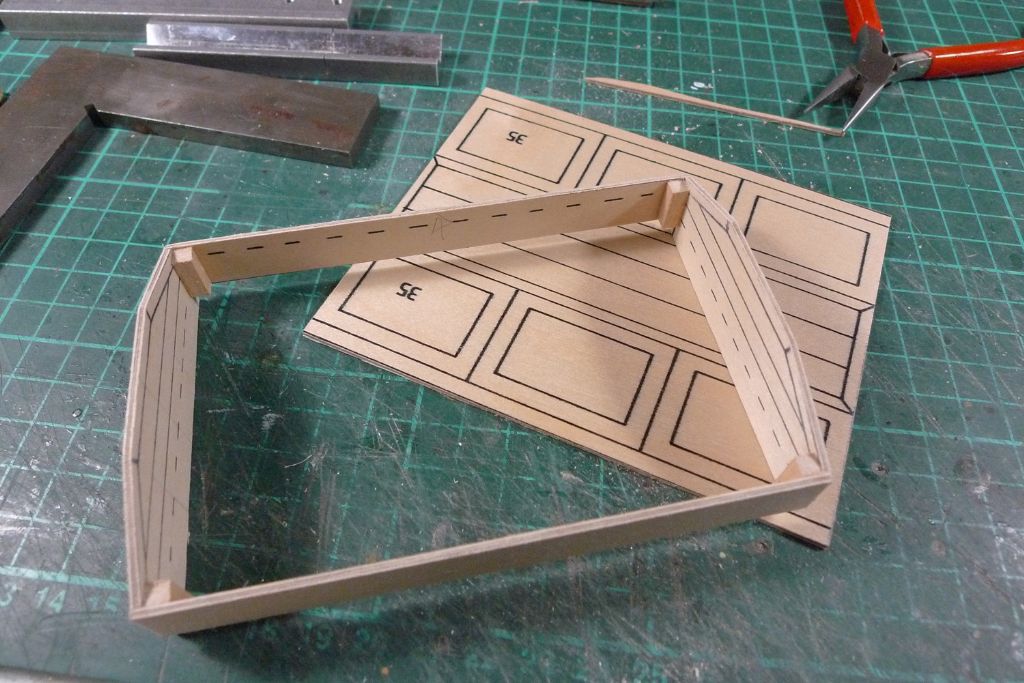
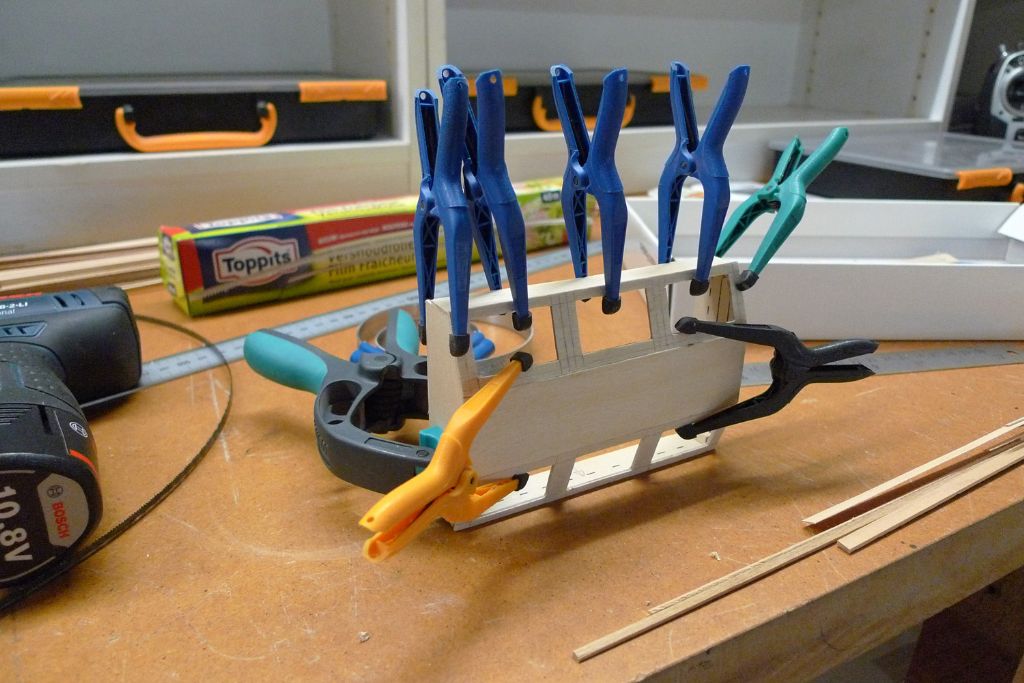
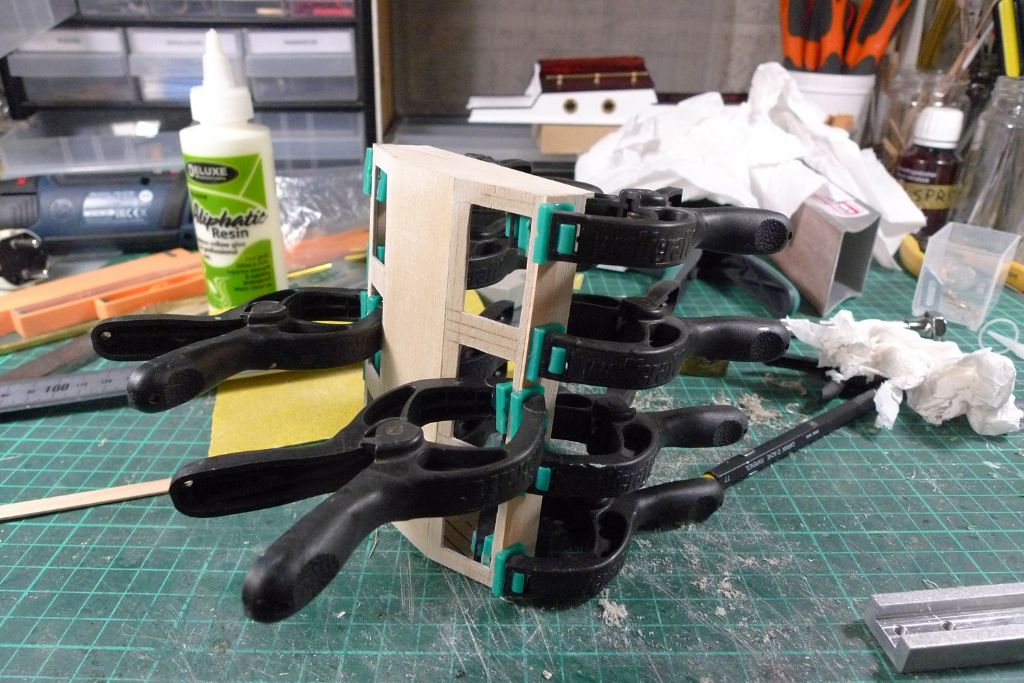
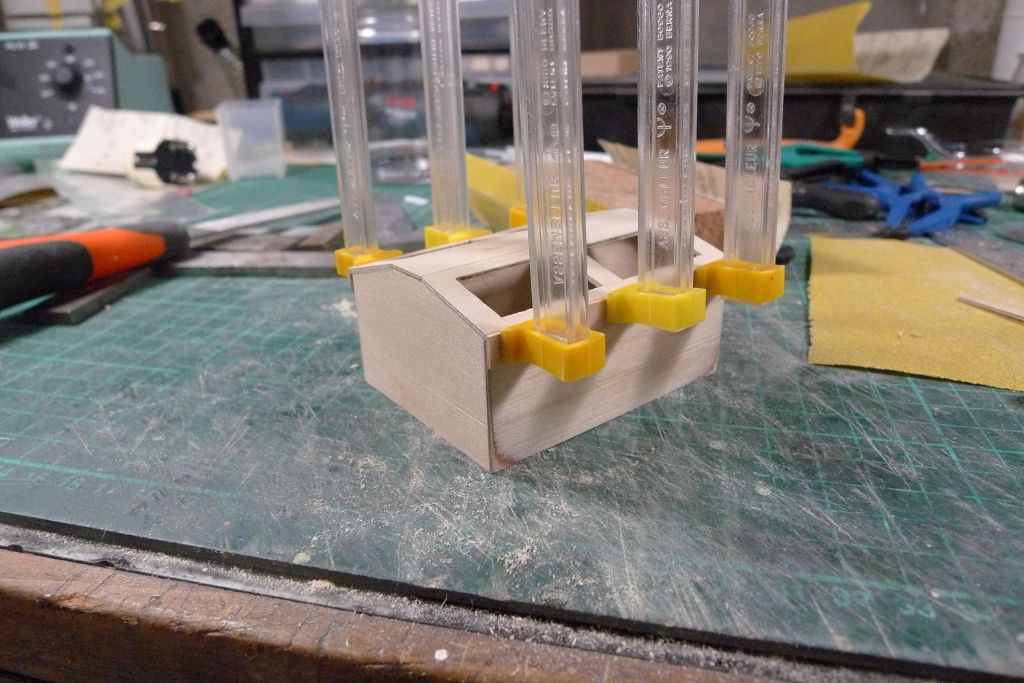
      With the sides glued together, it was time to add the roof to the skylight …

      mbbygg1115.jpg

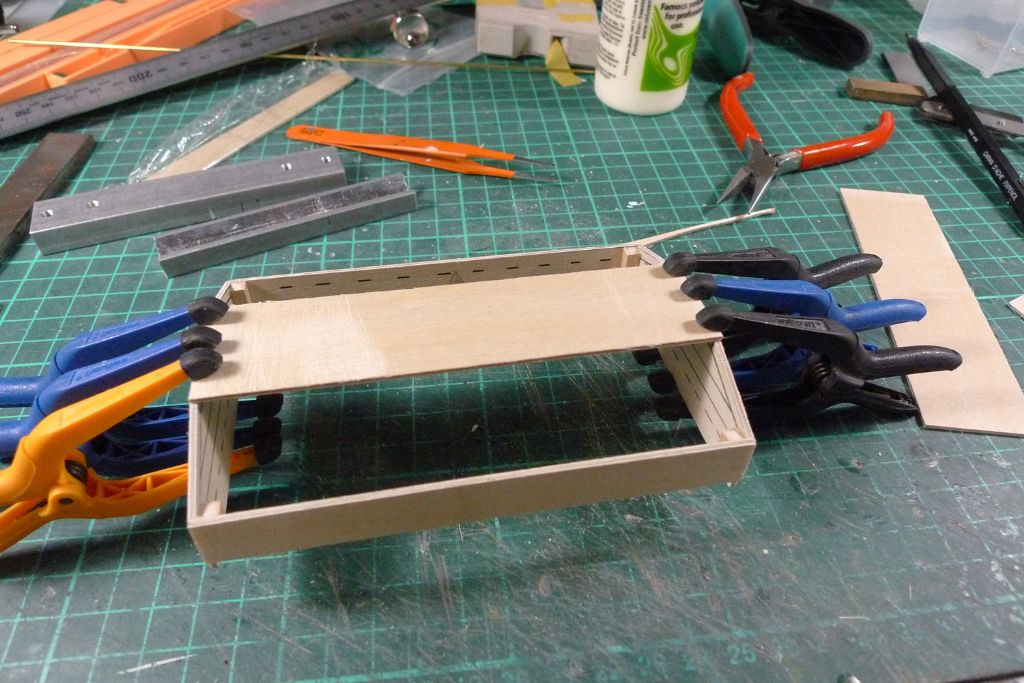
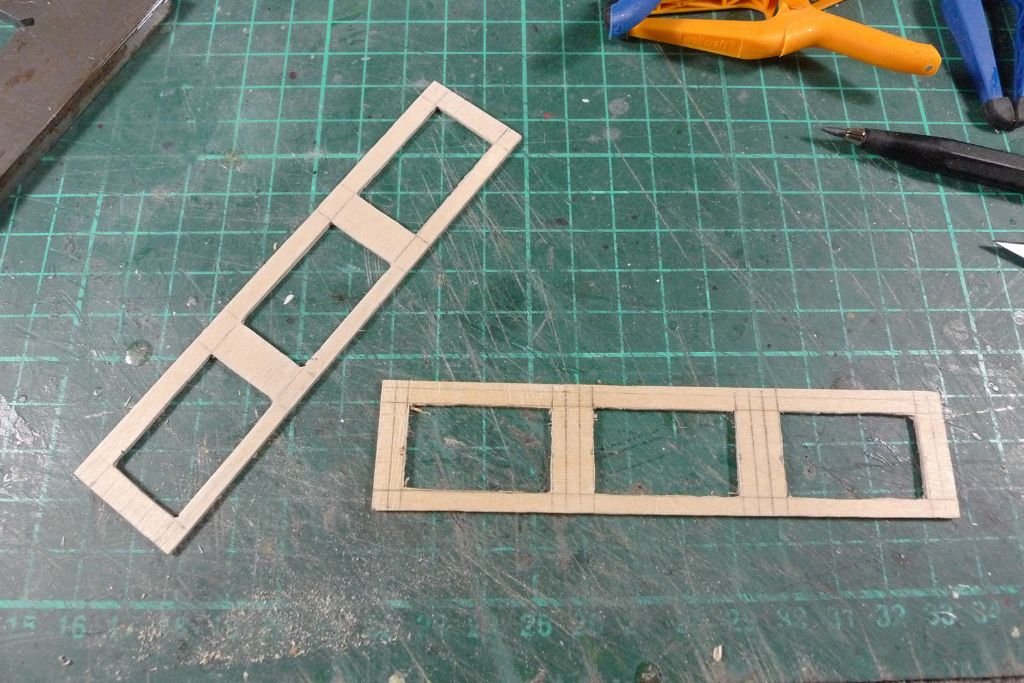
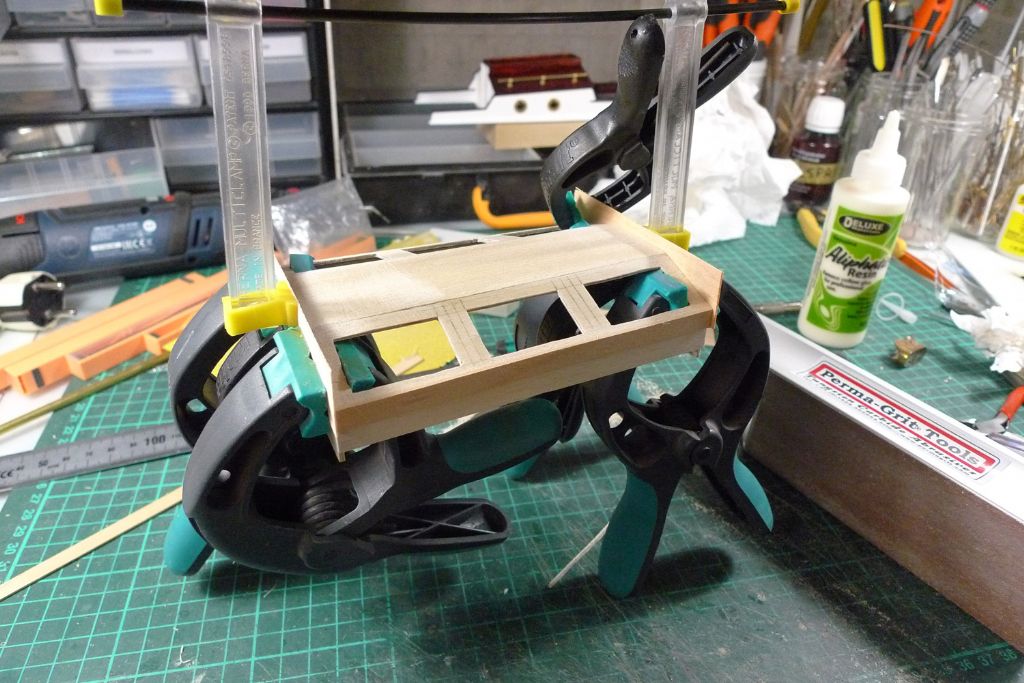
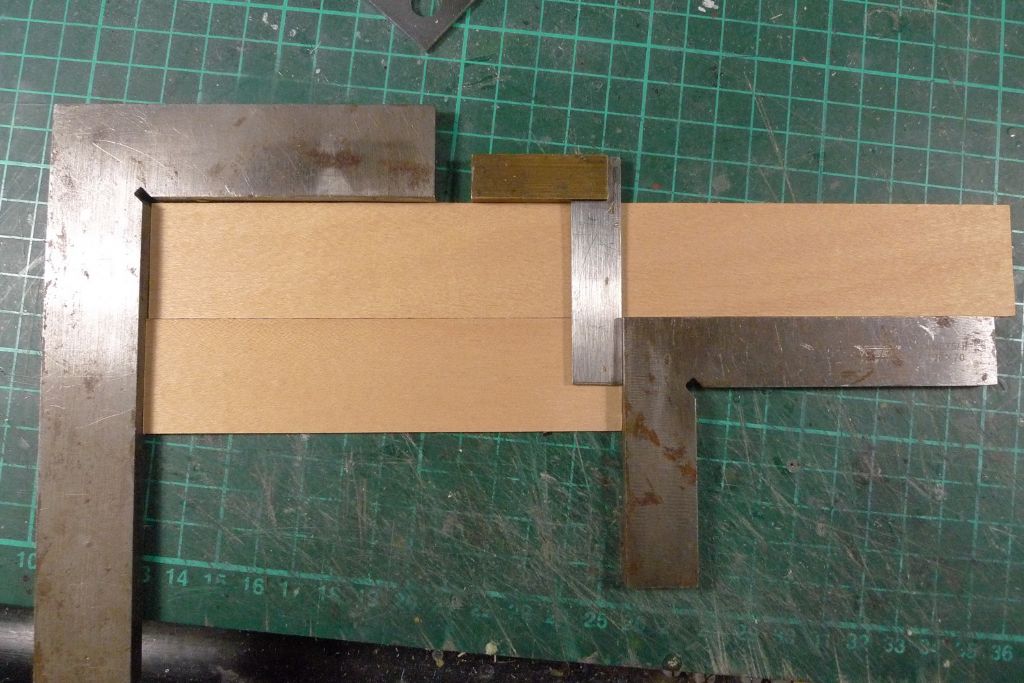
      … so the corresponding plywood parts were cut apart on the bandsaw, and the top glued on …

      mbbygg1116.jpg

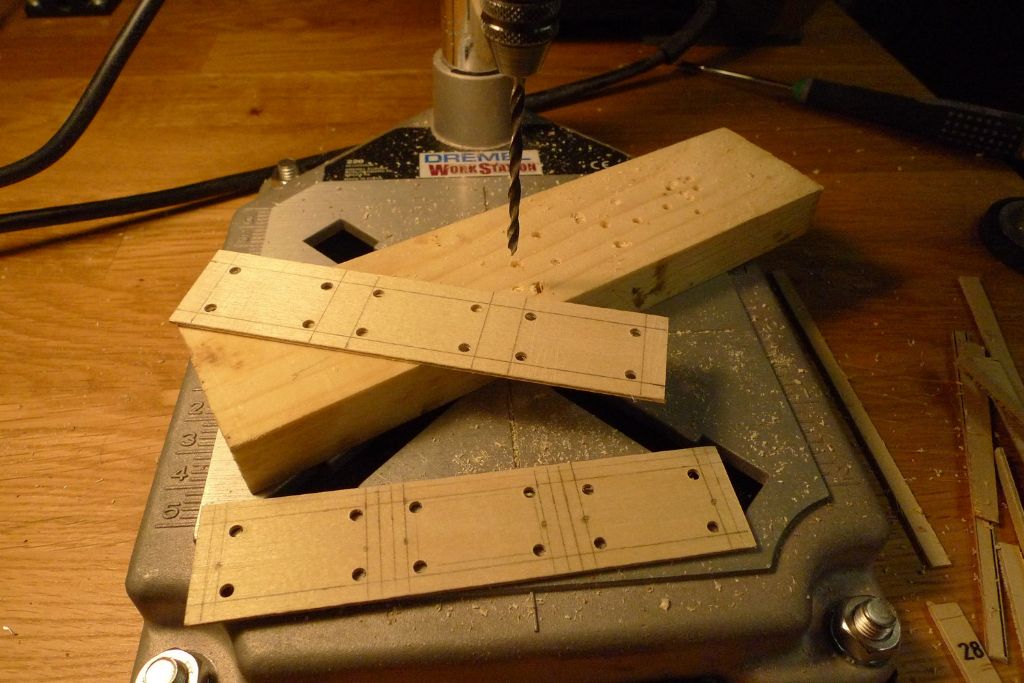
      … after which the sloping panels were measured for their openings and drilled …

      mbbygg1117.jpg

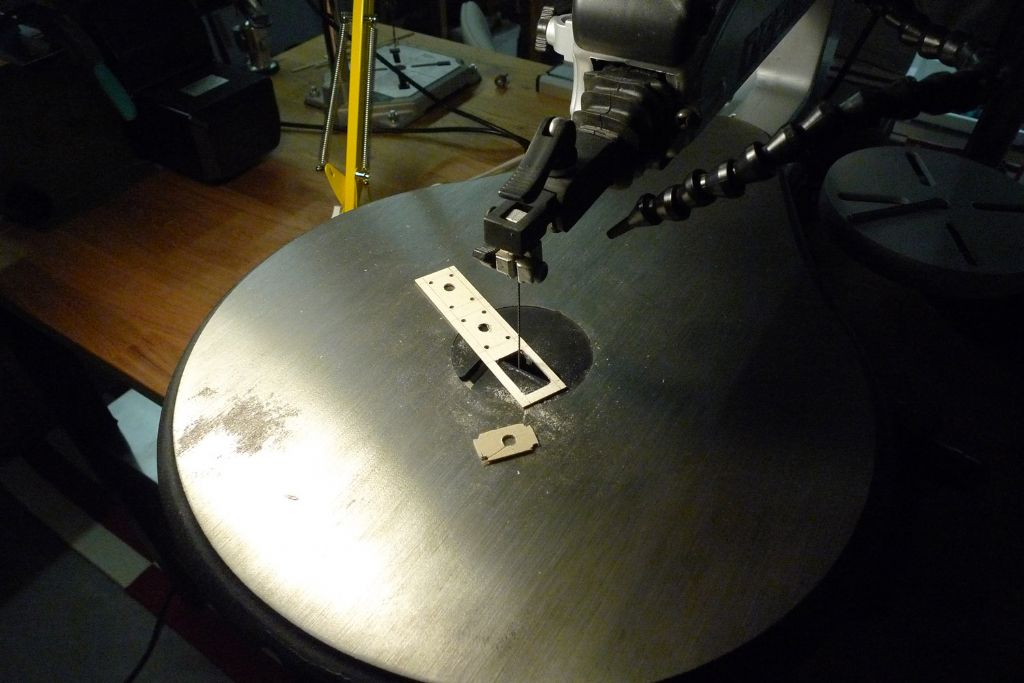
      … so that the jigsaw could be used …

      mbbygg1118.jpg

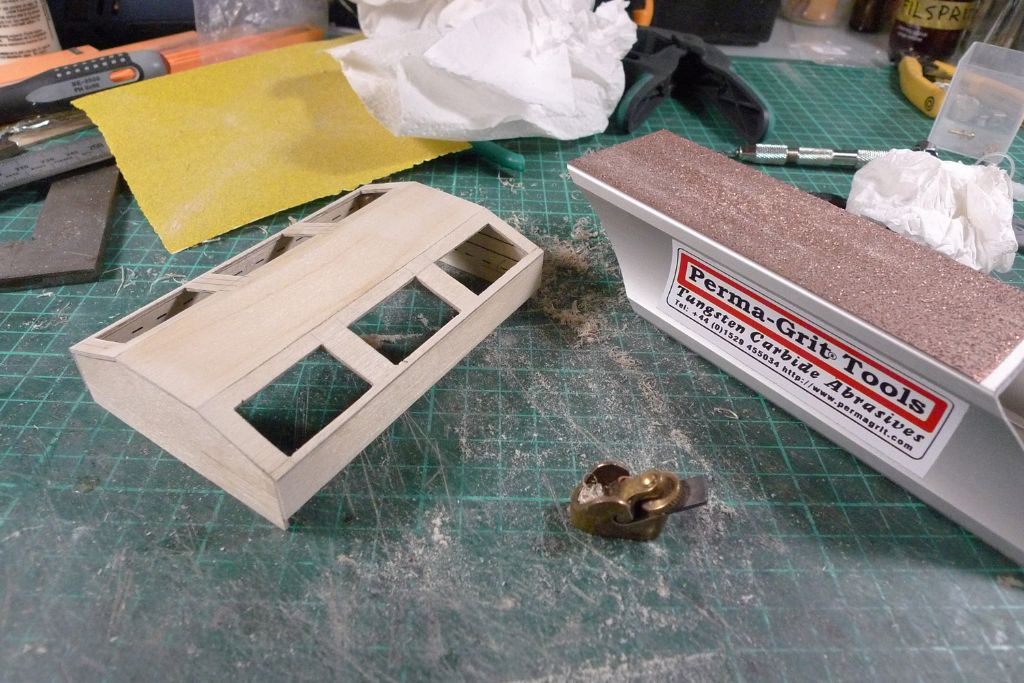
      … for the rough cut-out work. The openings were then filed reasonably (they won't really be visible) neat …

      mbbygg1119.jpg

      … and the remainder of the roof glued on.

      mbbygg1124.jpg

      To be continued …

      Mattias

      Edited By Banjoman on 04/01/2018 08:20:20

      Edited By Banjoman on 04/01/2018 08:20:36

      Advert
      #74851
      Banjoman
      Participant
        @banjoman

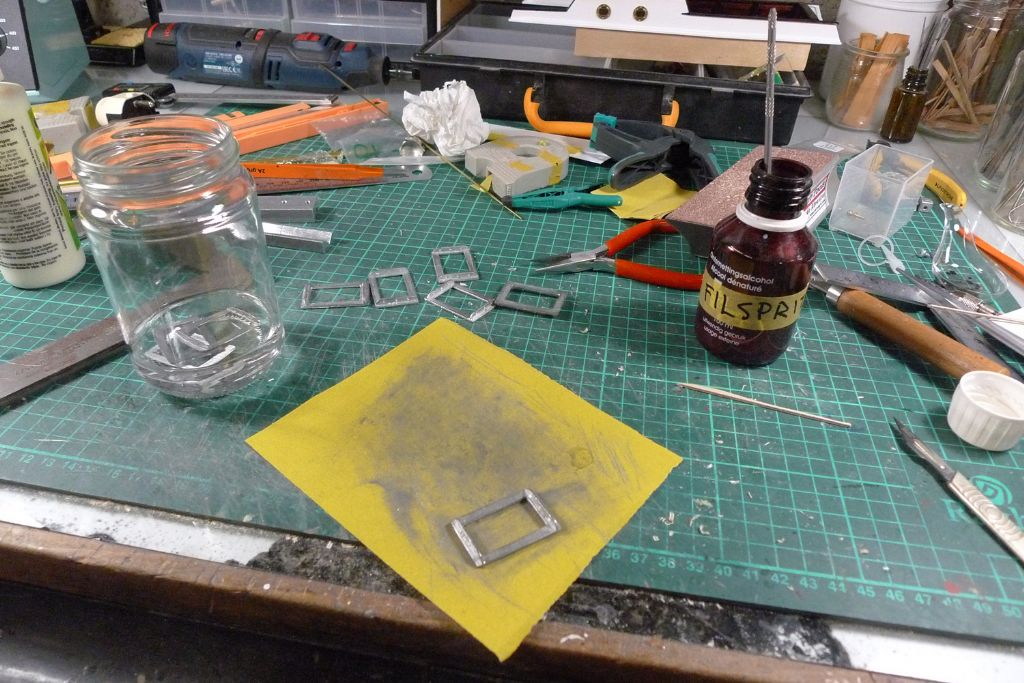
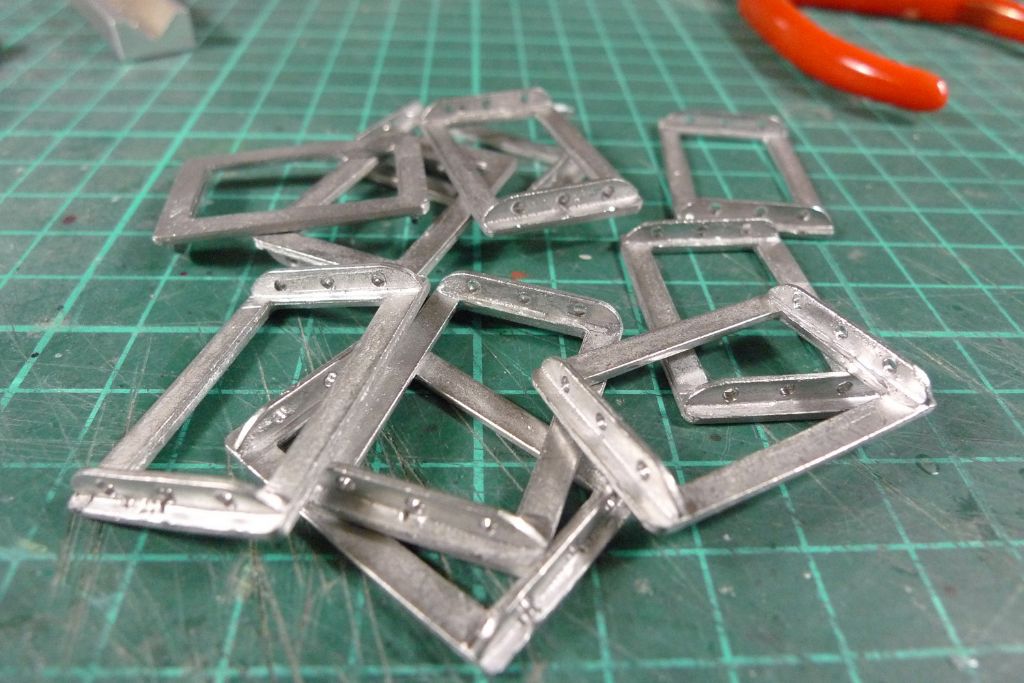
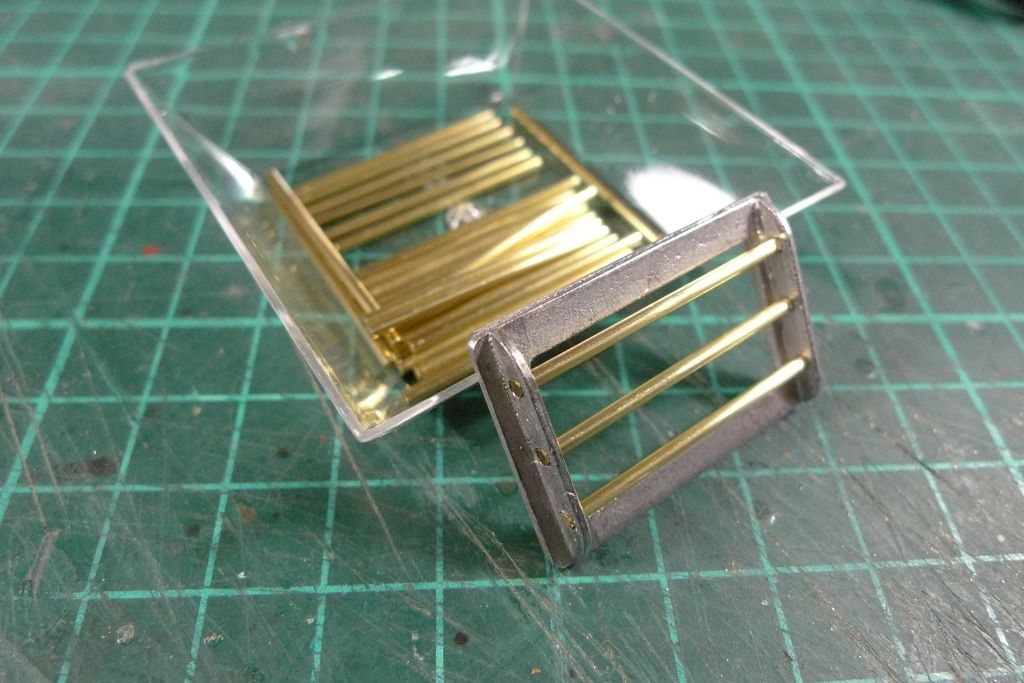
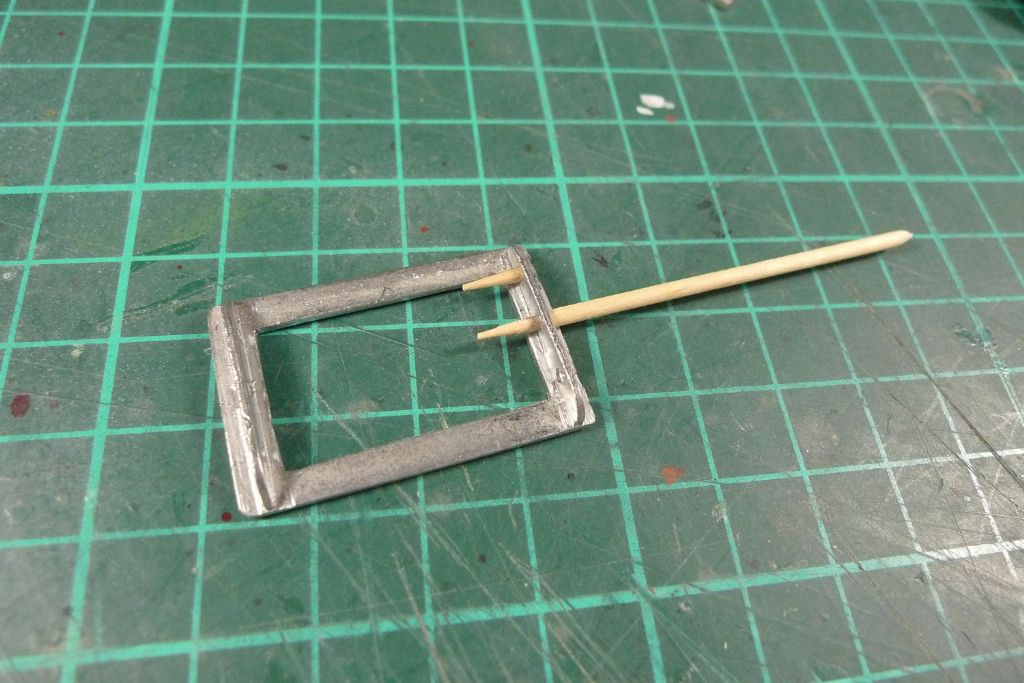
        In between glueing together the skylight structure, I also got on with fettling the white metal skylight frames, cleaning and degreasing them in methylated spirits …

        mbbygg1120.jpg

        … drilled out their holes …

        mbbygg1121.jpg

        … and cut off …

        mbbygg1122.jpg

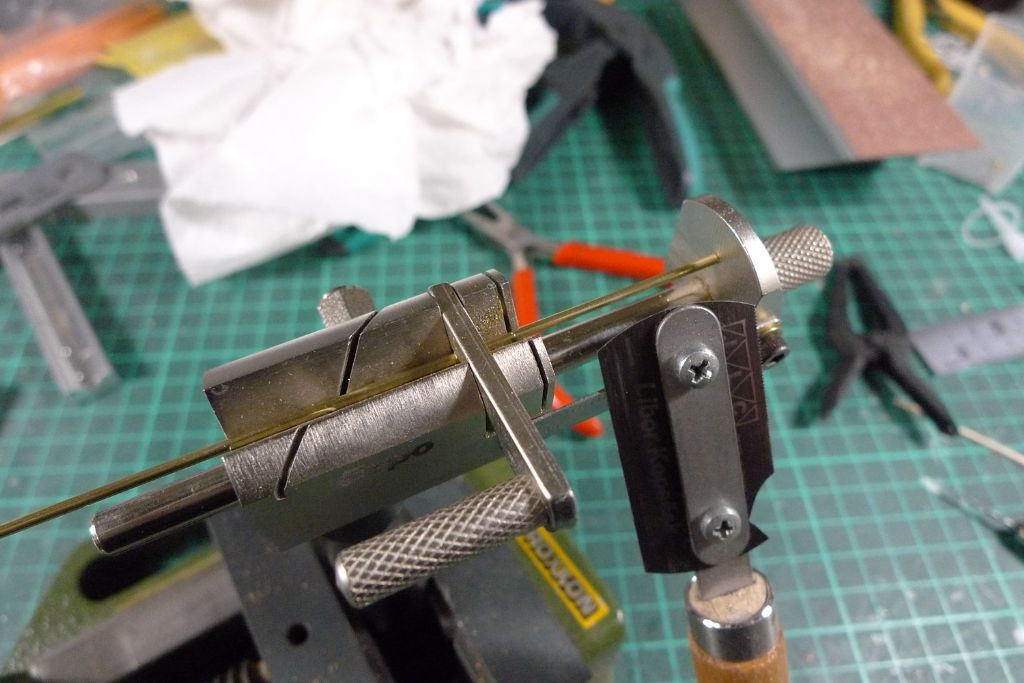
        … a total of 30 short (31 mm) lengths of 1.5 mm brass rod to make up the protective bars.

        mbbygg1123.jpg

        To be continued …

        Mattias

        #74852
        Ray Wood 3
        Participant
          @raywood3

          Hi Mattias

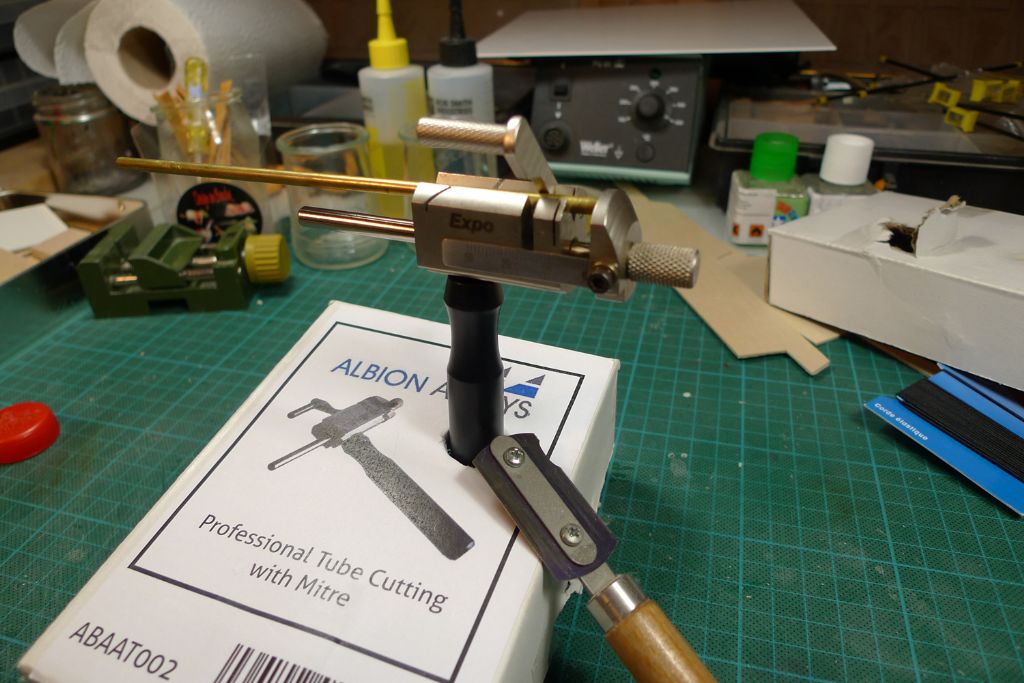
          You may not have a milling machine yet but wow I like your cutting to length jig, I will be making one of those soon.

          Regards Ray

          #74892
          Banjoman
          Participant
            @banjoman

            Ray,

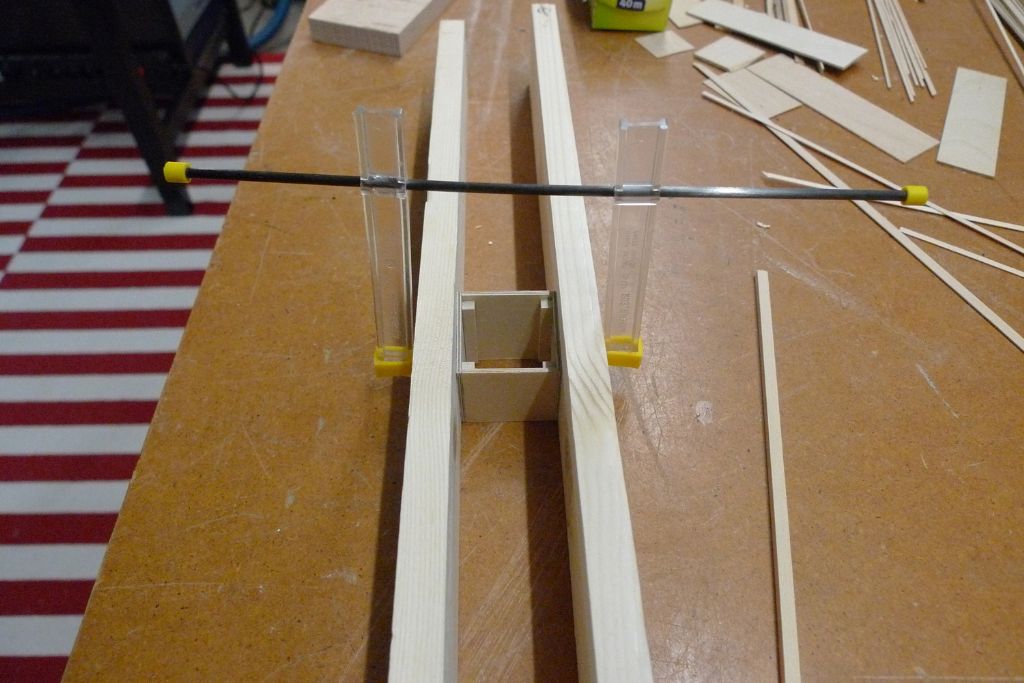
            The jig in question is of course store-bought; according to the box it came in, it is from Albion Alloys (ref. ABAAT002), although I cannot find it mentioned on their website.

            In any case, yes, it is a very handy jig for cutting round materials (tube and rod alike) to length. Although it can be managed hand-held, I usually secure the handle in a machine vise, as this gives greater stability. Not least the pivoting lever for holding the material still while cutting is very useful indeed …

            verktyg93.jpg

            Anyway, back to Moonbeam!

            With the basic skylight structure glued together, any excess material was planed and sanded off …

            mbbygg1125.jpg

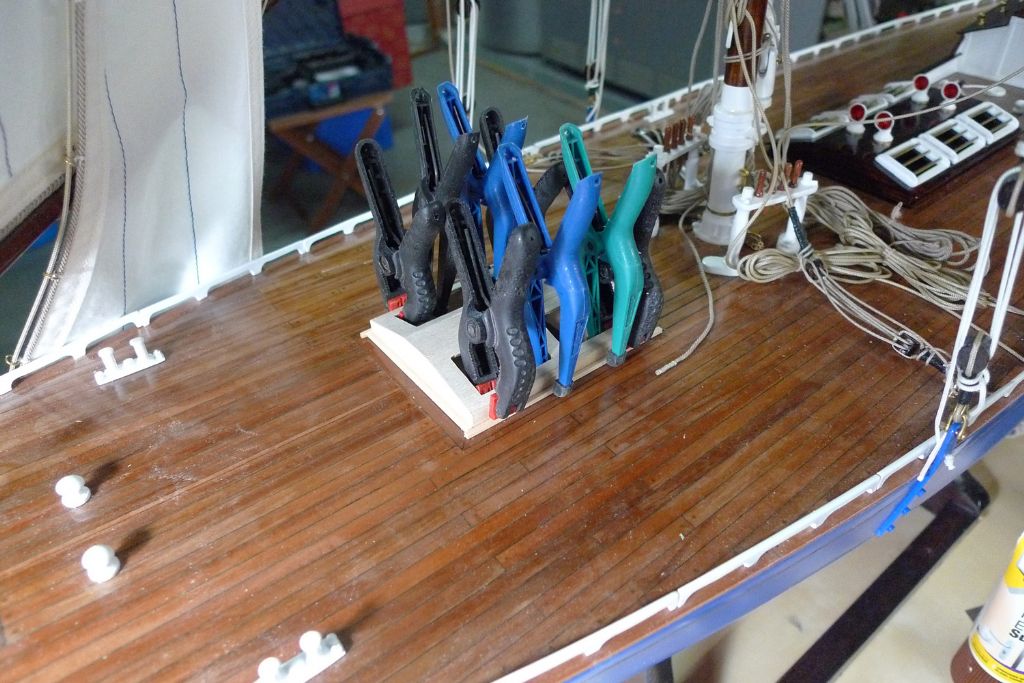
            … and the first bit of external cladding added in the form of two lengths of 7 mm wide maple strip glued to the sides.

            mbbygg1126.jpg

            I did not bother to make these pieces follow the sheer, for reasons that will become clear below …

            mbbygg1127.jpg

            … nor did I make the end claddings follow the camber.

            mbbygg1128.jpg

            Sheer and camber was, however, followed by the 2×2 mm strips added next.

            mbbygg1129.jpg

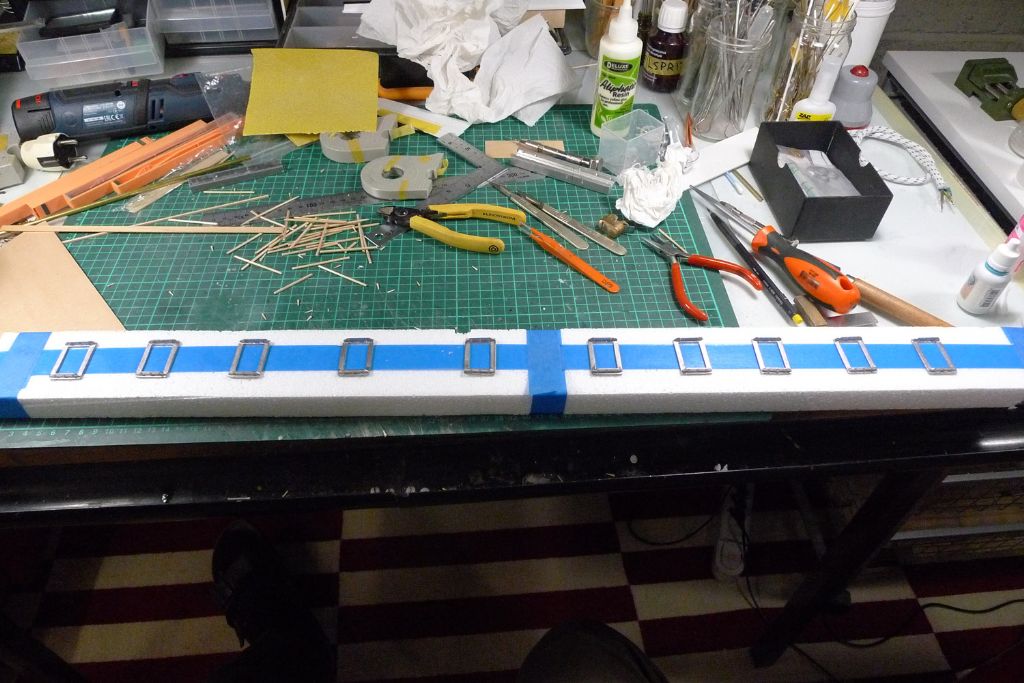
            While waiting for various glue joints to go off, I prepared the skylight frames for painting by inserting cut-off toothpicks in all the drilled holes …

            mbbygg1130.jpg

            … to mask them off, after which the frames where mounted for painting …

            mbbygg1131.jpg

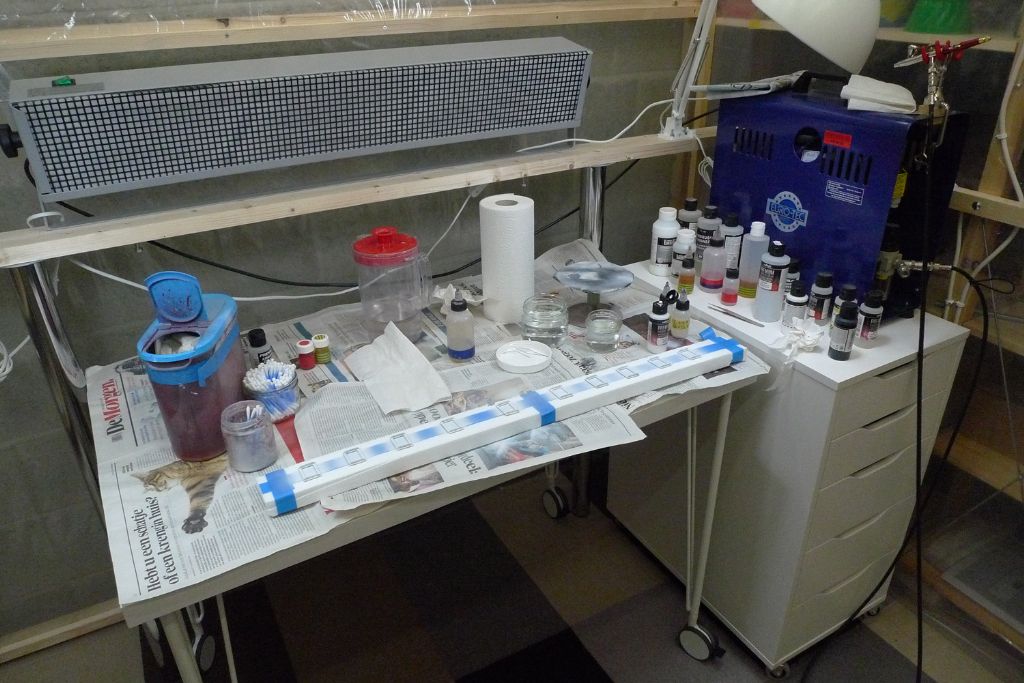
            … and taken to the paint booth to be painted.

            mbbygg1132.jpg

            Another inbetween job taken in hand at this point was beginning to make up the (non-sliding) sliding hatch for the cabin companionway.

            mbbygg1133.jpg

            To be continued …

            Mattias

            #74893
            Tim Cooper
            Participant
              @timcooper90034

              The cutting jigs seem to be available on EBAY for £17.85.

              Tim

              #74895
              Banjoman
              Participant
                @banjoman

                Tim,

                They do indeed, and although I, as already mentioned, got mine in a box marked Albion Alloys, the jig itself is branded Expo, and does seem to come from Expo Tools (their reference number is 71540): **LINK**

                Mattias

                #74901
                Banjoman
                Participant
                  @banjoman

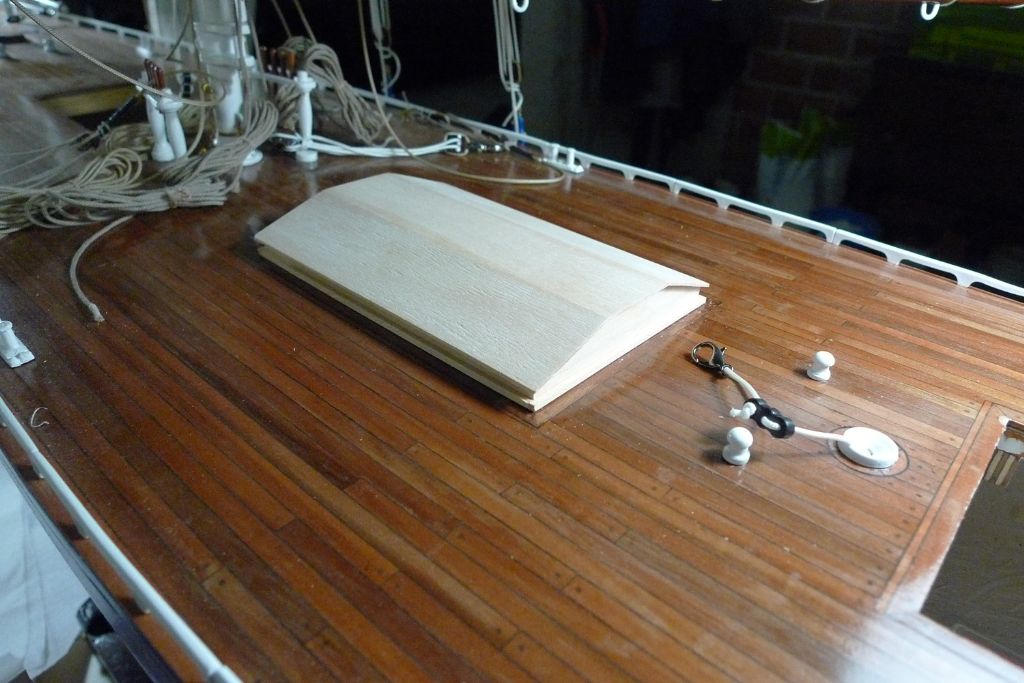
                  For final cladding of the roof, I used three pieces of 1 mm maple sheet, cut to precisely the same length …

                  mbbygg1134.jpg

                  … glued on and sanded down.

                  mbbygg1135.jpg

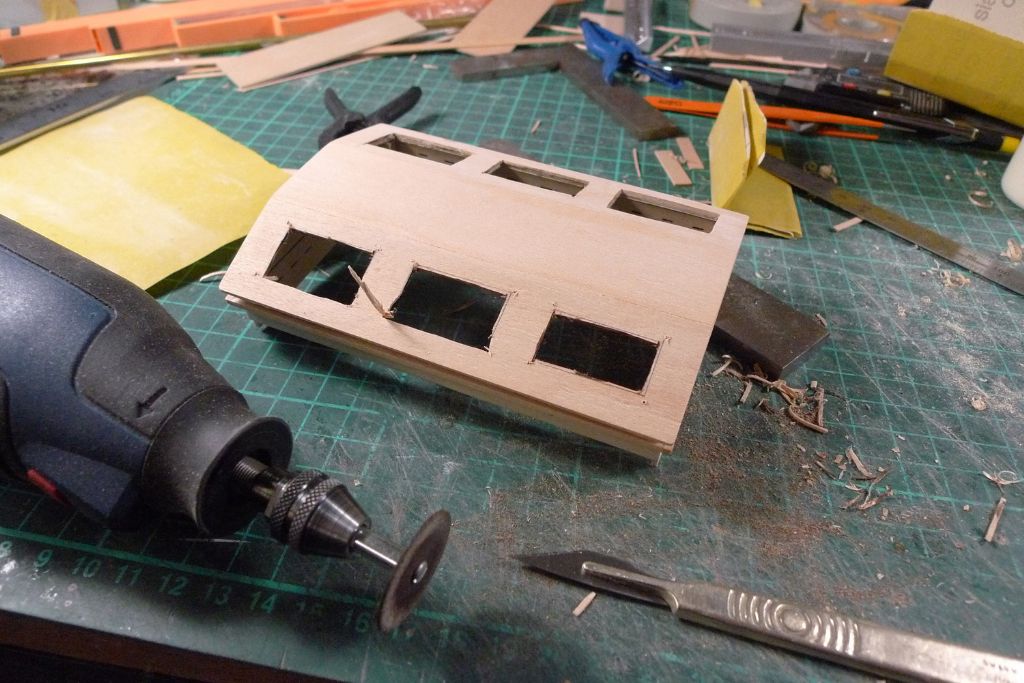
                  Next, the windows were roughly opened up with a cutting disc in the rotary tool …

                  mbbygg1136.jpg

                  … and then cleaned up with a scalpel back to the contours of the corresponding openings in the plywood base.

                  mbbygg1137.jpg

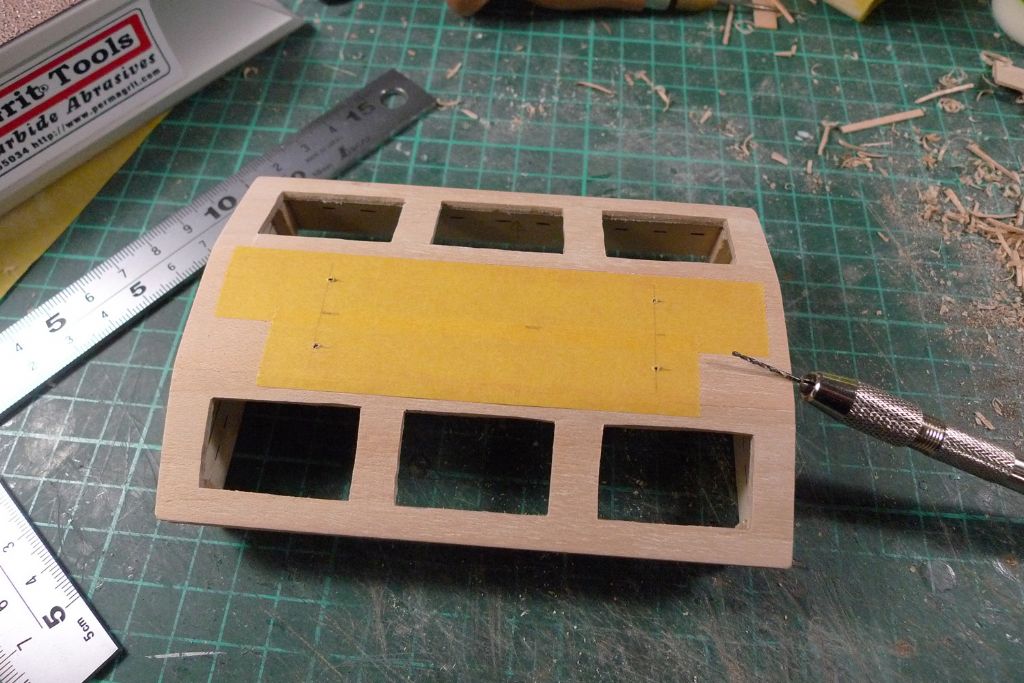
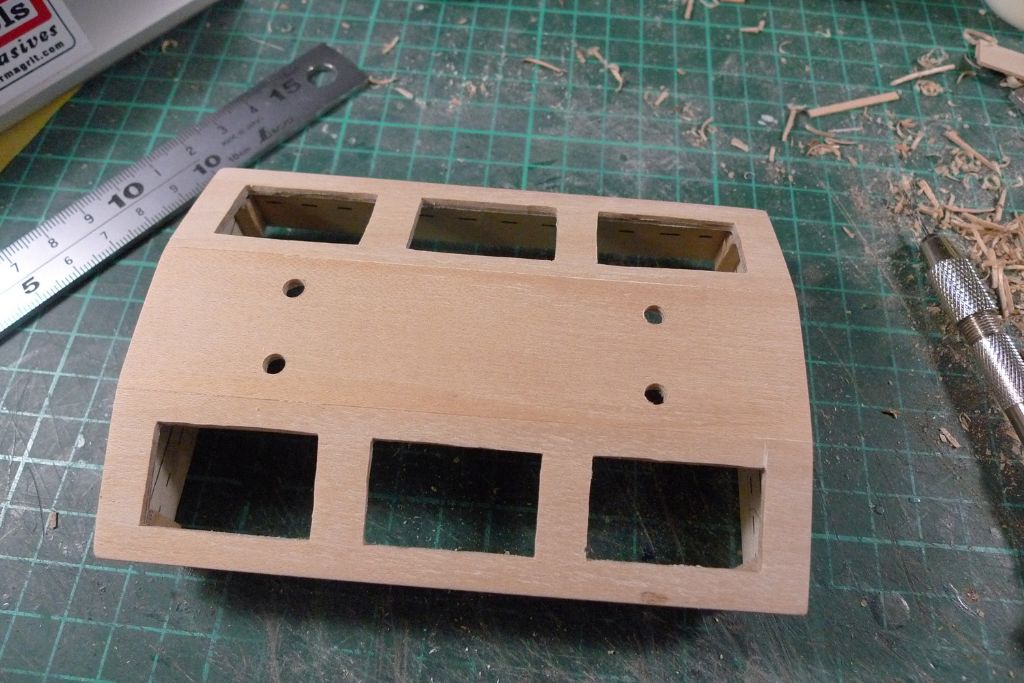
                  On the top of the roof, four points were pricked out, pre-drilled …

                  mbbygg1138.jpg

                  … and drilled …

                  mbbygg1139.jpg

                  … to take the ventilators …

                  mbbygg1140.jpg

                  … after which the skylight was stained mahogany (outside) and oak (inside).

                  mbbygg1141.jpg

                  In between these jobs, the companionway hatch had also been finished, varnished and glued on to the rails on top of the cabin roof.

                  mbbygg1142.jpg

                  To be continued …

                  Mattias

                  Edited By Banjoman on 09/01/2018 06:33:23

                  #74905
                  Banjoman
                  Participant
                    @banjoman

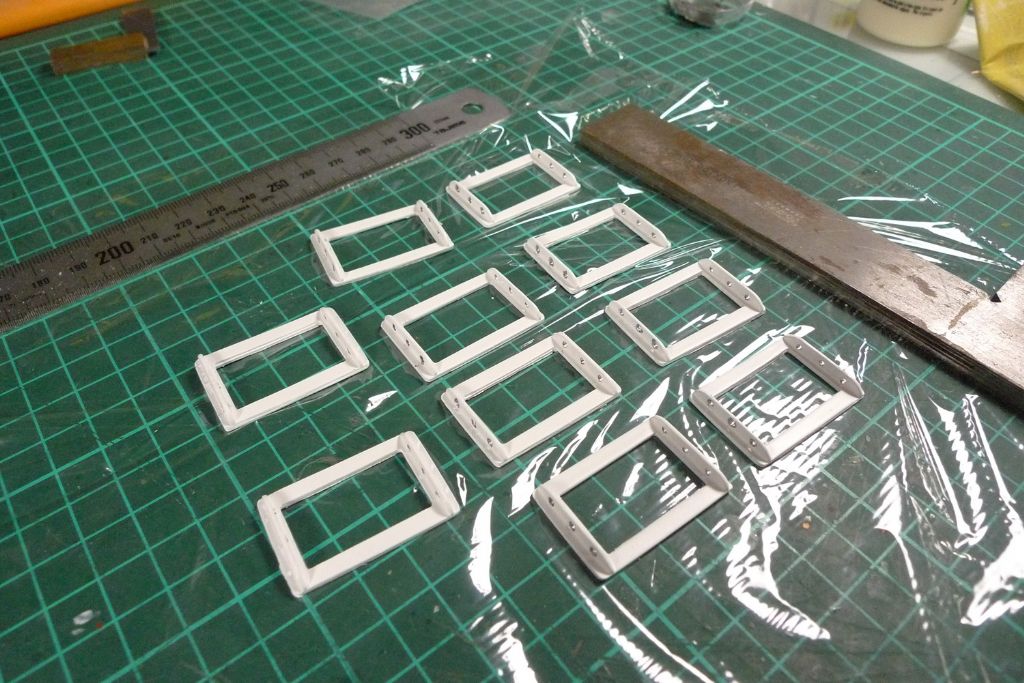
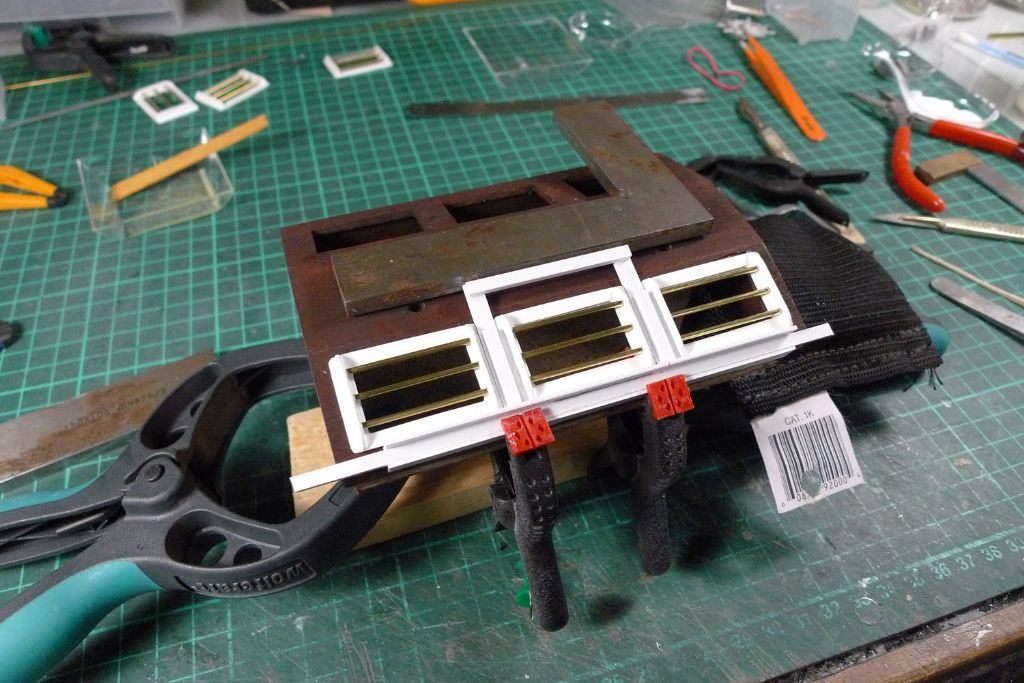
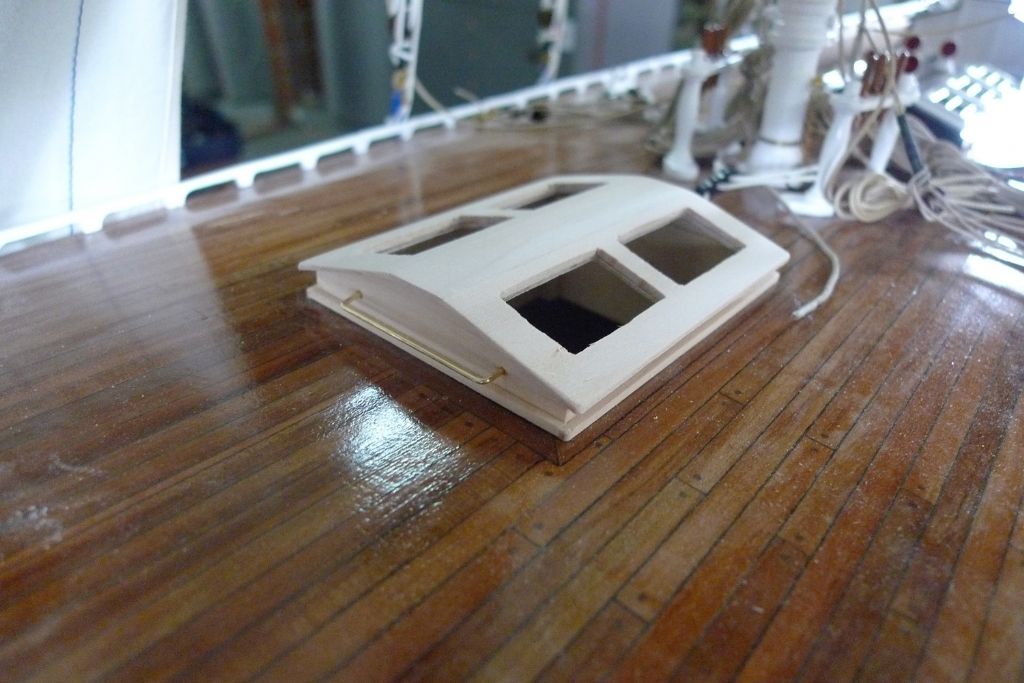
                    After the usual one coat of primer and four of topcoat, the window frames were all painted …

                    mbbygg1143.jpg

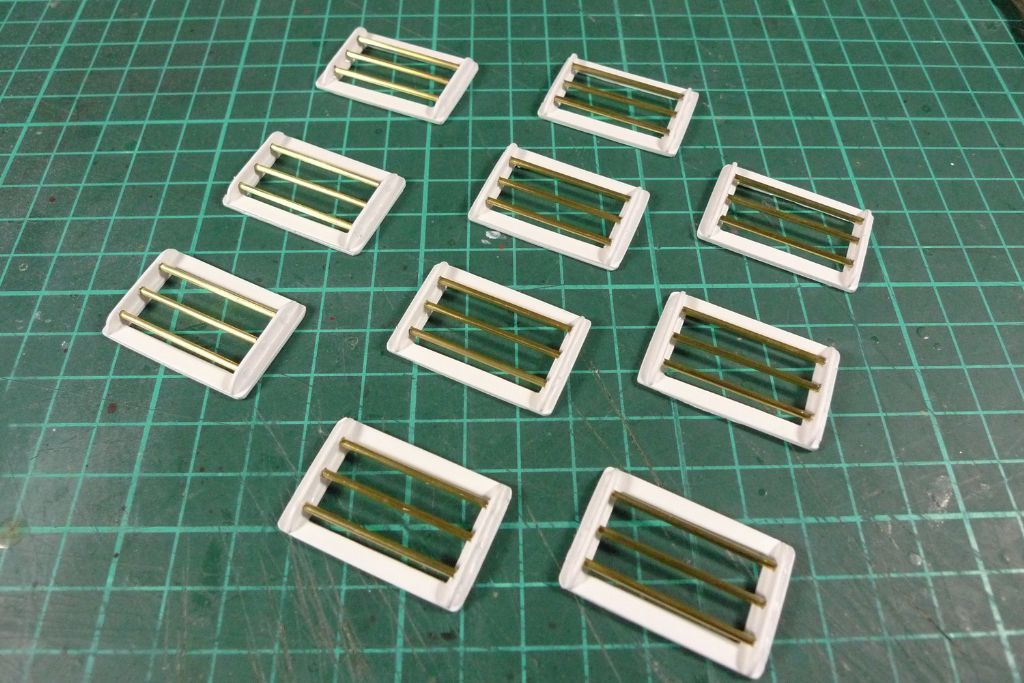
                    … after which the tooth pick stubs could be removed from the holes, and the transversal bars inserted and glued in place.

                    mbbygg1144.jpg

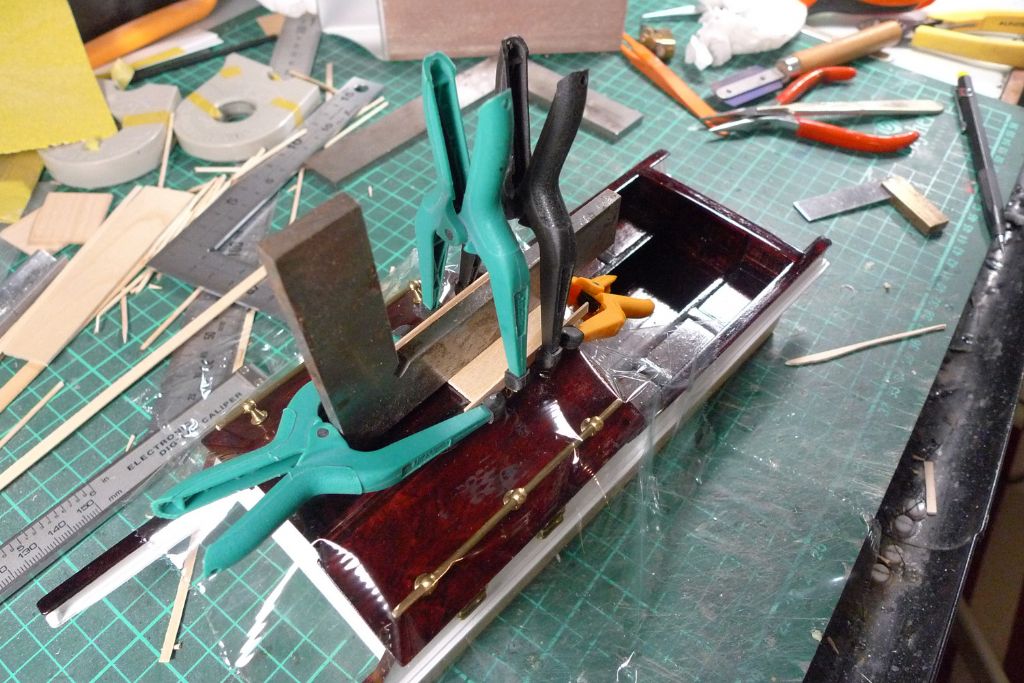
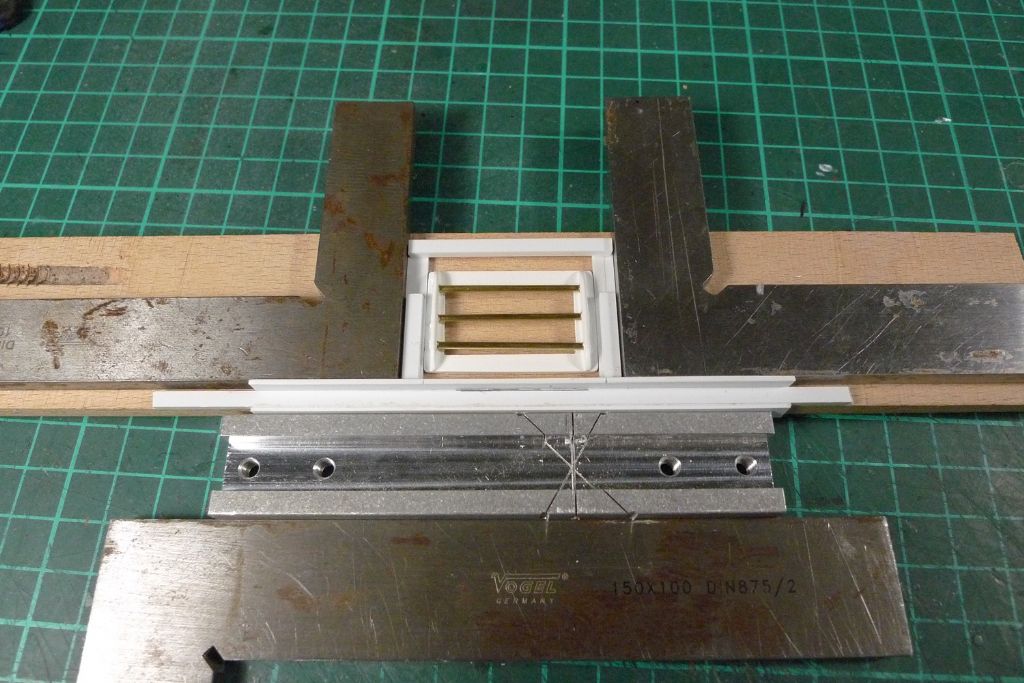
                    Next, I made up a jig from some plasticard strip …

                    mbbygg1145.jpg

                    … to help position the frames for glueing, and to hold them in the right position while the 24-hour epoxy went off.

                    mbbygg1146.jpg

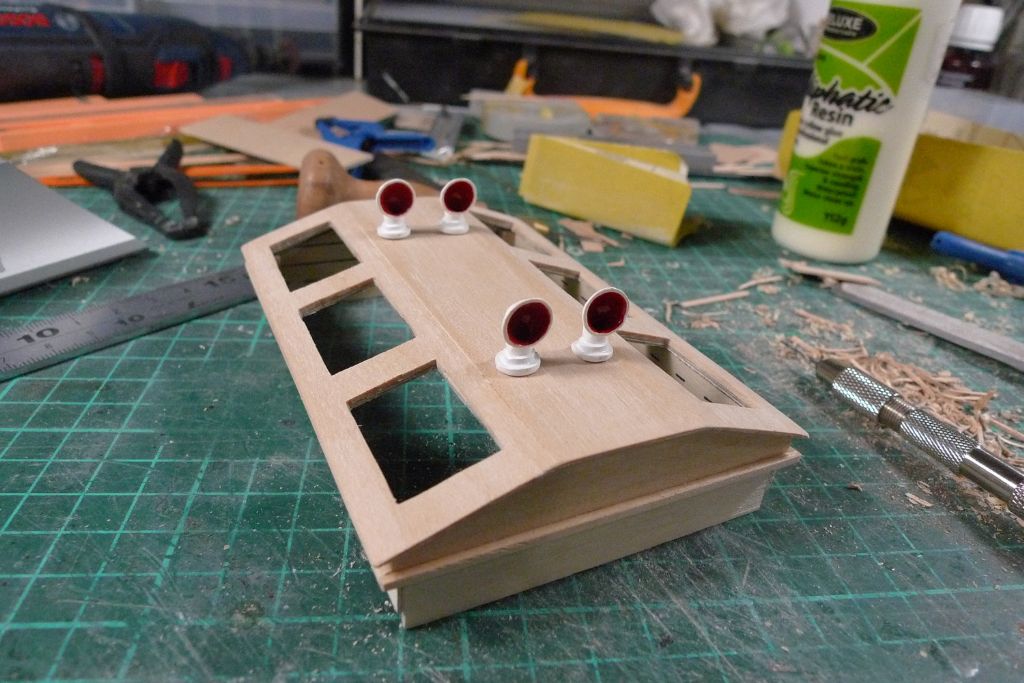
                    With both sides glued down, the ventlators followed; each with a brass washer set underneath to pick up the general brass-and-white colour scheme.

                    mbbygg1147.jpg

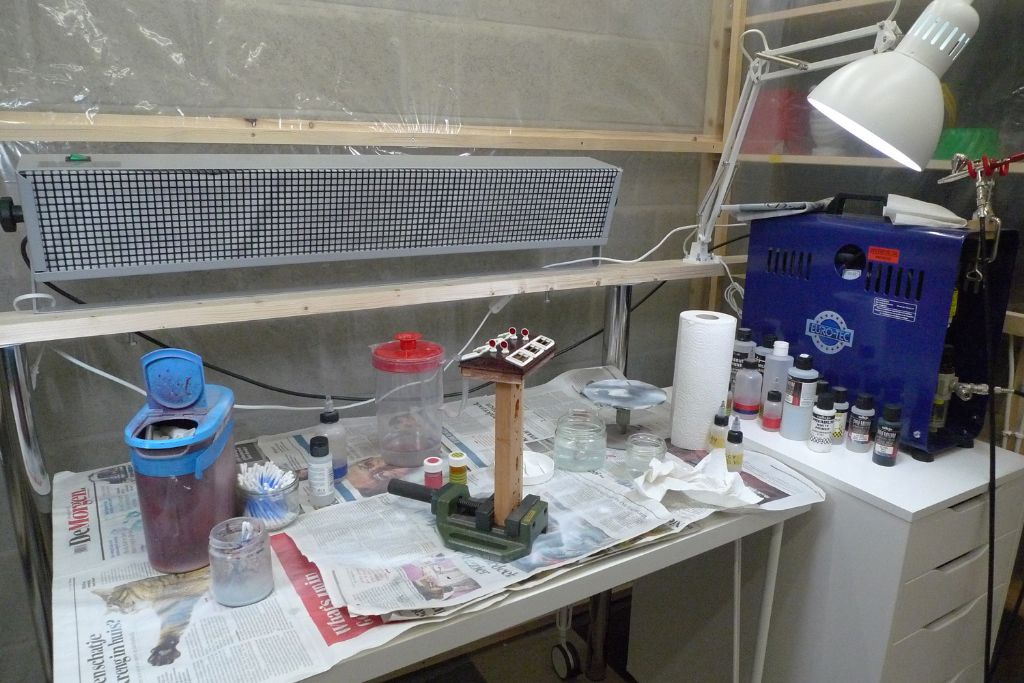
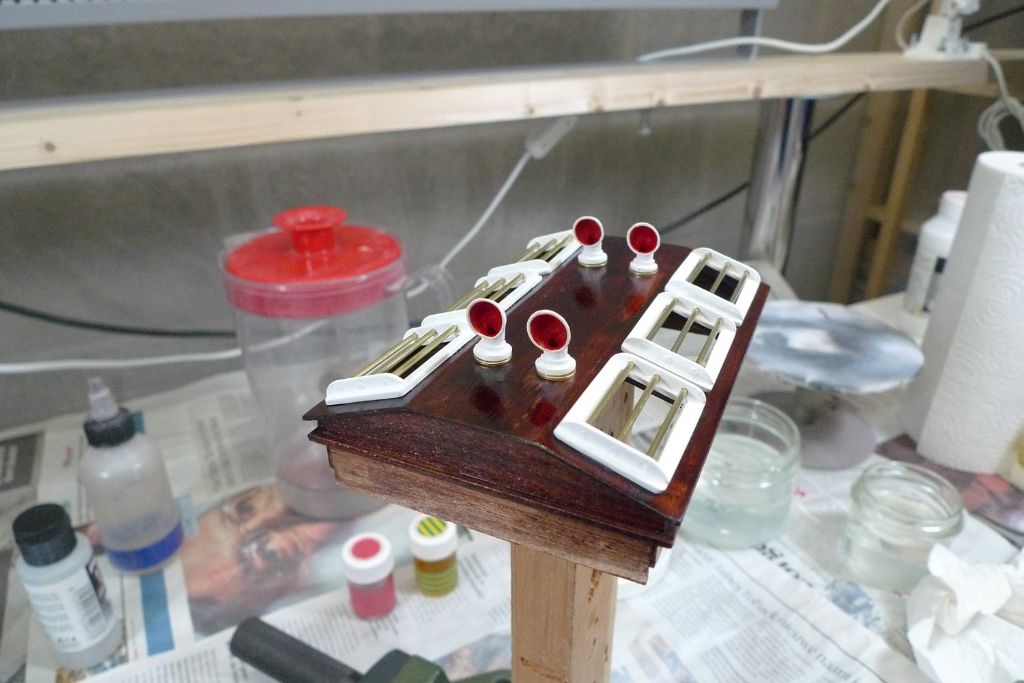
                    The skylight was then taken to the paint booth …

                    mbbygg1148.jpg

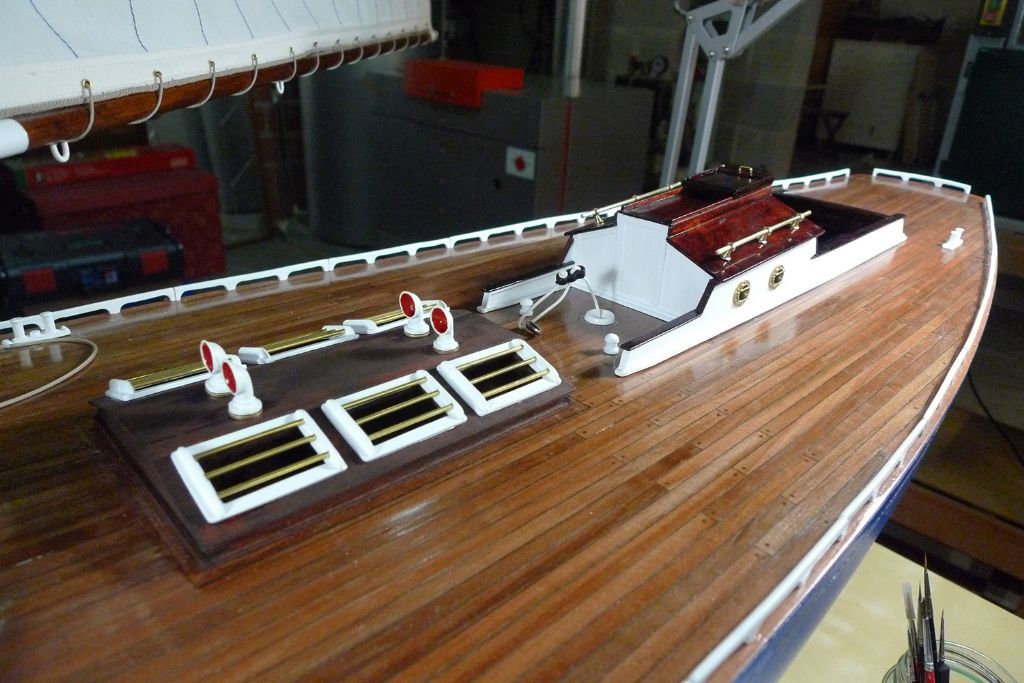
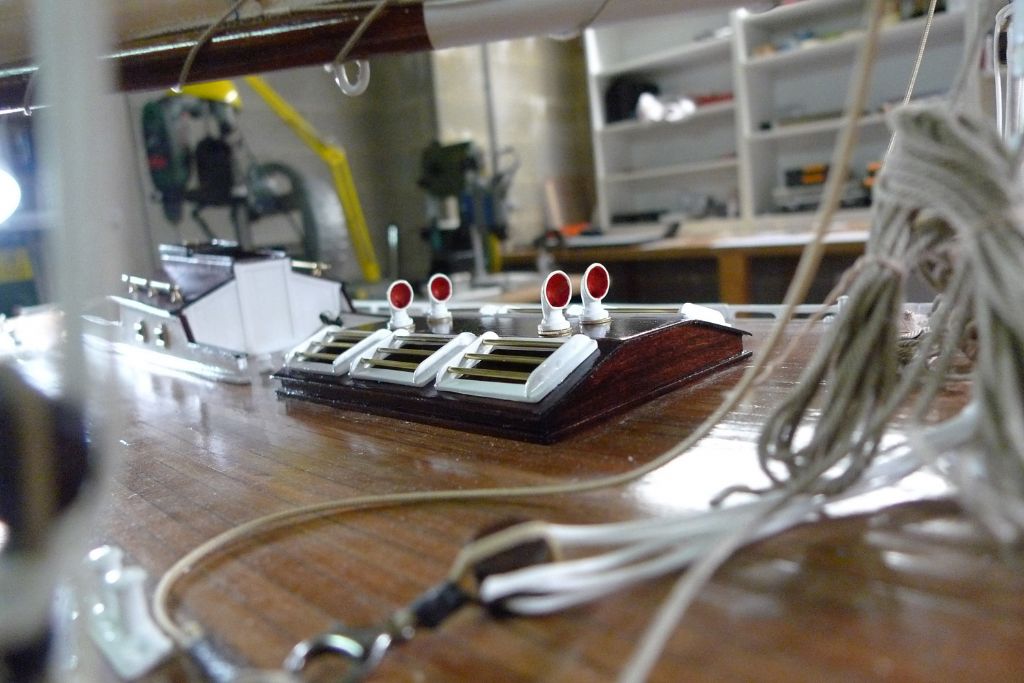
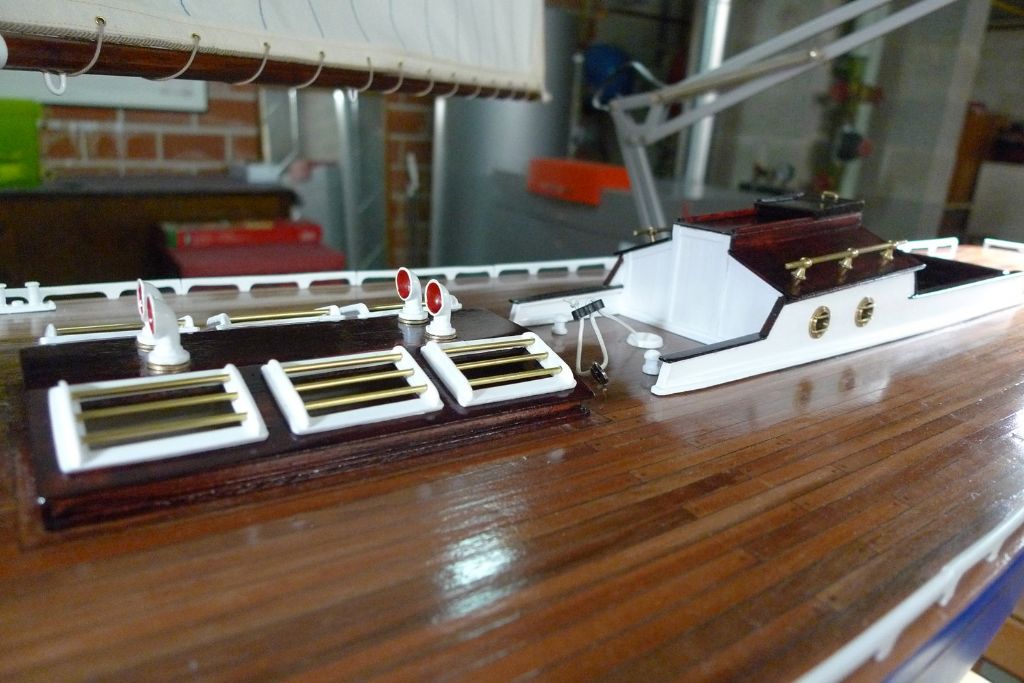
                    … and sprayed with a total of 8 coats of gloss varnish …

                    mbbygg1149.jpg

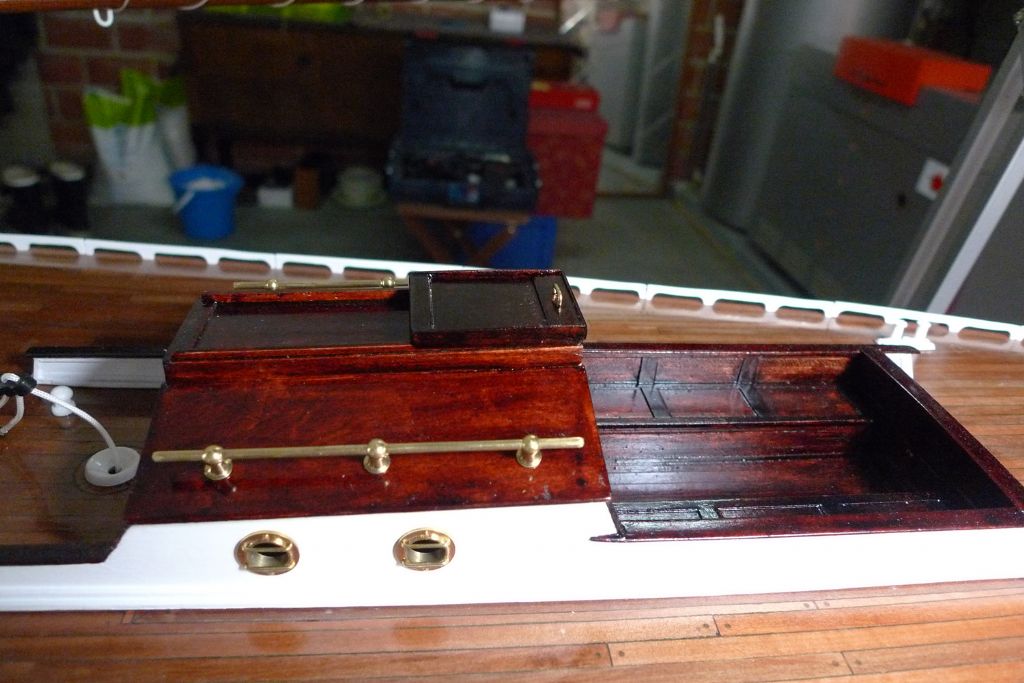
                    … to produce this result.

                    mbbygg1150.jpg

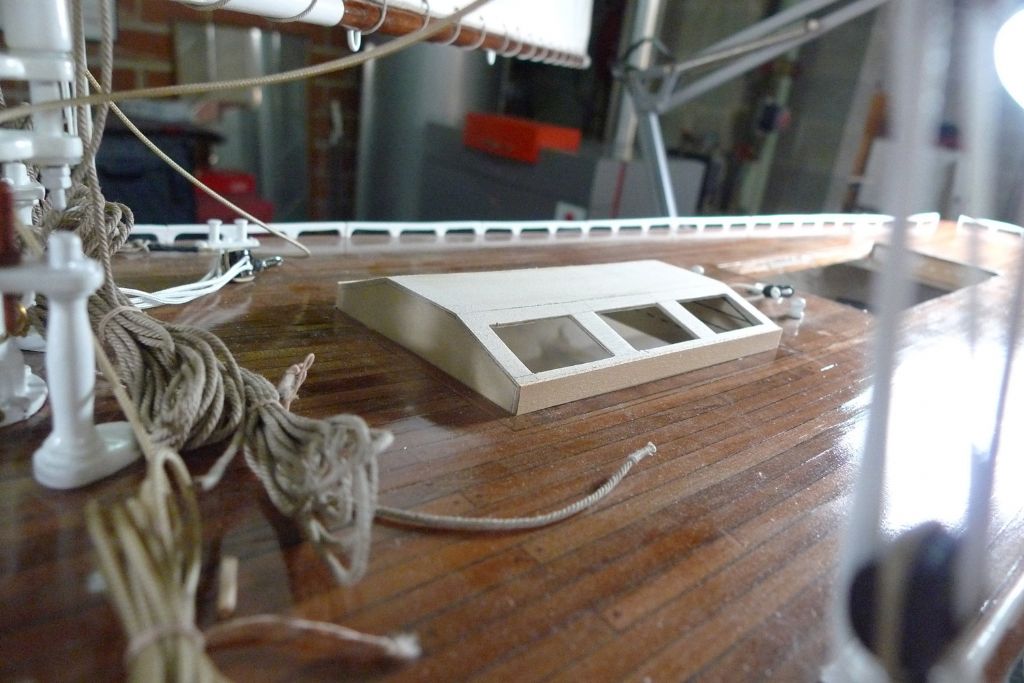
                    The windows still need to be glazed, and also the inside shall be given a rough coat or three of varnish, just to protect against humidity; also, I need to figure out some sort of mechanism for securing the whole thing firmly in place. As it is now, it comes out a tad too easily, and might be lost overboard when sailing. I'll see what I an come up with … Otherwise, this skylight is now done.

                    mbbygg1151.jpg

                    To be continued …

                    Mattias

                    Edited By Banjoman on 09/01/2018 09:57:12

                    #74978
                    Banjoman
                    Participant
                      @banjoman

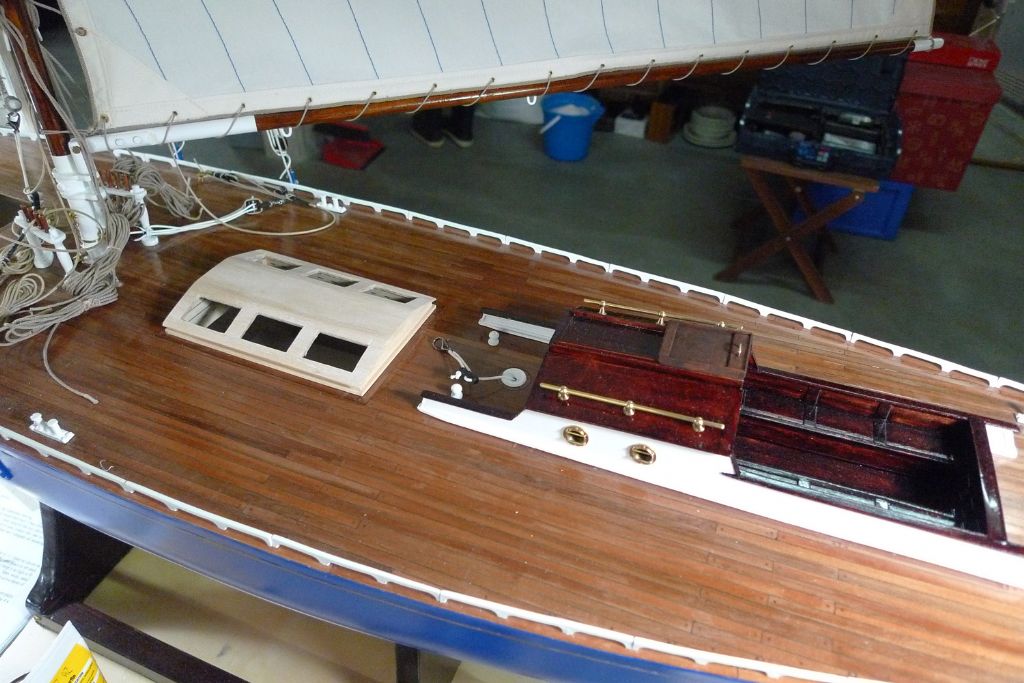
                      Before putting the final touches to the big skylight, I decided to make up the smaller one as well, following petty much the same procedure as for the bigger one.

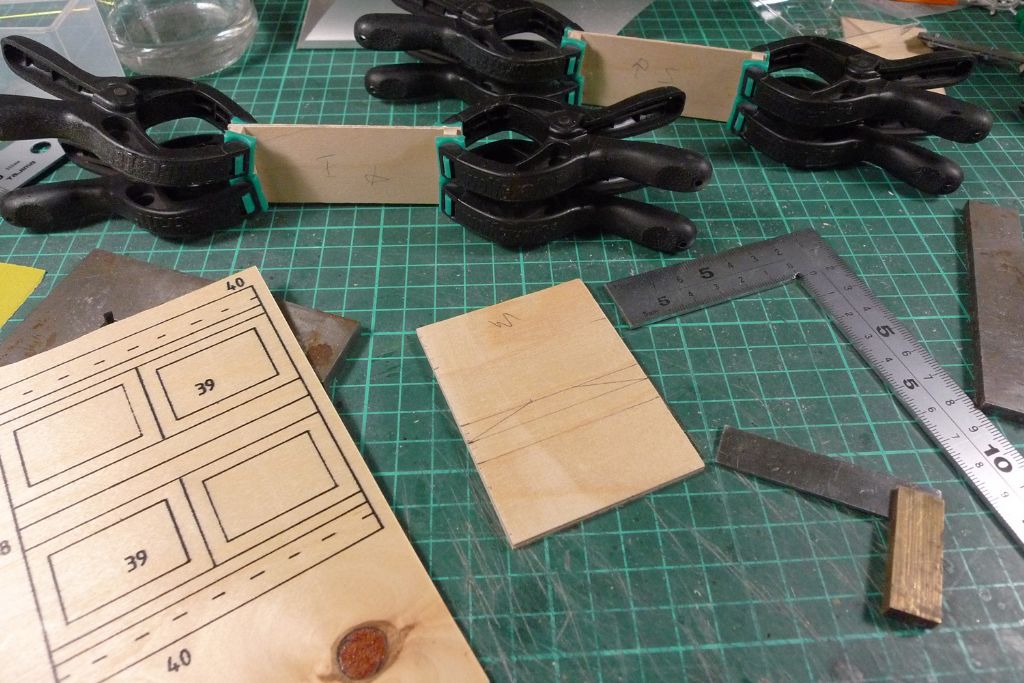
                      However, I'd noticed when making up the big skylight to the shape suggested by the pre-printed plywood that it did become a touch undeep, and thus might risk coming out of its hatch opening when sailing. I shall of course set up some sort of fastening to better secure it, but in order to save myself the same trouble with the smaller one, I decided to make that some 15 or so mm deeper under deck, and therefore drew up the shapes required myself, rather than to follow the pre-printed lines.

                      mbbygg1152.jpg

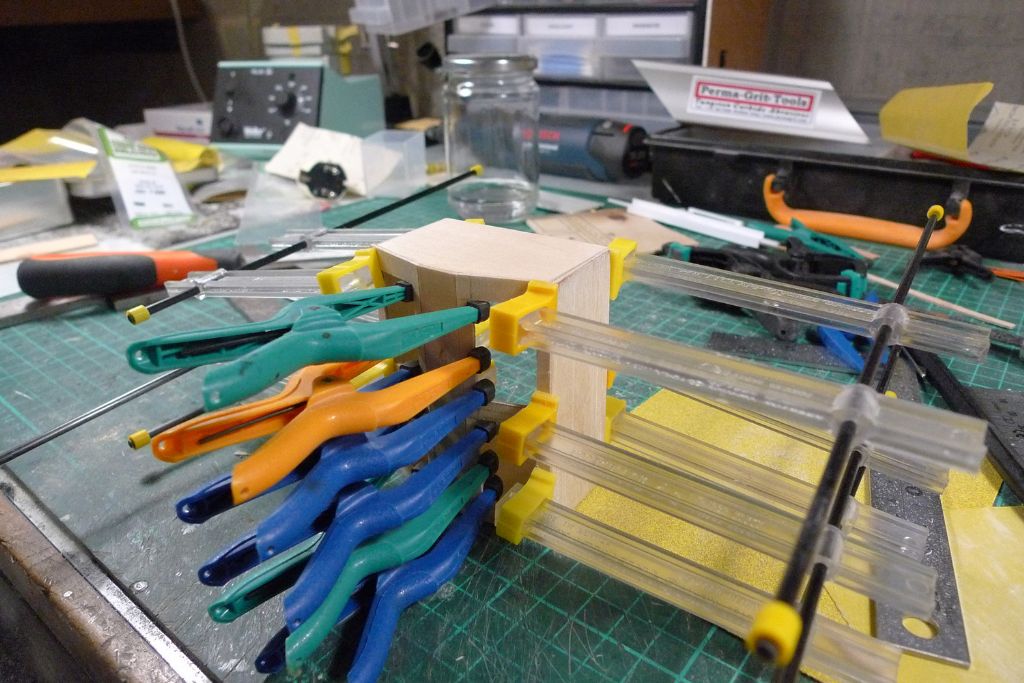
                      For the rest, construction was identical: glueing together a plywood box …

                      mbbygg1153.jpg

                      … with the window openings in the roof cut out on the jigsaw …

                      mbbygg1154.jpg

                      … and then cladding the visible upper parts with maple …

                      mbbygg1155.jpg

                      … in various dimensions.

                      mbbygg1156.jpg

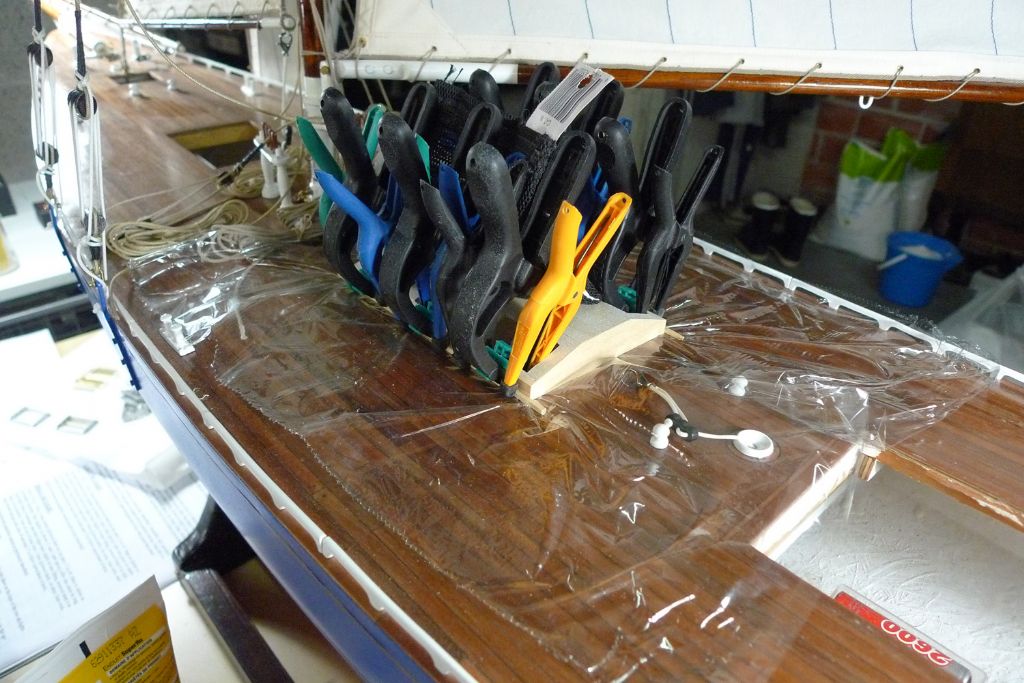
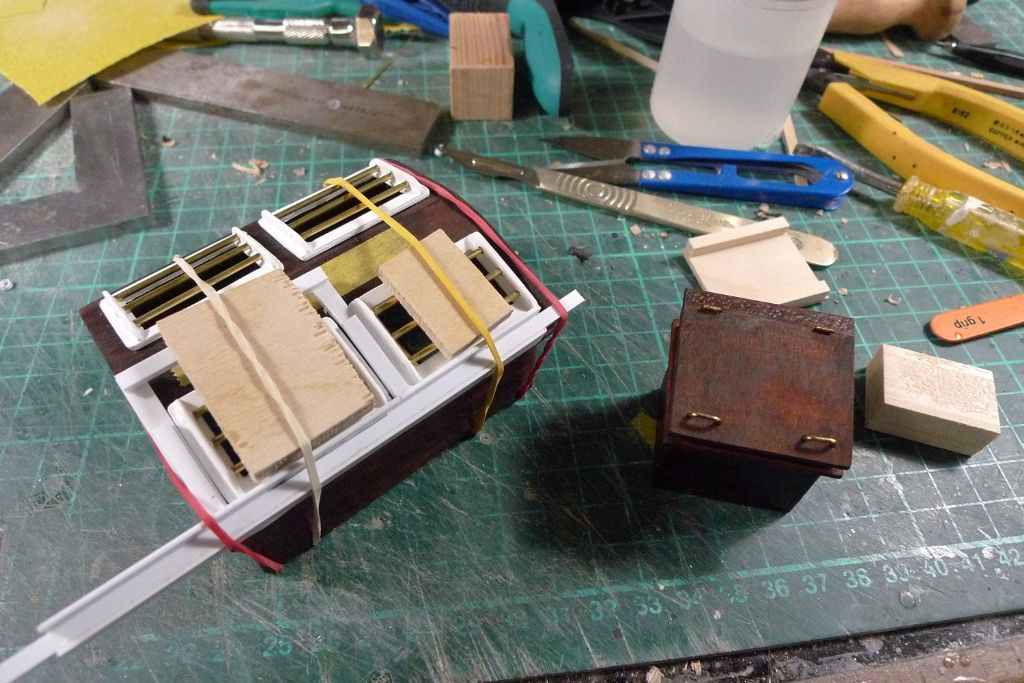
                      In parallel I have also started to put together a similar plywood box …

                      mbbygg1157.jpg

                      … equally clad with maple, to make up the foredeck hatch that is the last of the four deck superstructures.

                      mbbygg1158.jpg

                      To be continued …

                      Mattias

                      Edited By Banjoman on 13/01/2018 10:30:04

                      Edited By Banjoman on 13/01/2018 10:31:05

                      #74984
                      Rudy Why
                      Participant
                        @rudywhy43146

                        I have been using rare earth magnets to help secure items in place with good success. They come in many sized.

                        I have been thinking on my Moonbeam to have a surround in the deck holes that comes up above deck to help keep water from seeping in to the haul while sailing. The structures would fit over it.

                        I am just starting my build of Moonbeam. I’m about to start the decking in a week or so. We know how that goes. My boat will have some modifications to reflect the boat as if it was still in service today. Sails will be of Dacron, rigging, etc. throughout. Rudy

                        #74989
                        Banjoman
                        Participant
                          @banjoman

                          Rudy,

                          Magnets is indeed one of the options I'm considering; or I might go for a mechanical solution; or a hook-and-elastic one — it remains to be seen.

                          I also gave a certain amount of thought to whether or not to install coamings around the hatches, but in the end decided not to; not only was the prototype built without them, but I'd also been told by Gareth Jones that he and his wife Elizabeth haven't had any problems with their Moonbeam caused by the absence of coamings. Mine at least is in any case going to be a fair-weather sailer only, so it is to hoped the decks will never be that awash that it'll become an issue.

                          Please don't get me wrong, though! I am certainly not trying to dissuade you from installing coamings — I'm just explaining why I didn't!

                          And it would be very interesting indeed if you could perhaps start a thread to post a few pictures of your Moonbeam build?!

                          Mattias

                          Edited By Banjoman on 15/01/2018 06:41:37

                          Edited By Banjoman on 15/01/2018 06:42:06

                          #75013
                          Rudy Why
                          Participant
                            @rudywhy43146

                            Mattias, I really appreciate you sharing your Moonbeam build, tools and technics with us. New perspectives and views on building are always good. Moonbeam is my second model boat building project. I’ve been in love with boats all my life. My Dad had boats when I grew up. As I aged he would have me sand and varnish his 19’ Crist Chraft for using the boat on our outings. No, not one of the renowned runabouts but a nice open design. Then in the 80’s I quit working and went to California to play with yachts. I also, purchased a mahogany H-28 sailboat designed by L. Francis Herreshoff to the original design. I got lucky and hired on the 1920’s 111’ Henry Morgan MV for a year cruising Florida to Alaska. Etc. Etc. and back to my career, lost an arm to cancer and retirement nine years ago. Enough about that.

                            Thanks for the reply about the coamings. Good useful information. I’m a long way away from coaming now and am leaning away from them. My Moonbeam will be a far weather sailor as well.

                            I’m at a point with my first build a Lake Union Dream Boat at 47.5 inches scratch built. It is my own design of a classic I just don’t have a decent area to paint the last top coats on the haul and that will have to wait for wormer weather in a few months. Now that the Moonbeam is getting most of my attention.

                            My Moonbeam will be a departure from the kit. Modern rigging, different house/cockpit and, I’ve added bulwarks. There will be a waterway by the decking planks, too. I have spent a lot of time faring the haul to get the center line equal to the haul sides. Re-fared the stern to get it squared up to center line. I may use curved deck planking. This is my second build and that could me too much to ask of myself. Slightly reshaped rudder to the under body. Reshaped and added a half inch to the bow at the deck. My thinking is integrating the original haul design (it’s lonely) and what was happening in the early years of the 19th century above deck. Fife, Ole Stephens, Nathanael Herreshoff to name a few of my favorites from that era. And, it’s all I can do to not add a few inches to the stern.

                            bulwark angle.jpgmoon haul prep.jpg

                            #75014
                            Rudy Why
                            Participant
                              @rudywhy43146
                              #75081
                              Banjoman
                              Participant
                                @banjoman

                                Rudy,

                                Many thanks for those pictures! A very interesting and creative adaptation of the kit, I would say!

                                A question: given that you have added raised bulwarks, have you foreseen freeing ports of any kind, so that any water that ends up on deck can drain away? Also, had I included bulwarks, I think I would in all likelihood have added coamings to the hatch openings as well! With bulwarks, small amounts of water is much more likely to accumulate on deck, even if there are reeing ports, and when tacking would run from one side of the deck to the other and might then in passing seep through to below deck … ?!

                                Anyway, you have plenty of time yet to think it through, I'm sure

                                On my own build, I have finished cladding the smaller skylight, and also added a brass bar to the front end of same; not for any important purpose, but in part for the nice look of brass against dark wood, and in part so that I can easily tel which end is which of the skylight when putting it back in (it fits ever so slightly better this way round).

                                mbbygg1159.jpg

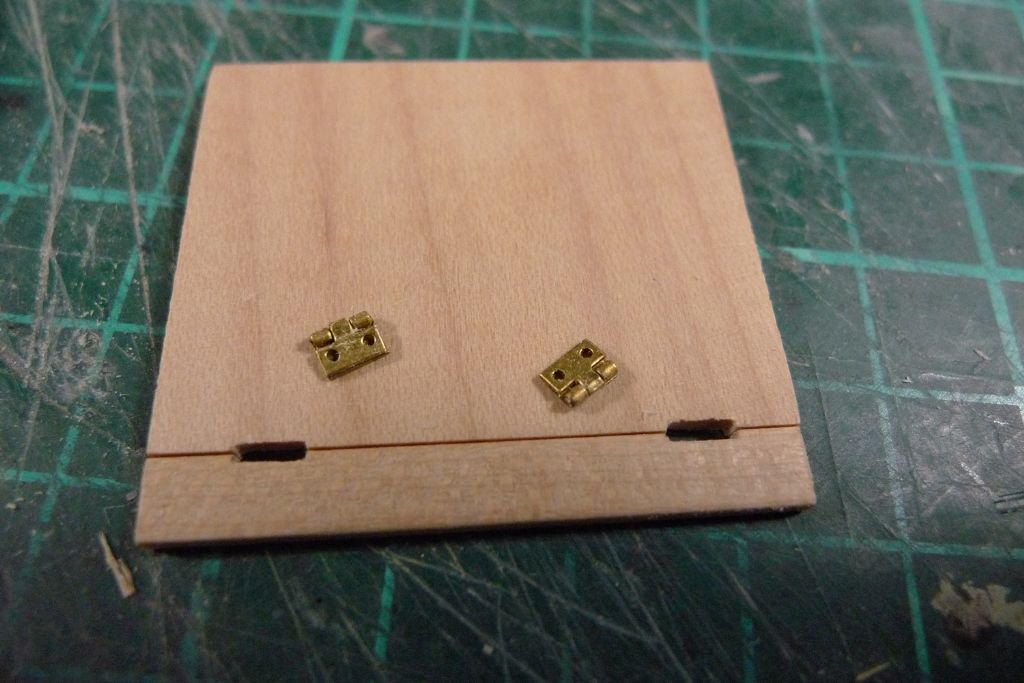
                                I have also prepared the (dummy) hinged lid for the forrard hatch, by taking two pieces of circa 1.5 mm thick maple, and rebating them to take a couple of hinges. The hinges are working, but will just be glued in for the look of the thing; there's no point in being able to actualy open the lid.

                                mbbygg1160.jpg

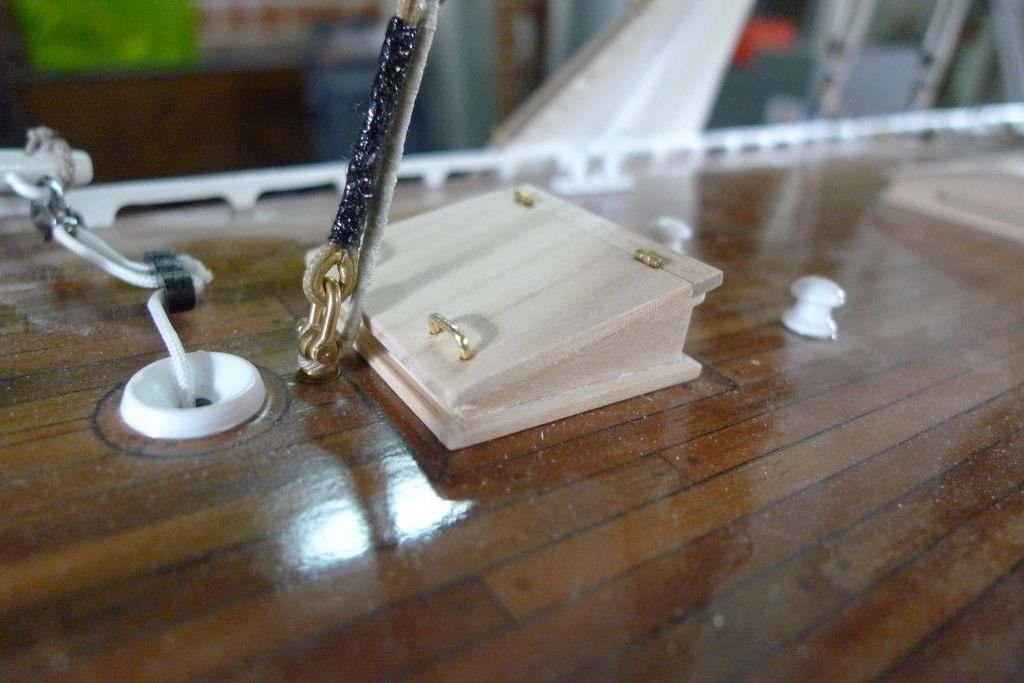
                                With a couple of handles from 1 mm brass wire added, the hatch looked like this …

                                mbbygg1161.jpg

                                … and after staining like this …

                                mbbygg1162.jpg

                                … while the final preparation before varnishing was to glue on the skylight window frames.

                                mbbygg1163.jpg

                                To be continued …

                                Mattias

                                #75083
                                Rudy Why
                                Participant
                                  @rudywhy43146

                                  Banjo, yes freeing ports will be added. I have them in brass, ready to go. After setting rigging to the sloop rig I have found to no surprise that the main sail is to big. Reducing its size gives me 100 sq in less sail the the gaff rig sails. If I was to go with that, I'd have to relocate the mast to get the proper center of gravity. Oh well…

                                  #75116
                                  Gareth Jones
                                  Participant
                                    @garethjones79649

                                    Hi Mattias and Rudy,

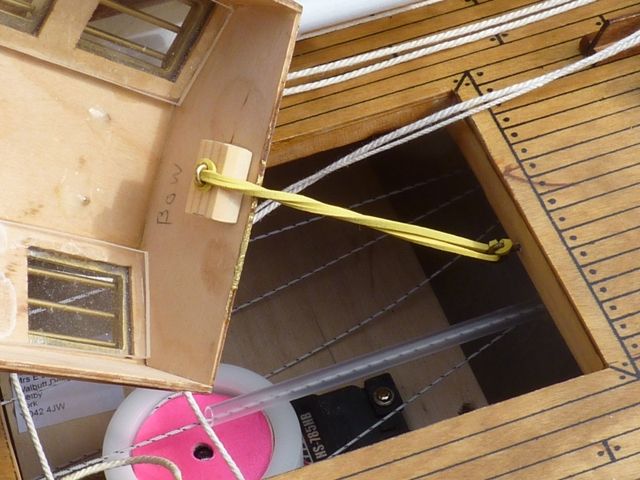
                                    Just for your information on a couple of aspects of my wife's Moonbeam. We secured the hatches, or at least provided a safety backup, using an elastic band through an eye screwed into the hatch and another in the hull. The photo below shows the idea. We found the centre hatch to be the most vulnerable one, as the sail sheets can snag on the ventilators and pull the hatch out of the hull. If you are unlucky, it falls overboard and sinks due to the weight of the white metal fittings. In Elizabeth's case she was lucky and the hatch fell down inside the hull.

                                    We have recently done a further mod to the rigging to address the problem of there being no effective backstay to prevent the mast leaning forward. It tends to lean in that direction because of the foresail luff lines pulling it from high up on the mast which gives them a long lever arm, even though the loads are not high. We have made the two main shrouds completely separate items rather than just being a single run up and over the lug on the mast and then back down again. Each of these separate shrouds has a bowsie at its top end to allow them to be tensioned independently. This allows the rear shrouds to be pulled much tighter than the front ones, providing a reasonably effective backstay. Adding the bowsies may detract from the appearance slightly but its a minor point (in our view) and is outweighed by a stiffer upright mast which looks better. The bowsies are easier to adjust than fiddling with the deadeyes (which we have retained) at the bottom of each shroud.

                                    Gareth

                                    #75245
                                    Banjoman
                                    Participant
                                      @banjoman

                                      Hello Gareth,

                                      Warmest thanks for your very helpful comments! As you will see below, I have adopted a similar solution to the problem of making sure the main skylight stays on, no matter what. But more about that further down!

                                      As for the matter of the set-up of the shrouds to keep the mast from bending to much forwards, I think I'll keep things as they are until I've had a couple of trial runs, but if needs be, the idea of de-coupling the shrouds sounds well worth looking into! For my part, though, I think I would probably prefer to use the deadeyes for adjustment rather than add bowsies; mine are set up in such a way that it wouldn't be too difficult to use them in such a way … But we'll see once she's been on the water a few times!

                                      Anyway, back to the build! With the window frames in place on the forrard skylight as well …
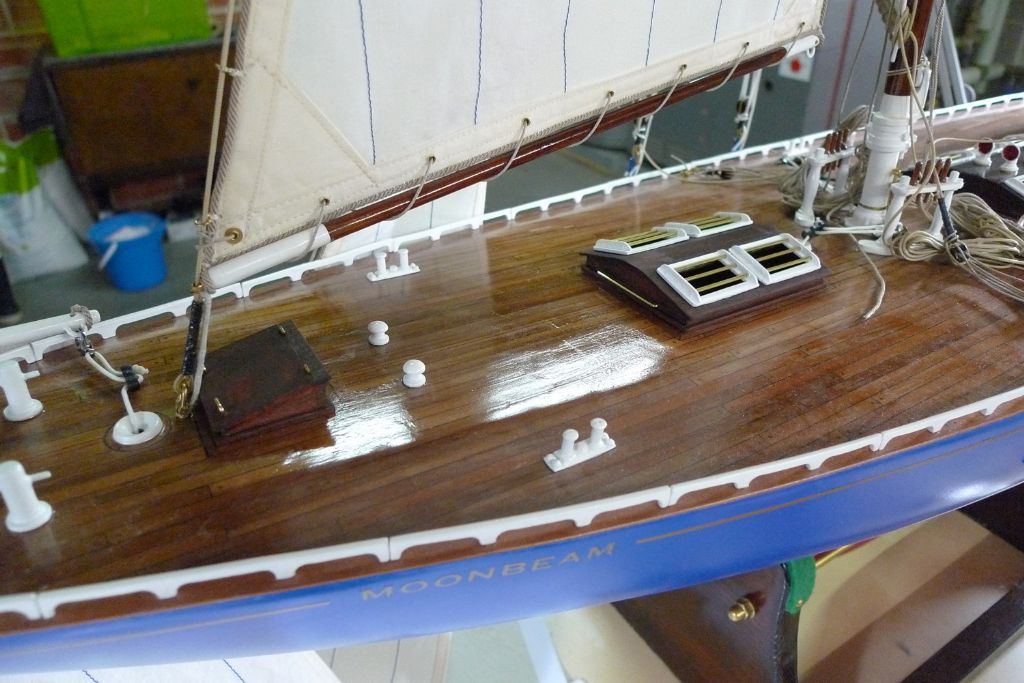
                                      mbbygg1164.jpg

                                      … it was once more time a-varnishing to go …
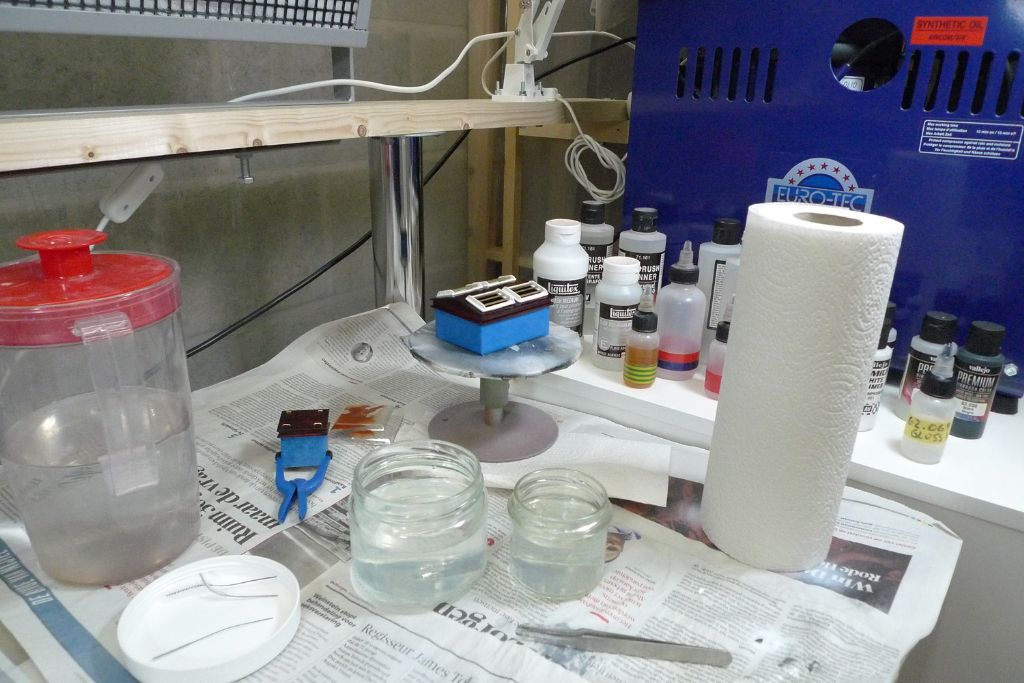
                                      mbbygg1165.jpg

                                      … until a total of eight coats of gloss varnish had been applied.
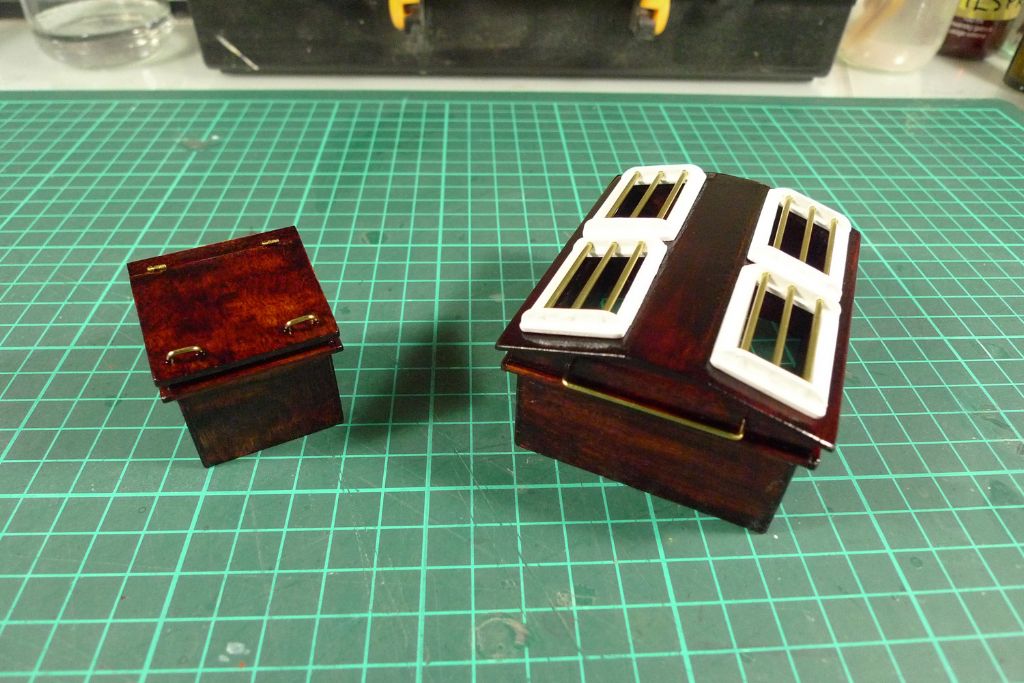
                                      mbbygg1166.jpg

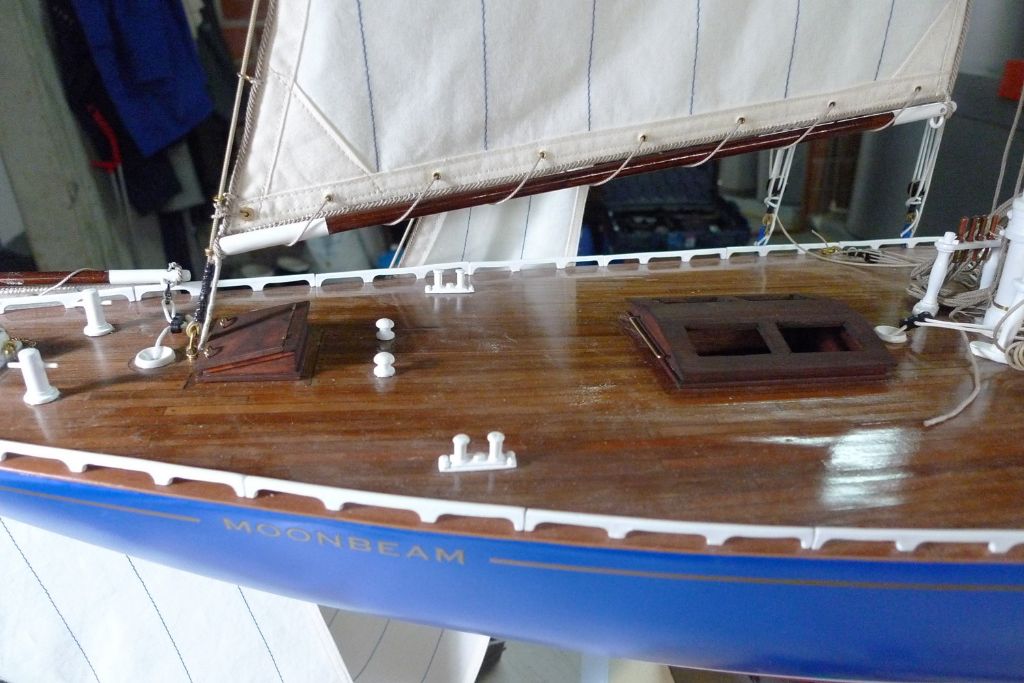
                                      This means that the build is now structurally complete …
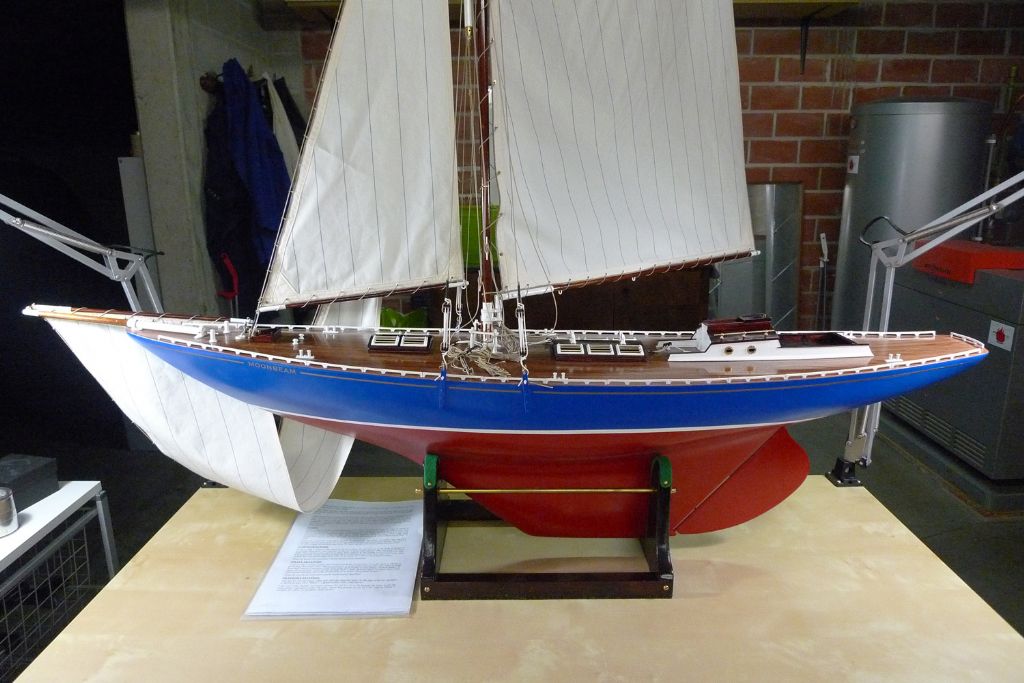
                                      mbbygg1167.jpg

                                      … looking like this. The reason why the jib is not fully hoist is of course the lack of ceiling space in our basement – for the boat to sit at comfortable working height on a table, I have to let the topmast down.
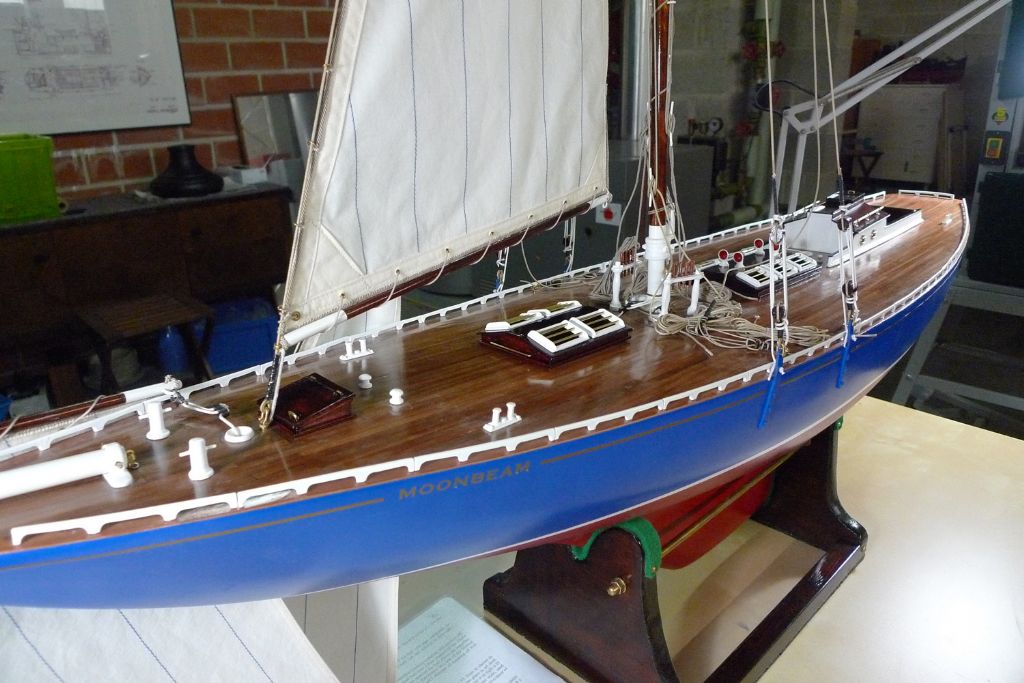
                                      mbbygg1168.jpg

                                      For the next small job, I had originally planned to use some thin real leather from my may-come-in-handy box (in this case a set of leather samples from back in the day, when one of my younger brothers was working as bookbinder), but in the end decided to get some fake leather instead, not least because I found some in a blue colour that nicely matches the hull above the boot top.

                                      After cutting pieces to size, their edges were stained a similar blue with a permanent marker pen …
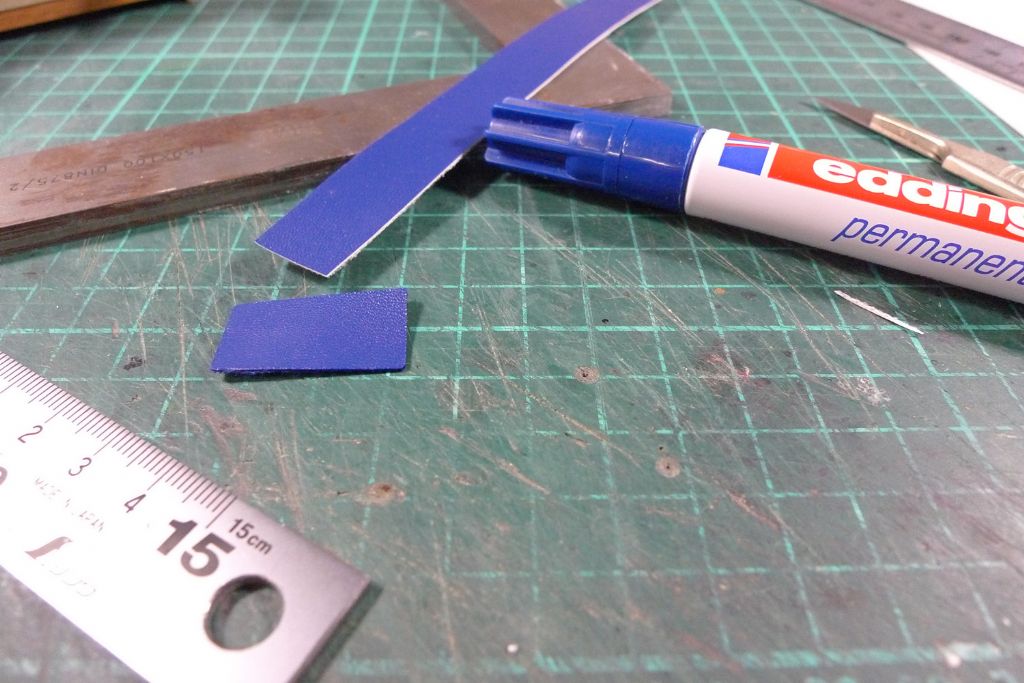
                                      mbbygg1169.jpg

                                      … and then glued in place on the cockpit benches.
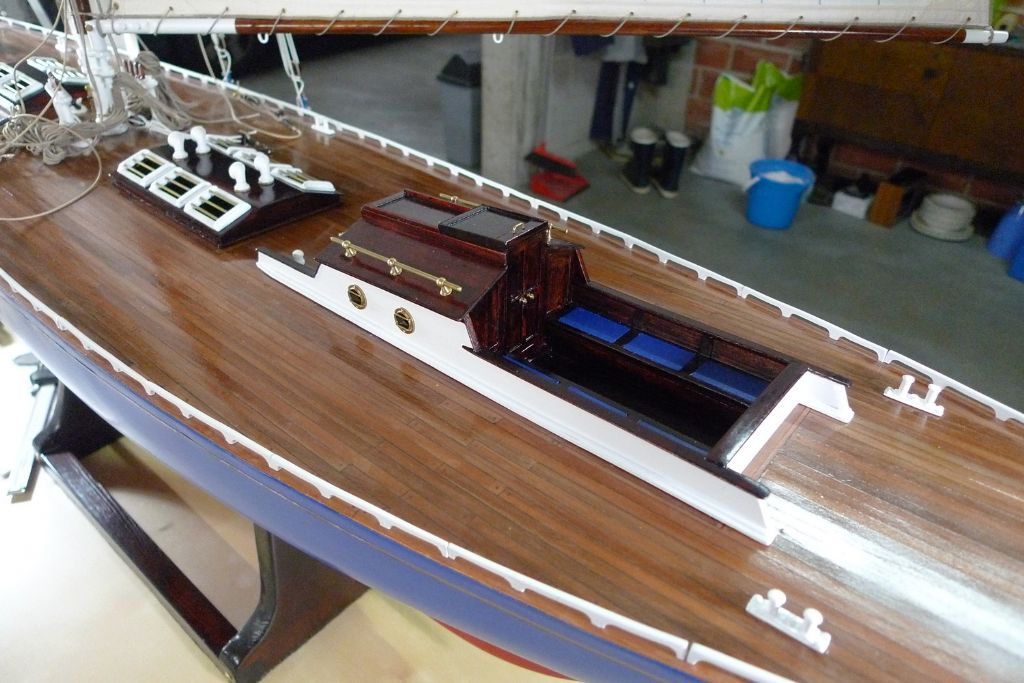
                                      mbbygg1170.jpg

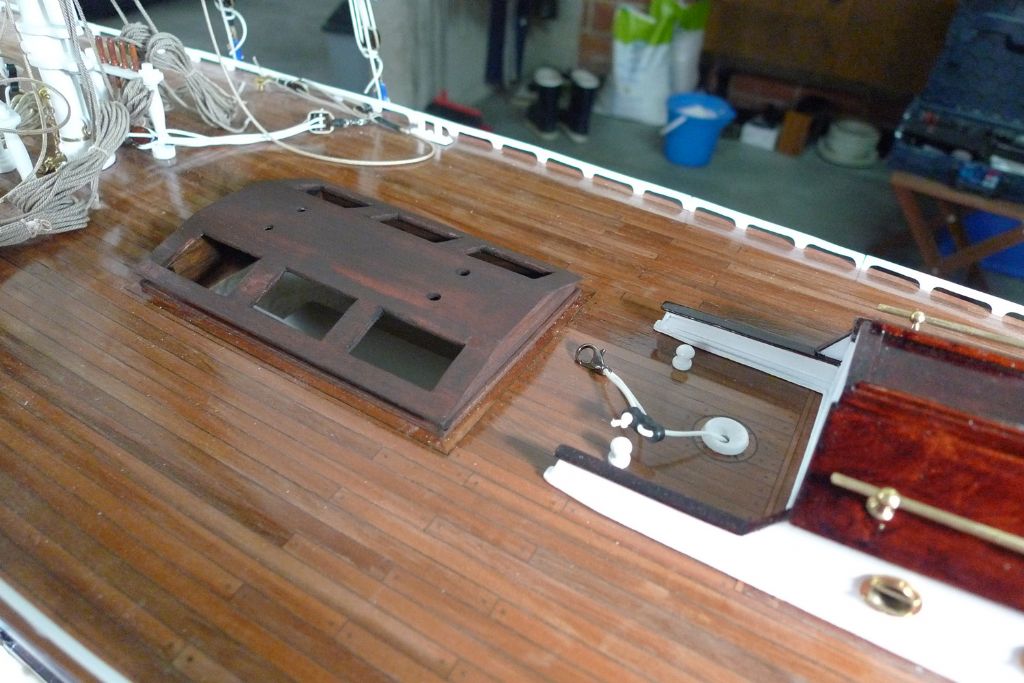
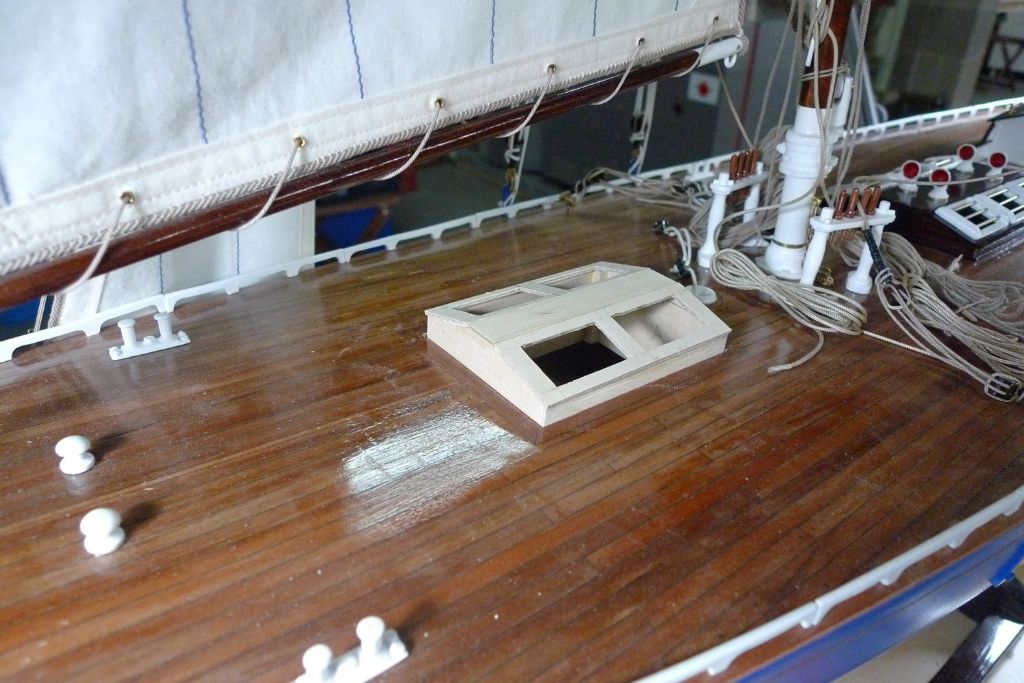
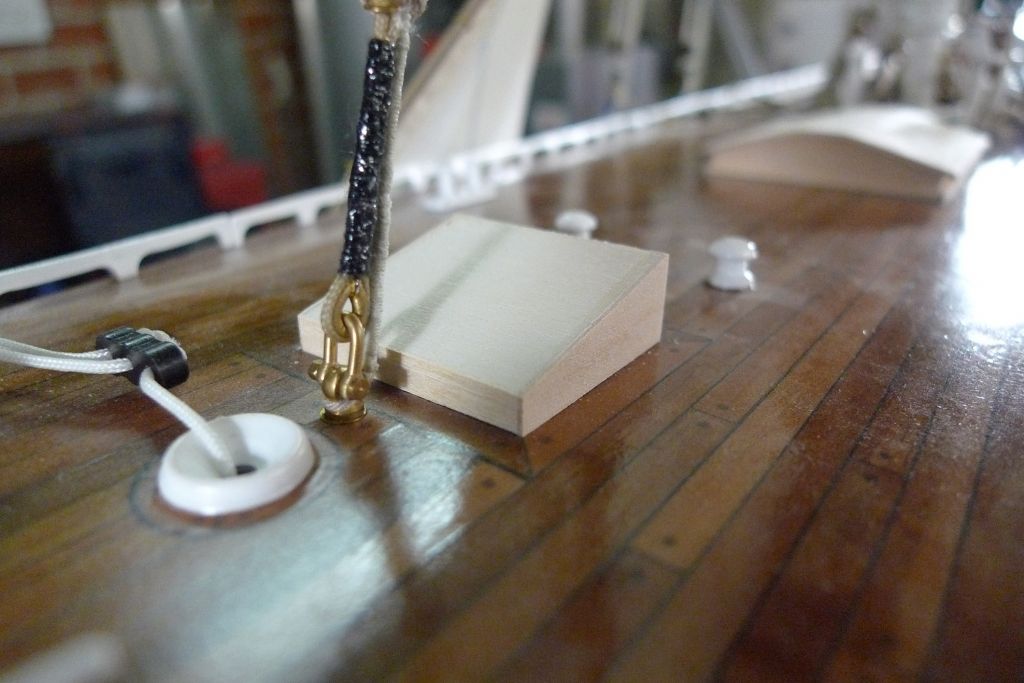
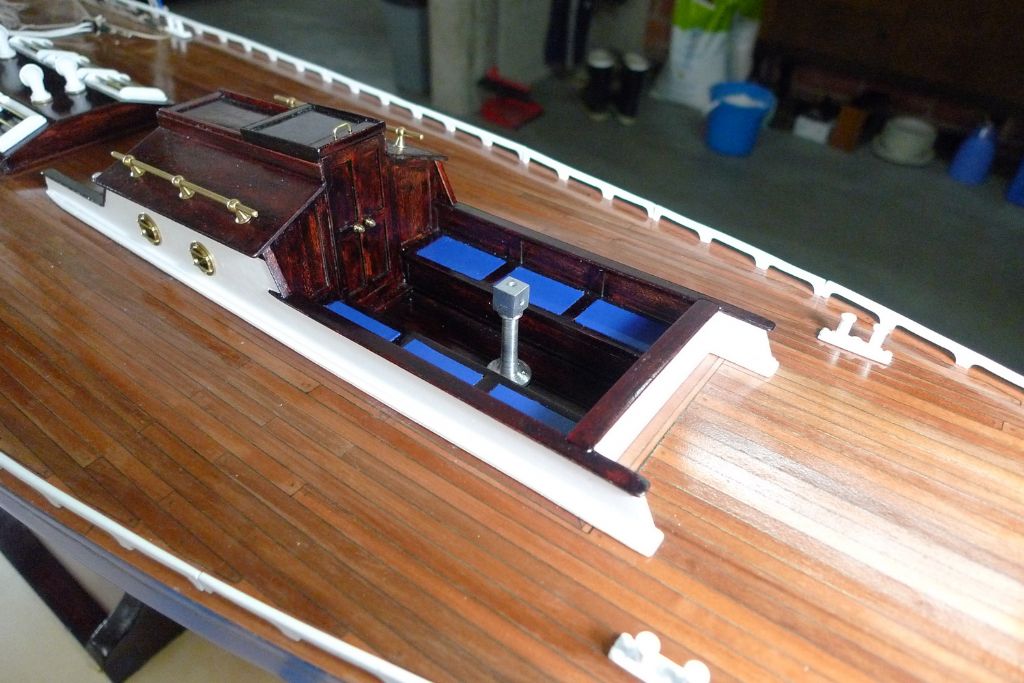
                                      Next, I went about sorting out the secure attachment of the main skylight. To this end, I drilled 2 mm holes in the middle of the fore-and-aft coamings, both port and starboard …
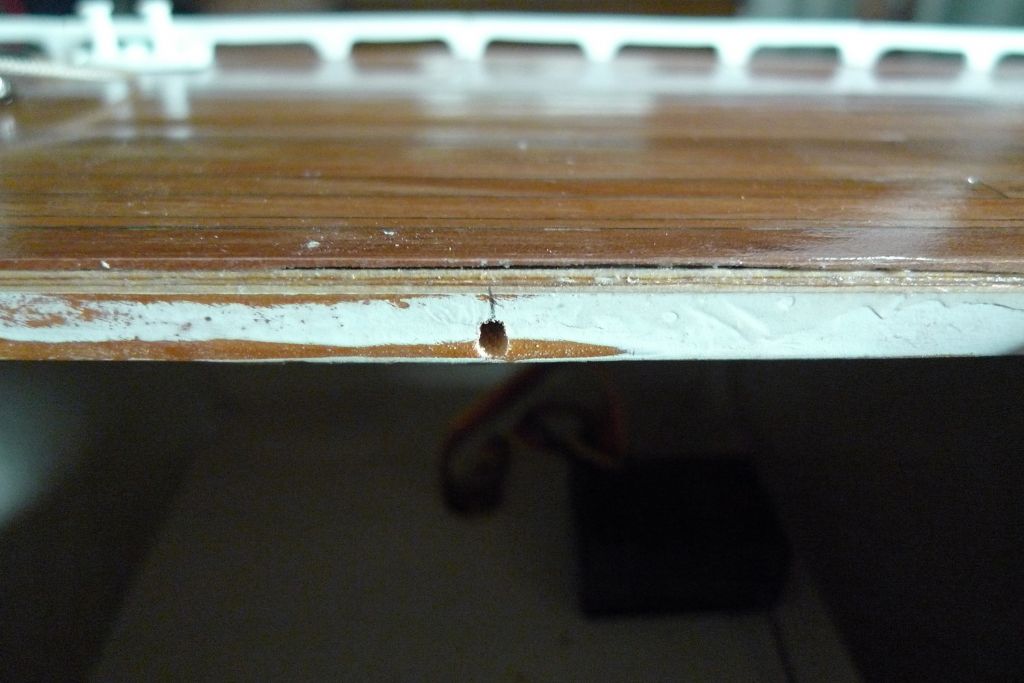
                                      mbbygg1171.jpg

                                      … then cut of two short lengths of 2 mm brass rod …
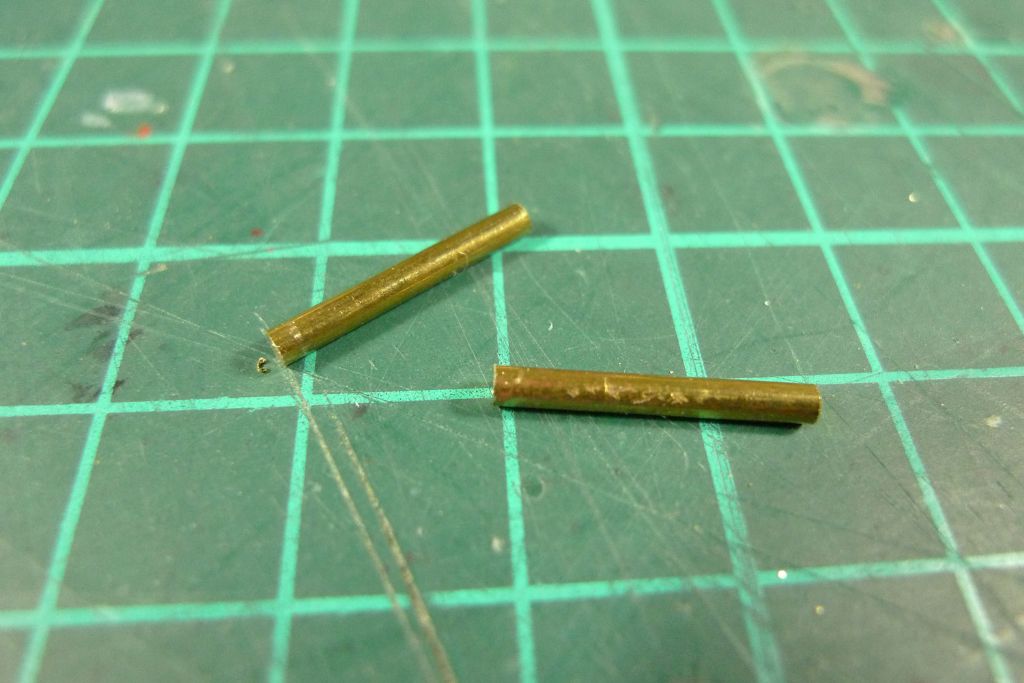
                                      mbbygg1172.jpg

                                      … push fitted the rod through the holes in the coamings, and set up a loop of elastic thread between the two brass pins.
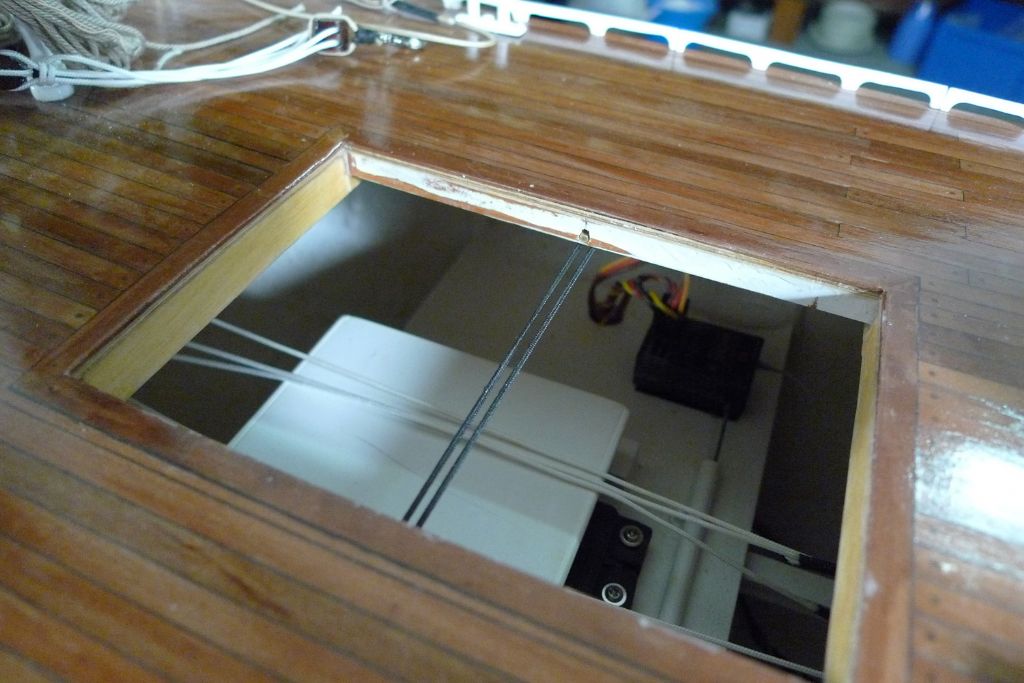
                                      mbbygg1173.jpg

                                      A block of wood was then epoxied to the underside of the skylight roof …
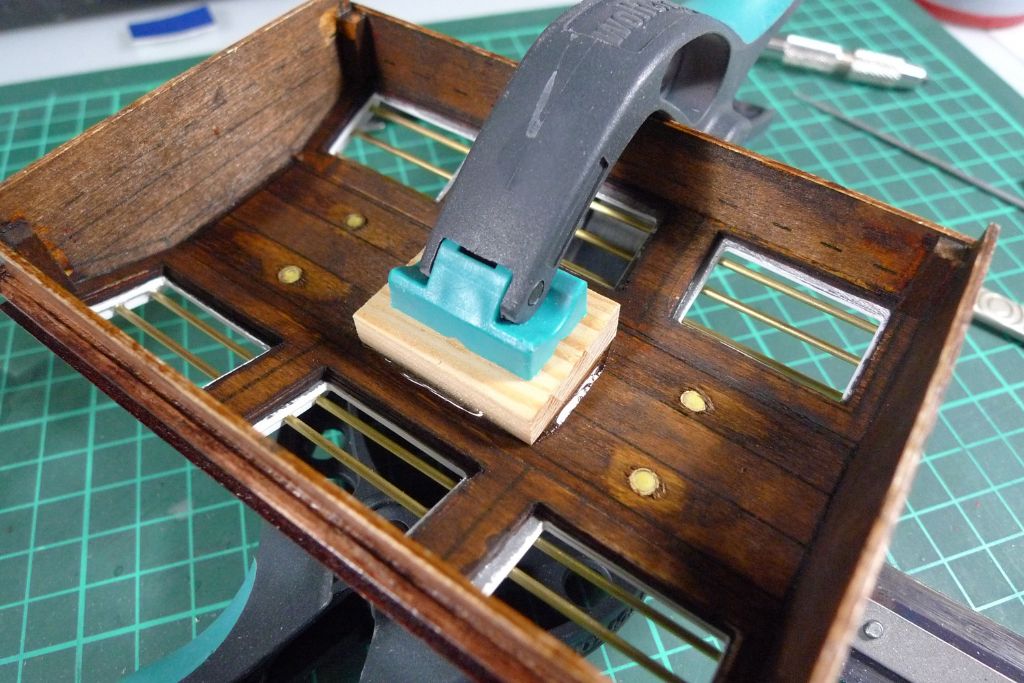
                                      mbbygg1174.jpg

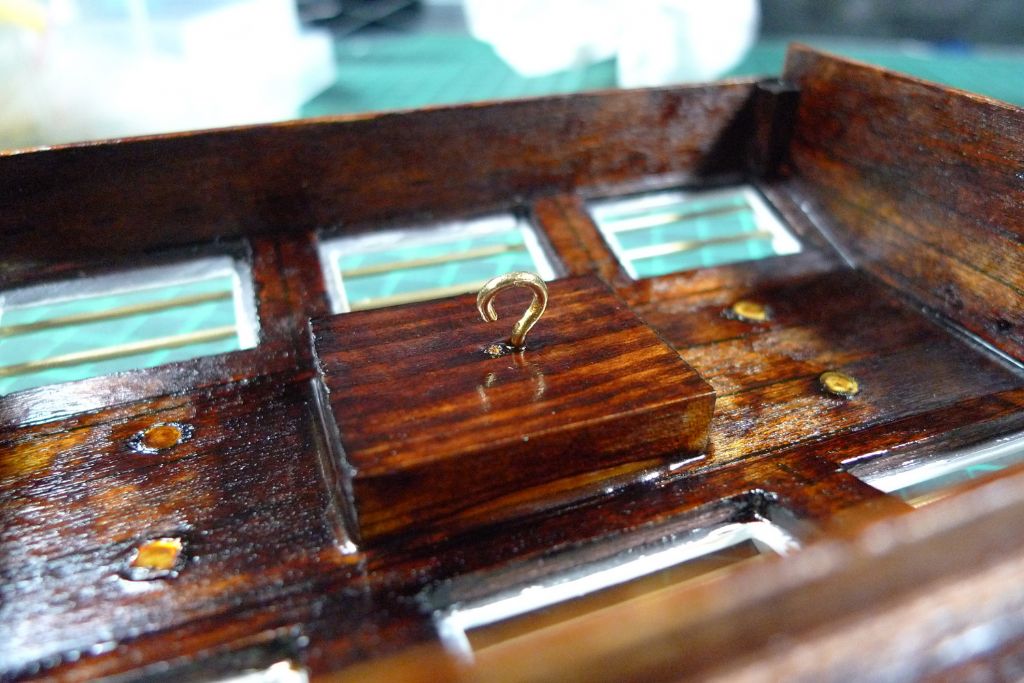
                                      … stained and coated with sanding sealer, after which a hook made from a brass screw eye was screwed into it. By hooking this over the elastic, the skylight is properly secured – it can still move a bit, but cannot come loose unless one puts one's fingers underneath the skylight to onhook the elastic.
                                      mbbygg1175.jpg

                                      To be continued …

                                      Mattias

                                      Edited By Banjoman on 21/01/2018 20:39:07

                                      Edited By Banjoman on 21/01/2018 20:41:42

                                      #75249
                                      Banjoman
                                      Participant
                                        @banjoman

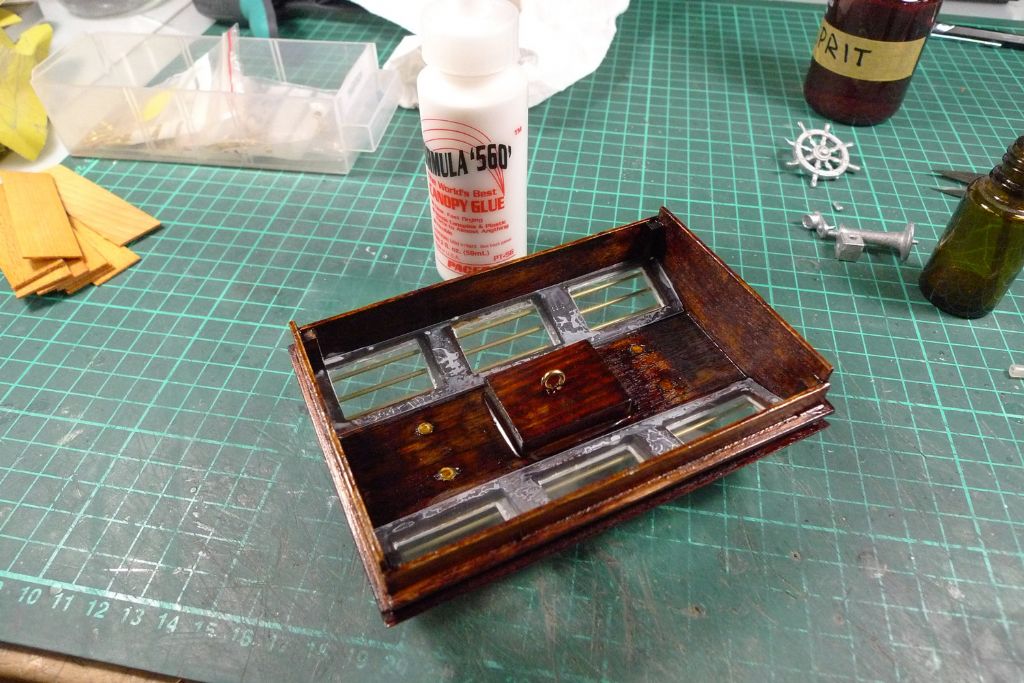
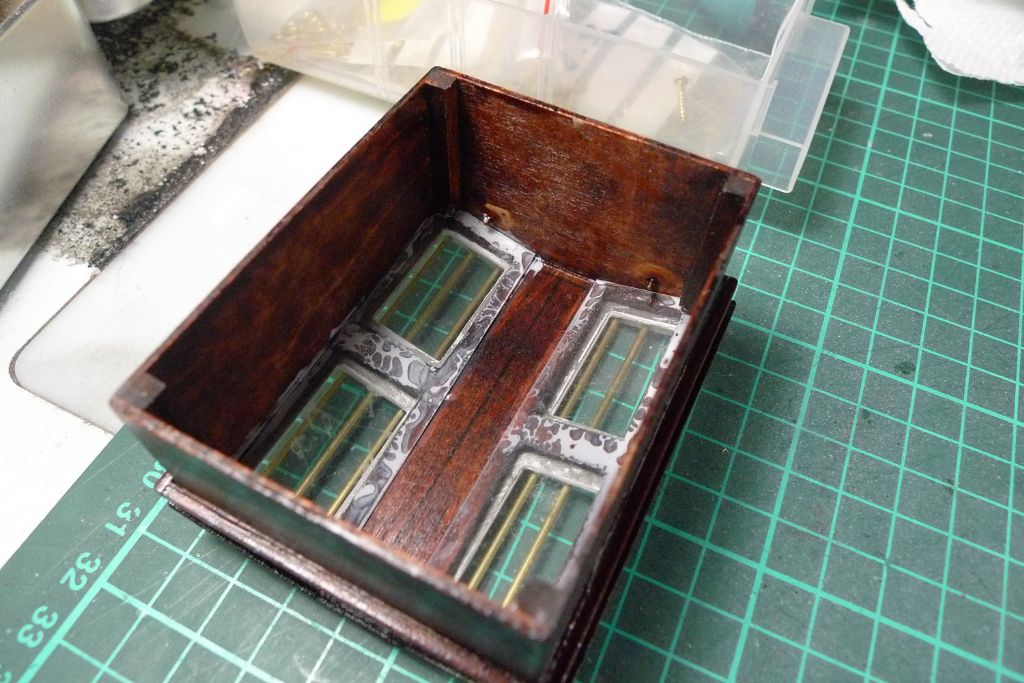
                                        With the securing strap in place, it was time to finish the skylights by glazing the windows — nothing fancy, just clear plastic sheet, simply glued in place …

                                        mbbygg1176.jpg

                                        … with canopy glue.

                                        mbbygg1177.jpg

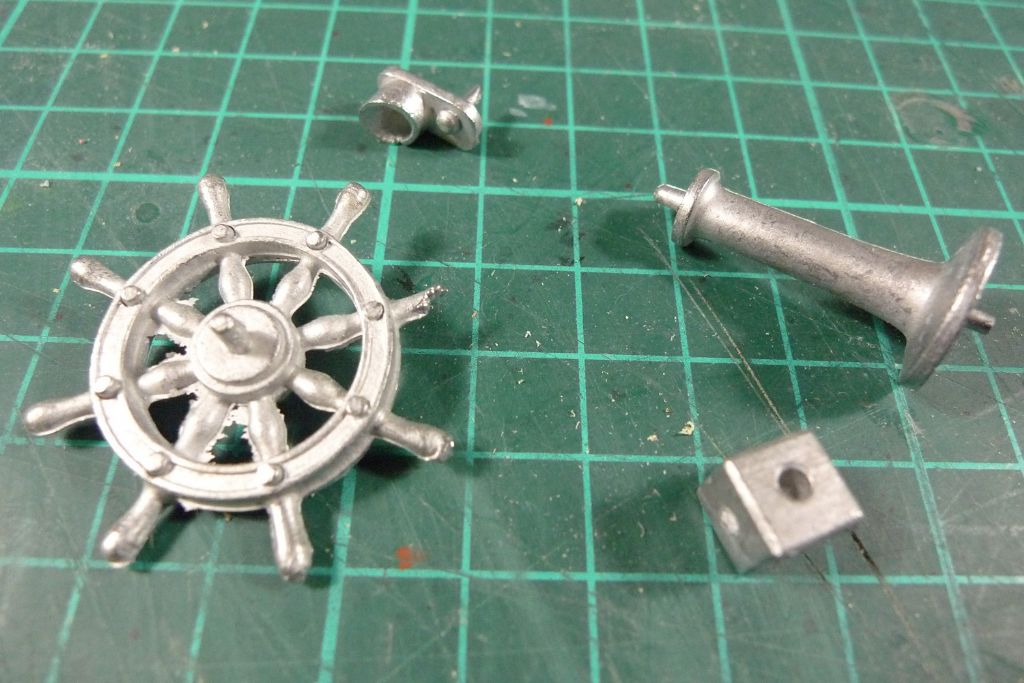
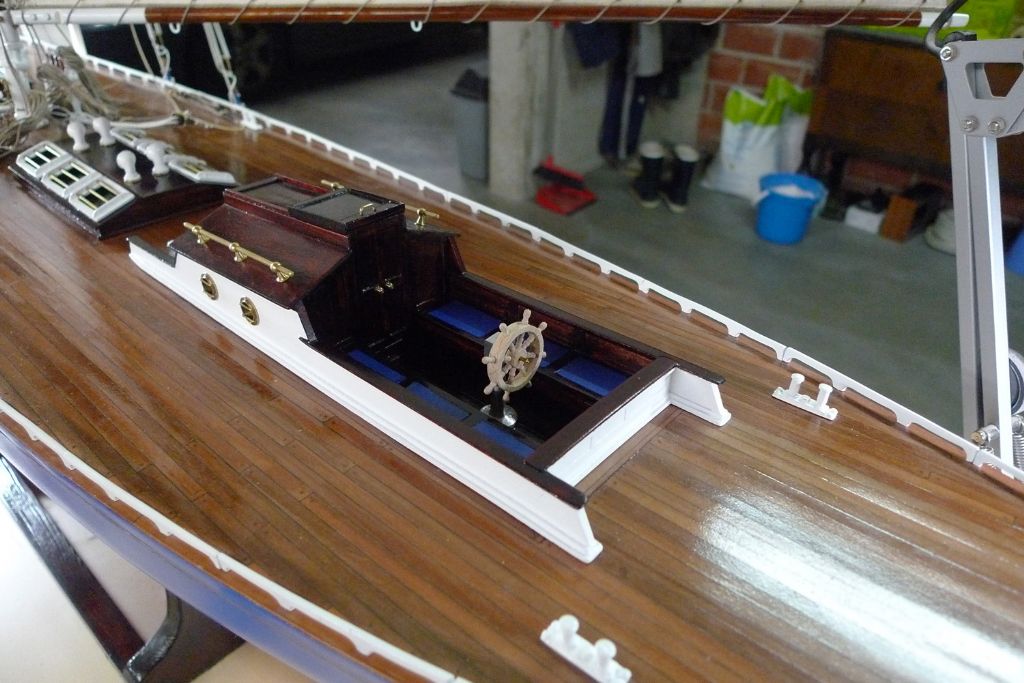
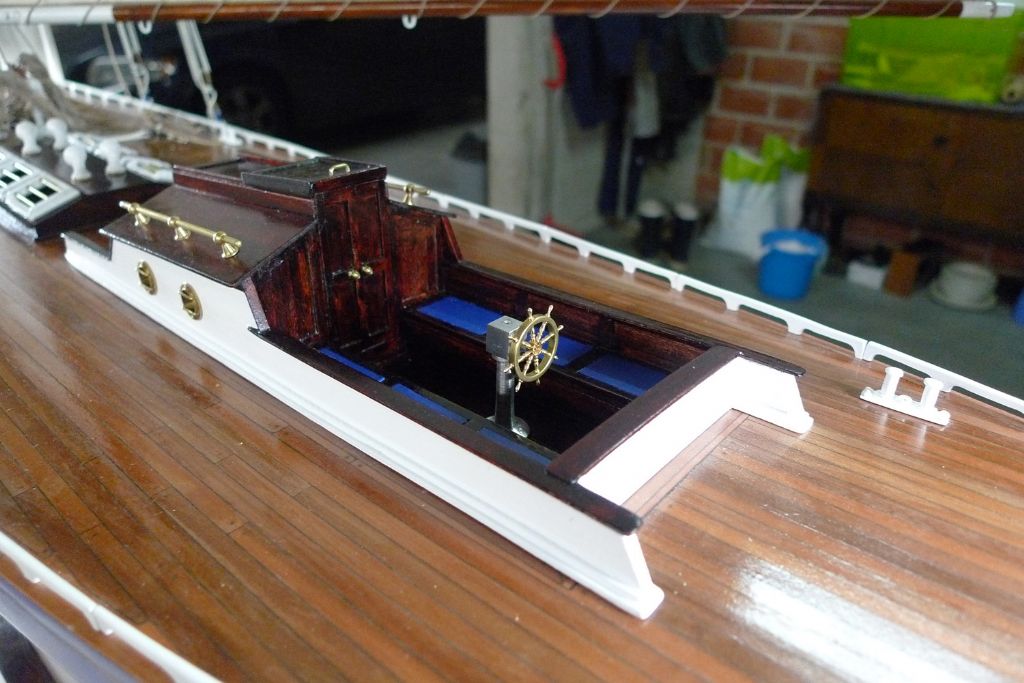
                                        This leaves just one, last job to sort before the build is finished, namely the wheel and binnacle!

                                        These come in the shape of white metal castings …

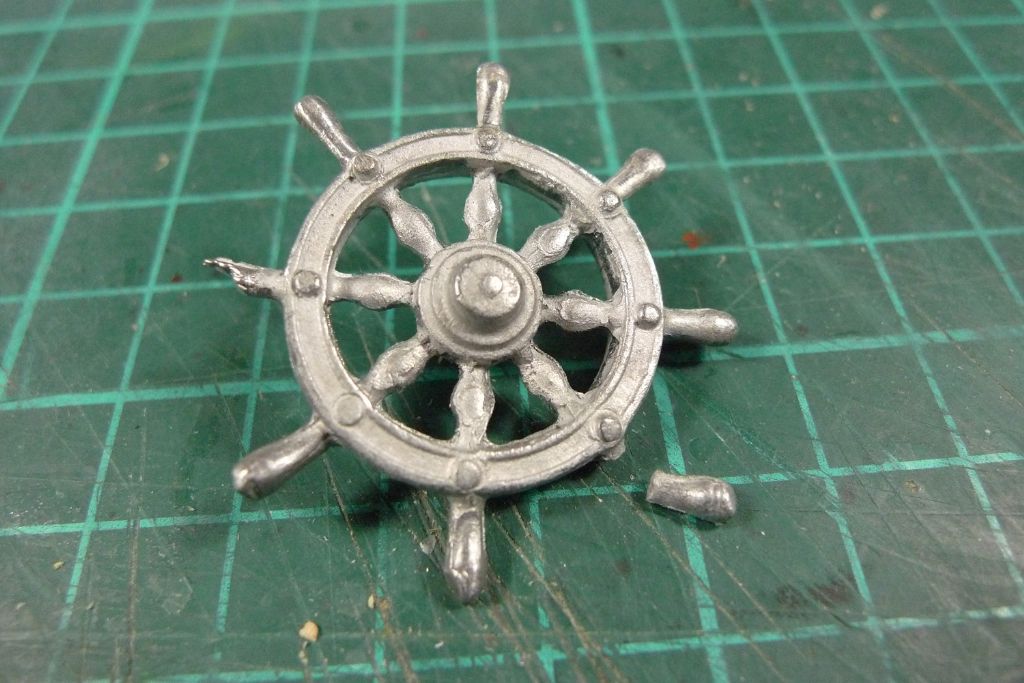
                                        mbbygg1178.jpg

                                        … and as can be seen from the photos, the wheel itself is not the best quality casting ever: one spoke was partially missing already when delivered, while a second one was badly cast, and broke off during fettling.

                                        Both spokes could be repaired/replaced easily enough with some brass rod and Milliput, but for the moment I've put the wheel to one side, and have sent off for a replacement; the casting of this one is a bit too mediocre for my taste, with badly aligned halves and a partially rough finish, for a rescue operation to appeal.

                                        mbbygg1179.jpg

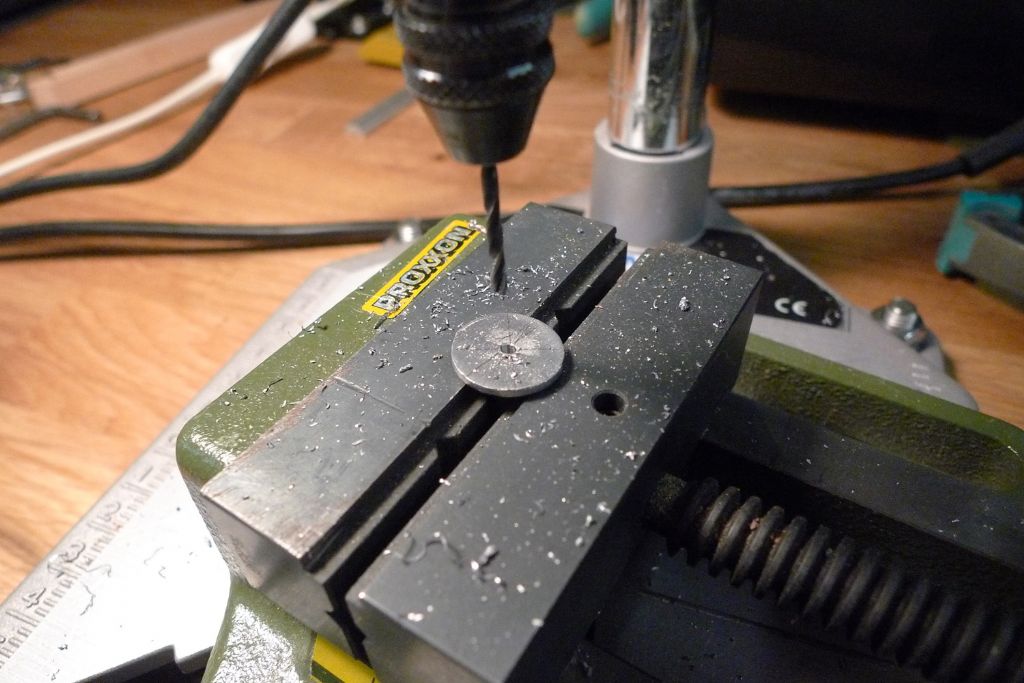
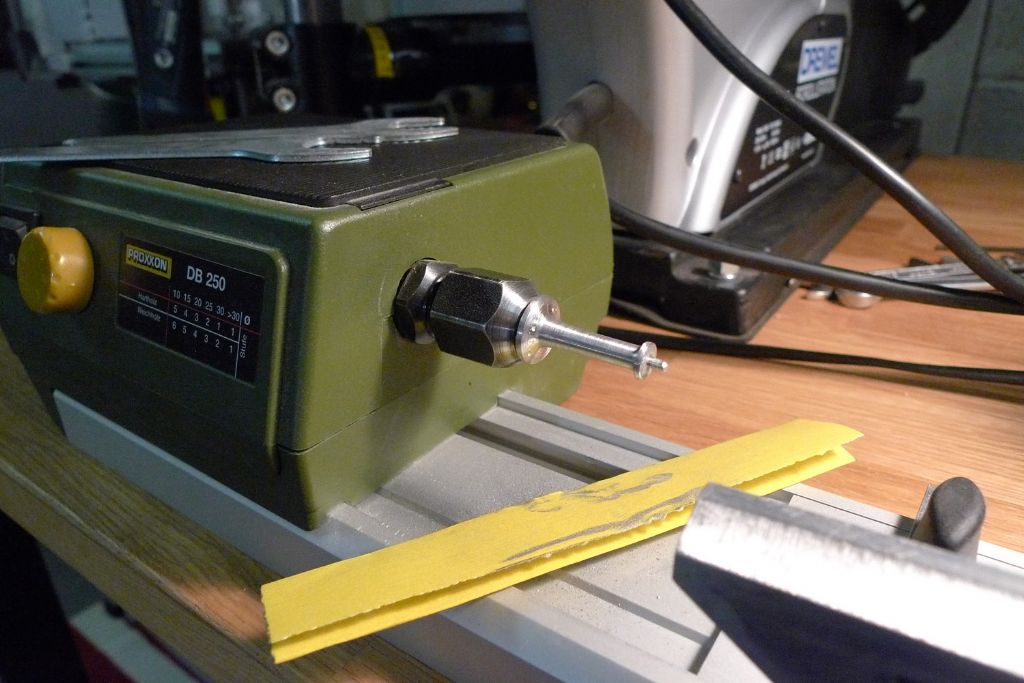
                                        The wheel column on the other hand, although also slightly misaligned in casting, was perfectly salvageable, so I first cut off the white metal pin on its underside, and drilled a 2 mm hole into the base into which was glued a piece of 2 mm brass rod.

                                        mbbygg1180.jpg

                                        This allowed me to set it up in the micro lathe, for some rotary fettling …

                                        mbbygg1181.jpg

                                        … after which the column top block was also fettled and glued on to the column.

                                        mbbygg1182.jpg

                                        To be continued …

                                        Mattias

                                        Edited By Banjoman on 22/01/2018 06:47:57

                                        #75468
                                        Banjoman
                                        Participant
                                          @banjoman

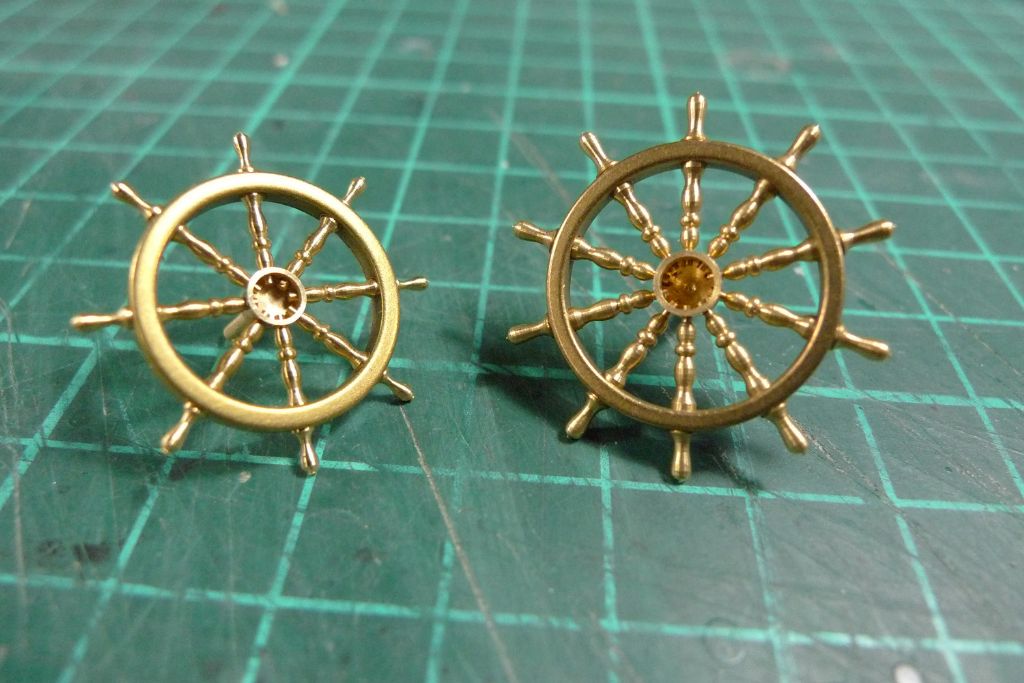
                                          As mentioned in my last posting, the wheel that came with the kit left a few things to be desired, so I sent off for two alternatives, both made by RB Models in Poland.

                                          One is in wood, and pretty much exactly the same size as the original white metal part …

                                          mbbygg1183.jpg

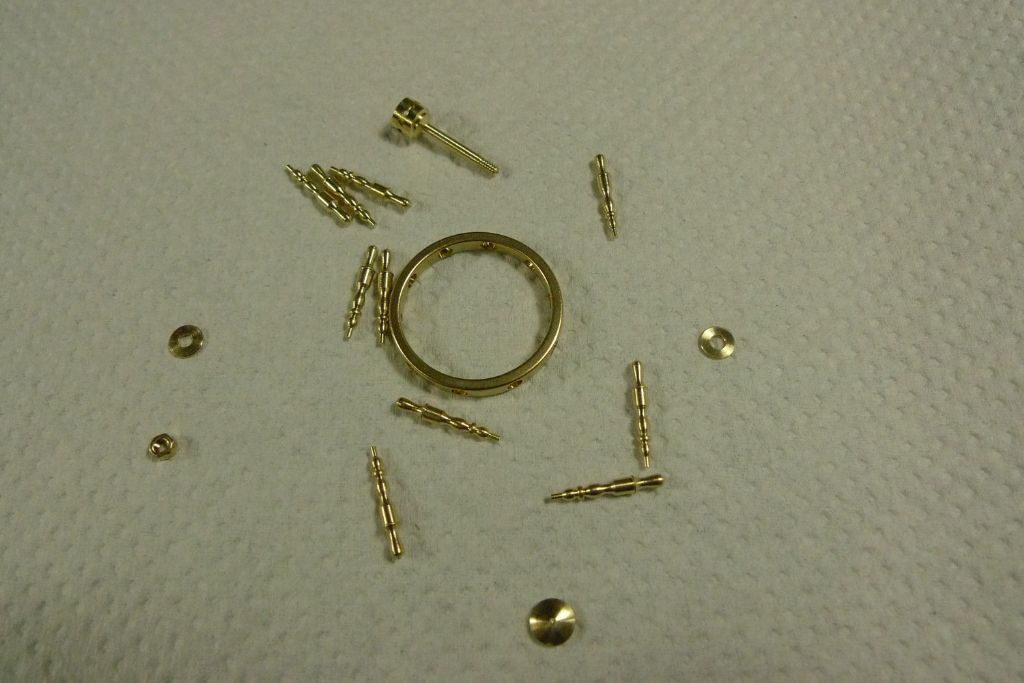
                                          .. while the second one is smaller, and all brass. They both came in the form of simple kits, i.e. rim, hub and separate spokes.

                                          mbbygg1184.jpg

                                          I much prefer the brass one, which I think is much prettier and has better proportions. However, its measurement description was slightly misleading, in that the given diameter of 24 mm seemed to indicate the diameter across the rim, but turned out to be across the spokes. I have therefore also ordered the same wheel but in the 27 mm size, and will compare them and pick whichever I think looks the best. The other one will, I'm sure, sooner or later come in handy for some other project.

                                          I have also ordered a couple of Deans Marine resin-and-white-metal crew figures, and, if they look good enough, will also see how the intended helmsman figure matches the different wheels …

                                          In the meantime, I have also fettled the white metal binnacle, and repaired a small casting error with some Milliput.

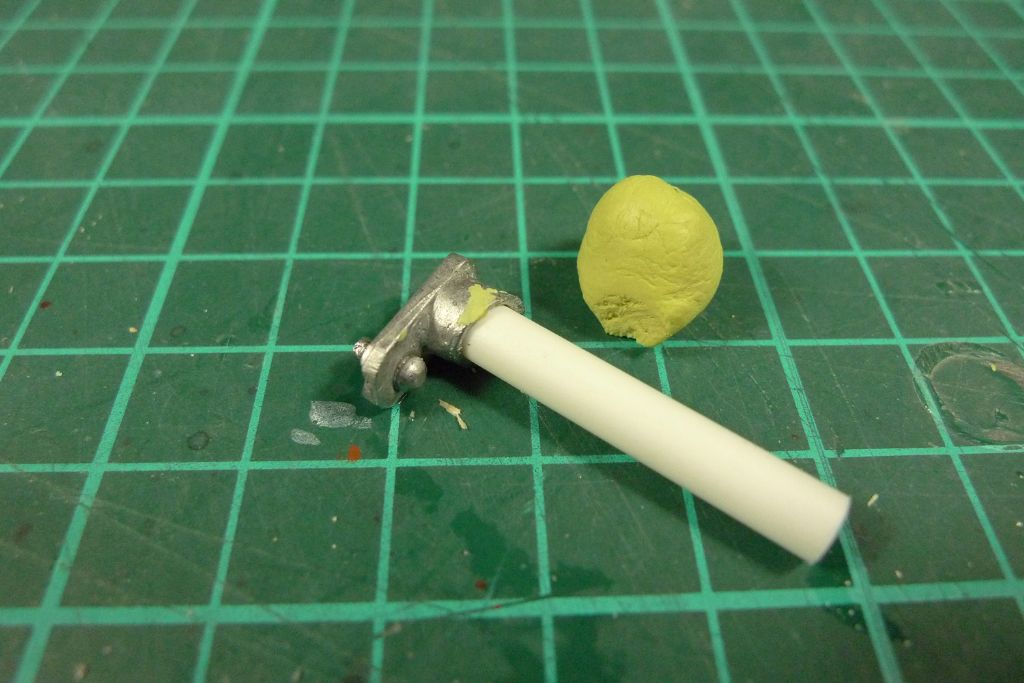
                                          mbbygg1185.jpg

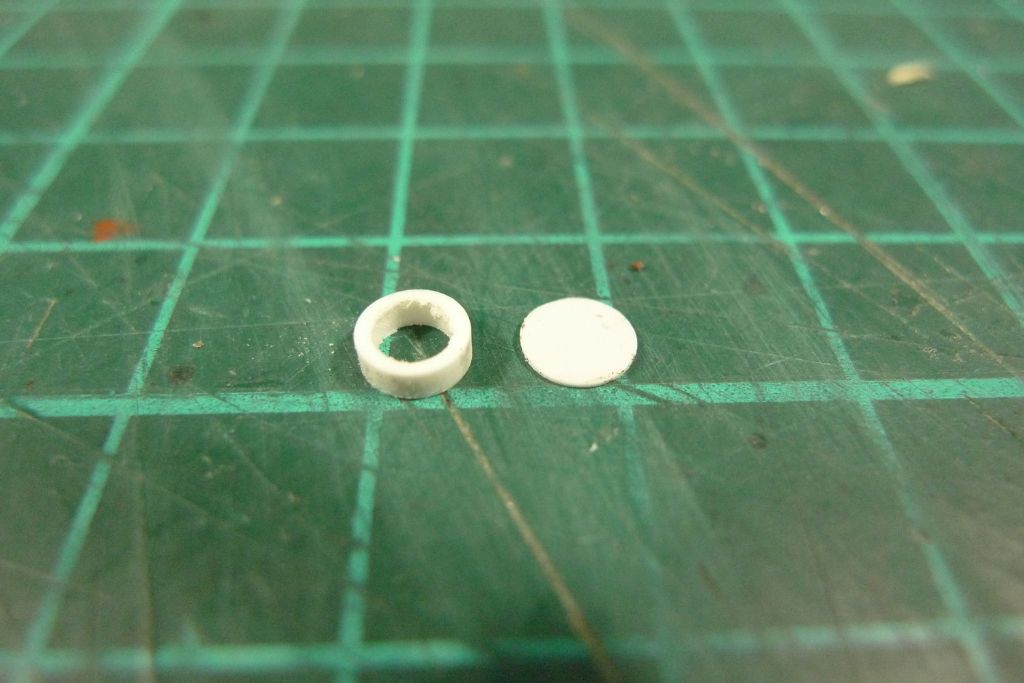
                                          As I found the interior of the binnacle slightly too deep as it was, I also cut of a +/- 1.5 mm slice of 4.8 mm styrene tube, and punched out a 5 mm diameter disc of thin plasticard.

                                          mbbygg1186.jpg

                                          I have likewise looked for and tested some compass rose images, and shall use the one in the lower row; I will first have a better one made, though, by printing it out as a photo rtaher than on the laser printer.

                                          mbbygg1187.jpg

                                          Anway, with all parts prepared …

                                          mbbygg1188.jpg

                                          … it was time to get on with painting the lst few white metal parts.

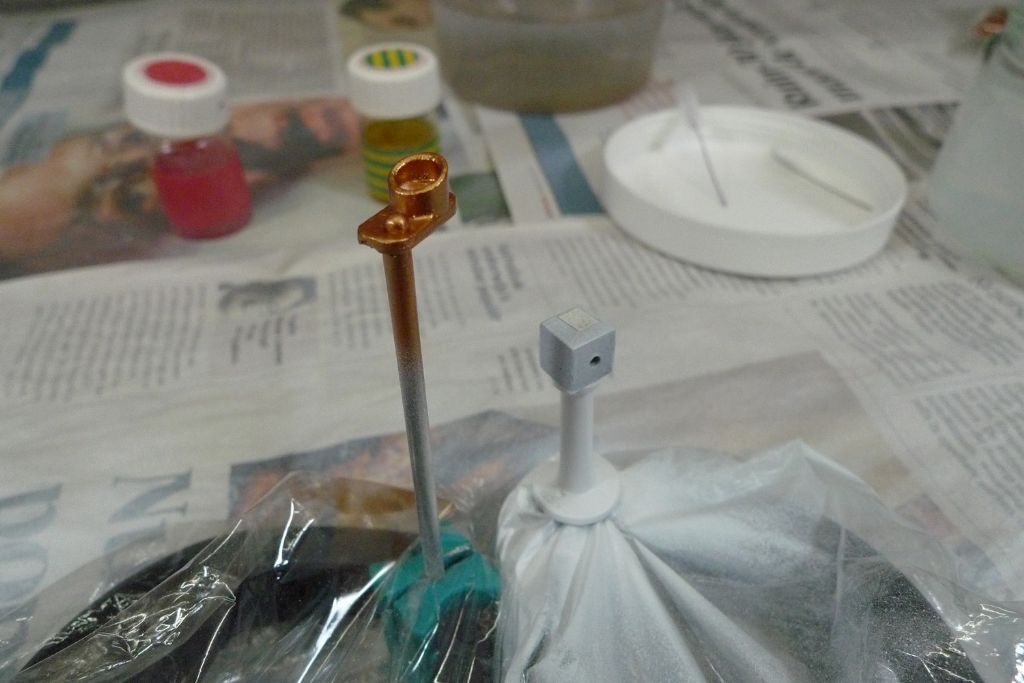
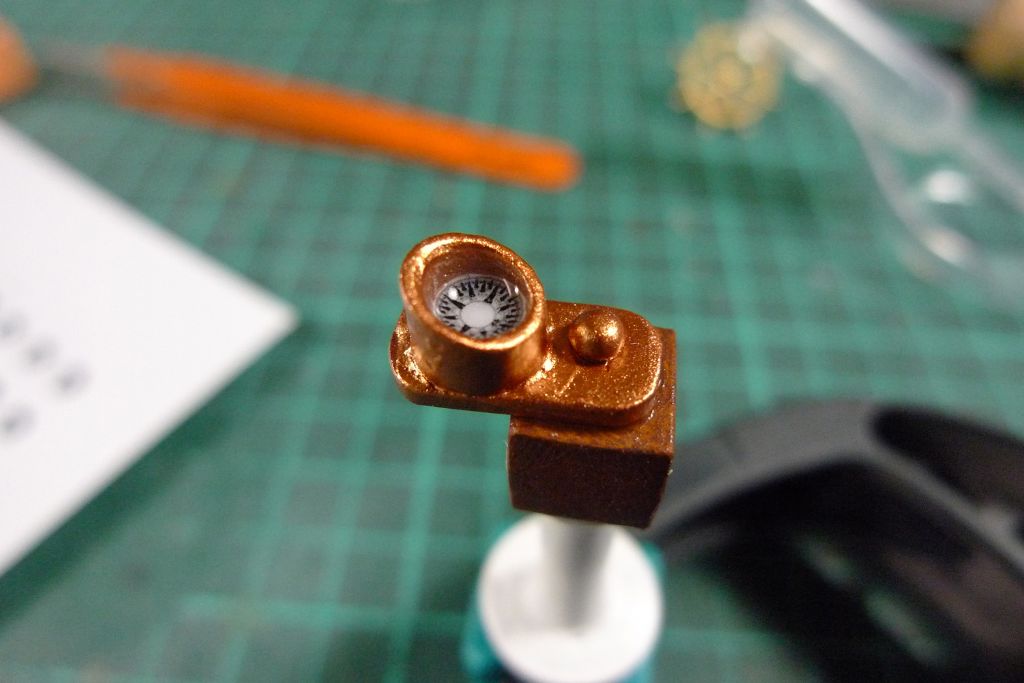
                                          The plasticard tube and disc were glued into the binnacle to form a platform for a compass rose, and the whole thing then painted copper. I opted for copper, rather than brass, as here is so much real brass around the cockpit that I think it would look too obvious that the binnacle is only painted; anyway, copper is not an unusual metal for binnacle housings either.

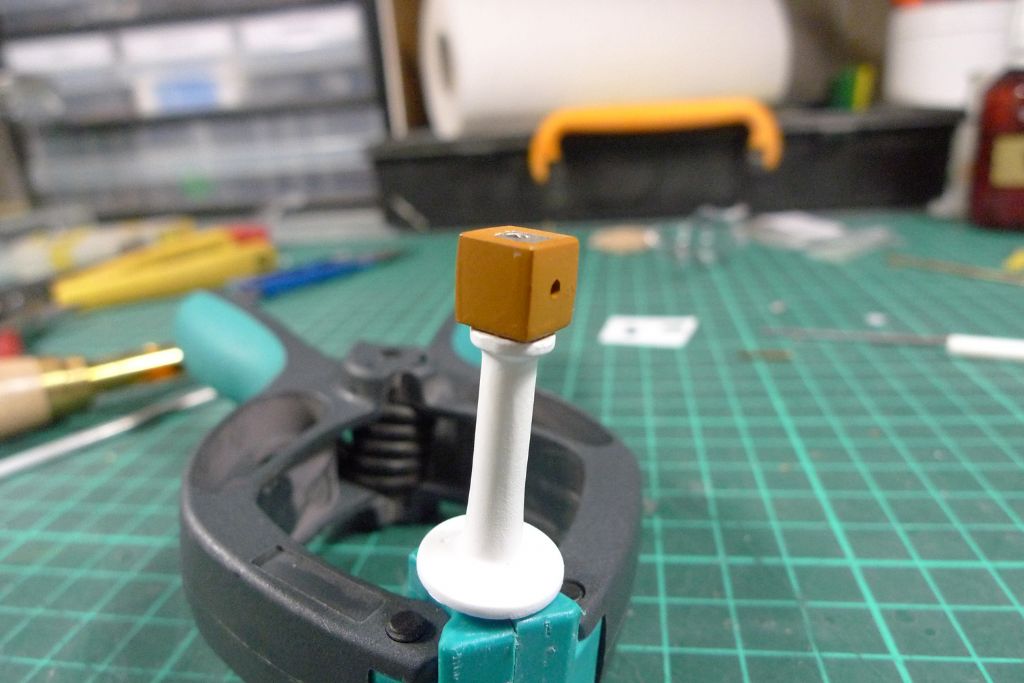
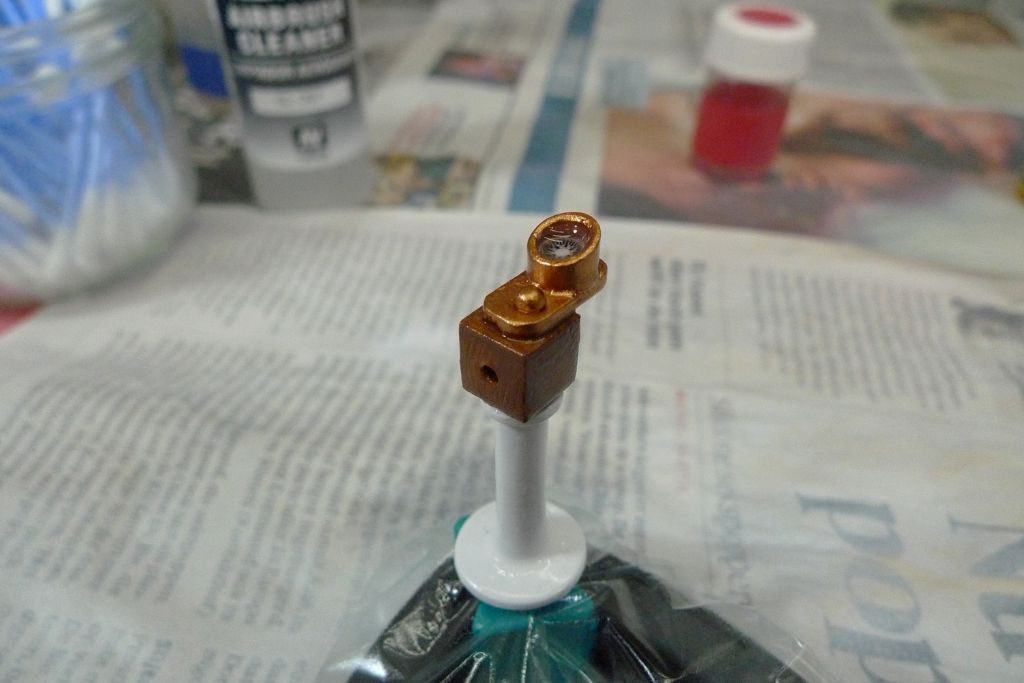
                                          The base pillar was painted the usual gloss white, but the connecting box on top has so far only been given a thin coat of white primer.

                                          mbbygg1189.jpg

                                          To be continued …

                                          Mattias

                                          Edited By Banjoman on 29/01/2018 07:28:17

                                          #75475
                                          Eddie Lancaster
                                          Participant
                                            @eddielancaster

                                            Good morning Mattias.

                                            I must thank you for all your posts, I refer to them constantly, and they give me so much insperation.
                                            You are a very accomplished modeller, there is nothing 'oh that will do' about you, it has got to be right!

                                            Best wishes and keep the posts coming.

                                            Eddie.

                                            #75485
                                            Banjoman
                                            Participant
                                              @banjoman

                                              Hello Eddie,

                                              Warmest thanks for your much too kind words! I am very glad to hear that you enjoy my posts, but must insist that I don't know at all about "very accomplished" or owt like that, or that anything has "to be right" … What I might say is that it has to be right enough to satisfy myself, but there is most deifinitely some "that'll do" leeway left in my book between right enough and right.
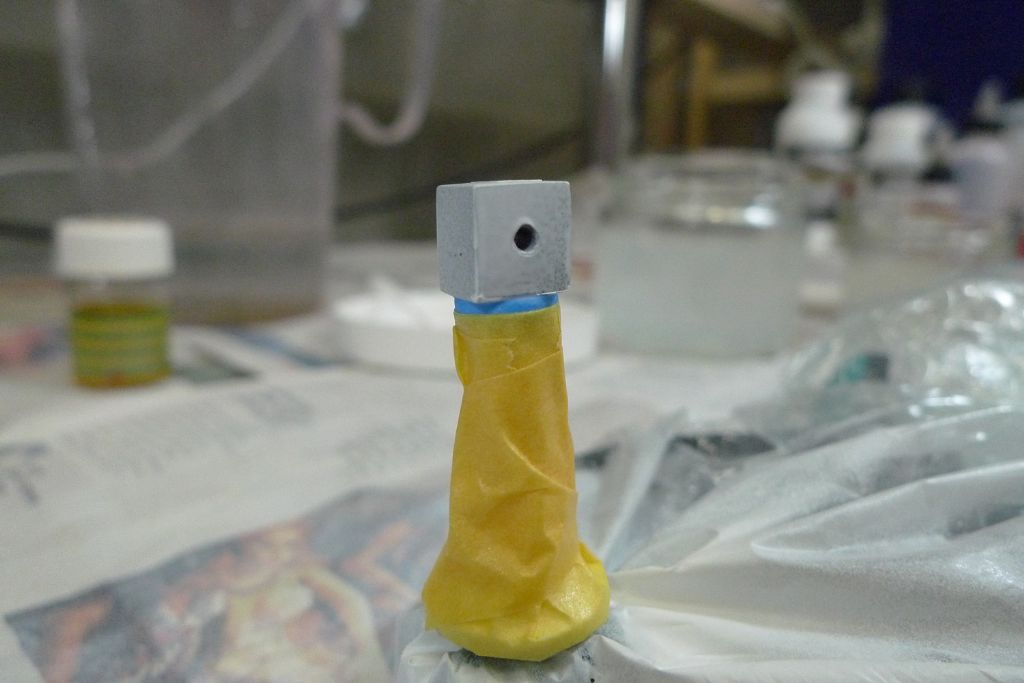
                                              Anyway, this is not a post to argue about my merits or lack therof, but to continue with the last bit of build, or rather painting. This afternoon, I masked off the steering wheel pillar …

                                              mbbygg1190.jpg

                                              … and then blew a coat of flat brown onto the top box.

                                              mbbygg1191.jpg

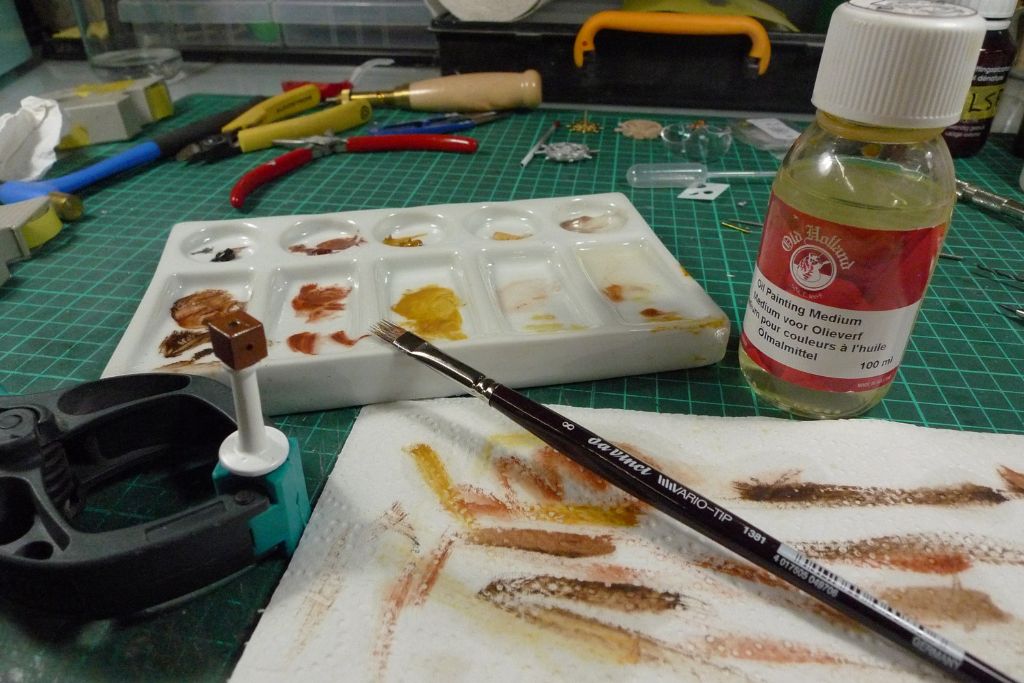
                                              Once this paint was sufficiently dry, it was time to break out the oil paints …

                                              mbbygg1192.jpg

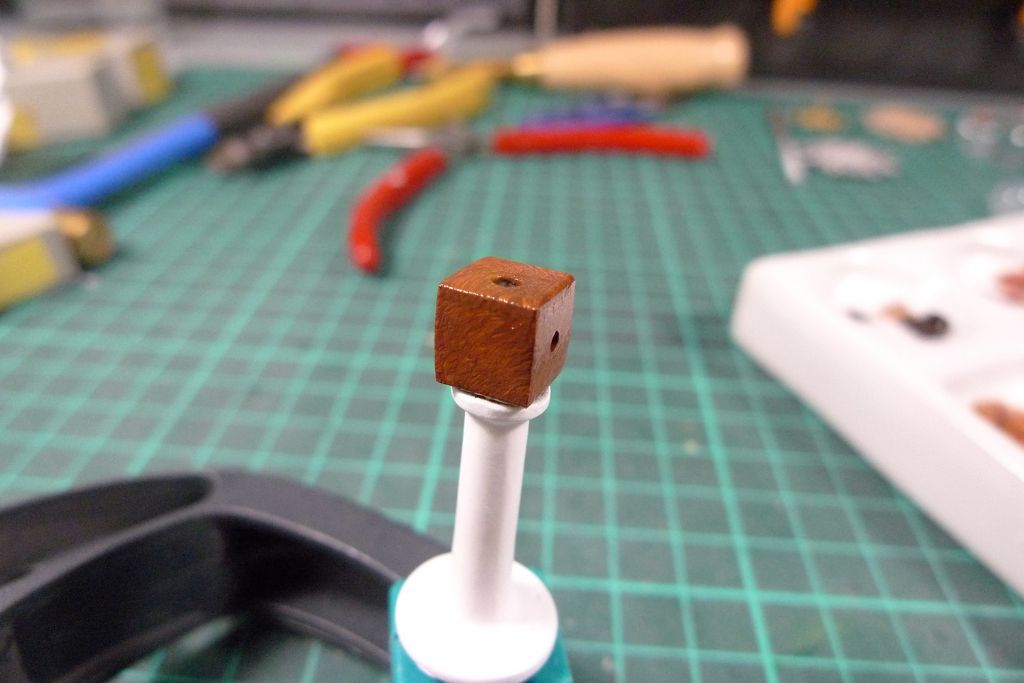
                                              … and to paint the box in an imitation wood grain pattern.

                                              This has now been set aside to dry for up to a week, or however long is needed for the oil paints to fully cure.

                                              mbbygg1193.jpg

                                              To be continued …

                                              Mattias

                                              Edited By Banjoman on 29/01/2018 16:30:29

                                              #75647
                                              Banjoman
                                              Participant
                                                @banjoman

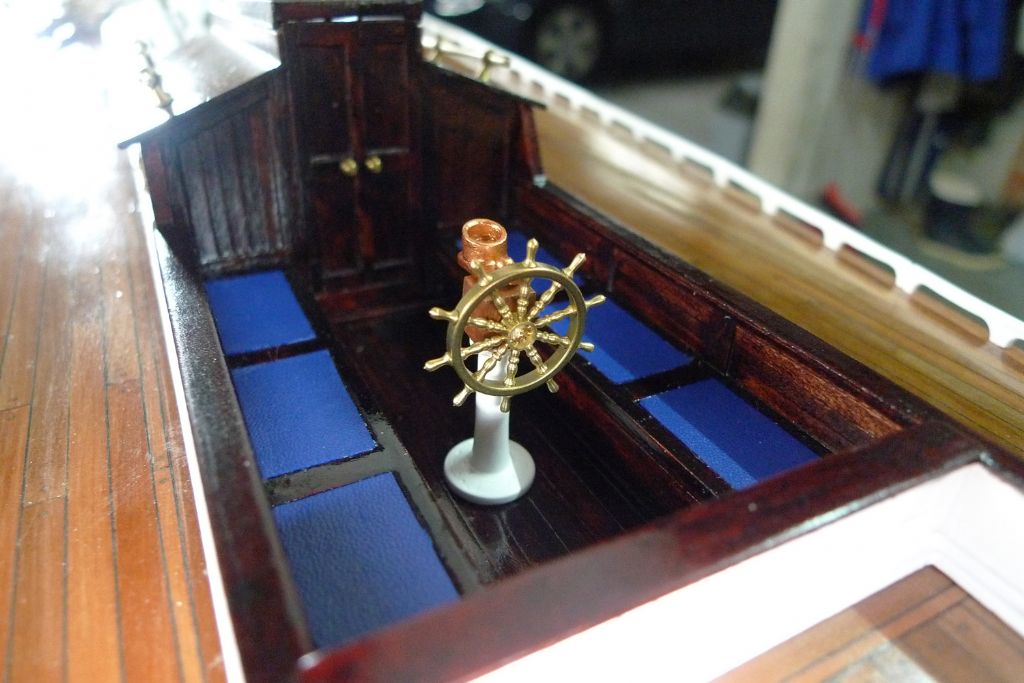
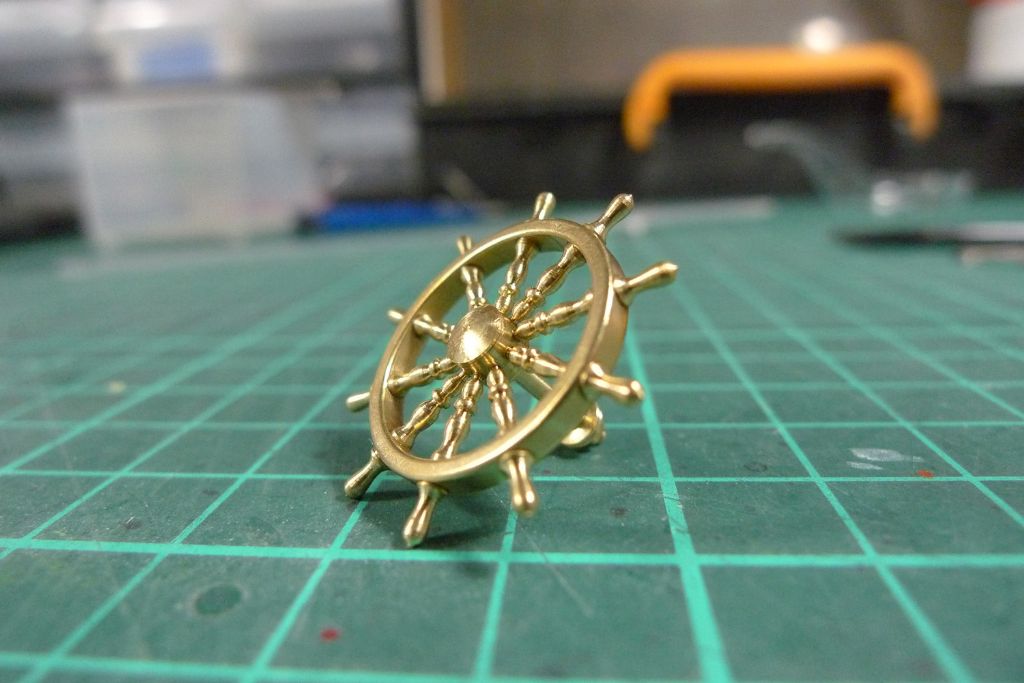
                                                The 27 mm brass wheel from RB Models arrived the other day …

                                                mbbygg1194.jpg

                                                … and will, I think, be a better fit, both for general appearance …

                                                mbbygg1195.jpg

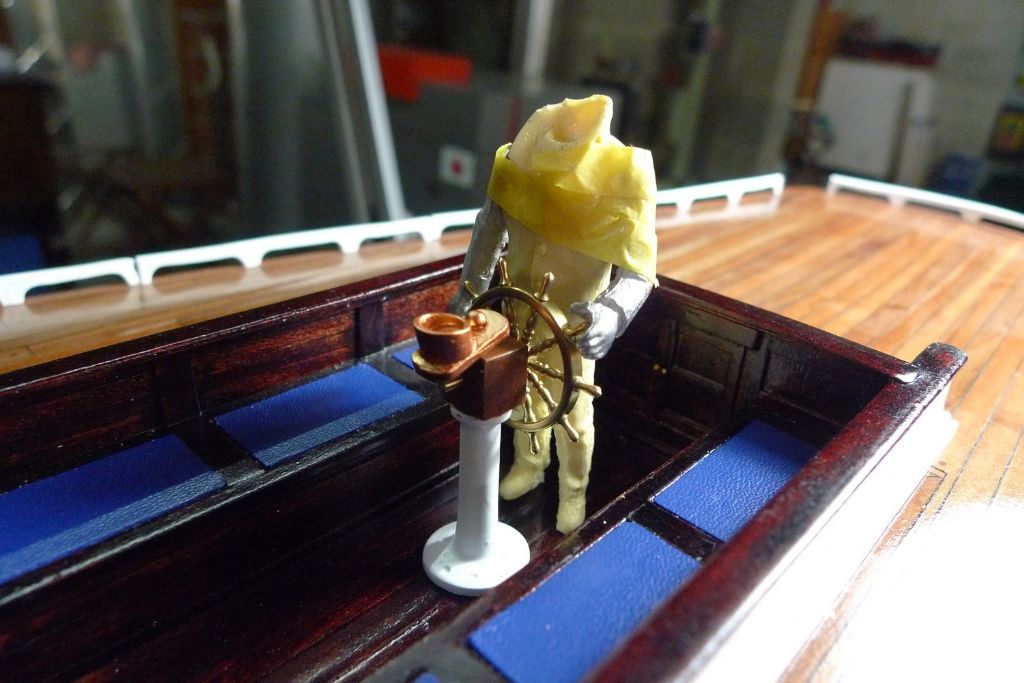
                                                … and when combined with the Deans Marine resin figure …

                                                mbbygg1196.jpg

                                                … that I intend to use as helmsman.

                                                mbbygg1197.jpg

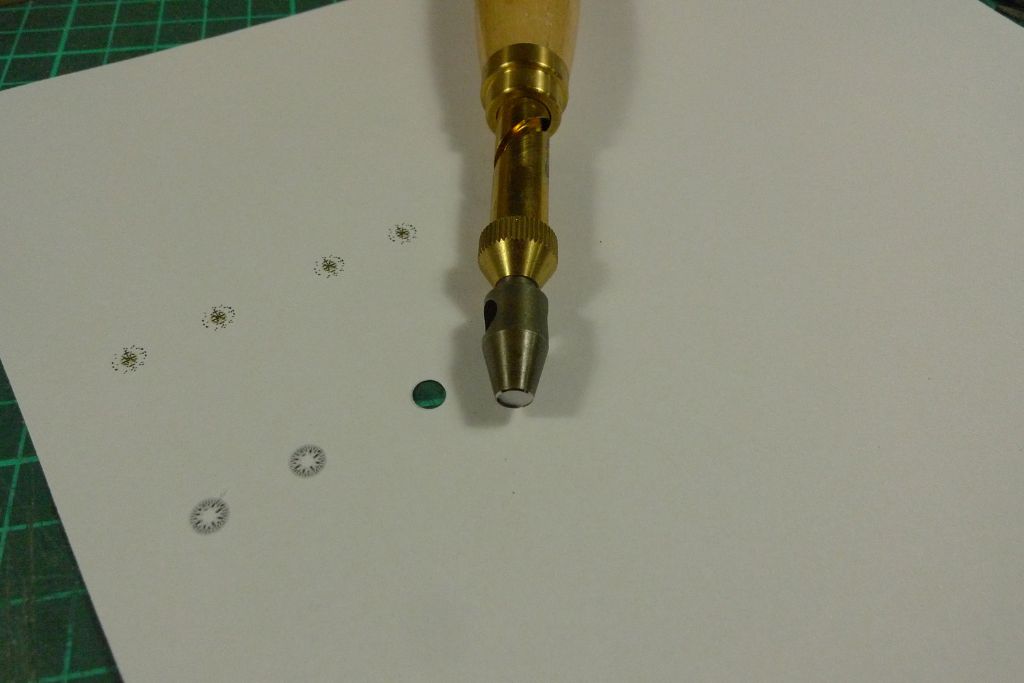
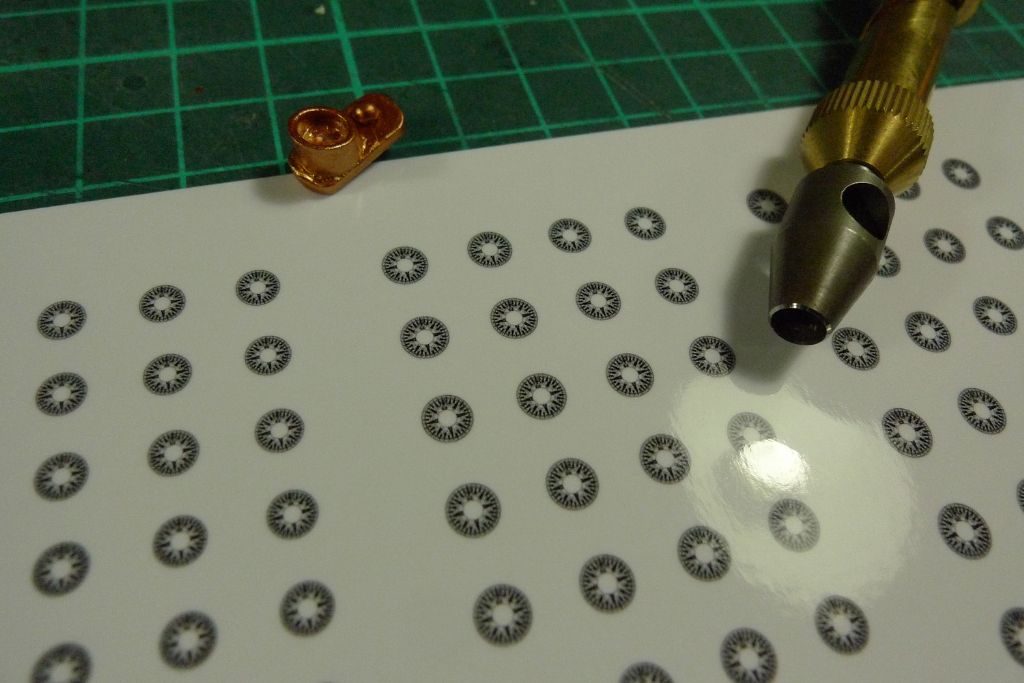
                                                Said helmsman shall of course be given a head and all that, but in the meantime I have also had a sheet of compass roses printed as a photo, and now proceeded to punch out a 4.5 mm one, using a 5 mm punch.

                                                mbbygg1198.jpg

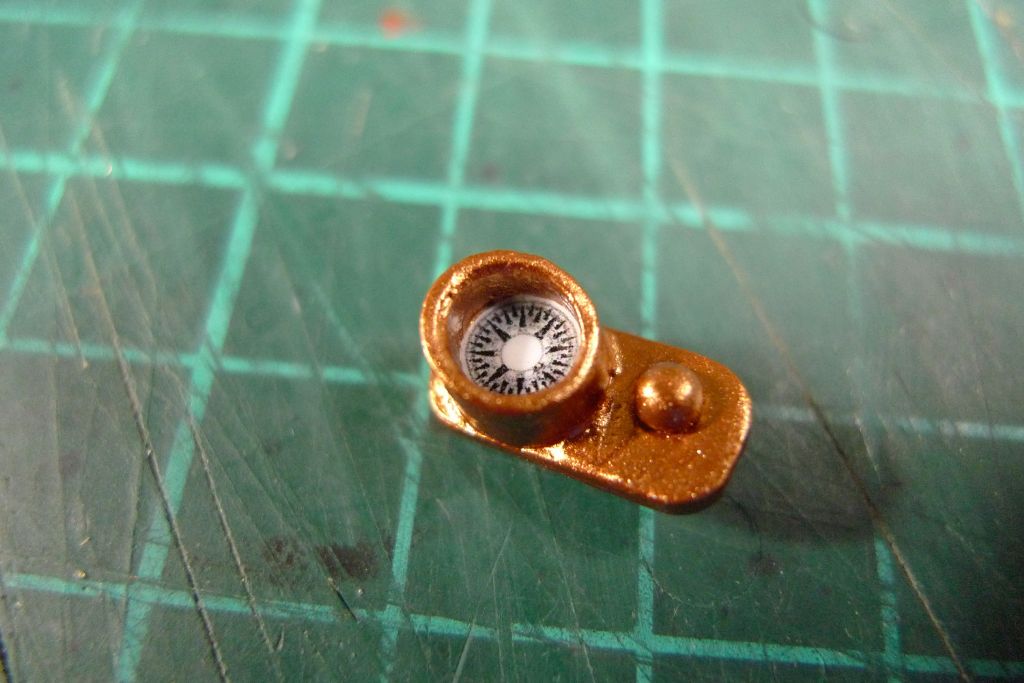
                                                After trimming down the resulting paper disc to the requisite 4.8 mm, it was glued in place with some canopy glue …

                                                mbbygg1199.jpg

                                                … and given a drop of clear varnish on top to sort of simulate a glassed effect, after which the binnacle was epoxy glued to the pillar stand.

                                                mbbygg1200.jpg

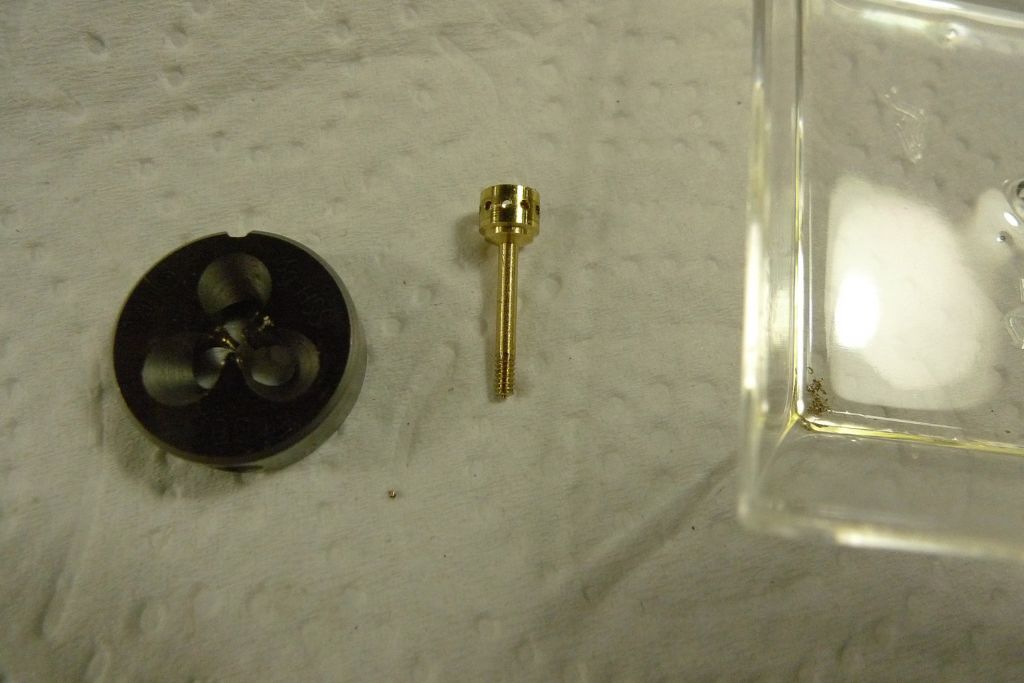
                                                The final job last night was to cut a M1.6 thread on the end of the wheel axle …

                                                mbbygg1201.jpg

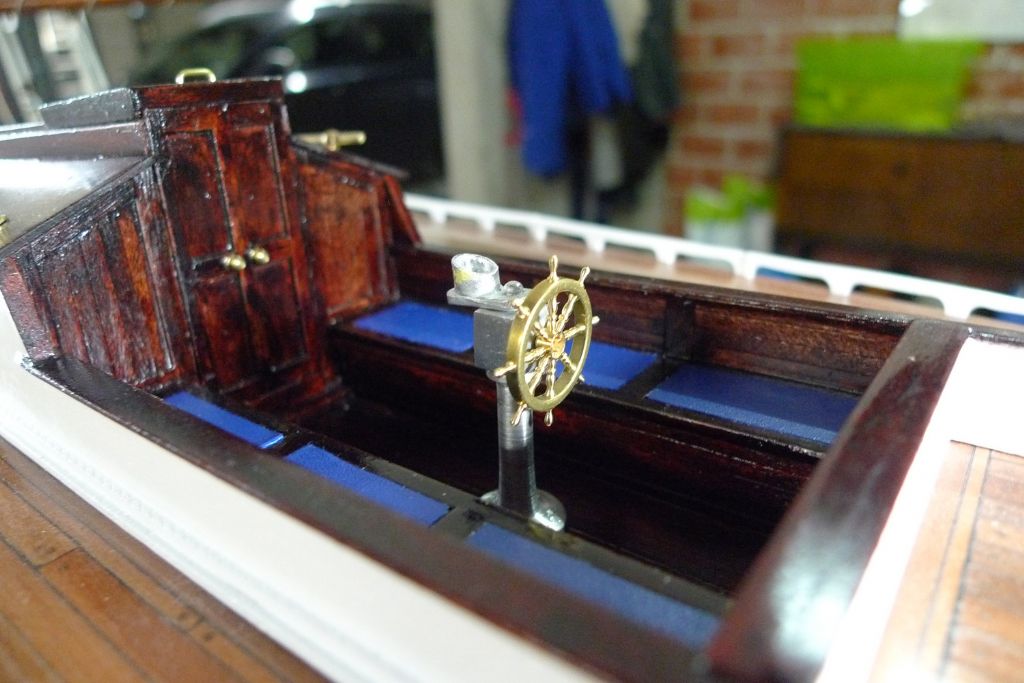
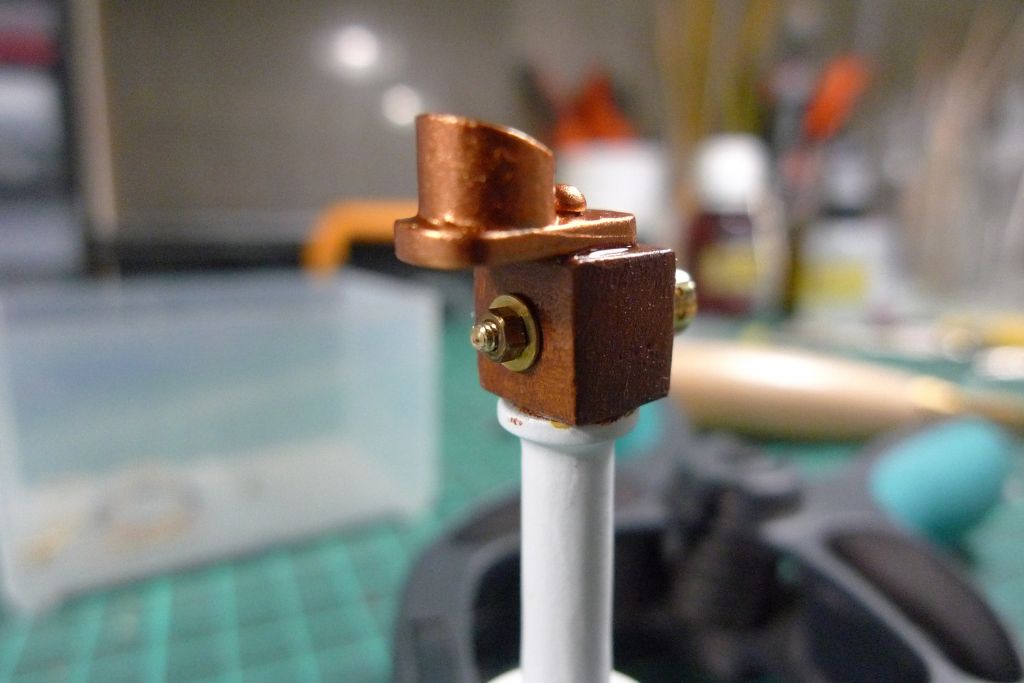
                                                … for a slightly more assembled look. Oh, and the photo below showed me that a slight touch-up of the white paint on the pillar seems to be called for …

                                                mbbygg1202.jpg

                                                To be continued …

                                                Mattias

                                                #75686
                                                Banjoman
                                                Participant
                                                  @banjoman

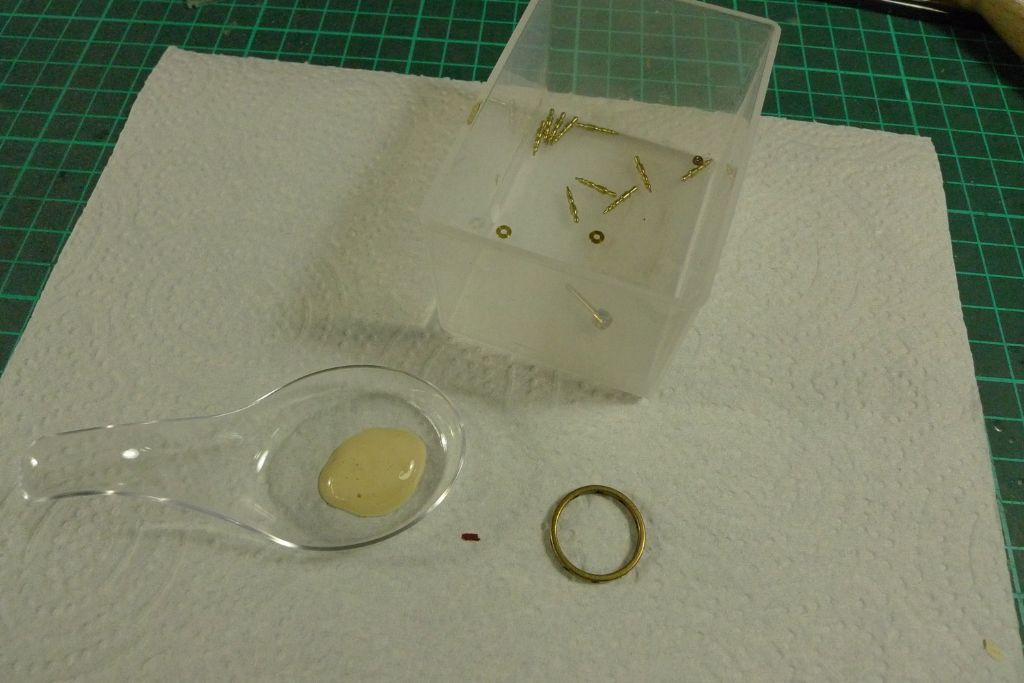
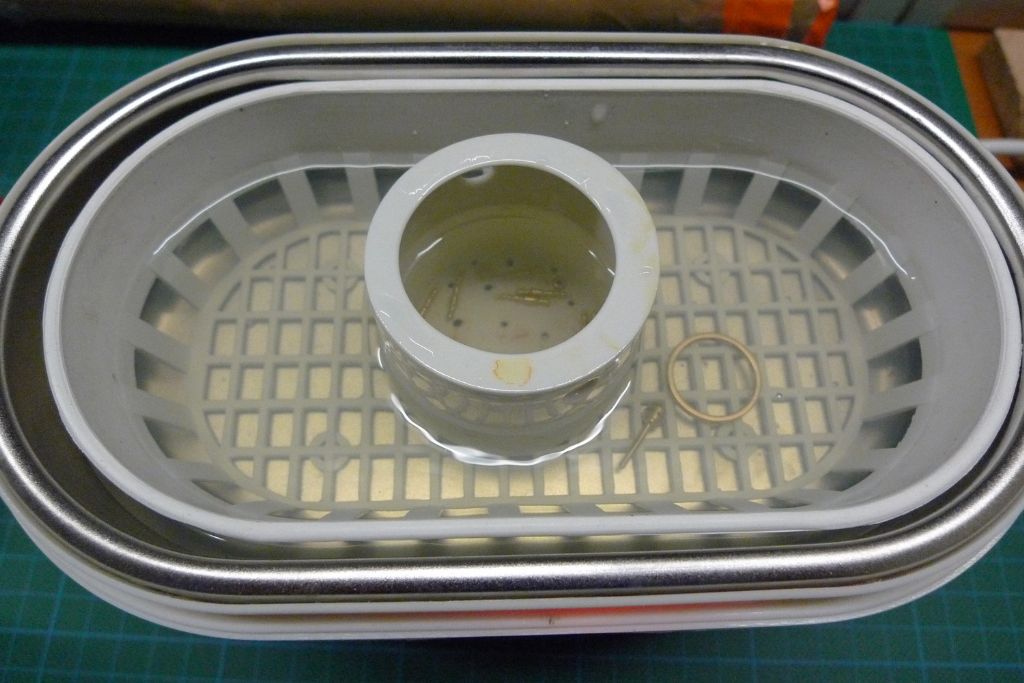
                                                  Having decided to use the 27 mm, ten-spoke brass wheel, it was time to clean and polish the parts, so some Häxans kopparputs (the Swedish equivalent of Brasso) was applied to the parts …

                                                  mbbygg1203.jpg

                                                  … after which they were sent for a swim in the ultrasonic cleaner.

                                                  mbbygg1204.jpg

                                                  In parallel, the pillar and binnacle assembly was given two coats of gloss varnish.

                                                  mbbygg1205.jpg

                                                  After their bath, the brass parts were rinsed in methylated spirits and wiped down to remove any vestiges of the ultrasonic cleaning agent …

                                                  mbbygg1206.jpg

                                                  … after which the wheel was assembled, the spokes being secured with some thin CA glue.

                                                  mbbygg1207.jpg

                                                  To be continued …

                                                  Mattias

                                                  #75693
                                                  Eddie Lancaster
                                                  Participant
                                                    @eddielancaster

                                                    Hi. Mattias, That wheel looks really smart, the ultrasonic cleaner does a good job, but the brass has to have a good finish to begin with?

                                                    Cheers Eddie.

                                                    #75695
                                                    Ray Wood 3
                                                    Participant
                                                      @raywood3

                                                      Hi Mattias

                                                      A shame your going to paint most of it to be timber, but the rim and boss left in brass will look great

                                                      Regards Ray

                                                    Viewing 25 posts - 401 through 425 (of 440 total)
                                                    • Please log in to reply to this topic. Registering is free and easy using the links on the menu at the top of this page.

                                                    Code of conduct | Forum Help/FAQs

                                                    Advert

                                                    Latest Replies

                                                    Home Forums Sailing Models Topics

                                                    Viewing 25 topics - 1 through 25 (of 25 total)
                                                    Viewing 25 topics - 1 through 25 (of 25 total)

                                                    View full reply list.

                                                    Advert