Lady Jan steam tug

Advert

Lady Jan steam tug

Home Forums Steam powered models Lady Jan steam tug

  • This topic is empty.
Viewing 17 posts - 26 through 42 (of 42 total)
  • Author
    Posts
  • #92865
    Mark Knight 4
    Participant
      @markknight4

      Hi Richard, thanks for this, I’ve now downloaded the orange book. I’ll be in touch once I’ve improved the valve leakage situation (and this Covid nonsense allows us to meet).

      Advert
      #92866
      Richard Simpson
      Participant
        @richardsimpson88330

        Mark, can you post a picture of the engine and point to exactly the leaks are coming from?

        #92867
        Mark Knight 4
        Participant
          @markknight4

          d95263cb-cac5-4ab5-9e54-1342c62b0f92.jpeg

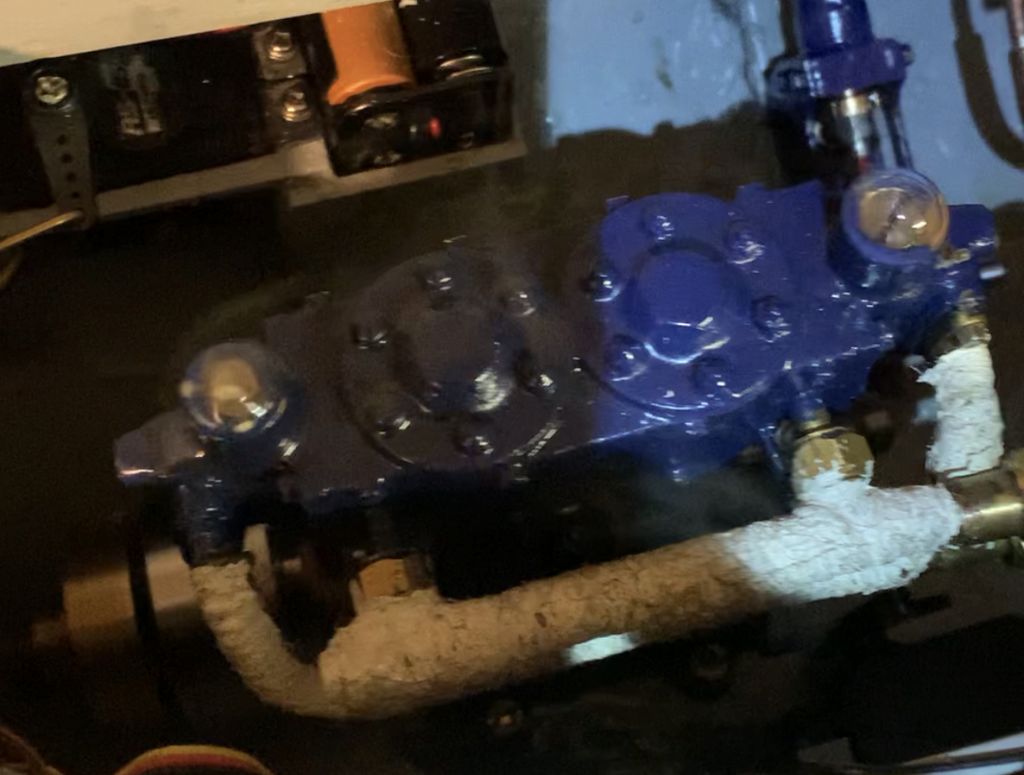
          Hi Richard, this snapshot from the YouTube video linked in my above post shows the engine piston valves bubbling on the top of the engine. There is some steam rising from these when the engine runs. However, I think the worst leak is coming from the reversing valve. It’s a piston type valve and when the piston is centralised (shutoff) there is still quite a plume of steam coming out of the exhaust. I think steam is leaking past the piston directly between the inlet and exhaust ports of the valve. If this was sealing correctly, it would stop any steam leaving the boiler. I’ve now re-reamed the bore of the valve and I’m in the process of making a new piston which will hopefully provide a better fit and seal.

          #92868
          Mark Knight 4
          Participant
            @markknight4

            I should also mention the process I’m going through with making this piston as there may be something more I can learn. I levelled my Myford lathe in accordance with the manual before I started and managed to get the turned diameter within 0.01mm down the length of the piston. I then turned the piston down such that it was a slight interference with the cylinder bore. The surface finish was very good from the turning but I then got it even better with some 800 grit wet and dry (the lathe was protected with a cover!). The piston was still a tight fit with the cylinder bore so finally I put some molybdenum disulphide on the piston and attempted to lap the interface with the cylinder. I put the lathe on a very slow speed and held the cylinder on the piston and gradually moved it in and out. It is loosening up slowly put still won’t fully go freely down the full length of the cylinder. I read about this method using molybdenum disulphide on a model steam forum but it had mixed opinions. Is there a better way of achieving a free but steam tight fit between piston and cylinder?

            Edited By Mark Knight 4 on 26/12/2020 13:43:10

            #92874
            Richard Simpson
            Participant
              @richardsimpson88330

              Mark, without taking it apart fro a look I cannot say for sure but those slots you can see may be for valve adjustment, in which case we are looking at the top of the piston valve itself. If that is the case and you have leaks there your only options are to dismantle it and see if there are any internal sealing arrangements such as 'O' rings, which can be replaced. If not, and you are getting leaks past the valve then your only option is a repeat of the process you are going through with the main reversing valve, which is a real pain. You could try threading the outside of the boss that supports the valve and fitting a cap, which might just be an easier option.

              Unfortunately piston valves are notorious for passing as there has to be a clearance for smooth running however make sure you run the engine with a good supply of steam oil in it as that helps to seal the piston. I don't think you can do any more than you are however the danger is that you are going to get the best possible fit you can when it is cold, which will change when it is up to temperature, and could lead to seizure if tolerances are too fine. Unfortunately the fit has to be a compromise between allowing free movement and resisting leaks. You will find you will have to compromise somewhere and that will inevitably mean putting up with a degree of leakage.

              #92895
              Mark Knight 4
              Participant
                @markknight4

                080bca85-1c5d-4eb1-a542-9404d2392474.jpeg

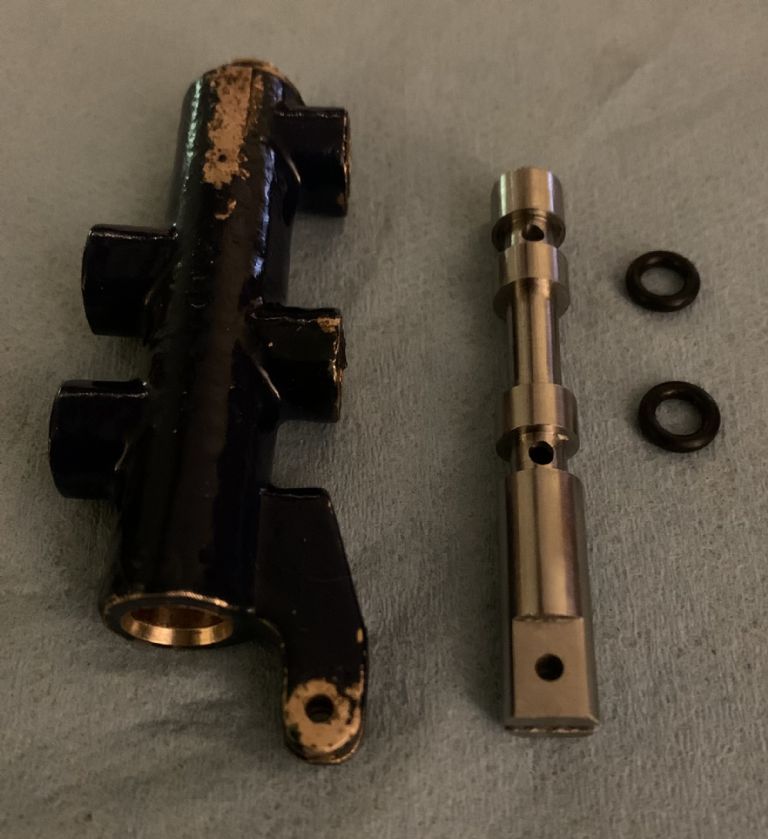
                I’ve now finished the new piston for the reversing valve. The fit in the cylinder feels decent but there’s still too much leakage between the inlet and exhaust ports in the shutoff position for my liking. I don’t think the adjustable reamer was the ideal tool for producing an accurate round and straight cylinder as it was only cutting along the middle portion of the flutes. I think a fixed reamer of the correct diameter would be better. Anyway next step is to turn a couple of grooves and insert a pair of O rings. I’ve done some experimentation and it looks like about 7 thou of radial nip across the O ring will work without the ports slicing the ring with every pass. It’ll be interesting to see how long these rings last in this application.

                Still not looked at the engine piston valves but going by the box of bits left by my Dad it appears these pistons have O rings at either end. I’ll hence take the pistons out and see if these rings have worn.

                Edited By Mark Knight 4 on 28/12/2020 22:00:10

                #92897
                Richard Simpson
                Participant
                  @richardsimpson88330

                  You might be lucky Mark and just need to replace the 'O' rings. That's a lovely job on the reversing valve by the way.

                  Actually an adjustable reamer should be a better tool for the bore as a fixed diameter reamer has to cut as it is presented into the bore. An expanding reamer can be completely inserted into the bore before it is expanded slowly to give a cut the full length of the bore. Hopefully you will get the ends sealed with the 'O' rings but there is always going to be a little internal passing as a result of the clearance fit.

                  #92911
                  Mark Knight 4
                  Participant
                    @markknight4

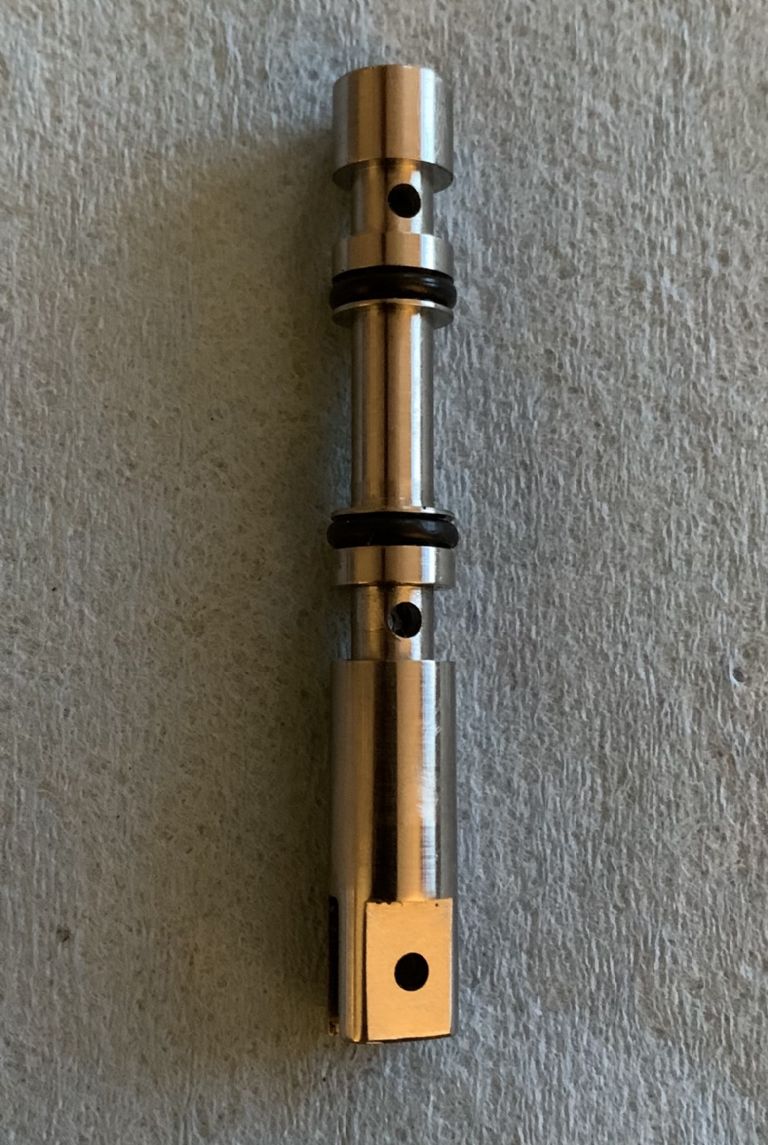
                    Thanks Richard, finally SUCCESS! I turned a couple of grooves into the reversing valve piston, installed a pair of O rings and sure enough no leakage in the shutoff position. It’ll be interesting to see how long the O rings last as it isn’t ideal that they pass over the port holes every time the valve is operated. This also causes some resistance although it appears the servo has sufficient force to overcome it fortunately.

                    683852d1-adfa-4f4a-aa0d-3633cc0d61f1.jpeg

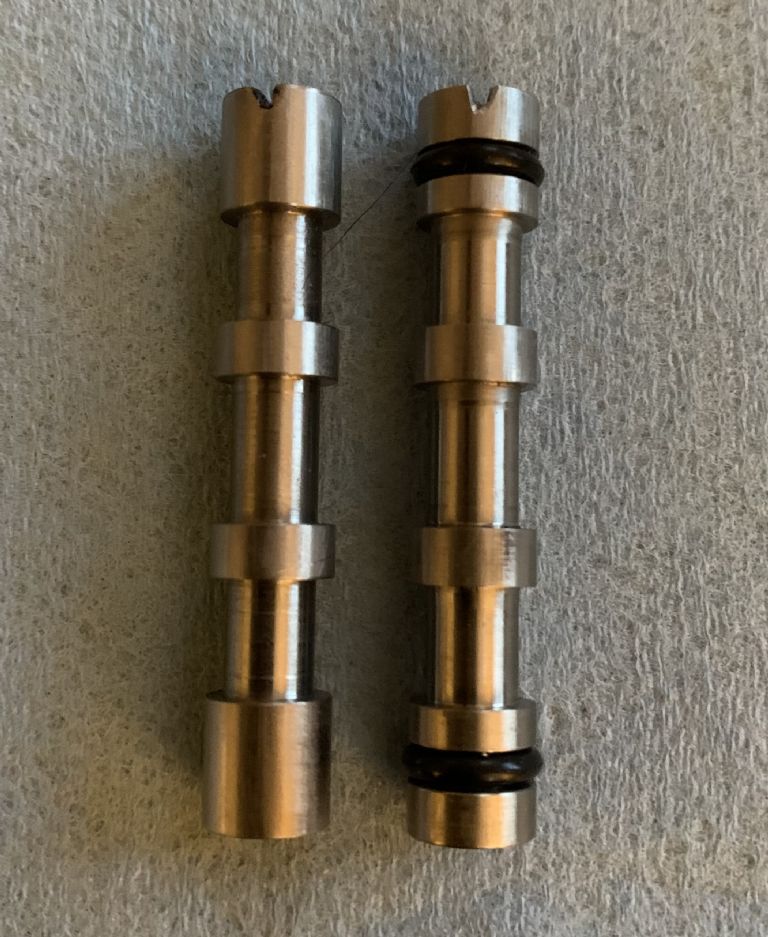
                    I took one of the piston valves off the engine and it doesn’t have any piston rings. My Dad must have experimented with the O rings as in his box of bits was a piston with O rings as shown below with the one off the engine. It has been run in the engine as I can see the wear marks. Perhaps he found the additional friction was a bigger problem than a bit of steam leakage.

                    7303f45d-30ea-40e2-8f13-663015d98607.jpeg

                    By far the worst leakage was through the reversing valve which I’ve now sorted so I’m going to leave the piston valves as they are. All the recent running has been done on air for convenience so I just need to steam it for a final check and then it’ll be finally finished.

                    #92912
                    Richard Simpson
                    Participant
                      @richardsimpson88330

                      Mark, Getting some steam oil around the valves might be all they need to reduce the leakage to a level you are happy with.

                      #92913
                      Richard Simpson
                      Participant
                        @richardsimpson88330

                        Hopefully your 'O' rings will survive but going past a sharp edged port usually seems to damage the surface.  You can only try.


                        Edited By Richard Simpson on 29/12/2020 17:03:17

                        #92916
                        Mark Knight 4
                        Participant
                          @markknight4

                          In an effort to prevent O ring damage, I’m going to try and break the sharp edge where the port holes meet the cylinder surface. Easier said than done on a 5/8” diameter cylinder with 1/8” diameter ports. Only way I can think of doing it is to make a tool that back faces the surface through the port. A 1/8” drill with the flutes ground down except for near the tip should do it. Any other ideas would be welcome.

                          #93131
                          Mark Knight 4
                          Participant
                            @markknight4

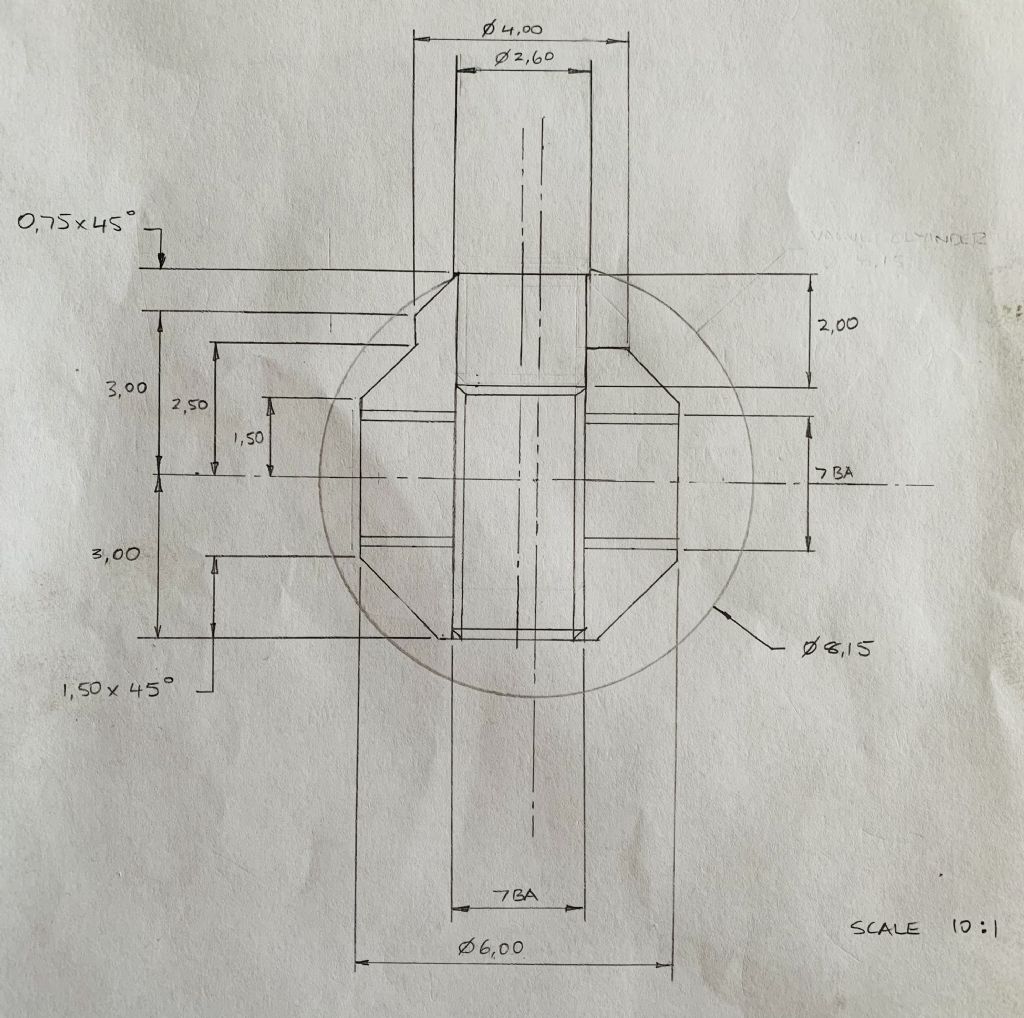
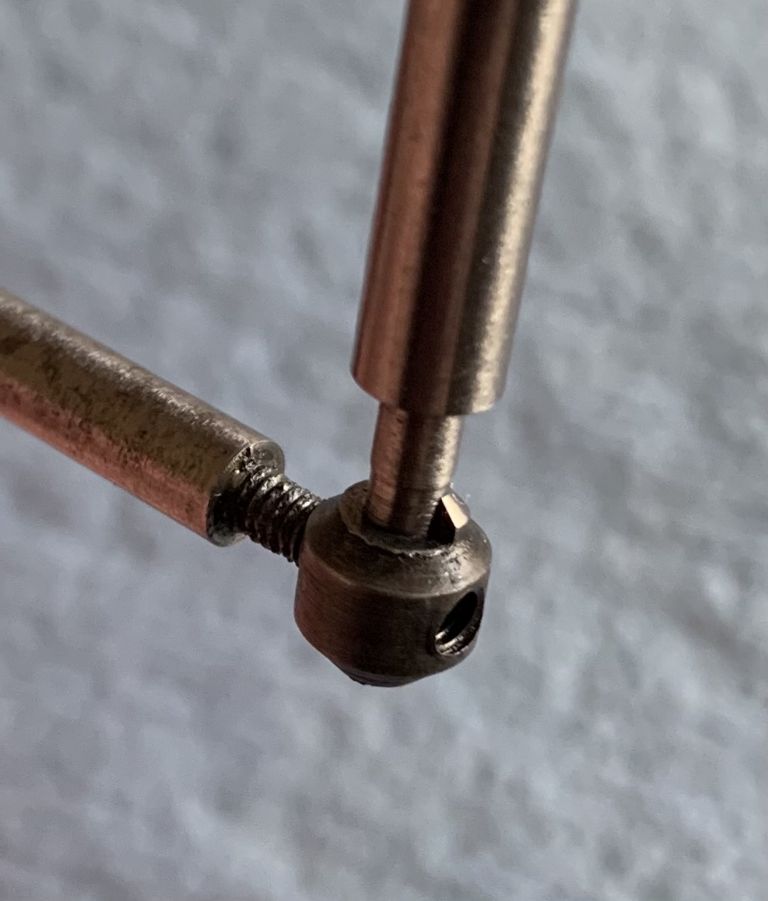
                            I’ve now designed and made a back facing tool for chamfering the corners between the port holes and cylinder wall that the O rings pass across. The head is made from silver steel which I quenched and tempered for a decent compromise between hardness and toughness. It has worked well and removed the phosphor bronze cylinder corner just by careful turning by hand. The operation of the valve as the O rings pass the ports now feels smoother so hopefully the rings will remain steam tight for longer.

                            fe12c10a-b9b3-454b-81a2-a8da519da805.jpeg

                            5248cd20-623a-408b-8b06-0b5f2093ff03.jpeg

                            Edited By Mark Knight 4 on 09/01/2021 14:41:10

                            #93134
                            Ray Wood 3
                            Participant
                              @raywood3

                              Hi Mark,

                              With your piston valves such small diameter it's difficult to pack them with graffited string as a normal piston would be in the engine, "O" rings are commonly used for sealing round a piston rod with good effect in lieu of a packed gland.

                              As the "O" ring is slightly compressed it will be tempted to be cut by port openings ? Full size loco piston valves are fitted with rings to make the seal.

                              Slide valve engines are so much easier

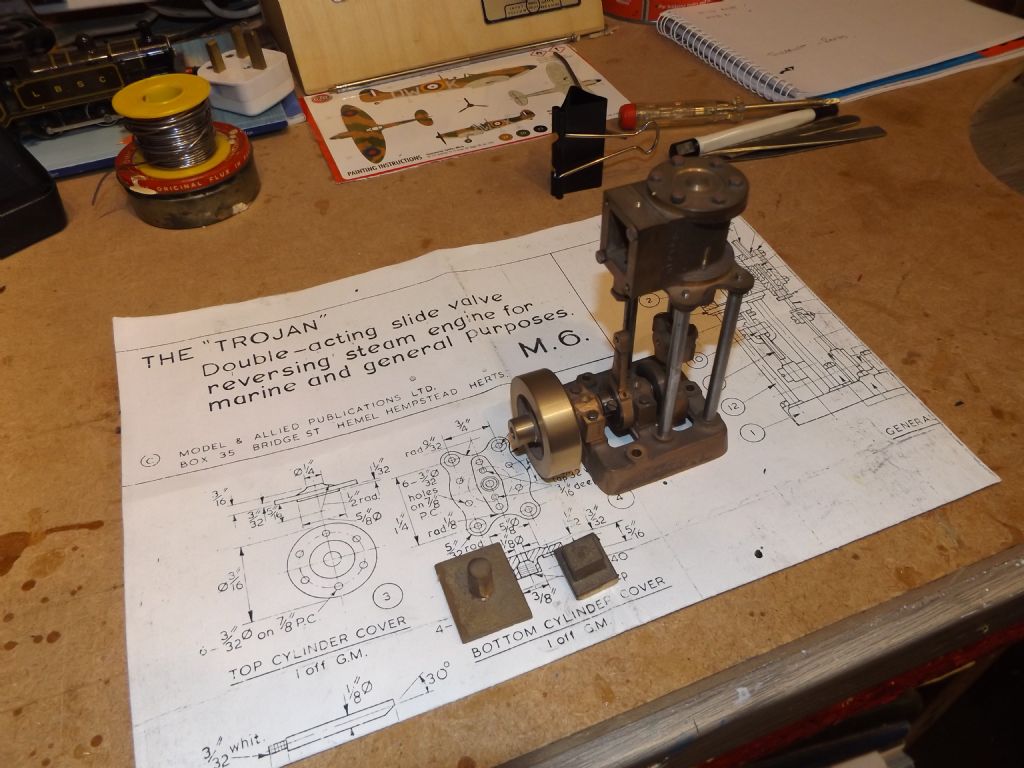
                              Regards Raytrojan 1.jpg

                              #93135
                              Mark Knight 4
                              Participant
                                @markknight4

                                Hi Ray,

                                Yes, I don’t think viton O rings would last long sealing the piston valves. For that reason I’ll accept the slight leakage. There was a much worse leakage through the reverse valve. I’ve solved that with O rings as I think they will last far longer in there compared to piston valves due to only seeing 10s of cycles per hour of running rather than 10s of thousands.

                                I can see why my Dad built the piston valve version of the engine even though there are problems to overcome. It is a far simpler installation in a radio controlled boat. There is only one radio channel required for full control of the engine and no complex reversing linkage that you need for slide valves.

                                Just got to put it all back together now and give it a final steam test.

                                #93146
                                Richard Simpson
                                Participant
                                  @richardsimpson88330

                                  Lovely job on the back facing tool Mark. I'm sure that only a slight chamfer will be needed to prevent damage of the 'O' rings. As you rightly say the operation of the reversing valve is minimal compared to the piston valves so treating them differently sounds like a sensible approach. Looking forward to you telling us it is working OK!

                                  #93150
                                  Mark Knight 4
                                  Participant
                                    @markknight4

                                    Thanks Richard, the encouragement is much appreciated at these times of isolation! I’ll update once I’ve steamed it and hopefully get to visit you sometime later this year.

                                    #93218
                                    Mark Knight 4
                                    Participant
                                      @markknight4

                                      **LINK**

                                      Got the boiler steamed today and I’m pleased with how it went. The attached video shows the safety valve keeping the boiler pressure at the working pressure of 40psi. The engine operates well on the reverse valve although there is still some leakage through the piston valves. The reverse valve is still performing well with the O rings providing a good seal in the off position. The valve is slightly tight but the servo manages to push it most of the time. Sometimes going from off to the forward position it doesn’t move but going into reverse and then switching to forward it gets there OK. The boiler can keep up with the engine steam consumption at part speed but not at full speed when under no load. Hopefully when the prop is loaded in water, the reduced speed will mean the boiler keeps up at full power.

                                      Next task is to steam it in the bath and see how it performs.

                                    Viewing 17 posts - 26 through 42 (of 42 total)
                                    • Please log in to reply to this topic. Registering is free and easy using the links on the menu at the top of this page.

                                    Code of conduct | Forum Help/FAQs

                                    Advert

                                    Latest Replies

                                    Home Forums Steam powered models Topics

                                    Viewing 25 topics - 1 through 25 (of 25 total)
                                    Viewing 25 topics - 1 through 25 (of 25 total)

                                    View full reply list.

                                    Advert