Fairey Huntsman 31

Advert

Fairey Huntsman 31

Home Forums Build Blogs Fairey Huntsman 31

  • This topic has 136 replies, 14 voices, and was last updated 2 days, 2 hours ago by Len Morris 2.
Viewing 25 posts - 76 through 100 (of 137 total)
  • Author
    Posts
  • #92079
    Colin Bishop
    Moderator
      @colinbishop34627

      Yes, they do but as Dave M has said, it is very difficult and expensive to steam teak into that sort of configuration!

      Colin

      Advert
      #92080
      Chris Fellows
      Participant
        @chrisfellows72943

        Hi Ray

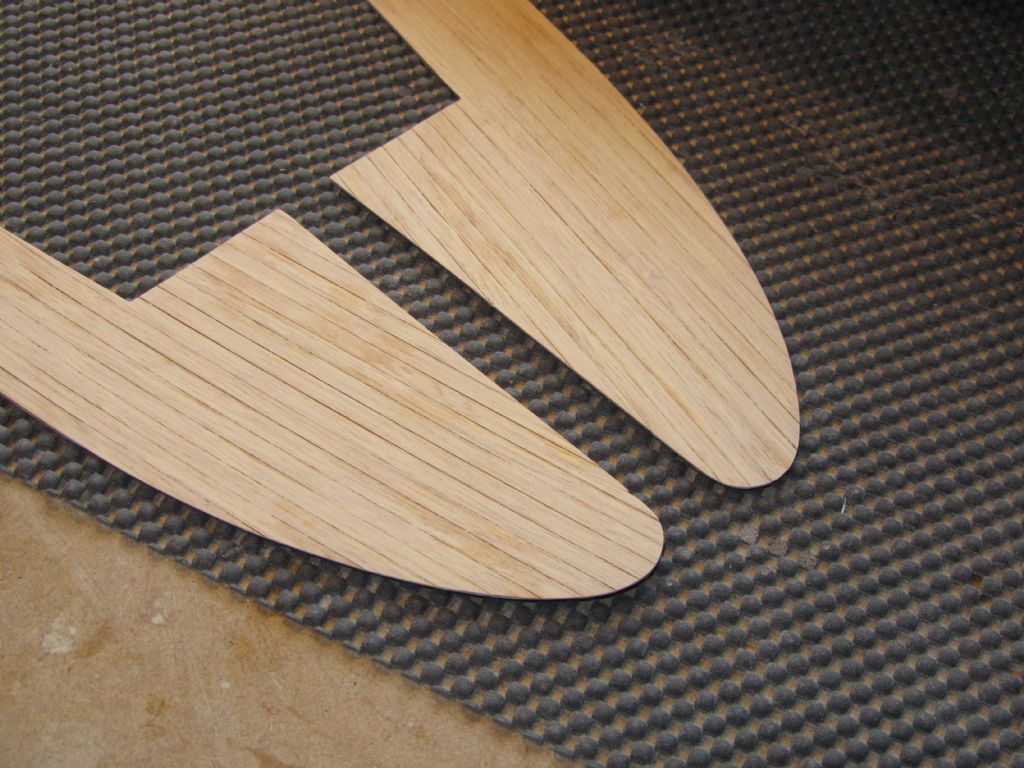
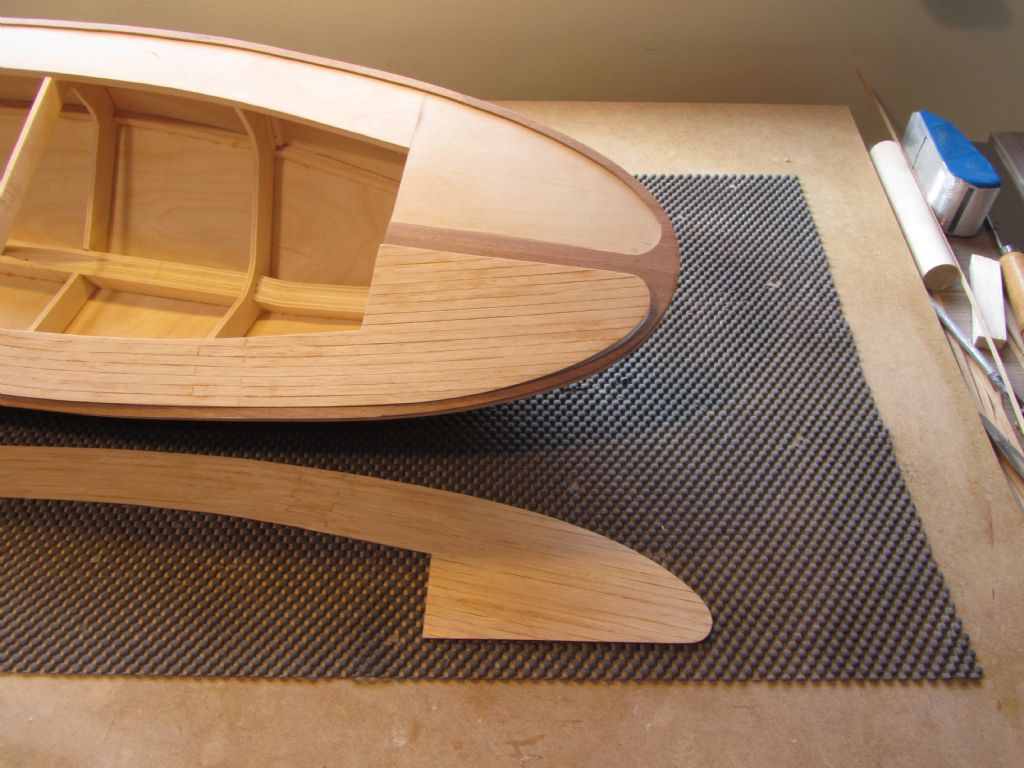
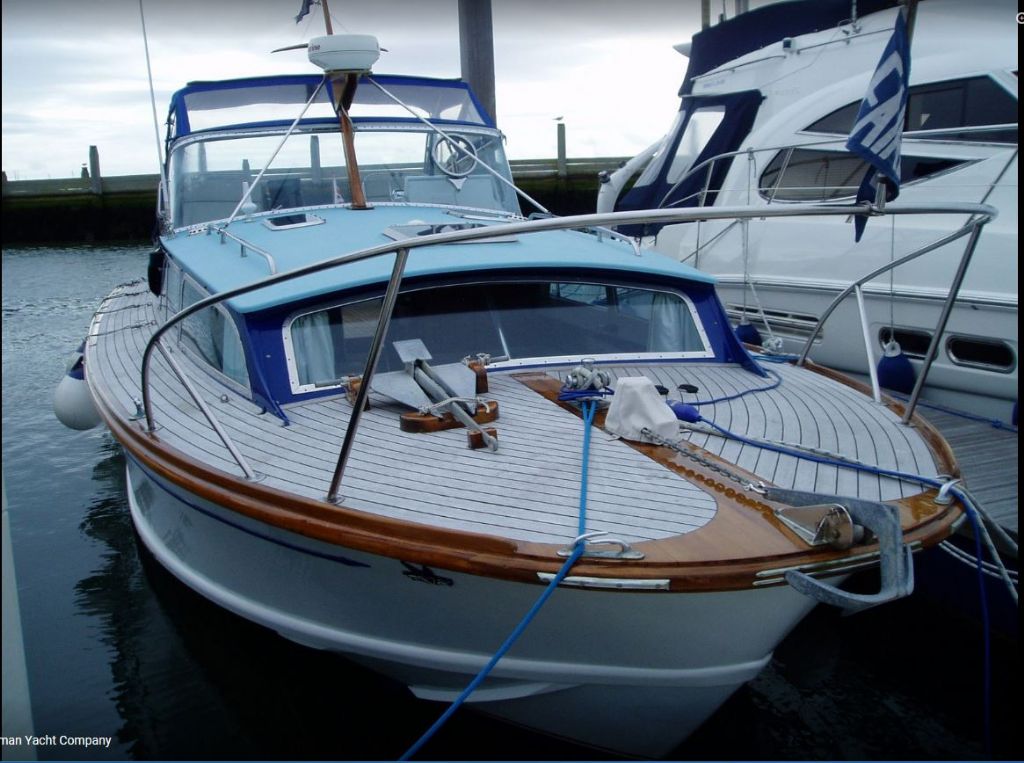
        The king plank and edging and the planking is being done with reference to photos of the real thing. They do vary a bit from boat to boat as many have had the decks replaced. The outermost plank doesn't go round that final bend to the bow but finishes as shown.

        The second plank was quicker and easier to glue in position as you have the first one to push up against.

        Photo attached of the Swordsman Tireur showing the bow detail which I'm using for the Huntsman and Swordsman builds.

        Chris

        Tireur bow


        Edited By Chris Fellows on 28/10/2020 20:42:36

        #92089
        Chris Fellows
        Participant
          @chrisfellows72943

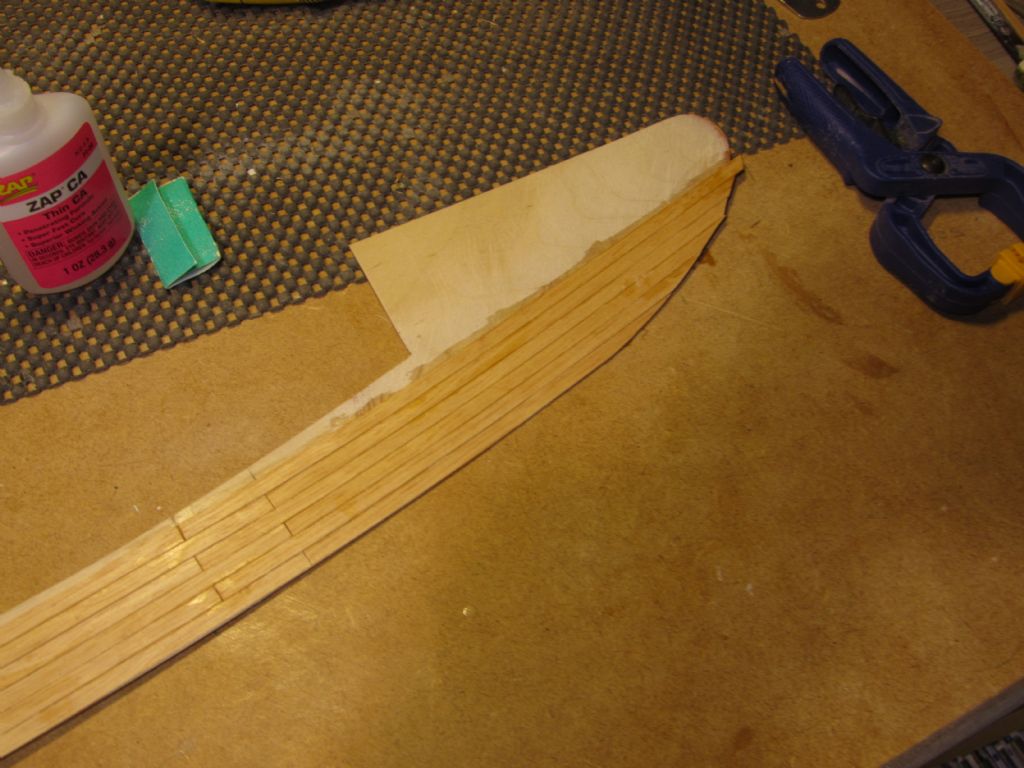
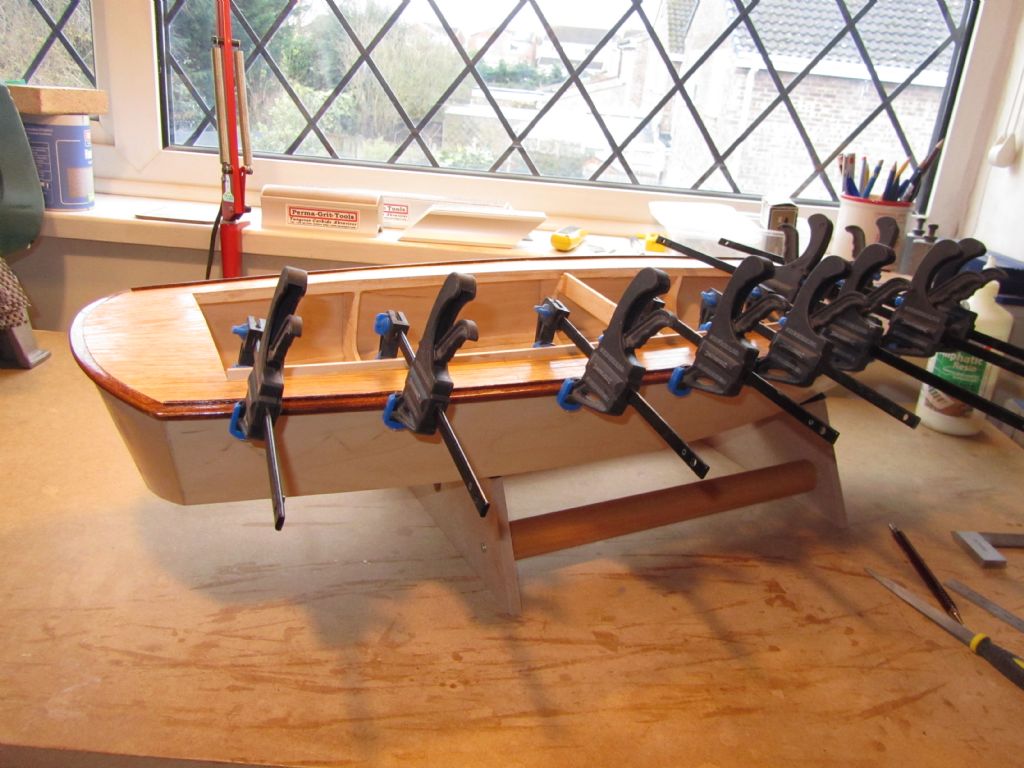
          It's been one of those two steps forward and one step back days today which most of us have from time to time. I started on the second plank and had difficulty getting it to lay flat where it curves towards the bow and not helped by a slight weakness in the plank due to a branch or similar. I got it flat but the plank started to splinter. Gave it a sand and it didn't look too bad so carried on. I made sure with the third plank that there weren't any defects at that point but still had trouble, not helped by the curve getting tighter as more planks were fitted.

          To be honest I wasn't completely happy anyway; in the previous photos you can see that the first plank isn't a nice smooth curve, so the decision was made to remove some of the planking. As you can imagine this was a bit of a pig to do having used CA but using a variety of sharp tools I got it done. No way was I going to remove the full length of the planks so I introduced joints just back from the front of the cabin, which I think looks better anyway, and cut some false joints with the Stanley knife further back to effectively cut the planks into thirds. Another hiccup was with one of the planks near the stern which had ridden up on the adjacent plank and the CA had grabbed before I noticed. So this was cut out and replaced.

          With the replacement planks at the bow I've straightened out the curve sooner so that they meet the edging sooner which makes fitting the planks easier. Not exactly like the real thing but still much better than straight planking. Was hoping to get both sides done today but with the problems that didn't happen. I shall start the second side before finishing the first incase I have to make any adjustments to get it symmetrical.

          Chris

          planking1

          planking 2

          #92090
          Ray Wood 3
          Participant
            @raywood3

            Hi Chris,

            Now you know why straight planks drawn on in ink wmwinchfeb19.jpgare so popular 😉

            Regards Ray

            #92095
            Chris Fellows
            Participant
              @chrisfellows72943

              Absolutely Ray! But after taking the easy option on Huntsman 28 by just varnishing the birch ply I wanted to have a go at planking.

              With the Huntress the planks need to curve all the way to the bow but from this experience I think I'm going to have to get some thicker planks and do it the usual way by bending the planks and gluing straight to the deck.

              Chris

              Edited By Chris Fellows on 30/10/2020 00:19:57

              #92104
              Chris Fellows
              Participant
                @chrisfellows72943

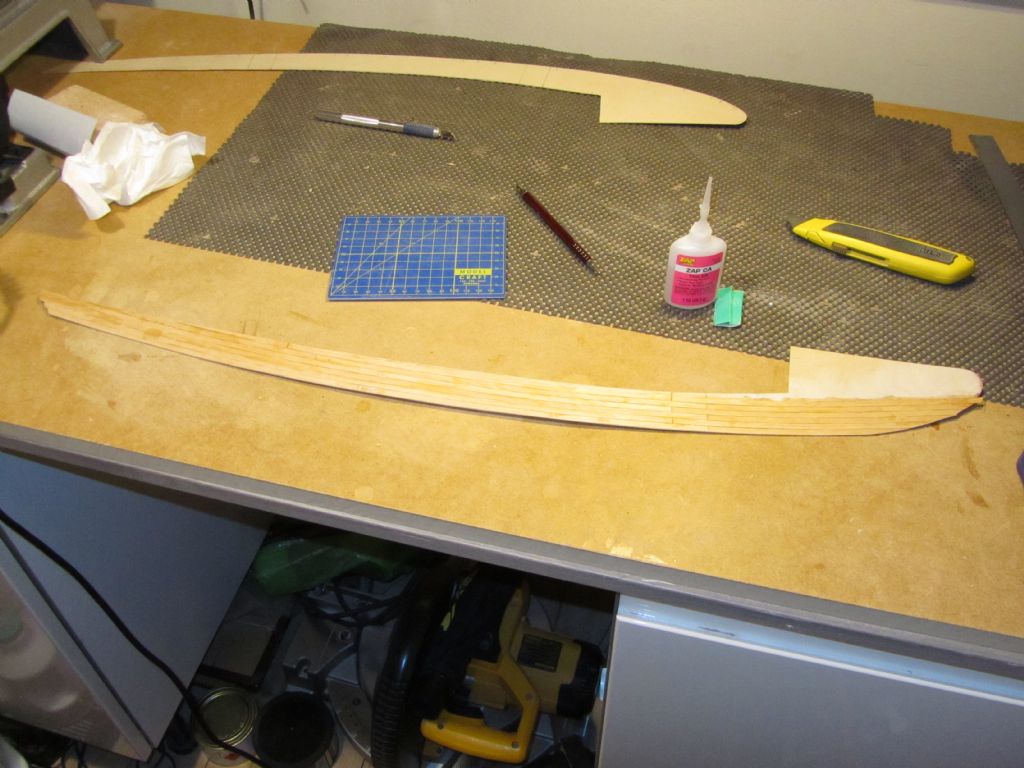
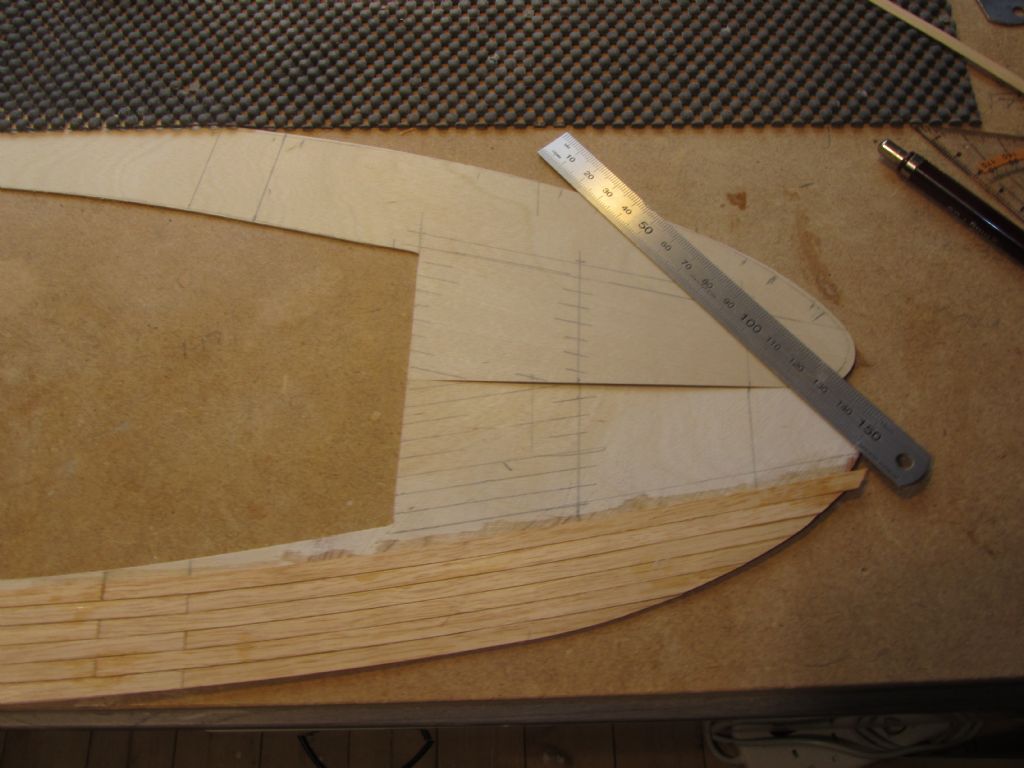
                Before starting on the second side it was prudent to do some marking out so that the planks on each would meet the king plank symmetrically. Having done this I planked the rear two thirds of the second side to where the joints are and then added the sixth plank which was the point I'd I'd got to on the first side, along the line marked out. This was a bit of a risk as I would be fitting planks both inside and outside this plank.

                I then fitted planks alternately to both sides, approaching the king plank, checking measurements as I went. The last thing you want is a marked difference in size of the last small triangular plank as the eye will be drawn to it. They ended up smaller than drawn out and less than a plank width but at least they are pretty much the same size. This part was definitely the hardest part!

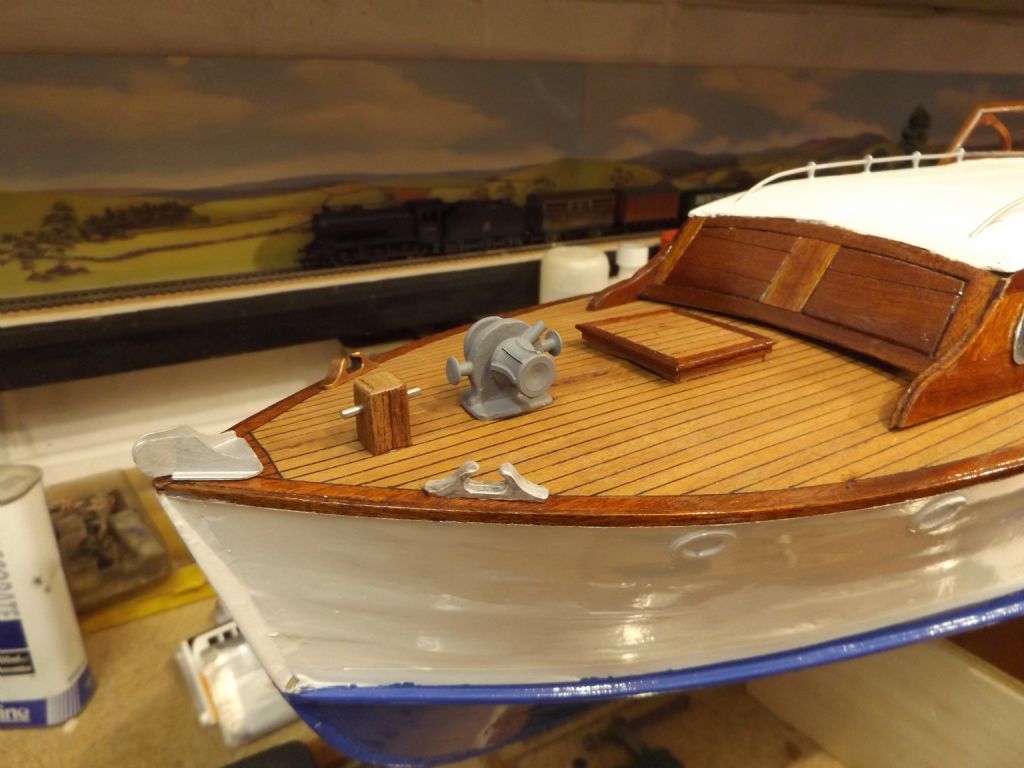
                I then added the planks to the outside and thankfully the outermost plank fitted nicely to the outside edge of the ply sub-base. The oversailing planking was then sanded back to the edge of the sub-base and the top given a preliminary sanding. As said, not perfect, but will look nice once varnished and contrasted with the mahogany.

                Got the Swordsman to do now and maybe the Huntress!

                Chris
                planking 3

                planking 4

                planking 5

                #92329
                Chris Fellows
                Participant
                  @chrisfellows72943

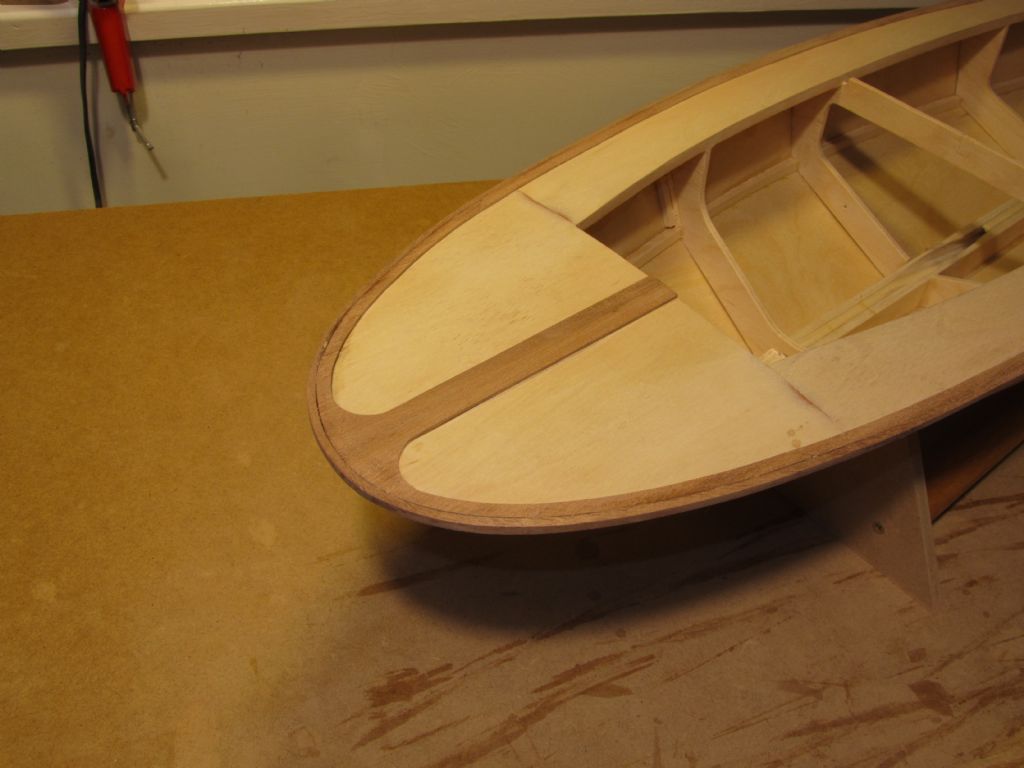
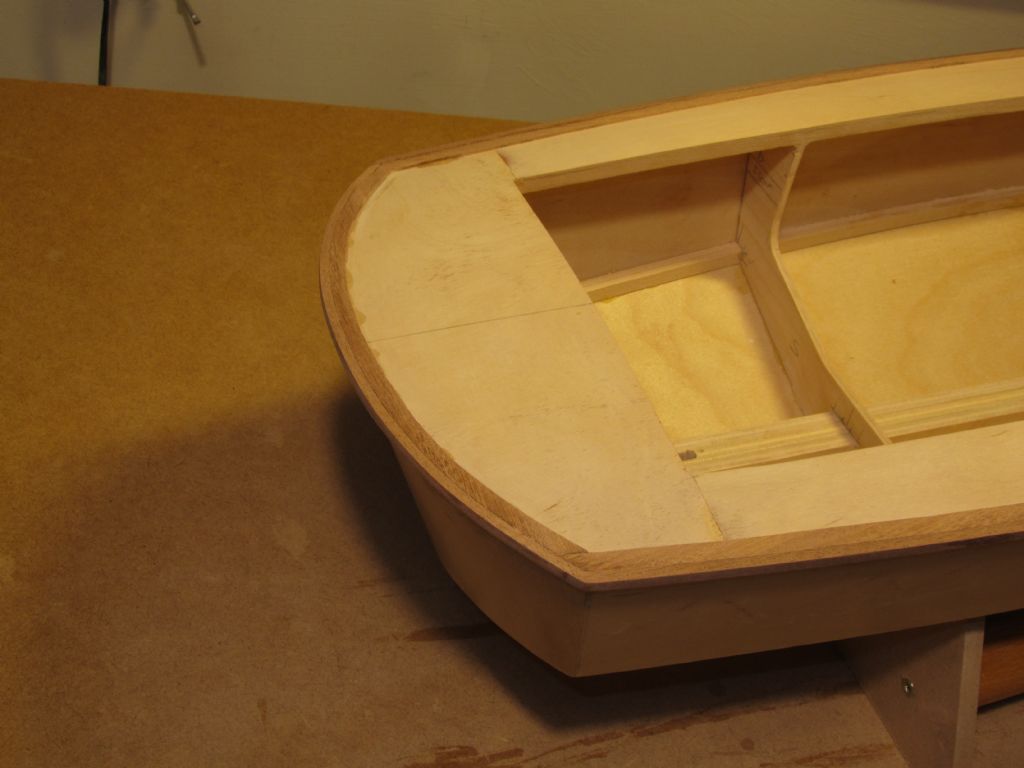
                  Next job was fitting the rubbing strips. Having joined those at the bow on the Swordsman I thought I'd make it easier for myself by having the curve of the bow in the middle of a strip rather than at the ends of two strips with a scarf joint to boot.

                  It was easier but I didn't get the strip as tight to the bow as I did with the Swordsman so am going to have to resort to a bit of filler. Just need some more sanding to remove glue marks and round off the edges and they will be ready for a coat of varnish before gluing down the planking.

                  Chris

                  rubbing strip 1.jpg

                  rubbing strip 2.jpg

                  rubbing strip 4.jpg

                  rubbing strip 5.jpg

                  #93359
                  Chris Fellows
                  Participant
                    @chrisfellows72943

                    Work on the Huntsman has been going on in parallel with the Swordsman and the deck has been planked in the same manner and the upstand has been fitted around the inside of the deck area for locating the superstructure.

                    upstand being fitted

                    #93360
                    Chris Fellows
                    Participant
                      @chrisfellows72943

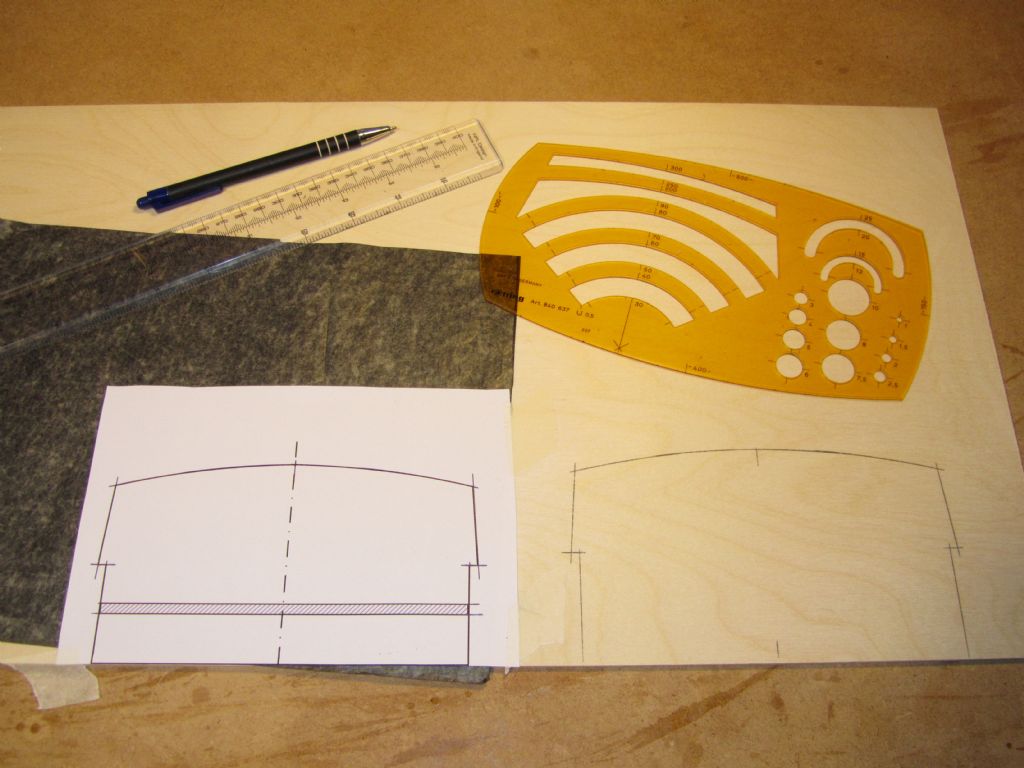
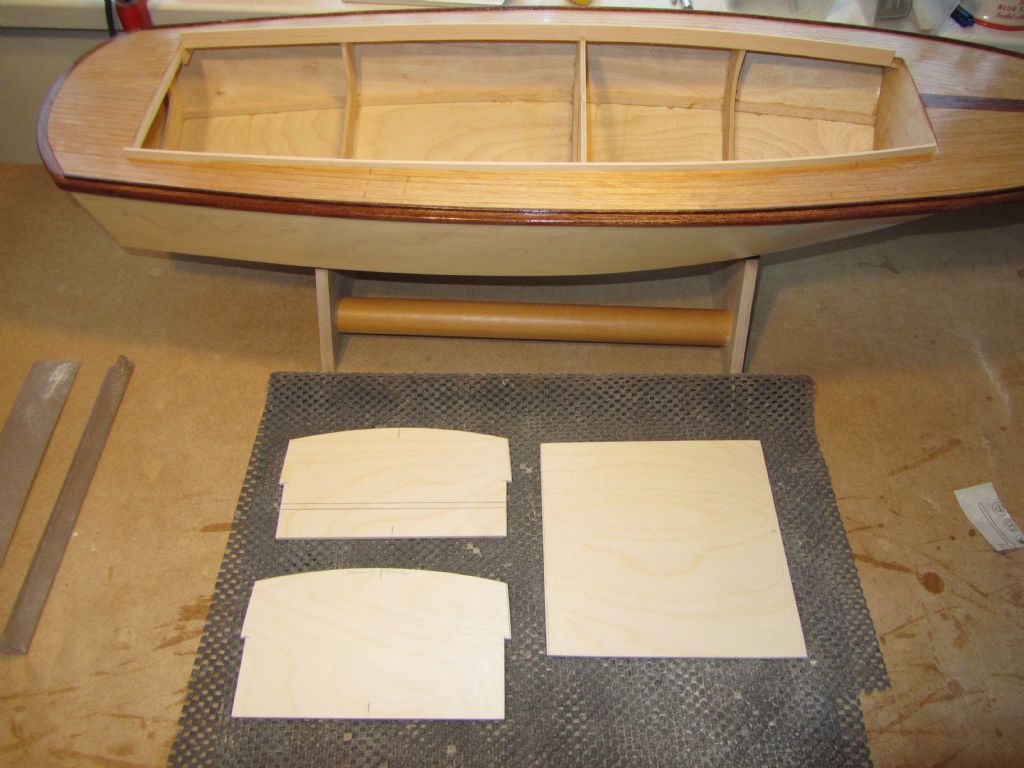
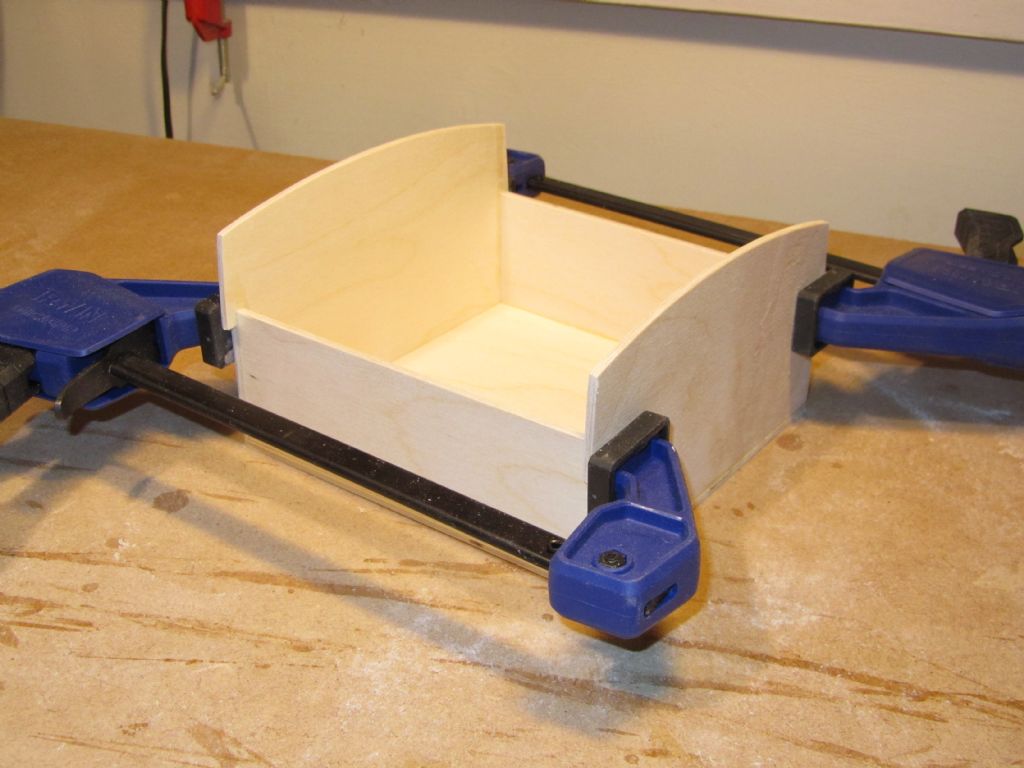
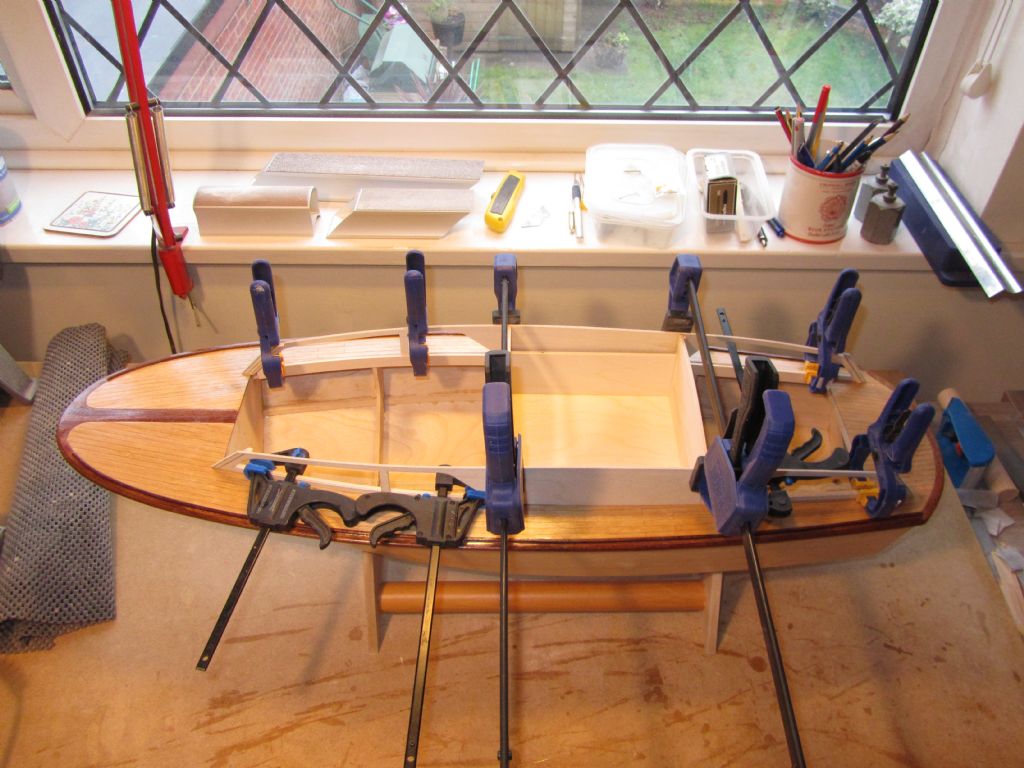
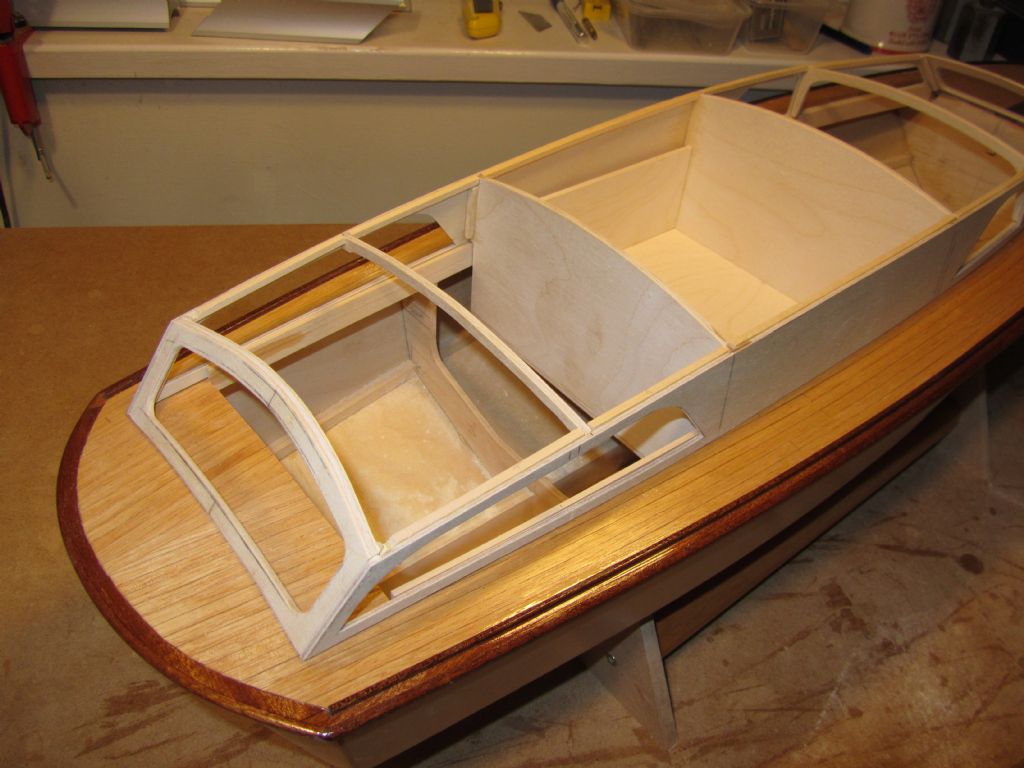
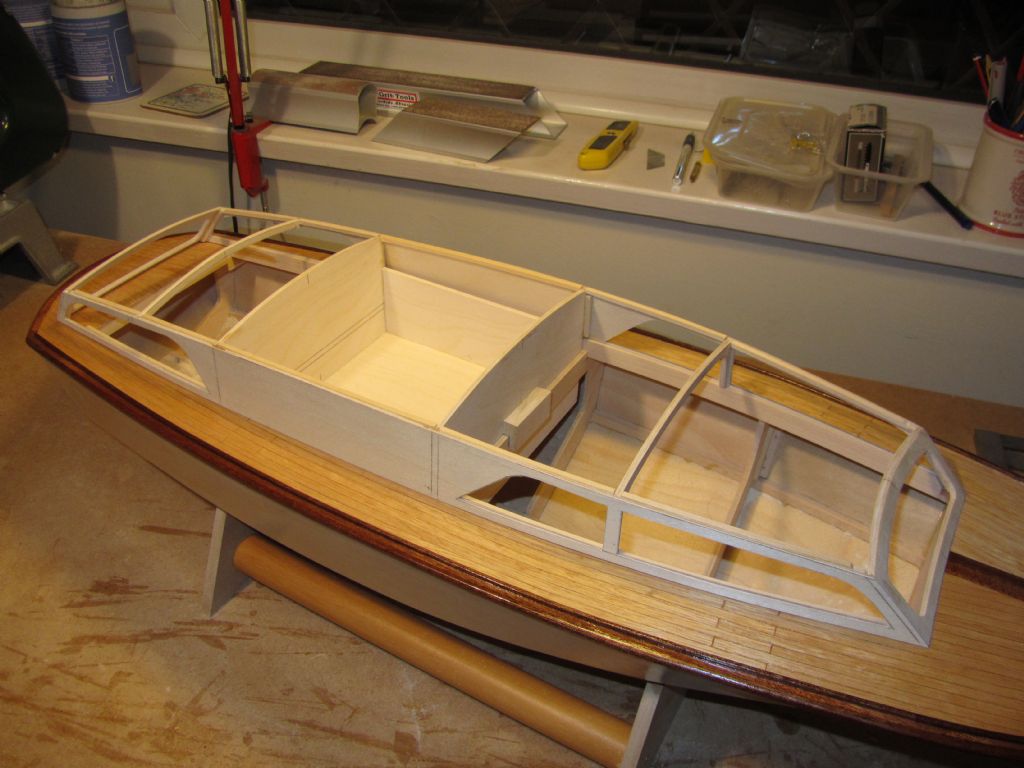
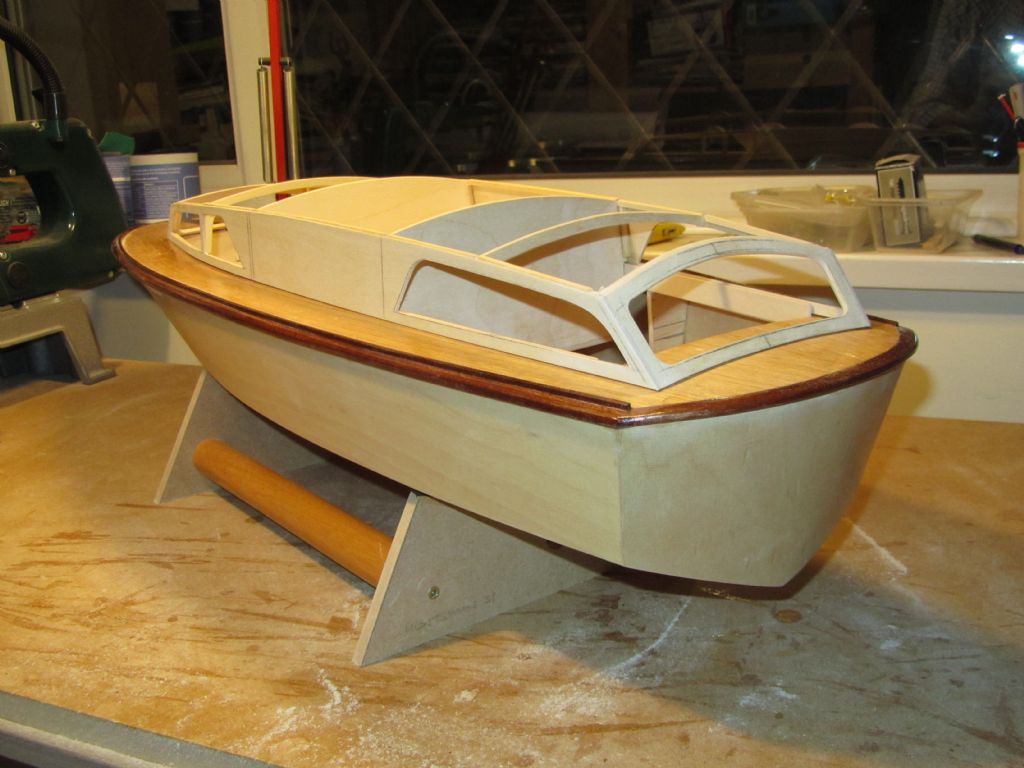
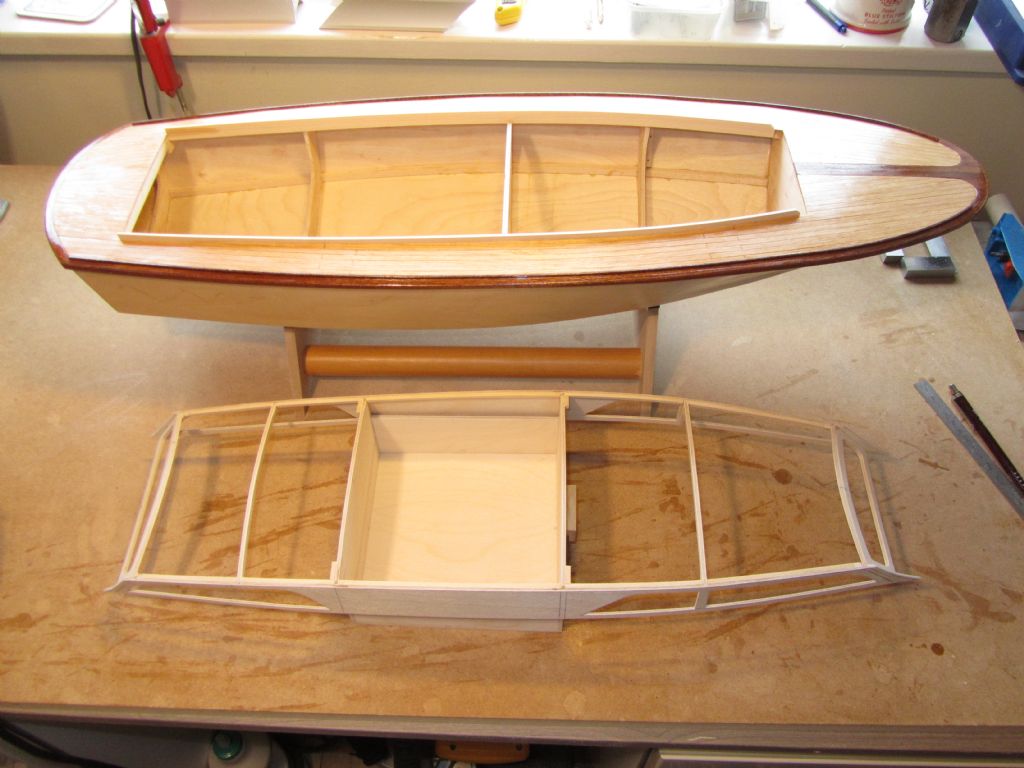
                      Next job then was to build the cockpit box. Drawings were produced for the rear of the front cabin and front of the rear cabin and for the base and then cut out of 3mm birch ply and glued together with a/resin. Measurements were then taken for the sides of the box, drawn directly onto the ply, cut out and glued in place.

                      Usually the cabin formers are restrained by and sit on the bulkheads, but as this was originally going to be a full cockpit version, the rear bulkhead had been repositioned and didn’t have a top to it. I did think of fitting a part bulkhead to do the job in the conversion to aft cabin but decided not too – more on this later.

                      superstructure2

                      superstructure3

                      superstructure4

                      #93361
                      Chris Fellows
                      Participant
                        @chrisfellows72943

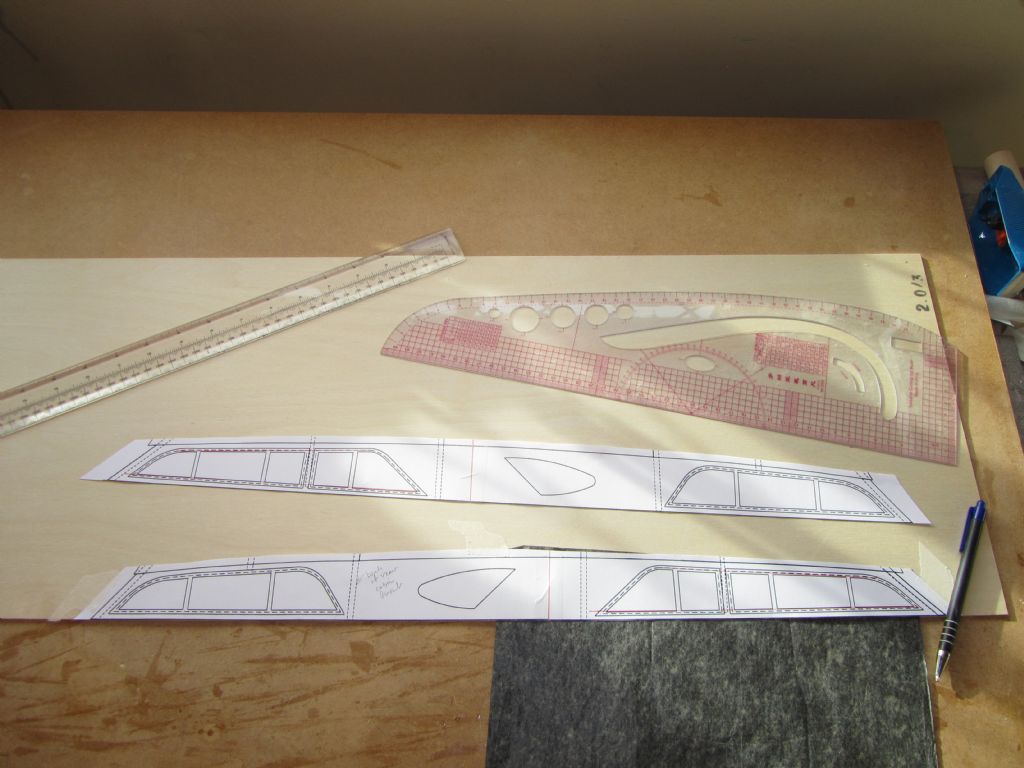
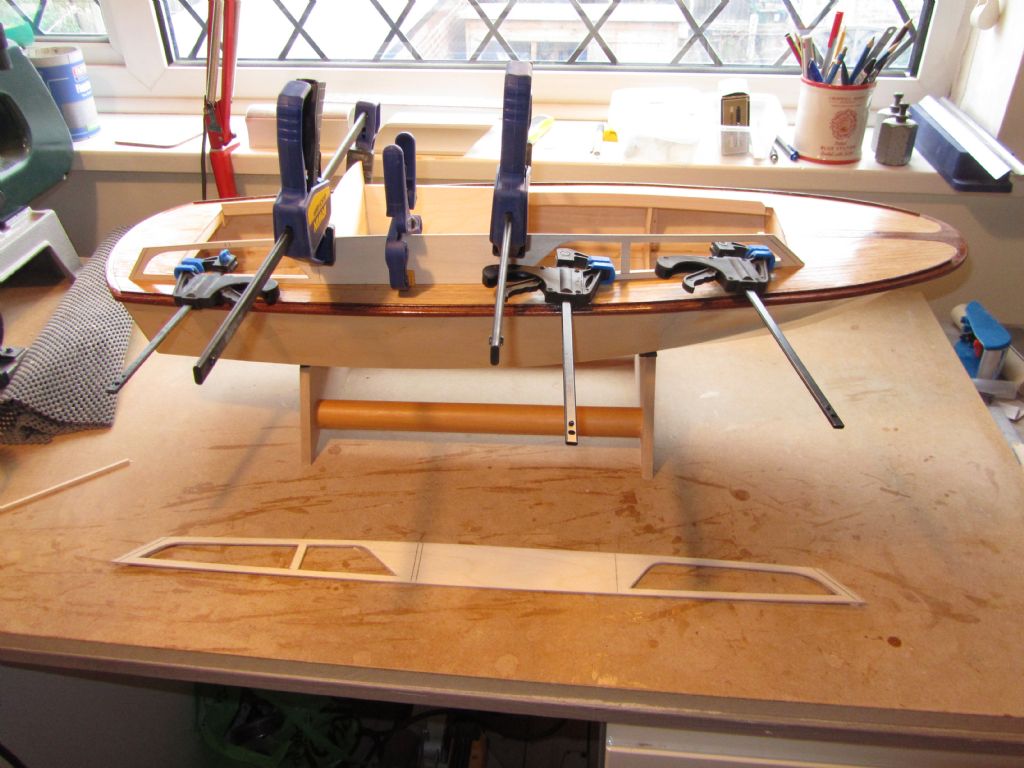
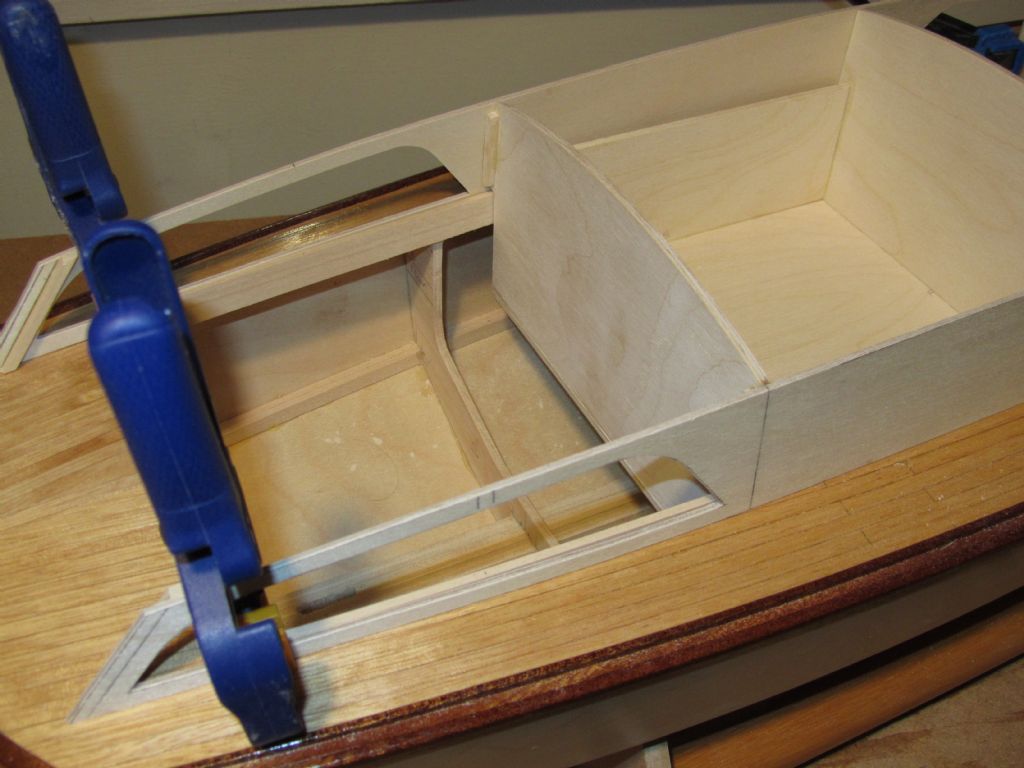
                        Then the cabin/cockpit sides, having been drawn up, were printed out and test fitted. Some slight adjustments were made to ensure that the front and back were in the right position and the bulkheads were aligned and then they were printed out again, transferred to 2mm birch ply and cut out with the scroll saw.

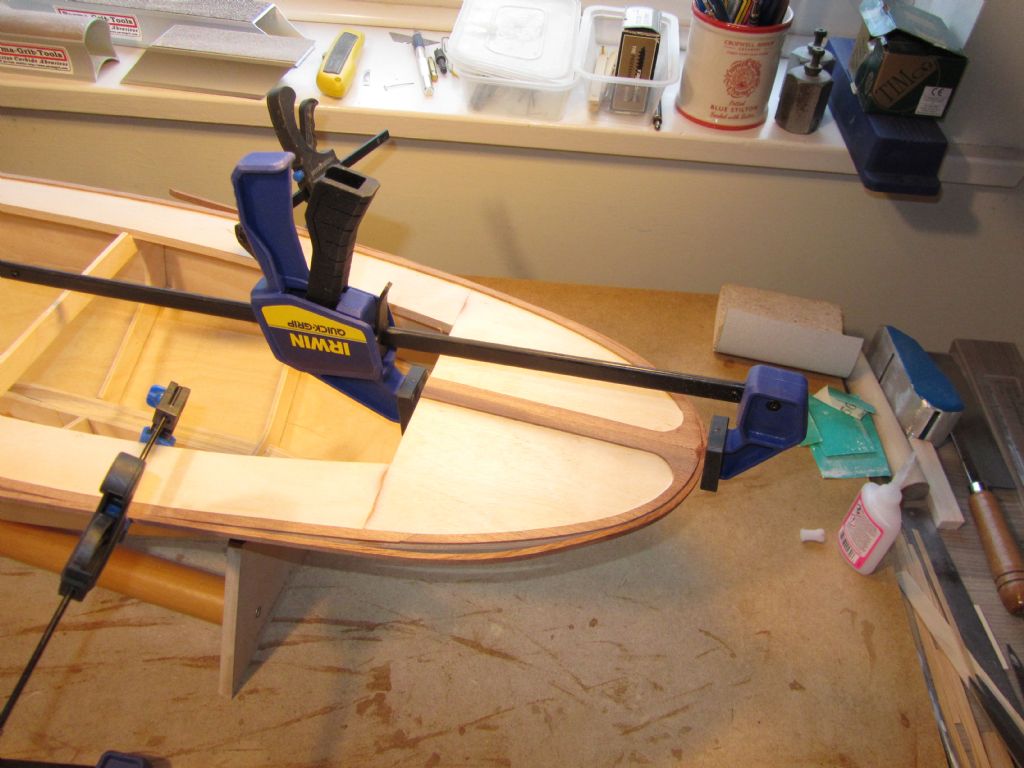
                        With the box in position, the sides were then clamped in place. On previous builds I’ve applied glue before doing this but as they were accurately positioned and not wanting to disturb them I glued the box and sides together using 2 x 2mm bass fillets and once the a/resin had gone off ran some thin CA between the ply joints.

                        superstructure6

                        superstructure8

                        superstructure9

                        #93362
                        Chris Fellows
                        Participant
                          @chrisfellows72943

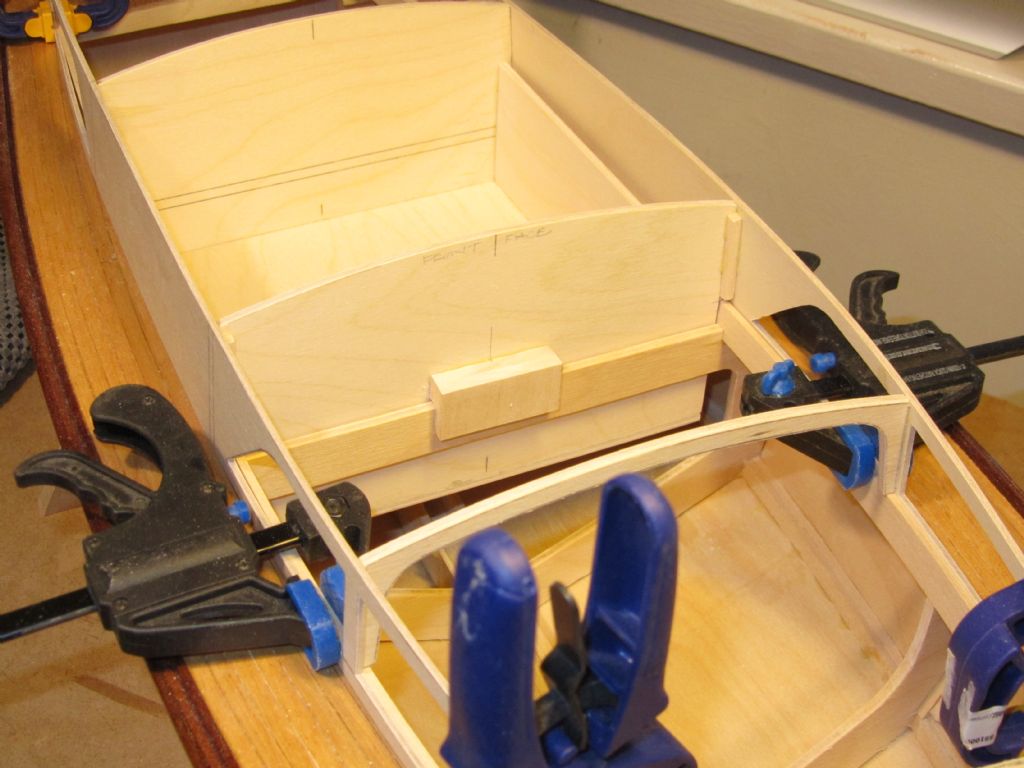
                          The photo shows the lack of bulkhead to the rear of the cockpit and I decided that as the superstructure sits on the deck, support from the bulkhead is not really required but restraint is and so the easiest thing to do is just to provide a hook at the front of the cockpit over the bulkhead there. Whist making and fitting this I also made and fitted the roof support with extended legs to give the right angle for the cabin sides.

                          superstructure11

                          superstructure12

                          Edited By Chris Fellows on 23/01/2021 21:42:27

                          #93363
                          Chris Fellows
                          Participant
                            @chrisfellows72943

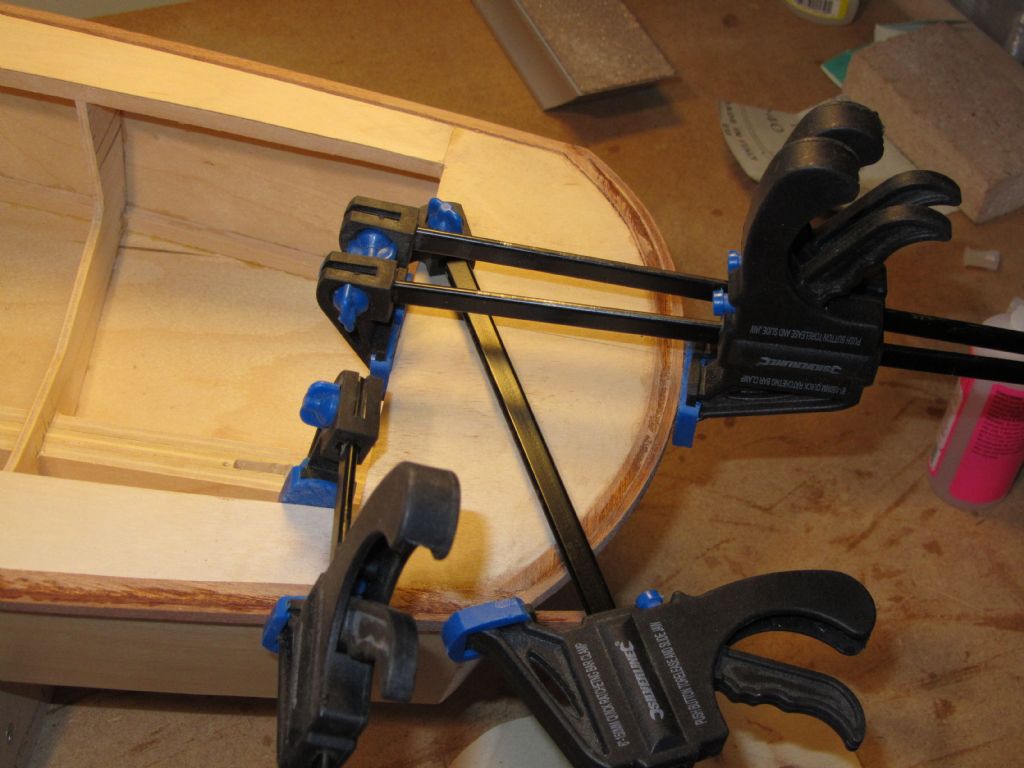
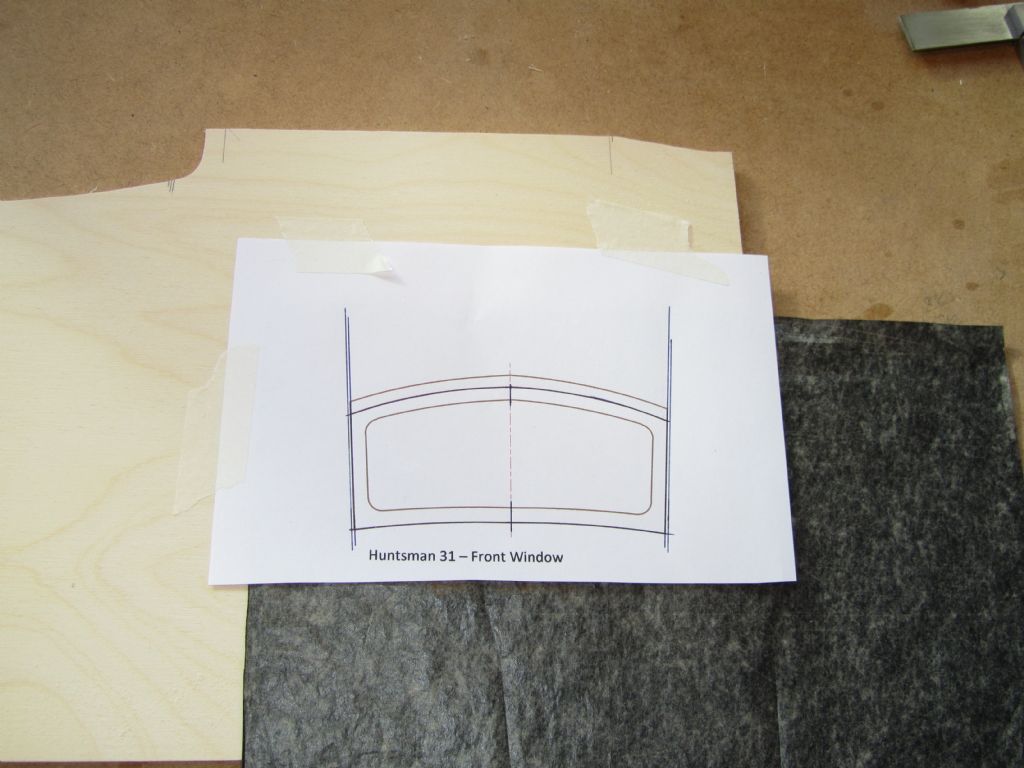
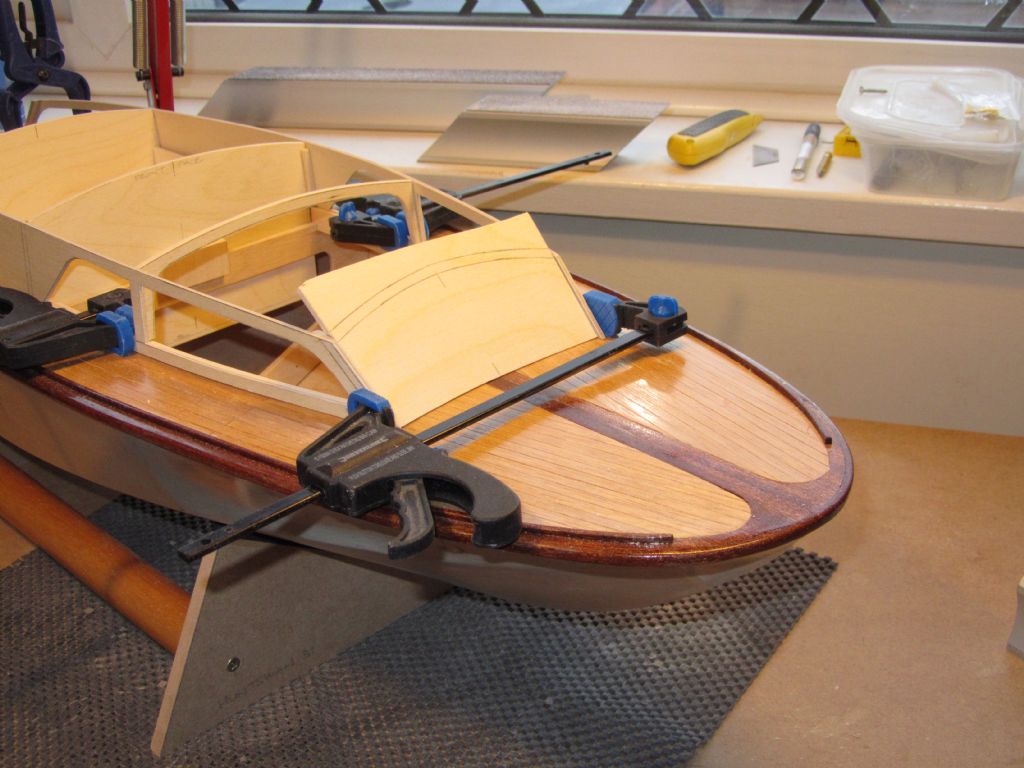
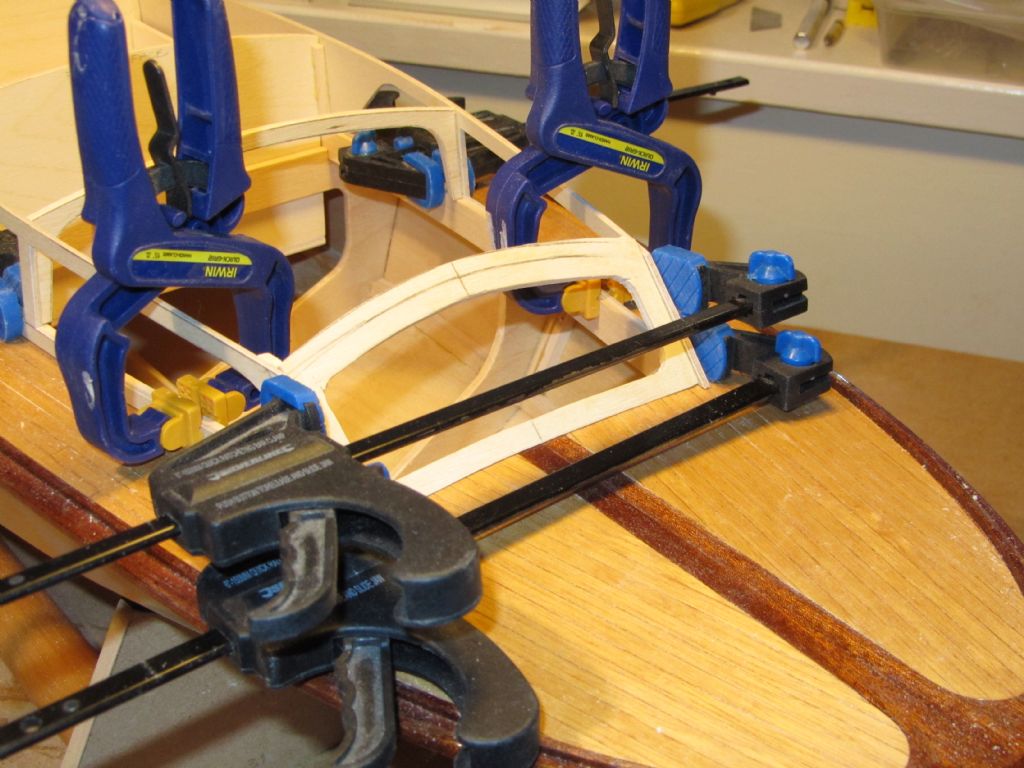
                            Then on with fitting the front window. First 2 x 2mm bass fillets were glued in place to locate the window and give increased gluing area. Part of the window drawing (the bottom and sides) was then transferred to birch ply and cut out. The bottom was then sanded to give a good fit to the deck camber and then sanded back at an angle to allow the window to angle backwards. The sides were then gradually sanded towards the line to ensure a snug fit. Now the position of the top of cabin sides can be marked on the blank along with the window opening. Rather than use the drawing for the opening I decided to draw the opening straight on in pencil, so far so good. But as I was cutting it out on the scroll saw and approaching the third corner I realised I had forgotten to draw the rounded corners, bugger! Quite a lot of time was taken to get to this stage and the window fitted really well so I was a bit gutted at having to remake it. But taking stock I saw that there was only one saw cut into each corner and enough timber left to just about get away with it, phew! The window frame will cover it anyway. The window was then glued with a/resin and clamped.

                            superstructure13

                            superstructure14

                            superstructure15

                            #93369
                            Chris Fellows
                            Participant
                              @chrisfellows72943

                              Rear window made and fitted, same process as the front one, but remembering to draw on the round corners this time! smiley

                              Chris

                              superstructure16

                              superstructure17

                              Edited By Chris Fellows on 24/01/2021 15:57:09

                              #93404
                              Chris Fellows
                              Participant
                                @chrisfellows72943

                                Didn't do anything yesterday as it was sunshine and blue skies and went for a long walk whilst there was still some snow about and I was too cream crackered to do much once we'd got back!

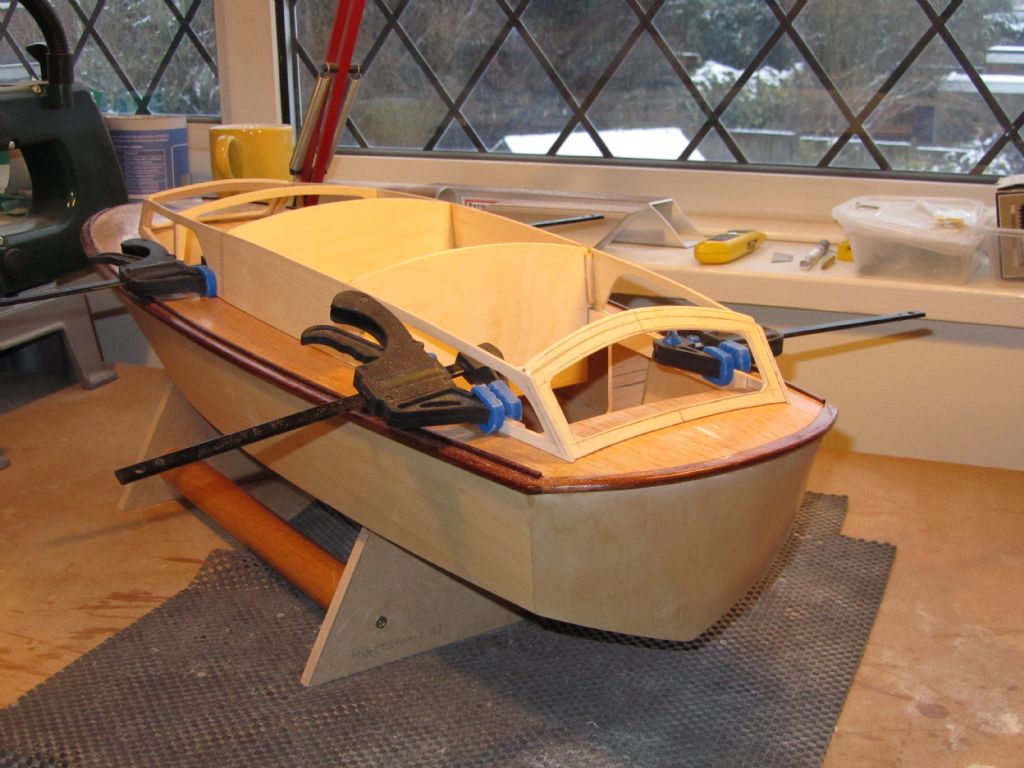
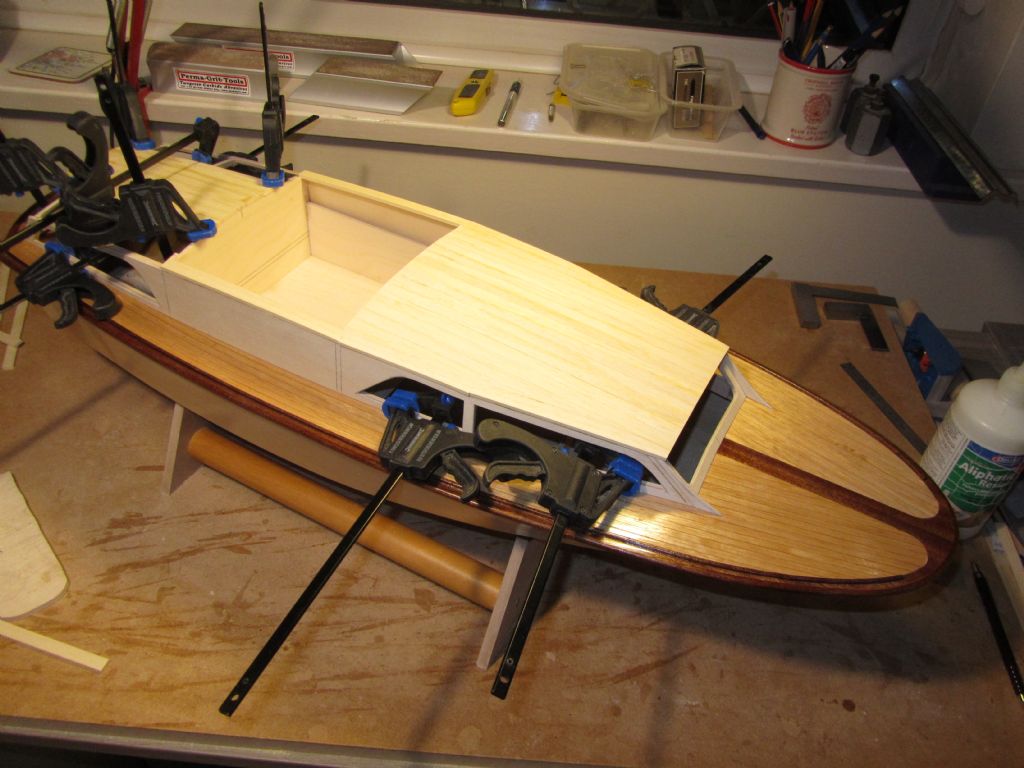
                                Today I was doing fiddly things like fitting the aft cabin roof support and 3 x 3mm bass around the top of the superstructure and sanding the top of the front and rear windows down flush in readiness for the roof planking.

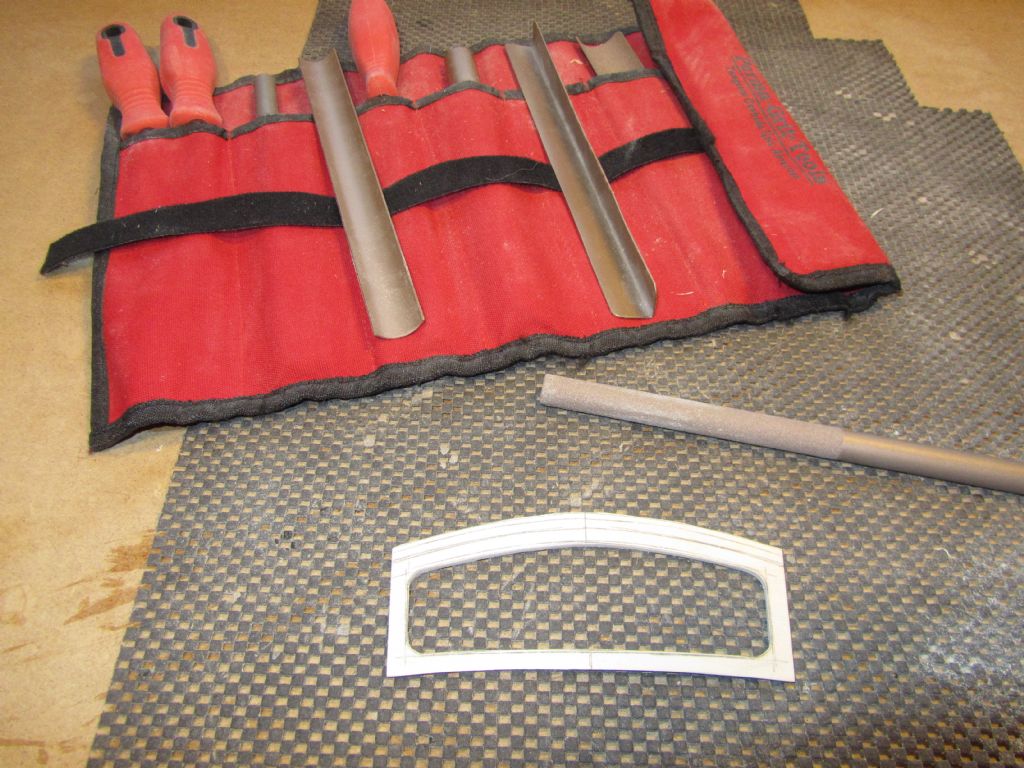
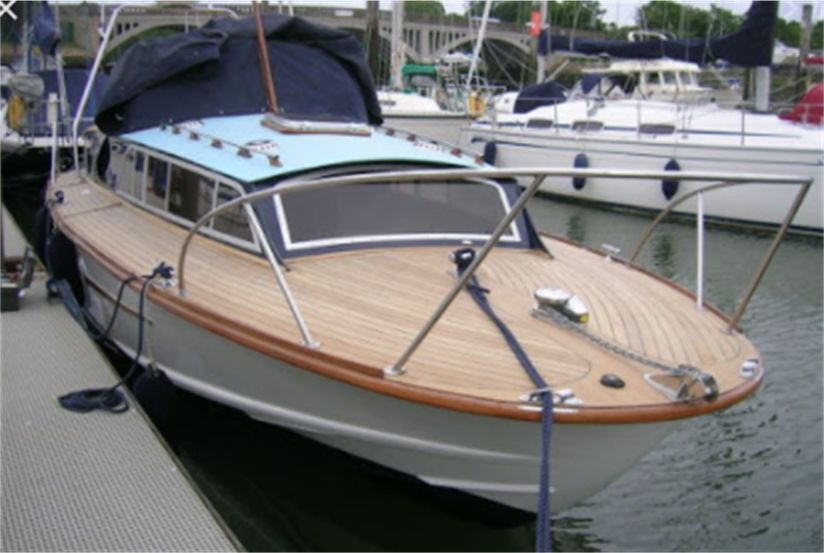
                                Before I do that though I need to make and fit the protrusions, for want of a better word, to the windows. Many models of the H31 don't have these fitted and I didn't draw them as part of the cabin/cockpit sides, unlike with my other builds, so they weren't included. It was only when looking at some photos of full sized boats to check something with regards to the windows that I noticed them and it was too late then, the sides had been glued to the cockpit box.

                                Chris

                                superstructure18

                                superstructure19

                                superstructure20

                                front window protrusions


                                Edited By Chris Fellows on 26/01/2021 20:52:50

                                #93406
                                Will Mason 1
                                Participant
                                  @willmason1

                                  Really starting to take shape now Chris, looks really good.

                                  I have soooo very much to learn/achieve yet when doing mine. I will definitely be referring to your threads and one or two others for inspiration and ideas of how to tackle things and what to aim for.

                                  Will

                                  #93410
                                  Chris Fellows
                                  Participant
                                    @chrisfellows72943

                                    Thanks Will

                                    Can't wait to get the roofs on now. Then I can return to the hull and fit the spray rails etc.

                                    Chris

                                    #93412
                                    Chris Fellows
                                    Participant
                                      @chrisfellows72943

                                      Protrusions/extensions added to front and rear windows and additional support timbers to perimeter sanded to profile ready for fixing roof planks which I'm just about to start – I like doing this part!

                                      Chris

                                      superstucture22

                                      #93414
                                      Ray Wood 3
                                      Participant
                                        @raywood3

                                        Hi Chris,

                                        That is super work, what are your thoughts on window frames ?? Etched brass & chromium plated would look great but expensive

                                        Regards Ray

                                        #93419
                                        Chris Fellows
                                        Participant
                                          @chrisfellows72943

                                          Hi Ray

                                          First thoughts were to use DM's method using styrene or maybe painting with that silver/chrome paint recommended by the former editor – can't find the post at the moment.

                                          Metal would be great but as I've never made frames in any material yet it is going to be a challenge. I've read of folks using brass angle but I guess it will be difficult making the curves?

                                          Chris

                                          #93422
                                          Chris Fellows
                                          Participant
                                            @chrisfellows72943

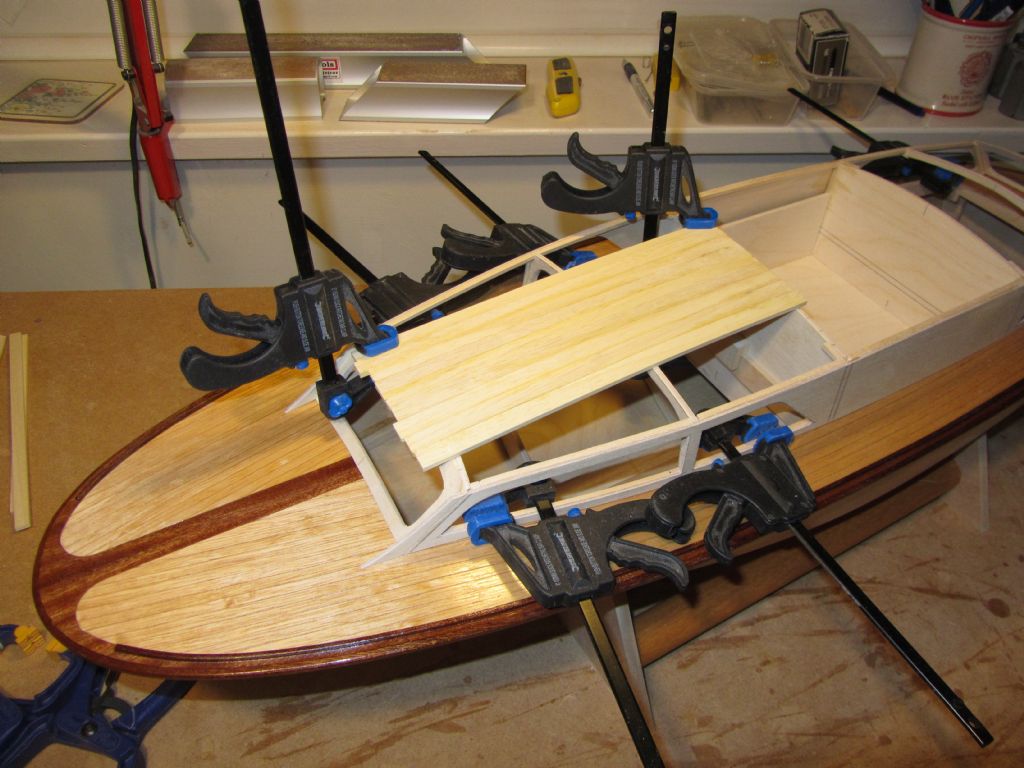
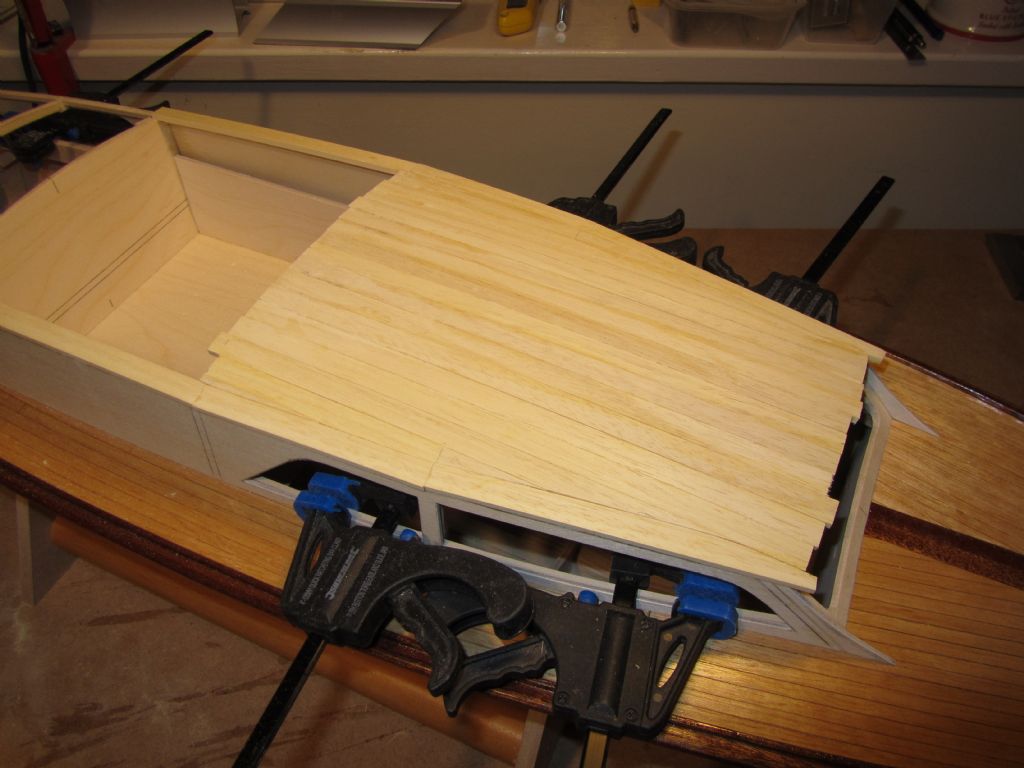
                                            Roof planking coming on. As per other builds using 3 x 9mm obechi planks glued down with Slo Zap slow cure CA underneath each end and a/resin along the sides.

                                            There is a slight curve fore to aft so clamping or weighing down at ends and leaving for awhile until the CA sets. As I said I enjoy this part, just cut a plank to length, glue in place, leave for awhile, and then on with the next, very relaxing!

                                            Bit more work at the sides as the planks have to be cut to shape to fit – on with that tomorrow.

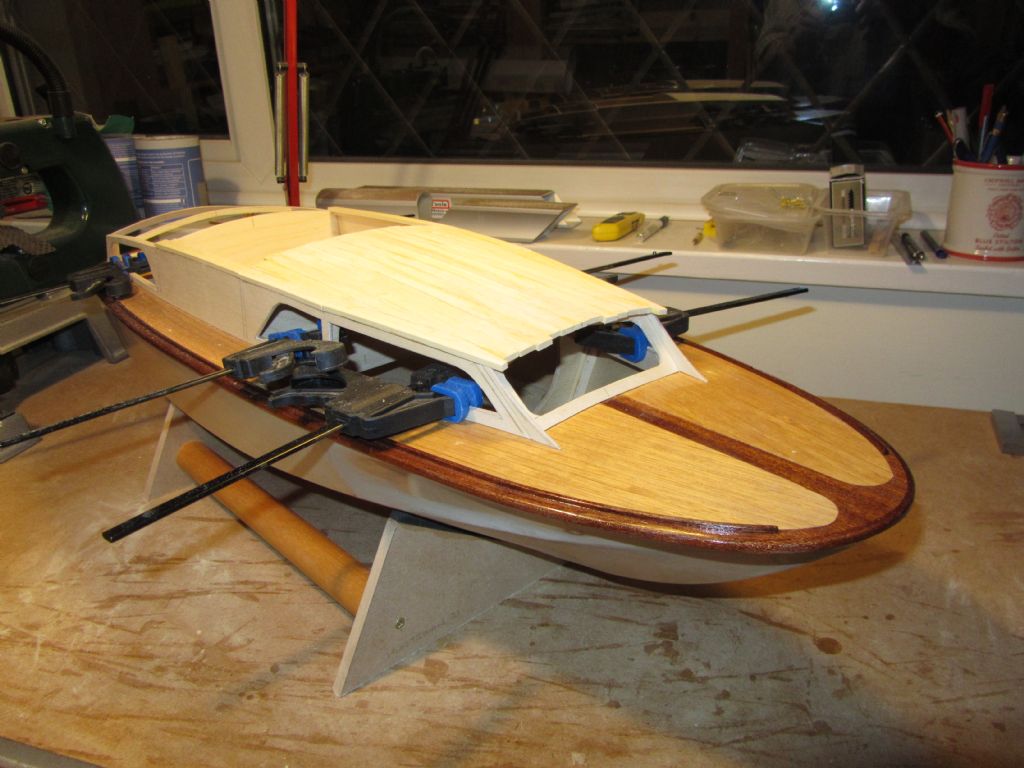
                                            Note the securely clamped down superstructure. Clamps will not be removed until all the planking is glued in place and then left overnight!

                                            Chris

                                            superstructure23

                                            Edited By Chris Fellows on 28/01/2021 19:12:57

                                            #93445
                                            Chris Fellows
                                            Participant
                                              @chrisfellows72943

                                              Finished planking the for'ard cabin roof today and along the top of the cockpit sides. Aft cockpit tomorrow.

                                              Chris

                                              superstructure24

                                              superstructure25

                                              #93446
                                              Will Mason 1
                                              Participant
                                                @willmason1

                                                What a difference that's made Chris.

                                                It's transforming all the time now.

                                                The contrast really emphasises the colour of the fore deck too.

                                                It's going to look fantastic.

                                                Will

                                                #93447
                                                Chris Fellows
                                                Participant
                                                  @chrisfellows72943

                                                  Cheers Will.

                                                  That's why I like to get the roof(s) on as the model really starts to take shape then, especially when the planks have been trimmed and sanded.

                                                  Have you managed to start on any of your projects yet?

                                                  Chris

                                                  #93448
                                                  Will Mason 1
                                                  Participant
                                                    @willmason1

                                                    I understand what you mean Chris. You can see real progress which motivates you even more.

                                                    My Sea Commander has been getting some TLC. I've been trying to sort the delamination of the bulkheads and front half of the keel. Two of the bulkheads are done now and the other two I'm working on slowly and getting there. The keel is done as far as rebonding where it had delaminated. I will have a load of epoxy work to do after I have finished the bulkheads. Most of them have come away from the bottom of the hull, so the old epoxy needs to be removed and then be rebonded.

                                                    Sea Rover I'm picking at now and then. The old damaged cabin side has been removed down to deck level, so I need to cut out the new pair of sides and trim them down to size next I guess. I'm going to finish a majority of the internal work first, before I fit the new cabin sides, that way access will be easier than when the full height sides are both on.

                                                    So not a great deal really, but making my usual slow progress.

                                                    Will

                                                    #93459
                                                    Chris Fellows
                                                    Participant
                                                      @chrisfellows72943

                                                      Will – good to hear that you are making progress on a couple of them.

                                                      As you've probably noticed I'm not the quickest either smiley but at least I'm managing to do a bit most days now and they are moving along.

                                                      Today I trimmed the front of the roof with the razor saw and sanded the back edge flush and am well on with planking the aft cabin roof.

                                                      Chris

                                                      superstructure26

                                                    Viewing 25 posts - 76 through 100 (of 137 total)
                                                    • Please log in to reply to this topic. Registering is free and easy using the links on the menu at the top of this page.

                                                    Code of conduct | Forum Help/FAQs

                                                    Advert

                                                    Latest Replies

                                                    Home Forums Build Blogs Topics

                                                    Viewing 25 topics - 1 through 25 (of 25 total)
                                                    Viewing 25 topics - 1 through 25 (of 25 total)

                                                    View full reply list.

                                                    Advert

                                                    Newsletter Sign-up