Sarik Air Sea Rescue kit build by beginner

Advert

Sarik Air Sea Rescue kit build by beginner

Home Forums Beginners Sarik Air Sea Rescue kit build by beginner

  • This topic is empty.
Viewing 25 posts - 1 through 25 (of 32 total)
  • Author
    Posts
  • #3084
    Dave Reed
    Participant
      @davereed72029

      Sarik Air Sea Rescue kit build by beginner

      Advert
      #101932
      Dave Reed
      Participant
        @davereed72029

        Hi all,

        I’m a beginner to boat models and thought it might be useful to other beginners to share my first kit build experience. I’m building the Sarik ASRL, Whaleback version (Sarik No:TW29) not the Vosper version.
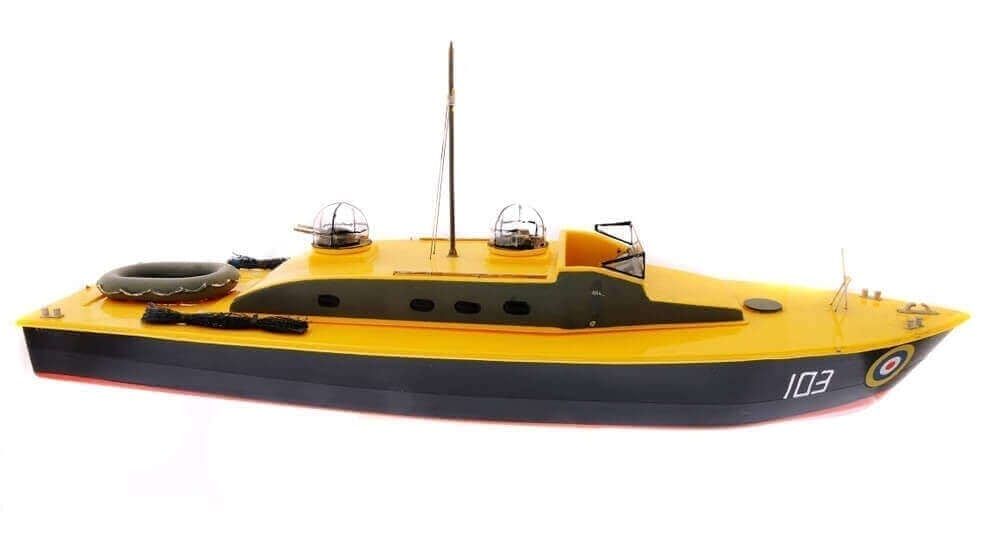
        p-946-0022611_ww2-british-air-sea-rescue-launch-boat-kit.jpeg

        There are 6 similar sized kits in the range on the Sarik web site, the Vosper kit has a magazine article by an experienced modeller in the photos. I’m using this and other invaluable information from people on this and other forums to get me on the right path.

        I would like to invite experienced boat builders to comment, particularly when I’ve made mistakes so other beginners can learn from them.

        So lets get started.

        The kit contains:

        Instructions, Hull, Deck ,Superstructure, Servo mount, Motor mount, Transparent windscreen, Transparent gun canopies x2, Gun mounts x2, Aerial (mast and cross member), Carley float, Plastic sheet for bulkheads / trim (33x23cm), Stand.

        #101933
        Dave Reed
        Participant
          @davereed72029

          Instructions: Not very comprehensive, just 10 points, giving general info.

          Step 1: Trim deck to line indicated. There is a line moulded on the inner surface of the deck edge but it wanders up and down so I decided to leave that till later.

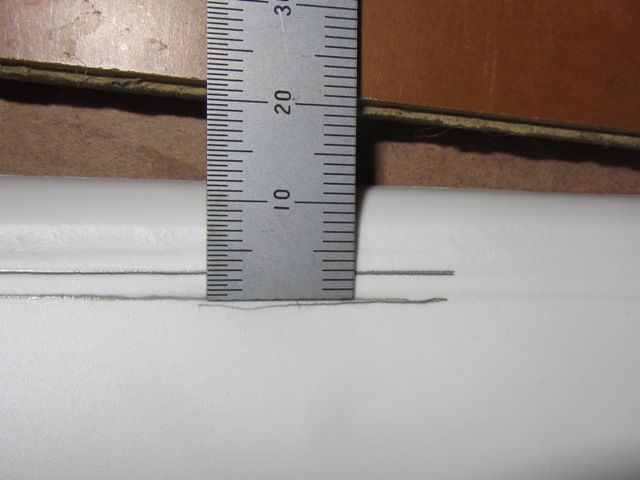
          Step 2: Trim hull to line. The moulded line on the hull is straight but about 2.5mm thick – trim to top middle or bottom? It’s not clear, so I trimmed to top of line leaving the full 2.5mm on the hull so it could be trimmed further if necessary. I used scissors to cut the bulk of the material off, then a razor plane and sanded to smooth and level off.3mm hull line.jpg

          Photo shows the hull cut line before cutting (pencil lines to make it easier to see).

          #101934
          Dave Reed
          Participant
            @davereed72029

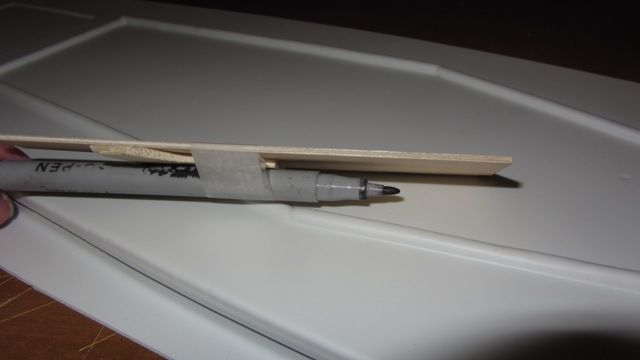
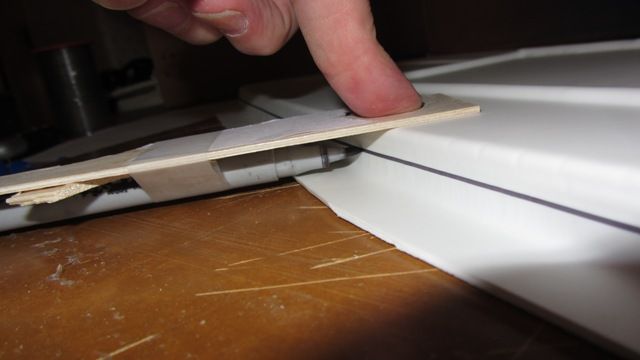
            Back to step 1: I’m still not happy with the cut lines on the deck so I created my own. I made a simple tool with a piece of scrap ply, CD marker pen and tape. By holding this against the top of the deck and running around the edge, I got a new level cut line.

            deck line tool.jpg

            deck tool use.jpg

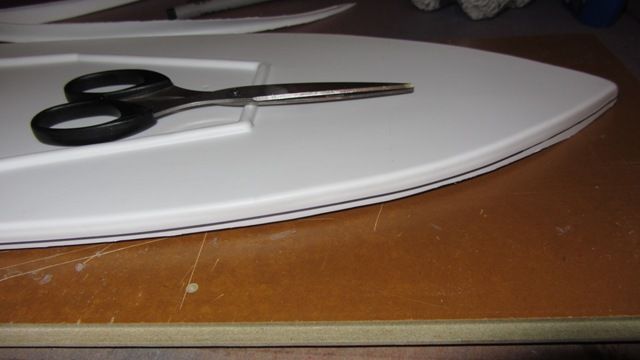
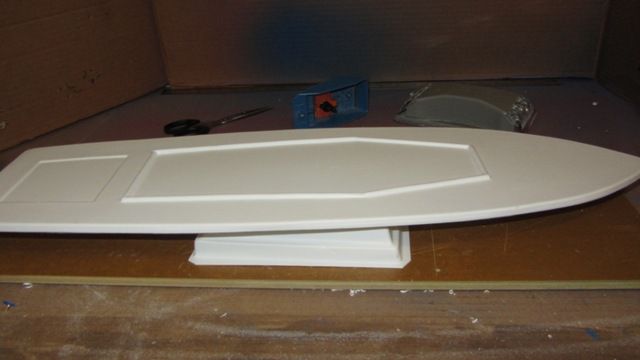
            I then trimmed using the same method as the hull – scissors, plane, sand.

            deck first trim.jpg

            deck trimmed.jpg

            Tools used can just be seen in the background

            #101935
            Dave Reed
            Participant
              @davereed72029

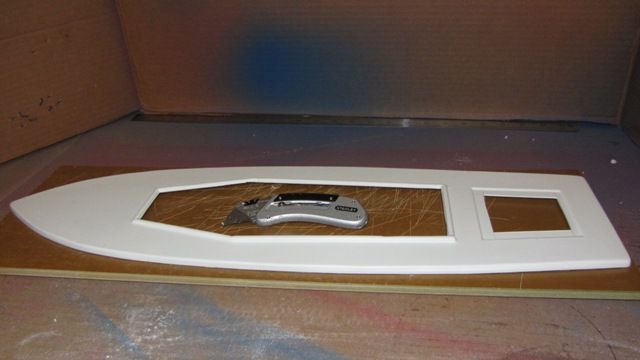
              With the help of Stan The Knife (Mack was out of town) the deck openings were cut out.

              deck cut out.jpg

              That's where I am so far.

              I had intended to be installing running gear today, but on reflection I need to get a more suitable motor. Had intended to use one from a 1980's Tamiya Hornet car but having removed it I think it's a bit too heavy and probably quite power hungry. Thinking something like a Mtroniks M400 is more suitable. Any suggestions welcome.

              #101948
              Dave Reed
              Participant
                @davereed72029

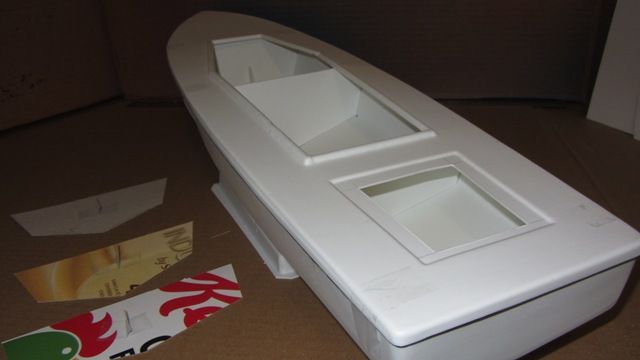
                Didn't have much time this evening, so cut some cardboard bulkheads from the templates provided so I could check the fit before cutting the real ones. Good job I did as none of them quite fit.

                More cereal boxes will have to be sacrificed so I can get the shape right before cutting final material.

                #101949
                Chris E
                Participant
                  @chrise

                  Seems to be going well. Cardboard templates are a great idea which I also use extensively. Even then transferring the shape to the styrene results in a little fettling.

                  Think motor + prop + battery as a combination rather than just motor.

                  #101950
                  Richard Simpson
                  Participant
                    @richardsimpson88330

                    I use card templates an model railway scenery, a very useful and time, and material, saving technique.

                    #101958
                    Cecil Webb
                    Participant
                      @cecilwebb96087
                      Posted by Sinking Feeling on 07/09/2022 22:40:41:

                      With the help of Stan The Knife (Mack was out of town) the deck openings were cut out.

                      deck cut out.jpg

                      That's where I am so far.

                      I had intended to be installing running gear today, but on reflection I need to get a more suitable motor. Had intended to use one from a 1980's Tamiya Hornet car but having removed it I think it's a bit too heavy and probably quite power hungry. Thinking something like a Mtroniks M400 is more suitable. Any suggestions welcome.

                      Nice work.

                      #102060
                      Dave Reed
                      Participant
                        @davereed72029

                        Been away for a bit so no progress for a while.

                        Bulkheads.

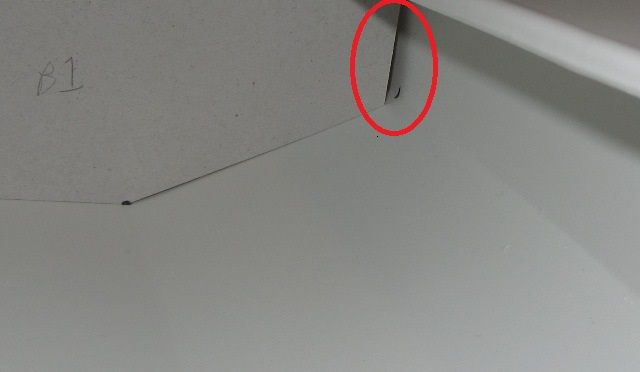
                        I marked locations of bulkheads inside the hull and taped the deck into position to get the final shape of the hull. Then I cut card templates to check size and fit – sellotape tags in the centre help to move them in the restricted space. My card bulkheads had gaps to the hull and needed to be bigger, so I drew around them on new card then by eye added what I thought I needed to make them fit.

                        add material here.jpgAfter a couple of goes I had the shape correct so cut them in the plastic sheet provided. They fit quite well.

                        bulkheads fitted.jpg

                        Deck and bulkheads not glued up yet. Removed to allow for fitting of rudder and propshaft next.

                        #102061
                        Dave Reed
                        Participant
                          @davereed72029

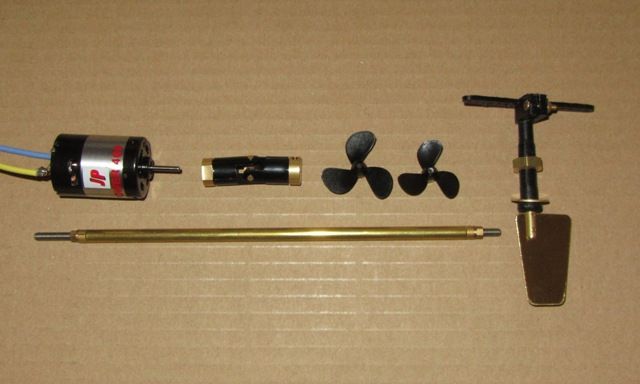
                          Propshaft: 7" M4

                          Rudder: Brass 'mini rudder' 40mm x 26mm

                          running gear.jpg

                          Also planning to use 400 size motor, universal joint coupling and 30mm or 35mm prop.

                          #102062
                          Ray Wood 3
                          Participant
                            @raywood3

                            Hi Dave,

                            It looks like you have all the bits you need, just don't forget to cut some decent sized holes through your bulkheads for wiring and plugs etc , it's a devil of a job to do once you have cemented them in place

                            Regards Ray

                            #102064
                            Chris E
                            Participant
                              @chrise

                              Before you glue down the decks is also a very good time to consider if you want to fit any buoyancy whilst you still have good access.

                              #102065
                              Dave Reed
                              Participant
                                @davereed72029

                                This is an 'Oops' moment

                                I'm sure we've all heard the expression 'measure twice, cut once'. I'd like to add to that – 'measure EVERYTHING twice, cut once'. Now the bulkheads are cut and ready, I turned my attention to rudder, propshaft, motor etc. I've measured (twice) and cut holes for rudder and propshaft, it looks like they'll go in nicely.

                                Just one problem – fitting the motor right in the middle of the central bulkhead could be a little awkward. Obvious solution is a longer propshaft or cut a new bulkhead to fit in a new position about 1" towards the stern. I'm a bit of a skinflint so it looks like I need to cut up another cornflake box.

                                Oh well, another lesson learned.

                                Dave.

                                #102086
                                Dave Reed
                                Participant
                                  @davereed72029

                                  I've dug myself into a bit of a hole here, sensible people might buy a longer propshaft and carry on but where's the fun in that? By the way, if anyone reading this is considering building this kit, I recommend a 10" propshaft to avoid this problem.

                                  So I'm going to keep on digging my hole to see where it leads, which means mostly making it up as I go along for a while.

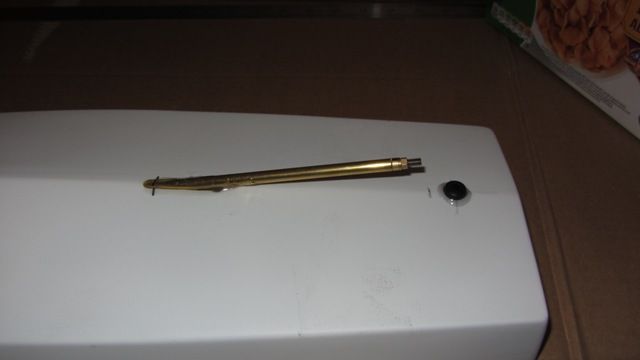
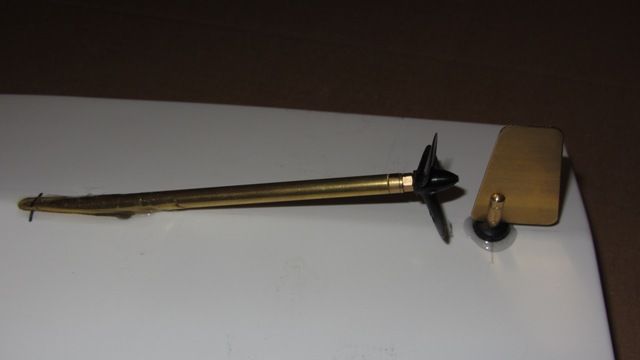
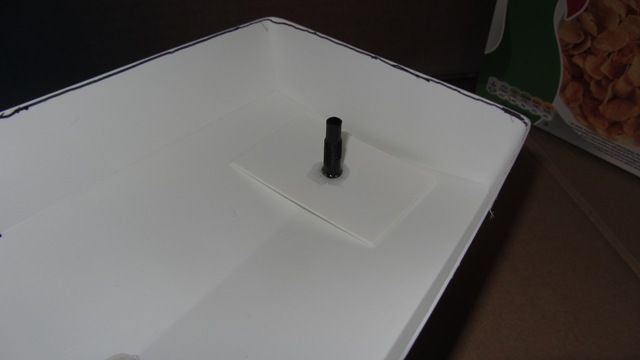
                                  I drilled a hole for the rudder where it looked right (and was protected from me backing the boat into something hard) about 30mm from the stern. Rudder tube was glued in with epoxy top and bottom, a reinforcing plate added and glued in.

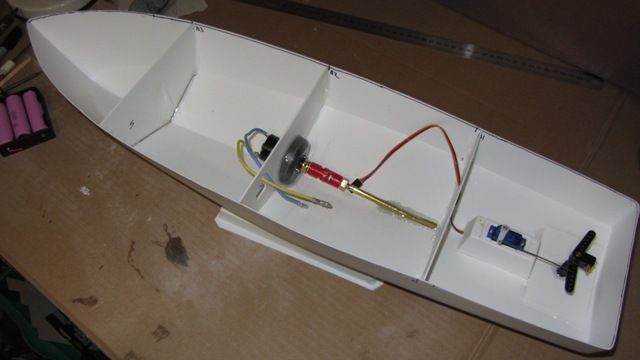
                                  Next a slot was cut for the propshaft. I held the propshaft alongside the hull to 'guestimate' where it needed to be, drilled a hole at each end and cut between them. It seemed OK so I fixed the shaft into position with tape and glued with epoxy. The slot ended up about 145mm to 185mm from stern. Sufficient space was left between the end of the shaft and rudder to allow easy changing of the propeller.

                                  I'll let the glue fully harden overnight then address the new bulkhead locations tomorrow. I'm considering leaving out the central bulkhead that conflicts with the motor position and replacing it with two others One between the motor and bow and one just aft of the motor end of the propshaft that will help support it.

                                  shaft and rudder tube.jpg

                                  prop and rudder.jpg

                                  rudder reinforcement.jpg

                                  #102088
                                  ashley needham
                                  Participant
                                    @ashleyneedham69188

                                    I personally always like to have a bit more support internally for a rudder post, a small block of wood or even just a bit of ply. I always think a rudder is one of those things that can catch underwater objects and the leverage can break the glue around the hull.

                                    Moving the bulkhead…no problem, blimey, buying another shaft! The expense!

                                    Ashley

                                    #102114
                                    Dave Reed
                                    Participant
                                      @davereed72029

                                      I've been thinking about bulkhead positioning but have had a hard time making a final decision. As Wallace would say, ‘It's no use prevaricating about the bush’.

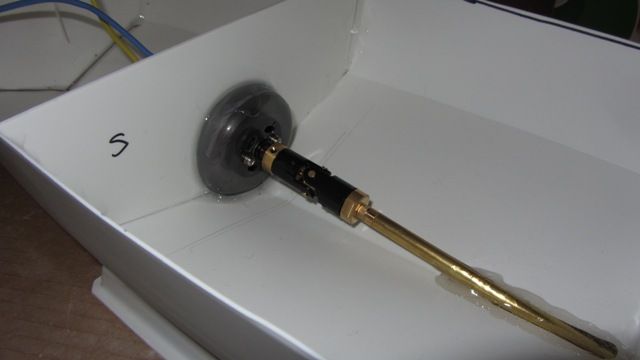
                                      A decision needed to be made, so I made one (right or wrong remains to be seen). Put the bulkheads where they should be and use the centre one as the motor mount as well. So this is how it went:

                                      1. Cut clearance hole in central bulkhead for motor
                                      2. Fit and glue in all bulkheads
                                      3. Search house for suitable motor mount to fix to bulkhead. Find aerosol cap in bathroom.
                                      4. Chop it up, drill holes in it, fit to motor and glue to bulkhead with motor propped into position.

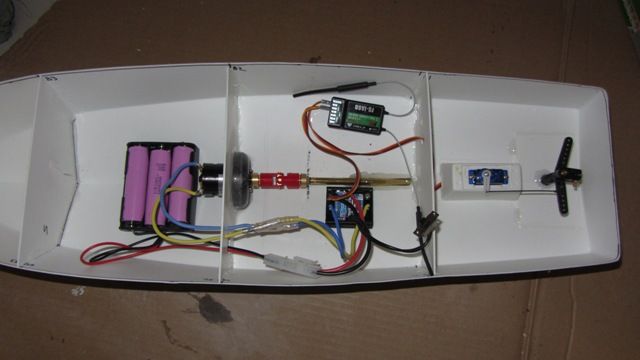
                                      It seems to work OK, sent boat for a swim in the bath and it seems fairly well trimmed with the battery just forward of the motor, receiver and esc in mid section.
                                      Next step, add fixings for battery, esc and receiver then look at build instructions that I’ve not seen for some time now!

                                      motor mount.jpg

                                      bulkheads, motor, servo.jpg

                                      trim test.jpg

                                      #103121
                                      dave garrett
                                      Participant
                                        @davegarrett24229

                                        hey guys i'm new to this hobby too,

                                        i was looking at getting one of these as a rescue boat for my swordsman and my slo mo shun. Looking good so far it looks like a plastic model kit without all the detail, what glue are you using ? and do you think a jet drive will fit in there please ? yes

                                        #103122
                                        ashley needham
                                        Participant
                                          @ashleyneedham69188

                                          Sinking:. Love the Aerosol cap! Looking good.

                                          DG. A jet drive would not be a good fit for this boat as I reckon there would be too much weight aft.

                                          Ashley

                                          #103125
                                          Chris E
                                          Participant
                                            @chrise

                                            This is coming along really nicely.


                                            Dave Garrett

                                            All the jet drives that I have seen require a flat floor section at the back of the hull for mounting the water inlet part of the jet. As this has a V floor you have a problem that will need plenty of work to resolve.

                                            Edited By Chris E on 04/12/2022 09:11:31

                                            #103144
                                            Chris Fellows
                                            Participant
                                              @chrisfellows72943

                                              SF- I thought the aerosol cap was ingenious as well, certainly different. Build is coming along nicely.

                                              Dave – for a rescue boat something like a springer tug would be a better bet; slower, more manoeuvable and with a bit more oomph. You could fit arms to the front as well for collecting your other boats. How big is the Swordsman?

                                              Chris

                                              #103152
                                              Dave Reed
                                              Participant
                                                @davereed72029

                                                I'm a bit of a "kitchen table" builder, don't have a dedicated build space and haven't had a chance to progress for a while.

                                                #103154
                                                Dave Reed
                                                Participant
                                                  @davereed72029

                                                  Hi Dave G,

                                                  I'm using a liquid poly cement for most of the kit parts. Where I'm gluing other non-polystyrene parts (eg propshaft) a 2 part Epoxy. Branded epoxy can get quite expensive but I did find some in the pound store for £1 – worth a try.

                                                  Dave

                                                  #103166
                                                  Tim Moody
                                                  Participant
                                                    @timmoody76107

                                                    Hi I am about to start my very first build and it is of this very boat. Could please tell me which servo you are going to use and as I know slightly less than nothing where the best place to buy all of the components from. Thanks

                                                    #103178
                                                    Dave Reed
                                                    Participant
                                                      @davereed72029

                                                      Hi Tim,

                                                      I've fitted a micro-servo (often known as a 9g micro servo). You can get them from e-bay, Amazon etc. They're dead cheap and should be just about good enough for this size of boat. 

                                                      I'm pretty new to this myself so others may have better ideas for the servo.

                                                      One piece of advice though: I used a 7 inch propshaft which left the motor right in the middle of a bulkhead, not the best choice. Plan the layout before you buy components – propshaft length will determine motor location, other components will have to fit around it.

                                                      There are several suppliers out there (presumably you got your kit from one). I tend to buy from those that advertise in the Model Boats magazine but other builders will be able to suggest other options.

                                                      Edited By Sinking Feeling on 07/12/2022 18:58:14

                                                    Viewing 25 posts - 1 through 25 (of 32 total)
                                                    • Please log in to reply to this topic. Registering is free and easy using the links on the menu at the top of this page.

                                                    Code of conduct | Forum Help/FAQs

                                                    Advert

                                                    Latest Replies

                                                    Home Forums Beginners Topics

                                                    Viewing 25 topics - 1 through 25 (of 25 total)
                                                    Viewing 25 topics - 1 through 25 (of 25 total)

                                                    View full reply list.

                                                    Advert