Fairey Huntress 23

Advert

Fairey Huntress 23

Home Forums Build Blogs Fairey Huntress 23

  • This topic is empty.
Viewing 25 posts - 1 through 25 (of 42 total)
  • Author
    Posts
  • #75544
    Rumration
    Participant
      @rumration

      I am embarking on my first ever scratch build. It is Mr. Dave Milbourn’s design of the Fairey Huntress 23, published in the Model Boats magazine autumn special 2017.

      The first difference I have noticed is how much longer it takes, compared to a pre formed kit. I think it will be considerably cheaper as well.

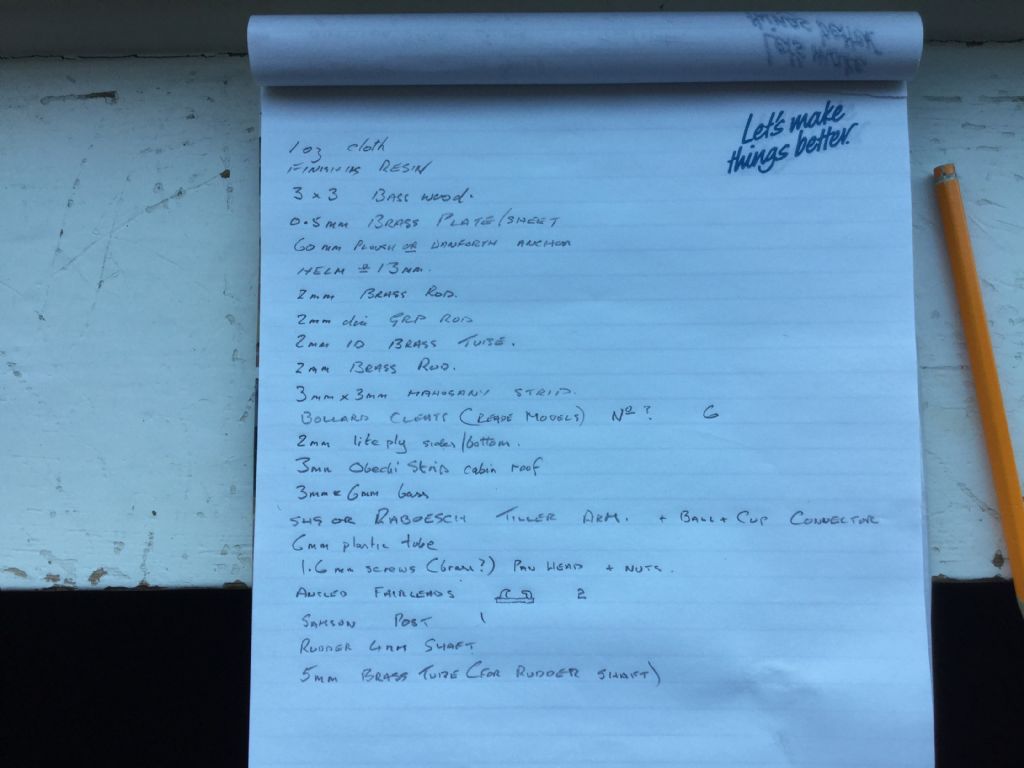
      .I bought as much wood and parts as possible at the Warwick show, but as I delve deeper into the plan, and instructions I am forever making lists, and buying via the internet. ( There are no model shops around my area, as far as I am aware.) I also had a 2nd copy made of the plan.

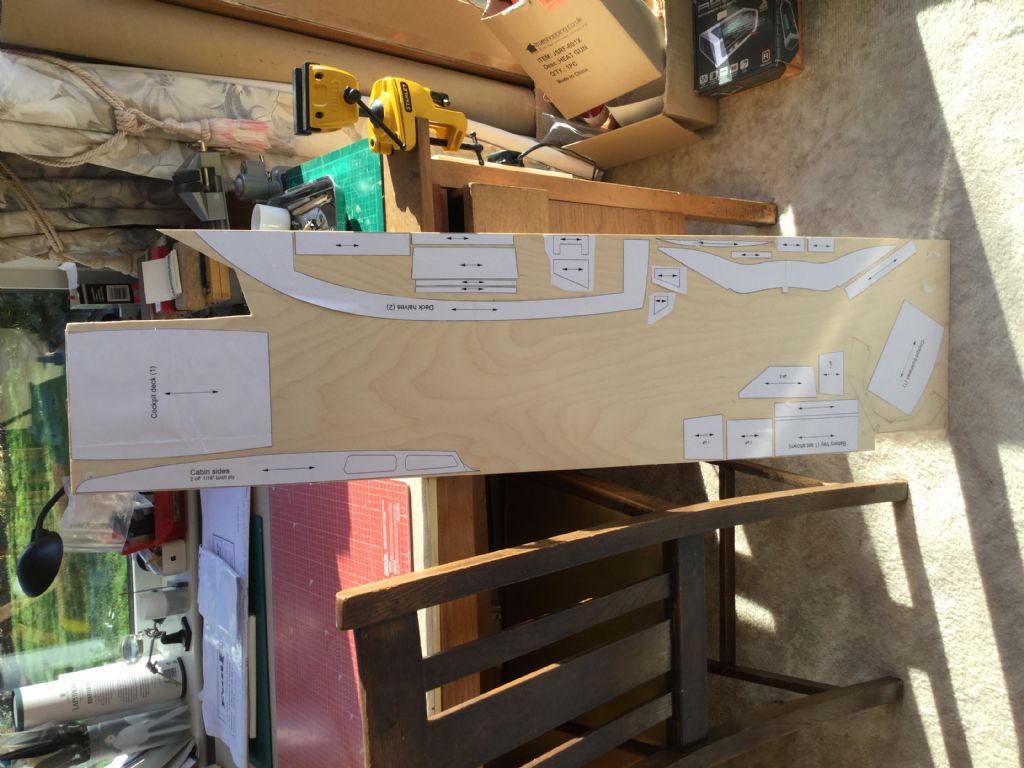
      I started by cutting out the parts for the hull, and sticking them onto my plywood, using double sided sellotape.
      6197f47b-715d-4a9e-804e-3ce583467ffe.jpeg

      Then time to try out my recently purchased scroll and small table saw. Learning curve was fairly steep but managed to get the parts cut eventually. I still have a fear of turning the ply when scroll cutting, when the blade snaps it’s makes me jump, and I’m always on edge waiting for it to happen! Must practice.

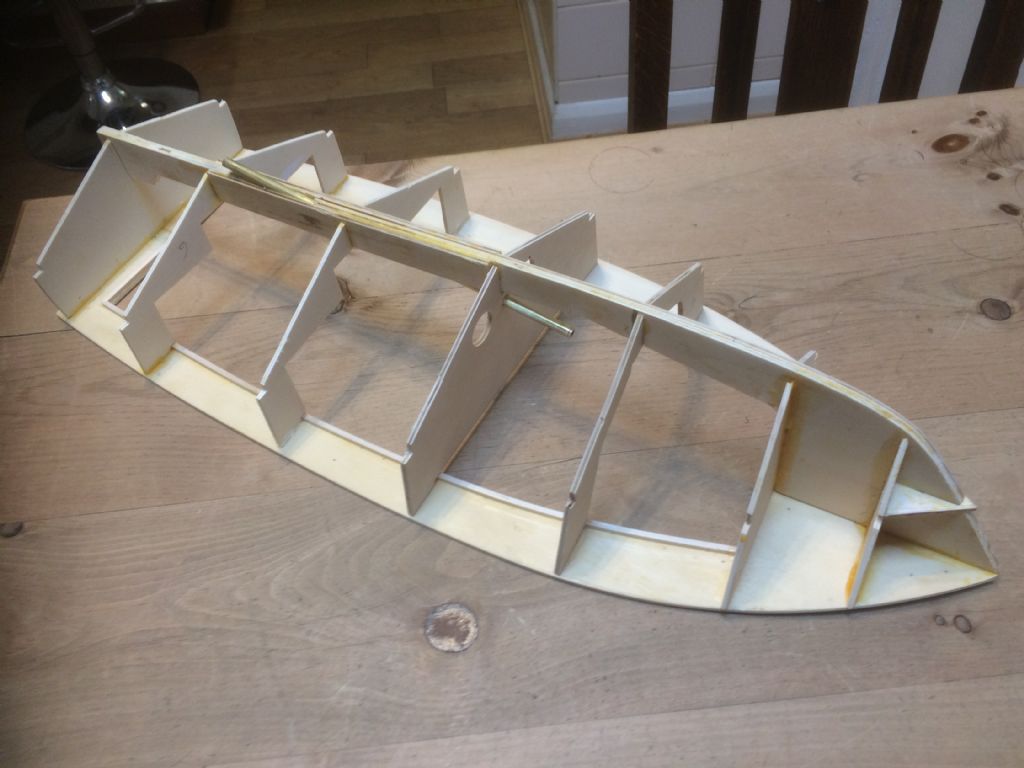
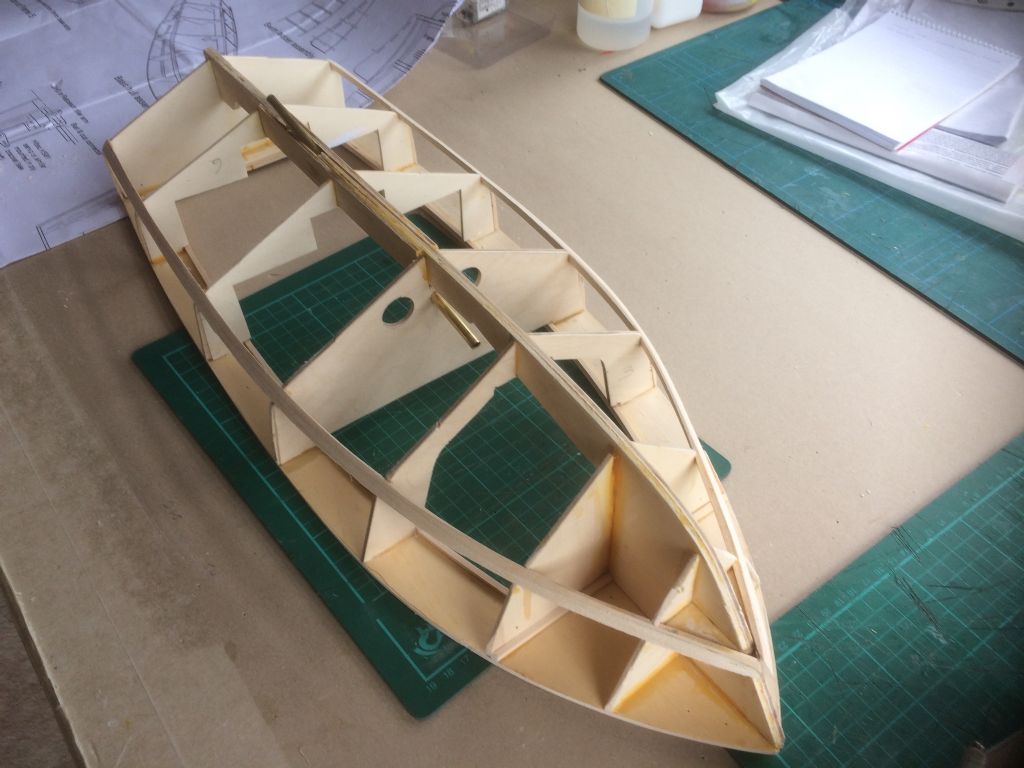
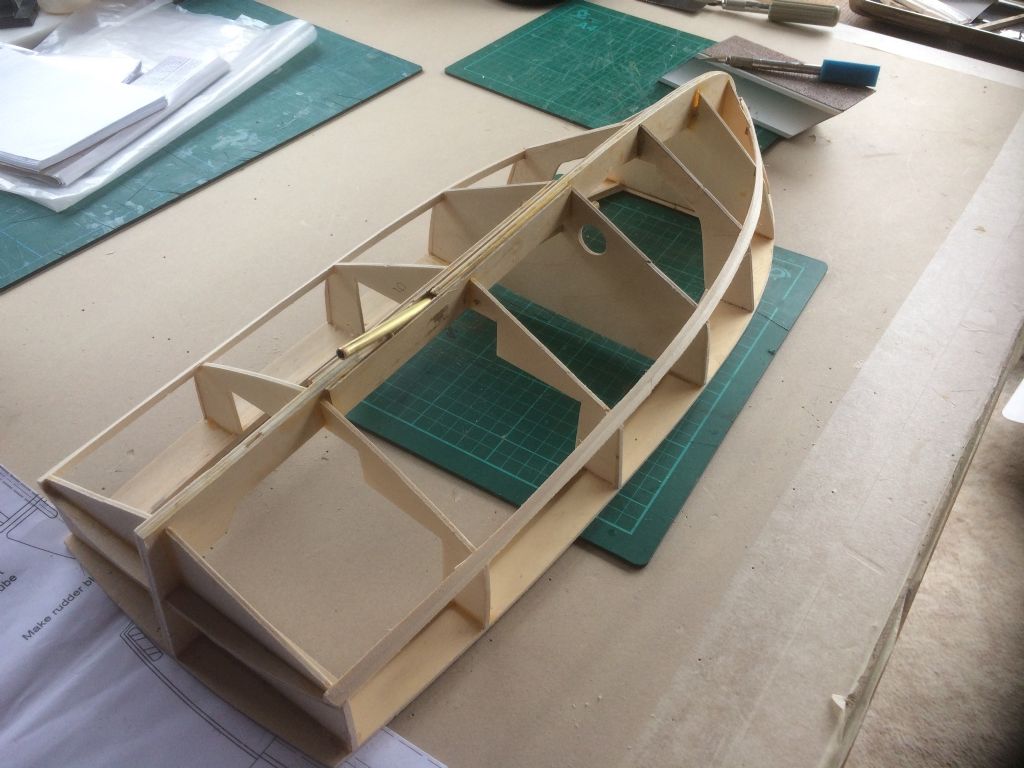
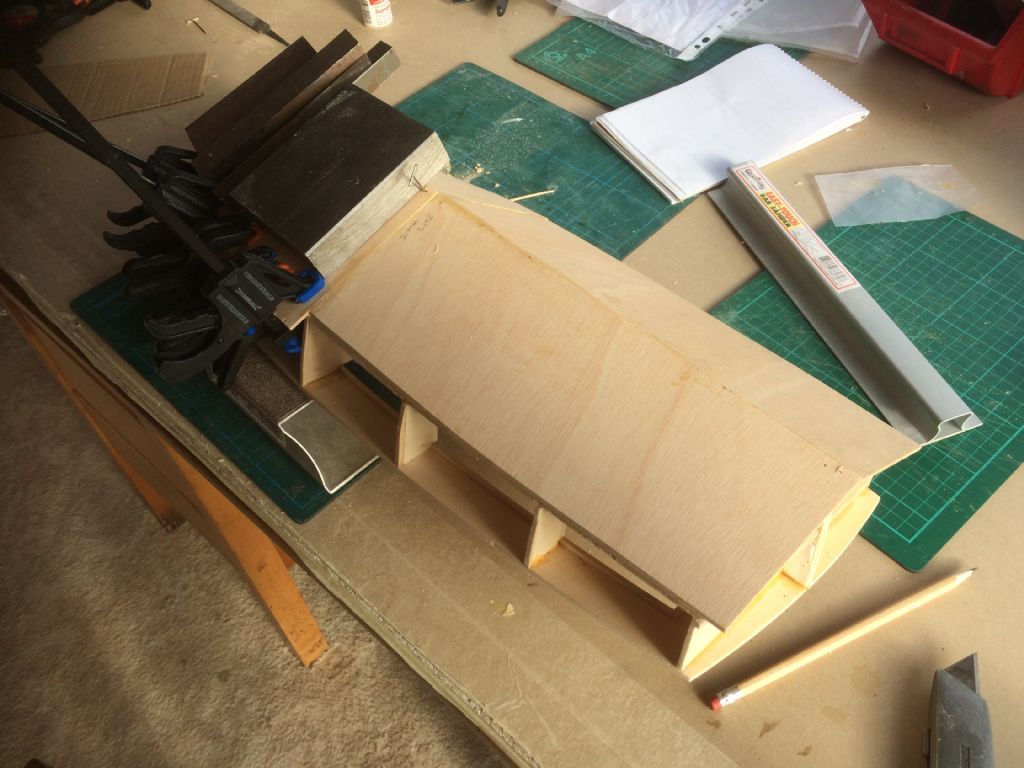
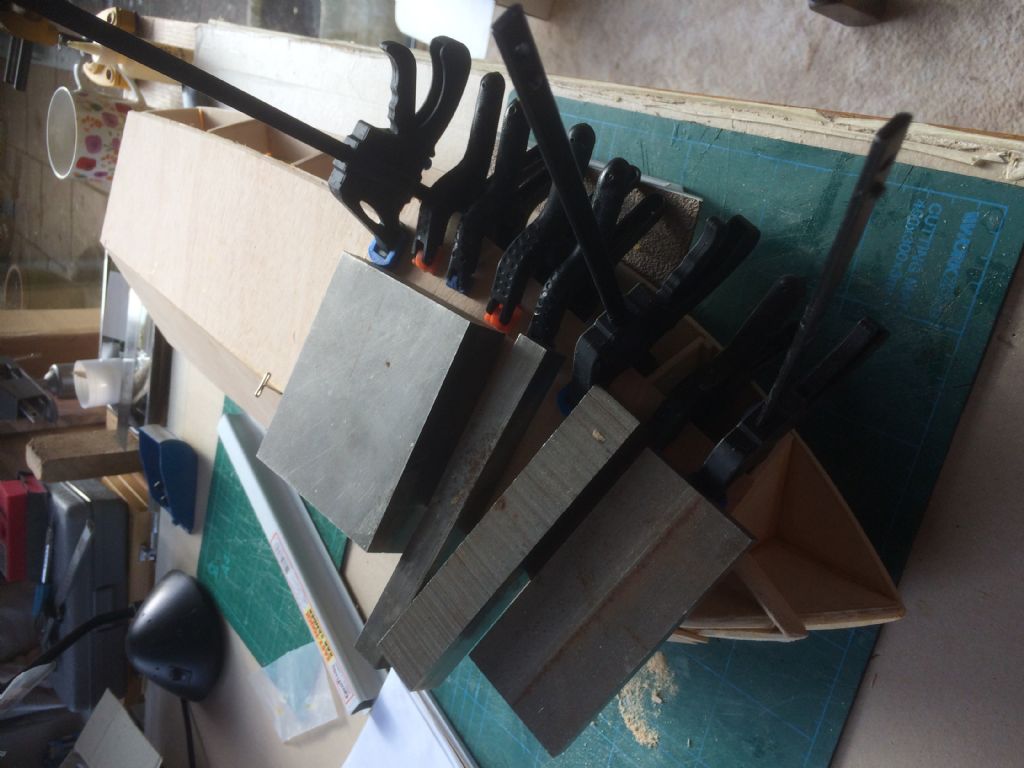
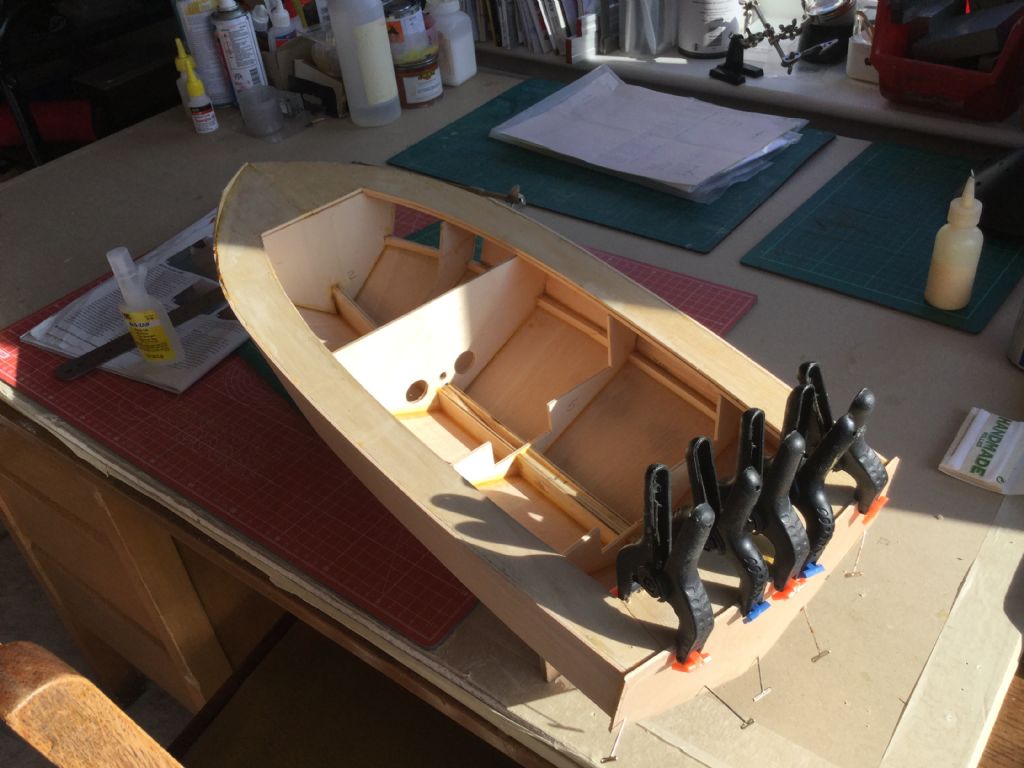
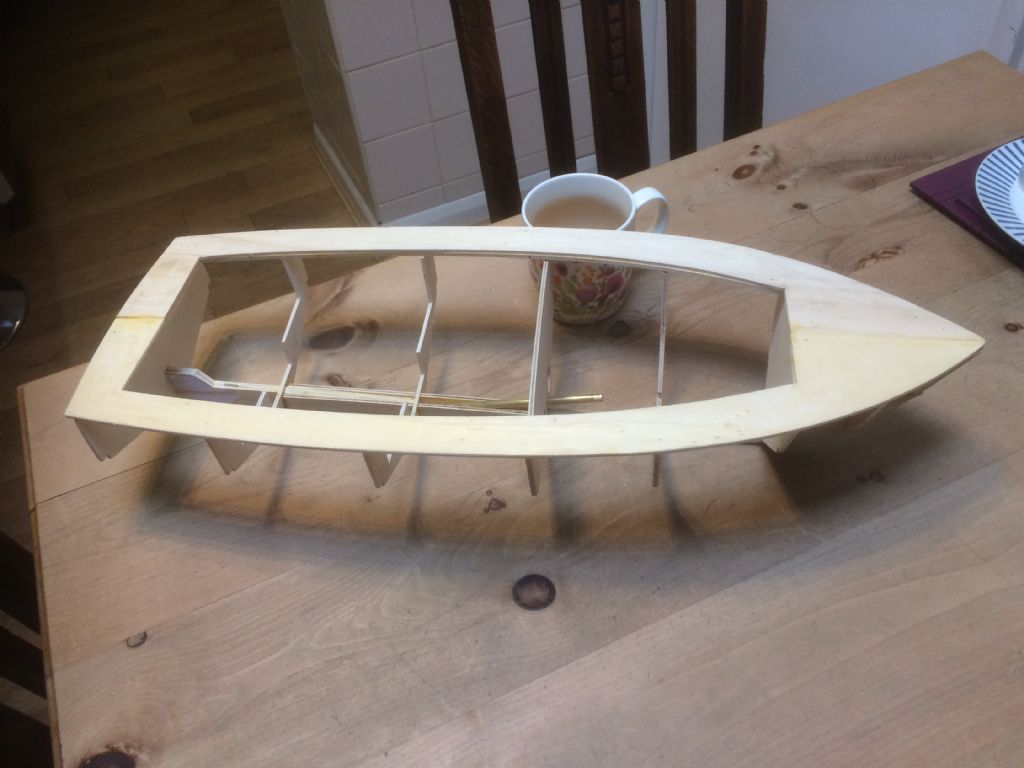
      Today I have virtually finished the assembly.
      68943512-9714-4c4b-9593-345a44ee39ca.jpeg

      c41ad1a2-acee-4c73-bea9-74a83b48ea1e.jpeg

      I think I have a little trimming to do so as to achieve a uniform distance from the edge of the deck to the point of contact of the ribs so that the sheeting will align correctly along the length of the hull.

      The next job is to make the brushless motor mount support and align motor to shaft. I think?

      Well its starting to look like boat, to me anyway.

      PS it’s a real pain typing this onan ipad. The text and curser keep disappearing out of view. Ball ache.

      To be continued..

      Advert
      #9761
      Rumration
      Participant
        @rumration

        My first scratch build

        #75545
        Dave Milbourn
        Participant
          @davemilbourn48782

          Glyn
          Where the frame is narrower than the deck you can stick an extra strip of wood along the edge of the frame to pack it out, then sand back to the edge of the deck. I used 3mm x 3mm basswood strip.
          Do pin the hull down flat onto a board while you fit the chine stringers. If you build a twist into it then you'll have a helluva job getting rid of it. I'd leave fitting motor mount and aligning the prop tube until after you've fitted these because there's then no risk of catching the corners of the frames and snapping them while handling the model.
          Dave M

          #75546
          Eddie Lancaster
          Participant
            @eddielancaster

            Hi Glyn That looks smart! it also looks like that could be my next build, if my grandson takes to boating after the maiden voyage of the Vic Smeed Moonglow I am just finishing for him!

            Cheers Eddie.

            #75547
            Rumration
            Participant
              @rumration

              Many thanks for the tip DM I will indeed take the advice. Many thanks.

              #75548
              Chris Fellows
              Participant
                @chrisfellows72943

                Hi Glyn

                Good to see you have started a build blog.

                Like you, being a first time builder (but in my case of anything!) it's taken me quite awhile, both from the Warwick Show (twice) and online to collect all the stuff required, including a few tools, to begin building. At least on the next one will have most of the timber etc. required.

                I think you will need to adjust or replace that small triangular piece at the bow (Dave will put me right if I'm wrong) because as I understand it the chine stringers need to terminate at the front edge/bow part of the keel. In your shot they will be well in front of it.

                With my builds I'm at the stage where I've cut out the hull parts and am just finishing off the sanding so will begin assembly very soon. Must admit I'm feeling nervous about when I get to the stage when I have to sand the chines and fit the skins. I will take it very slowly!

                Chris

                #75549
                Rumration
                Participant
                  @rumration

                  Chris, I have just looked carefully at pic 7 in the mag article and it may be that I will have to shave it back a tad I’ll decide when I come to do it. The piece should be right as I cut all part exactly ( I think) to the dimensions on the plan. Hey but what’s a mm or two of wood when you have perma grit! Anyway I can’t remove it, it’s glued with a ton and a half of title bond.

                  But thanks for the tip off.

                  #75552
                  Rumration
                  Participant
                    @rumration

                    Also realised today, after much rocking and rolling, I need to fashion a suitable stand. It will make life easier. So that will be next if I can dig out suitable wood tomorrow.

                    #75574
                    Rumration
                    Participant
                      @rumration

                      Just had a long perusal of the plan to see what items I need to complete the model.

                      image5.jpg

                      Oh Dear!

                      #75753
                      Rumration
                      Participant
                        @rumration

                        I have attempted, maybe three times to produce the swim ladder. Only because it been a bit nippy in the shed, and I reckoned I could ge away with that in the kitchen. I did. The ladder has three curved slots cut into the solid sides for hand holds. This I found these seriously difficult to produce so as to get matching slots, not yet achieved.

                        If I used a rat tail file it was quite hard, well for me, to keep the slot width uniform, ah well work in progress. I do have a completed one but it only 3mm holes in place of the slots at the moment. I thought that would be a get out until I realised that their purpose was to enable a swimmer to put their hands through when using the thing!

                        I have fitted the chines and shaped them.

                        Chine1.jpeg

                        Chine2.jpeg

                        So next I will manafacture some balsa blocks to fill out the prow, or I might use the packing type polystyrene that comes around washing machines etc. I have a lot of that somewhere.

                        Oh, still not made a stand as yet. Onwards and upwards. Looking forward now to the England v Wales game later on.

                        #75801
                        Rumration
                        Participant
                          @rumration

                          Last piece of bottom sheeting, glue drying. I think it is ok. so sides come next. progress on the model stand, Ive sketched out the design onto my wood.

                          img_0210.jpg

                          img_0211.jpg

                          #75972
                          Rumration
                          Participant
                            @rumration

                            Been a bit quiet for various reasons. Progress is rather slow as I’m having quite a lot of bother fitting the two bottom bow skins. As of the moment I’ve just removed the fitted one for the second time. Can’t seem to get it on right, mainly because I’m having trouble clamping it accurately whilst the glue sets. I think that tomorrow I’ll try glueing it a bit at a time, rather than the whole sheet at once. Also it’s rather chilly in the workshop, and I hate being cold!

                            Secondly I spent ages trying temporally fit the prop shaft, glad I did as after a lot of measuring angles exit hole positions for shaft and P bracket I realised something was amiss. Guess what, not my bad for a change, I had ordered a 250mm shaft, but according to my ruler, the one supplied is 225mm! ( brass tube) so had to order another. It just ain’t long enough.

                            I’ll post pics when I’ve sorted out the front end skinning. I’m not sure I like building hulls, onwards and upwards

                            Positive side, I’ve built a stand!

                            #75975
                            Dave Milbourn
                            Participant
                              @davemilbourn48782

                              Make sure you've cut the liteply with the surface grain running from keel to chine i.e. across the hull and not along it. Hold the front end of the sheet in the steam from a kettle for a couple of minutes while you hold a curve in it (use gloves!). Remove from the steam and carry on holding it until it's cooled off, then most of the curve will be retained. Liteply is soft enough to be able to hold a piece in place by tapping a few steel dressmaking pins through it with a small hammer and into the frame beneath. Remove pins with pliers.
                              Works every time for me.

                              Dave M

                              #75982
                              Rumration
                              Participant
                                @rumration

                                Hi Dave,

                                Doing that this morning, thanks. I have only tried to adhere a couple of inches, top & bottom, aftmost. I’m going to allow that to dry (titebond), then continue up to the bow. I think it will be easier to complete once this way. I may be wrong, we’ll see! Downside is it makes progress very slow waiting for the adhesive to set before continuing.

                                I notice that SLEC now have the laser cut kit for sale, nice price.

                                Thanks as always for your input.

                                G

                                #75983
                                Dave Milbourn
                                Participant
                                  @davemilbourn48782

                                  I notice that SLEC now have the laser cut kit for sale, nice price.

                                  I think you'll find that's the Huntsman 31, not this model. Incidentally I used Slo-Zap for the hull skinning on my models. 'Dries' in about ten seconds!

                                  Dave M

                                  #75984
                                  Rumration
                                  Participant
                                    @rumration

                                    My mistake, it is indeed a Huntsman kit.

                                    I was tempted to use CA but wasn’t sure if it was the right stuff to use. I even considered tacking every couple of inches with CA, and then running titebond along the joints afterwards, again I thought getting into all the joints might be problematical, so didn’t do it.

                                    Don’t you find CA is harder to sand down than normal wood glue?

                                    At the end of the day this is a learning project for me, so I expect to make some mistakes with my methods. Reckon that’s part of the “fun”

                                    Cheers G

                                    #75985
                                    Dave Milbourn
                                    Participant
                                      @davemilbourn48782

                                      Don’t you find CA is harder to sand down than normal wood glue?

                                      Nope – not this stuff. You use so little of it that you're seldom sanding anything more than the edge of a microscopically thin "layer" between two surfaces. SloZap is my go-to glue for sheeting and skinning these days.

                                      Dave M

                                      #75987
                                      Rumration
                                      Participant
                                        @rumration

                                        Ok, the CA I have is rock hard when dry and the devils,own job to rub down on a flat surface. I.e skins.

                                        I’ll take up your tip and get some, thick type I guess.

                                        #75991
                                        Dave Milbourn
                                        Participant
                                          @davemilbourn48782

                                          SloZap. Nothing else comes close.

                                          DM

                                          #76004
                                          Rumration
                                          Participant
                                            @rumration

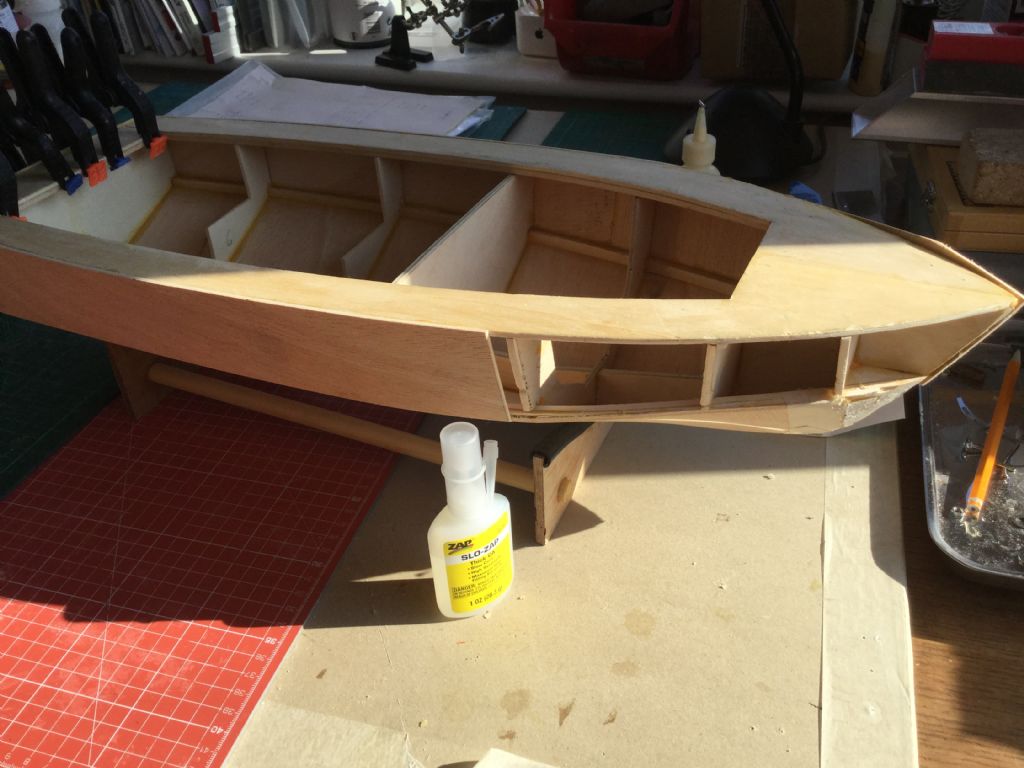
                                            I have almost finished skinning, one piece to go. I was having trouble holding the skins in place whilst the glue dried, and was advised helpfully to use slo zap CA. This I will try out on the remaining piece.

                                            As you can see below, this morning I have fitted the transom. I think all is well. Oh, and the replacement prop shafts has arrived, but not tried it yet, confidant all will be well.

                                            My next project will be the glass fibre outer on the hull. Never done any of that before, so fingers crossed.

                                            What are my feelings so far re scratch building?

                                            It’s a slow but satisfying method.

                                            It’s a lot of additional work.

                                            A lot of postage payments to gather all the components, and some are difficult to obtain. I still,have not found a suitable wheel or helm. I’m still hoping I can as a don’t fancy trying to construct one!

                                            I don’t think I would scratch build if a laser cut kit was available, especially if it had most, or all, of the fittings included. I really can’t see the point, at the moment.

                                            b5499aab-2b8b-458b-a225-31a31452a9c4.jpeg

                                            7ea7631c-6917-4e7e-abc3-ba1a7ccc3d31.jpeg

                                            That’s it for now.

                                            #76006
                                            Chris Fellows
                                            Participant
                                              @chrisfellows72943

                                              Glyn – Yes, scratch building does take more time, but what the heck it's a hobby! As you say it's very satisfying (well most of the time!) and I enjoy working with timber.

                                              I agree about getting the bits and pieces together. Despite going to two shows I've still had to get loads of stuff online and still forget things. All part of the fun and learning process though. In fact I've started collecting stuff already for future builds and now have most of the tools required. Most of my planned builds are going to be scratch.

                                              How did you get on with sanding the stringers to profile as I must admit that and fitting the skins is the part that's filling me with trepidation! I've got the tools for the job though so hopefully it won't be as bad as I think.

                                              Chris

                                              #76007
                                              Dave Milbourn
                                              Participant
                                                @davemilbourn48782

                                                Chris

                                                It's all a matter of minding your P's – that's Pencil, Plane and Permagrit. You have to start practicing somewhere…

                                                Dave M

                                                #76009
                                                Chris Fellows
                                                Participant
                                                  @chrisfellows72943

                                                  It's the practicing I'm worried about!

                                                  I shall take my time and I'm sure it will be Ok.

                                                  Chris

                                                  #76040
                                                  Rumration
                                                  Participant
                                                    @rumration

                                                    Chris,

                                                    Fortunately, perhaps I didn’t realise that shaping the the stringers is a recognised problem, so I just gently sanded them, eyeballed them, down their lengths until they looked about right. The skins seem to be ok to my inexperienced eye.

                                                    I’m now waiting for the filler to harden on the bow, so I can sand it back.

                                                    I do have a question for you guys. How good does the surfaces have to be before glassing? I mean absolutely perfect, or will the resin help to mask them to some extent?

                                                    #76043
                                                    Dave Milbourn
                                                    Participant
                                                      @davemilbourn48782

                                                      Glyn

                                                      The better the preparation then the better the finished job is likely to be. I've always used Fine Surface Polyfilla as a grain filler although Derek Bradley recently brought this to my attention –

                                                      The filler is called One Strike Ready Mixed Filler and the number in the Toolstation catalogue is 20822 on page 34.

                                                      After use you'll still find a very slight indentation from the grain but the glass cloth and resin will take care of that. The subsequent primer will fill any weave left showing from the cloth.

                                                      Dave M

                                                    Viewing 25 posts - 1 through 25 (of 42 total)
                                                    • Please log in to reply to this topic. Registering is free and easy using the links on the menu at the top of this page.

                                                    Code of conduct | Forum Help/FAQs

                                                    Advert

                                                    Latest Replies

                                                    Home Forums Build Blogs Topics

                                                    Viewing 25 topics - 1 through 25 (of 25 total)
                                                    Viewing 25 topics - 1 through 25 (of 25 total)

                                                    View full reply list.

                                                    Advert