A class yacht – Serica II

Advert

A class yacht – Serica II

Home Forums Sailing Models A class yacht – Serica II

  • This topic is empty.
Viewing 25 posts - 1 through 25 (of 54 total)
  • Author
    Posts
  • #69007
    Gareth Jones
    Participant
      @garethjones79649

      There seems to be some interest in big model yachts at the moment so I thought I would start a new thread to cover the build of our A class hull, Serica II. It has not yet been completed and sailed, but it has connections with some of the most famous names in UK model yachting so I will start with its history. Over the next few months I will add some more photos as the build progresses and hopefully we will have it on the water next year, about 60 years after it was originally designed.

      My wife Elizabeth is an enthusiastic restorer of vintage model yachts and sailing vessels. We saw Serica II advertised in the Turning Pole, the journal of the Vintage Model Yacht Group about a year ago. Elizabeth has about 20 models ranging from a 78 inch long 10 rater down to toy Star yachts so an A class would fill the hole in her collection at the large end of the class size range. With the help of the Vintage Model Yacht Group, of which we are both members, and in particular David Bell, we have now managed to trace the history of this particular hull.

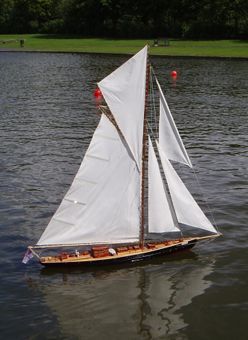
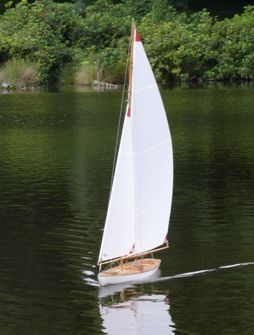
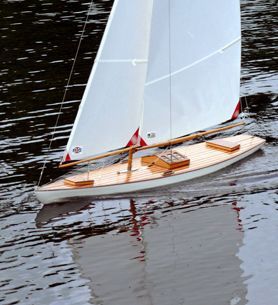
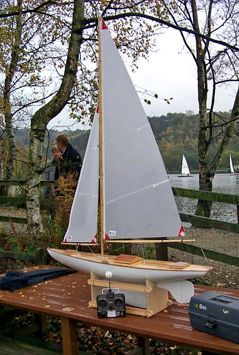
      Serica was designed in 1956 by Bill Daniels for Norman Hatfield, for the princely sum of 3 guineas. Bill Daniels was one of the most influential figures in British model yachting, being an active designer, builder and competitor from around the start of the twentieth century until his death in 1959. Here is a picture, courtesy of David Bell, showing Serica (registered K750) some time in the 1950's
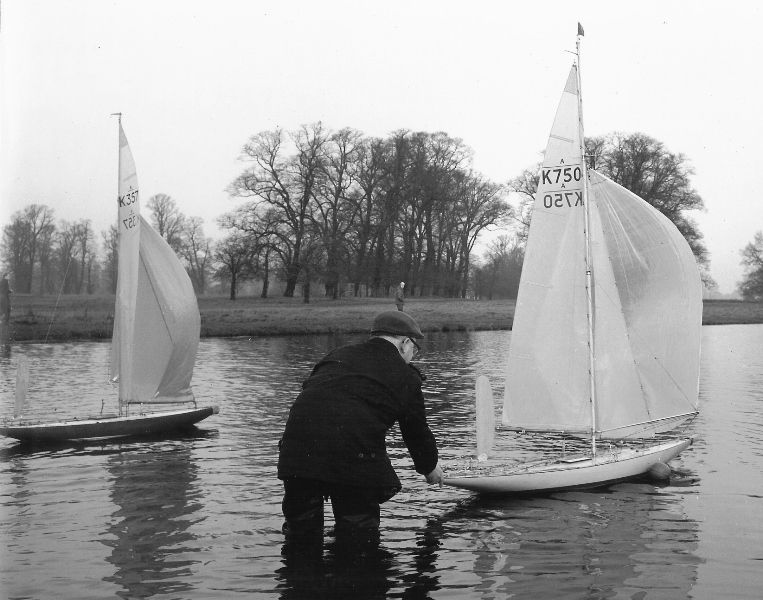
      serica 4.jpg

      Serica was build by Arthur Levison, another of the great names in British model yachting, The hull would have been built on the bread and butter principle then carved to shape, inside and out. Arthur Levison built many similar hulls in the 1950's, often modifying and developing designs to improve their performance. One of Arthur's other claims to fame is that he carved the figurehead of the Cutty Sark, now preserved in Greenwich.

      Serica was not a success as it is thought that Daniels got his calculations wrong and the keel came out significantly too heavy. Under the A class rating formula this meant that it would not be able to carry the optimum amount of sail area and would be uncompetitive.

      Arthur Levison built a second hull to the same or slightly modified design but this was never completed and abandoned in its roughly carved state. The reason for this is not clear but it is alleged that it was for an American customer who never took delivery of it. This hull was given to one of Arthur's neighbours and languished there, untouched, until after his death. His widow advertised the hull for sale and the advert was seen by David Bell, who lived nearby and suspected that this might be an Arthur Levison original.

      David bought the hull but decided that there was too much work involved for him to complete the build so he passed it on to John Gale. John was also renowned for the quality of his wooden hull construction and had built many classic racing yachts up until his death in 2015. He completed the bare hull of Serica II, including a modified keel to address the over weight issue of the original design. After his death the hull of Serica II was offered for sale by his daughter, but in the confusion, the keel was separated from the hull and lost. In January of this year Elizabeth and I traveled down to London to collect the bare hull and start to plan its completion, 60 years after the original design was done.

      More to follow, probably tomorrow.

      Gareth

      Edited By Gareth Jones on 12/12/2016 20:38:05

      Edited By Gareth Jones on 12/12/2016 20:43:00

      Advert
      #9633
      Gareth Jones
      Participant
        @garethjones79649
        #69017
        Banjoman
        Participant
          @banjoman

          Thank you very much indeed, Gareth, for starting a thread on this fascinating model yacht – I look forward very much to follow its completion in your hands!

          Mattias

          #69031
          Gareth Jones
          Participant
            @garethjones79649

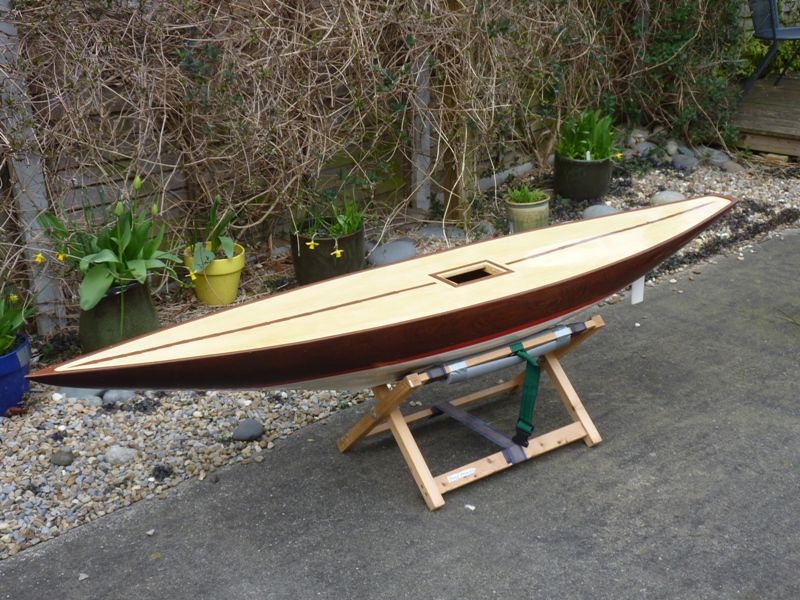
            So to continue the story, we had a beautifully finished 84 inch mahogany hull, with no keel or deck fittings.

            serica 1.jpg

            Making a keel was going to be a challenge, if the original Serica designer and builder could not get it right, there would not be much chance for us.

            Fortunately David Bell had the original Bill Daniels drawing of Serica's lines and calculations plus a second drawing by a man named Jim Belton of a revised, lighter weight keel. Apparently Jim Belton built a plank on frame version of Serica using the modified keel. However what happened to it is not known.

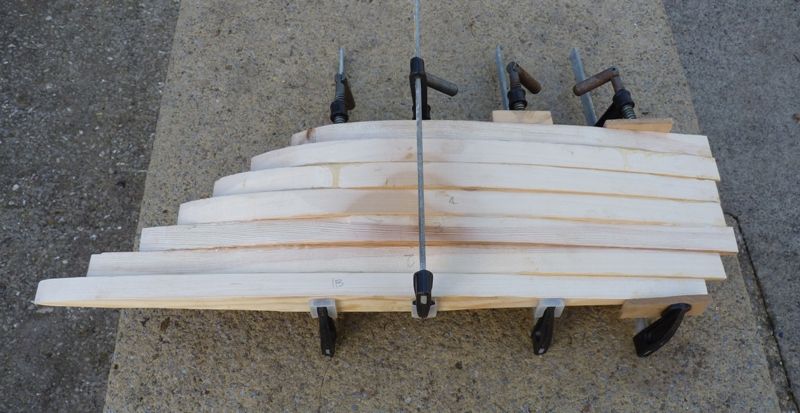
            Using the Jim Belton drawing I have started to make a new keel, laminated from 1 inch thick pine planks. When finally carved to shape, the lower front section will be cut off and used as the pattern for the lead casting, which should weigh in at around 17 kg/38 lb. Serica II should come out as a typical A class model of that era, around 55 inches waterline length, 60 lb in weight and 1570 square inches of sail area.

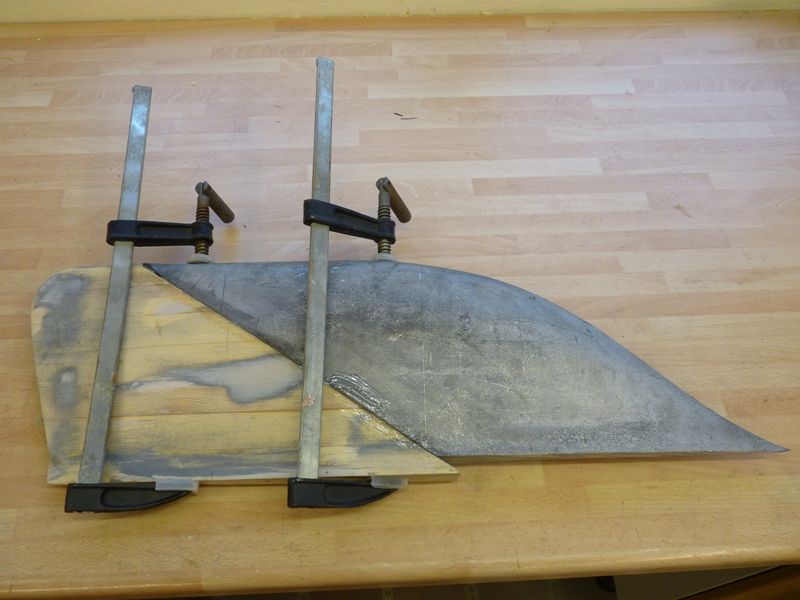
            Here is the start of the laminating process for the keel with some of the pieces clamped up while the glue dries.

            serica 2.jpg

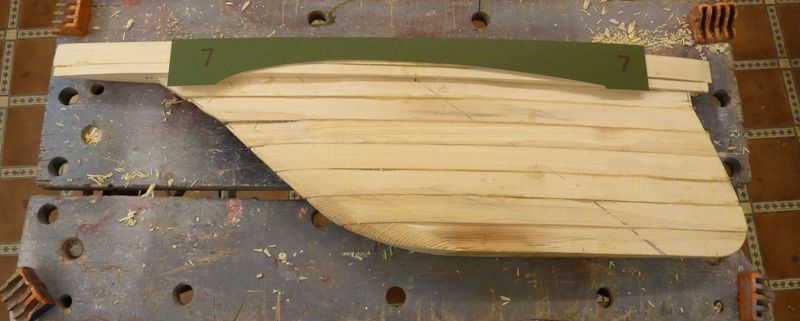
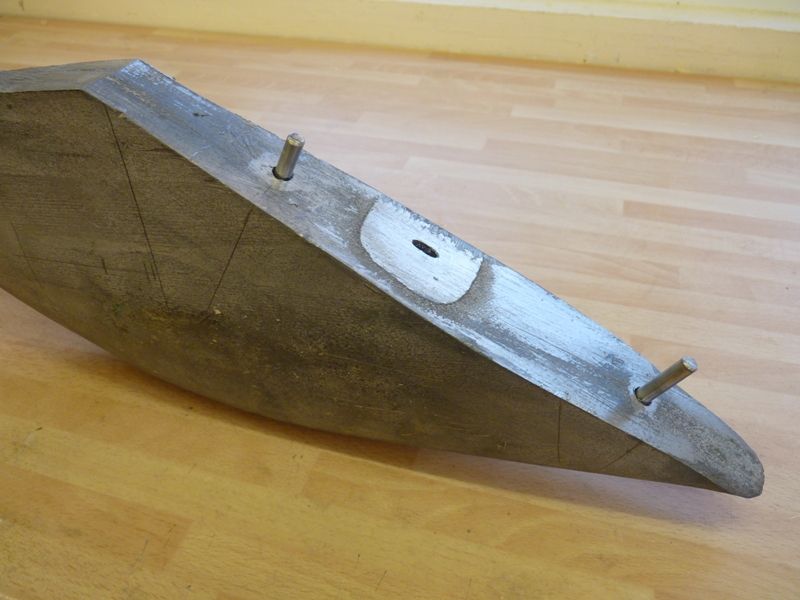
            The next one shows the roughly carved block after a few nights work with a small plane. The piece of green card at the top is one of the patterns cut to get the profile correctly shaped. No 7 is at the joint between the bottom two pieces of wood. The diagonal line marks boundary between the lead and the timber in the final assembly.

            serica 3.jpg

            Gareth

            #69033
            Ray Wood 3
            Participant
              @raywood3

              Hi Gareth

              That's going to be a lot of lead ! have you considered a cast iron keel ? I've had locomotive wheel castings produced from my wooden patterns in the past. You would need a local foundry of course, maybe hard to find these days.

              Also CI is much easier to drill an tap a thread for some stainless steel studding, than lead is in my experience.

              As I say only a thought as an alternative ??

              Regards Ray

              #69036
              Bob Abell 2
              Participant
                @bobabell2

                Gareth and Elizabeth……..This could be your lucky day!

                Why is that, I hear you ask?

                I was just about to post you a message about the surplus lead I have in the garage, that would do for your your latest yacht renovation……..When I realised, you two classic yacht stalwarts would be the ideal guardians of two nice yachts I have……..Gathering dust upstairs

                William Daniels Marplehead…….Pocahontas

                Sandy Cousins yacht……..Britannia……..Complete with motor drive

                Both are in perfect working order and nicely made

                Next time you are in the Manchester area, please call in for a chat and take the boats into safe keeping?

                FOC of course

                If you would like them, that is

                I am down sizing at the moment

                Bob

                The Britannia photo is actually my Pocatannia hybrid

                image.jpeg

                image.jpeg

                image.jpeg

                image.jpeg

                #69039
                Gareth Jones
                Participant
                  @garethjones79649

                  Bob,

                  That is a very kind offer. I will send you a pm later this evening.

                  Ray,

                  I had not thought of using cast iron. I have found a small company in West Yorkshire who specialise in lead castings so we are planning to use them at the moment. I don't intend to tap the lead section of the keel, the studs will go all the way through and locate in a couple of stainless steel nuts bonded into the bottom of the lead and then filled afterwards. I am going to need to invest in a long 8 mm drill bit though. It will need a very careful lining up to make sure the holes come out of the bottom of the keel in the right place on the centreline.

                  I have done a bit more planing and whittling tonight. The keel is now looking something like, but still needs some material taking off as it's a bit fat in places. I have deliberately left it a bit long so that I can adjust the position longitudinally to get the cg in the right place.

                  I am also trying to think of some way of checking it will come out at the right weight before I saw the pattern off the rest of the keel. At the moment my thoughts are around the idea of submerging the lead section and measuring the volume of water displaced – somehow.

                  The other option is to cut it off and weigh it at that stage. I know the wood I have used has a specific gravity of 0.65 grm/cc and lead is 11.36 grm/cc. I could, at that stage temporarily reattach the front section and do some reshaping to get nearer the right weight if I am a long way off.

                  serica 5.jpg

                  Gareth

                  #69148
                  Gareth Jones
                  Participant
                    @garethjones79649

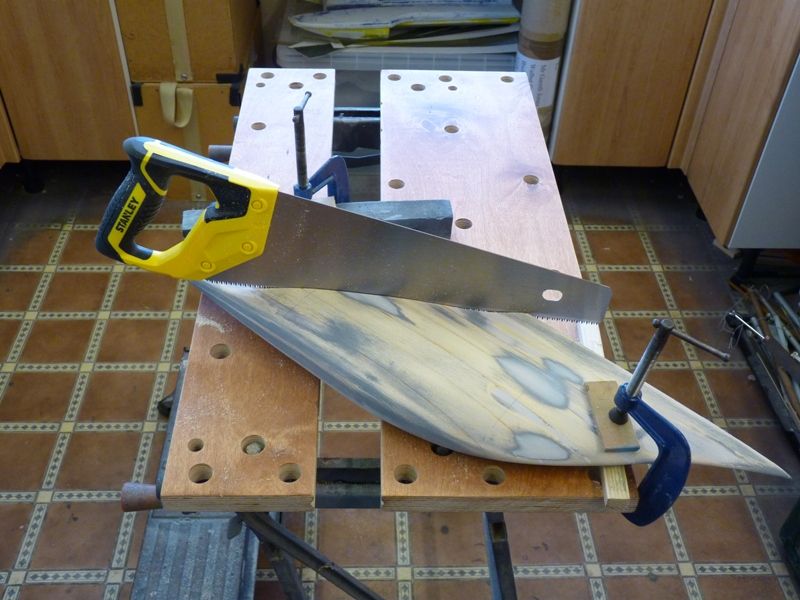
                    I have made a bit more progress over the last couple of days and finished the lower section of the keel that will form the pattern for the lead ballast

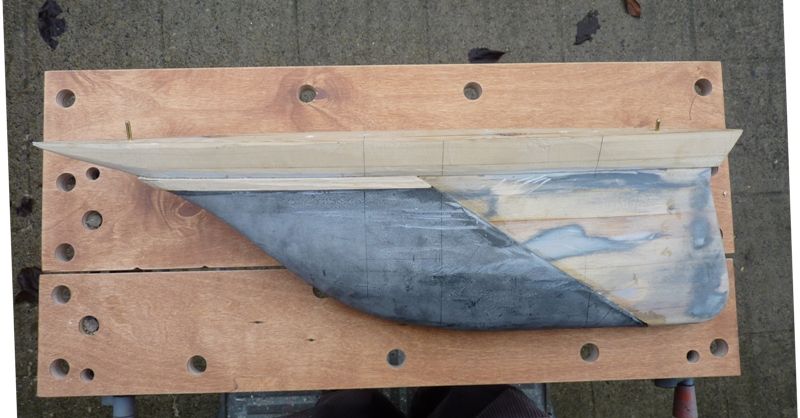
                    Here is a picture of the lead pattern about to be cut away from the rest of the lower part. I tried various way of dunking the piece in buckets and boxes of water to try and estimate the volume and hence weight of the final lead casting. Unfortunately the results were too variable to be usable, but I reckoned I was somewhere in the right parish and the shape matched the templates on the lines drawing that I have. I therefore decided there was no option but to cut it off and weigh it afterwards.

                    serica 6.jpg

                    The picture also shows two of my Christmas presets, a new saw and a new top for my Black and Decker workmate. I have had this workmate for about 40 years and it has given sterling service despite being abused on many occasions. It was becoming slightly less usable as I had managed to cut a couple of corners off the top section when jigsawing a few years ago. I was planning to ask for a new one for Christmas but on reading the reviews on a well known website, most of them said the latest workmates are nowhere near as robustly made as they were in the past. However I found a company on Ebay who supply new birch ply tops to fit virtually any model of workmate so I ordered a set as a present to myself. They arrived just before Christmas and I fitted them yesterday. Its nearly as good as new now.

                    serica 7.jpg

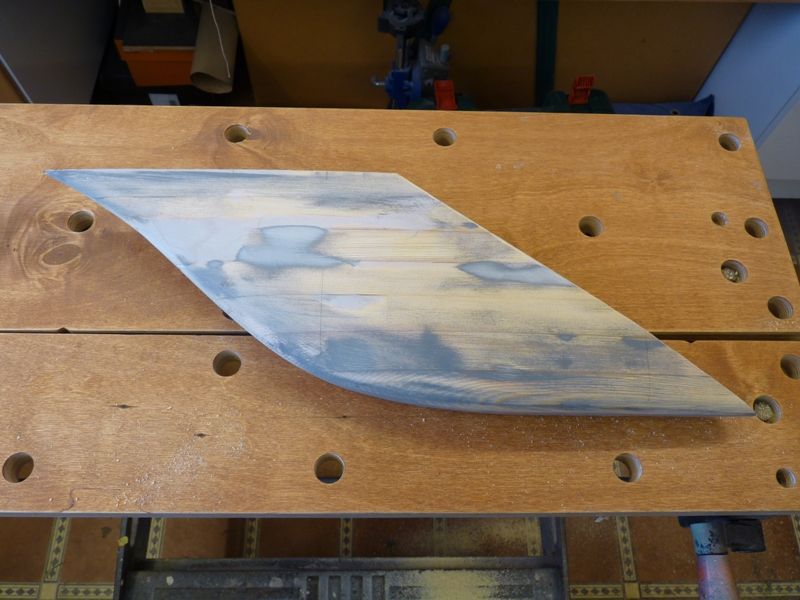
                    Here is the pattern which weighs about 1050 grams on the kitchen scales. Based on the relative density of the wood I used and that of lead, the keel should come out at about 17.5 kg, which is about half a kg over my target. I am going to go with the shape as it now and if the final casting is too heavy I will drill a few strategic holes and fill them to get the weight down. Hopefully the pattern will be off to the foundry in Bradford at the end of next week.

                    Over the next few weeks I am going to start making the rudder and some of the deck fittings, which will take me on to learning another new skill I have never tried before – silver soldering

                    Regards and best wishes to everyone for the New Year

                    Gareth

                    #69238
                    Gareth Jones
                    Participant
                      @garethjones79649

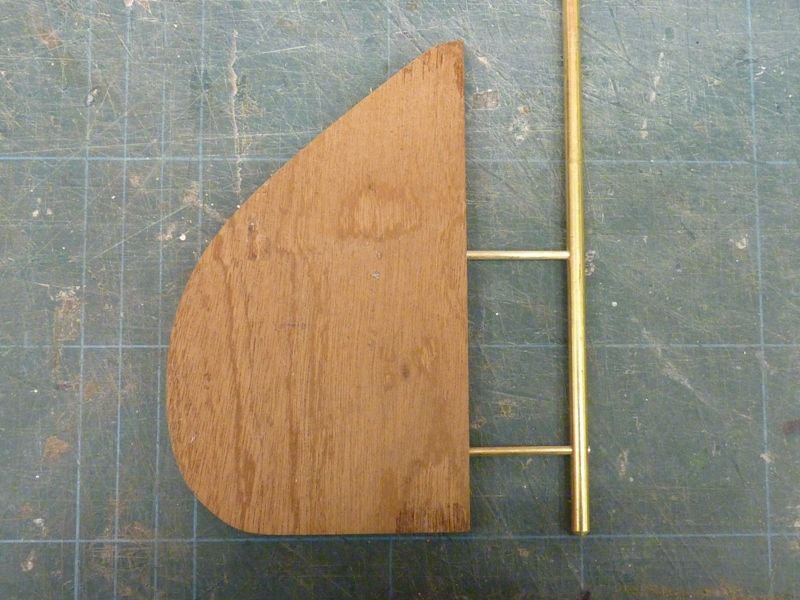
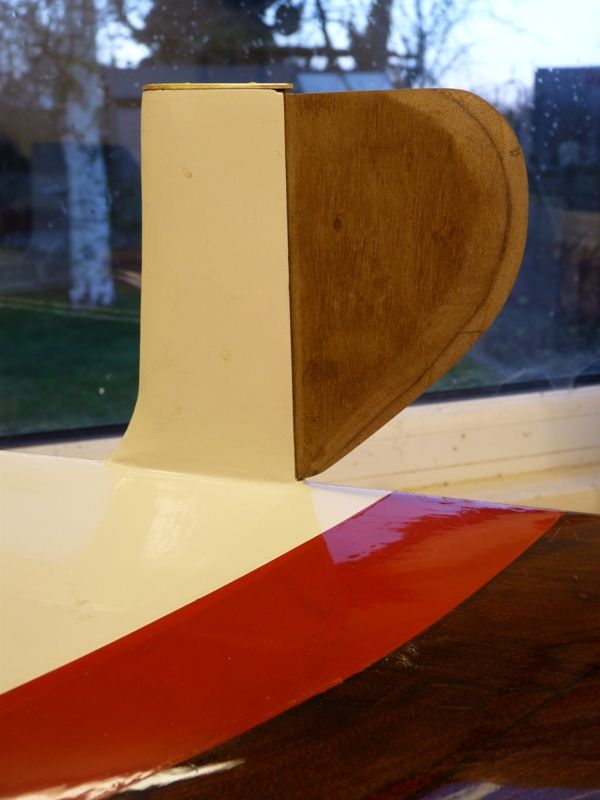
                      Serica now has a rudder, made from 4 laminations of 2 mm thick mahogany sheet, glued together with epoxy. The rudder post is made from 3/16 brass rod and a pair of 3/32 pieces of brass rod are soldered into cross drilled holes to tie the whole thing together. Here are the component parts before being fully assembled.

                      serica 8.jpg

                      The rudder bearing tube in the hull is 1/4 inch bore so a pair of brass tube bushes were fitted to locate the rudder post at the top and bottom of the hull, allowing the rudder to pivot with minimal friction. In a conventional servo driven rudder I would have used 1/4 rod for the rudder post but on a vane steered yacht, it is important that there is minimal friction in the rudder to allow the vane to drive it accurately.

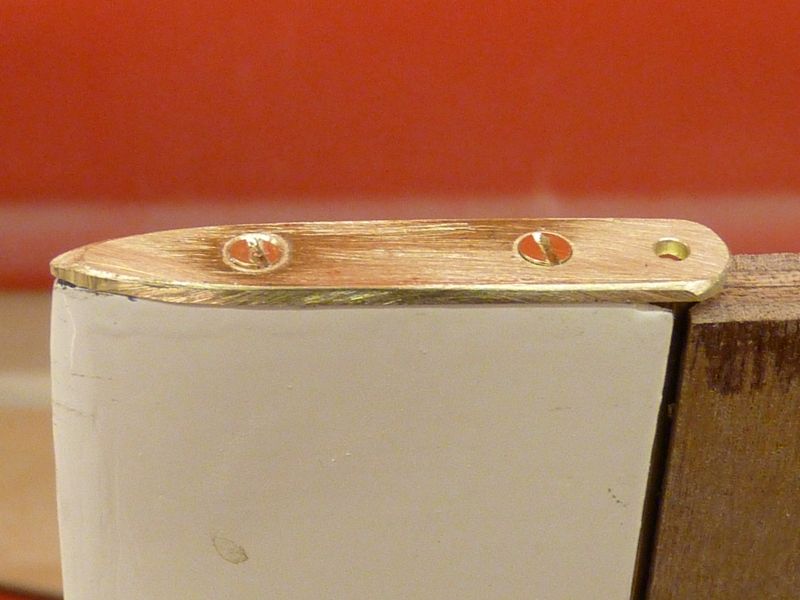
                      The bottom bearing is made from a piece of brass strip screwed on to the bottom of the rudder skeg. A small hole in this strip is used to locate a triangular sectioned end of the rudder post, i.e. it primarily provides a pivot point to support the weight of the rudder assembly.

                      serica 9.jpg

                      Here is the final assembly glued and shaped, ready for varnishing.

                      serica 10.jpg

                      Gareth

                      #69266
                      Gareth Jones
                      Participant
                        @garethjones79649

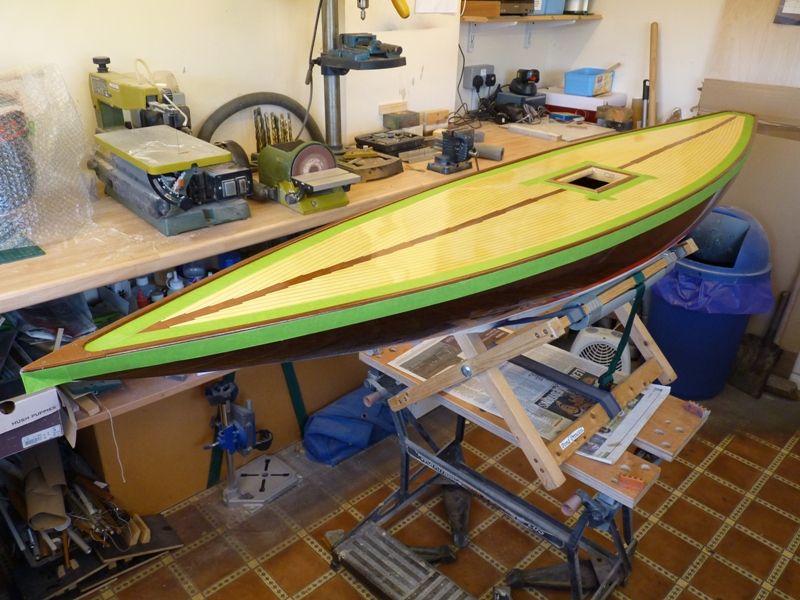
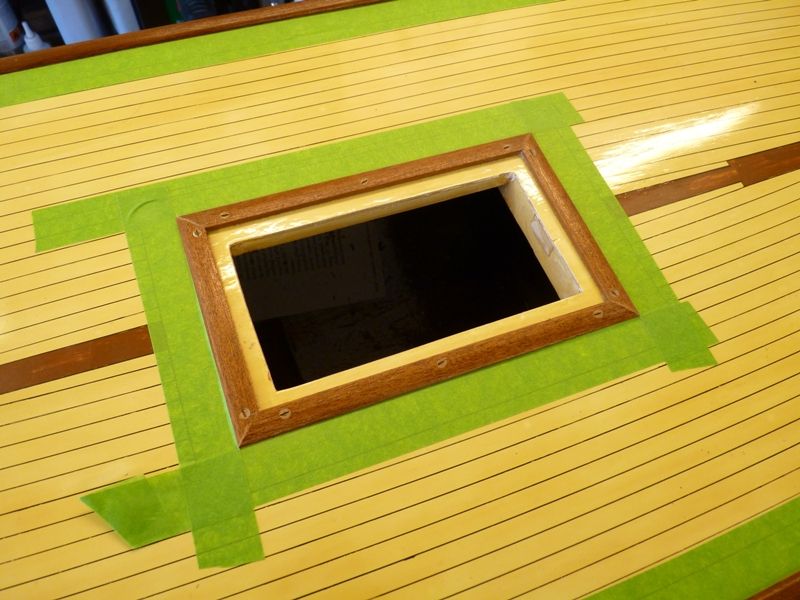
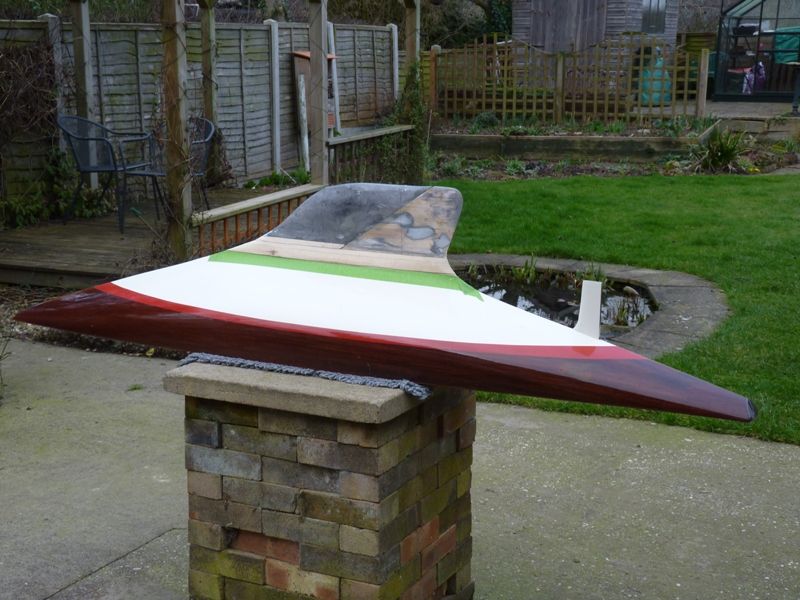
                        While Elizabeth was varnishing the deck of her Marblehead China Boy, she decided she would have some spare time and varnish to do the rudder for Serica and also the deck edge strips and hatch coamings. Both these items had only an initial sealing coat by John Gale when he finished the hull.

                        Serica is now sitting in the middle of the workshop, taking up most of the room, waiting for the varnish to dry before a further one or two coats is added.

                        serica 11.jpg

                        serica 12.jpg

                        #69430
                        Gareth Jones
                        Participant
                          @garethjones79649

                          Serica's keel weight pattern has been taken to Monkmans Brass Foundry in Bradford and been cast in lead. We would have gone to collect it today but in view of the snow and ice this morning decided to put it off till next week.

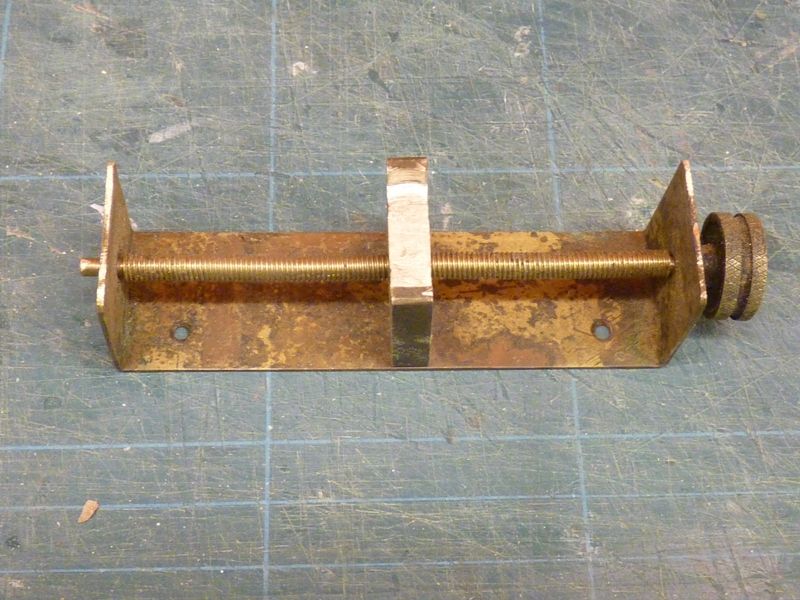
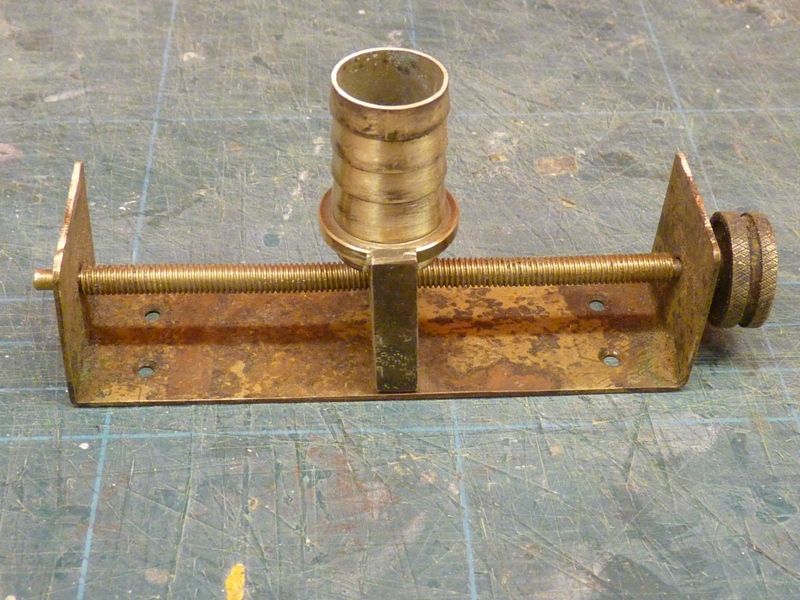
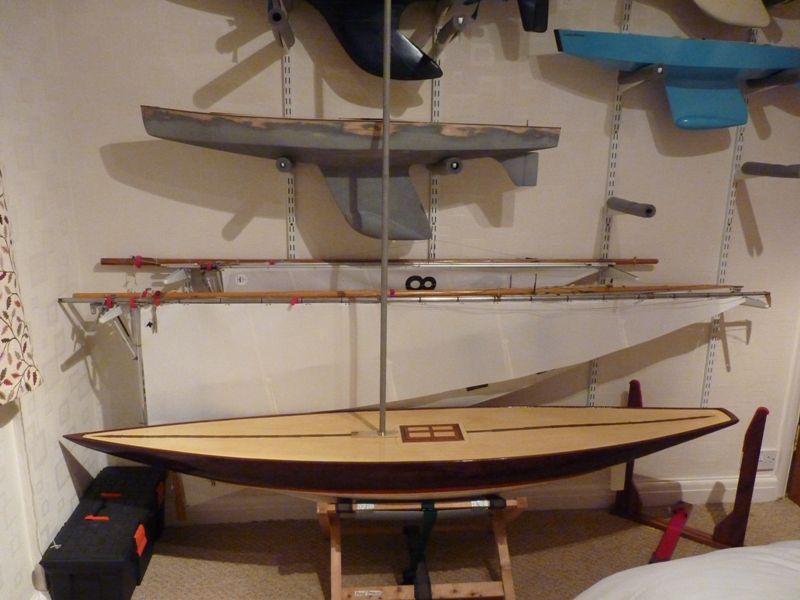
                          In the meantime I have fitted the mast, the bottom section of which is a 2 metre length of 3/4 inch aluminium tube. The mast step is an unusual design, not one I have seen before, but infinitely adjustable over its range. This was the only metal fitting in the hull when we acquired it.

                          serica 13.jpg

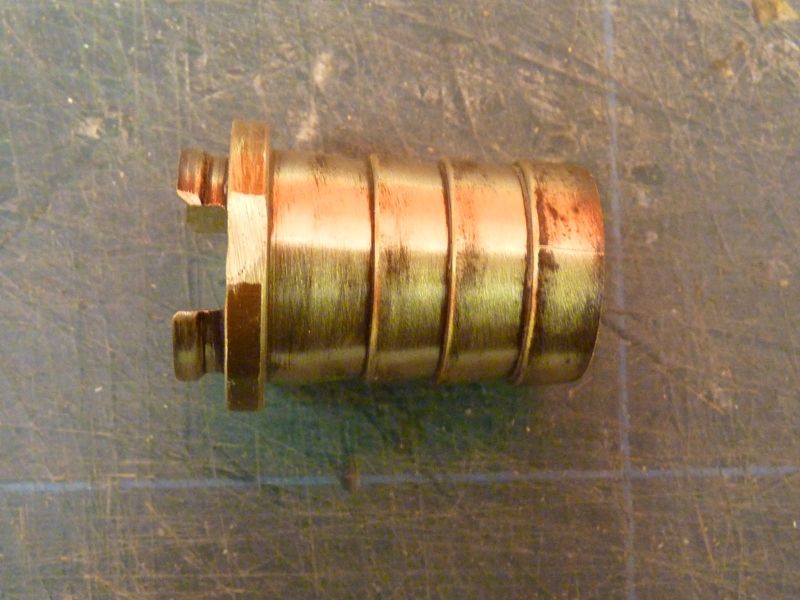
                          I did not want to sit the mast directly on this as I thought the relatively soft aluminium could be subject to some fairly big loads on its earth point. After hunting around various scrap boxes of stuff not to be thrown away because it might come in useful, I came across a brass hose end fitting that was a snug fit in the end of the mast. I filed a slot in it so that it locates in the step as shown in the two pictures below.

                          serica 14.jpg

                          serica 15.jpg

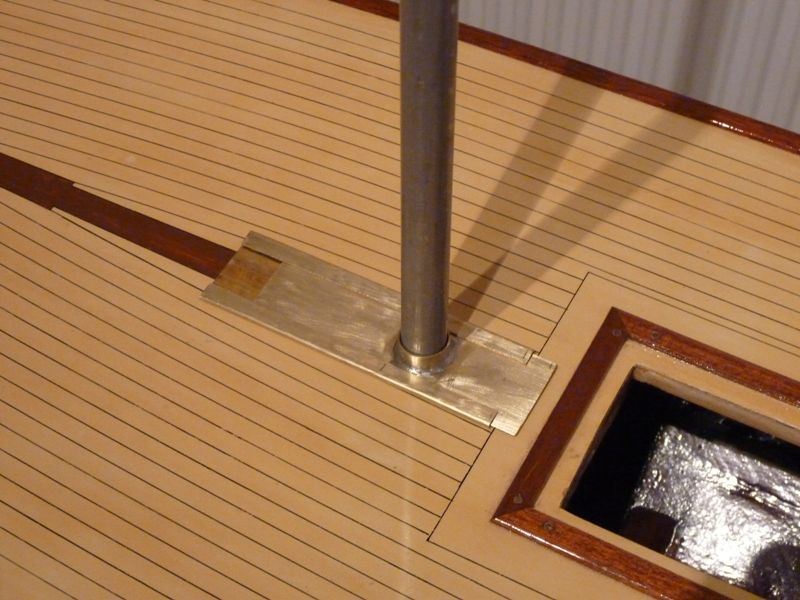
                          The flange on the end was then filed down until it was flush with the outside wall of the mast tube and the whole fitting glued into the bottom of the mast with epoxy. I then made up a slide to fit on the deck from sheet and strip brass and Serica now has a mast, or at least part of one, for the first time in her life.

                          serica 16.jpg

                          serica 17.jpg

                          I have got some dowel suitable for making the booms so I will make a start on that job prior to collecting the keel weight, hopefully next Friday. As you can see from the picture above our older sons bedroom has been partially taken over as a yacht and sail rig storage area

                          Gareth


                          Edited By Gareth Jones on 13/01/2017 20:42:18

                          #69528
                          Gareth Jones
                          Participant
                            @garethjones79649

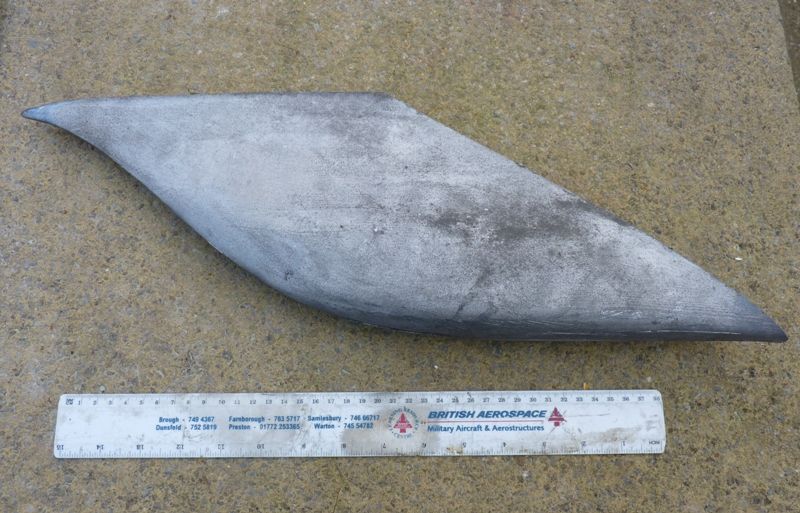
                            We collected Serica's keel weight from Bradford today. Here is a picture to give you an idea of the size.

                            serica 18.jpg

                            As I expected it is too heavy, weighing in at 17.4 kilos. I have weighed the hull, the wooden parts of the keel, a similar mast and sails, radio gear, vane gear and guessed at the weight of fittings and I reckon I need to remove a kilo in weight from the keel. I have measured the area of the top surface of the weight and based on that I need to remove 15 mm from the top of the keel. I decided this is the best approach since it will keep the centre of gravity as low as possible and it will be relatively easy to do. A 15 mm thick wooden packing piece will replace the lead removed.

                            I have also measured the fore and aft position of the centre of gravity and it is about 20 mm further back than recommended on the drawing. I made allowance to be able to move the keel weight and the wooden section behind it fore and aft on the transition piece between it at the bottom of the hull. I plan to recheck the position of the c. g. when I have cut off the top section and position it accordingly.

                            Tomorrows job is sawing off the surplus lead, filing the top flat and then rechecking the cg. After that it is drilling the weight and aft section with a couple of 6 mm holes to hold a pair of stainless steel dowels that will locate the two parts together when they are glued. I then have some planing and sanding to do to get the transition piece to fit the bottom of the hull and top of the keel and then the tricky job of drilling holes for the 8 mm stainless steel keel bolts. I have ordered a couple of extra long 6 mm and 8 mm drills. in preparation for this task.

                            Gareth

                            #69534
                            ashley needham
                            Participant
                              @ashleyneedham69188

                              Gareth. That is a whopper. It is one thing to read about it and nod sagely into your cup of tea, but to see it in the flesh next to a foot ruler….cor. Way to go, have it cast professionally.

                              Ashley

                              #69537
                              Gareth Jones
                              Participant
                                @garethjones79649

                                Its bigger than you think Ashley, it's next to a 15 inch ruler!

                                Gareth

                                #69541
                                ashley needham
                                Participant
                                  @ashleyneedham69188

                                  Wowzer !!! Ashley

                                  #69546
                                  Bob Abell 2
                                  Participant
                                    @bobabell2

                                    Hello Gareth

                                    For next time……..Think about two tubes or holes for the bolts at the casting stage?

                                    Drilling lead can be awkward, as it snatches

                                    Bob

                                    #69551
                                    Gareth Jones
                                    Participant
                                      @garethjones79649

                                      Good idea Bob, I will bear it in mind if I ever make another keel weight. Unfortunately I could not easily do that with Serica. The position on the mounting bolts is already set in the hull as there are a pair of beams already fixed in the hull and predrilled from the original keel, made by John Gale but lost after his death.

                                      The centre of gravity of the keel weight has to sit directly below the centre of buoyancy of the hull. The lead keel weight is over 60% of the total weight of the boat so if the two points do not sit in line, the hull will sit bow or stern down. I know where the centre of buoyancy of the hull is supposed to be because I have had a copy of the original BIll Daniels drawing and it is indicated on the revised keel weight drawings done by Jim Belton. However I was not certain where the centre of gravity of the keel weight would turn out to be until after it was cast.

                                      I found the cg of the keel weight by balancing it on a length of aluminium rod laid on the workbench and was then able to mark it up on the weight itself. I then positioned the weight and the piece of wood that forms the rear of the keel on the transition piece between them and the hull and marked the position where the keel bolt holes need to be drilled.

                                      Once I knew where those would go I marked and drilled the holes for the two dowels that locate the keel weight and the aft part of the keel. I did not want the dowels to end up crossing the path of the keel bolts.

                                      serica 19.jpg

                                      The dowels will add to the strength of the completed keel, but probably more importantly locate the two parts together while it is being glued. Araldite makes quite a good lubricant when it is still wet so the two parts would slide all over the place and since the glue joint is on a 35 degree slope it would be almost impossible to clamp them together.

                                      serica 20.jpg

                                      The two parts that make up the bottom section are now clamped up and drying on the boiler. You can see where I cut away the top section of the lead weight in the bottom right hand side. That gap will be filled with a length of 15 mm thick timber before attaching the whole thing to the transition section that fits on the bottom of the hull. The holes for the keel bolts have already been drilled in that so it will be used as a pilot for drilling through the bottom section. I will have to make some sort of fixture to hold the bottom of the keel upright and level under the pillar drill before attempting to drill the holes.

                                      Gareth

                                      Edited By Gareth Jones on 22/01/2017 17:15:20

                                      #69552
                                      Bob Abell 2
                                      Participant
                                        @bobabell2

                                        Hello Gareth

                                        How about clamping the keel assembly to a plank on the joint face

                                        And then clamping the plank to the drill base plate?

                                        At least, it will maintain some sort of datum reference in the clamping sequence?

                                        Just a suggestion

                                        Bob

                                        #69555
                                        Gareth Jones
                                        Participant
                                          @garethjones79649

                                          I am thinking along those lines Bob. Ideally I would like to drill down from the top because the pilot holes are in the transition piece that fits above the lower keel. I think I will probably do as you suggest for the first bolt hole, which will be the aft one. Then I will fit that bolt through the transition piece and keel and drill the second hole down from the top using the transition piece as the pilot. I will post some pictures of my final solution.

                                          Gareth

                                          #69669
                                          Gareth Jones
                                          Participant
                                            @garethjones79649

                                            Serica's keel has progressed a bit further with the upper transition piece now screwed,but not yet glued to the bottom section. Its now ready for the final shaping, sanding and drilling for the keel bolts.

                                            serica 21.jpg

                                            Unfortunately it will have to be parked for a few weeks as a priority DIY job has come along. Our upstairs shower has transformed itself into a 2 person device but unfortunately the second person has to stand downstairs in the living room. A major dry-lining, and re-tiling job has now commenced.

                                            Gareth

                                            #69671
                                            Banjoman
                                            Participant
                                              @banjoman

                                              Gareth,

                                              Sorry to hear about your shower troubles and the ensuing temporary moratorium on your model building activities!

                                              Your description of how the second person would have to stand downstairs for his/her shower made me think of something I once read about the Terra Nova (of Scott's Antarctic expedition fame) where, apparently, the Siberian ponies had been stabled one deck up from and directly above the ratings' mess table … and where the intervening deck planking certainly hadn't been dry-lined! As my wife likes to reply whenever I say that something could have been worse: "it can always be worse!"

                                              And, returning to Serica II, that is one most impressive keel piece!

                                              Mattias

                                              #69832
                                              Bob Abell 2
                                              Participant
                                                @bobabell2

                                                Gareth

                                                Is your visit still on?….. As you've not read my last PM

                                                Bob

                                                #69952
                                                Gareth Jones
                                                Participant
                                                  @garethjones79649

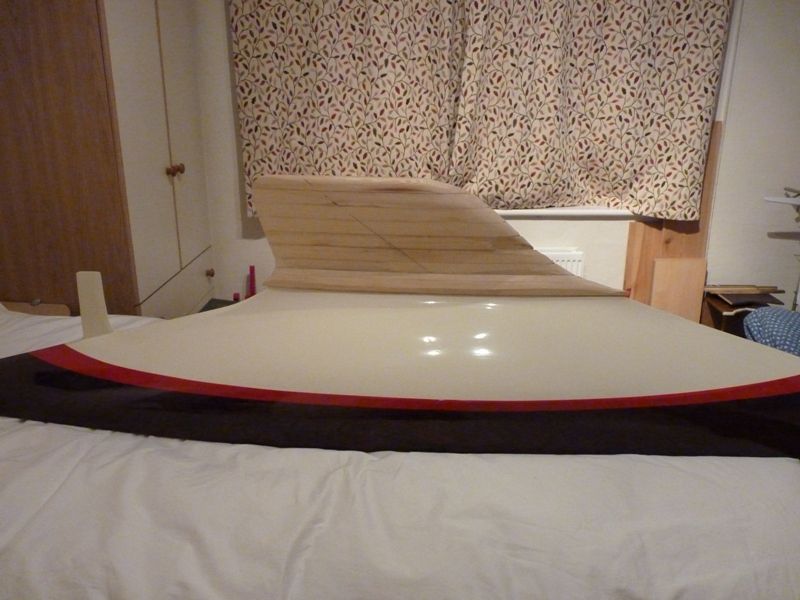
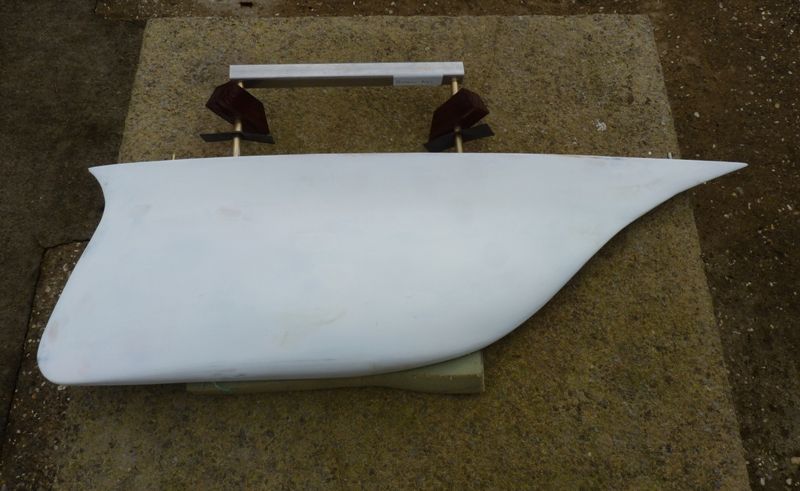
                                                  Rebuilding our upstairs shower has progressed quite well, all the old tiles and plasterboard have been stripped out, Aquaboard fitted in its place and I was about to start re-tiling today when I discovered the new tiles are too big to fit on my tile cutter. As its also my birthday today I was allowed a day off and made a bit more progress on Serica. The new keel has been trial fitted and faired in to the profile of the hull. There is still some sanding and filling to do before it will be ready for painting.

                                                  The stainless steel rod for the keel bolts proved too tough for my die when trying to cut the 8 mm thread. I have ordered some 8 mm brass rod as a replacement.

                                                  serica 22.jpg

                                                  My winter contract has come to a rather premature end this year, two months early, so I will have a longer summer holiday to get on with some boat building and sailing.

                                                  Gareth

                                                  Edited By Gareth Jones on 19/02/2017 17:19:11

                                                  #69957
                                                  Banjoman
                                                  Participant
                                                    @banjoman

                                                    Many happy returns of the day, Gareth!

                                                    Even without the additional filler you mention, and unpainted and all, the keel is looking very, very nice indeed!

                                                    Mattias

                                                    #70246
                                                    Gareth Jones
                                                    Participant
                                                      @garethjones79649

                                                      Thank you Mattias, another year older, probably no wiser but at least I am still here so I can't complain.

                                                      The upstairs bathroom and shower are now full operational again so I have been able to give Serica a bit of attention over the last week or so.

                                                      Drilling the keel to take the bolts was a bit time consuming as the lead grabs the drill and it is necessary to keep pulling it out to clear it. I also found my specially purchased longer drill bit was still not long enough to go all the way through from one side so I had to drill from both sides. Fortunately, with a bit of care the holes lined up reasonably well, somewhere in the middle of the keel.

                                                      I have counter-bored the bottom of the keel to accommodate the nuts and washers on the bottom of the keel bolts. I used a flat wood bit to get a flat bottom to the countersunk section. To guide the drill bit I tapped a piece of 8 mm dowel into the bolt holes first.

                                                      serica 23.jpg

                                                      The keel has now been sanded and filled to shape and give a covering of fine glass cloth and two coats of Z poxy. That has all been rubbed down, filled and primed and is now ready for its final finishing coat of paint. There is just a bit of tidying up to do at the front top corner which is quite pointed and prone to damage, as I found when I caught it on the workshop door while carrying it out to trial fit it on the hull. Its a heavy chunk of stuff to carry around.

                                                      serica 24.jpg

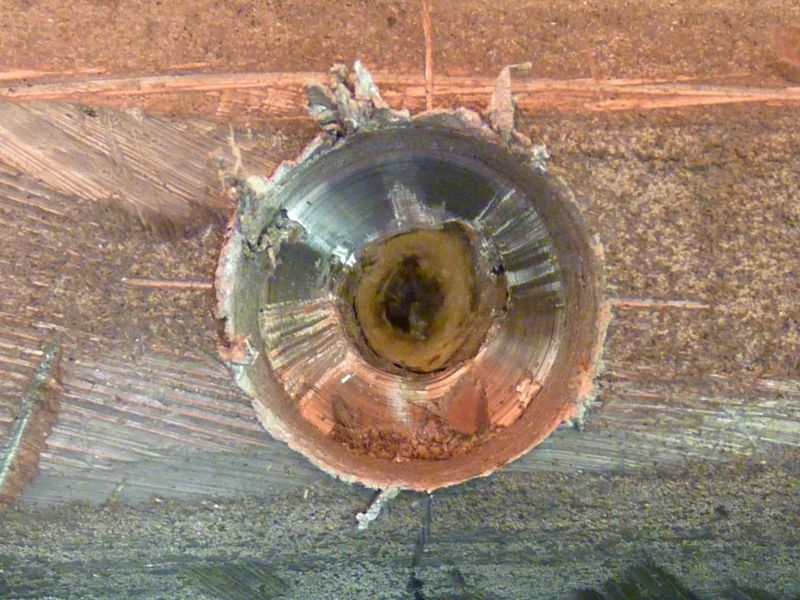
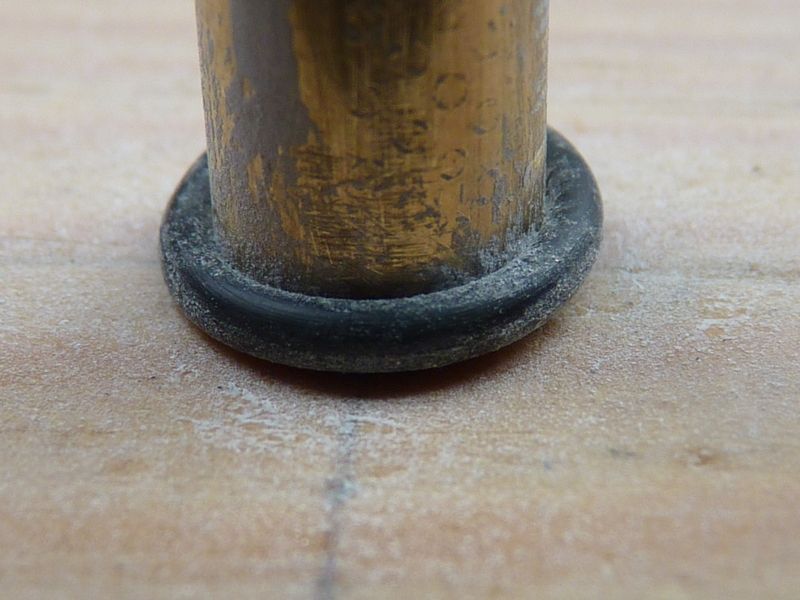
                                                      The keel bolts are sealed in two places. At the top, where they enter the bottom of the hull there is a small O ring and the holes in the hull have been chamfered/countersunk slightly to accommodate it.

                                                      serica 25.jpg

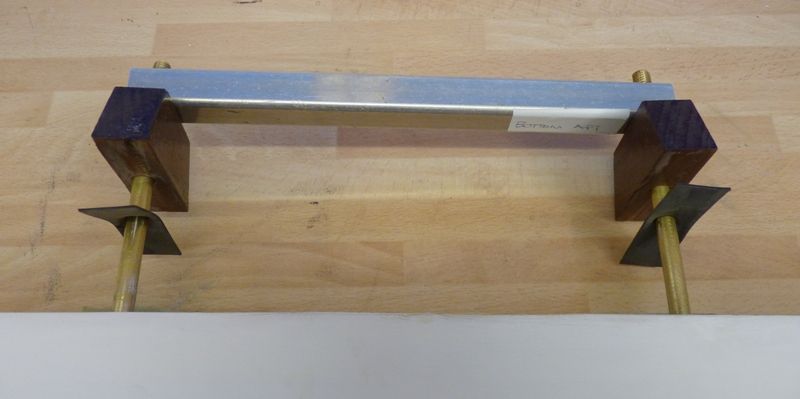
                                                      On the inside of the hull there is a wooden packing piece which spaces the metal handle away from the bottom of the hull. The packing pieces sit on a cross beam on the bottom of the hull and between the two is a nitrile rubber gasket cut from a spare piece of pond liner. The hole in the gasket was cut undersize so it seals around the brass keel bolts.

                                                      serica 26.jpg

                                                      The handle is a piece of 20 mm square aluminium tube with rounded corners that we found in the garage when we moved into this house about 30 years ago. I knew it would come in handy one day and I still have about 18 inches left for another job, whatever that might be. Threading the 8 mm brass keel bolts was much easier than the stainless steel I tried originally, my cheap dies just made no impression at all.

                                                      Gareth

                                                    Viewing 25 posts - 1 through 25 (of 54 total)
                                                    • Please log in to reply to this topic. Registering is free and easy using the links on the menu at the top of this page.

                                                    Code of conduct | Forum Help/FAQs

                                                    Advert

                                                    Latest Replies

                                                    Home Forums Sailing Models Topics

                                                    Viewing 25 topics - 1 through 25 (of 25 total)
                                                    Viewing 25 topics - 1 through 25 (of 25 total)

                                                    View full reply list.

                                                    Advert