decaperm motor

Advert

decaperm motor

Home Forums Scratch build decaperm motor

  • This topic is empty.
Viewing 14 posts - 1 through 14 (of 14 total)
  • Author
    Posts
  • #7211
    John Hibberd
    Participant
      @johnhibberd75918
      Advert
      #97071
      John Hibberd
      Participant
        @johnhibberd75918

        Please

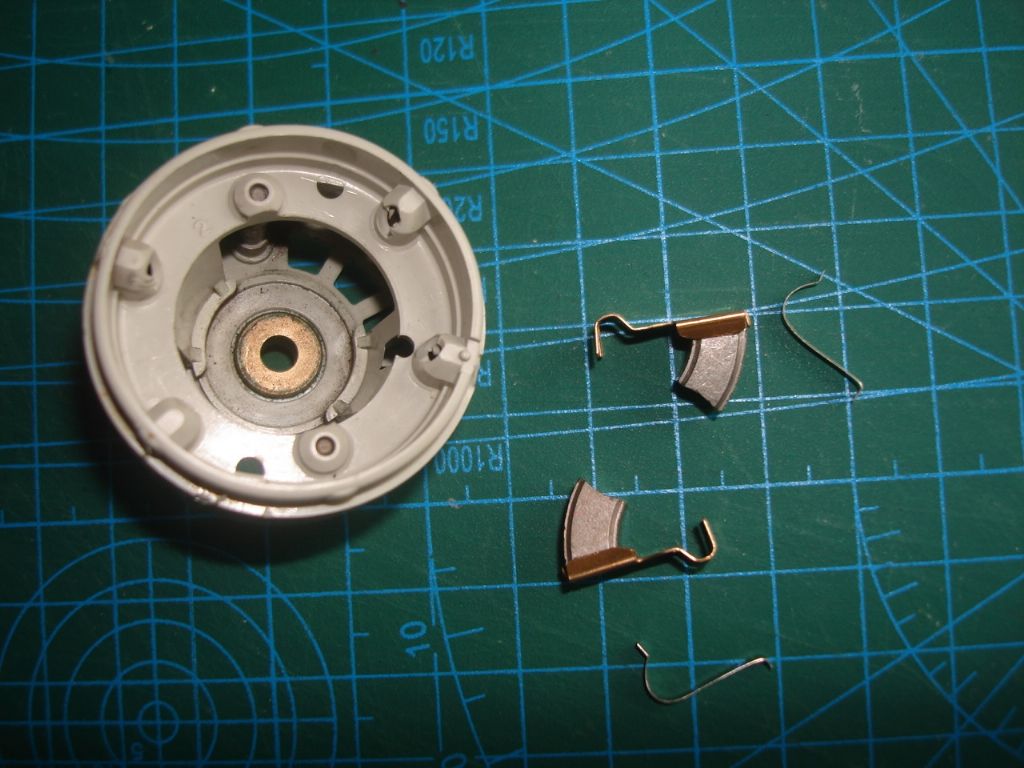
        does anyone know how to fit the brushes in a Decaperm 6 volt motor.

        I have it stripped down to clean the armature but now I need to reassemble!!

        Please

        #97079
        Richard Simpson
        Participant
          @richardsimpson88330

          John, I would hate you to think you are being ignored but I suspect that there might be no-one here who has changed the brushes on a Decaperm. However at the end of the day reassembly is simply the reverse of disassembly with the carbon brushes simply sliding back into their sockets and the spring being reassembled to hold them against the commutator.

          One thing you should have done was to identify which carbon brush came from which socket and which way around it was orientated. If you didn't you must at least identify the curvature on the end of the brush and ensure that it matches the curvature of the commutator. If you have access, some people might put a piece of very fine abrasive (2000 grit or finer) on the commutator, with the grit facing the carbon, gently hold the brush against it, and rotate the commutator backwards and forwards. This ensures a good seat between the brush and the commutator.

          If you are still unsure then perhaps you could post some good pictures so we can see what the arrangement is and help you to reassemble.

          #97080
          John Hibberd
          Participant
            @johnhibberd75918

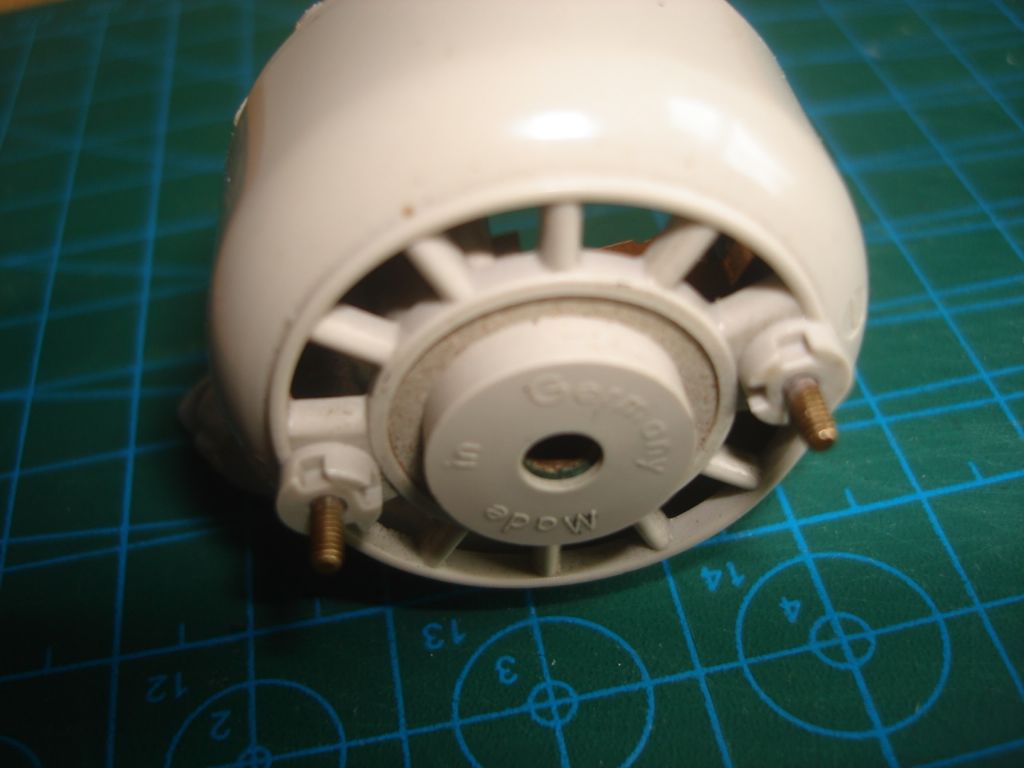
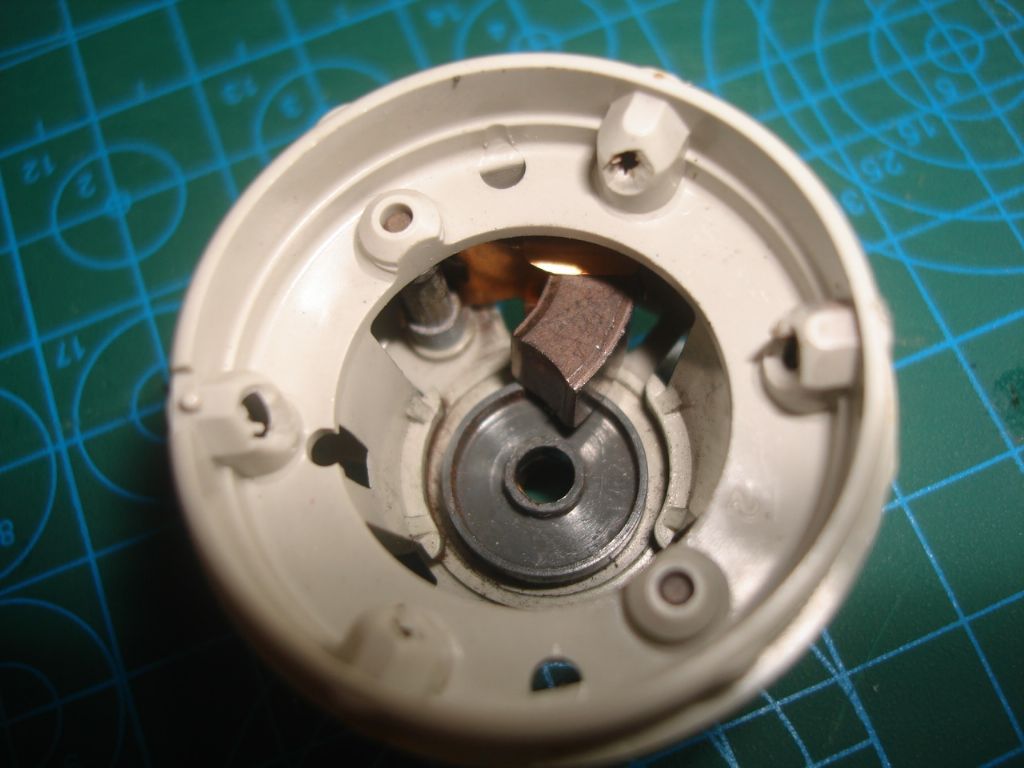
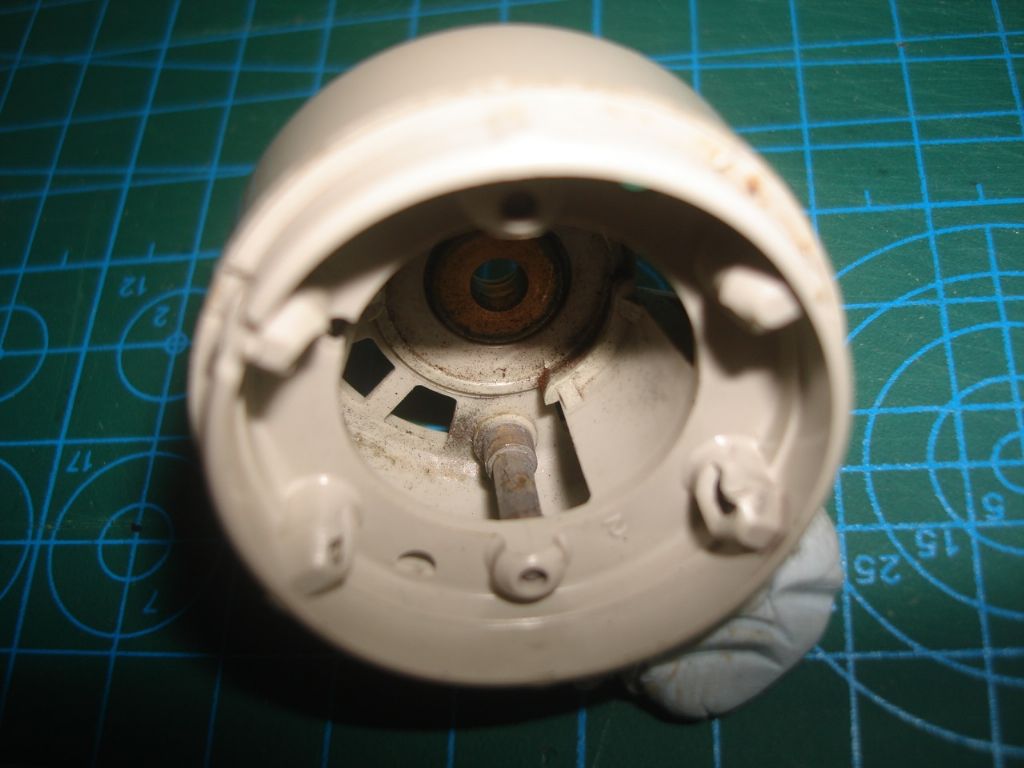
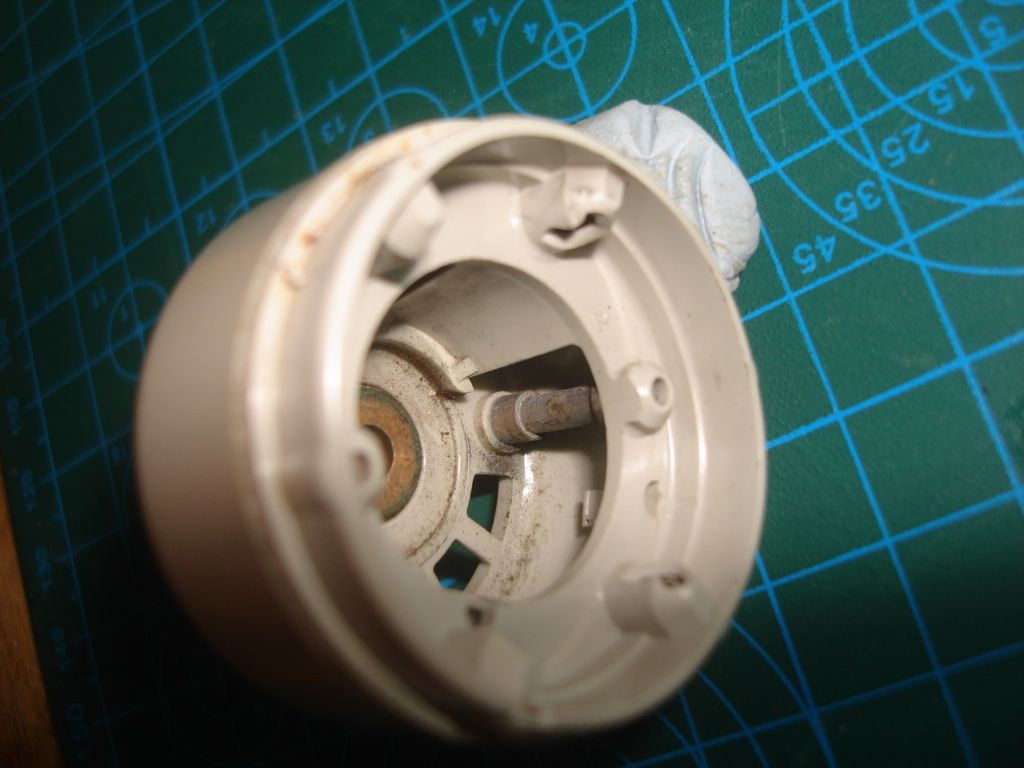
            decaperm brushes 4.jpgdecaperm brushes 3.jpgdecaperm brushes 2.jpgdecaperm brushes 1.jpgManydecaperm brushes.jpg

            #97081
            Richard Simpson
            Participant
              @richardsimpson88330

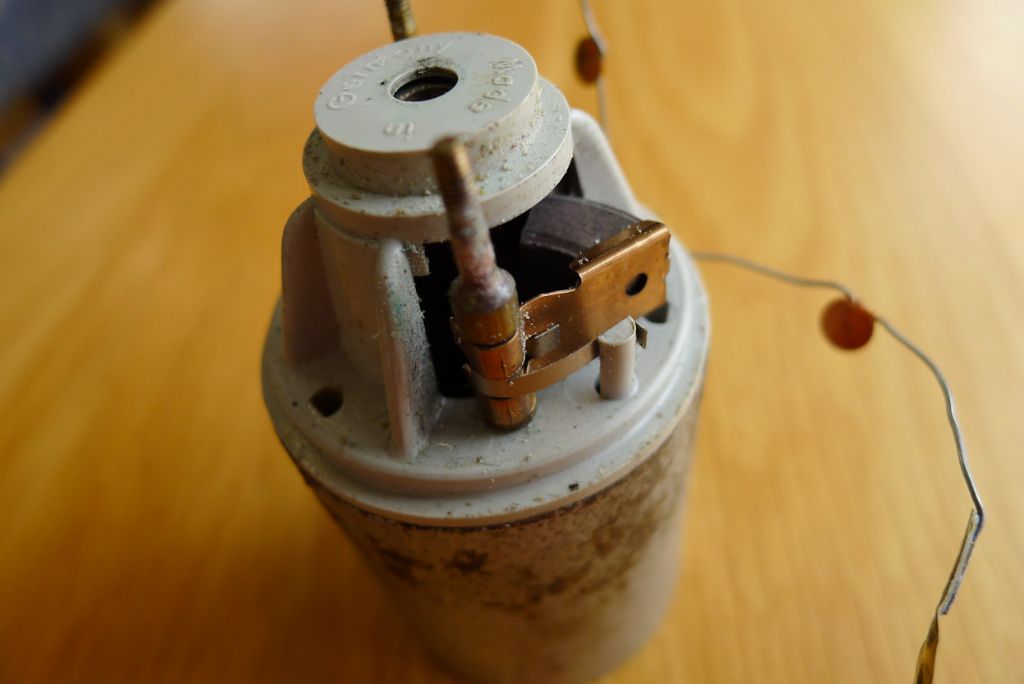
              From what I can see there the two brushes locate on the posts that carry the current from the connections on the outside ends. I cannot see any way in which the brushes are fitted from the outside so I am assuming that they have to be fitted first then the motor assembled.

              What isn't so straightforward is how the springs are fitted. Again with no obvious external access you might have to fit the springs before assembly. If that is the case I would fit the brushes, then the springs then, holding the two brushes apart with a fine implement drop the rotor into the bearing. Then you can release the brushes to allow them to sit against the commutator. Then the rest of the motor should drop into place.

              See how you go with that process. If you can get to the posts to clean them a little it might be worthwhile. They look a little corroded, which may affect current transfer to the brush holders.

              #97082
              Richard Simpson
              Participant
                @richardsimpson88330

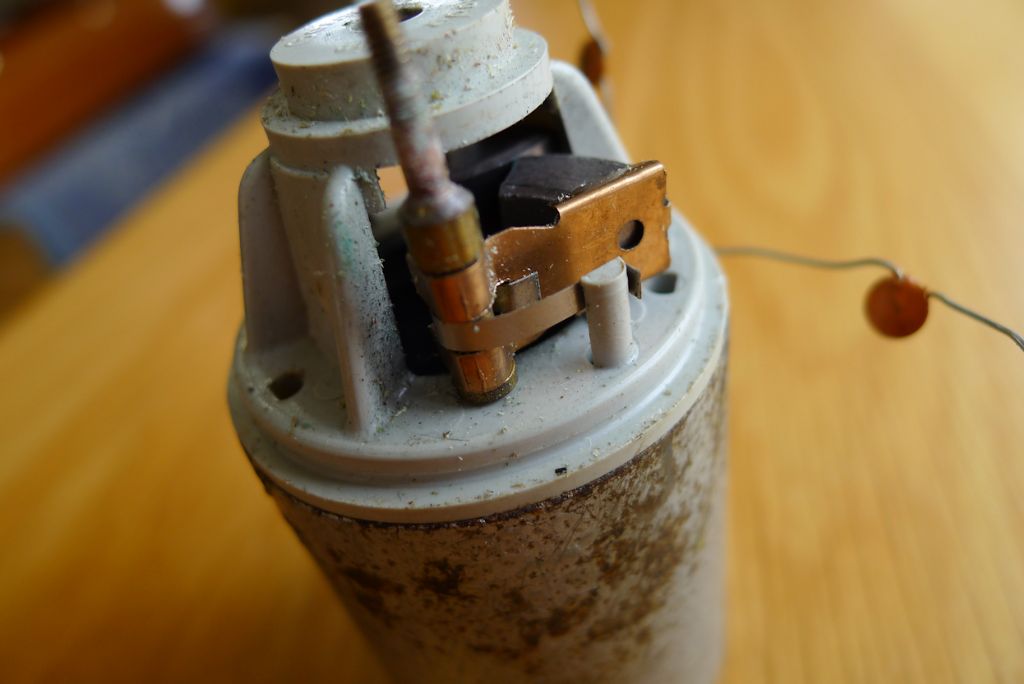
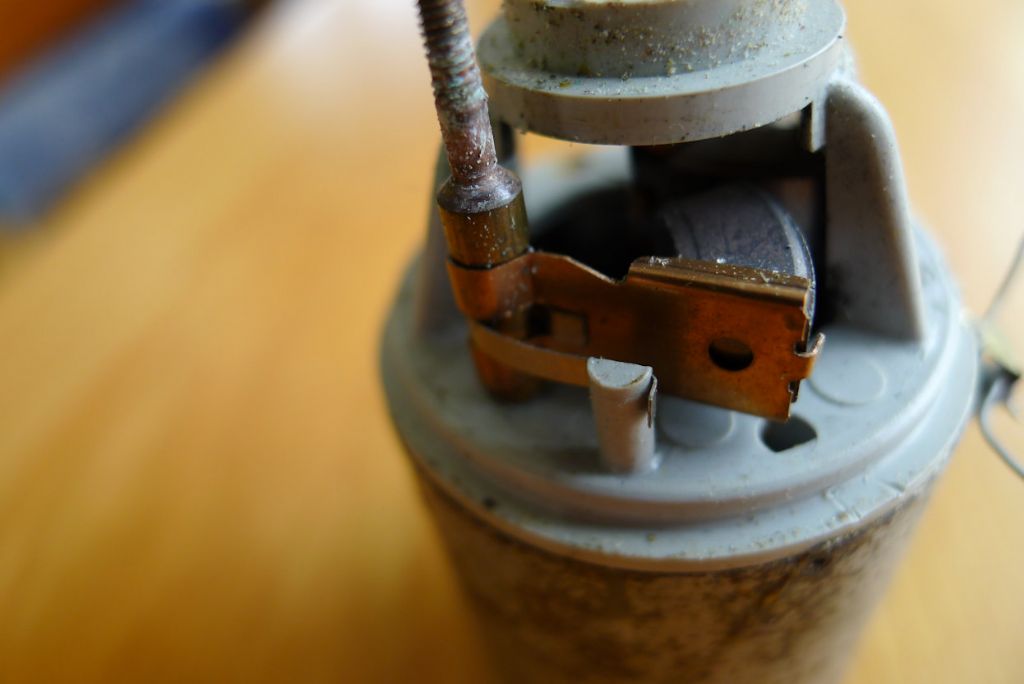
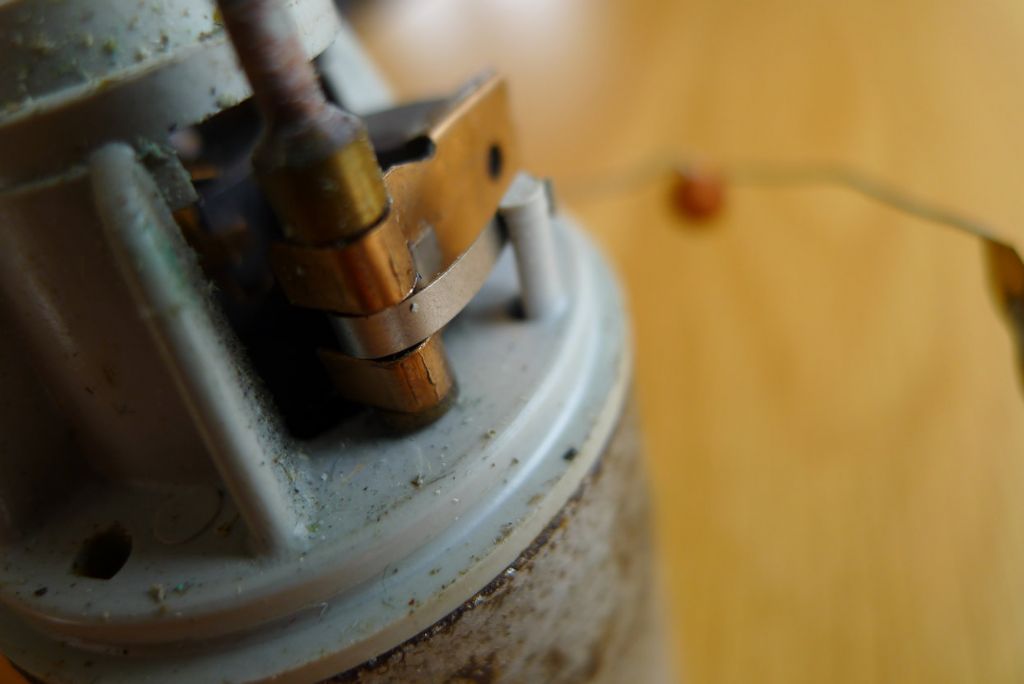
                I managed to dig out a spare Decaperm I have and have just taken it apart. From what I can see you are best leaving the motor end on the body and only removing the end cover, which is tight but which prizes off the posts.

                You can then assemble a lot easier. Have a look at the following pictures to see how the spring is located on the brushes. With the brushes and springs assembled it should be straightforward to refit the rotor before finally putting the end cover back in place.

                It is always worth remembering to take photographs of something as you take it apart so that you can see how things go back together.

                p1070868.jpg

                p1070869.jpg

                p1070870.jpg

                p1070871.jpg

                #97083
                John Hibberd
                Participant
                  @johnhibberd75918

                  That is very very kind of you Richard

                  I got it wrong just now

                  It runs, but I will do it properly now

                  Best

                  John

                  #97089
                  ashley needham
                  Participant
                    @ashleyneedham69188

                    Oddly enough, and not at all boat related….the Mrs bought back a B&D strimmer from her mums, wot was not working.

                    i unscrewed the thing (it’s just two moulded halves) and the brushes in the motor were clagged up. Probably this was easier to do than the Decaperm, but a bit of switch cleaner and cotton bud action followed by a couple of drops of 20/50 and it was running Luvvly.

                    Ashley. Yes I knew you would all be interested.

                    #97093
                    Kev.W
                    Participant
                      @kev-w

                      I actually run a pusher tug with a 6v Hectoperm motor, but have never had to do any maintenance to it, so I cannot help, the darn thing just keeps going, it's a solid motor


                      Edited By Kev.W on 24/07/2021 23:33:28

                      #97096
                      John Hibberd
                      Participant
                        @johnhibberd75918

                        I have to admit my motor wasn't boat related either

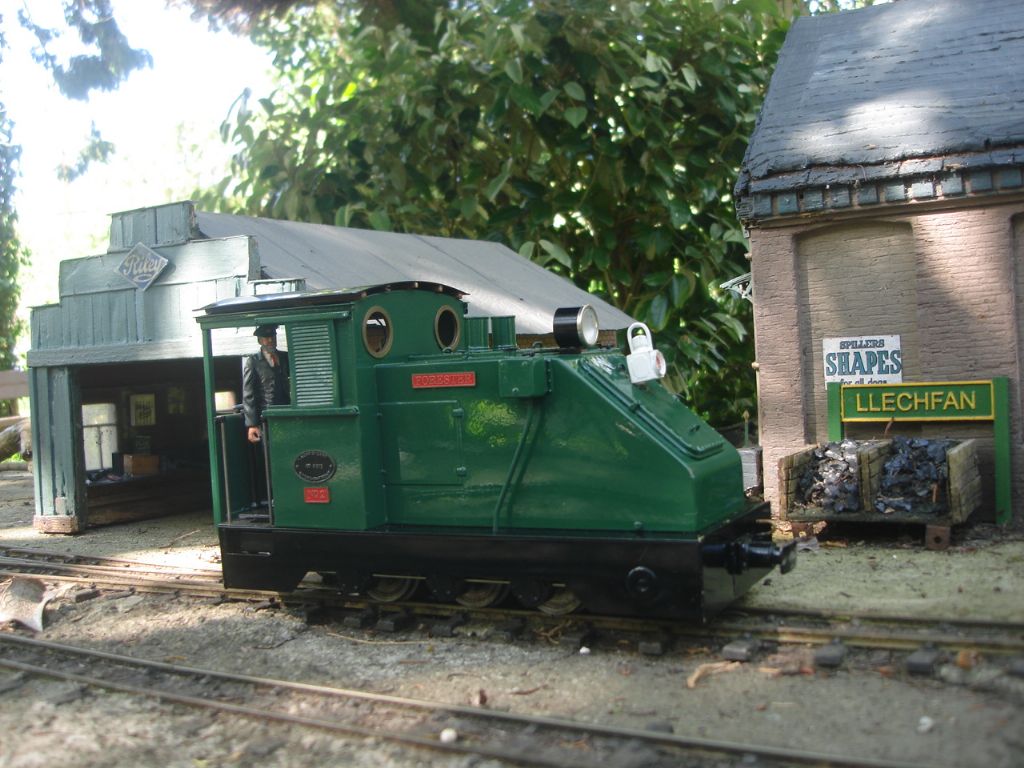
                        Its off a 1/20 diesel loco I have ran for 35 years

                        Due to lockdown it was left in its case for too long while I was away.

                        It looked like the lead acid 6 volt tho' not switch on ,ran down and vented

                        the whole loco works were very corroded but are now recovered quite well.

                        I had to strip the Decaperm and remove the heavy rust from the armature poles and clean the commutator.

                        I thought I has got the brushes out of the way while putting the armature back in, but all went whatsit.

                        Thanks to Richard I got the brush cover off, cleaned all round inside and put the brushes and springs back correctly.

                        Now runs very nicely and hopefully with the upgrade to 2.4 GHz the loco will run for another 35 years

                        Tho I will never know!!

                        #97097
                        John Hibberd
                        Participant
                          @johnhibberd75918

                          Before lockdown

                          dsc04532.jpg

                          #97098
                          Richard Simpson
                          Participant
                            @richardsimpson88330

                            Hi John, glad I could help, especially to get such a beautiful locomotive back in operation. I for one would love to see more shots of your layout.

                            If that is a 1/20th scale loco then you must be working with home made track and everything scratch built? Perhaps it is worth starting a model railway thread with a few more shots of your layout, maybe on the "Soapbox" forum.

                            Edited By Richard Simpson on 25/07/2021 08:53:37

                            #97103
                            Ray Wood 3
                            Participant
                              @raywood3

                              Hi Richard ,

                              That's a great idea, lets have some Diversity of modelling interests

                              My first Decaperm motor cost me 63 shillings in the 60's still runs ok

                              Regards Ray

                              #97106
                              Richard Simpson
                              Participant
                                @richardsimpson88330

                                63/- was a lot of money in the 60's! My first pocket money in the 70's was 2/6. Just enough for a Series 1 bagged Airfix kit.

                              Viewing 14 posts - 1 through 14 (of 14 total)
                              • Please log in to reply to this topic. Registering is free and easy using the links on the menu at the top of this page.

                              Code of conduct | Forum Help/FAQs

                              Advert

                              Latest Replies

                              Home Forums Scratch build Topics

                              Viewing 25 topics - 1 through 25 (of 25 total)
                              Viewing 25 topics - 1 through 25 (of 25 total)

                              View full reply list.

                              Advert