Aerokits Sea Rover

Advert

Aerokits Sea Rover

Home Forums Build Blogs Aerokits Sea Rover

  • This topic is empty.
Viewing 18 posts - 1 through 18 (of 18 total)
  • Author
    Posts
  • #9824
    Andy Sephton 2
    Participant
      @andysephton2

      Build Blog

      Advert
      #98186
      Andy Sephton 2
      Participant
        @andysephton2

        I popped an intro with some questions onto the beginners area earlier today, but essentially, I'm an experienced aeromodeller with little to no experience of building boats. This one has been in my 'stash' for nearly 50 years and deserves to be built.

        I started it in 1975 but the build stalled when I discovered the asymmetry of the supposedly symmetric pre-cut parts. I'm now treating the build as a challenge, so bare with me, please, as I suspect there'll be a lot of questions en-route to completion!

        Here's the current state of the kit:

        img_6998.jpeg

        #98197
        Richard Simpson
        Participant
          @richardsimpson88330

          It is certainly going to be a challenge but there is a huge degree of satisfaction to be had in building a very old kit. Its like it "deserves" to be built!

          Good luck and don't be afraid to ask. There is plenty of experience on here to help.

          #98199
          Andy Sephton 2
          Participant
            @andysephton2
            Posted by Richard Simpson on 10/10/2021 22:17:47:

            It is certainly going to be a challenge but there is a huge degree of satisfaction to be had in building a very old kit. Its like it "deserves" to be built!

            Good luck and don't be afraid to ask. There is plenty of experience on here to help.

            Thanks Richard. As you know, I've already put up a post in the beginners thread which has produced some good and very helpful info – including some from your good self, so thanks again! smiley 

            Edited By Andy Sephton 2 on 11/10/2021 08:36:01

            #98203
            harry smith 1
            Participant
              @harrysmith1

              Hi Andy

              Check each parts measurement against the plan, mainly the bulkhead and keel.

              Trace the bulkheads on to tracing paper and using the center line mark them out on to Manilla folder with the fold line down the center line.

              Fold the Manilla folder up and cut out using the one side and unfold.

              The both sides will be the same, but maybe the original lines on the underside will be out.

              I have found this to be the case on a Wavemaster kit I am working on.

              Harry

              #98228
              Dave Smith 17
              Participant
                @davesmith17

                Watching this with interest as I have a Norstar Waverider which also 'deserves to be built'. The price on the box lid is in shillings and pence, so it's been around for a while. Most of the parts are unusable as a previous owner had started to build it but not made a good job of it, plus it was damaged in the post on its way to me.

                It's a worthy challenge to complete a model like this and get it on the water. It feels wrong to abandon them now.

                #98254
                harry smith 1
                Participant
                  @harrysmith1

                  Hi Dave

                  I bought one second hand and restored it.

                  It built like a tank !!!

                  Requires spray rails for better handling.

                  Installed 35mm brushless on 3S, goes well.

                  Harry

                  #98255
                  Andy Sephton 2
                  Participant
                    @andysephton2
                    Posted by harry smith 1 on 14/10/2021 23:34:28:

                    Hi Dave

                    I bought one second hand and restored it.

                    It built like a tank !!!

                    Requires spray rails for better handling.

                    Installed 35mm brushless on 3S, goes well.

                    Harry

                    forgive my ignorance Harry, but are you talking about the Sea Rover? Either way, would you explain what a spray rail is and exactly how the handling was changed?

                    Thanks, Andy

                    #98260
                    Dave Smith 17
                    Participant
                      @davesmith17

                      Sorry for derailing your thread, Andy – I think Harry was referring to my Waverider comments, not the Sea Rover.

                      Spray rails are square-ish strips of wood usually along the chine (where the side skins meet the bottom skins) and help the model rise onto the plane by deflecting the water downwards as the model accelerates. That's my understanding, anyway, though I am sure that if I am wrong, someone will put me right.

                      I have to admit that the last thing I need right now is another project, but your thread has already got me visiting the Slec Sea Rover page more often than is good for me!

                      #98261
                      Ray Wood 3
                      Participant
                        @raywood3

                        Hi Andy,

                        Yes as Dave says they provide lift for the bow and deflect the water which would otherwise go straight up the sides of the hull at speed, developed for fast planing craft like MTB's when they started using aero engines, couldn't beat a couple of Merlins for 40 knots.

                        The old Aerokits had been designed for margin low power electric motors, but many of them showed ic diesel engines and could nip along

                        Regards Rayterrier mtb spray rails.jpg

                        #98357
                        Andy Sephton 2
                        Participant
                          @andysephton2
                          Posted by Dave Smith 17 on 15/10/2021 08:11:08:

                          Sorry for derailing your thread, Andy

                          No need at all for apologies Dave, it's all good stuff, so thanks for posting.

                          #98358
                          Andy Sephton 2
                          Participant
                            @andysephton2

                            Thanks to all for answering the questions, I'm learning a lot!

                            Now for the next batch. I read in Vic Smeed's Model Boats book that the drive shaft should be lubricated by packing the sleeve with a grease such as petroleum jelly. On researching the subject here;

                            https://www.modelboats.co.uk/news/article/drivelines/27166

                            it appears that this is not now the done thing due to the extra friction it causes. Rather, it's better to oil the shaft bearings before each use either directly or by using an oiling tube. My question is, which is the best way to go for the Sea Rover? I've procured the recommended shaft, prop, electric motor, connector and ESC from SLEC, so that is what I'll be using in the model.

                            The next one is that the above mentioned ESC has provision for water cooling. I have a water scoop and outlet in the spares box from the initial intention to make the Sea Rover IC driven, so it would be an easy job to make the ESC water cooled. My question is, is water cooling the ESC worth it, desirable, necessary, or essential on the Sea Rover.

                            Again, thanks in advance for your help.

                            #98359
                            Colin Bishop
                            Moderator
                              @colinbishop34627

                              No need to water cool the ESC. Sea Rover is a sedate pleasure boat design and not intended to plane or go very fast. Current draw from the battery will be modest.

                              With regard to oiling, no two people have the same ideas! The consensus on here, such as it is, is to apply a little grease to the top and bottom bearings (although the latter will be water lubricated anyway).

                              Ingress of water up the tube can largely be prevented by ensuring that there is no 'play' on the shaft and it fits snugly at both ends of the tube. At the lower end use a washer against the tube followed by a lock nut against the prop. If the upper end of the shaft is plain then use a collet on the shaft to prevent any tendency for it to slip down the tube. We can advise on suppliers of collets if needed. The motor is there simply to turn the shaft, not take the thrust load in either direction.

                              Colin

                              #98360
                              Andy Sephton 2
                              Participant
                                @andysephton2

                                Thanks Colin, that all sounds logical. I'll do as you suggest and report back if I need more info.

                                #98378
                                Andy Sephton 2
                                Participant
                                  @andysephton2

                                  I've started the build. It'll be a slow one as I've a lot of thinking to do en route and it will need to dovetail into several aircraft projects that are on the go.

                                  The first job was to enlarge the instructions so that I could read them! Following that, I discovered that the keel assembly should be constructed first (Fig1 and 2 in the photo), followed by the Cabin assembly (Fig3 in the photo)

                                  img_7316.jpeg

                                  This assumes that the slots in the Cabin assembly parts match the positions of the formers on the plan … which is not the case. The slots in the formers are also of variable width, but luckily most are too small. My PermaGrit tools have really come into their own on this job as they have made short work of enlarging the slots in the ply.

                                  The construction lines on the formers were drawn some 40 odd years ago when I originally checked the symmetry of the parts. For the most part, they are not too bad, but I've had to straighten some curved parts as well as open out some slots. I've not started gluing yet, but here's a pic of the semi prepared parts and the enlarged instructions. The yellowing on the plan is due to age – compare it to the white instruction sheet for reference.

                                  img_7315.jpeg

                                  Edited By Andy Sephton 2 on 27/10/2021 19:28:42

                                  #98387
                                  Ray Wood 3
                                  Participant
                                    @raywood3

                                    Hi Andy,

                                    Yes the the old Aerokits were cut out by hand with a Mk 1 bandsaw and eyeball but were near enough to make a decent model, It must have been a brain damaging job at the time as there were thousands of the kits produced, I like the John Bull printing set numbers on the bulkheads

                                    I almost think the challenge of building them was trying to make all the parts actually fit each other, we are spoilt these days the laser cut Sea Queen & Commander kits go together like IKEA furniture !!

                                    It never does any harm to drill out the centres to add lightness and make openings for wiring etc, they were massivelysh wd sq oct 16 001.jpg over engineered for ic power.

                                    Regards Ray

                                    Edited By Ray Wood 2 on 28/10/2021 09:11:49

                                    #98389
                                    Andy Sephton 2
                                    Participant
                                      @andysephton2

                                      That's a good point on the lightening holes, Ray, thanks for posting. Coincidently, after a trial fit of the parts, I was starting to think about radio, LiPo, motor installation, etc in order to get the model roughly balanced. This will, of course, mean holes in the bulkheads.

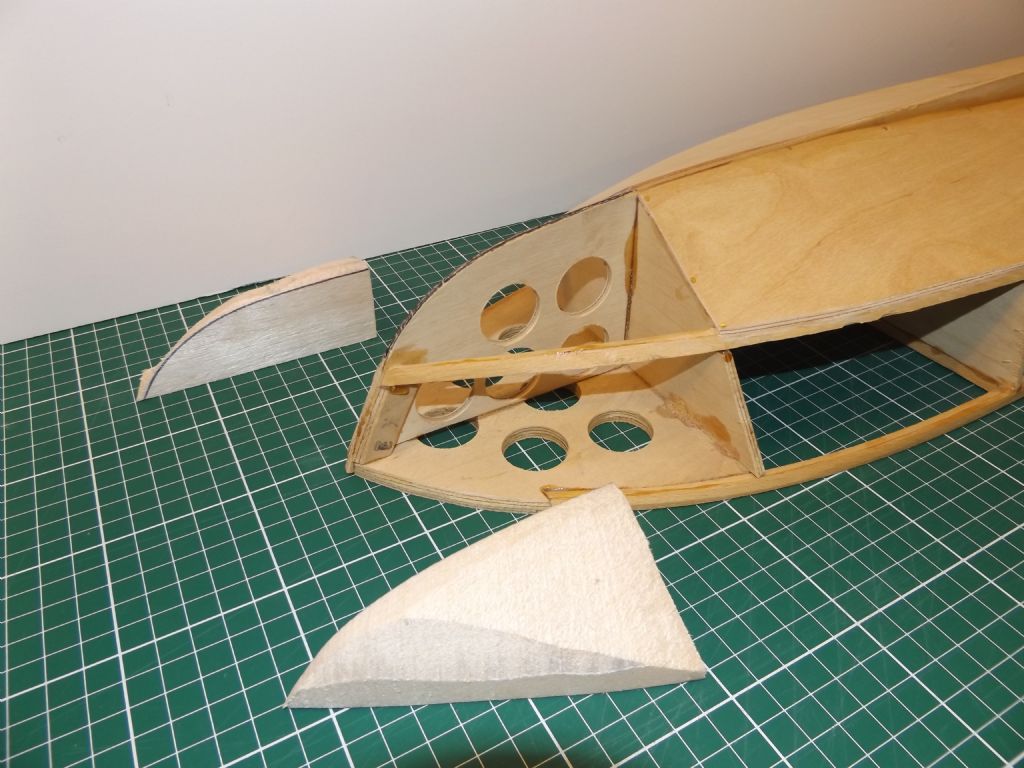
                                      Anyway, the instructions require that the side cabin panels be cut 2/3 through to enable a bend in front of the rear cabin. This was done with a junior hacksaw, taking care to make a handed pair

                                      image0-1.jpeg

                                      With the slots opened out and the formers trimmed where necessary, it was time to test a dry fit. There's a slight bend in the rear part of the keel that I can steam out before gluing, and some of the formers are slightly off, but there's nothing significant to worry about.

                                      image2.jpeg

                                      image0.jpeg

                                      The 'bend in the cabin sides can be seen in the next shot.

                                      image1.jpeg

                                      As suggested earlier, the former slots in the cabin side pieces don't match the former positions on the plan. The next shot shows the plan former positions on the keel, which is different from the former positions defined by the cabin sides. I'll need to take that into account when adding the doublers to the sides of the keel.

                                      image3-1.jpeg

                                      #98390
                                      Ray Wood 3
                                      Participant
                                        @raywood3

                                        Hi Andy,

                                        The great thing about boat building at this level, you don't need to worry about the C of G but as she is an open cockpit design the more weight you can take out of the bow, the less ballast you may need at the stern. I do have Lipo'sfor my aeroplanes but for this sort of boat I recently used a Nmh 7.2v buggy pack under a seat in the cockpit. Fit the keel doublers between the bulkheads it's not critical your just creating a seating to fix the bottom ply skins to.

                                        Regards Ray

                                      Viewing 18 posts - 1 through 18 (of 18 total)
                                      • Please log in to reply to this topic. Registering is free and easy using the links on the menu at the top of this page.

                                      Code of conduct | Forum Help/FAQs

                                      Advert

                                      Latest Replies

                                      Home Forums Build Blogs Topics

                                      Viewing 25 topics - 1 through 25 (of 25 total)
                                      Viewing 25 topics - 1 through 25 (of 25 total)

                                      View full reply list.

                                      Advert