A couple of IOM yachts

Advert

A couple of IOM yachts

Home Forums Sailing Models A couple of IOM yachts

  • This topic is empty.
Viewing 25 posts - 1 through 25 (of 66 total)
  • Author
    Posts
  • #93839
    Eddie Lancaster
    Participant
      @eddielancaster

      Hi.Tim, My first IOM build was a Boxkite, and I have had some good sailing with it, so now on to my second, another Graham Bantock boat, Nimbus 3.

      The first hull I have planked with balsa and two layers of lightweight glass fibre on the outside and one inside the hull, that hull is now ready for a final coat of gloss paint, as soon as we have some warmer weather.img_1001.jpg

      I have made a few changes to the design, but only cosmetic, the original deck is flat but I have given it a raised fordeck the same as Boxkite, I have also moved the rudder servo from the side of the finbox to closer to the rudder stock, again as in the Boxkite.

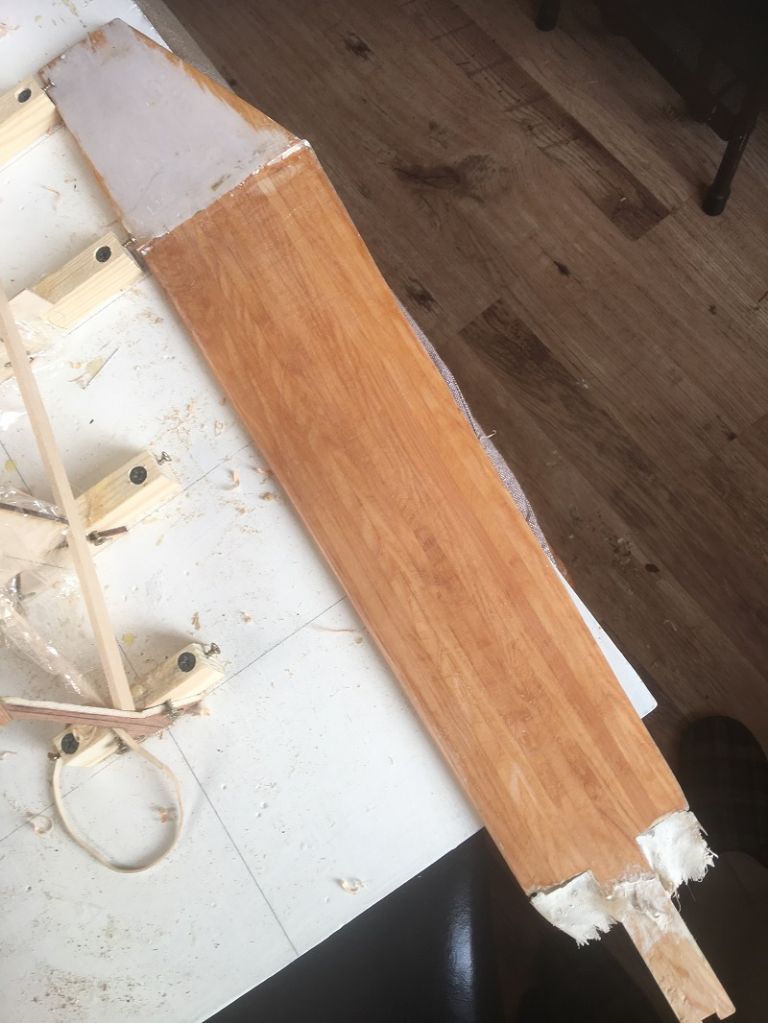
      img_0982.jpg This is the laminated fin for the first hull, laminated from vertical pieces of 1/4" x 3/8" spruce, and I thought a hull would look good with a hull planked and varnished, so hull No. two is on its way.

      It would be nice to see some pictures of your refurbishment of a Boxkite.

      Regards.

      Eddie.

      Advert
      #9711
      Eddie Lancaster
      Participant
        @eddielancaster
        #93844
        Ray Wood 3
        Participant
          @raywood3

          Hi Eddie,

          As suggested by Tim, could I borrow your Nimbus moulds on the board when we meet for barge racing in the summer ?? I have a keel of an IOM somewhere

          Your spruce goose looks great . I may try Obeche.

          Regards Ray

          #93845
          Eddie Lancaster
          Participant
            @eddielancaster

            Hi. Ray, yes that will be fine, they are laser cut by Sarik, so are very accurate.

            The drawings specify any of the hardwoods but not balsa. You will also need the drawings for the finbox and mast step as they are rather intricate, although I am hoping to use the drawings for Boxkite for my second build.

            Regards.

            Eddie.

            #93851
            Eddie Lancaster
            Participant
              @eddielancaster

              Hi.Tim, That hull looks fine, but is it difficult to see on the water with that dark colour?

              I sail with another club member who has an IOM and we sail a set course around the bouys in our lake, when I first sailed my Boxkite I couldn't even keep up with him, on our last sail day before this lockdown I was able to catch him, overtake him and stay in front, so I am quite happy with my first IOM build, and look forward to sailing Nimbus against him, We don't race as such but we do keep an eye on each other and comment on any mistakes either of us may make.

              The hull of the Nimbus is difficult to hold to work on so I hope it will be just as slippery in the water.

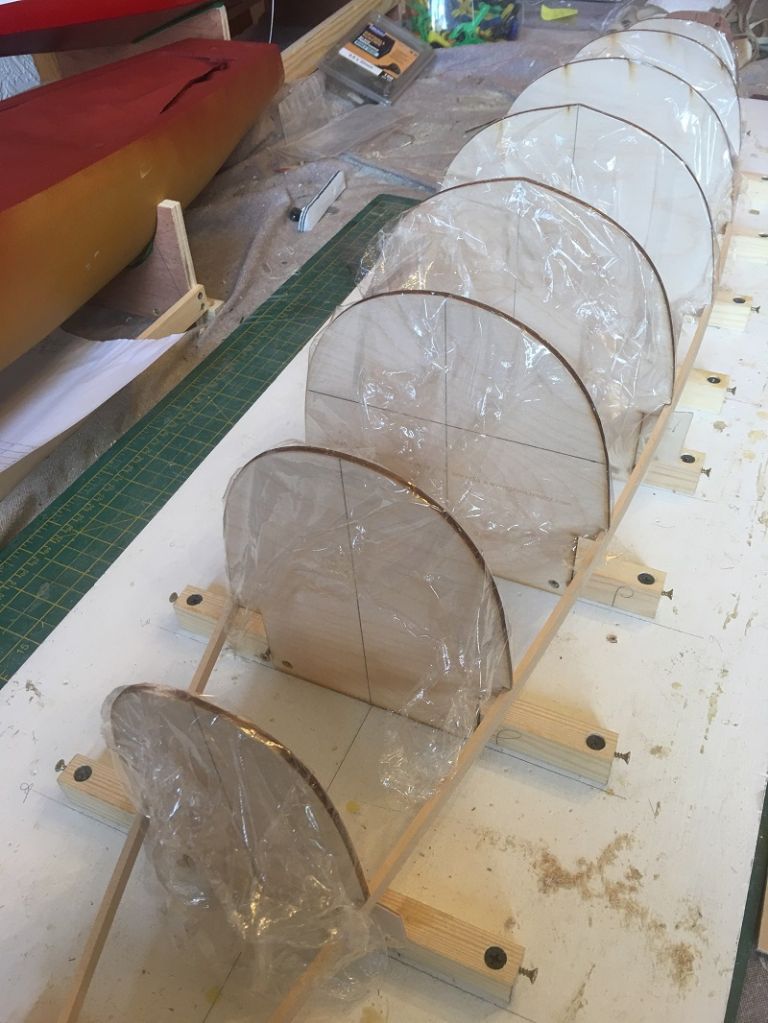
              Going back a few weeks this is the shadows set up ready for planking to begin, I used cling film to stop the glue from fixing the planks to them.

              img_0976.jpg

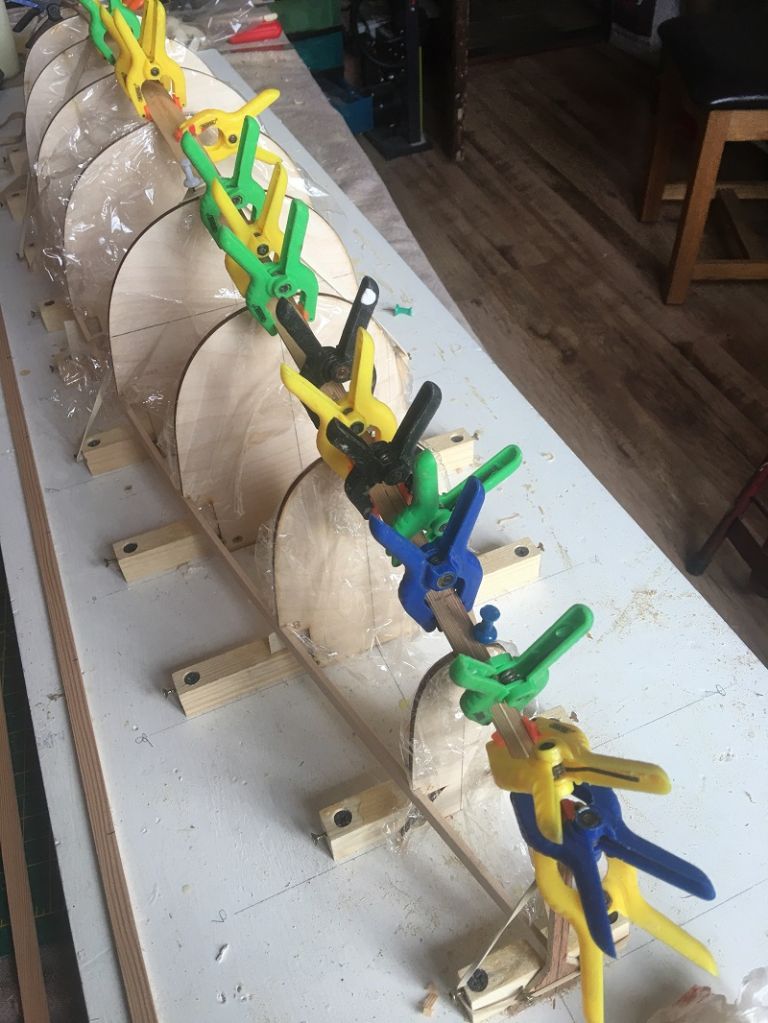
              The first six or so planks were the most difificult to fit as they had to twist 90deg. in the fisrt 3".

              img_0977.jpg

              img_0992.jpg

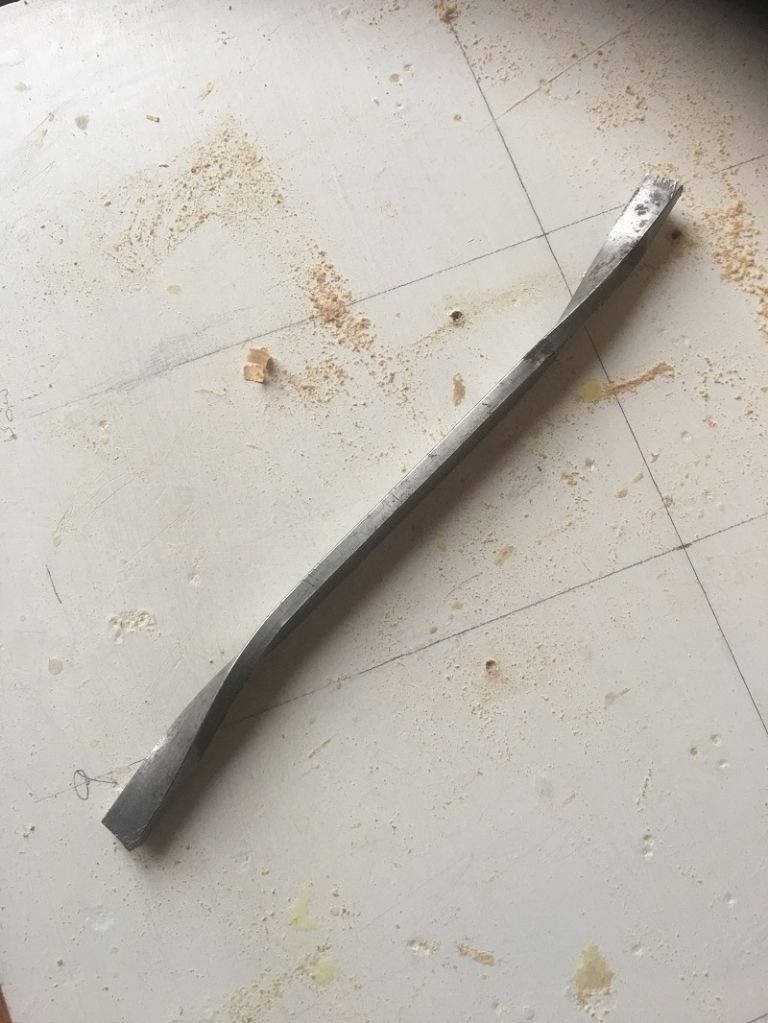
              I had to make a jig,a piece of flat steel twisted 90deg. to clamp the planks to after boiling them in the kettle for a couple of minutes and allowed to dry before fitting hem.

              img_1011.jpg

              It had have a right hand twist and a left hand one.

              Regards.

              Eddie.

              #93864
              Eddie Lancaster
              Participant
                @eddielancaster

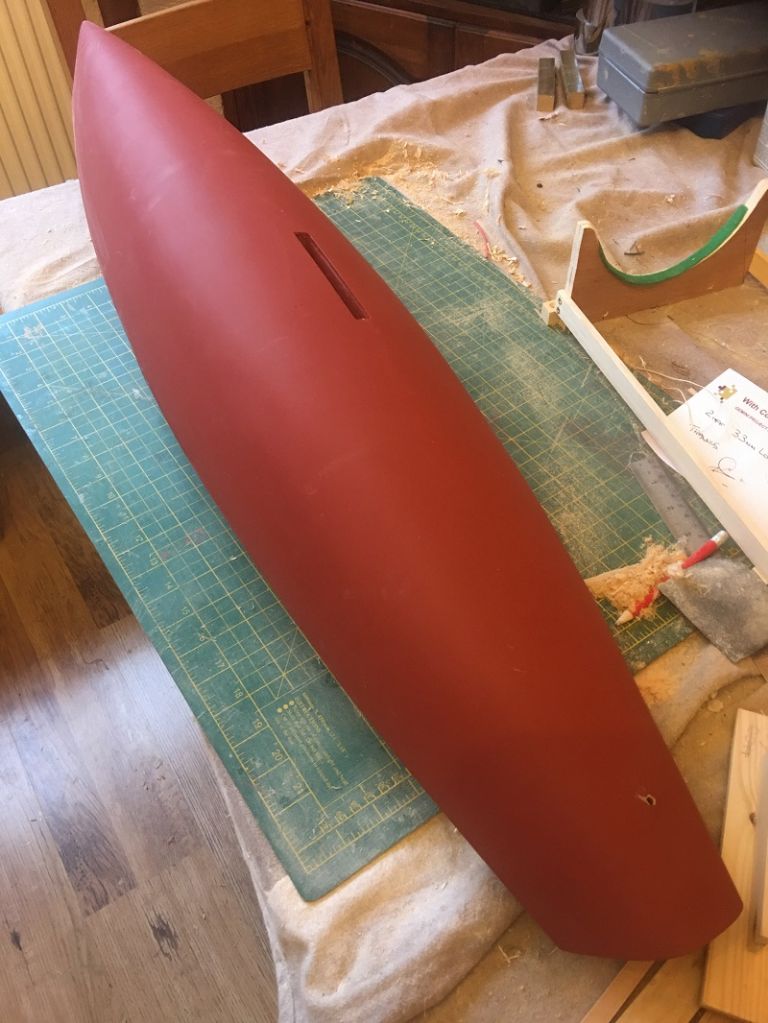
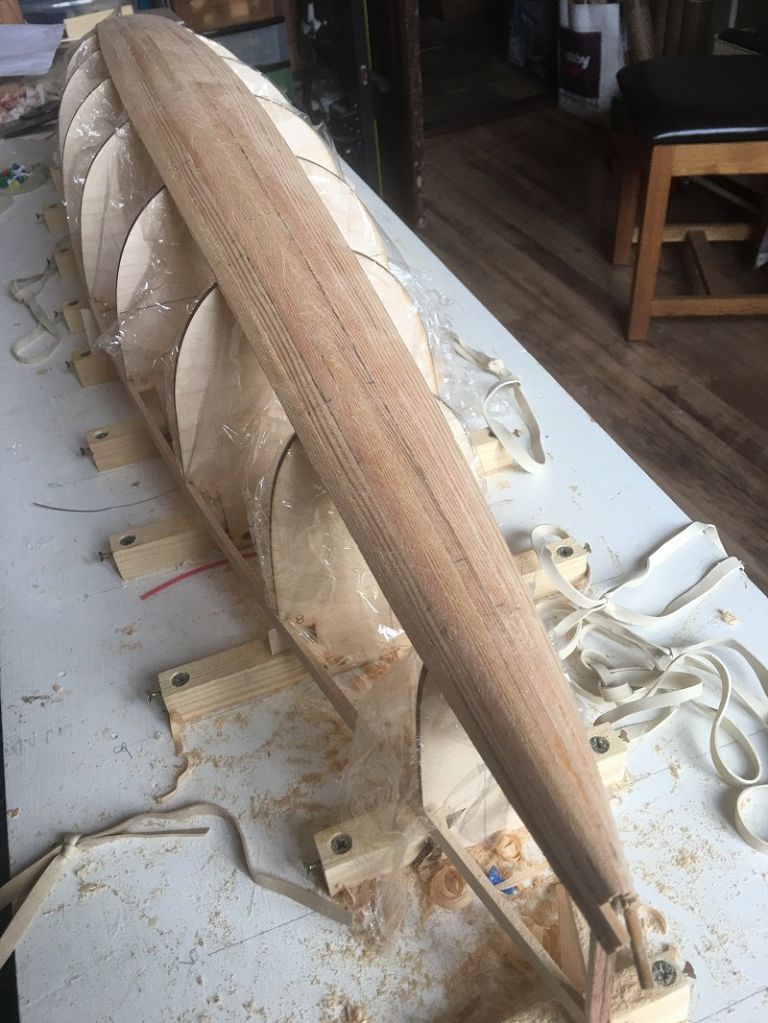
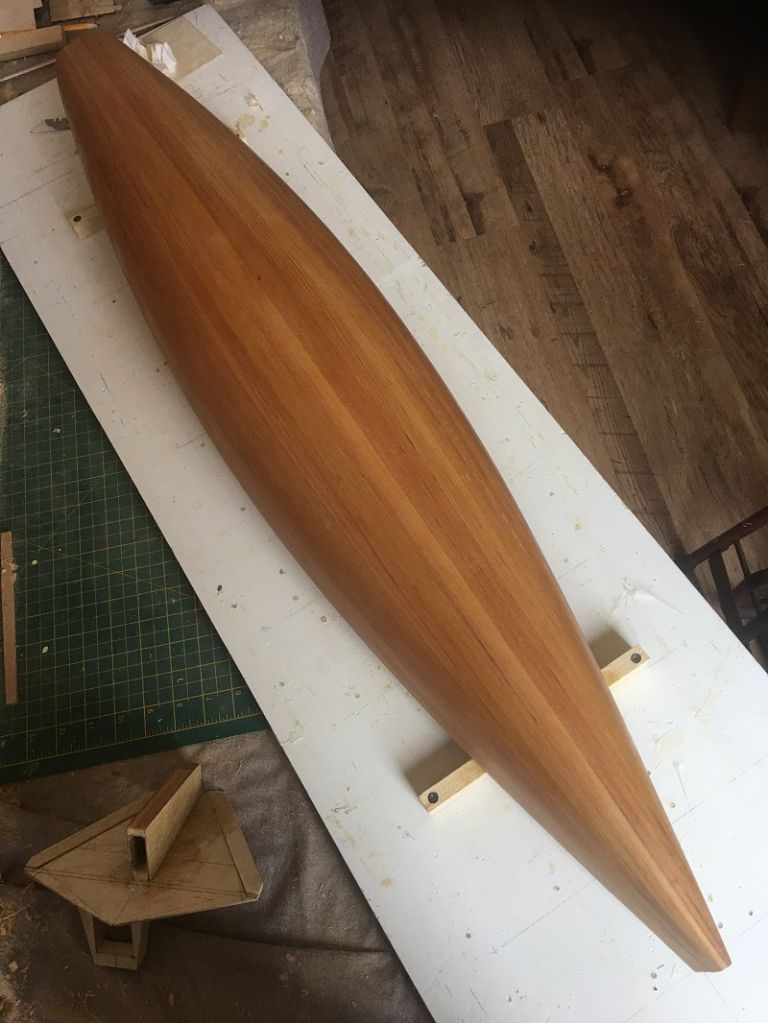
                The hull has now been removed from the building board and shadows, I am quite pleased with it as there are just a few small lumps of adhesive to sand away.

                img_1012.jpg

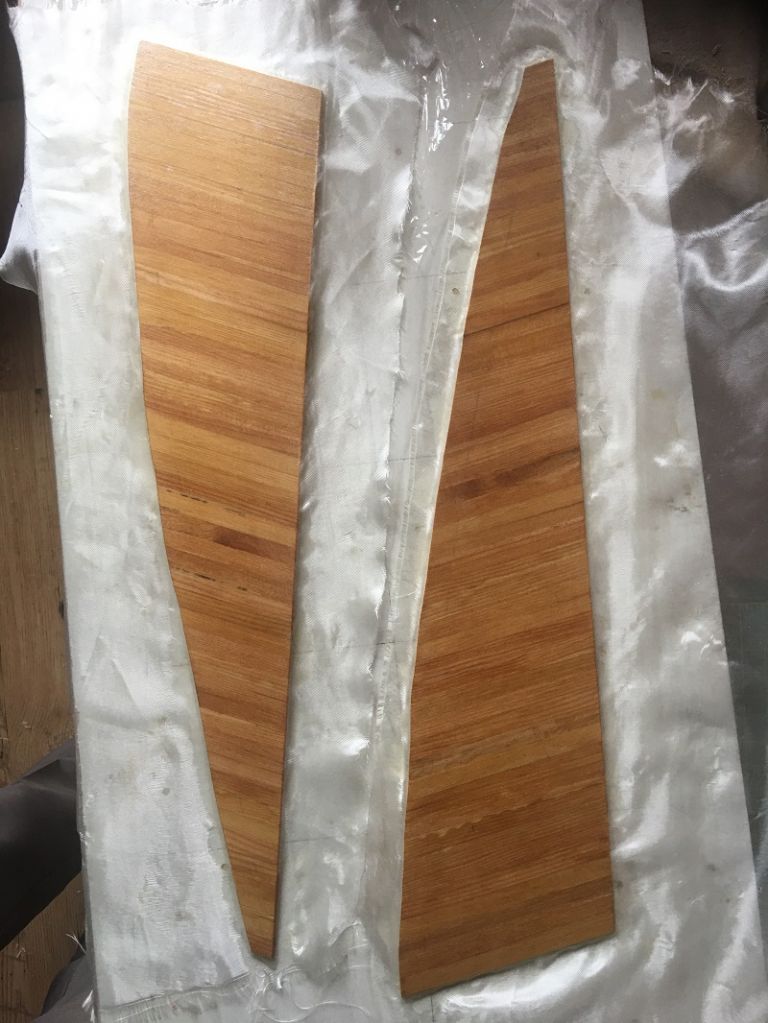
                The fordeack panels have been formed to match the hull, with the same planking, they have had a layer of lightweight glassfibre and resin on the back to reinforce them while I cut the access holes.

                img_1014.jpg

                Regards.

                Eddie.

                Edited By Eddie Lancaster on 19/02/2021 18:31:04

                #93865
                Tim Rowe
                Participant
                  @timrowe83142

                  Nice work Eddie.

                  What thickness are the planks and what wood are you using? You may have told us but I have forgotten.

                  Following with interest.

                  Tim R

                  #93866
                  Eddie Lancaster
                  Participant
                    @eddielancaster

                    Hi.Tim,thanks, the wood is spruce 1/8” thick, it will make a heavy boat but that doesn’t matter for this build, as I am only doing it this way for the fun of the build, and it will share the rig with other hull.

                    I am having a problem with the fin at moment. it is too flexible, with a 2300 gram weight it flexes by over 3/4” I may try a 1/8” thick aluminium core planked with the spruce.

                    Regards.

                    Eddie.

                    #93869
                    Tim Rowe
                    Participant
                      @timrowe83142

                      Hi Eddie

                      What glass reinforcement are you using on the keel?

                      Tim R

                      #93873
                      Eddie Lancaster
                      Participant
                        @eddielancaster

                        Hi Tim, it is one layer of 1oz. With two coats of epoxy resin, I do have 2.3oz /75gram, do you think a layer of that would help?

                        Eddie.

                        #93876
                        Tim Rowe
                        Participant
                          @timrowe83142

                          Hi Eddie

                          The core of these keels only contributes a relatively small amount of stiffness. Moment of inertia and all that.

                          The stiffness comes from the skins that are furthest away from the neutral axis. Glass cloth generally has half the fibre content running the wrong way. To get stiffness on these high aspect ration fins you need the fibres to run along the span IE from top to bottom. You could stick with a spruce (cedar is good) core and then build up "tows" of carbon fibre arranged to get close to an aerofoil shape. I would finish off with a few zig-zags as tis will give some torsional stiffness. A small amount of filler will complete the profile followed by painting. That will make a stiff fin.

                          The strands of bundled carbon (tows) are easily available.

                          Tim R

                          #93917
                          Eddie Lancaster
                          Participant
                            @eddielancaster

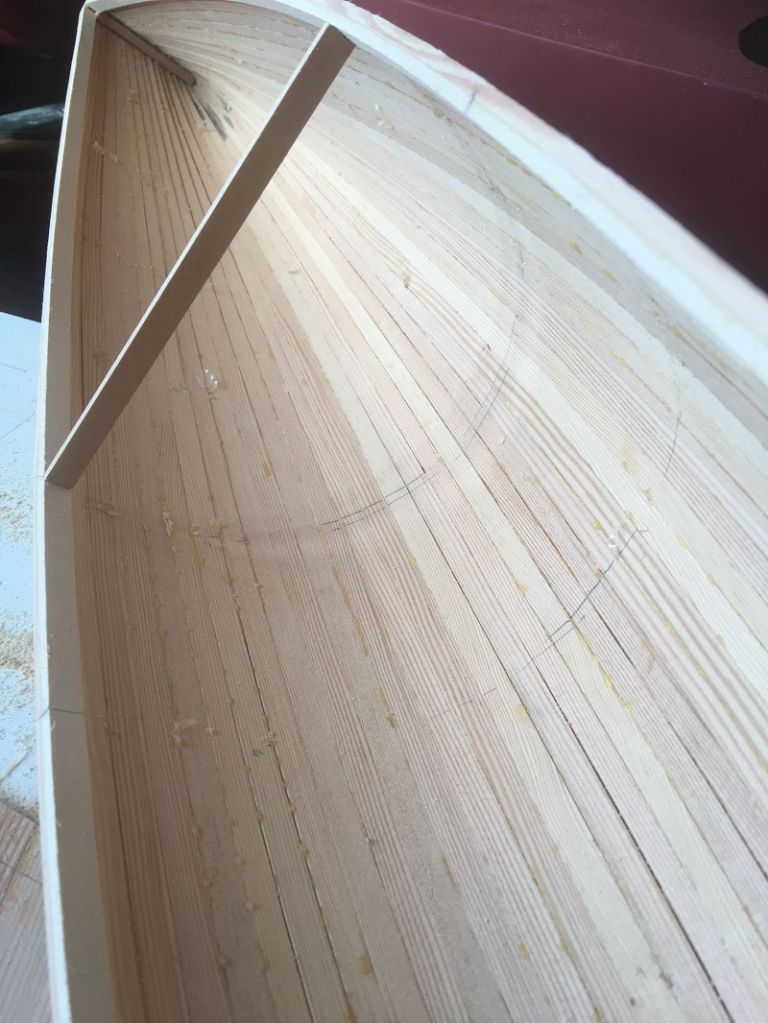
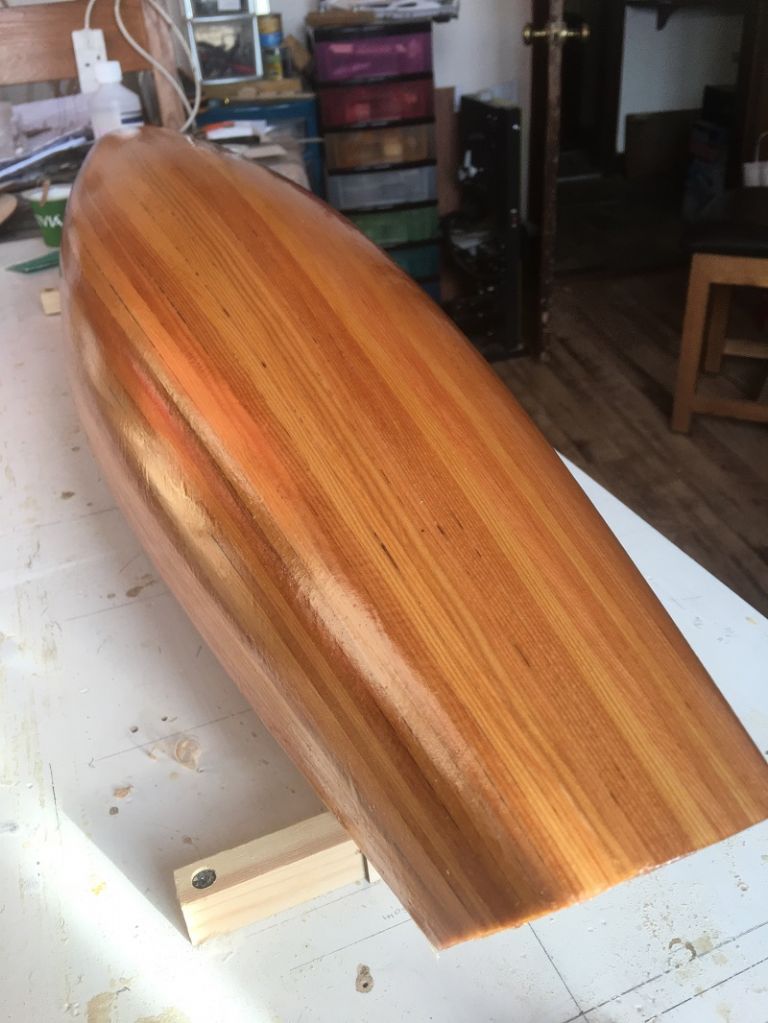
                            The hull has had a layer of 1oz. glassfibre and two coats of epoxy resin, it now has to be rubbed down with wet and dry paper unttil all the high spots are removed and it has a matt finish all over ready for a lacquered finish.

                            img_1020.jpg

                            img_1021.jpg

                            Eddie.

                            #93919
                            Chris Fellows
                            Participant
                              @chrisfellows72943

                              Hi Eddie

                              The hull will look great once it has its final finish as it looks pretty good now!

                              Chris

                              #93926
                              Ray Wood 3
                              Participant
                                @raywood3

                                Hi Eddie,

                                That's a good looking hull, and a good planking job ! and nowhere to hide my dodgy joints I'm looking forward to seeing how a IOM performs against my Dragonflite 95 ??

                                I will take Tim up on his offer of sails, long weekend in Mallorca to pick them up Gwen has booked another holiday in Spain for September !!

                                PS. first Covid jab this morning, very impressed with the systems in place

                                Best Regards Ray

                                Edited By Ray Wood 2 on 25/02/2021 10:47:49

                                #93932
                                Tim Rowe
                                Participant
                                  @timrowe83142

                                  That's a great job Eddie.

                                  As a matter of interest how much does your bare hull weigh?

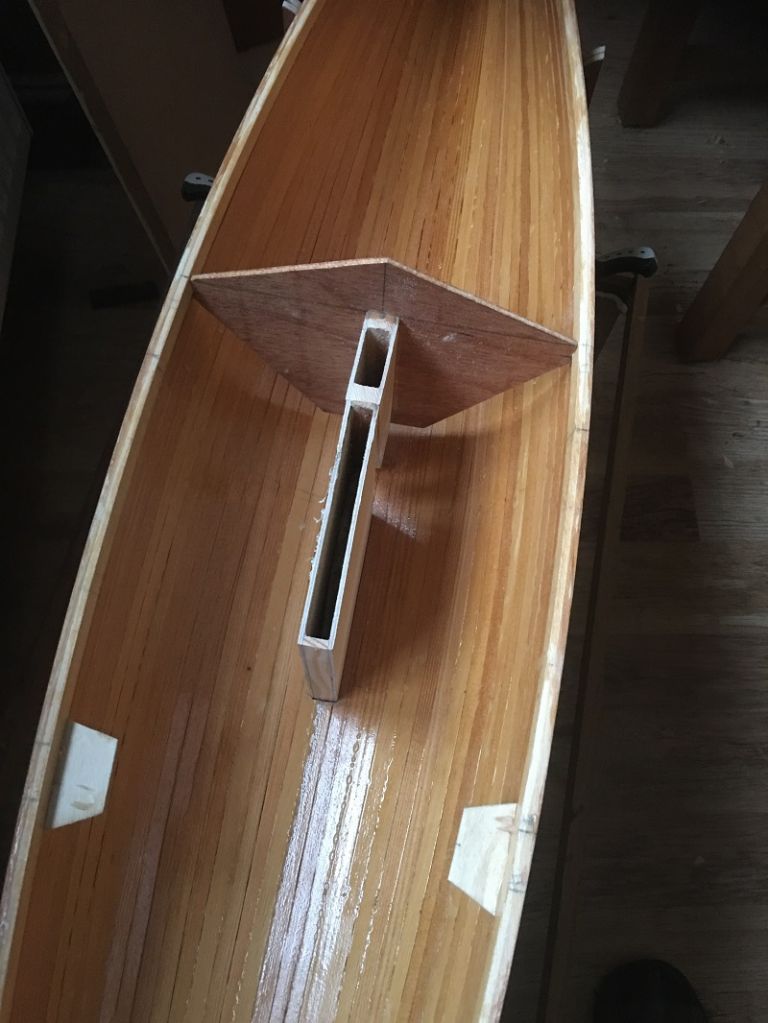
                                  I saw in your photo the partial bulkhead with the mast box. From one of my earlier comments about over-building models it is interesting to point out these boats do not have any bulkheads, formers or stringers. The partial bulkhead does not touch the hull sides and is only connected to the deck and keel box. The loads on these boats from the the rigging when sailing hard are much higher than on the average motor model.

                                  Note for Ray. I will get one of my sails measured and approved so I can be certain of sending you a rule compliant set. Now getting worried because I know how fast you build wink

                                  Looking forward to your next stages.

                                  #94021
                                  Eddie Lancaster
                                  Participant
                                    @eddielancaster

                                    Hi.Tim, the bare hull with no other bits added is 512 grams.

                                    The finbox and mast step are now ready for fixing in place, it looks like everything is lining up nicely.

                                    img_1026.jpg

                                    The fin box is 1/16" ply lined with glass and two coats of resin,the bulhead with the maststep attached is 1/8" liteply, both boxes will have at least two layers of glass and resin around them and extended up the sides of the hull to help spread the loads you mention.

                                    Regards.

                                    Eddie

                                    #94150
                                    Eddie Lancaster
                                    Participant
                                      @eddielancaster

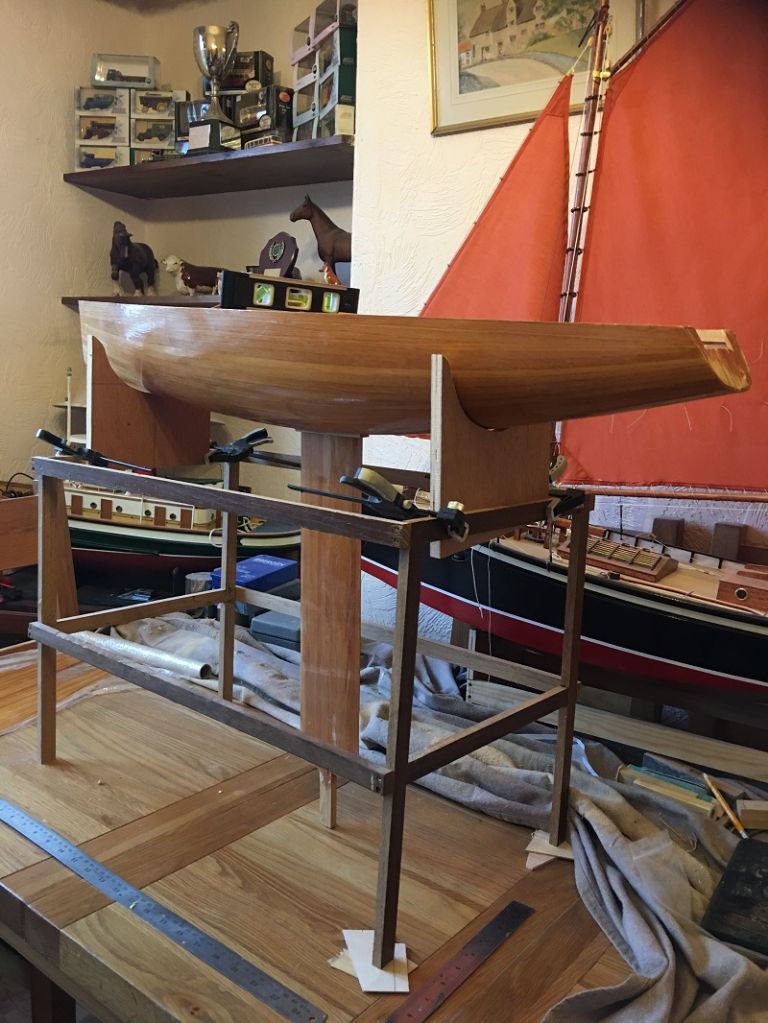
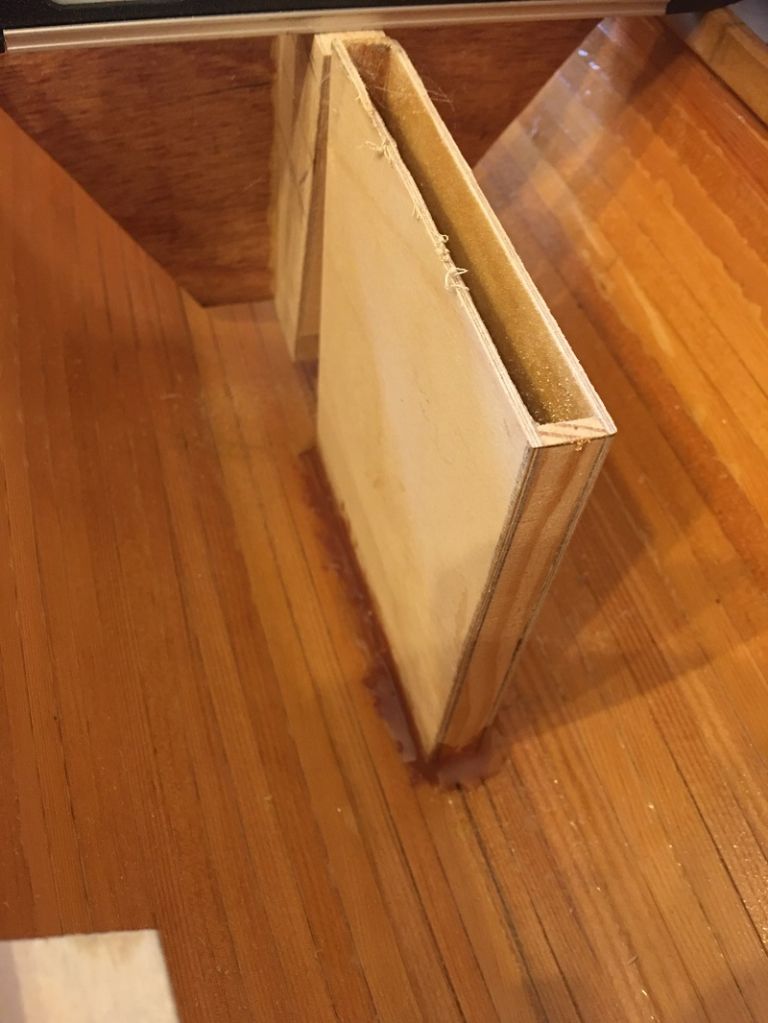
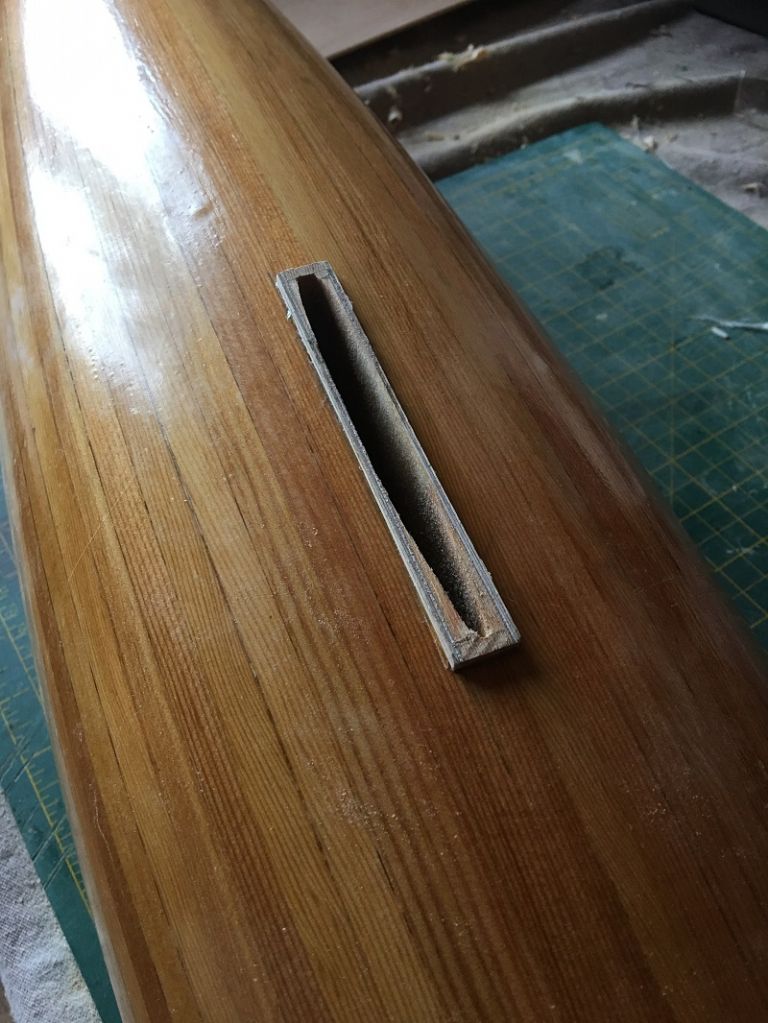
                                      I have now fitted the finbox and mast step, taking a lot of care to get it vertical, central in the hull and square to the water line.

                                      img_1029.jpg

                                      The hull was set on a frame that was level with the table ,that was also set level in both directions, the waterline was set parellel to the table top and the hull level across the deck line,I was then able to set the fin vertical in both planes using a small spirit level.

                                      img_1031.jpg

                                      The edges of the slot for the finbox were bevelled inside and a thickened epoxy used to fill the joint, a second layer of epoxy was applied to create a good fillet between the hull and fin box, the whole lot was then left for twenty four hours to fully harden.img_1033.jpg

                                      The box then had a couple of layers of 2 1/2 oz. glassfibre wrapped around it and more was added up the sides of the box and extended up the sides of the hull, and extra layers at the back and front of the box across the bottom of the hull, hopefully these will take all the stress loads around this area of the hull.

                                      img_1041.jpg

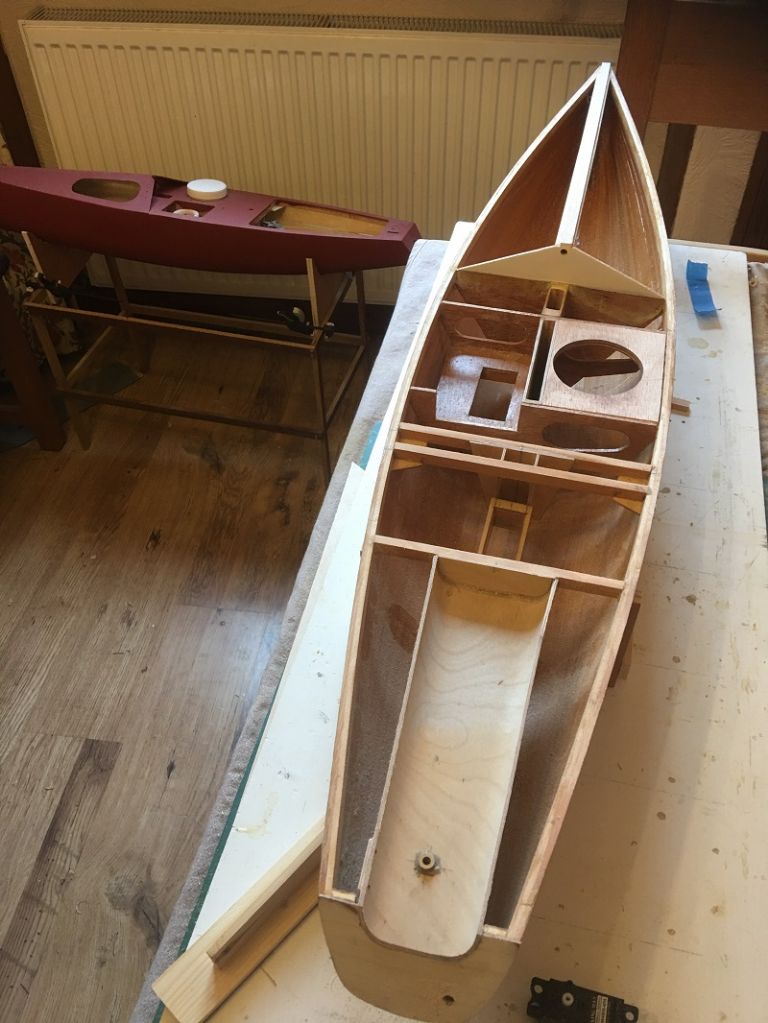
                                      All the internals have also been added. The deck on the drawings is a single flat single piece of 1/8" ply, but I liked the raised foredeck on the Boxkite, I have also lowered the rear deck to expose the rudder stock.

                                      Regards.

                                      Eddie

                                      #94170
                                      Tim Rowe
                                      Participant
                                        @timrowe83142

                                        Very nice indeed Eddie.

                                        The bar is rising.

                                        How did you create the U section lowered aft deck. Nice touch.

                                        Tim R

                                        #94174
                                        Ray Wood 3
                                        Participant
                                          @raywood3

                                          Hi Eddie,

                                          Yes I was also wondering that ? Tim beat me to it

                                          Where is the cabin ??

                                          Regards Ray

                                          #94188
                                          Eddie Lancaster
                                          Participant
                                            @eddielancaster

                                            The U section was formed from two pieces of 1/32” ply, first steamed and then clamped to a block of wood shaped to the form I needed, when it was dry it was then reclamped to the block with a good layer of aliphatic resin, after another twenty four hours it came off and held its shape.

                                            The block was made using my Ryobi band saw that looks very much like yours Ray, just a different colour.

                                            Regards.

                                            Eddie.

                                            #94191
                                            Ray Wood 3
                                            Participant
                                              @raywood3

                                              Hi Eddie,

                                              Well Christmas has come very early this year Many thanks for the parcel which arrived safely this morning,

                                              Are you making your own lead bulbs ?? I will have to get down to my son in laws unit to rip up some mahogany for the planking.

                                              Thanks Again, Regards Ray

                                              #94193
                                              Eddie Lancaster
                                              Participant
                                                @eddielancaster

                                                Hi.Ray, a new boat to build and a new bandsaw who’s a lucky boy then 😆.

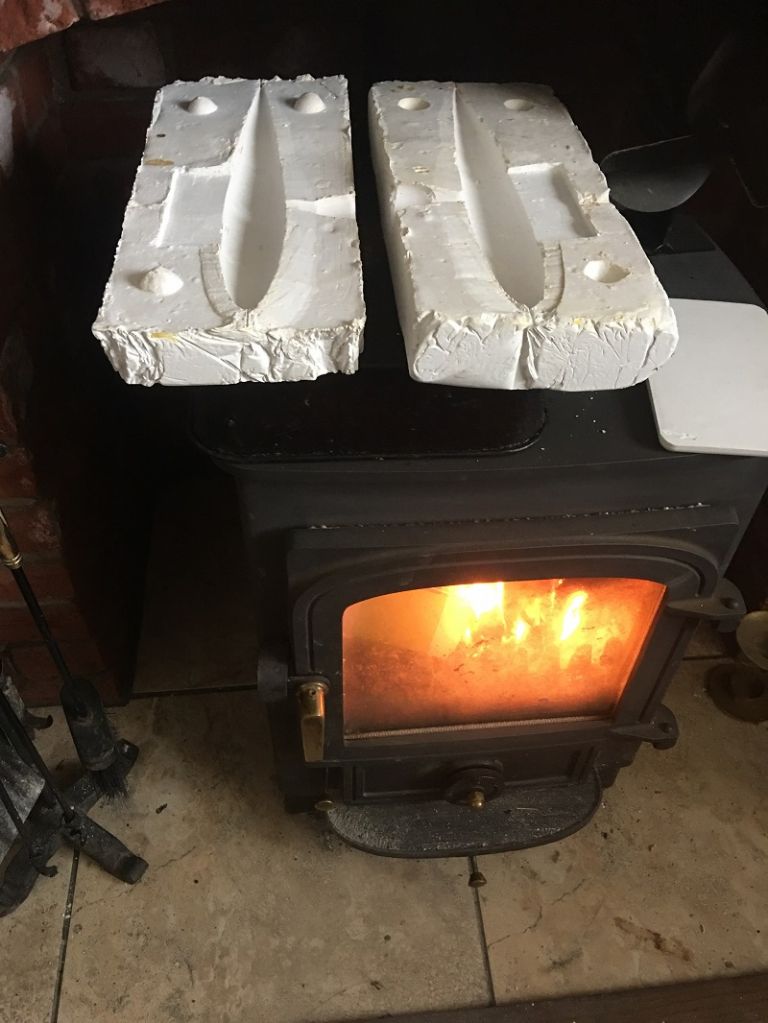
                                                The plaster casts for the bulb are on the wood burner drying out ready for casting when we get a suitable day.

                                                img_1045.jpg
                                                I hope to be able to meet get two casts from it.

                                                Regards.

                                                Eddie.

                                                #94194
                                                Tim Rowe
                                                Participant
                                                  @timrowe83142

                                                  Hi Eddie

                                                  Even when you think they are dry, dry them out some more, and then some more. The slightest humidity in the mould will vaporise when you introduce the lead and not only will it spit at you like a very angry cat, you will have big lumps missing from the castings.

                                                  It is amazing how long it take the moisture to come out of the mould even when it appears dry.

                                                  Gentle clamping pressure is all that is needed to hold the two parts together and avoid point loads.

                                                  Pre-heat the mould as hot as you can in the oven before pouring. You will avoid short runs and get a better surface finish. The mould is less likely to crack from thermal shock.

                                                  Put the mould on a metal try on a suitable surface so that is the worse happens and the mould break you catch the lead before it does damage and you can use it again.

                                                  Next mould you make have a filling point at the thin end and a vent at the top. Having the filling point at the thin end will keep it hot and reduce the chance of the lead solidifying early giving a short run.  At the moment, the air is coming out at the same place you are putting the lead it.  They will fight and the risk is dross getting included and bit missing again.

                                                  The slot to take an insert to mould the keel slot is spot on.  

                                                  Plenty of safety advice on the web and you should take it.

                                                  It is very satisfying making your own castings.

                                                  Tim R (Former foundry owner)

                                                  Edited By Tim Rowe on 12/03/2021 11:54:02

                                                  #94195
                                                  Eddie Lancaster
                                                  Participant
                                                    @eddielancaster

                                                    Hi. Tim, thanks for your very help-full comments, they have been on the stove for over a month now, I know what you mean about them needing to be absolutely dry, my last attempt at a closed mold was spoilt by a trace of moisture in the core for the fin slot, I also take your point about only a single entry exit point.

                                                    Regards.

                                                    Eddie.

                                                    #94238
                                                    Eddie Lancaster
                                                    Participant
                                                      @eddielancaster

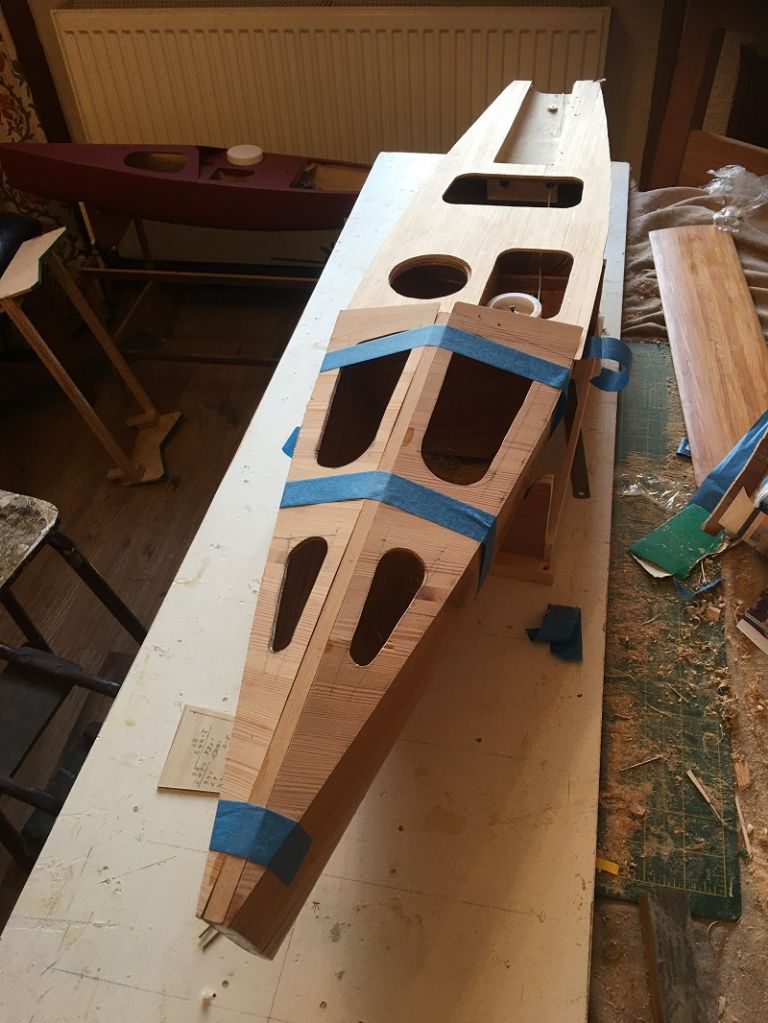
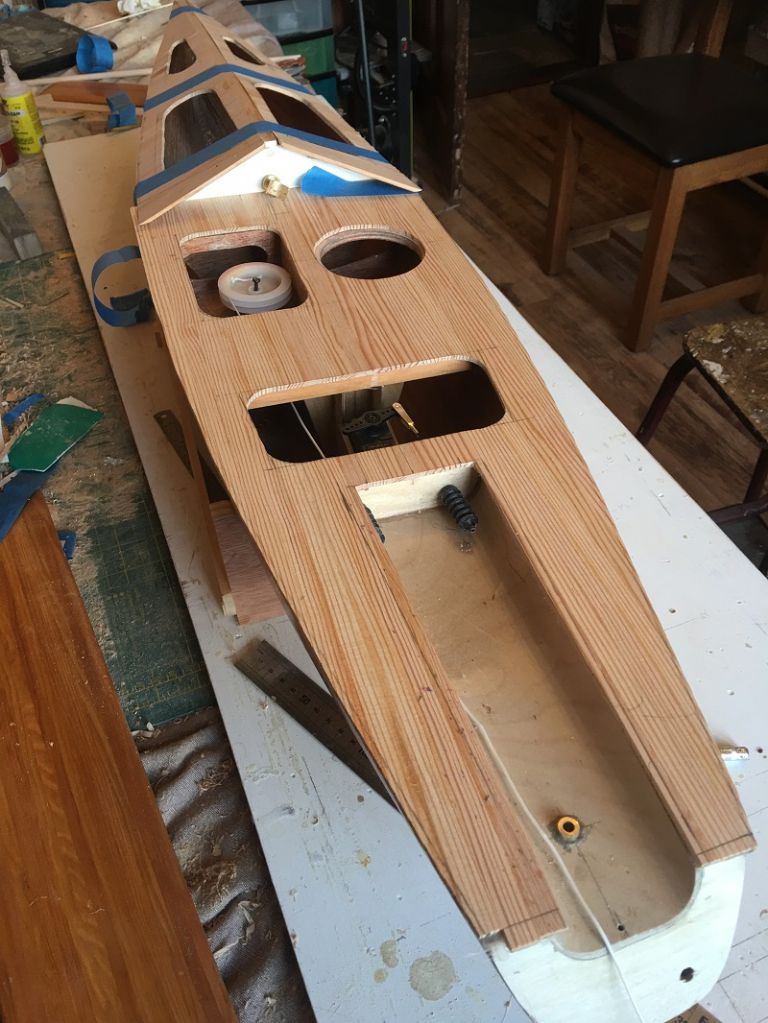
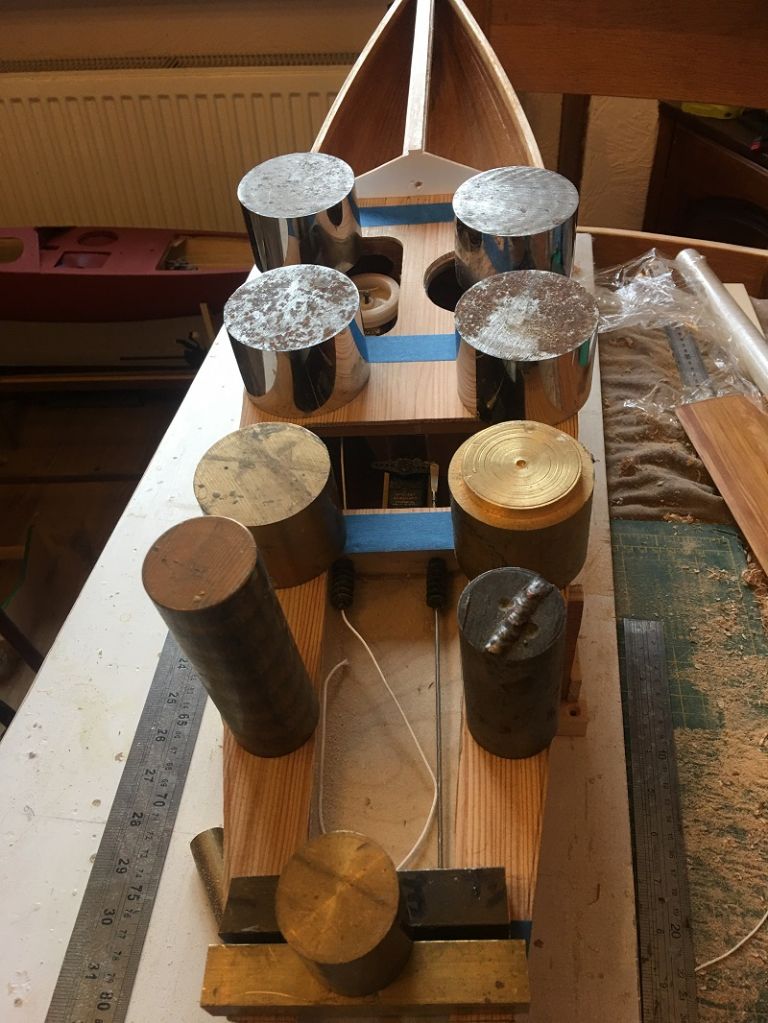
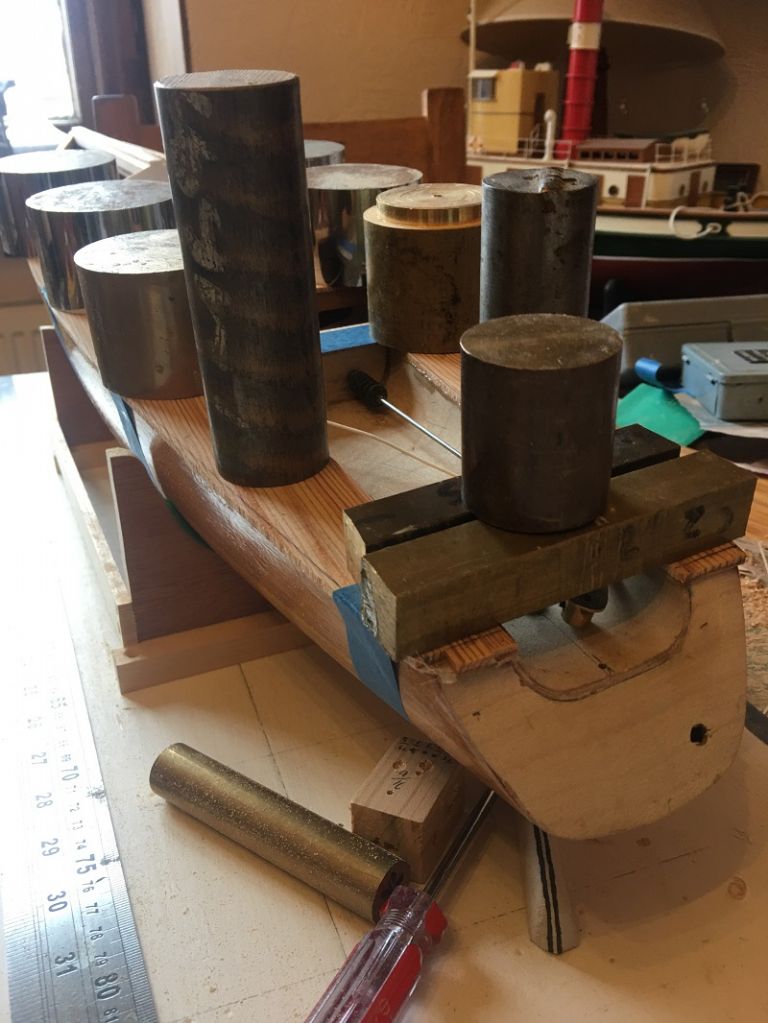
                                                      Earlier this week I had a trial fixing and placement of the decks after the internals were finalised.

                                                      img_1048.jpg

                                                      img_1049.jpg

                                                      Today the rear deck has been glued in place using eight hour epoxy.

                                                      img_1050.jpg

                                                      img_1051.jpg

                                                      Tomorrow the fore deck will go on and then the finishing of the hull, plenty of rubbing down and Halfords spray can lacquer.

                                                      Regards.

                                                      Eddie.

                                                    Viewing 25 posts - 1 through 25 (of 66 total)
                                                    • Please log in to reply to this topic. Registering is free and easy using the links on the menu at the top of this page.

                                                    Code of conduct | Forum Help/FAQs

                                                    Advert

                                                    Latest Replies

                                                    Home Forums Sailing Models Topics

                                                    Viewing 25 topics - 1 through 25 (of 25 total)
                                                    Viewing 25 topics - 1 through 25 (of 25 total)

                                                    View full reply list.

                                                    Advert