61′ Barnett class lifeboat

Advert

61′ Barnett class lifeboat

Home Forums Scratch build 61′ Barnett class lifeboat

Viewing 25 posts - 76 through 100 (of 648 total)
  • Author
    Posts
  • #101555
    neil hp
    Participant
      @neilhp

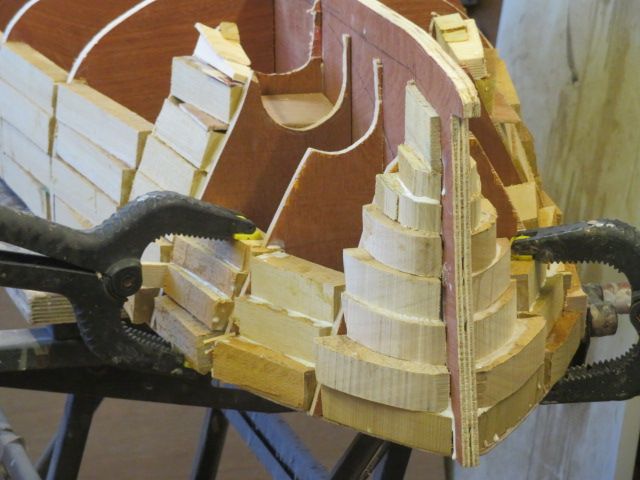
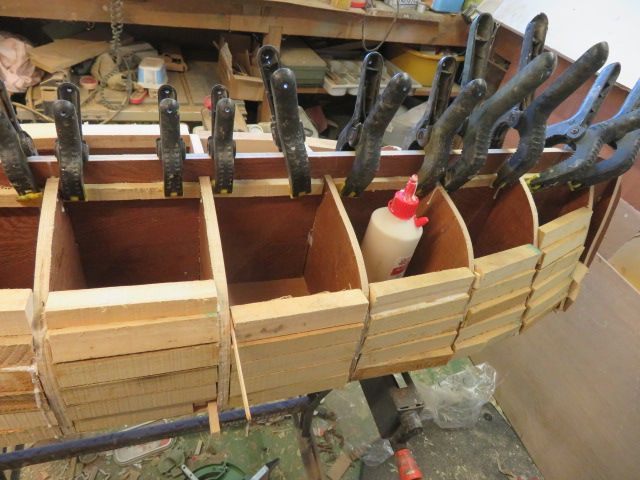
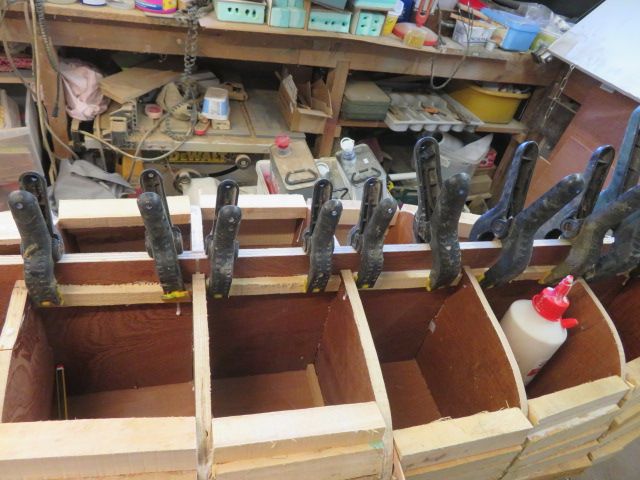
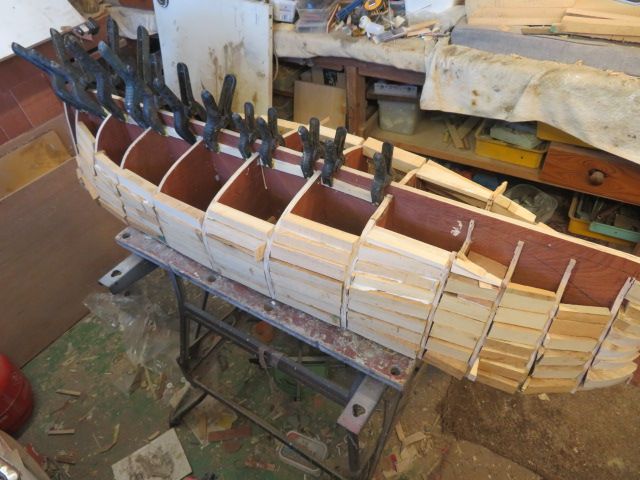
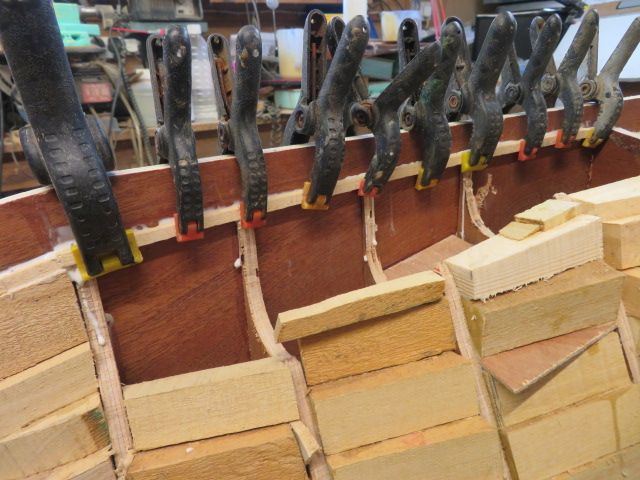
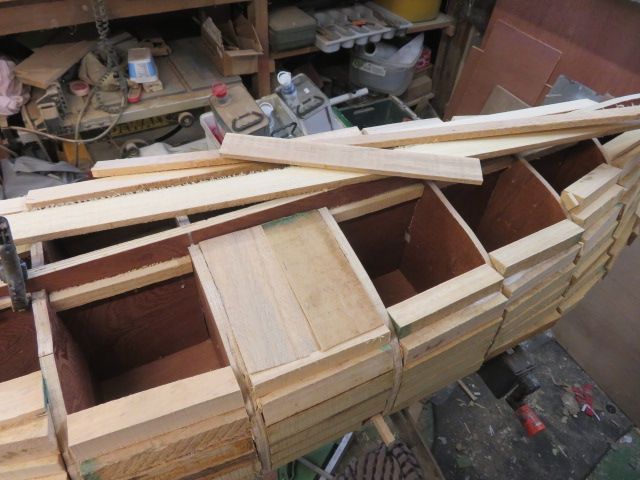
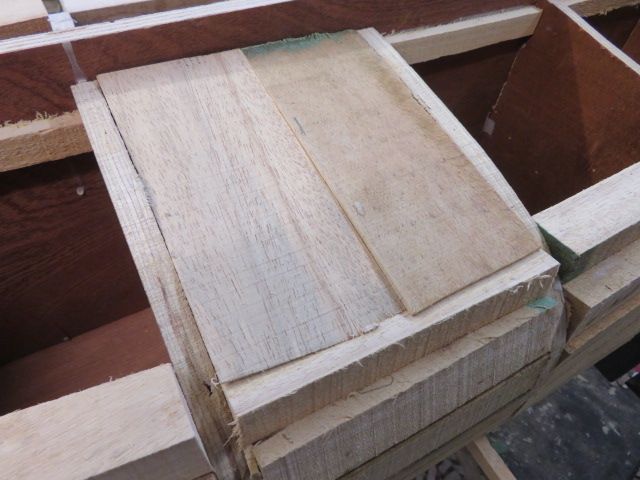
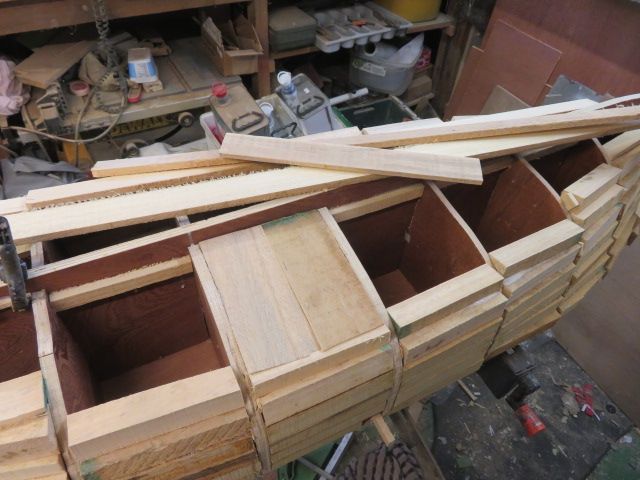
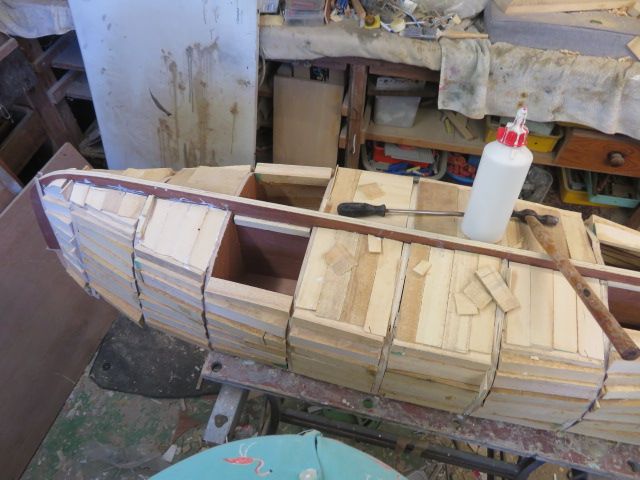
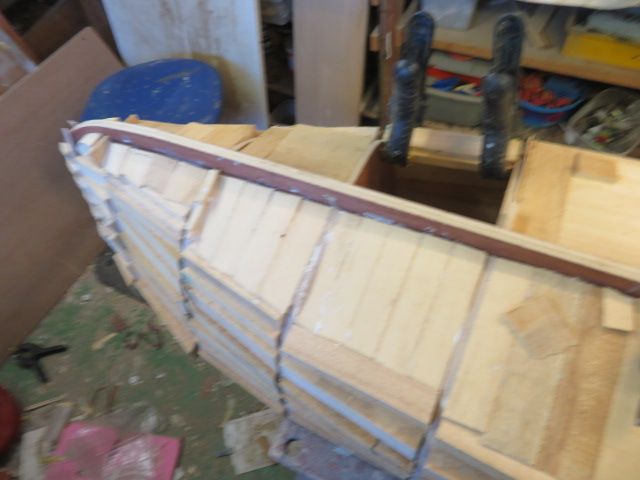
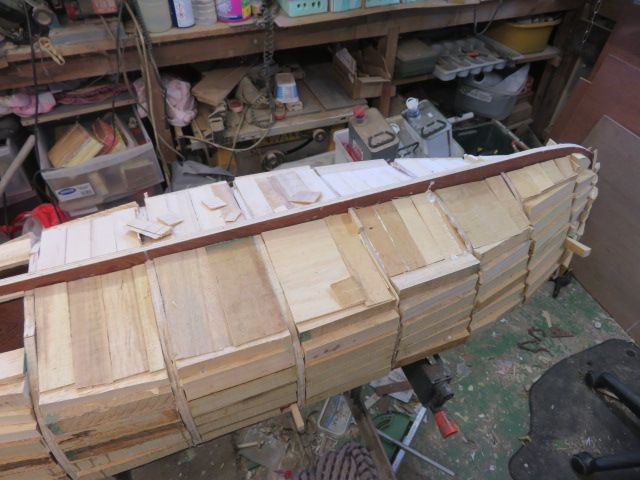
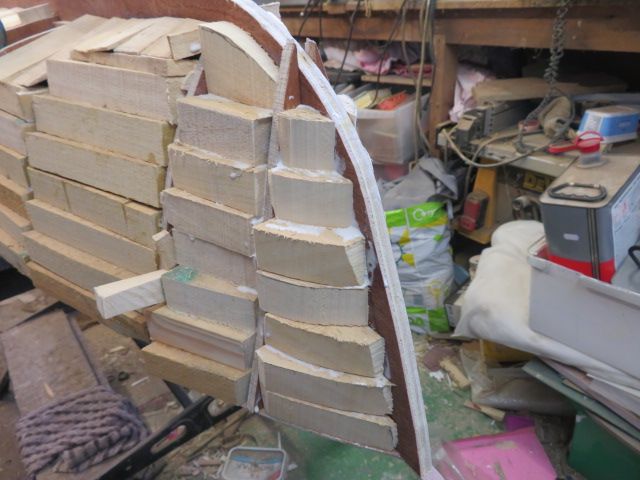
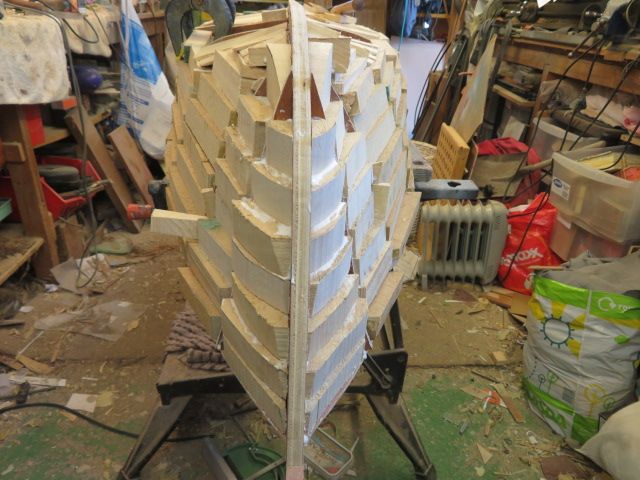
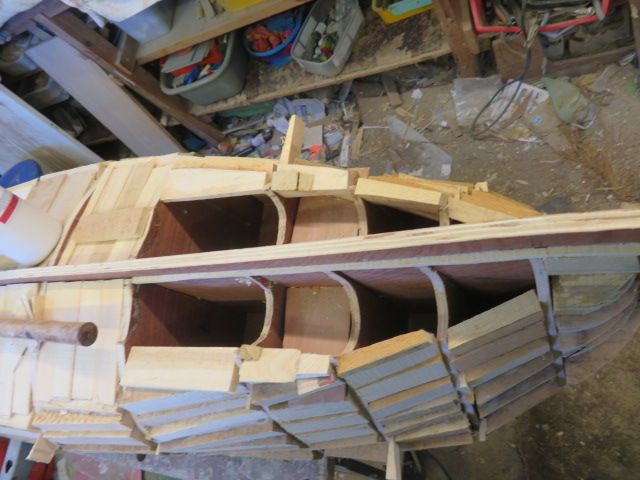
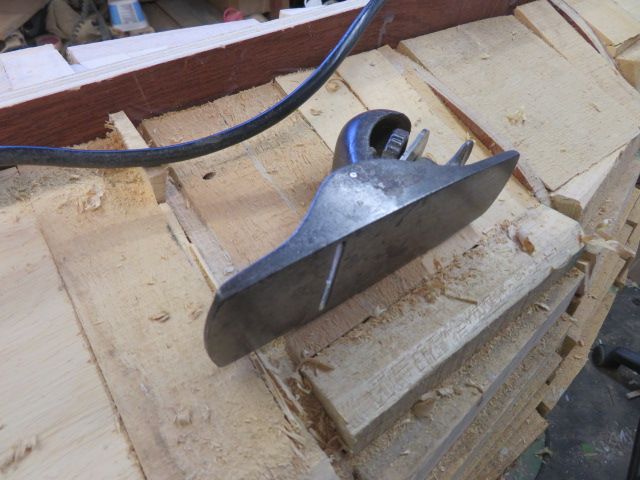
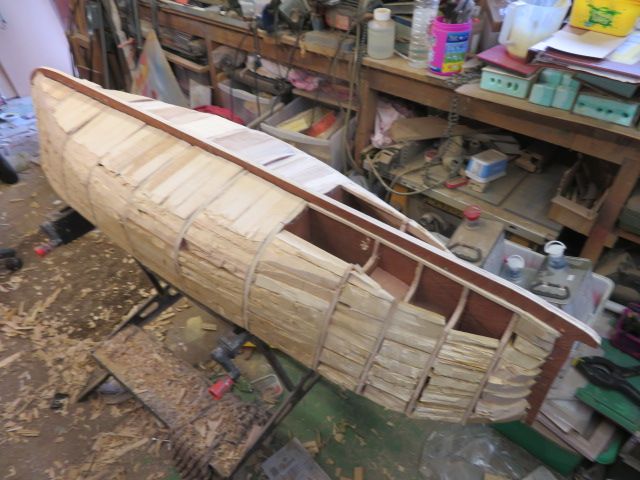
      IT LOOKS MESSY!!!, and it is messy with all the glue around, but once I get my sonoc rasp and block plane on it it will start to take shape.

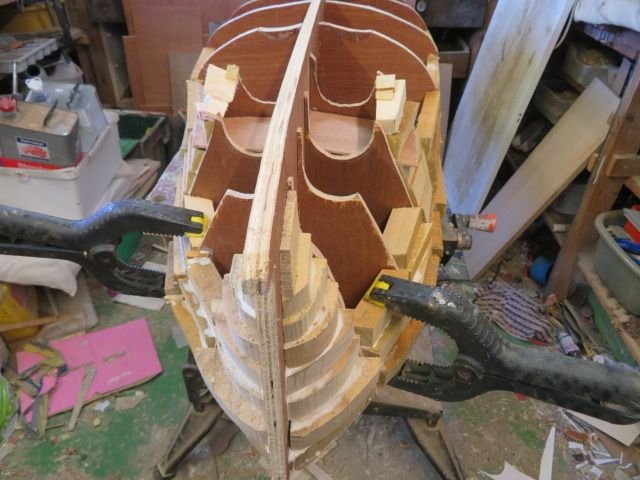
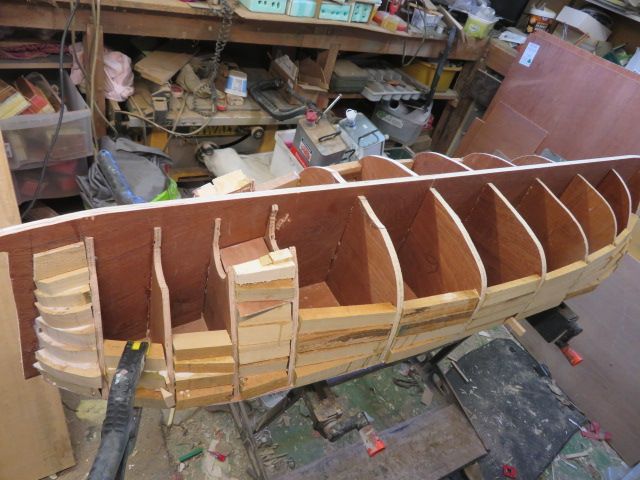
      But I have been working on the last 4 frames of the stern of the boat at the moment, and once that area has been blocked up, I will then finish all the frames from 1 to 8, before finally filling in the bow with solid blocks of obeche.

      Hopefully I should have that done by tuesday at the latest.

      And once that has been achieved I will then start shaping it all before turning my attention to the two tunnels for the props and shafts.

      img_3116.jpg

      img_3117.jpg

      img_3118.jpg

      Edited By neil howard-pritchard on 06/08/2022 18:57:45

      Advert
      #101559
      neil hp
      Participant
        @neilhp

        I had paid no real attention to the superstructure i.e. the cabin and engine room casing until this morning.

        It came to a point where I had glued on some more blocks into the hull frames that until those parts had set and glued, that I needed to get on with another task, and that was cutting out the timber [ more of the obeche' bought last month.

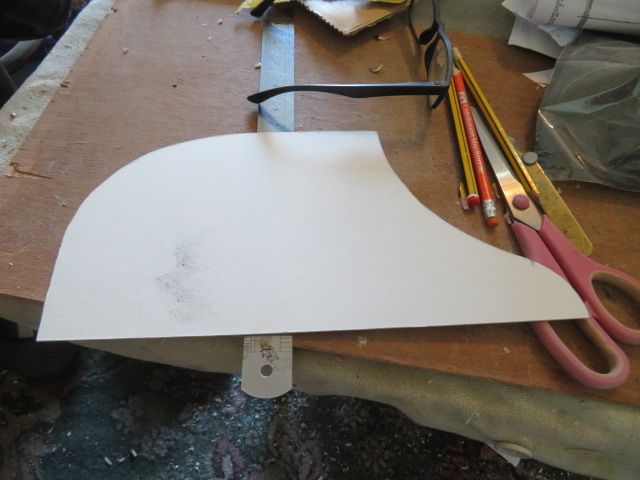
        Therefore templates had to be made for marking out the obeche ready for cutting.

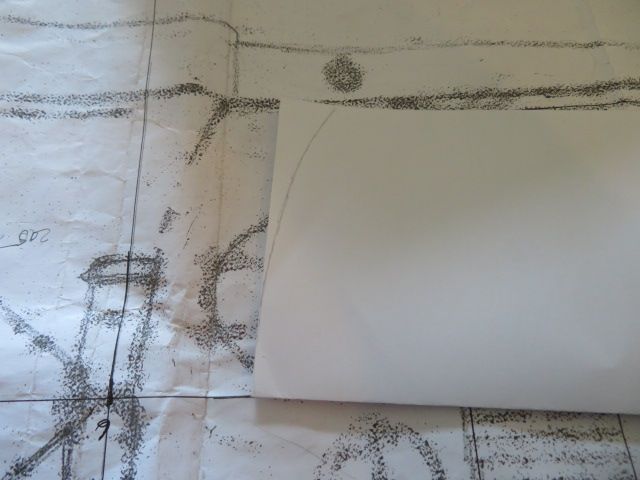
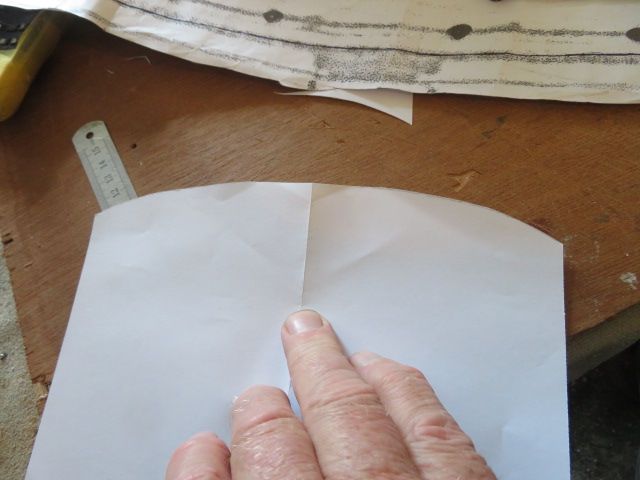
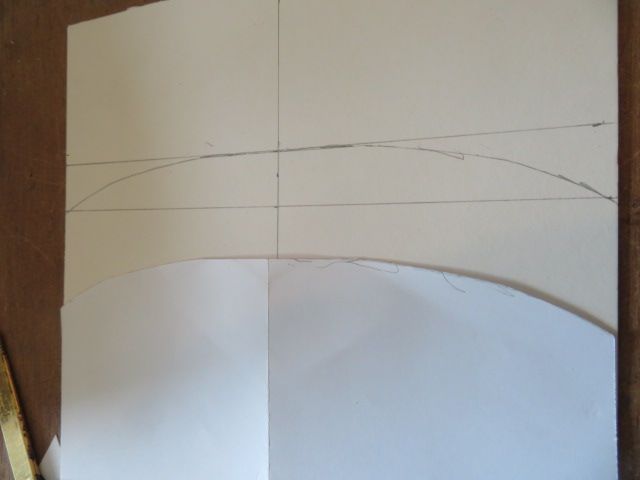
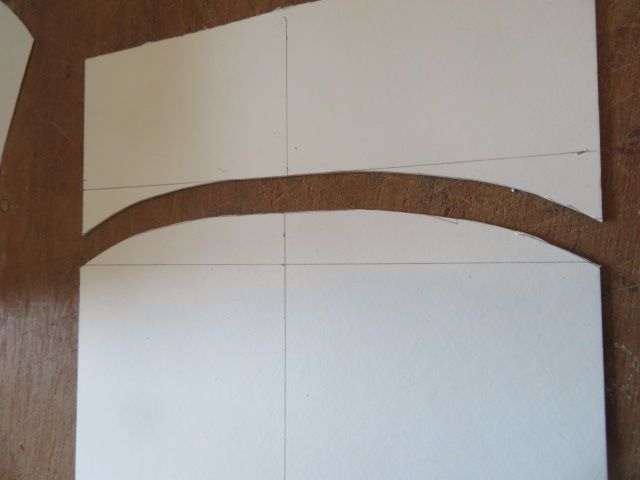
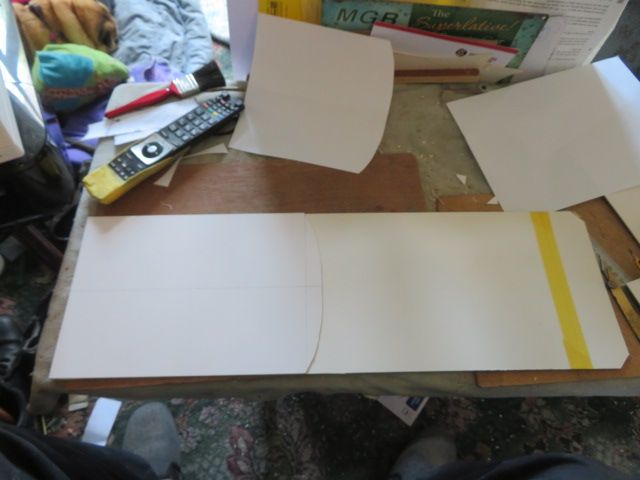
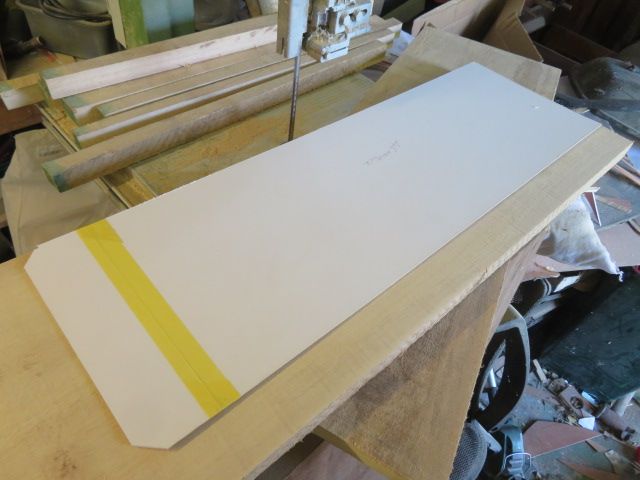
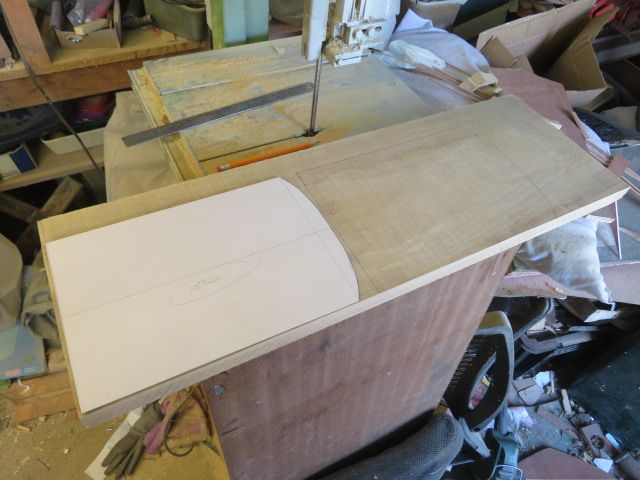
        I made the templates after carefully measuring the plans 3 times to make sure, from framing card [3mm thick], and to get the curve in the front of the cabin cockpit I used a sheet of paper, folded down the centre, marked on one side and cut , leaving a semetrical curve before transfering to the framing card and cutting out. these two pieces are ready for transfering to the obeche', which again will be built in layers, glued together.

        And now that the card is cut I can see that I will have an access of around 450 x 200mm approx hole ………more than I have had in a long while, whoopeee !!!

        img_3120.jpg

        img_3122.jpg

        img_3125.jpg

        img_3126.jpg

        img_3128.jpg

        #101561
        neil hp
        Participant
          @neilhp

          and down to work!

          It always makes life easy if you have the right tools to do the job properly, and my Electra Bekum German made band saw is probably my most tool in my workshop, giving countless hours of dutifull and faithful work without failure over the past 30 years…i cannot stress just how good this machine is…..sod your proxxon overpriced stuff only fit for light use……if you want excellent wear and tare by chunkr stuff……….pays in the end.

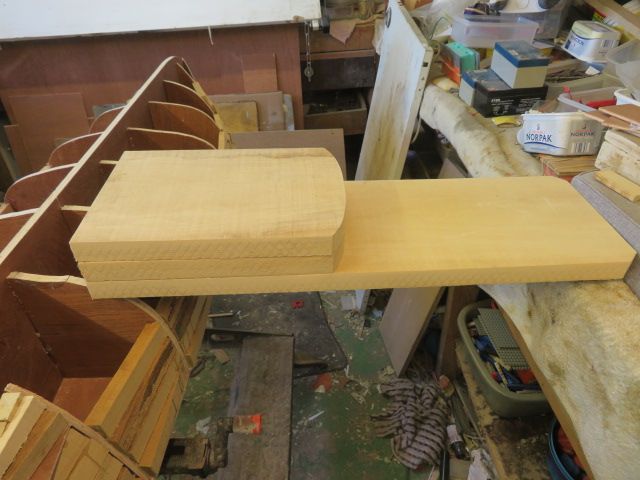
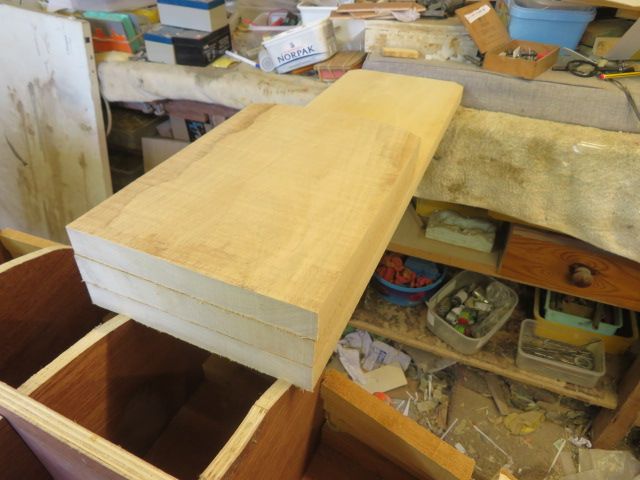
          So i sanded the surfaces of my obeche' planks lightly to get the rough sawn surface reasonably level and then marked out both the base and engine casing as one, and then marked out 3 cabin profiles and cut them using the band saw.

          Once cut, I lightly sanded the two surfaces of each piece for a decent clamped gluing surface.

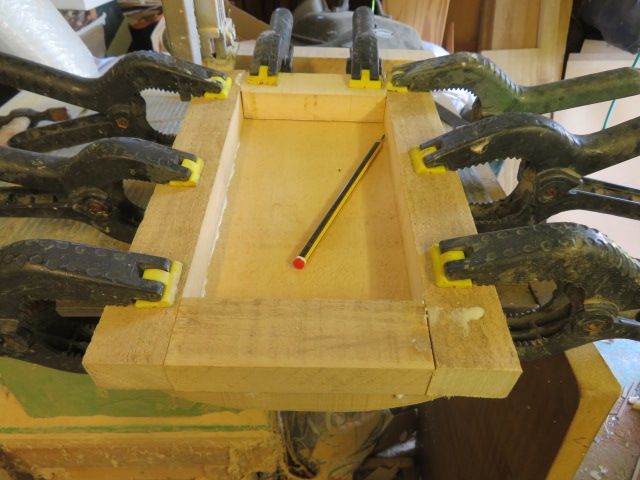
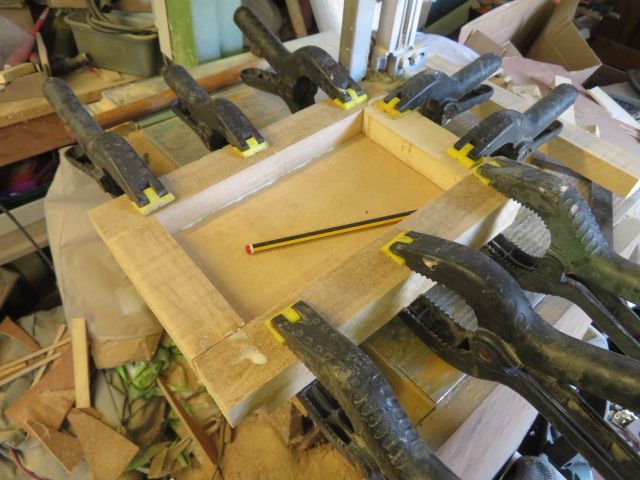
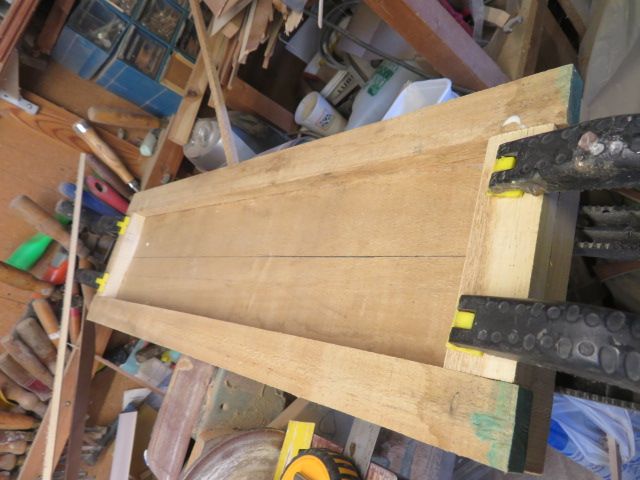
          Then using some "scrap" lengths [although no timber is ever scrap until it is too small for any conceivable use] I made a 40mm boarder around one layer of the cabin cut outs which will then be glued to the base piece.

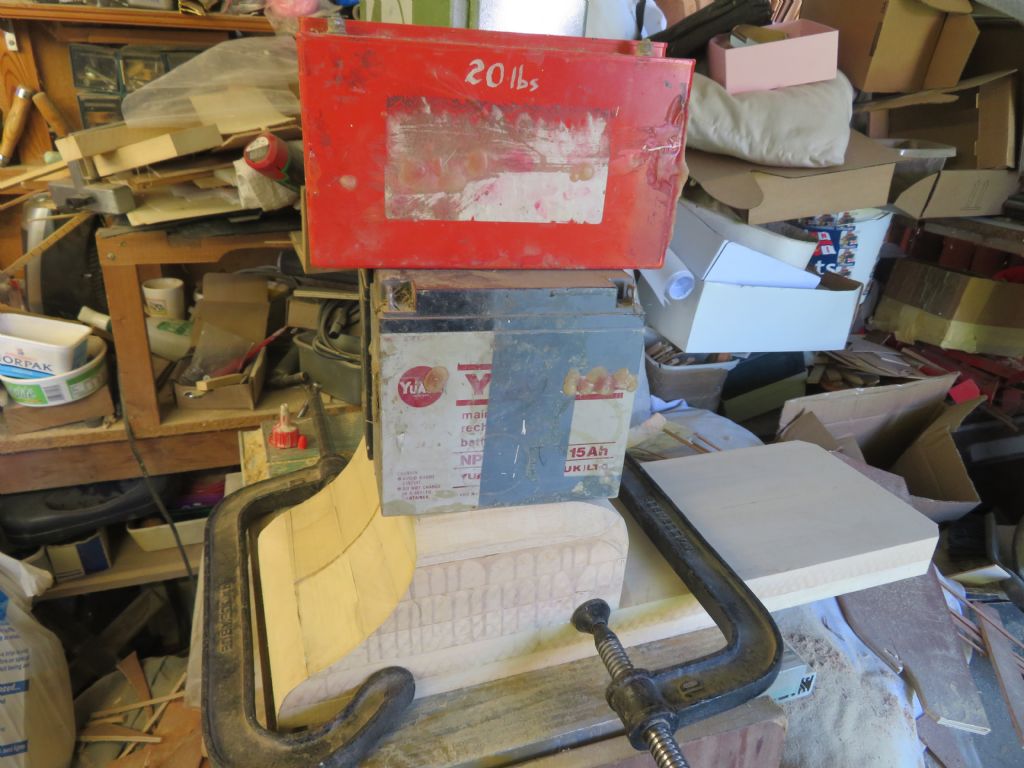
          Although it will save a small piece of timber, when glueing to the base, it won't slide as much, when glueing the top three tiers and the bottom to the base, as by that time I wont have cramps or clamps with a wide enough "gate" to hold it all, so will have to use batteries as weights to glue it together.

          img_3131.jpg

          img_3132.jpg

          img_3133.jpg

          img_3134.jpg

          img_3135.jpg

          img_3136.jpg

          #101575
          neil hp
          Participant
            @neilhp

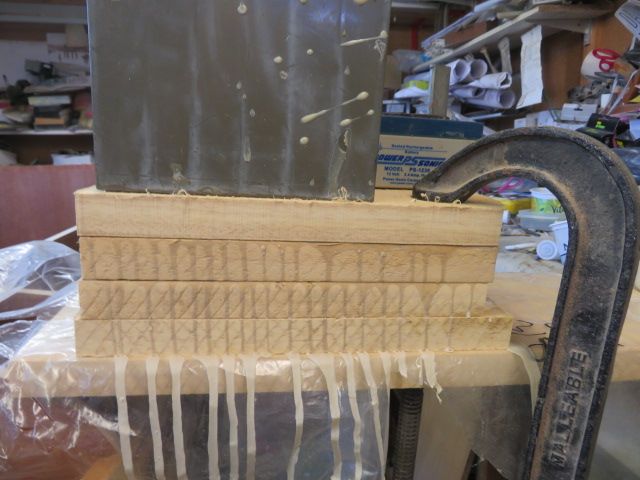
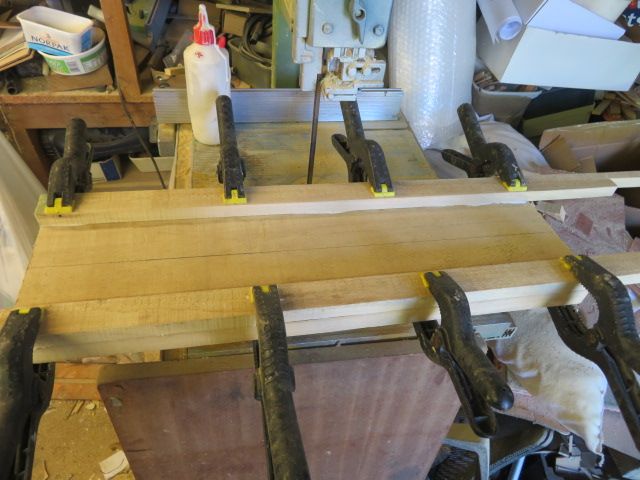
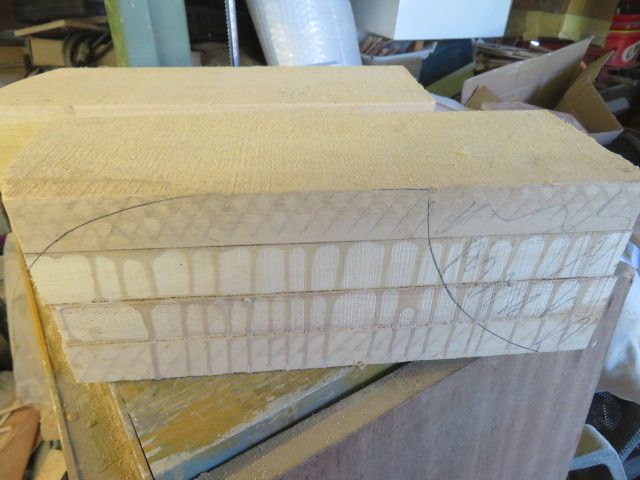
            A lot of pieces of obeche' board,

            A lot of glue,………..

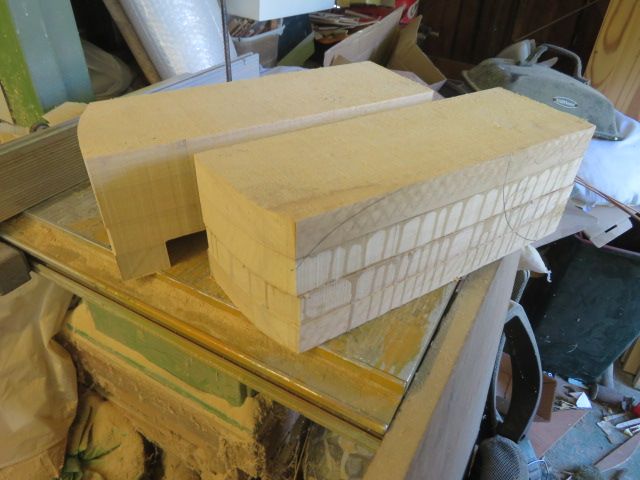
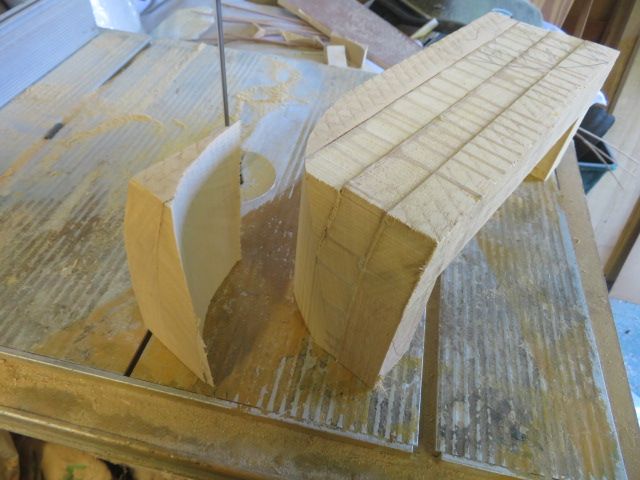
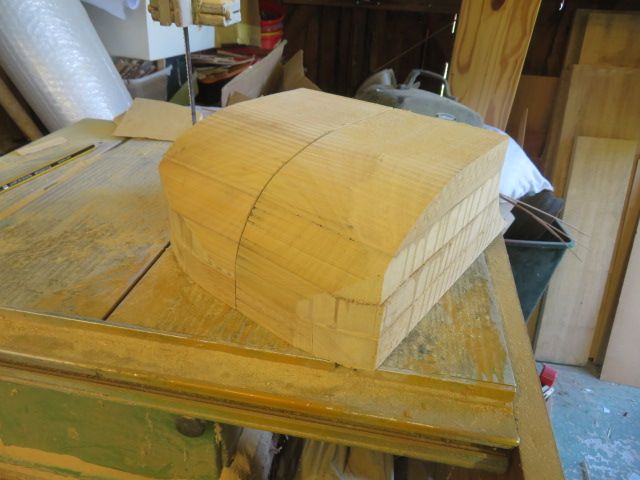
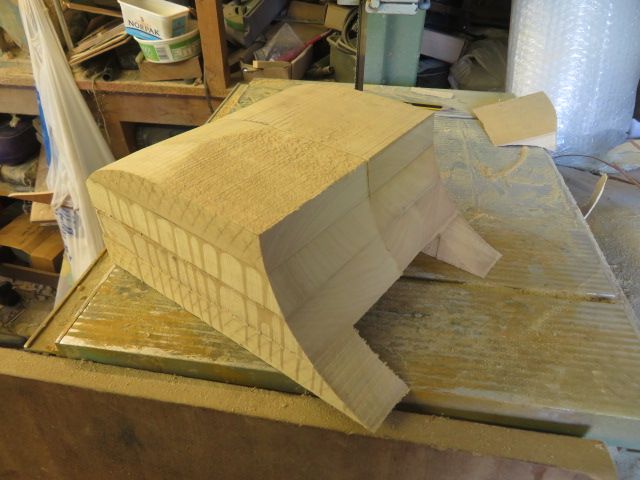
            And this is what I ended up with, the main cabin hood, and the base.

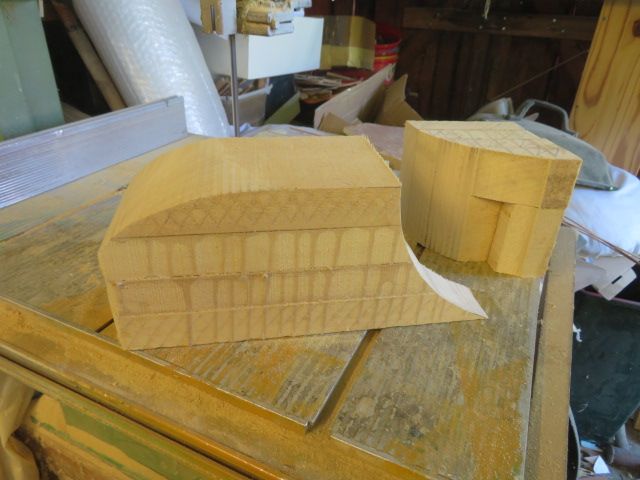
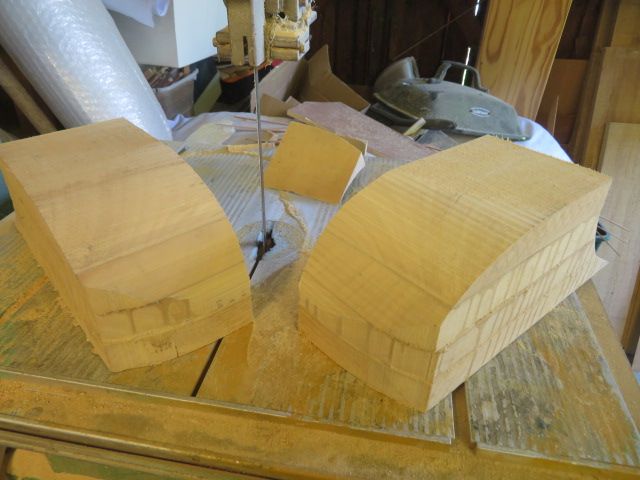
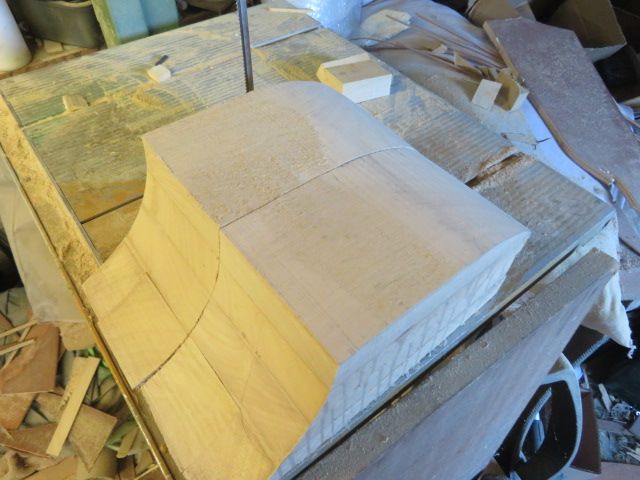
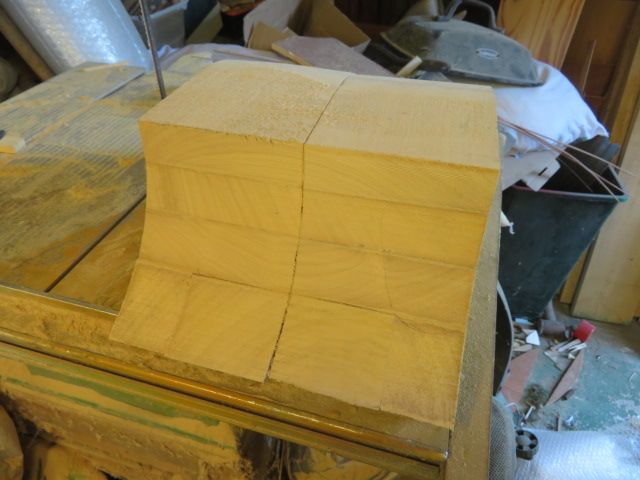
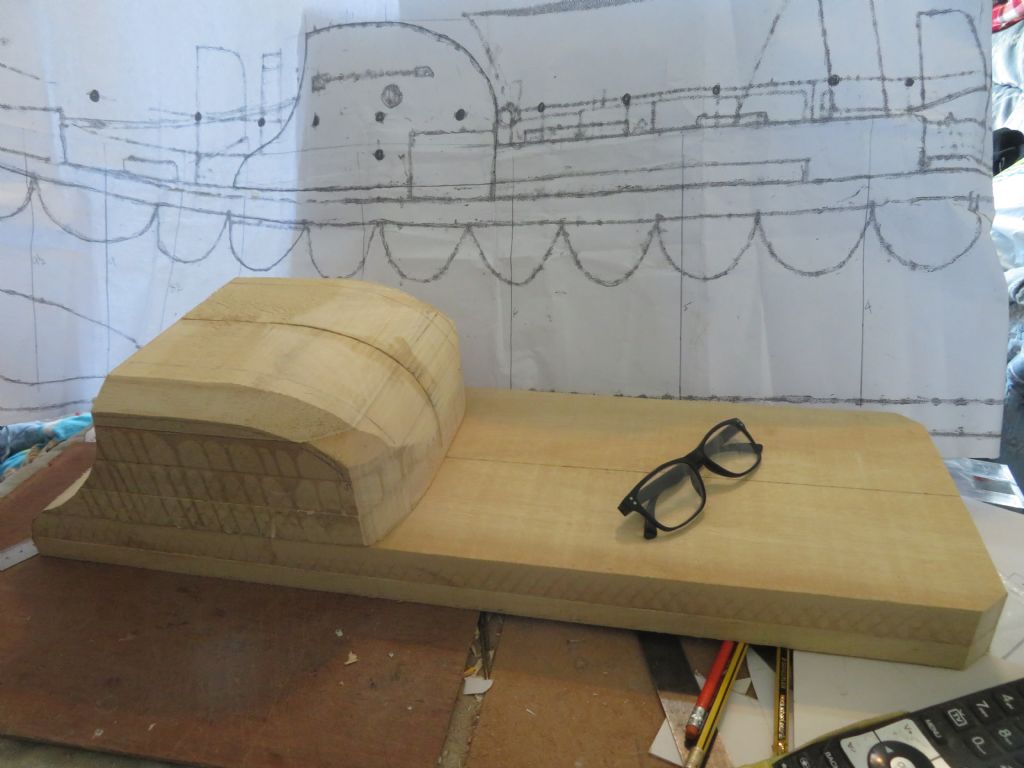
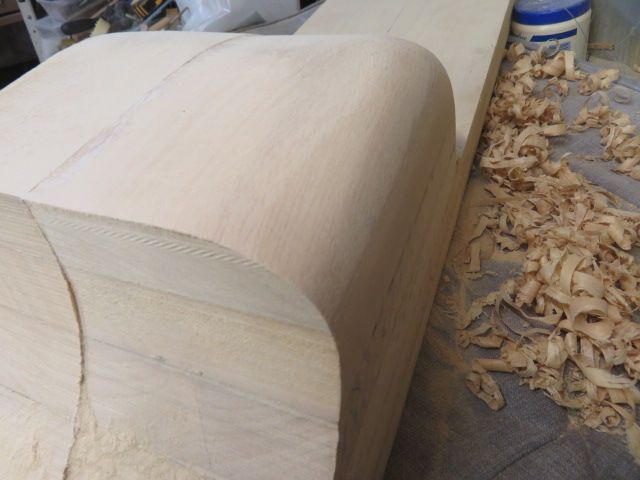
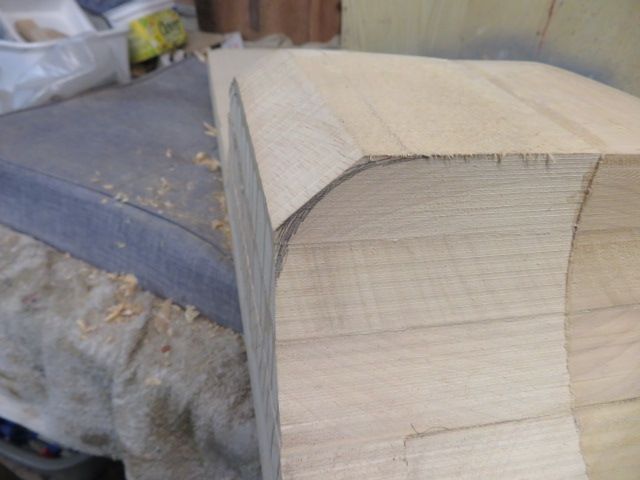
            And once I had cut the top in half length ways as the whole block wouldn't fit through the gate of the band saw which I used for cutting it, the curves were cut into the two parts of the cabin top using the template I had made from card.

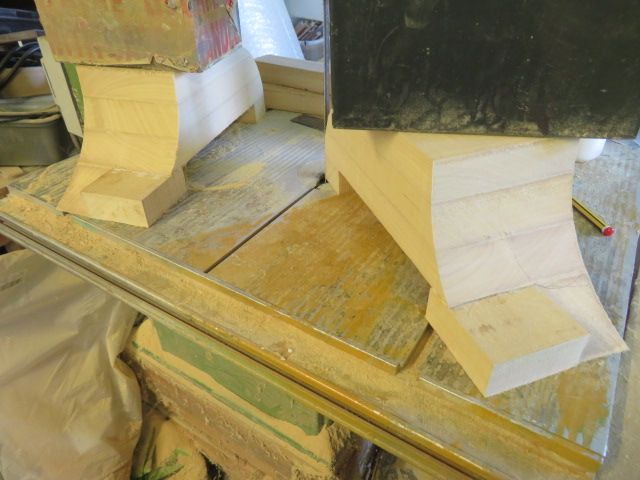
            I had miscalculated the back lower cross member, and this dropped out as I cut the sweeping curve……..so had to put two blocks back in, and these are now setting using aliphatic resin.

            img_3139.jpg

            img_3141.jpg

            img_3151.jpg

            img_3142.jpg

            img_3143.jpg

            img_3144.jpg

            img_3145.jpg

            img_3146.jpg

            img_3147.jpg

            img_3148.jpg

            img_3150.jpg

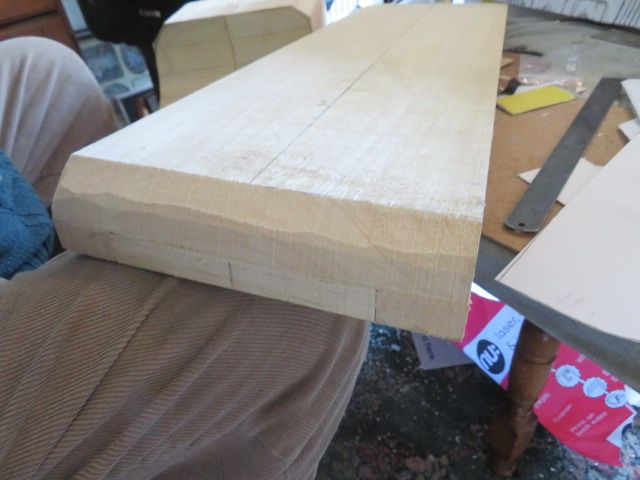
            and once the base 2 layers of the engine room casing have dried after gluing the second base layer of strips on to the solid board, that too will have to be cut length ways right down the centre so that i can cu the final part of the cabin's curve before glueing it all back together before shaping the cabin.

            img_3154.jpg

            img_3153.jpg

            img_3152.jpg

            #101576
            Richard Simpson
            Participant
              @richardsimpson88330

              I must admit Neil I've never seen such a method of hull construction. It looks to me like it is going to be as solid as a brick "Out House" by the time you will have it to shape.

              #101578
              Ray Wood 3
              Participant
                @raywood3

                Hi Richard,

                Neil is not making a boat hull, he's making a plug to take a mould from.

                Judging by the amount of timber he's using he must think it grows on trees

                Regards Ray

                #101580
                neil hp
                Participant
                  @neilhp
                  Posted by Richard Simpson on 08/08/2022 19:28:58:

                  I must admit Neil I've never seen such a method of hull construction. It looks to me like it is going to be as solid as a brick "Out House" by the time you will have it to shape.

                  put it this way, Richard, if i drop it it will bounce and not fall apart, or put my finger through a plank when i sand too vigourously, haha.

                  #101581
                  neil hp
                  Participant
                    @neilhp

                    good one Ray………at the price i paid for it, a snip……….the plug will last forever, lol.

                    #101582
                    neil hp
                    Participant
                      @neilhp

                      As the old song says…….."the first cut is the Deapest."

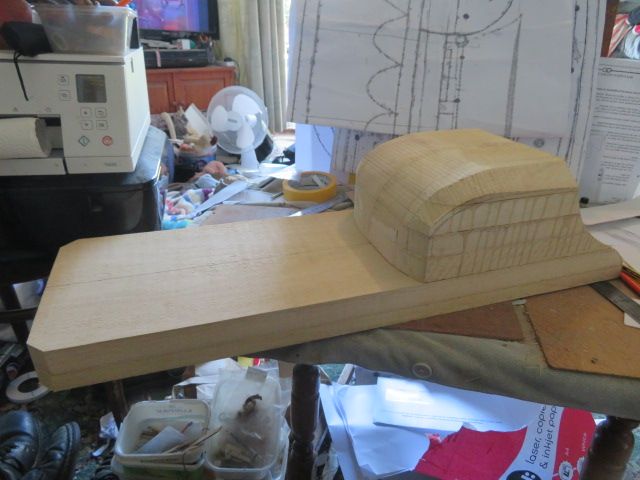
                      And so I made those first cuts this morning on both the cabin and the base engine casing.

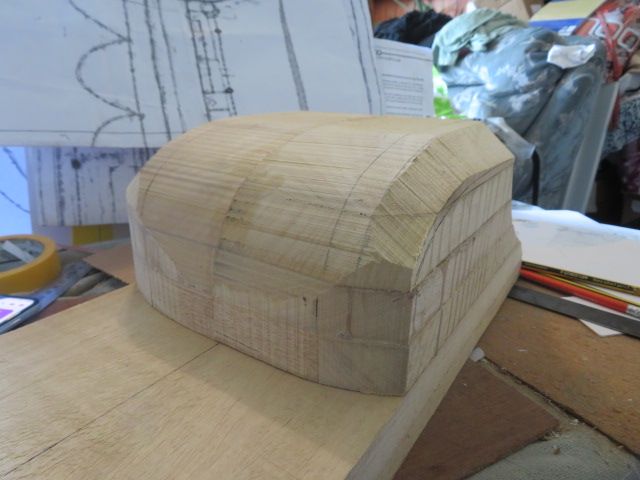
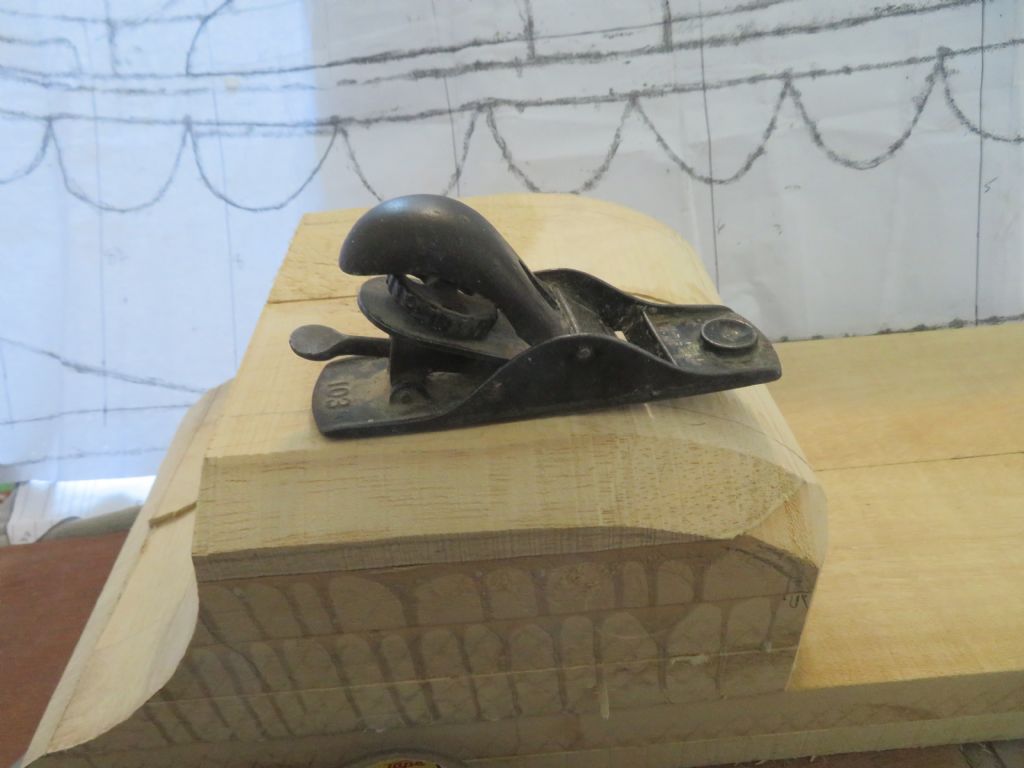
                      I shall now glue the cabin to the engine casing and once set, tomorrow I shall start shaping with my small palm plane and sander.

                      img_3154.jpg

                      img_3162.jpg

                      img_3165.jpg

                      img_3166.jpg

                      img_3168.jpg

                      img_3169.jpg

                      #101583
                      neil hp
                      Participant
                        @neilhp

                        Richard, its a form of bread and butter construction,the only difference being thather than having the set lines for cutting the layers to produce he hull withour using the cross sections,

                        this method is where you only have the cross section frames, and no set lines.

                        takes longer but the result is the same in the end.

                        #101584
                        neil hp
                        Participant
                          @neilhp

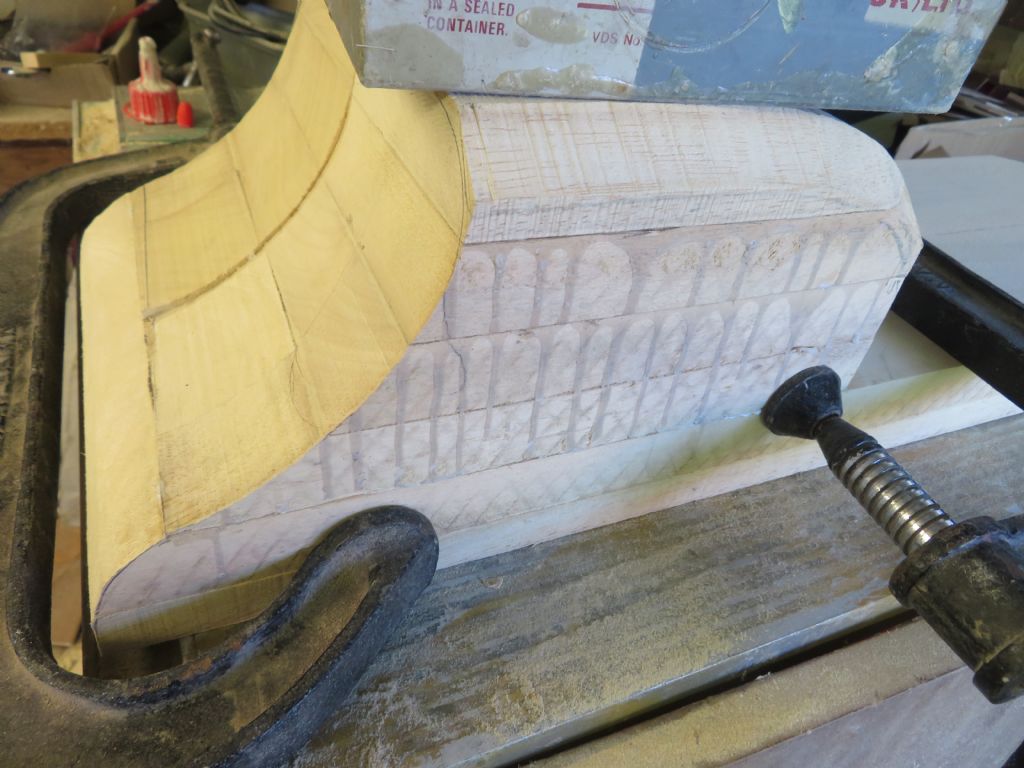
                          And whilst the 2 heavy G cramps are stopping the cabin from slipping sideways or back and forwards whilst glewing the 60lbs [27 kilos] of old batteries are maintaining a downward force to glue the cabin and engine casing together, using aliphatic resin wood glue.

                          img_3170.jpg

                          img_3171.jpg

                          #101588
                          neil hp
                          Participant
                            @neilhp

                            ten minutes planing, and thn 5 minutes sanding with a delta sander and 40 grade grit and one side of the top of the cabin was looking a little more like a cabin.

                            much more work to do but those 15 minutes were very constructive and thought cultivating.

                            More tomorrow.

                            img_3177.jpg

                            img_3178.jpg

                            img_3179.jpg

                            #101589
                            neil hp
                            Participant
                              @neilhp

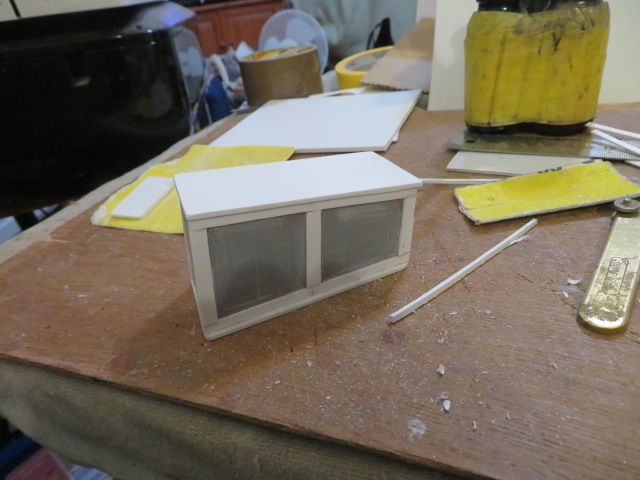
                              Was looking at the photos that I was sent by Martin Kinghoward at certain parts of the plans that I didn't understand, and found one of the parts was the steering box at the stern.

                              It was the steering gear box through which the steering shaft to the steering wheel was attached.

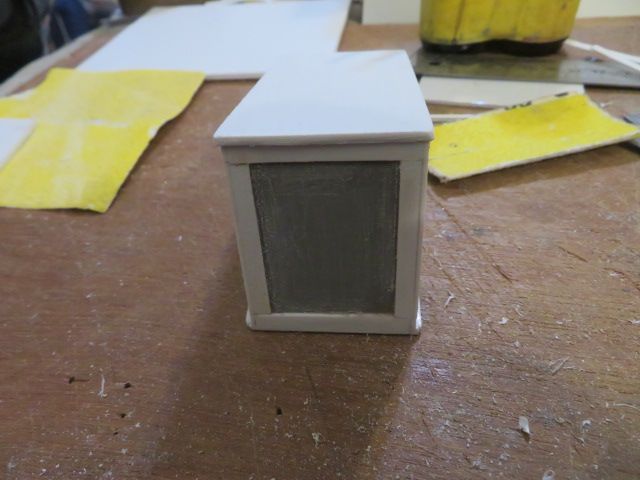
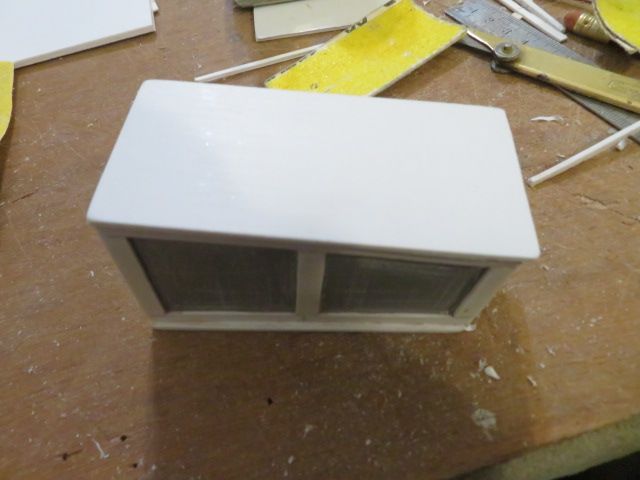
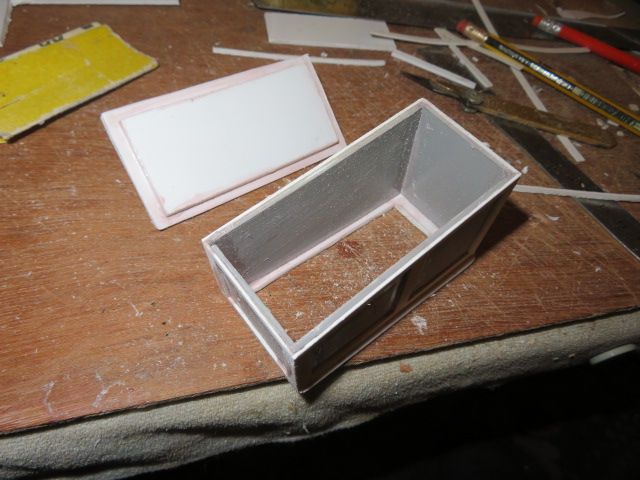
                              And so I fabricated it from 2mm and 1.5mm plasticard, with a lift off lid, and if all goes to plan i will use it to house the steering gear servo for the rudder.

                              But this has to be sorted at a later date, as at the moment i'm thinking on my feet, lol.

                              img_3180.jpg

                              img_3181.jpg

                              img_3182.jpg

                              img_3184.jpg

                              #101595
                              neil hp
                              Participant
                                @neilhp

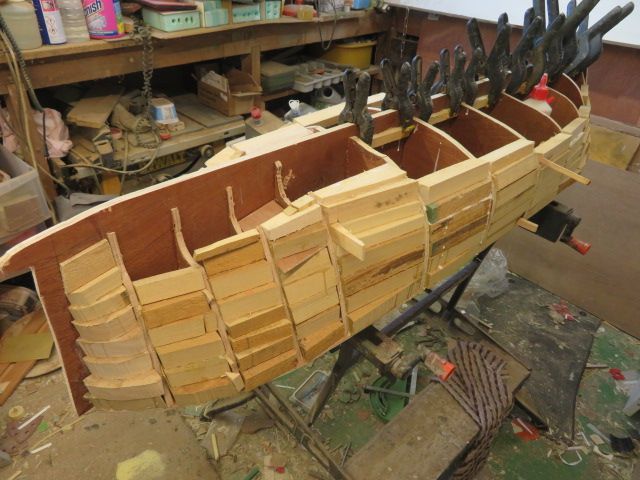
                                Done some more blocking up between frames this afternoon, and have come to the stage whereby if I put any more blocks on them, the first ones will not set because the upper ones dislodge them when I am tamping them in to place…….so 4 blocks maximum.

                                I am also getting the stage where the bilges are becoming to run flat , and as such I'll be cutting some wider and thinner plates to fit into the spaces in one piece.

                                Therefore a support strip needed to be added to the keelson, and these are also now glued in place, and shall leave it now untill tomorrow when I hope to finish blocking in the hull totally.

                                My back is now killing me constantly bending over and straightening up, so will also give that a rest before I go out again tonight to shape the port side of the cabin top.

                                img_3186.jpg

                                img_3187.jpg

                                img_3188.jpg

                                img_3189.jpg

                                #101596
                                neil hp
                                Participant
                                  @neilhp

                                  I have the last four frames, [two each side] at the bow to fill, and then I can concentrate on capping the tops of each frame with some 8mm thick planks from the keel to the blocks as shown on one mid section set of frames.

                                  I also put a runner strip for resting the chequered motor factor gauze into the propeller shaft tunnels, ready for skimming with body filler.

                                  But for now, I'll retire to my TV seat and let the glue set.

                                  img_3190.jpg

                                  img_3192.jpg

                                  img_3191.jpg

                                  #101599
                                  gecon
                                  Participant
                                    @gecon

                                    I'm amazed by what you dare to embark upon Neil! That's a real HD project. You're a brave manyes

                                    George

                                    #101600
                                    gecon
                                    Participant
                                      @gecon

                                      I'm amazed by what you dare to embark upon Neil! That's a real HD project. You're a brave manyes

                                      George

                                      #101608
                                      neil hp
                                      Participant
                                        @neilhp

                                        It will all come out in the end George, but I feel more confidant in this method than plank on frame.

                                        #101614
                                        neil hp
                                        Participant
                                          @neilhp

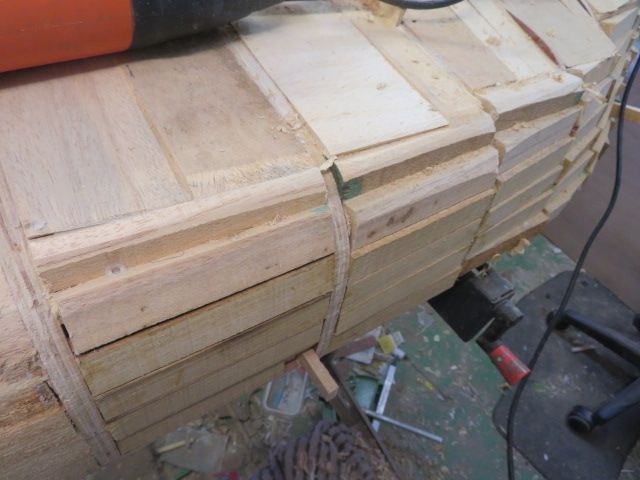
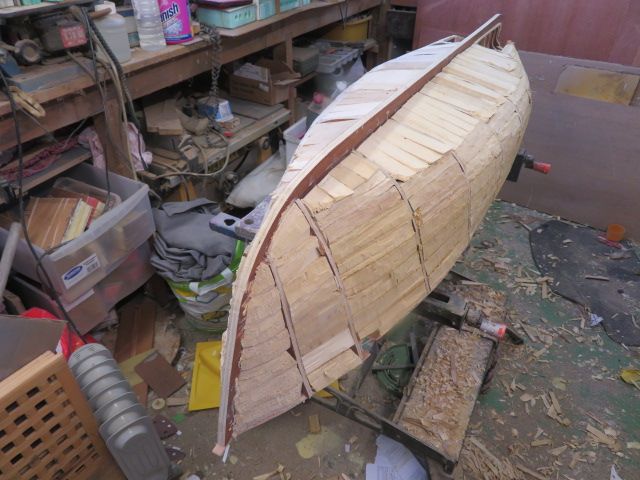
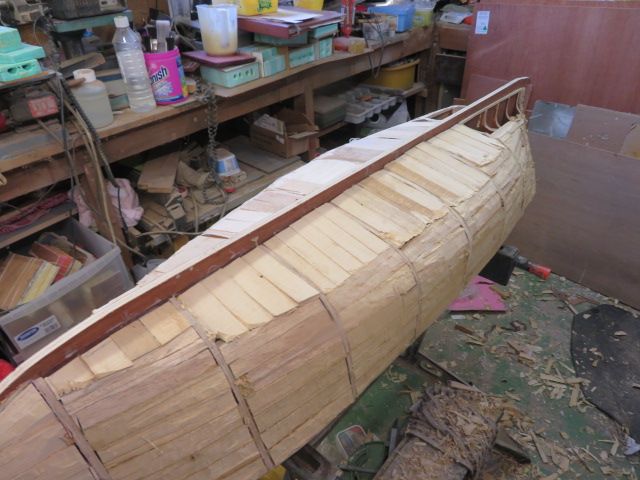
                                          slowly, Slowly, SLOWLY,…….. and quite monotonously, the frames have all been filled with blocks and strips of obeche'………

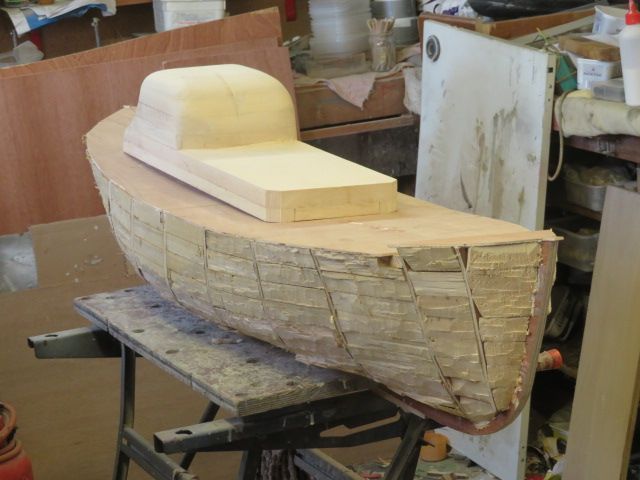
                                          That is, ALL but the holes that would form the propeller shaft tunnels, and these will be formed and shaped once the rest of the hull has been planed, shaped and sanded to a nice smooth finish…but that's for later……….once the glue has set overnight in a very hot workshop, tomorrow i shall go to our local car boot sale and see if i can pick up a decnt smoothing plane to do some damage to the blocks………….but for now, i shall have a sit down, and contemplate there to start on it.

                                          Its nice though to look at it, and see what sort of hull it is going to turn out like.

                                          ohhhh happy days!!!

                                          img_3191.jpg

                                          img_3192.jpg

                                          img_3193.jpg

                                          img_3198.jpg

                                          img_3201.jpg

                                          img_3195.jpg

                                          img_3196.jpg


                                          img_3200.jpg

                                          Edited By neil howard-pritchard on 12/08/2022 15:57:02

                                          #101615
                                          neil hp
                                          Participant
                                            @neilhp

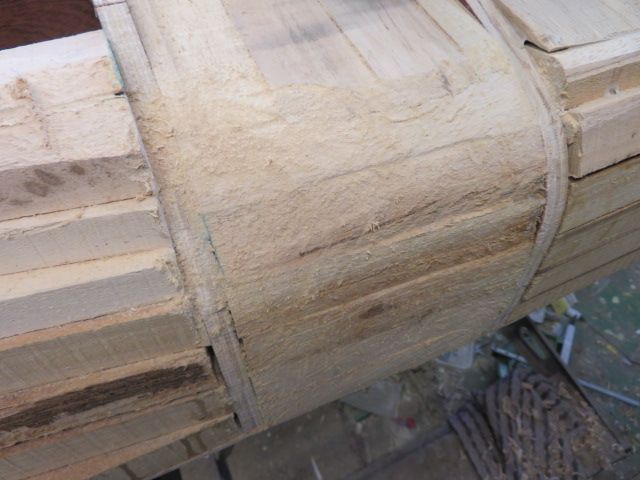
                                            15 minutes with a block plane, an aching arm, and a blister on my thumb……..and so I started to think of a better way.

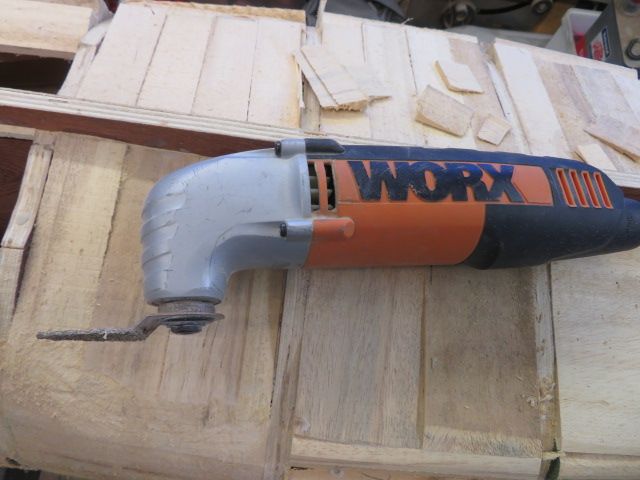
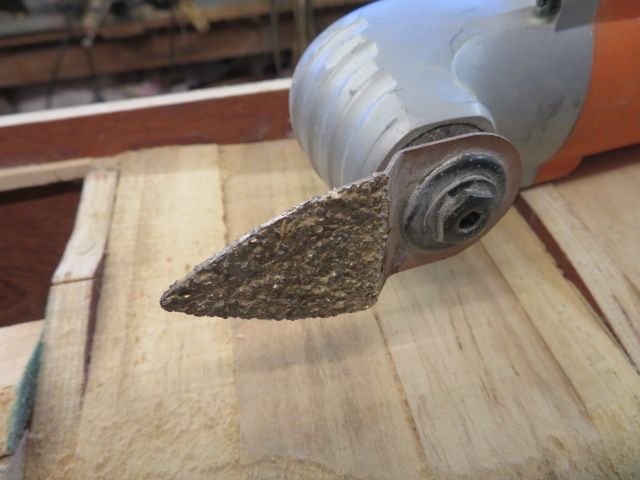
                                            And so! I took out my WORX sonic sander with one of the diamond encrusted blades, and the full panel and the parts astern of the panel took me just 5 minutes to sand down………..

                                            And so, if the weather is as nice tomorrow as it has been the last few days, I will transfer the plug to the garden and spend the day sanding it down to a state where i can then use a delta sander with 40 and then 60/80, 120 grade grits to get a smoother finish before skimming with Dolphin Glaze surface filler [as recommended with our resident car body restorer and sprayer] before sanding again.

                                            img_3205.jpg

                                            img_3204.jpg

                                            img_3207.jpg

                                            img_3208.jpg

                                            img_3209.jpg

                                            img_3206.jpg

                                            #101628
                                            neil hp
                                            Participant
                                              @neilhp

                                              Whilst working in the garden on my Princess Mary of Padstow with the sunshine on my shoulder, [reminds me of my favourite song] I was visited by the dead.

                                              I openly admit that I believe in ghosts and the spirit world, and I lived in a written about haunted house in Fleetwood, and a pub near Maidenhead……….both with history to them!

                                              I was taught woodwork by a GREAT man. He was called "taffy" Evans, a Welsh man from the Rhondda Valley and I think I had more respect for him than any teacher I had ever had or ever came across in my teaching career.

                                              And I always took notice of what he said, until today.

                                              A little bit about the man. He was in the RAF from college graduate and flew Spitfires and hurricanes during WW2, earning 12 kills and 3 possibles, but seldom talked about his background. I learned this when studying at A level,

                                              He was strict, but fair, and unlike almost every other teacher in that school who took great delight in wheelding a cane like a cowboy his colt 45, I never in my 7 years at that school saw him need to cane a lad, even the roughest of kids respected him. But I would have got 6 of the best had he seen me doing what I had done today.

                                              His pet hate was anyone using a hammer on a chisel, rather than a wooden mallet.

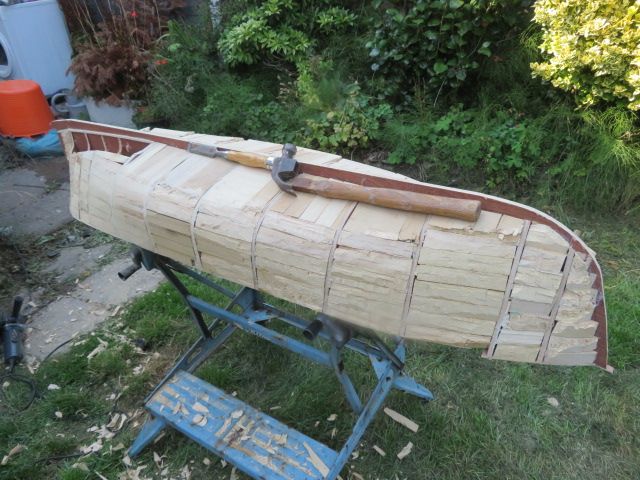
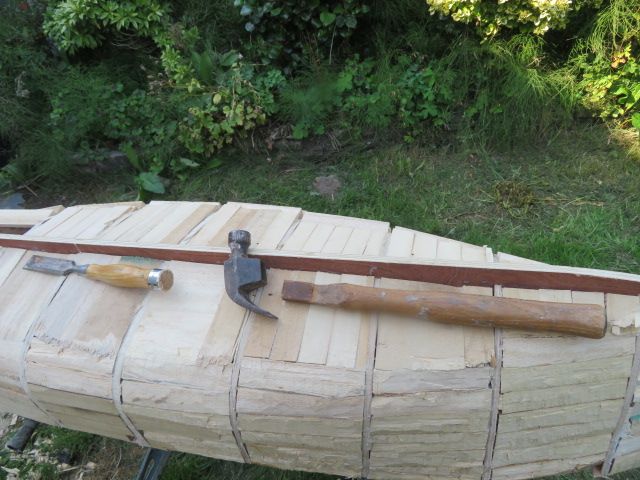
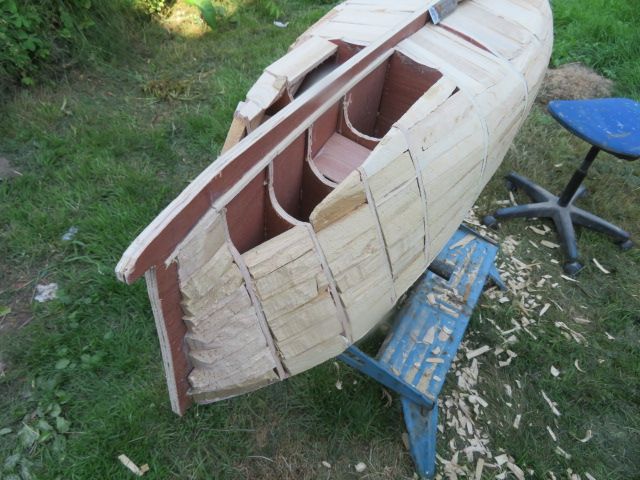
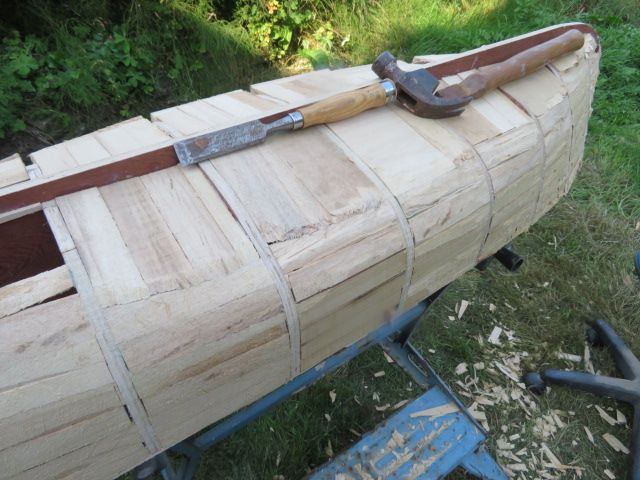
                                              Today I found that sanding the boat level with all the blocks was going to take a lifetime, it is so big, and after an hour of getting little where fast, decided that I would dig out one of my 1" mortice chisels and a mallet………only problem was that I couldn't find a mallet, and so, much against my training I started using a claw hammer with my mortice chisel.

                                              All was fine for about 20 minutes without his prophesy of broken thumbs coming true, when a hammer is used…..when sudenly overhead flew a Spitfire from the Memorial flight that was taking part in the Blackpool airshow this weekend!. I looked up to see it and yes………..I clouted my bloody thumb and hurt it. the head flew off the hammer and I dropped the chissel on my bloody foot, luckily without further injury.

                                              I looked up, and as sure as is gospel, I am sure the wings tipped once in recognition!
                                              And I'm bloody sure that "Taffy" Evens spirit was in that aeroplane telling me I was an ass h***
                                              Anyway, I went into the workshop and pulled out a piece of hard wood to use as a temporary mallet with no further injuries.

                                              The Spitfire came around a second time and I pictured its "dot" in the sky as a mark of respect, lol….the old sod finally told me off. hahaa

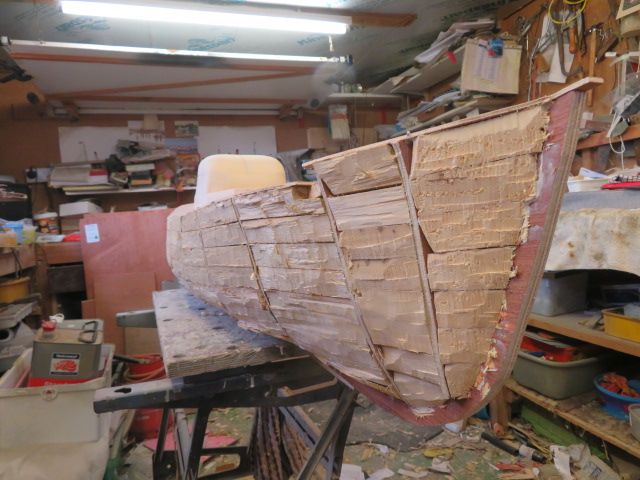
                                              But I did get a whole side of the boat done to rough shaping with the sanders next, before filling and skimming once the other side is done hopefully tomorrow.
                                              img_3220.jpg

                                              img_3221.jpg

                                              img_3222.jpg

                                              img_3223.jpg

                                              img_3224.jpg

                                              #101629
                                              Richard Simpson
                                              Participant
                                                @richardsimpson88330

                                                Lovely story. I did woodwork at Grammar School to 'O' Level and thoroughly enjoyed every minute of it. If anyone had dared to use a hammer on a chisel there would have been hell to pay for it! Good days long gone.
                                                Schools now are terrified of all the little darlings hurting themselves with nasty sharp things so I think woodwork has just about died a death. We had a woodwork shop, a metalwork shop, with more horrible sharp things like hacksaws and a combined workshop that actually had a working forge where we learned how to form bits of red hot metal round anvils and hammer them into various shapes. I loved every second of it. Can you imagine using a forge in a school nowadays? Teachers would have a fit.

                                                #101630
                                                neil hp
                                                Participant
                                                  @neilhp

                                                  I gave up teaching when craft design and technology became de rigueur…….wasn't for me!

                                                  kids began to loose the know how and knowledge of how to use tools safely and efficiently, much to the mamby pamby methods as laid down in the "Baker" years, and followed on when Gove became education minister….and the curriculum went to pot for old fashioned teacher like myself who were brought up and gone through the years of sound knowledge and training.

                                                  You cannot [ i believe] to teach a kid how to design something if their thought waves are not geared up to thinking outside the box……..designers are born, not taught…………. to design.


                                                  Edited By neil howard-pritchard on 15/08/2022 00:44:30

                                                  #101632
                                                  Tim Cooper
                                                  Participant
                                                    @timcooper90034

                                                    Going to a Technical Grammar School in the 60's, not sure quite what they were for, as we were on the same campus as the Grammar School, I was taught Woodwork. Metalwork,and Tech Drawing.

                                                    Only passed the Tech Drawing but have made use of the skills ever since, especially useful as we had little money when first married, so have made bits for the house and wooden toys for kids and Grandkids. Not forgetting the model railway, Warhammer figures, model boats. Lots of DIY over the years.

                                                    Unfortunately I cant see my grandkids having the same sort of life skills as they grow up, they will be absolutely brilliant at sorting out mobile phone or computer problems.

                                                    Guess the world has changed.

                                                    Tim

                                                    Edited By Tim Cooper on 15/08/2022 09:11:06

                                                    #101635
                                                    neil hp
                                                    Participant
                                                      @neilhp

                                                      Halfway through the month, and halfway there!!!.

                                                      I sharpenned my chisels on an oil stone ready for my makeshift mallet…….a lump of australian red sycamore, and got down to work!

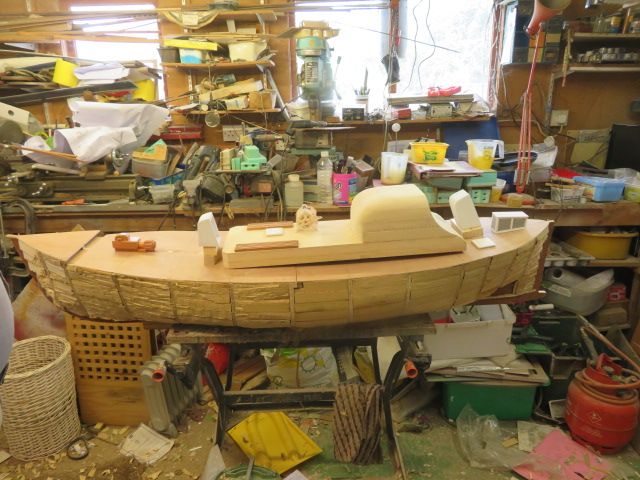
                                                      The blocks have now been chipped, chiselled and sawn to get the basic shape, and from tomorrow it will be the chance of the sanders to do the next part………

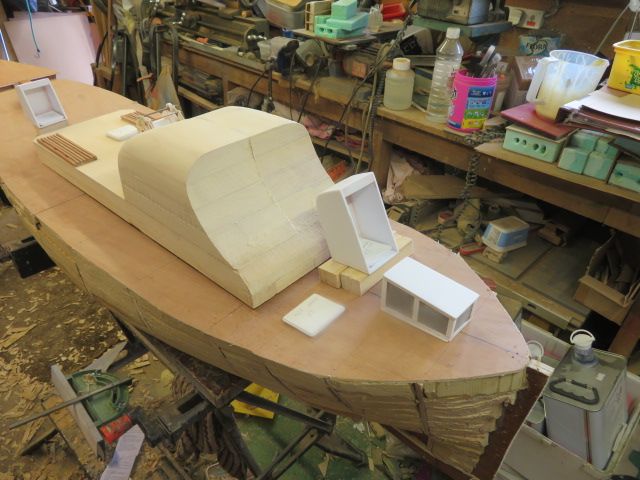
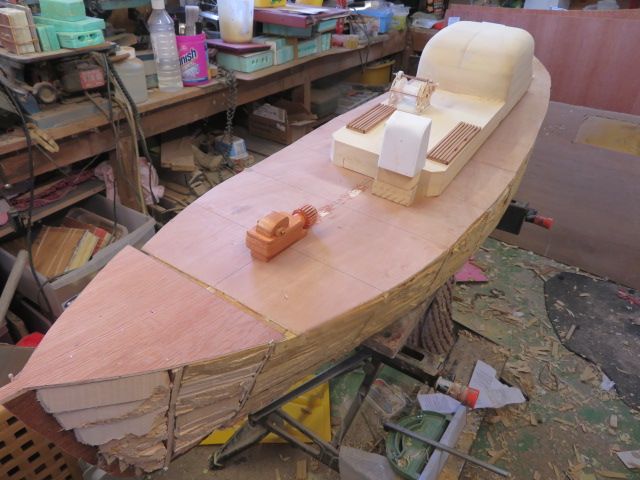
                                                      smoothing all down, filling the bigger holes with p38, before skimming the whole hull with Dolphin glaze, and then sanding to a uniform finish and taking it westward for a certain wizzard to do his bit before I start waxing pollishing and getting ready for moulding. 15 days should be long enough to do that job.

                                                      I must say though, that even in its rough state, the hull looks pretty damn magnificent, and i just thought I'd have a play and put a few bits on the deck for the fun of it.

                                                      Now getting more excited than I was.

                                                      img_3230.jpg

                                                      img_3231.jpg

                                                      img_3232.jpg

                                                      img_3242.jpg

                                                      img_3241.jpg

                                                      img_3238.jpg

                                                      img_3234.jpg

                                                      img_3235.jpg

                                                    Viewing 25 posts - 76 through 100 (of 648 total)
                                                    • Please log in to reply to this topic. Registering is free and easy using the links on the menu at the top of this page.

                                                    Code of conduct | Forum Help/FAQs

                                                    Advert

                                                    Latest Replies

                                                    Home Forums Scratch build Topics

                                                    Viewing 25 topics - 1 through 25 (of 25 total)
                                                    Viewing 25 topics - 1 through 25 (of 25 total)

                                                    View full reply list.

                                                    Advert

                                                    Newsletter Sign-up