Fairey Huntress 23 Long Cabin Version

Advert

Fairey Huntress 23 Long Cabin Version

Home Forums Build Blogs Fairey Huntress 23 Long Cabin Version

Viewing 25 posts - 126 through 150 (of 217 total)
  • Author
    Posts
  • #99440
    Derek Bradley
    Participant
      @derekbradley32270

      Chris,

      Forgive me if you have seen this but, among others, there are some terrific shots of 1:1 scale Faireys racing –

      Derek.

      Advert
      #99451
      Chris Fellows
      Participant
        @chrisfellows72943

        Yes, I have Derek but always worth watching again and again.

        Keep thinking about finishing my Huntsman 28 as a race boat.

        Chris

        Edited By Chris Fellows on 09/02/2022 20:04:07

        #99452
        Chris Fellows
        Participant
          @chrisfellows72943

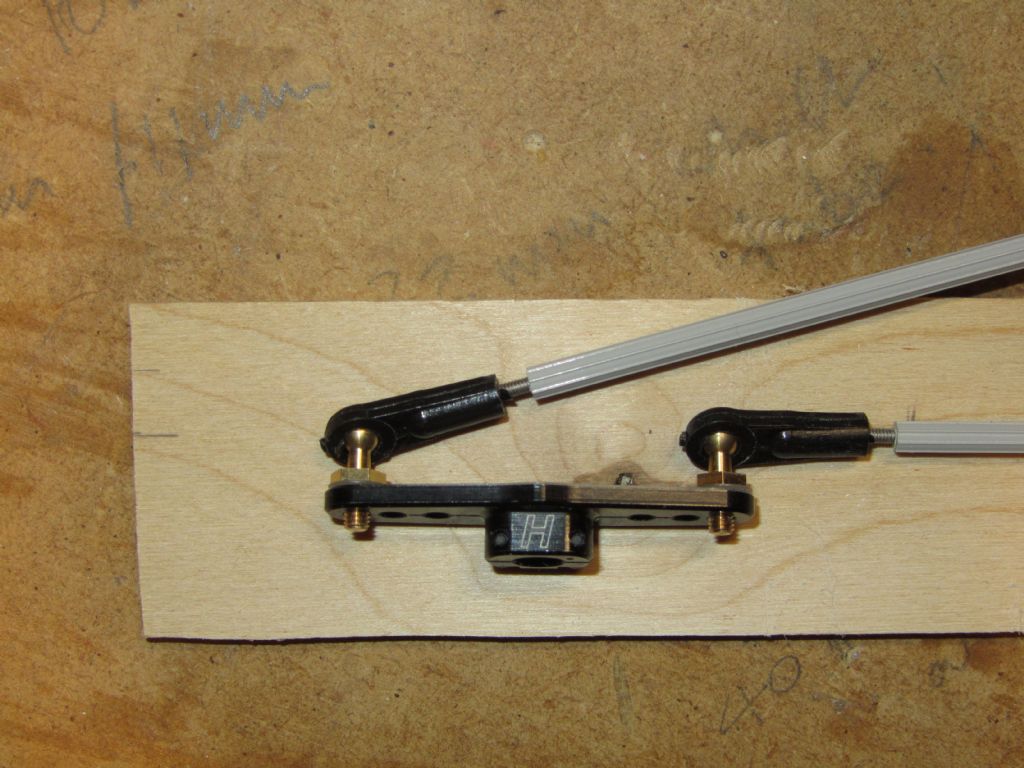
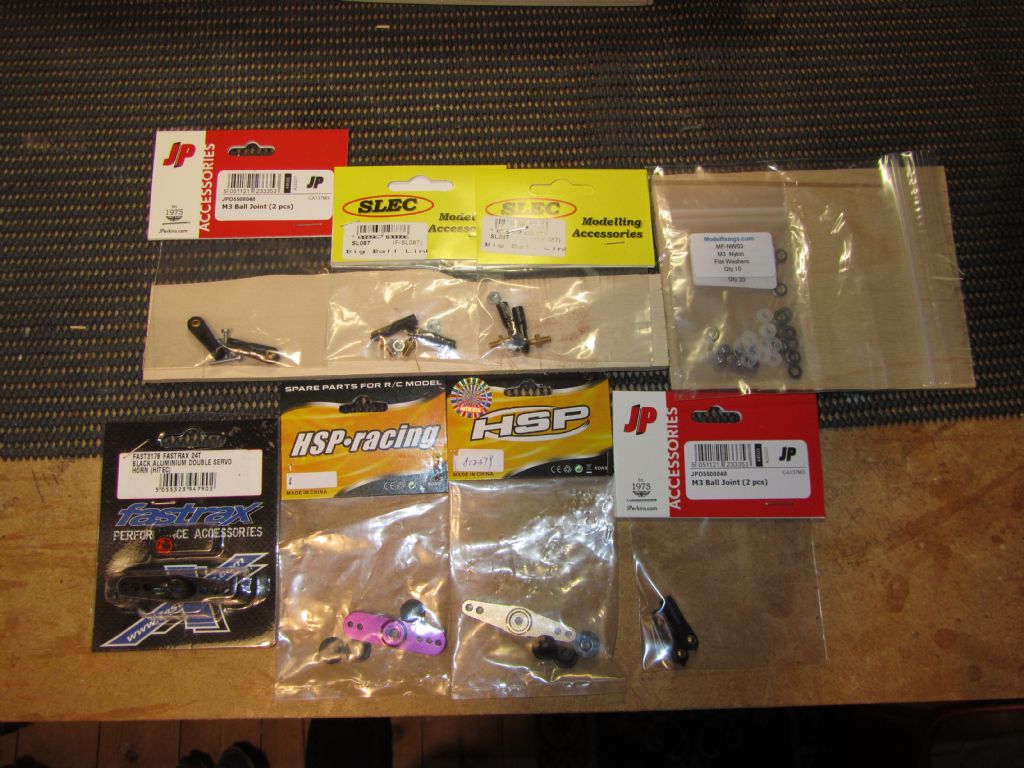
          As mentioned in my last but one post I needed a bigger servo horn and because of the size it needed to be in alloy. It was a bit frustrating trying to find what I wanted which involved much browsing on Ebay and numerous suppliers, not helped by measurements not being given, even on manufacturers sites. Why is this as I consider it pretty much essential when buying aftermarket parts? Had it previously when buying motor mounts when the centres of the motor mounting holes weren't given – pretty basic really!

          Anyway I found a couple of garish anodised ones on Ebay (one gold and one purple) where the size was given but really liked the look of the Fastrax ones in a much more acceptable black and looked to be well made. I know it's only a servo horn but it’s nice to do it properly! Ordered the garish ones and posted a question on a suppliers site about the size of the Fastrax one but they were slow in answering and shadow stock so I ordered one from elsewhere. Also ordered some ball-end connecters, nut and washers, partly for the build and partly for others and the spares box.

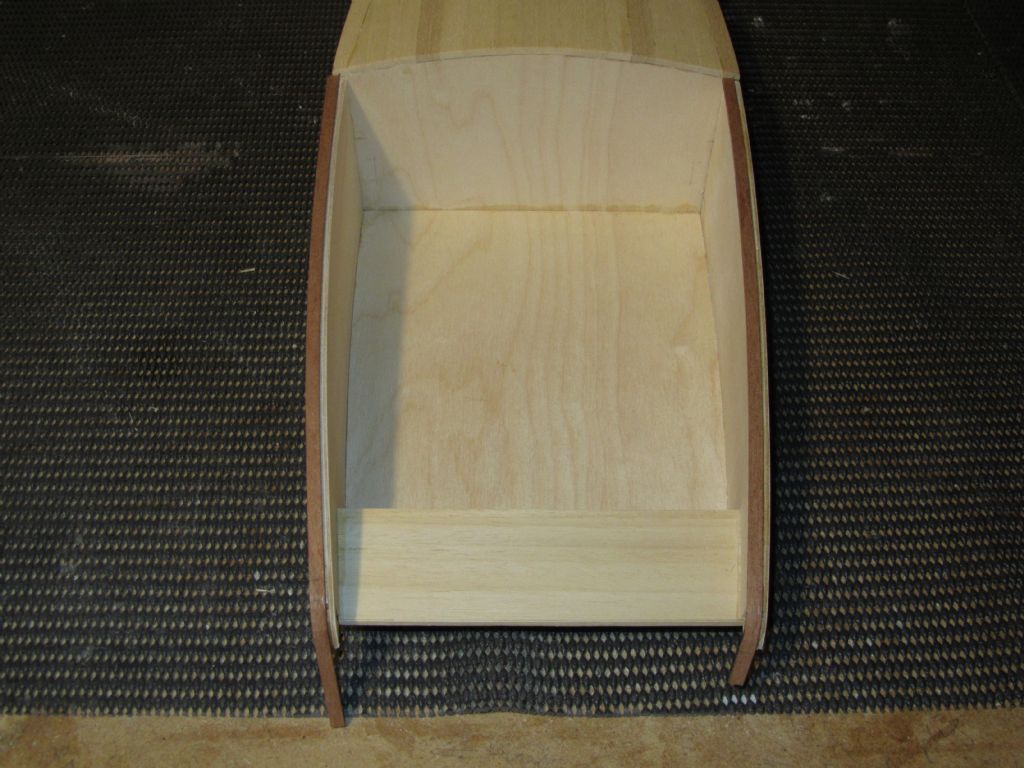
          In the meantime I returned to the superstructure and started fitting the mahogany cappings to the coamings. I did have some the right width but it was a bit thick and would have been almost impossible to bend laterally to suit the curve of the cockpit and apply the tight bend where the coamings meet the deck, even with steaming and/or saw cuts. So I’m doing it in two pieces per side with one done so far.

          The postman then arrived with the bits ordered, goody. The Fastrax horn is 40mm overall, so just what I wanted. I shall order another one for the Swordsman as they enable the use of stronger connecters and nicer ones! The supplier also answered my question on the dimensions of the horn as well today!

          Chris
          servo 1.jpg

          superstructure35.jpg

          Edited By Chris Fellows on 09/02/2022 21:38:09

          #99453
          Derek Bradley
          Participant
            @derekbradley32270

            Some useful information you've put out there, Chris. I like the look of the SLEC ball connectors.

            Something else I've noticed in one of your previous posts is that you are using some slightly larger sliding clamps (the ones that are rather like miniature sash clamps) and I wondered where you got them from. I have got several of the 'regular' ones which are about 8" end to end. Some of them have never worked properly since the day I got them – they do not clamp up tight even though I have tried roughening the shaft without it improving things.

            Derek.

            #99458
            Chris Fellows
            Participant
              @chrisfellows72943

              Hi Derek

              Yes, I like the ball connecters as well but probably won't use them on this build as they may be too high. Will more than likely use them on the Swordsman though.

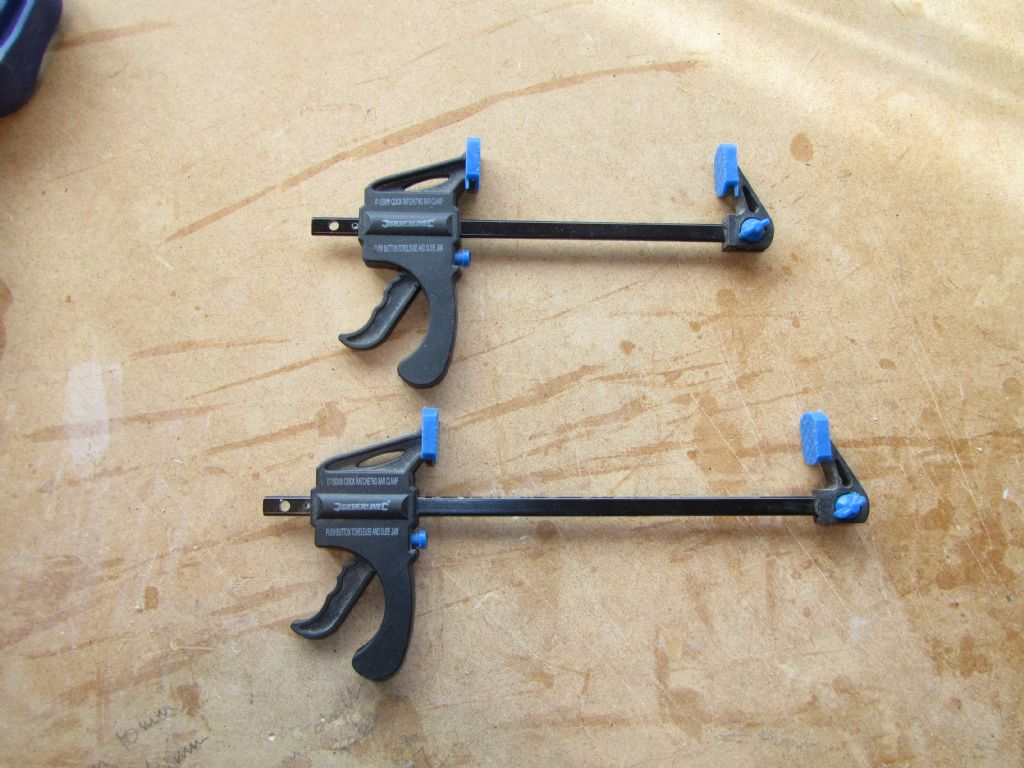
              Those clamps are Silverline and are approx. 7.5" and 9.5". They work pretty well but the odd one doesn't clamp as hard as it should sometimes. I got them from Homebase but their stock of items gets worse and worse so usually buy from Amazon. They have them plus others that look good. There are times when I could do with some smaller ones so will have a look. Fast Clamps threw up the Silverline ones etc.

              I tend to use those clamps and the Irwin Quick-Grip clamps the most but do have quite a few of the small spring clamps and G-clamps and some big fast clamps that do get used from time to time. As often said you can never have too many clamps!

              Chris

              silverline clamps

              Edited By Chris Fellows on 10/02/2022 14:49:40

              #99459
              Derek Bradley
              Participant
                @derekbradley32270

                Many thanks, Chris. That was most helpful – I will have to do a further search.

                Derek.

                #99461
                Colin Bishop
                Moderator
                  @colinbishop34627

                  I have some of the Silverline ones too plus some similar 4 inch older ones which have started to wear out and lose grip. Last August I bought four of the Duratec ones which seem to be of much better quality.

                  **LINK**

                  Colin

                  #99462
                  Chris Fellows
                  Participant
                    @chrisfellows72943

                    They look to be very good quality. You wouldn't want to buy too many though!

                    #99463
                    Colin Bishop
                    Moderator
                      @colinbishop34627

                      No, i just bought the four. These type of clamps were really very useful in building my Faireys as you can reverse them to keep things apart as well as clamping them together. Great for pushing the internal cockpit panels against the sides etc.

                      I've still got two of the cheaper 4 inch ones but the other two I had failed altogether and had to be binned.

                      Colin

                      #99472
                      Chris Fellows
                      Participant
                        @chrisfellows72943

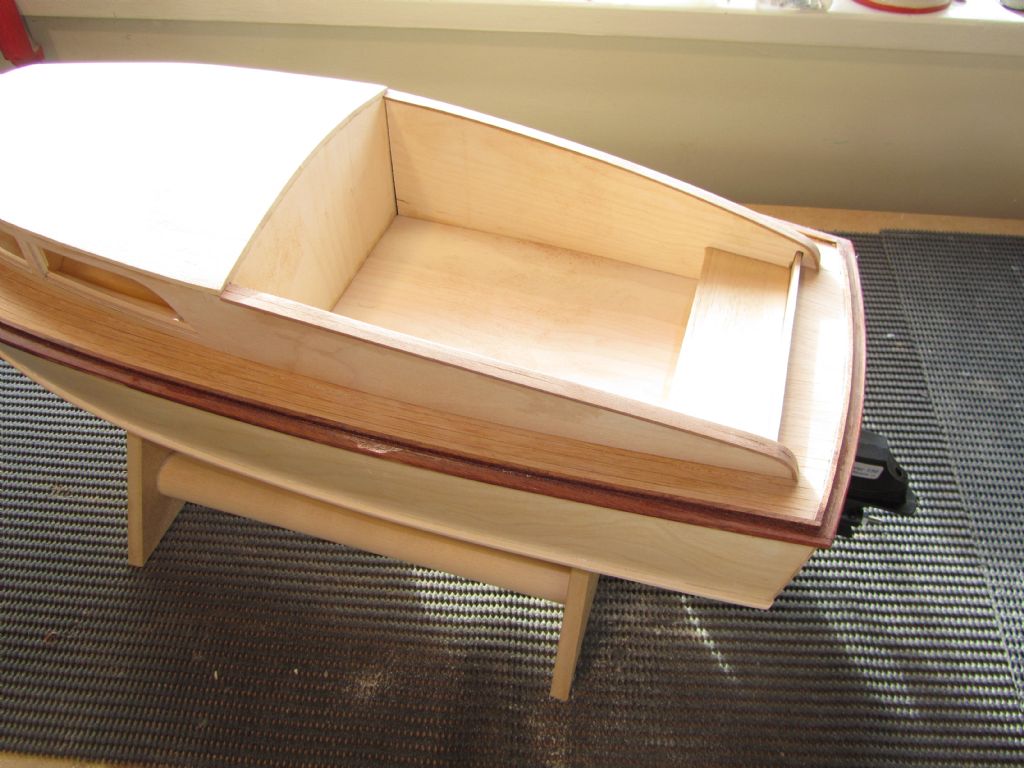
                        I've got 10 of the Silverline ones and I've used them all on occasion plus the Quick-Grips! The Silverlines are reversable as well and for cheapies they aren't bad. I like good quality tools though and generally buy mid-priced for most of them. I'll probably add some of the Duratec ones though as they could also be used for small DIY jobs.

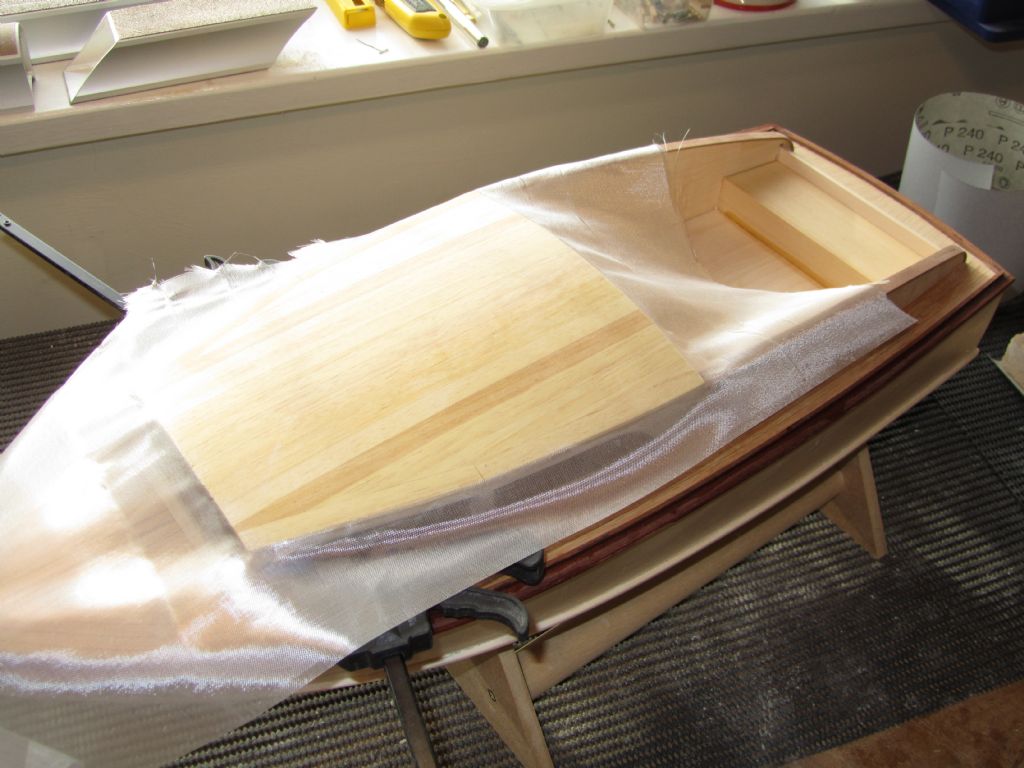
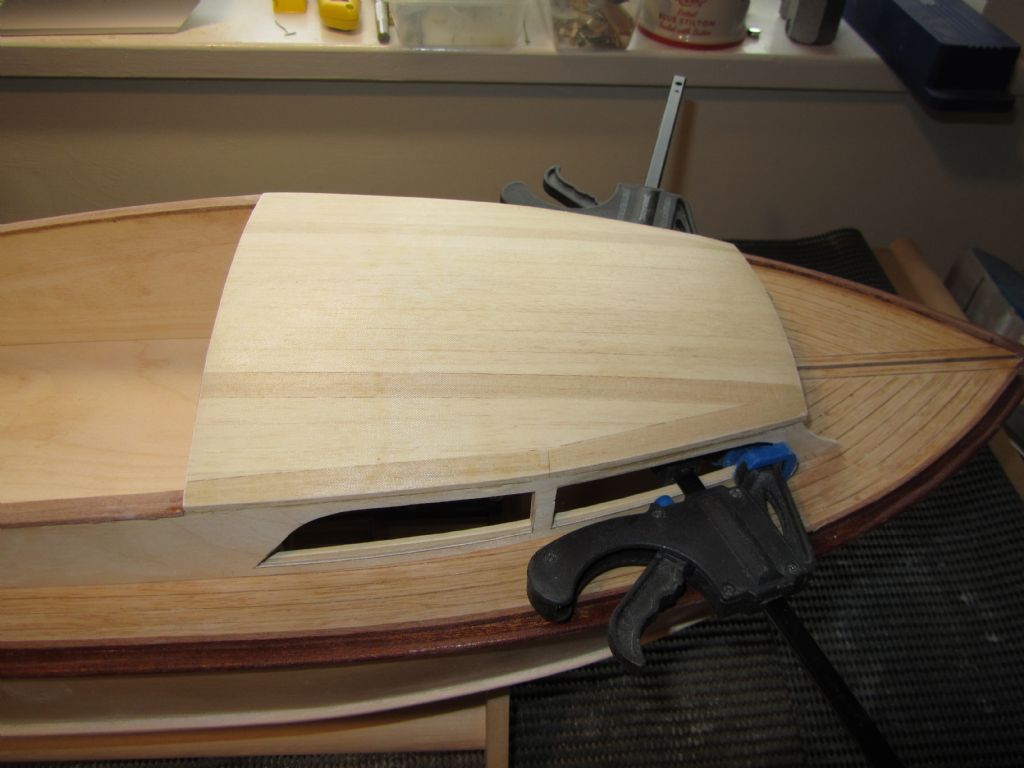
                        Didn't have much time yesterday but I did finish fitting the cappings to the coamings and this morning gave them a preliminary sanding and I'm now applying Eze-Kote and lightweight cloth to the roof with multiple coats of the resin. Superstructure clamped to the hull to resist twisting/warping.

                        Chris

                        superstructure36.jpg

                        resin to roof.jpg

                        Edited By Chris Fellows on 11/02/2022 15:16:19

                        #99473
                        Colin Bishop
                        Moderator
                          @colinbishop34627

                          Looking very nice Chris. I must get my Faireys out of hibernation and take them up to Bushy soon.

                          Colin

                          #99474
                          Chris Fellows
                          Participant
                            @chrisfellows72943

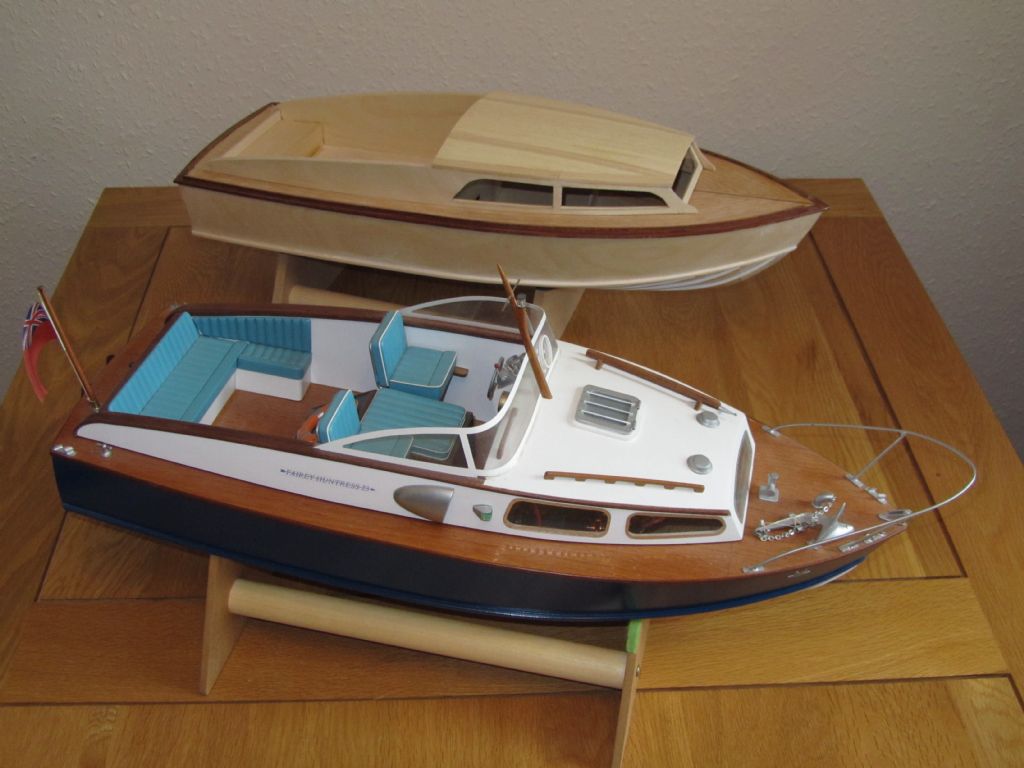
                            Thanks Colin. Yes, I must give DMs Huntress a run as well soon now that temperatures are going in the right direction, albeit slowly!

                            Cloth now trimmed with a sanding block.

                            Chris

                            both huntresses.jpg

                            resin to roof 2.jpg

                            #99477
                            Derek Bradley
                            Participant
                              @derekbradley32270

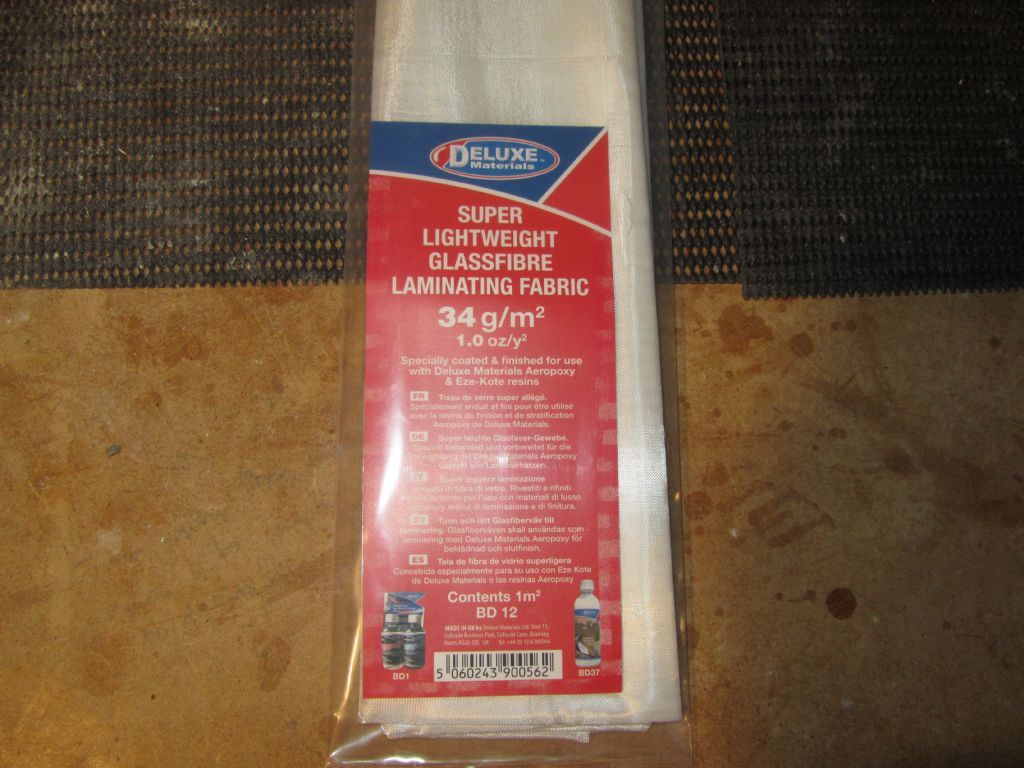
                              All looking good Chris. Can I ask you what weight of cloth you used for the hull? I have got some left over from the previous 1:8 Huntress and it is quite thick, but from what I remember, it went on well and I got a good finish.

                              Derek.

                              #99483
                              Chris Fellows
                              Participant
                                @chrisfellows72943

                                Hi Derek

                                This.

                                Chris

                                cloth.jpg

                                #99484
                                Colin Bishop
                                Moderator
                                  @colinbishop34627

                                  As Chris says, the 1oz version is fine for these applications. Lightweight and flexible.

                                  Use anything thicker and it just absorbs more resin.

                                  Colin

                                  #99487
                                  Derek Bradley
                                  Participant
                                    @derekbradley32270

                                    Thanks Chris and Colin. I know that SLEC do various weights of the Delux mat as in your photo. I will have to have a look at what I have got and see whether it is usable.

                                    Derek.

                                    #99502
                                    Chris Fellows
                                    Participant
                                      @chrisfellows72943

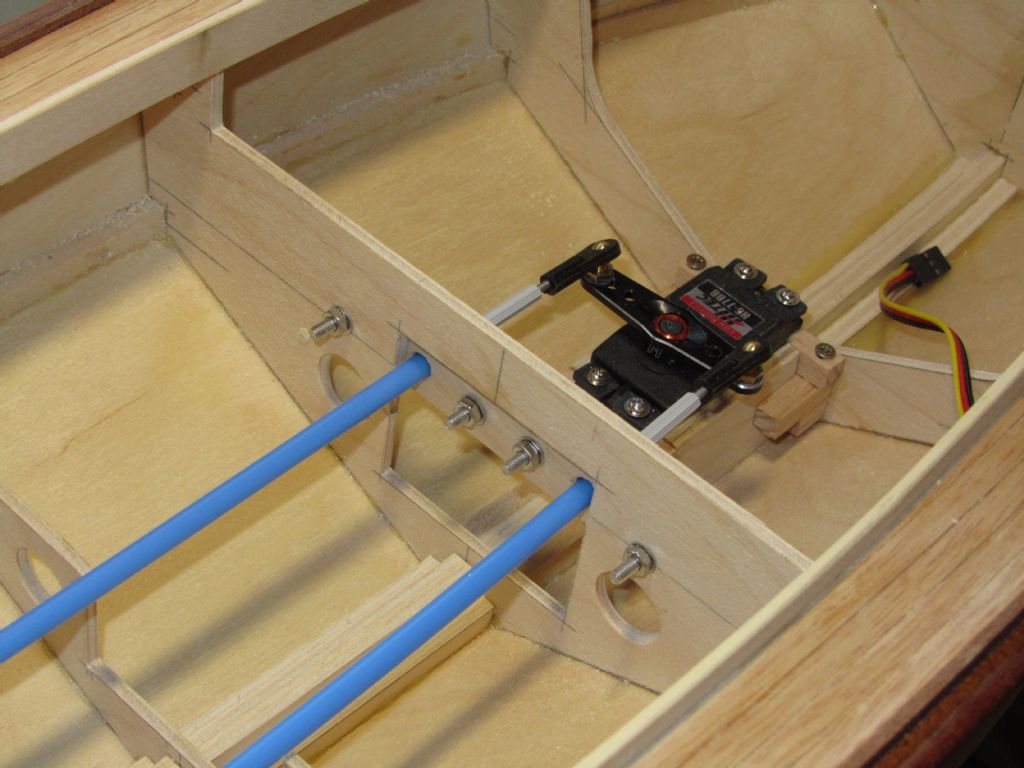
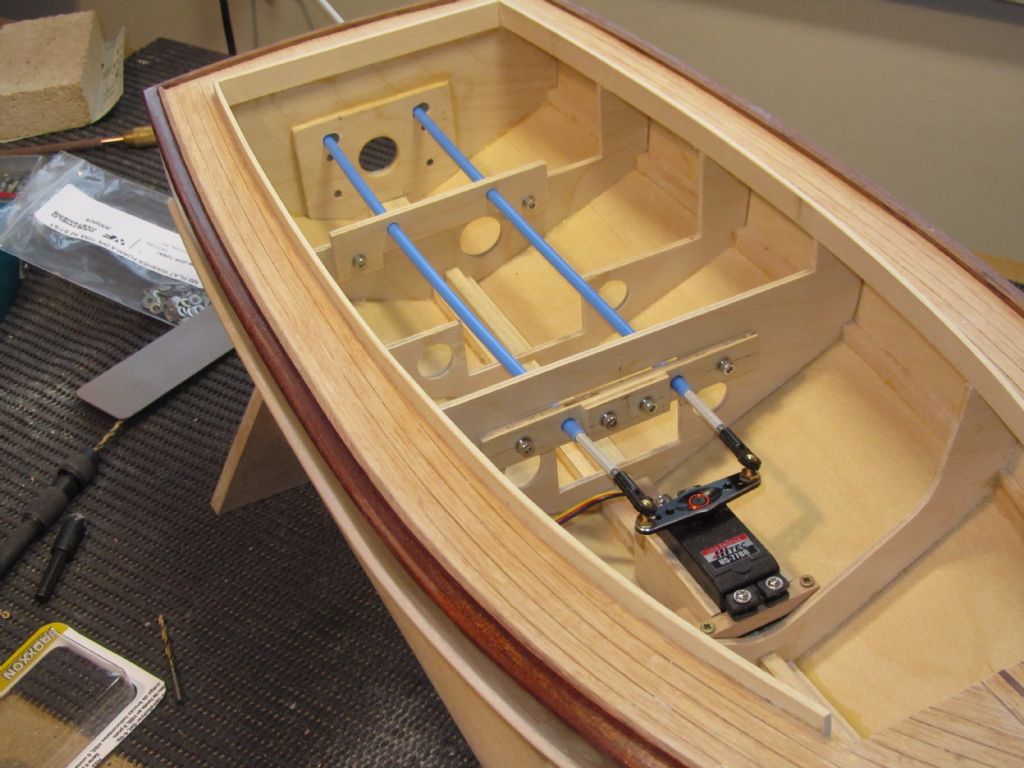
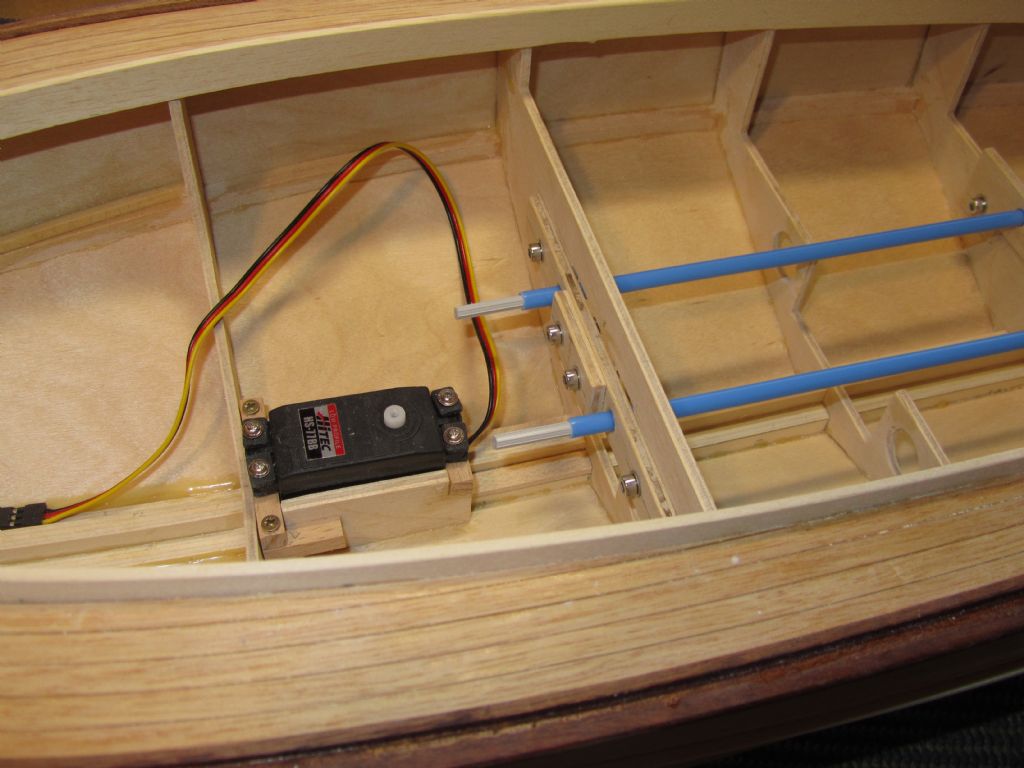
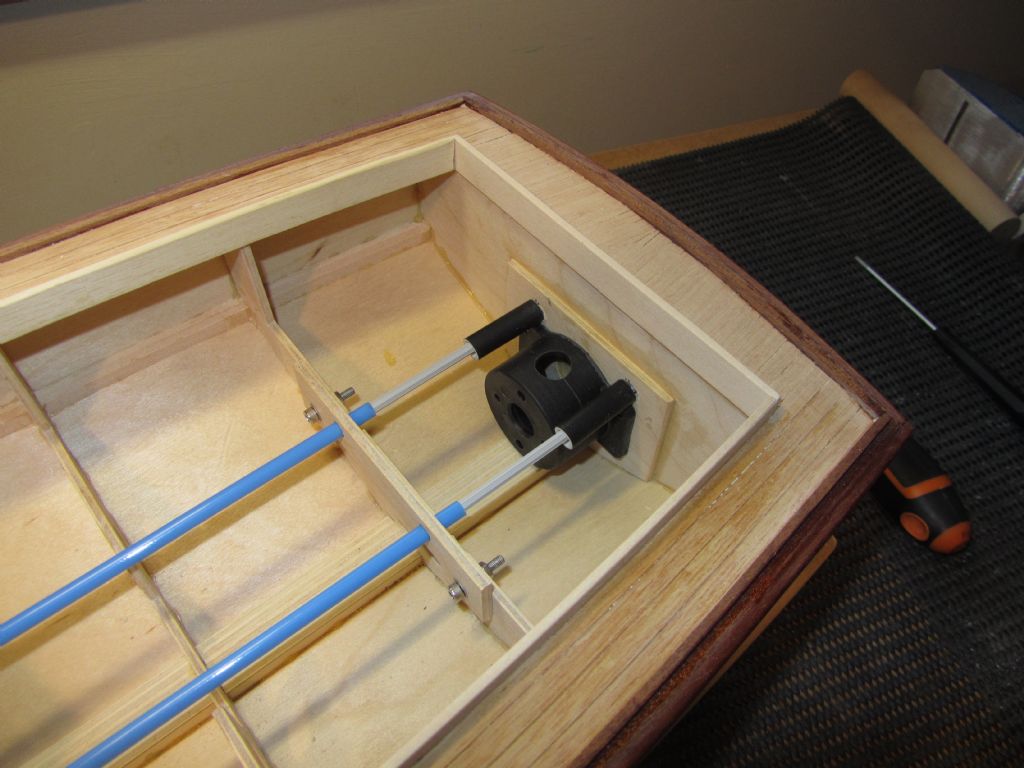
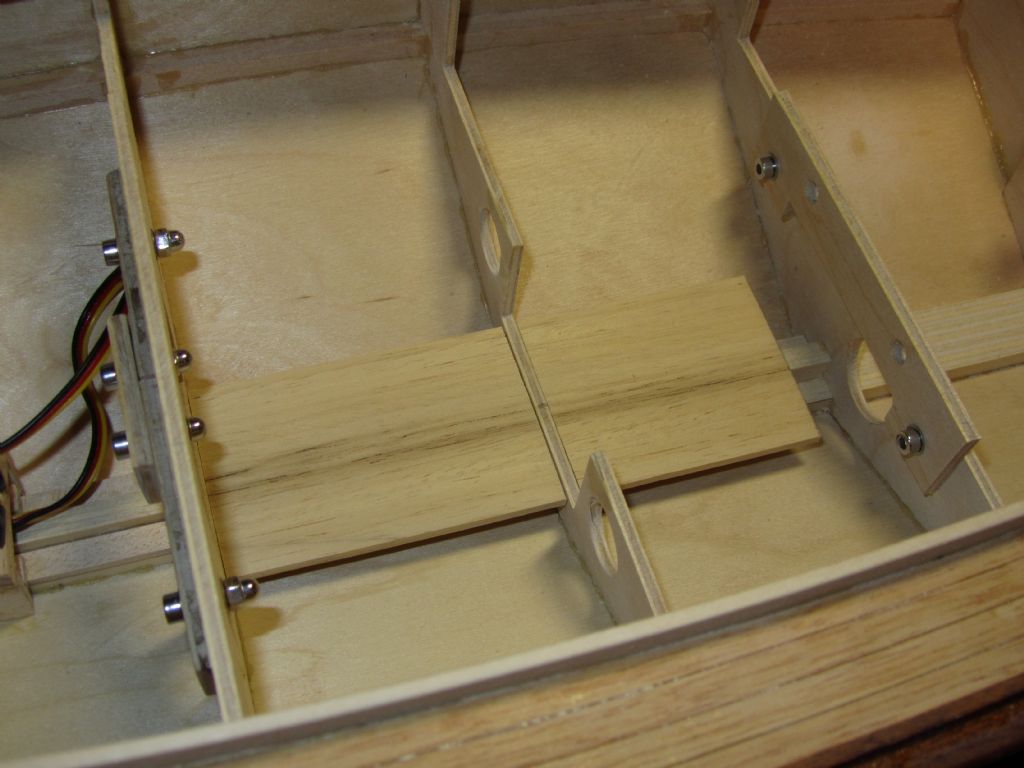
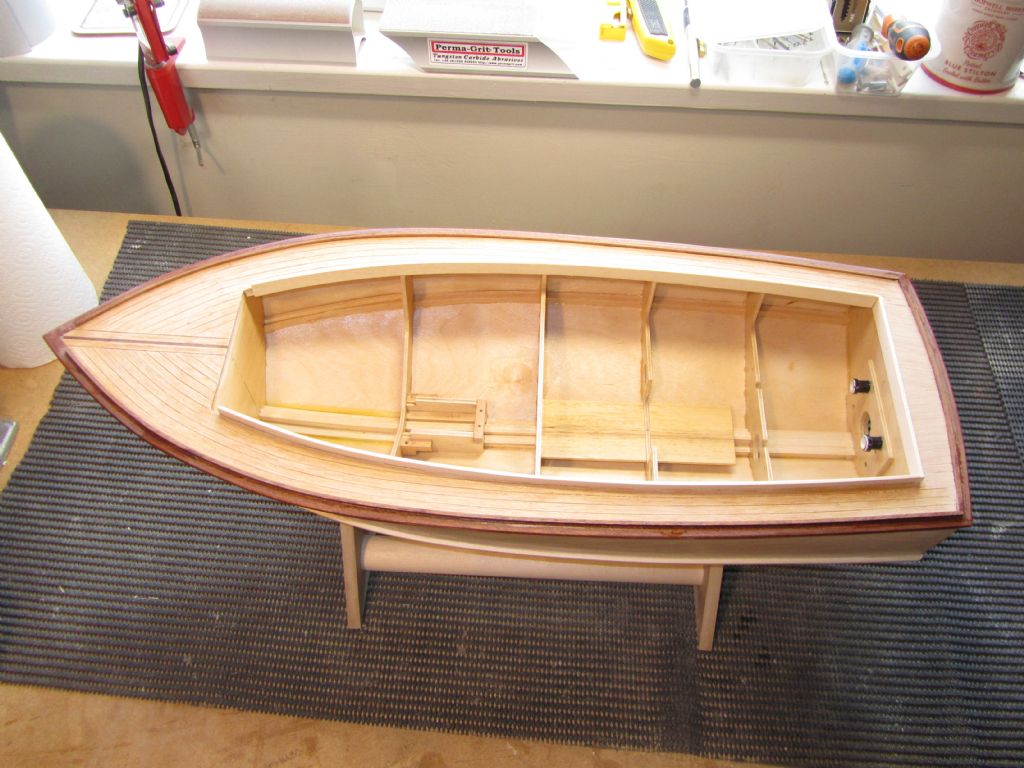
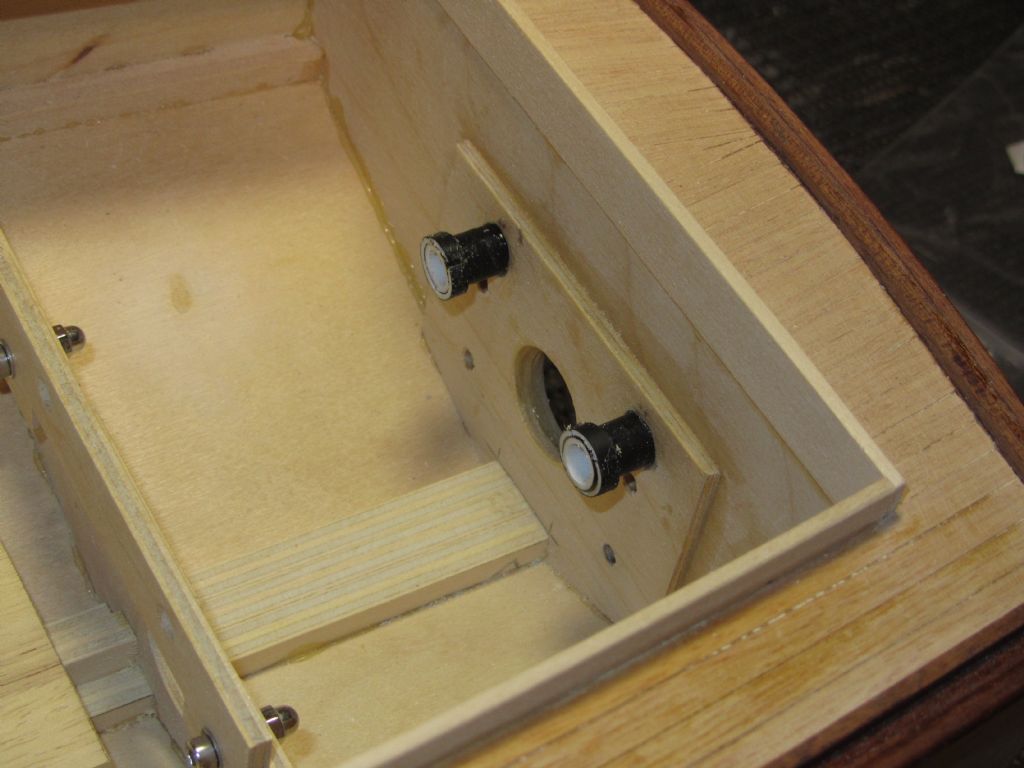
                                      Returned to the hull to do some work on getting the snakes installed. Pleased to see that I can use the ball joint connecters, as there is sufficient room under the cockpit floor. They are nice and positive and screw directly into the Fastrax servo horn.

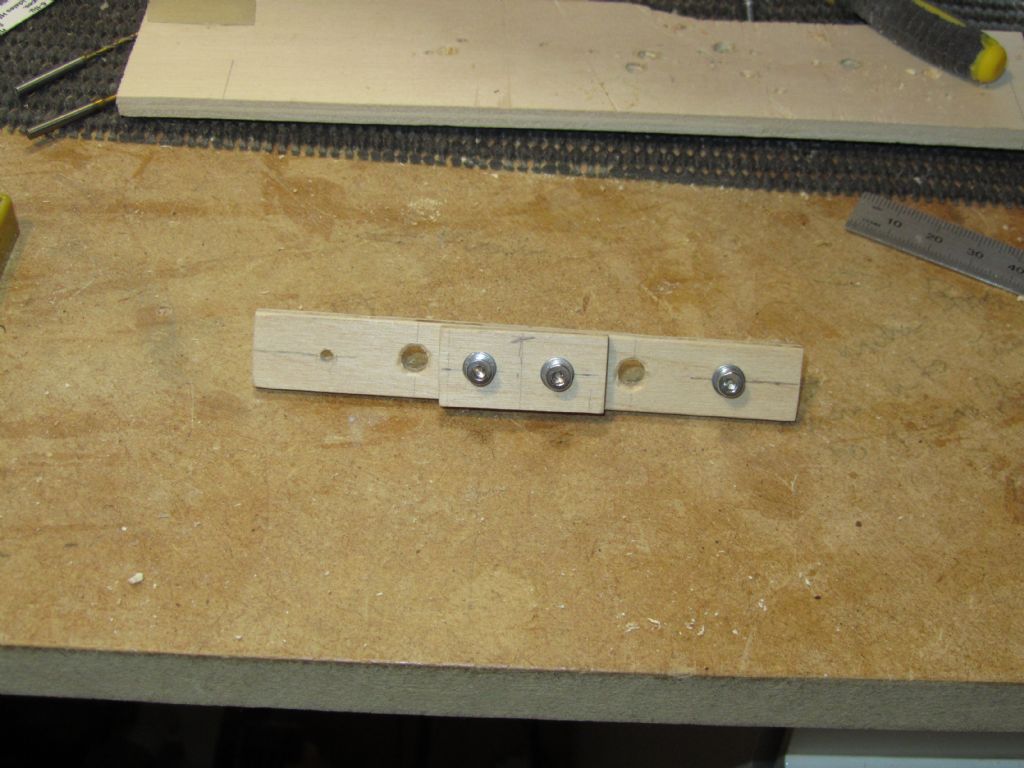
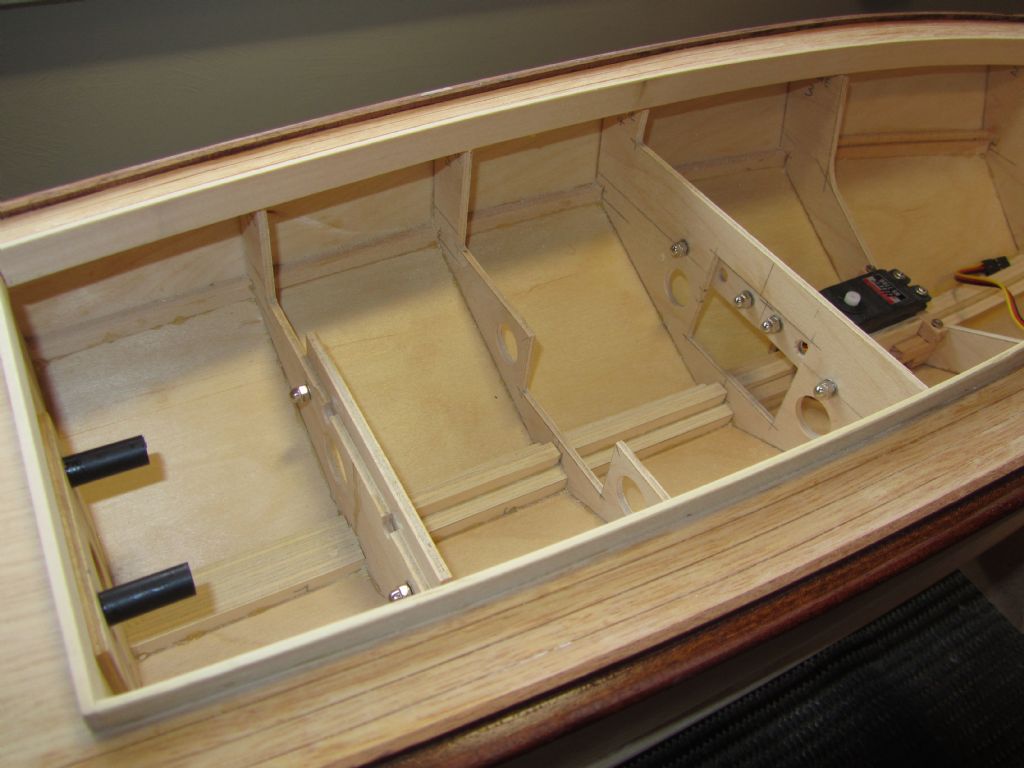
                                      As the snakes will sit higher than originally planned I carefully cut the ply brackets out that I had made sometime ago and glued to one of the frames. It would be quicker and easier just to glue the snakes in position but where they run they make access to the stern-drive and motor difficult and I may not get them out and I also need to do some work on the keel to support the battery box, so decided to make them removeable.

                                      To do this I made ply brackets to go front and rear and bolted them with SS allen head bolts to the frames. Later on I shall glue the snakes into the brackets and cut through the front bracket so that if removal is required it can be pulled through the hole in the front frame.

                                      Chris

                                      snakes 2.jpg

                                      snakes front bracket.jpg

                                      snakes 4.jpg

                                      snakes 5.jpg


                                      Edited By Chris Fellows on 13/02/2022 15:56:35

                                      #99518
                                      Chris Fellows
                                      Participant
                                        @chrisfellows72943

                                        Usually try and go for a long walk on a Tuesday, especially as it usually ends up with a pub lunch smiley but due to rain this morning it has been postponed until later in the week.

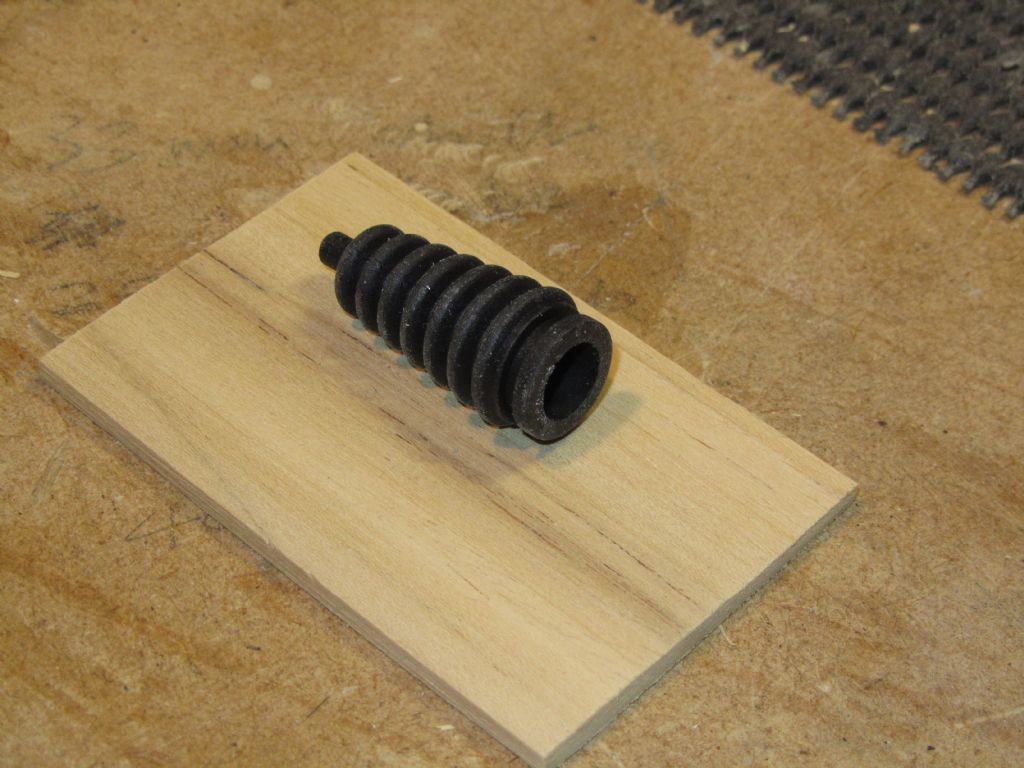
                                        So I was able to do a bit more today. Fitted the stern-drive back in so that I could work out the length required for the snakes and then cut them to length. I then cast around my work room to find something suitable to fit the bellows over to (hopefully!) stop any water ingress around the snakes on the odd occasion I might be reversing. It shouldn't be a problem as the holes are well above the waterline but better safe than sorry. Found the ideal thing, which was an old plastic Biro and it was black! Got standards to maintain you know!

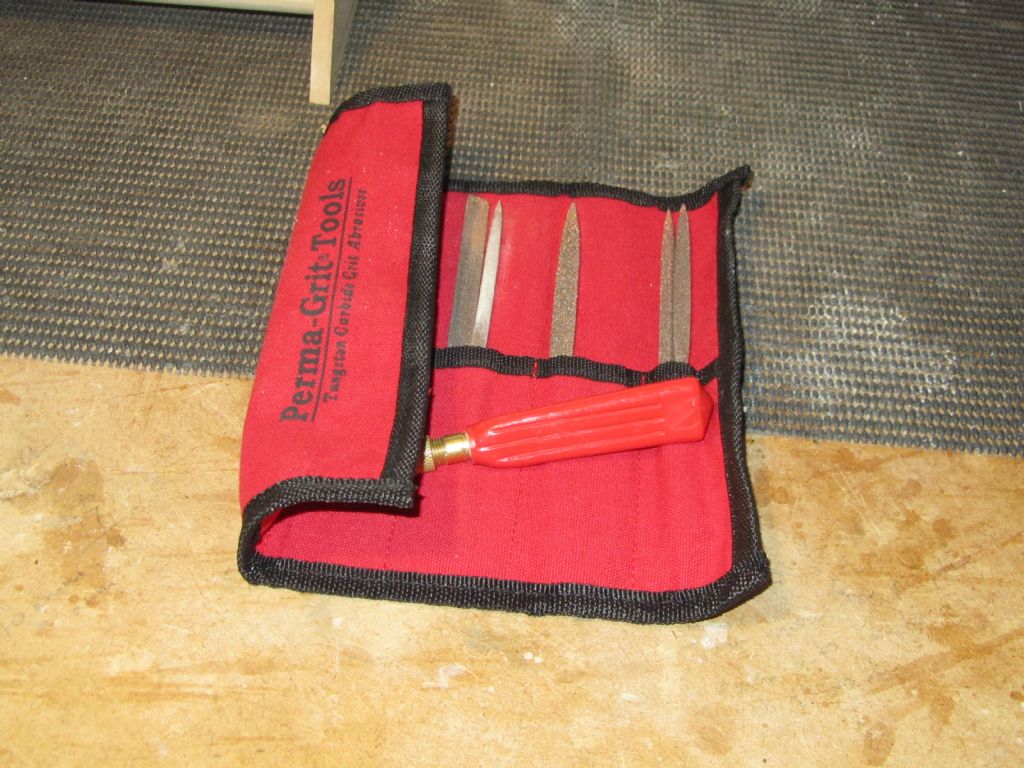
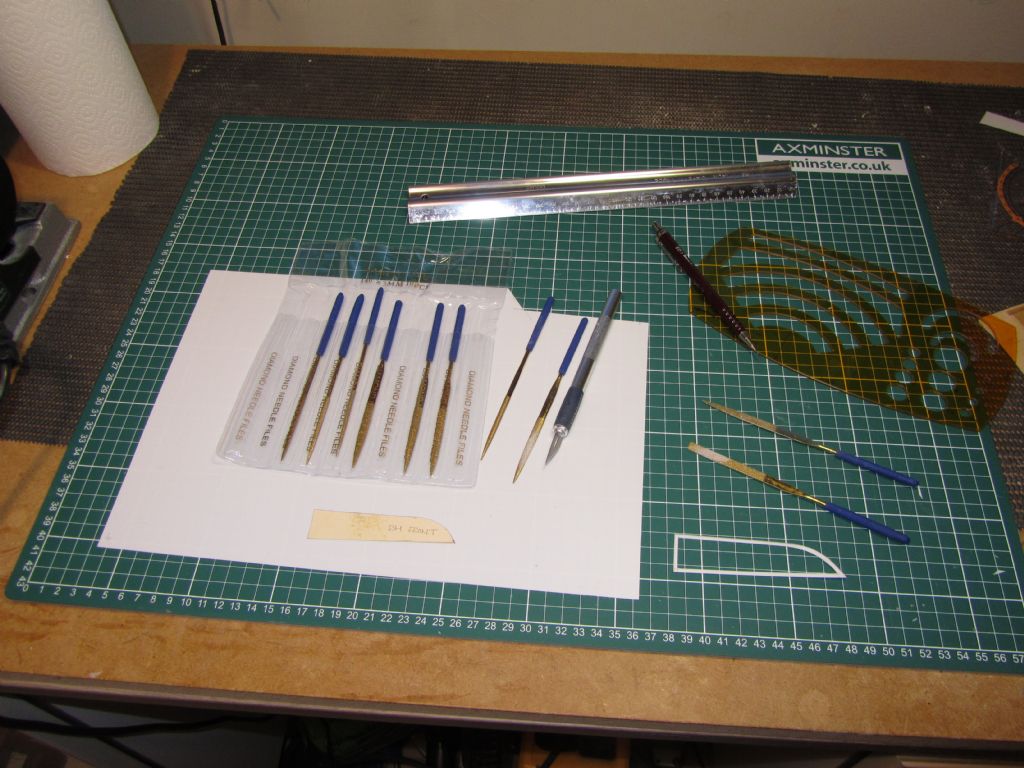
                                        The pen was cut down to the two lengths required, the holes through the transom opened up using one of my recently acquired small set of PermaGrit files (much quicker than when I originally opened up the hole with my other small and cheaper round file) and the tubes were glued in place with canopy glue.

                                        You may have noticed that the bolts holding the snake brackets in were too long, so I've cut them down and fitted domed nuts, all in SS. I also cut through the rear part of the front bracket to allow removal of the snakes in the future , if required, once the outer sleeves have been glued in place.

                                        Chris

                                        snakes 6.jpg

                                        small permagrit files.jpg

                                        snakes 8.jpg

                                        snakes brackets.jpg


                                        Edited By Chris Fellows on 15/02/2022 17:03:12

                                        #99519
                                        Ray Wood 3
                                        Participant
                                          @raywood3

                                          Hi Chris

                                          Your work as clinical as ever by that stage I just chuck all the gear in and hope for the best !!
                                          But now you can see why outboard motors were so popular

                                          Regards Ray

                                          #99523
                                          Chris Fellows
                                          Participant
                                            @chrisfellows72943

                                            Cheers Ray.

                                            Fairey customers are very discerning and only the best will do! smiley

                                            Chris

                                            #99558
                                            Chris Fellows
                                            Participant
                                              @chrisfellows72943

                                              I needed some bigger diameter rubber bellows so ordered those earlier in the week and they arrived yesterday. No modelling though then as did the postponed walk. No pub lunch though sad and had to make do with a National Trust pasty which was very nice though. Had to console myself with a couple of glasses of red last night instead.

                                              Late start today. Decided that the protuberances for the bellows were too long so reduced them in length with my razor saw. I then used the offcuts to form a flange to retain the bellows. These will be held in place with twisted wire when the time comes.

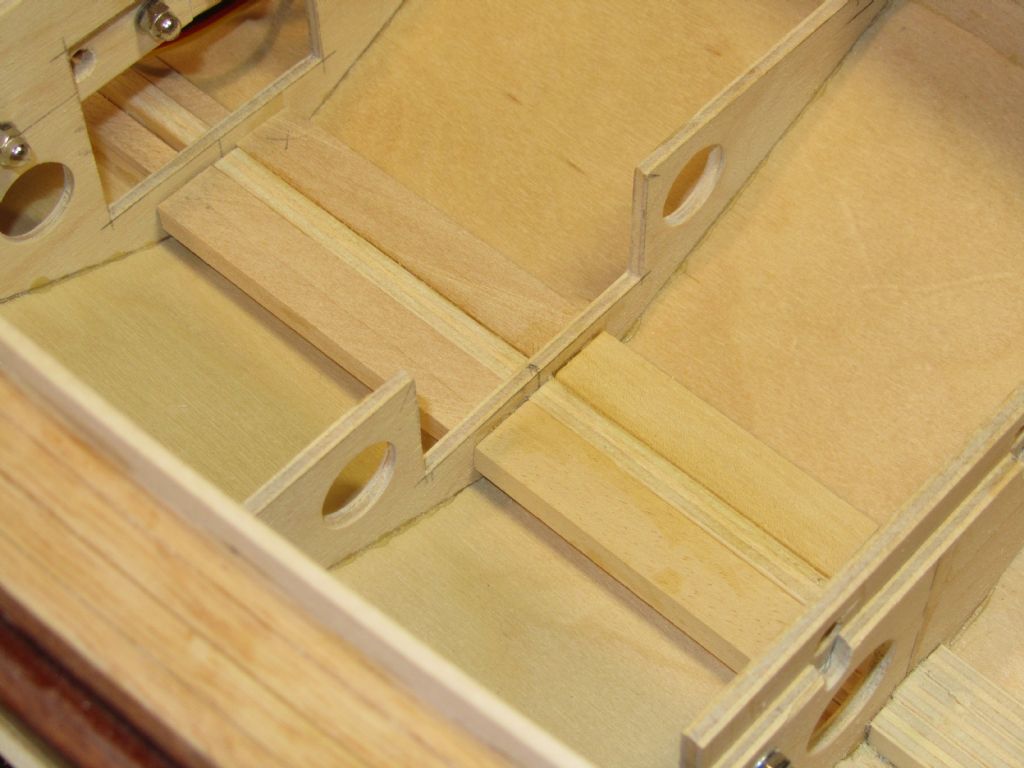
                                              I then turned to the battery tray support. I cut and glued bearers to the top of the doublers to bring the top up level with the keel. From my offcuts box I found some bass sheet for the battery box to sit on and cut to size. This will be glued in place once the inside of the hull has been coated with resin. The battery box will be secured with Velcro so that it's position can be altered if necessary.

                                              Chris

                                              snakes 11.jpg

                                              snakes 12.jpg

                                              snakes 13.jpg

                                              snakes 14.jpg

                                              #99573
                                              Chris Fellows
                                              Participant
                                                @chrisfellows72943

                                                I took the servo out and the two brackets for the snakes. The inside of the hull was then vacuumed out and two liberal coats of Eze-Kote applied and left to dry. The supports for the battery tray were then glued in and the tops coated with Eze-Kote along with the battery box. I shall prime and paint the rearmost compartment as that will likely get some water into it due to the holes through the transom even though I will do my best to stop it!

                                                Well that is the hull pretty much finished now except for a little bit of filling where I caught the transom when filing and is ready for painting.

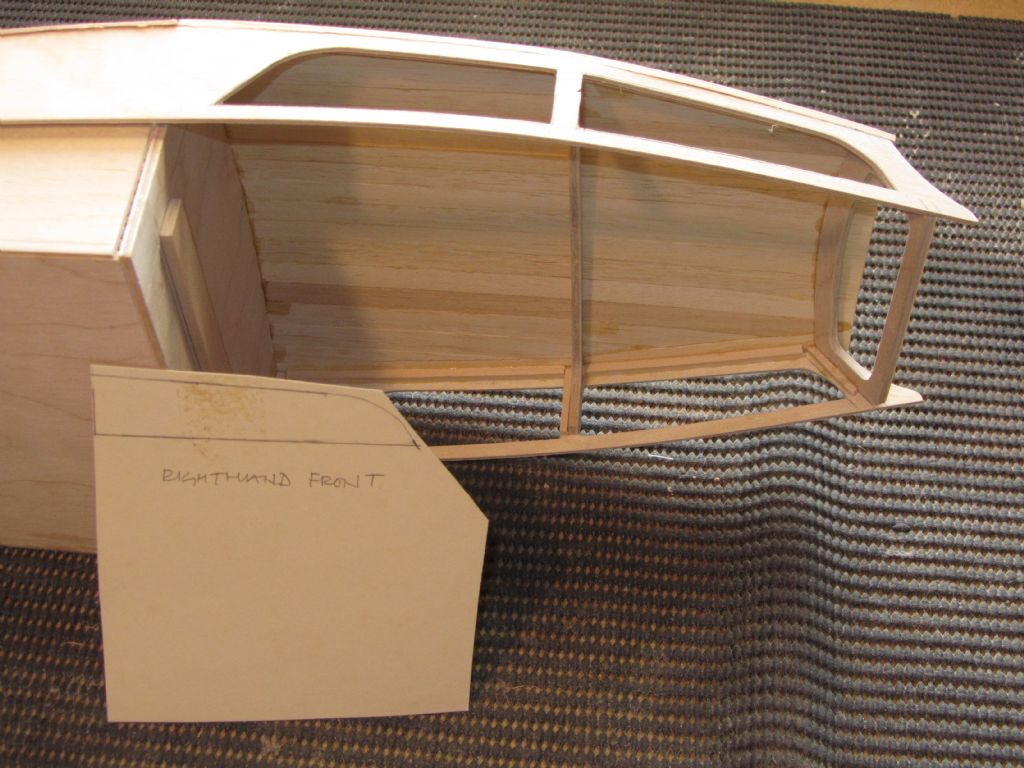
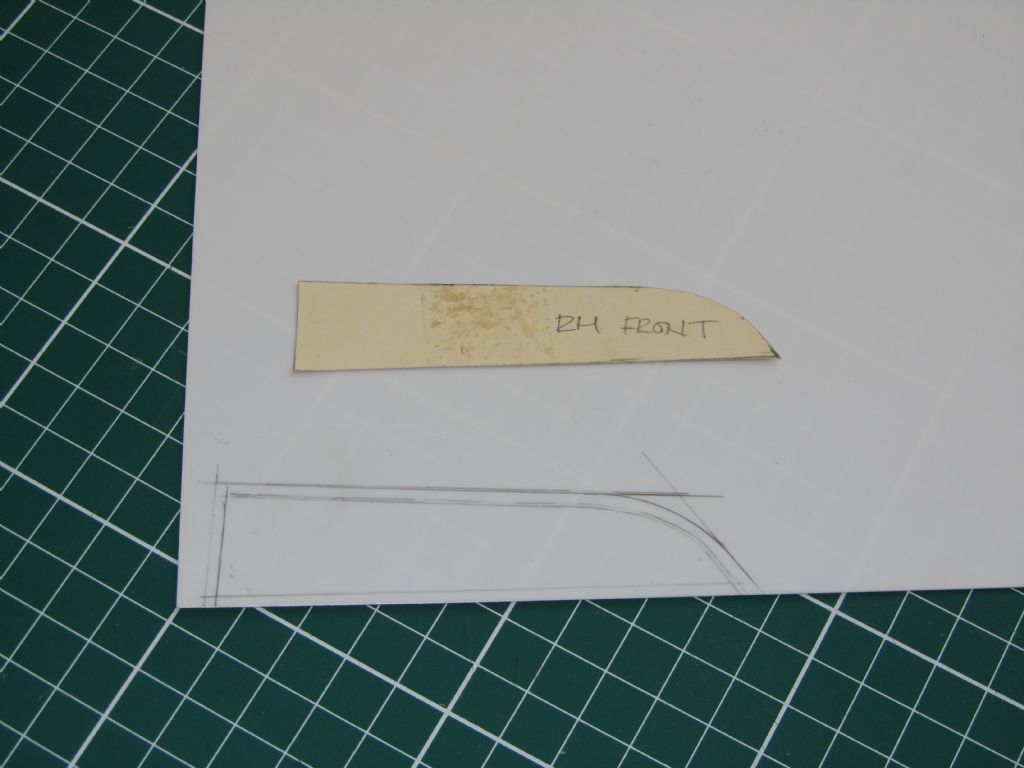
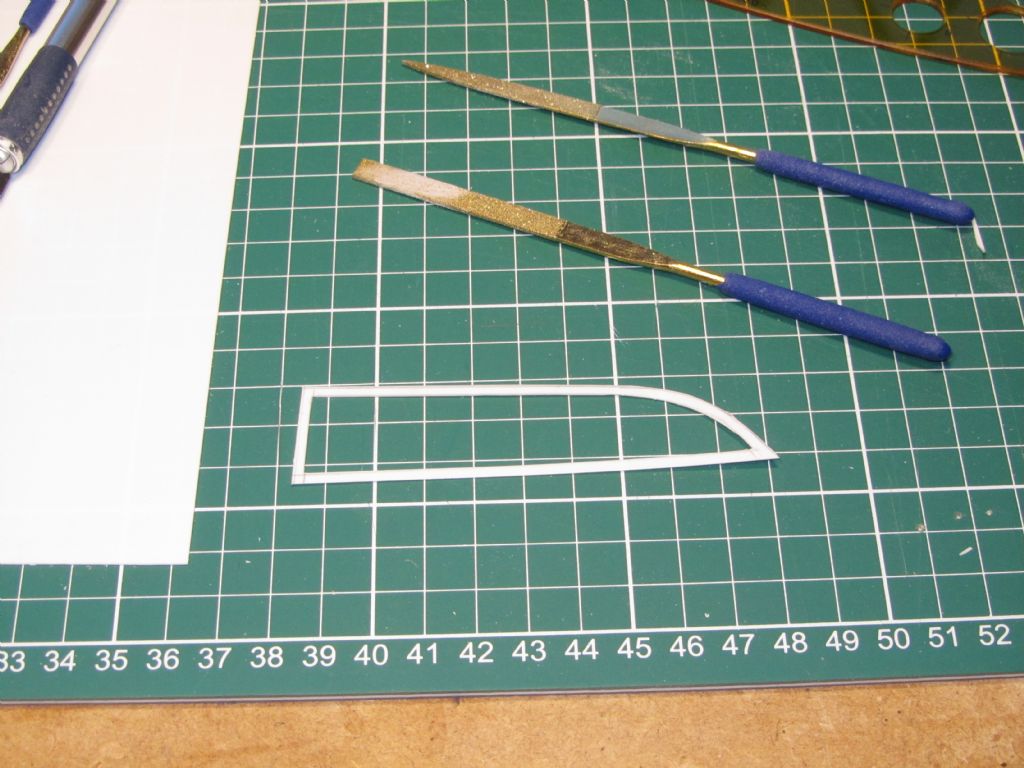
                                                So on to the windows. I'd bought some 0.5mm plastic sheet awhile ago for these and this will be my first time working with it. First of all I held some thin cardboard inside one of the window openings and drew round it. It was then cut out and the shape transferred to the plastic sheet and the width of the frame added. I then cut out the straight lines using a craft knife and across the corners on the curves. It took quite a few goes to cut through using a new blade so I will have to look at perhaps using a different style of blade? I've got 5 windows to do on this model and 29 in total across the 5 builds!

                                                internal 1.jpg

                                                windows 1.jpg

                                                windows 2.jpg

                                                windows 3.jpg

                                                The curves were then finished off with diamond needle files and I did my finger nails unintentionally at the same time!

                                                I'll be doing this sporadically as I need to get some paint and glazing material before I can fit them so will return to working on the other builds as well.

                                                Chris

                                                windows 4.jpg

                                                Edited By Chris Fellows on 19/02/2022 18:29:40

                                                #99576
                                                Derek Bradley
                                                Participant
                                                  @derekbradley32270

                                                  I like the way you are working Chris. I think that these are going to be brilliant models. You seem to put an enormous amount of thought into everything you do and every step of the build.

                                                  Derek.

                                                  #99584
                                                  Chris Fellows
                                                  Participant
                                                    @chrisfellows72943

                                                    Thanks Derek. Some areas of the builds I put quite a lot of thought into but other parts I just launch right into and hope it works out Ok!

                                                    In some ways I wish I'd started off with a simpler model and built it quickly and got it on the water but I've got to see it through with the Faireys now. I do have thoughts of doing something though for tearing round the club lake which will be all painted and no window frames and little other detail. I think for a lot of us though the building is the part that gives the most satisfaction and the Faireys are certainly providing that along with a bit of stress now and then!

                                                    Chris

                                                    #100129
                                                    DJW
                                                    Participant
                                                      @djw

                                                      Hi Chris

                                                      Just been catching up with and looking over the various Fairey builds, great to see the progress and the running hardware now going in. It's the attention to detail at every stage that will make them look epic when complete. Really nice work..!

                                                      Best regards

                                                      David (Riva)

                                                    Viewing 25 posts - 126 through 150 (of 217 total)
                                                    • Please log in to reply to this topic. Registering is free and easy using the links on the menu at the top of this page.

                                                    Code of conduct | Forum Help/FAQs

                                                    Advert

                                                    Latest Replies

                                                    Home Forums Build Blogs Topics

                                                    Viewing 25 topics - 1 through 25 (of 25 total)
                                                    Viewing 25 topics - 1 through 25 (of 25 total)

                                                    View full reply list.

                                                    Advert

                                                    Newsletter Sign-up