61′ Barnett class lifeboat

Advert

61′ Barnett class lifeboat

Home Forums Scratch build 61′ Barnett class lifeboat

Viewing 25 posts - 551 through 575 (of 648 total)
  • Author
    Posts
  • #105121
    Chris Fellows
    Participant
      @chrisfellows72943

      Congratulations to your daughter Neil. One of my son's went to York uni as well.

      Chris

      Advert
      #105123
      neil hp
      Participant
        @neilhp
        Posted by Chris Fellows on 08/06/2023 21:11:26:

        Congratulations to your daughter Neil. One of my son's went to York uni as well.

        Chris

        a lovely city to study in……..when was he resident there Chris.

        I went to another great city myself, Liverpool, but that was way back in 1970. lol.

        #105124
        Colin Bishop
        Moderator
          @colinbishop34627

          Well done your daughter Neil. Hope she gets the career she wants off the back of it.

          Colin

          #105125
          Chris Fellows
          Participant
            @chrisfellows72943
            Posted by neil howard-pritchard on 09/06/2023 00:18:37:

            Posted by Chris Fellows on 08/06/2023 21:11:26:

            Congratulations to your daughter Neil. One of my son's went to York uni as well.

            Chris

            a lovely city to study in……..when was he resident there Chris.


            I went to another great city myself, Liverpool, but that was way back in 1970. lol.

            He went in 2008 and was there for 5 years as he said he'd been told that it was better to do his Masters over 2 years! My car knew it's own way there and back! He then went to university in Hong Kong which was good as we did a trip there, along with Singapore and Vietnam.

            Our other son went to Lincoln which is another nice place.

            Chris


            Edited By Chris Fellows on 09/06/2023 14:52:00

            #105126
            neil hp
            Participant
              @neilhp
              Posted by Colin Bishop on 09/06/2023 12:42:11:

              Well done your daughter Neil. Hope she gets the career she wants off the back of it.

              Colin

              Thanks Colin. she did her 3rd year in industry with the world wide company called Price Waterhouse and Cooper [ PWC], and they were so impressed with her work erthics and interaction during the year that one of the senior manaqgers offered her a possition as a junior in the company, Leeds branch without any further initiation, and she is tempted but this was two days after she put in her CV and application to Lancashire Constabulary as a marketting consultant for Lancs Constabulary based near Preston.

              But with her attitude and aptitude, I have an incline that she will go far in advertising…….far better than I ever did in teaching, lol.


              Edited By neil howard-pritchard on 09/06/2023 16:28:18

              #105129
              neil hp
              Participant
                @neilhp

                Our other son went to Lincoln which is another nice place.

                Chris

                i am sorry to say, that i have never been to Lincoln, much to my embarrasment.

                spent many years driving past the city on my way to Norfolk but sadly much to my sadness, never made that detour. must go one day.

                #105130
                neil hp
                Participant
                  @neilhp

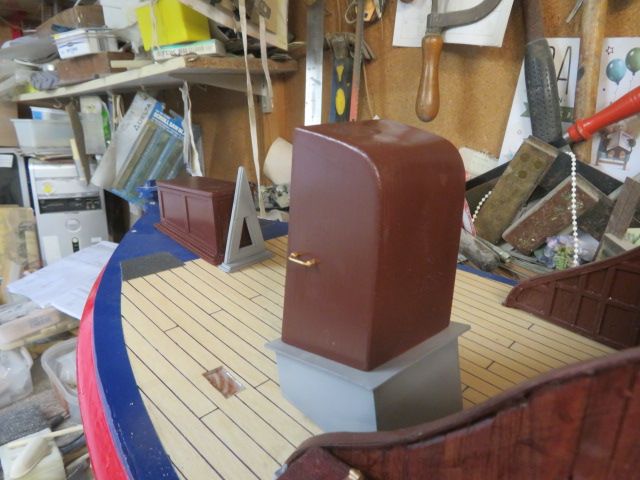
                  Bit of detailing this evening.

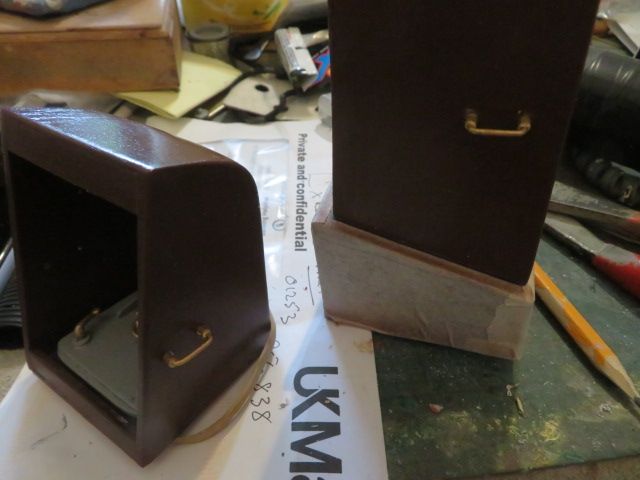
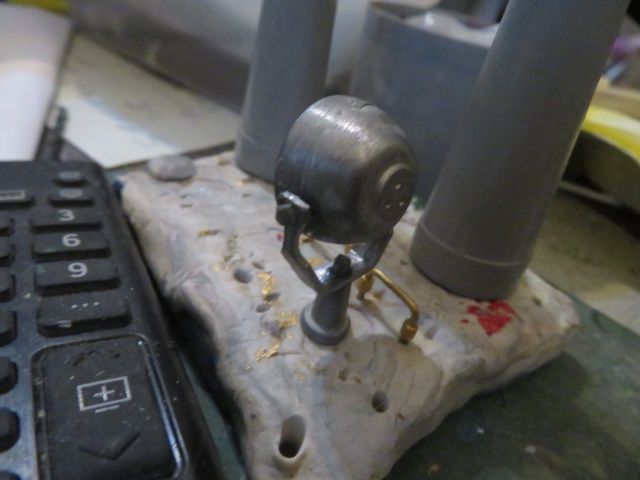
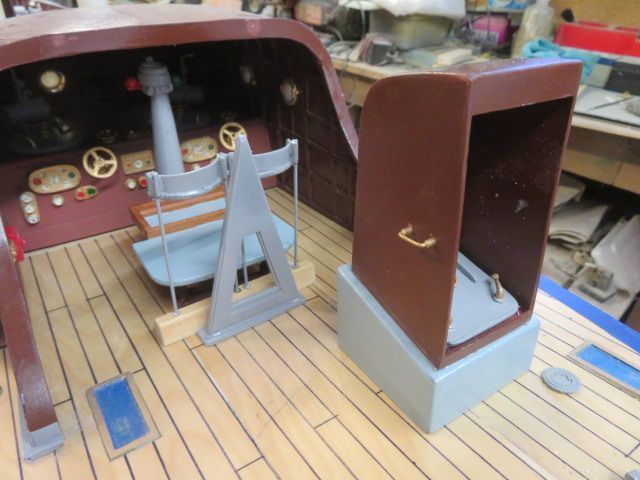
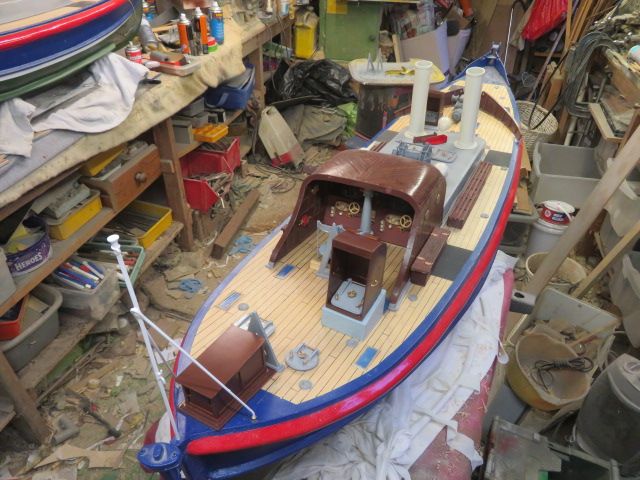
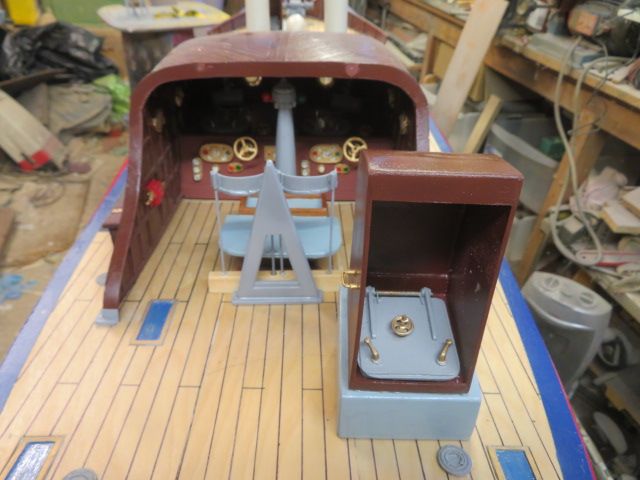
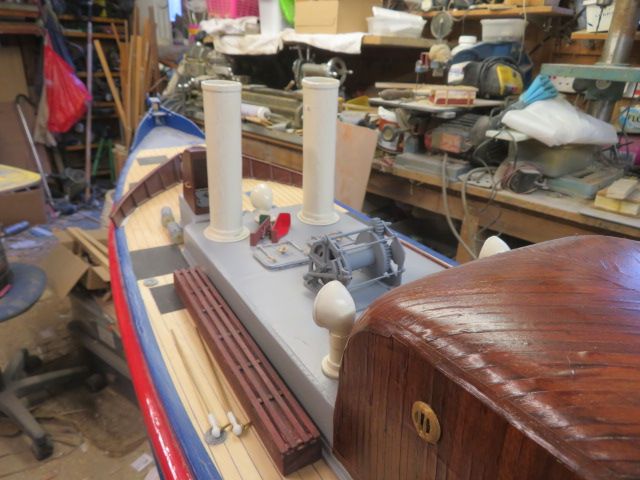
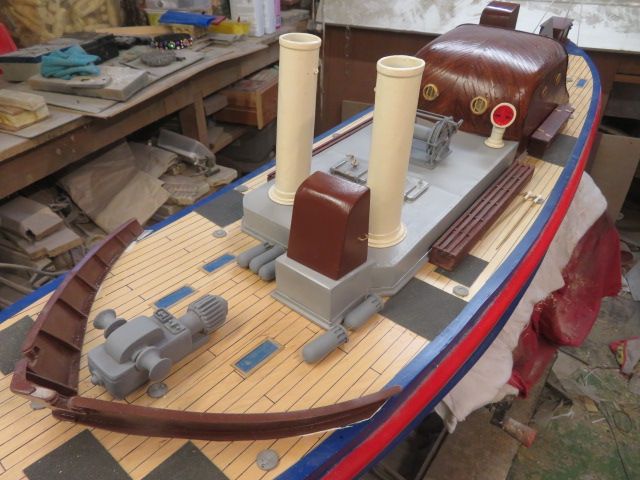
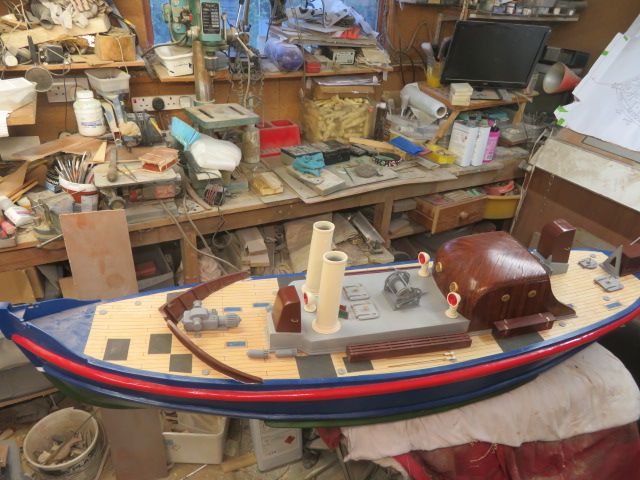
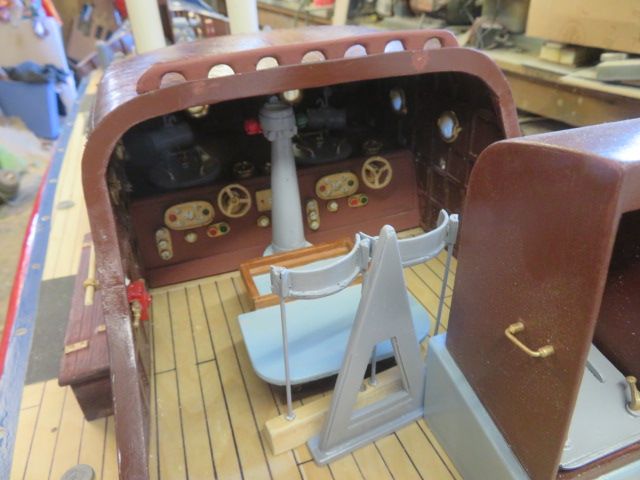
                  the brass handles put on to the companionways, and then the fore loud speaker put together that sits on a plinth.

                  Finally the compass binacle was mounted on to the raised conning platform, which had been painted earlier today.

                  It IS ONLY the later 3 boats that seem to have the raised plinth, as nowhere on the plans or photos does one apear on the 1st boat, the William and Kate Johnston

                  img_6541.jpg

                  img_6546.jpg

                  img_6547.jpg

                  #105131
                  neil hp
                  Participant
                    @neilhp

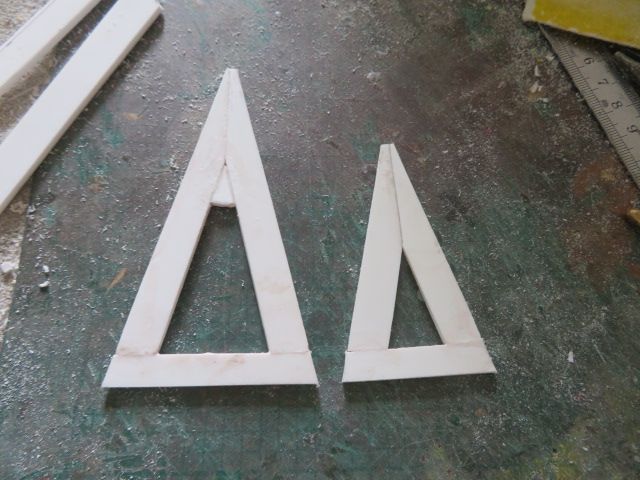
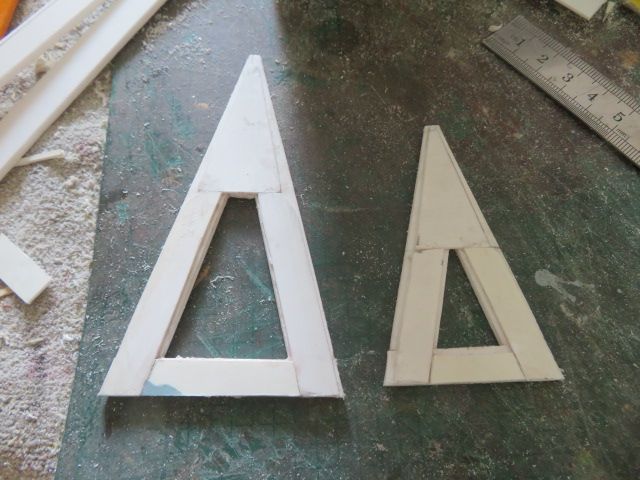
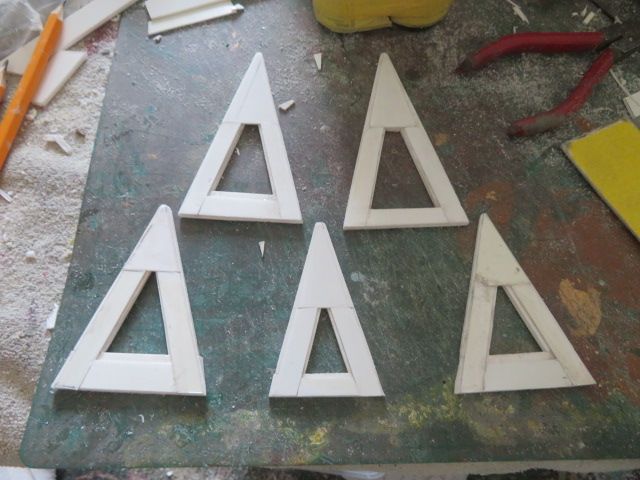
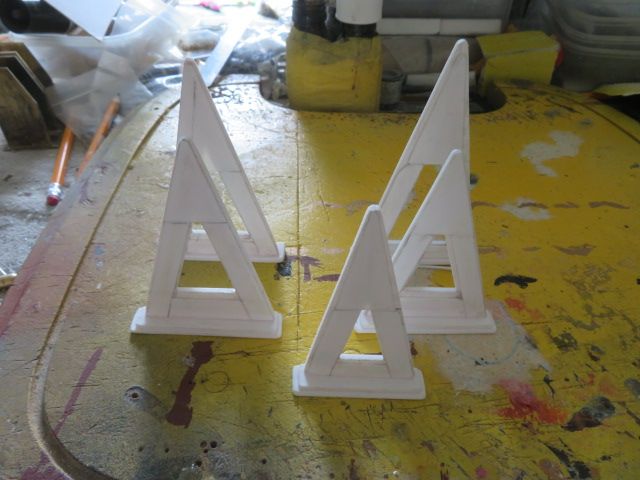
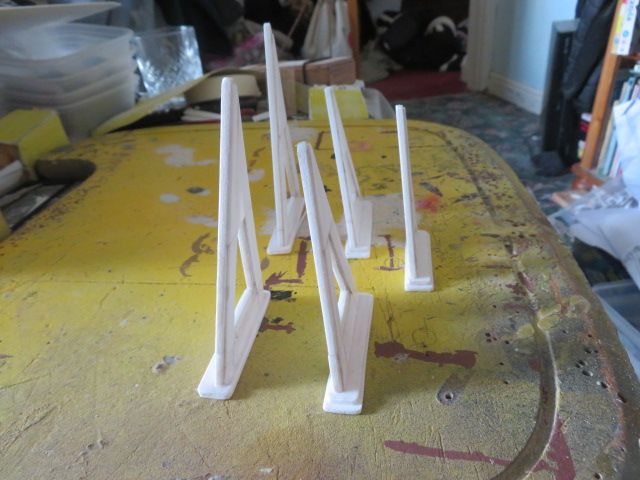
                    Today in fits and starts, and I really do think and hope that these are the last parts to be made, I fabricated the "A" frame brackets for the steering rod that connects the steering box to the ship's wheels.

                    You might wonder why I only made two of the higher brackets.

                    The reason being that the Princess Mary and the other two boats had twin wheels, where as the William and Kate Johnston only had one steering possition and that was immediately foreward of the aft steering box for the rudder geaing.

                    The other 3 boats had the steering shaft running through to the inside of the covered cockpit and helms possition just aft of the binacle.

                    Also, the "lean" on the A frames from the bases is to counter the sheer on the deck at the aft of the boats.

                    img_6548.jpg

                    img_6549.jpg

                    img_6552.jpg

                    img_6553.jpg

                    img_6555.jpg

                    #105135
                    neil hp
                    Participant
                      @neilhp

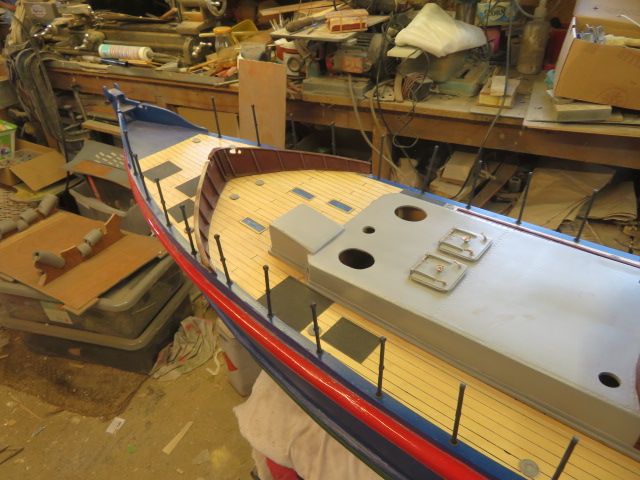
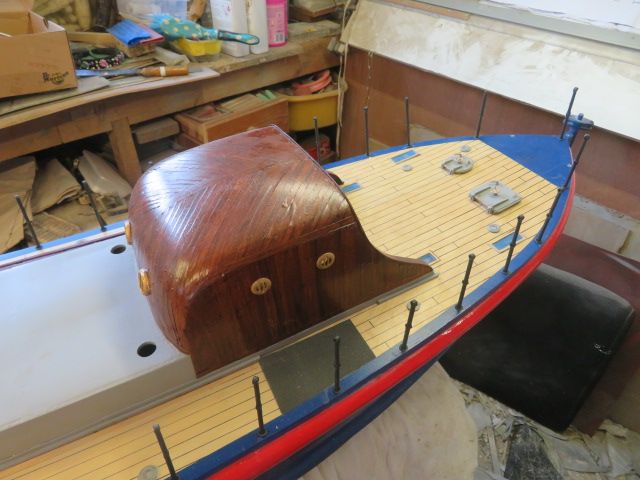
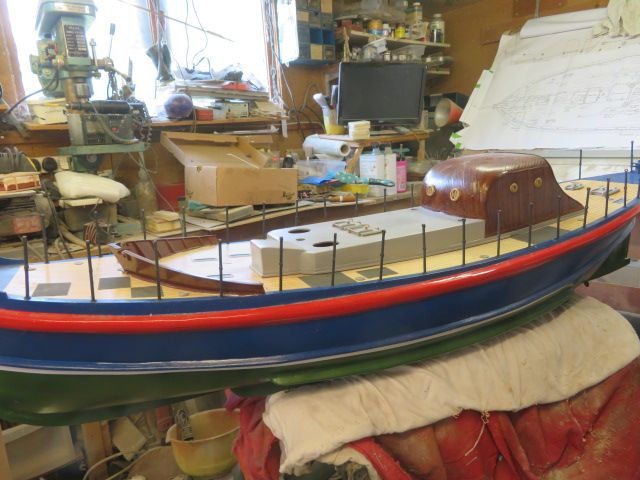
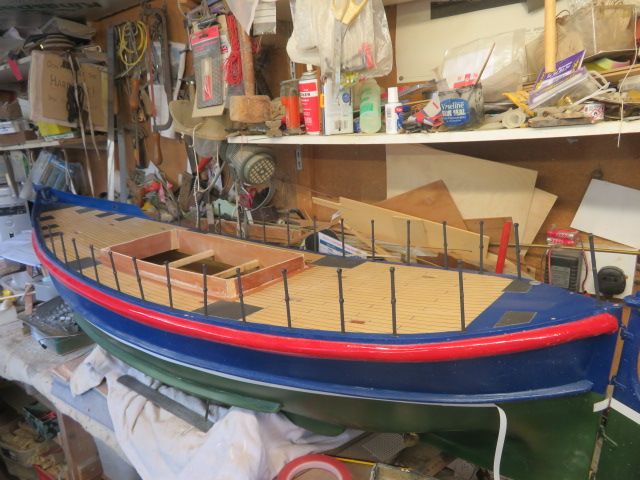
                      I dont think I can say anything about this exciting stage now that I have reached, other than I best now get the glue out and start sticking all the bits on to the two boats as I think I am now on the verge of being able to finish these two models by the end of this month, just about 1 year to the date of starting the project.

                      img_6557.jpg

                      img_6559.jpg

                      img_6560.jpg

                      img_6562.jpg

                      img_6563.jpg

                      img_6565.jpg

                      img_6566.jpg

                      img_6567.jpg

                      #105145
                      neil hp
                      Participant
                        @neilhp

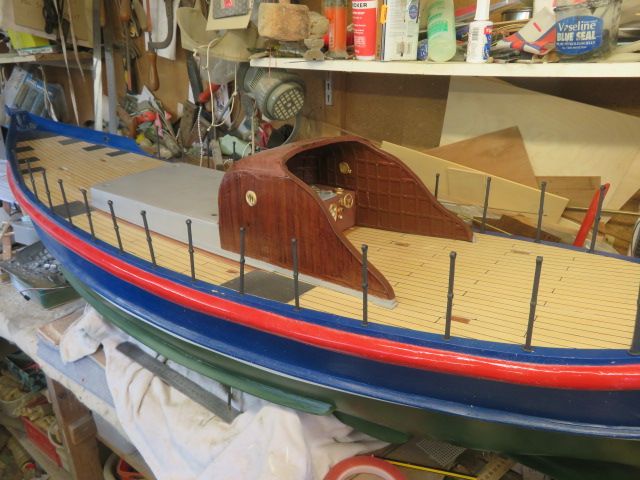
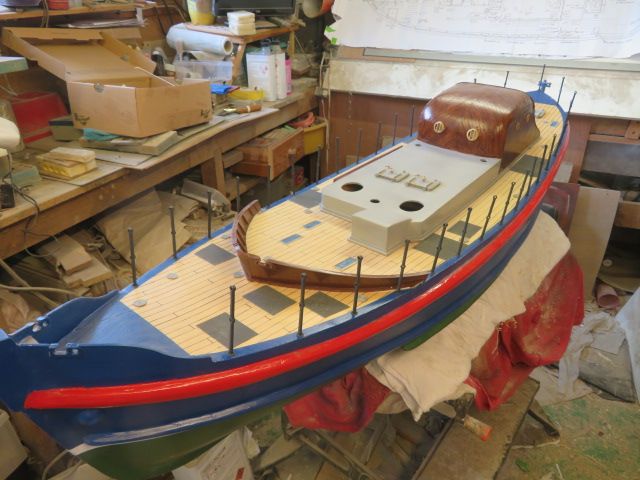
                        This afternoon I made the decision to drill and mount the two ball stanchions on the two boats.

                        Not just for vanity on my part to imagin what they'll look like, but to get the possitioning for all of the toe rails which go between them, which I'll be glueing on to the boats tomorrow.

                        Once those are in place I can then position the cleats, bitts and bollards for both boats, plus the deck lights for the William and Kate Johnston.

                        Getting closer day by day.

                        img_6574.jpg

                        img_6575.jpg

                        img_6576.jpg

                        img_6577.jpg

                        img_6578.jpg

                        img_6579.jpg

                        img_6580.jpg

                        img_6581.jpg

                        #105149
                        neil hp
                        Participant
                          @neilhp

                          I feel like Victor Meldrew this morning……..I DON'T BELIEVE IT!!!!

                          The other day I found the deck lights that I had painted months ago, and had found in a plastic bag, and "put to one side" ready for fitting once i had dry fit the stanchions!

                          You guess it……………I have spent 2 hours looking for them that I put in a "safe place".

                          And so, I have had to ready more for [painting and fitting and am half way through!……… fitting them later this afternoon………

                          I DESPAIR, at times!!!

                          img_6582.jpg

                          #105150
                          neil hp
                          Participant
                            @neilhp

                            Well, to be honest, I thought I had finished all the fittings for the boats………WRONG!!!!

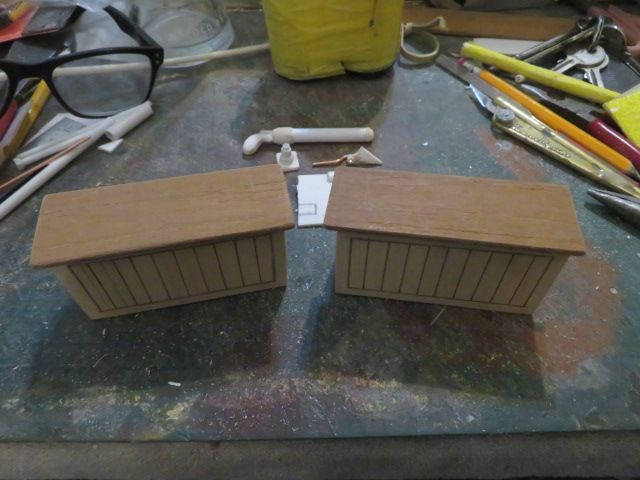
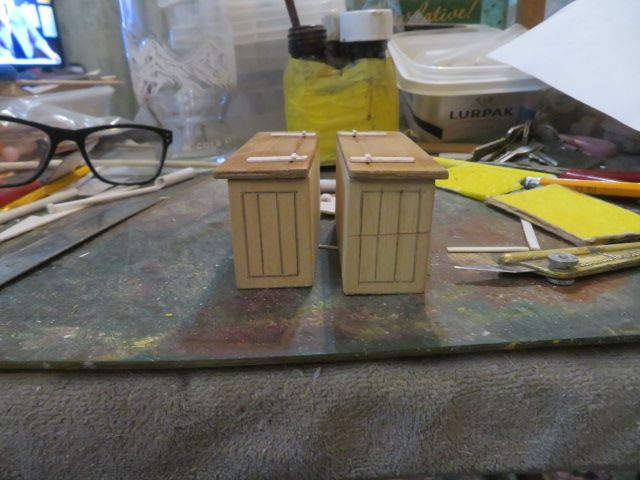
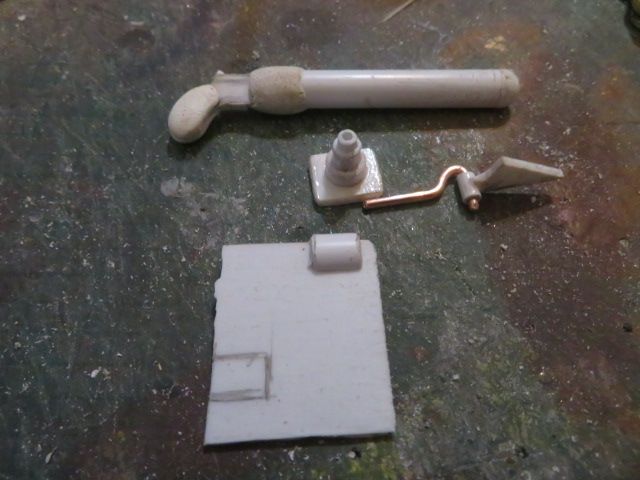
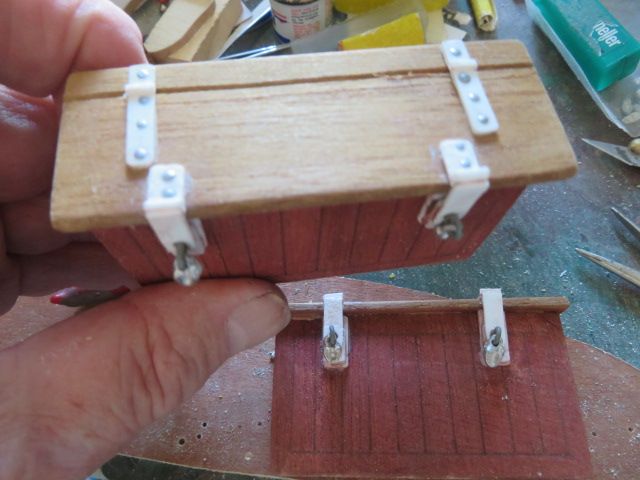
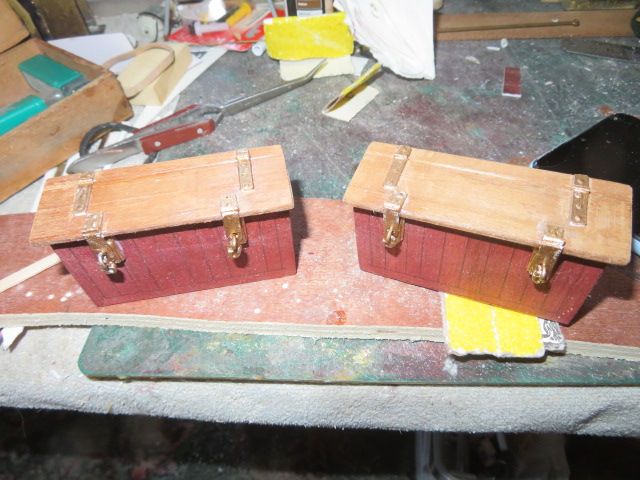
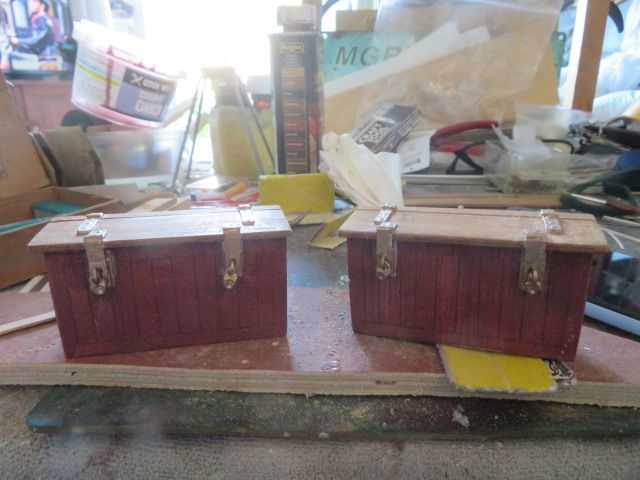
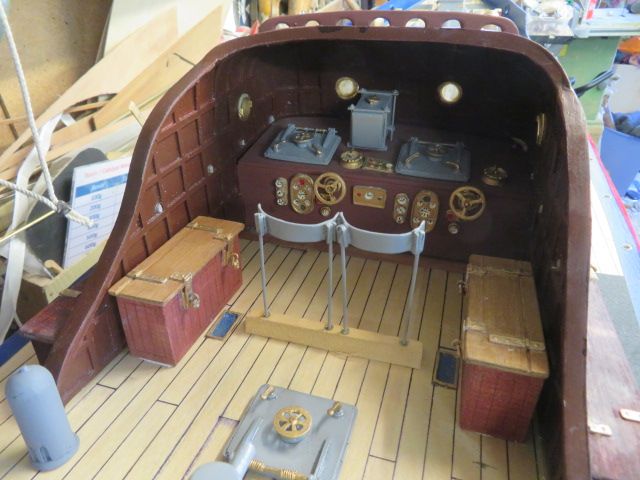
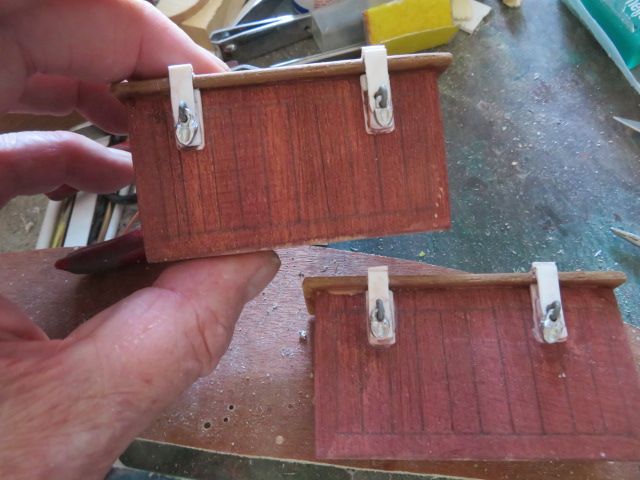
                            Browsing the plans tonight I had realised that I hadn't made the seeting for the inside of the cockpit for the William and Kate Johnston, and so using some obeche' for the main box, and some nice thin [3mm] teak for the top I made the two for the cabin, and with a little detailing such as hinges and hasps/staples and the odd padlock, they will be finished tomorrow!

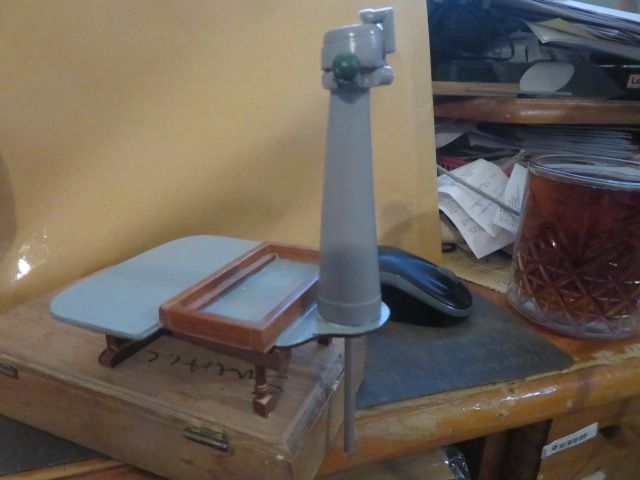
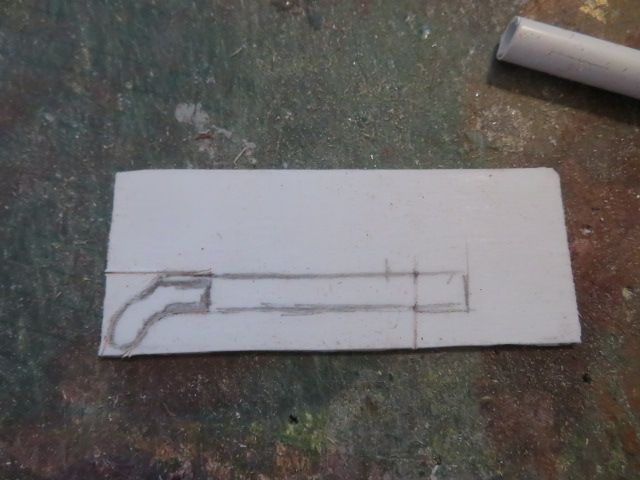
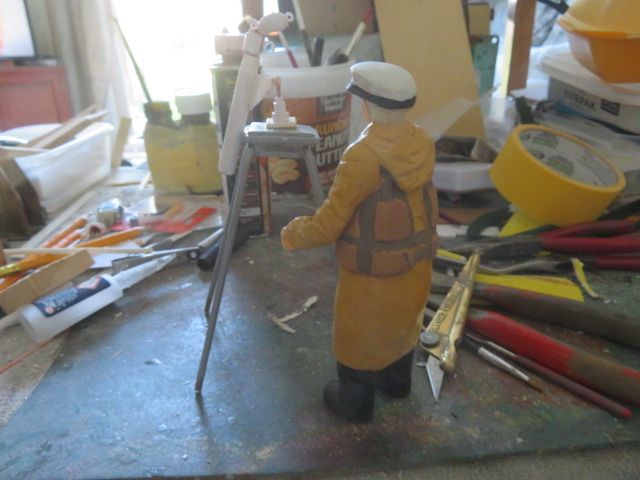
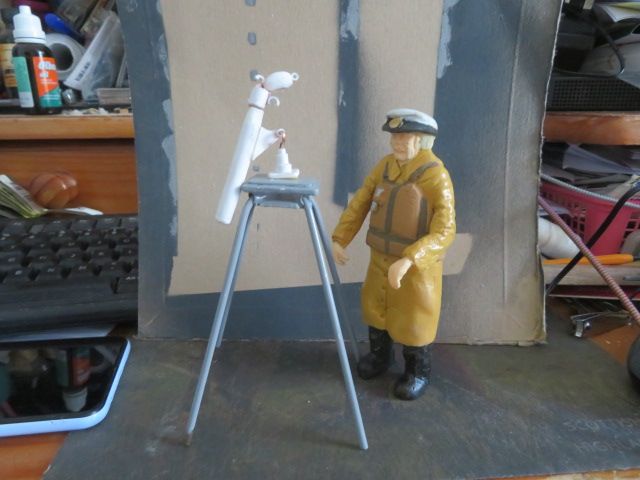
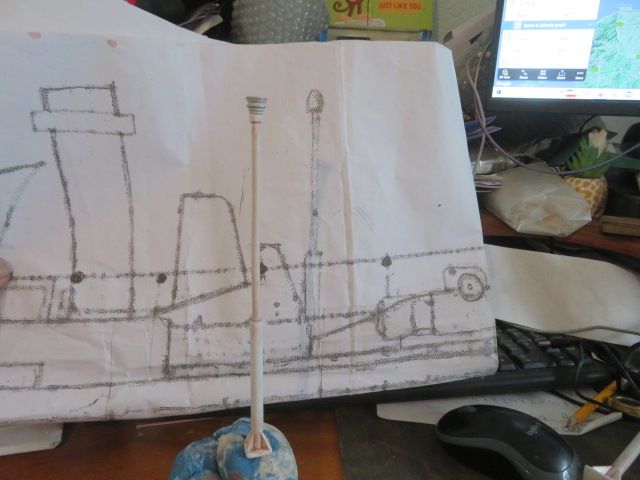
                            Now the second item that I decided that I wanted to make and then probably cast in resin was an item that goes on top of the stand, that towers above the steering box at the stern of the boats.

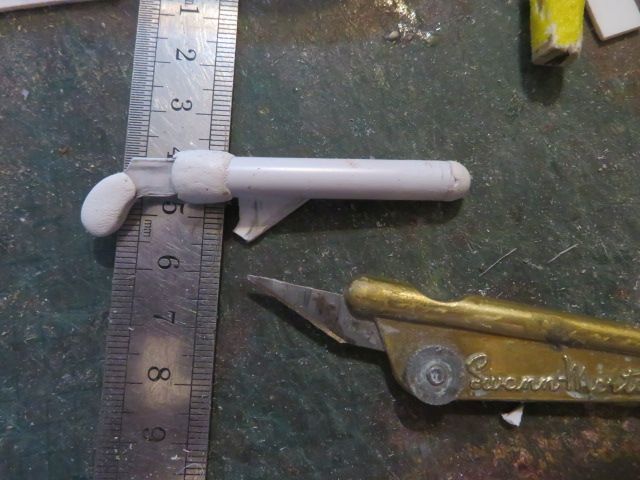
                            So in stages, and with the help of a very kind gent called Hugh Searle, from the Historic Lifeboat forum he helped me by showing me what a "Rocket canon" of the period looked like.

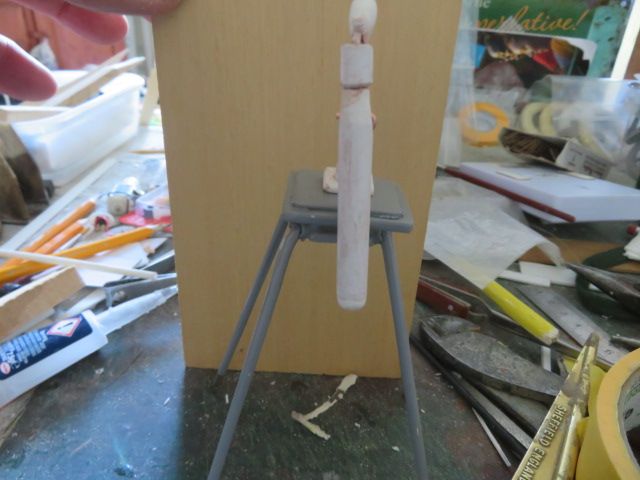
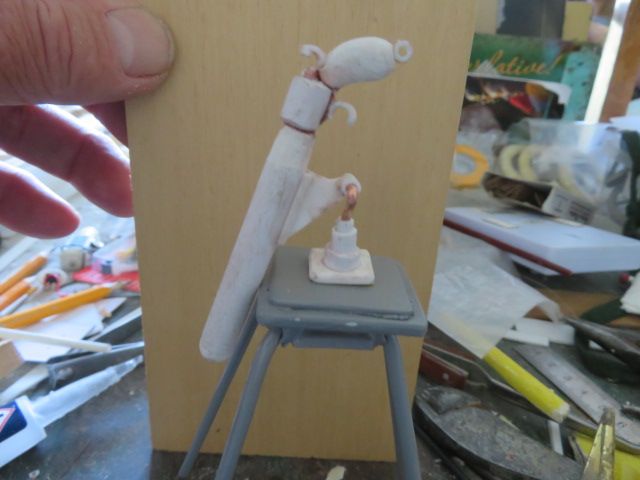
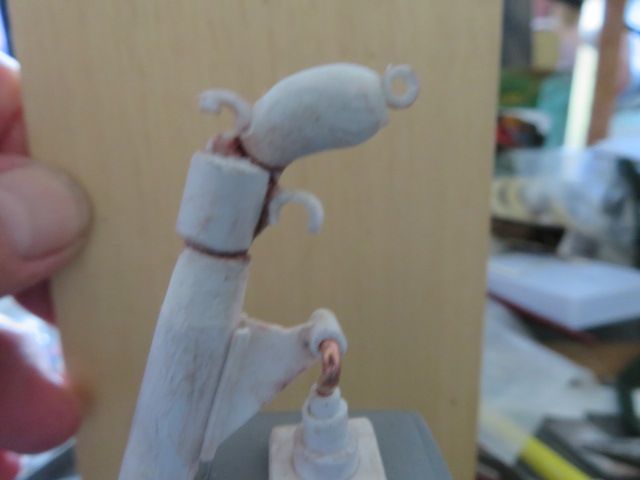
                            Using the plastic items plus some milliput, I am halfway to producing a rocket cannon to fit on to the stern with a swivel bracket as in the photos.

                            img_6597.jpg

                            img_6598.jpg

                            img_6587.jpg

                            img_6590.jpg

                            img_6594.jpg

                            img_6595.jpg

                            #105151
                            neil hp
                            Participant
                              @neilhp
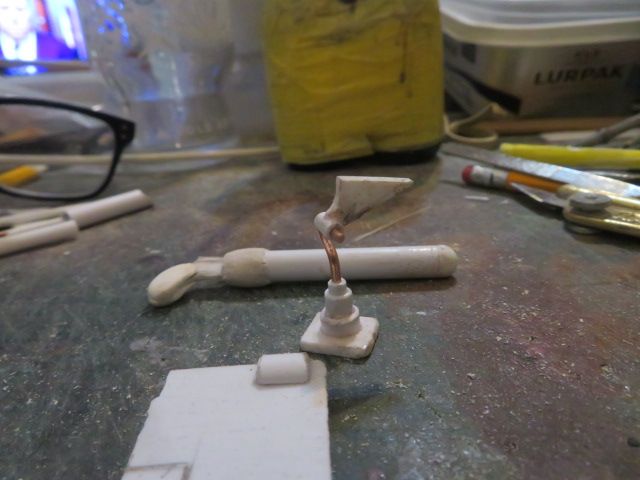
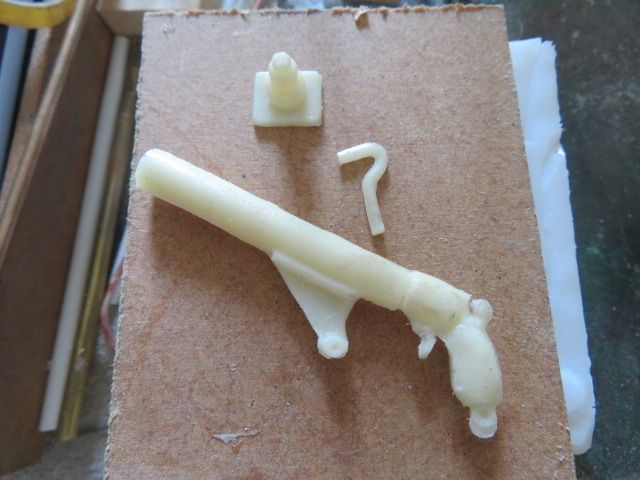
                              The Rocket cannon and its mounting bracket have been finished, but for painting, and are now ready for moulding in rubber, and then casting in resin for duplicate numbers when needed.
                               
                              seen here on the purpose fitted stand aft and over the steering gearbox
                               
                              And that I'll do later this afternoon!
                               
                              img_6601.jpg
                               
                              img_6602.jpg
                               
                              img_6603.jpg
                               
                              img_6604.jpg
                               
                              img_6605.jpg


                              Edited By neil howard-pritchard on 14/06/2023 14:10:53

                              #105154
                              neil hp
                              Participant
                                @neilhp
                                Put the hinges, hasps and staples and padlocks on to the storage boxes for the inside of the cabin on the William and Kate Johnston [none inside the cabin of the other 3 Barnetts, thank god…] that double up as seats!
                                I will paint the fittings once the cyano has set so I don't muck up my brush [yes, done that before, lol]
                                Which in the interim has now set, so have painted the fittings brass colour.
                                img_6606.jpg
                                img_6607.jpg
                                img_6608.jpg
                                img_6609.jpg
                                #105159
                                neil hp
                                Participant
                                  @neilhp

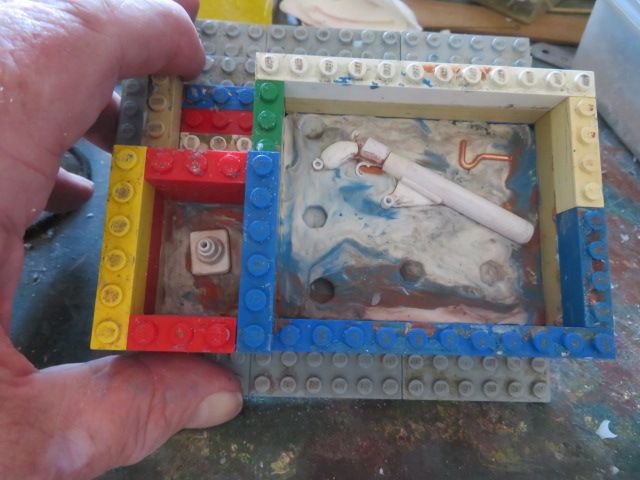
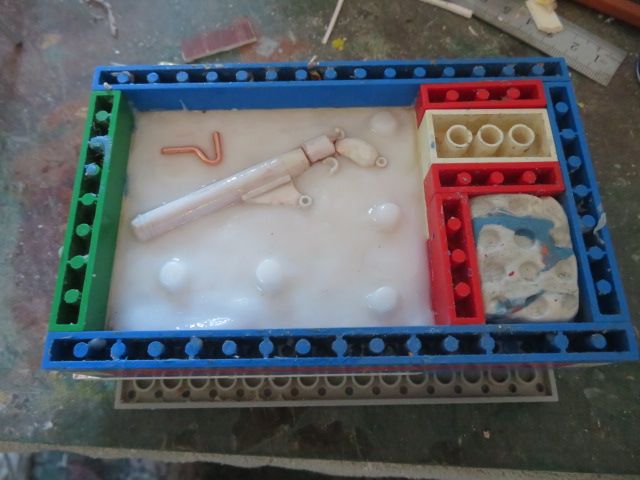
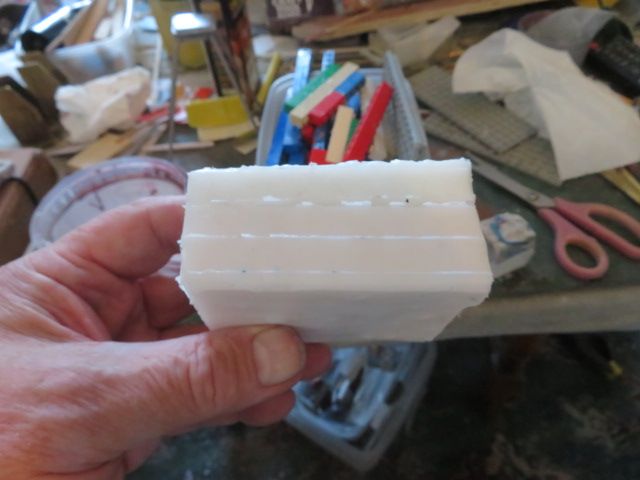
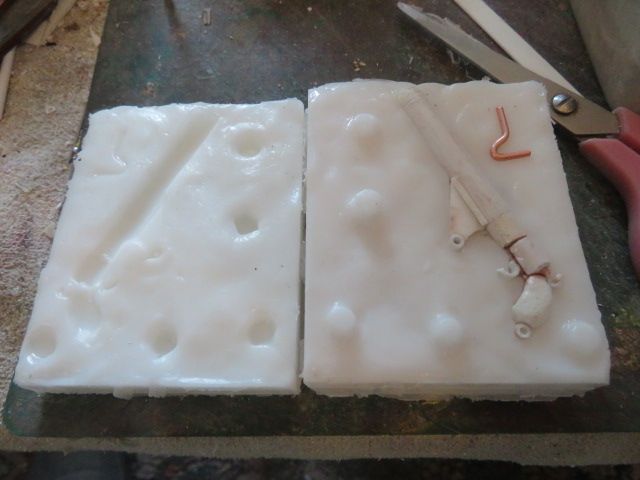
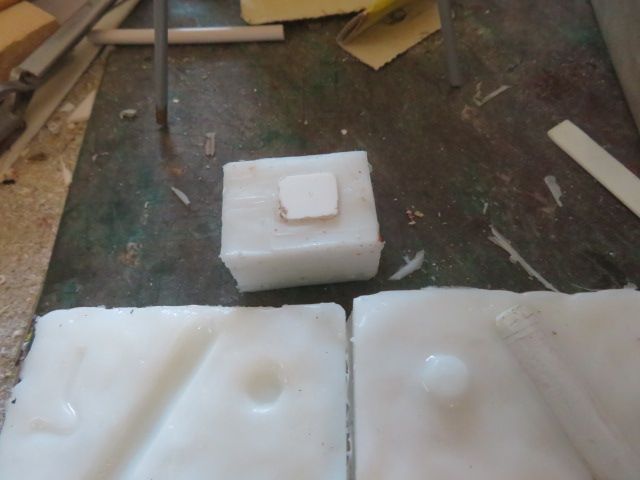
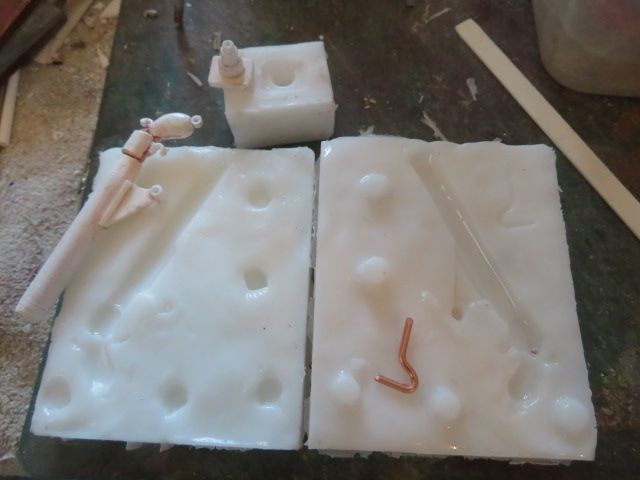
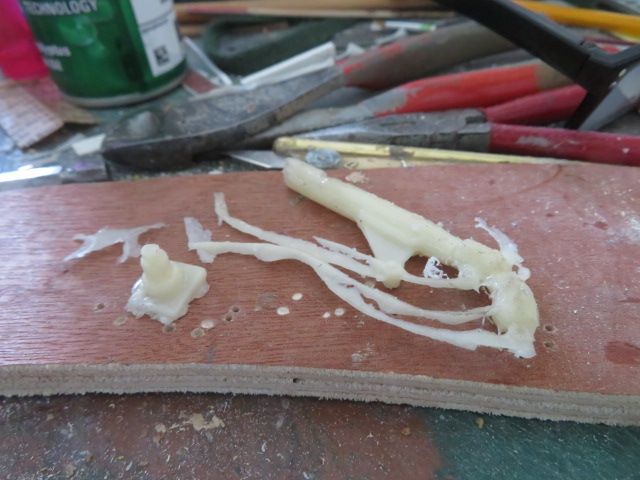
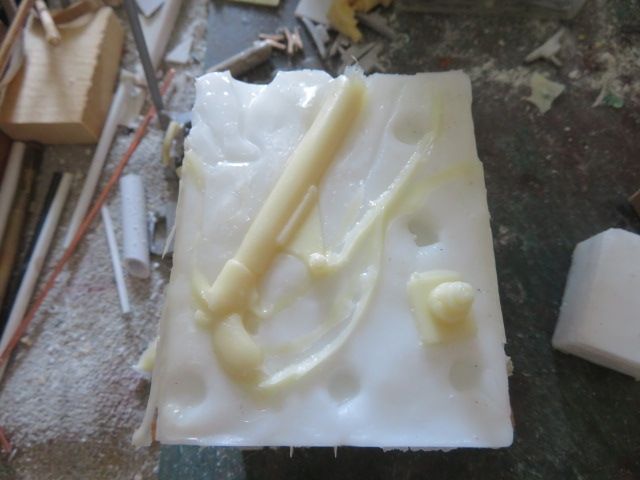
                                  Last night I made the split mould for the rocket gun and a surface pour mould for the stand that the gun sits on.

                                  Sadly this morning after mixing the polyurethane two part resin I left it for 20 minutes by which time it should have set and cured.

                                  It didn't and after an hour it is still sticky, I can only come to one of two conclusions.

                                  Either because the amount miced was only 12 gms in total, i possibly mixed a slightly karger amount of one component to the other OR the resin has gone off and exceeds its shelf life……… I hope not the 2nd reason.

                                  ANYWAY, I have mixed another lot of just 8 gms and that is now curing in the "warm" kitchen.
                                  But even from the failed first casting, it shows that the mould actually works well.

                                  img_6610.jpg

                                  img_6612.jpg

                                  img_6613.jpg

                                  img_6614.jpg

                                  img_6615.jpg

                                  img_6616.jpg

                                  img_6617.jpg

                                  img_6618.jpg

                                  #105160
                                  neil hp
                                  Participant
                                    @neilhp

                                    must have been my mixing volumes of the two part epoxy, as the second mouldings came out perfectly with no flash lines and virtually no cleaning up of anything.

                                    img_6620.jpg

                                    img_6621.jpg

                                    #105182
                                    neil hp
                                    Participant
                                      @neilhp

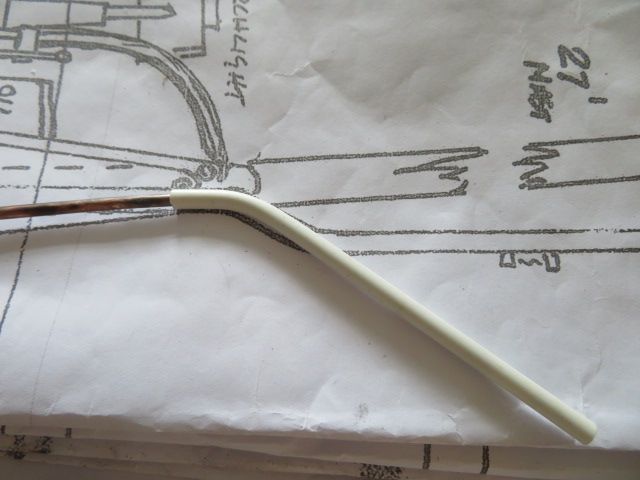
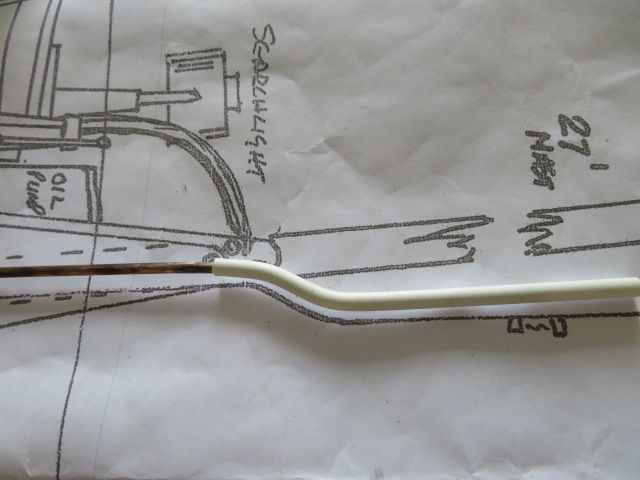
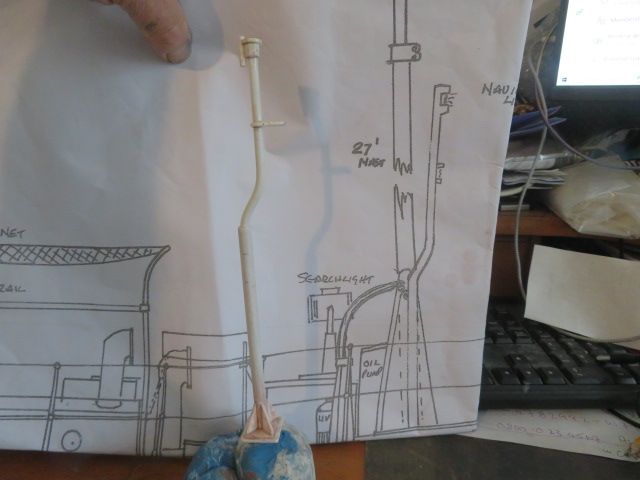
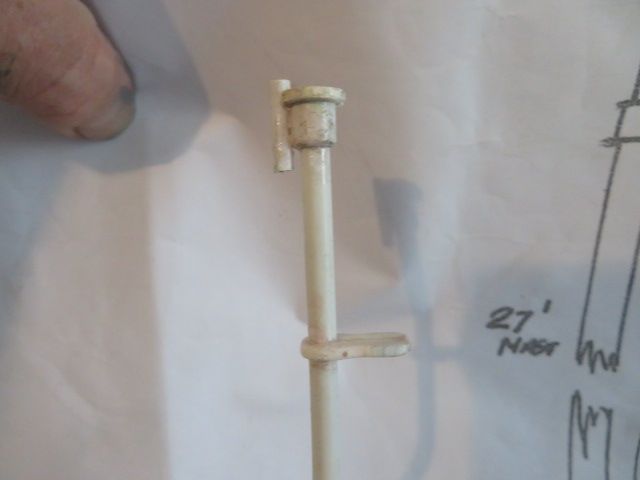
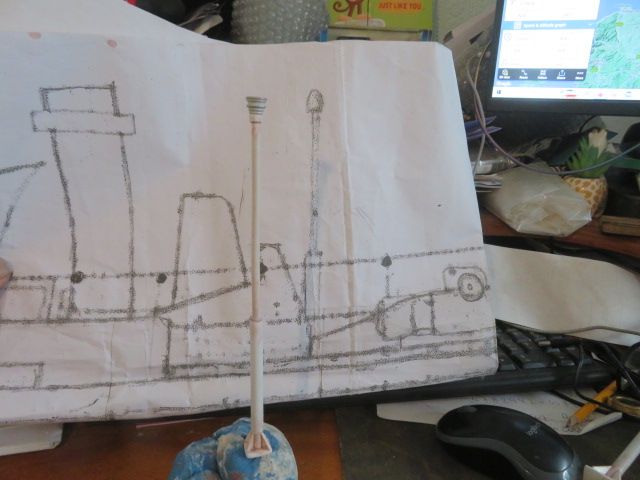
                                      A tip for anyone wanting to bend some plastic tubing without trying to heat it up and seeing it deform or desolve in front of their eyes by adding direct heat.

                                      Take your plastic tube, in this case the signalling lamp on the RNLB William and Kate Johnston and find a piece of brass rod that is a good sliding [but not tight] fit for the inside of the plastic tube.

                                      Aneel the brass rod until it is cherry red, gusing a gas cooker, a camping gas stove or best of all a gas brazing torch. You can even use a weed burner from a garden centre but it takes a little longer to heat the brass.

                                      Once it has been heated to cherry red, leave it to cool SLOWLY. DON'T quench it in water to cool as that defeats the object and just hardens the brass up again.

                                      Once it has cooled to the touch, slode it in to the plastic tube, you can bent the whole thing into the shape that you need, as shown in the photos.not magic, just using a bit of metal working science.

                                      You can actually bend brass rod up to 5mm diameter once aneeled and cooled naturally, but never tried anything larger.

                                      But it works as you can see from the photo.

                                      Obviously you cannot pass any wiring through the plastic tubing as the brass rod remains inside, but if like me weho doesn't wire up lights to his boats due to incompetance, you have a nice strong masdt that won't break if you catch it through clumbsiness.

                                      img_6646.jpg

                                      img_6647.jpg

                                      img_6648.jpg

                                      img_6649.jpg

                                      img_6651.jpg

                                      img_6651.jpg

                                      #105185
                                      Trevor Holloway
                                      Participant
                                        @trevorholloway99134

                                        Ah but you can use the brass rod as one conductor, meaning you only have to hide one wire for lights. 😜

                                        #105187
                                        neil hp
                                        Participant
                                          @neilhp
                                          Posted by Trevor Holloway on 17/06/2023 17:59:13:

                                          Ah but you can use the brass rod as one conductor, meaning you only have to hide one wire for lights. 😜

                                          far too complicated for someone like me with a phobia for electrics, lol.

                                          and i never sail in the dark anyway.

                                          #105189
                                          Ray Wood 3
                                          Participant
                                            @raywood3

                                            Hi Neil,

                                            Loving your detailed work as always especially the lockers hasp and staples and I'm sure the padlocks work as well.

                                            Best Regards from down south

                                            Ray

                                            #105190
                                            neil hp
                                            Participant
                                              @neilhp

                                              thanks Ray, am going to stick a load of bits onto the boat this morning and afternoon, had dry fitted them yesterday, so know where they go……….and tbh, they really make the boat come alive and almost real.

                                              Look forward to getting them finished and mine on the water.

                                              #105199
                                              neil hp
                                              Participant
                                                @neilhp

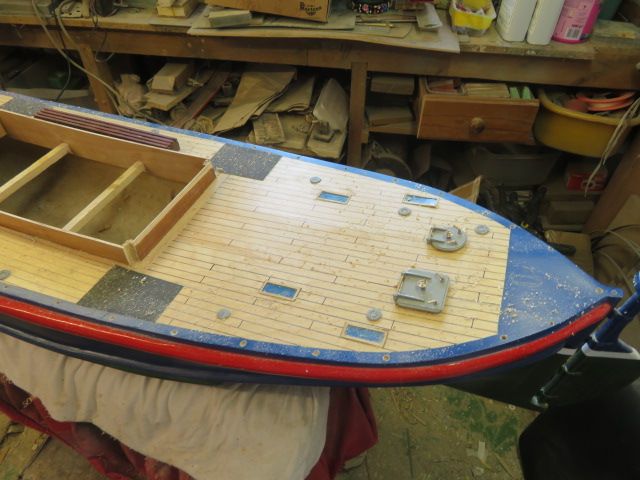
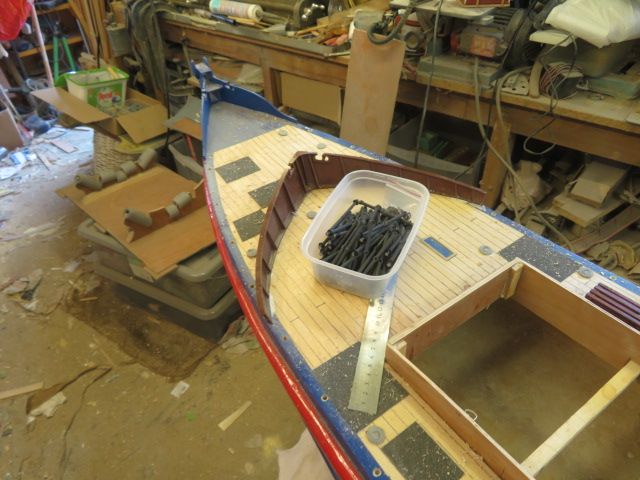
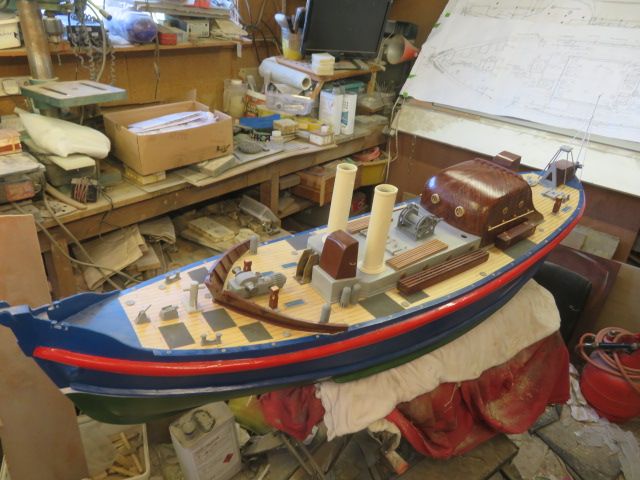
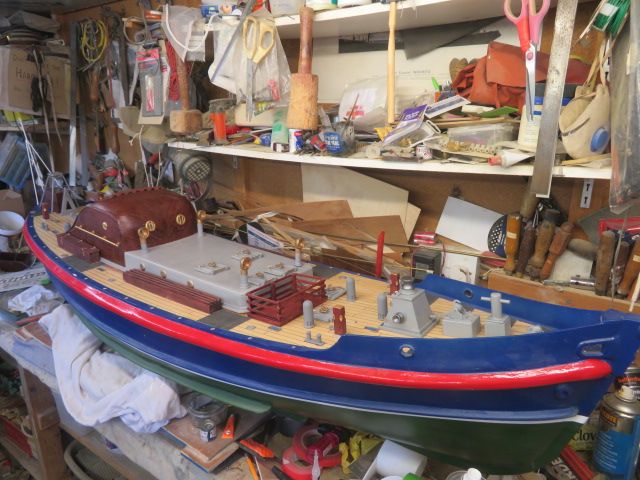
                                                As promissed Ray a few photos of the progress and all the bits so far fitted to the decks of the two different looking lifeboats of the same lifeboat class,

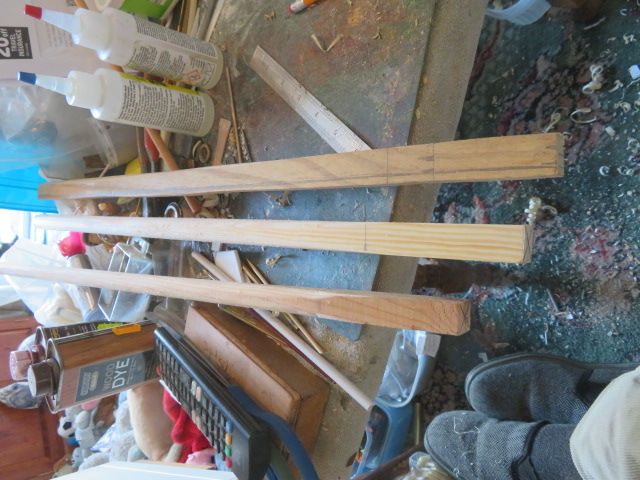
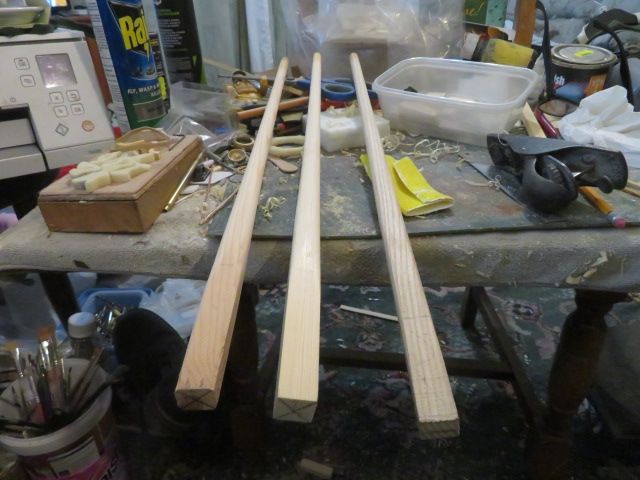
                                                And also the hand planing of the masts for the two I'm making and the one for the friend who took the first set of mouldings I made 9 months ago.

                                                A few more fittings to go on to the boats, and then, before I fit the stanchions to my boat I want to fit the motors to my boat, so that i don't break any in my clumbsy way.

                                                img_6660.jpg

                                                img_6661.jpg

                                                img_6662.jpg

                                                img_6663.jpg

                                                img_6668.jpg

                                                Edited By neil howard-pritchard on 19/06/2023 19:57:18

                                                #105212
                                                neil hp
                                                Participant
                                                  @neilhp

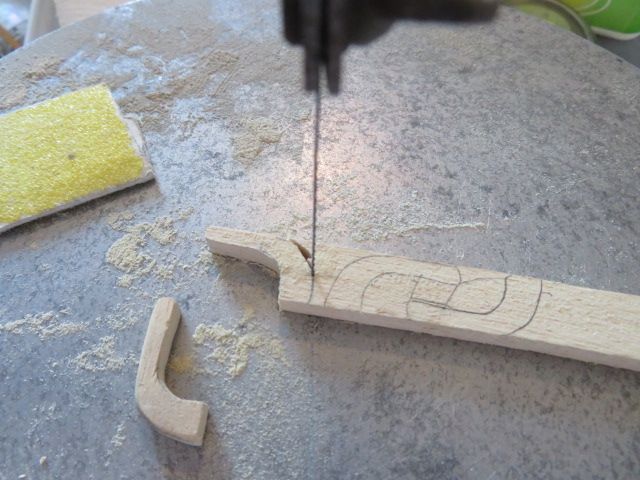
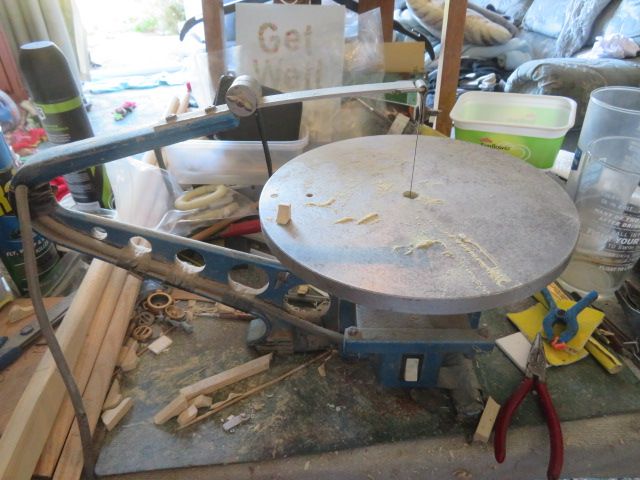
                                                  Today is the first day in about 10 or so years that I have used this power tool that has great sentimental value to me.

                                                  It is the first ever modelling power tool that I bought, and has always been there for me.

                                                  When my first pay packet for the month was £242.16p as a teacher in my first post in 1973 I couldnt afford a new one but used it in the woodwork room to show kids how versetile it was in cutting shapes, and at home for my own modelling…….was great for deaqling with the crap wood supplied in early Billing kits.

                                                  It had been on a shelf in the store room unused for 6 years.

                                                  When I left 2.5 years later to go to Australia to teach, I asked head of department if I could buy it as no one other than I had ever used it….."give the school 15 quid for it fir the Christmas staff party and you can have it…….15 quid was a chunk out of my last UK pay packet which had gone up to 360 quid pcm by then as I was saving to go out to Ozz, I knocked him down to £12 quid!, BUT what a stallwart it has been in my workshop ever since, and always very reliable,touch wood!

                                                  The tool in question is an Aero Piccola Vibro saw, and just brilliant.

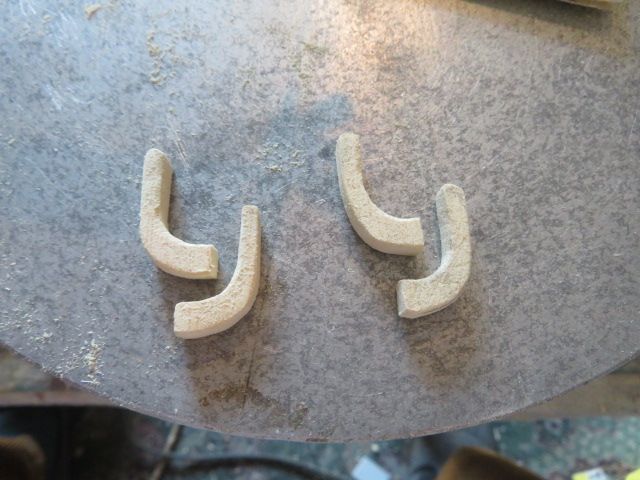
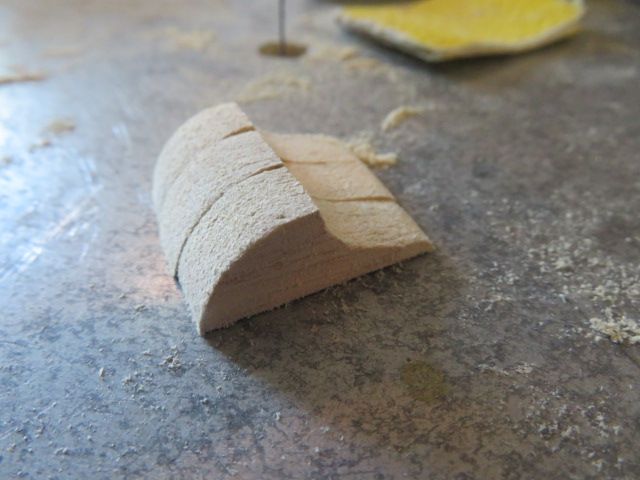
                                                  And to that fact I dug it out from the dust to cut both sets of brackets and seats for both vertically hung, asnd flat stored life rings for the boats.

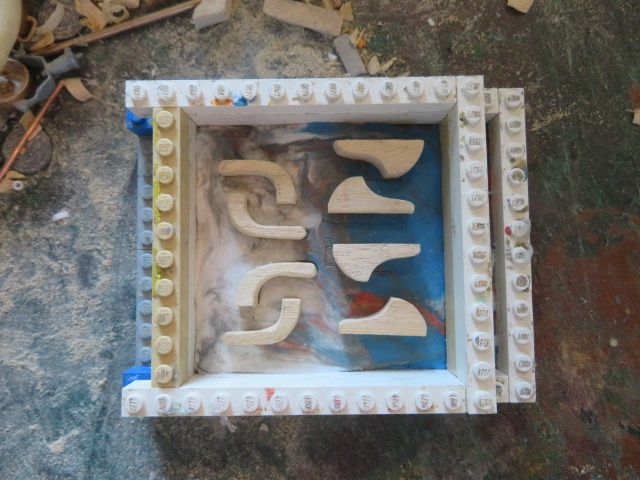
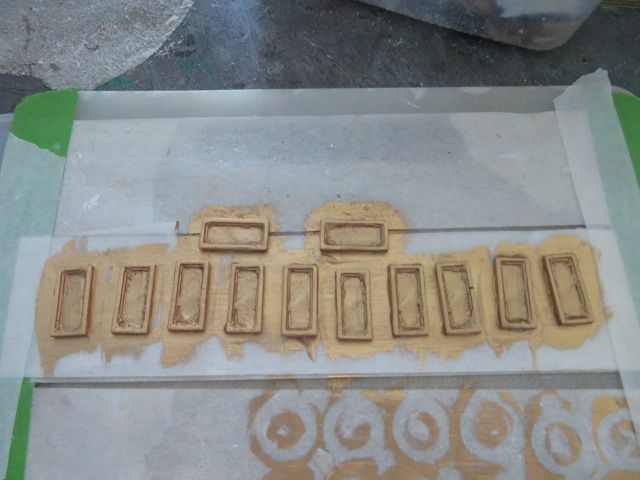
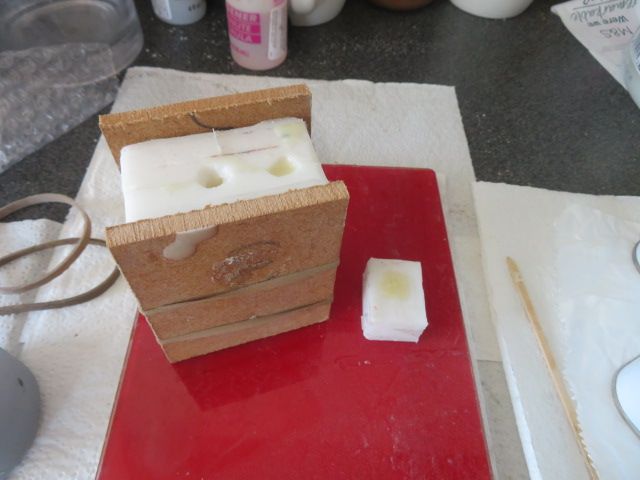
                                                  Finally came another old faithfull, my lego bricks that was given to me by a very kind man [who never wanted to be named, but he knows who he is] and have been used in probably getting on for over 100 moulds.

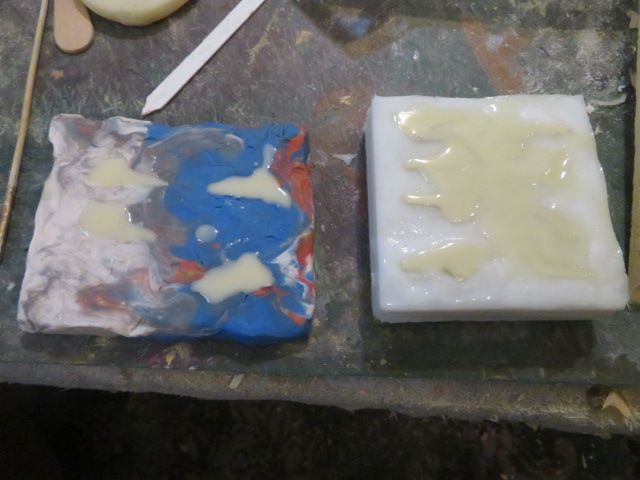
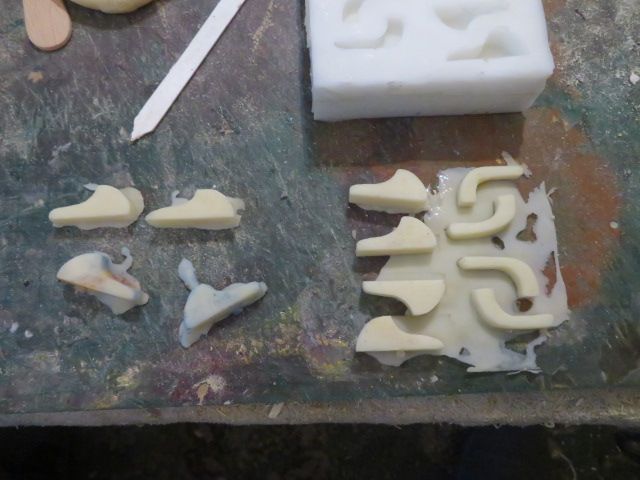
                                                  The mould made today was a surface poured mould for those brackets that were cut and sanded out of Obeche'.
                                                  img_6672.jpg

                                                  img_6676.jpg

                                                  img_6681.jpg

                                                  img_6683.jpg

                                                  img_6686.jpg

                                                  #105214
                                                  neil hp
                                                  Participant
                                                    @neilhp

                                                    So once the mould was finished I mixed some resin.
                                                    But after filling the mould to full overflowing I realised I had some resin left so quickly pressed some of the wooden masters in to plasticine and used the rest on those 4, knowing that next time I won't mix as much,

                                                    However all came out well, ready for sanding the over fill off, once thoroughly cured.

                                                    img_6688.jpg

                                                    img_6689.jpg

                                                    #105215
                                                    neil hp
                                                    Participant
                                                      @neilhp
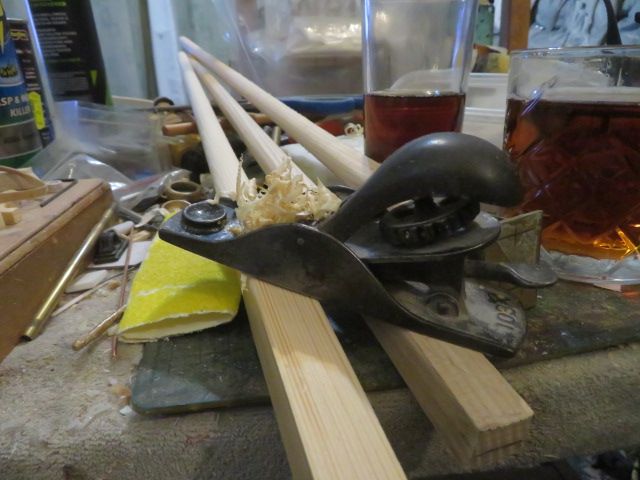
                                                      And whilst taking a breather from the job of making and casting the supports for the life rings, I spent another half hour planing the tapers on the 3 masts, using a vintage palm plane that was given to me by an old friend.
                                                      Sadly he died some years ago, but I think of him often, especially when using this lovely little well ballanced tool.
                                                      And the three masts are slowly getting there ready for mounting on to my laithe, in order to be given a final sanding of the taper to the head and a final sanding…………looking better every day.
                                                      img_6692.jpg
                                                      img_6691.jpg
                                                    Viewing 25 posts - 551 through 575 (of 648 total)
                                                    • Please log in to reply to this topic. Registering is free and easy using the links on the menu at the top of this page.

                                                    Code of conduct | Forum Help/FAQs

                                                    Advert

                                                    Latest Replies

                                                    Home Forums Scratch build Topics

                                                    Viewing 25 topics - 1 through 25 (of 25 total)
                                                    Viewing 25 topics - 1 through 25 (of 25 total)

                                                    View full reply list.

                                                    Advert

                                                    Newsletter Sign-up