TYNE Class Lifeboat build

Advert

TYNE Class Lifeboat build

Home Forums Build Blogs TYNE Class Lifeboat build

  • This topic is empty.
Viewing 25 posts - 326 through 350 (of 593 total)
  • Author
    Posts
  • #92407
    neil hp
    Participant
      @neilhp

      BACK TO THE MERSEY for the present,

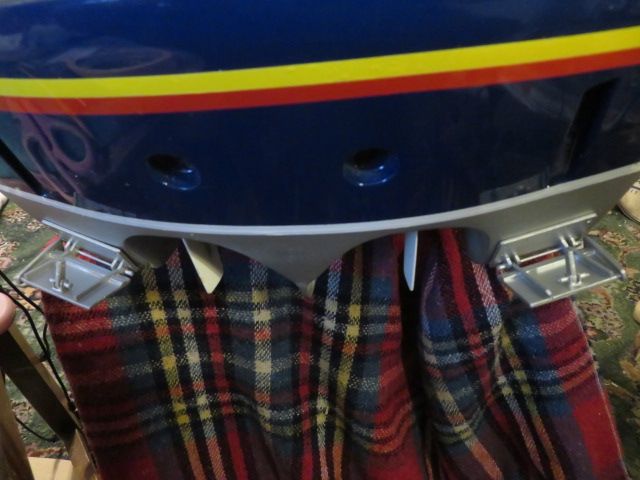
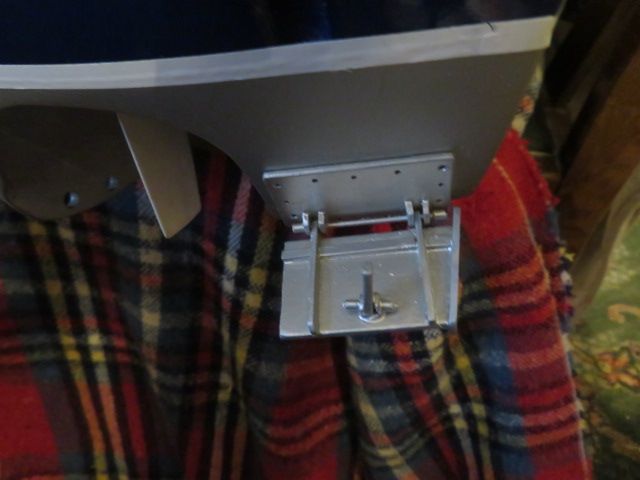
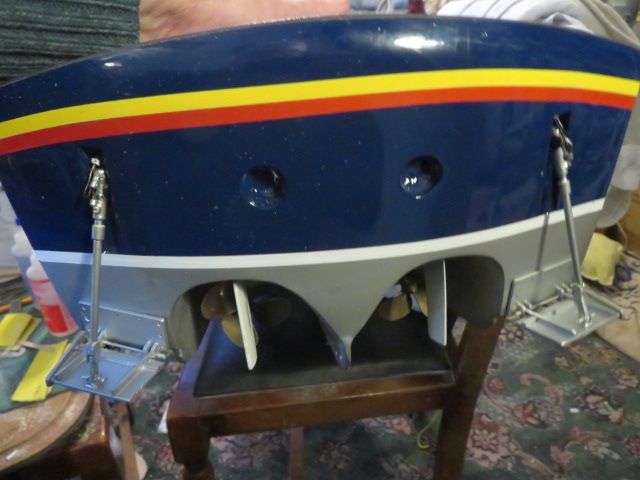
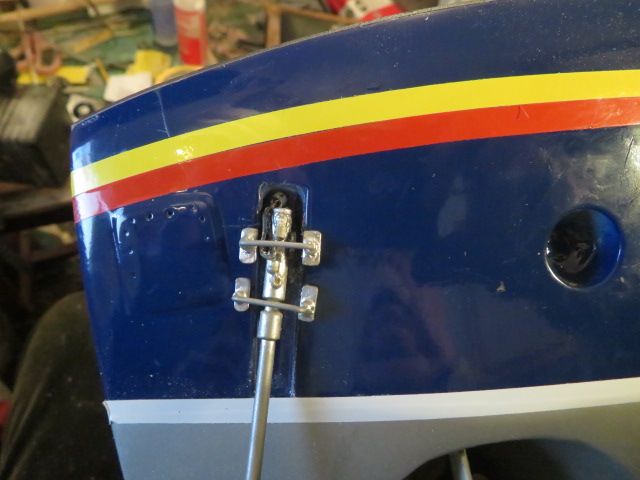
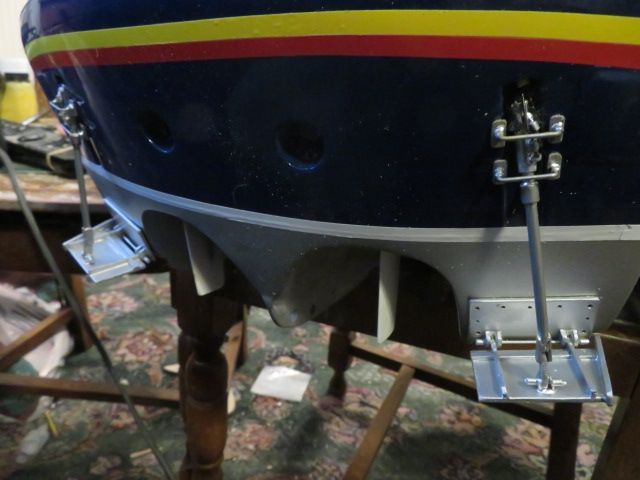
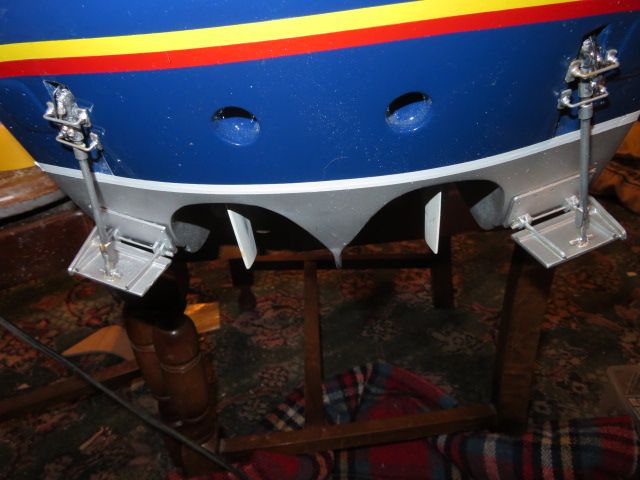
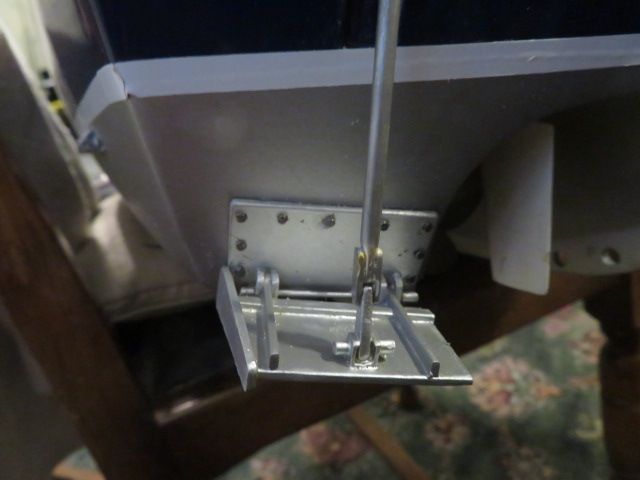
      I fitted the trim tabs this afternoon after putting them together and spraying the other night.

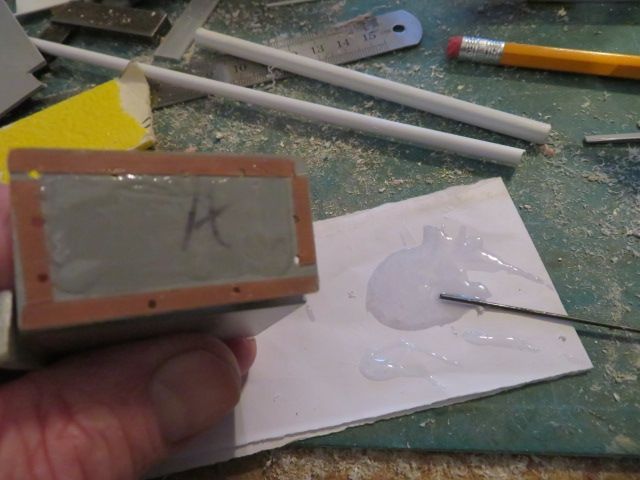
      i put some double sided 3mm wide waterproof tape around the [already drilled] backing plates and then mixed some 30 minute epoxy into the middle of each plate surrounded by the tape. peeled the protective outer covering from the tape and stuck the tabs to the stern.i will leave them a few hours this evening and then will drill through with a 0.8mm drill bit and push some framing pins through the holes, with more epoxy on to them , and tomorrow when everything is set, i will back fill from the insides with some polyester resin to seal it all and make watertight.

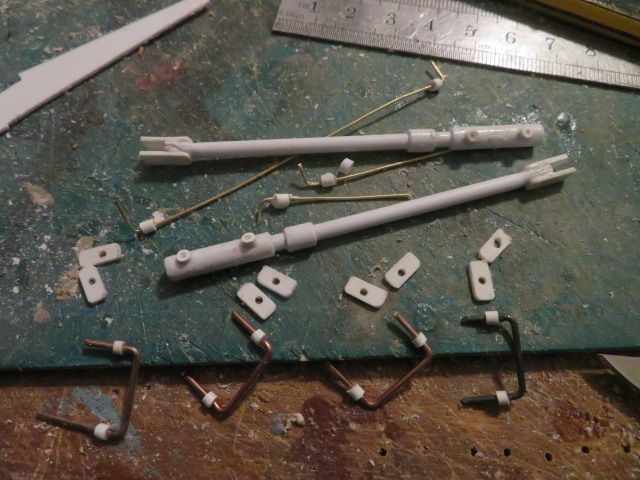
      now that the trim tabs have been fitted semi permanently i can make the hydraulic rams to fit in a neutral position.

      simply made from different lengths of plastic tubing, some scraps of plasticard and some copper and brass wire, all the parts are ready for fitting together once painted tomorrow.

      img_7207.jpg

      img_7208.jpg

      img_7209.jpg

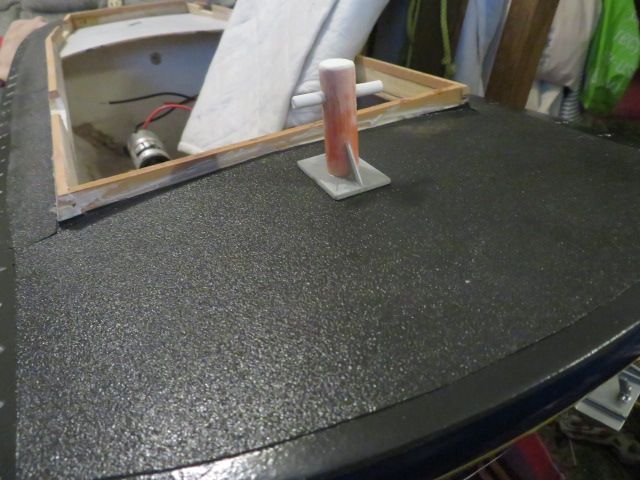
      I also made the two towing/mooring Bitts for the bow and stern for Mick French's boat. there are two in the parts going to Dave Stavros Jones, so only needed to make these two.

      img_7212.jpg

      img_7213.jpg

      Advert
      #92408
      neil hp
      Participant
        @neilhp

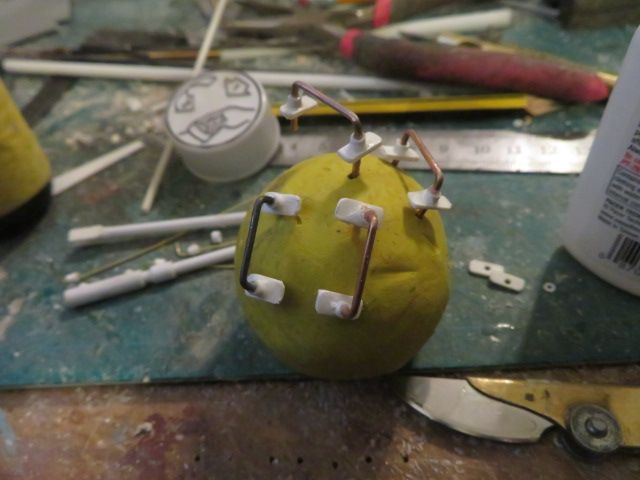
        Always handy to have a ball of plasticine to stick your bits in whilst the glue is drying.

        img_7214.jpg

        #92427
        neil hp
        Participant
          @neilhp

          still on the mersey..

          piping, and unions added, the rams have now been attached to Mick French's Mersey'.
          tomorrow I'll find, and spray the engine exhausts chrome, and then fit them. and then apart from the belting and the bow strops where i have some red cord, unless i sent it to Mick….can you remember old boy, the hull has been finished below deck level.
          then time to fit out the cabin, before lastly fitting all the deck paraphernalia and stanchions.

          img_7221 (1).jpg

          img_7223.jpg

          img_7224.jpg

          img_7225.jpg

          #92457
          neil hp
          Participant
            @neilhp

            Mick's Mersey has had the piping, and unions added to the rams, the rams have now been attached to Mick French Mersey stern

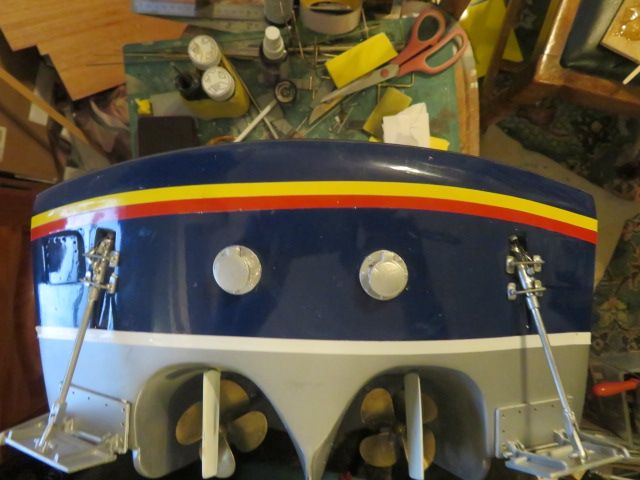
            sprayed the engine exhausts chrome, and fitted them. and then apart from the belting and the bow strops where I have some red cord, unless i sent it to Mick….can you remember old boy, the hull has been finished below deck level.

            Engine exhausts fitted……

            had a bit of a minor problem to overcome.
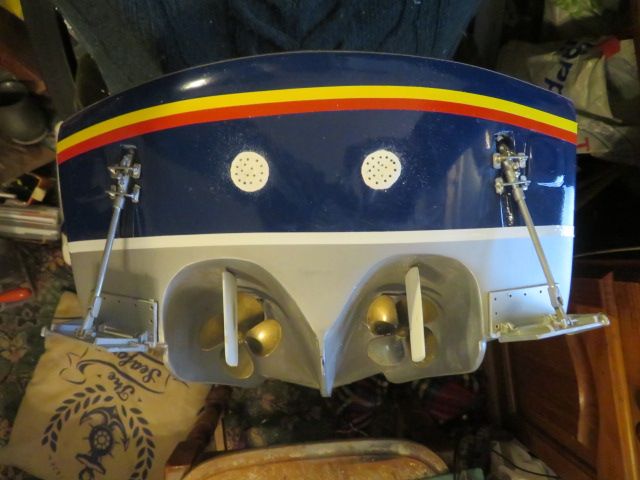
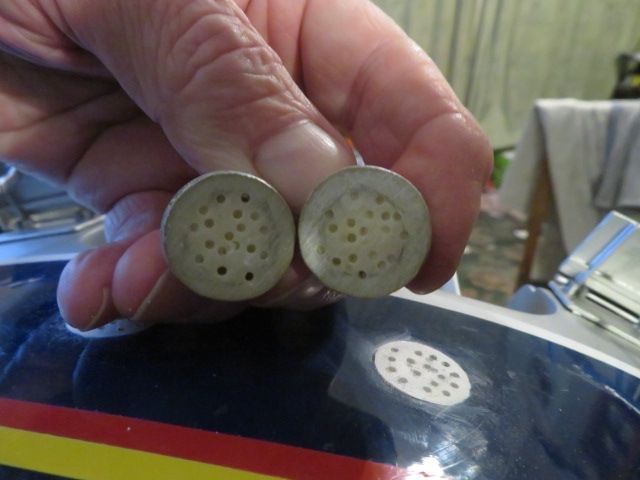
            there are/were circular recesses into the transom that are barely smaller in diameter than the flange on the exhausts are.
            and so, I doctored it……I filled the two recesses with milliput to the level of the transom so as to get a level area.
            once set, over night, this evening I drilled into both the milliput and the bases of the exhausts and then spread over the base of the exhausts with 5 minute epoxy and glued in place.

            the holes in each part of the joint are to make a good purchase and anchor bond, so that they wont drop off.

            then I drilled the backing plates for the trim tabs and with epoxy again glued some framing pins through the plates, transom and into the hull……….this I will make watertight tomorrow by pouring some grp resin into the stern to cover those pins, and setting them in place permanently.

            img_7225.jpg

            img_7268.jpg

            img_7269.jpg

            img_7270.jpg

            img_7271.jpg

            #92481
            neil hp
            Participant
              @neilhp

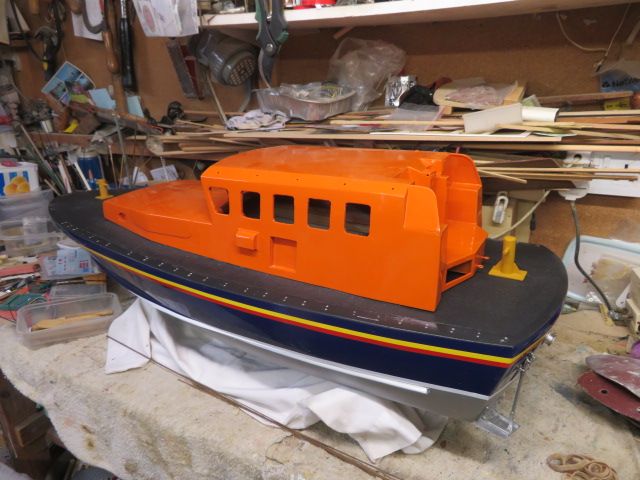
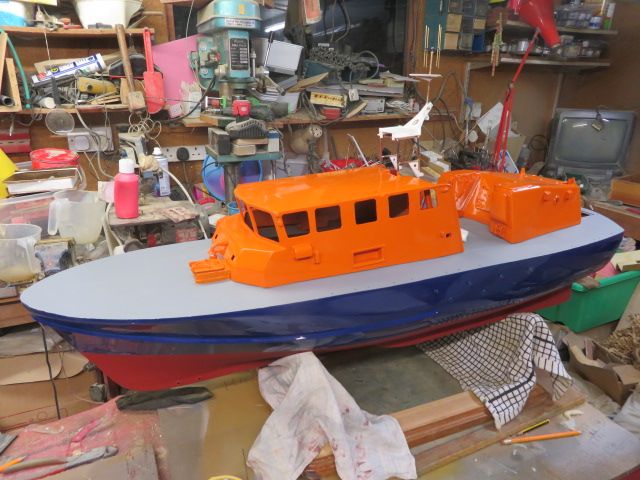
              the two boats, beautifully painted and now ready for fitting out are now safely back home with me.

              am i looking forward to getting stuck in………not at the moment more pressing personal matters on my mind.

              img_7294.jpg

              img_7295.jpg

              #92546
              neil hp
              Participant
                @neilhp

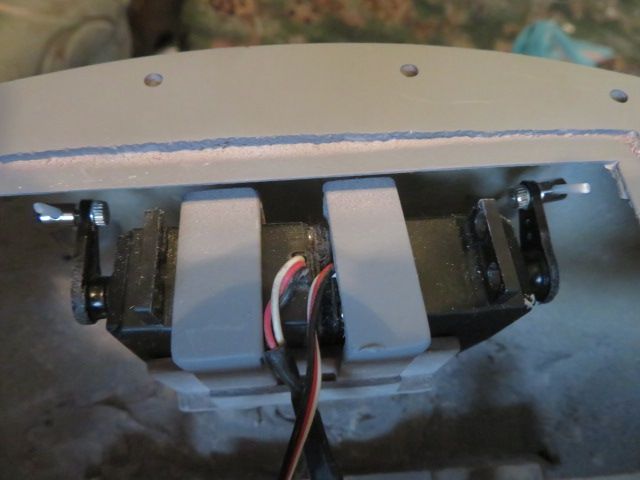
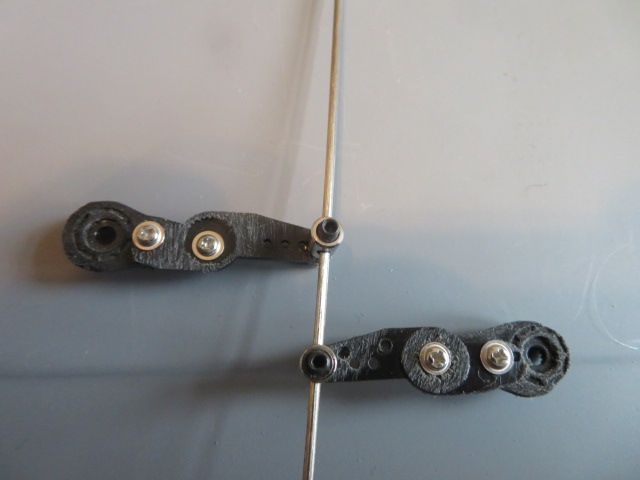
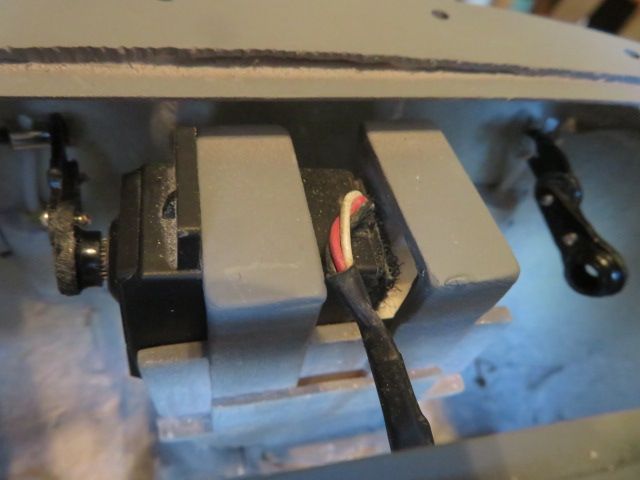
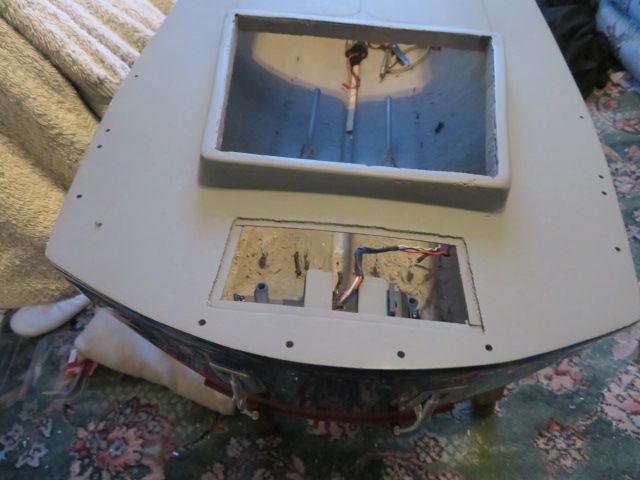
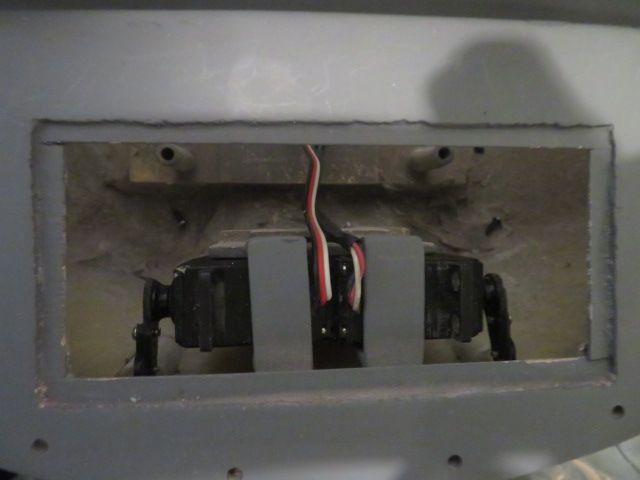
                today i spent time making the servo arms of operating the "hydraulic" rams for the trim tabs on the Tyne lifeboat, and fitting the servos into their cradle at the stern.
                when trying them out with radio gear installed, i found that the port side servo would only operate in the direction opposite to that which i needed.
                and so to resolve this i have sent for two servo reversing leads from China, which reverses the polarity and travel direction of the servo capstan.
                once installed, both servos will operate in the right direction to raise and lower the tabs.

                img_7316.jpg

                i then modified the servo arms by lengthening them, as they were too short and were bending the "snakes" too much….really just trial and error at this point in time.

                img_7317.jpg

                img_7318.jpg

                img_7321.jpg

                #92563
                neil hp
                Participant
                  @neilhp

                  back to my Tyne and setting up the trim tabs.

                  it has taken some time to get the set up right, and have lost count of the number of times i have disconnected it all from the tabs and taken the servo arms off the servos to get the right lengths and settings for those arms so that the rams run straight inside the boat and don't catch on the inside of the transom or the underside of the deck.

                  but i have finally got it all right, and a smooth operational run.

                  i have adjusted the servo capstans so that they are, when boat stationary with tabs up, are both in a position that when tabs in operation they will only push the tabs down from their "locked" position.

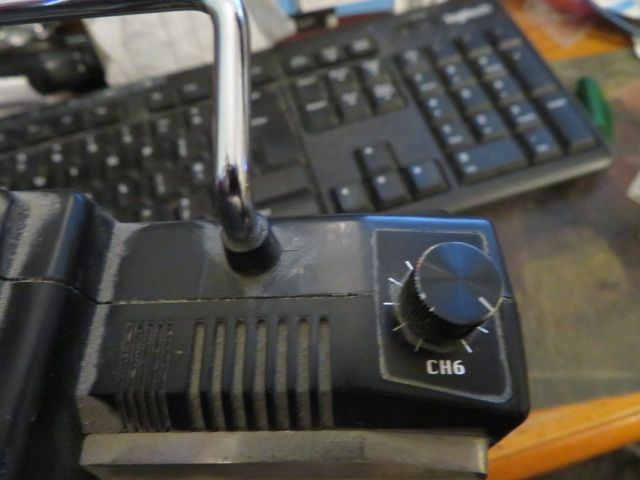
                  to do this, i have [ or will have once the servo reverse lead is set up…i hope] i can use the 6th channel on my RC TX, the potentiometer nob on the top of my TX, and from zero to full, the tabs run down to an angle of around 40 degrees to keep the bow from porpoising on full chat!

                  I just need to find my very short screwdriver that i won in a set of Christmas crackers a couple of years ago so that i can screw the servo arms onto the capstans now …..AND THEN, job done, hopefully and as soon as I get the servo reverse lead and place it in line and make sure it all works, i can cover in the hatch to semi permanent fixture……

                  img_7324.jpg

                  img_7322.jpg

                  img_7323.jpg

                  #92590
                  neil hp
                  Participant
                    @neilhp

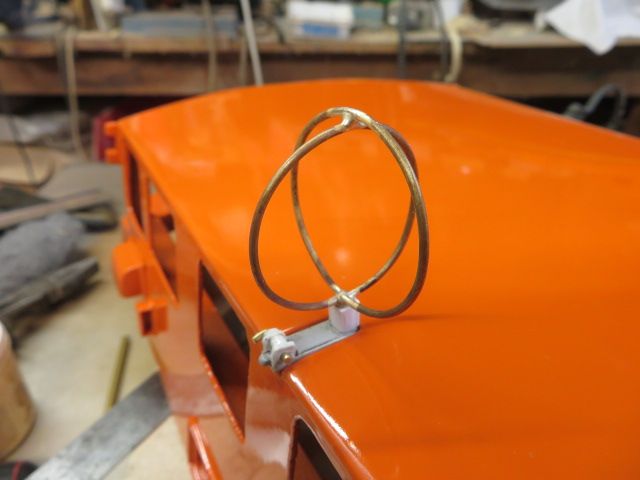
                    i wa sitting doing sod all, as i have done for the last few days on either boat, as it is so cold in the garage, even with heaters on, and i was looking through a few photos on the internet, and i found a picture of the Garside.

                    the garside was an earlier Tyne than ours, and was fitted with a DF Loop to the port side of the main cabin

                    i was sure i also have seen a picture of the William Street early on with a DF Loop. it was actually located in a recess set into the cabin top which i cut into the cabin moulding.

                    the loop was probably removed when the boats went in for the fitting of self righting airbags on the aft cabin, as no photos show of any boat with airbags having a loop also fitted…………..unless that photo was taken at the time of conversion.

                    However using my own brand of modelers license i have decided to fit the loop, as well as airbags and sod the rivet counters.

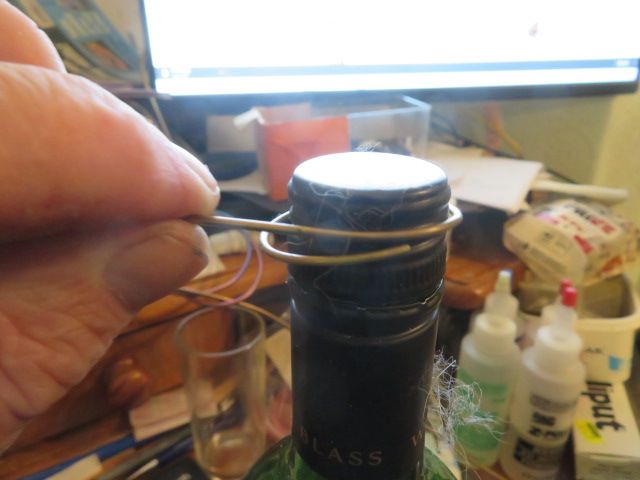
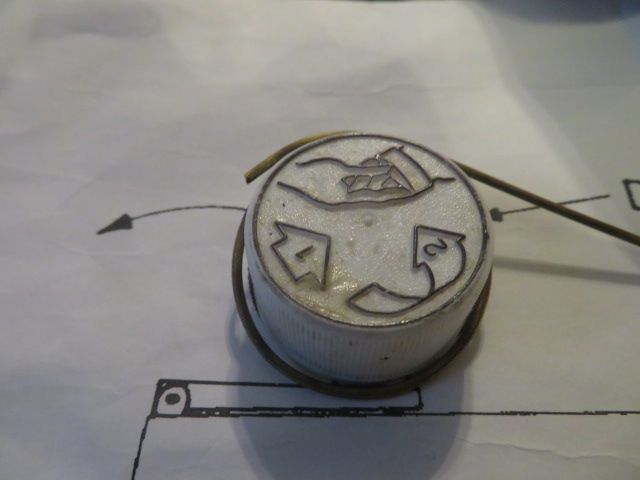
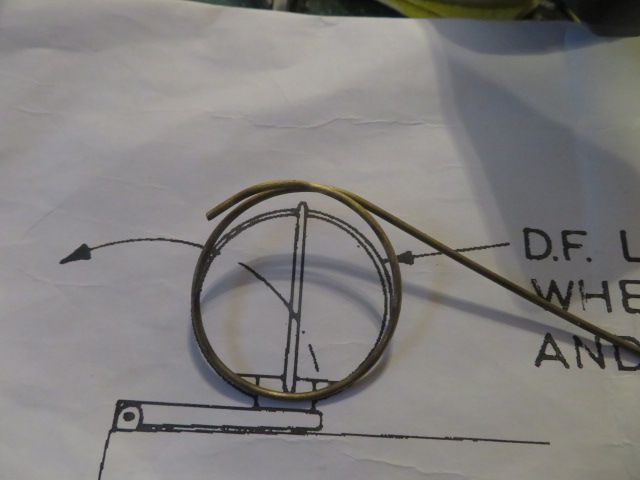
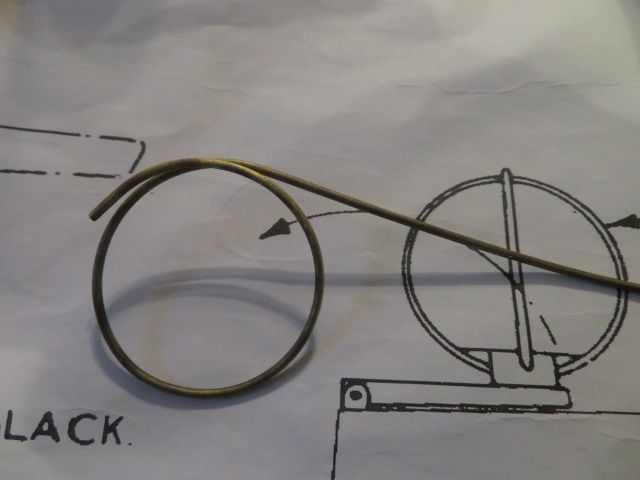
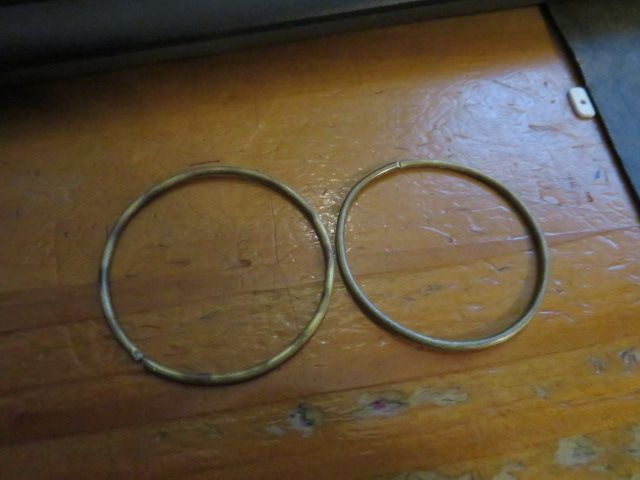
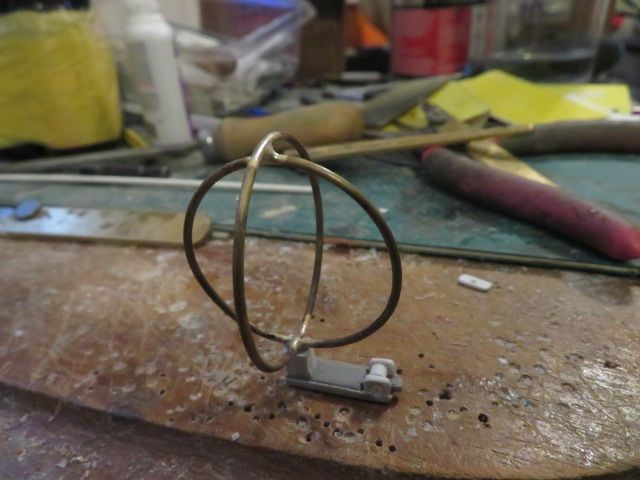
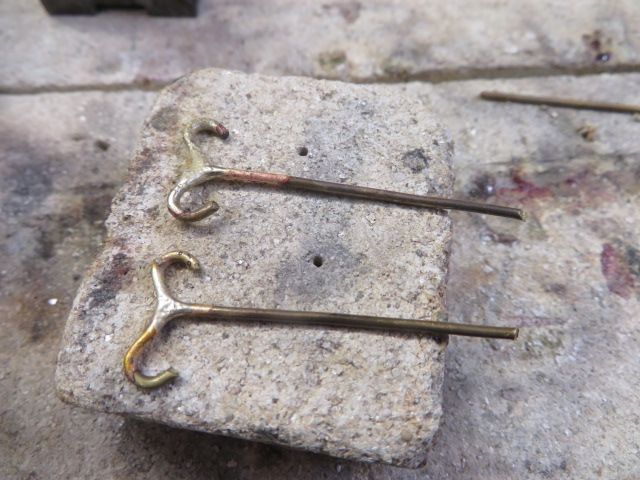
                    to make them, I annealed a length of brass wire, and wound the soften brass around a bottle top…….

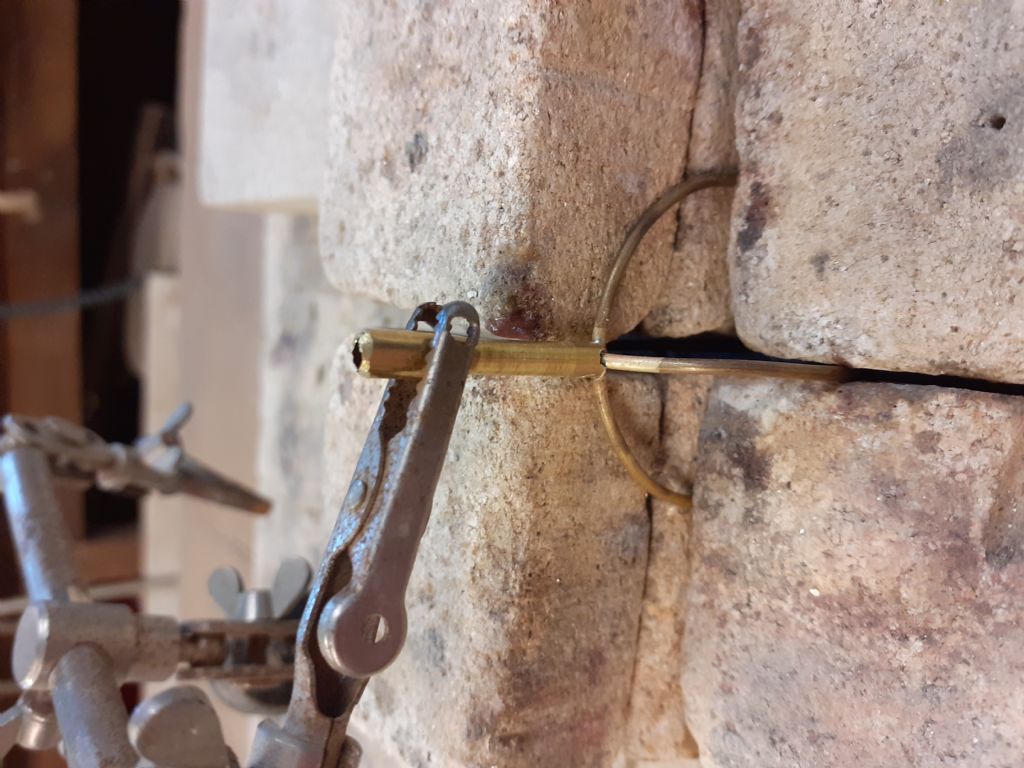
                    got two rings now that interlock, and will solder them onto a piece of brass tube, and brass flat tomorrow if its warm enough.

                    amazing the help that an empty bottle of Wolf Blass will give, lol.

                    img_7348.jpg

                    img_7345.jpg

                    img_7346.jpg

                    img_7347.jpg

                    img_7349.jpg

                    #92592
                    gecon
                    Participant
                      @gecon

                      Nice loops Neil! I needed this info when bending a loop (almost round) for the helm/wheel on my Fisher.

                      A bit late now to fix that, but for future info' how hot does the brass wire need to be to anneal it? Does it need to be cooled quickly after heating?

                      We all need to 'apply' a bit of modellers licence now and then. Specially if we want to incorporate a bit of gear we like from a previous age. Or to find an excuse for an anomaly in the build.

                      You could perhaps call your own 'modellers licence' for H-P (Howard-Pritchard) sauce? Spices up your life -and boat…..sorry, I'll log out now… But will note with interest how to anneal brass wire if you wish to advise.

                      George

                      #92594
                      neil hp
                      Participant
                        @neilhp

                        hi george,

                        i heat small items like that on my gas cooker hob.

                        heat the brass wire or rod depending on thickness to a cherry red, and as you progress along the wire just let it cool naturally.

                        if you quench it in cold water it goes brittle and could break when bent.


                        been called a lot worse than that lol

                        Edited By neil howard-pritchard on 05/12/2020 13:22:45

                        #92597
                        neil hp
                        Participant
                          @neilhp

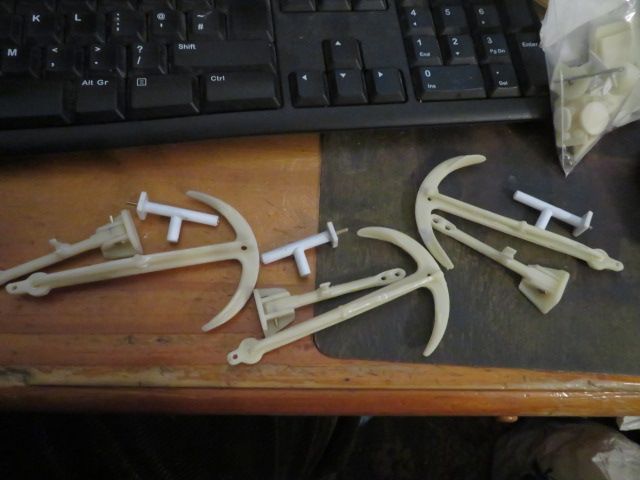
                          tonight, I started putting the anchor brackets and anchors together for the 3 boats…….

                          my Tyne and Micks and Daves Merseys ………….

                          Dave Stavros Jones there are some parts here that were on the computer desk that I haven't put in to your set of fittings…….when I find them all [ including Daves anchor set I'll send them all together in one guaranteed postage packet,

                          img_7351.jpg

                          #92599
                          gecon
                          Participant
                            @gecon
                            Posted by neil howard-pritchard on 05/12/2020 13:17:18:

                            hi george,

                            i heat small items like that on my gas cooker hob.

                            heat the brass wire or rod depending on thickness to a cherry red, and as you progress along the wire just let it cool naturally.

                            if you quench it in cold water it goes brittle and could break when bent.

                            been called a lot worse than that lol

                            Edited By neil howard-pritchard on 05/12/2020 13:22:45

                            Thanks Neil, I would probably have tried cooling it down quickly in watercrying. Then I would 'google it' to find out what went wrong! I'll have to find a safe way of getting it hot though…no gas in the flat….camping stove maybe?

                            I wasn't suggesting that YOU were H-P sauce -just that your smart "modellers licence" could be refered to as such.

                            Anyway, I'll stop the sauce-chat before the 'inuendo police' get out of bed laugh

                            Thanks again,

                            George

                            #92604
                            neil hp
                            Participant
                              @neilhp

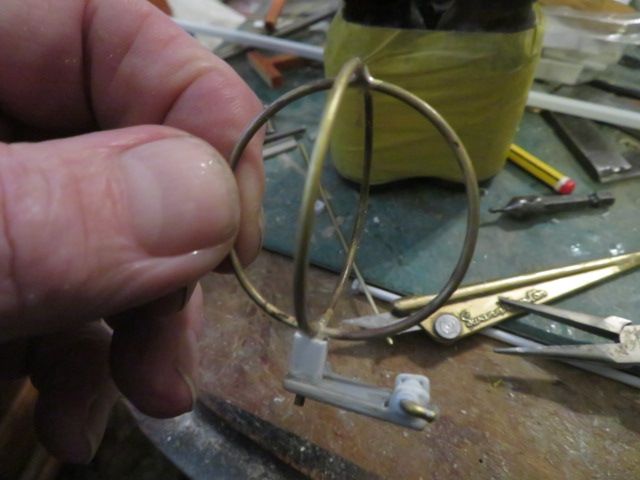
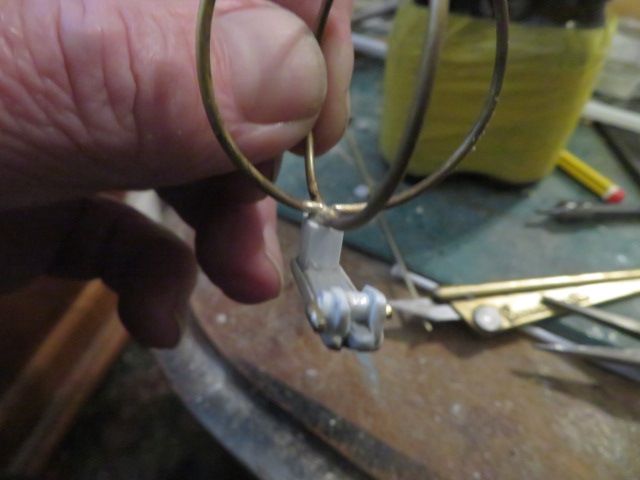
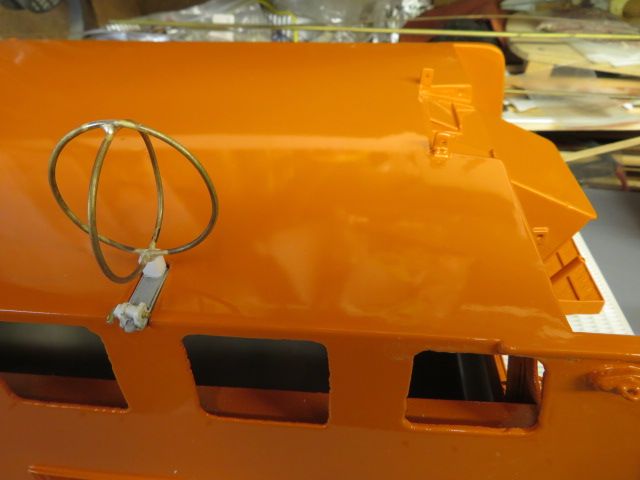
                              The DF loop……….a delicate little fitting to make, but got there in the end.

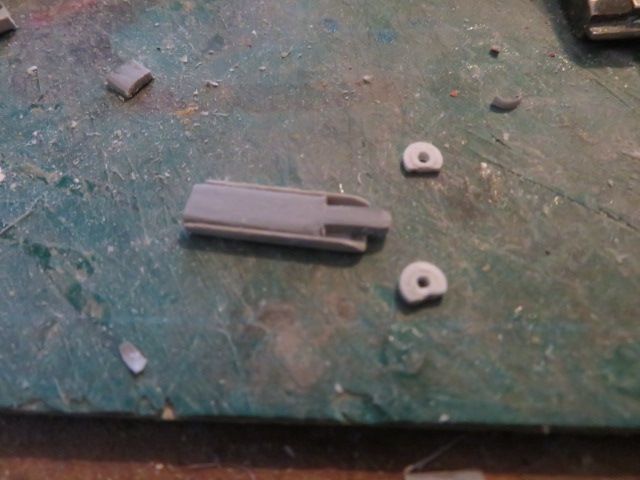
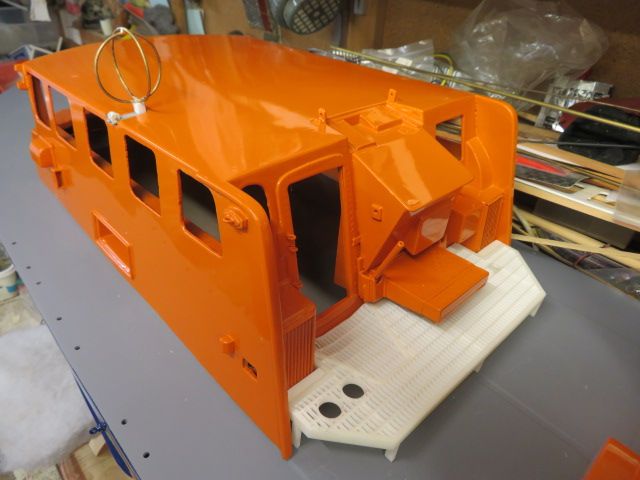
                              with the two brass rings for the DF Loop silver soldered together I could now make the [none] folding base for it that fits into the recess on the top port side of the cabin of my Tyne out of scrap pieces of plastic card, tubing and a little brass wire.

                              turned out reete gud, as us lankisher folk say.

                              20201206_142835.jpg

                              img_7356.jpg

                              img_7358.jpg

                              img_7360.jpg

                              img_7362.jpg

                              #92605
                              neil hp
                              Participant
                                @neilhp

                                and it fits nice and snugly in its recessed channel in the roof of the cabin.

                                img_7363.jpg

                                img_7364.jpg

                                img_7365.jpg

                                #92620
                                neil hp
                                Participant
                                  @neilhp

                                  tonight was a mamoth task of silver soldering5 brass fittings together. 4 for my Tyne class lifeboat and one for the two Mersey's of

                                  Mick French

                                  and

                                  Dave Stavros Jones

                                  .

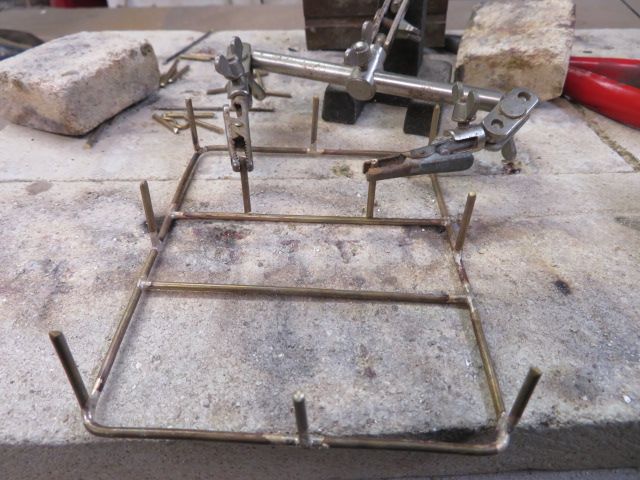
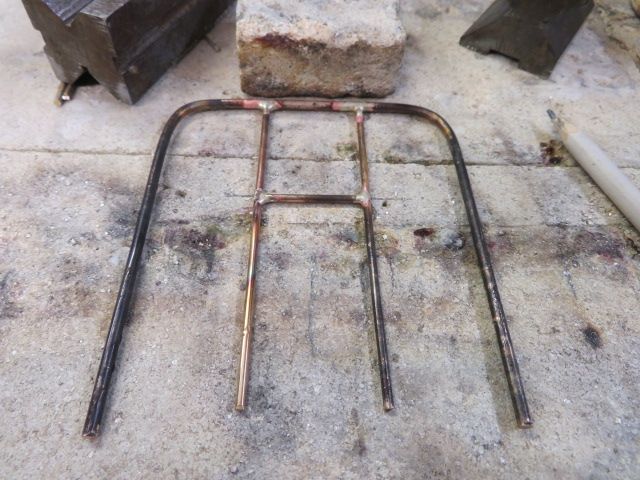
                                  all of the parts had multiple parts and all needed setting up and jigging all parts to hold them whilst soldering.

                                  multiple stupid burns to fingers followed.

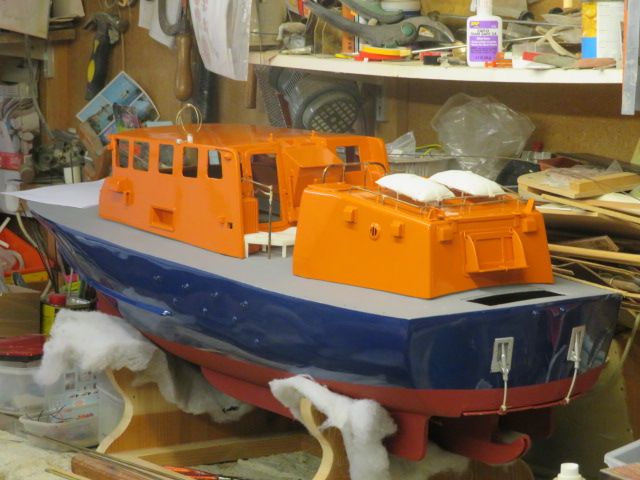
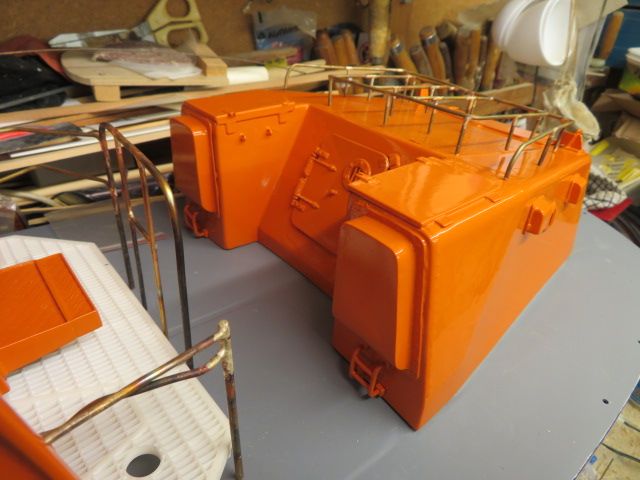
                                  1st job, after cutting all parts last night was the cradle atop the aft cabin for holding the self righting air bags. Although the Tyne waS classed as self righting from conception to build AND of course every single one was tested for self righting before going on service, some Tynes were given an engine change mid service and the change in engines gave concern that they wouldn't right quickly enough if capsized because of the geometry of the new engines, and so those boats with the engine change were given the additional air bags. the Boat i am building was one of those, but not all Tynes were given them. 15 parts were needed for this fitting!

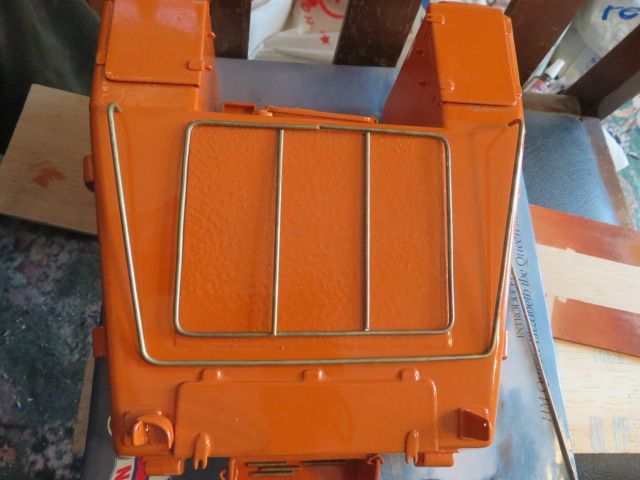
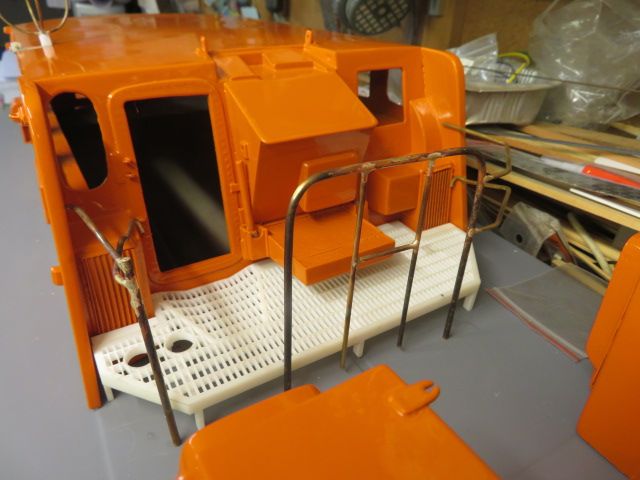
                                  2nd job was the safety grab rail that runs around the aft perimeter of the survivors cabin. 6 parts were needed for this to take shape.

                                  3rd job was the centre and starboard part of the flying bridge safety rail and coxs'ns back rest. 6 parts!

                                  4th job was the port side of flying bridge safety rail,

                                  and finally for the Merseys, the hooks to attach the bow tightener to the cradle holding strops.

                                  jobs done!

                                  img_7373.jpg

                                  img_7375.jpg

                                  img_7382.jpg

                                  img_7386.jpg

                                  img_7391.jpg

                                  img_7389.jpg

                                  #92629
                                  neil hp
                                  Participant
                                    @neilhp

                                    Onwards and upwards…

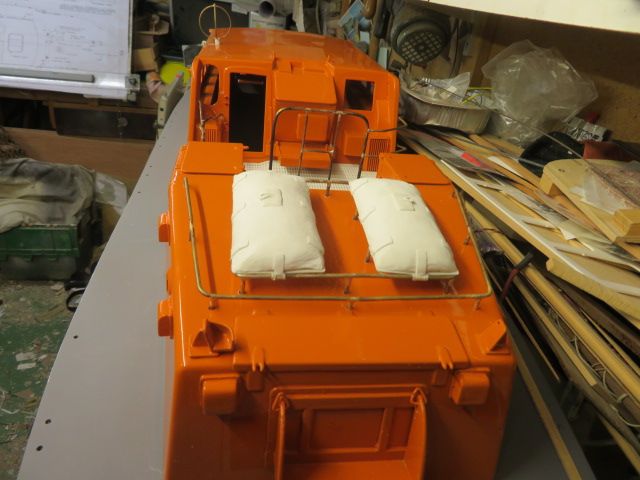
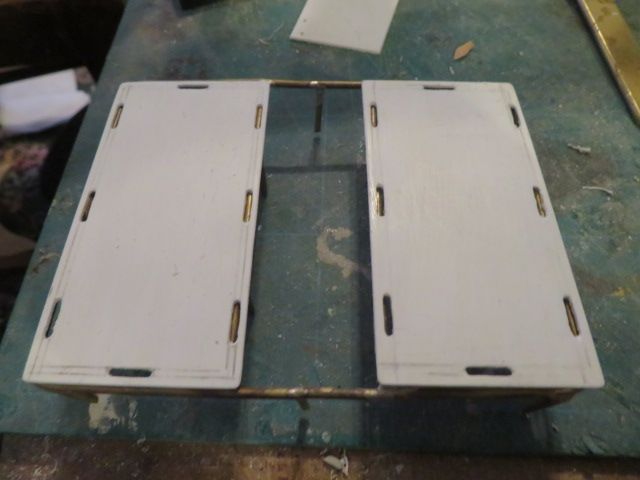
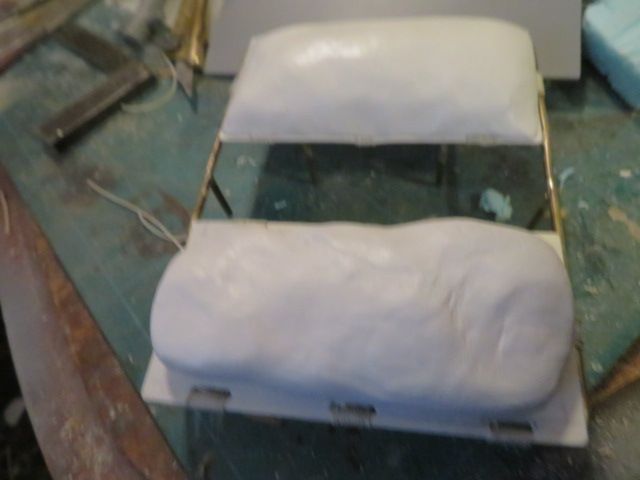
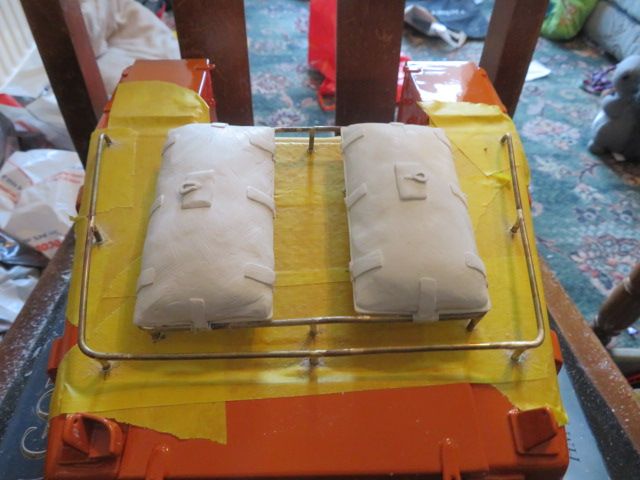
                                    tonight i made the beds that are going to put my airbags on.

                                    I presume the actual bags were just strapped to the frames, on top of the aft cabin.

                                    however I thought this impractical as i am going to make the airbags out of either milliput or hi density foam as used in insulating and plugs for grp, etc.

                                    I will experiment with the foam first and if unsuccessful, use the milliput

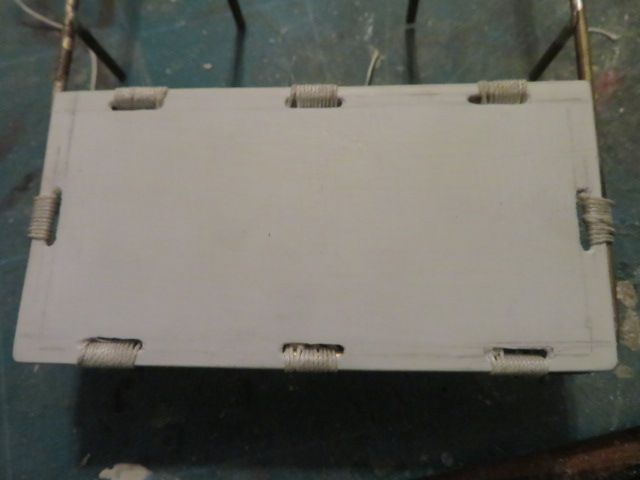
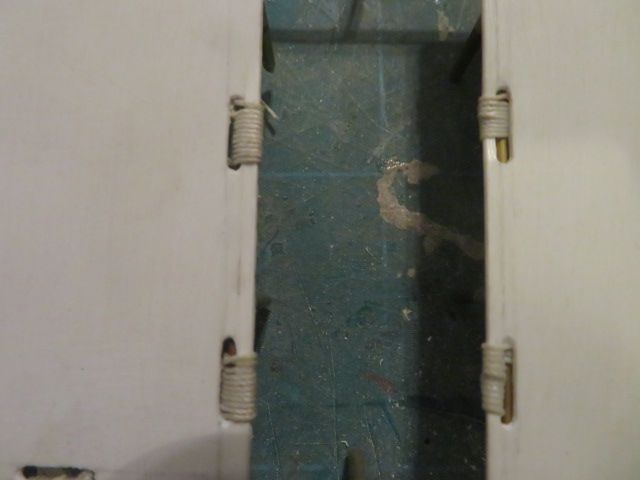
                                    so I made two plates from 1mm plasticard, cut into the edges the holes that would have been on the airbag casings, and then wound thin twine around the frame and the plates.

                                    These will be the base to put the bags on to.

                                    img_7395.jpg

                                    img_7396.jpg

                                    img_7398.jpg

                                    img_7399.jpg

                                    img_7400.jpg

                                    #92630
                                    neil hp
                                    Participant
                                      @neilhp

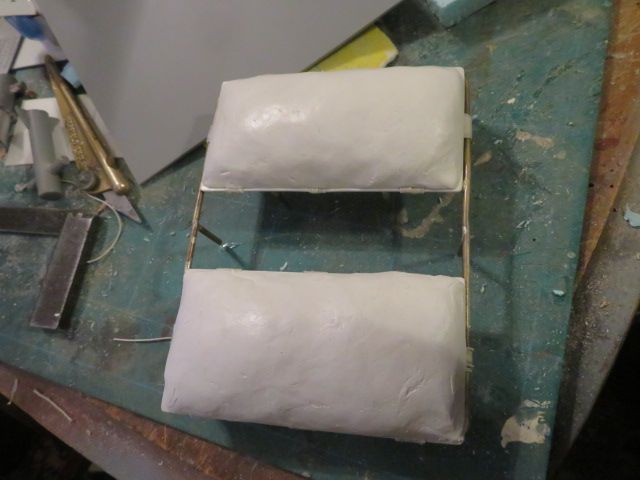
                                      and so………..i thought before i started mixing a couple of lumps of milliput i would attempt to carve a piece of foam.

                                      that turned into a disaster, even with new sharp scalpel blades…..

                                      so i reverted to plan A……use milliput.

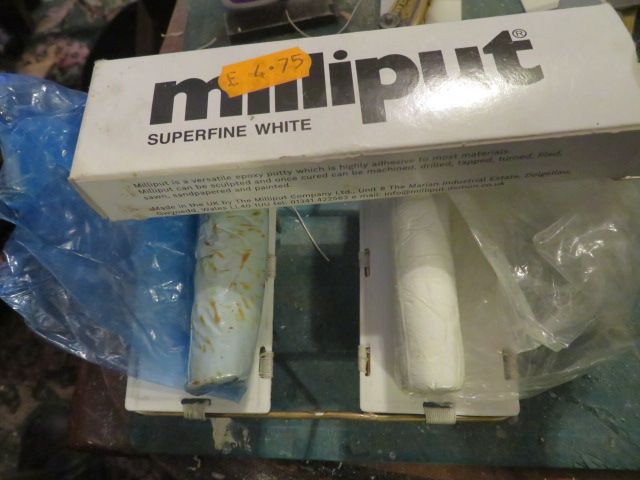
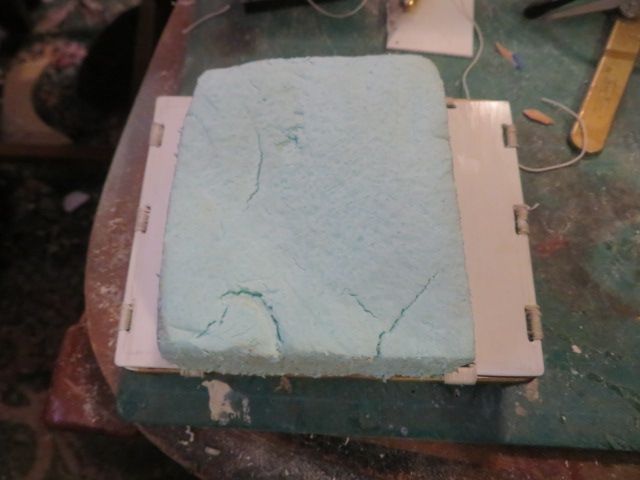
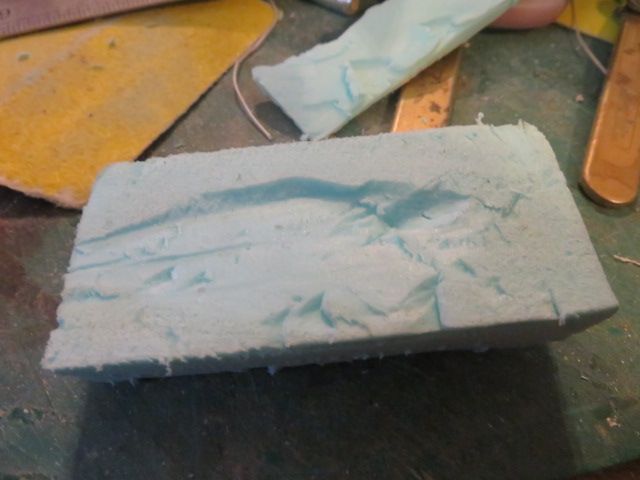
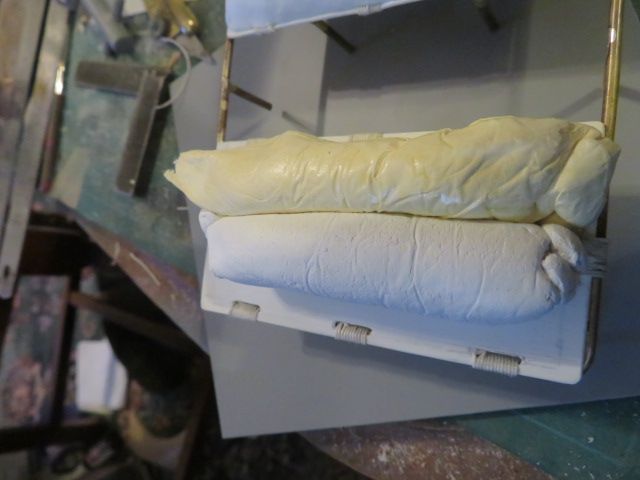
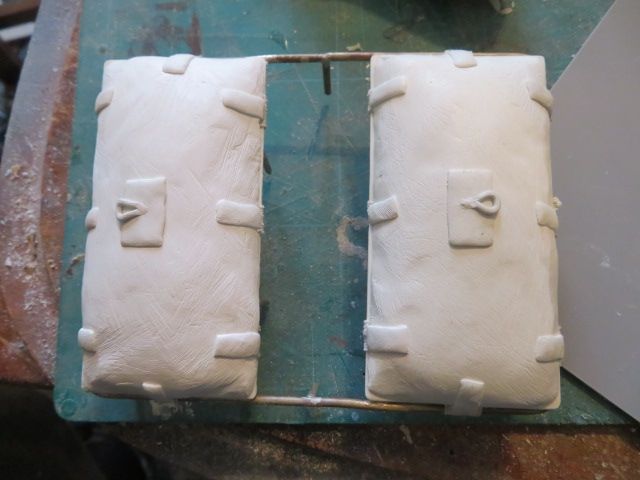
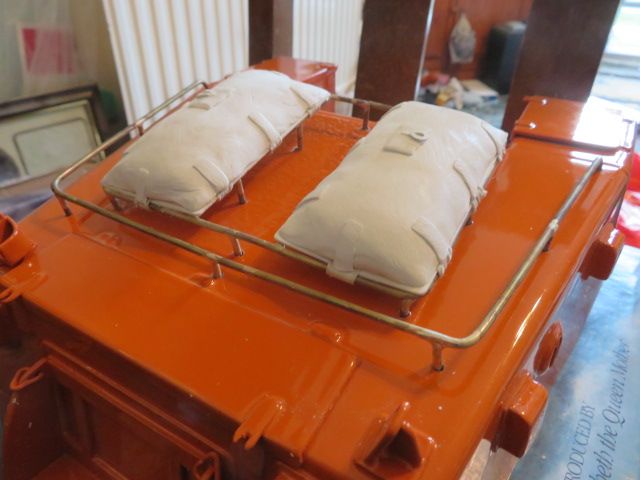
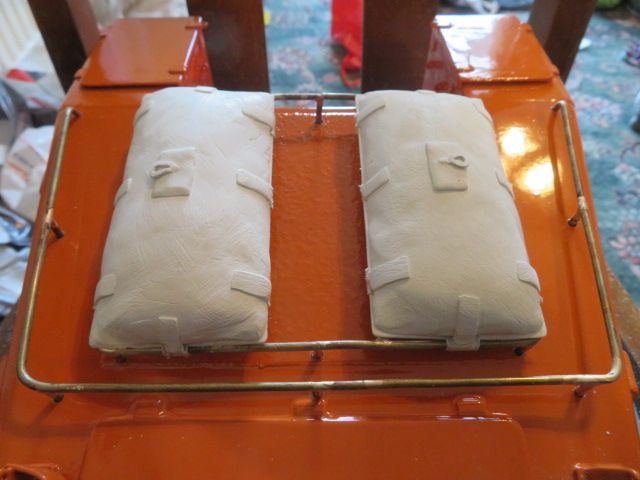
                                      took a box and a half to make the two bags but once hard, tomorrow i will carve the creases into the bags, and then sand down.

                                      job done.

                                      img_7401.jpg

                                      img_7402.jpg

                                      img_7404.jpg

                                      img_7405.jpg

                                      #92634
                                      neil hp
                                      Participant
                                        @neilhp

                                        detailing on the airbags done.

                                        that can, once the milliput has hardened and cured be painted up and fitted to the cabin top.

                                        img_7406.jpg

                                        #92635
                                        Chris Fellows
                                        Participant
                                          @chrisfellows72943

                                          Nice work on the railings and airbags Neil.

                                          I bet it's a bit nerve wracking working on top of that lovely paintwork!

                                          Chris

                                          #92636
                                          neil hp
                                          Participant
                                            @neilhp

                                            very, but being 2 pac, it is as hard as nails, but i am going to put low tac masking tape onto it to mark and then drill with a new bit…..the masking tape, for those that want to know will help stop the drill bit skimming across the paint.

                                            at the moment though i am casting some of my lifeboat figures for a customer.

                                            img_5954.jpg

                                            #92647
                                            neil hp
                                            Participant
                                              @neilhp

                                              i ruined two halves of two lifeboat men moulds [seen above] yesterday through lack of concentration and a stupid mistake, so using my original masters i laid the figures into the good side of the moulds that weren't damaged, and using lego to make new casting boxes around them i relayed two new halves this morning. they are now on the radiators to help cure a little faster.

                                              so….

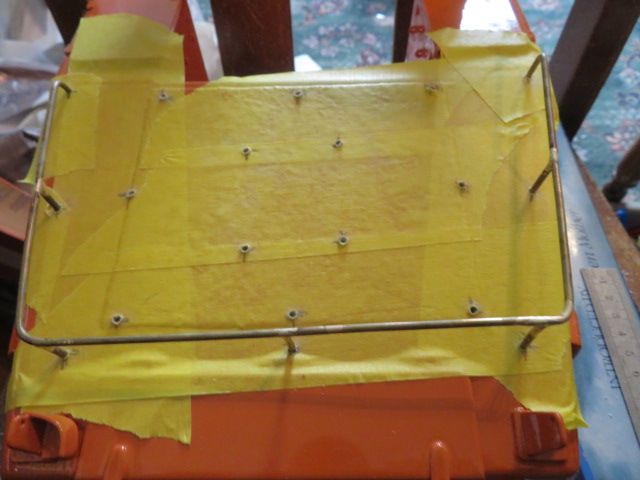
                                              whilst waiting put low tac masking tape on the aft cabin top, marked out the positions og the legs for both the hand safety rail and the airbag cradle.

                                              drilled through and sited the two parts.

                                              once sited, i removed them, trimmed the legs to the same length and replaced.

                                              will paint before fixing permanently.

                                              img_7412.jpg

                                              img_7413.jpg

                                              img_7415.jpg

                                              img_7416.jpg

                                              #92653
                                              neil hp
                                              Participant
                                                @neilhp

                                                I have to say, that for a "modern" fast afloat lifeboat I am and have really enjoyed building this Tyne, that I bought second hand from ebay.

                                                And although I paid a little over the odds because half of the fittings set didn't pertain to the Tyne, it has given me a great deal of pleasure building the scratch parts for the boat,

                                                's Mersey, as I seem to be building a little of each boat at a time, and progress is slow on both boats.But TBH my workshop is so full of model boat parts and other crap, that I don't know where to turn with the two boats I am now building…….the Tyne andMick French

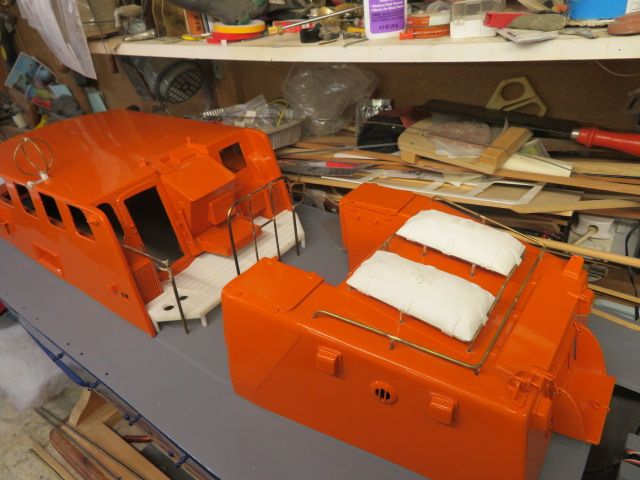
                                                However adding the rack and air bags tonight has spurred me on!, and even though to is only a small part of the overall makeup of the boat, it has inspired me to make a decision.

                                                However I have sold both of my old classic Watson lifeboats to an elderly gentleman with connections to Cromer in Norfolk where these two boats were based pre and post war and will be taking them to him whilst on business in January.

                                                This will relieve some working space on the breakfast room table, and I am going to bring my Tyne in to place where my Shannon and motor sailor are now, once the Watsons are gone.

                                                Thus giving space for working on the Mersey in my workshop, and getting that finished first, which will then come inside and sit where the Tyne is taking up temporary mooring rights.

                                                I will also after Christmas begin to get rid of a lot of rubbish in the garage that is just hogging space.

                                                Sorted!!! but in the meantime, I might just take all my tools back out in the garage, clean and tidy the house ready for the festive period and prepare for hopefully a new better year to come in 2021.

                                                And so, this might be the last photos of my Tyne [and Mersey] until the new year.

                                                Enjoy it as I do looking at it.

                                                as Arnie said……….I'LL BE BACK!
                                                img_7423.jpg

                                                img_7424.jpg

                                                img_7425.jpg

                                                #93251
                                                neil hp
                                                Participant
                                                  @neilhp

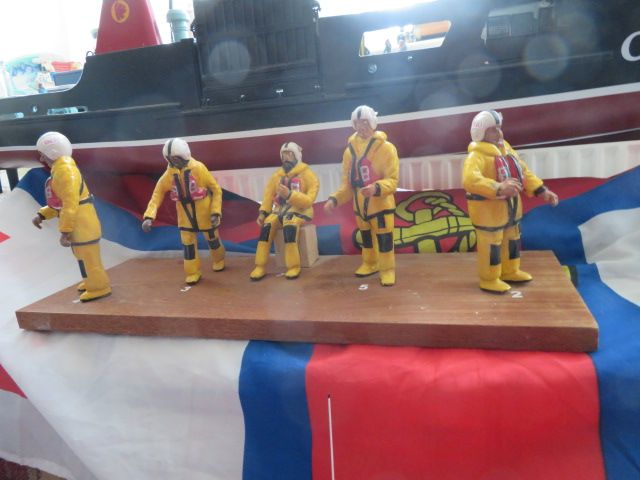
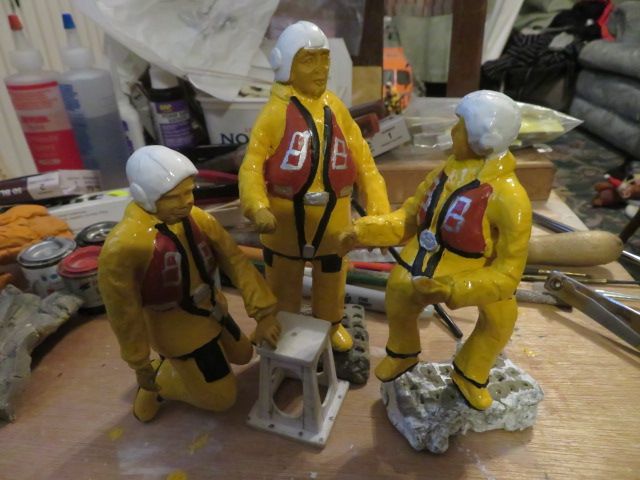
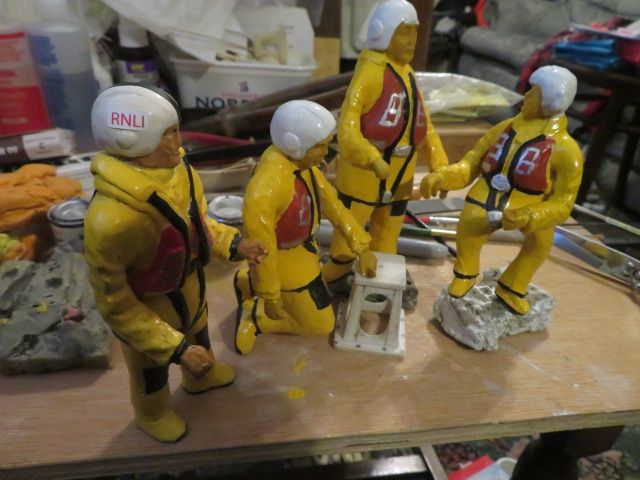
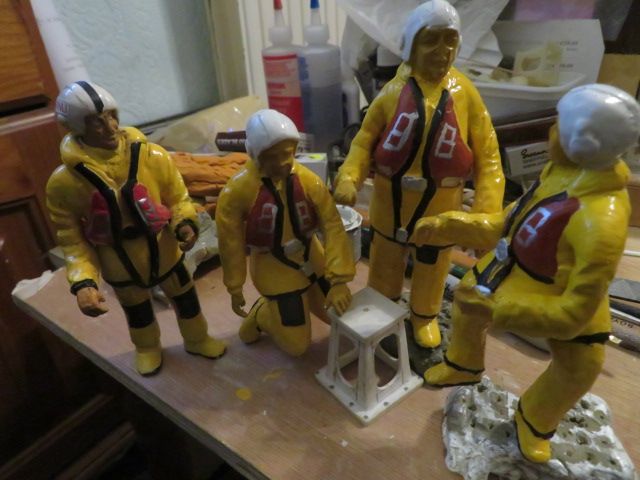
                                                  the weather has been too cold in my workshop even with my radiators on full power to keep the place warm, and so for the past couple of weeks converting some old lifeboat figures into 3 new uniformed protective suits.

                                                  they are almost finished and when done will make up my full set of 8 lifeboat figures in different poses…..

                                                  its kept me busy and happy during lockdown, and tomorrow i pick up a new ceramic heater for the workshop, so outside modelling can resume, especially as from next week, Britain is going to be in the grip of a long spell of minus figures and snow.

                                                  The beast from the east is returning apparently.

                                                  below, my 3 new figures with one of the originals on the left.

                                                  img_7587.jpg

                                                  img_7588.jpg

                                                  img_7589.jpg

                                                  #93274
                                                  Bob Abell 2
                                                  Participant
                                                    @bobabell2

                                                    Happy New Year my mate…..A bit late, but late than never, eh?

                                                    Just called in for a look round and I notice that you are back on the job again

                                                    I like your pillows and bits and pieces and the crew are looking good to

                                                    Will call again shortly

                                                    Bob

                                                    #93275
                                                    neil hp
                                                    Participant
                                                      @neilhp

                                                      you mean the "pillows" on the aft cabin, Bob.

                                                      they are the anti capsize air bags lol..

                                                      as for all the other junk in the room……..what my two daughters cant be bothered taking up to their bedrooms….but at least they make the room easier and quicker to warm up, lol.

                                                      and a very happy and brave new year to you and all modelers out there, and especially on here too.

                                                      all the best for hopefully a better new year.

                                                    Viewing 25 posts - 326 through 350 (of 593 total)
                                                    • Please log in to reply to this topic. Registering is free and easy using the links on the menu at the top of this page.

                                                    Code of conduct | Forum Help/FAQs

                                                    Advert

                                                    Latest Replies

                                                    Home Forums Build Blogs Topics

                                                    Viewing 25 topics - 1 through 25 (of 25 total)
                                                    Viewing 25 topics - 1 through 25 (of 25 total)

                                                    View full reply list.

                                                    Advert

                                                    Newsletter Sign-up