Spurn Light Vessel

Spurn Light Vessel

Home › Forums › Scratch build › Spurn Light Vessel

Viewing 12 posts - 1 through 12 (of 12 total)
  • Author
    Posts
  • #128883
    Gareth Jones
    Participant
      @garethjones79649

      Hi everyone,  its a long time since I posted anything on the MB Forum.  My last scale project was a 1:16 scale model of a Humber Sloop, based on the builder’s drawings of Spider T, which I finished in 2019.  I kept a build log on this forum and I guess its still here somewhere, assuming it survived the forum changes.

      I have not been completely idle over the last 7 years but defected to the world of vintage model yachts, completed the build of two A class yachts to Bill Daniels designs, and restored a third,  scratch built a 6M yacht to the John Lewis Petrel design and restored a 70 year old 10 Rater.

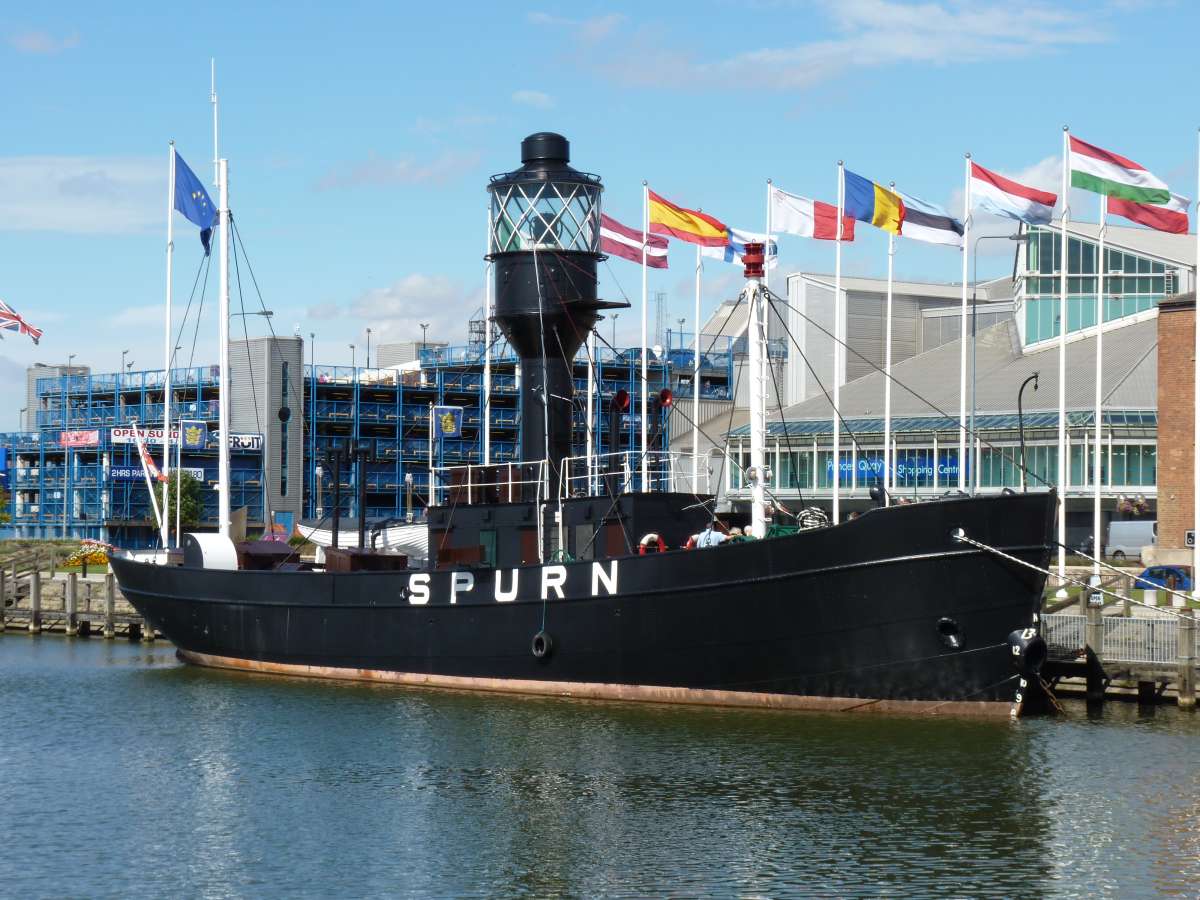
      Following a visit to the Isle of Man to attend the Manx Model Boat Club’s Manannan event this summer I decided at the grand old age of 77 I still have another scale model project to complete.  This will be another build with a local interest, given that I live in East Yorkshire and will be a 1:24 scale model of the Spurn light vessel which is moored in the marina in Hull and celebrates its centenary next year.

      P1020706

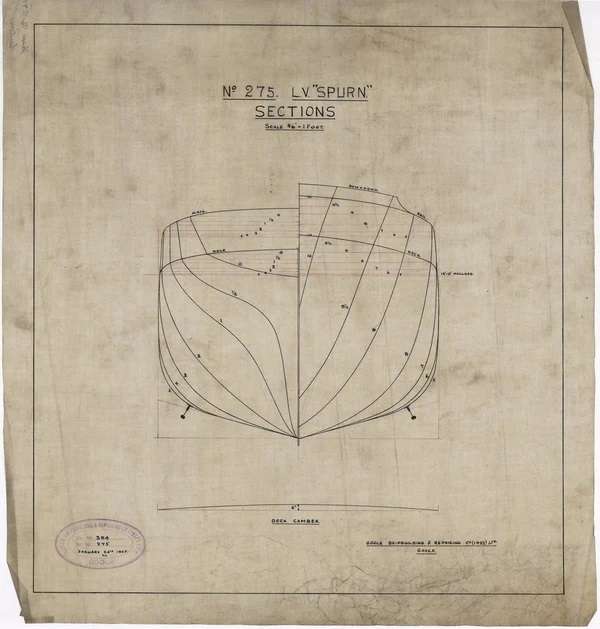
      I considered this as a project about 15 years ago and obtained some drawings from the Maritime Museum in Hull.  Unfortunately they did not have the hull sections drawing, only a plan and elevation so the project was parked for lack of information to define the hull shape.  I recently contacted the National Maritime Museum in Greenwich and they had a copy of the hull sections drawing by the original builders, the Goole Shipbuilding and Repairing Company so I ordered a copy.  The drawings are quite expensive but the quality of the prints was first class and accurately to scale.  I have made a start on cutting out the frames and fixing them to the building board so keep an eye on the forum to follow the progress.

      #128884
      Colin Bishop
      Moderator
        @colinbishop34627

        Welcome back Gareth, a lot of water has passed under the bridge since you were last here. Being much the same age as yourself, I recall seeing the Calshot Spit lightship on station back in the 1960s when travelling to and from Cowes on the Isle of Wight. After retirement the vessel was exhibited, set in concrete, at Ocean Village in Southampton Docks where I saw it decades later. Subsequently it has been moved to the Solent Sky Museum where the intention is to restore it but there doesn’t seem to be much recent information.

        https://www.nationalhistoricships.org.uk/register/144/light-vessel-78-calshotspit

        When I had my own boat in the 90s/00s we sometimes called in at Haslar Marina at Portsmouth where the former lightship Mary Mouse II was used  for marina accommodation and shower facilities. It is now a dining venue!

        Main Home

        Colin


        #128908
        ashley needham
        Participant
          @ashleyneedham69188

          Hi Gareth. An attractive boat.

          Are you planning on motorising it and having a decent bright flashing light in the tower?

          Not looked it up but were most lightship simply towed into position.  ?

          Ooohhh…could be an interesting top for my GP hulls…

          Ashley

          #128909
          Gareth Jones
          Participant
            @garethjones79649

            Hi Ashley,  An interesting boat to model, attractive, not so sure.

            Motorising was a bit of a conundrum, as you say lightships usually had no means of propulsion and Spurn was no exception.  I have considered towing it behind my 1:24 scale TID tug, releasing the tow and dropping the anchor but then picking up the tow again would be difficult. Not being able to sail it around the pond would be a bit boring. I have decided it will be motorised but the propeller will be removable and replaced by a plug in the hull to hide the space when the model is on static display.

            It will have a working light by a ring of flashing LEDs controlled, probably by an Arduino to get the right sequence if I can work out how to programme it.  It will probably be a flashing sequence with no attempt to get the rotating effect that would have been the case in real life but I have not finally decided on this yet.  There will be a working foghorn and mushroom anchor plus the usual lights.

            Overall the model should be about 53 inches long, 27 inches tall and weigh about 35 lb.

            Gareth

            #128914
            ashley needham
            Participant
              @ashleyneedham69188

              Gareth. Devils advocate.

              Would the on/ off abruptness of an led light give the right look?

              Ashley

              #128916
              Colin Bishop
              Moderator
                @colinbishop34627

                Maybe the arduino circuit could fix that. LEDs do have a brightness range relative to voltage input.

                Colin

                #128918
                Gareth Jones
                Participant
                  @garethjones79649

                  I think that some experimenting will be called for when I start on the light unit.

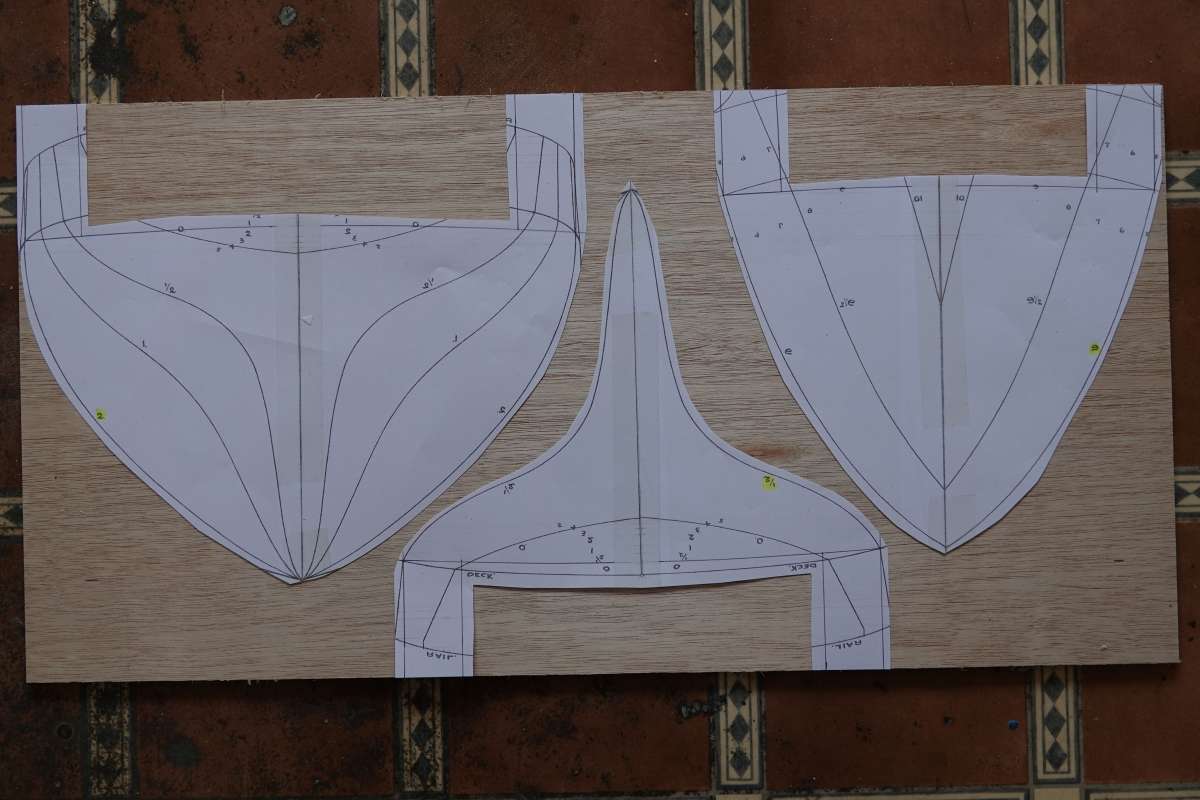
                  I have made a start on the construction of the model by cutting out all the hull frames.  I developed a method of marking out the shape when I did my Humber Sloop and have used the same method for Spurn.  The hull sections are shown below with the original drawing being 3/8 inch to a foot or 1:32 scale.  My model will be 1:24 scale.

                  Spurn sections

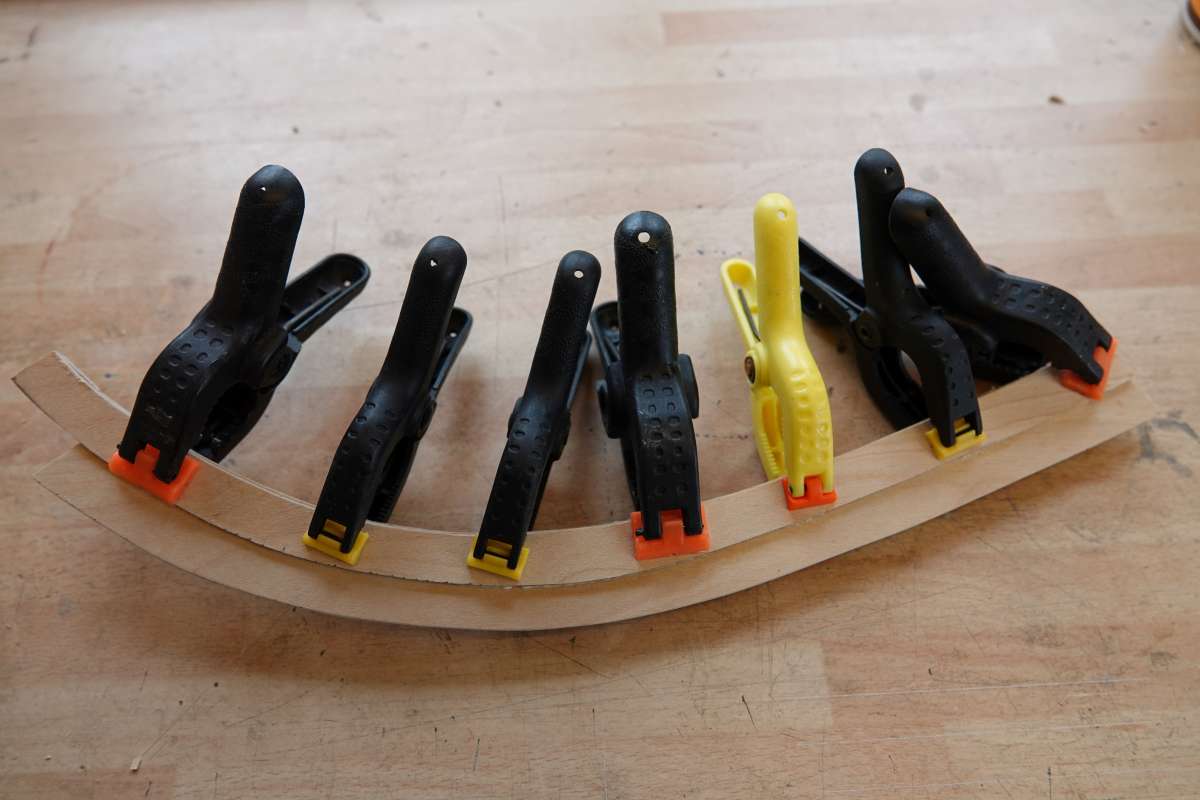
                  The drawing is scanned in two halves, either side of the centreline with a couple on inches overlap.  Each of these images is then flipped in the computer so I have a mirror image.  Each image is then printed with an appropriate magnification to give me a complete 1:24 size cross section at each hull station, but taking account the thickness of the hull.  There is a bit of trial and error involved here with several test prints but it worked out at about x1.28.  The two parts of the section at each hull station can then be taped together and cut round just outside the line for each frame.  They are then stuck on the 5 mm plywood I used for the frames with Spraymount adhesive.  There are a few sample frames below.

                  DSC04363A

                  The right hand image shows my first mistake, which I will explain in the next post.  The frames are cut out using my scroll saw and then trimmed to size using a disk sander


                  #128919
                  Ray Wood 3
                  Participant
                    @raywood3

                    Hi Gareth,

                    Nice to see you back 🙂 glad you have decided to back to scale modelling of an interesting subject, take plenty of pictures, our editor Lindsey is always interested in articles on scratch building , even if it’s too big to be a free plan.

                    Kind Regards  Ray

                    #128922
                    Gareth Jones
                    Participant
                      @garethjones79649

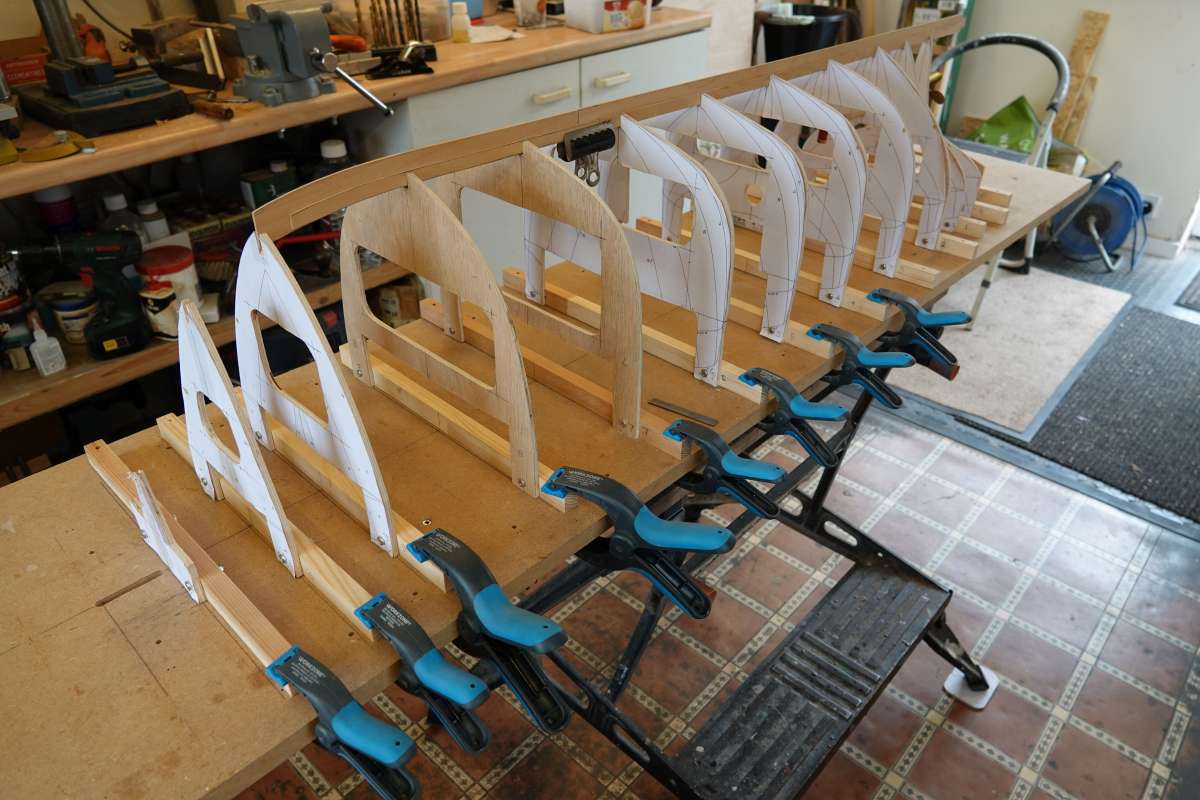
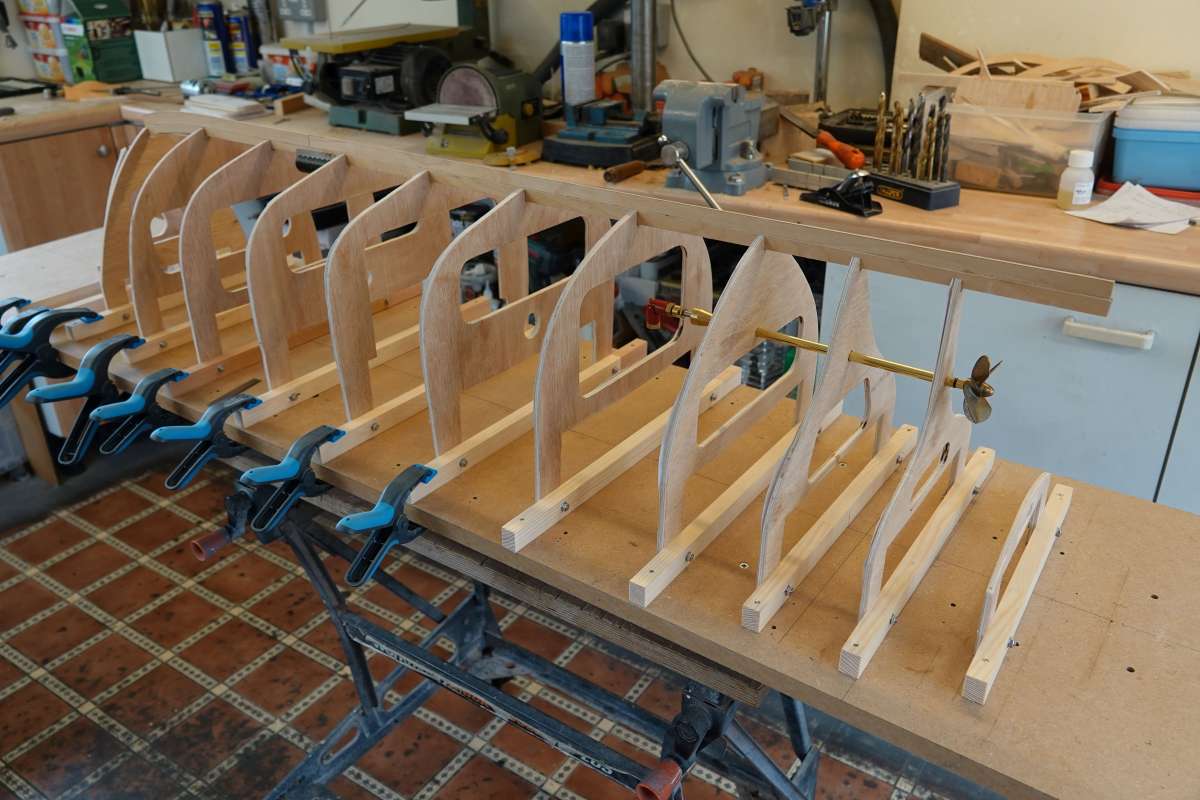
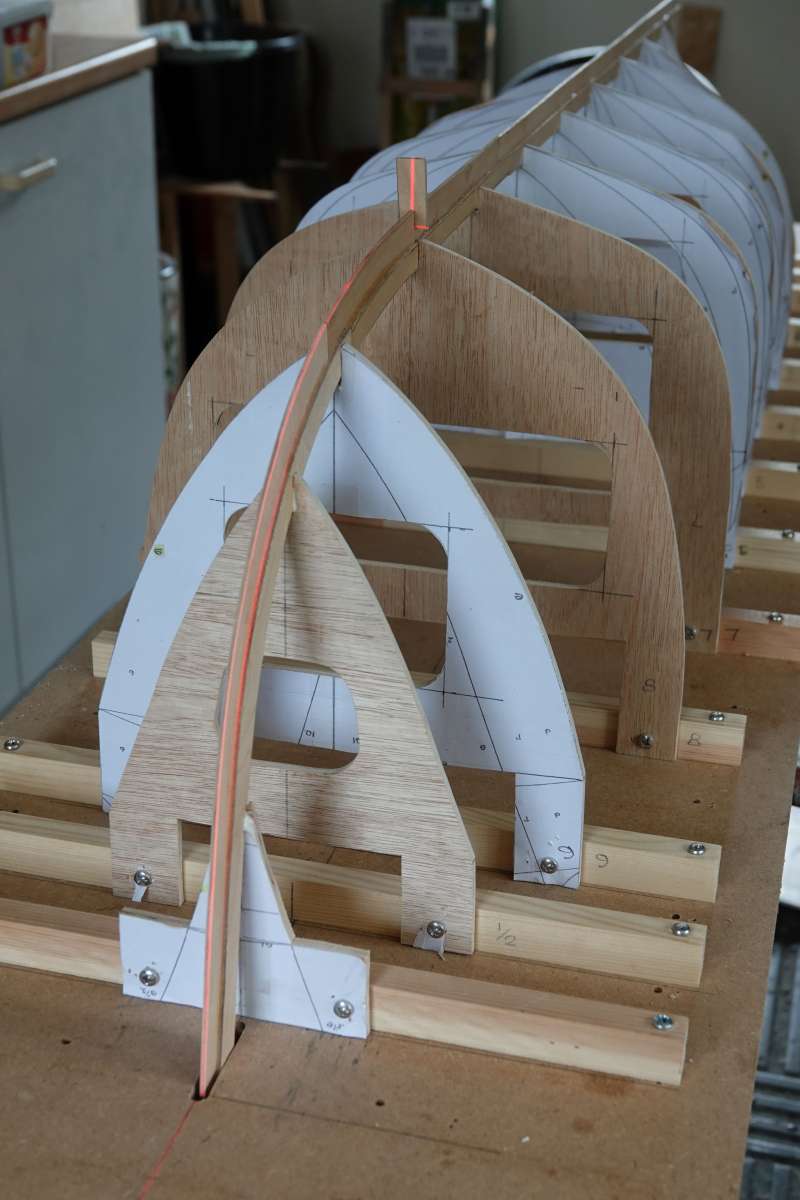
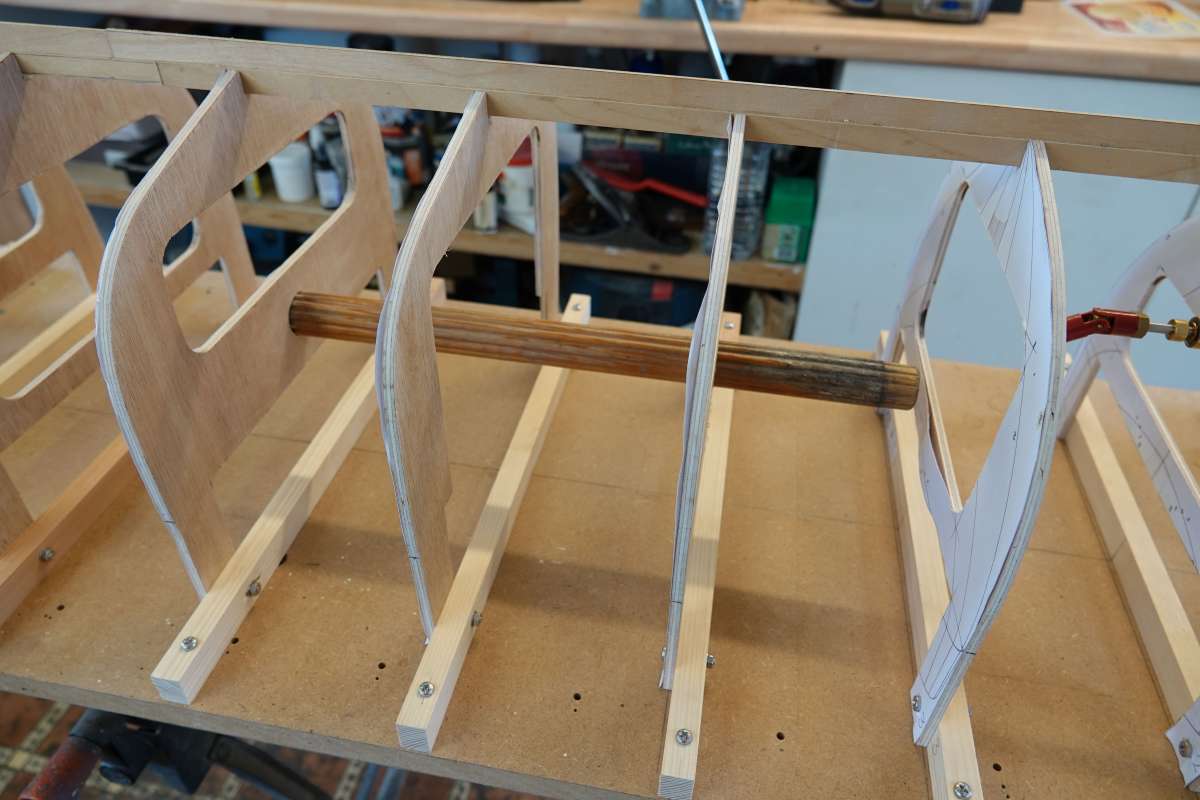
                      The frames were all cut out and fixed onto battens which can then be fixed to the building board, initially just using spring clamps.  I could then plan which area of the frames to cut away to allow access and space for the 12 V lead acid battery, servos and other electrical parts.  I drilled three of the frames to take the prop shaft as its much easier to drill accurately through 3 frames clamped together rather than spaced 5 inches apart. The bottom of each frame was notched to take the keel which is made from 3 pieces of 2mm ply laminated together.  There are three sections of keel which are joined in a mortice and tenon fashion for strength and stiffness.  Once I was satisfied everything fitted together the frames were bolted to the building board which had the hull centreline marked on it.  In addition I used a laser level to shine along the keel to ensure everything was straight.

                      DSC04993DSC04995DSC04992DSC04999DSC05001

                      The model will also incorporate a carrying handle in the centre of the hull.  This can be removed or slid backwards for access underneath it to fit the battery.  I first did this on Shemarah, a 1:24 scale Scottish trawler I built some years ago which weighed about 65 lbs when complete.  I discussed this with Dave Milbourn at the Warwick Model Show at the time and he told me it was a daft idea as the bottom would fall out of the boat if I tried to pick it up.  I sent him a photo of me holding the model, ballasted with bricks temporarily and he reluctantly conceded it might work.  I have now used this approach on three fairly heavy models and it makes carrying them much easier, if no lighter.

                      In the fourth picture you can see the mistake I make in drawing the frames.  I did not make the extension above deck level high enough for the stem of the hull to clear the building board so I have had to cut a slot to accommodate it.

                      #128923
                      Richard Simpson
                      Moderator
                        @richardsimpson88330

                        Hi Gareth, good to see you back and good to see another traditional build in progress.  I’m looking forward to seeing how you tackle one or two aspects of this one, particularly stability, although at this size and weight it might not be the challenge that it might be if a smaller scale.

                        As regards the lights, just my own thoughts into the mix for you to consider.  If it was me I would not use LEDs on this one.  You might end up with an array of pin point light sources that look just that when lit.  Even using a diffuser might not help and the frosted lens would not look right.  I generally tend to look to recreating as closely as possible the reality so in this case I would go for a single centrally mounted lamp.  As LEDs are directional the lamp would best be an incandescent lamp of some sort.  The lamp would be mounted in the centre of a horizontal rotating disc and, on the edge of the disc, facing the lamp would be a reflector.  This is obviously pretty much the same arrangement as emergency lamps were before the advent of LEDs and much closer to how the original ship’s light would have worked.

                        Whatever you decide on I’m sure that you will do it justice.

                        #128924
                        ashley needham
                        Participant
                          @ashleyneedham69188

                          You can buy rotating reflector lights. Not looked into it but some are disco lights and can be battery powered. Likely too big for yours..but for a bit of a larf it would make a fun model….

                          Ashley

                          #128954
                          Richard Simpson
                          Moderator
                            @richardsimpson88330

                            The disco light is the same kind of arrangement.  I have seen it reproduced in miniature very successfully with a micro servo being used via  gearing to rotate the disc with the reflector mounted on it.

                          Viewing 12 posts - 1 through 12 (of 12 total)
                          • Please log in to reply to this topic. Registering is free and easy using the links on the menu at the top of this page.

                          Code of conduct | Forum Help/FAQs

                          Latest Replies

                          Home › Forums › Scratch build › Topics

                          Viewing 25 topics - 1 through 25 (of 25 total)
                          Viewing 25 topics - 1 through 25 (of 25 total)

                          View full reply list.