My Clyde Puffer

Advert

My Clyde Puffer

Home Forums Scratch build My Clyde Puffer

Viewing 25 posts - 51 through 75 (of 235 total)
  • Author
    Posts
  • #103522
    Colin Bishop
    Moderator
      @colinbishop34627

      I always like to take photos of thngs which might come in useful and so frequently it proves to be just so! This one was a classic example!

      Colin

      Advert
      #103523
      James Hill 5
      Participant
        @jameshill5

        Can agree with you there Colin.

        On that picture it shows the sort of random way plates were placed, obviusly for a possible good reason. It wouldn`t look the same with a smooth hull. I just like that bashed about look they had.

        Jim.

        #103525
        Richard Simpson
        Participant
          @richardsimpson88330

          Jim,

          This was a site I stumbled across many years ago when I was doing some research for my own steamer build, the Ben Ain, ex Doris Thomas. The site is nothing more than a Welsh village information site but has included a huge collection of ship pictures. Unfortunately there are no colour pictures however for nothing more than the simple enjoyment of drinking in the atmosphere and textures of these characterful vessels it is well worth a visit:

          Rhiw.com link

          As regards the bashed about look, most of these vessels such as puffers were 'short sea traders' and were worked very hard. If they weren't carrying cargo they weren't earning money. Frequently they were simply beached on a receding tide, unloaded to horse and cart on the beach as soon as access to the ship was possible, then simply floated away on the next tide. Docking, locks, canals and almost constant loading and unloading knocked the vessels about and they frequently looked hard worked and battered. Combined with very infrequent maintenance kept them looking a little worse for wear. For most people of course this is the attraction of such vessels.

          #103526
          James Hill 5
          Participant
            @jameshill5

            Richard,

            Thankyou for that link. I`ve just had a look at the pictures. What a collection.

            As you rightly say, back in those days there were so many interesting vessels around and of course they would be busy times I would think.

            The stories you read on the Puffers always suggest the pretty hard life they had was what gave them that look. Certainly in my case, I`ve liked them eversince I saw them on the Clyde in the fifties when visiting an aunt in Gourock. She had a bungalow high up overlooking the town, station and the river. If the wind was in the right direction. you saw the smoke before you saw the boat, so you new what was approaching. Great memories.

            Jim.

            #103527
            Ray Wood 3
            Participant
              @raywood3

              Hi Jim,

              I suppose the ultimate Puffer fan's will be watching the TV series The Vital Spark which ran from 1959 – 1974 ??

              Regards Ray

              #103529
              James Hill 5
              Participant
                @jameshill5

                Hello Ray,

                Correct. I remember watching the series when they were first on television. You can still find them on you tube.

                Hope you`re well and progressing with the boat.

                Nice to see some sunshine this morning. The last few days have been real gloomy and very wet.

                Jim.

                #103575
                James Hill 5
                Participant
                  @jameshill5

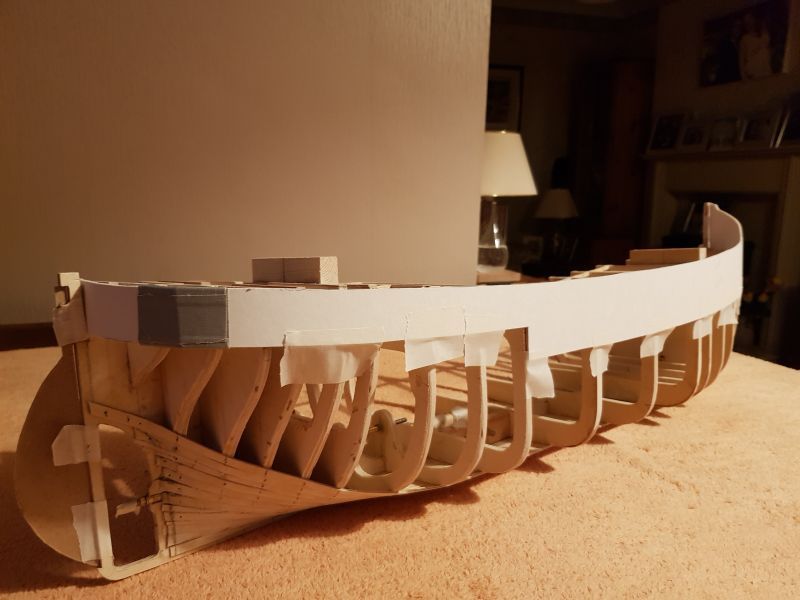
                  20230113_195729s.jpg20230113_195504s.jpg20230113_195429s.jpgA few more planks been added and starting to show the shape of the hull.

                  Anyone whose good at planking would probably be mortified when looking at what I`m producing.laugh20230113_195358s.jpg

                  #103579
                  Bob Wilson
                  Participant
                    @bobwilson59101

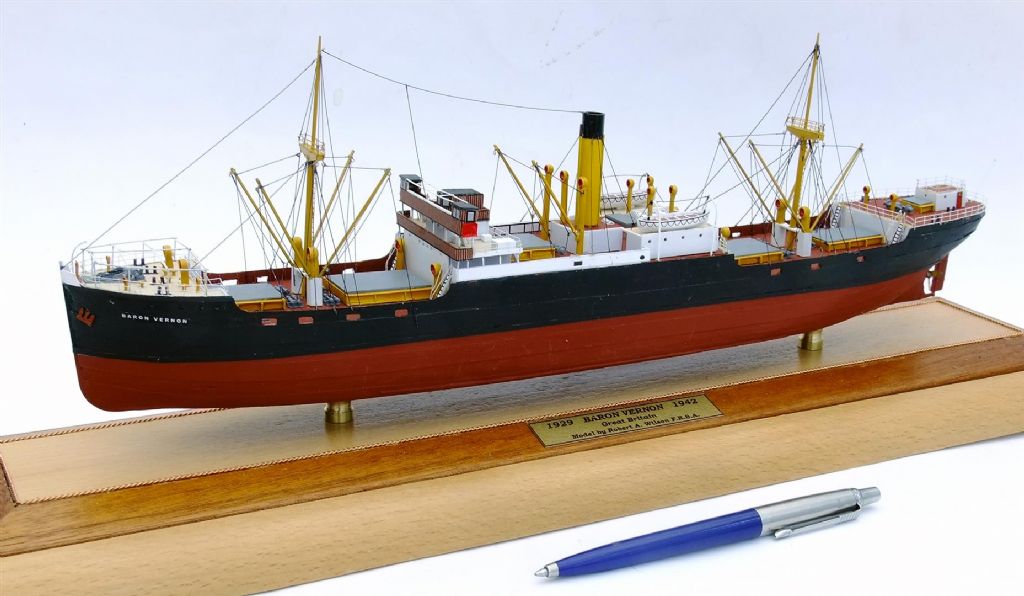
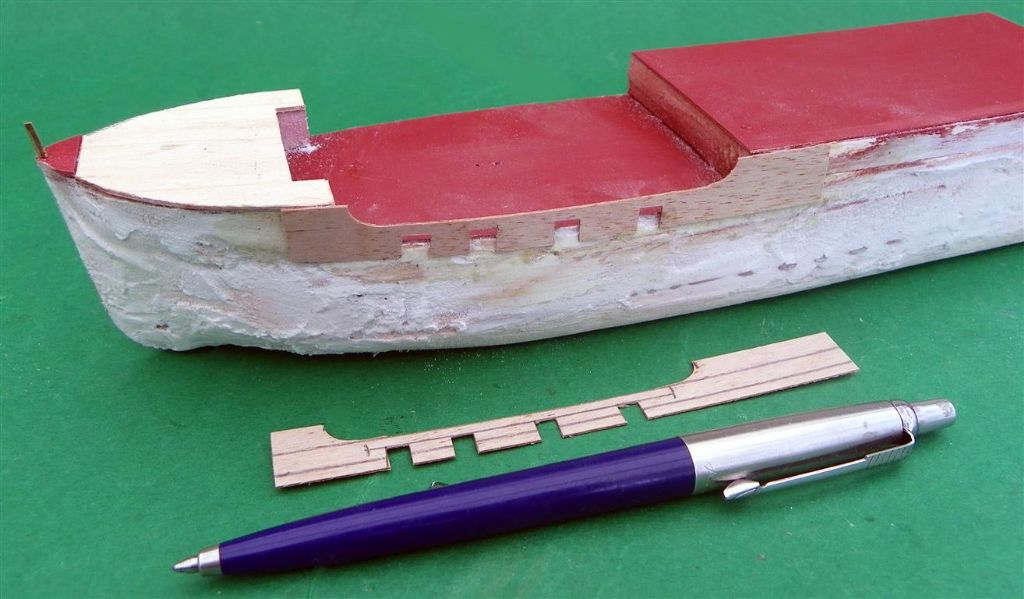
                    I have been mortifying people for years with similar "rough" methods, but they enable me to work a lot faster, and when covered up, all the rough disappears, and allows collectors to obtain good models at a fraction of the price that they would have to pay top craftsmen in the field. I am at present winding up my ship modelling activities, and last week quite easily sold four models for a couple of thousand pounds or so to free up space. Anything I build from now on will be "behind closed doors" and purely for my own amusement, although I may display them when complete.

                    I am concentrating more on drawing and writing from now on, as it requires less physical energy, but keeps my brain and eyes working.

                    I am already feeling the benefits of this withdrawal, as at almost 79, I feel like a change, although I remain interested in the subject, and your puffer is coming along well, and appeals to me very much. I fill in the rough bits with wood filler.

                    Bob

                    1 dscf8001 (large).jpg

                    Baron Vernon complete (above) and "in the rough" (below)

                    25 imgp9063 - bv (medium).jpg

                    #103581
                    Ray Wood 3
                    Participant
                      @raywood3

                      Hello Jim,

                      Nice planking I use 1/16" ply for planking the bow's and sterns of my sailing barges , I would start planking from the deck line now or you will be cutting stealers for ever

                      She's going to need loads of ballast !!

                      Raining again !!

                      Regards Ray

                      #103582
                      James Hill 5
                      Participant
                        @jameshill5

                        Good morning Bob and Ray,

                        Thankyou for your comments.

                        Bob, I know what you mean about the second layer covering up the "rough " first layer. Much as we try, I find there are many humps and dips to level out but, as you say, a bit of filler works wonders. You say your coming up 79, I`m a bit ahead of you, coming up 81. Like you though. you need something to keep things active. Where as you are winding things down, I seem to have gone the other way and can`t keep out of the garage and building, I Ineed to find places to keep the results. It`s good to see you`re going to keep modelling even if it`s just for youself. When you look at what you make, they are just exquisite There aren`t many people who could build to that standard.

                        Ray, thankyou for your suggestion on the planking so far. I`d been looking ahead at the next move, I`m thinking I will need to make the top "plank" a lot deeper , as I need to be able to glue it to the bulkheads for support where the deck level drops. Does that make sense to you. It was the only thing I could think of. I`ll make a paper or card template and see what it looks like.

                        Best wishes to you both.

                        Jim.

                        #103584
                        Ray Wood 3
                        Participant
                          @raywood3

                          Hello Jim,

                          Yes that makes sense, the wider plank in ply should take the curve, but I think you will need to block the stern ? It's just too tighter radius for the ply.

                          Model making has always been my hobby through out the years and with my recent of change of situation that you know about it's making me consider giving up my 3 days a day job and becoming a proper OAP , I'm 68 this year but still no time to lose, plenty more to build

                          Kind Regards Ray

                          Edited By Ray Wood 2 on 14/01/2023 11:53:46

                          #103585
                          Bob Wilson
                          Participant
                            @bobwilson59101

                            Jim,

                            Thanks for comments. When I did plank-on-frame, I used to start from the top and work down, but after getting a few planks on the top, I would also start from the keel upwards, and then a few more on the top etc the intention being to meet just under the turn of the bilge. Filler should get all the lumps out ready for the plating.

                            For me, the most interesting part has been the fitting out of the fine detail and superstructure.

                            I have to do some work outside, which is why I do not do much in the winter months as it is too cold.

                            But working inside, I come across the problem of glue fumes and dust that affect me badly these days.

                            Consequently, plan drawing is an extremely good alternative – non toxic and no dust, and can be done inside with no mess to clear up.

                            Bob

                            #103586
                            James Hill 5
                            Participant
                              @jameshill5

                              Bob, it`s the fine detail you manage on the deck and above which make the models really stand out.

                              Sounds like you`ve worked out your continuing way to work really well. Dust and fumes no more.

                              Ray,

                              I finished work at 70 and don`t regret it, although it took me a year to get past the idea I should have been at worksmiley. You have a multitude of modelling interests so your days will be filled with plenty to do. And I`m convinced when you get in that workshop of yours you turn the after burners on which is why you build so quicklylaugh

                              Regards, Jim.

                              #103620
                              James Hill 5
                              Participant
                                @jameshill5

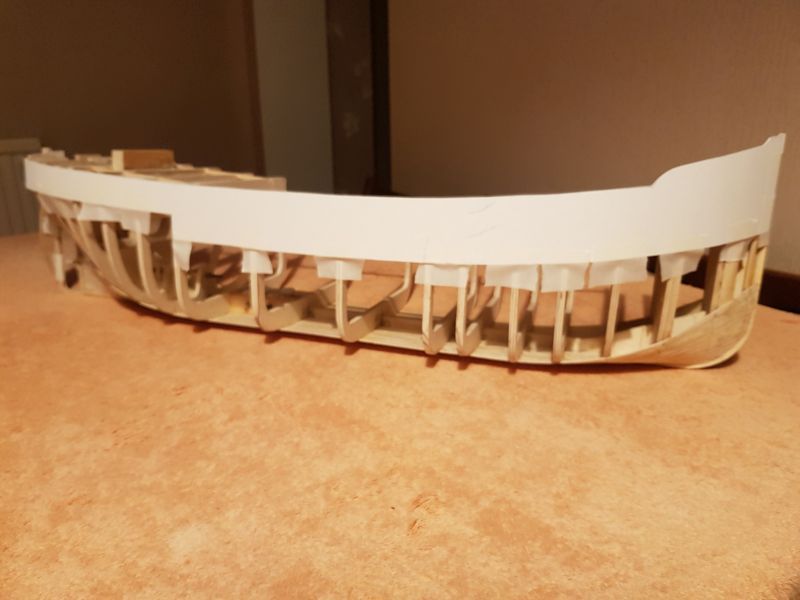
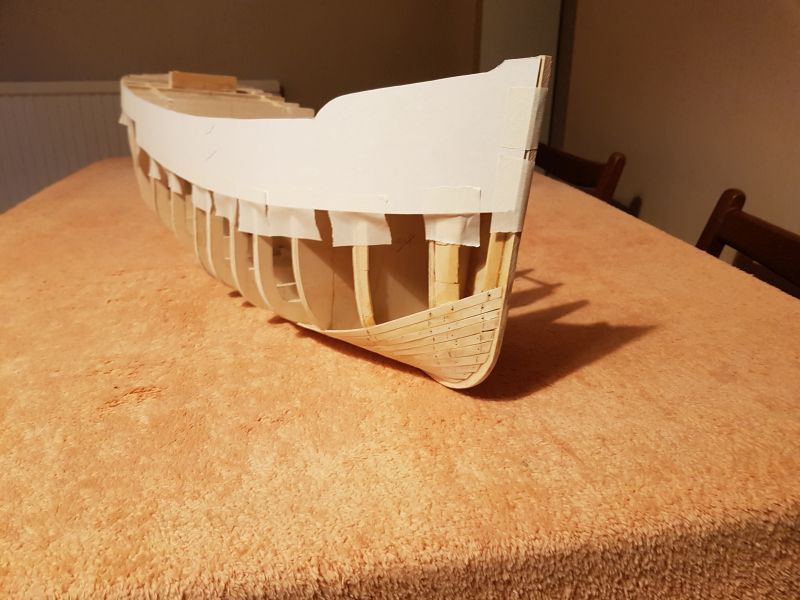
                                20230117_164045s.jpg20230117_163953s.jpg20230117_163907s.jpgHad a go at cutting out a card template for the above deck detail. Doesn`t seem to look too bad. The right angled section is where I`m hoping to go from the bigger section and plank round to the stern. As Ray suggested, I may not manage that and would have to block it, but my feeling was, as that strip is only one inch wide , soaked in water then persuaded, it might take the curve. If not, I`ll cut it where it gets akward and use block. Planking after that should be interesting. Hopefully I won`t make it look too much of a mess!laugh.

                                Jim.20230117_163844s.jpg

                                #103622
                                Ray Wood 3
                                Participant
                                  @raywood3

                                  Hi Jim,

                                  Looks like an ideal solution, and makes the bulwarks in one hit I'm a great fan of laminating thinner ply, not quite such a struggle to bend the 1/16" so I'd go with 1/32" x 2 just a thought and expensive these days.

                                  My workshop has got the better of me at the moment, I can't find my stash of Litho plate !!

                                  Also thinking to the next project a 40" Aerokits PT boat with dual power with a 3.5cc Diesel & Brushless/Lipos, that would suit both my clubs, Electric at Chantry & IC at Cygnets in Maidstone

                                  Regards Ray

                                  #103626
                                  James Hill 5
                                  Participant
                                    @jameshill5

                                    Hi Ray,

                                    That next build of yours should knock the socks off any competition. Looks like top step on the podium`s not far offlaugh.Be good to watch it coming together.

                                    Best wishes, Jim.

                                    #103799
                                    James Hill 5
                                    Participant
                                      @jameshill5

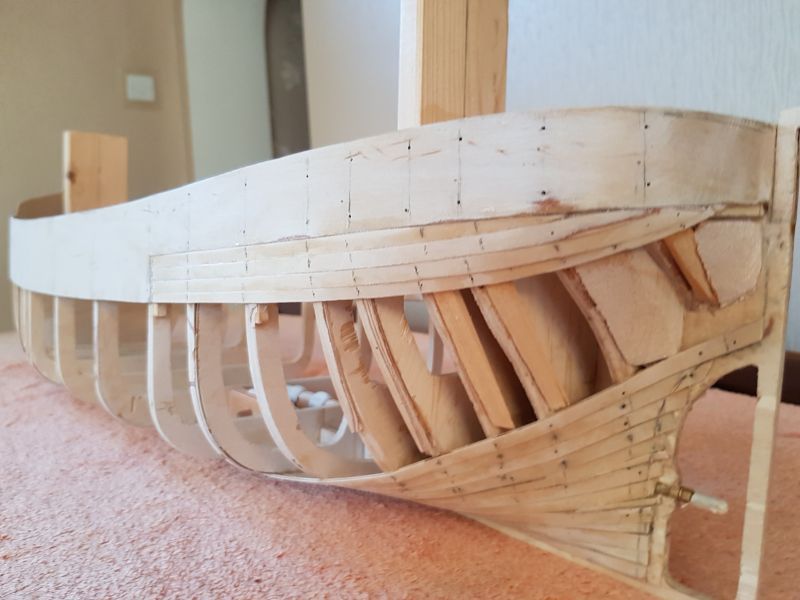
                                      20230206_105923s.jpg20230206_105723s.jpg20230206_105641s.jpgSlow progress at the moment. Only managing to get out in the garage in the evenings so planking is slow.

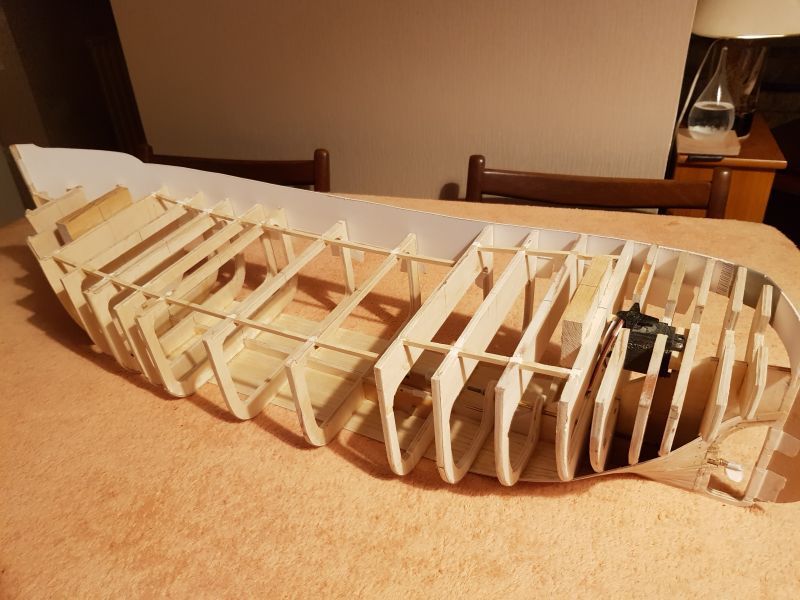
                                      The pictures show things so far in all it`s messy state. Both sides are the same. I`m not sure at the moment whether to lay the next long plank following the slight curve in the shape , or to lay it in a straight line and fill in the gaps which will occur with a bunch of stealers. I don`t suppose it matters too much, as after all the filling and sanding has taken place I want try and simulate the hull being plated. Would it be usefull to glass cloth the internals, where reachable, or just give everything a good coat of varnish or something similar?

                                      Jim.20230206_105628s.jpg

                                      #104280
                                      James Hill 5
                                      Participant
                                        @jameshill5

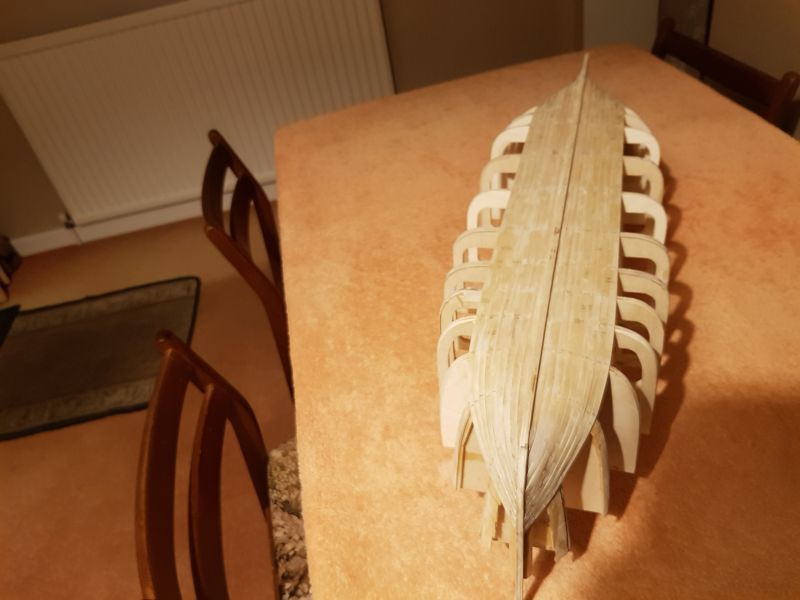
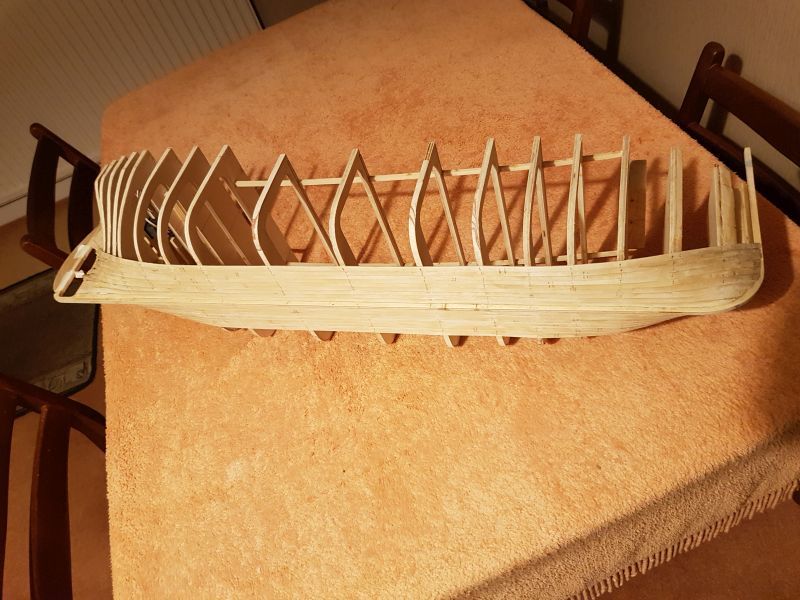
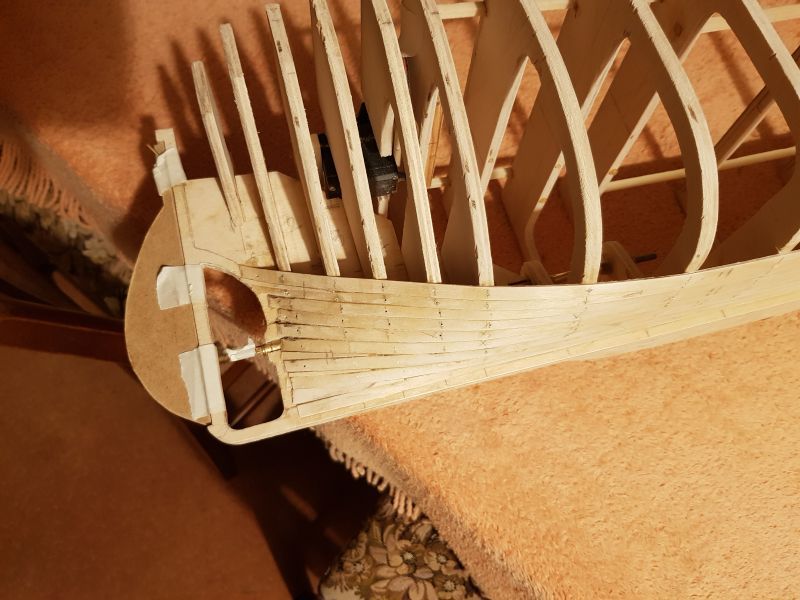
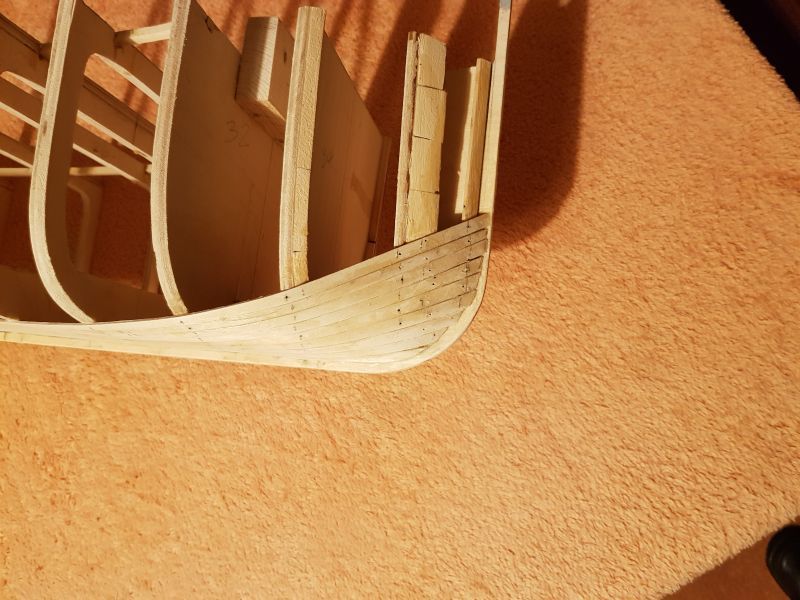
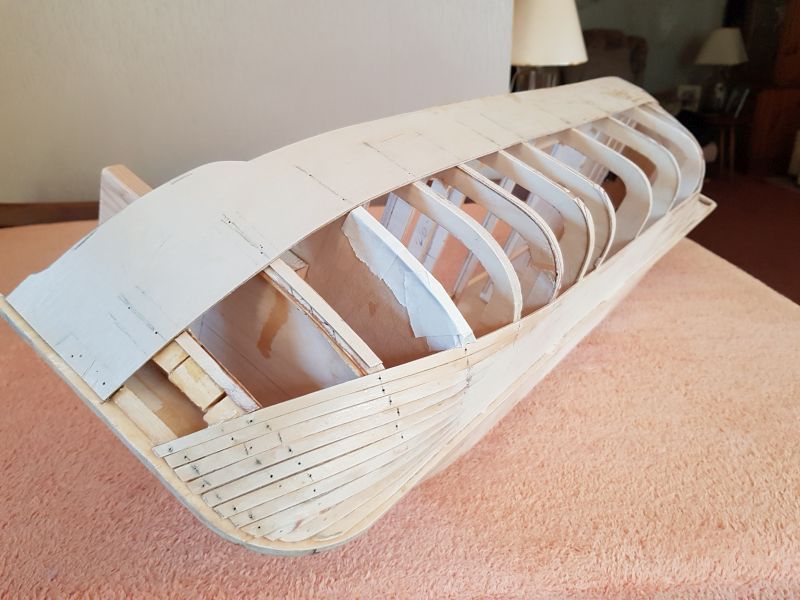
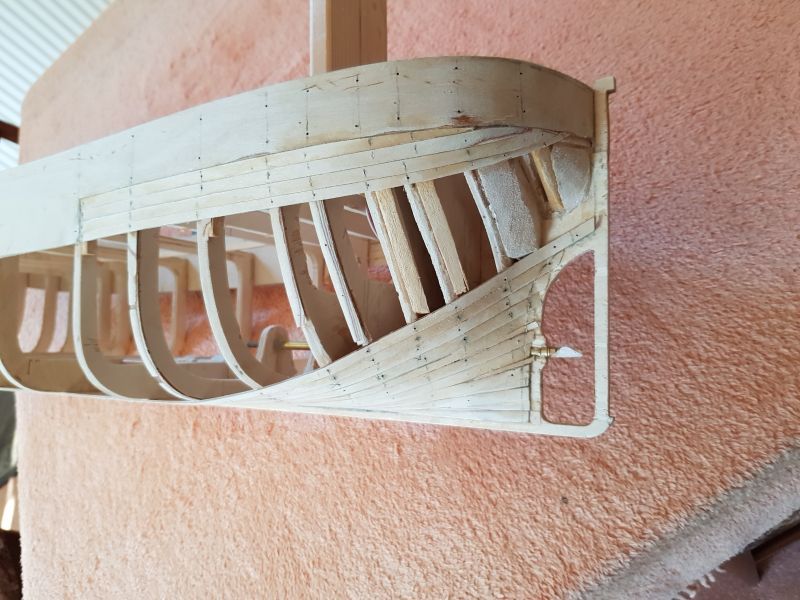
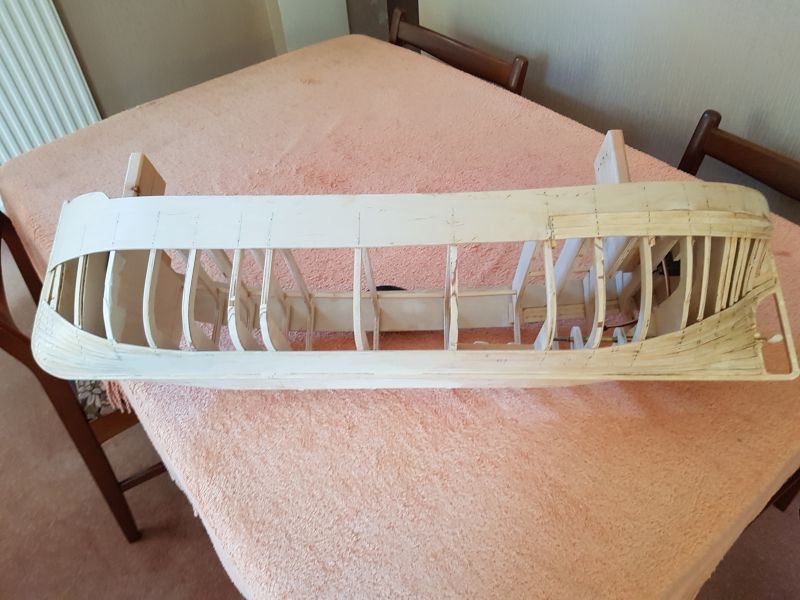
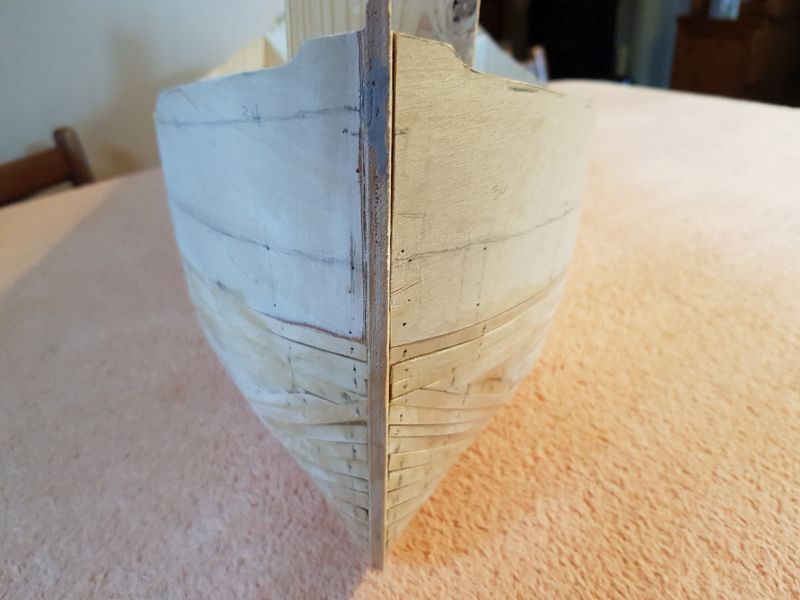
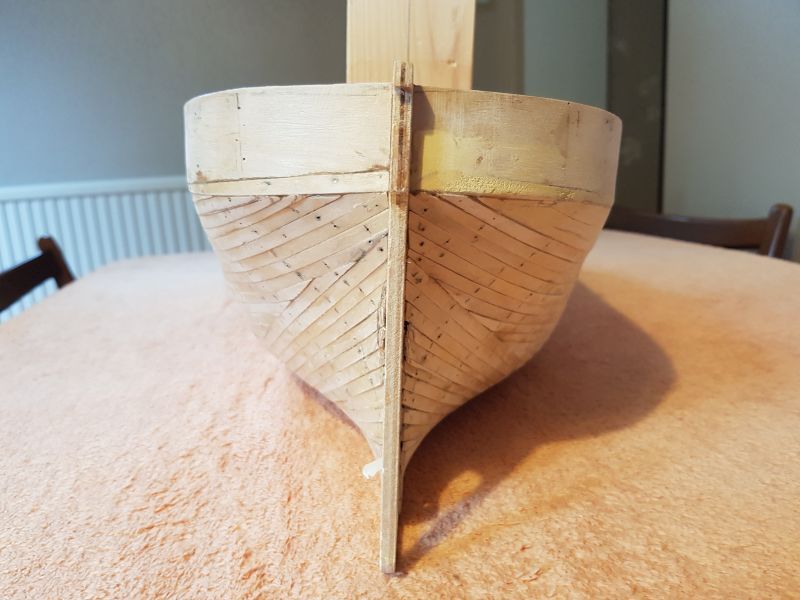
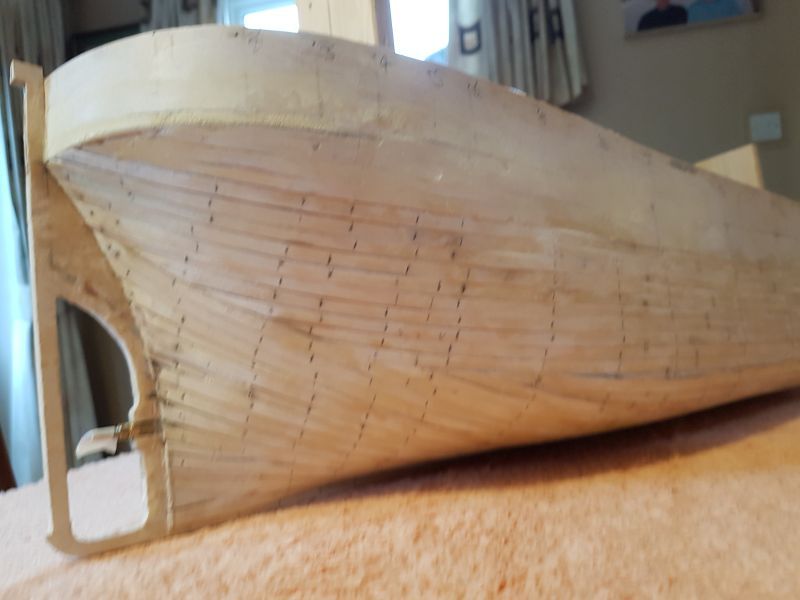
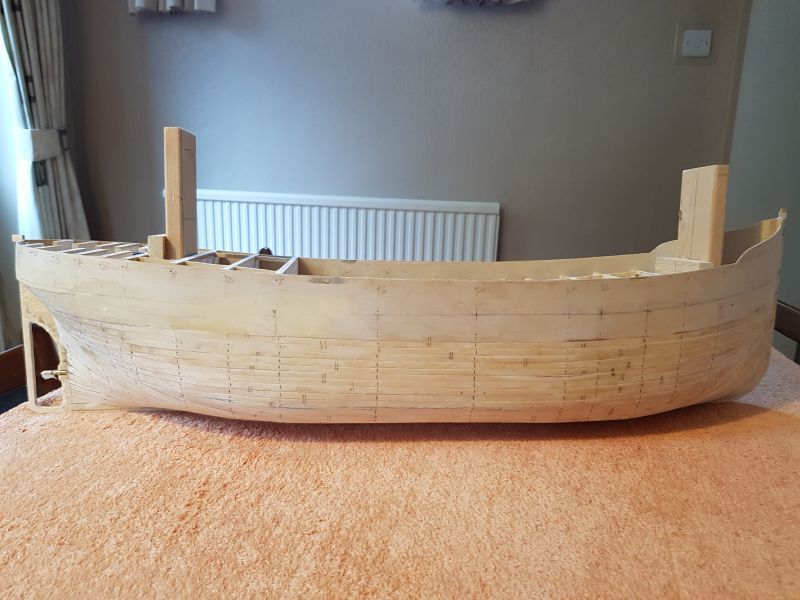
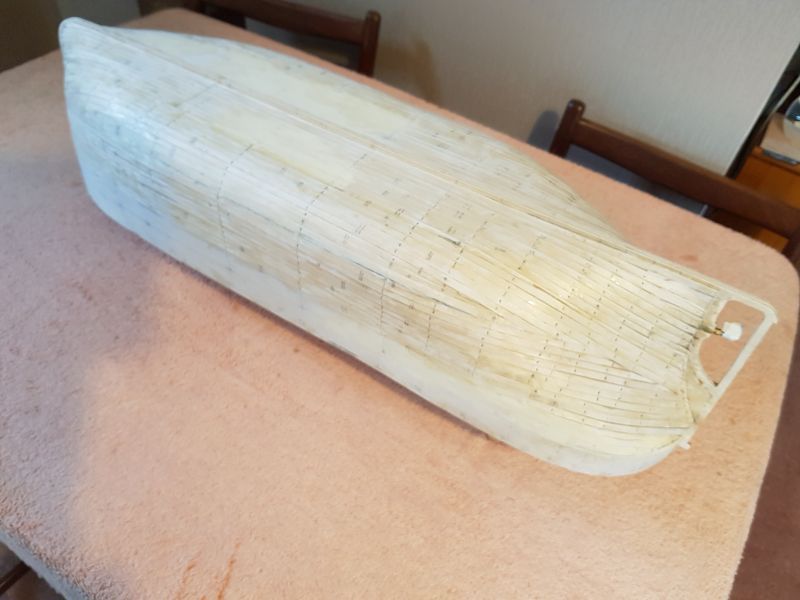
                                        20230319_101847s.jpg20230319_101919s.jpg20230319_101929s.jpg20230319_102113s.jpgFinally got the planking finished. It`s taken a while but worth it as I can now see properly what the boat will look like. All a bit grubby at the moment with all the pencil marks and pin holes. It`s a bath tub of a hull!

                                        In some recent posts, I asked questions regarding the fact that I wanted to plate the hull. As I`ve never attempted this before, and in the hope of not repeating myself, Ray suggested card for the plating, which is fine, but is there an ideal type or would the type you get from Hobbycraft etc. be suitable? I have some at here at home but at 1.5mm thick I think that`s a bit too thick so would look for something lighter. So far in the build I`ve used Gorrilla glue and would hope that would be ok to glue the card to the hull. Once the plating and rivets are on, would a coat of sealer of some sort be required, or leave it as just sealed with the paint?

                                        A lot of rubbing down and filling next to get a decent surface to attach the plating.20230319_102948s.jpg

                                        #104282
                                        Bob Wilson
                                        Participant
                                          @bobwilson59101

                                          That is looking pretty good now. The plating was probably about one inch thick, so you can work out how thick the card should be from your scale.

                                          Bob

                                          #104284
                                          James Hill 5
                                          Participant
                                            @jameshill5

                                            Thanks Bob, the plate thickness was something I`d not seen anywhere so that helps.

                                            I`ll try some test pieces at some point to get the hang of it,

                                            Jim.

                                            #104286
                                            Ray Wood 3
                                            Participant
                                              @raywood3

                                              Hello Jim,

                                              You made a fine job of the planking are going to resin and cloth the inside of the hull to stop it leaking ?

                                              The card plating would look good with 1/32" card would look about and dampened take the compound curves required.

                                              Keep up the good work

                                              Regards Ray

                                              #104287
                                              James Hill 5
                                              Participant
                                                @jameshill5

                                                Thanks Ray,

                                                Although the outside of the hull will need sanding down and filling ( most of which will be sanded off ), I take your point about glass clothing the inside to give it a chance of not leaking…. hopefully he says.

                                                With the best will in the world not all the planks butted up to one another gapless, so leak proofing is a must. The planking was quite enjoyable but took a while, but now it`s done I`ll have to make a cradle to sit it in.

                                                Jim.

                                                #104288
                                                ashley needham
                                                Participant
                                                  @ashleyneedham69188

                                                  ….OR glass the outside and stop the water getting at the planks and frame. In theory, you could glass the inside and then have all the frames and planks rot away, leaving an inner shell….just a thought!!

                                                  Plating. My extra thoughts on plating is that at scale it’s hardly noticeable at viewing distances so you have to overdo it. Glassing the outside and then sticking on card (as suggested) plate means that if or when the plating comes away, as it is likely to do after a few years, you can just scrape the bits off, re-apply and then stick more on as the integrity of the watertightness of the hull is not compromised.

                                                  My Titanic has card strips on the hull, and after several years some corners and ends started to lift despite being EzeKoted and painted.

                                                  Everyone has their favourite method.

                                                  Ashley

                                                  #104293
                                                  James Hill 5
                                                  Participant
                                                    @jameshill5

                                                    Interesting thoughts Ashley. As you say, everyone has their favourite method but not having done this before , I`m grateful for other peoples suggestions and ideas.

                                                    Many thanks,

                                                    Jim.

                                                    #104294
                                                    Bob Wilson
                                                    Participant
                                                      @bobwilson59101

                                                      The plating on puffers was quite prominent. They were strongly built so they could safely be left to "dry out" when the tide went out, and discharged by horses and carts on the beach.

                                                      I measured the plating on a 7,000ton 1944 built cargo ship that I was on a long time ago, and it was one inch. Years later, on a 33,000 ton tanker, completed in 1977, the plating was only 5/8th inch!

                                                      On all the puffers that I saw, the plating was very heavy, and I believe that one inch would be quire common. I plate my miniarures at 32 feet to 1 inch, so a larger scale puffer without plating would look rather bare.

                                                      Here is a puffer example: **LINK**

                                                    Viewing 25 posts - 51 through 75 (of 235 total)
                                                    • Please log in to reply to this topic. Registering is free and easy using the links on the menu at the top of this page.

                                                    Code of conduct | Forum Help/FAQs

                                                    Advert

                                                    Latest Replies

                                                    Home Forums Scratch build Topics

                                                    Viewing 25 topics - 1 through 25 (of 25 total)
                                                    Viewing 25 topics - 1 through 25 (of 25 total)

                                                    View full reply list.

                                                    Advert