The world's leading magazine for all model boating interests
Galileo – A resurrection
Galileo – A resurrection
Home › Forums › Sailing Models › Galileo – A resurrection
- This topic is empty.
-
AuthorPosts
-
12 April 2019 at 18:45 #81855
Tim Rowe
Participant@timrowe83142Hi Ray
Are you posting your Raven on the other side. There is a thread called Forum Member's New Models, Let's See Them. If you click here and scroll down the page you will see a fiery Isabella which is my latest.
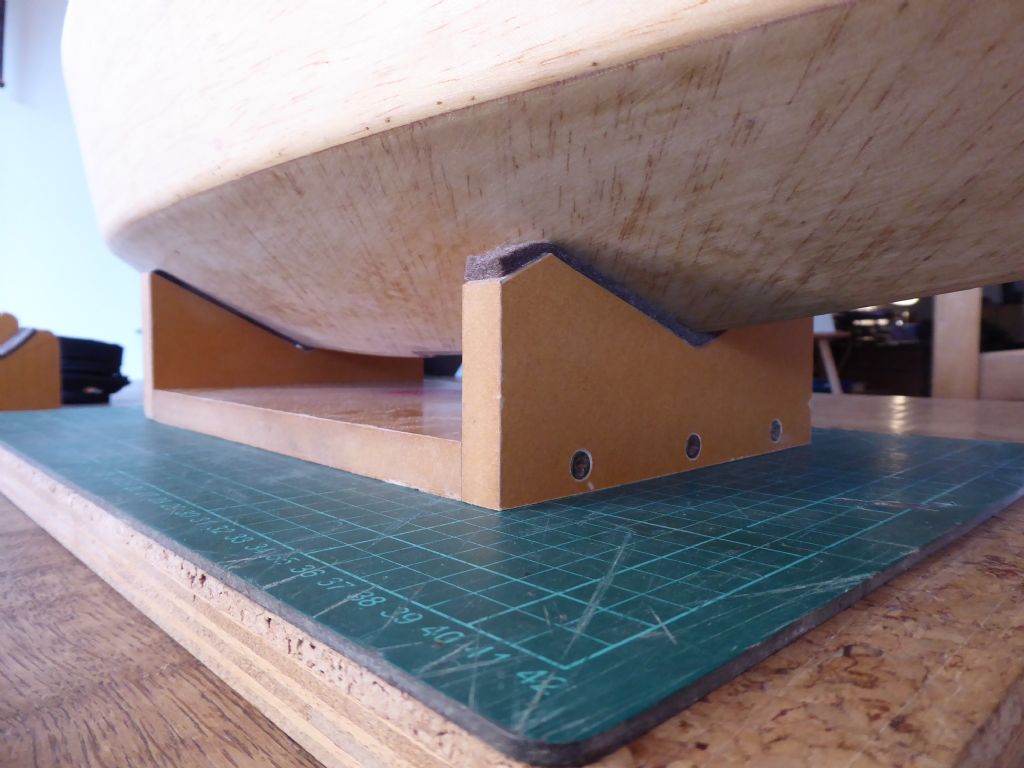
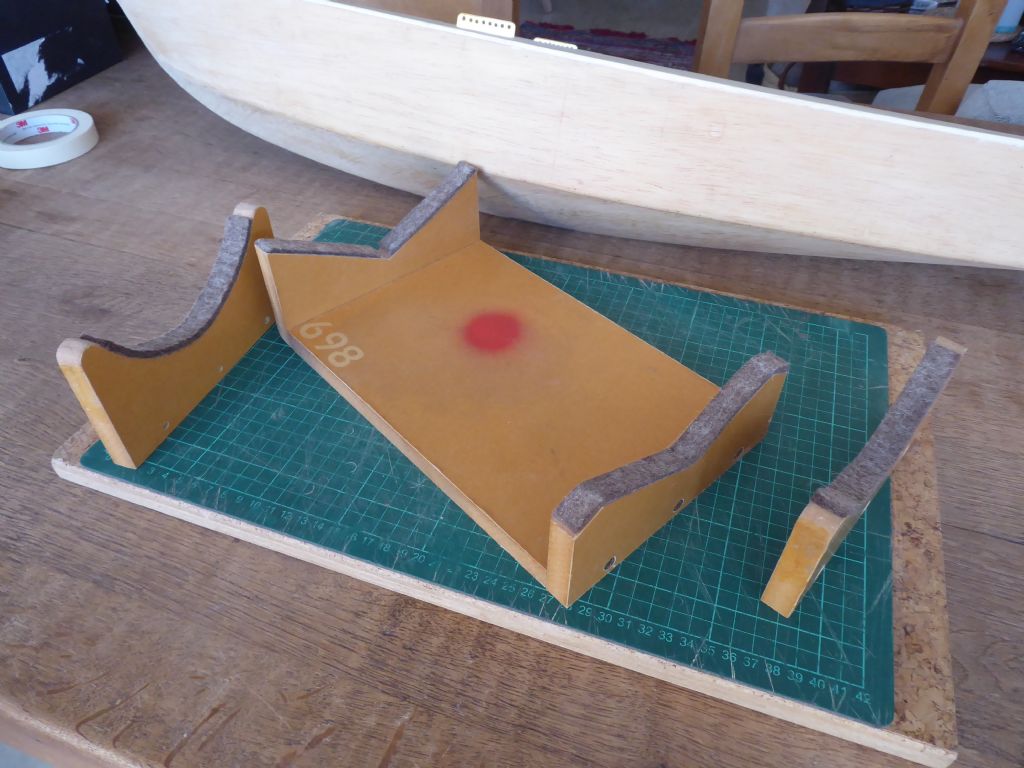
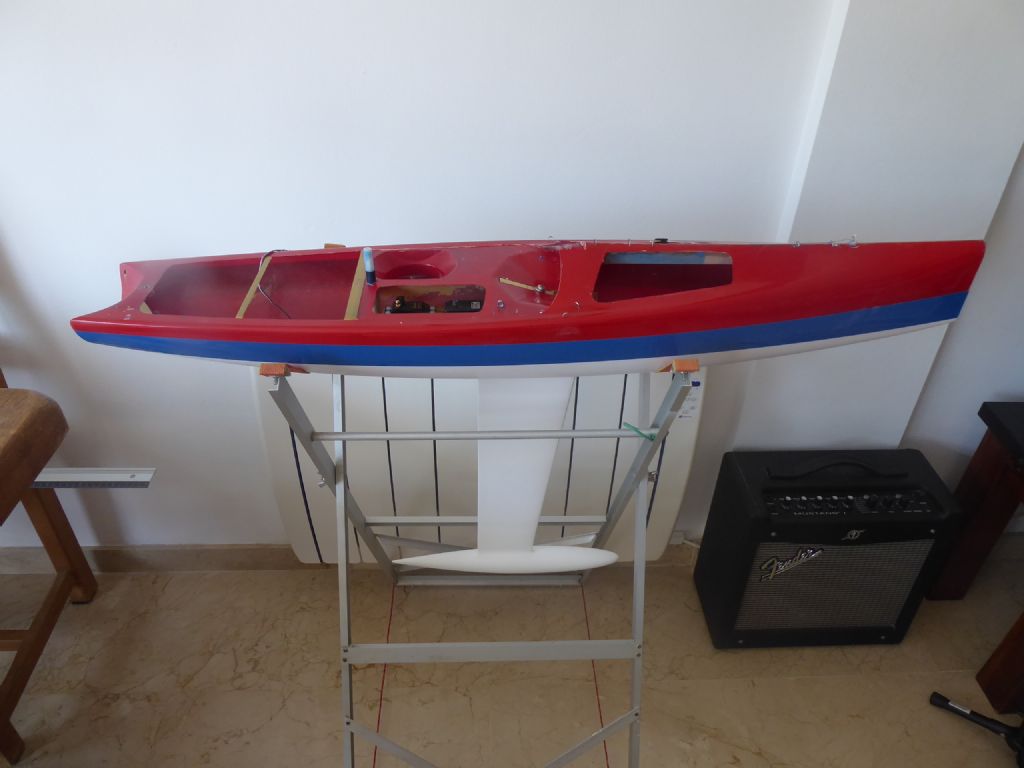
I always seem to have parallel things to do and I have had to spend a bit of time on the stands. During building I use a simple stand made from MDF with some self-adhesive felt as a cushion.
This keep the model nice and low as well as stable while I work on it. Galileo even sits in this one on the chine.
It is a universal stand and I have different ends that screw on and below are the ends for the IOM
One of the reasons I like detachable keels as the hull are very light on their own and easy to manipulate.
The problem now is that I am working on the keels and later I will need something while setting up and tuning.
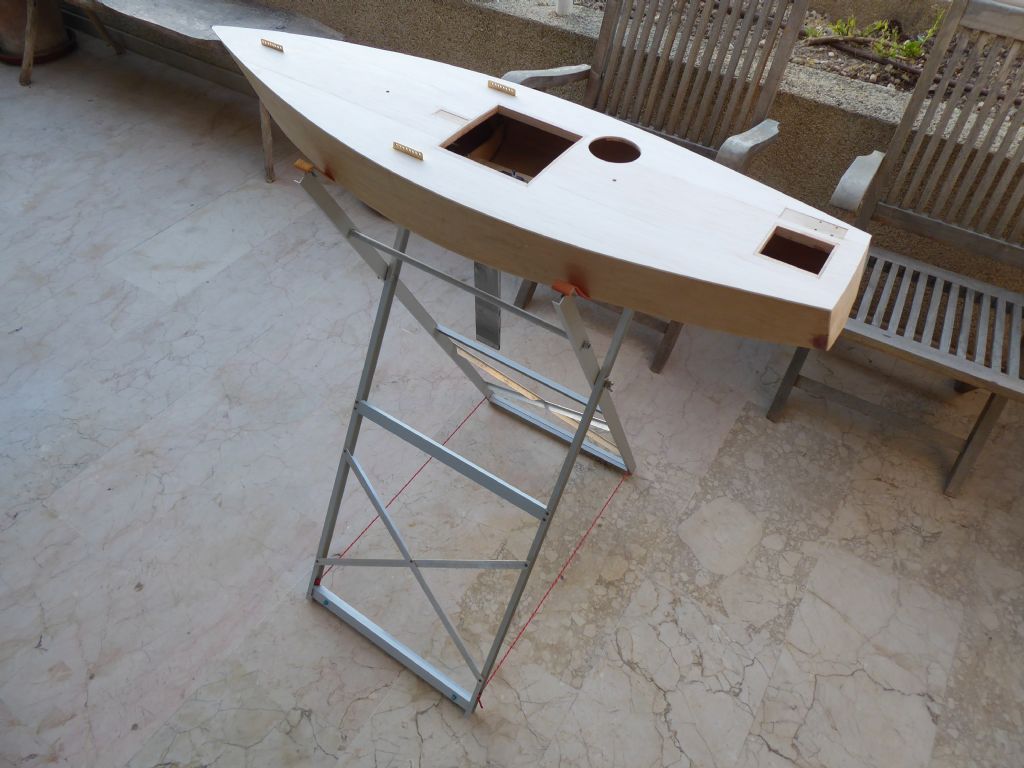
A couple of years ago when I bought the IOM the first job was to make a stand but because I have some difficulty bending down I wanted it to be waist height.
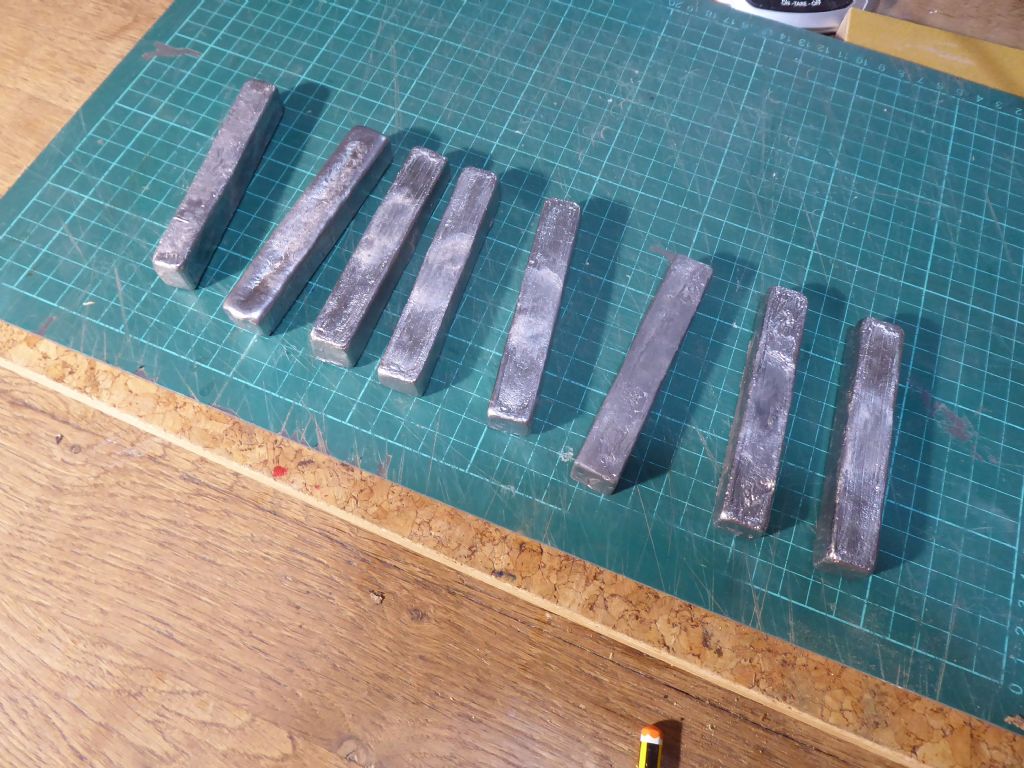
It was made from alloy sections bought at the local hardware store and pop-riveted together. The bases are hollow and filled with lead fishing weights which give it a lot of stability. There was however quite a lot of fresh air between the weights to while I had the plaster of Paris out and was melting lead I decided to make some lead blocks that would completely fill the alloy channels.
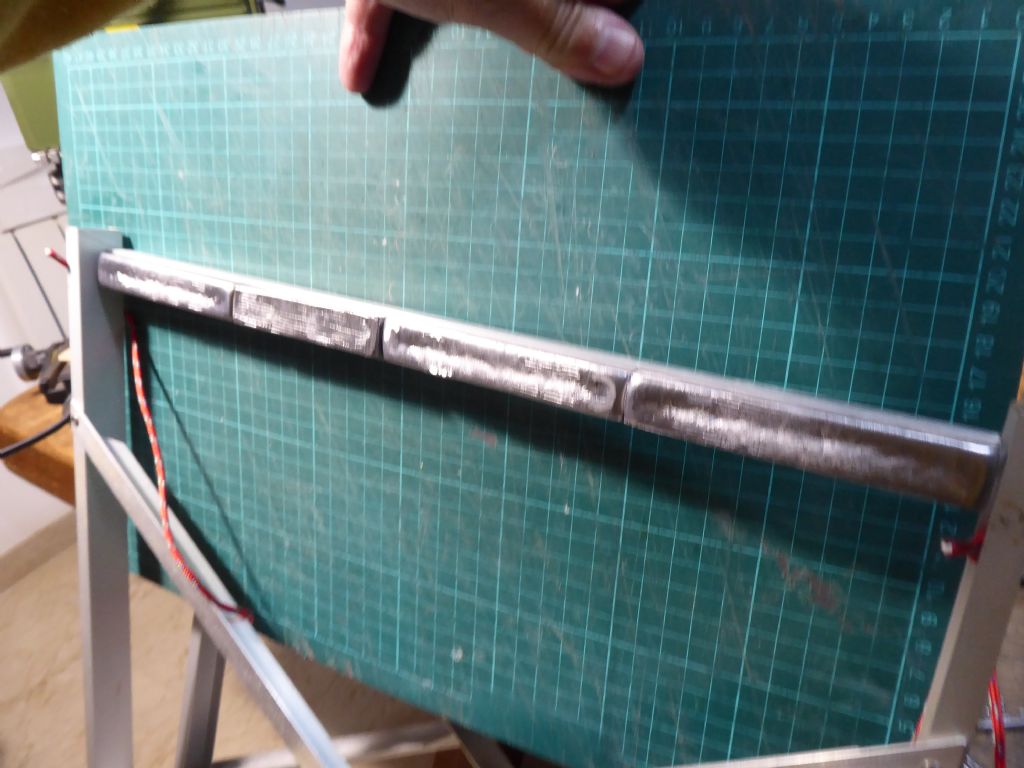
Turned out like these. The plaster of Paris mould was struggling a bit with the last two.
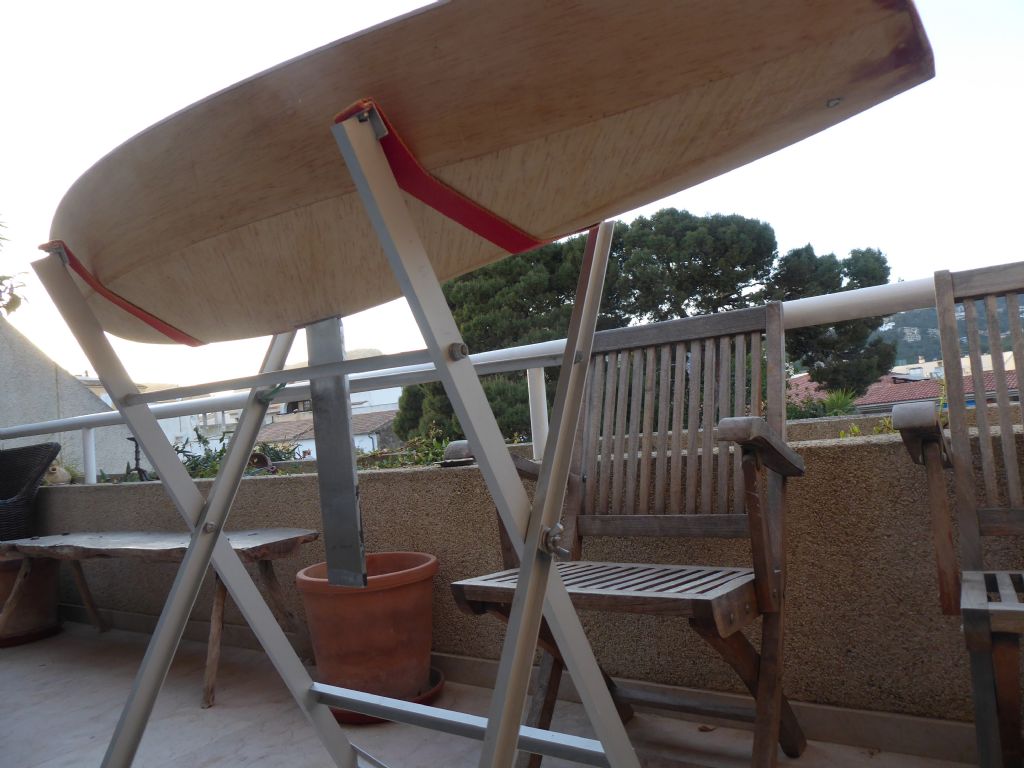
Packed into the channel and the slightly large channel then through bolted over the top. This increased the weight by a good 50% and now the stand folds flat for transport or storage and opens out to accept the hull (and aircraft)
The webbing straps evenly support any shaped hull and the keel hangs down between the rails. The boats can be heeled which is needed when tuning and the boats give a bit is strong winds without trying to tip up the stand. It has a clip on tray for holding odds and ends.
The top points are level so with a board on top it also double as a table. Quite possibly one of the most practical things I have ever built and I wouldn't be without it.
Tim R
20 April 2019 at 12:34 #81943Tim Rowe
Participant@timrowe83142Hi Ray
Just seen Raven on the Modelfying forum. Very nice.On Galileo I have finally reached the point where I feel it is all coming together. Painting Yippee!
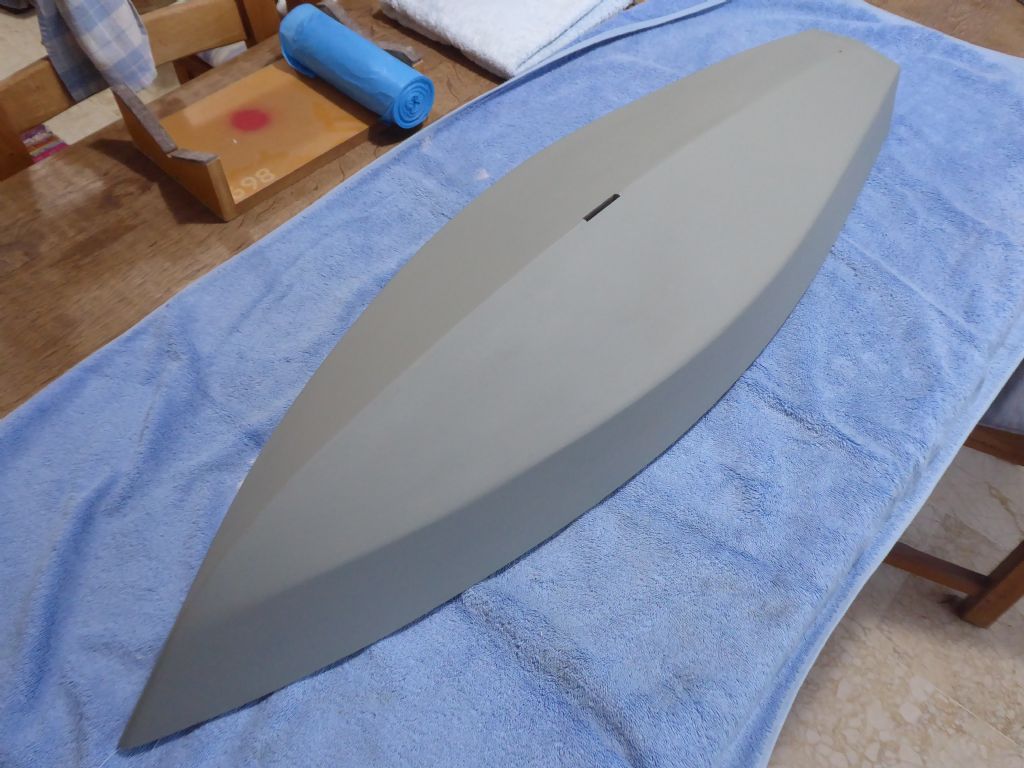
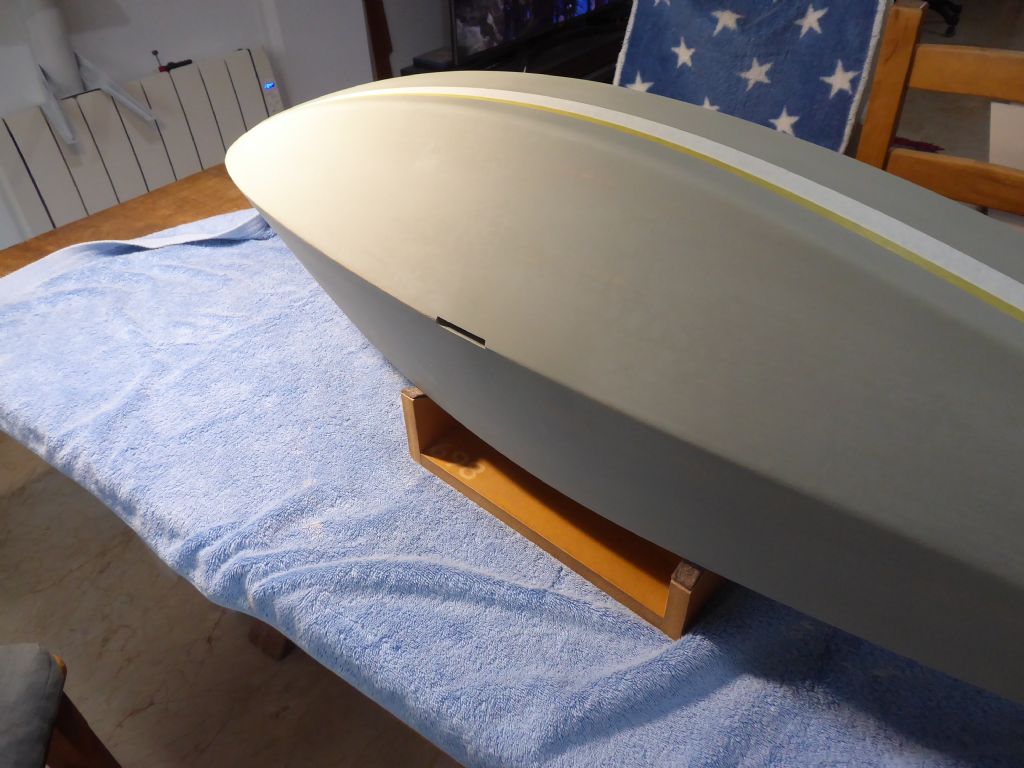
Here is the first coat of high build spray primer applied directly to the glass / epoxy surface. I did feather in the joins and overlaps of the cloth beforehand but was pleased with the uniform result. All of a sudden the boat looks a whole lot bigger and the form is more apparent because there is no distraction from the grain and colours of the balsa. It is quite an interesting shape and quite curvy for a hard chine boat.
At this stage the hull was given a thorough sanding to take off all the high spots (important) and just breaking through to the glass in a few places. The topsides were then given a second coat as the finish will be a dark colour.
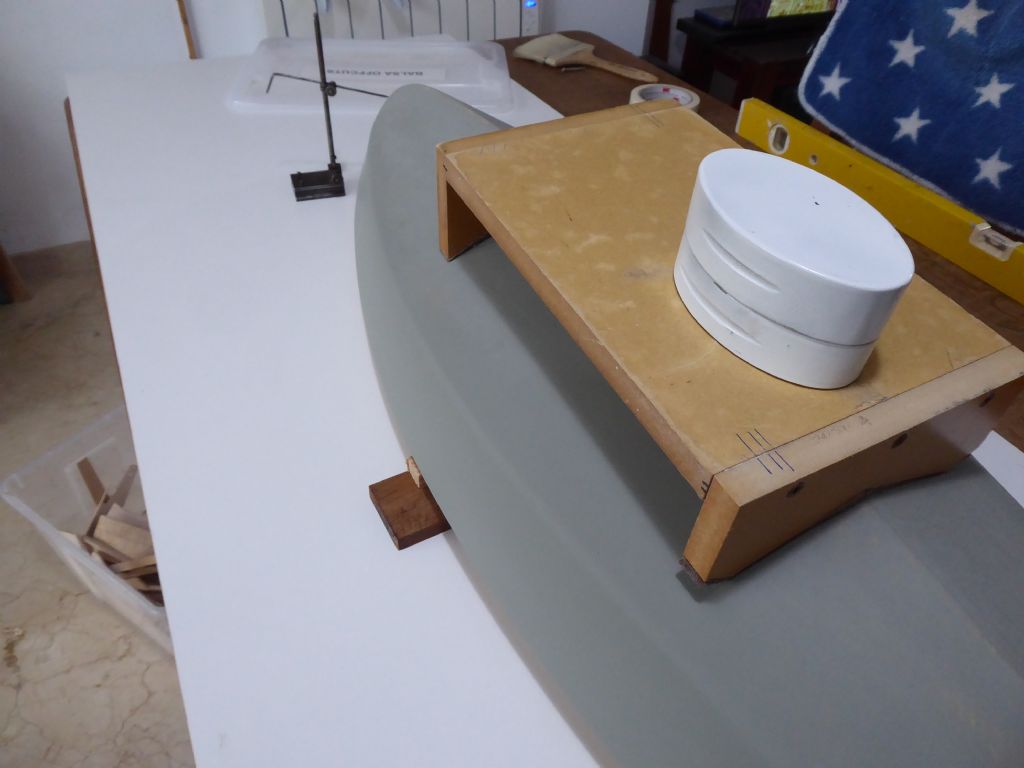
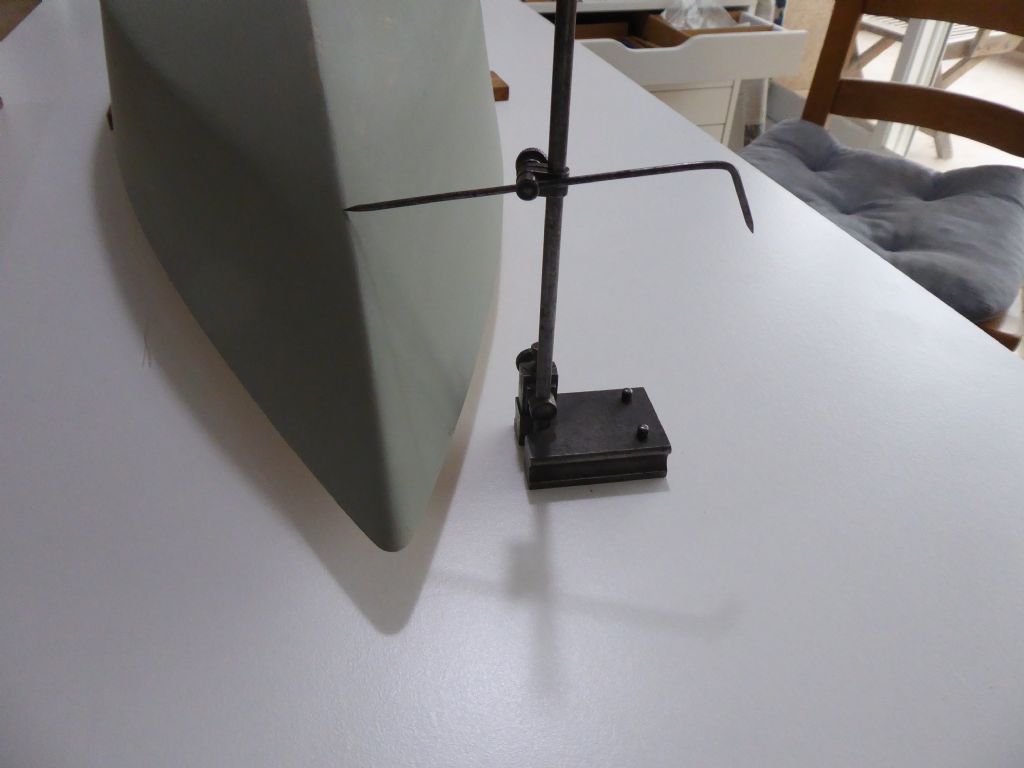
Nest stage was to set up to mark the waterline. The hull was blocked up on a flat melamine board lined up to give slightly more waterline showing at the bow than at the stern (hopefully). The aft edge of the keel is plumb when the boat is on its design waterline and so I put a piece of balsa in the slot and sighted that in to the vertical side of a bookcase with a little allowance for the bias at the bow. The stand was put on the boat and weighted to hold it firmly while marking.
This useful tool was inherited from my grandfather and using the lowest point of the transom, set the height and scribed a very light line in the primer.
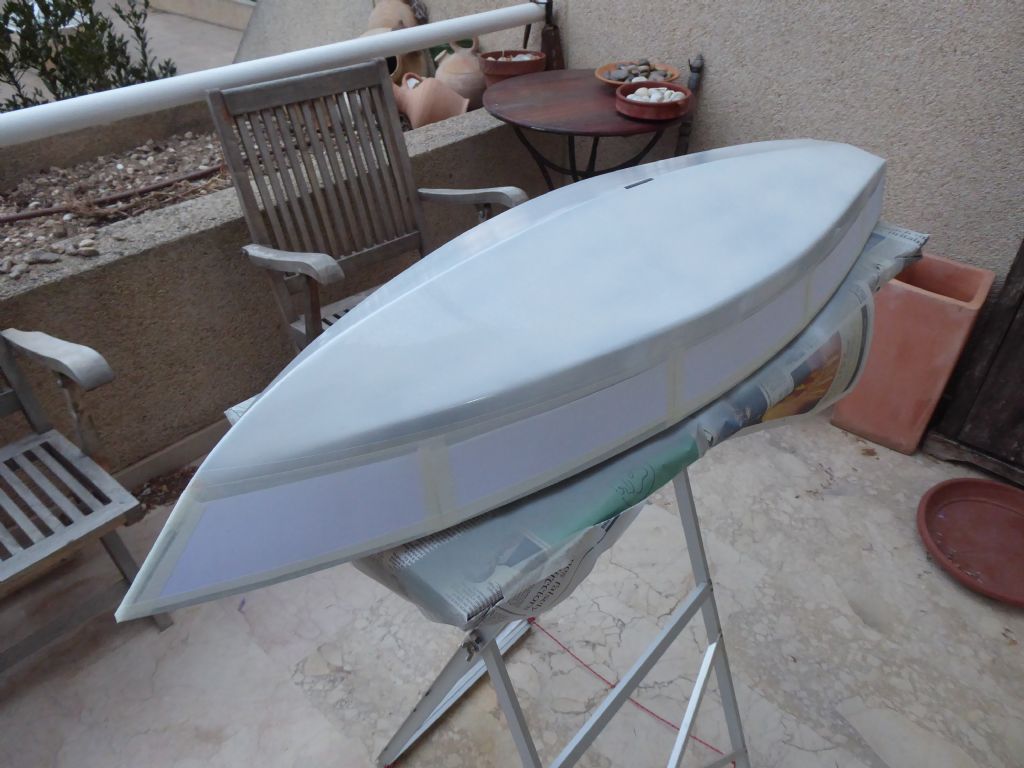
Fine line tape was then applied and backed up with ordinary masking tape before covering the rest of the topsides with paper. The fine line tape was gently rubbed down using a soft cloth to make sure the edge was fully stuck down.
First coat of white high build primer applied. The light colour helped to highlight small areas that need to be filled.
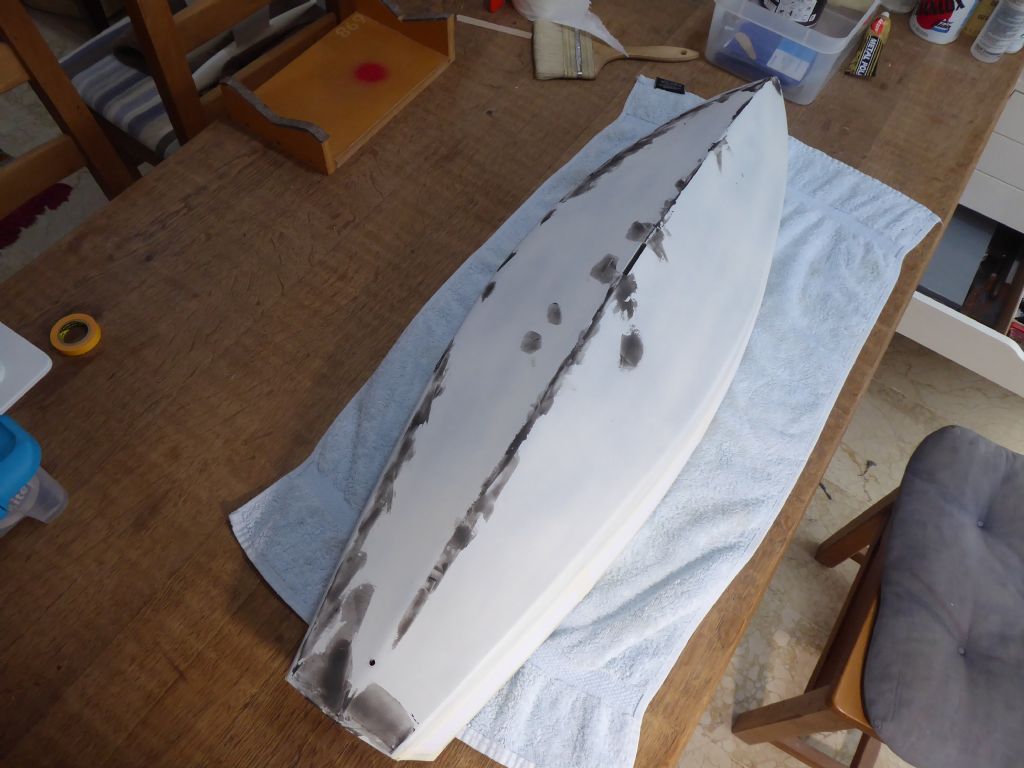
I used a polyester filler which I like because it sets quickly and is hard although easy to sand. I intentionally make the mixture hot ie generous with the catalyst because if the filler takes too long to cure, the styrene can soften or even blister the primer which is just a synthetic paint. You have to work quickly and mix small quantities but the material then sets before the paint knows it is being attacked.
There is a lot more filler on one side and I will explain. When I was glassing the first side I put the glass cloth on dry and worked the resin in from the top, This was because the glass was very thin and tricky to handle. This meant that it ended up resin rich in places. On the second side I decided to use the better method of applying the resin first and then laying on the cloth. This had to be done very carefully but there was no need to add any more resin and I got a very smooth result.
The bottom will now be sanded again to get the filler down to the datum surface and then get one more coat of white primer before the finishing coats. The bottom will be white in keeping with the original and the topsides burgundy.Tim R
2 May 2019 at 19:22 #82131Tim Rowe
Participant@timrowe83142It gets very boring watching paint dry with frantic bouts of action as the intermediate coats are flattened. I am working in some new brushes for the final coats and have been experimenting with a sponge brush to lay off the paint. These are used for varnishing and can produce a mirror finish. This is the stage where I can easily get distracted and I will hold my hands up to admitting there is another aircraft on the building board.
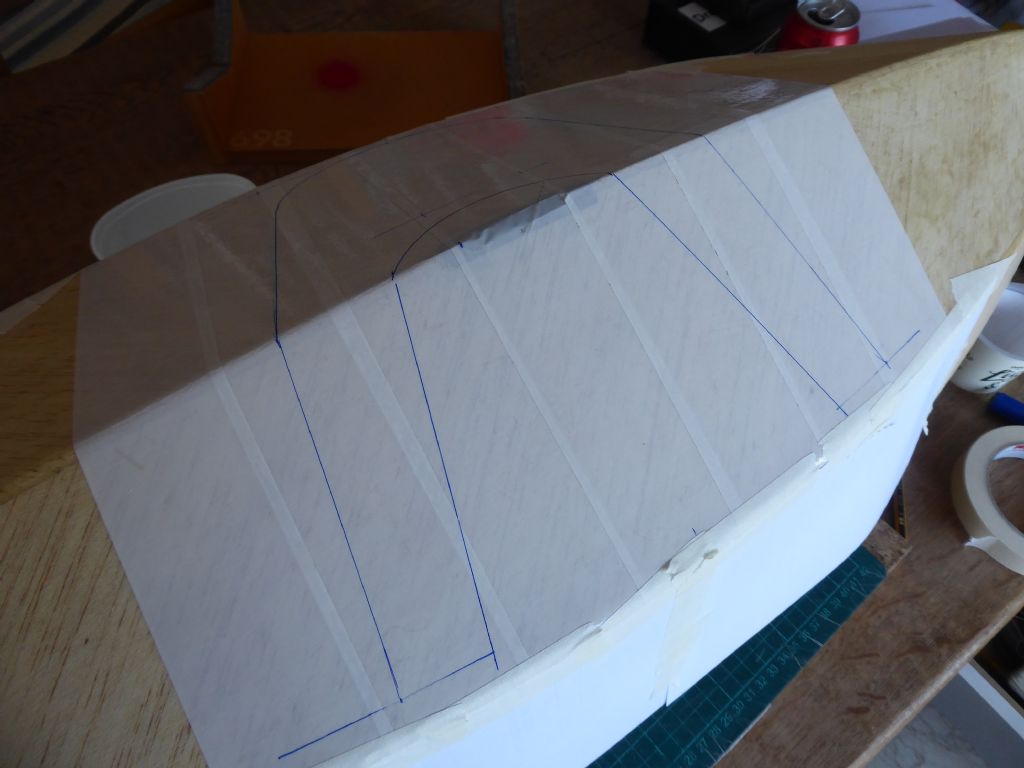
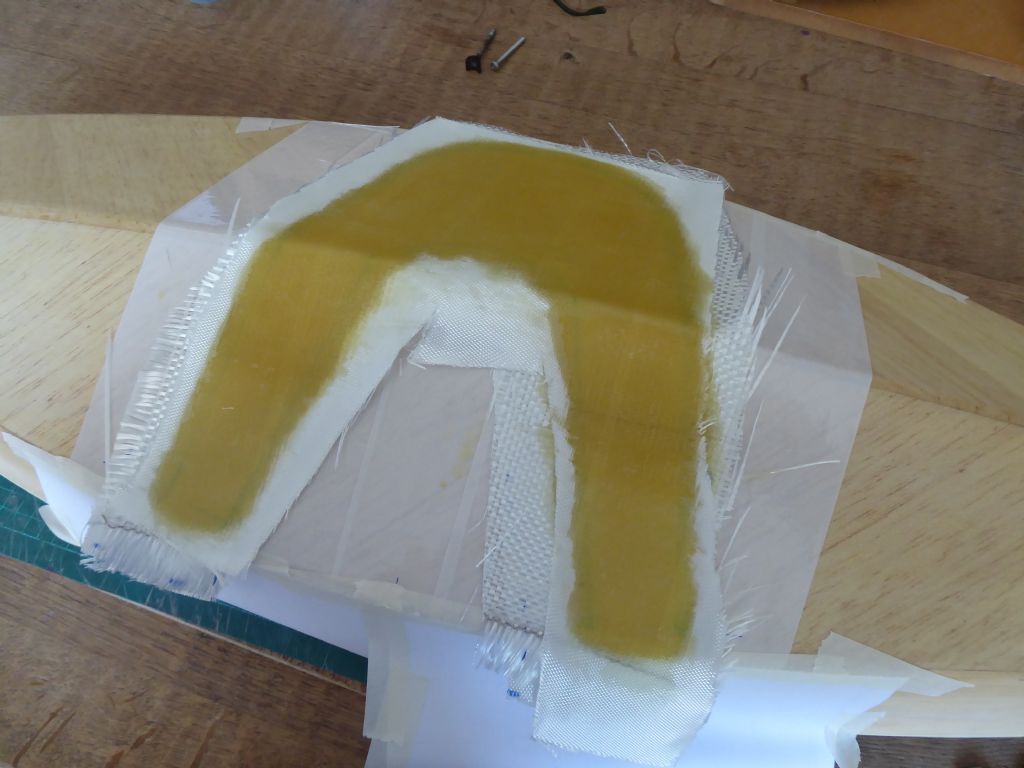
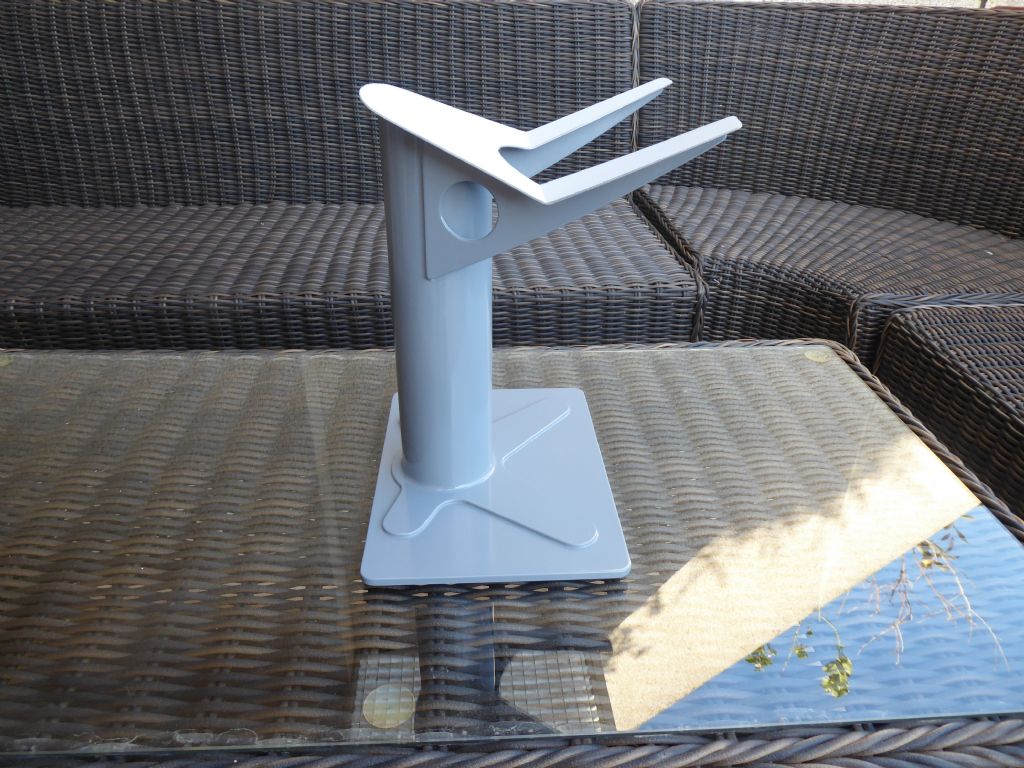
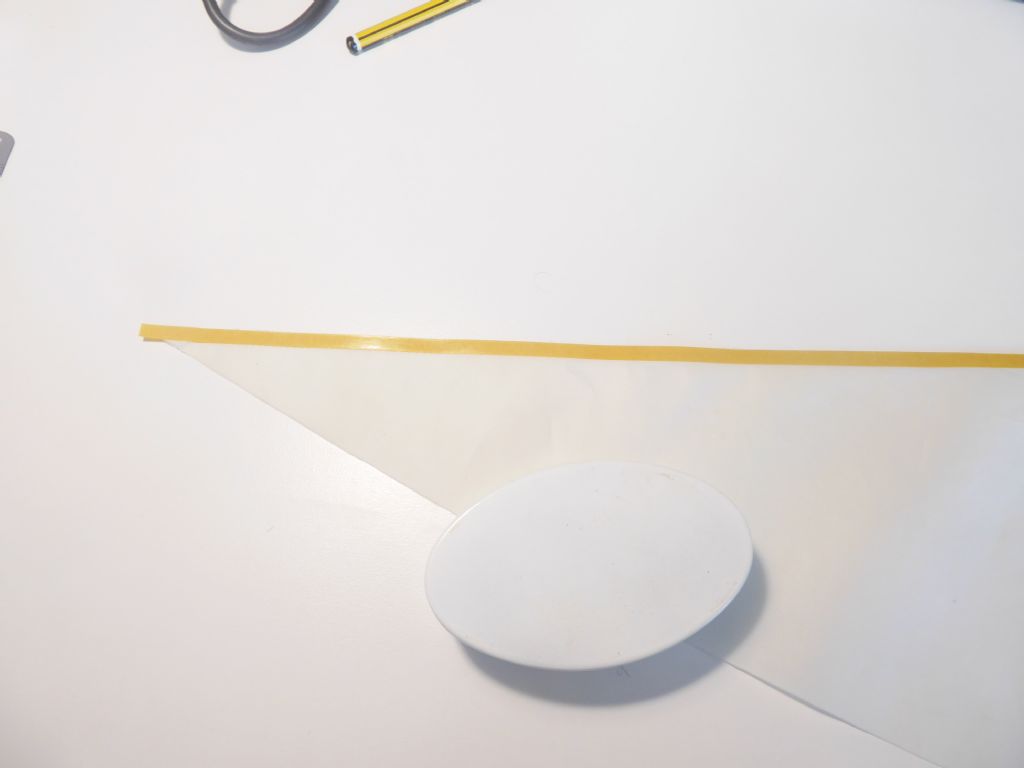
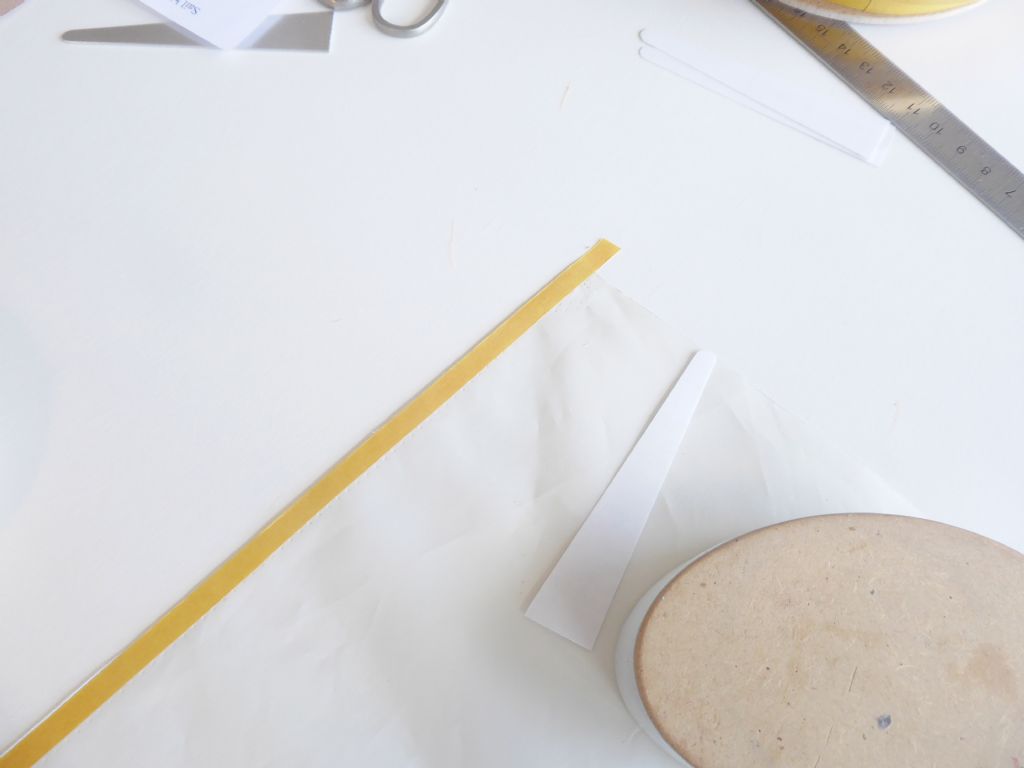
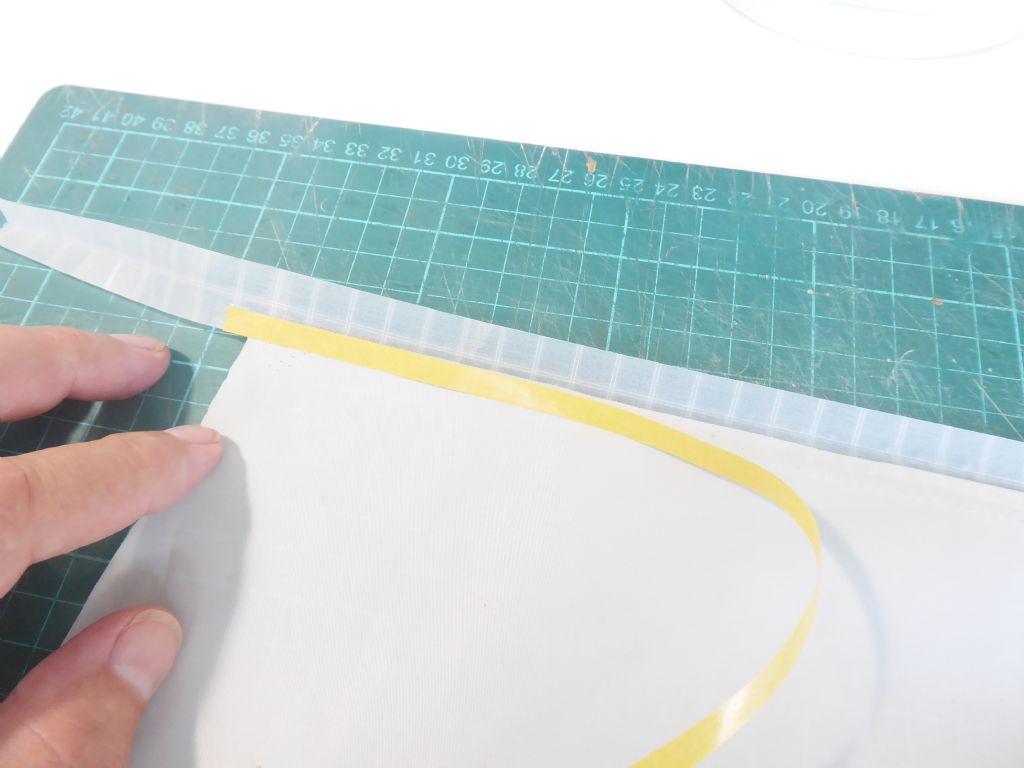
In an attempt to keep something happening on Galileo everyday (which means that you will finish sometime) I started to think about a display stand. I does seem to me that stands tend to follow the two V'eed uprights with a plank of wood in the middle. I was determined to do something quite different and this is how it panned out.To get the cradle part to fit exactly to the hull the easiest thing is to mould it directly off the hull itself. This is often done on full sized racing yachts. The parting surface is white parcel tape and the outline of the supports was drawn on with a fine marker pen. This will show through the laminate and with any luck some printing will occur on the surface of the moulding to give me a trim line. (It did work)
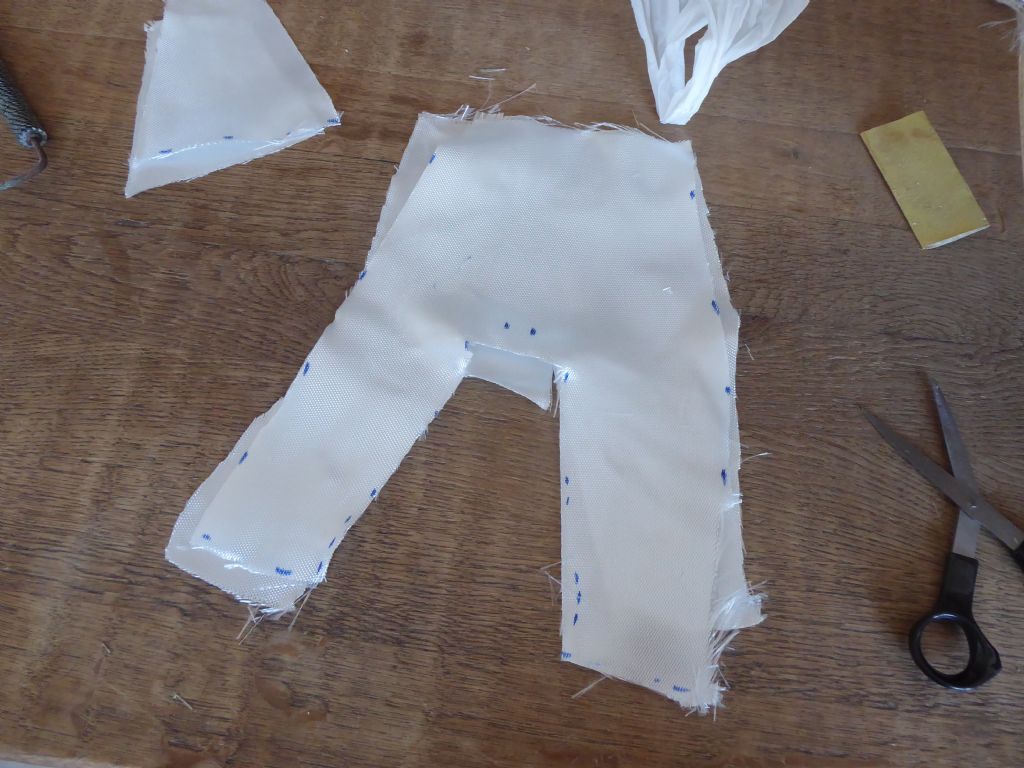
Here the glass cloth is roughly tailored with a decent trimming allowance.
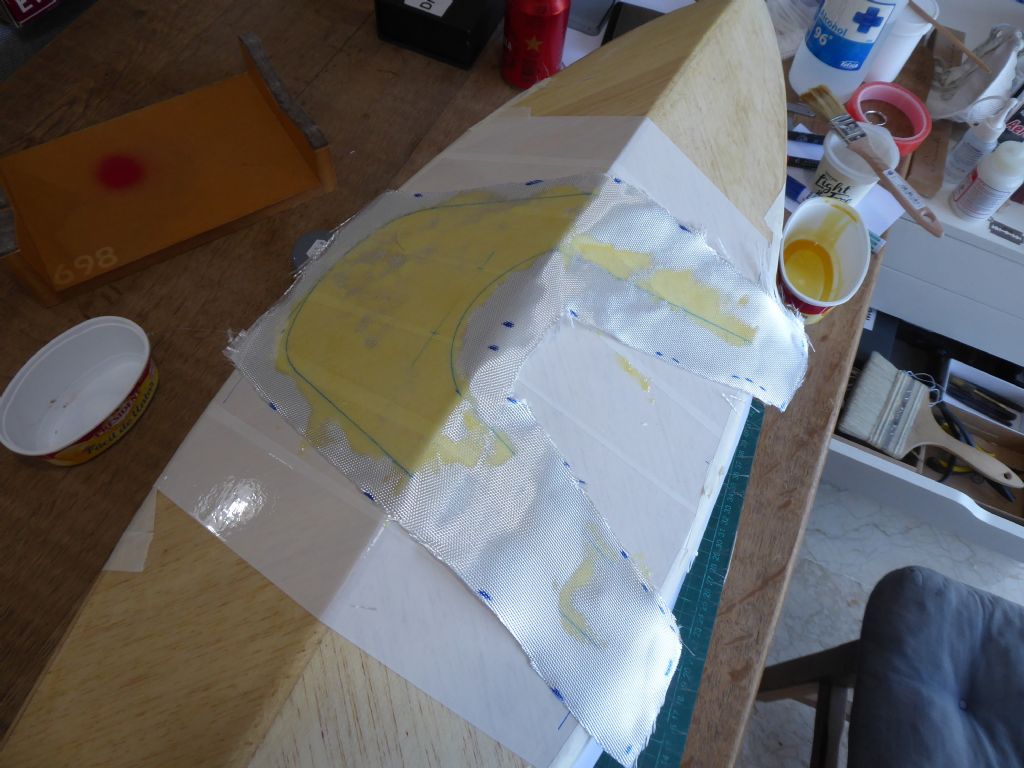
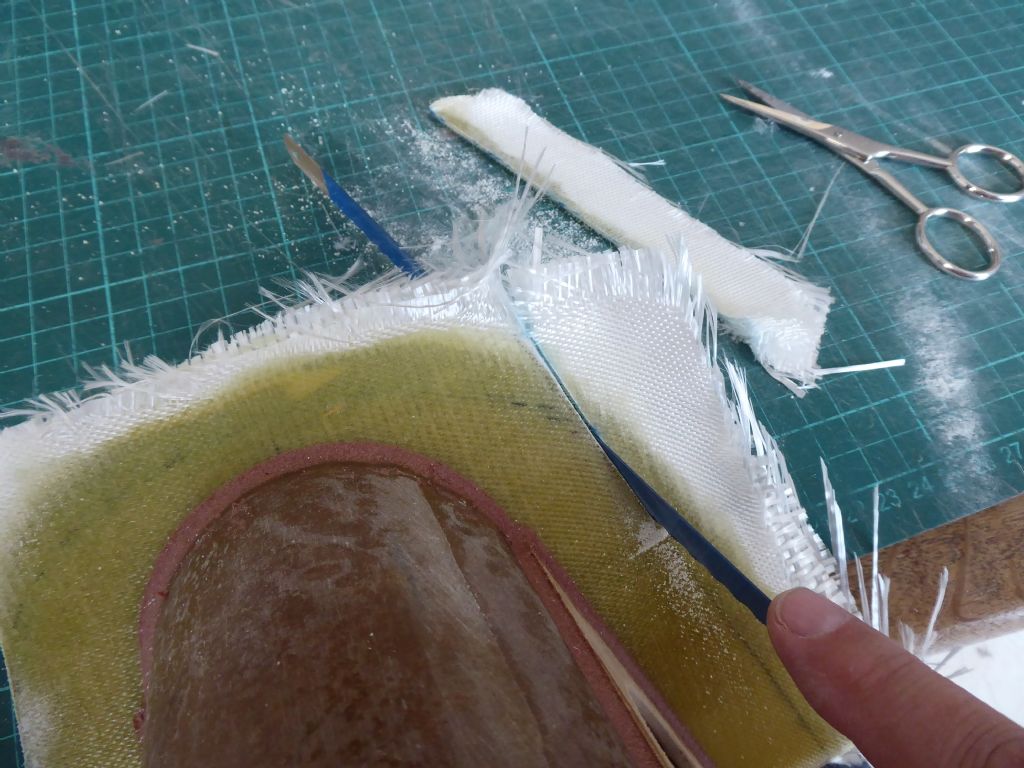
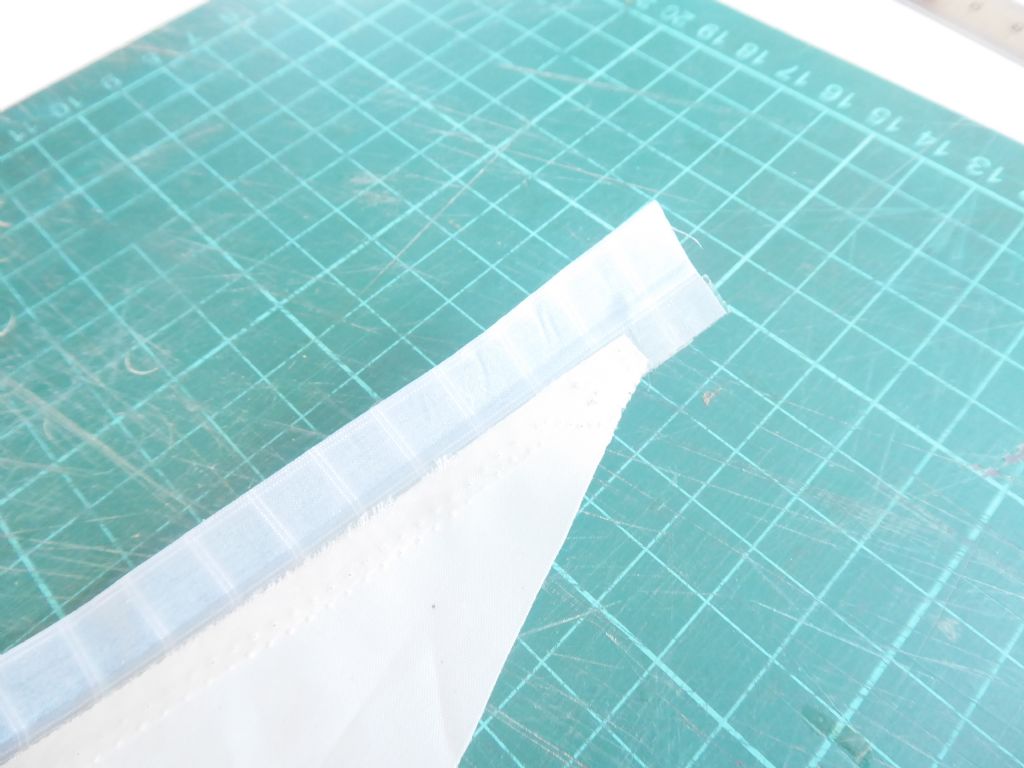
Starting the lamination process using epoxy. Where the resin has consolidated into the cloth, the blue cut line shows up very clearly.
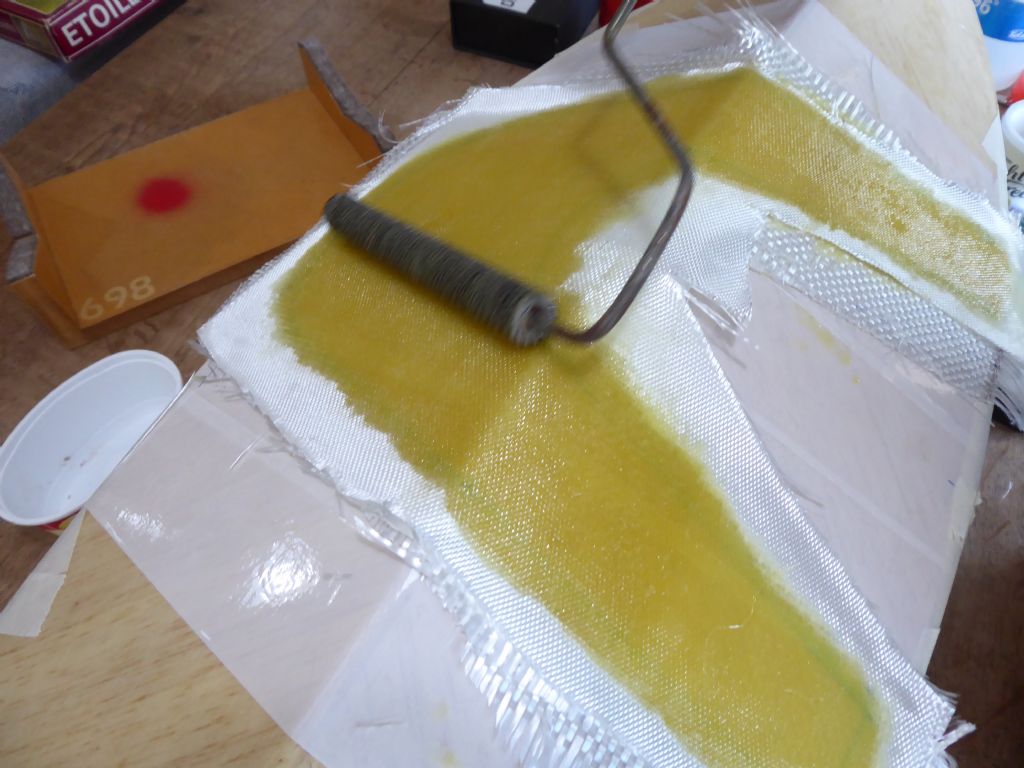
Building up the layers and rolling using a washer roller made with serrated washers. We used washer rollers a lot in the moulding shop. They don't flick the resin so much as the paddle type and they tend to pick up any excess resin much better. Downside – they are harder to clean.
The laminates are tapered with just two layers at the tip on the right hand side but with 4 layers across the V of the hull. Strength where needed but is good aesthetically too.Finished laminations and also not very clear on the photo it was still possible to see the blue cut lines.
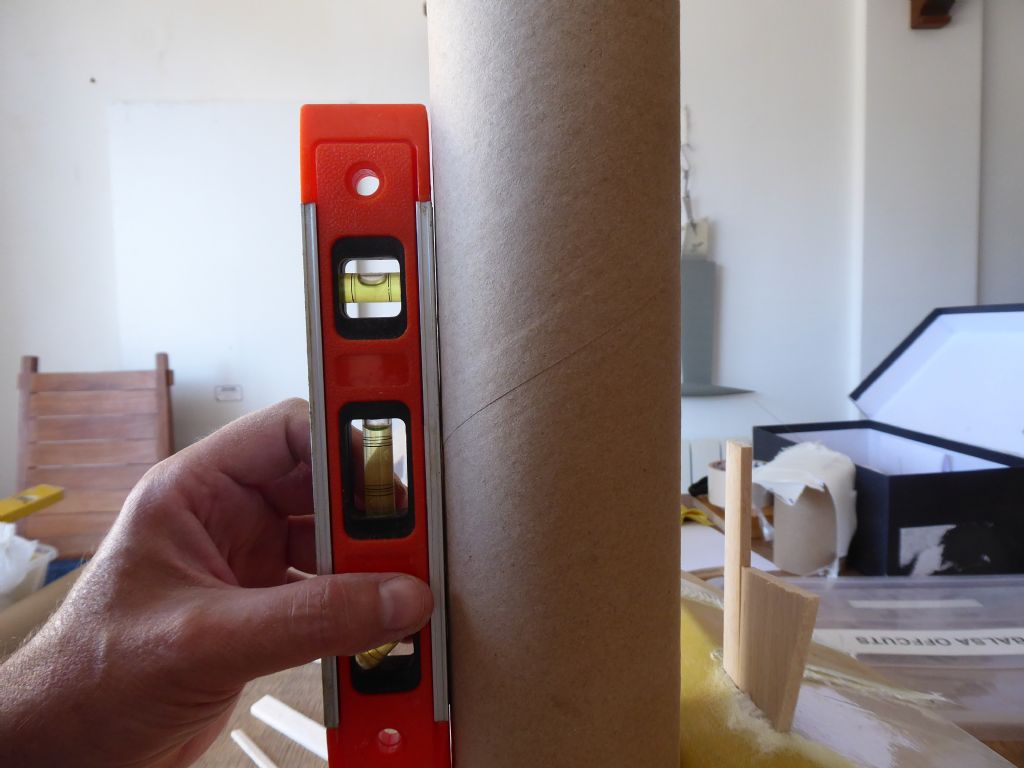
The cradle is supported by cardboard tube rescued from the skip of some laminators. The first job was to put the hull upside down on the table. It was carefully levelled onto its waterline and the tube held vertically in both directions so that the angle could be marked off and cut.
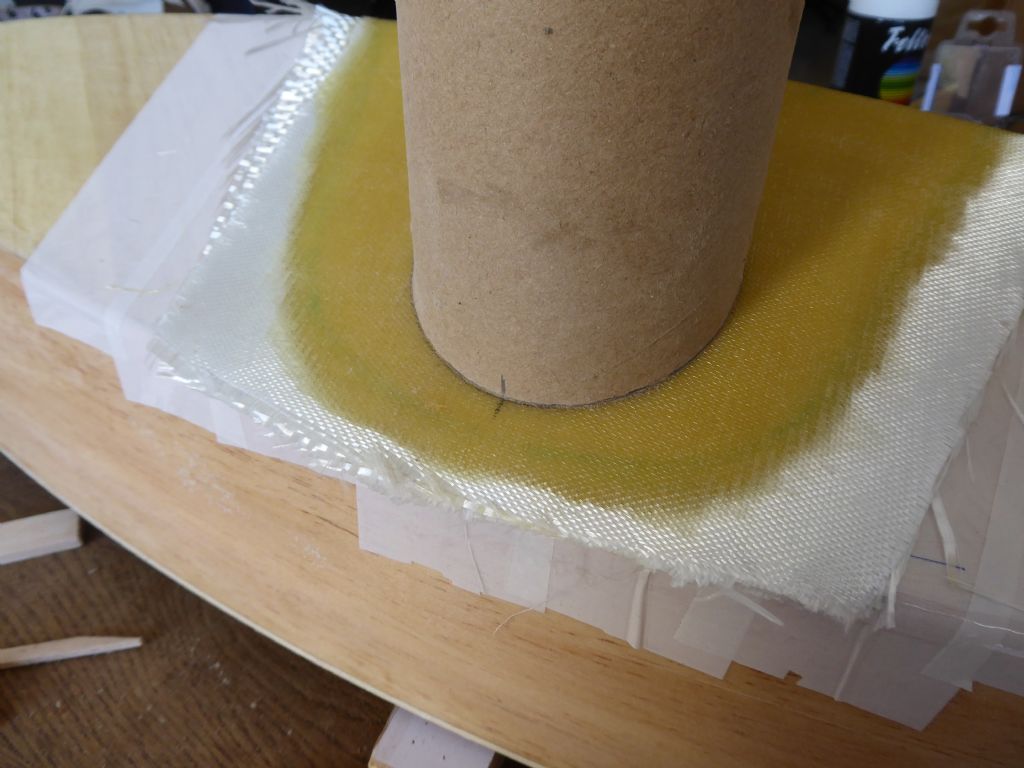
Here the tube has bee cut of to the correct angle between the keel and the chine. The pencil mark provides the correct reference and the tube was epoxied onto the cradle part after covering the cardboard with two layers of tissue and epoxy. This seals the surface and gives some meat to sand. Sanding cardboard is not much fun. Here the cut lines do show up well.
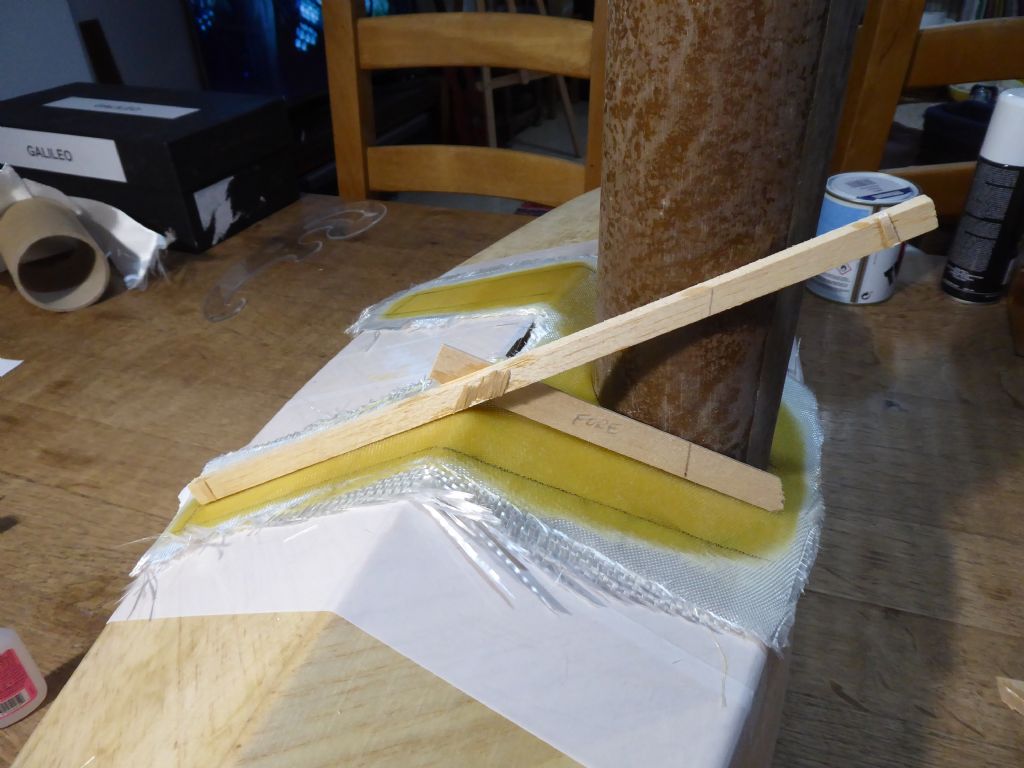
The cardboard tube has changed colour with the epoxy and templates are made for webs to support the connection to the tube.
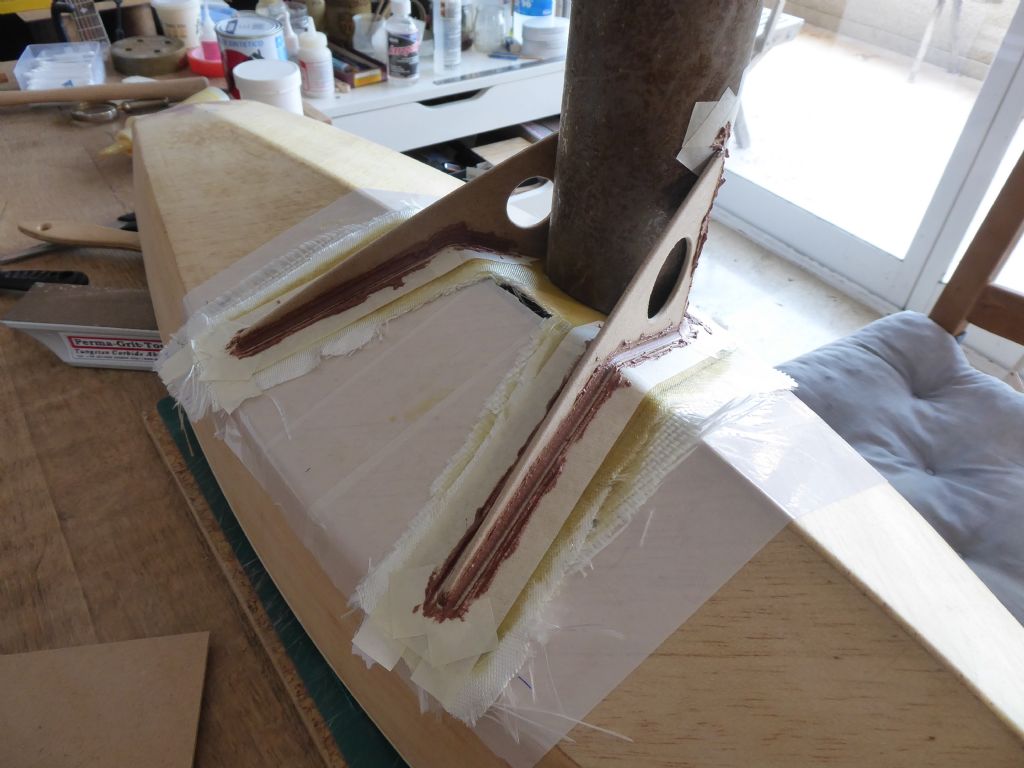
The webs were made from 3mm MDF and joined to the cradle and tube using my usual filleting technique with masked edges. The shape is now truly locked in.
To be continued
Tim R
2 May 2019 at 19:34 #82132Tim Rowe
Participant@timrowe83142Next stages
The assembly was then parted off the hull with the traces of blue used as a guide to trim the moulding using a junior hacksaw blade.
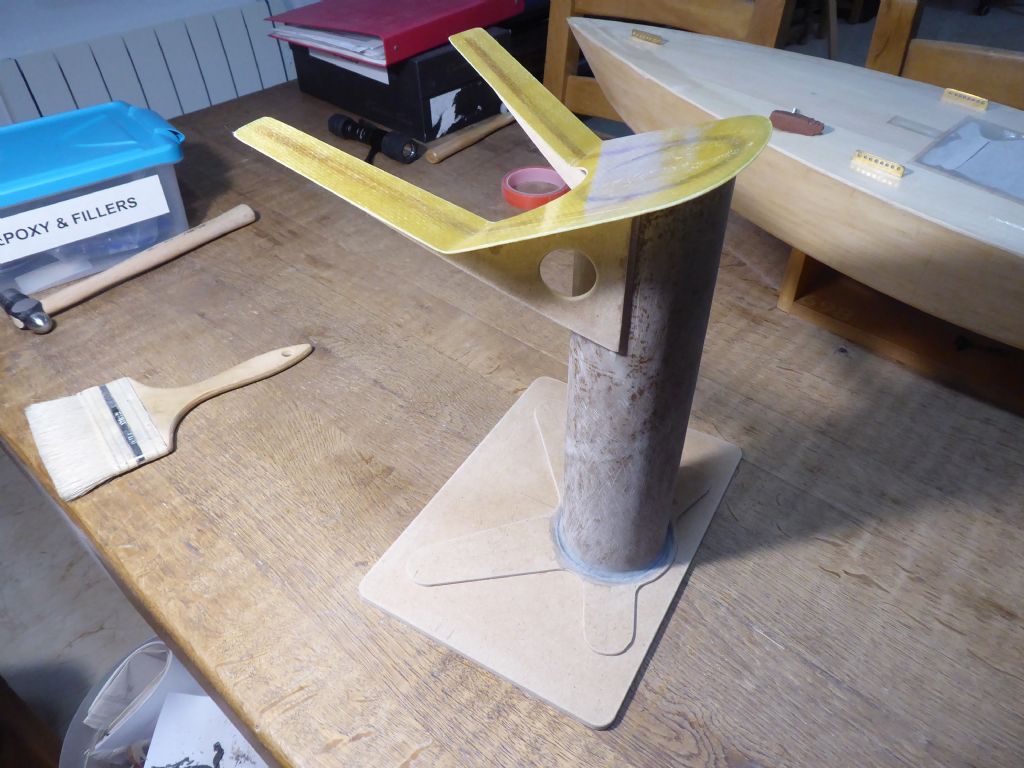
All trimmed and sitting on its MDF base. The tube had to be cut off the right length to accommodate the depth of the keel and dead square so the tube would be upright. This puts the boat exactly back on its waterline.
In spray primer with the top surface of the cradle masked off.
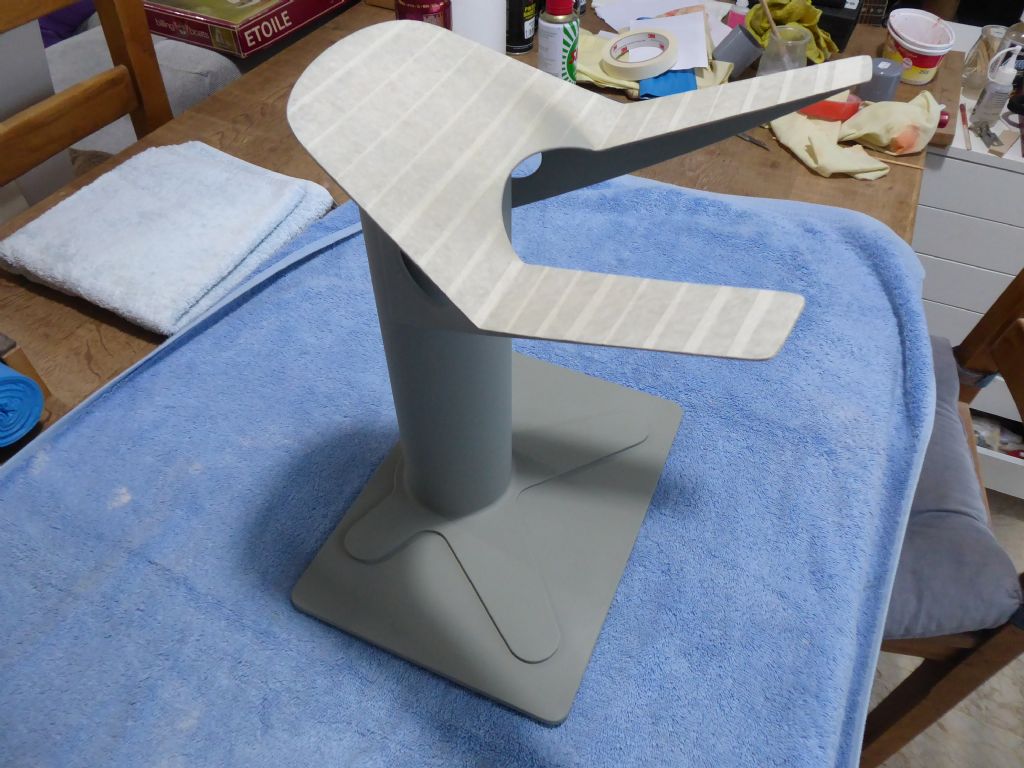
Finished job in light grey gloss. The top surface now has some white self-adhesive sail repair material which is all that is needed to stop the paint getting damaged.
The holes are partly decorative but also made getting paint into the internal corner much easier.
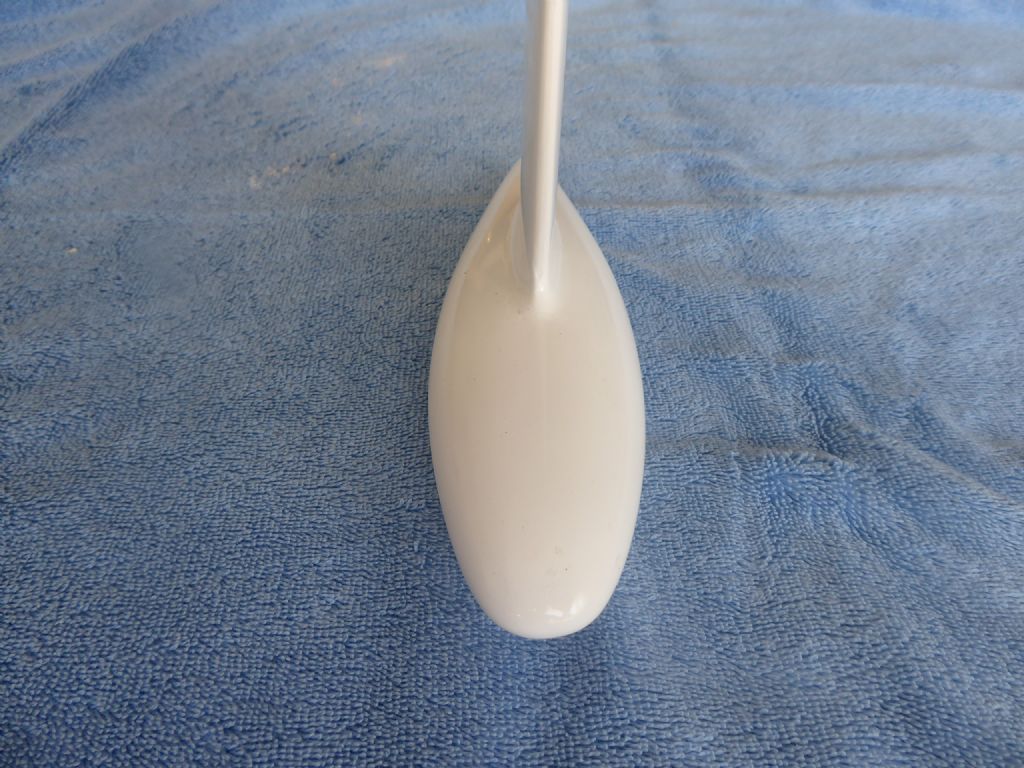
The V of the cradle is offset from the tube by half the width of the lead bulb. The bulb just kisses the tube and this take the torque reaction from the tube being off centre.
It is very light, very strong and provides perfect support for the hull. With the yacht in place it is almost like it is floating in air and the lines are completely unobstructed.I hope you like it.
Tim R
2 May 2019 at 20:06 #82133 Ray Wood 3Participant@raywood3
Hi Tim,
A very innovative stand design, I think looking back you may have to thank the dog for wrecking your original yacht 😀
Ditto, cutting ribs tonight 😉
Regards Ray
2 May 2019 at 20:52 #82134Eddie Lancaster
Participant@eddielancasterHi.Tim, I do like your attention to detail and your attitude of get it right first time.
Regards.
Eddie.
3 May 2019 at 10:02 #82136 Chris FellowsParticipant@chrisfellows72943
Hi Tim
That is a cracking stand and I admire your decision to do something different, your construction method and skills and attention to detail. Great to see.
Chris
4 May 2019 at 09:57 #82146Tim Rowe
Participant@timrowe83142Thank you Ray, Eddie and Chris.
The painting continues. A couple of time now I have thought this will be the last coat but realistically I probably need at least another 2 on top of the four gloss coats already applied. Finally I need to end up with enough coats of enamel so there is enough thickness to cut and polish when the initial gloss gets a bit tired. If any polishing goes through to the undercoats there is no alternative to starting all over again.
My IOM is being painted at the same time.
Tim R
4 May 2019 at 10:45 #82147Dave Milbourn
Participant@davemilbourn48782Tim
I know it's too late for this model but I have a tip when applying lightweight glasscloth. The problem with laying it on dry and then brushing the resin through it is that your brush will almost certainly push the weave out of shape, making filling the gap with resin more problematic. Applying it to a hull which is wet with resin is even more a nightmare if you get any wrinkles in it, as it's almost impossible to lift and reposition without creating wrinkles or distorting the weave.
I use a very light dusting of 3M 'Spraymount', applied to the dry hull after sanding, and then lay the cloth over it and gently smooth it out. It's tacky enough to hold the weave in shape but loose enough to allow repositioning if you get it wrong.
Works for me every time – in fact I'm curently in the process of covering yet another ply hull with 34gsm cloth using this method. Spraymount isn't cheap [@ £8+ for a 400ml can] but I've had this can for so long that I can't remember when I bought it – and it's still one-third full.
Dave M
4 May 2019 at 15:17 #82148Tim Rowe
Participant@timrowe83142Hello Dave
Thanks for the tip. I have got some spray mount and don't use it much for anything else so I will give it a whorl.
I always have glassing projects coming along so it won't be long.
Tim R
4 May 2019 at 15:39 #82149Dave Milbourn
Participant@davemilbourn48782Tim
Just a light dusting, mind. I spray it from about a foot above the hull and let it settle onto the surface.
DM
4 May 2019 at 16:23 #82150Tim Rowe
Participant@timrowe83142Dave
Yes. Just enough to give a very slight tack but not enough to affect any properties.
Can't remember what I bought the stuff for in the first place. It is the pucker stuff and like yours, is lasting well.
Tim R
7 July 2019 at 09:15 #82883Tim Rowe
Participant@timrowe83142There's been quite a lot of painting going on as well as lack of modelling time

My order for various bits from SailEtc arrived during the week so I now have everything to hand to finish the boat off.
While setting up for painting I did some work on the IOM Footloose. The whole boat was red but at some time there had been some small repairs to the hull that were quite visible. It looked very much like the damage occurred with the boat in a cradle as it was the same both side and in the right sort of position. Painting was the only option.
The keel fin is carbon epoxy and the surface was a bit porous in places plus a couple of dings and the lead bulb was loose (my fault that one) so it had to be fixed with the 2 degrees pointing up in relation to the static waterline.
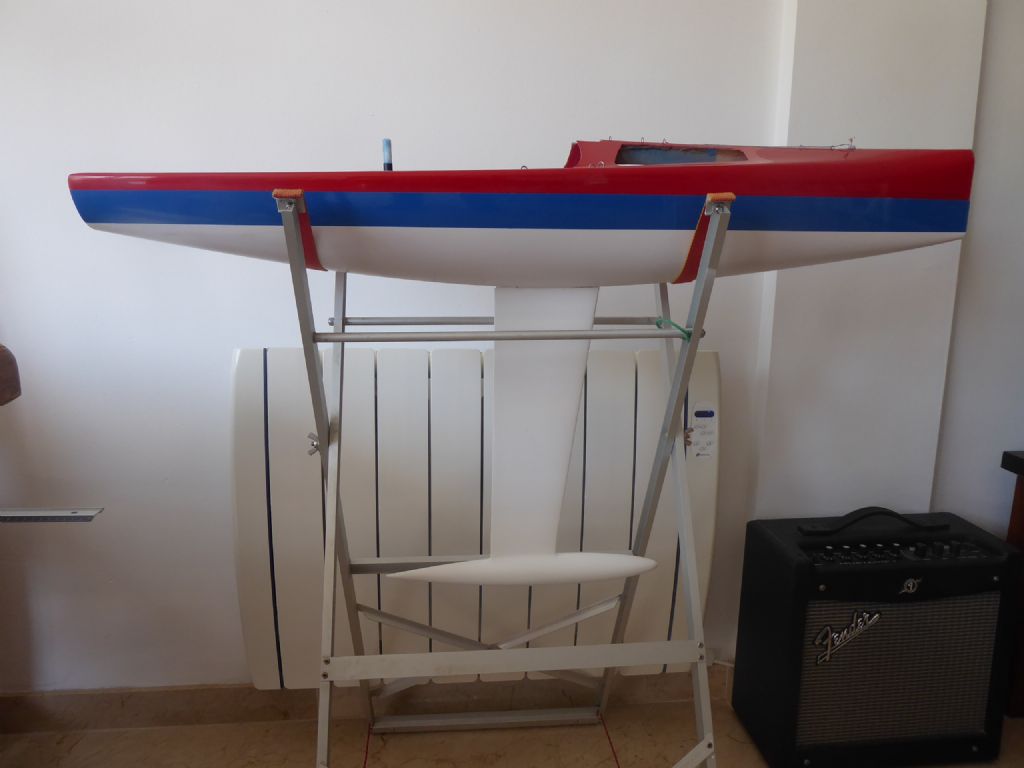
I just need to paint the transom and then I can reassemble everything and maybe get on the water as a therapy while I get back to work on Galileo.
And Ray has persuaded me to build an HMS Cossack!
Bit of a long time since the last post.
Tim R
7 July 2019 at 09:32 #82884Tim Rowe
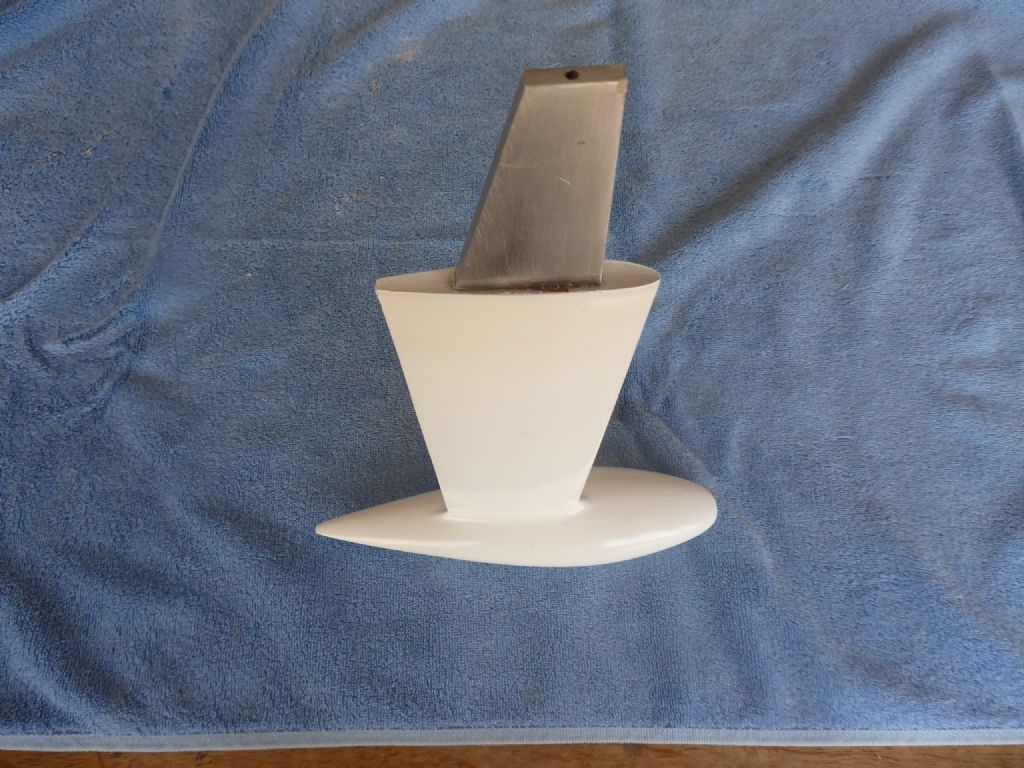
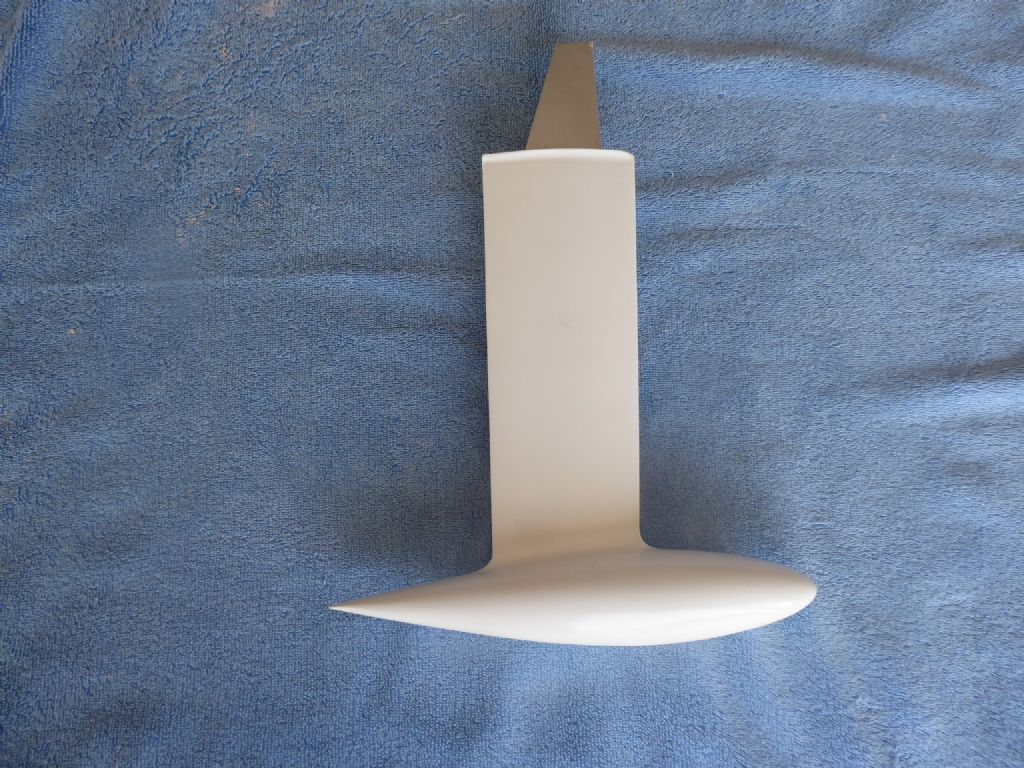
Participant@timrowe83142One part of Galileo is now finished and that is the detachable keel.
It received multiple coats of paint rubbing down between coats and filling where necessary to get a good surface.
At the bottom of the tang the fin is flared slightly and has a V to match the bottom of the hull. When inserted this creates a slight fillet at the join with the hull.
The top of the aluminium tang is drilled and tapped for an M3 retaining machine screw. The alloy is 6mm thick and there is just room to open it out to M4. This is not because the M3 is not strong enough. It is because the thread form will be more robust at M4 and will tolerate being screwed and unscrewed much better.
I have yet to see if I have got my sums right on the longitudinal cg. Fingers crossed. It could be rectified but not without much wailing and gnashing of teeth!
Tim R
7 July 2019 at 22:04 #82898 Ray Wood 3Participant@raywood3
Hi Tim,
Glad to see you back on the case 😀 the good thing about multiple projects on the go it gives time for the paint to dry.
Precision work as always,most impressive.
Regards Ray
9 July 2019 at 22:03 #82927 Chris FellowsParticipant@chrisfellows72943
Yes, good to see work progressing again Tim.
I haven't done anything for weeks but having just got back from France after watching the Women's World Cup etc. I'm keen to get going again.
Chris
8 September 2019 at 13:10 #83734Tim Rowe
Participant@timrowe83142Some overdue updates!
I haven't been completely idle and the IOM is very nearly ready. The big and medium rigs needed some attention so some more parts have been ordered from Sails Etc and the Mylar film I ordered for the some sail making was thinner than I expected (35g/m2) so I have ordered some at 50g. I have no experience with Mylar so this will be fun.
The original Galileo had a birch ply deck that was put down in one piece. At first it was virtually without grain or figuring but over time, acquired quite a pleasant patina. I have kept some pieces jewelry boxes or suchlike.
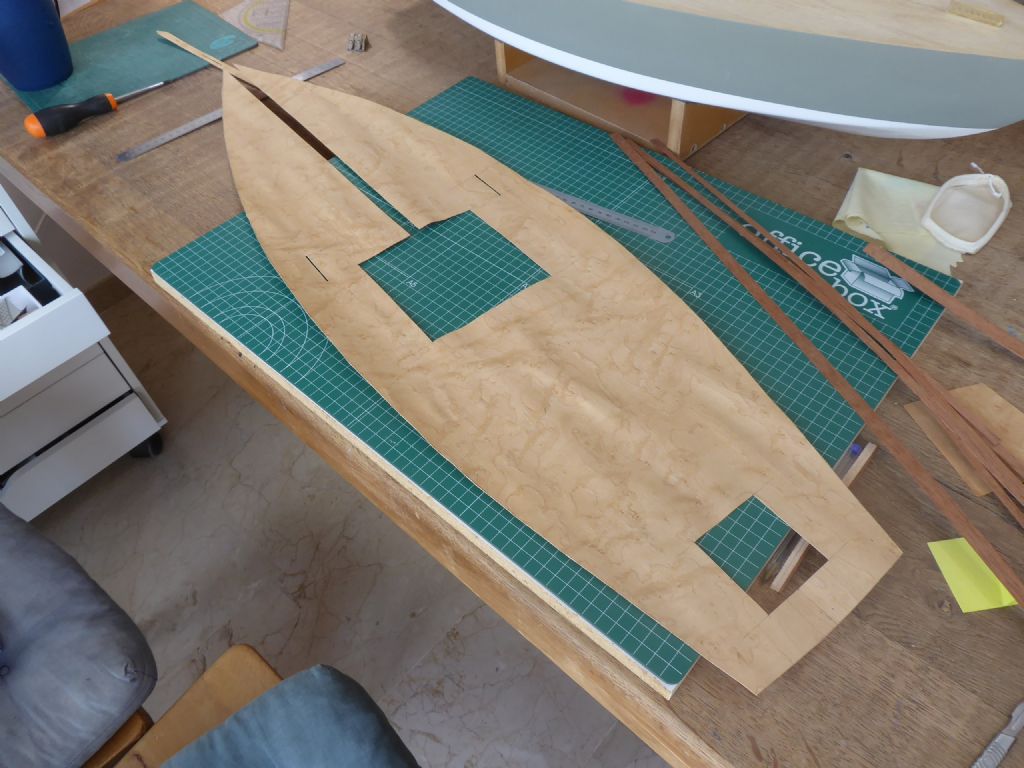
The easy way out would have been to paint the new deck light blue following the full sized but I wanted to try something a bit more adventurous. By chance I found an artisan furniture repairing shop in Palma and they had a selection of beautiful veneers sized 1m x 300mm. Perfect for a one piece covering over the balsa / tissue / epoxy subdeck and I chose a sheet of light coloured wood that had a slight burr and tiny "eyes" knowing that it would look fantastic with a deep gloss varnish.
Here it is in the marking out stage. It is arranged to have a king plank of mahogany veneer and also mahogany margin planks. Marking and cutting took a lot of time because going down in one piece there is very little margin for error around the chainplates. Also I want to use the cut-outs for the hatches on the hatches themselves all the while keeping the grain pattern truly lined up.
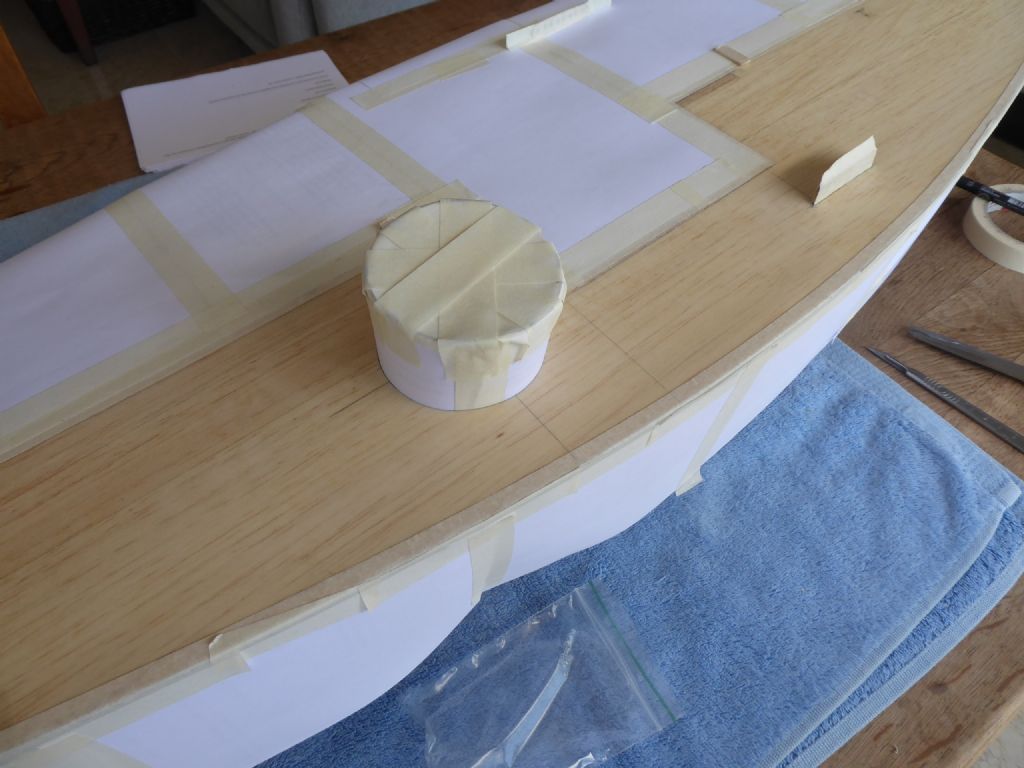
Here the starboard side is masked up around the hatch, radio pot, chainplate and mast step. The gap around the edge is for the margin plank and the veneer fits exactly in the masked area ready for the glue.
The advice of the artisan shop was to use contact adhesive or animal glue. Looking up on the web I saw that heat sensitive glues can also be used suck as Balsaloc for model aircraft covering. Of the three I decided that contact adhesive was the way to go and did a dry run.
DISASTER!!!!!
In a total brain fade moment having applied the contact adhesive to the deck, I put the glue on the wrong side of the veneer. This was despite clearly marking the side to be glued. Ruined as there was no way to get the glue off the veneer and into a useable condition.
As it was it took the best part of a day to get the glue off the deck using copious amounts of white spirit and clean rags.This stupid episode killed my MoJo for a while but I have not been put off having another go. When the shop opens again after the summer holiday I will buy another veneer and have another go. Beforehand I will also experiment with different glues as I now have some spare material to work on!!
In the meantime I have turned my attention to the sails and that I where I will pick up next.
I still kick myself every time I think about it.
Tim R
8 September 2019 at 14:25 #83735 Chris FellowsParticipant@chrisfellows72943
Hi Tim
Good to see some more progress but a killer as regards the veneer after all the time and effort in cutting it to fit. I can well understand your lack of interest for a while afterwards. I've done some stupid things but not as annoying as that.
It will look great once completed though, with your attention to detail.
Chris
8 September 2019 at 16:42 #83739 Ray Wood 3Participant@raywood3
Hi Tim,
Yes a set back ! but think how much better the next one will be now you have practiced 😀 we have all built 2 off something left handed like aeroplane wings or fuselage sides. Good to see you back on here 😁 definite nip in the air here autumn is arriving.
Regards Ray
8 September 2019 at 17:28 #83742Tim Rowe
Participant@timrowe83142Thanks Chris and Ray
But don't you sometimes find that the first one is the best one and it is difficult to get the second the same. I find this quite a lot with model aircraft when there are two items to make. Because of this I have started to use templates more often and make the twin at exactly the same time.
While waiting to select some more veneer (thankfully not a fortune at 7.50 euros a sheet) I dug out the original sails. These are Dacron and I remember going to the local sailmakers in Hamble, Williams run at the time by the redoubtable Mrs Williams. A couple of offcuts was all I needed so I don't think my pocket money reserves were depleted.
Sail making by a certain Mr Vic Smeed in his book (still one of my favourites) Boat Modelling published the same year as me in 1956, was consulted. Mum helped out by loaning me her swing needle sewing machine and we're ready to go.
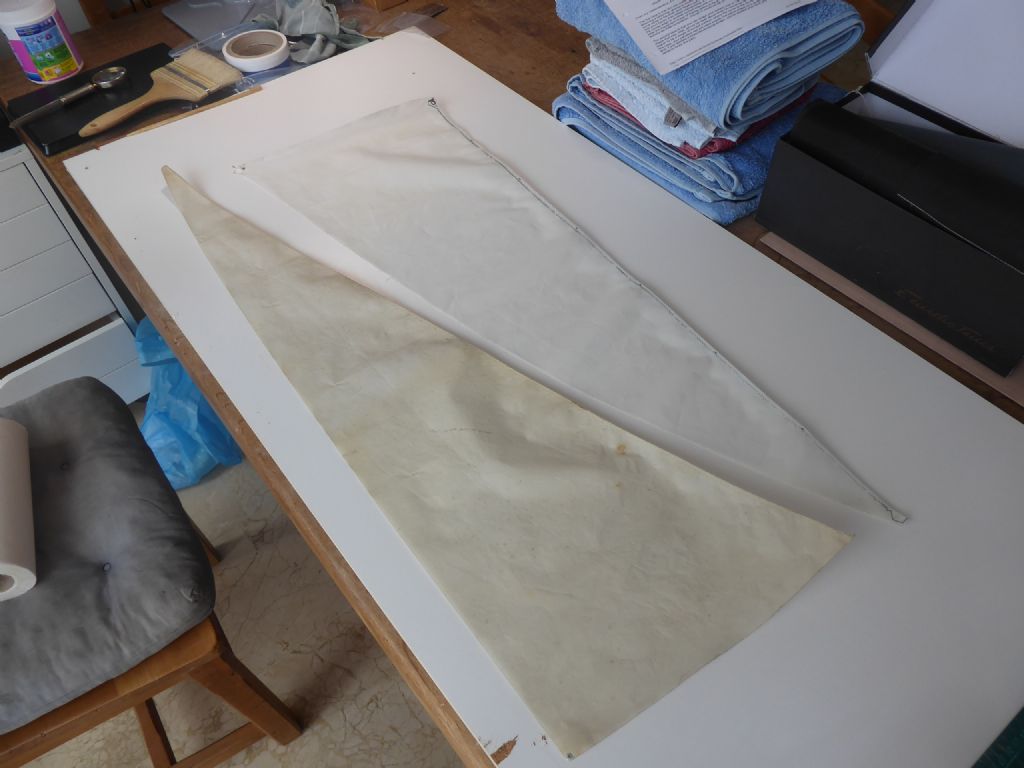
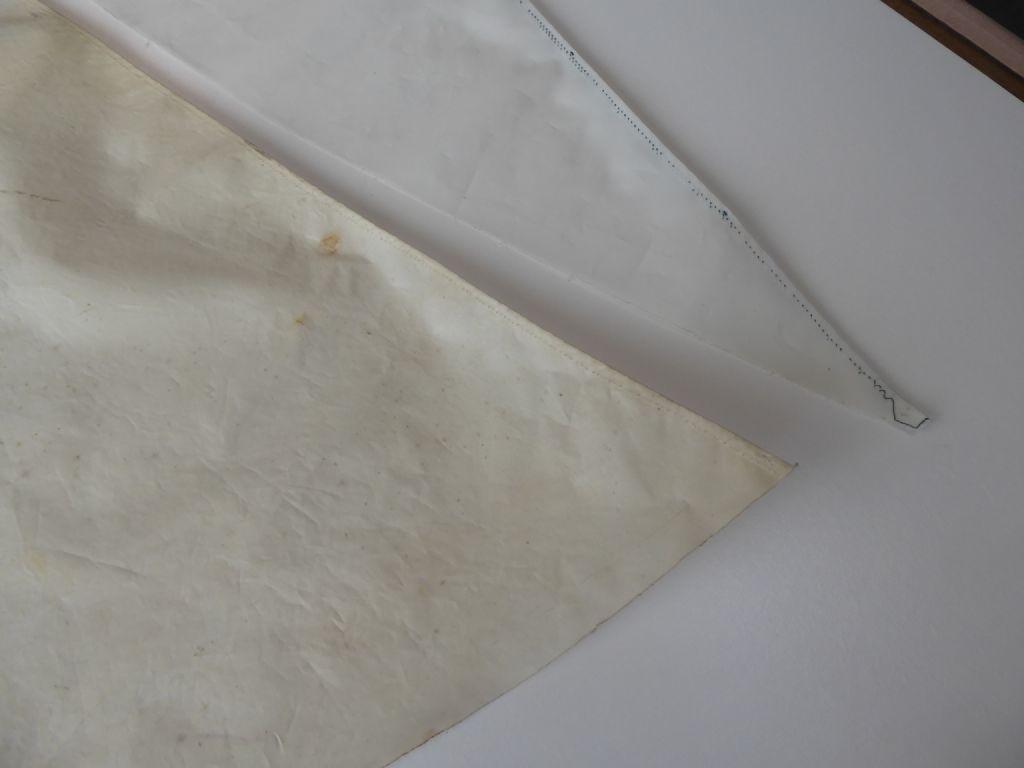
Amazingly, at 50 years old the sail cloth was still in perfect condition. It was certainly a dirty laundry colour and the stitching had perished but worth a go at saving for sure.Here is a before and after with the jib (bottom) as found and the main after a few scrubs with Vanish. Transformed and a couple of small rust stains were removed by soak the local area with lemon juice overnight.
I am starting to get my MoJo back!
My understanding of sails has moved on somewhat and of course we have different material available now. The first thing was that I didn't put any reinforcing in the sail corners. I only ever took the boat out in light winds and the new version is much more powerful with the deeper fin and slightly increased weight in the bulb ballast.
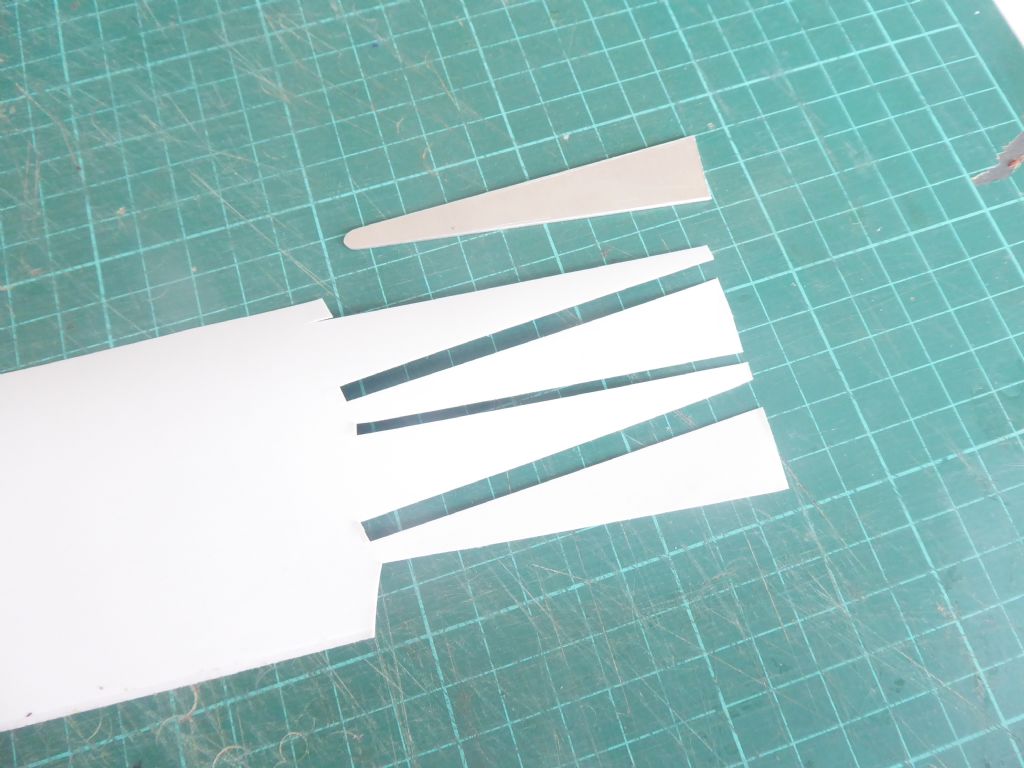
Cribbing the system on my IOM and reading up I made a template out of alloy plate to cut some reinforcement strips.
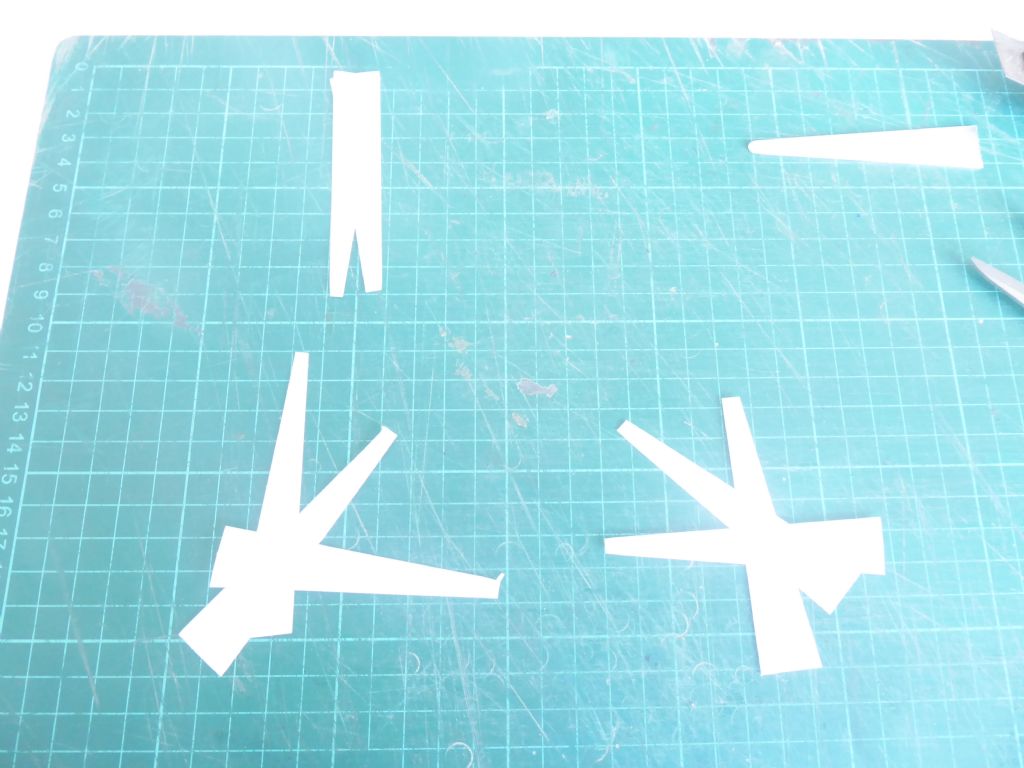
Here are some blanks cut onto some deck patch material (self adhesive Dacron) and ready to be arranged on the sails like this
The top pair go on the head of the sail. Bottom left on the tack and bottom right on the clew. The excess is trimmed off after sticking to the sail material.
Tim R
12 September 2019 at 18:31 #83793Tim Rowe
Participant@timrowe83142On with the sails.
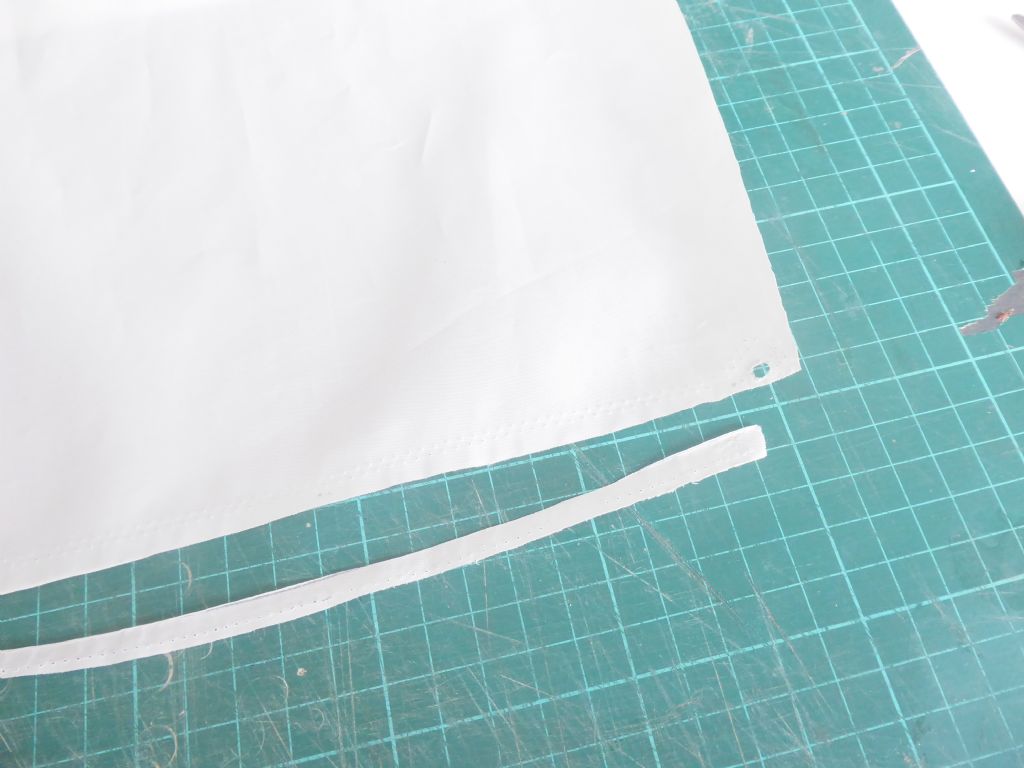
The stitching had perished completely on the jib but I thought I had got away with it on the mainsail where I hade used a different thread. I have no idea what it was but I think the Vanish finally did for it. Having decided to modernise the sails I started by picking out all the old threads and cutting off the hems
Actually the seam was only on the luff of both sails so it was a quick job and gave me the opportunity to adjust the "curves" that were originally a bit wobbly. The luff of the jib has to have a slight hollow and the luff of the main has the opposite with a slight bulge. We are only talking a few millimetres. I also removed the old eyelets as I have a new supply from SailsEtc and the eyelets need to go through the sail and the corner reinforcements.
This is 6mm double sided tape carefully placed along the luff showing the head of the sail.
And this is down at the tack.
This is the luff type material. It is similar to spinnaker material but I think it is probably Icarex which is a lightweight material for making kites.
Now applying the double sided tape to the other side of the sail so the tape then folds over and makes a pocket.
This is the tack of the jib and shows the luff tape forming a pocket, the three strips of self adhesive Dacron reinforcing the corner and a new eyelet. A stainless steel wire is led down through the pocket and serves as the forestay.
The sail is free to slide on the wire which allows the forestay to be tensioned independently of the lib luff. In light winds the luff will have no or little tension and when the wind is strong it will be tightened up.The original sails are now restored and ready to go. These are for the scale mast which is suitable for moderate and heavy winds. Around the same time as the original model was built I made a second mast approximately 250mm taller which will be perfect for lighter conditions. There are no sails for this mast so I am going to make some new ones using 35 micron Mylar and I will go through their construction in a bit more detail later.
Tim R
13 September 2019 at 08:38 #83801 Ray Wood 3Participant@raywood3
Hi Tim,
I think you maybe making my next set of sails, excellent job 😀 have you a suitable motif in mind for your main sail ? To reflect the boats history, maybe a phoenix? Or maybe the dog who caused the project !!
Regards Ray
14 September 2019 at 11:01 #83820Tim Rowe
Participant@timrowe83142Hello Ray
The sail making bit is a lot of fun and very different from the construction bit. I hadn't thought about a sail emblem and as this is not a Class boat I think it is unlikely I will use one. If I could find the sail number of the original full size I would definitely use that.
When the boat is finally rigged I will apply a dark horizontal thin tape that will show up the camber.
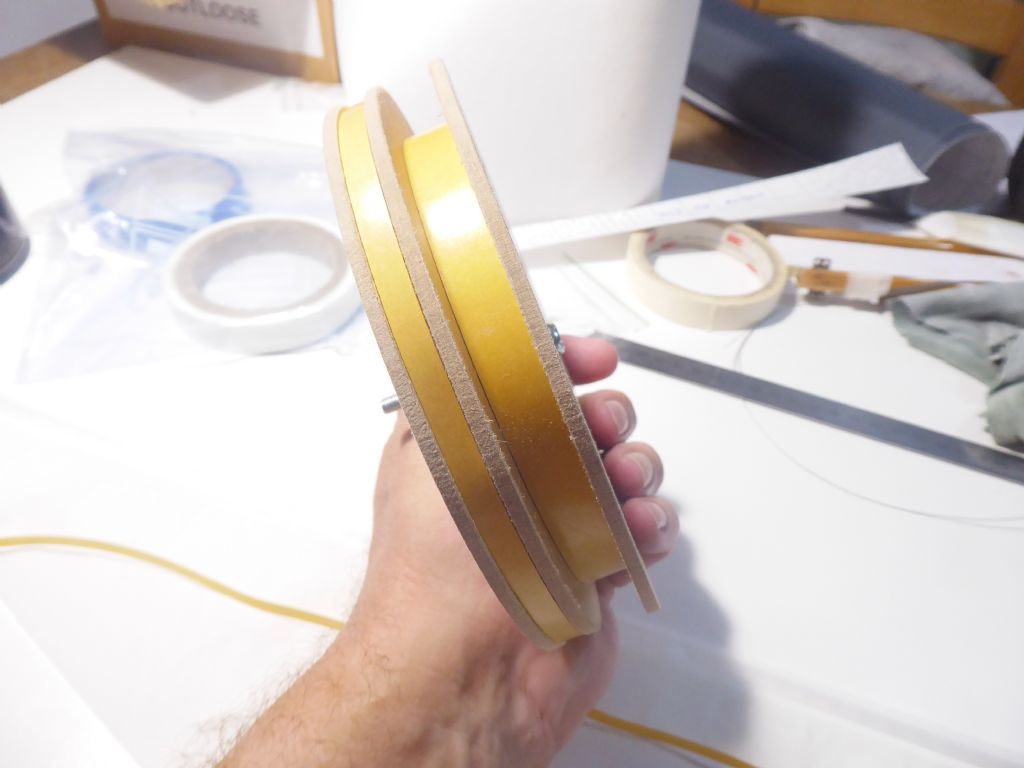
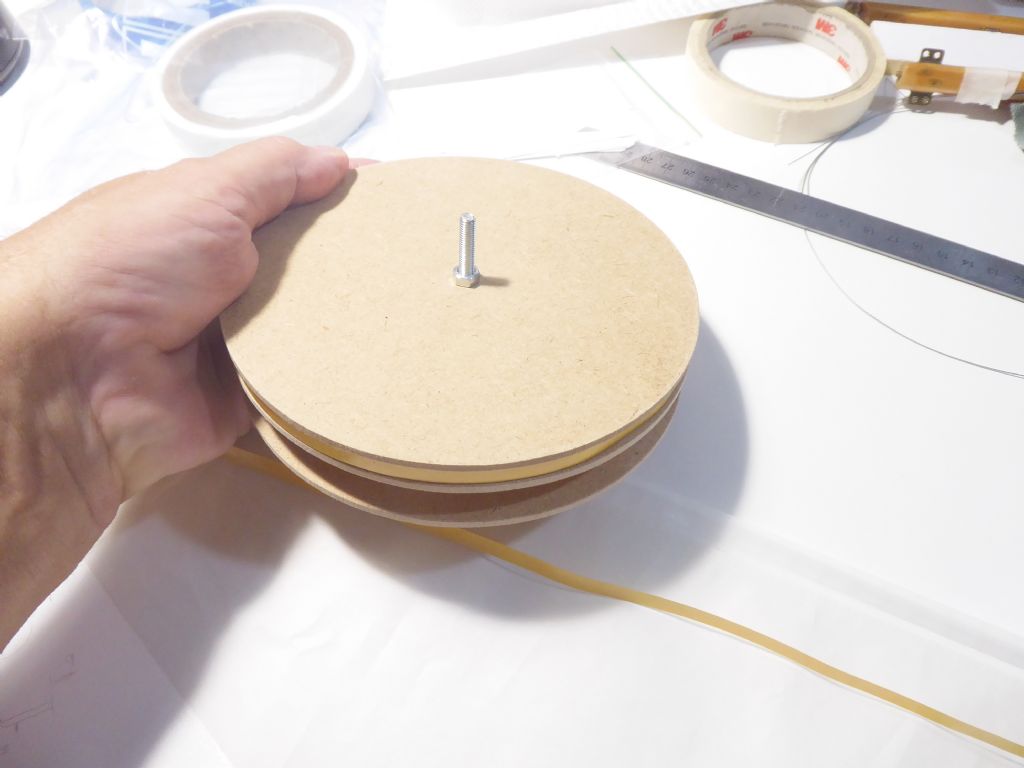
While on the subject of tapes I found my double sided tapes were trying to climb off their cardboard centres into a cone shape. I also found the edges were picking up dirt which is not ideal. To sort this out I made up a tape holder.
Three discs of 3mm MDF
Held together with an M5 machine screw and nut. This was for the 12mm and 6mm tapes and the latest delivery included some 10mm tape so I now have 4 discs on the same bolt.
Tape held flat and the edges protected.Tim R
12 October 2019 at 17:50 #84104Tim Rowe
Participant@timrowe83142I worked out the opening hours of the specialist shop for the veneers and luckily they had another sheet of the same. Fortunately not a grand fortune at 12.50 euros a slice and I will have some left over to try on other things.
Work on the boat did not come to a complete stop but have had little time for posting.
Going back to the sails, the original set cleaned up very well and are ready for use as above. These sails fit the mast that is scale length but this will be under canvassed in light weather so ages ago I made another mast but never got around to rigging it of making any sails.
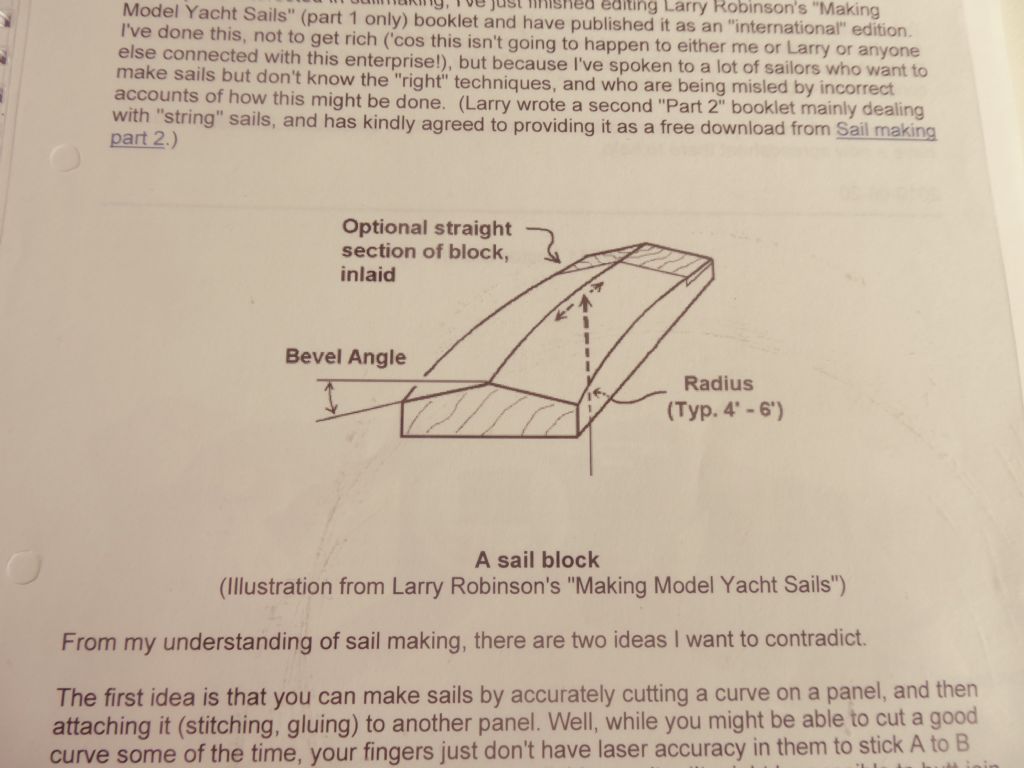
These new sails are going to be made in 30 micron Mylar and because this material does not have a warp and weft like Dacron you cannot get any camber (curve) in the sail like one can with a woven material. The camber has to be built in using a sail block.
It is not immediately easy to see how this works and Larry Robinson's book is quite technical so I will try to explain it in simple steps because once you get there it makes sail making dead easy. At this size (and IOM at one metre) there is no need for any sewing.
Larry made his (and others do too) from two wooden blocks stuck together. Some use foam as you can find on UTube and some are fabricated. I don't have large blocks of wood and Larry's method of cutting the curves frightened the life out of me. Fabrication was the way to go as I don't have any suitable foam either and I wanted something much more durable.
The essence is that have two surfaces that are curved in one plane only and bring them together at a slight angle. This give the third dimension to the sail panel and the camber that we are looking for.
On a small sail is may not be necessary. Much of the camber of the sail can be achieved by slackening or tightening the outhaul. Even on large sails a significant proportion of the draft is controlled be the outhaul but as we go higher up the sail the effect lessens so we have to build in the shape.
The amount of draft to put in and where to put could occupy a discussion until the end of the world but like most things, there is a trade off. A large amount of camber (within limits) will produce more power (as in lift from and aircraft wing) but the drag will increase and the ability to point into the wind will be reduced. On the other hand a very flat sail would be able to point close to the wind but produce less drive. To complicate things, these conflicting features vary with wind strength. Foe example as the wind picks up you need to flatten the sail, however if the increased wind is producing awkward waves you may need to increase the camber and not point so high to get the power to push through the waves. Of course on a real boat all this can and is, adjusted in real time but in a model, unless you are using complicated radio equipment everything has to be pre-set. Most classes only allow 2 channels controlling the rudder and the winch.
We have to compromise and that will follow next.
Tim R
12 October 2019 at 18:22 #84105Eddie Lancaster
Participant@eddielancasterHi. Tim, as usual a simple explanation of what seems like a complicated procedure, thank you.
I have spent the last week down in Kent with my friends, but I have not been idle, I had made the pattern for the keel bulb for my IOM, that came with me so that I could produce the plaster of paris mould while down here, I now have the mould ready to produce the lead weight, as soon as it has dried out.
Thanks to you and your detailed explanation of the techniques you used, I couldn't have done without your help.
Regards.
Eddie.
-
AuthorPosts
- Please log in to reply to this topic. Registering is free and easy using the links on the menu at the top of this page.
Code of conduct | Forum Help/FAQs
Latest Replies
Home › Forums › Sailing Models › Topics
-
- Topic
- Voices
- Posts
- Last Post
-
-
Fairey Huntsman 31
1
2
…
5
6
Started by:
 Chris Fellows
in: Build Blogs
- 14
- 139
-
3 hours, 36 minutes ago
 Chris Fellows
-
Fairey Faun
1
2
3
Started by:
 Chris Fellows
in: Build Blogs
- 7
- 58
-
3 hours, 58 minutes ago
 Chris Fellows
-
Vic Smeed’s Silver Mist
1
2
…
32
33
Started by:
Bob Abell 2 in: Scratch build
- 4
- 822
-
4 hours, 37 minutes ago
 Tony Hadley
-
Fairey Huntsman 28
1
2
…
7
8
Started by:
 Chris Fellows
in: Build Blogs
- 1
- 195
-
6 hours, 6 minutes ago
 Chris Fellows
-
Eezebilt RAF Fire Boat
Started by:
Tim Cooper in: Build Blogs
- 2
- 3
-
6 hours, 41 minutes ago
 Dave Reed
-
Feathered Friends
Started by:
 Chris Fellows
in: Soapbox
- 3
- 7
-
9 hours, 48 minutes ago
 Chris Fellows
-
4D Modelshop
Started by:
Keith Long in: Scratch build
- 6
- 7
-
10 hours, 16 minutes ago
 Chris Fellows
-
John Cobb’s Crusader
1
2
…
7
8
Started by:
 Paul T
in: Scratch build
- 1
- 192
-
1 day, 6 hours ago
 John W E
-
Complex Automata
Started by:
 Colin Bishop
in: Soapbox
- 1
- 1
-
2 days, 8 hours ago
 Colin Bishop
-
RAF Fireboat ID
Started by:
 Dave Reed
in: Collectors’ corner
- 8
- 24
-
3 days, 10 hours ago
Tim Cooper
-
TID steam tug 42″ – PN Thomas drawing enlarged
1
2
Started by:
 Ray Wood 3
in: Scratch build
- 8
- 33
-
4 days, 3 hours ago
 Richard Simpson
-
Lady of Skye (puffer)
1
2
Started by:
 mick east
in: Build Blogs
- 9
- 43
-
4 days, 13 hours ago
 Richard Simpson
-
Building a hull.
Started by:
 mick east
in: Scratch build
- 7
- 10
-
6 days, 12 hours ago
 Ray Wood 3
-
Todays Boating
1
2
…
210
211
Started by:
 ashley needham
in: All things floating
- 84
- 5,252
-
1 week ago
 Colin Bishop
-
Sea Rover Restoration
Started by:
harry smith 1 in: Collectors’ corner
- 4
- 10
-
1 week ago
 Richard Simpson
-
WORKSHOP LIGHTING
Started by:
 John W E
in: All things floating
- 9
- 18
-
1 week, 1 day ago
 Colin Bishop
-
Mayhem Website Down
Started by:
 Colin Bishop
in: All things floating
- 4
- 10
-
1 week, 4 days ago
 Colin Bishop
-
MAGGIE M trawler
Started by:
 sammyk
in: Buy/Sell or Trade
- 2
- 3
-
1 week, 4 days ago
 sammyk
-
meter
Started by:
 Alasdair Allan
in: All things floating
- 5
- 16
-
1 week, 6 days ago
 Chris Fellows
-
River Queen 2”- 1’.
Started by:
Richard B in: Steam powered models
- 5
- 7
-
1 week, 6 days ago
Richard B
-
Deluxe Superphatic Glue.
Started by:
 Colin Bishop
in: All things floating
- 4
- 12
-
2 weeks ago
 Chris Fellows
-
How to add photos to your posts
Started by:
 Colin Bishop
in: Adding Images to Forum Posts
- 3
- 16
-
2 weeks ago
Len Morris 2
-
Cataract
Started by:
Bob Wilson in: Soapbox
- 2
- 4
-
2 weeks, 1 day ago
 Colin Bishop
-
The mighty tug Wattle
1
2
3
Started by:
 mick east
in: Build Blogs
- 10
- 61
-
2 weeks, 1 day ago
 Richard Simpson
-
Clyde Puffer Glenaray
1
2
3
Started by:
 Alasdair Allan
in: Build Blogs
- 6
- 57
-
2 weeks, 4 days ago
 Alasdair Allan
-
Fairey Huntsman 31
1
2
…
5
6
-


