Galileo – A resurrection

Advert

Galileo – A resurrection

Home Forums Sailing Models Galileo – A resurrection

  • This topic is empty.
Viewing 25 posts - 151 through 175 (of 180 total)
  • Author
    Posts
  • #84106
    Tim Rowe
    Participant
      @timrowe83142

      Hello Eddie

      Thank you for the feedback. It is much appreciated and I am delighted to be able to help. I am really looking forward to watching your IOM take shape.

      There is much said about mixing lead and water and it is all true. Sometimes it is made to sound like lead is especially dangerous. Well try mixing water with molten aluminium or steel. The explosive effects are far more entertaining. It's just that we don't normally need to melt anything other than lead which in the scheme of things has quite a low melting point.

      I can't stress how important it is however to make sure the mould is totally dry. Mine spent two weeks or so in the Spanish sun and I thought it was really dry. Even then I got a very slight kick-back when I poured the lead. If you can be hugely patient and get on with something else for a while that would be better.

      When the big day comes. Preheat the mould in the oven for at least an hour. This will help drive out any last traces of moisture and it will give you a much better finish on the lead and help to make sure any thin sections get fully filled.

      Rounding off the safety topic, there is always a possibility of the mould cracking. If it where to do that imagine where the molten lead would go. When I pour mine I put the mould in an old roasting dish which would catch everything if there was a problem.

      It is immensely satisfying casting your own lead keel so enjoy it to the hilt.

      Tim R

      Advert
      #84109
      Eddie Lancaster
      Participant
        @eddielancaster

        Hi. Tim, yes I have got more than enough to keep me occupied while the plaster dries, that is one reason for doing that bit first,I have also got the old roasting tin ready, I have made half bulbs in an open mould before and had no problems so I am going to try and keep it that way.

        Eddie.

        #84117
        Tim Rowe
        Participant
          @timrowe83142

          Eddie yes

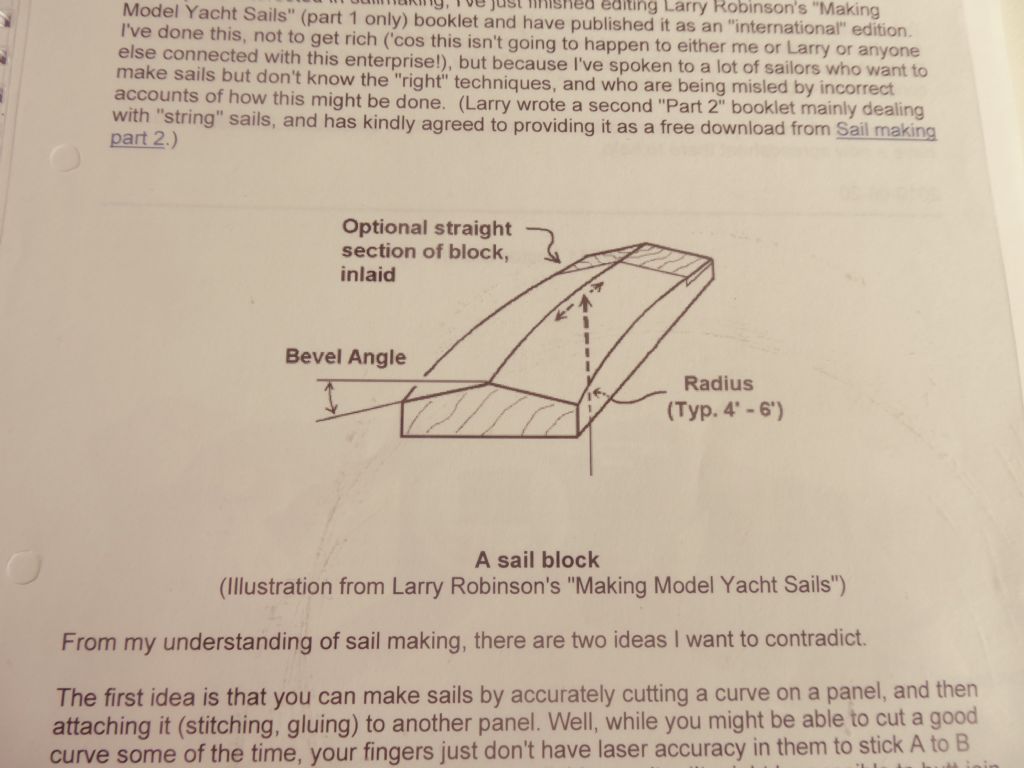
          Using the sail block, the amount of camber put into the sails is governed by two features. One is the curve of the block and the other is the angle that the curves are set to in relation to each other. The camber can be increased by reducing the radius of the curve or by increasing the angle. There may be reasons to vary the amount of camber from one suit of sail to another and the advanced theorists will say that the camber of a sail should increase towards the top of the sail. Obviously it is relatively easy to change the angle but if you want a smaller radius you have to make another block.

          Another discussion for the theorists is the shape of the curve with the natural inclination to go for an aerofoil type section. All sorts of curves get mentioned like caternary, parabolic and other types of curve I hadn't even heard of. Studying the options and with a view to KISS I like the simple plain arc of a circle. Actually this is quite a good one because the forces on the sail are trying to pull it forward (that's our motor) and this pulls the point of maximum camber further forward making a nice aerofoil in a controllable manner. Maybe this is not the optimum at Championship level but I just want some practical and reasonably efficient sails.

          To follow

          Tim R

          #84118
          Tim Rowe
          Participant
            @timrowe83142

            Going back to the block.

            p1100358.jpg

            Swatting up on the options I decided on the lower limit of the radius as shown on this picture. As I am metric, the radius of my block is 1200mm.

            For the angle I chose a mid range figure so my Bevel Angle will be 6 degrees. This is best guess stuff but gives me some flexibility in reducing the camber if necessary by reducing the angle. A small reduction in the Bevel Angle will make quite a significant difference. I haven't made the sails yet so we will see!!

            Tim R

            #84119
            Tim Rowe
            Participant
              @timrowe83142

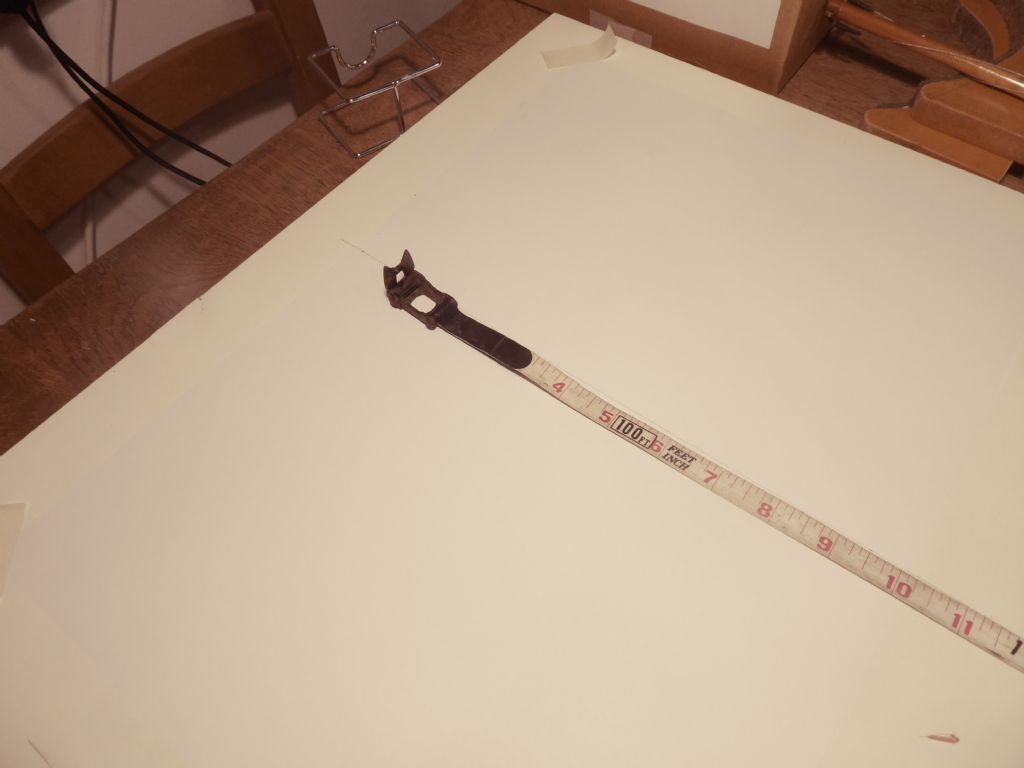
              First step is to mark out the 1200mm radius on a piece of paper.

              p1100354.jpg

              Not a clever photo I am afraid with the paper on a white board but you can just see the centerline at the end of the tape. The tape was used to scribe an arc.

              p1100355.jpg

              The paper template is cut out roughly in readiness to stick on a piece of 3mm MDF to use as a template.

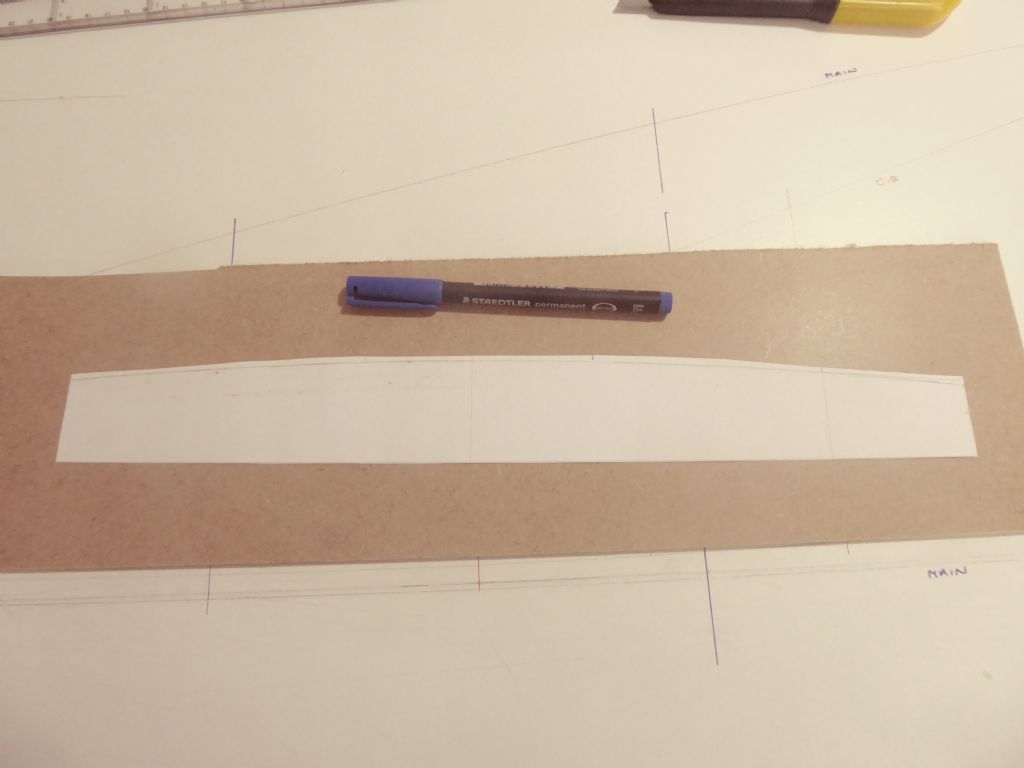
              p1100357.jpg

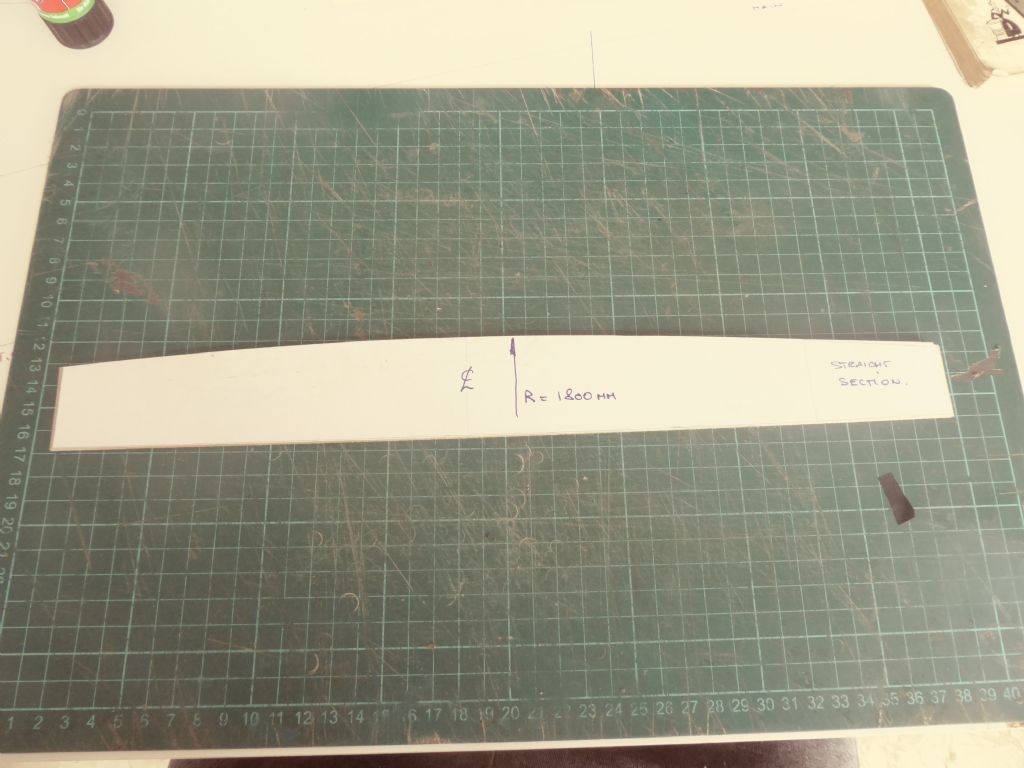
              The finished template with the centerline marked and on the right hand side, a straight section. This corresponds to the straight section on the picture of the Sail Block. The idea of the straight section is that when making the sails, the panels can be moved towards the straight section to give a part curve and a part straight. This makes an approximation of an aerofoil type section should I need it. Again reverting to theory this section could be useful when making a jib. Up to now I have been talking mostly about the mainsail. The templates are to make up a set of ribs or frames depending your inclination for an aeronautical or marine definition.

              p1100363.jpg

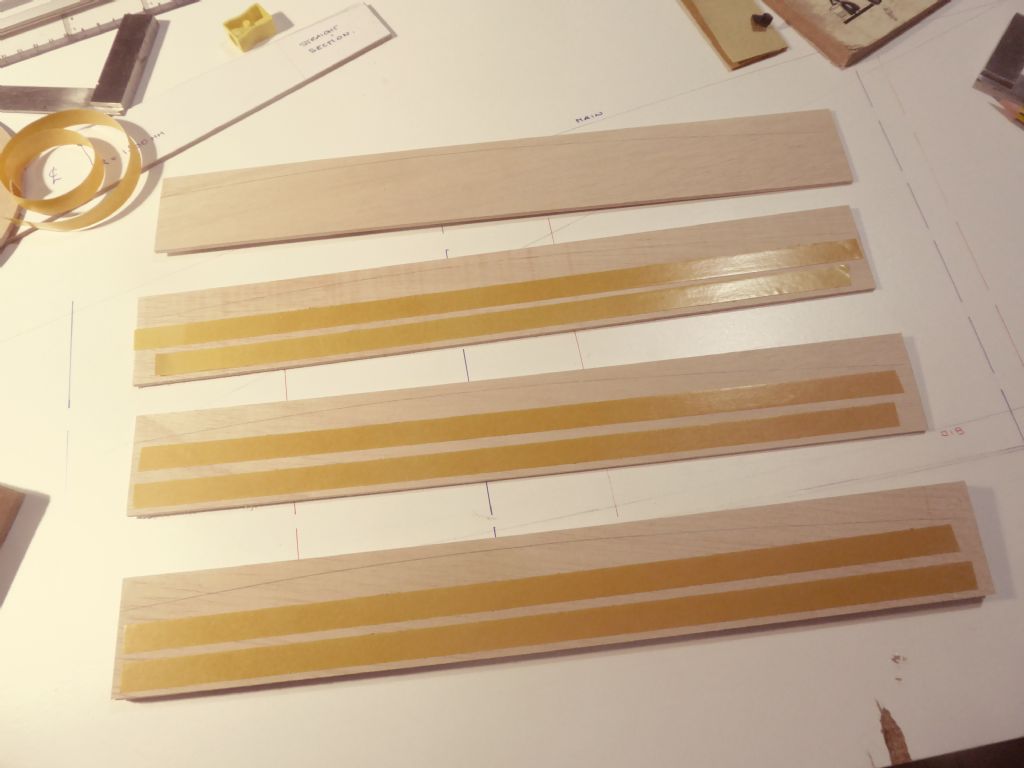
              Here are the blanks. The double sided tape is to gang the blanks together so that they can all be formed at the same time. Accuracy of the ribs is quite important.

              p1100364.jpg

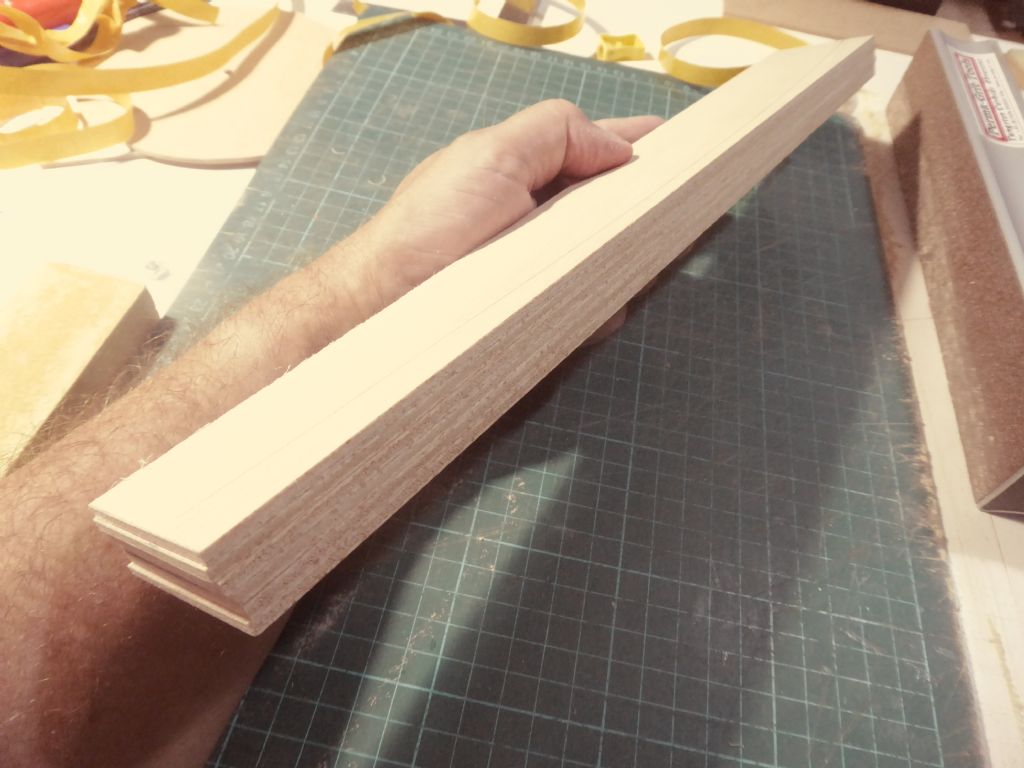
              The bundle of ribs is now well secured. The material is Liteply being a bit tougher than balsa, especially for the taping, but very easy to work.

              p1100368.jpg

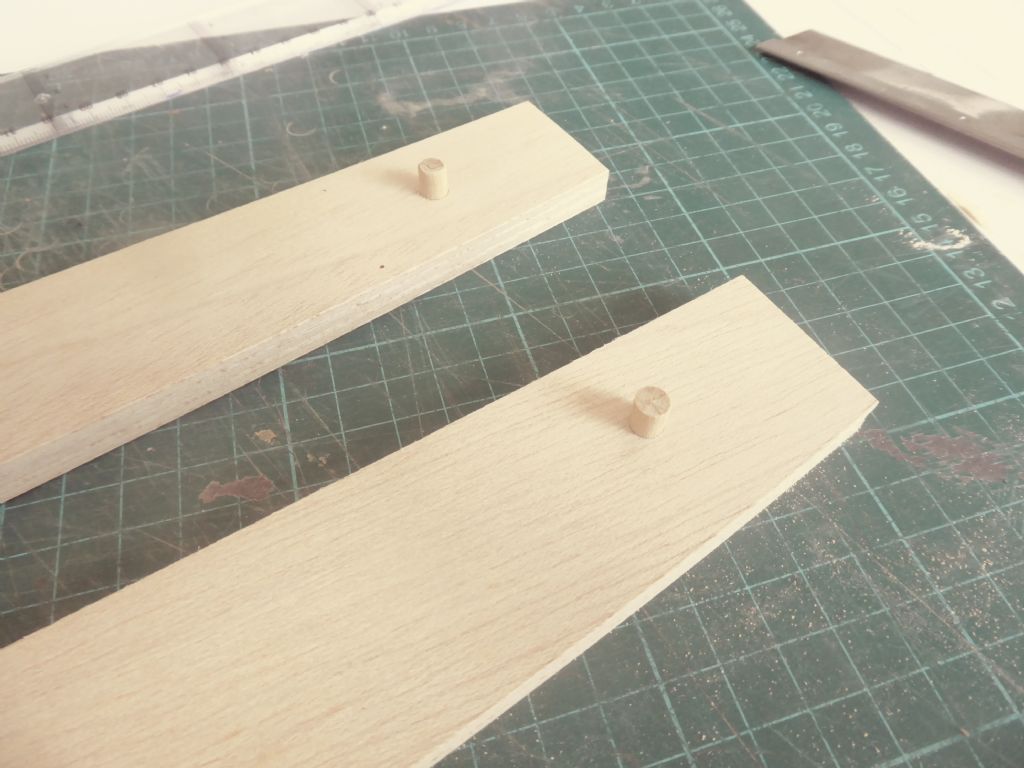
              All the forming is done with the ribs taped together. Before separating the bundle was drilled through at each end to accept a tightly fitting 6mm dowel. Later when the bundle was separated, two ribs were re-aligned using the dowels so that three matching holes could be drilled for the bolts that will hold the two halves of the Sail Block together.
              There are six ribs in total.

              Tim R

              #84150
              Chris Fellows
              Participant
                @chrisfellows72943

                Interesting stuff Tim.

                And carried out meticulously as usual.

                Chris

                #84153
                Tim Rowe
                Participant
                  @timrowe83142

                  Thanks Chris.

                  It is an interesting diversion making efectively what is a tool. I hope it will be quite universal but time will tell.

                  p1100774.jpg

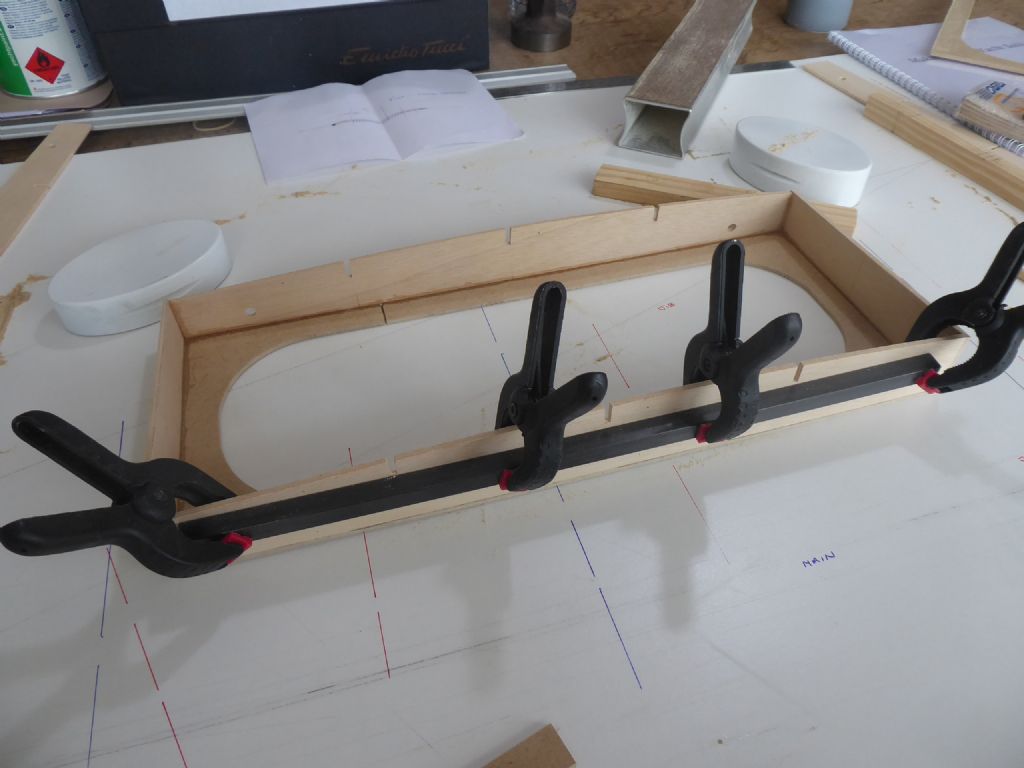
                  Here I am starting to make the two boxes that make up the sail block. Liteply never seems to come flat so it is receiving some help while the glue sets.

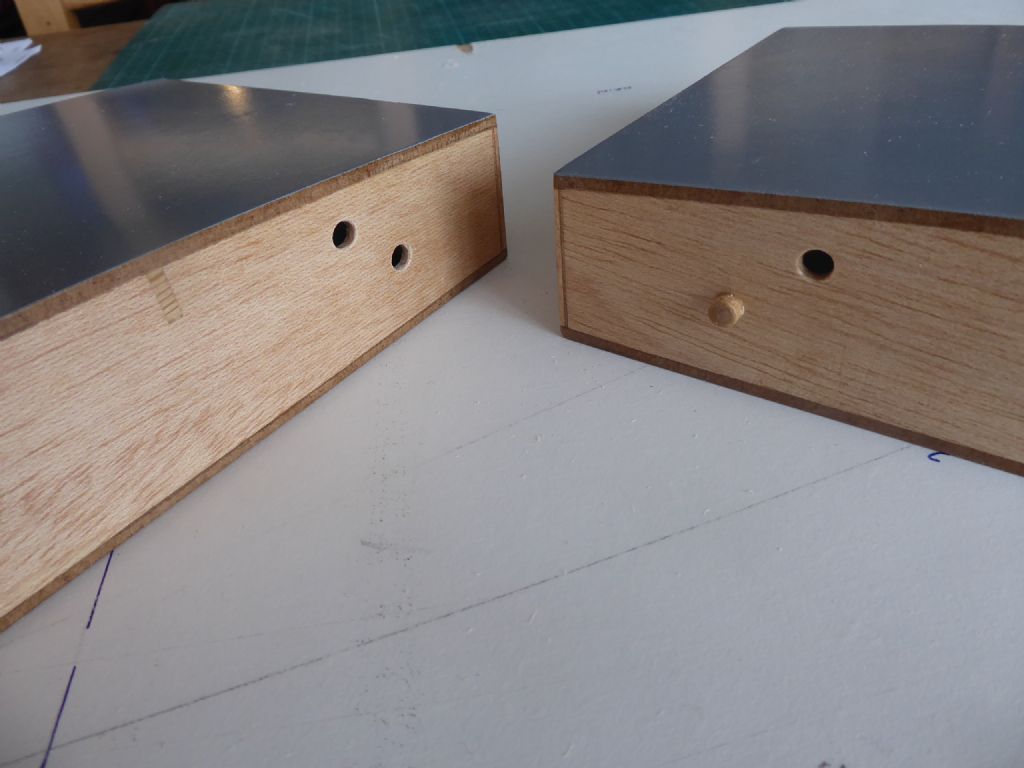
                  The base is cut from 3mm MDF and is in the form of a ring so I can get in and varnish all the internal surfaces to stop it warping later. I cheated a bit on the ribs. I didn't calculate the different heights and instead cut the end pieces at 3 degrees and marked the depth of the ribs against the end pieces. I then cut off the excess material. This was slightly wasteful but did ensure precision which is important if the block is to work properly.

                  p1100775.jpg

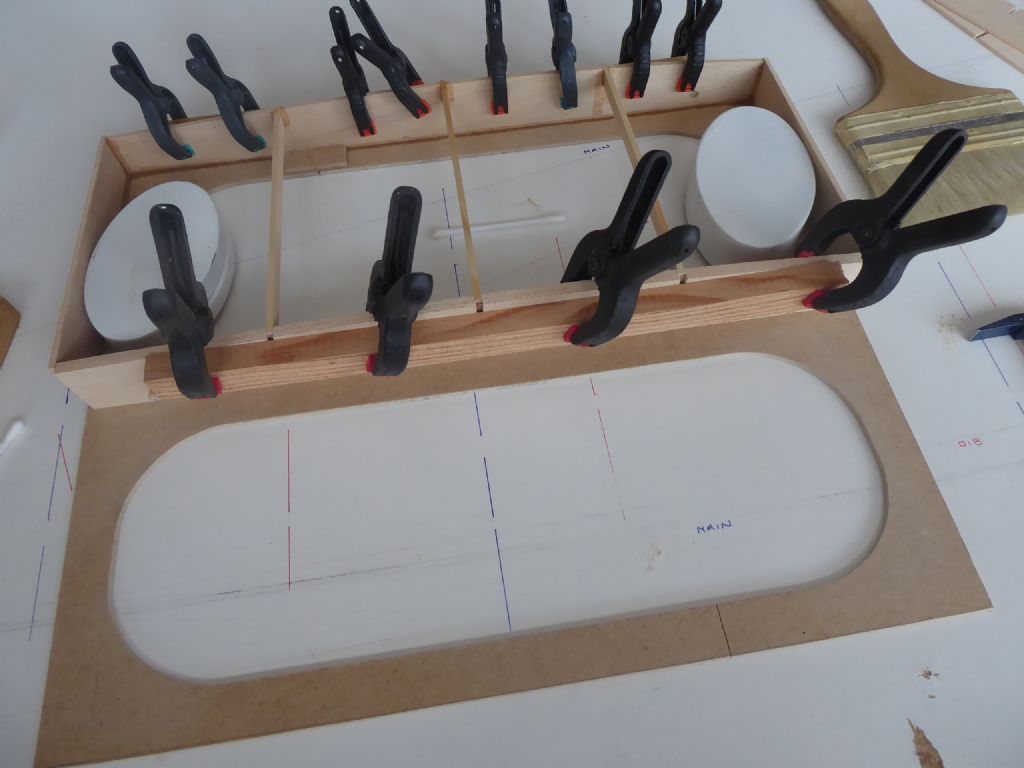
                  The second half is now built alongside the first and on the left hand side you can just see one of the alignment dowels. The first half has been fitted with some intermediate rails to help give some stability before the top sheets go on.

                  p1100776.jpg

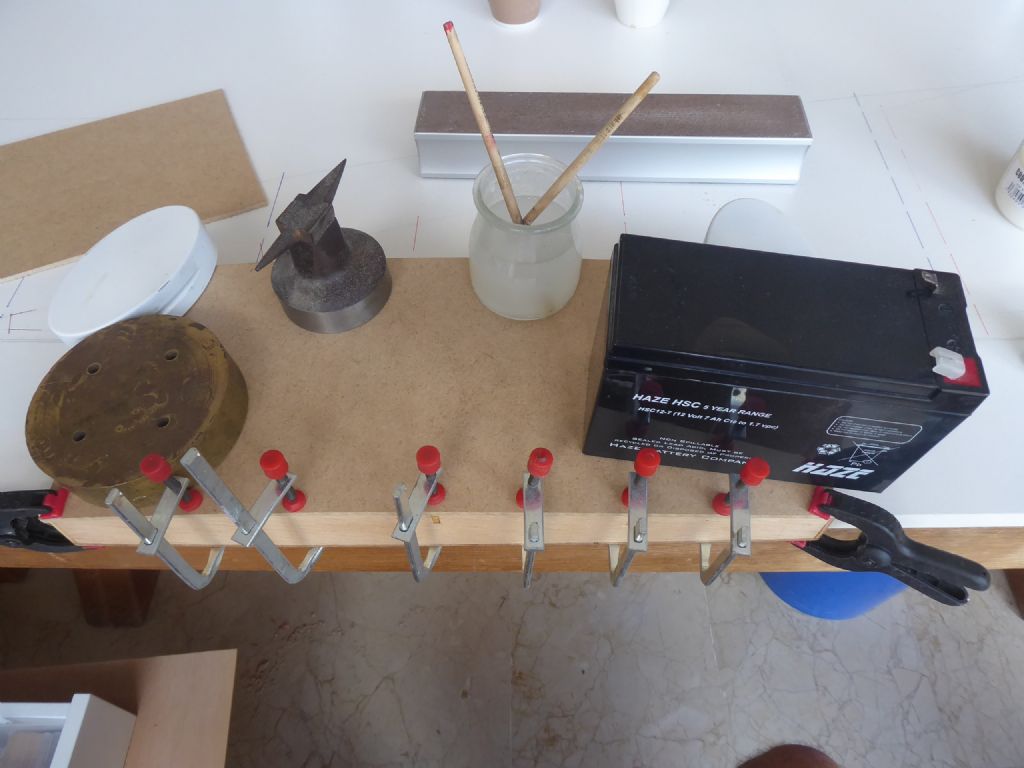
                  The top skin of 3mm MDF gets glued in place with whatever is at hand to weigh it down. I used MDF for a couple of reasons. Firstly at this size it comes free as offcuts from the local hardware store and secondly it is completely uniform without any grain. It doesn't care which way it goes on. Hopefully it will not be going anywhere near water.

                  p1100788.jpg

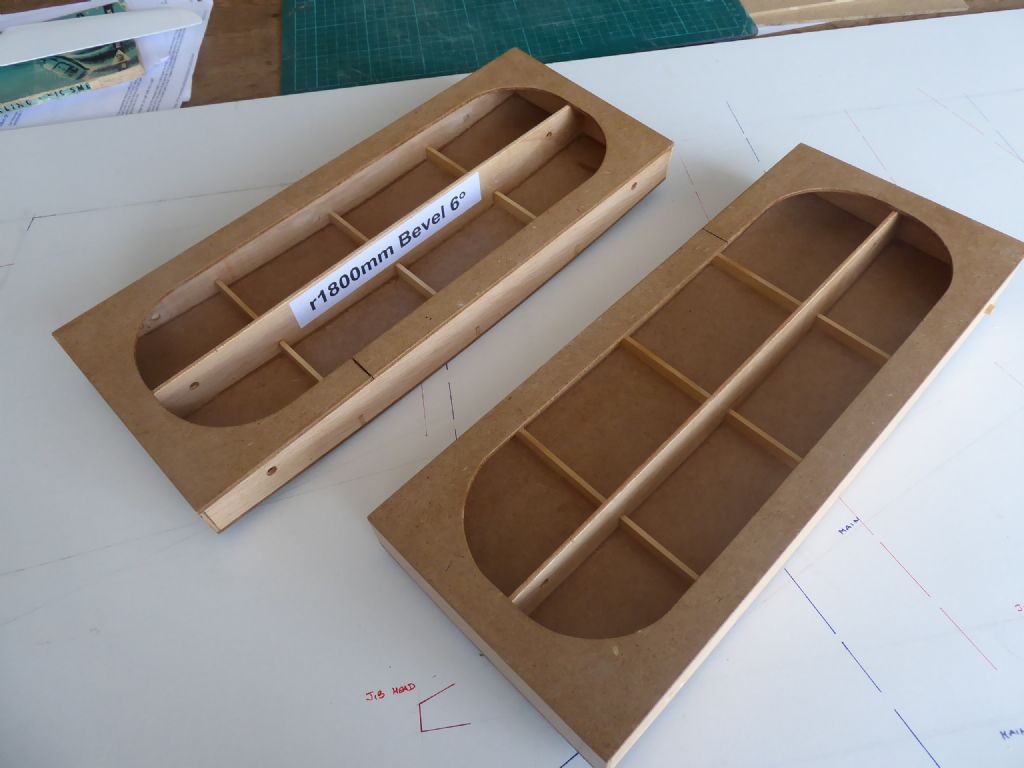
                  The underside of the finished blocks now showing the intermediate rib giving three per side. The construction is very strong, light and stable.

                  p1100789.jpg

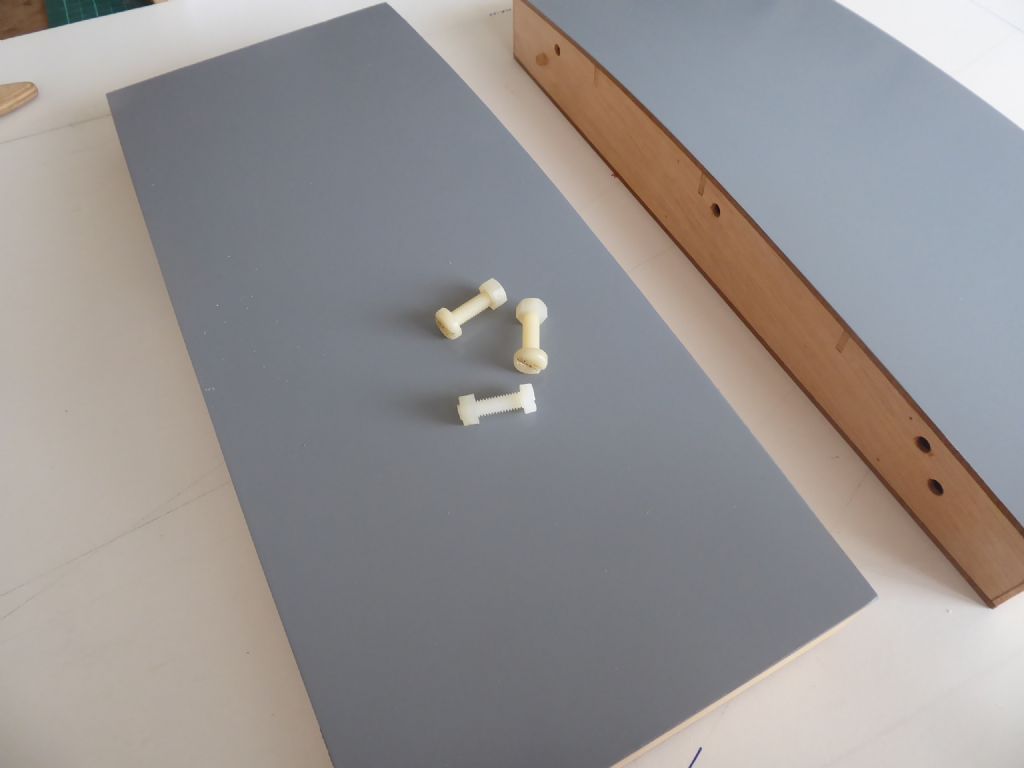
                  This shows how the two halves get joined and aligned. The dowels were shortened right down because they are now only going through two thicknesses of Liteply.

                  p1100791.jpg

                  There are two dowel and three nylon bolts robbed from my aeromodelling stuff.

                  Follow next post to finish

                  Tim R

                  #84154
                  Tim Rowe
                  Participant
                    @timrowe83142

                    Final Sail Block stages

                    p1100796.jpg

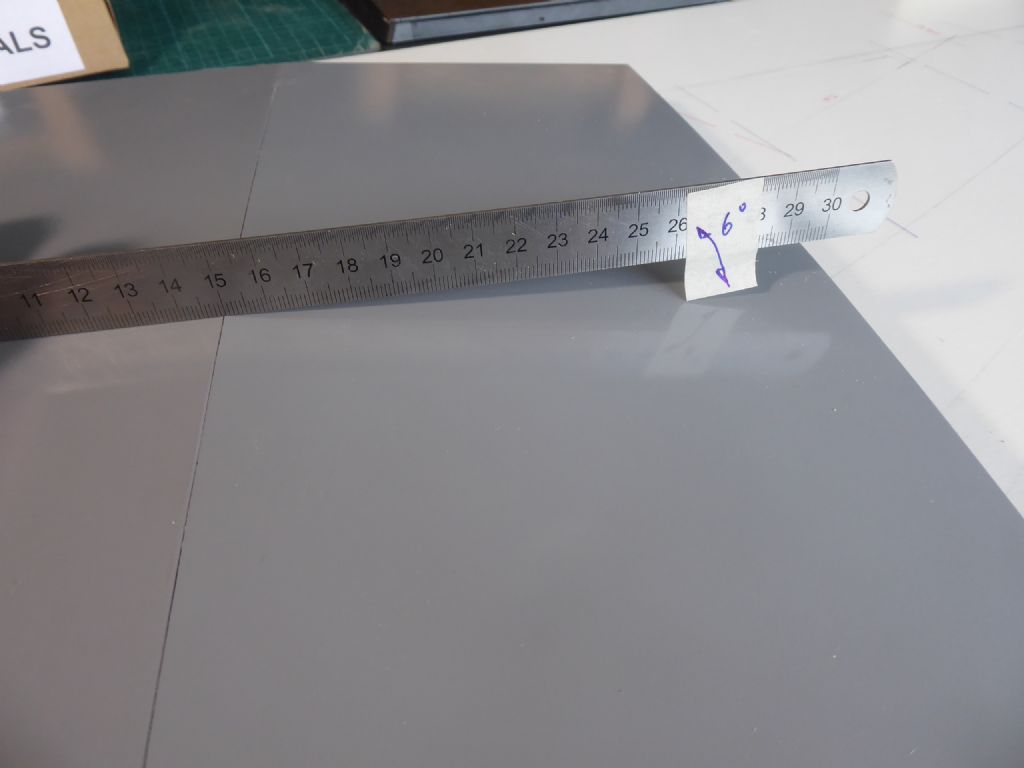
                    The two blocks fully painted, varnished and bolted together. The precision bit comes in because the two halves have to match exactly. If not the sail panels later will have wrinkles along the seams.

                    Each half has an angle of three degrees to give the six showing here under the rule.

                    p1100845.jpg

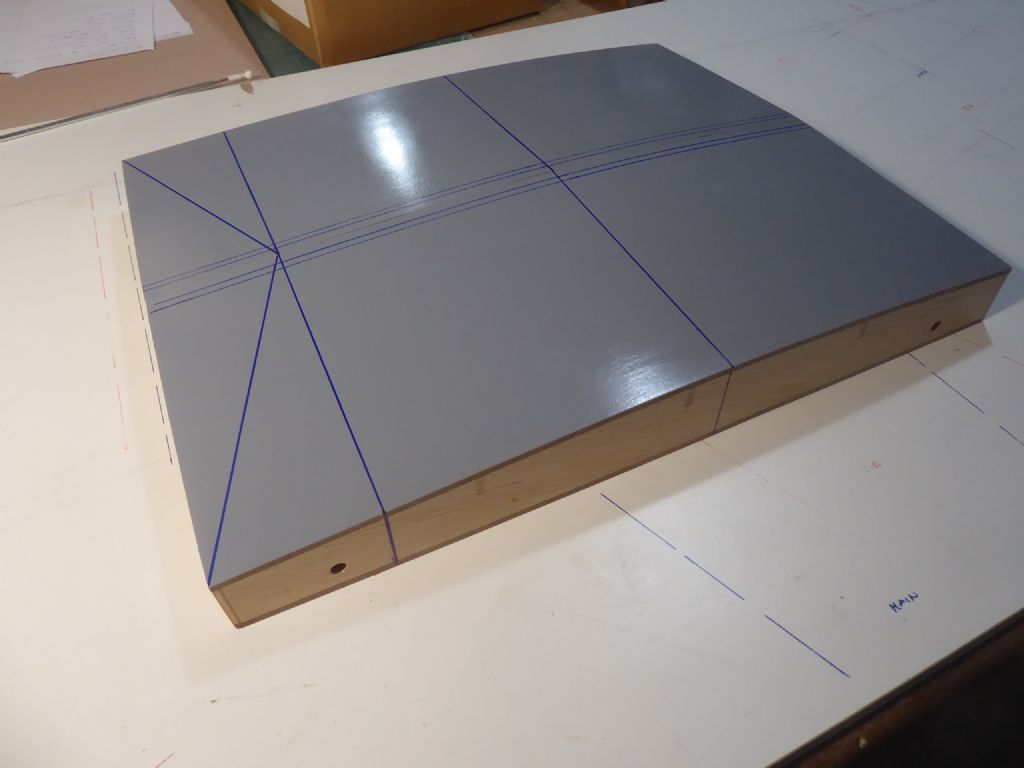
                    Last stage is to draw some reference lines. The line on the right is the centerline of the radiused section. The line on the left marks the start of the straight section and is hatched to stand out more. The lines at the join are set at 6mm and 10mm from the edges to assist with alignment of the sail seams at different widths depending on the size of the sails.

                    Sail Block ready for use and the sail making with film will take me into completely new territory.

                    Tim R

                    #84159
                    Chris Fellows
                    Participant
                      @chrisfellows72943

                      That will be a useful bit of kit. Interesting to see it completed as in the illustration it looks as though the block is curved in plan, which it is not. The curves along the top and sides make it look, well to me, that it does.

                      All of this is new to me (who knew that making sails properly could be so complicated) and explains why some of the homemade sails I see don't look right or perform very well.

                      Chris

                      #84160
                      Ray Wood 3
                      Participant
                        @raywood3

                        Hi Tim,

                        Now your set up, how much for a set of RS 400 sails ?? 😀

                        How do you join the individual panels ?

                        Blooming wet over here !!

                        Regards Ray

                        #84171
                        Tim Rowe
                        Participant
                          @timrowe83142

                          Basically Chris the block creates a hump. It is simply two curved panels meeting at a slight angle. The curves are in one plane only otherwise the film could not be made to sit flat.
                          If you think of a jacket or a dress, the flat material is stitched at various angles to make a 3D garment. I think some are called darts. The block does something similar to the tailor's dummy but hugely less complicated.

                          The actual process of making the sails Ray, now becomes quite simple. There are some important rules to follow which I hope to explain later. The panels are joined with double sided tape (quality stuff).
                          I am an enthusiastic amateur and I am sure you will be able to make your own sails when you see how it all goes together. You will be able to make a sail block out of your foam. Or maybe I should offer to make the block a free plan in the mag once I have confirmed it works as intended. The sail making materials are not very expensive and less so for you UK dwellers.

                          Blooming wet here as well last night. Thunder so loud I thought it was inside the flat. Yacht up on the breakwater in Puerto de Andratx and tomorrow I have to check out a lightning strike on a 50m yacht that got walloped in Puerto Portals. A 50m yacht has one enormous mast and most of the electrics have been fried. Oops.

                          Tim R

                          #88513
                          Tim Rowe
                          Participant
                            @timrowe83142

                            Goodness Gracious Me

                            Last post in October last year. At this rate Galileo will be old again before it is new! Time to bump the thread so I can find it again.

                            I did a bit more research on sail making and getting down to scraping performance out of sails (ie the engine) the shape in the mainsail will be slightly different to that in the jib. Going a step further the shape of a sail or the camber can vary from top to bottom of the sail so ultimately the combinations are infinite and why sailmaking has an art as well as science. With this in mind I have made two more blocks, one with the maximum camber at 40% of the chord and another at 33% to bring the draft well forward. The block I have will make fairly full sails so I probably need another set of three at a shallower angle. Apparently making good flat sails it harder than full ones. I have yet to find out why.

                            Galileo is in paint and in the gap I have been working on the rigs and a carry case for the keel. Instead of watching the paint drying I will catch up on the spars, rigging and the case. I am dying to get the boat on the water and it is absolutely going to get there before the Huntsman 31 and the flying boat.

                            Tim R

                            Edited By Tim Rowe on 29/05/2020 20:07:39

                            #88515
                            Ray Wood 3
                            Participant
                              @raywood3

                              Welcome back Galileo,

                              We have missed your ongoing re-build, but I gather your creator has been busy of late 😄

                              Regards Ray

                              #88517
                              Chris Fellows
                              Participant
                                @chrisfellows72943

                                I thought you were going to break into "Great balls of fire" there Tim! smiley

                                Indeed, welcome back Galileo.

                                Chris

                                #88535
                                Tim Rowe
                                Participant
                                  @timrowe83142

                                  Thanks Ray and Chris

                                  Just to prove there really is one.

                                  p1150459.jpg

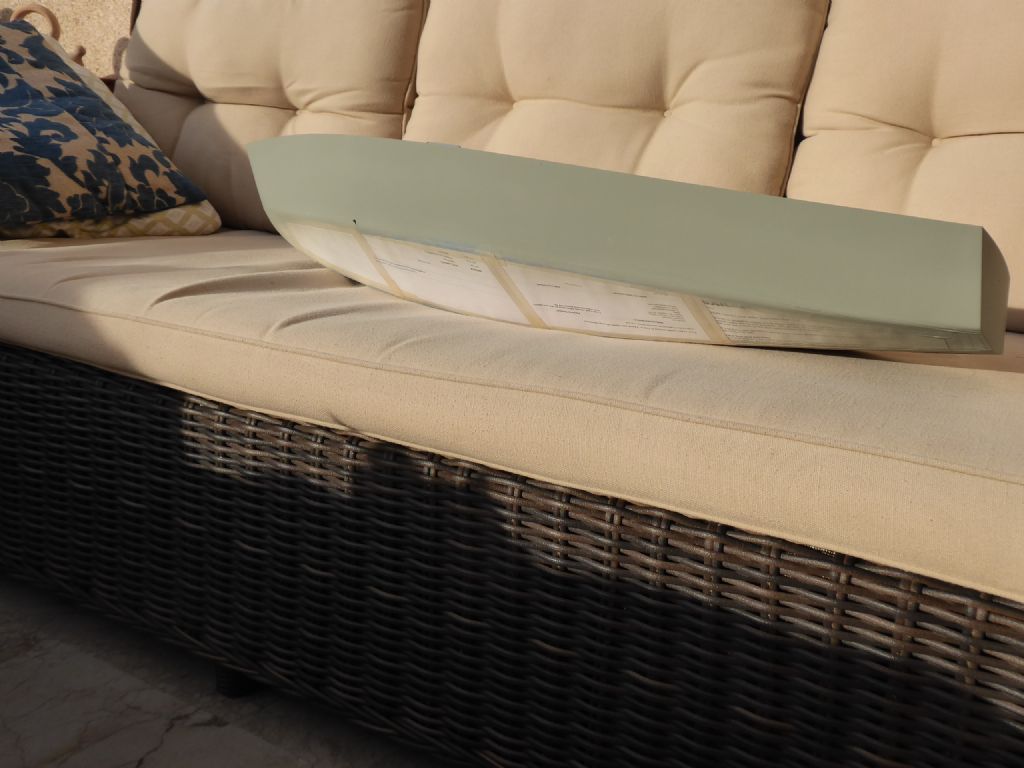
                                  Here are the topside in primer with everything else masked off. I use a Spanish brand high build spray primer. It goes on beautifully and dries quickly so it can be sanded the same day. It doesn't like overcoating too soon or it can blister as I found some time ago on another model. Getting on with something else or being very patient is the by-word. Now I know how it behaves I use a lot.

                                  p1160889.jpg

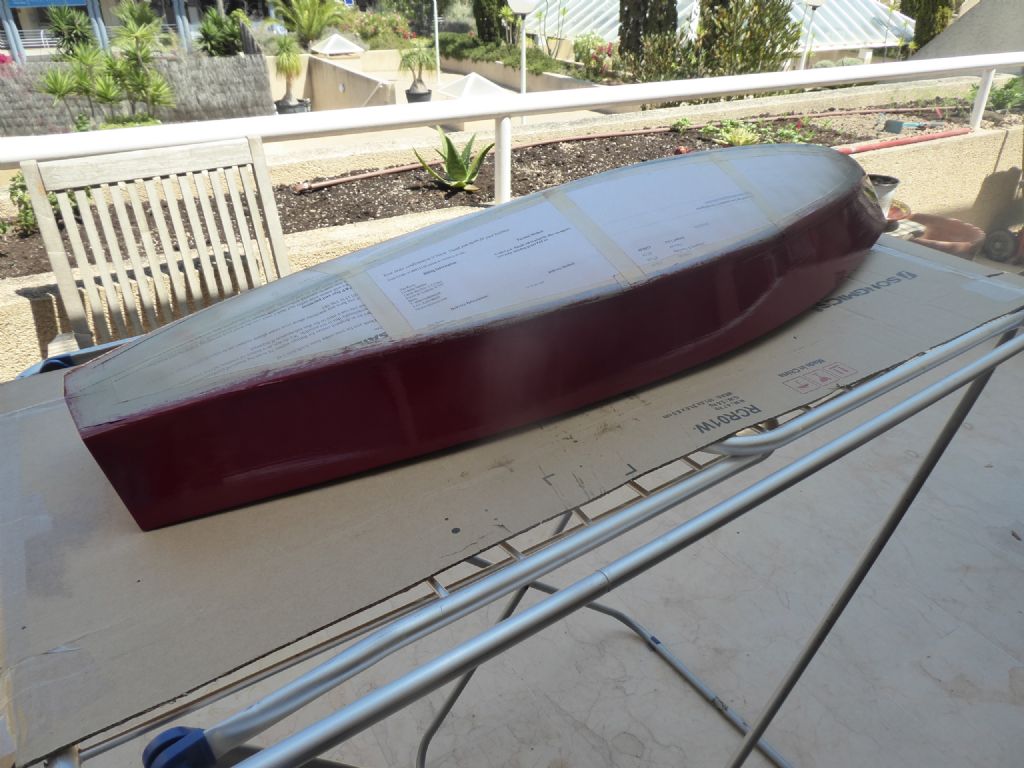
                                  And now with the third coat of top colour. Burgundy was the unusual colour of big Galileo and the defunct model. I did wonder about other colours but I have other model to try some favourite colours on.

                                  Eddie was asking what paint. It is a Spanish brand again Titanlux and the colour is Burdeos 524. It was an end of line offer and I only have a small 125ml tin. I am not convinced of the shade as I think it is coming out a bit to "cherry". To get a good final finish I would have to thin it a bit but I think I may call a halt at the 3 coats and just call it an undercoat. I think the real colour should be RAL 3005 and I think I will get a lager tin blended.

                                  First choice is brush finish.
                                  Second choice is brush finish and then cut and polish
                                  Third choice is spray in which case I would use my airbrush. (and that would probably need a cut and polish.

                                  The varnished deck is with brush and no post-finishing.

                                  I get involved quite a lot with painting of large yacht hulls and spars. These get tented up with extractors and often we use a special plastic film to make a tent within a tent. The film has a side that has to face the work and has a static charge that attracts dust particles and to a lesser extent overspray when you get going. Even using airless spray only about 40% of the paint you buy actually gets to stay on the job. Some kind person is going to give me a couple of metres.

                                  I have a love / hate relationship with painting.

                                  Tim R

                                  #88539
                                  ashley needham
                                  Participant
                                    @ashleyneedham69188

                                    ….and so you should doTim. I have said before that any amount of really great work can easily be ruined by bad paintwork.

                                    Ashley

                                    #88547
                                    Chris Fellows
                                    Participant
                                      @chrisfellows72943

                                      Hi Tim

                                      Will watch with interest as you progress through the painting. As Ray knows in building construction the work stands or falls by the standard of decoration. Doesn't matter to most clients what the rest is like.

                                      Wondered how work was during the lockdown. Sounds as though you are getting busy?

                                      Chris

                                      #88561
                                      Tim Rowe
                                      Participant
                                        @timrowe83142

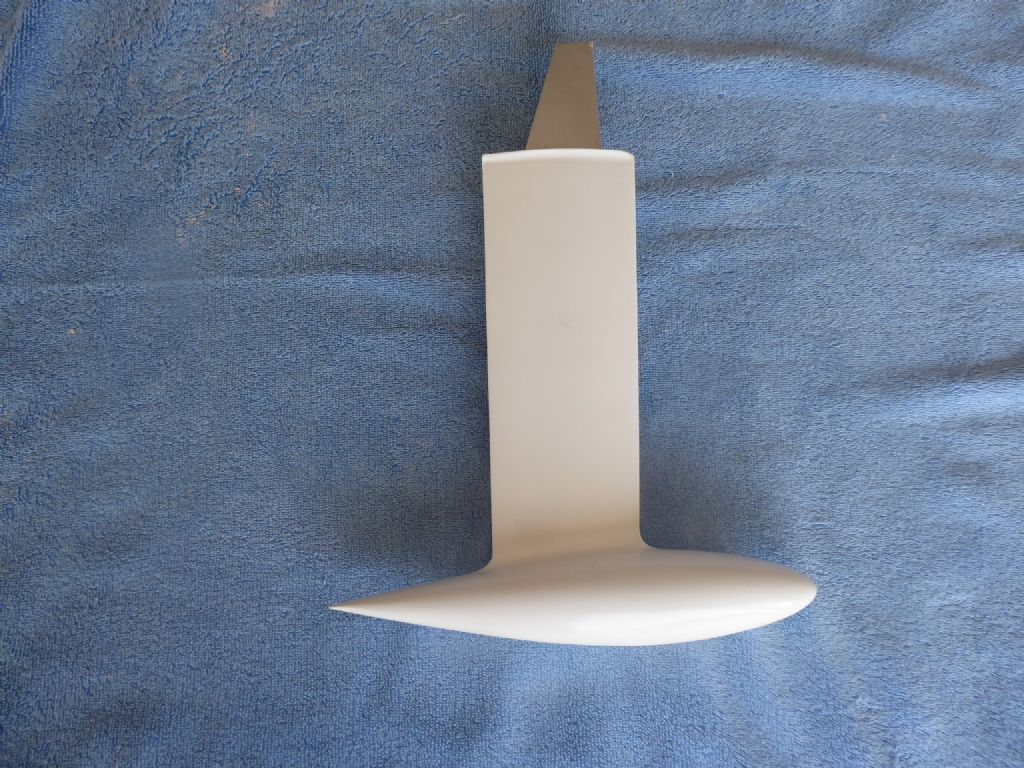
                                        If you remember my keel. it is quite heavy, strong enough but strangely fragile and liable to surface damage from knocks and scratches.
                                        p1070220.jpg

                                        This is what it looked like and I found myself moving it around all over the place trying to find a safe haven. My IOM keel is safely behind the telly and seeing as no one does any dusting around there it is quite safe.

                                        Time to make a box for storage and especially transport. It also gave me some breathing space and think time to get back to the deck that had been subjected to a stupidity.
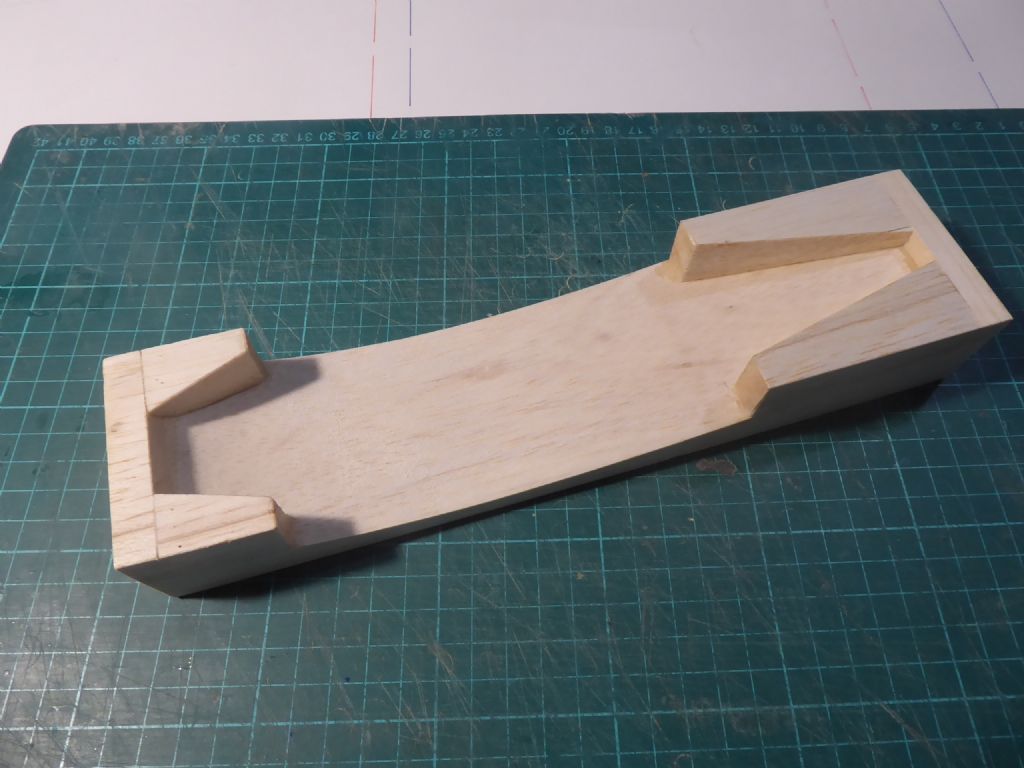
                                        p1100778.jpg

                                        First step was to make the cradle for the bulb. Various bits of balsa from the scrap box glued together and arranged to give the bulb plenty of support.
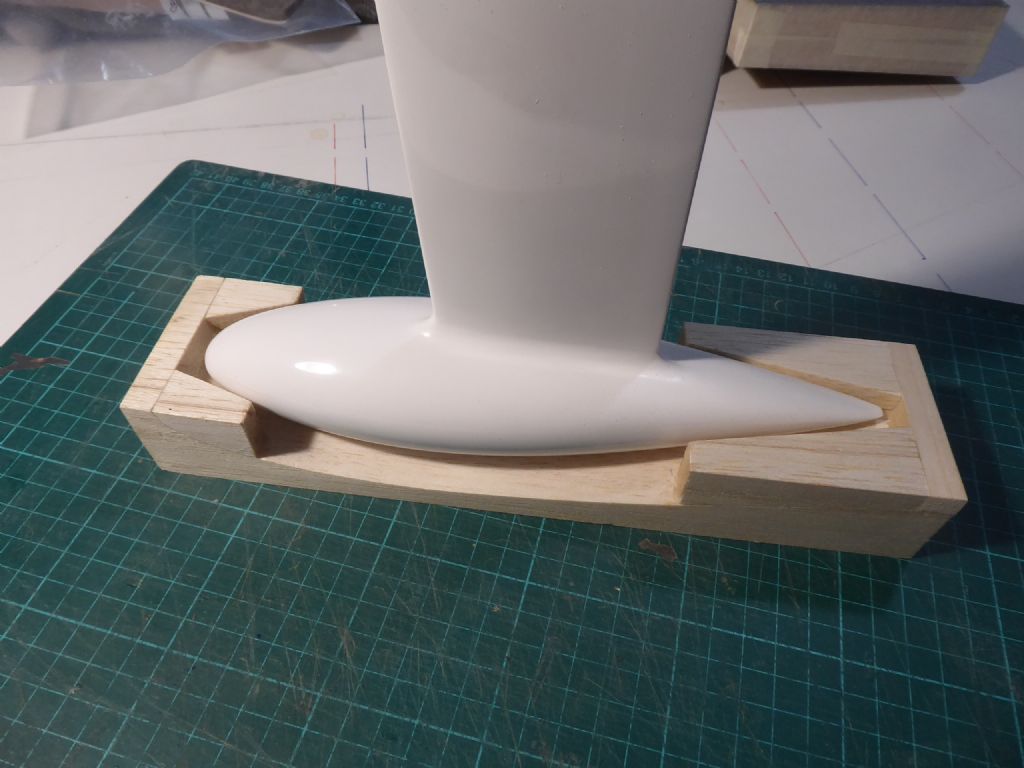
                                        p1100780.jpg

                                        Test fit to make sure the keel was vertical when in the correct position.
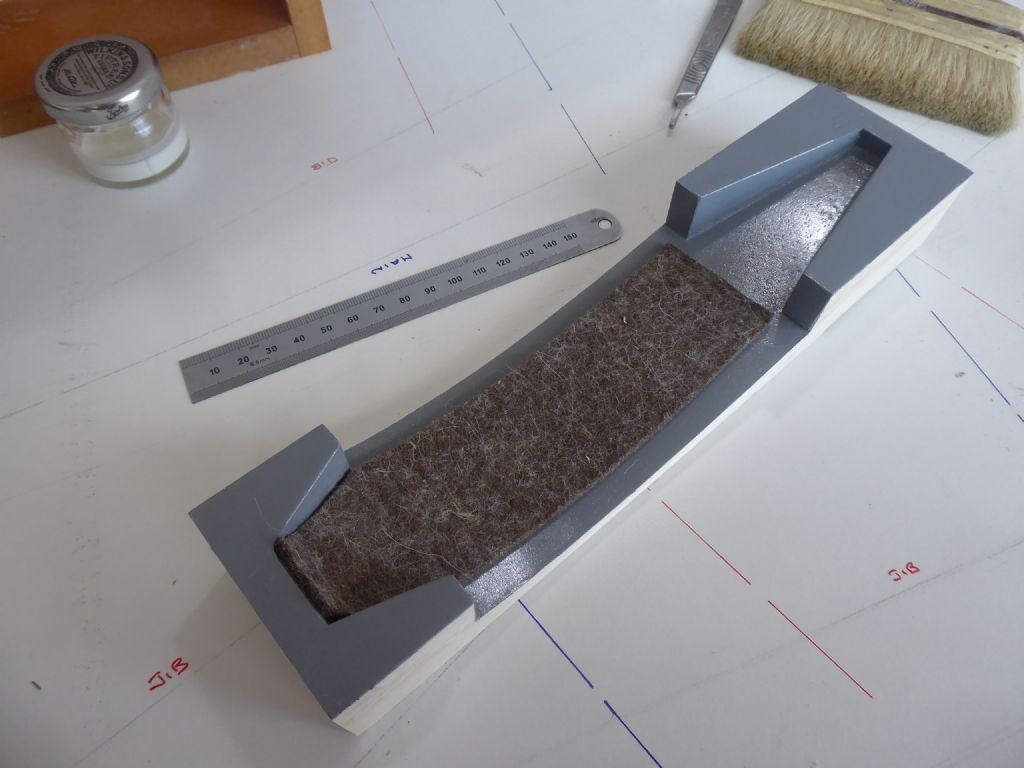
                                        p1100781.jpg

                                        Pre-painted and nearly finished with the felt bed.
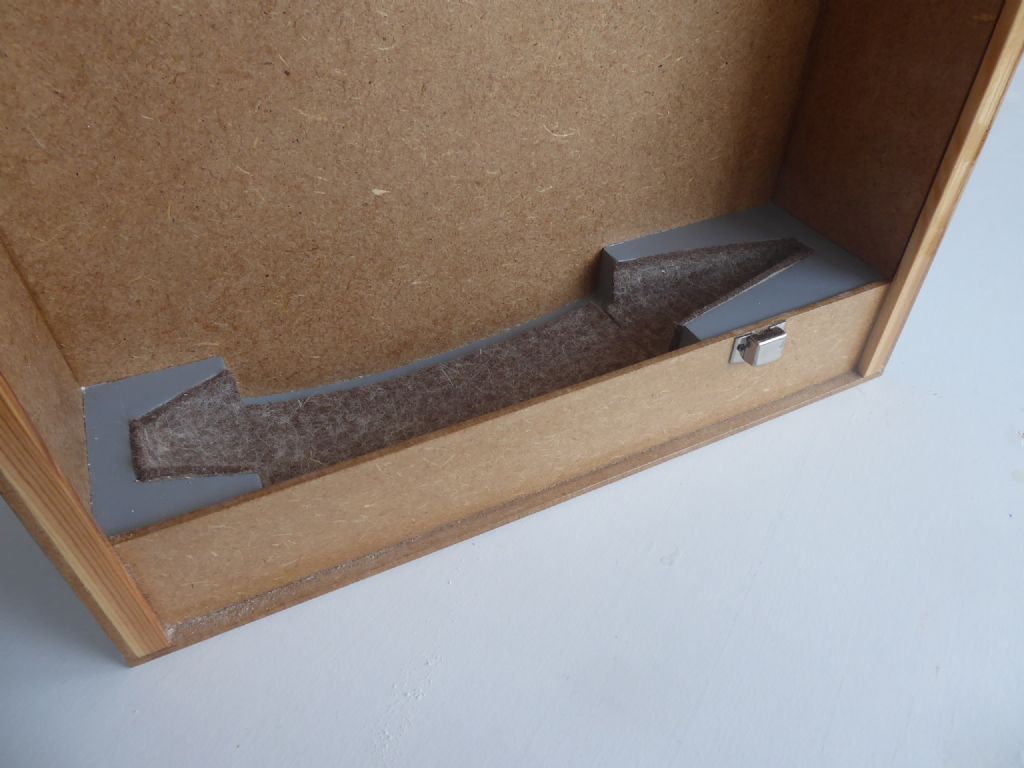
                                        p1120425.jpg

                                        Felt complete and the sides and base made up. The sides are two pieces of 3mm MDF stuck together with one 3.5mm wider than the other. This make the slot for the slide in cover. The catch is a chromed fitting costing a few cents from a Craft shop.
                                        p1120426.jpg

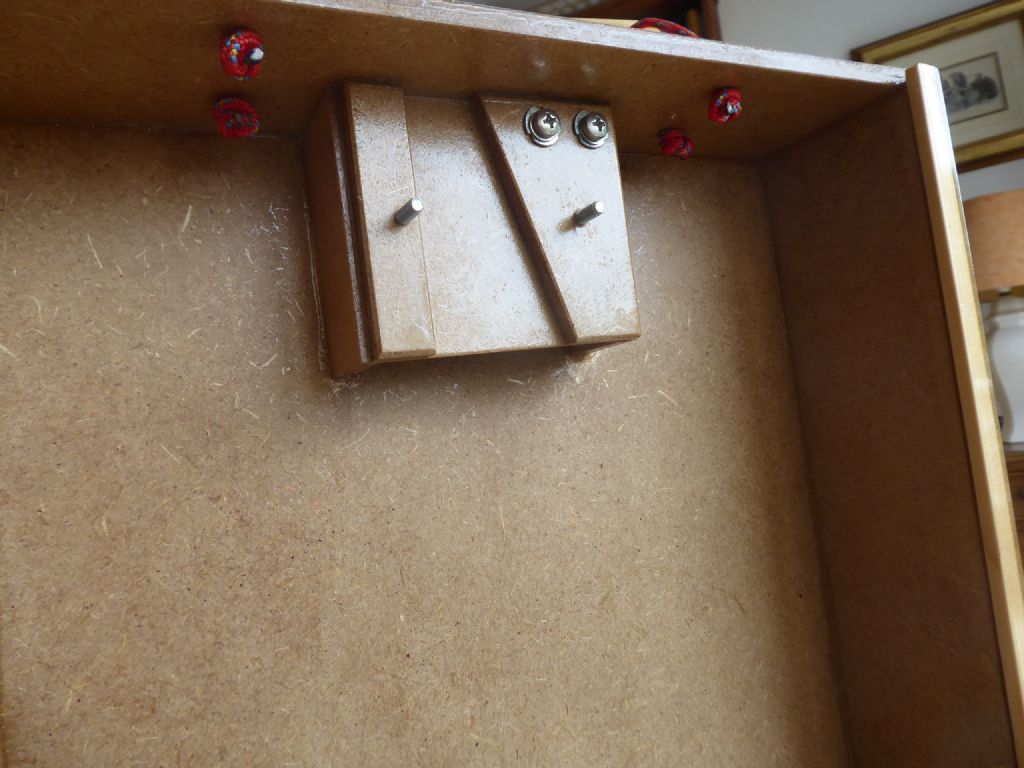
                                        This built-up MDF block locates the alloy tang of the with matching tapers.
                                        p1120428.jpg
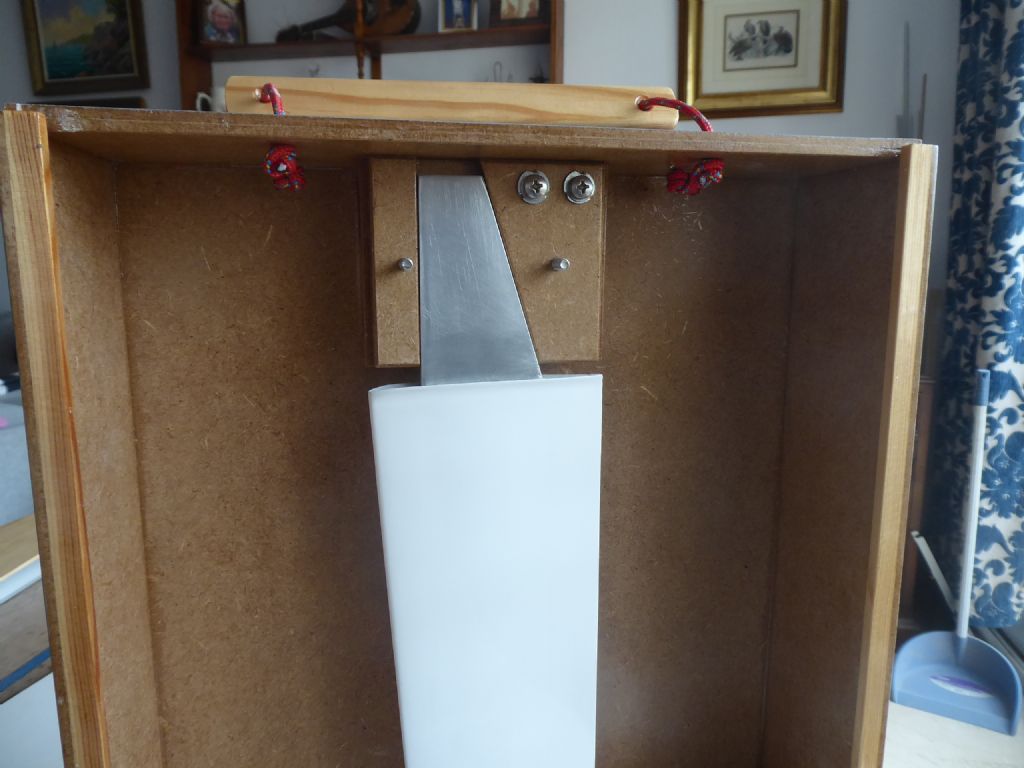
                                        Showing the tang in the retainer.

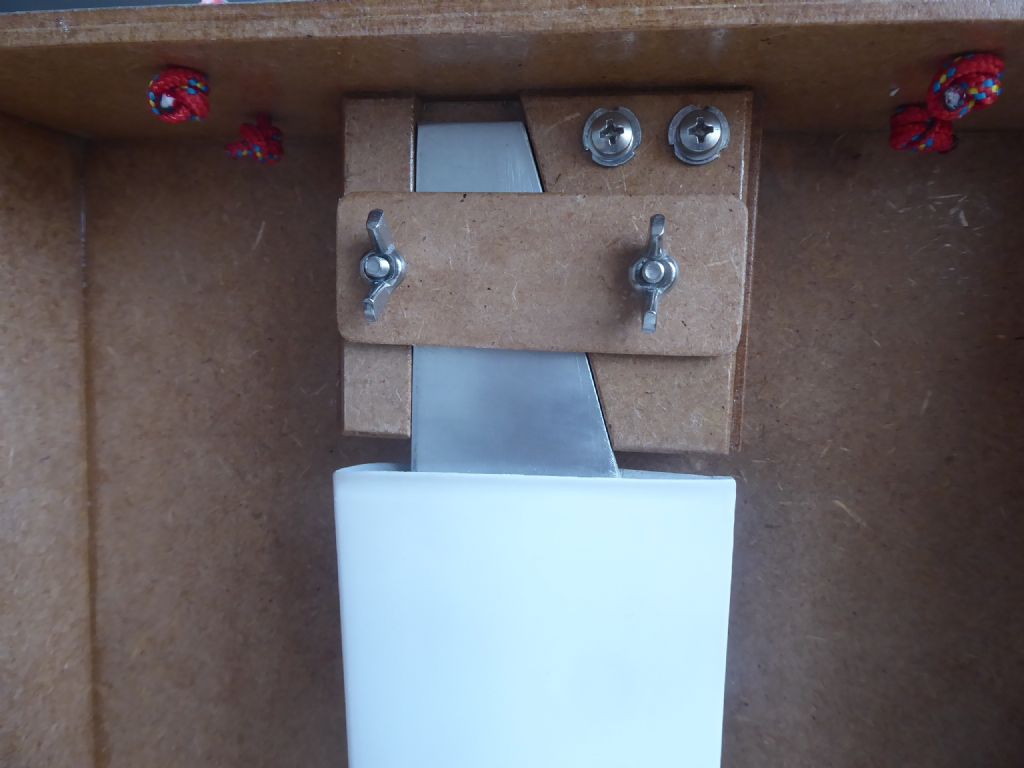
                                        p1120429.jpg

                                        Clamp now fitted to the retainer and the keel cannot go anywhere. The two cross points are M4 machine screws to hold the keel in the boat. One to use and the other in case I lose! The screws are fitted into blind nuts.
                                        p1120431.jpg

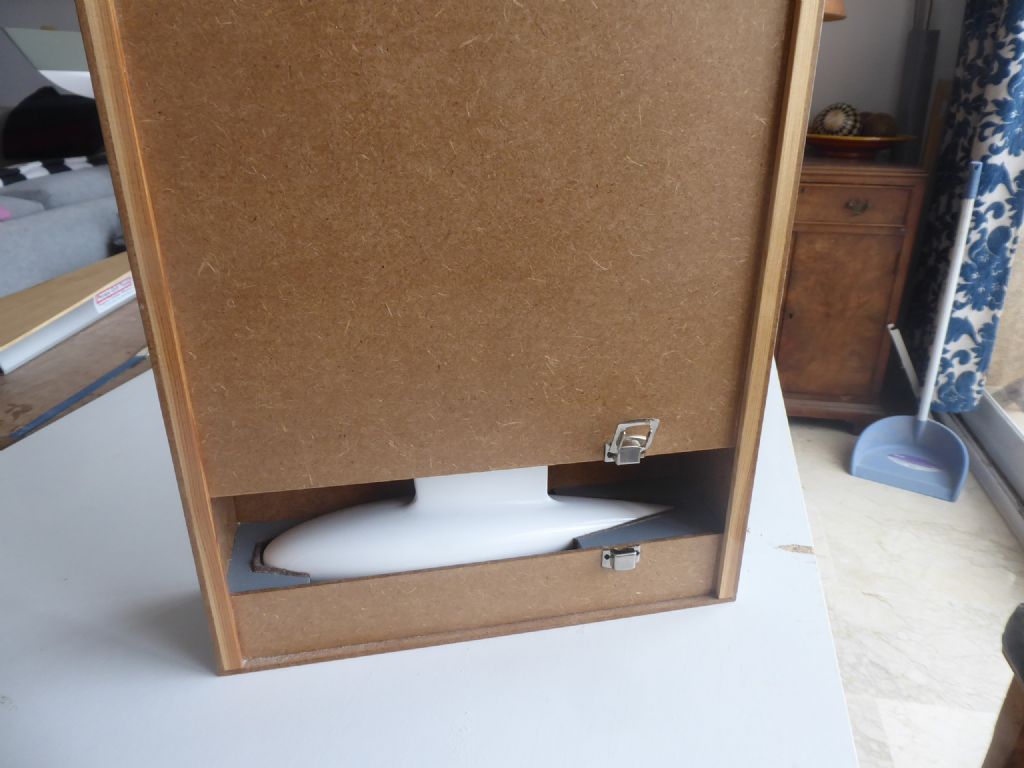
                                        The sliding door nearly shut showing the two parts of the clip.
                                        p1120433.jpg

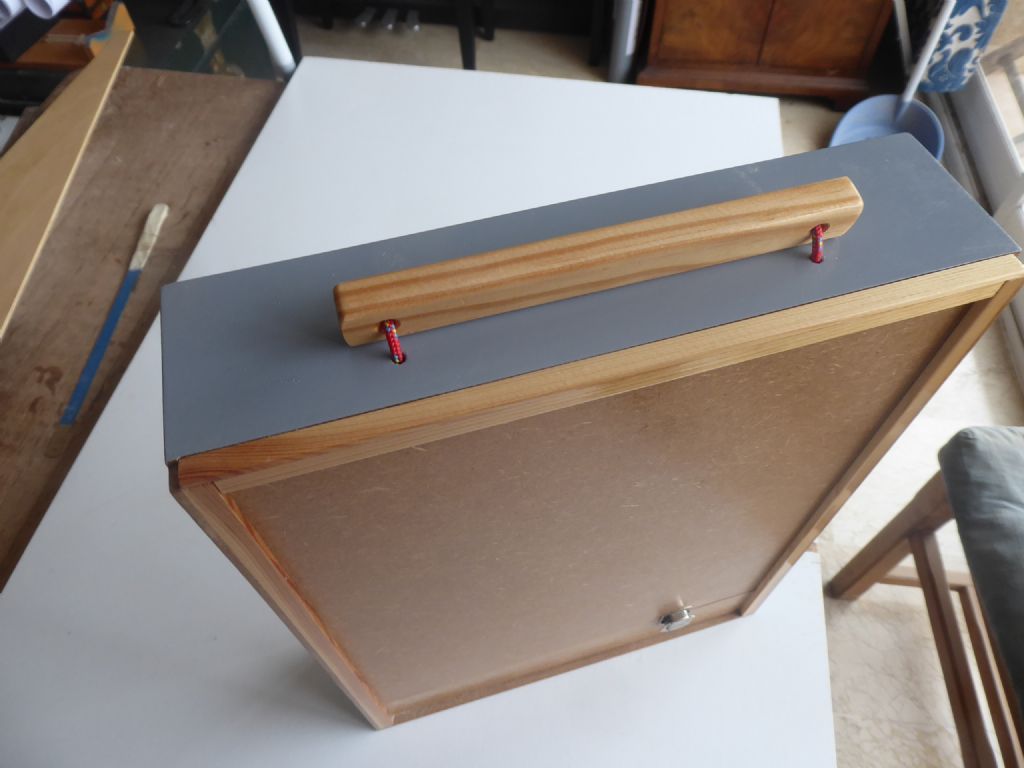
                                        Finished case with pine carry handle hanging on Terylene braided cord. Knots underneath hold the cords in place.

                                        And here is where the keel has been hiding since Novemberish last year. Must have a look.

                                        Tim R

                                        #88562
                                        Ray Wood 3
                                        Participant
                                          @raywood3

                                          Hi Tim,

                                          You have put more effort and thought into your keel carrying box than I put into most of my boats 😄

                                          My sailing barge keels travel in an ex army goon bag, well that's what my dad used to call them !! I started carrying them in a specific bag as I did turned up to a race with Veronica + Tx but no keel, I also have launching ropes with copper pipes which support the barge fill with water so they come out easily.

                                          Anyway , probably the best looking keel box in the world 😉

                                          Regards Ray

                                          #88563
                                          Ray Wood 3
                                          Participant
                                            @raywood3

                                            Hi Tim,

                                            Just a quick question, how are you stopping the keel falling out of the boat ??

                                            I'm just putting the Comanche keels together today 😄

                                            Regards Ray

                                            #88564
                                            Tim Rowe
                                            Participant
                                              @timrowe83142

                                              Hi Ray

                                              Thanks for the comments but didn't quite understand your launching procedure.

                                              The tang of the keel goes up into a matching tapered slot in a fibre / epoxy box. The top of the tang is drilled and tapped M4 and one of those screws goes through a carbon fibre plate at the top of the keel box and pulls the taper up tight. The taper is a non-locking taper unlike Morse. More like an ISO taper that I copied to make sure the keel would not jam in place. All the screw has to do is hold the weight of the keel in pure tension. M2 would have done it but the thread would be a bit flimsy in the alloy.

                                              p1010869.jpg

                                              Here is the hole for the retaining screw on the carbon plate on the centreline.

                                              Tim R

                                              #88566
                                              Tim Rowe
                                              Participant
                                                @timrowe83142

                                                Hi Chris

                                                Much of my traditional work has dried up but I am running a refit on a 1948 Owens 40. A wooden yacht built in Baltimore. That will finish mid July.
                                                I am also the Balearic agent for a large international marine group. I am normally their first responder, mainly on insurance claims on large yachts. Because of the Covid travel restrictions no other surveyors can get to the island so my scope has widened. The other day I went for a walk inside a boom 21m long damaged in a crass gybe. In another instance a damaged mainsail with a replacement cost of a fraction under €500,000 ex tax! Makes me fell better about my modelling budget!

                                                Tim R

                                                #88567
                                                Ray Wood 3
                                                Participant
                                                  @raywood3

                                                  Hi Tim

                                                  Good show 😄 I will show you a picture of the highly technical procedure we use with weighted launching strops for launching and recovery .

                                                  Regards Ray

                                                  #88571
                                                  Chris Fellows
                                                  Participant
                                                    @chrisfellows72943

                                                    Hi Tim

                                                    Still earning then, which is good news. Mainsail replacement – it's certainly another world for some!

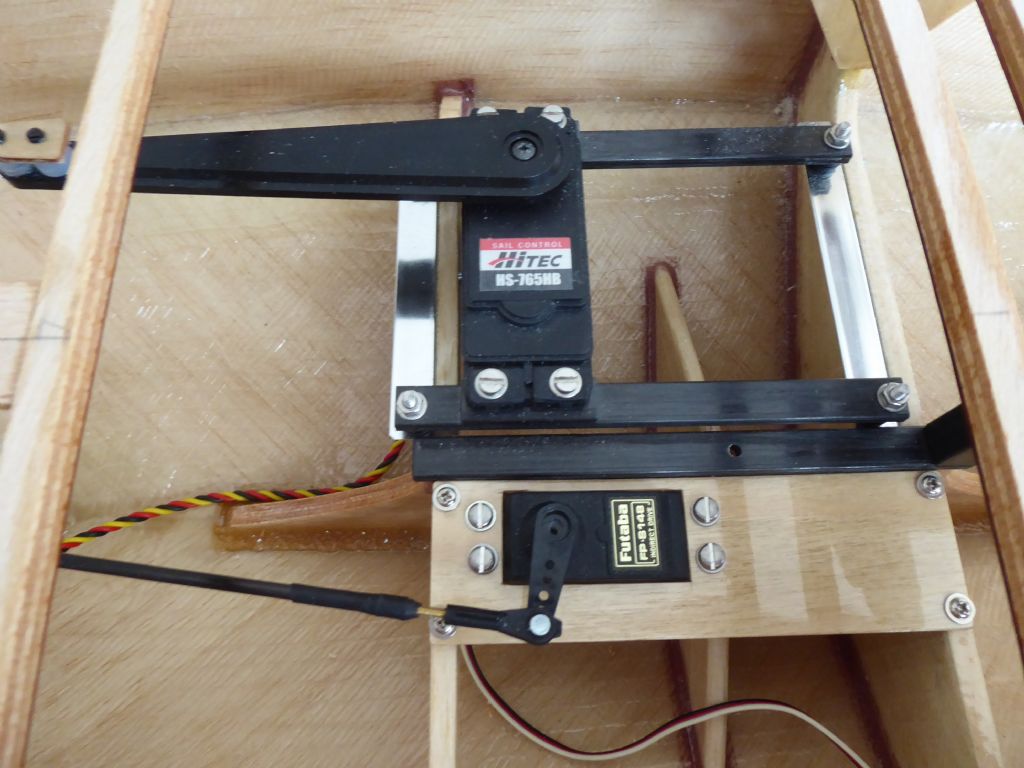
                                                    Yes, the keel box is certainly a work of art! And looking at your other photos I'd forgotten (just a bit) what an excellent attention to detail you've got. Even the screw heads on the servos line up, great stuff. I'm going to have to up my game!

                                                    Chris

                                                    #88576
                                                    Eddie Lancaster
                                                    Participant
                                                      @eddielancaster

                                                      Hi. Tim, I can see now why you are so precise with your modelling, with that scale, both size and value, you have no room for error.

                                                      Regards.

                                                      Eddie.

                                                    Viewing 25 posts - 151 through 175 (of 180 total)
                                                    • Please log in to reply to this topic. Registering is free and easy using the links on the menu at the top of this page.

                                                    Code of conduct | Forum Help/FAQs

                                                    Advert

                                                    Latest Replies

                                                    Home Forums Sailing Models Topics

                                                    Viewing 25 topics - 1 through 25 (of 25 total)
                                                    Viewing 25 topics - 1 through 25 (of 25 total)

                                                    View full reply list.

                                                    Advert