Galileo – A resurrection

Advert

Galileo – A resurrection

Home Forums Sailing Models Galileo – A resurrection

  • This topic is empty.
Viewing 25 posts - 76 through 100 (of 180 total)
  • Author
    Posts
  • #81100
    Ray Wood 3
    Participant
      @raywood3

      Hi Tim,

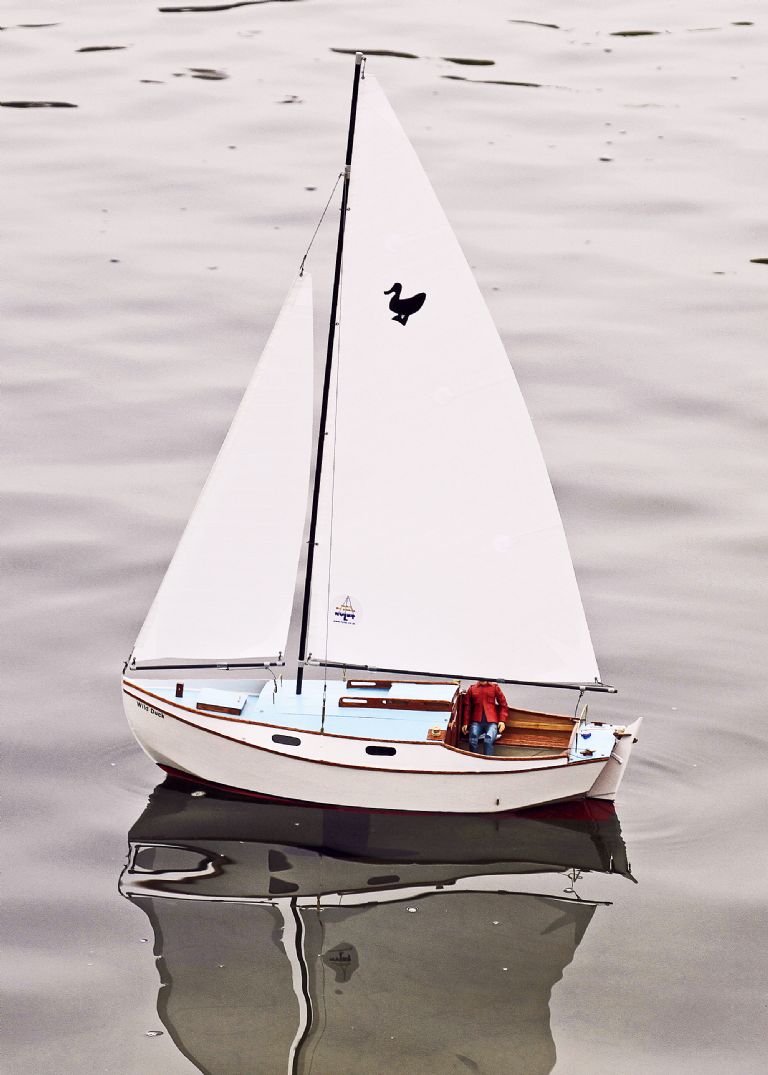
      That's a shame I had thought you were building her as the opening photo of the thread, but you know what you want to create, I like to save an old designs for posterity like my Yachting Monthly Wild Duck at a massive 22" long 😃 ,

      Regards Raywd48.jpg

      Advert
      #81102
      Tim Rowe
      Participant
        @timrowe83142

        That's very cute Ray.

        I shall have some features on the deck that I hope will provide some interest. My hull is scale but everything else is functional like the original model. I will be using it as a bit of a test bed.

        I have other models in the pipeline that are more lifelike one including a very detailed deck and cockpit. More on that later.

        I could also be very easily tempted to build Wild Duck even at 11" if you have the drawings.

        Tim R

        #81130
        Ray Wood 3
        Participant
          @raywood3

          Hi Tim,

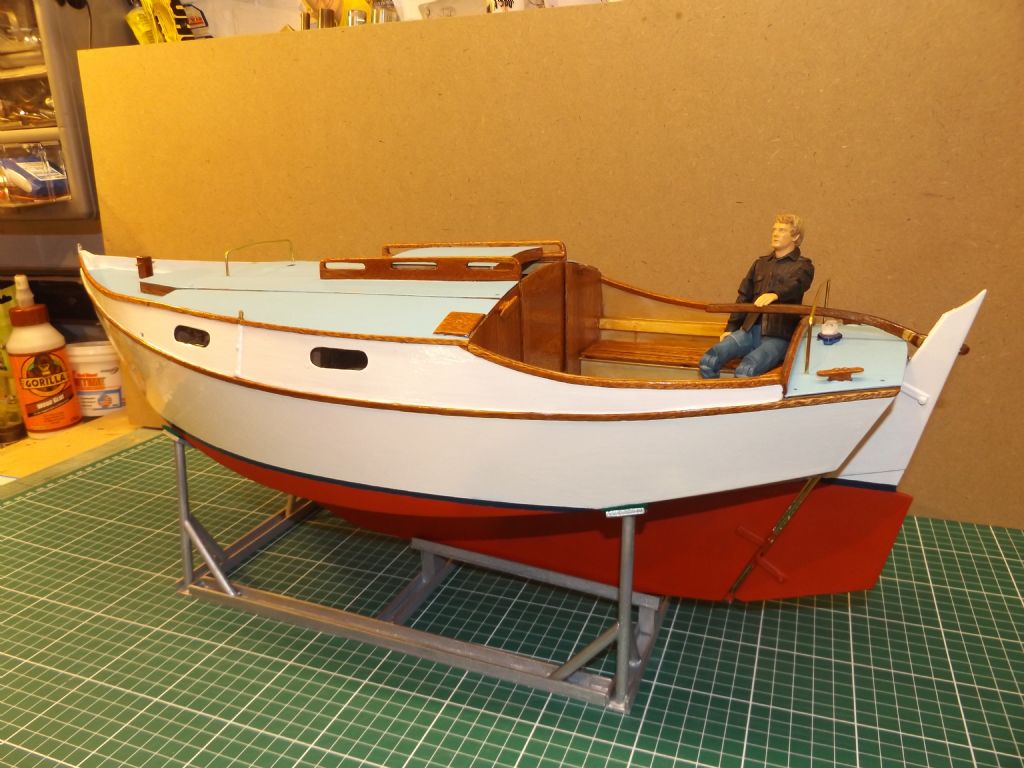
          Yes the YM designs are good looking craft, next sailing cruiser maybe the Eventide at 26' my uncle bought the book building chine boats 1963 12s & 6 pence great source of drawings 😀 I will see if I have prints of the Wild Duck drawings she has a detachable fin keel and looks good on scale cradle.

          Regards Raywd34.jpg

          Edited By Ray Wood 2 on 16/02/2019 20:27:28

          #81131
          Tim Rowe
          Participant
            @timrowe83142

            Hello Ray

            Like the cradle too. Very authentic. I would like to build that very much.

            Made lots of dust today fairing up the hull outside and rounding off the chines slightly. Got a primer coat of epoxy on this evening so in the bath tomorrow to see how much ballast is needed and where the longitudinal cg needs to go. Hopefully things will move quite quickly now the fiddly bits are done and in the real water soon.

            Tim R

            #81132
            Ray Wood 3
            Participant
              @raywood3

              Hi Tim,

              Bad luck ! I have found some spare prints of the Wild Duck drawings 😀 PM me your address & I will post them to you, off to Rye Harbour this morning to blow away the cobwebs 😯

              Regards Ray

              #81133
              Tim Rowe
              Participant
                @timrowe83142

                Hi Ray

                That's very kind. Have some fond memories of Rye and the surrounding area. I am a Hampshire Hog more or less born on the Hamble River.

                Decision made on the hatches.

                p1020174.jpg

                It will have to go off to one side but is big enough to take a buggy battery if I go that route or plenty big enough for a switch and charging point. Nothing like kicking the can down the road!

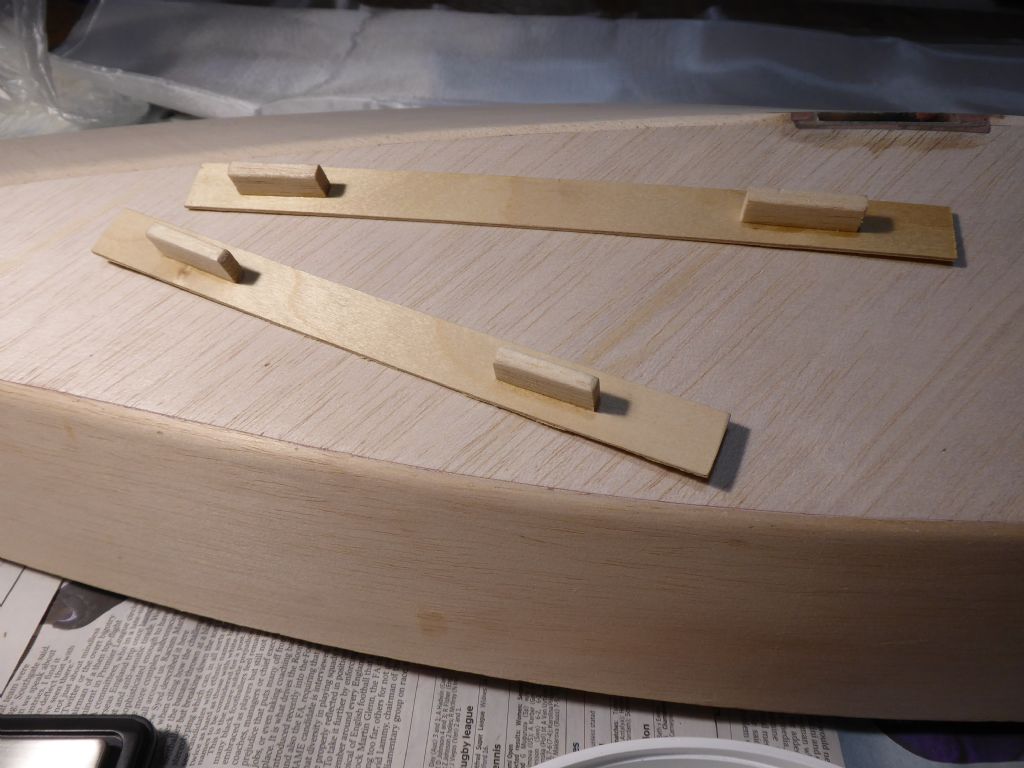
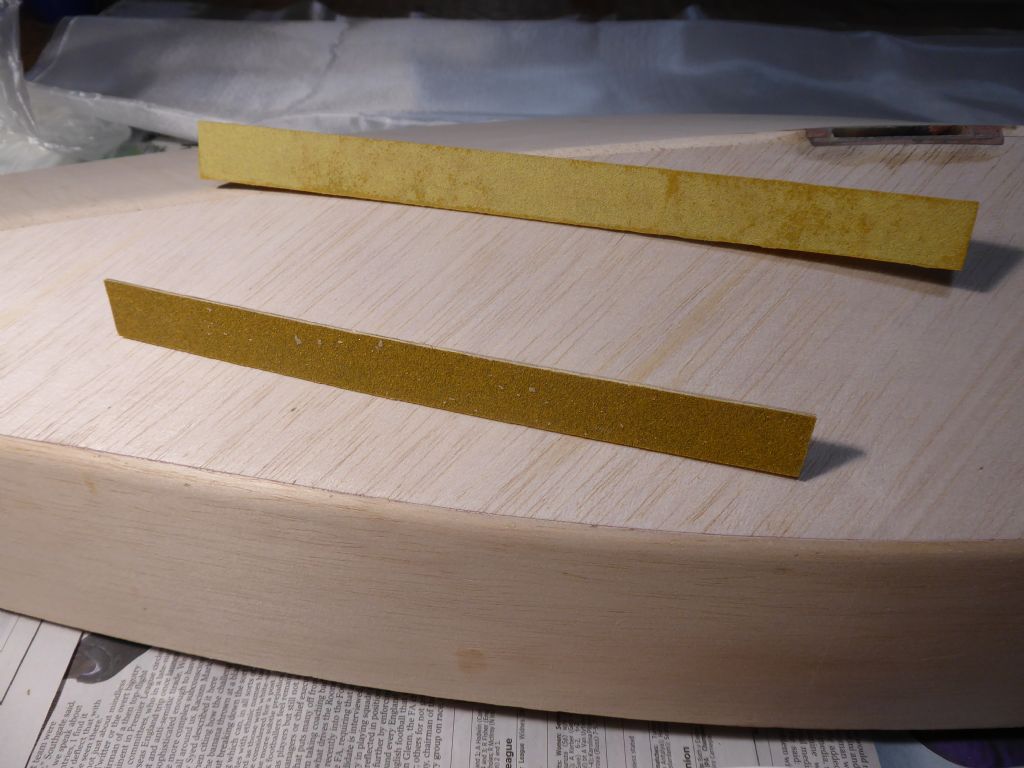
                The sanding job was not too bad and was made a lot easier by making up a couple of "long boards". These are flexible boards with abrasive stuck to one side. They are used extensively for fairing large yacht hulls, particularly those constructed from steel or alumimium. I have seen these 4m long with four people working them in sync.

                My largest one is 200mm long for the 220 grit and a bit smaller for the 180 grit.

                p1020175.jpg

                p1020176.jpg

                The paper is good quality 3M stuff so last a long time on balsa. The paper is stuck to the ply board with Pritt Stick which makes replacement easy, just requiring a sprinkle of water to make the paper damp. The handles are just blocks of hard balsa.

                The long boards make short work of any high spots and help to provide a very fair surface. The only thing to watch out for is to avoid making grooves. The boards must be given a slight sideways motion on each stroke and not just used on their long access. Like a lot of things, easier to do than describe.

                p1020178.jpg

                The primer coat of epoxy cured overnight so the hull is now sealed and watertight for the float test today. Later this will be sanded smooth to take off the nibs ready for glassing. Still no deck on.

                Tim R

                #81164
                Tim Rowe
                Participant
                  @timrowe83142

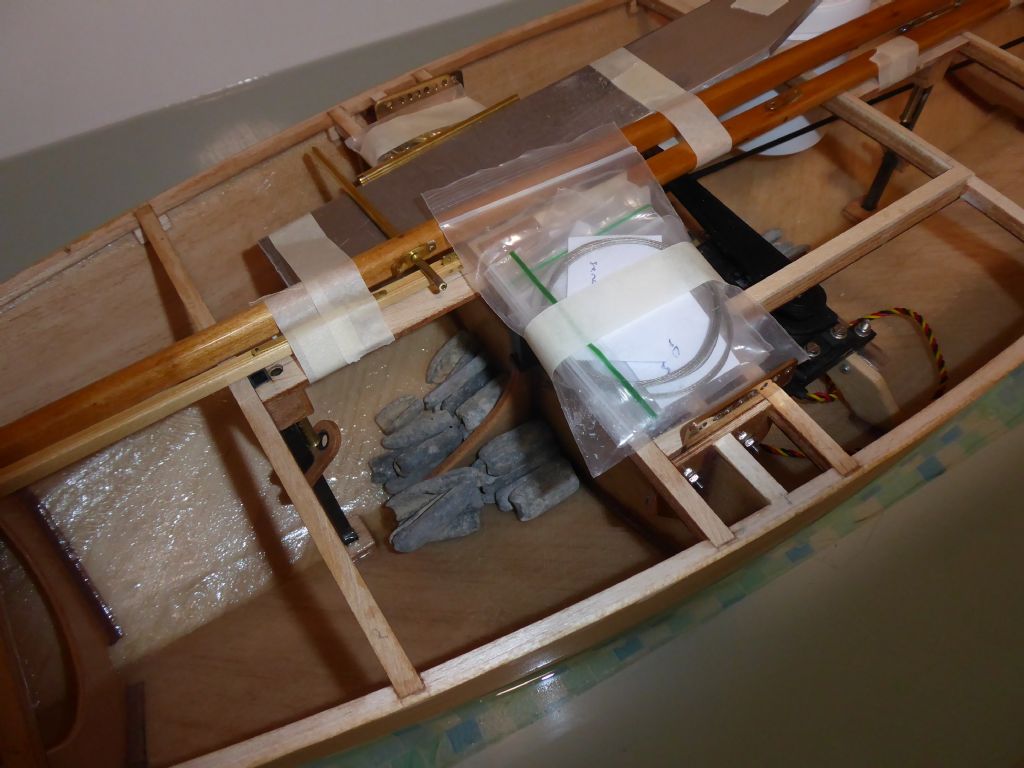
                  I am trying to get the amount or weight and its distribution as accurate as I can. This meant loading it with all the main bits and pieces before taking a bath.

                  p1020181.jpg

                  The mast was placed with its centre of gravity over the mast step and the alloy fin over the keel box. The rest of the fittings were taped roughly in place and a battery put in the hull bottom. The deck is going to weigh very little as well and sails not much either so I have not counted these.

                  p1020184.jpg

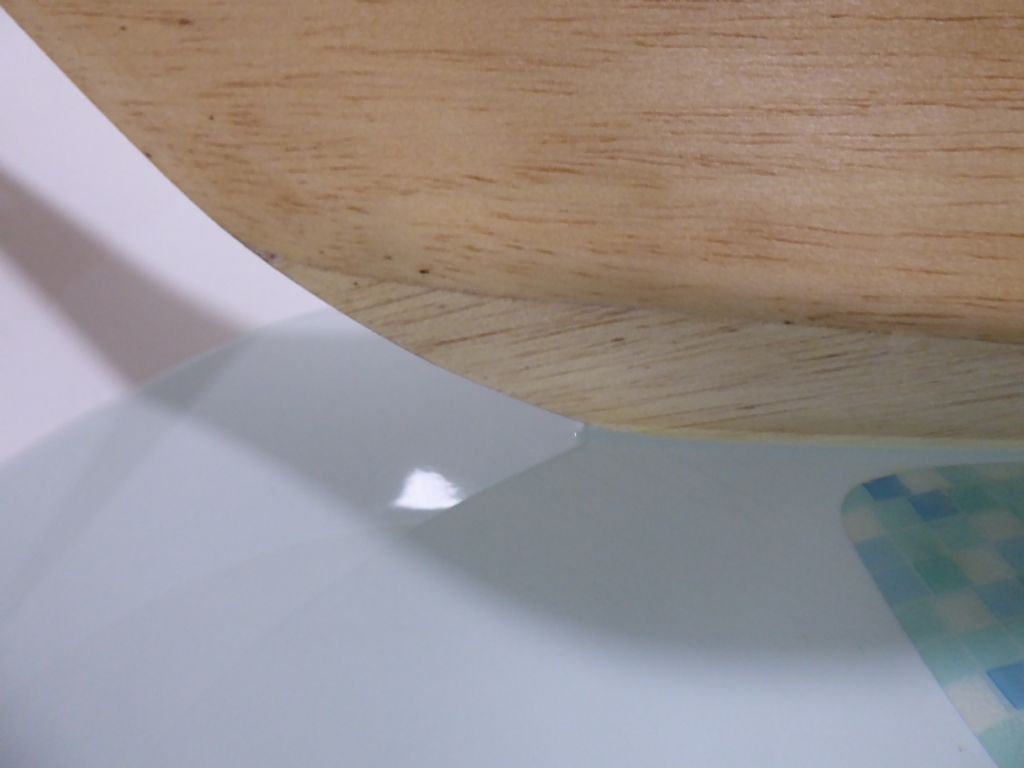
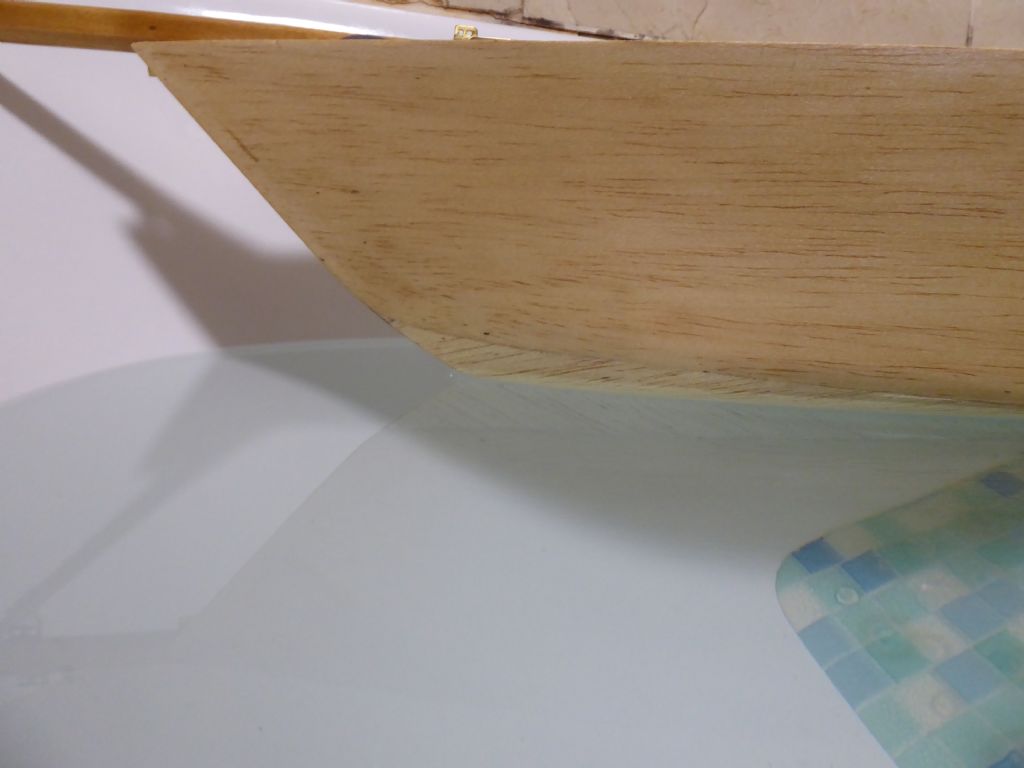
                  Un-ballasted it was very high at the bow. The chine did not come down to the waterline but the transom did not have far to go.

                  p1020198.jpg

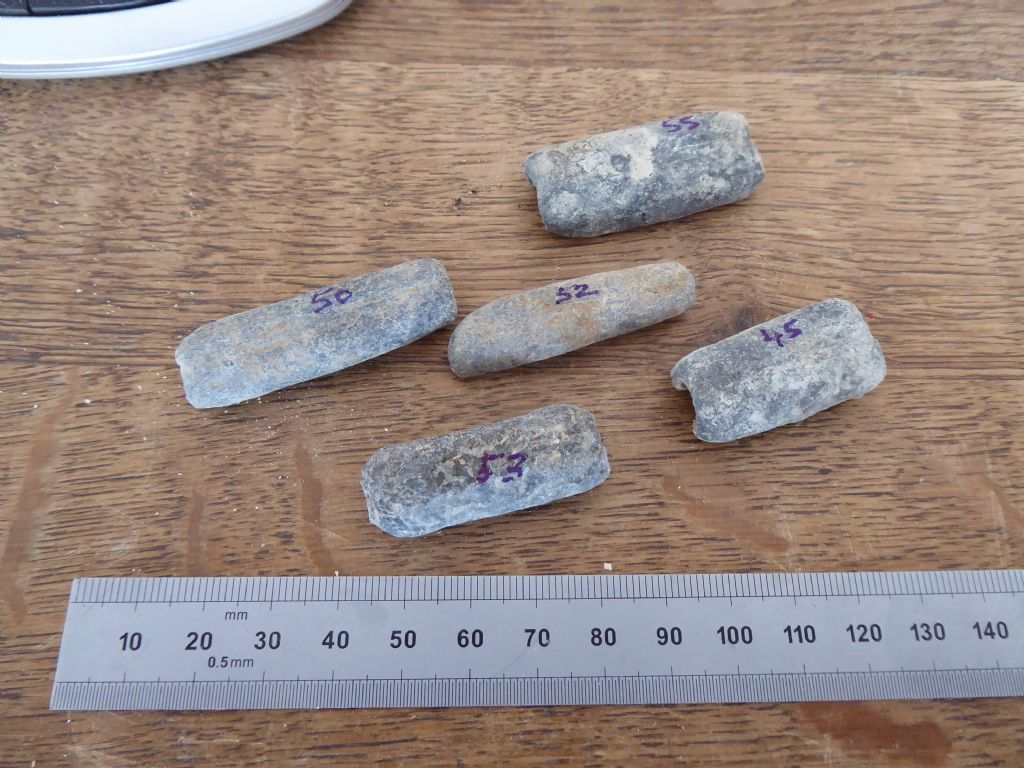
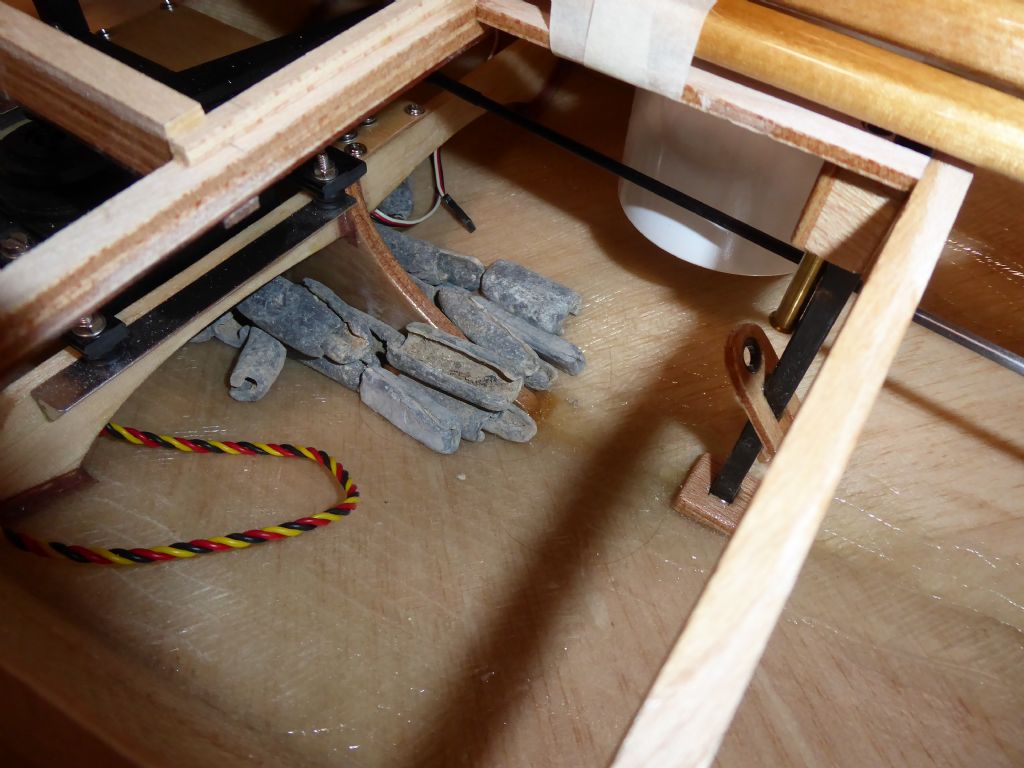
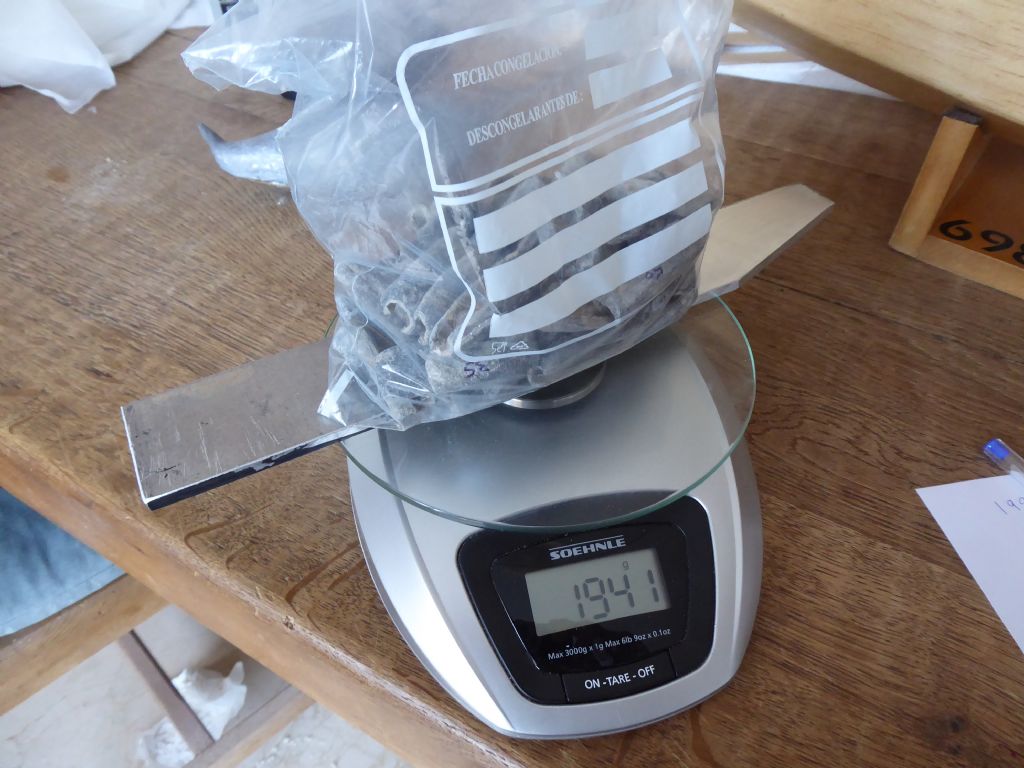
                  The first house I lived in in Spain belonged to a fisherman. He was not a tidy person and in the undergrowth were numerous short lengths of weighted lines for his nets. In all I found about 20kg of lead in little pieces like these.

                  p1020199.jpg

                  Ideal for loading into the bilge like this

                  p1020187.jpg

                  And like this

                  p1020191.jpg

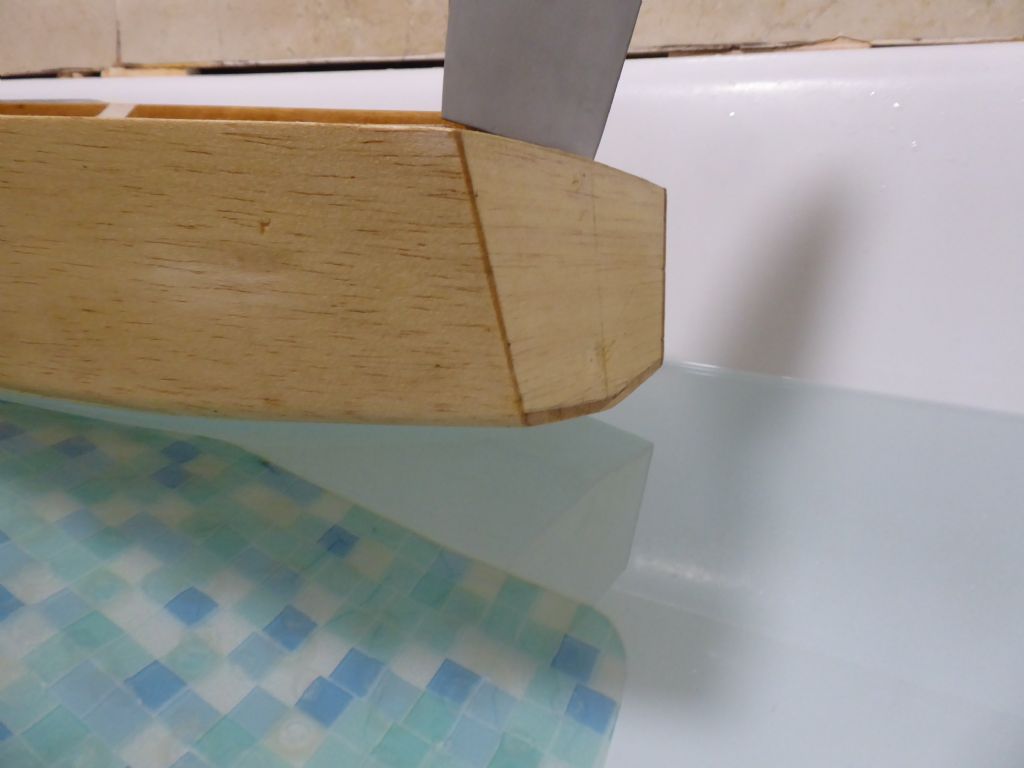
                  Until we got down to the correct waterline and longitudinal trim

                  p1020185.jpg

                  At the bow

                  p1020186.jpg

                  And at the stern. Now I know the exact amount of lead that has to go in the bulb. By ignoring the deck and sails the bulb might end up being very slightly heavy but better that way around as I can always shave a bit off. Much easier than putting on.

                  Tim R

                  #81165
                  Ray Wood 3
                  Participant
                    @raywood3

                    Hi Tim

                    Looks like a wet room will never be any good for us model boat builders ???

                    My slope soarer wings are coming on a treat 😀

                    Regards Ray

                    Edited By Ray Wood 2 on 17/02/2019 22:11:35

                    #81166
                    Tim Rowe
                    Participant
                      @timrowe83142

                      Ha Ha Ray

                      I was thinking exactly the same today laugh

                      Post some photos of the wings.

                      Tim R

                      #81168
                      Ray Wood 3
                      Participant
                        @raywood3

                        Hi Tim,

                        If I post glider pictures on here maybe shot at dawn 😯 may put a build thread on the dark side ! It's Raven by Jack Headley,design a bit of a classic Polyhedral 84" span job 😁

                        regards Ray

                        #81192
                        Tim Rowe
                        Participant
                          @timrowe83142

                          Hi Ray

                          Pretty pictures of a pretty glider. Should float well as being a light wind sloper. Notice the nautical term to keep things sweet wink

                          Tim R

                          #81195
                          Tim Rowe
                          Participant
                            @timrowe83142

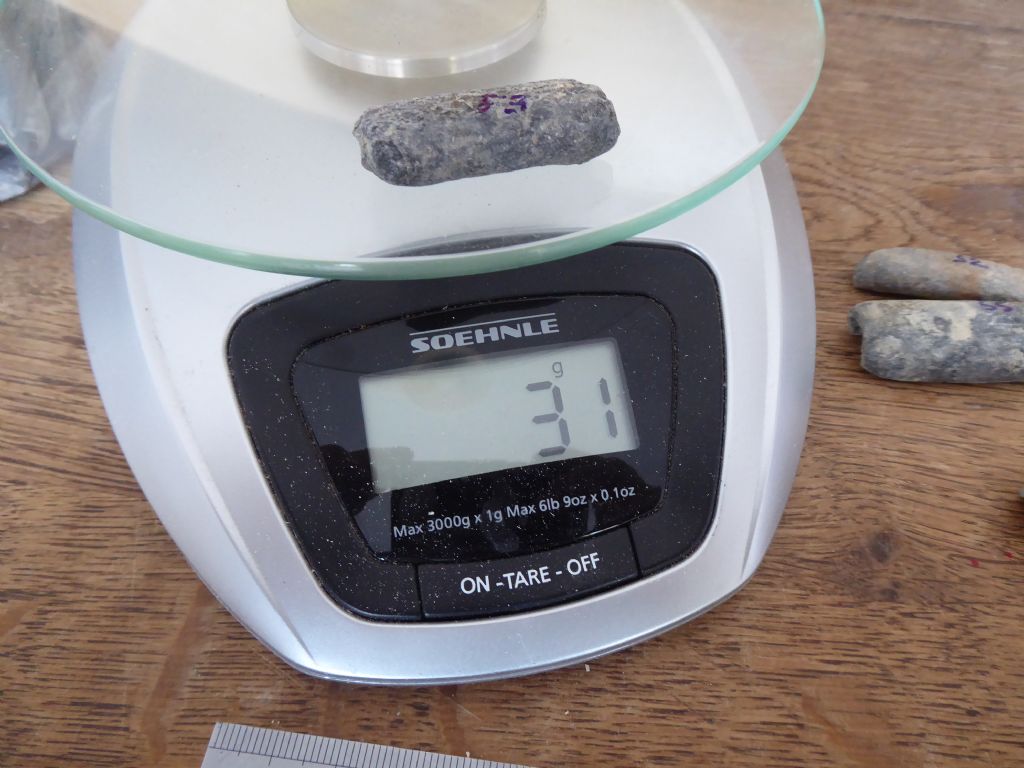
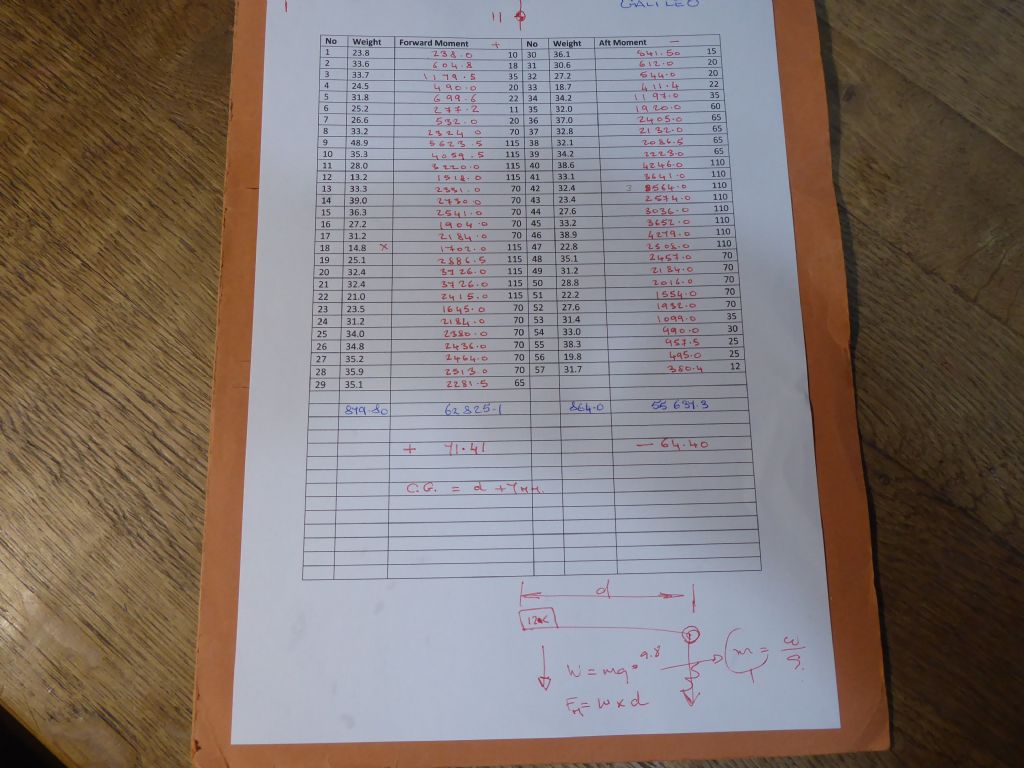
                            In one of the previous you can see that the weights are individually numbered. After taking the boat out of the bath I removed each small weight in turn to measure the weight and give it a number. I also measured its distance from a datum point which for convenience, was the hole in the keel box for the retaining bolt. This allows me to calculate the longitudinal centre of gravity of the combined weights and therefore the centre of gravity of the lead bulb. With this information I can cast the bulb with a slot in the right position to achieve the same centre of gravity. The more precise I can be, the less chance I will have to add trimming ballast. The aim of course is to get all the ballast as low down as possible on the keel.

                            p1020225.jpg

                            Here is the table and if I knew how to work a spreadsheet it would have been a whole lot quicker. On the left hand side of the table are all the weights forward of my chosen datum and on the right, all those aft.
                            The distance from the datum is recorded in mm and is given a positive value forward of the datum and negative aft.
                            Each weight is them multiplied by the distance from the datum to give a moment. The positive moments are added up and divided by the total weight of everything forward of the datum. The same calculation is done for the negative values.

                            In this instance the positive value came to 71.41mm and the negative to 64.40 (at this point one can obviously ignore the decimal points). The actual c.g. of all those weights was therefore 7mm forward of my datum. This puts it nicely within the keel section and means that there will be very little twisting force on the fin.

                            p1020192.jpg

                            This was the weight of the original bulb. Rather mangled in my unsuccessful attempts to get it off the Tufnol. 50 year old Araladite is well cured!!

                            p1020194.jpg

                            This is the weight I added for the actual float test so a fraction under the original. I was hoping this to be the other way around but the original did not have a chunky sheet winch (110g) and all the associated bits plus the original had four dry cells and the new Galileo has the buggy battery with six.

                            p1020196.jpg

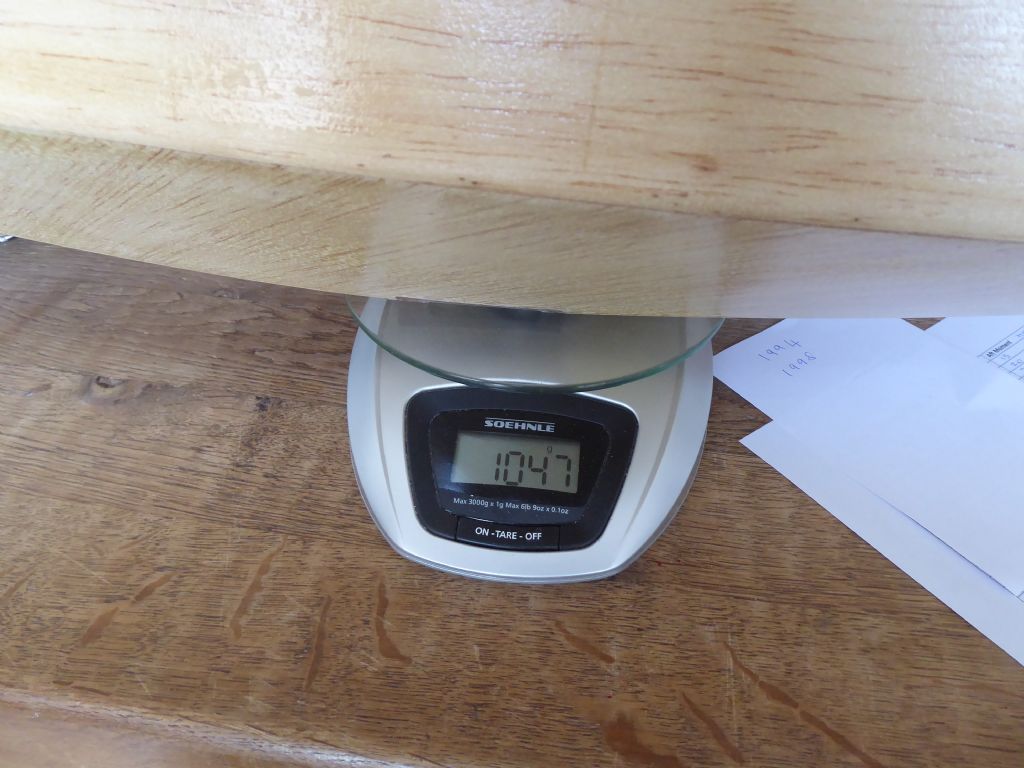
                            The hull weight has not turned out too bad at just over 1kg on an overall length of 970mm. It is however massively stronger than the original but I am not rushing to give it the Rottweiler test.

                            Tim R

                            #81202
                            Tim Rowe
                            Participant
                              @timrowe83142

                              If I can I like to do at least something everyday. Mostly I can even if it is some sketches or some research.

                              p1020217.jpg

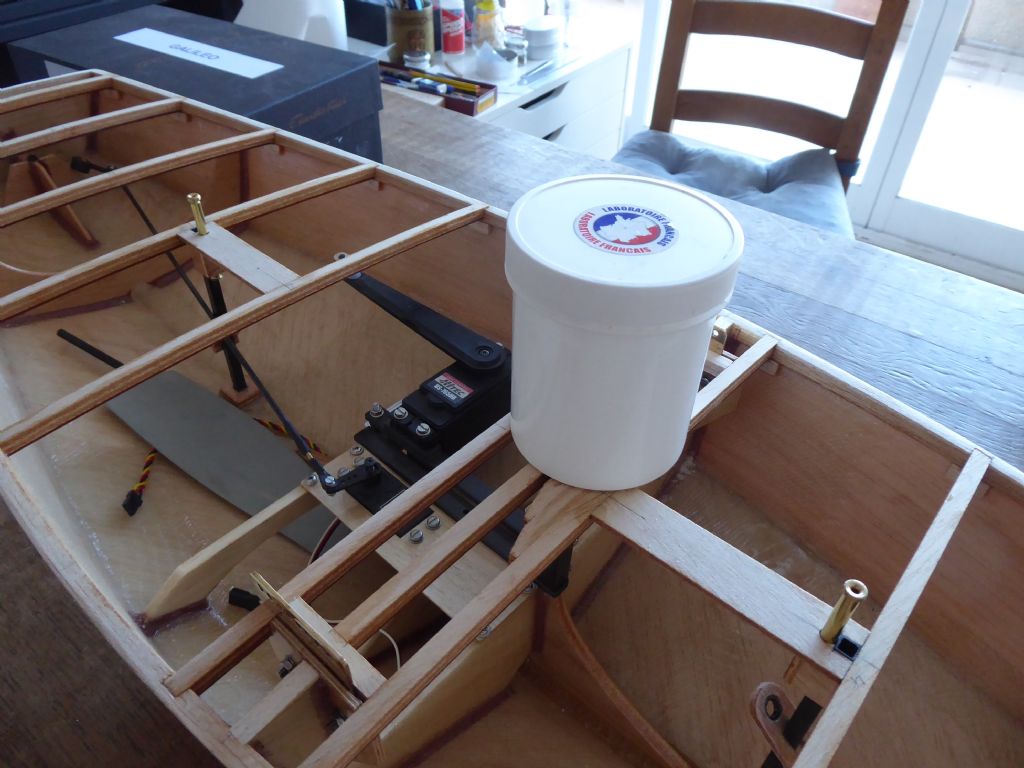
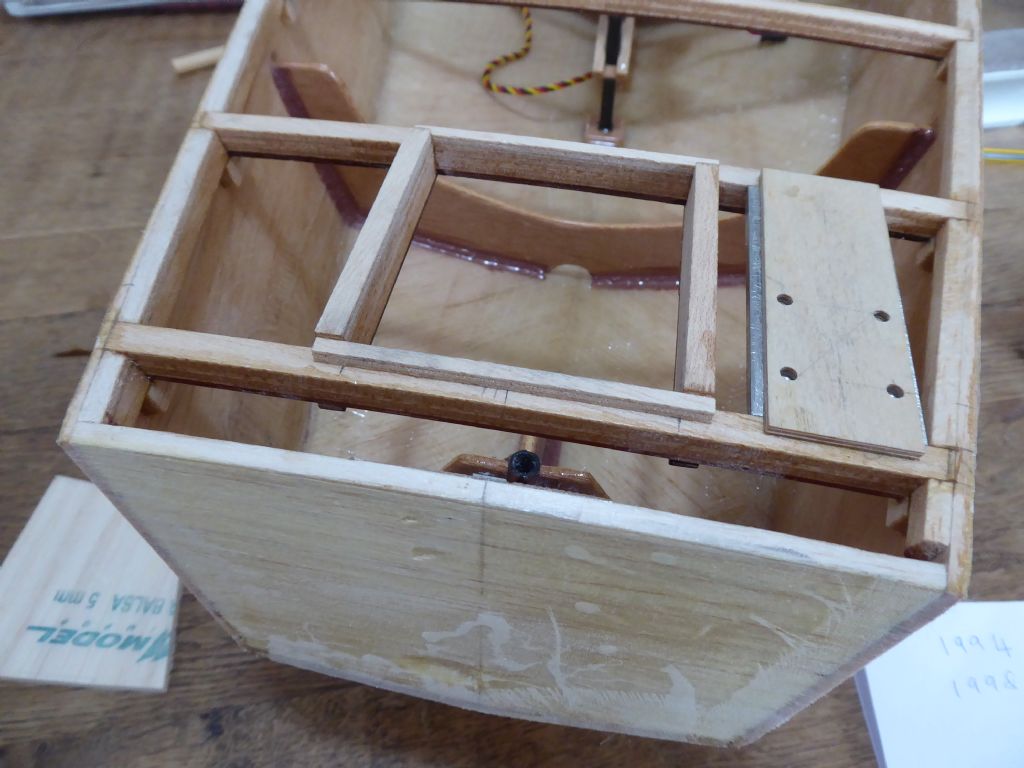
                              Here are the supports for the pot. I would have liked to have kept the decks completely clean but in the end practicality won the day. The original had removeable hatches in the centre and over the rudder. They were quite close fitting and locked in place although very easy to remove. They leaked however and as I will be sailing in open sea water I am very keel to keep leaking to the minimum. The idea at the moment is to have the main hatches semi-permanent ie screwed onto a seal and have the battery and / or switch, charging point readily accessible in the screw- top pot.

                              The small strips of soft balsa are temporary jigs to keep the supports level with the deck beams while the glue sets. They are easily sanded off later.

                              p1020219.jpg

                              Here the carlins have been added for the aft hatch. They form a coaming and the balsa sub deck will be cut around them. This will hide and protect the edge of the soft balsa deck and only the laminated beams and carlins will be seen when the hatches are open.

                              The transom is a "false" transom and has some building scars. It has some further work on the way.

                              p1020218.jpg

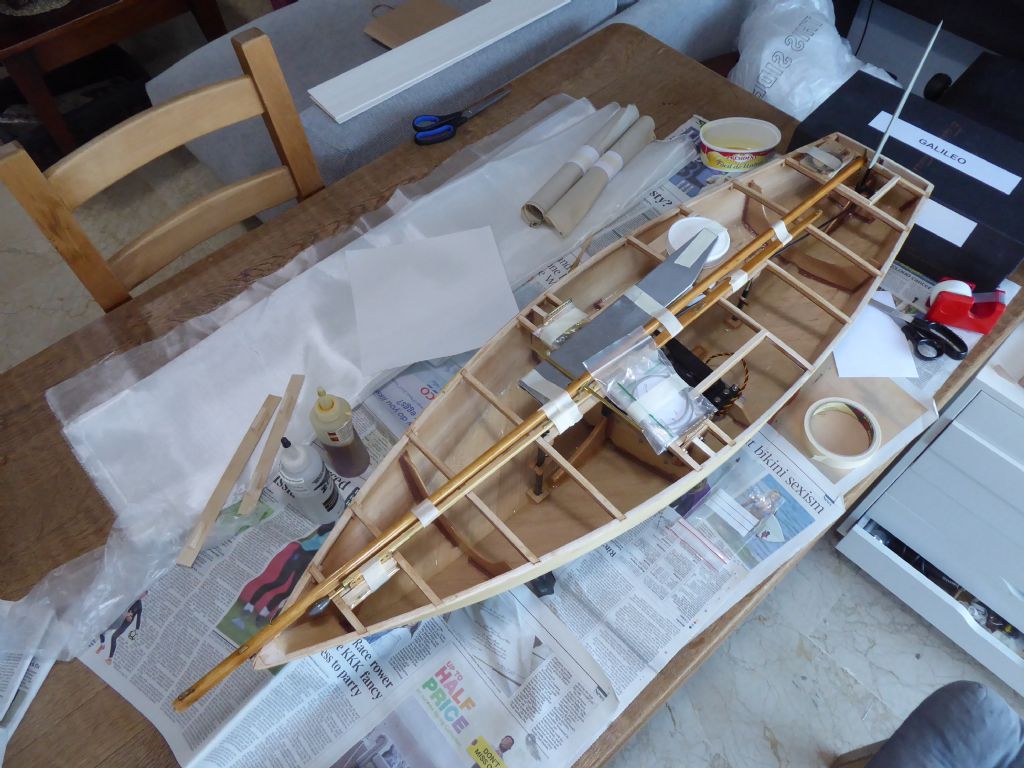
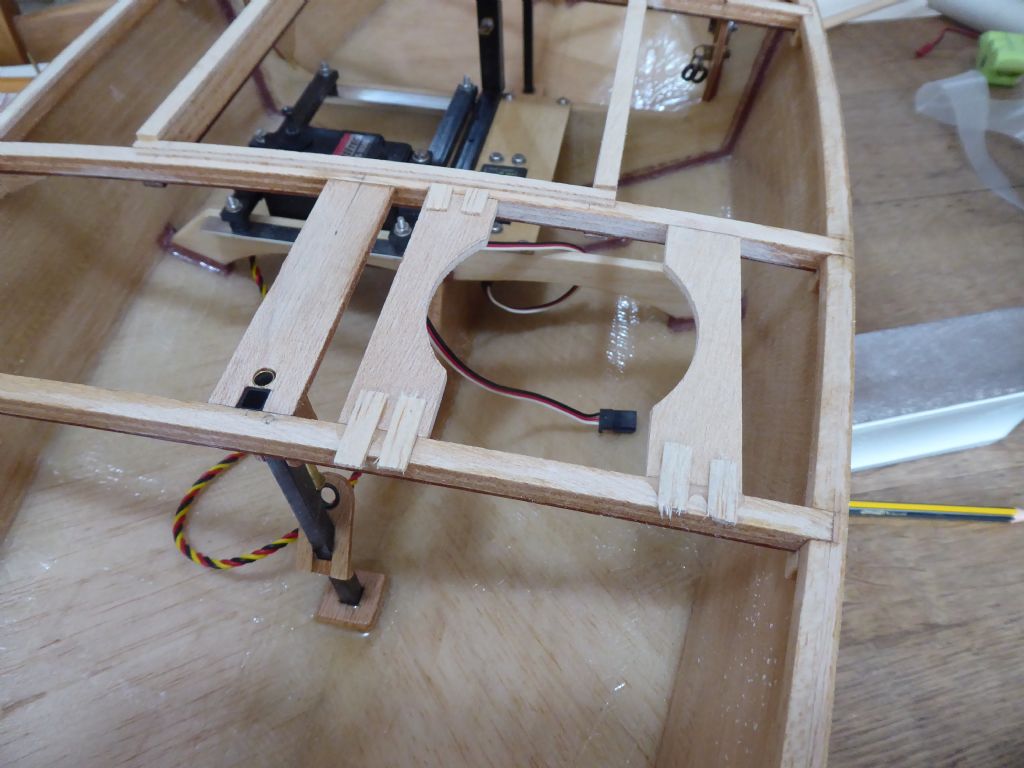
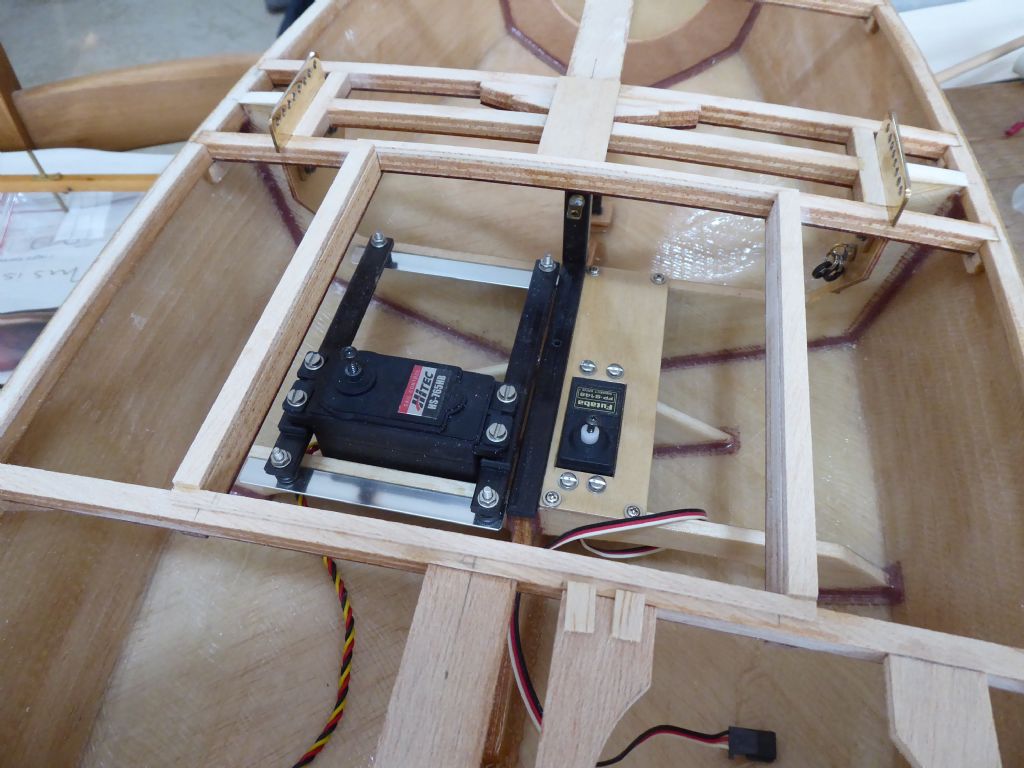
                              The carlins for the main hatch were located as inboard as possible while making sure I could get my hands in to service / replace servos etc and to re-rig the sheets incase they break or wear out.

                              On the port side you may just be able to make out a rectangular patch of additional GRP. From my aircraft building I have a fear of servos going over-travel when switched on or going faulty. The sail servo is very strong and I would prefer it to stall rather than punch a hole in the side which I think it is quite capable of doing if it got angry.

                              Still resisting putting the deck on.

                              Tim R

                              #81230
                              Ray Wood 3
                              Participant
                                @raywood3

                                Hi Tim,

                                All below decks looking good, are you going to use 1/32" ply for the deck? I bought 5 sheets of miralite 1 /64" 5 ' x 5' 20 years ago for £100 now worth £600 amazing !!

                                Back on the water tomorrow with the DF95 😀

                                Regards Ray

                                #81233
                                Tim Rowe
                                Participant
                                  @timrowe83142

                                  Hi Ray

                                  Thanks. Below decks are done except that just before the deck does finally go on, I will use an angled brush to seal the deck beams, plates and carlins etc. This will mean that all the interior woodwork is encapsulated with thin epoxy and won't be able to soak up moisture. Apart from preserving the wood it will stabilize the natural moisture content of the wood and prevent movement and cracking of the joints and paint film. I say this hopefully.

                                  The deck will be a ply of sorts but not in the traditional sense. I can tell you that it starts off with 3mm soft balsa, What happens next I will reveal later and I hope will be a good substitution for the superstructure that I am omitting.
                                  I have kept the undamaged part of the old deck as it acquired a lovely patina over the years. Part of it has already gone on the lid of a jewelry box I made for Evelyn my wife for Christmas.

                                  p1020220.jpg

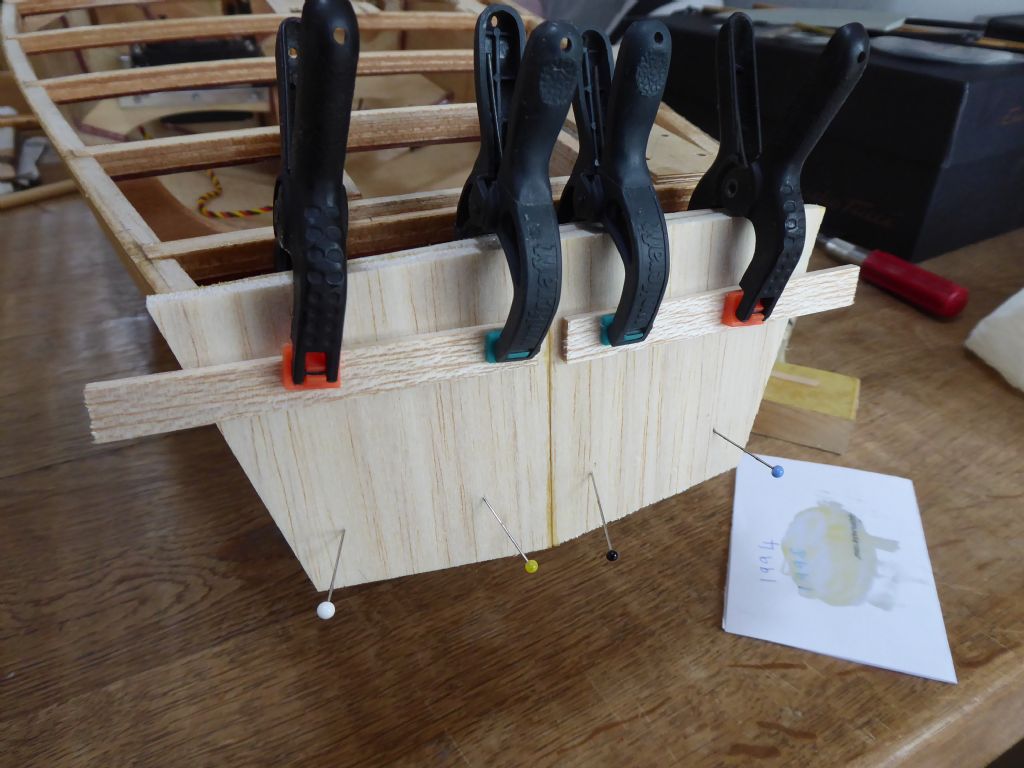
                                  The last bit of work to do on the transom was to face it with 4mm soft balsa with the grain running vertical. I am not keen on dead flat surfaces and this facing gives me a little bit of meat to gently sand the transom into a gentle curve.

                                  p1020223.jpg

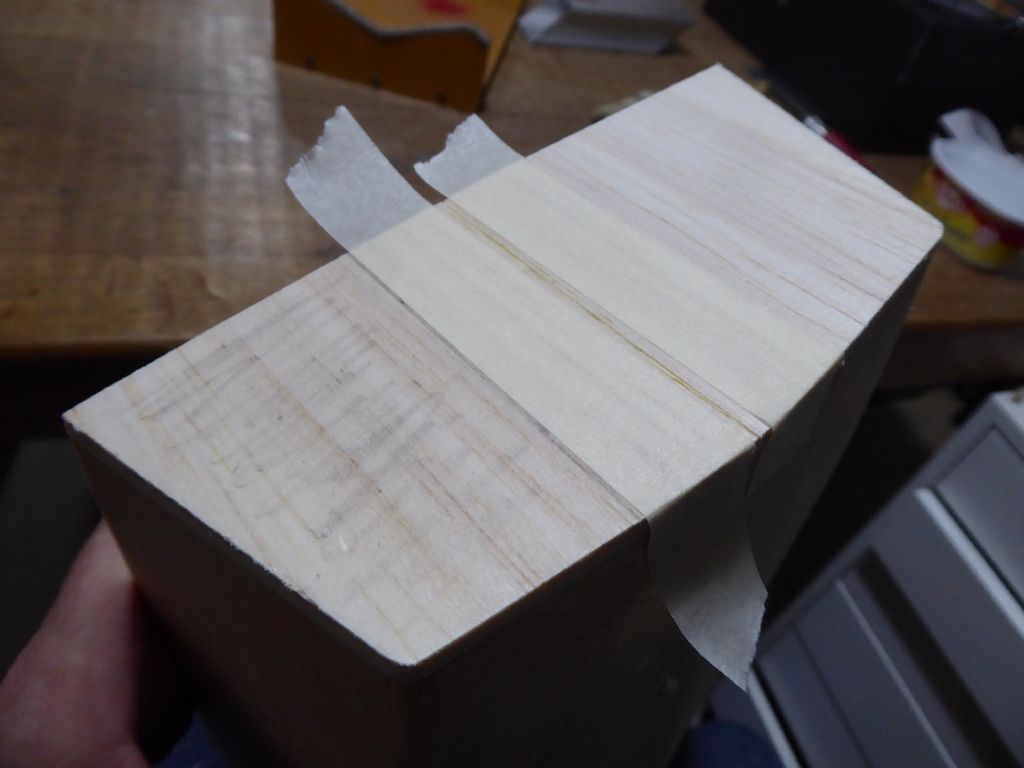
                                  I use masking tape a lot to give me a sanding guide. The starboard side of the transom has been sanded making a facet with the inboard edge defined by the tape and the outboard edge marked with a pencil line. That controls how much I have to sand off. The port side is ready to go and the pencil tracery is there to let me know how I am doing. As the marks get sanded off I know I am getting close to the tape and have to be a bit careful.

                                  p1020224.jpg

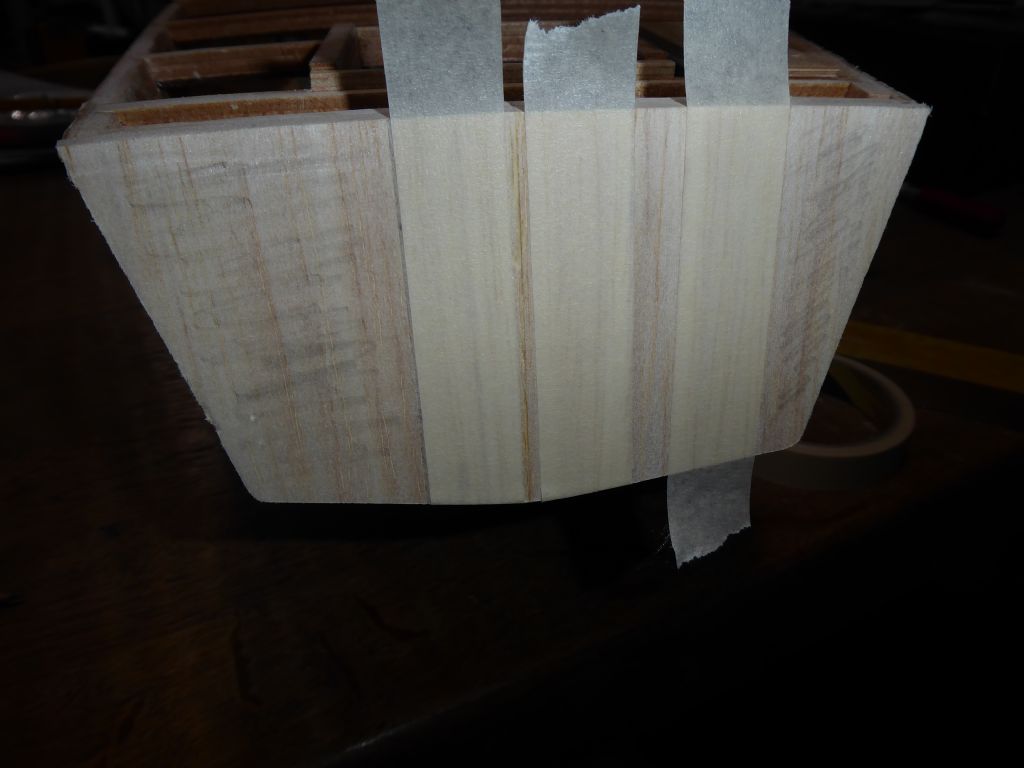
                                  Now the starboard side has been taped up and marked to create another facet. This will be repeated on the port side. When these are sanded the transom will have four facets approximating to a curve but with the geometry controlled and symmetrical.

                                  It is then simple and quick to round off the ridges to obtain an even curve. The edges were then sanded flush with the topsides and the hull bottom and again controlling the symmetry especially on the centre section of the lower lip of the transom where any discrepancy would show.

                                  The sharp edges were broken with a tiny radius in preparation for applying the extremely light weight glass cloth.

                                  Next job, the keel bulb.

                                  Tim R

                                  #81271
                                  Tim Rowe
                                  Participant
                                    @timrowe83142

                                    Hello Ray

                                    What was the weather like for your DF95 outing.

                                    I am getting itchy feet to get something on the water. Realistically I think Galileo is about 2 months away. Not so much work to get the IOM afloat but for that I need to buy some bits.

                                    Tim R

                                    #81272
                                    Ray Wood 3
                                    Participant
                                      @raywood3

                                      Hi Tim,

                                      Unfortunately the management put the block on the sailing, walked round the grounds of Leeds Castle instead, but not much wind anyway,it's been 17 deg here today lovely weather for Being in the office 😀I

                                      Definitely sailing this Saturday!

                                      Regards Ray

                                      Edited By Ray Wood 2 on 25/02/2019 21:37:26

                                      #81273
                                      Tim Rowe
                                      Participant
                                        @timrowe83142

                                        The new lead bulb is turning out to be a lot of fun.

                                        The original would not come off the Tufnol fin and got mangled in the attempt. It was also a homemade section probably influenced somewhere along the line by Vic Smeed's book "Boat Modelling". By modern standards it is very dumpy and extensive tank testing for RC racing yachts shows that long slim bulbs have lower drag. They can be so thin that they become fragile so a compromise is reached on the diameter to length ratio and usually they are reinforced with a rod. As is happens, ultra slim keels are not as efficient at full size and there is a very definite optimum beyond which increasing the length does nothing and causes unwanted side effects.
                                        p1020227.jpg

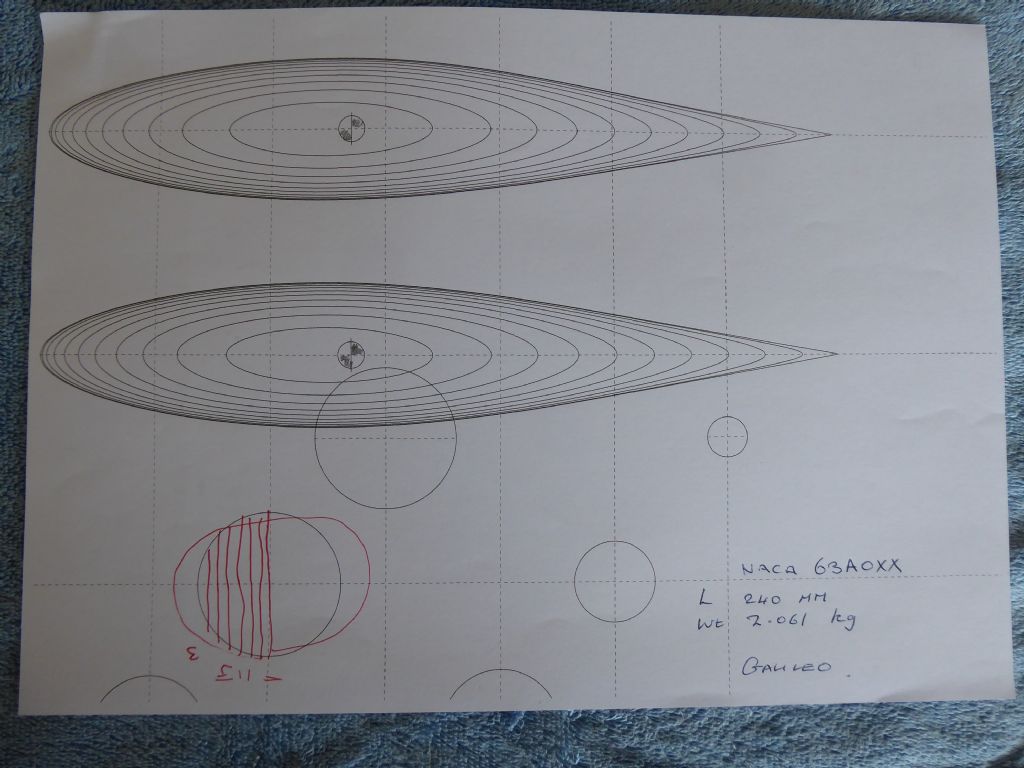
                                        This is the design for my keel and before I go any further I should acknowledge the use of Marko's Bulb Calculator that you will find if you click the title. Thank you Marko!

                                        It has a selection of aerofoil sections where you can decide the ratios and proportions. You can invent your own if you like. I decided that I wanted the bulb to be no longer than 240mm and that it should weight a fraction over my target weight of 1.49 kg. The reason for going slightly overweight was to have a shrinkage allowance (roughly 1.5%) and to give me something to dress smooth if the casting comes out a bit lumpy. I chose the option that gave me 2.06 kg and chose to divide it into 2mm slices as that will be the thickness of the balsa sheets I will be using to make it.
                                        Conveniently the cg is marked on the drawing so there is all the information you need.
                                        p1020229.jpg

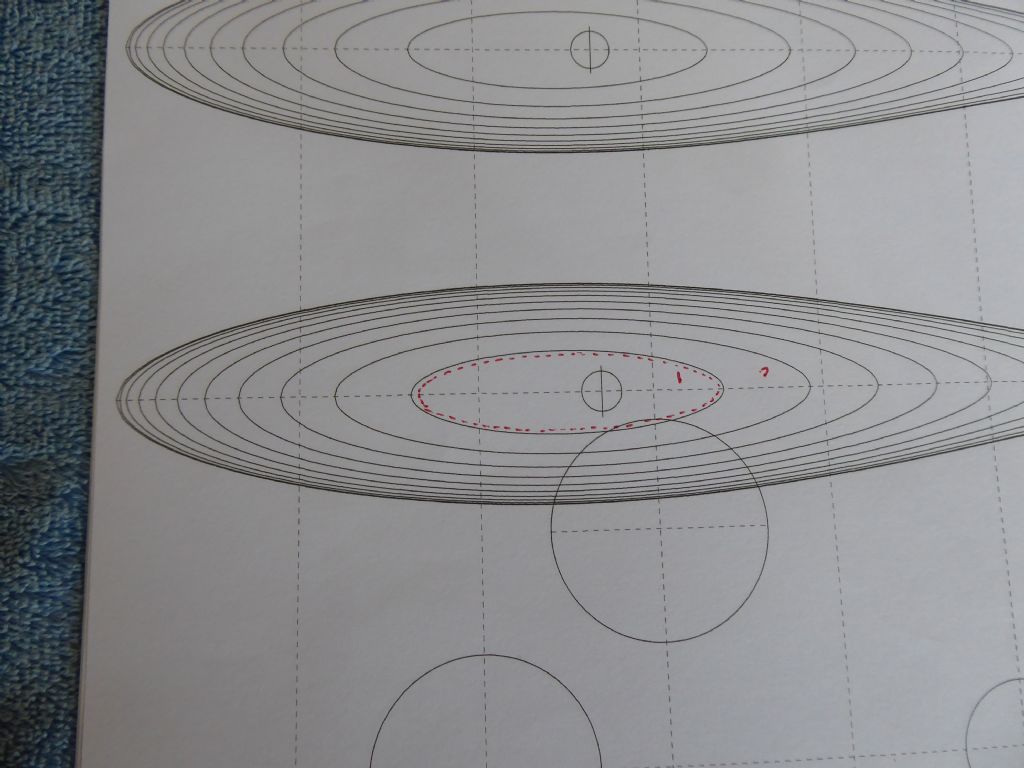
                                        I printed off a number of sheets and outlined each laminate in red and numbered them 1 – 11. They are then cut out roughly and then stuck to the balsa sheet with Pritt Stick (easy to remove the paper later) The laminates are done in pairs and sanded to the outline using my Proxxon disc sander which is the most efficient dust maker I have ever known.
                                        p1020303.jpg

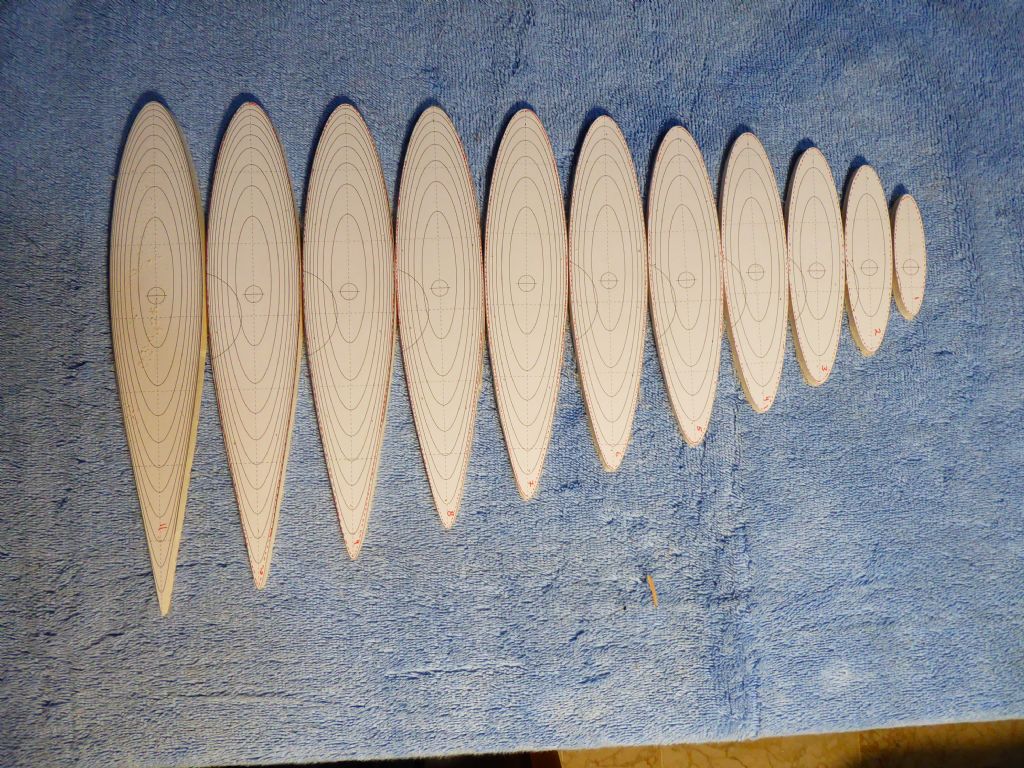
                                        Here are the 11 pairs of laminates ready to be stuck together like building a "bread and butter" hull. The printed reference lines makes it easy to line them up for gluing.
                                        p1020305.jpg

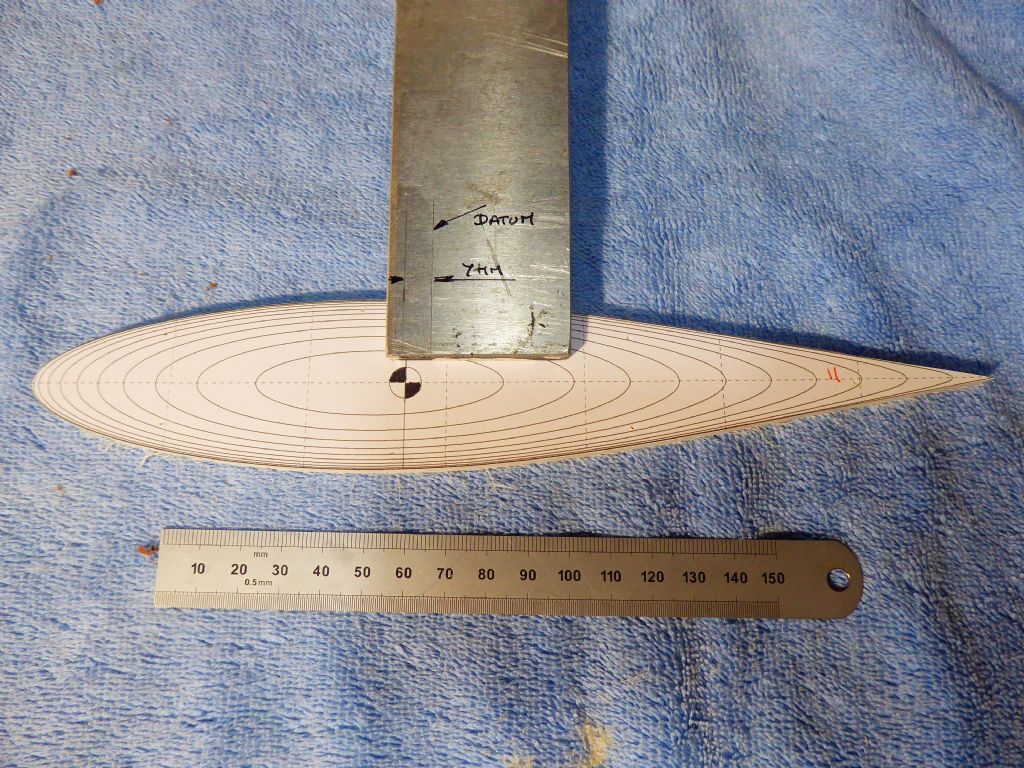
                                        The two centre laminates were made from 3mm balsa to give me the 6mm slot for the alloy fin. This makes the bulb slightly oval in cross section and will increase the weight very slightly to my advantage. The slight ovality actually looks very nice.  Here the cg is lined up with the 7mm offset that I previously calculated from the loose weights.
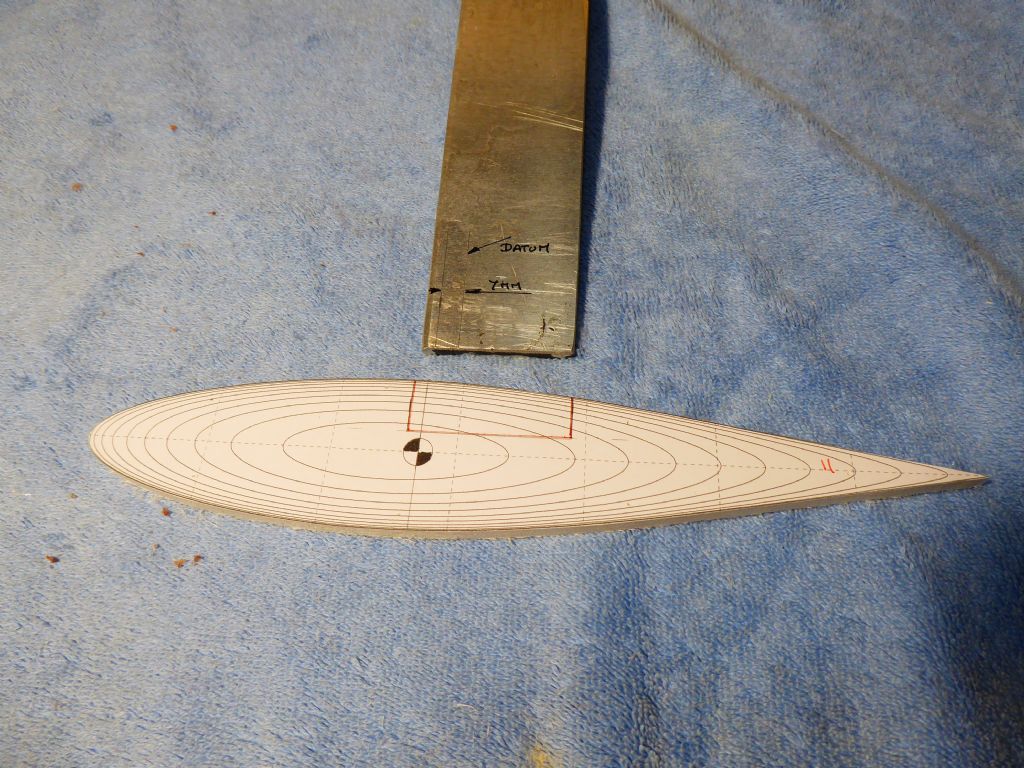
                                        p1020307.jpg

                                        The 3mm pieces were marked with the slot and cut out.
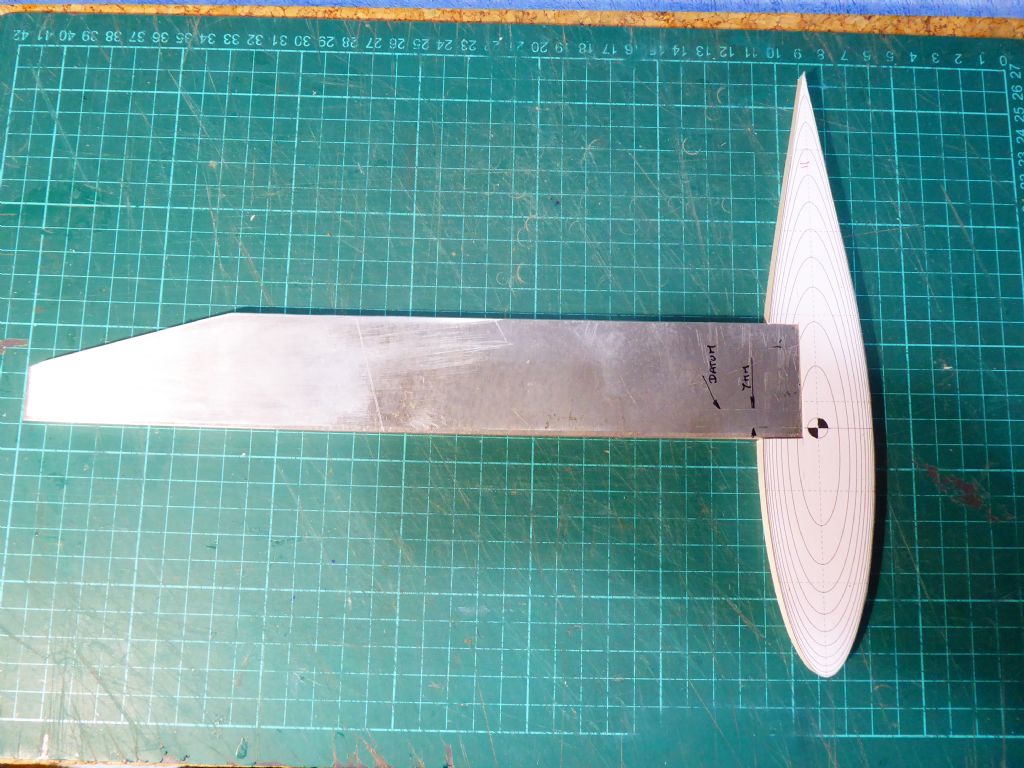
                                        p1020308.jpg

                                        To allow the fin and bulb to fit like this.
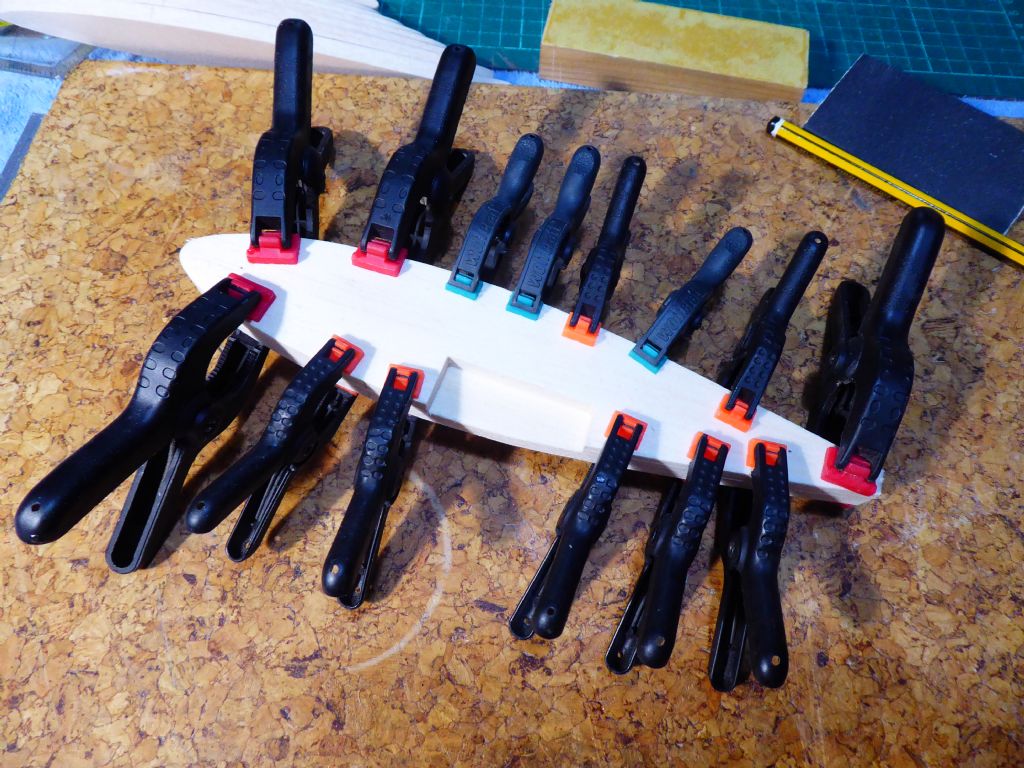
                                        p1020309.jpg

                                        Sticking the laminates together in pairs initially for easy clamping.
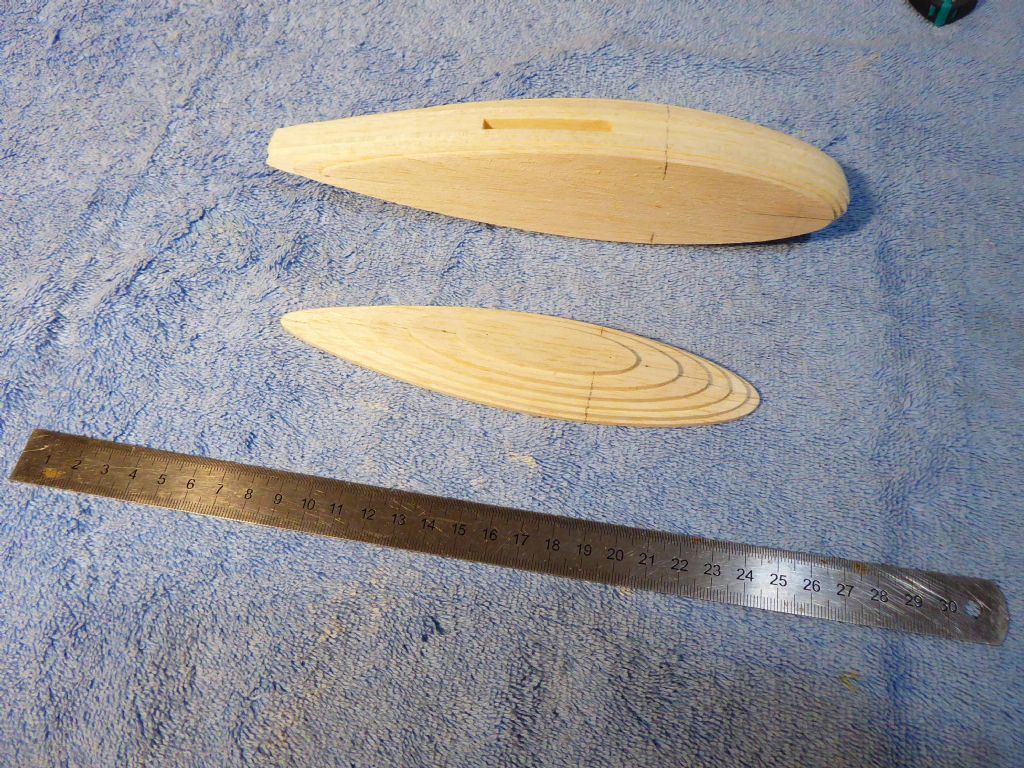
                                        p1020310.jpg

                                        And gradually building them up

                                        p1020311.jpg

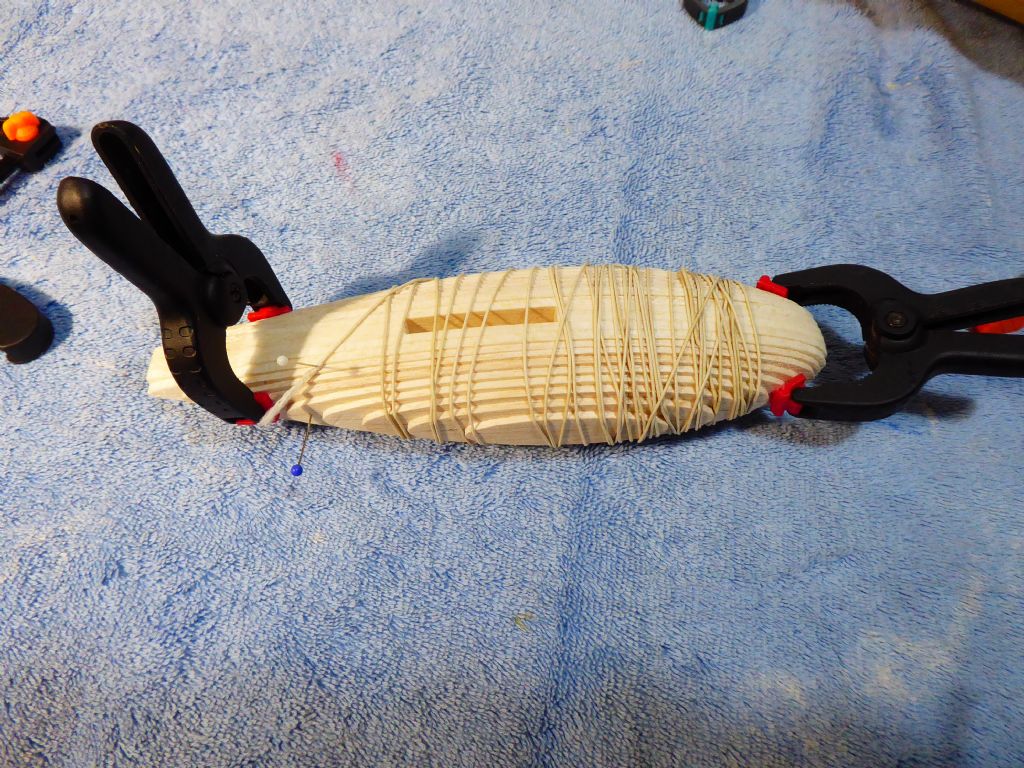
                                        To finally build up the basic shape of the pattern. Here I am using elastic to hold everything tightly together while the aliphatic glue dries.
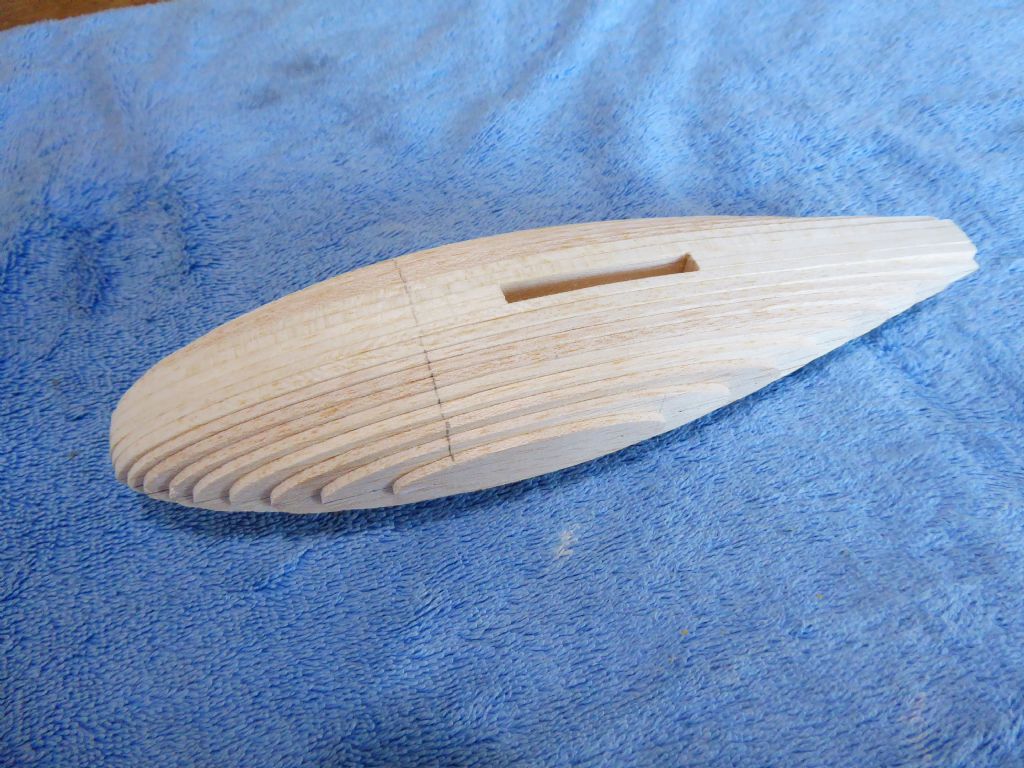
                                        p1020313.jpg

                                        The reference lines can be seen that makes sure each section is in the correct place.
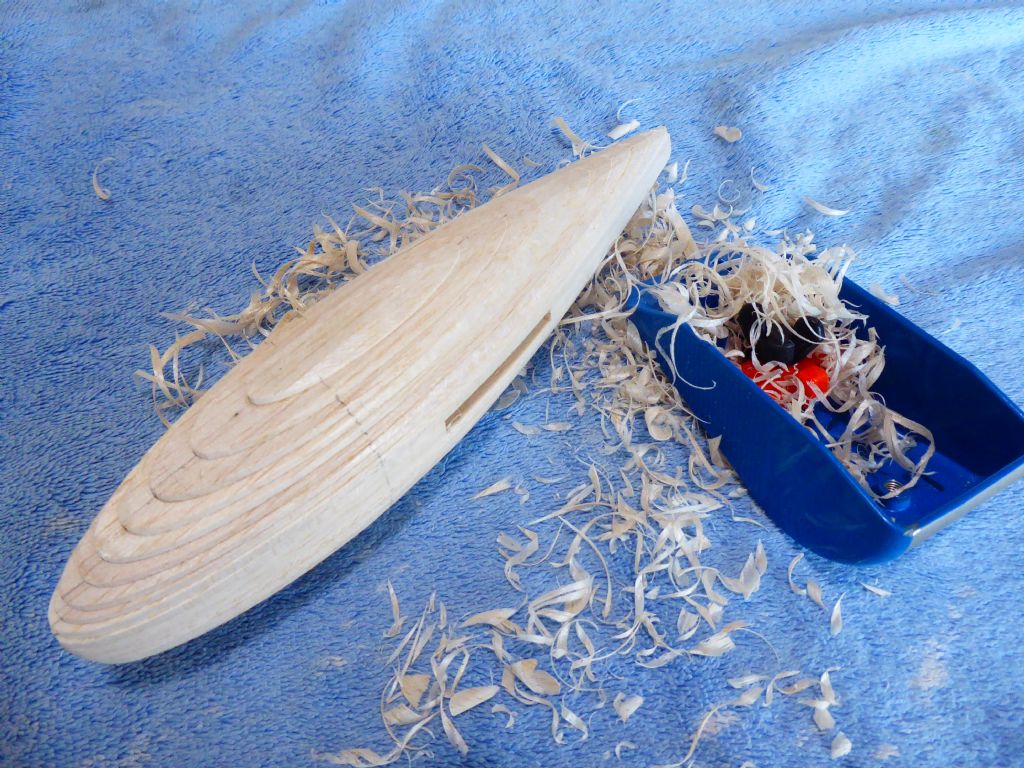
                                        p1020314.jpg

                                        First work done with the Davids plane taking the plank fairly close to the joints
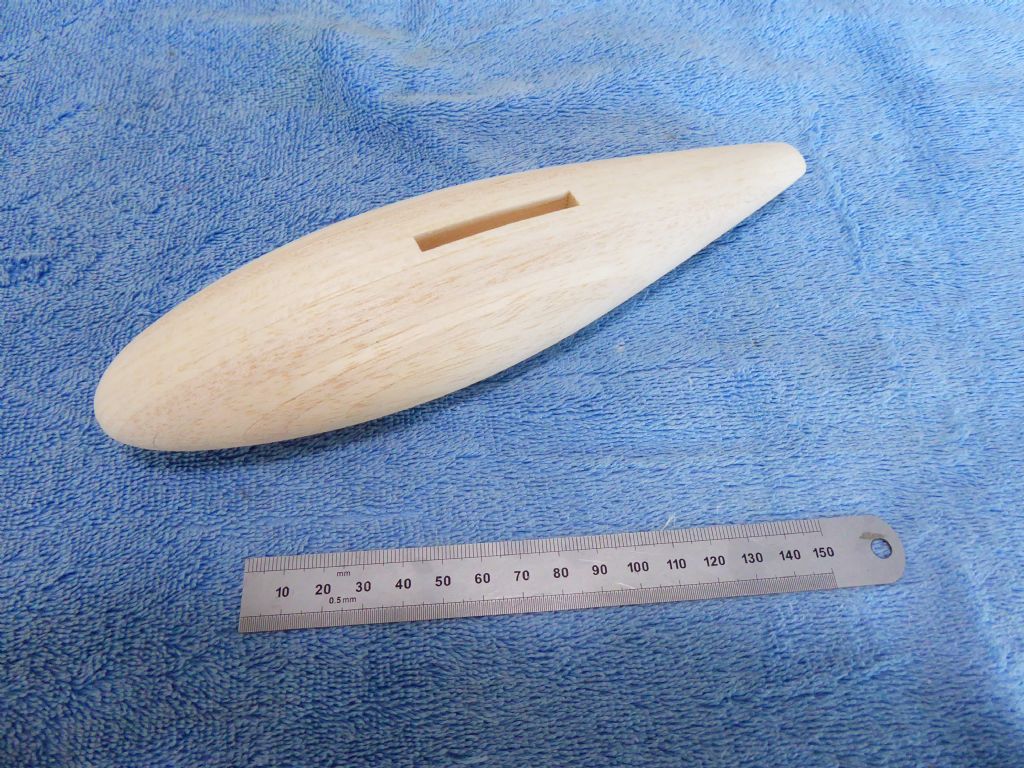
                                        p1020315.jpg

                                        Sanded smooth with 240 grit and 320. As soon as the lines between each piece are sanded out you have reached the correct size and shape. Really quick in balsa with about 15 minute using the plane and about 1/2 sanding.
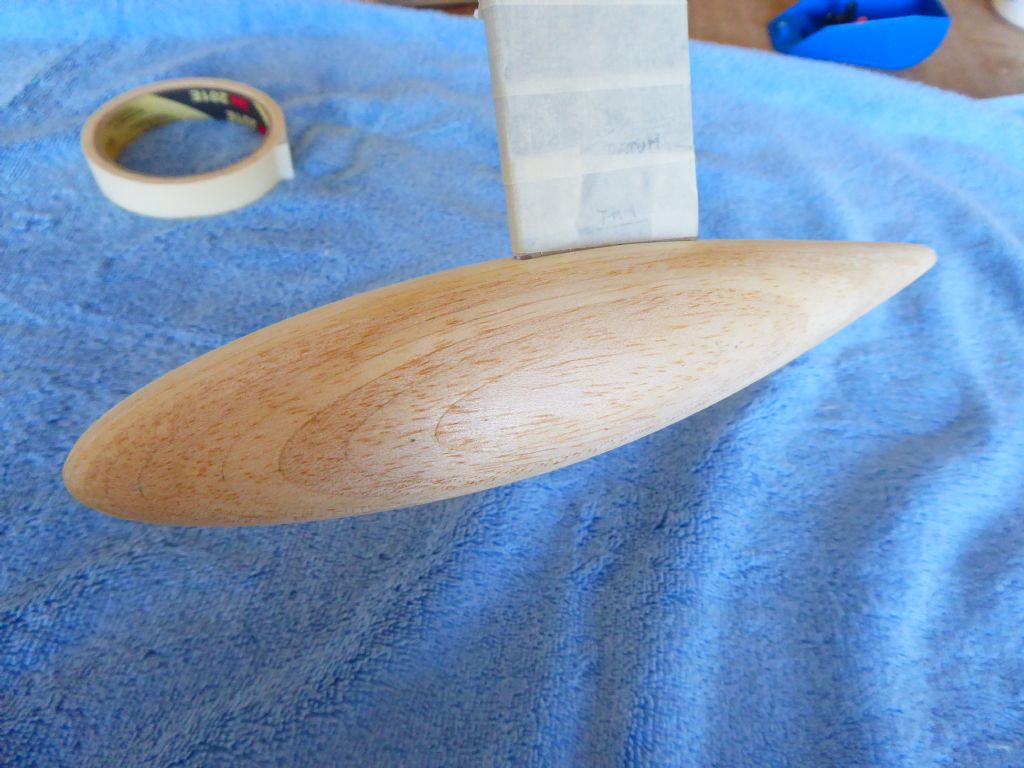
                                        p1020316.jpg

                                        Then a coat of sanding sealer to harden it up a bit and fill the grain before final painting.

                                        Tim R


                                        #81274
                                        Tim Rowe
                                        Participant
                                          @timrowe83142

                                          Hi Ray

                                          Hasn't Leeds castle got a moat for goodness sake wink

                                          Nice place but a long way from Leeds.

                                          Regards

                                          Tim R
                                          #81276
                                          Ray Wood 3
                                          Participant
                                            @raywood3

                                            Hi Tim,

                                            Yes some brilliant water around the Castle, thought I was buying a time share there, £29 each admission, but the tickets last us a year, there is also a maze which I would still be in it if our grandchildren hadn't rescued me 😀

                                            Regards Ray

                                            #81277
                                            Tim Rowe
                                            Participant
                                              @timrowe83142

                                              Hi Ray

                                              I know the maze having been there myself. They give you a year on the ticket just in case you don't make it out! You were lucky, a very narrow escape. I found it quite scary.

                                              Never did find out why it is called Leeds castle in the middle of the garden of England.

                                              Days starting to get warmer so the beginnings of the sea breezes. That means safer sailing off a lee shore in the harbour. If anything goes wrong at least the boat will drift in.

                                              In the summer you could sail all around Mallorca on a reach. A great column of hot air rises out of the centre of the island sucking air in from all around. Mind you, you would need quite a fast yacht as it is a long way. I think it has been done by a big cat.

                                              Tim R

                                              #81282
                                              Ray Wood 3
                                              Participant
                                                @raywood3

                                                Hi Tim,

                                                Many a finger tip at risk with a David plane, essential tool 😀 one more bulb pattern and you'd have a pair of tip tanks for a Jet Provost 😁 Oops

                                                Regards Ray

                                                #81305
                                                Tim Rowe
                                                Participant
                                                  @timrowe83142

                                                  No more excuses. The deck has to go on sometime so a final check that everything is sealed, no sharp glass fibre strands and all the dust is vacuumed out. Of course one the deck is on it will not be possible to seal the underside so this has to be done beforehand.
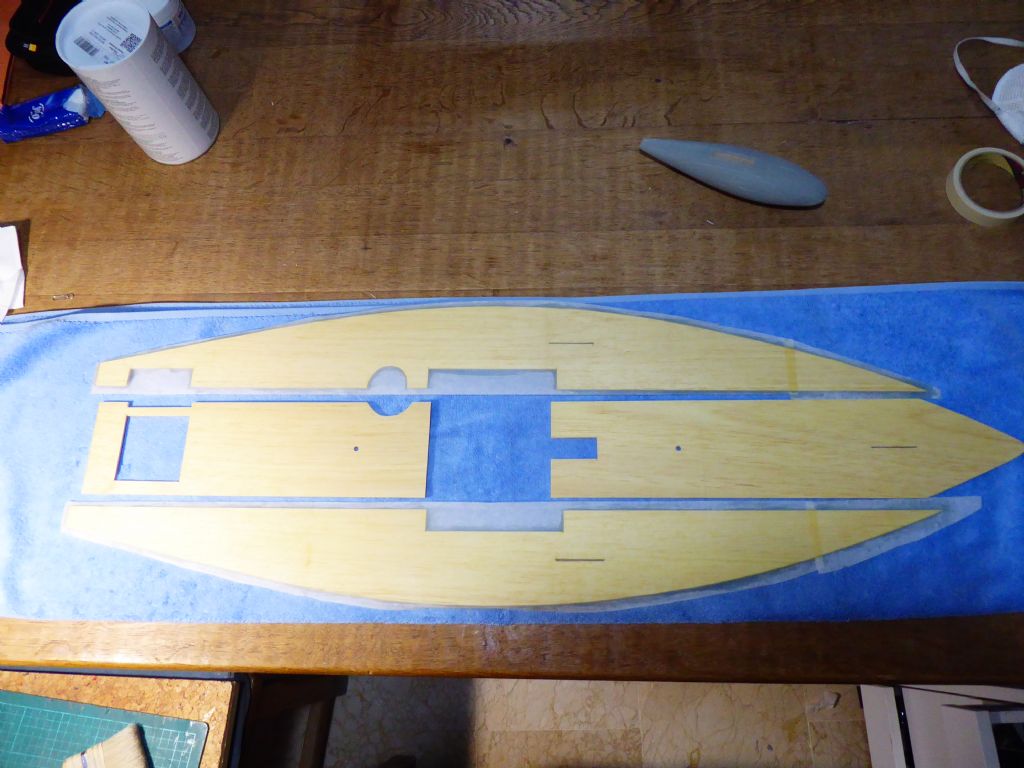
                                                  p1020319.jpg

                                                  Here are the sub-deck panels with the slots for the forestay and shroud fittings, the slot for the hard point mast step, the slot for the Go-Pro mount, the rough hole for the pot and the cut-outs for the hatches. Using the same method for the initial sealing of the hull, the underside of the deck is covered with a layer of heavyweight tissue fixed with epoxy. Only a few grams of material added keeping the epoxy to the bare minimum to just fill the tissue.

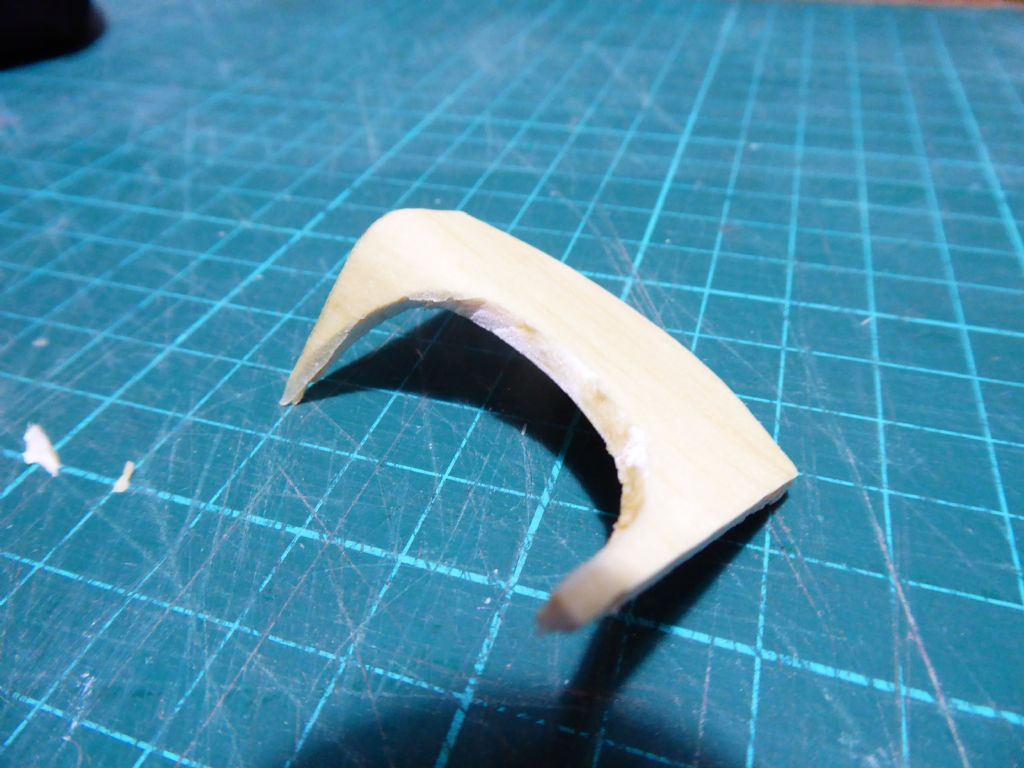
                                                  p1020321.jpg

                                                  p1020320.jpg

                                                  The tissue give the balsa incredible toughness. These two photos show a piece of off-cut from the pot bent over at 90 degrees. No cracks in either the balsa or the tissue.
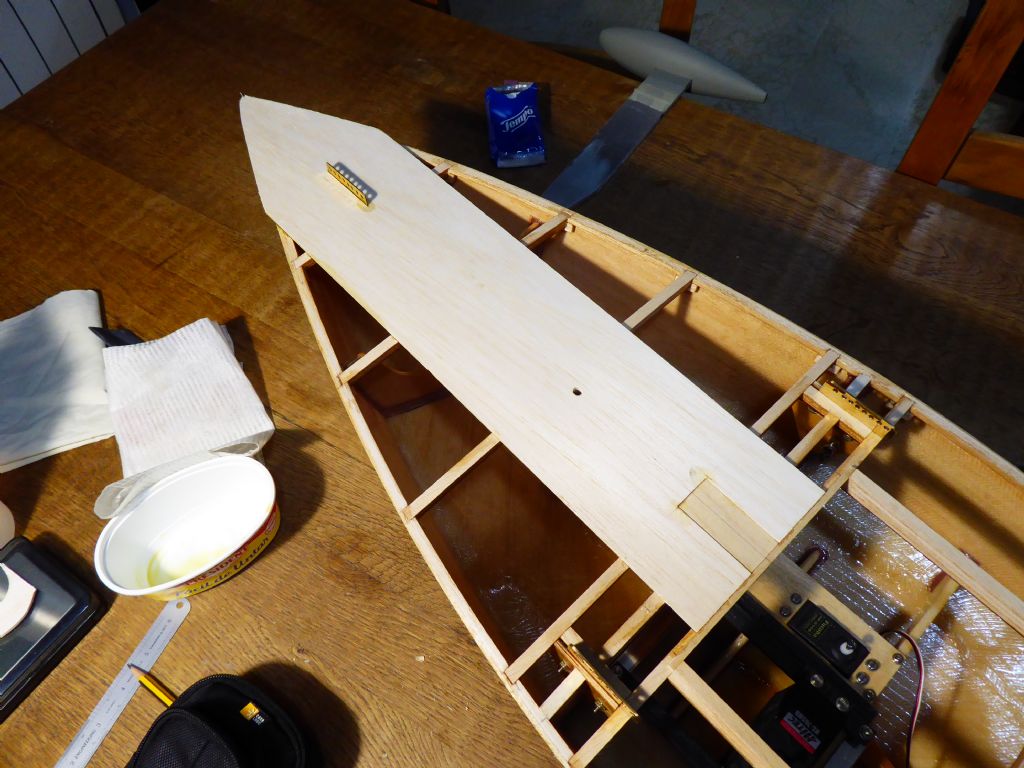
                                                  p1020322.jpg

                                                  Here the front centre section of deck is in place
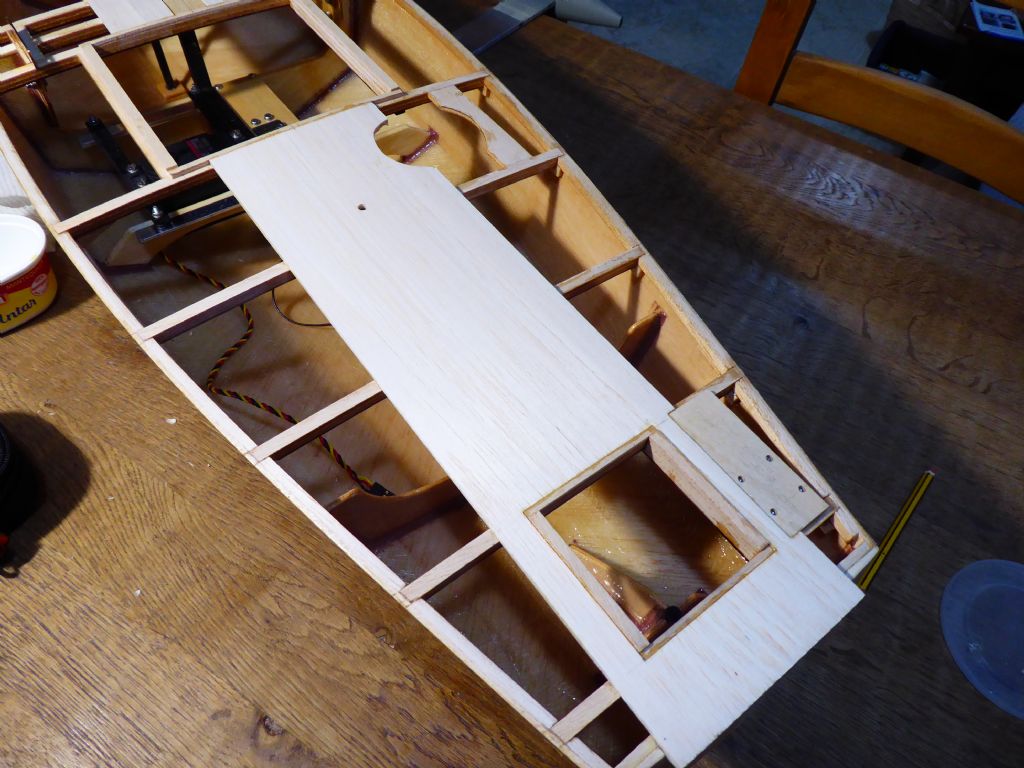
                                                  p1020323.jpg

                                                  And here the aft sections.

                                                  Tim R

                                                  #81320
                                                  Tim Rowe
                                                  Participant
                                                    @timrowe83142

                                                    Finishing touches to the subdeck
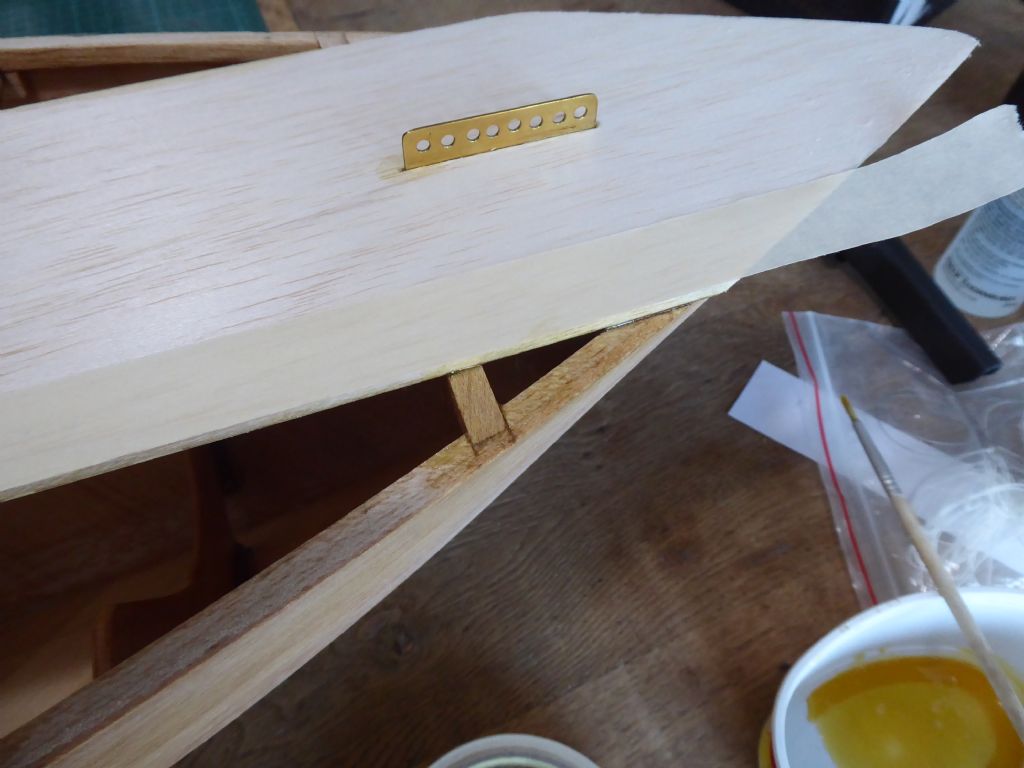
                                                    p1020346.jpg

                                                    I am using epoxy to join the deck panels and fix to the hull. The centre section is masked meaning that I can apply the glue quickly to the edge without getting it all over the surface. Keeping the glue off the surface means that I will only have to sand a very fine glue line rather than hard lumps. Likewise, the edge of the section to be fitted was masked.

                                                    The underside of the sub deck was previously sealed with tissue and epoxy so it was only needed to "paint" the glue onto the deck beams and deck edge. By making sure everything is coated it does not matter too much if there is a slightly open joint somewhere. I won't be able to see inside if all the joints are perfectly tight but the wood will at least be sealed. With everything effectively capsulated there should be virtually no expansion or contraction of the wood due to moisture changes and I am hoping to avoid any later cracks in the finishes.

                                                    Tim R

                                                    #81404
                                                    Tim Rowe
                                                    Participant
                                                      @timrowe83142

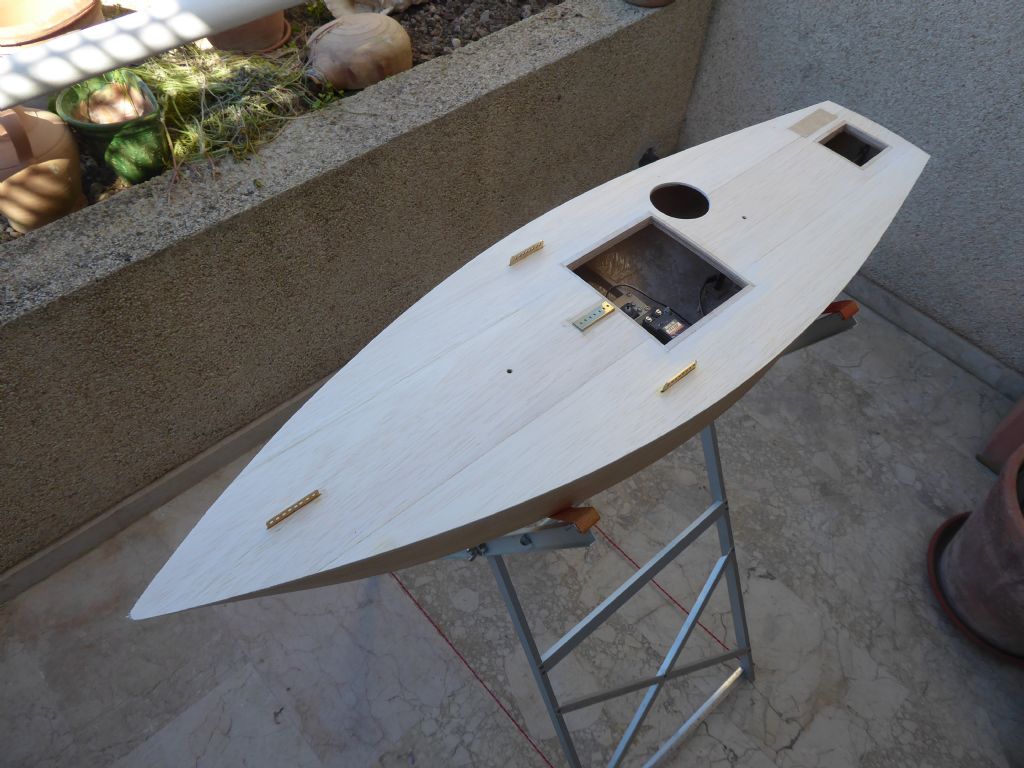
                                                      Sundeck now complete.

                                                      p1020788.jpg

                                                      A truly authentic new build as the bilges are full of dust and debris just like the real deal.

                                                      The stand is one of the first things I made when I came back to modelling. For a number of reasons working at low level does not suit me so I made this folding universal stand from stock aluminium extrusions from the local bricolage (sort of one step up from a hardware store in Spain) I will come back to the stand in another thread as it is immensely useful.

                                                      Quite a lot of work is going on "off" the boat. Rig, keel, etc but now I have got to the stage where I need the lead bulb ready so that I can finish the fin.
                                                      p1020351.jpg

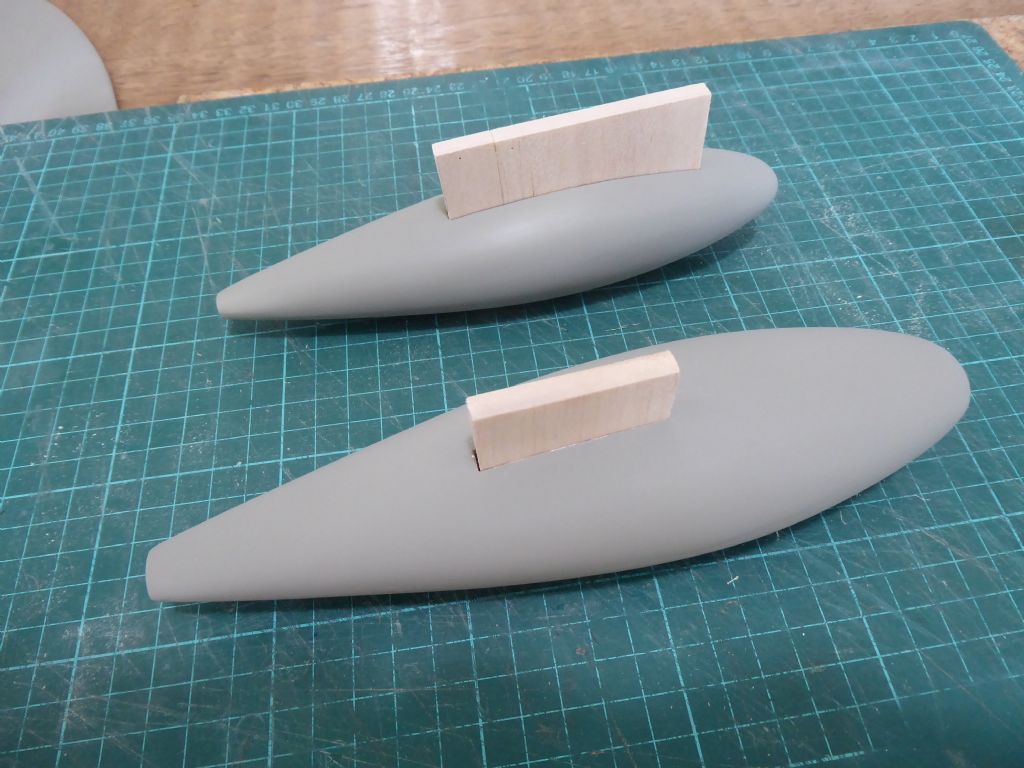
                                                      The bulbs will be made with the slots cast in. Another project has a similar but lighter bulb and it is easier and quicker to work on the two in parallel. In the foreground is the Galileo bulb pattern and I know the position of the bulb in relation to the fin to get the cg in the right position because it was calculated earlier. I don't know where the cg needs to be yet on the smaller bulb so the slot will be longer to make it adjustable.

                                                      The balsa inserts are called core prints and I will explain later how they work. A quick blast of primer and a good waxing and they are ready to go.

                                                      Tim R

                                                    Viewing 25 posts - 76 through 100 (of 180 total)
                                                    • Please log in to reply to this topic. Registering is free and easy using the links on the menu at the top of this page.

                                                    Code of conduct | Forum Help/FAQs

                                                    Advert

                                                    Latest Replies

                                                    Home Forums Sailing Models Topics

                                                    Viewing 25 topics - 1 through 25 (of 25 total)
                                                    Viewing 25 topics - 1 through 25 (of 25 total)

                                                    View full reply list.

                                                    Advert

                                                    Newsletter Sign-up