Fairey Swordsman 33

Advert

Fairey Swordsman 33

Home Forums Build Blogs Fairey Swordsman 33

  • This topic is empty.
Viewing 25 posts - 76 through 100 (of 133 total)
  • Author
    Posts
  • #94483
    Chris Fellows
    Participant
      @chrisfellows72943

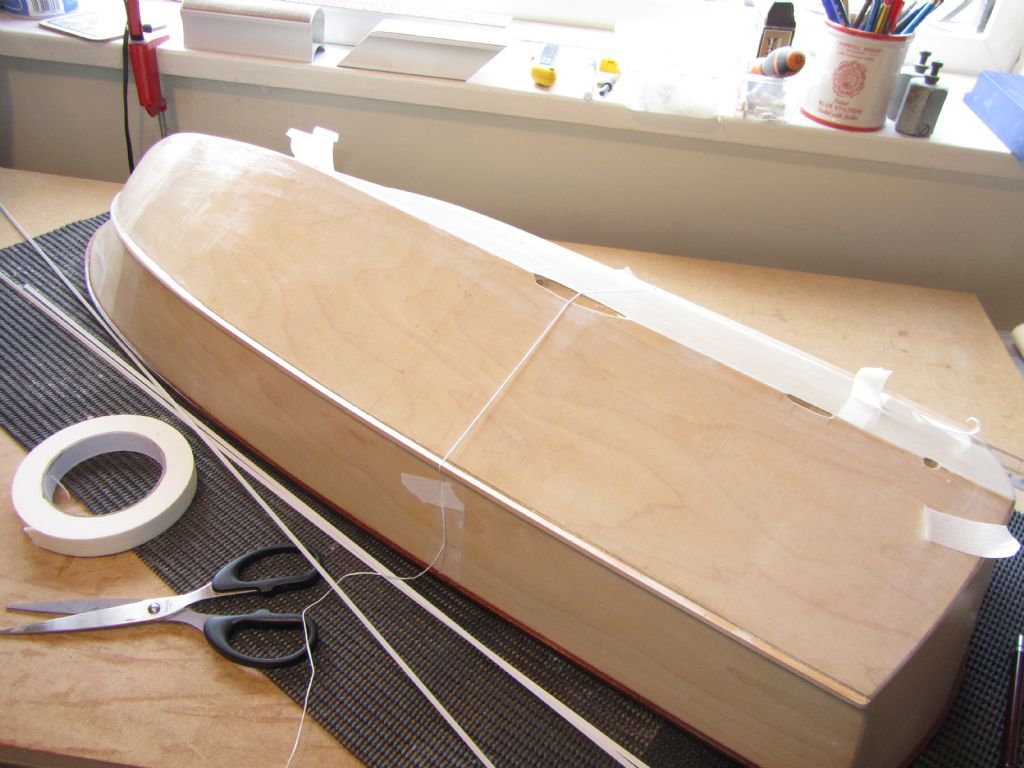
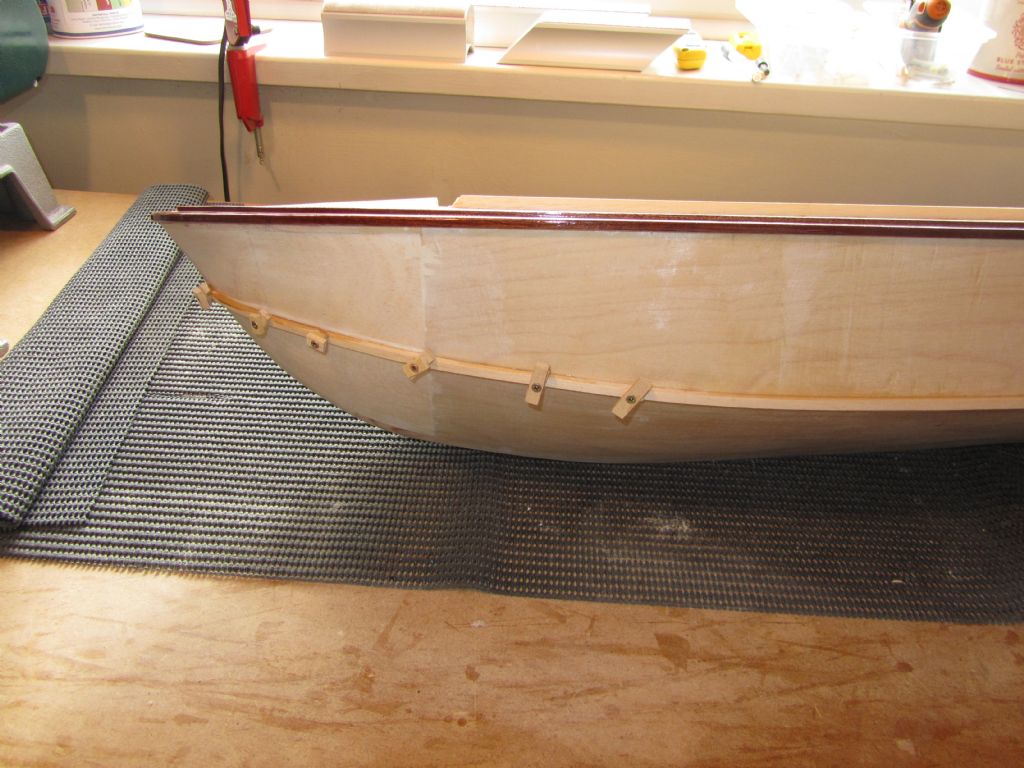
      Fitting chine rails to each of the three hulls now. For the Swordsman, being a much bigger hull than my other builds, I'm using 5 x 5mm bass rather than 3 x 3mm.

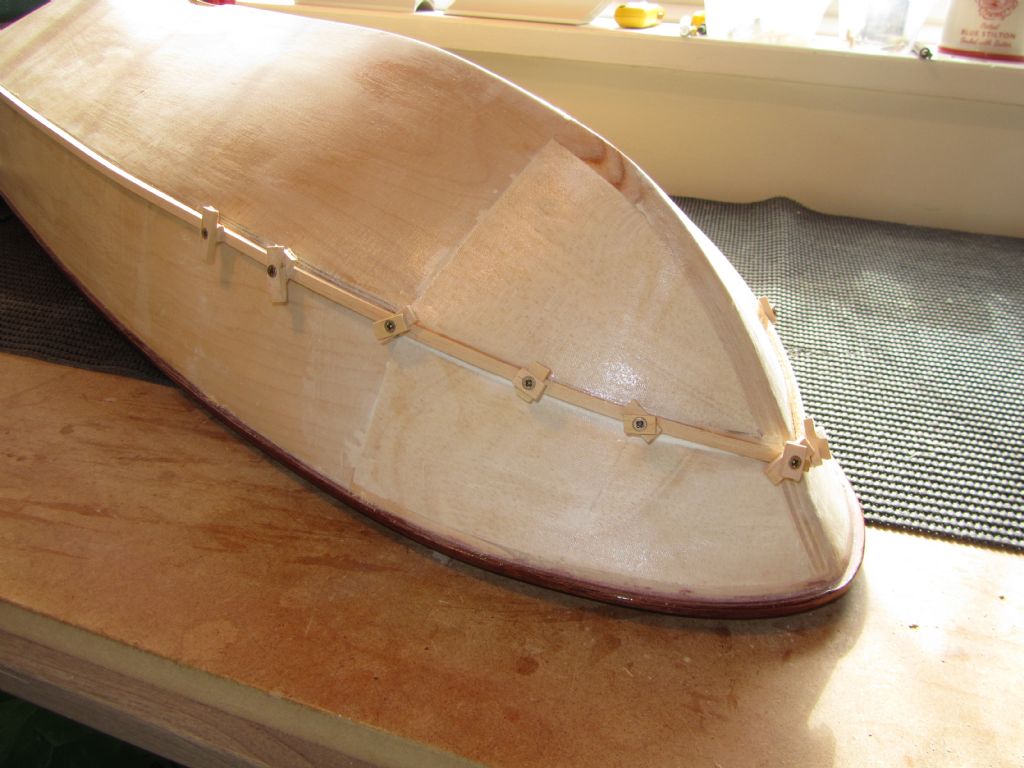
      Been a bit of a pig really! I'm gluing to Eze-Kote and cloth, as per previous builds, but the Slo Zap just didn't want to grab despite being held in place by hand for quite some time. It did though eventually and I made slow progress from stern to bow on one side. I'd steamed the bass beforehand, over bent it actually which didn't help, and it was resisting efforts to get it to lie tightly to the hull. I then sanded it thinner towards the bow (as was going to be required anyway) and still had to use a couple of screws to hold it down.

      Onto the other side, but starting from the bow this time to ensure that both rails met correctly at the bow and drilled a couple of holes as per the other side ready for screws. Sanded the rail to taper towards the bow and then steamed it. Still wouldn't fit without a fight and had to use some more screws! Again glued from the stern forwards, in sections, and having left it to dry for awhile over lunch I glued the bow section and screwed into place. I shall leave it until tomorrow until I take the screws out!

      Have already done the chine rails to the Huntsman 31 using 3 x 3mm and will now do the Huntress which should be the easiest of the three.

      Chris

      chine rails 1

      chine rails 3

      Advert
      #94484
      Chris Fellows
      Participant
        @chrisfellows72943

        Fitting chine rails to each of the three hulls now. For the Swordsman, being a much bigger hull than my other builds, I'm using 5 x 5mm bass rather than 3 x 3mm.

        Been a bit of a pig really! I'm gluing to Eze-Kote and cloth, as per previous builds, but the Slo Zap just didn't want to grab despite being held in place by hand for quite some time. It did though eventually and I made slow progress from stern to bow on one side. I'd steamed the bass beforehand, over bent it actually which didn't help, and it was resisting efforts to get it to lie tightly to the hull. I then sanded it thinner towards the bow (as was going to be required anyway) and still had to use a couple of screws to hold it down.

        Onto the other side, but starting from the bow this time to ensure that both rails met correctly at the bow and drilled a couple of holes as per the other side ready for screws. Sanded the rail to taper towards the bow and then steamed it. Still wouldn't fit without a fight and had to use some more screws! Again glued from the stern forwards, in sections, and having left it to dry for awhile over lunch I glued the bow section and screwed into place. I shall leave it until tomorrow until I take the screws out!

        Have already done the chine rails to the Huntsman 31 using 3 x 3mm and will now do the Huntress which should be the easiest of the three.

        Chris

        chine rails 1

        chine rails 3

        #95435
        Chris Fellows
        Participant
          @chrisfellows72943

          Been awhile since I've done anything on the Fairey builds.

          After the last posting I removed the screws, filled the holes with P38, and sanded the chine rails to a more rounded profile but keeping a sharp lower, outside edge, where in the water, to aid turning.

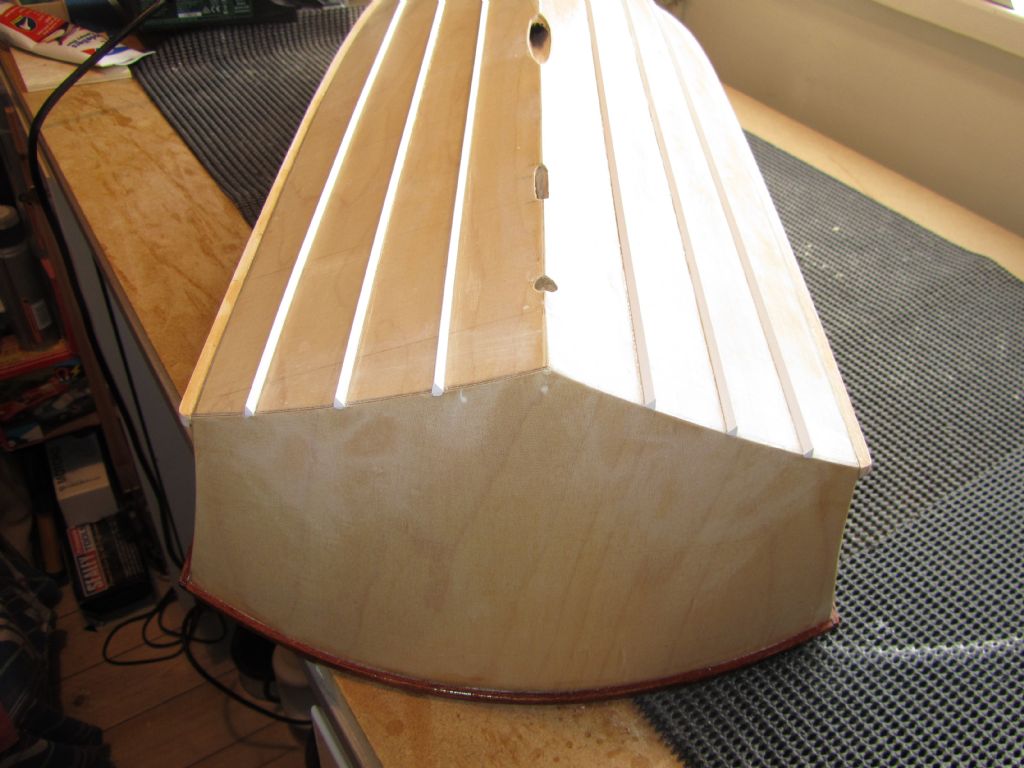
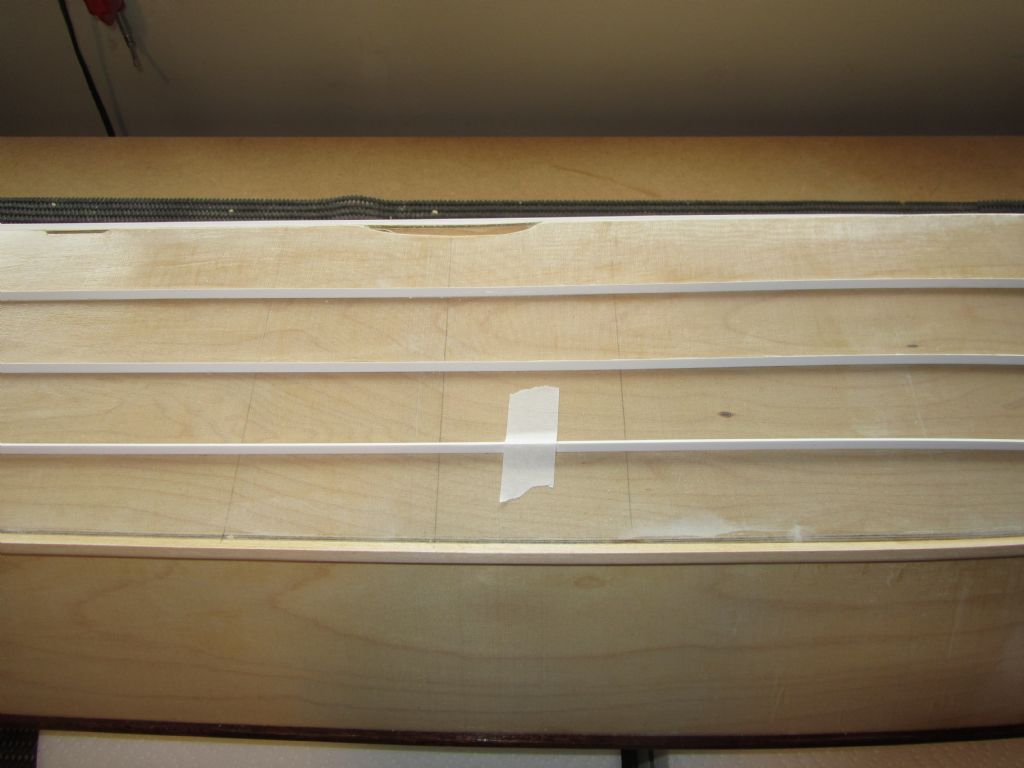
          This week I've started fitting the strakes – another of those jobs I'm not too keen on! I've searched on more than one occasion for triangular section timber, but apart from short lengths for dolls houses, you just can't get it. It can be cut with a band saw, but I don't have one, and I've had ideas about using my router to produce the section but the other idea was to use styrene.

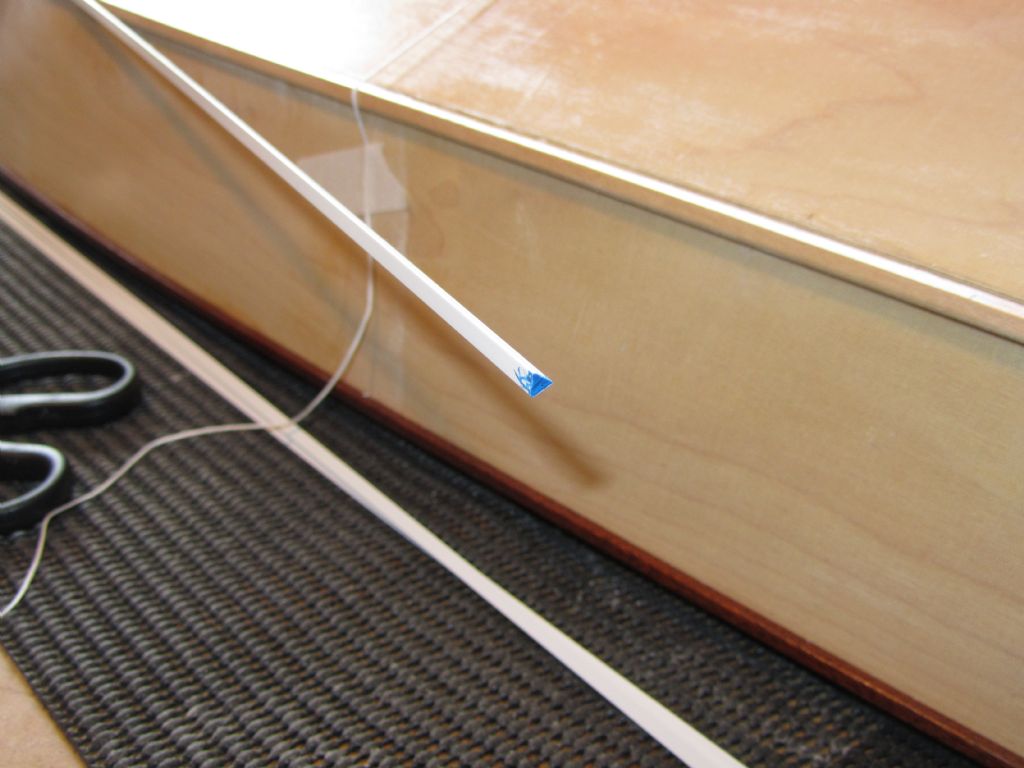
          The sections are available in different sizes but finding a stockist of the longer, 1m lengths isn't so easy, but Deans Marine came up trumps. Postage is expensive though, because of the length, but I bought some brass rod for the bow rails etc. at the same time to lessen the pain. I decided on 60 degree 4x4mm for the Swordsman.

          What I like about using styrene is that it's a very accurate profile but I was concerned about getting a strong glued joint with the Eze-Kote and cloth. I did a test using Slo Zap slow cure CA but despite being left overnight it pulled off quite easily. Knowing that canopy glue sticks plastic to a number of surfaces I looked up the details and appearing that it would do the job I ordered some from DeLuxe Materials. I then did a test and it provided a very strong bond.

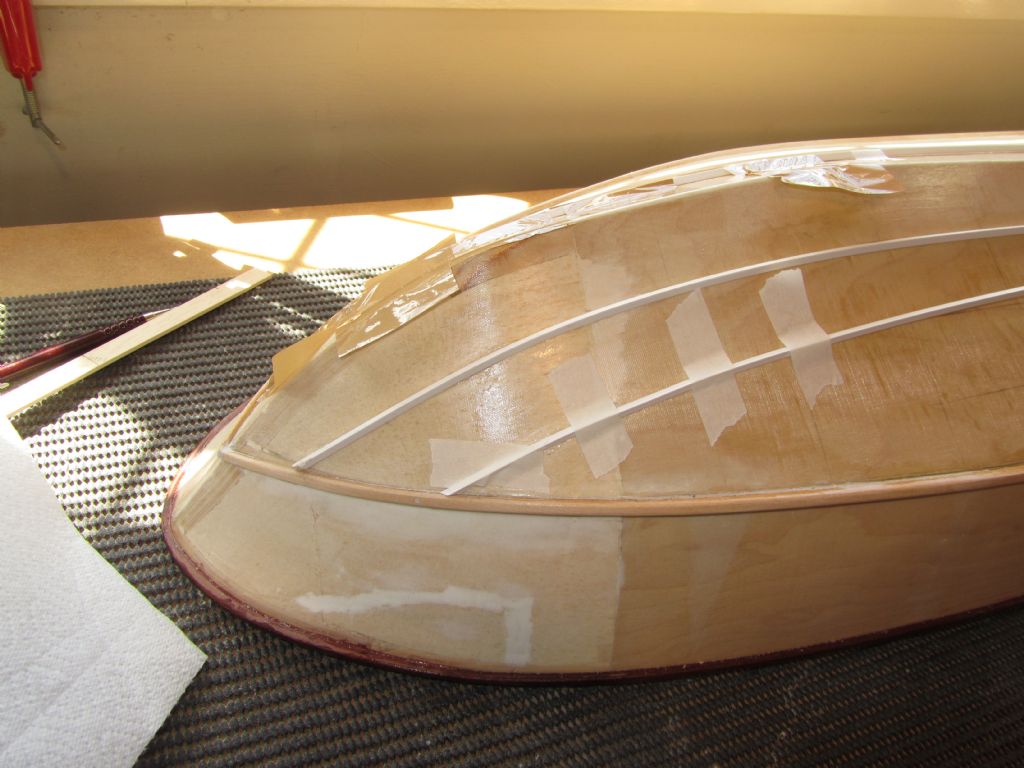
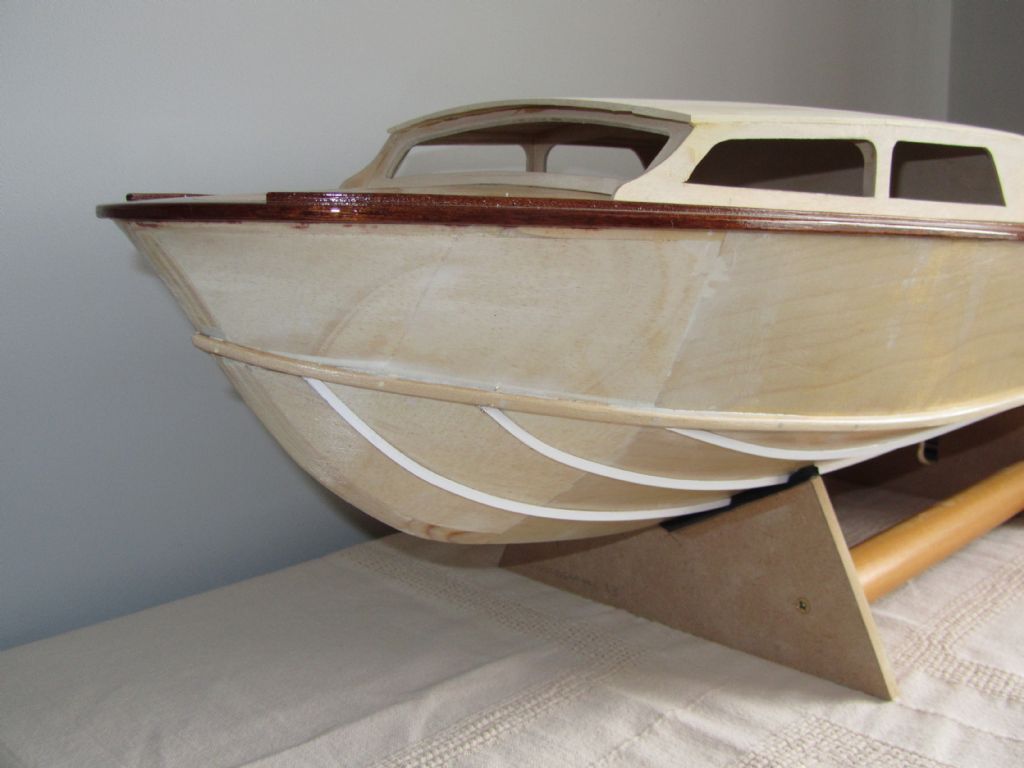
          With that good news I could start fixing the strakes. First job was to check the number and position of those on the full-size boat. Fortunately Tireur, which I'm loosely basing my build on only has three strakes per side, though others have more. I then marked the hull up in pencil with the strake positions parallel to the keel and at equi-distance at the widest point i.e. the beam, which looked right.

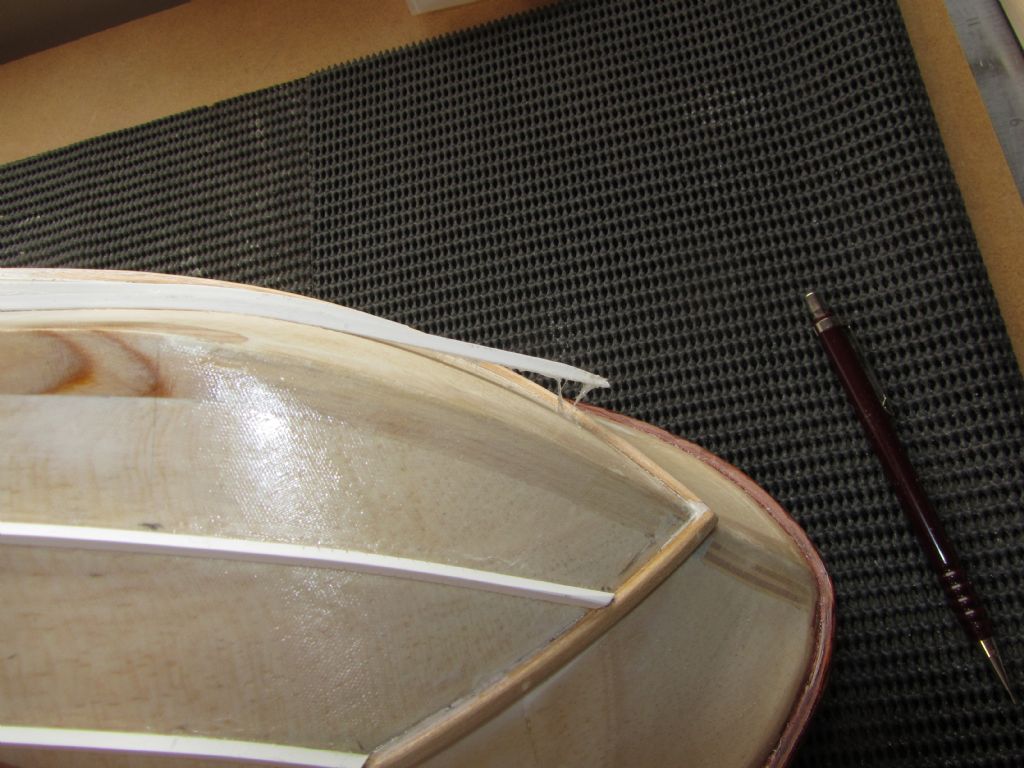
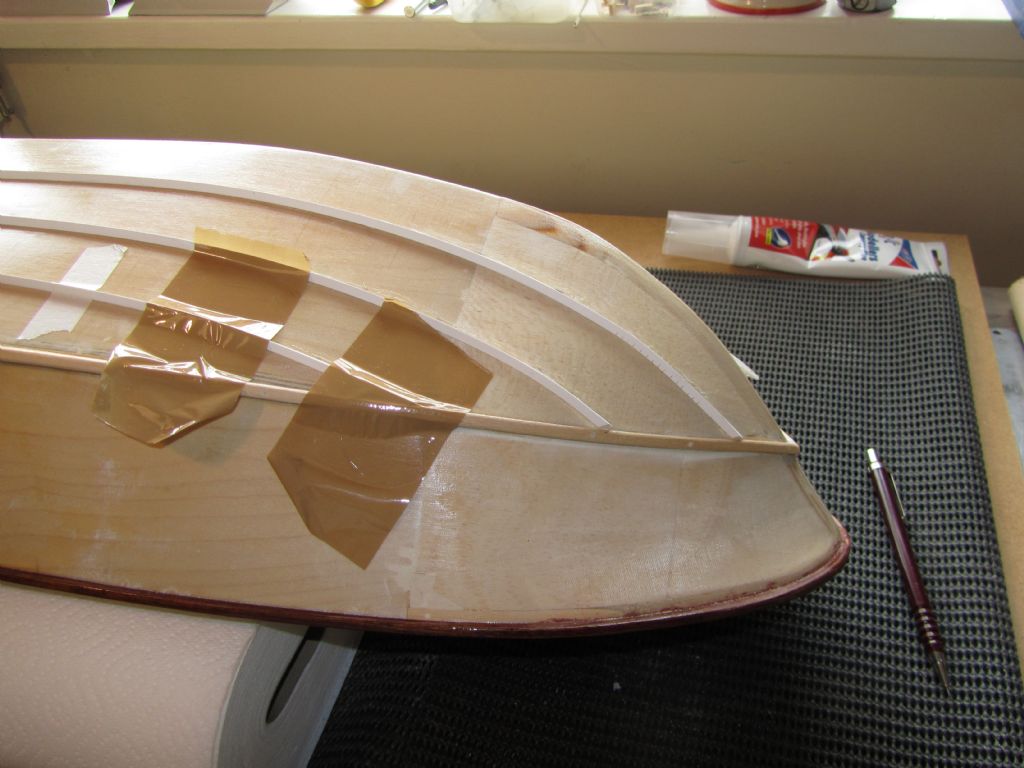
          First strake, nearest the keel, was a bit of a pig. The glue has some grab and dries in about 30 minutes but no way was it going to stick the strake to the curve of the bow. I held it in place for some time and then taped it down and left it for a lot longer than 30 minutes. It partly held, but the end sprang up, but it was enough for me to glue the straight part of the strake which was no problem and once dry held firm. It took me two attempts to glue the bow section with it being held in place with my cork sanding block wedged between it and my scroll saw. Trouble is you just can't clamp it.

          I then did its opposite number but lessened the spring by saw cuts on the underside which I will fill with P38. Still some spring but that has been left taped down and fingers crossed it will hold OK.

          Then on with the middle strake. When using timber I'd steam it to a bend, but had dismissed this with the styrene. But thought I'd give it a go using my usual steamer, the kettle, and it bent a treat, even easier than timber! B*gger, if only I'd tried it on the first one! But you live and learn.

          That was then easily glued and taped in place and will be left for a while before gluing the straight section. A slow process but I will get there. Only another two hulls to do then!

          Chris
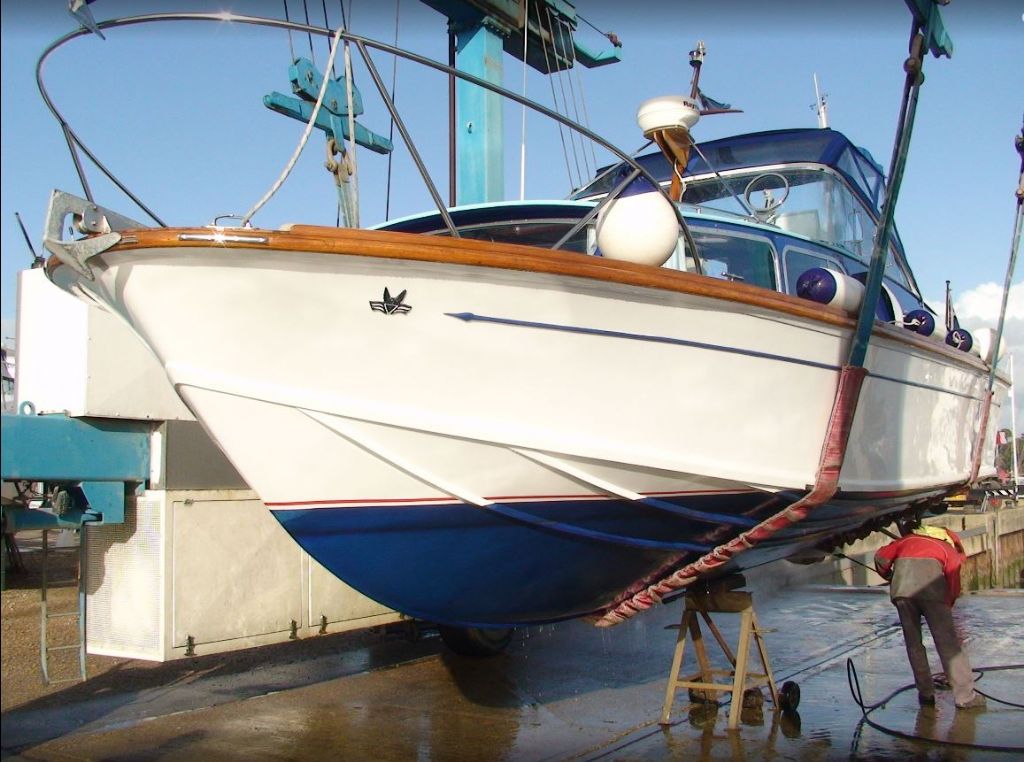
          tireur19.jpg

          strakes1.jpg

          strakes2.jpg

          strakes3.jpg


          Edited By Chris Fellows on 11/05/2021 15:41:01

          #95437
          Ray Wood 3
          Participant
            @raywood3

            Hi Chris,

            Yes spray rails/strakes are very nearly the worst job in the world !! I must confess my favourite material is obeche 1/4" X 1/8" which I can plane to triangular with a David Razor Plane, second most useful tool to the Permagrit block in my view cheap superglue from poundland faired in with lightweight filler.
            Regards Ray

            #95441
            Tim Rowe
            Participant
              @timrowe83142

              I have spray rails to look forward to on the Cigarettes.

              I find following your builds quite Zen Chris. I can't say the same for Ray's stuff because blink and he is onto the next thing!

              By the way Chris, where do you get your shiny wood from smiley?

              Tim R

              #95446
              Chris Fellows
              Participant
                @chrisfellows72943

                Hi Ray and Tim

                I've got a razor plane but don't think I could produce a uniform triangular section. Also I remember Dave M telling me he used to use that method but his fingertips bore the scars! He suggested using square section and sanding the corners off which is fine for smaller sections and boats so I used it on the Huntsman 28 to good effect.

                I thought about using styrene quite some time ago and now that I've cracked the fitting I'm pleased with how it looks and is turning out and will be my go to method in the future. It's my first use of styrene and the next will be the window frames.

                Do you mean the hull timber Tim? If so the shine is due to the Eze-Kote and cloth finish.

                Cheers, Chris

                Edited By Chris Fellows on 11/05/2021 21:59:46

                #95480
                Chris Fellows
                Participant
                  @chrisfellows72943

                  Progress is slow and steady with fitting the strakes mainly due to having to leave the glue to dry thoroughly at the bow before gluing the straight parts in place. So glad I've only got 3 per side to do!

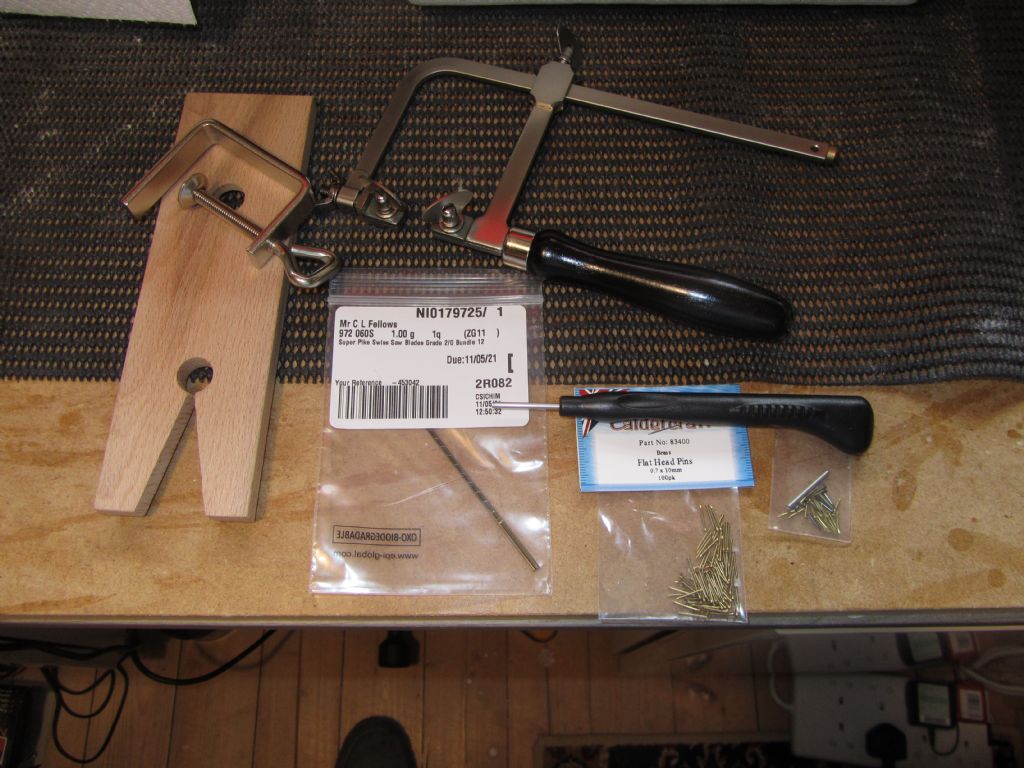
                  The first one I did, the pig one (!) has raised its ugly head again by springing off again, grrrr! I thought I might have to go back to that one again and so ordered some small brass pins and a pusher which arrived this morning. I shall probably drill through the chine rail to secure in place.

                  I've also added to the tool collection and bought a jewellers piercing saw which I've been thinking about for awhile which will be useful for cutting the pins down – this also arrived this morning.

                  Bought it off Amazon as a jewellery repair kit from Cooksongold for £18.95 and free postage which I thought was pretty good as it appears to be good quality and includes a V-shaped cutting block and blades.

                  Back to the strakes!

                  strakes4.jpg

                  strakes5.jpg

                  strakes6.jpg

                  Chris

                  tools.jpg

                  Edited By Chris Fellows on 13/05/2021 13:59:00

                  #95529
                  Chris Fellows
                  Participant
                    @chrisfellows72943

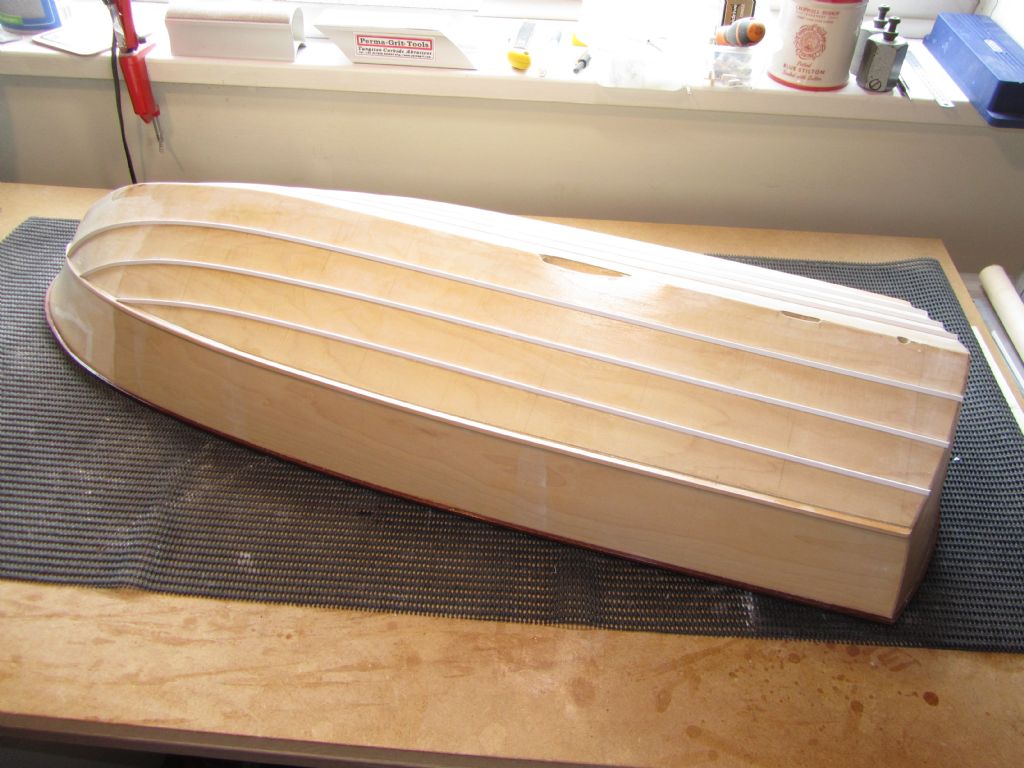
                    Finished gluing the strakes in place and attended to the pig by drilling and inserting a 0.7mm dia. brass pin and gluing again. I also did a couple of the others to be on the safe side. Checked this morning and all appear to be secure, phew!

                    Yesterday I cut the end of the strakes off at the transom and sanded smooth.

                    I'm now marking out the Huntsman 31. I'm using smaller 3mm strakes on that.

                    Chris

                    strakes7.jpg

                    strakes8.jpg

                    strakes9.jpg

                    #95530
                    Tim Rowe
                    Participant
                      @timrowe83142

                      You nailed it Chris!!

                      Looks mighty fine

                      Tim R

                      #95532
                      Chris Fellows
                      Participant
                        @chrisfellows72943

                        Thanks Tim, very punny! smiley

                        Huntsman is being more cooperative as I'm using a smaller section and having to bend it less at the bow. That to the Huntress will require steaming though.

                        Chris

                        #95533
                        Will Mason 1
                        Participant
                          @willmason1

                          I'm guessing it's all of those sorts of jobs that that take time Chris.

                          Looking good and all adding to both the end performance and the accurate scale look of the boat.

                          Keep up the good work, they're looking really good.

                          Will

                          #95537
                          Chris Fellows
                          Participant
                            @chrisfellows72943

                            Thanks Will.

                            Yes, I could build a hull pretty quickly now but once you get into any sort of detail that you want to make a decent job of progress certainly slows down. Of course I'd be further on if I was only building one boat!

                            Chris

                            #95719
                            Chris Fellows
                            Participant
                              @chrisfellows72943

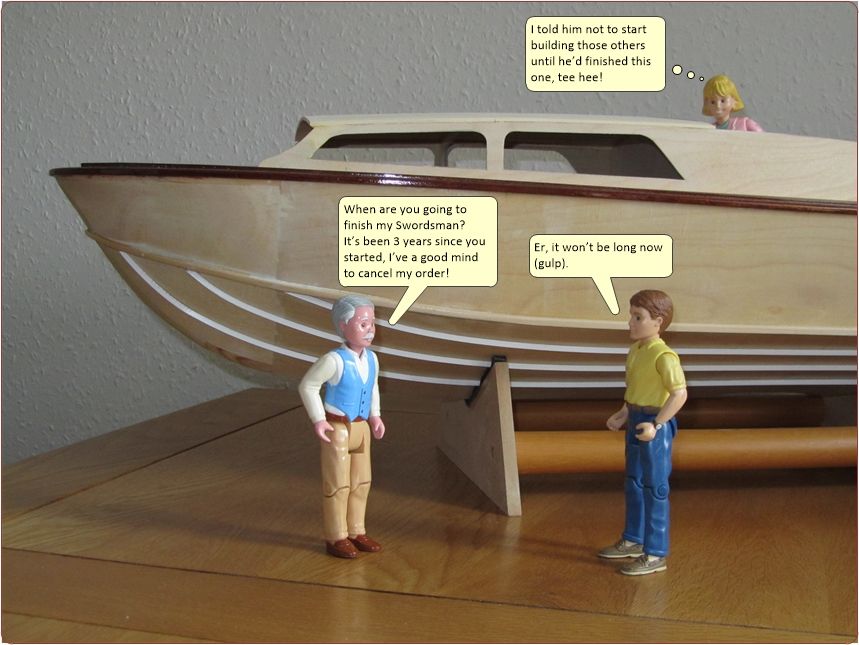
                              cartoon1

                              #95721
                              Tim Rowe
                              Participant
                                @timrowe83142

                                Quality Chris, Quality

                                Priceless and ultimately timeless.

                                Tim R

                                #95723
                                Chris Fellows
                                Participant
                                  @chrisfellows72943

                                  Thanks Tim.

                                  Gotta have a laf!  smiley

                                  Chris

                                  Edited By Chris Fellows on 24/05/2021 19:55:03

                                  #95730
                                  ashley needham
                                  Participant
                                    @ashleyneedham69188

                                    I recognise those people!

                                    Ashley

                                    #95732
                                    Chris Fellows
                                    Participant
                                      @chrisfellows72943

                                      They get about a bit!

                                      Chris

                                      #98320
                                      Chris Fellows
                                      Participant
                                        @chrisfellows72943

                                        Blimey, I think this has been the longest break from building in my few years of model making!

                                        But now that temperatures are dropping and nights are drawing in the summery things have virtually come to an end and thoughts have turned once again to modelling and today I actually restarted!

                                        May sound daft, but I was actually a little nervous, had forgotten how to do things, what tools etc. I had and where and found that the first filler I tried had gone hard.

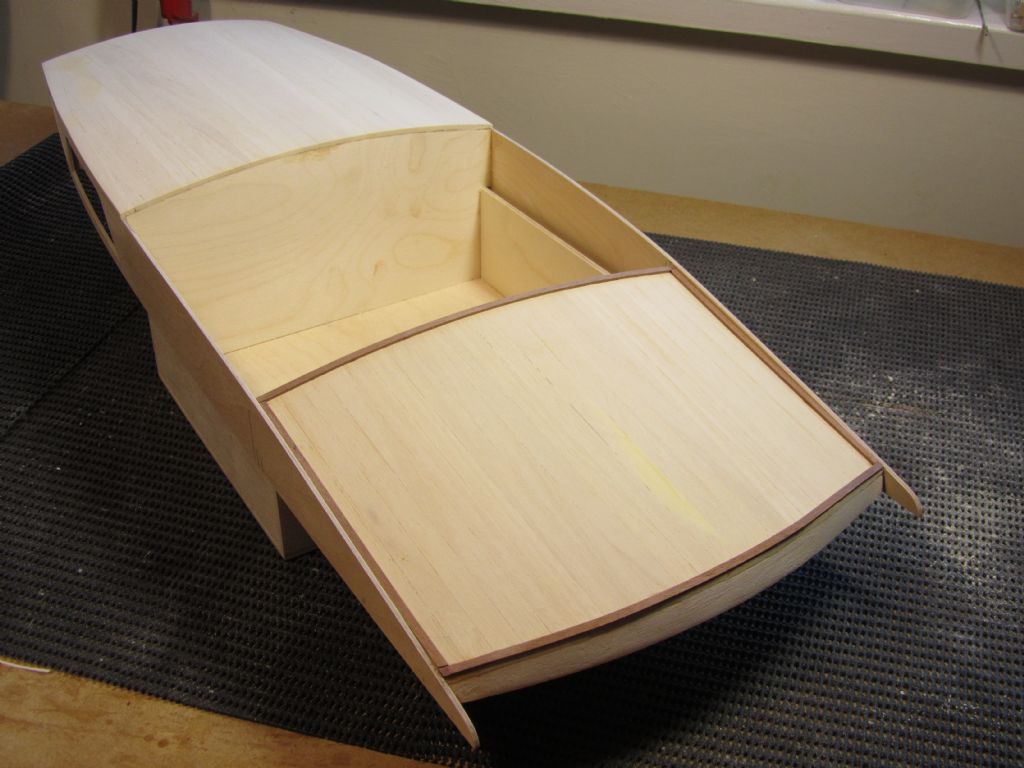
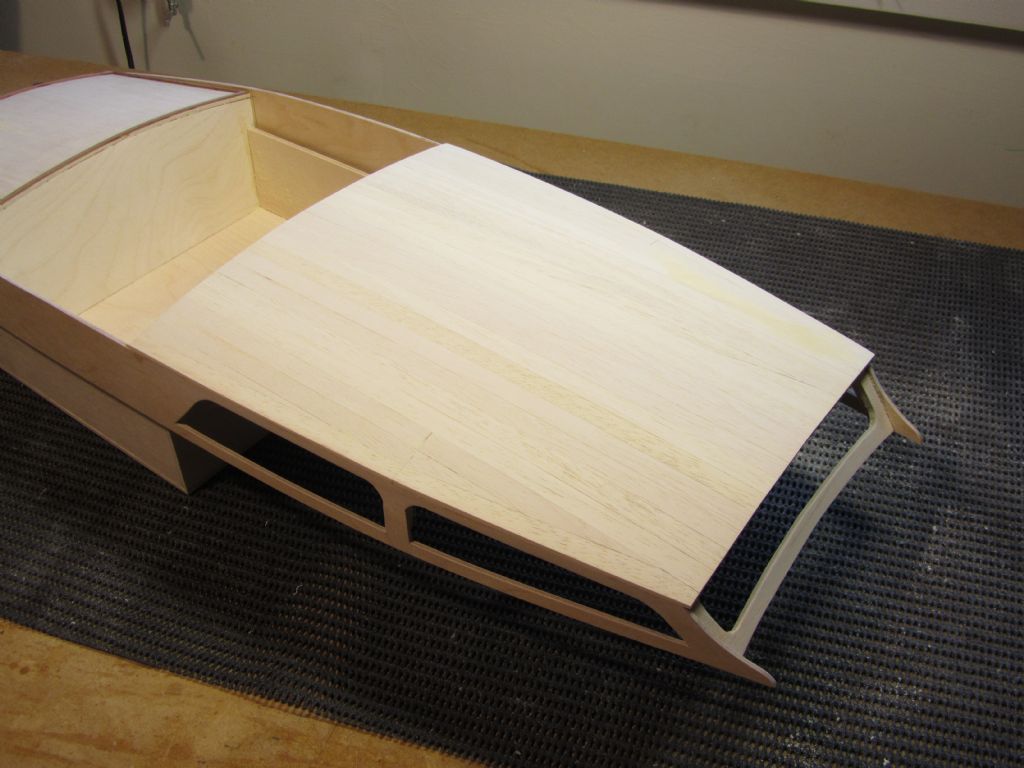
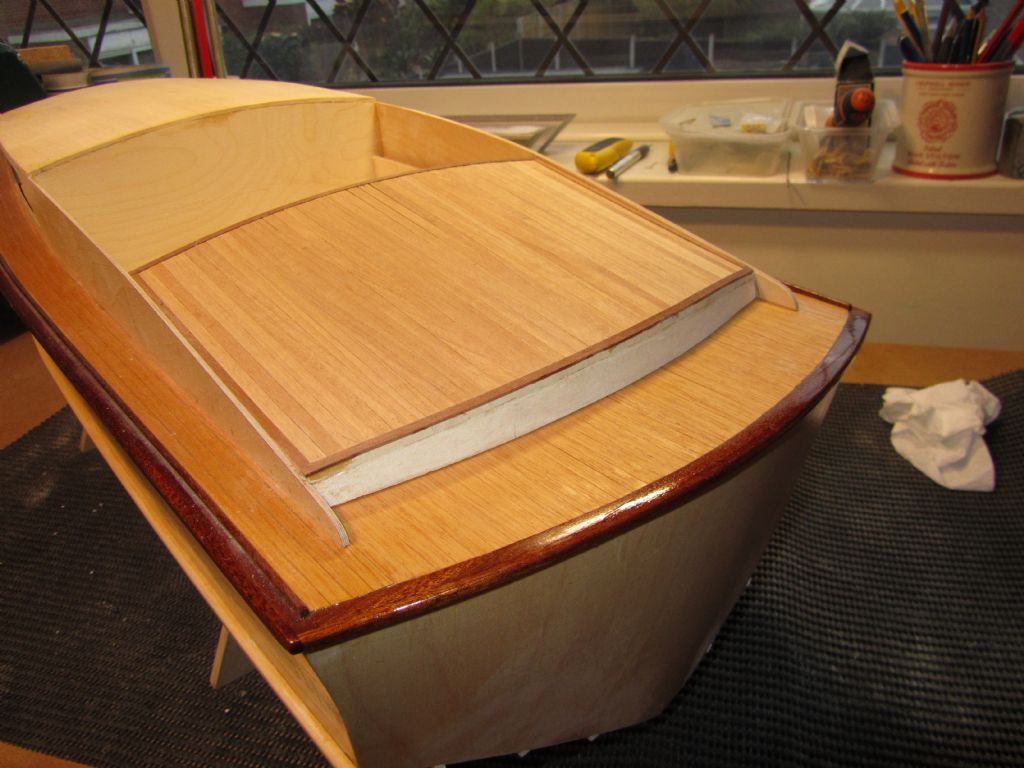
                                        I remembered I'd been working on the superstructure though and after a little thought decided what needed doing next and how to do it. This was planking the roof of the rear cabin and first job was to fit some small section mahogany around the perimeter, inside which the planking, to match the deck, would be fitted.

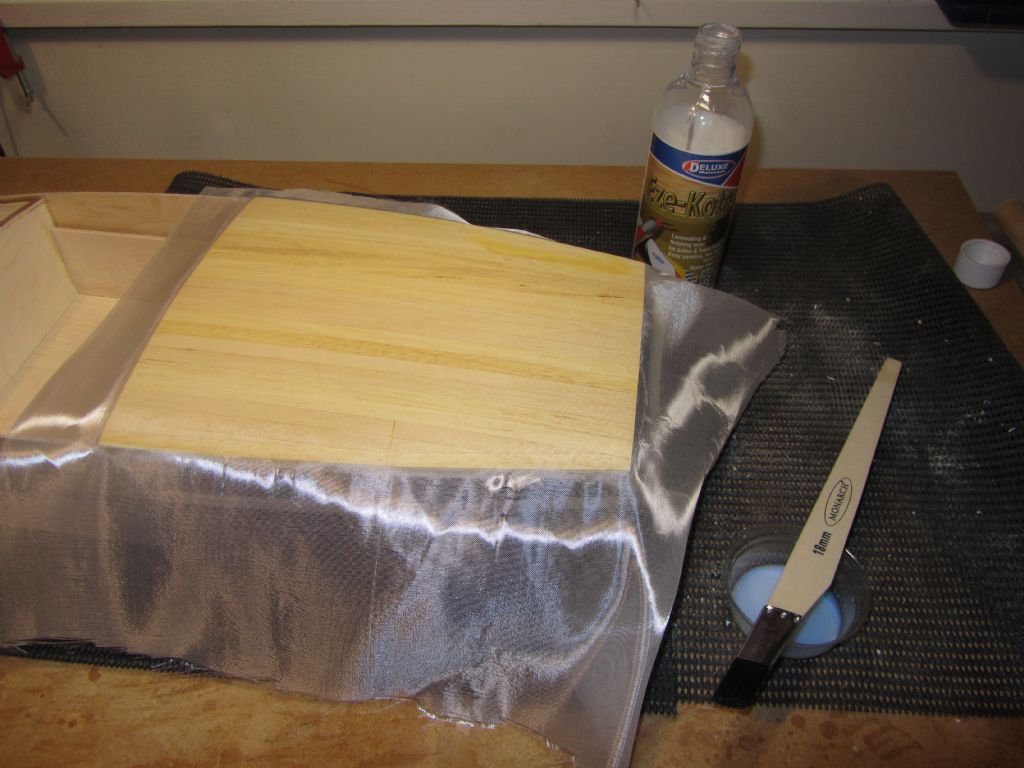
                                        Once this was done I turned to the front cabin roof and filled a couple of blemishes, with a different filler (!) before giving a final sanding. Mahogany strip is to be fitted to the sides and rear of the roof but before doing that decided it would be a good idea to apply the Eze-Kote and lightweight cloth first. This was duly done and tomorrow I will sand off the excess to the perimeter and fix the mahogany.

                                        It was certainly good to get started again!

                                        Chris

                                        superstructure29.jpg

                                        superstructure30.jpg

                                        superstructure31.jpg

                                        #98326
                                        Richard Simpson
                                        Participant
                                          @richardsimpson88330

                                          Lovely neat woodwork.

                                          #98327
                                          Chris Fellows
                                          Participant
                                            @chrisfellows72943

                                            Thanks Richard.

                                            #98337
                                            Chris Fellows
                                            Participant
                                              @chrisfellows72943

                                              Cloth was trimmed to the perimeter of the roof using 320 grit and a sanding block and then given 3 more coats of Eze-Kote. This was left to harden overnight and then sanded with 320 and 400 grit to leave ready for painting.

                                              The rear cabin roof was then planked to match the deck but using 1mm thick planks rather than 0.5mm as these don't need to be bent sideways. I ordered these planks after some while after those for the deck and annoyingly they are a different colour. Shouldn't be as noticeable once they are varnished though.

                                              Chris

                                              superstructure32.jpg

                                              #98338
                                              Ray Wood 3
                                              Participant
                                                @raywood3

                                                Hi Chris,

                                                Good to see you back on forum and the famous 3 builds Now you have had your summer vacation you will be able to get on with them. I'm also having an autumn break from boats and building aeroplanes for a change having said that I'm running trains on the workshop railway tonight

                                                Regards Ray

                                                #98339
                                                Chris Fellows
                                                Participant
                                                  @chrisfellows72943

                                                  Thanks Ray.

                                                  I'm itching to start one of the other Fairies that I've started the drawings for (bit different to my existing builds and the usual Fairies that most folks build) but I must restrain myself and do the bits and pieces required to the 3 to leave them ready for painting plus the Huntsman 28 but we will see! I love starting new builds!

                                                  Mentioning aeroplanes has made me think though. I've resisted a neighbour's efforts to teach me to fly so far as too many hobbies already, but I'm having to spend time every week at my mothers and could do with something to build. Scratch building is out (otherwise I'd do one of the other Fairies) as I wouldn't have my scroll saw and other tools over there but I could do an aircraft kit! Any ideas for an easy to fly plane, a high wing type I guess?

                                                  Chris

                                                  #98345
                                                  Ray Wood 3
                                                  Participant
                                                    @raywood3

                                                    Hi Chris,

                                                    Rather depends on if you are aiming to do learn to fly or just want an enjoyable build ? also electric or IC ? I flew with a club for 25 years mainly IC which meant travelling 20 miles to the back of beyond to make a noise ! But maybe the last 20 years electric has become very popular and I fly now 5 minutes walk from home. I know this is answering a question with a question. If your neighbour is willing to teach you to fly happy days SLEC sell a kit for a high wing trainer with trike undercarriage. The third dimension make's it more exciting

                                                    Regards Ray

                                                    #98349
                                                    Chris Fellows
                                                    Participant
                                                      @chrisfellows72943

                                                      Thanks Ray

                                                      He flies more than he uses his boats and is keen to teach me, so yes I would fly it. Definitely electric. 

                                                      That one from SLEC looks the sort of thing. I did have one similar when I was young which I got partially built and finished it off but never flew it. RC was not like it is nowadays! I just enjoyed messing around with it. I've still got a diesel somewhere I bought new but it's not RC.

                                                      Chris

                                                      Edited By Chris Fellows on 24/10/2021 14:15:12

                                                    Viewing 25 posts - 76 through 100 (of 133 total)
                                                    • Please log in to reply to this topic. Registering is free and easy using the links on the menu at the top of this page.

                                                    Code of conduct | Forum Help/FAQs

                                                    Advert

                                                    Latest Replies

                                                    Home Forums Build Blogs Topics

                                                    Viewing 25 topics - 1 through 25 (of 25 total)
                                                    Viewing 25 topics - 1 through 25 (of 25 total)

                                                    View full reply list.

                                                    Advert

                                                    Newsletter Sign-up