61′ Barnett class lifeboat

Advert

61′ Barnett class lifeboat

Home Forums Scratch build 61′ Barnett class lifeboat

Viewing 25 posts - 151 through 175 (of 648 total)
  • Author
    Posts
  • #102012
    neil hp
    Participant
      @neilhp

      Thats a very good point Ashley.

      you can get up a good motion the longer a piece of wood is to sand, AND you have less undulations in the hull……

      I like building big.

      Advert
      #102013
      neil hp
      Participant
        @neilhp

        What can I say……….she's as smooth as a baby's bot bot.

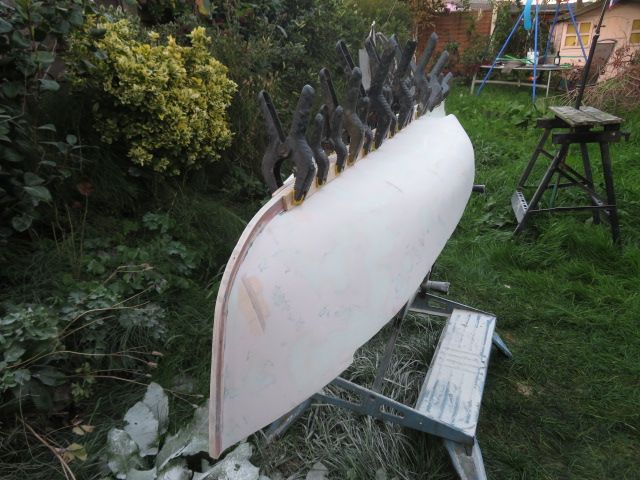
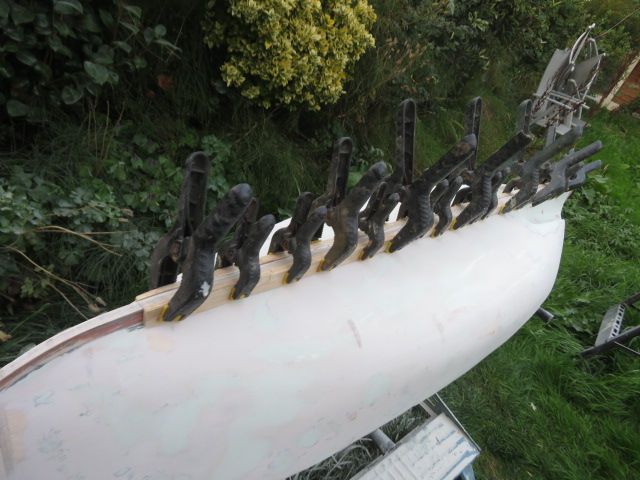
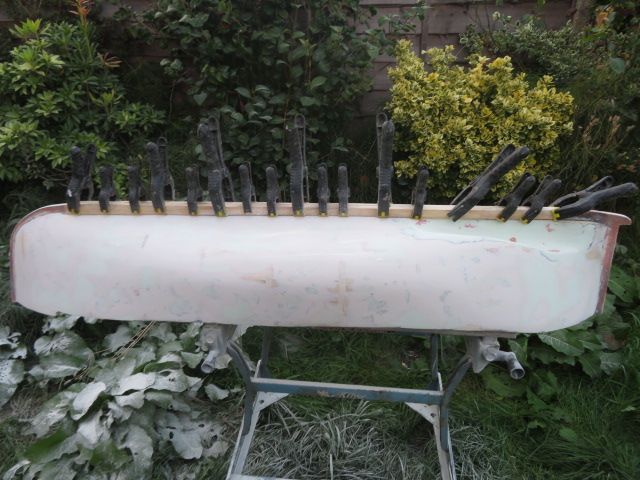
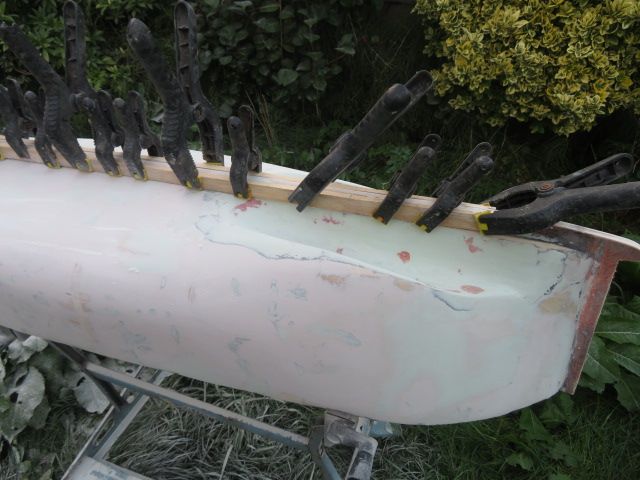
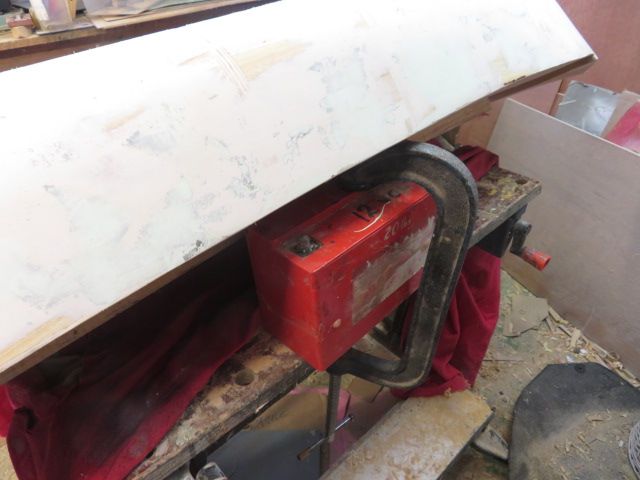
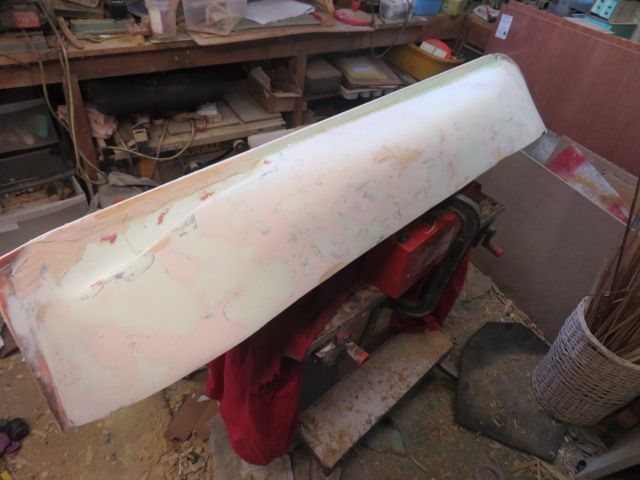
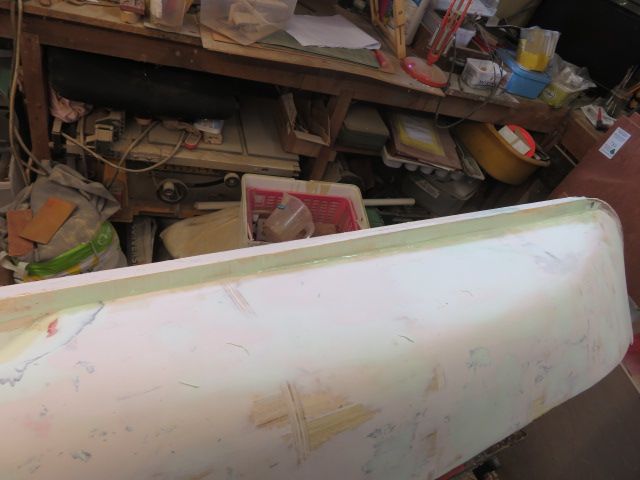
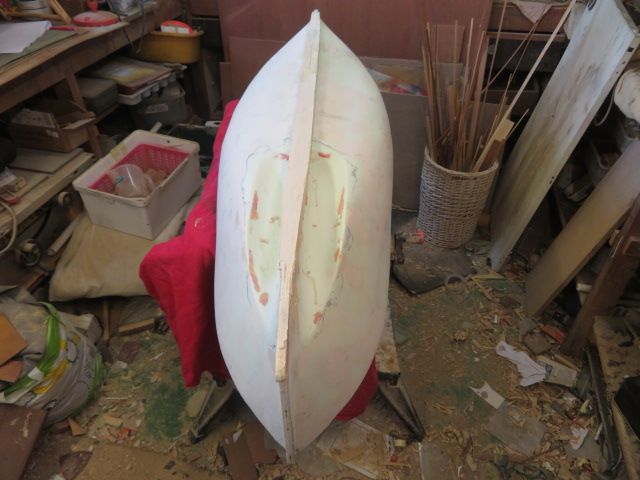
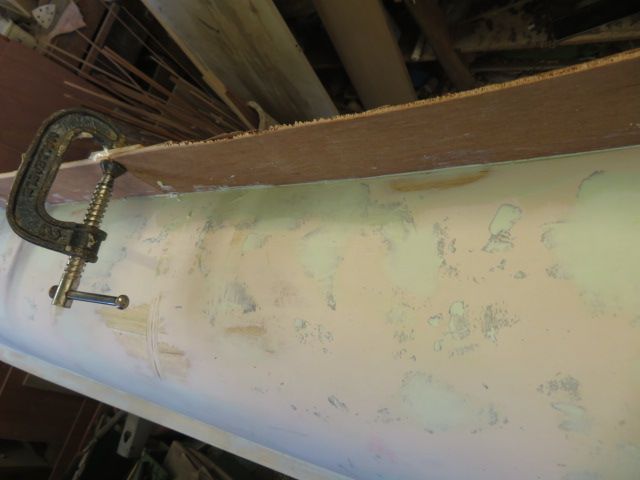
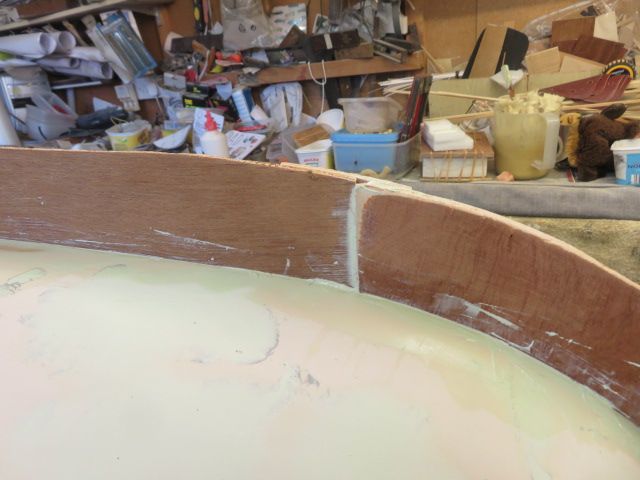
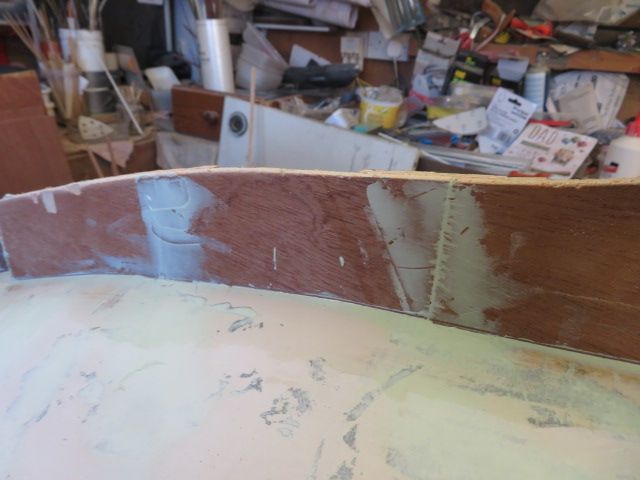
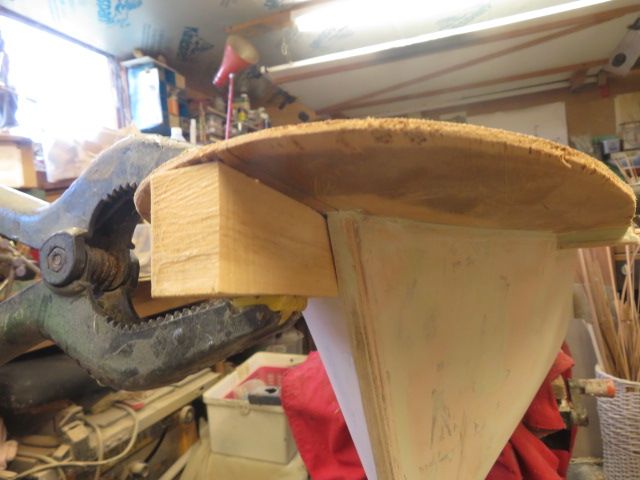
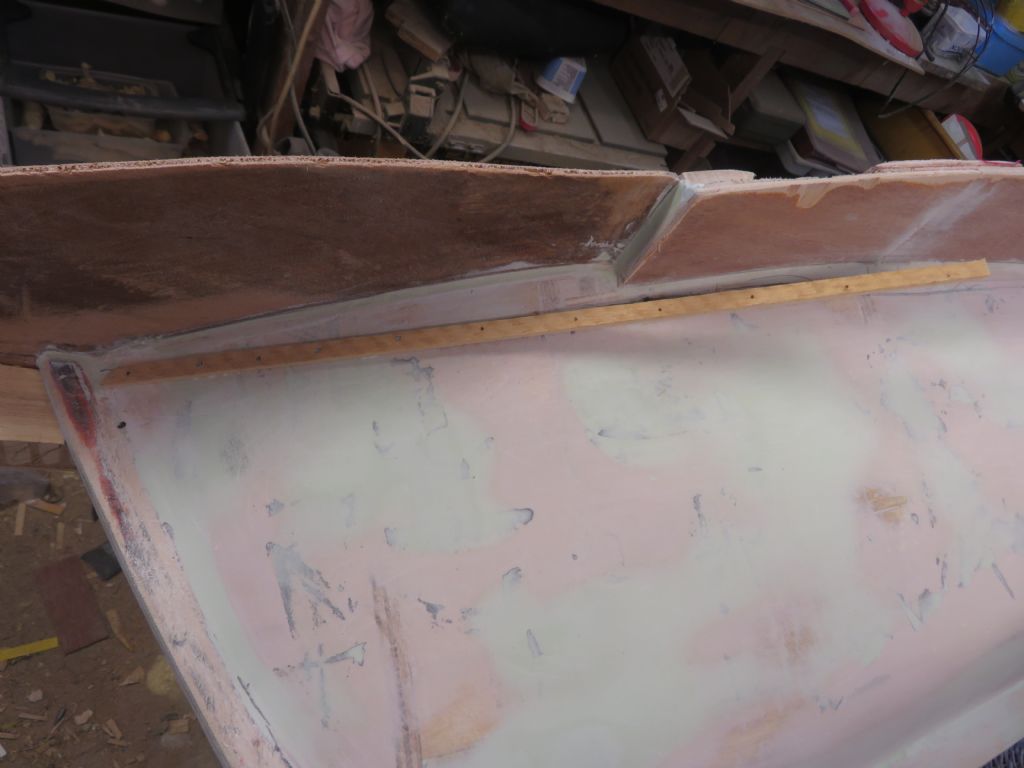
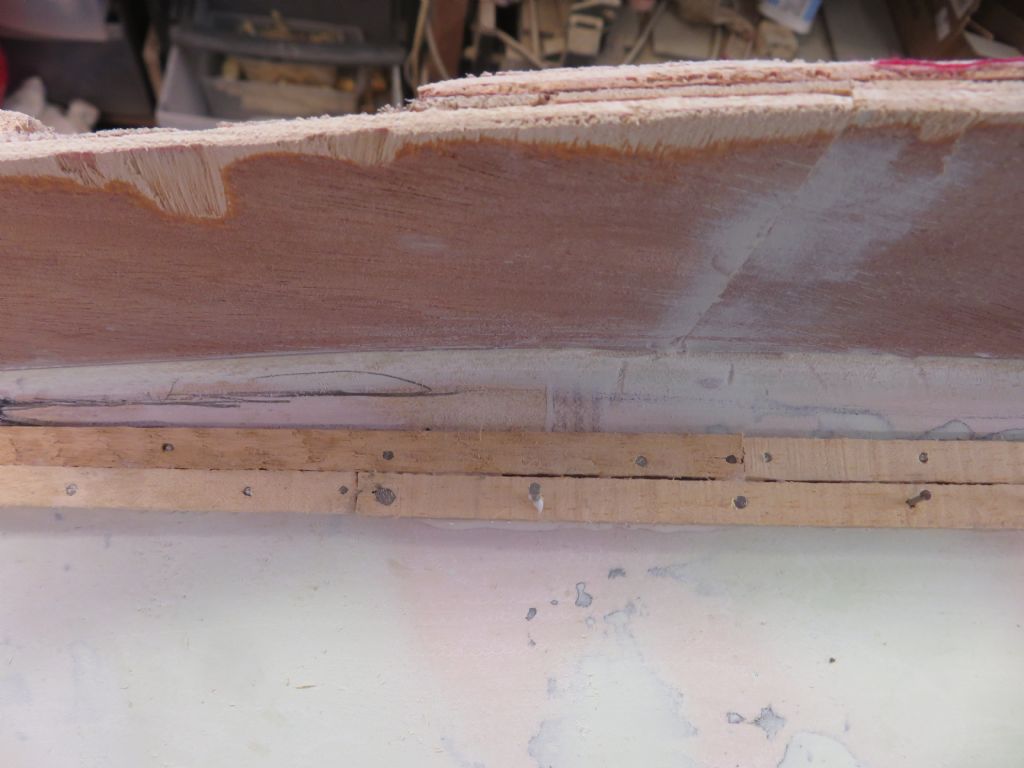
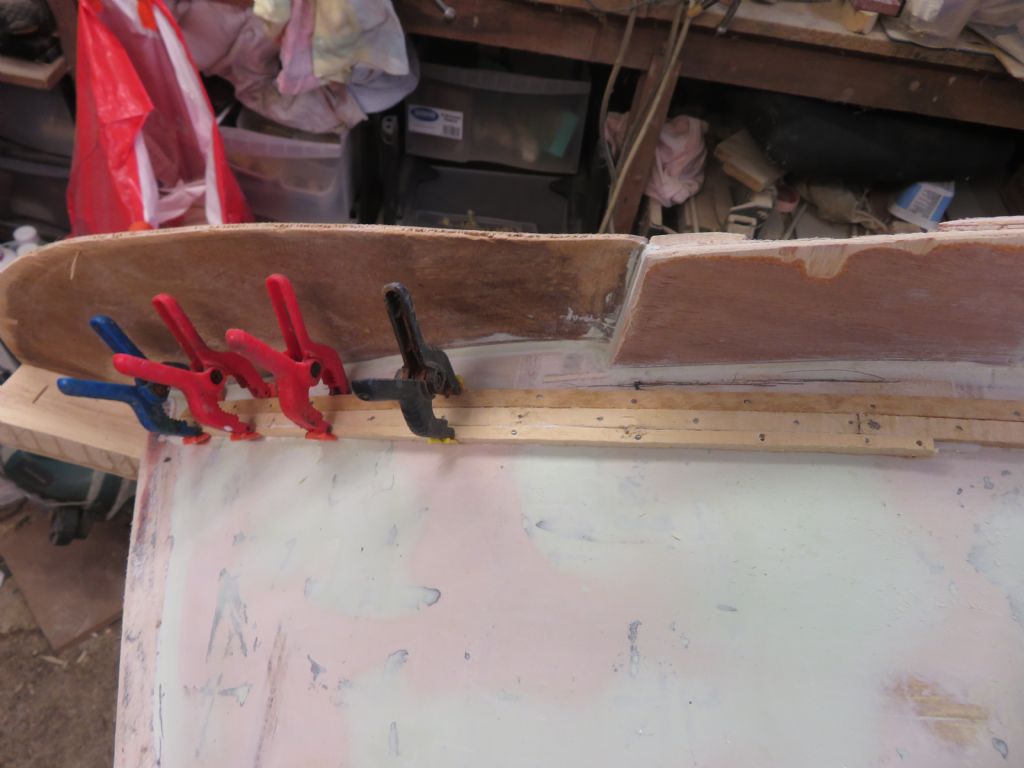
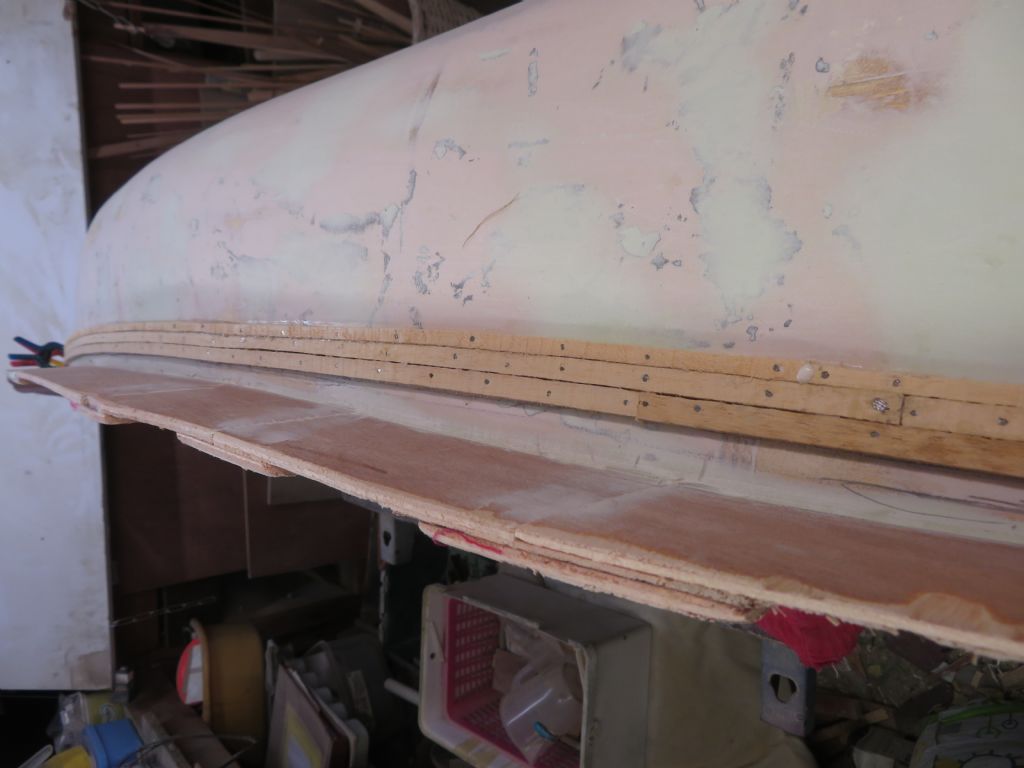
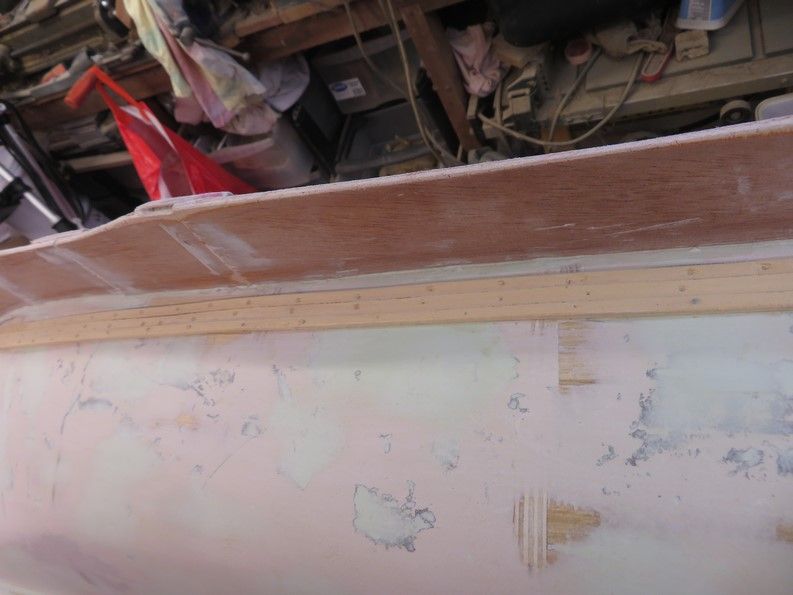
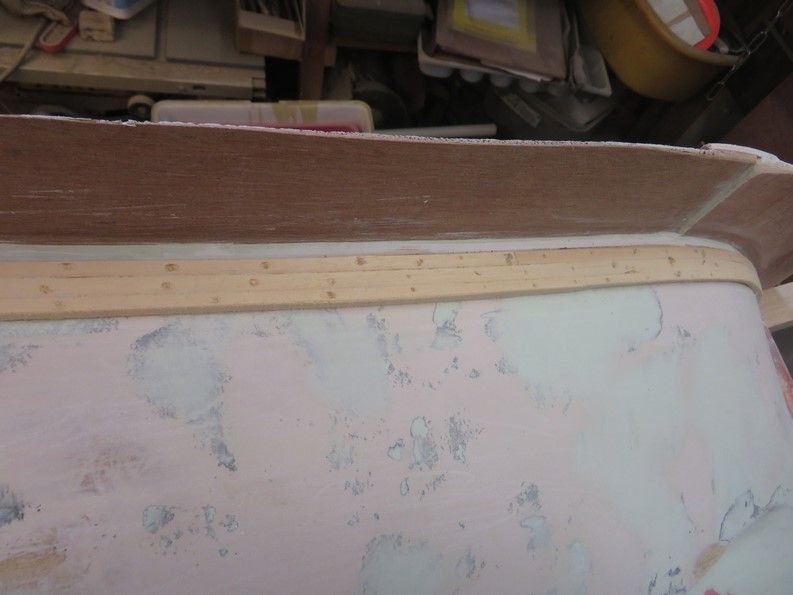
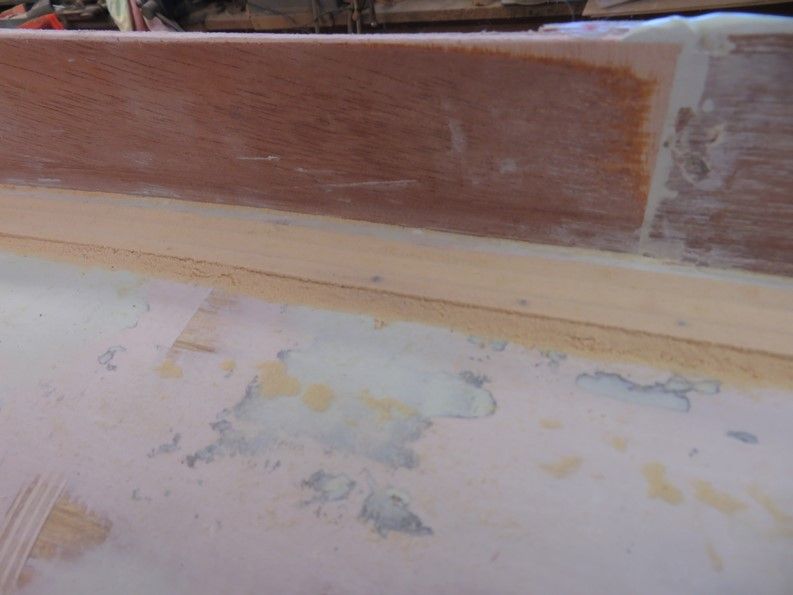
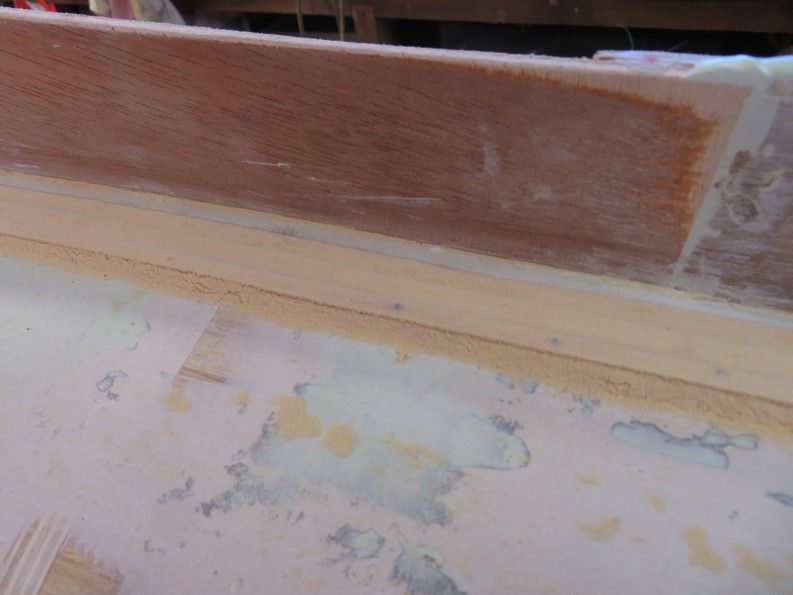
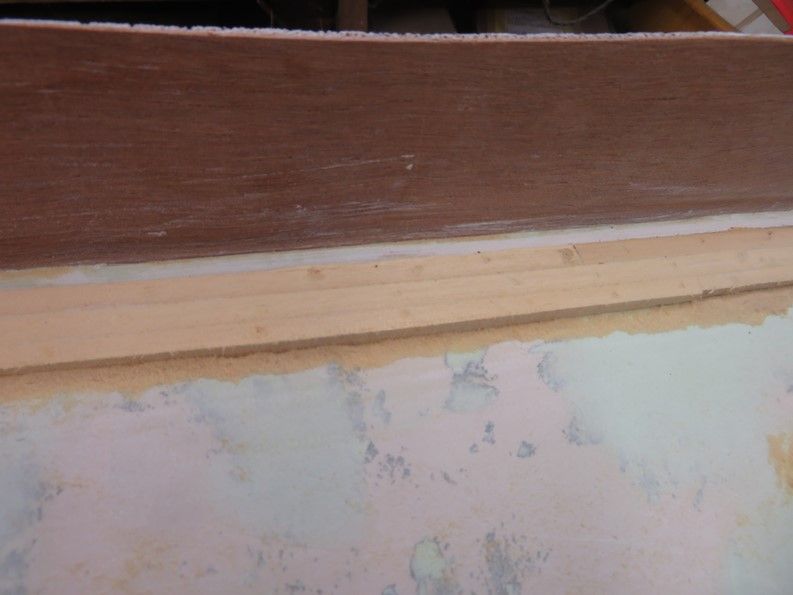
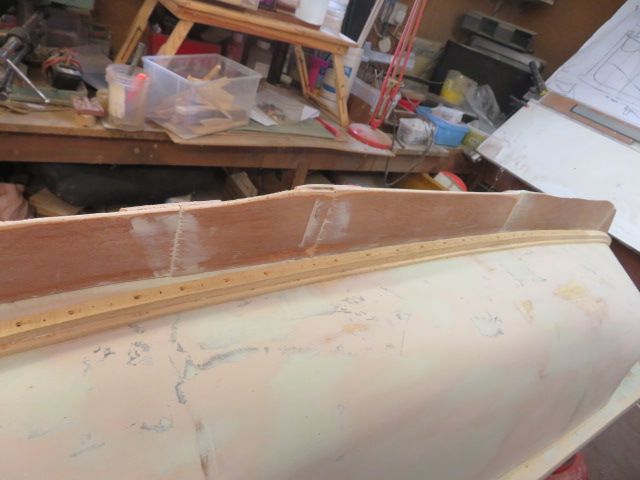
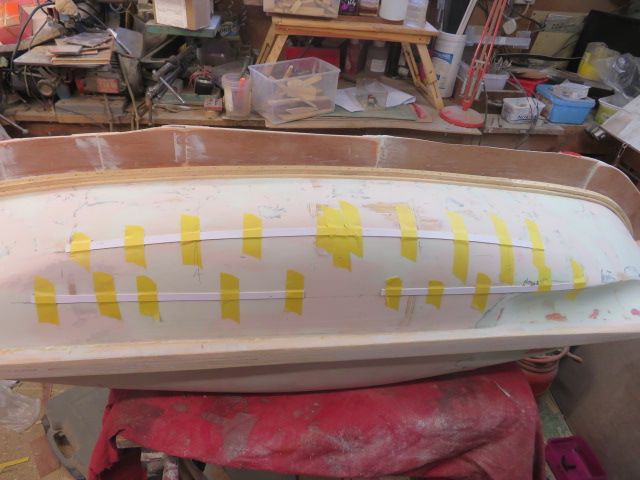
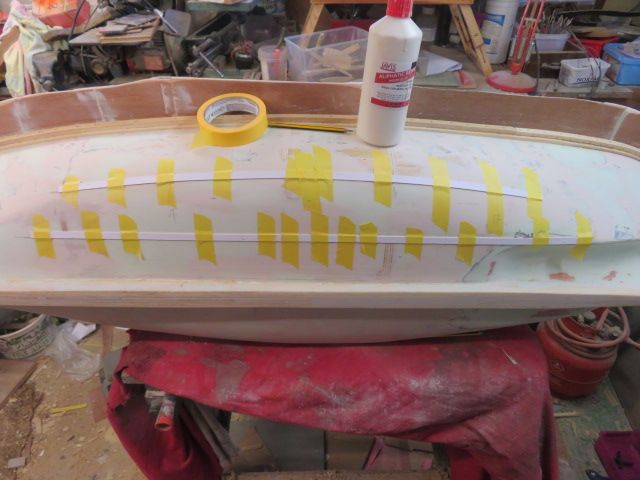
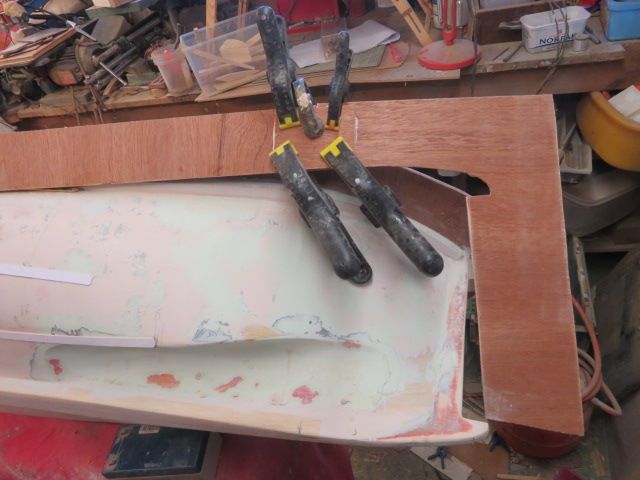
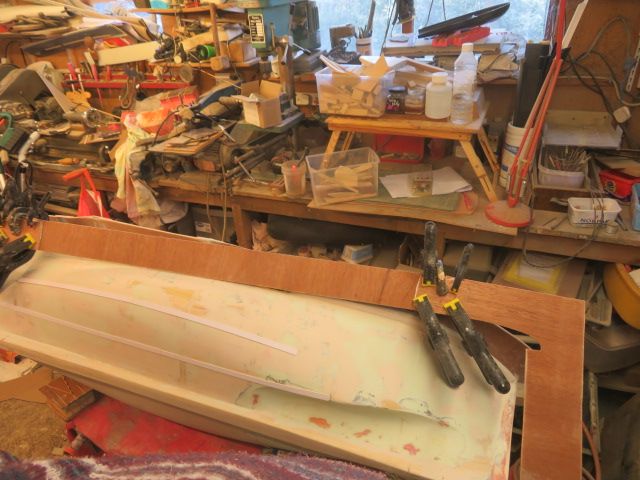
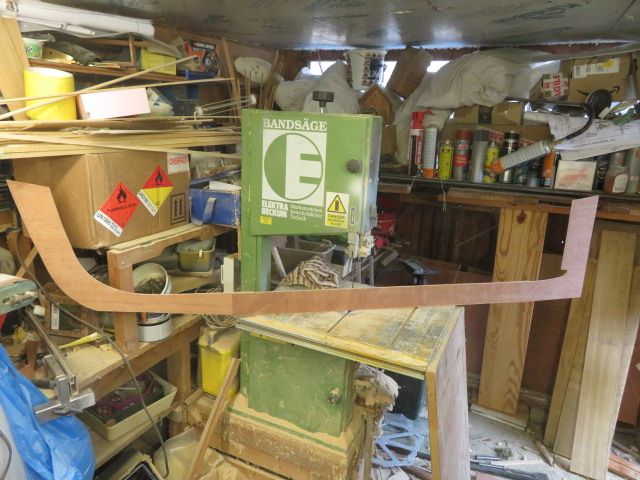
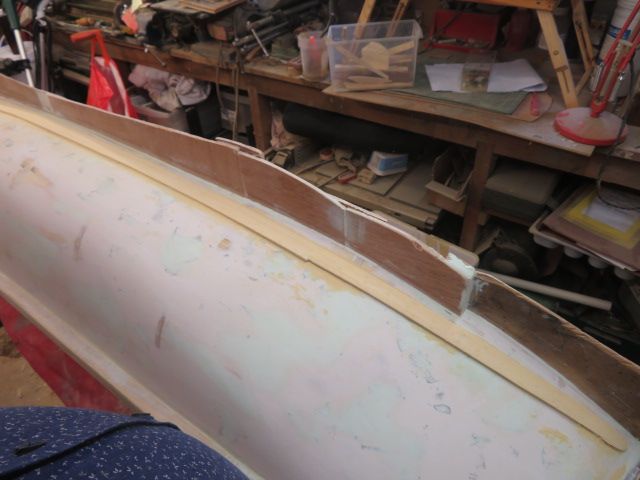
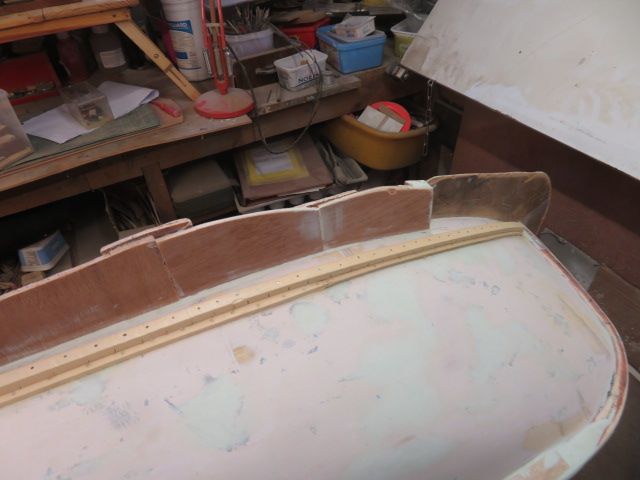
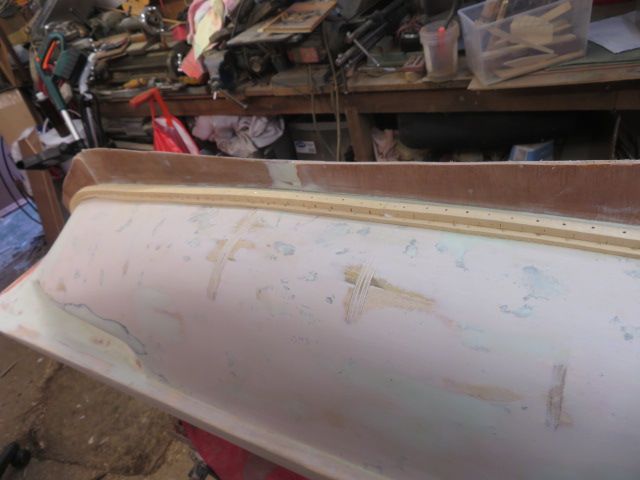
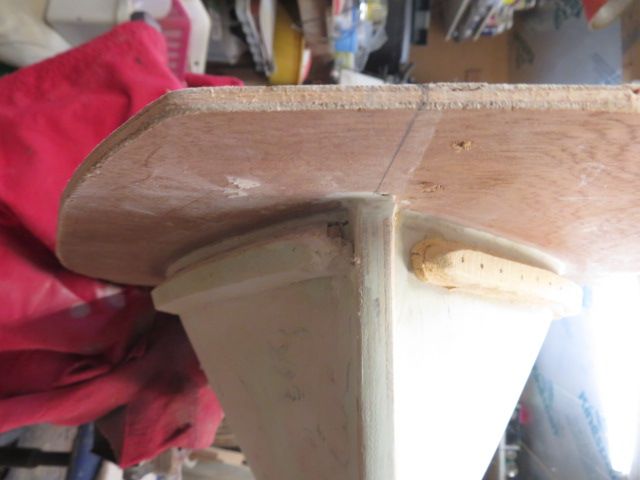
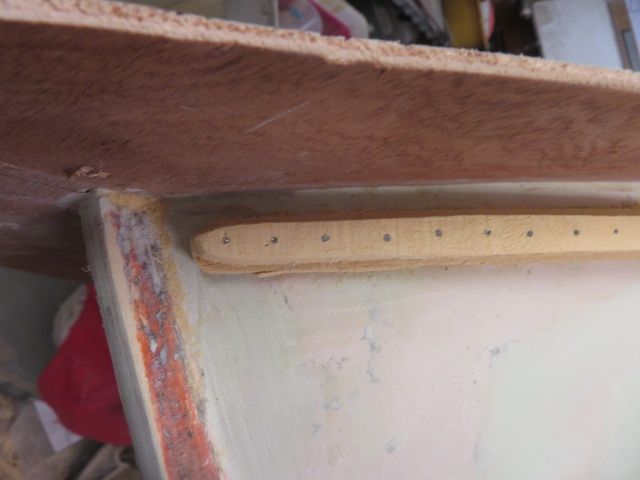
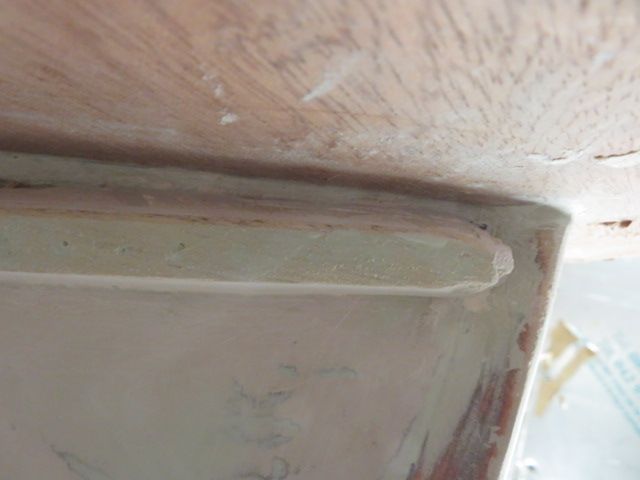
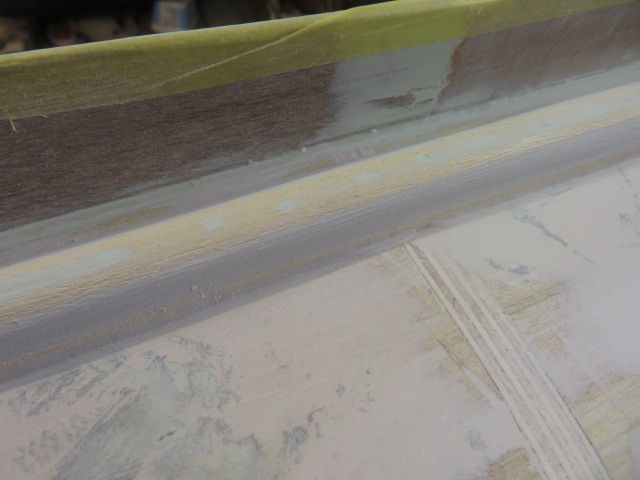
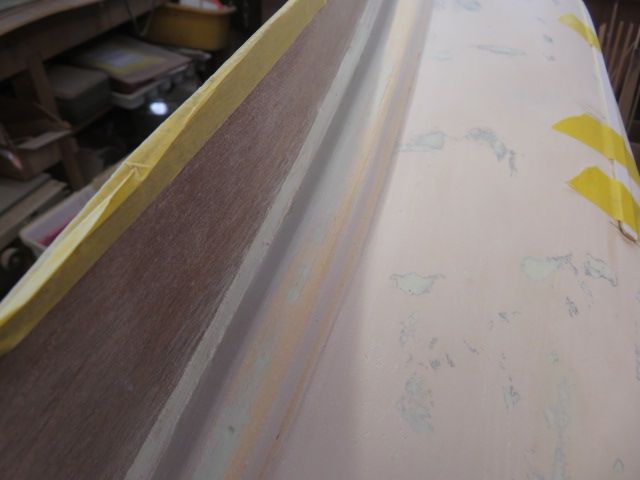
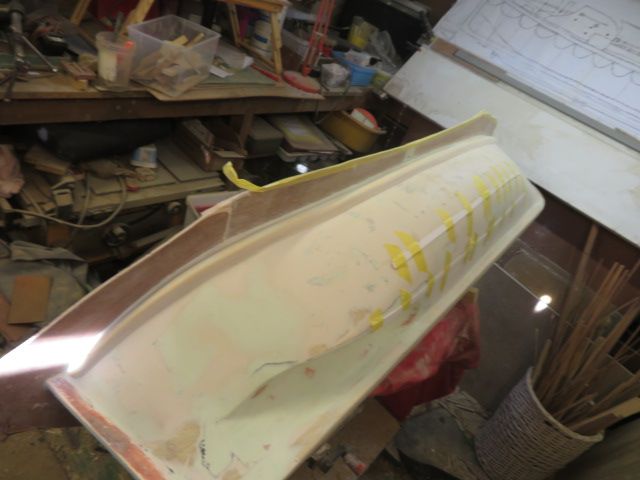
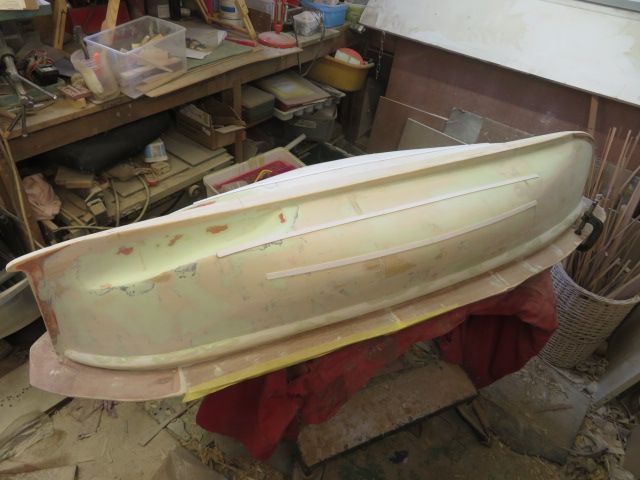
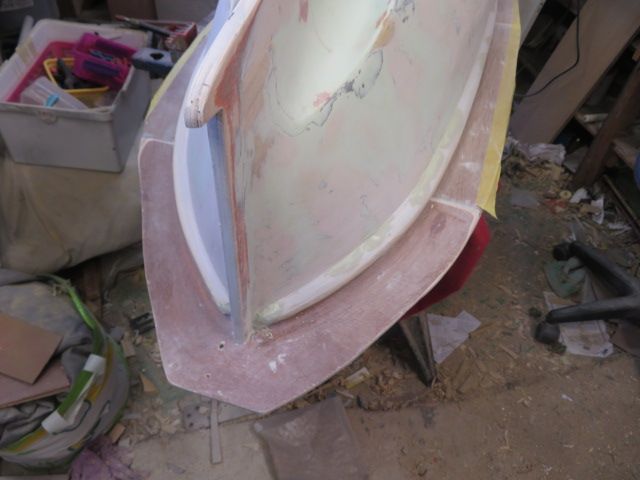
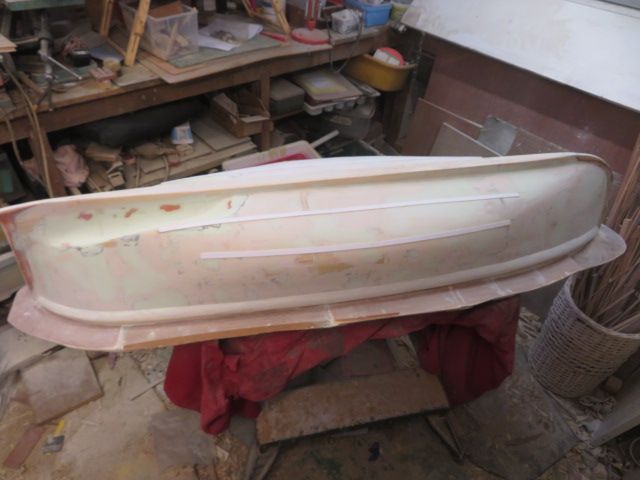
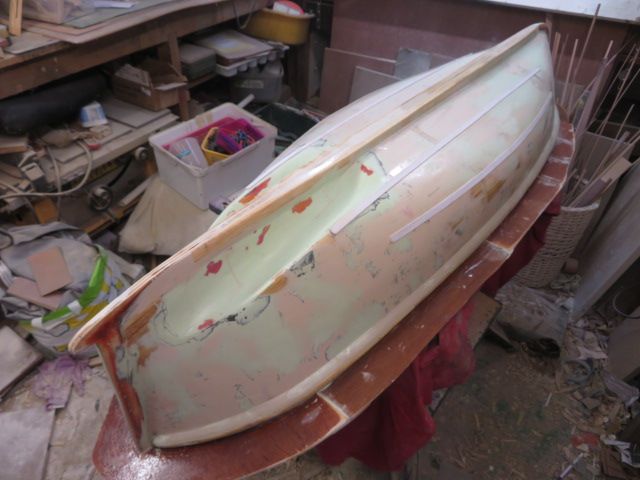
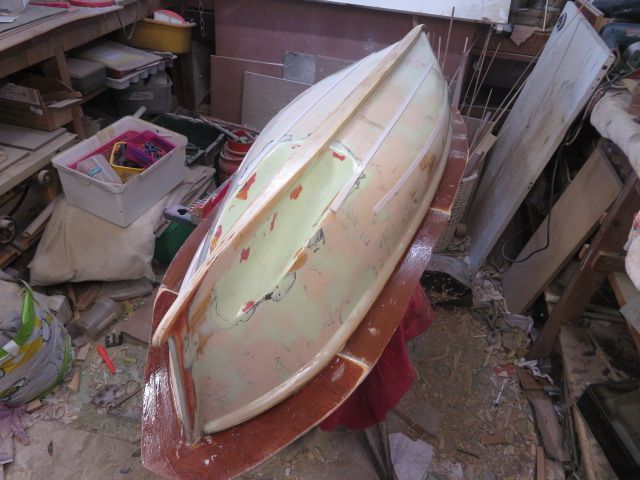
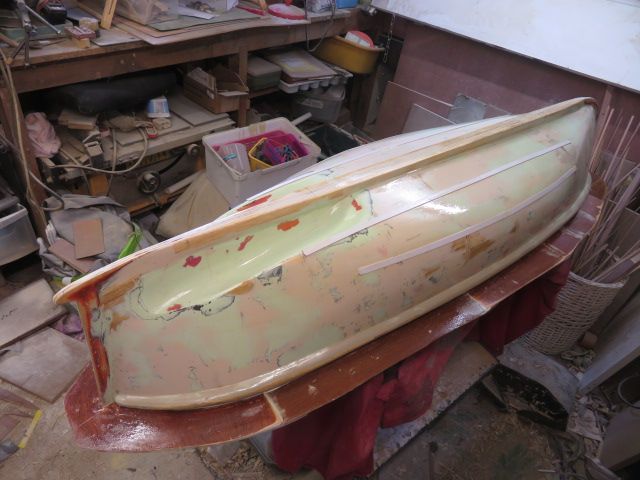
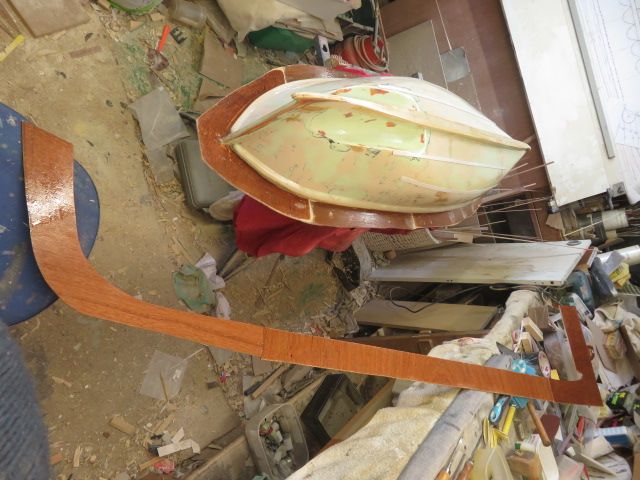
        And so I have started to put on the wooden parts to mark her out as a lifeboat.

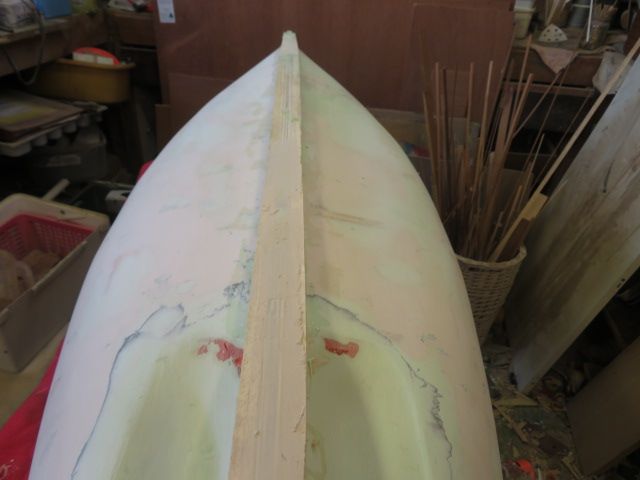
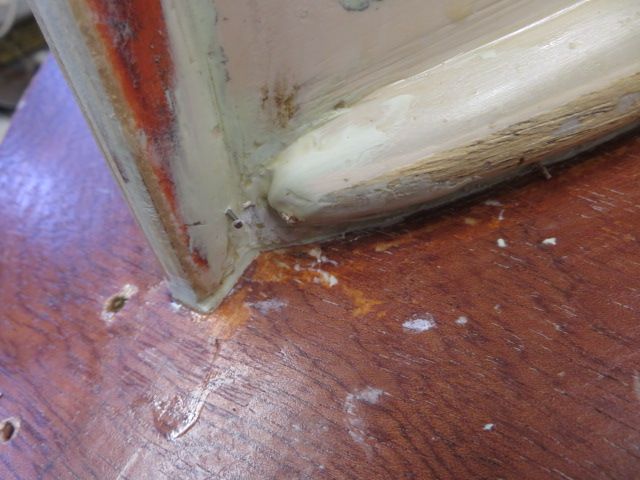
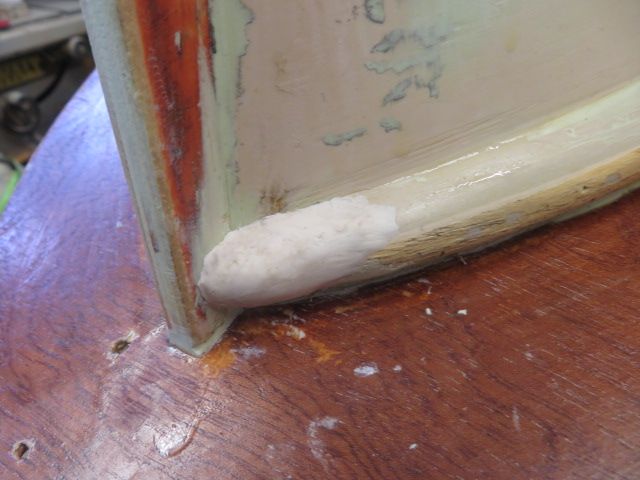
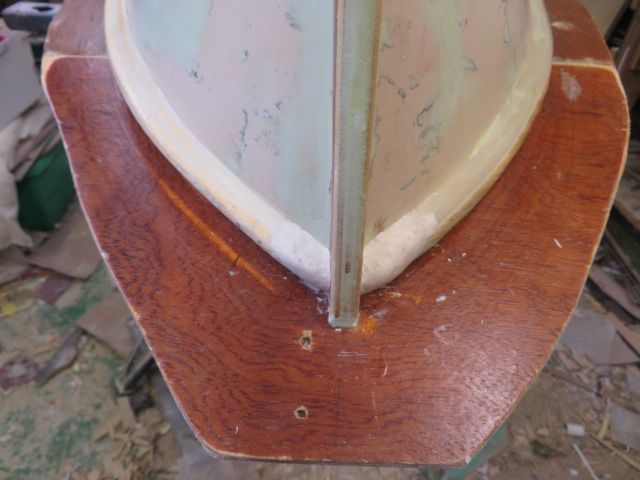
        First the cast iron keel running almost the full length of the level keelson. Made it earlier as they say on Blue Peter from some obeche, tapered at bow and stern.

        Tomorrow it will be trimmed to the top of the keelson and then filled where it sits on the hull bilges., before sanding smooth.

        Then it will be fitting the wooden moulding to form the "cork/timber" fender that runs around the sheer of the deck.

        This I'll do in two layers and multiple pieces of timber overlapping joints.

        img_3681.jpg

        img_3682.jpg

        img_3683.jpg

        img_3684.jpg

        #102027
        neil hp
        Participant
          @neilhp

          After a very nice day out in Liverpool and the Wirral today, and then back to Fleetwood with by daughter for lunch on very nice haddock and chips from the Ferry Cafe on the sea front at Fleetwood I decided that I should get my ass into gear and fill the gaps between the false keel and the keelson/bilges.

          I used the Dolphin Glaze for the gaps and then some P38 to blend in the false keel to the prop tube tunnels.
          and there are more than one job an old battery can do than just take up space in your workshop.

          Now just waiting for it all to set and harden before sanding it down.

          img_3694.jpg

          img_3695.jpg

          img_3696.jpg

          img_3698.jpg

          img_3697.jpg

          img_3699.jpg

          #102039
          neil hp
          Participant
            @neilhp

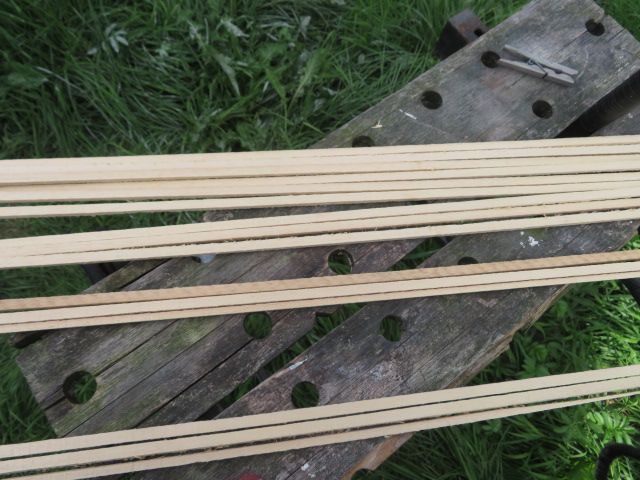
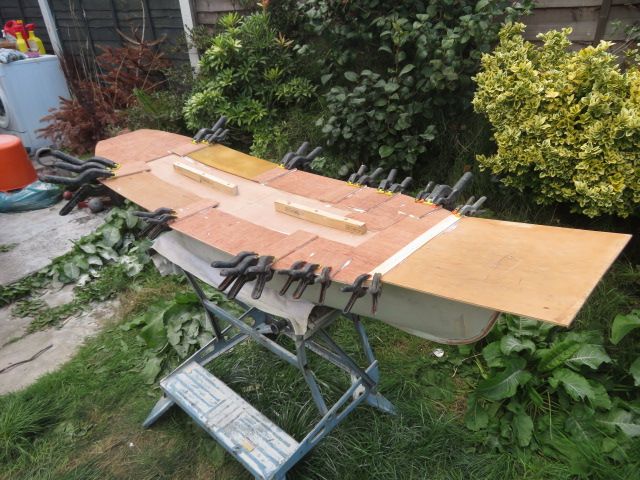
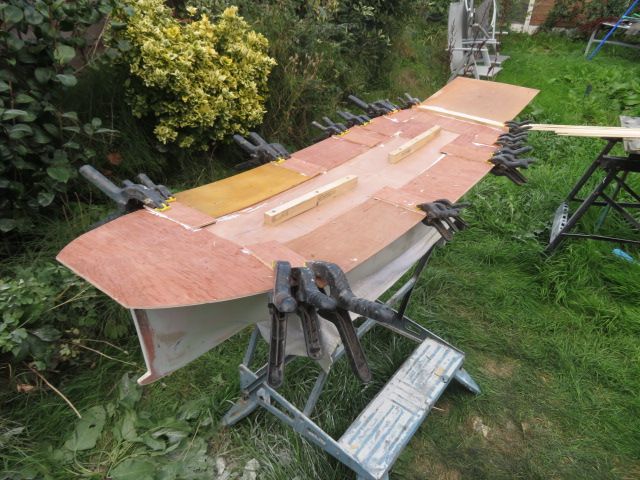
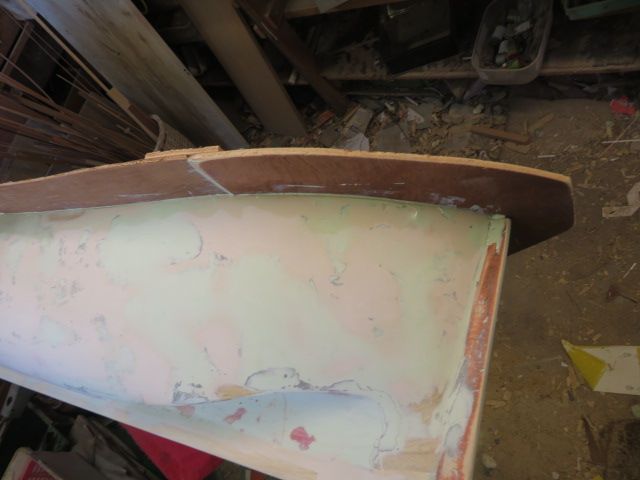
            Whilst waiting for some filler to cure on the prop tunnels I have cut the first layer of the belting to go around the shear line of the bulwarks.

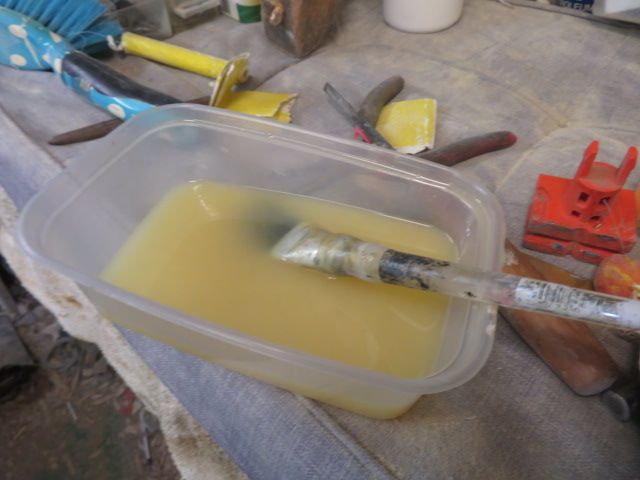
            This will be soaked in warm water in the bath tonight, and then pinned temporarily in place until dry .

            Once dry, the pins will be loosened, the timber takem off, 2 part epoxy applied and then glued in place using the pins to drive into the wooden hull and glue in place.

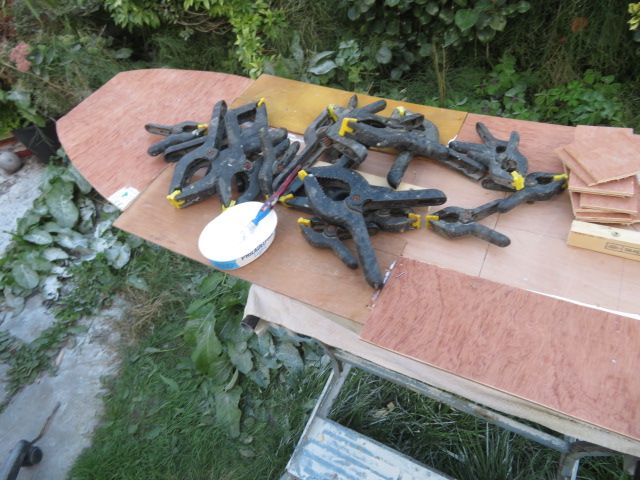
            And after cutting the timber for the belting, I dug out some 4mm ply and made the flange in sections that runs around the top of the deck to mould up to once fibre glassing begins.

            With a flange laid on to the mould, it is easier to trin the hull moulding off whilst still "blue".

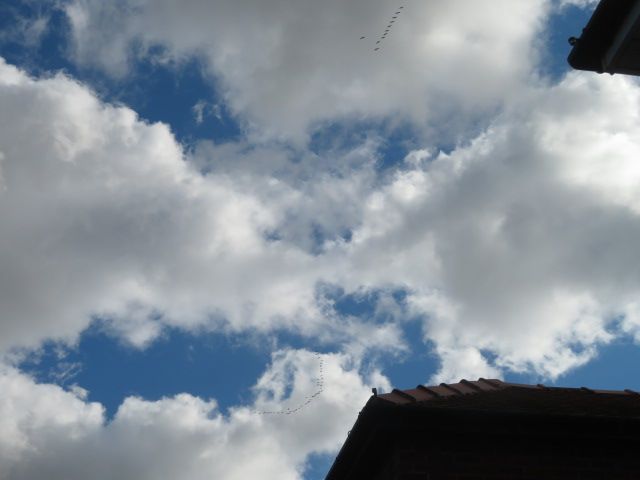
            And the first picture of the clouds, is what I DID NOT WANT to see in mid september…….a skein of geese flying south…winter comes early. grrrrr

            img_3707.jpg

            img_3710.jpg

            img_3712.jpg

            img_3713.jpg

            img_3708.jpg

            #102044
            neil hp
            Participant
              @neilhp

              Now that the pieces of ply have been glued on to the deck line of the hull and allowed to set overnight, they have been trimmed all around the deck line to give an average of about 2.5 – 3inches in width so that when the gelcoat and resin/matting have been laid onto the plug it gives a flange on the mould to trim the moulding to.

              Then I sealed any gaps between hull and flange on one side with Dolphin glaze………

              just waiting now for it to set, whilst listening to the weekly thrash of the blades of an historic aircraft that does a curcuit of the bay close to me……….a Huey Cobra helicopter……….can hear it for miles around, but only ever seen it once lol.

              img_3720.jpg

              img_3721.jpg

              img_3722.jpg

              img_3723.jpg

              #102049
              Cecil Webb
              Participant
                @cecilwebb96087
                Posted by neil howard-pritchard on 17/09/2022 11:15:33:

                Now that the pieces of ply have been glued on to the deck line of the hull and allowed to set overnight, they have been trimmed all around the deck line to give an average of about 2.5 – 3inches in width so that when the gelcoat and resin/matting have been laid onto the plug it gives a flange on the mould to trim the moulding to.

                Then I sealed any gaps between hull and flange on one side with Dolphin glaze………

                just waiting now for it to set, whilst listening to the weekly thrash of the blades of an historic aircraft that does a curcuit of the bay close to me……….a Huey Cobra helicopter……….can hear it for miles around, but only ever seen it once lol.

                img_3720.jpg

                img_3721.jpg

                img_3722.jpg

                img_3723.jpg

                Hope to end your waiting soon.

                Waiting for your update.

                #102054
                Richard Simpson
                Participant
                  @richardsimpson88330

                  Looking good Neil. Remembering the quantity of wood that has gone into the manufacture of this plug I can imagine it is getting to quite a weight by now!

                  #102056
                  neil hp
                  Participant
                    @neilhp

                    I'm now needing to move it in and out of the workshop on a sack trolley its so heavy…….but a final sanding of the filler to fill the gaps will be done this afternoon, and then it will take up permanent residence on the workmate until the mould is made and finished.

                    And then the plugs can be put away for safety .

                    #102059
                    neil hp
                    Participant
                      @neilhp

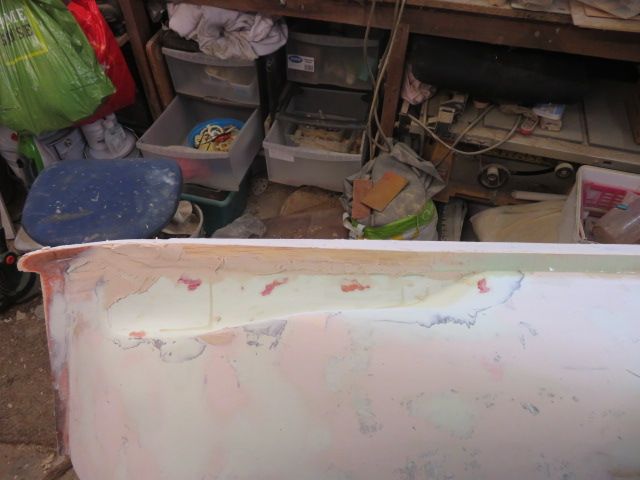
                      This afternoon, I started by sanding off any filler to the hull/flange seem to give a nice clear joint ready for eventual laying up of the mould.

                      Then I put a block of obeche on to each end of the flange to screw the hull flange following the stem, keel and stern post of the boat, to screw the other flange to but that will become clearer onceI have finished the hull detailing ready for laying up the mould.

                      Then it was the start of the belting following the sheer of the deck that has already been determined not only by laying a moulding flange on to the top of the boats already laid deck but also by the frames that I worked too.

                      I had already tried a one piece base of 4mm thick and 22mm width, by cutting slots into the timber to aid bending……sadly it didn't work as the "planks" just broke at the weekest part.

                      And so I went down to Fleetwood docks where our old 41' Watson Ann Letitia Russell is lying uncovered.

                      Having looked at the belting on the old boat, I discovered that she had a belting made of some base stringers and then top stringers to form the depth and width of what becomes a rounded bulbous semi circle belting.

                      And so I did exactly the same using 3 strips of 4 x 4mm obeche and this gave the strips a much better chance of taking the curves of the hull without splitting or breaking at the tightest of curves. they were pinned to the hull with 12mm framing pins……….

                      Far easier that the first idea, and far less time wasted than soaking or steaming the planks too. that one side took me about an hour.

                      I also lapped the joints so that the join was not in the same place on each layer.

                      img_3725.jpg

                      img_3730.jpg

                      img_3736.jpg

                      img_3737.jpg

                      img_3741.jpg

                      #102075
                      neil hp
                      Participant
                        @neilhp

                        So, before the ceremony begins later this morning I have had time to nip into the workshop and pin punch all of the framing pins, to below the surface of the timber.

                        This then allowed me to sand the levels of the 3 strips of belting to a mutual level, before applying the outer belting.

                        Once cut, the outer layer in two strips will be applied later this afternoon/evening.

                        img_3748 (copy).jpg

                        img_3749 (copy).jpg

                        img_3745 (copy).jpg

                        img_3746 (copy).jpg

                        img_3747 (copy).jpg

                        #102079
                        neil hp
                        Participant
                          @neilhp

                          Well, its back from the surreal and the sadness of the week, to the model lifeboat plug.

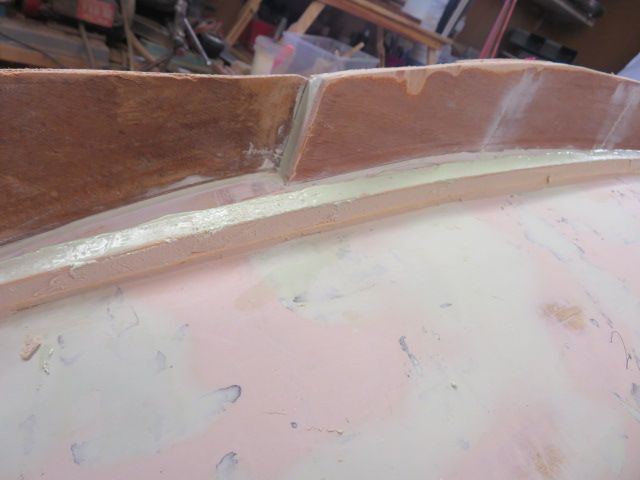
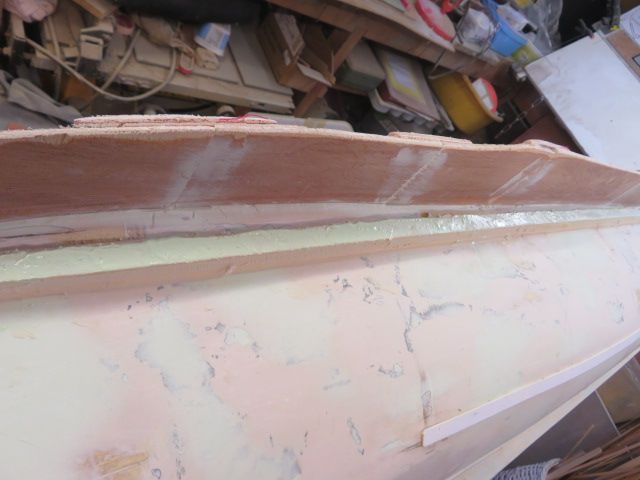
                          And this afternoon i put the top piece of belting on to the first layer. It now has to be sanded to a semi round surface and the inner edges sanded to a quarter round.

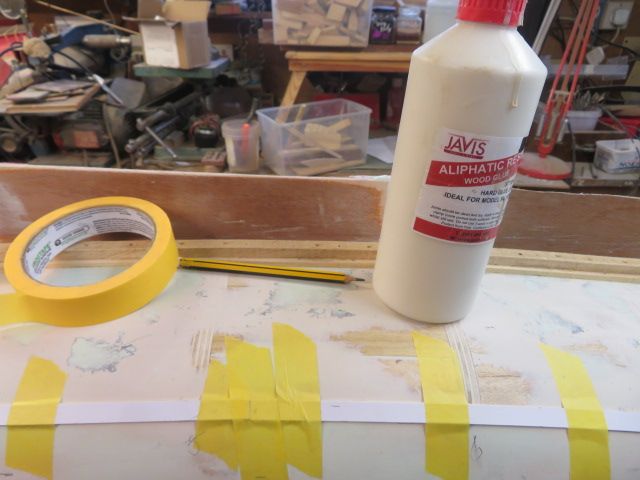
                          Then it was on to the base plates for the keel skegs and the grab rails. These bases were simply made from 1mm photo/painting mounting card, glued to the hull using aliphatic resin and held in place with low tack masking tape…

                          These will all be treated with celulose sanding sealer once both sides are done and a final rub down with fine wire wool and then 180 grit wet and dry carburundum paper, USED DRY/!

                          img_3752.jpg

                          img_3754.jpg

                          img_3756.jpg

                          img_3757.jpg

                          #102083
                          neil hp
                          Participant
                            @neilhp

                            first job today was to fill in the "step" between the base planks and the upper section of the belting to msake a smooth romboydal section of the belting ready for sanding to a rounded top pnce the filler has cured.

                            I will then make the other starboard side of the hull exactly the same as that of the port side, before sanding all to the correct shape.
                            done!!

                            img_3760.jpg

                            img_3761.jpg

                            #102084
                            neil hp
                            Participant
                              @neilhp

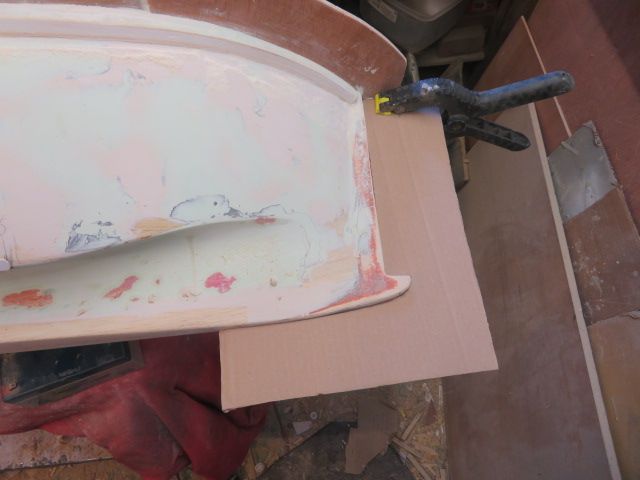
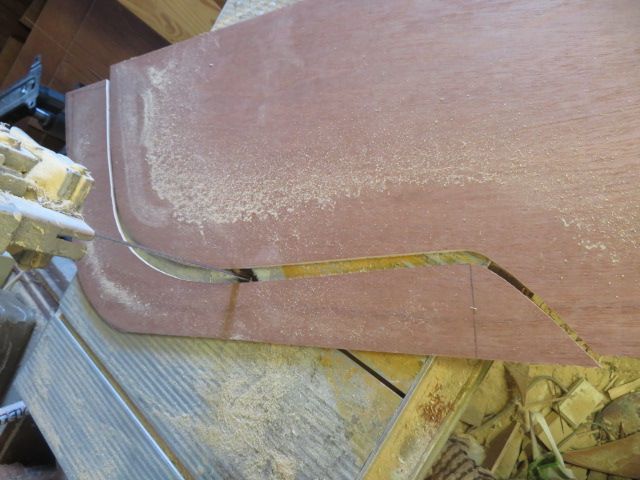
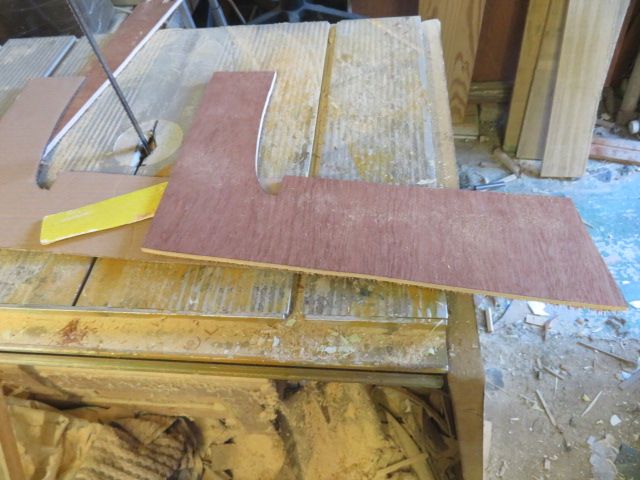
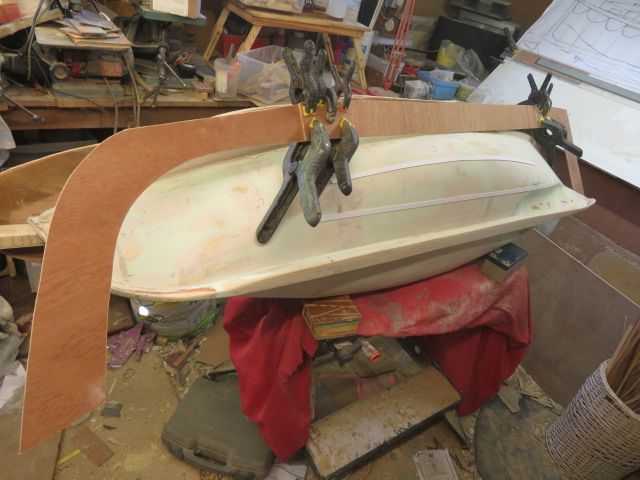
                              next job was to make the flange for seperating the two halves of the mould along the full length of the boat, from stem to stern.

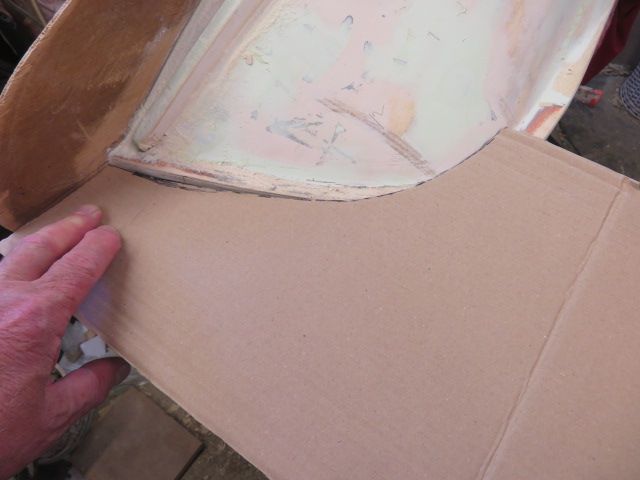
                              This needed some card to make templated from before transfering to 5mm ply and cutting and glueing the 3 pieces together.

                              Done!

                              img_3762.jpg

                              img_3764.jpg

                              img_3771.jpg

                              img_3772.jpg

                              img_3773.jpg

                              img_3774.jpg

                              img_3775.jpg

                              img_3776.jpg

                              #102098
                              neil hp
                              Participant
                                @neilhp

                                One sits, or stands playing with their model on a daily basis, and although it [the plug at this moment in time] gets heavier and heavier, you don't realise just how large it is until you stand side on to the flange that surrounds the boat itself…………..and take the size in perspective to the band saw table it sits on…..and then you look bewildered thinking how the hell are you going to lower it in to the lake……….it's HUGE!!!

                                And now that the starboard side belting has been glued on to the boat in layers the same as the port side, I will fill that in the same manner as was the port side and tomorrow have a massive sanding party MAMOTH sanding down party……….SADLY just myself attending as I cant find any other nutters to volunteer. C'ese la vie'

                                img_3795.jpg

                                img_3794.jpg

                                img_3796.jpg

                                img_3797.jpg

                                #102105
                                neil hp
                                Participant
                                  @neilhp

                                  warts and all, so people say……..

                                  well! i made a big wart the last night as i was fixing the second set of base belting planks on to the starboard side….

                                  probably not concentrating as i should, being blase' and big headed that i had done it so well on the port side, that when i went out last night to view it and all i can say or hear are the imortal words………."Wodney……….YOU are a plonker"

                                  the levels of the two ends at the bow were fine and same distance from the flange…………..but, and it was a big BUT…….the levels at the stern were about 3mm off…….not much but very noticable, and having a trained eye……….it would have urked me every time i looked at it.

                                  Something had to be done, and my first choice was to lift the stern off the boat, but it was stuck fast.

                                  Think again, and without ripping it all off, probably damaging the hull whilst doing it, i decided to plane off some of the timber on the bottom of the belting and raise it at the top with more filler………and this was what i did.

                                  Once both are sanded smooth and rounded off on the outer edge I think [ AND HOPE] that they will match up.

                                  img_3802.jpg

                                  img_3803.jpg

                                  img_3804.jpg

                                  #102110
                                  ashley needham
                                  Participant
                                    @ashleyneedham69188

                                    Oh dear Neil. Been there, done that!

                                    Great workshop shot. My sort of workshop.

                                    Ashley

                                    #102113
                                    neil hp
                                    Participant
                                      @neilhp

                                      I have now completed the starboard side.

                                      The belting has been filled to match up with the port side with some jiggery pokery, sanded and rounded off to the outer edge and ends.

                                      The raised positions for the keel skeg and the grab handles have been fixed using mounting card, and the whole side sanded smooth.

                                      Tonight I will attack the port side belting, rounding and filling to match the starboard side belting, and then left for finishing tomorrow.

                                      My arms and shoulders now ache from all the sanding, so a nice hot bath and soak with some salts to ease the pain before starting again tomorrow, ready for an overall sanding and sealing.

                                      img_3819.jpg

                                      img_3820.jpg

                                      img_3821.jpg

                                      #102121
                                      neil hp
                                      Participant
                                        @neilhp

                                        Working most of the day, trying to profile, fill and sand the starboard side belting to match the port side finished earlier this week., and I think I have finally managed it.

                                        Let any rivet counter point out the differences, and I have an answer for them, amd not what you think, lol.

                                        Now that that has been done, I have started sealing it all wih cellulose sanding sealer/thinners mix, and at the moment have given the whole plug just 1 coat but will give it another in an hour, and then glue the two anchor chain hawse outlet fittings to the bow.

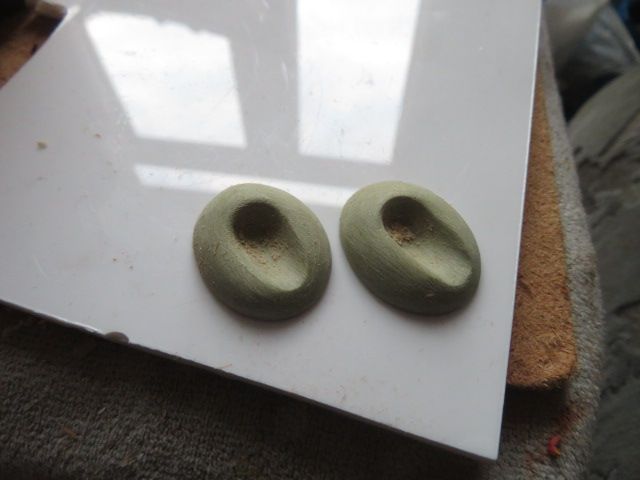
                                        These fittings were made from milliput 11 years ago for the 51' Barnett and are the same fitting as on this earlier Barnett……….I like to think ahead, lol.

                                        They will come out in the mouldings

                                        And if you believe that, ??????, lol.

                                        img_3824.jpg

                                        img_3825.jpg

                                        img_3826.jpg

                                        img_3827.jpg

                                        img_3828.jpg

                                        img_3829.jpg

                                        #102129
                                        neil hp
                                        Participant
                                          @neilhp

                                          3 coats of sanding sealer on the hull and one on the flange already….

                                          So two coats more on both and then a rub down with wire wool of varying harshness, and hopefully by tonight I can start waxing the boat up ready for laying on the gelcoat and then fibre glass matting on the first side of the boat, ONCE I have fitted the flange to the boat .

                                          img_3830.jpg

                                          img_3831.jpg

                                          img_3832.jpg

                                          #102132
                                          neil hp
                                          Participant
                                            @neilhp

                                            Stepped up a gear this afternoon and got motoring.

                                            The plug has had its coats of sealer, but before I put the flange on to the hull, I had had enough of the roughness in the gaps between the belting and the stem and stern posts, and so I would look into the Padstow lifeboat book at the photos of the Princess Mary,see what I could do, and realised that the photos show that the belting follows through to both stem and stern posts, without a gap.

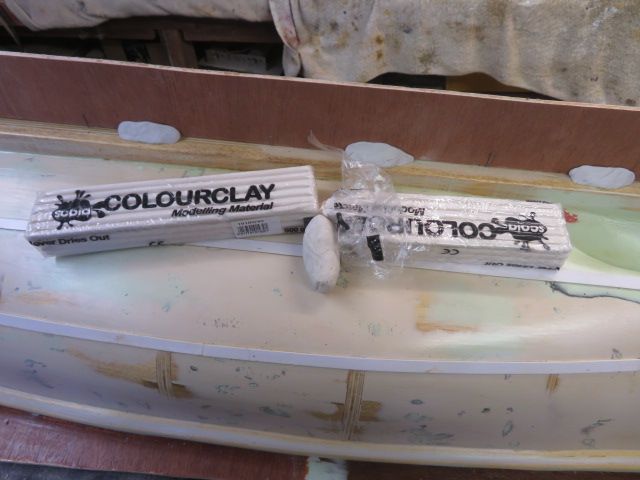
                                            At this stage I realised that there was no posibility of putting in a small section of timber, getting some filler to stay put and sanded to shape would be impossible, and it would do nothing for me stress level in making such a stupid cock up, I deciced the answer lay in my hands…………plasticine.

                                            And so I CHEATED!!!!! YES I made the infills of belting from lumps of plasticine; it is easily moulded in to shape, it can take the heat generated from curing resins, it doesn't stick and it goes hard enough in a cold workshop to work on if carefull.

                                            And they were easy to mould in to shape with the rest of the belting…….
                                            DON'T BE AFRAID TO CHEAT . It reduces stress, and unless you don't mind owning up like I do……no problems, lol.

                                            oh yes and I also fitted the anchor hawse plates to the bow………….well I think it was the bow……these double enders confuse me lol…….will check later.

                                            img_3834.jpg

                                            img_3835.jpg

                                            img_3836.jpg

                                            img_3837.jpg

                                            img_3838.jpg

                                            #102133
                                            neil hp
                                            Participant
                                              @neilhp

                                              And then into second gear….

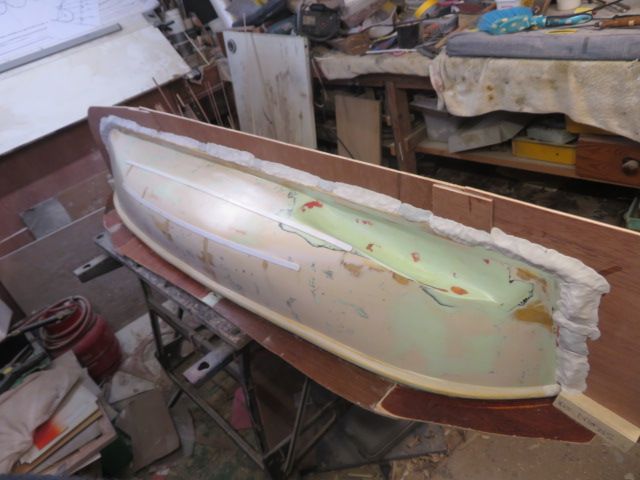
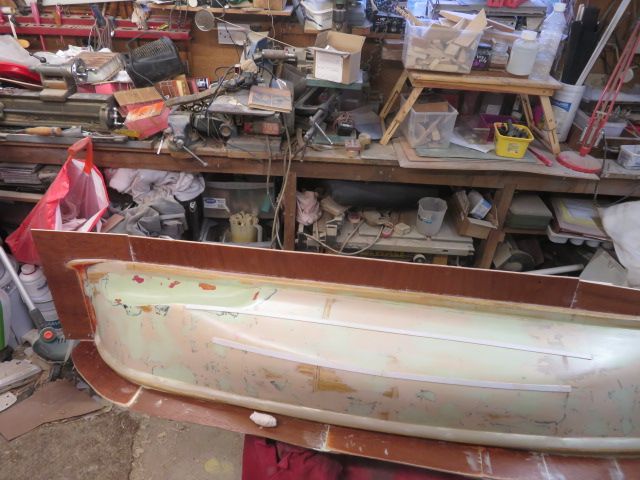
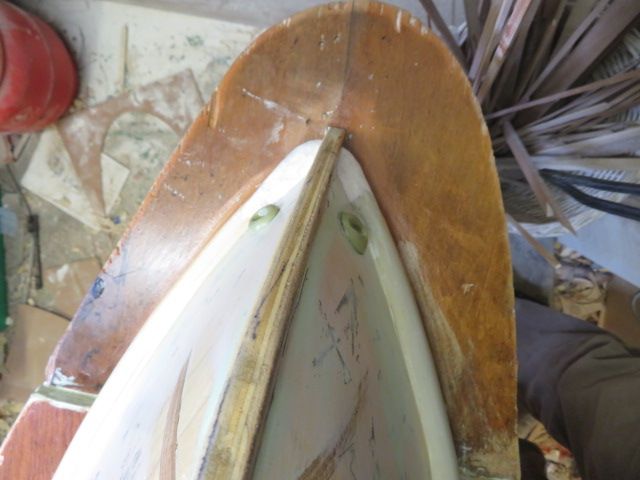
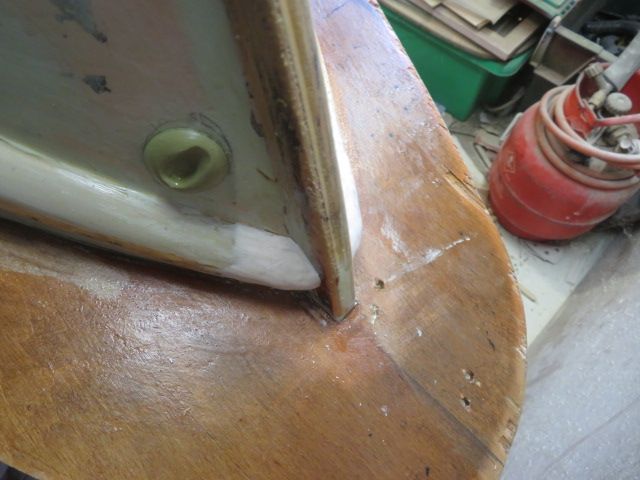
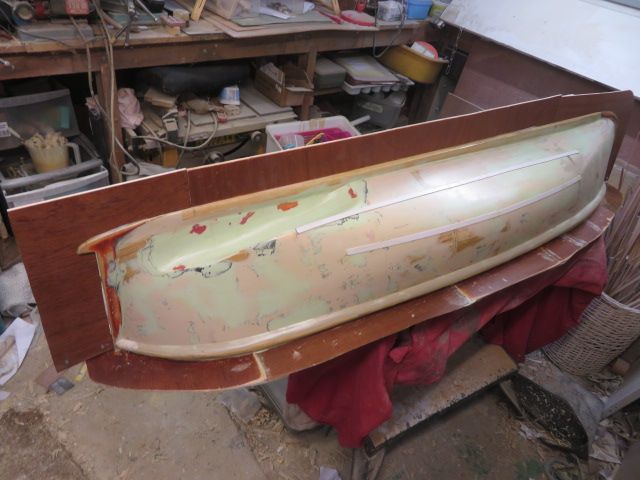
                                              I refitted the wooden blocks that anchor the flange at bow and stern, and screwed the flange to the blocks………not quite a perfect fit, and i have never ever managed a perfect fit, as there are also some gaps between the keelson, stem and stern posts and the flange. But what does one do about the gaps.

                                              WELL, first of all, the flange has to be held in place so as not to wobble when laying up the first half of the mould., and at nearly 70 inches long on the outer dims, this 5mm flange wobbles in the middle.

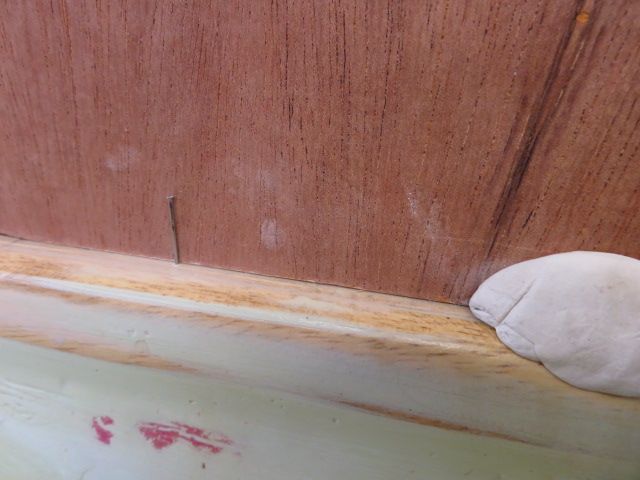
                                              Normally with a shorter hull, even up to 46" there isn't a great need to steady the centre as the next process holds a flange in place. However on this length I pinned both the object and obverse side with some fine veneering pins [about 0.5mm diameter] and these did the job holding the flange still and from wobbling. They will be removed from the object side before waxing up, and the holes which will be so small will be filled with the wax that will be added .

                                              And so the job of securing the flange to the keel began, using at first lumps of nice new whitetac [blutack, black tac or any other combo will do] I stuck the flange and hull together every 20 mmm or so, and then between the lumps of whitetac I stuffeffed into and over the white tac lumps of nicely softened plasticine. [be carefull to use architects modelling plasticine, NOT childrens playdo stuff as the former will go hard after being left and will hold its possition.

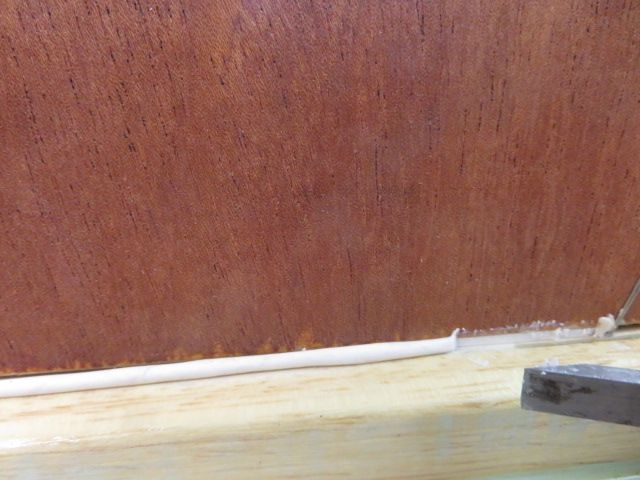
                                              Once that is done,………back to the object side and fill all the little gaps with rolled up lengths of plasticine, pressing it in to the gap, with either a chisel, or a thin spatula with a flat end [macdonalds coffee sterers are great for it with a flattened end.

                                              And then its just a case of leaving overnight for it all to go hard, before you start waxing the boat and flange up……..simples!!!
                                              img_3839.jpg

                                              img_3841.jpg

                                              img_3842.jpg

                                              img_3844.jpg

                                              img_3849.jpg

                                              img_3851.jpg

                                              I needed a drink after that, and all I had was a Tango, booohooo!!!

                                              #102135
                                              Tim Rowe
                                              Participant
                                                @timrowe83142

                                                Hello Neil

                                                I have been following you all along. It is exciting to watch and your posts are always informative.
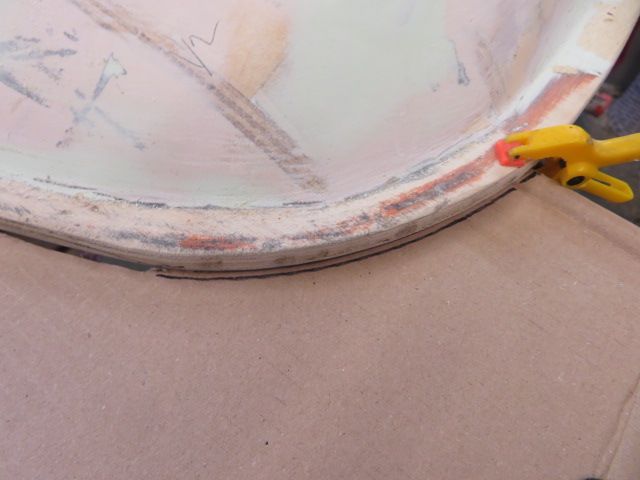
                                                I am intrigued to see how this will release. If you are planning to release diagonally are you expecting the card rail closest to the coming out with the mould and you will then have enough "spring" in the actual moulding to get it out? Secondly do you have a release draft angle between the top of the belting and the outside edge of the shaft tunnel?

                                                I ask because I was a patternmaker for a GRP moulding company and I would get a right royal ribbing from the laminators if I had a hang-up and an even bigger one from the management. That would have happened if a kind hearted colleague hadn't pointed out my undercut!

                                                Might you have to consider a supplementary joint line around your shaft tunnels? It would be a shame to damage your plug getting it out of the mould half.

                                                Tim R

                                                #102136
                                                neil hp
                                                Participant
                                                  @neilhp

                                                  hi Tim…..

                                                  going from experience only in making such lifeboat moulds with the exact same hull markings as this one has.

                                                  they are so heavily waxed and with a pva release agent applied, i eventually insert my nylon wedges into the keel flange, plus the belting flange to release the mould at that point, and pull in a diagonally upwards and away from the plug,

                                                  the card strips are litterally 1mm thick and to be honest pose no problem in lifting the mould off in that way…….

                                                  I have plans in making a short video of the mould releasing once i have drilled the flange with 8mm holes for my coach bolts to hild the halves together when moulding the hulls, so hopefully it will show you how easily they come off with a slight ping and then a dash to catcj one half before it falls to the floor.

                                                  But never had a problem yet.

                                                  However……..theres always a first time. lol.

                                                  #102137
                                                  neil hp
                                                  Participant
                                                    @neilhp

                                                    but, that problem as might be………is a week away……….i'll start swearing and cursing 5 minutes into the release programme, lol.

                                                    #102152
                                                    ashley needham
                                                    Participant
                                                      @ashleyneedham69188

                                                      ….can we have that on video as well please???

                                                      Ashley

                                                    Viewing 25 posts - 151 through 175 (of 648 total)
                                                    • Please log in to reply to this topic. Registering is free and easy using the links on the menu at the top of this page.

                                                    Code of conduct | Forum Help/FAQs

                                                    Advert

                                                    Latest Replies

                                                    Home Forums Scratch build Topics

                                                    Viewing 25 topics - 1 through 25 (of 25 total)
                                                    Viewing 25 topics - 1 through 25 (of 25 total)

                                                    View full reply list.

                                                    Advert

                                                    Newsletter Sign-up