61′ Barnett class lifeboat

Advert

61′ Barnett class lifeboat

Home Forums Scratch build 61′ Barnett class lifeboat

Viewing 25 posts - 301 through 325 (of 648 total)
  • Author
    Posts
  • #102934
    neil hp
    Participant
      @neilhp

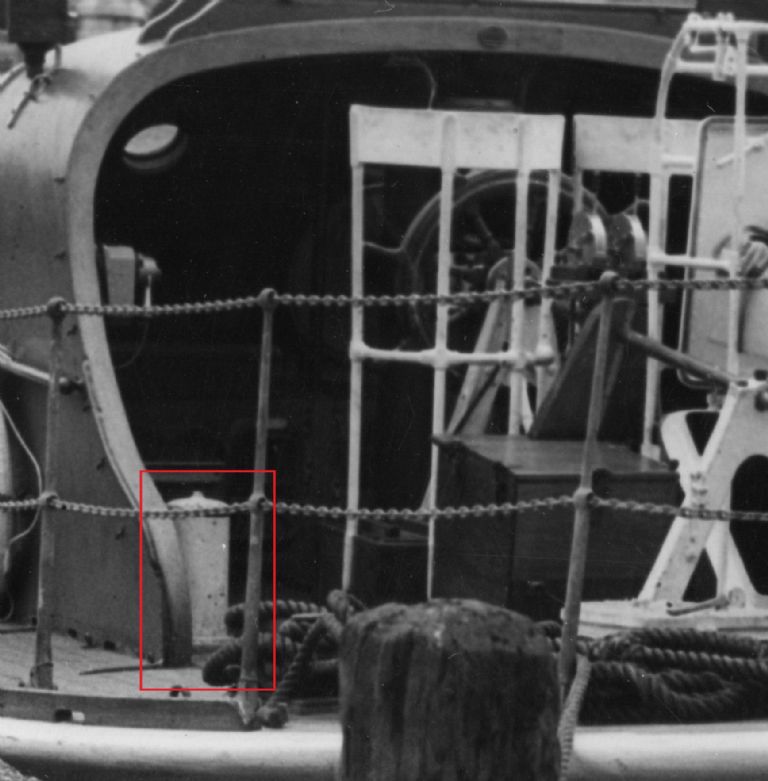
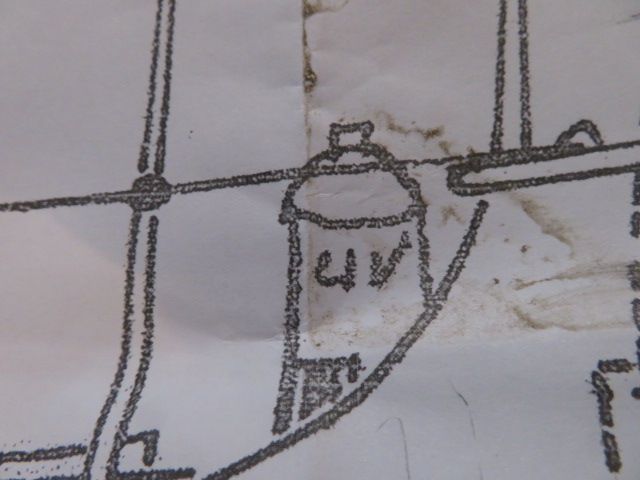
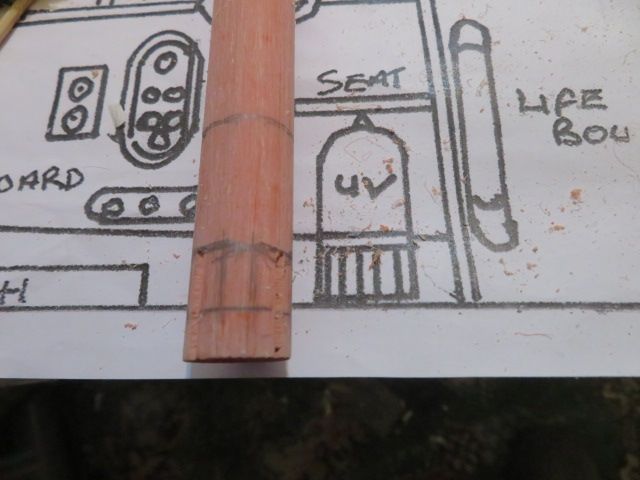
      With many thanks to Richie Leonard from the Historic Lifeboats site I now know what an UTLEY vent looks like from a photo he sent me of the aft end of Princess Mary and so have found some plastic tubing of the right outside diameter, marked it out ready for cutting tomorrow on my band saw and then using some milliput to mould both top and bottom in to the shape of that shown in the plans and the single photo I have been sent.

      I am going to make 4 – 6 of them as there are at least 8 in total on each boat that I have counted so far and so am going to set them in to a rubber surface mould and cast in resin.

      AND FOR THE 4TH DAY RUNNING, I have spent quite a few hours each dat sanding smooth the bases of all the surface moulded fittings for the first 3 models that came ot of the moulds……

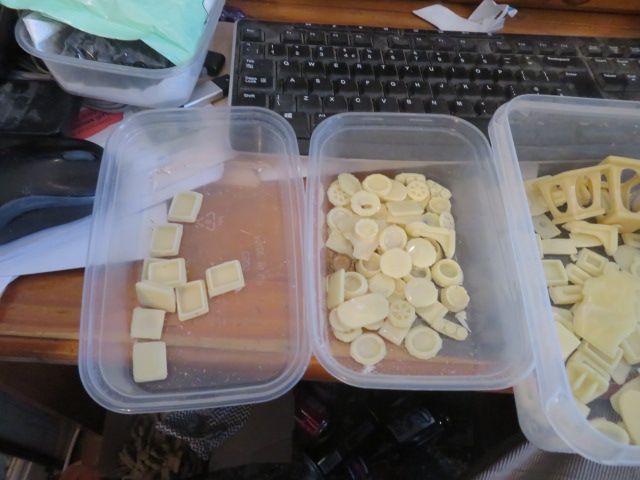
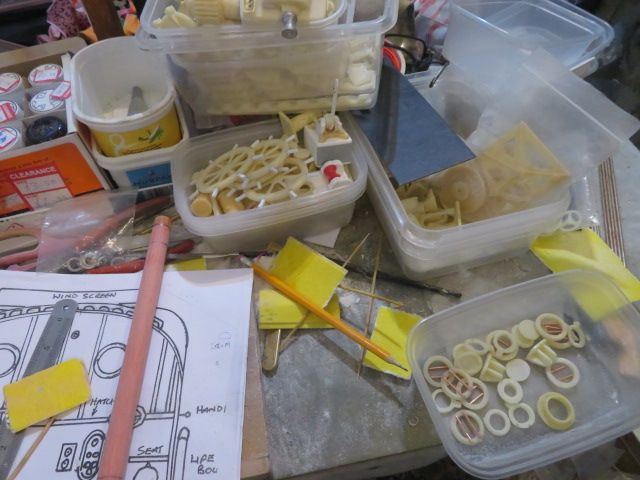
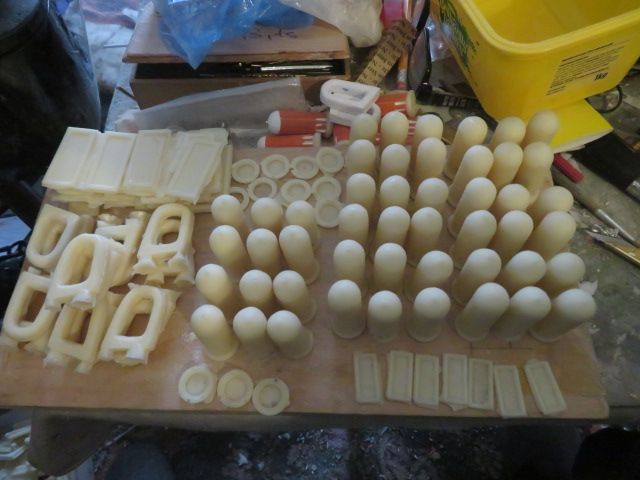
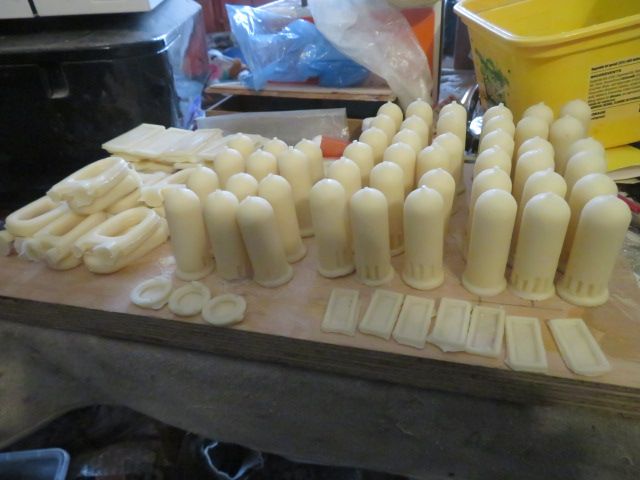
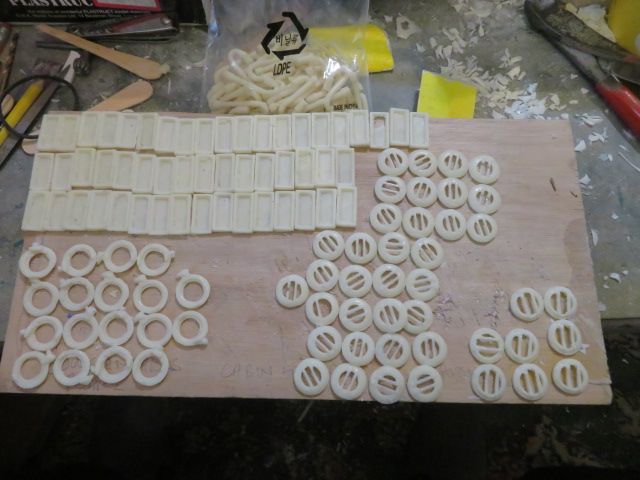
      and i can say, my fingers and thumb hurt so much now that i am going to rest up for a day or so before sanding down the two hulls in my charge, but below shows just some of the trays of fittings that will go on to these boats eventually……..and there are quite a good number of them!

      316161170_2208956359307756_4507345289755643407_n.jpg

      img_4428.jpg

      img_4447.jpg

      img_4439.jpg

      img_4441.jpg

      img_4448.jpg

      Advert
      #102942
      neil hp
      Participant
        @neilhp

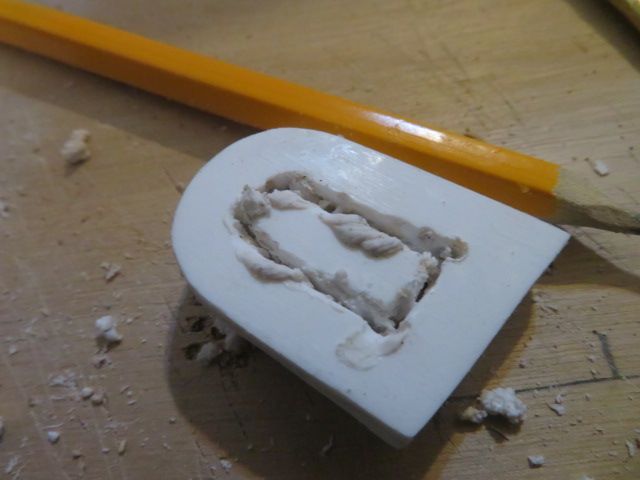
        TODAY, was a day of making two new parts for a lifeboat I have never had to make for before in all the lifeboats I have produced.

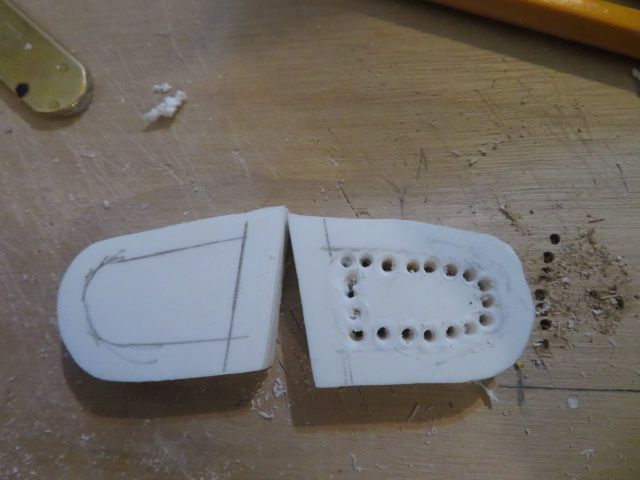
        The first was a set of "gobeye's" for the bow water sheds for both boats I am building.

        These were fabricated from 4 layers of plasticard glued together., each layer being cut to match the last piece layd so as not to have to cut in one go through a "lump" of plastic 9mm thick.

        Once all glued and set, I marked the inner hole and drilled on the "waste side" of the marking with a 1mm bit, from both sides and reaming out the waste plastic with the drill bit.

        This having been successful I rolled 3 different grades of abrasive paper for sanding smooth inside the orifice, and some paper in normal mode for sadning the extremities of the pieces. Job done.

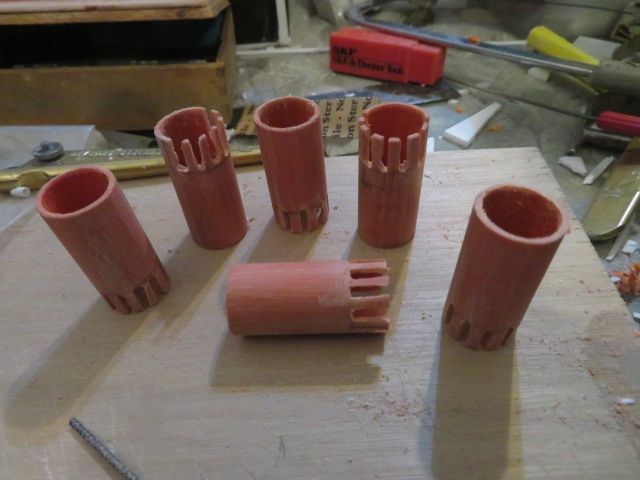
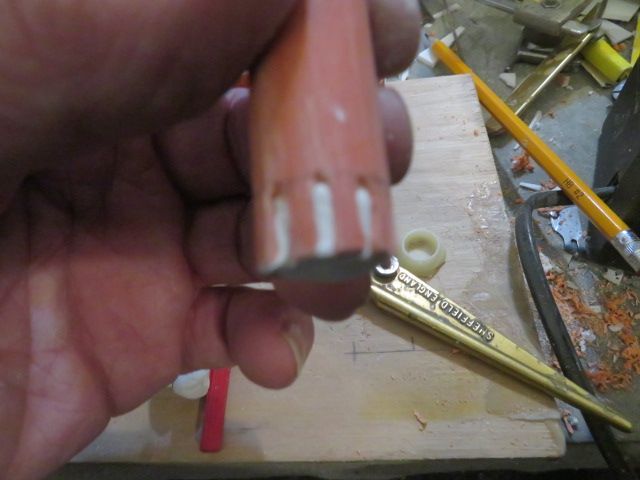
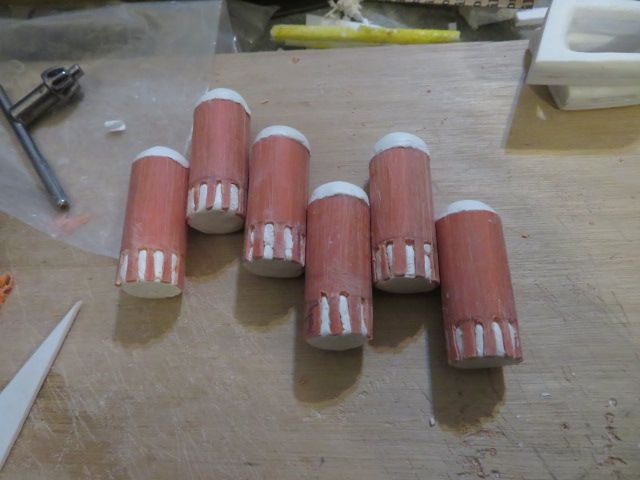
        And so, having finally got a picture of an UTLEY vent and the use of the plans, I fabricated 6 of these elusive vents from some 14mm plastic tube and some Milliput. The slots were initially reamed out and then cut straight, and look reasonably like the photo and the plans.

        Six of them eventually cleaned up and bases added, they will be put in to a mould for casting.

        img_4449.jpg

        img_4450.jpg

        img_4451.jpg

        img_4452.jpg

        img_4454.jpg

        img_4457.jpg

        img_4459.jpg

        img_4460.jpg

        img_4461.jpg

        #102943
        Stephen Garrad
        Participant
          @stephengarrad28964

          What does an Utley Vent do Neil?

          Stephen

          #102954
          neil hp
          Participant
            @neilhp
            Posted by Stephen Garrad on 23/11/2022 21:19:30:

            What does an Utley Vent do Neil?

            Stephen

            haven't a clue, Stephen………..as i can find no information on them….the company went out of busines in the 1970's but started in the late 1800's.

            All i can think of is they were an early type of vent that allowed air and such out, but wouldn't let water in……….

            can find ABSOLUTELY NO information about them or their products at all.

            #102956
            neil hp
            Participant
              @neilhp

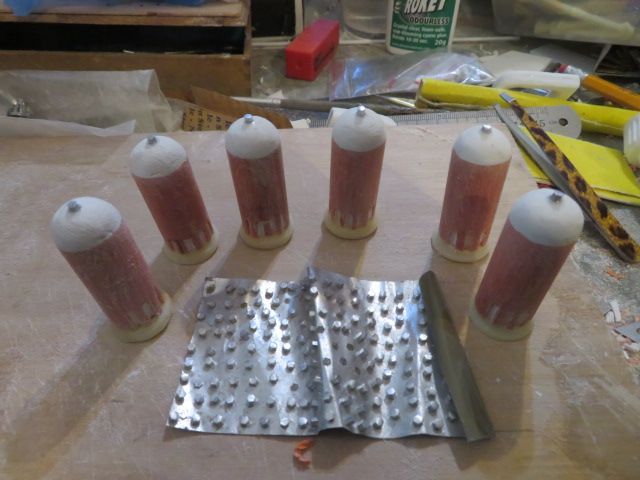
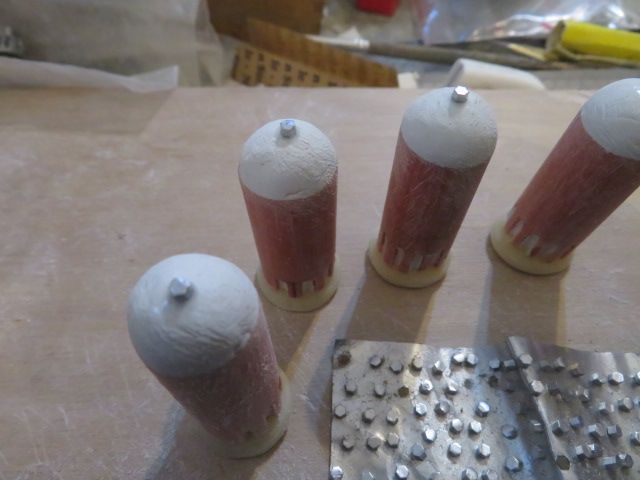
              been out shopping all morning and up to about an hour ago so back home into the warmth of the house i have just finished the UTLEY vents.

              Putbases on to the cylinders and a nut on to the top domed part using cyano.

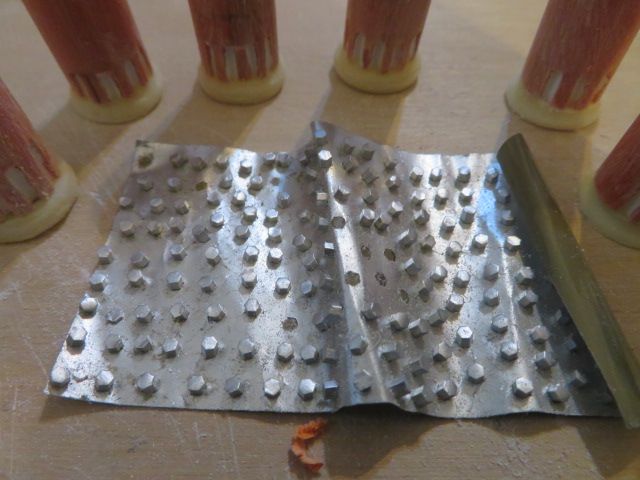
              The nuts made by slicing thin slithers from a hexagonal length of plaststruct rod, some years ago for a mersey class lifeboat i built for someone a couple of years ago but decided it was easier to represent these with blobs of glue, and so have a whole sheet of nut heads left.

              The nuts were from suposition, to hold the canister of the vent on to the base ………………they will go into a surface cast silicon rubber mould as soon as the glue has set, ready for casting later tonight.

              img_4462.jpg

              img_4464.jpg

              img_4463.jpg

              #102965
              neil hp
              Participant
                @neilhp

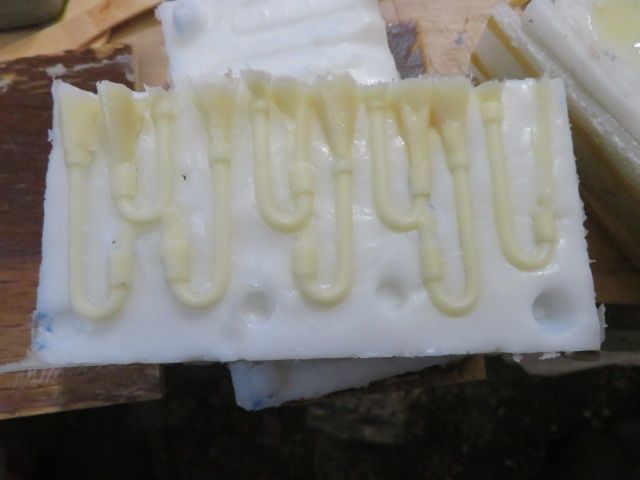
                So!!!, you want to make some simple moulds….well here are two types……the surface poured, and the split moulds.

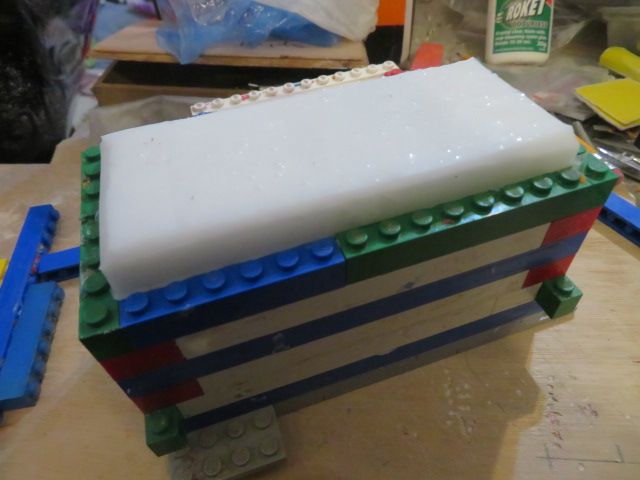
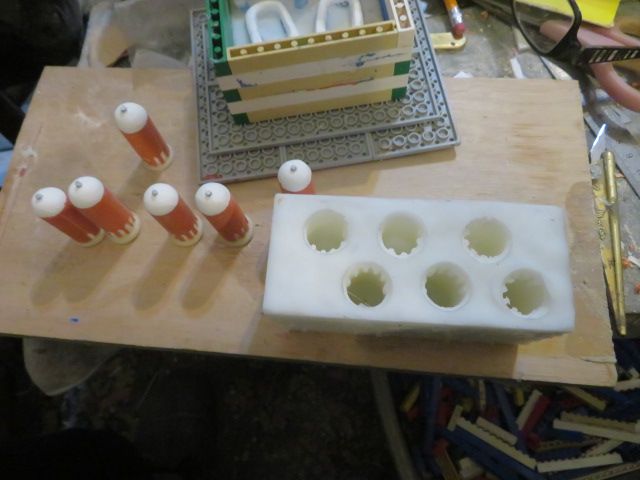
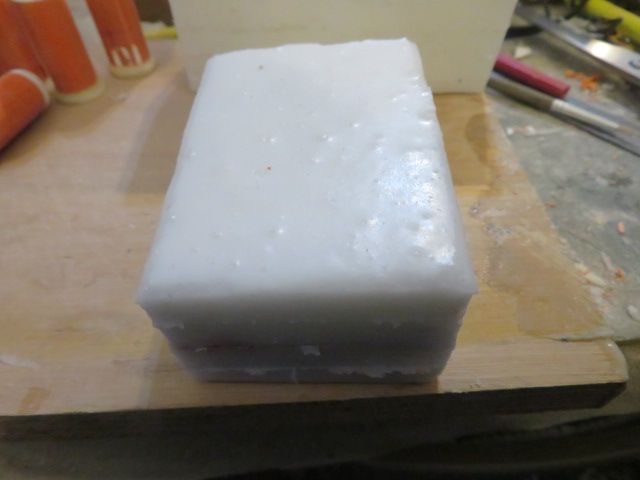
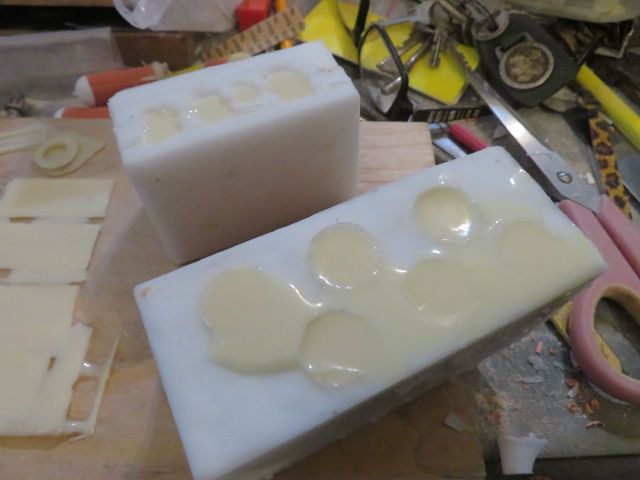
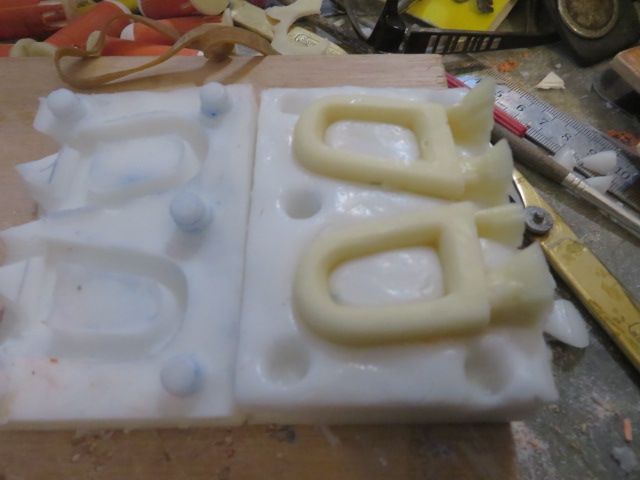
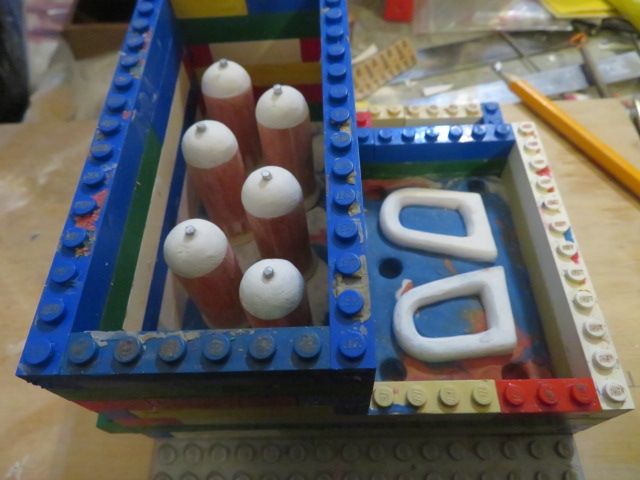
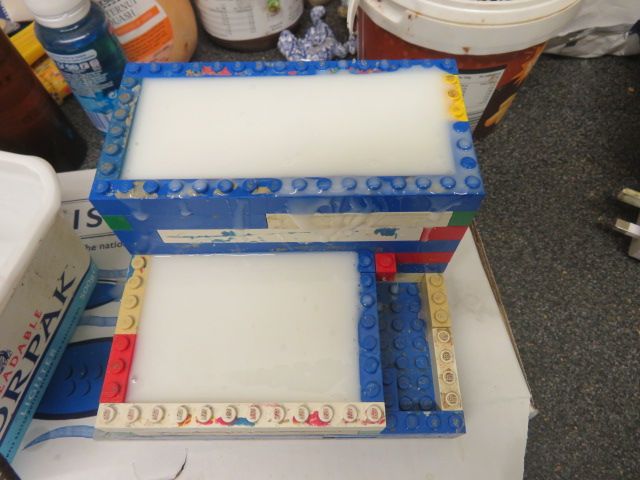
                The surface mould can be used when the item is a simple item such as the vent where it has a base and all other parts have a 360 easy shape to copy without any items sticking out, or have a hole in them. As such the base is mounted on a sheat of modelling plasticine, and a box built around it. Rubber is poured in to the box, surrounding and burying the item. Once set the box [I use Lego to construct the boxes] is removed and the "masters" can be removed from the rubber, and then resin can be used to pour into the shapes left by the original masters, thus giving perfect replica's

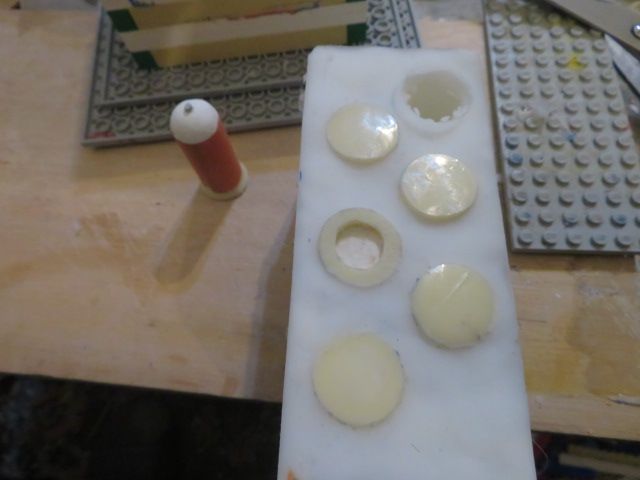
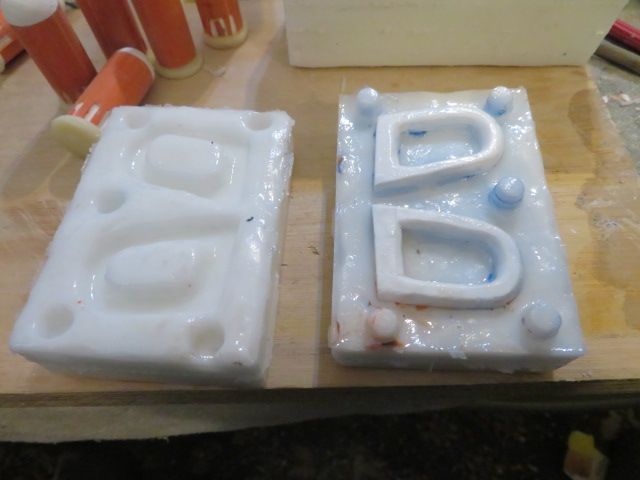
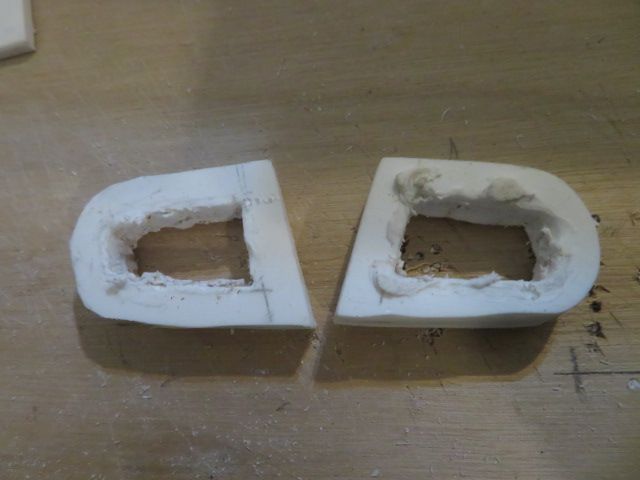
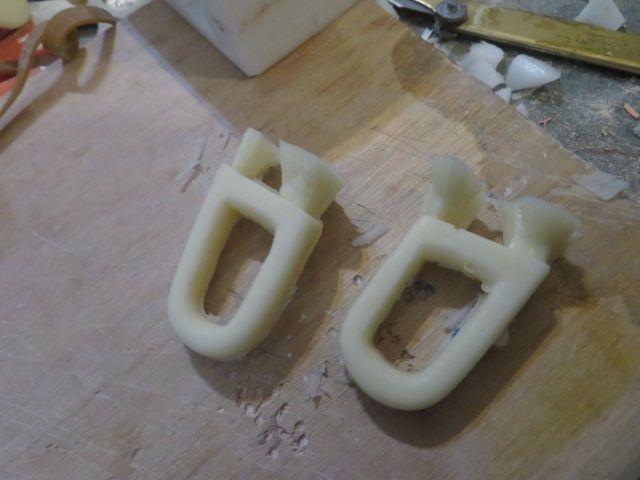
                The second type as with the bow "gobeyes", has to be a split mould because of the hole in the centre of the fitting.

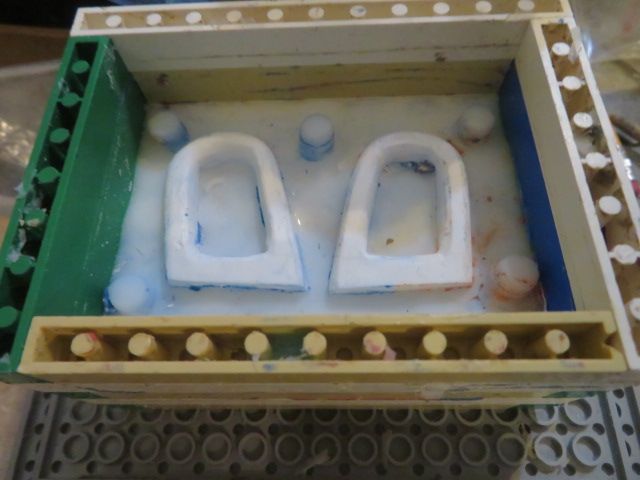
                Again a box is made from Lego or material of your choice, and a layer of plasticine is laid into the bottom of the box.

                Then the item to be copied is pressed into the plasticine to halfway down its thickness. And once done some indentations are made in the outer rims with the end of a pencil, pen or similar.

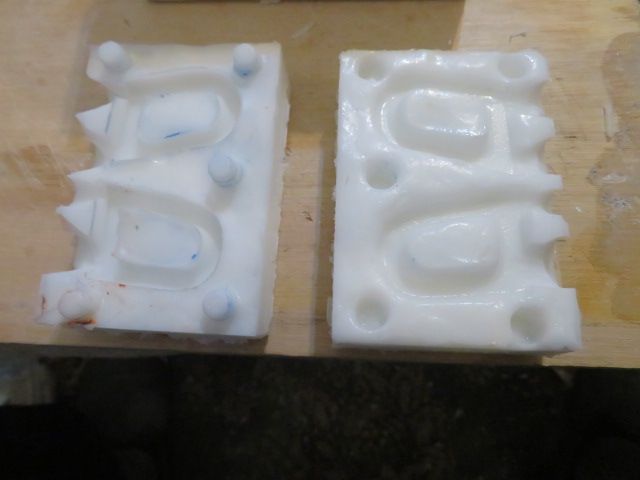
                Once rubber is poured in to the box, the rubber sinks in to these depressions, thus leaving a "tit" to locate the two halves together perfectly.

                Once set the box can be opened up on the face where the plasticine is, and the plasticine is removed to find the master half stuck in rubber and the other half sitting proud and naked to the elements.

                The box is built up again around the second halfe to be cast. But first, one has to put a release agent onto the already existing rubber or when you pour the second half of rubber in to the box, this new half will bond to the first half, and you end up with a block of rubber, with a master set inside that rubber block.

                So what do you use as a release agent. WELL, you can buy a can of aerosol release agent from ebay for anything from £8 – 17 quid…….or as suggested to me by one of the men in know at a certain casting suppliers down in Reading, you can rub a little common or garden petrolium jelly[vasciline] or take some ordinary house hold vegitable cooking oil and paint it on to one half with a soft paint bruch at a fraction of the cost of a thumb full of spray from a £10 quid aerosol spray……and that is what i use with perfect results.

                And below are the pics in order of the fruits of my labours…..even having cut the flow tracks in the split mould for the resin to flow into.

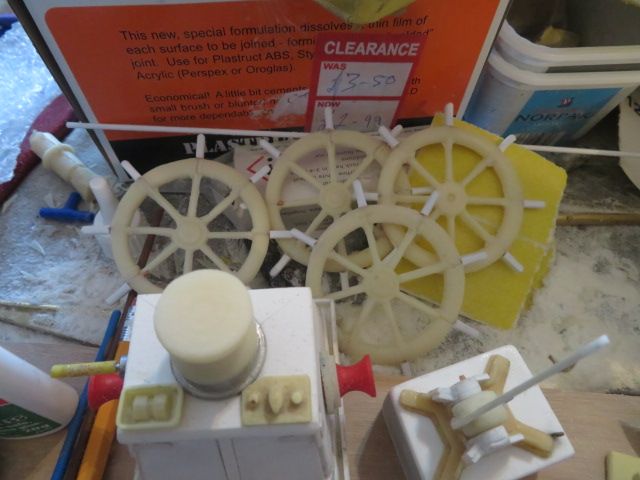
                That split mould is a vert simple one to cast, but on some if there are extrusions from the main body of the item such as a steering wheel where the tongues stick out, one would need breathing tracks cutting n from each tongue to the top of the mould to alow the displacement of trapped are by the resin……..

                And its as easy as that.

                Go one, have a go…..I find it much more pleasurable thanwriting and printing 3 d images on a machine. But that is a personal choice of mine.
                img_4468.jpg

                img_4469.jpg

                img_4470.jpg

                img_4472.jpg

                img_4473.jpg

                img_4474.jpg

                img_4476.jpg

                img_4477.jpg

                img_4478.jpg

                #102967
                neil hp
                Participant
                  @neilhp

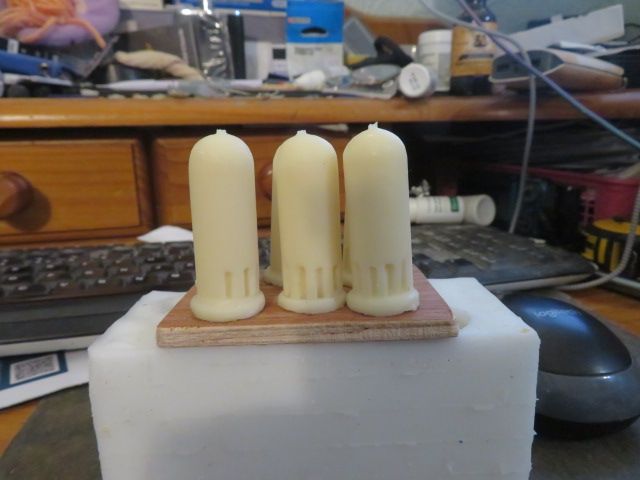
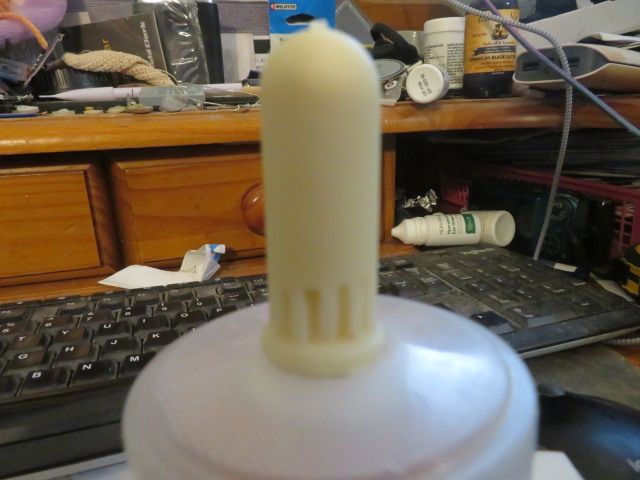
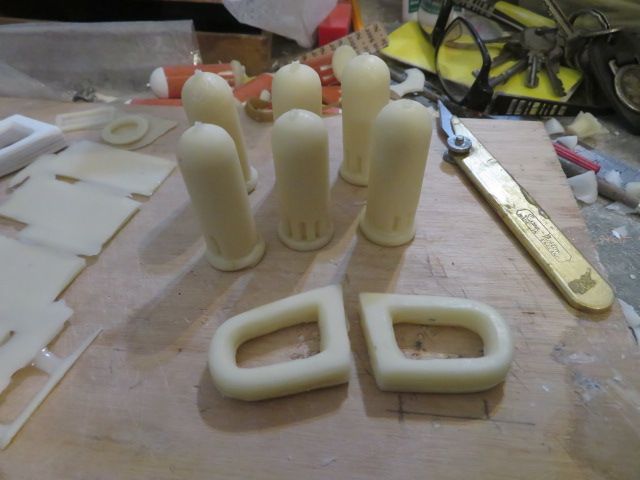
                  I did the first casting from the moulds made just about 20 minutes ago, and as I use a fast cast polyurethane none shatter resin, I was able to pull the castings out of the moulds just a few minutes ago!

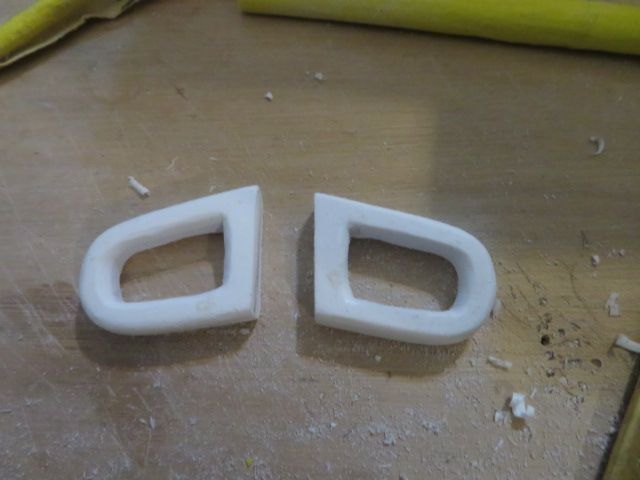
                  And was very pleasantly pleased just how well they turned out and pleased with the reproduction of the originals.

                  img_4479.jpg

                  img_4480.jpg

                  img_4483.jpg

                  img_4481.jpg

                  img_4482.jpg

                  img_4485.jpg

                  #102972
                  neil hp
                  Participant
                    @neilhp

                    I sometimes worry about the state of some peoples minds and ones thoughts………

                    In the last two days I have had two comments about wives liking the shape of the UTLEY vents………..c'mon you guys have a cold shower or you'll be thinking the gobeyes are something explisite.

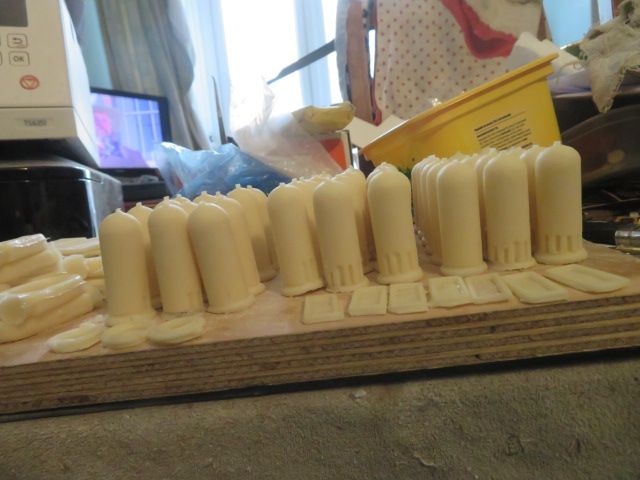
                    Anyway I have finished casting 48 suppositories and seven sets of horses collars, and can now get on "AGAIN", sanding the hulls down , which seems to be a never ending job!!!

                    img_4486.jpg

                    img_4487.jpg

                    img_4488.jpg

                    #102990
                    neil hp
                    Participant
                      @neilhp

                      Whilst perusing the plans for both boats a few nights ago I noticed that on both boats there were a number of Goose Neck vents.

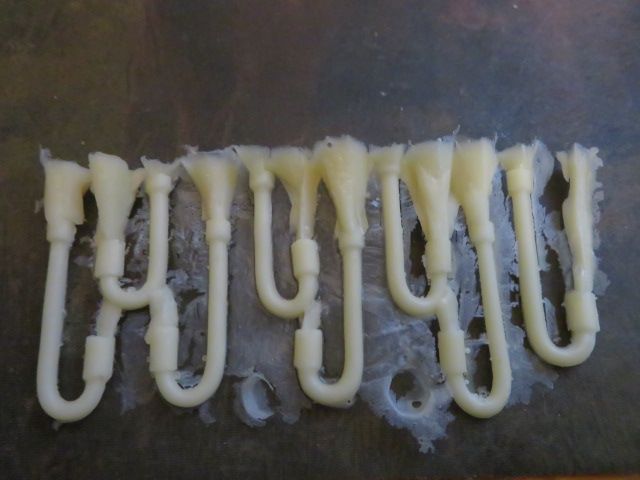
                      So, an easy way of making them was needed instead of anealing brass rod, getting my soldering torch and other stuff out to do it and then bending in to uniform shapes, and cutting to length……..As I need a few for each boat and therefore need to cast in resin, and so I came up with an idea of utilising materials I already have…..

                      I love collecting wire, as the interior core of the heavier 30 and 60 amp wire, the single strand copper is great for eyelets, and other rigging fittings.

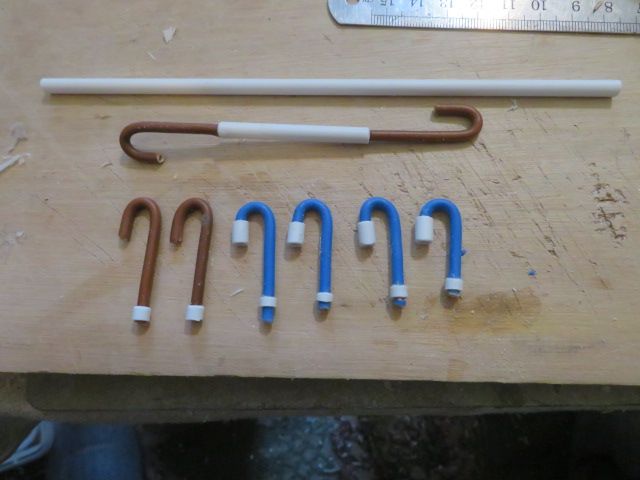
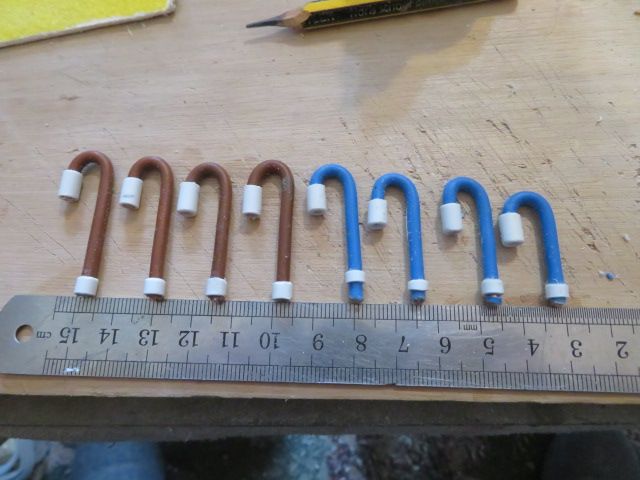
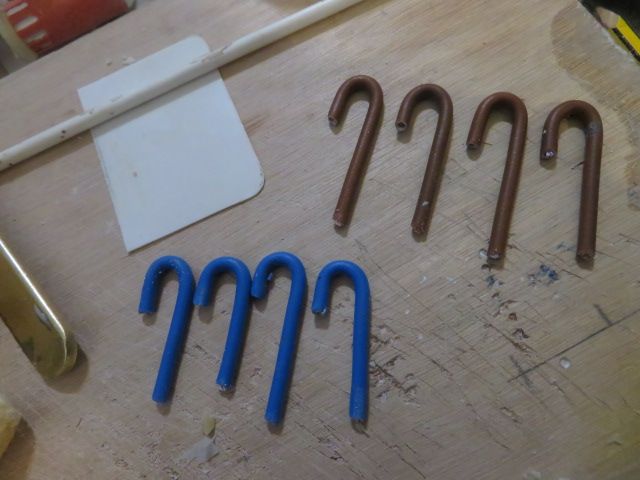
                      I dug out some 30 amp wire compleat with outer casing, and fashioned 8 lengths in to some Goose Necks, as the copper wire will bend so easily.

                      Then it was just a case of cutting some lengths for the bases and others for the "mouth" of the vent.

                      These can now go into [hopefully] a final silicon rubber mould ready for casting in resin.

                      img_4494.jpg

                      img_4495.jpg

                      img_4496.jpg

                      #102992
                      James Hill 5
                      Participant
                        @jameshill5

                        Production line in full swing Neil. Good to see. Be great to see when it all comes together.

                        Jim.

                        #102993
                        neil hp
                        Participant
                          @neilhp
                          Posted by James Hill 5 on 26/11/2022 15:26:06:

                          Production line in full swing Neil. Good to see. Be great to see when it all comes together.

                          Jim.

                          thats a day i am looking forward to hopefully by spring and warmer sailing weather. James.

                          hope that these are the last bits i need to make and cast, and then, just like an airfix kit it will go together straight forward in an orderly fashion.

                          #103009
                          neil hp
                          Participant
                            @neilhp

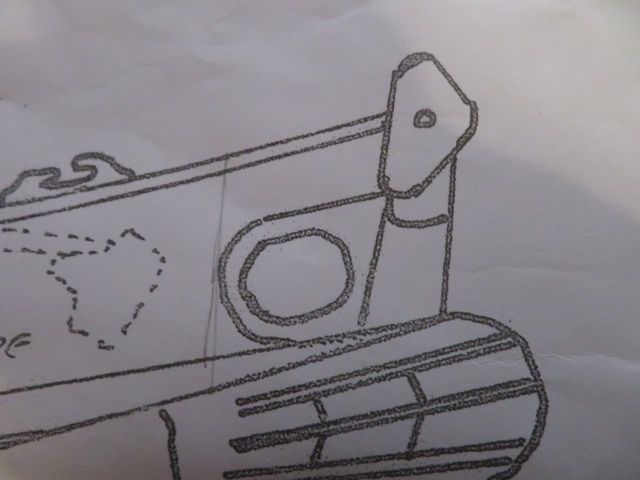
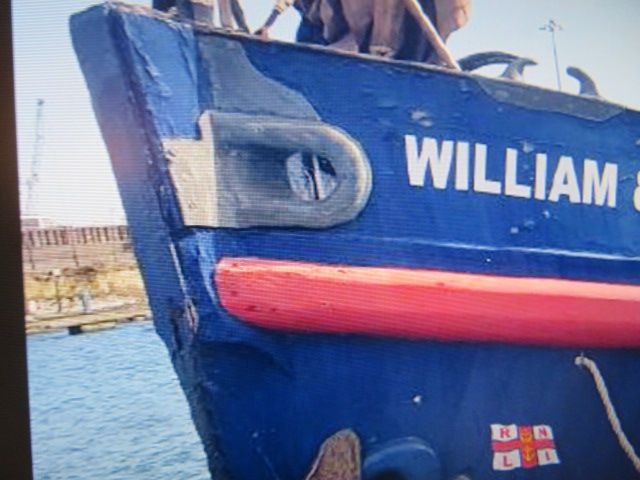
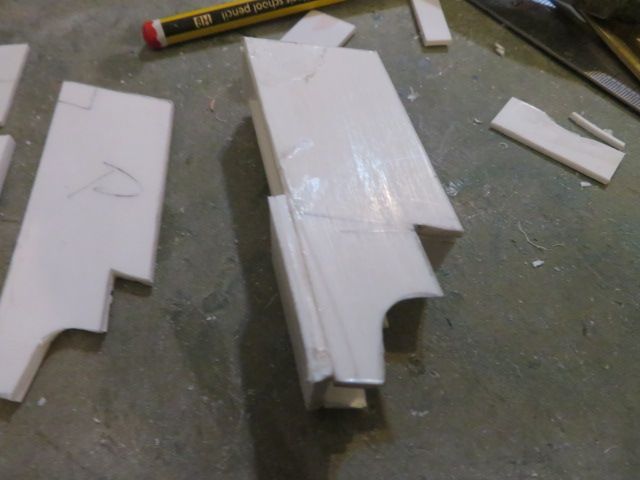
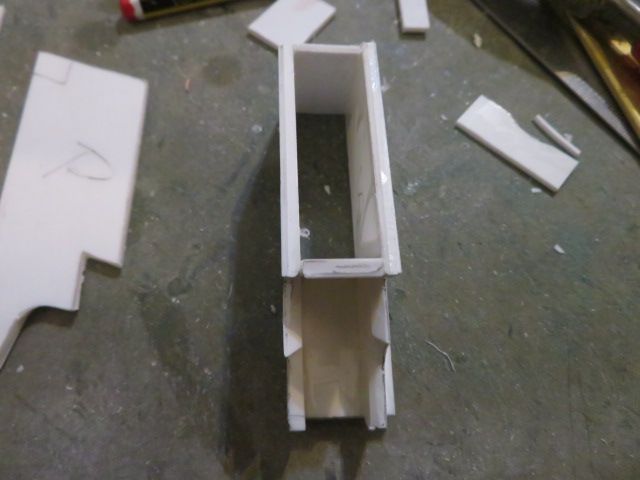
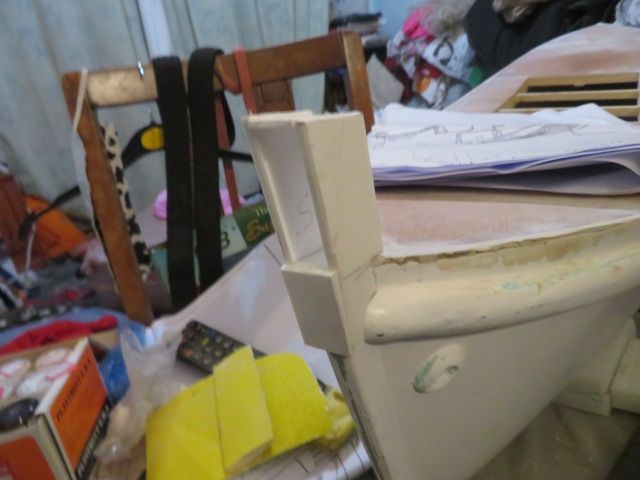
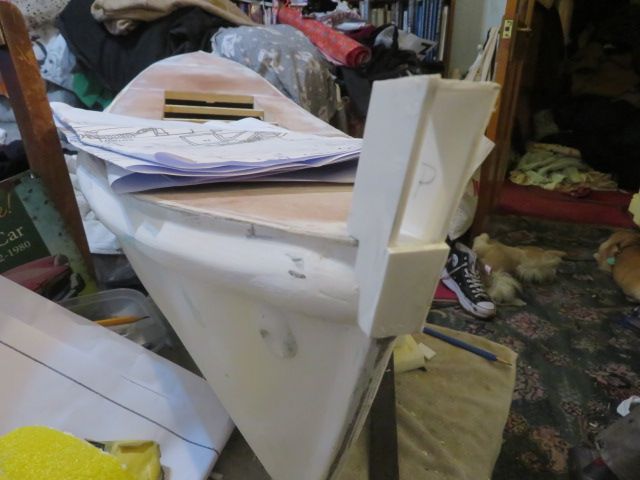
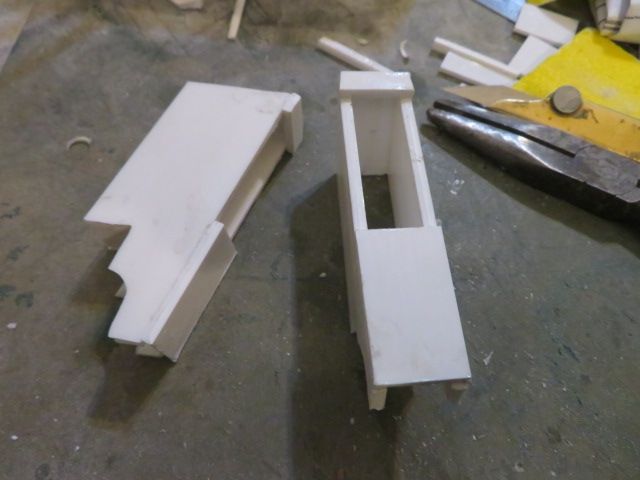
                            The Bow was the next area to be attacked, as both boats that I am building, the Princess Mary of Padstow, and the William and Kate Johnston of New Brighton both have raised bow bulwarks to shed some of the water from heavy seas, but they need something to attach to, and also to house a roller for a veering or anchoring line to enable the boat to anchor off in bad sea conditions and then to use their windlasses to veer down stern too on to the casualty.

                            Most of the early classic lifeboats had cast shaped bronze "Gobeyes", but from all the photos and plans that i have seen of these two boats just show plate steel roller fairleads.

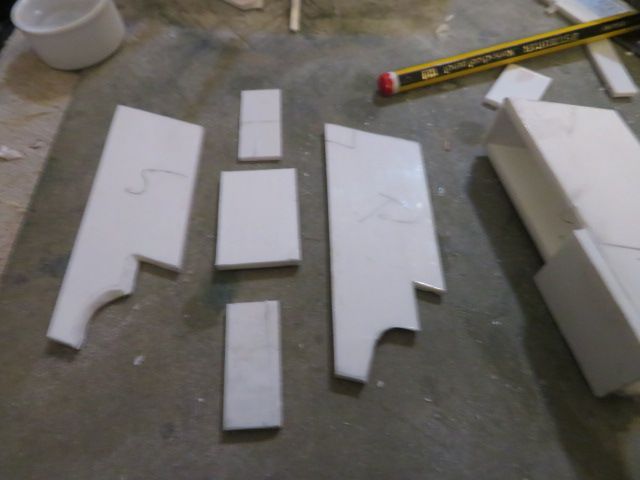
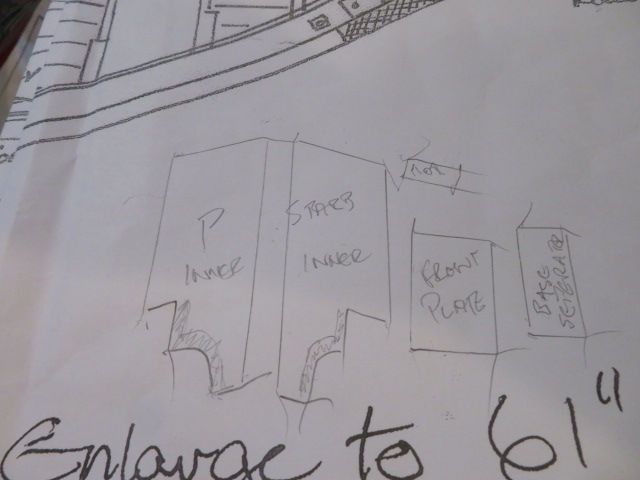
                            AND SO, working from the photos of both boats, they were almost identical in their design, and therefore I used the measurements from the plans to fabricate two, from 2mm plasticard.

                            And as each part was made and fitted, I drew round the part and marked it on the plan for future reference for other builders should they want to build one of the four boats built.

                            img_4503.jpg

                            img_4504.jpg

                            img_4505.jpg

                            img_4506.jpg

                            img_4507.jpg

                            img_4508.jpg

                            img_4509.jpg

                            #103038
                            neil hp
                            Participant
                              @neilhp

                              At the moment I am constructing a little something for a friend that will take me a couple of days, but as such can't get to do the sanding down of my hulls if the two boats.

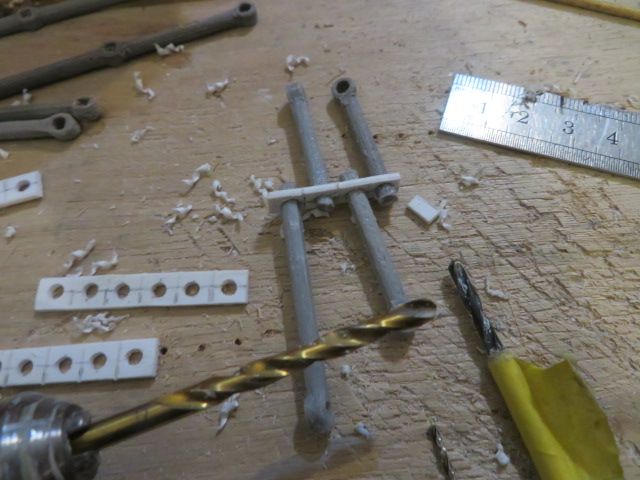
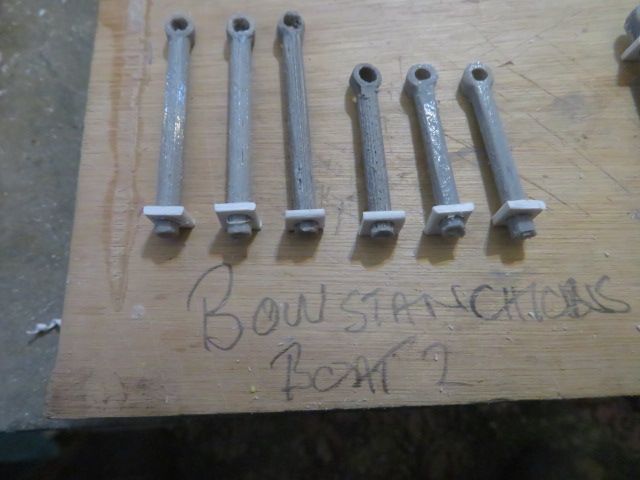
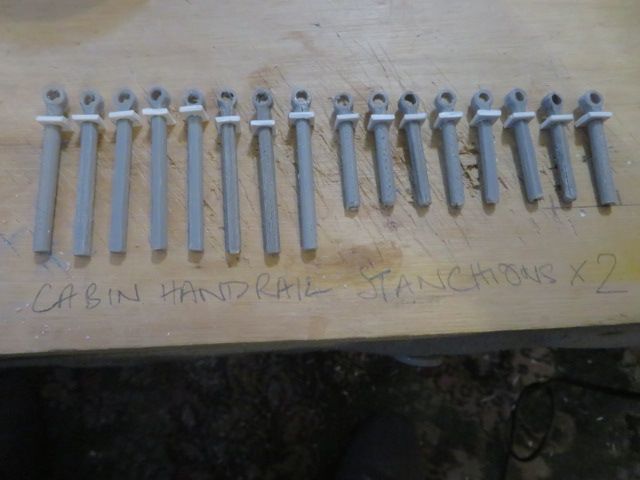
                              And so brought my work indoors and put together the bow stanchions for boat no. 2 and the cabin hand rail brackets for both boats.

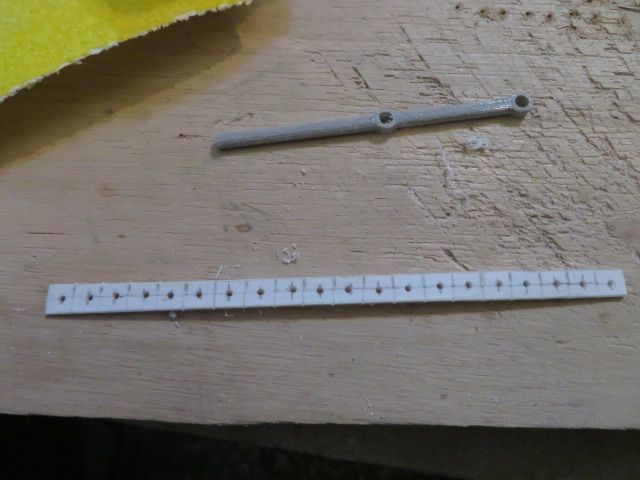
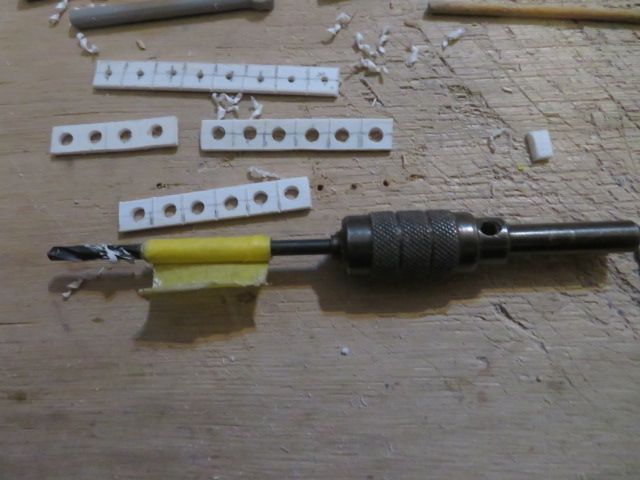
                              These stanchions and hand rail brackets were made from those stanchions that a friend kindly had 3D printed for my two boats by a friend of his…….and I must say they are very robust stanchions indeed.

                              The square bases were made out of 1.5mm plasticard drilled and reamed out to size with a hand held chuck and increasing sized bits until the correct diameter hole was achieved.

                              img_4513.jpg

                              img_4515.jpg

                              img_4517.jpg

                              img_4523.jpg

                              img_4524.jpg

                              #103040
                              Richard Simpson
                              Participant
                                @richardsimpson88330

                                As always Neil, quality scratchbuilding. Thoroughly enjoyable to watch.

                                #103048
                                neil hp
                                Participant
                                  @neilhp
                                  Posted by Richard Simpson on 29/11/2022 09:28:07:

                                  As always Neil, quality scratchbuilding. Thoroughly enjoyable to watch.

                                  thank you Richard, and all your comments are really appreciated. cheers all.

                                  neil.

                                  #103049
                                  James Hill 5
                                  Participant
                                    @jameshill5

                                    I know exactly what you mean Neil. I`m still using tools I bought when I started getting payed as an apprentice in 1958.

                                    As Richard has said, great scratchbuilding.

                                    Jim.

                                    #103057
                                    neil hp
                                    Participant
                                      @neilhp

                                      thanks Jim.

                                      #103088
                                      neil hp
                                      Participant
                                        @neilhp

                                        a friend asked me last week if i could pick up a model if he won it on fleebay and send it to him.

                                        never had a problem with shipping them to international destinations before and so said yes no probs.

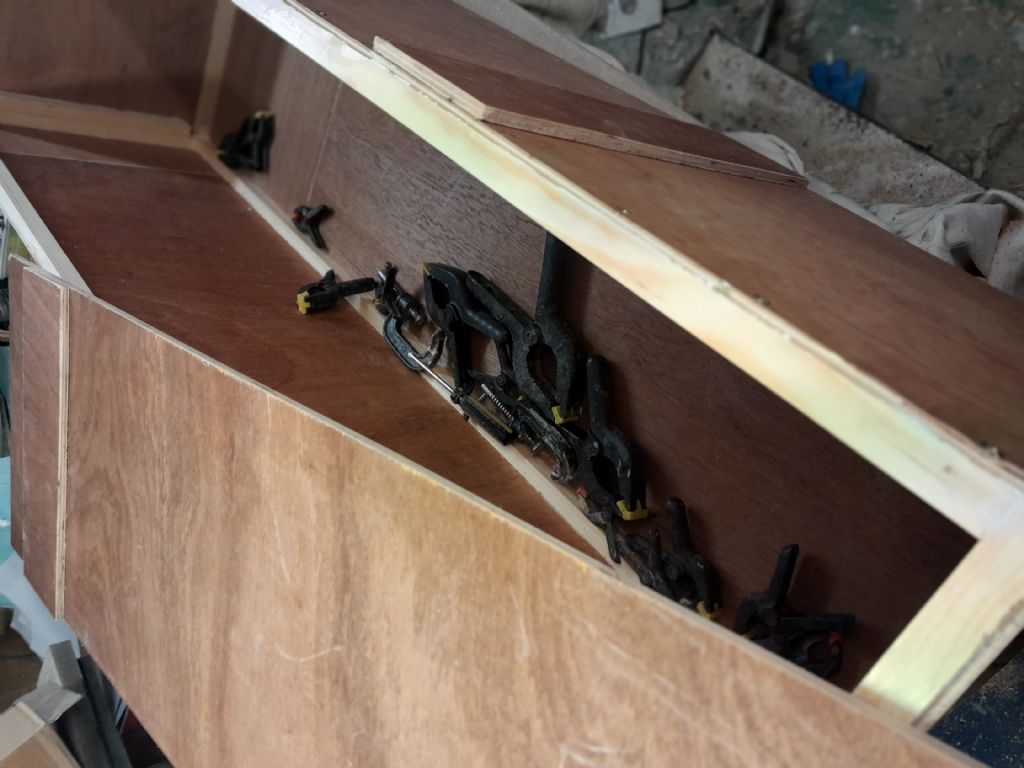
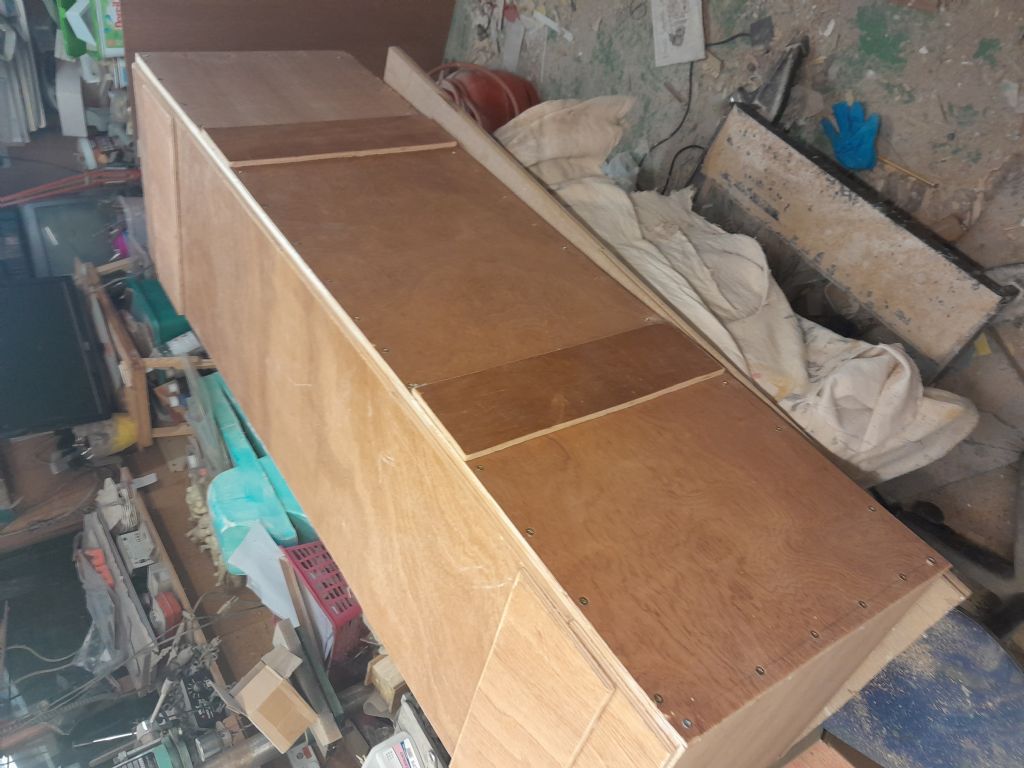
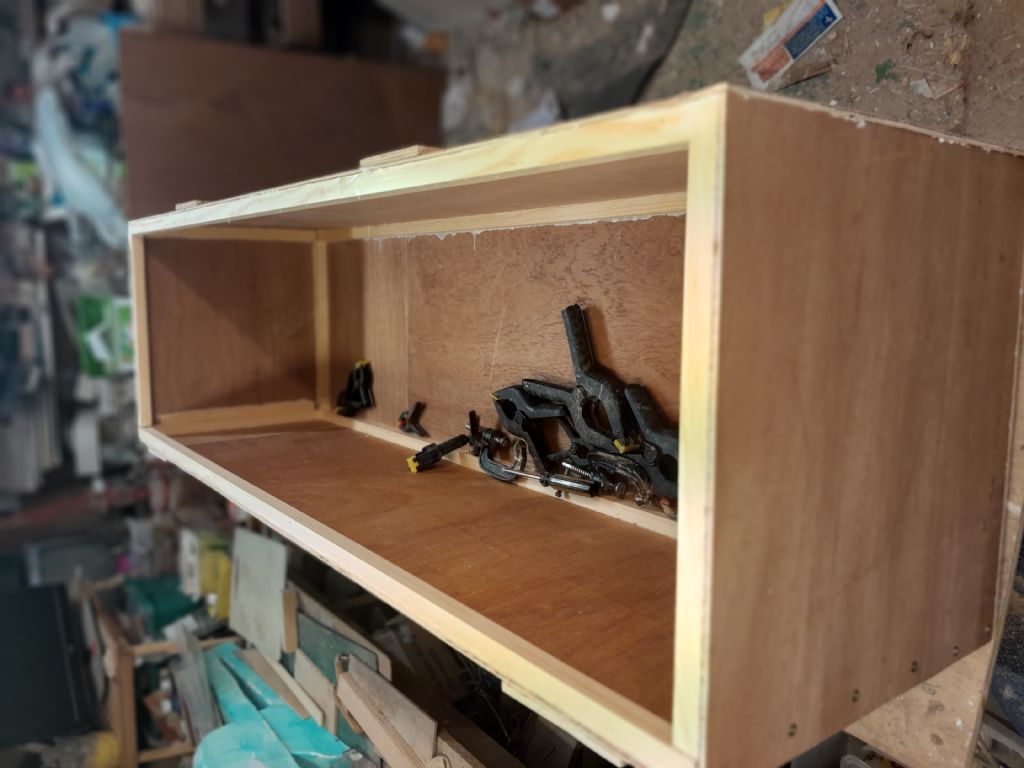
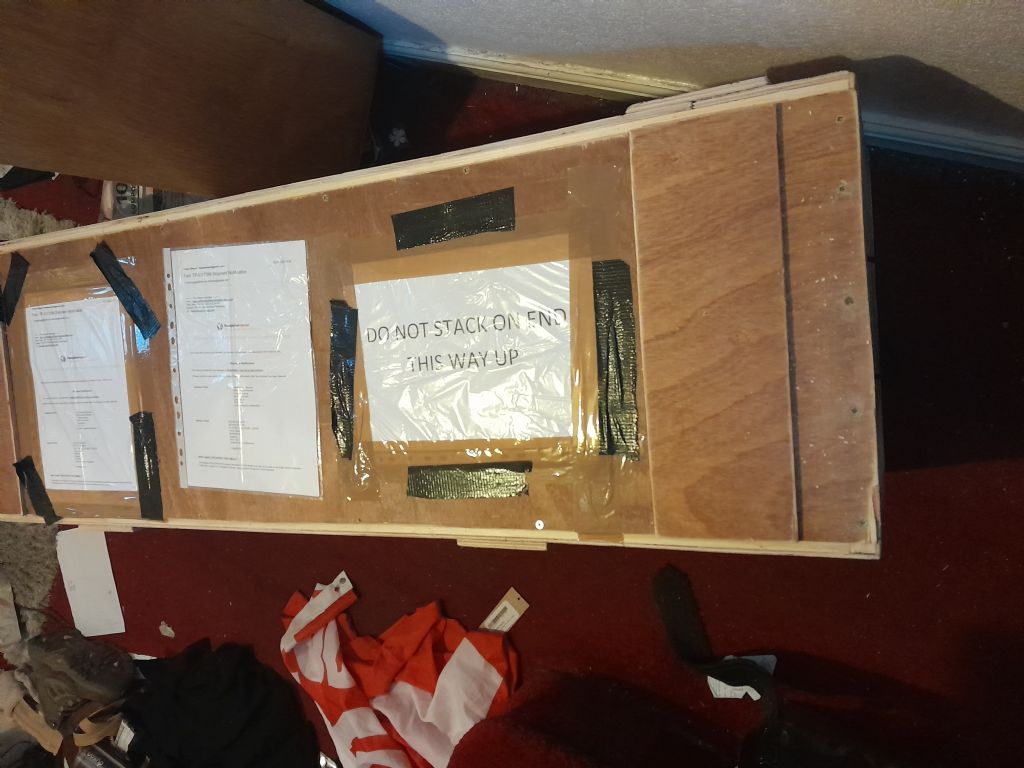
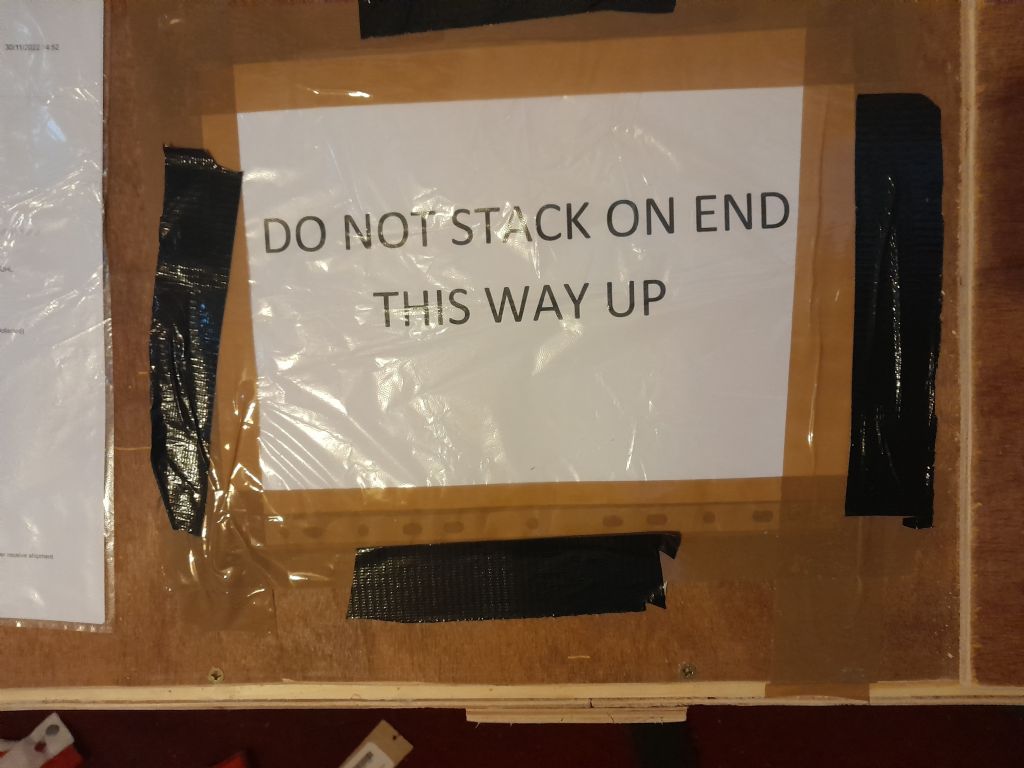
                                        didn't realise how big heavy and long it was till i picked it up, and realised it just wouldn't suit a cardboard box……..needed something more substantial. luckily i had been given a shedload of 6 + 9mm ply free earlier in the summer, so 3 days ago started constructing a 5' box to put the model in and ship it to the south coast,

                                        i finished i last night and am now just waiting for the courier to pick it up tomorrow………but feel that it would, being packed so well and tightly survive a trip to the other side of the world. Happy trails.

                                        20221129_233526.jpg

                                        20221129_233515.jpg

                                        20221129_233552.jpg

                                        20221201_092908.jpg

                                        20221201_092911.jpg

                                        #103089
                                        neil hp
                                        Participant
                                          @neilhp

                                          back to the lifeboats tomorrow once the model has been collected.

                                          #103097
                                          Chris Fellows
                                          Participant
                                            @chrisfellows72943

                                            I hate packing things for postage and if selling anything prefer pickup. I did have to post a motor cycle flyscreen recently and the purchaser said it was the best packing ever! I formed a polystyrene inner box along with bubblewrap.
                                            Your builds are coming on well Neil. You, Ray and Ashley make the rest of us look like proper tortoises!

                                            Chris

                                            #103112
                                            neil hp
                                            Participant
                                              @neilhp

                                              once i start, Chris there is usually no holding me back but lost a little bit of mojo the last couple of weeks with having to do other things…….but hopefully back too it within the next couple of days.

                                              At least i have finished prepping all the fittings and got one boat back on to the work table.

                                              #103113
                                              ashley needham
                                              Participant
                                                @ashleyneedham69188

                                                Tortuses indeed, but after the current amount of steps having been taken, one of mine would have been finished by now.

                                                i don’t “do” strict scale so the latitude that gives me means a faster build…to get on to the next one!

                                                Neil is upping the ante by building TWO as once to a soaring standard.

                                                Ashley

                                                #103115
                                                James Hill 5
                                                Participant
                                                  @jameshill5

                                                  Ashley, I think Neil is in a league on his own . His production rate ( for the smaller bits especially ) is amazing. They are going to be lovely models when completed

                                                  Jim.

                                                  #103134
                                                  neil hp
                                                  Participant
                                                    @neilhp

                                                    Thanks for the comments guys, sadly my mind has been on other things for the past few days.

                                                    However, I had to get over my complacency and do something to take my mind off things.

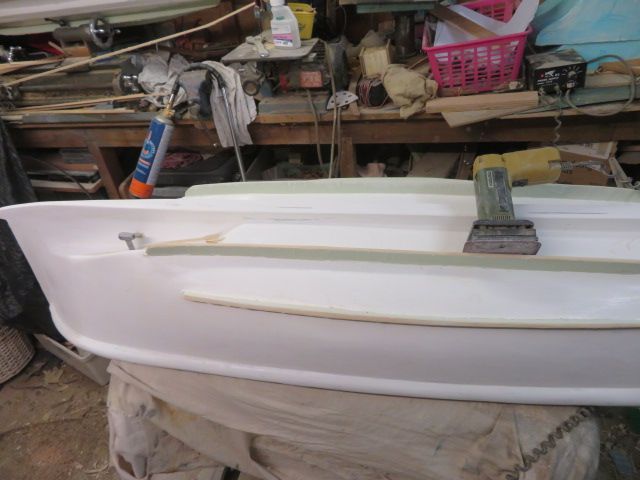
                                                    Not making much headway on the sanding of the hulls at the moment, being that my workshop is like an icebox at the moment with this vey cold weather and only two oil filled radiaters to give heat.

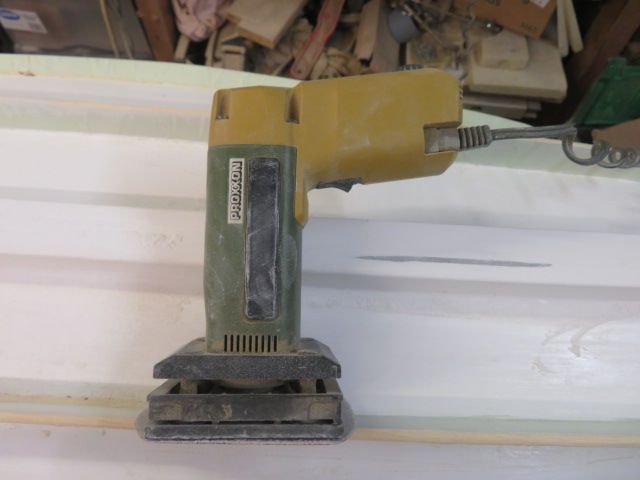
                                                    Plus the fact that the small Proxxon sander is and always has been c r a p, and at nearly £100 quid, like all my other Proxxon tools I bought when flush some years ago, not fit for any other use other than for playing with balsa wood. All a total waste of good money when better tools can be bought for a fraction of the price!.

                                                    Plus this cold weather plays absolute havock and murder with the arthritis in my fingers and wrists, both of which I have broken in years gone by from spills on motorcycles…….so it is very slow going.

                                                    But I have today, bought off eBay a mouse sander for £12 quid as opposed to my Proxxon rubbish of a ton, and hopefully with some fine 180 – 240 grit pads, I can get the bulk nice and smooth before reverting to my rubber block sander to hand finish. then can start to put the bow bulwarks on and the rubbing strakes , before fitting the rudders.

                                                    If the mouse goes well, the Proxxon minus motor will be going in the bin, lol.

                                                    so going to be well in to the new year before I even contemplate colouring it all in.

                                                    OH HOW I HATE WINTER !!!

                                                    s-l1600.jpg

                                                    img_4554.jpg

                                                    img_4555.jpg

                                                    #103204
                                                    neil hp
                                                    Participant
                                                      @neilhp

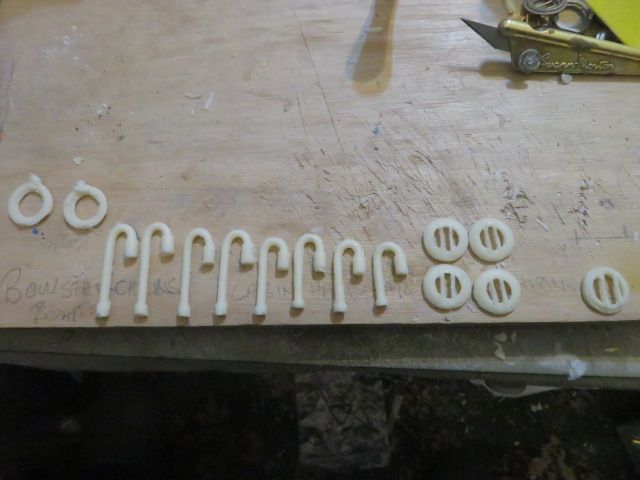
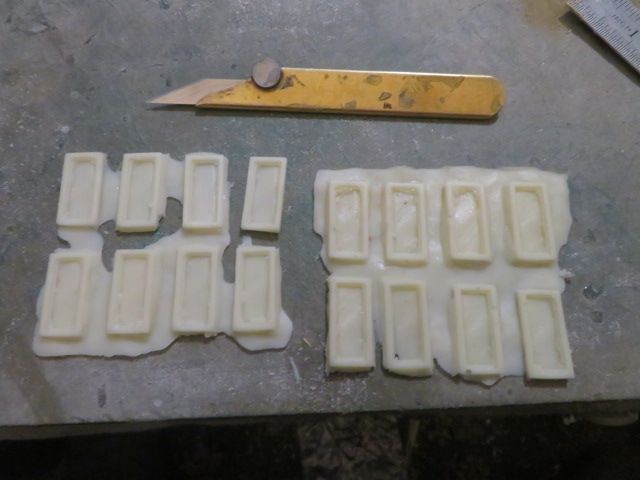
                                                      Casting mould after mould of the same fittings becomes tedious after a time, but when the temperature outside is -2c and in the workshop itself even with 4 heaters on the go it is only reaching about 10c I have only one option……stay inside and cast the last of the fitings needed for the 3 boats that I made the mouldings for, and that is what I have done today and over the last few freezing days!

                                                      And besides, the mouse sander has still not arrived which gives me absolutely no incentive to go into the cold to do anything!

                                                      But in the 2 photos are the smaller deck lights which are set flush into the planked decks [2 sizes], a bag of goose neck vents [varying heights] porthole inners, and barred port lights of 2 designs.

                                                      All I have to do now is to aneal 15 rods of brasing brass to form 12 "davits" for the jumping nets and 3 for anchor davits for the 3 boats…brass has been cut to length and a jig possibly needs to be bend them all to a uniform shape. ………so must HAVE TO turn the heaters on for longer before I go in to work on them………….perhaps the brazing torch will warm me up.

                                                      img_4569.jpg

                                                      img_4570.jpg

                                                      img_4571.jpg

                                                      img_4572.jpg

                                                      img_4574.jpg

                                                    Viewing 25 posts - 301 through 325 (of 648 total)
                                                    • Please log in to reply to this topic. Registering is free and easy using the links on the menu at the top of this page.

                                                    Code of conduct | Forum Help/FAQs

                                                    Advert

                                                    Latest Replies

                                                    Home Forums Scratch build Topics

                                                    Viewing 25 topics - 1 through 25 (of 25 total)
                                                    Viewing 25 topics - 1 through 25 (of 25 total)

                                                    View full reply list.

                                                    Advert

                                                    Newsletter Sign-up